Supplies of the Ship Modeler's Handbook are running out. Get your copy NOW before they are gone! Click here to order
×
MORE HANDBOOKS ARE ON THEIR WAY! We will let you know when they get here.
×


DaveRow
-
Posts
690 -
Joined
-
Last visited
Content Type
Profiles
Forums
Gallery
Events
Everything posted by DaveRow
-
 Hi Guys, Re: Post #241. I edited the post, deleted all the 5 pictures(did not save or exit), reloaded in the order I wanted 004 to 008, but they still show 008 first down to 004. So I edited #241 again. Deleted the 5 pictures, posted(exit, with no pictures). Went back in(edit) and loaded up the 5 pictures 004 through to 008, Now they are mixed up, 005, 006, 007, 008, 004. I give up. Maybe it works better for the original post, not afterwards. PS I installed Google Chrome - works fine now. Dave R
 -
Hi Jason, Thanks; I upload the lot in 1 upload all the time. I'll go for 1 at a time next upload. Thanks Dave R
-
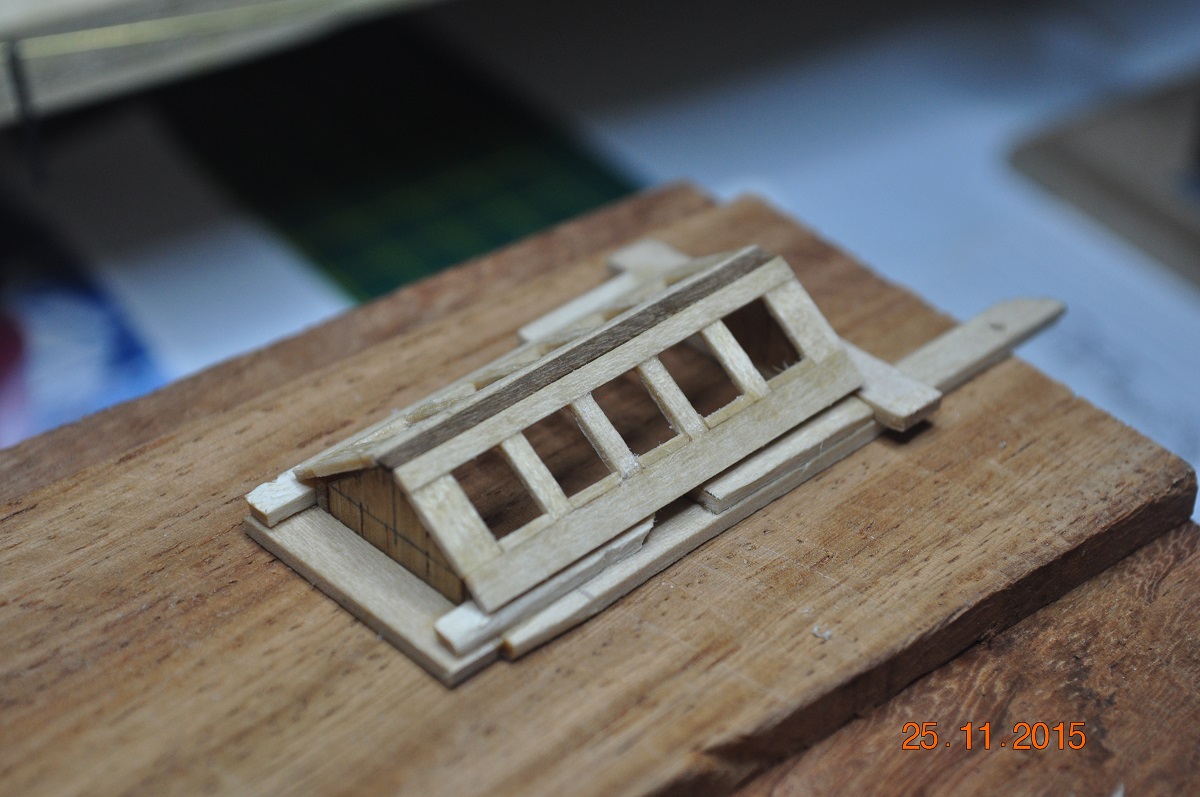
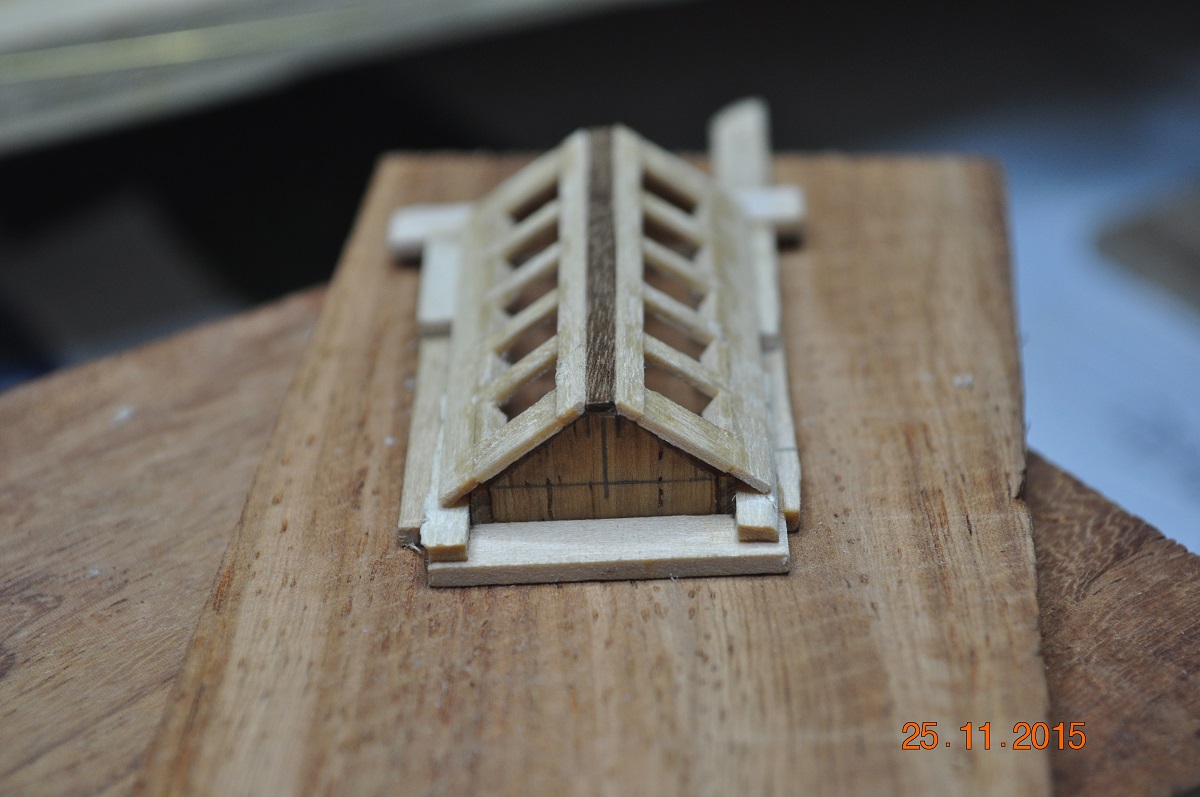
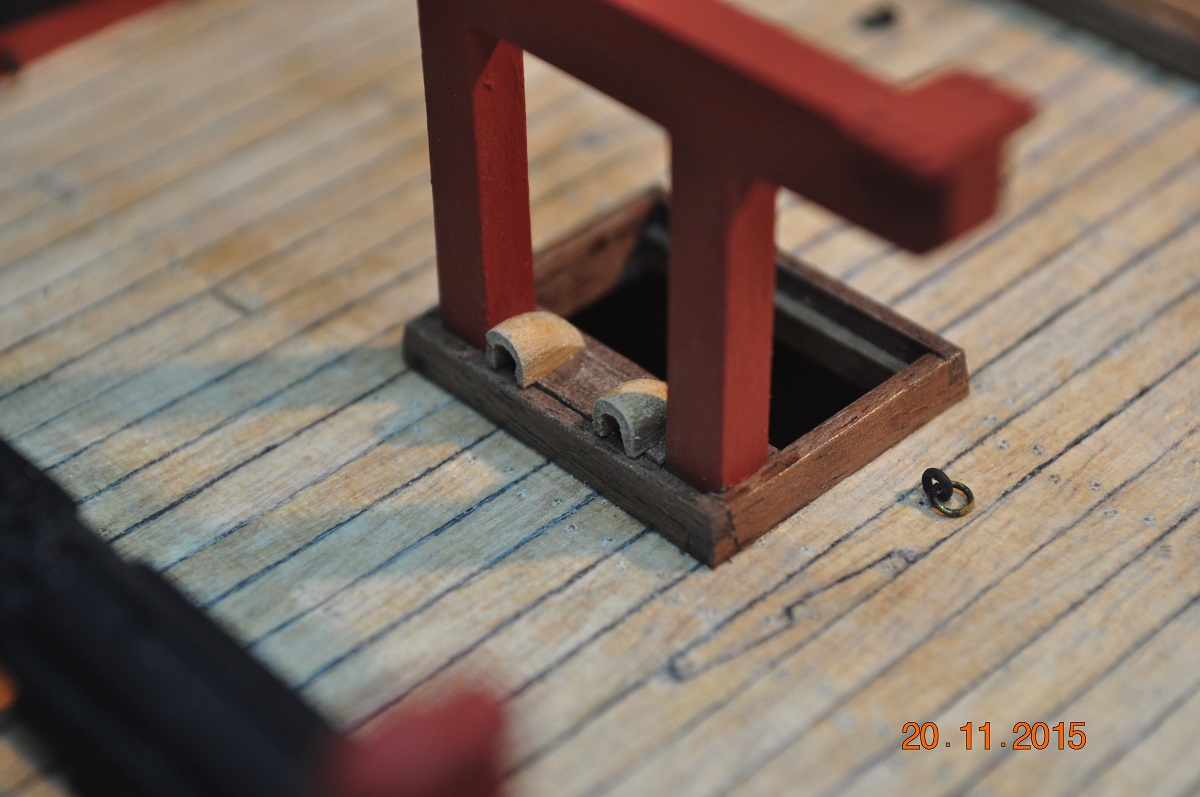
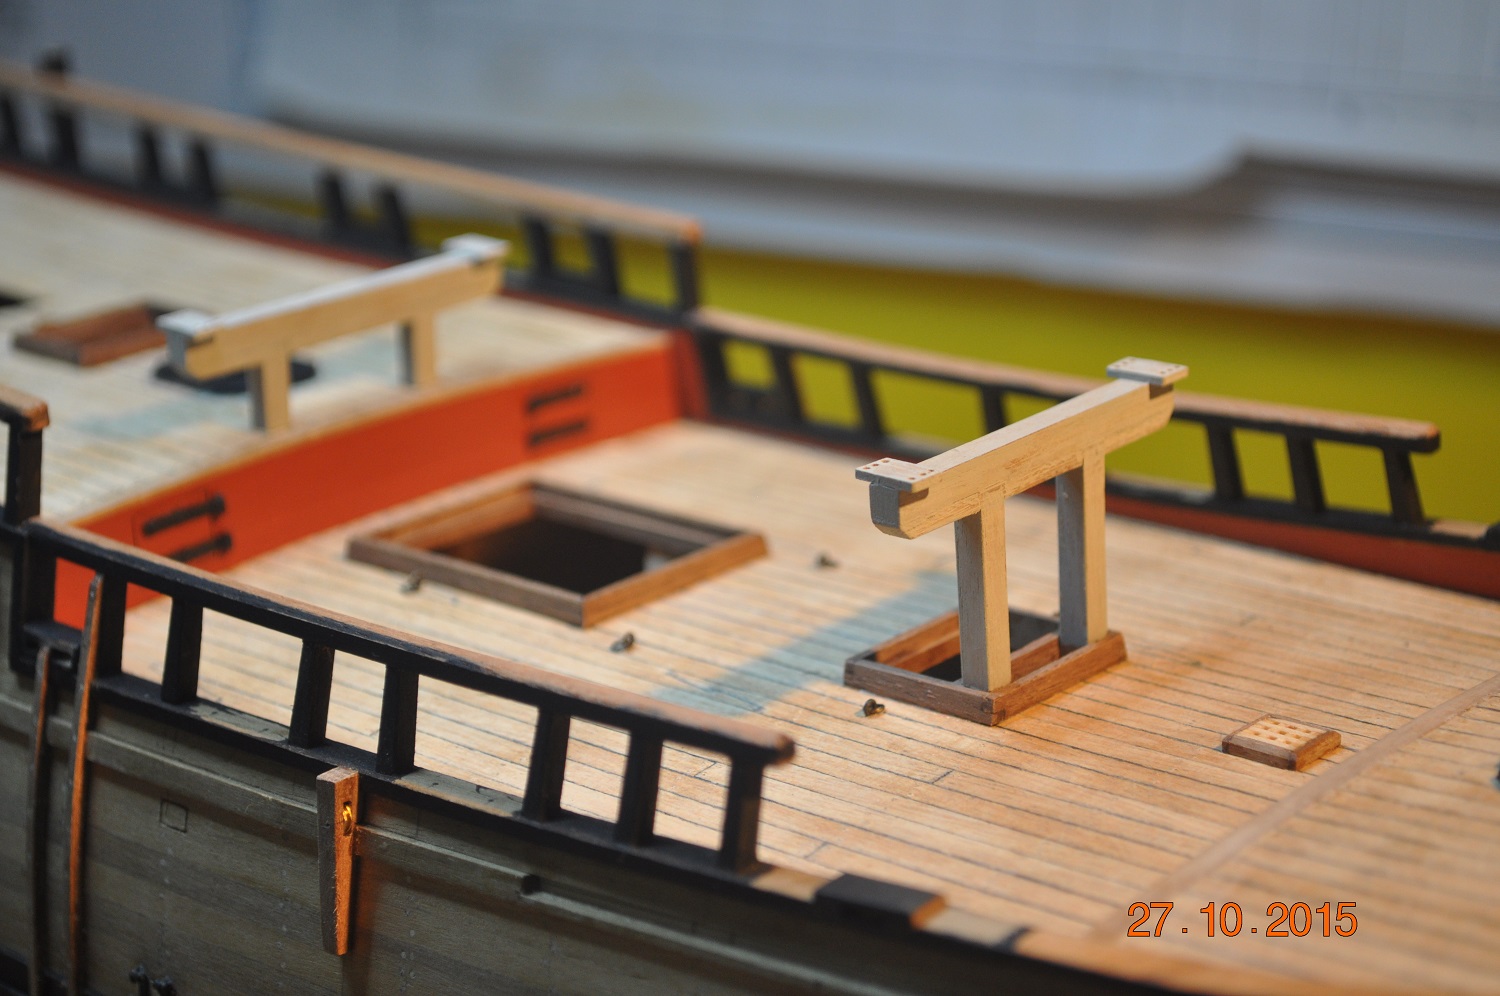
The Skylight, I have had the shipyard busy working on the Deck Skylight. We made a frame to hold the "box" square whilst glue drying, and then to hold it whilst the lids fashioned. At first I had the sides higher, but cut them down to this size. Currently working on the hinges and bar setup over the lids, so more pictures to come. PS. Does any of you chaps, know how to re-order the pictures that are loaded up ? Basic box in build frame. Where she goes. Lids underway. Taking shape Dave R


-
Biz, Slow and steady is good. All the additional blocking will work well. I added additional frames to the bow and stern, either side of where the ports go. Helped for fixing the planks. Dave R
-
Great start Biz. Good to see another Endeavour underway. You seem to know what your doing with the blocking of the frames. Something I regret not doing, as it was my first build(green). Dave R
-
Anchor Stock, It looked all too hard to do when I was planking the hull - what seems months ago now. I wasn't confident enough that I could do it justice back then. I wonder if I could now add the Anchor Stock pattern to my Endeavour wales ? Will have to think carefully how to etch the pattern to the planks, not stuffing them up. Hum ?? Dave R
-
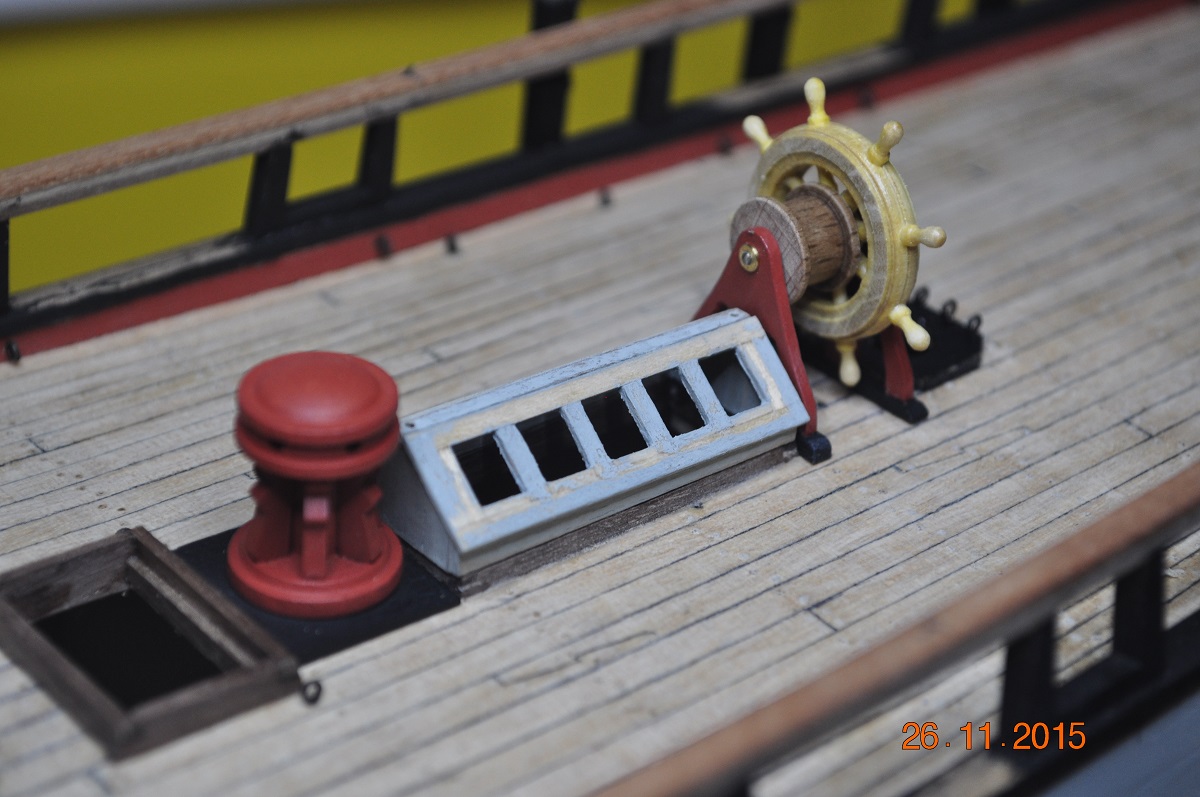
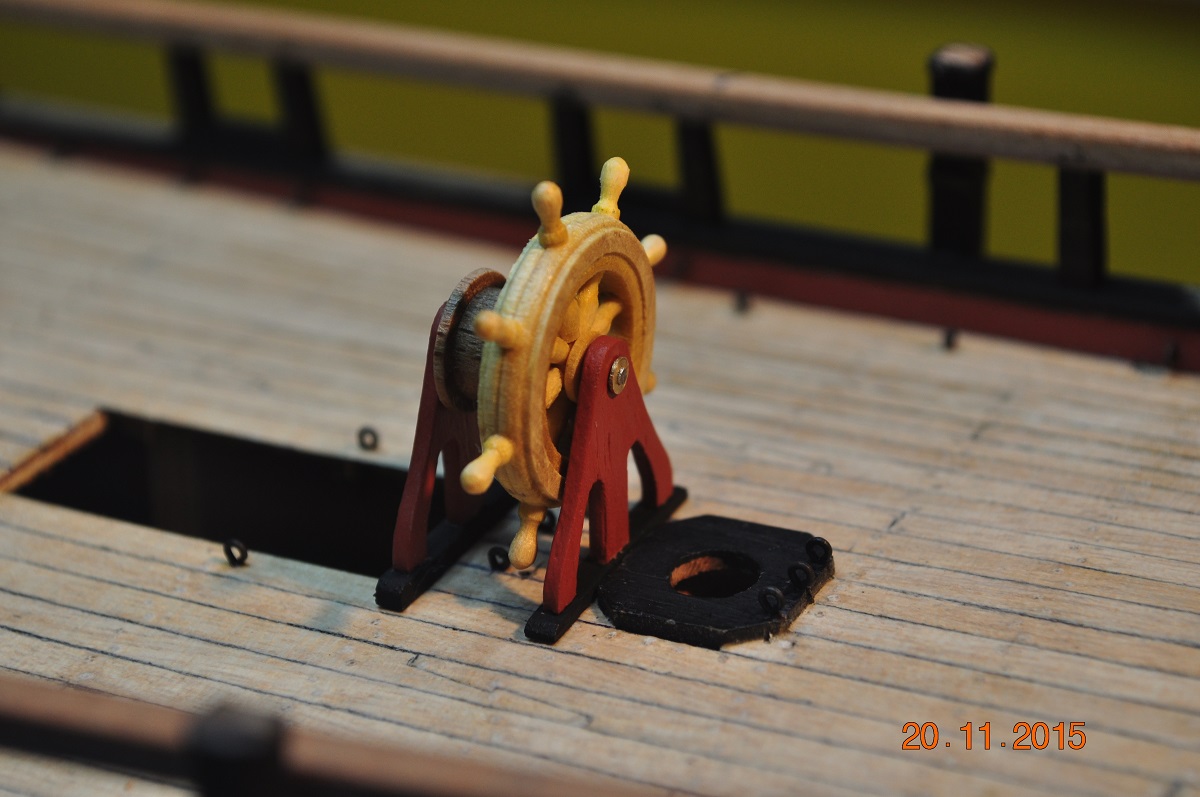
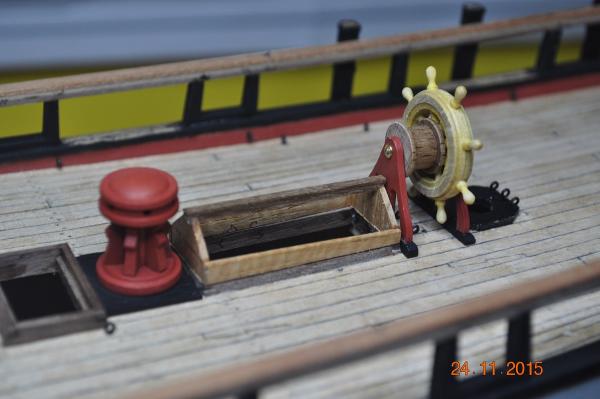
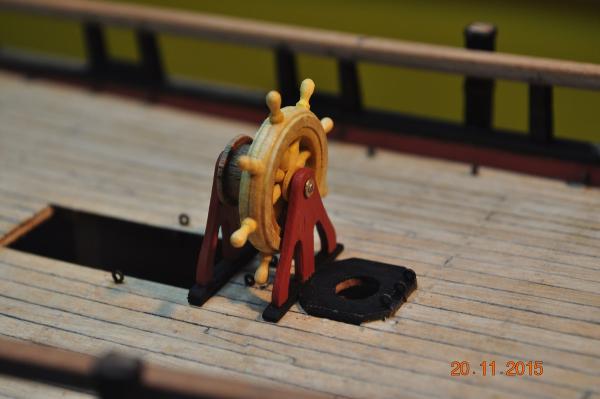
The Steering Wheel. The kit supplied a timber steering wheel(I used it), but with metal side frames and drum, no way. I did not wish to use the metal parts as they were out of scale and all wrong for me. The Capstan in the kit(which was too large for 1:60) I cut the middle out to use for the steering wheel drum. So: I made/shaped the timber side frames - red(similar ? from the replica) Drum from the kit capstan scale worked out well. Shaved the steering wheel so it is a bit thinner(recessed the drum on one side), although it is still thick, should of shaved more off. Used some brass washers for spacers(between the drum/wheel and side frames, but these pics you cannot see these) and end caps for the stainless shaft. The fore frame has a higher base than the rear, to counter the sloping deck. Total width came in at 13.5mm plus a bit more for the feet just fitted in the room between the companion and the mizzen base plate. I had to relocate the 2 eye bolts under, as they were not directly beneath the drum. Glad that little piece is done for now. Dave R

-
Hi Guys, Thanks all for looking in to the progress. I appreciate your kind comments. I must look like I have too much time on my hands ! I gather a lot of ideas and enthusiasm from looking through build logs and the AOTS. Having heaps of pictures of the replica also helps make decisions on how something may of looked. An item like the cable half cleat pairs, I copy from the AOTS. Dave R

-
HI Chris, I agree with Steve, plank from the main wale down. The first plank to the keel is the Garboard plank. Are you planning to have a rabbet on the stem ? where the planks run into ? I only did this on the 2nd planking layer. Let the planks lay(go) where they want to wrap on the hull, otherwise they will twist and (I) got into a bit of problem in this area until I got them back on track. Good that you want to practice the spiling and steelers ? On the second layer, it will look a treat. Dave R
-
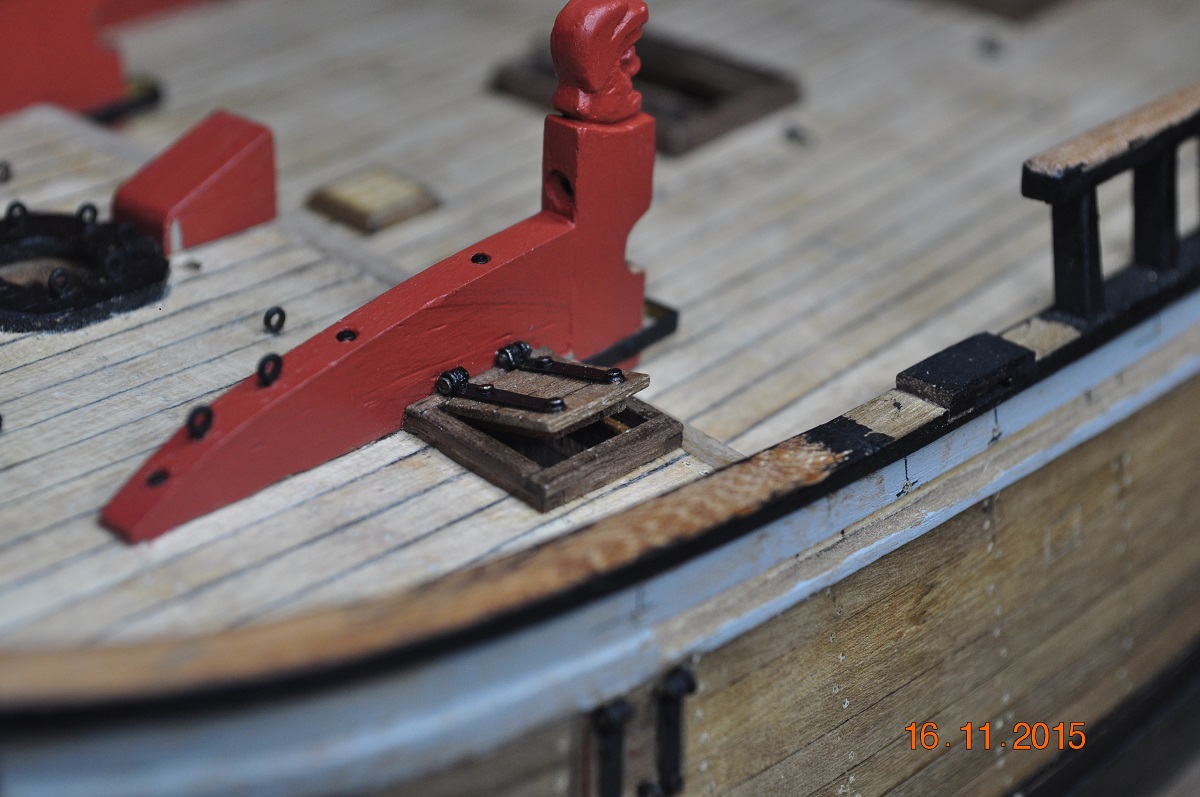
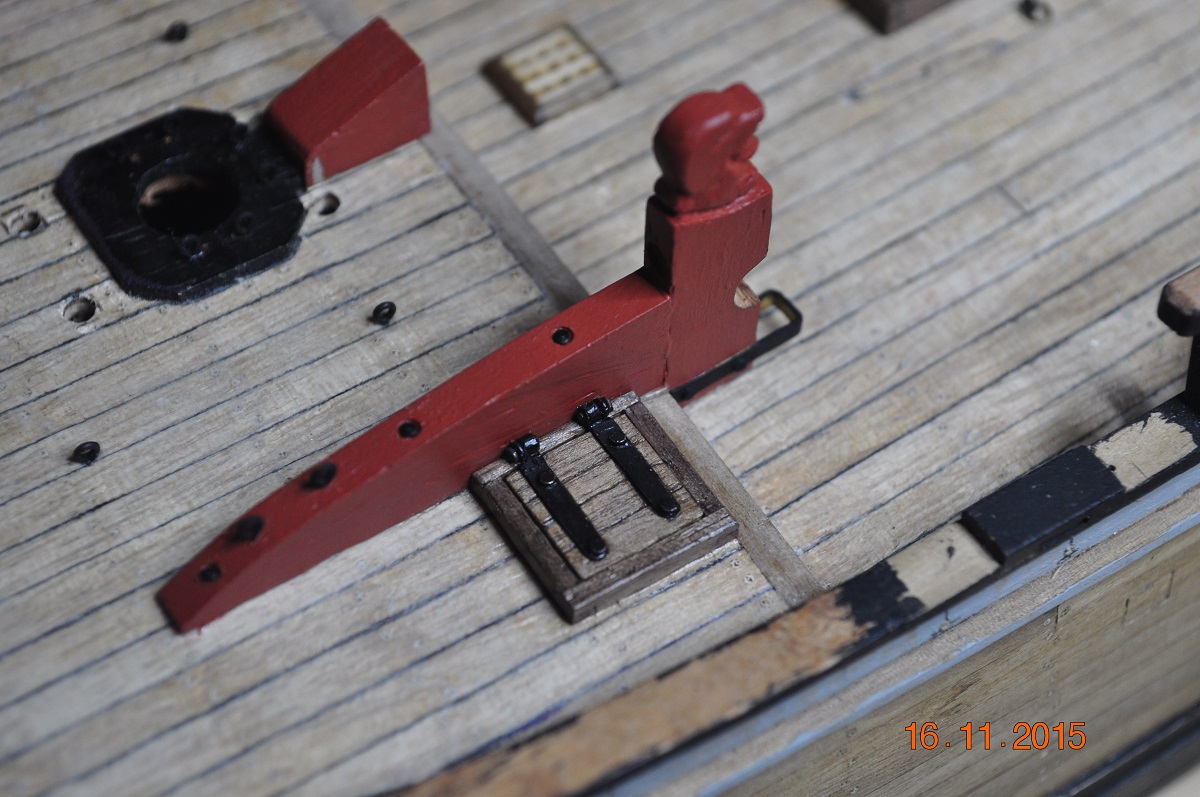
Fore Fall Hatch. Hatch came up ok, am happy with it. Underneath where it seals I have groove for the water to be drained away. Bit overboard I know, I tend to over think things. Dave R


-
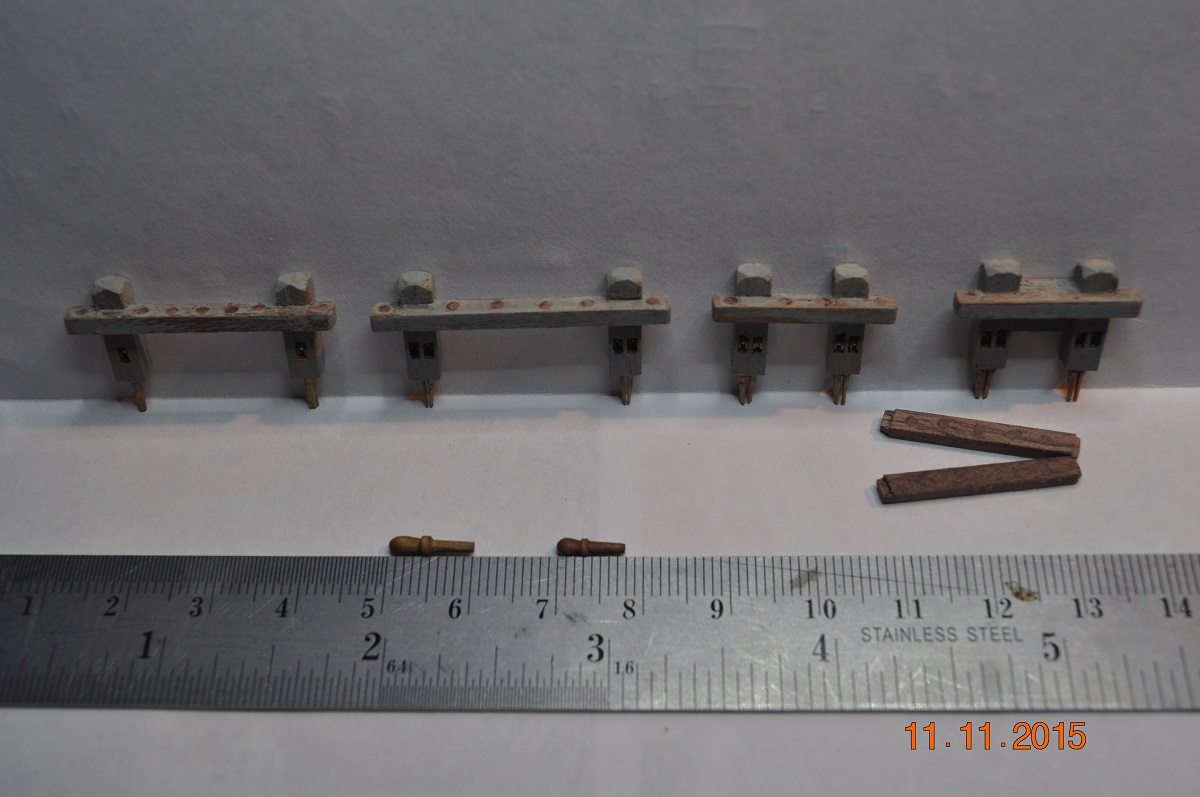
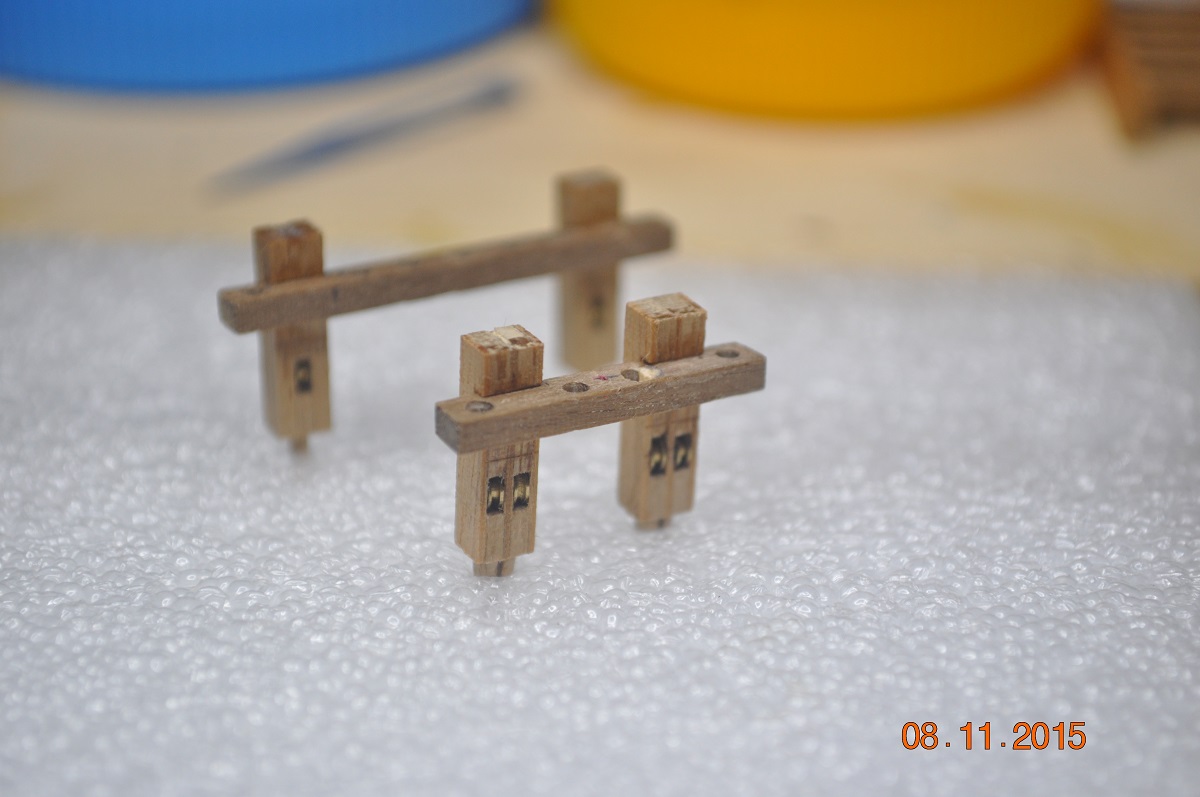
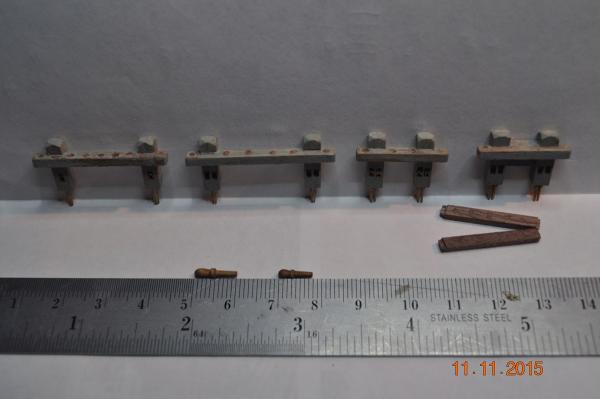
Fixing things. I filled the pin holes in the 4 Jeers & 2 pin rails I had made, as I was not happy with the dia. of the holes(too big). The kit came with 10mm belaying pins(way to big, out of scale), I bought 6mm pins, but dia. still too big. So will be redrilling 0.8mm holes and shaving the 8mm pins down to fit. Will have to get my head in the right space to do that job. Dave R
-
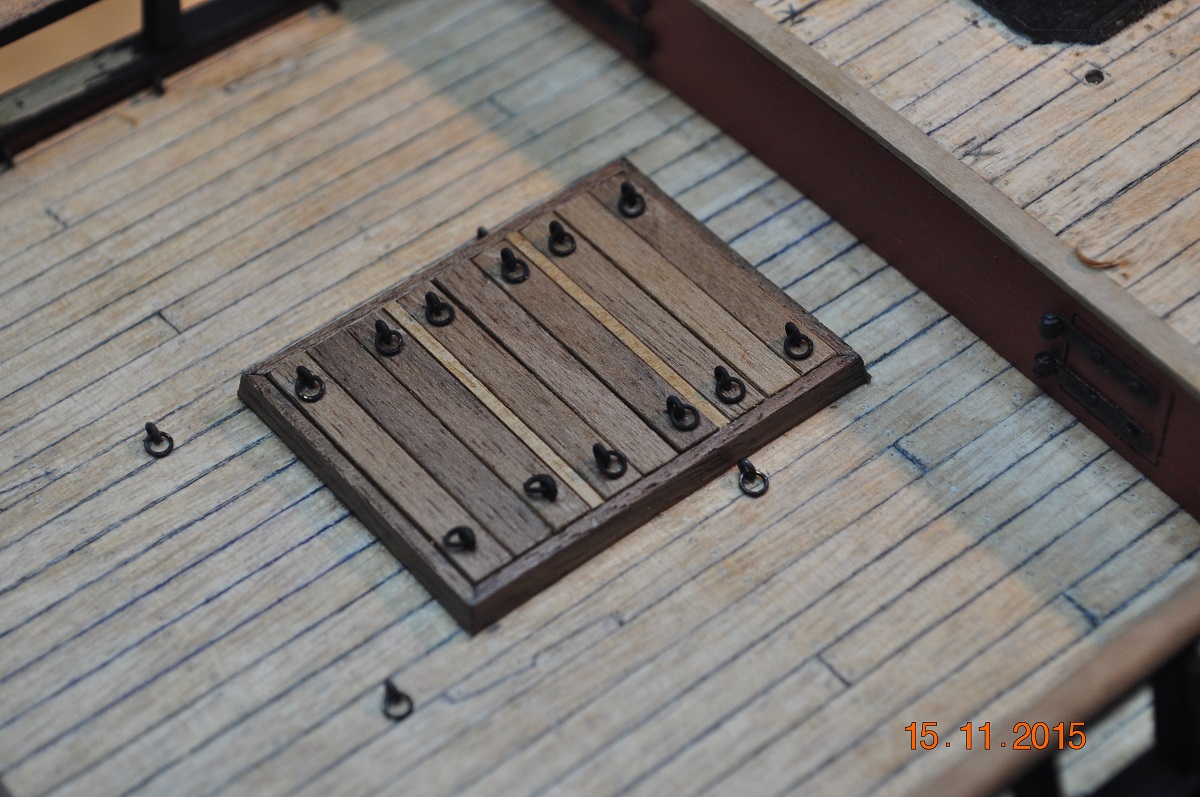
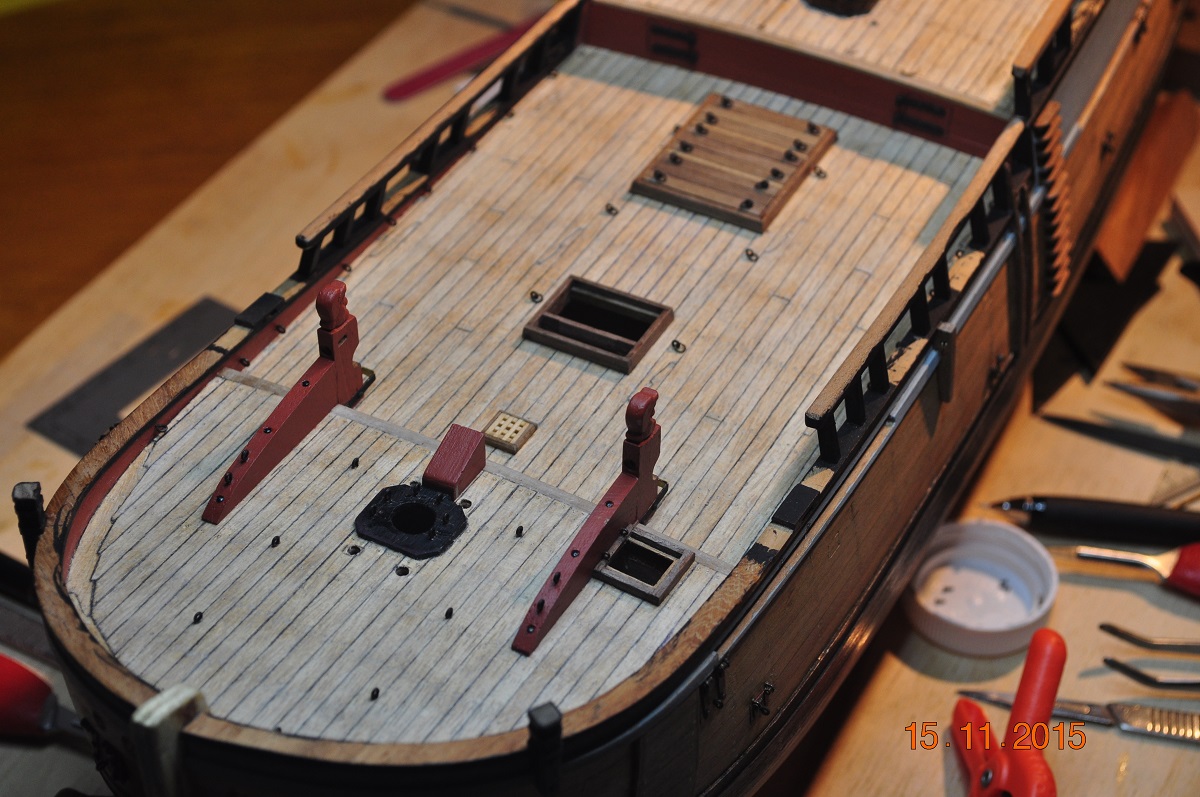
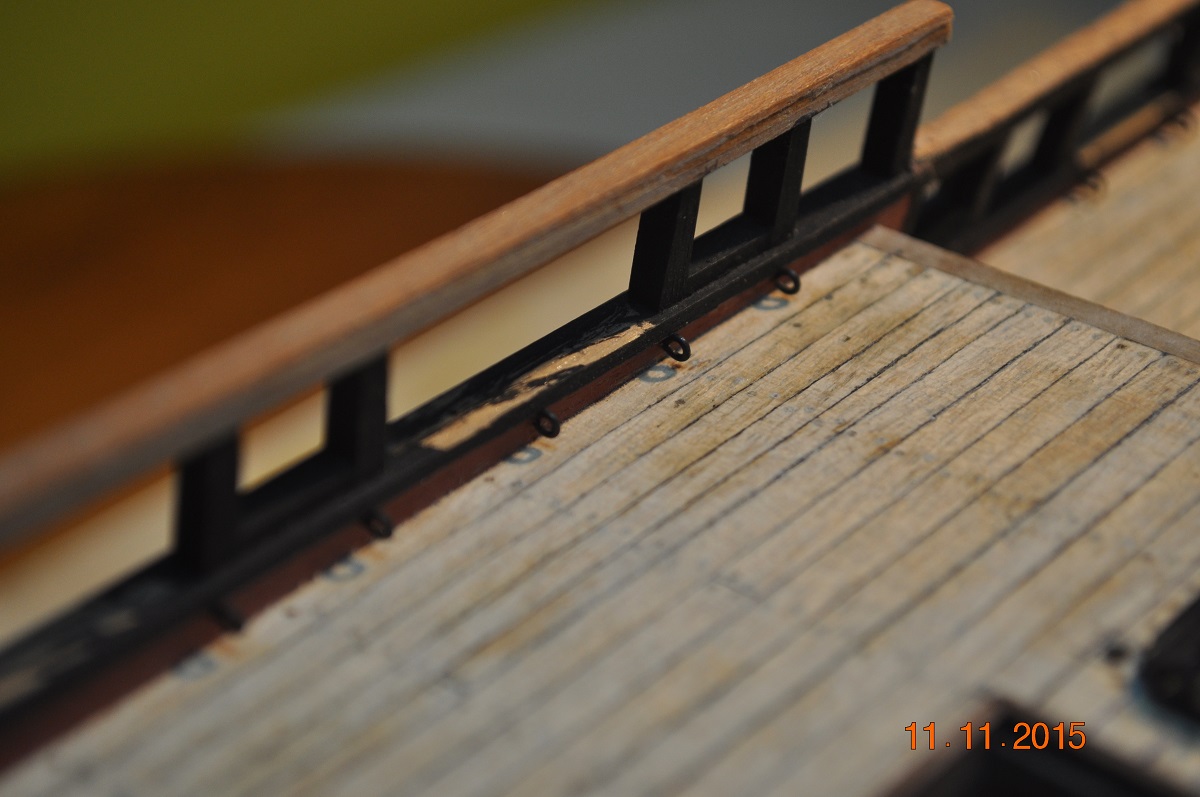
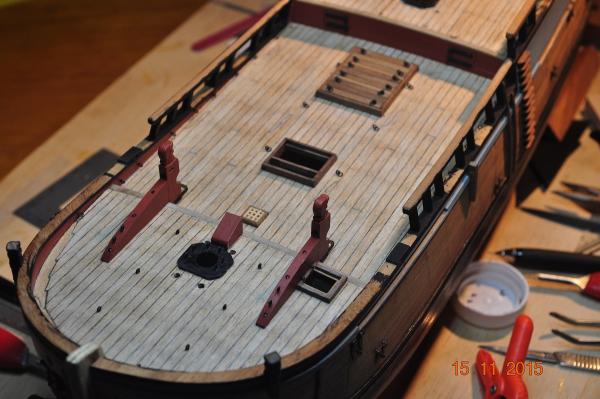
Shipyard Update. A few days ago I drilled and installed 80 eyebolts around the decks. And still more to go; 12 more for the carriage guns in the rail stanchions. Probably more I haven't found yet. Best to get as many as possible done now before it gets busy(eh Greg!). Dave R

-
Chris(cabbie), Plenty of ways to build things. One just has to get there head around how they want the end result to look, and work at how the get there. For instance: the main and for jeer bits, the AOTS shows sheaves in the posts. I used 2 different thickness timber strips(laminated) around the 2.5mm sheave/s. By the time they are painted, you would not know this. And the paint will hide the sins/errors. Happy construction. Dave R
-
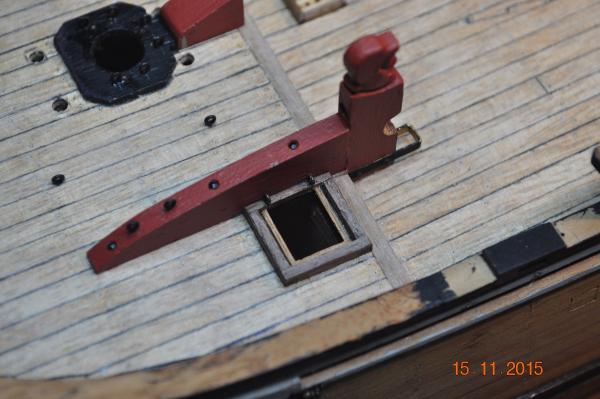
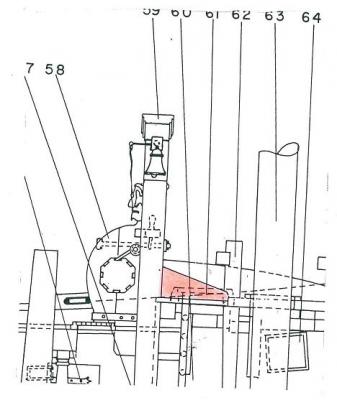
Hi Greg, The brace you mentioned. Only item I could see that may be the brace you mentioned is the highlighted frame in the enclosed. ? Yes ? Easily missed. 2 of them running to the fore jeer bit/foremast partner. I'll be adding cleats as well. Another item to make now. Thanks heaps Dave R
-
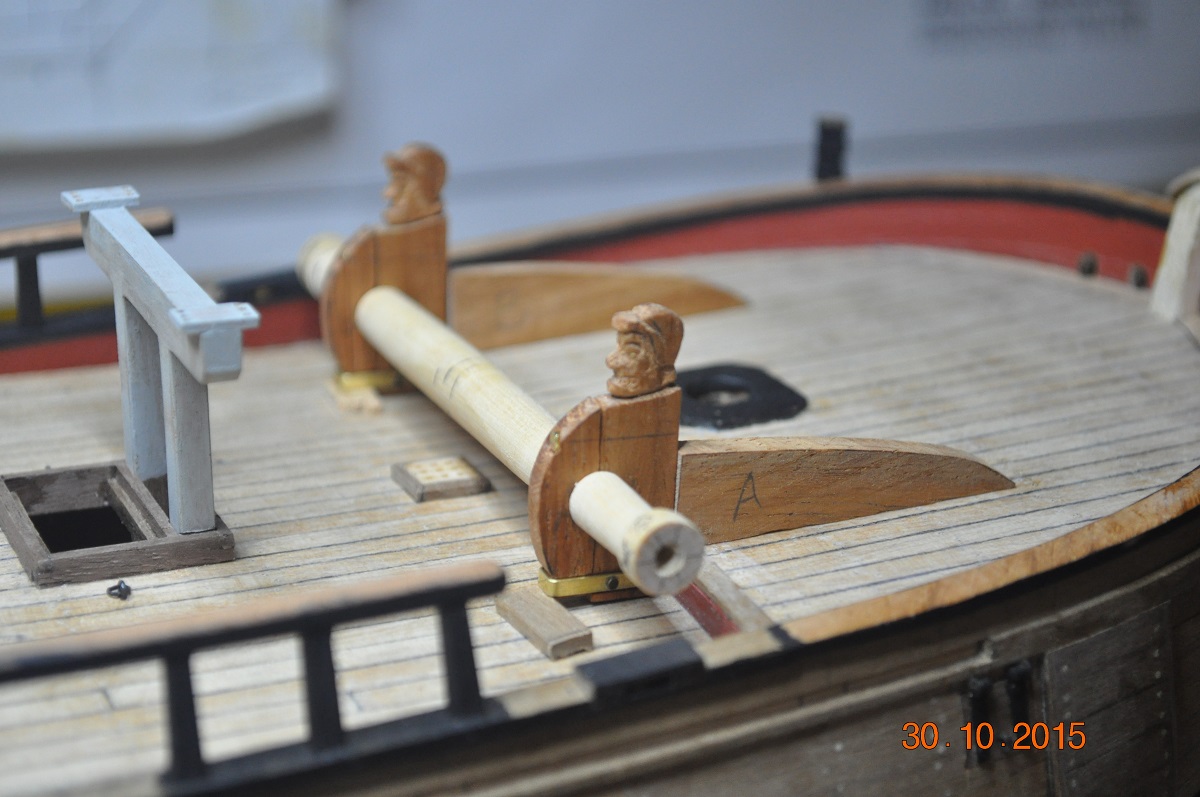
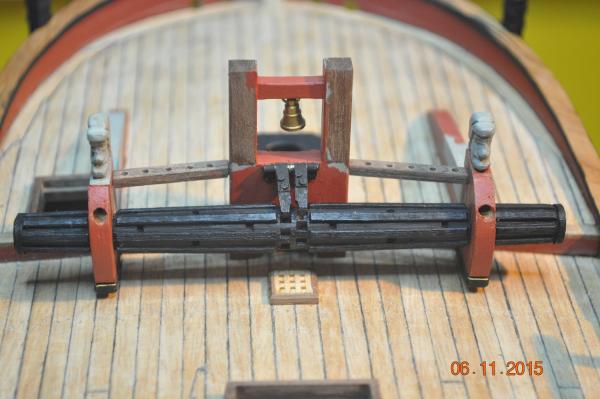
Thanks to all that have been looking in on the build. I was on the replica on the 6th Oct, took plenty of pictures to assist in details. Windlass Update, I have spent hours on this baby so far. The side Standards & Bit Pins are glued in place now. This allowed me to fit the pin rails to the Pawl Bits(the bell tower !) The barrel is 95% complete, fitted and turns in place between the Bits(pin & cheek) complete with brass bolt and nut to lock in place - for final lockup. Neat eh! Made up some pawls - bit rough but at this scale lucky to get them. Need to trim them back a bit. Still more to go - the belfry cap to finish off. Then onto more bibs and bobs. Dave R

-
Michael, I have found the Corel Kit, well let's say has many differences to AOTS(by K.M.) I've bashed my Endeavour to look as much as I can to the AOTS. The Corel plans and notes, I don't look at them. Dave R
-
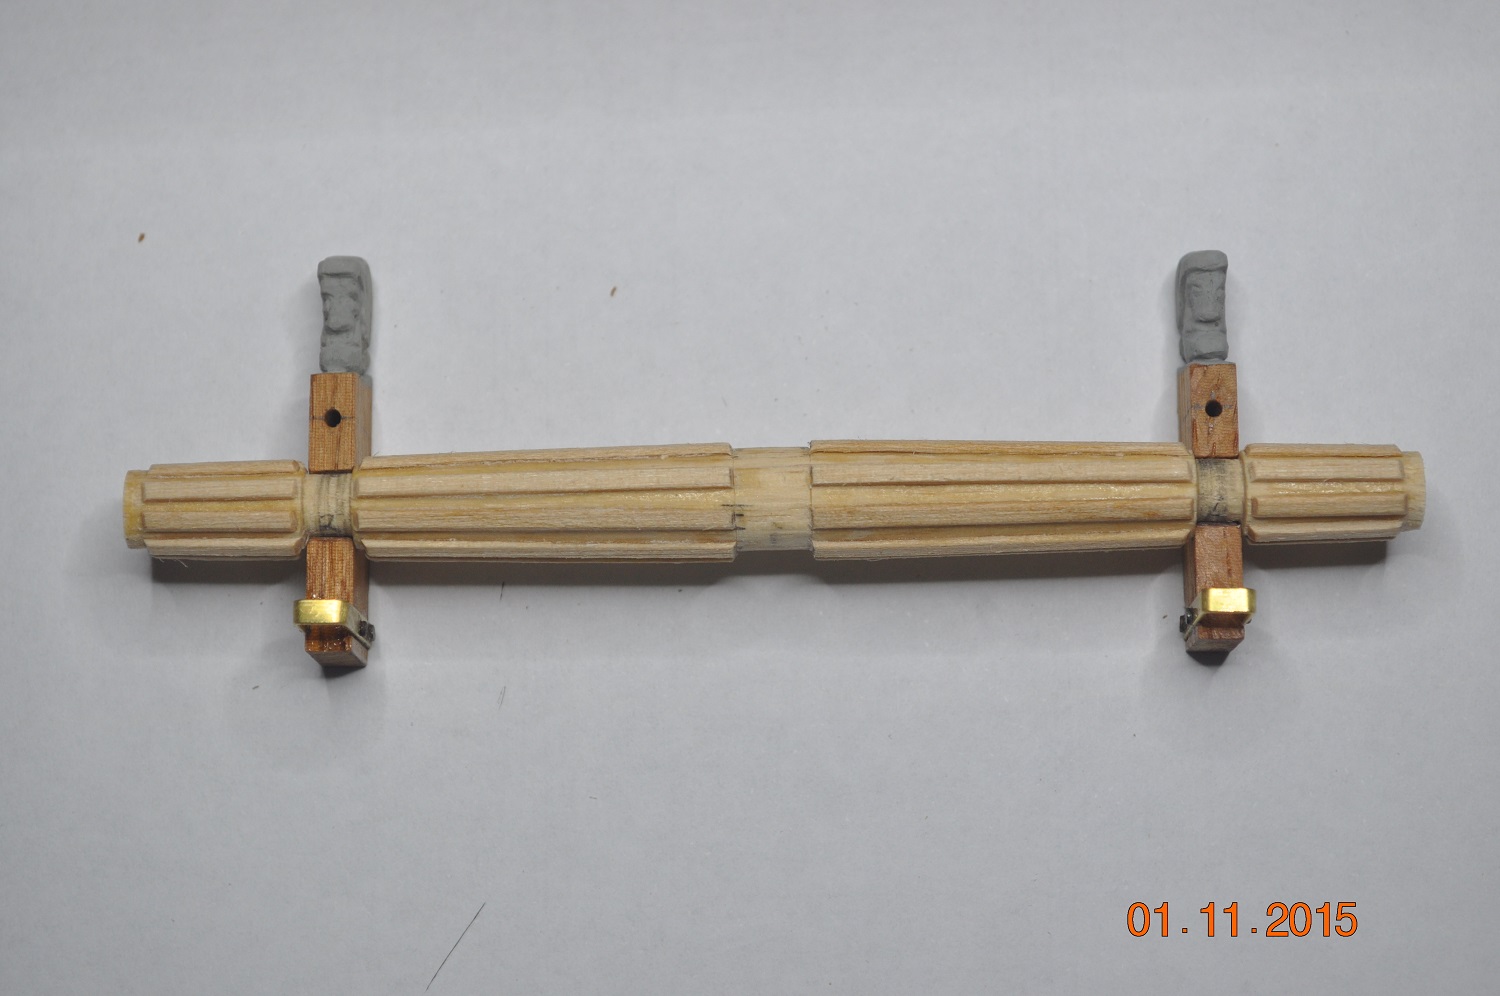
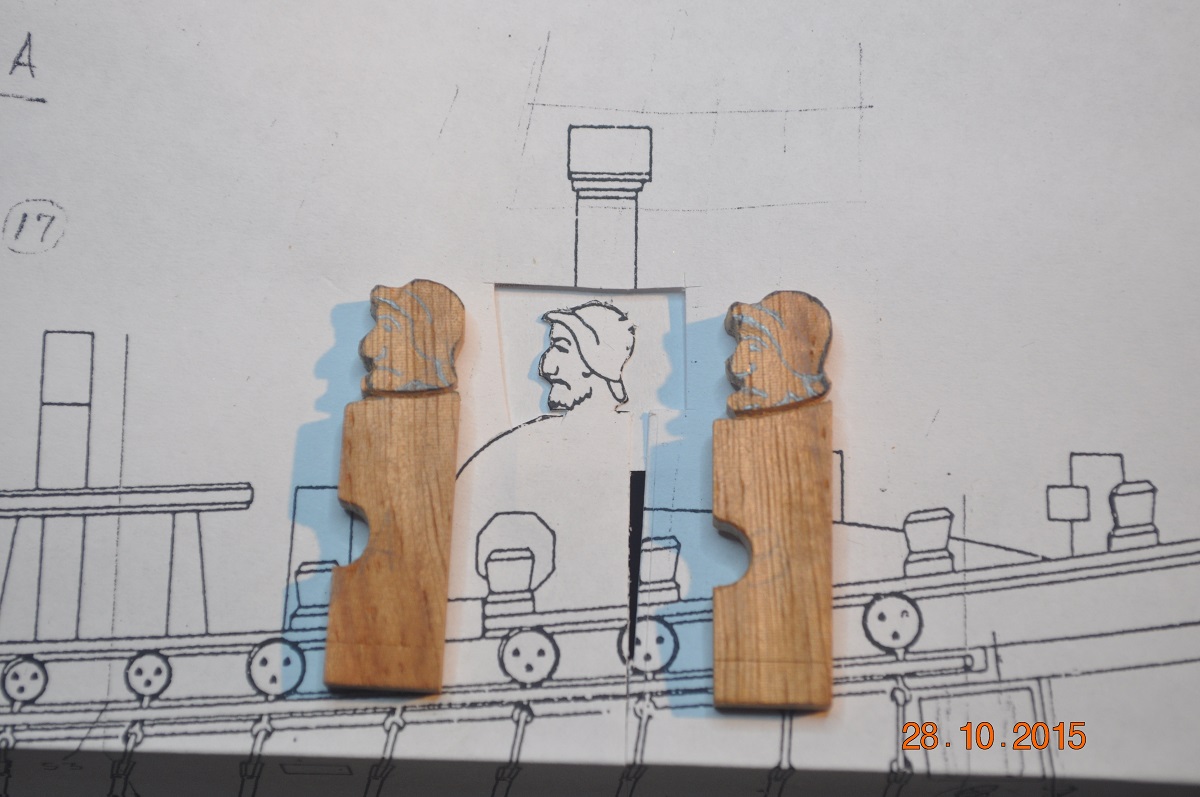
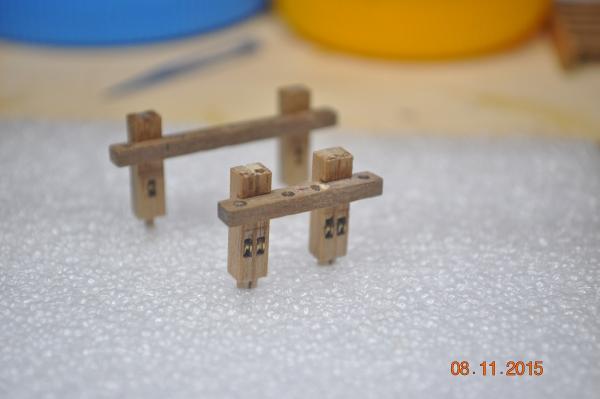
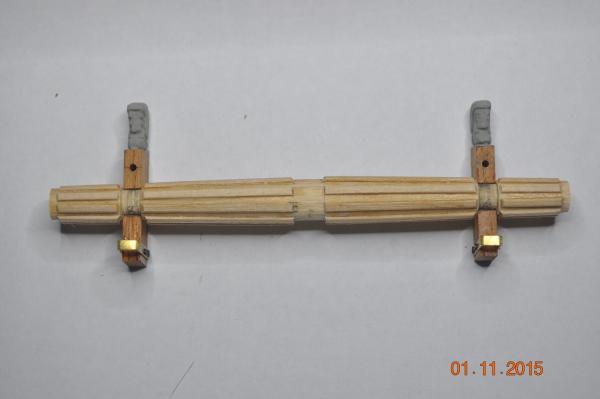
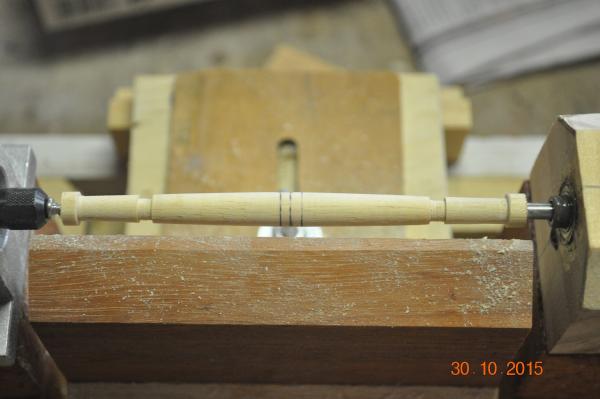
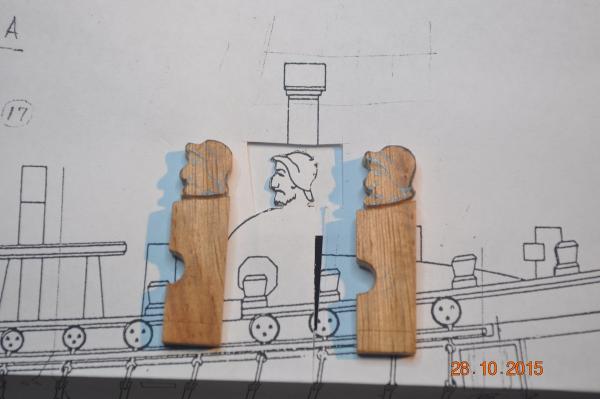
Some progress on the Windlass. I turned up the barrel on my home made lathe. The Bit pins & cheeks(ends) come apart to house the barrel, the cheek bottom held in with a brass bracket, the top with a brass bolt. Took a while to finely tuned the fitting to get the barrel to turn. I was surprised the figure heads came up fairly well I reckon. Only 2 days work. ! Next to add the pin rail, whelps, brackets etc. make the bell tower thingy. Mine will be something based on the replica, 2 posts. PS. I have yet to trim the ends of the barrel off, left them on for now. Dave R

-
Michael, As the "Earl of Pembroke": 81' 3/8" was the length of the keel for tonnage. This is recorded in Ray Parkin's book "H.M. Bark Endeavour" Also noted: Length of the lower deck from the after side of the rabbit of the stem to the foreside of the rabbit of the post: 97' 7" Hope that helps. Dave R
-
Hi Michael, The filler blocks. front or back run them all the way to the keel, so it is tight and square to start from. Too late now. I am leaving my keel 4mm thick, paint it brown probably, then it is same thickness as the rudder. The rudder, I tapered it slightly to the rear. Pics in my log if you want to see. June this year. I cut all the light ports out after the second plank layer. The thought being the planks lay truer when drying, cut out later. The Corel plans are full of mistakes. I completely remade the stern, threw the metal window thing and their design to the wind. Have you got yourself Karl Marquardt's "Anatomy of the Ship", a lot of the guys building the Endeavour use this as a definitive source of what the ship was most likely like. Up to you though. Dave R
-
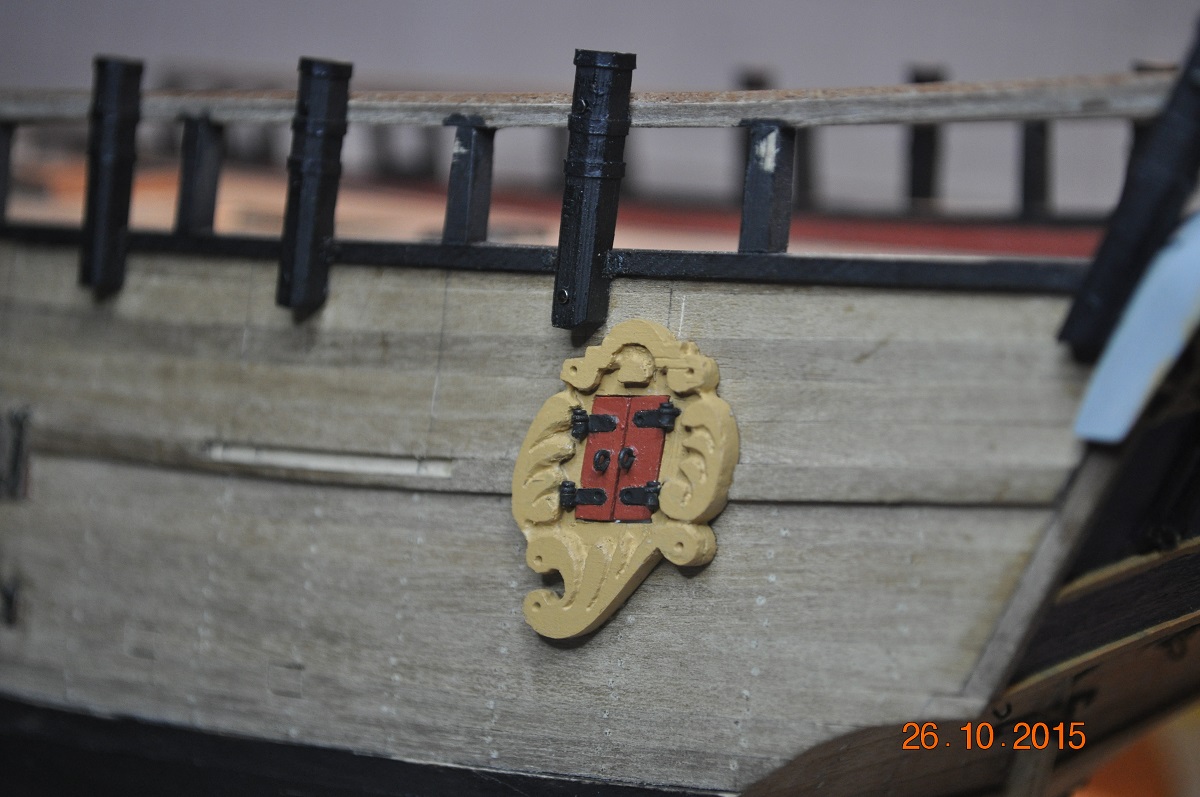
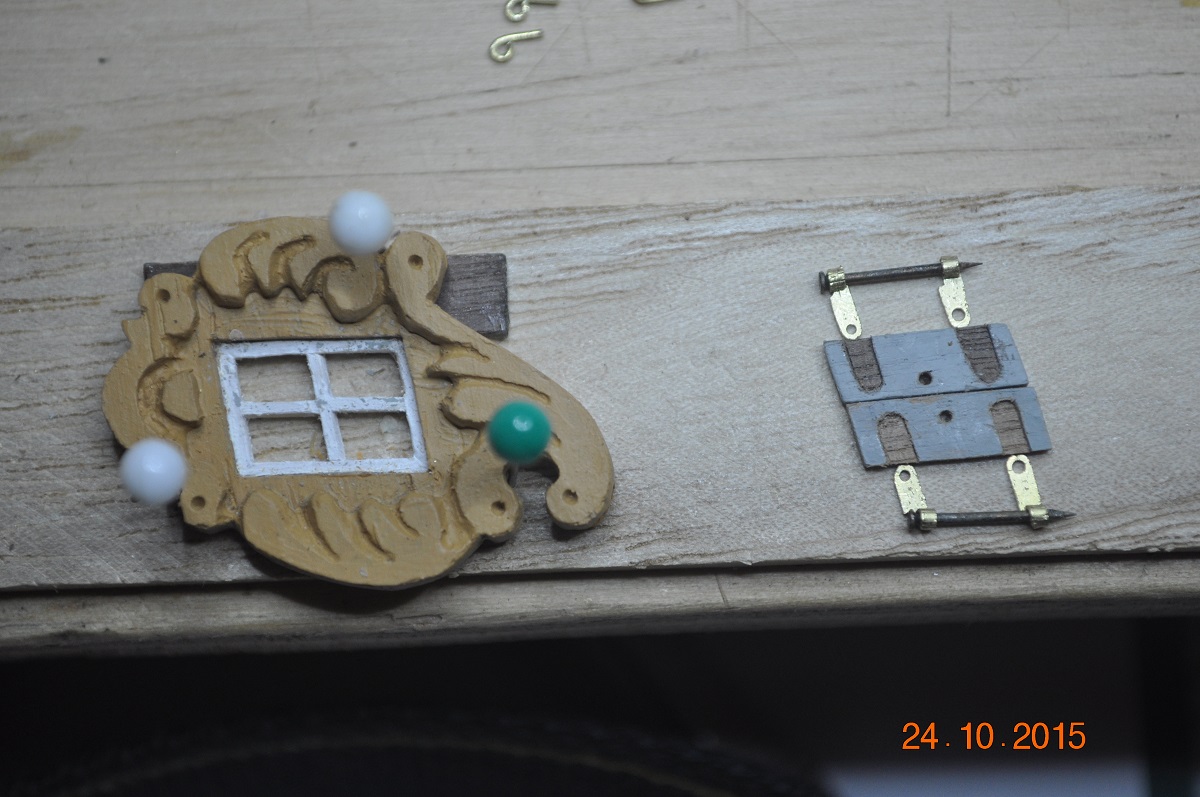
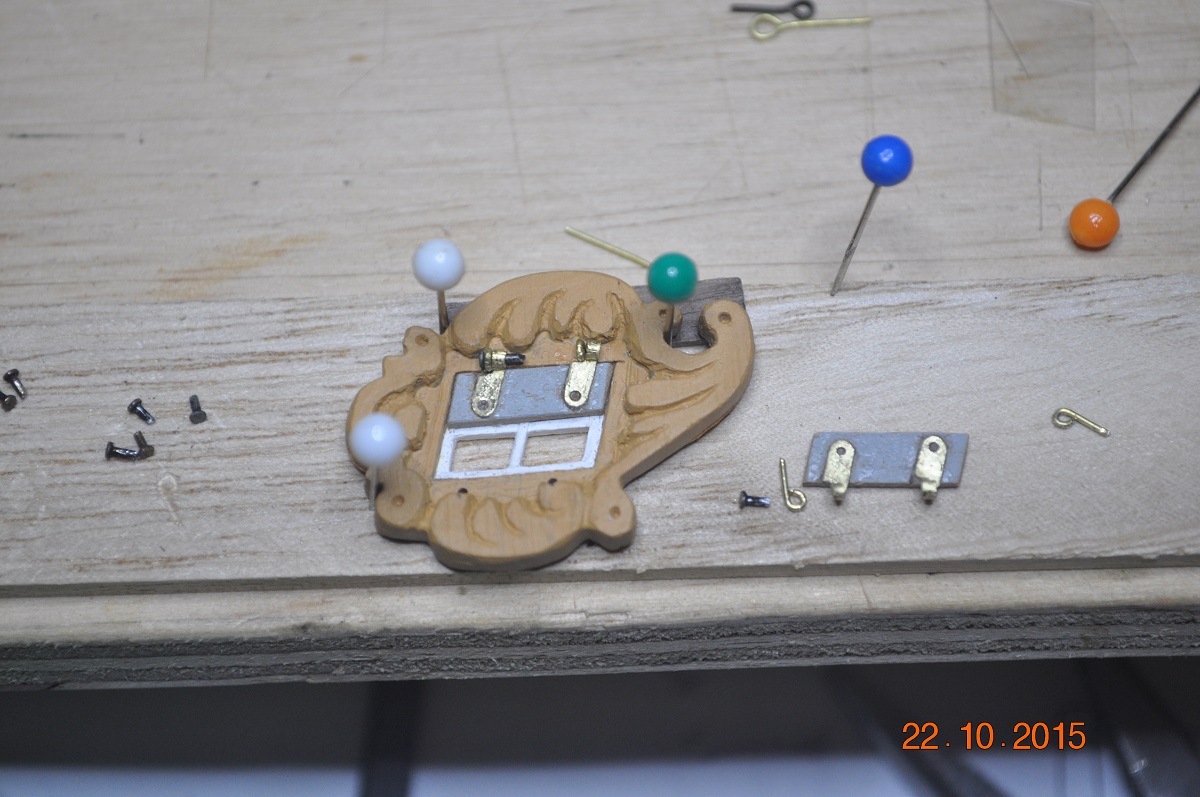
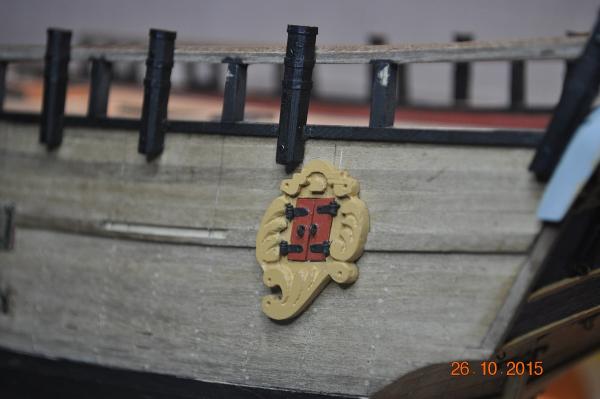
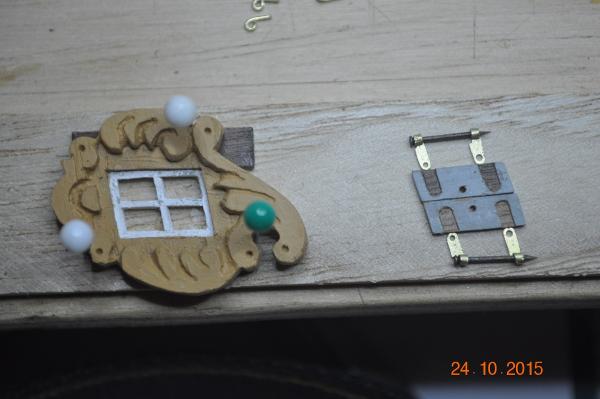
Hi Greg, Will concentrate on the deck items from now. All makes sense. I did push on over the weekend to get the Quarter Badge Deadlights made and fixed in place on the hull. I started the badges in April this year. I love making very small hinges , did I say that ? I am over them. I rebated the hinges on the deadlight so they did not stand out so much. At such a small scale, I found it difficult to make them smaller. At least the deadlights open, when all the glue is fully dry will snap a pic, post, then close them for the remainder of the build. The deck awaits the shipyard. Dave R

-
Hi Pat/Greg others, I agree, will have to leave the items that are loose/swing off to the end. Anchors, Boats, Cannons(maybe fit them up and glue in place ?) I should start to move onto the deck items next/soon. Get these tucked away in place then back to the outside/mast bottoms. Dave R
-
Hi Ron, Going well I see. Oh man, the rigging is going to be a tough one to tackle for me. Seeing what you and the others are doing, going to be a challenge. I have spent some time already looking into the rigging. Was definitely going to go black on the standing rig. Tan on the running. Dave R