-
Posts
691 -
Joined
-
Last visited
Content Type
Profiles
Forums
Gallery
Events
Everything posted by DaveRow
-
They were tricky little buggers. Glad they are out of the way. I'm onto making the spar blanks now.
-
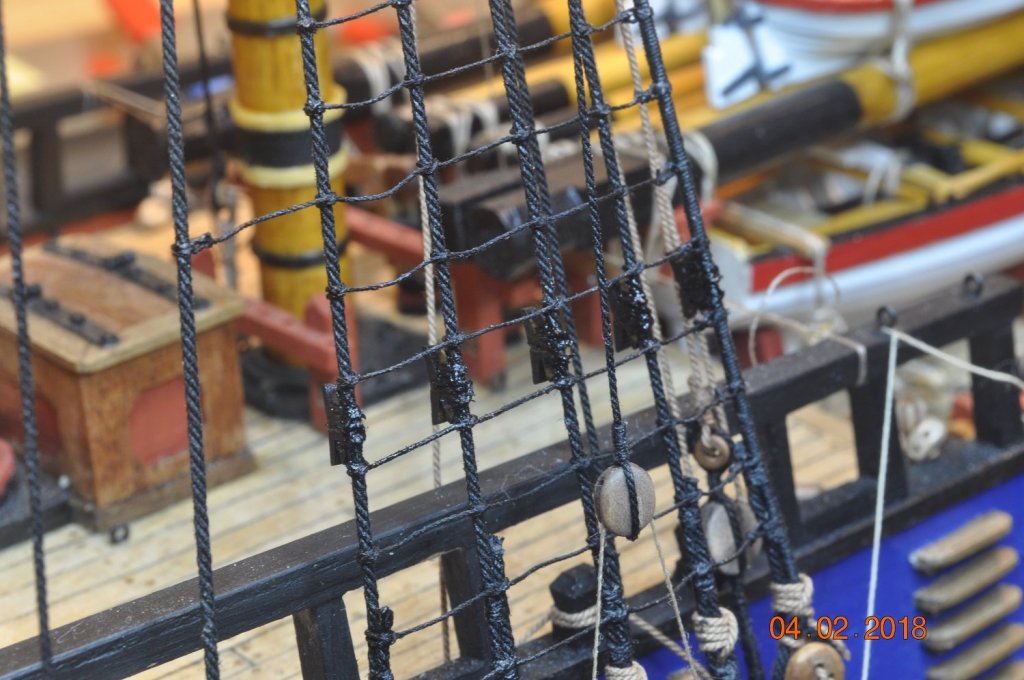
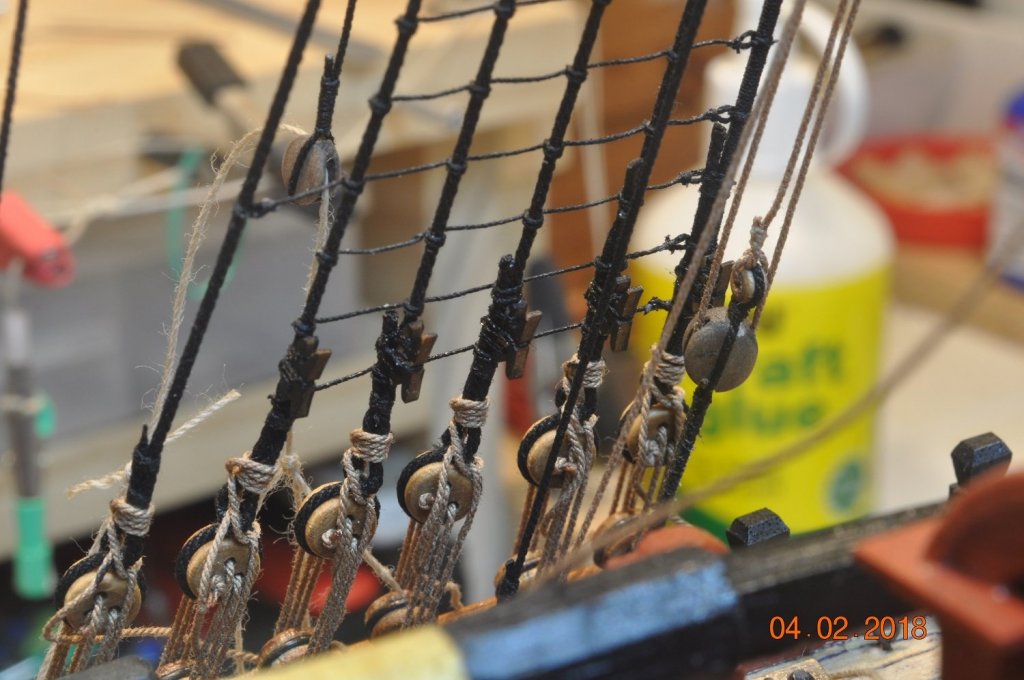
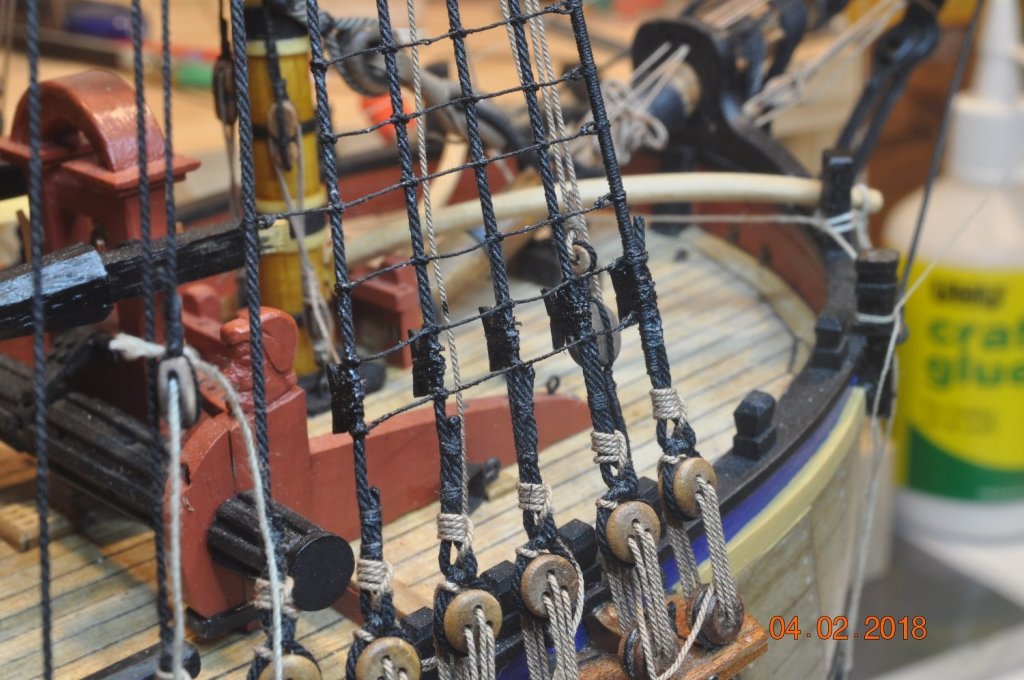
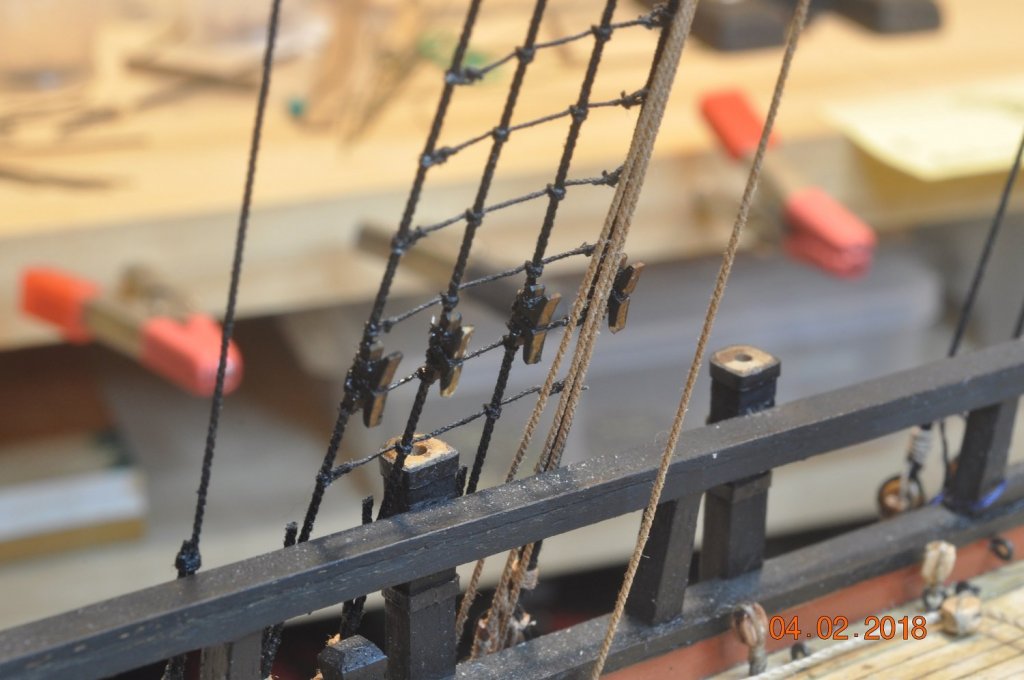
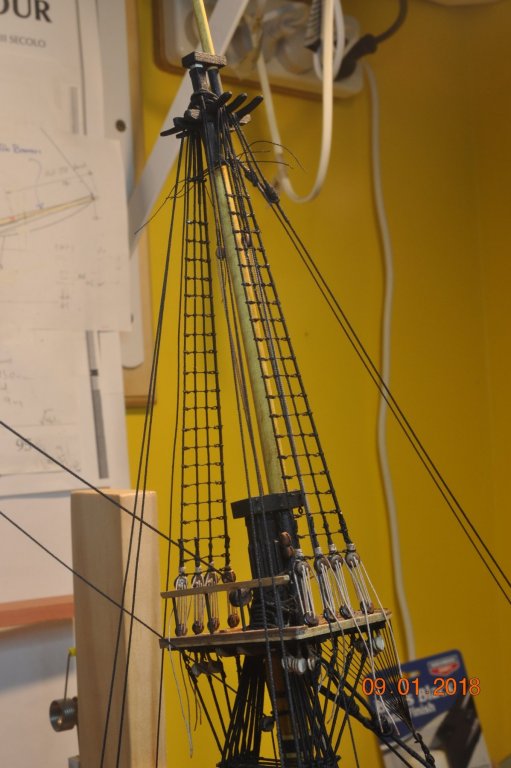
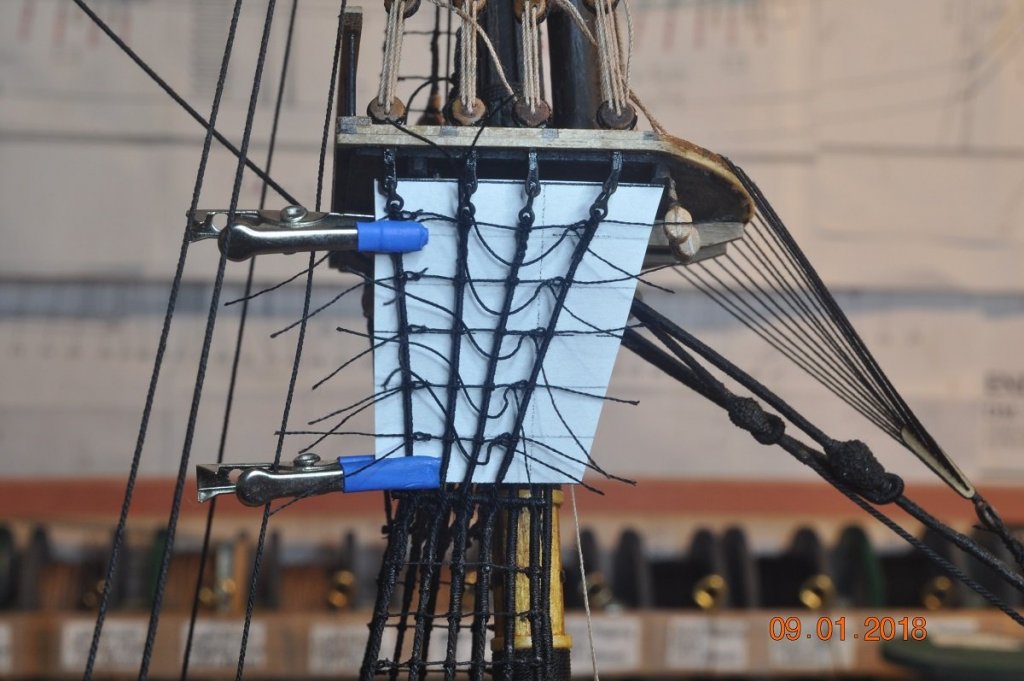
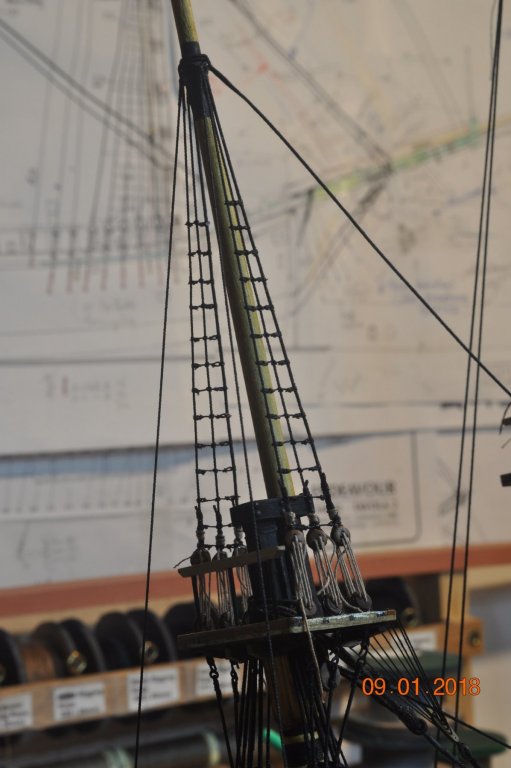
Twisting ? All my ratlines were glued at every shroud intersection, which kept the shroud fixed. The cleats, held in place with tweezers whilst the middle thread looped and tightened. Then a drop of CA on opp side of the cleat touching the shroud to hold in place. Then finish the 2 outer threads. Sounds simple ? I've mastered using 2 tweezers(one per hand) at a time.
-
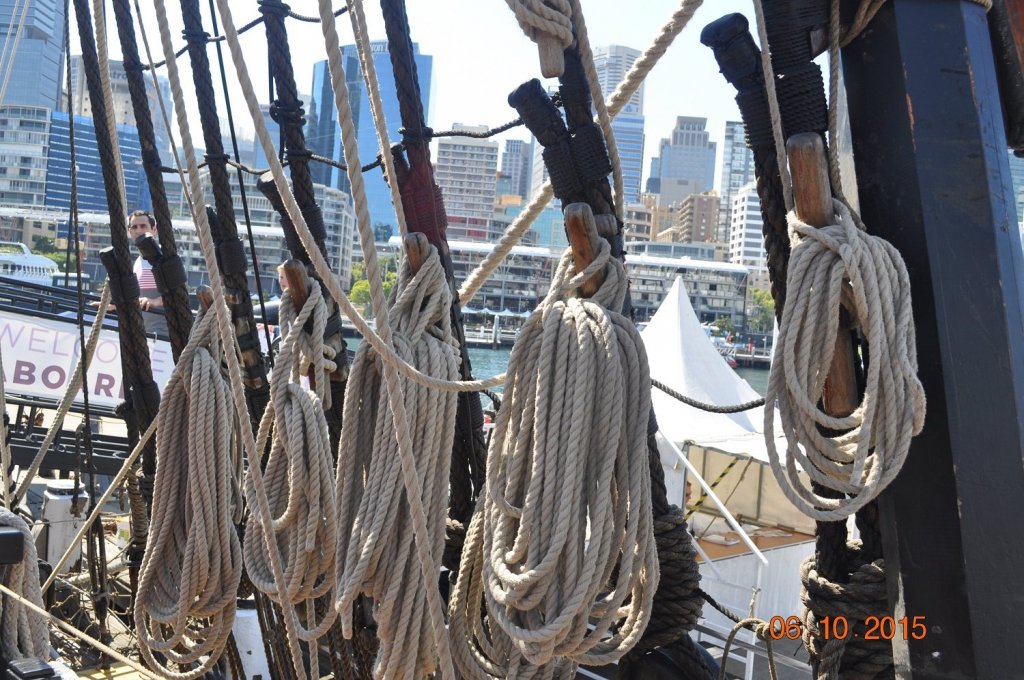
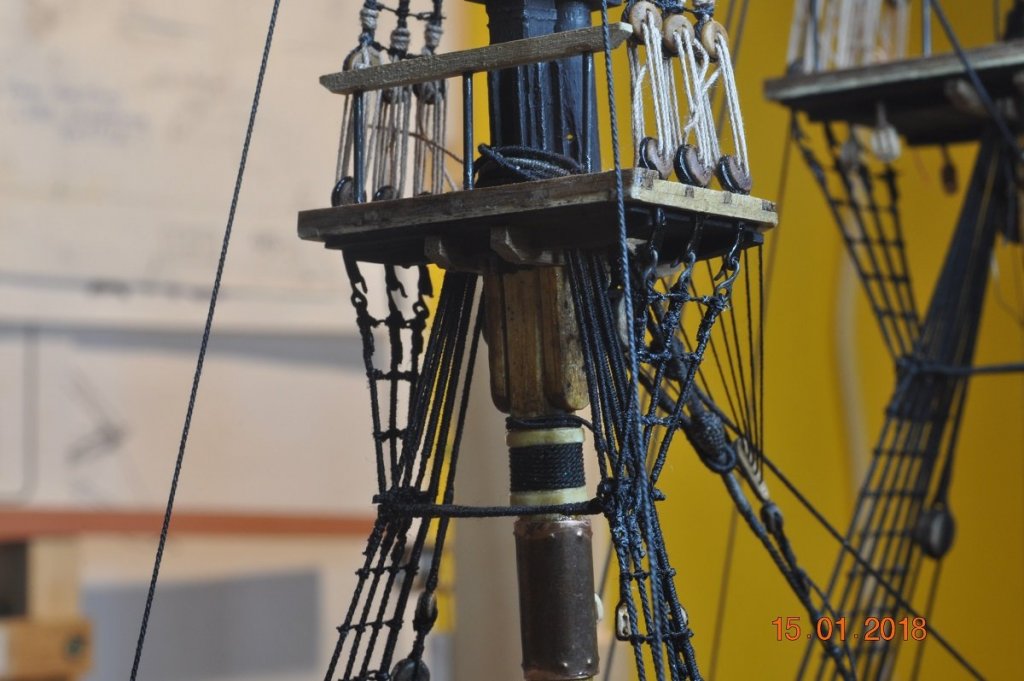
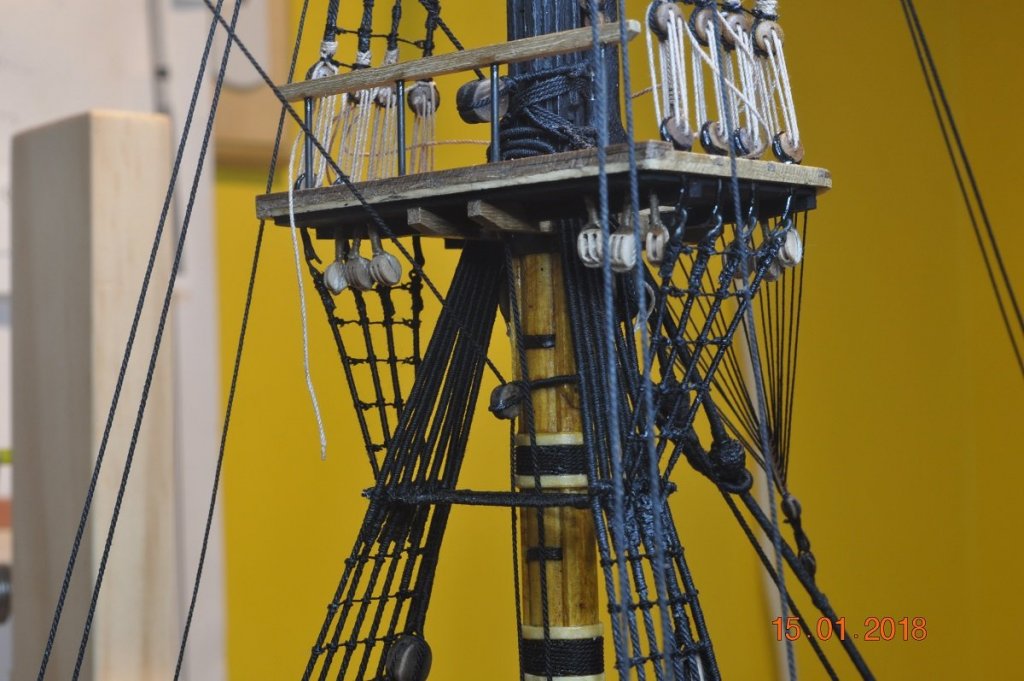
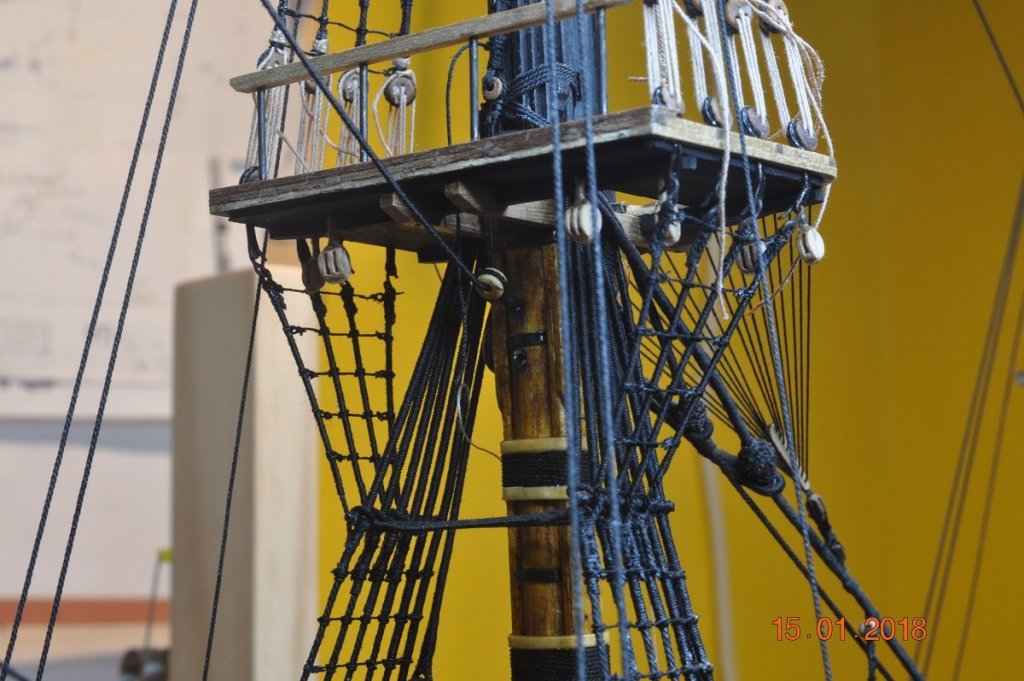
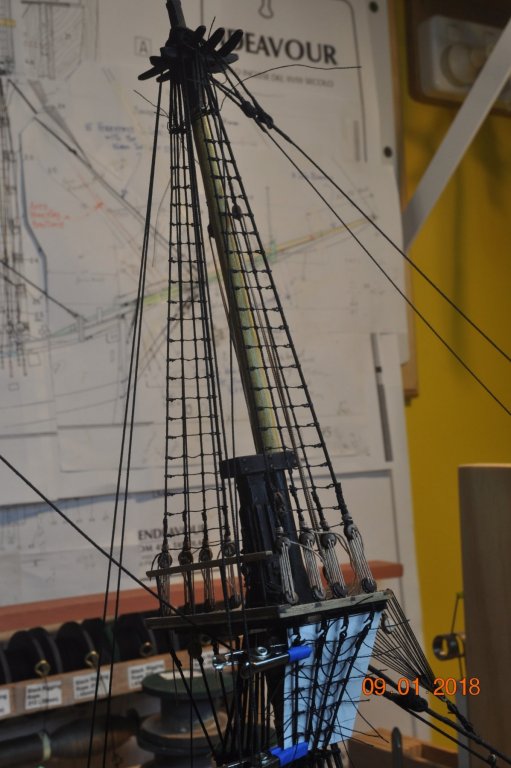
Shipyard Update: Cleats to the lower Shrouds: The shipyard took on the task of adding cleats to the lower shrouds. Tricky little buggers to lash onto the inside of the shrouds. 3 x 2 loops per cleat. Each cleat had a groove filed to the inside leg to "sit" over the shroud/rope. Starboard Fore Shroud cleats. Starboard outer Shroud cleats. Inner Port view Shroud cleats. Inner Port Mizzen Shroud cleats. Cleats on the shrouds - picture on the HMB Endeavour Replica at AMM - Sydney
-
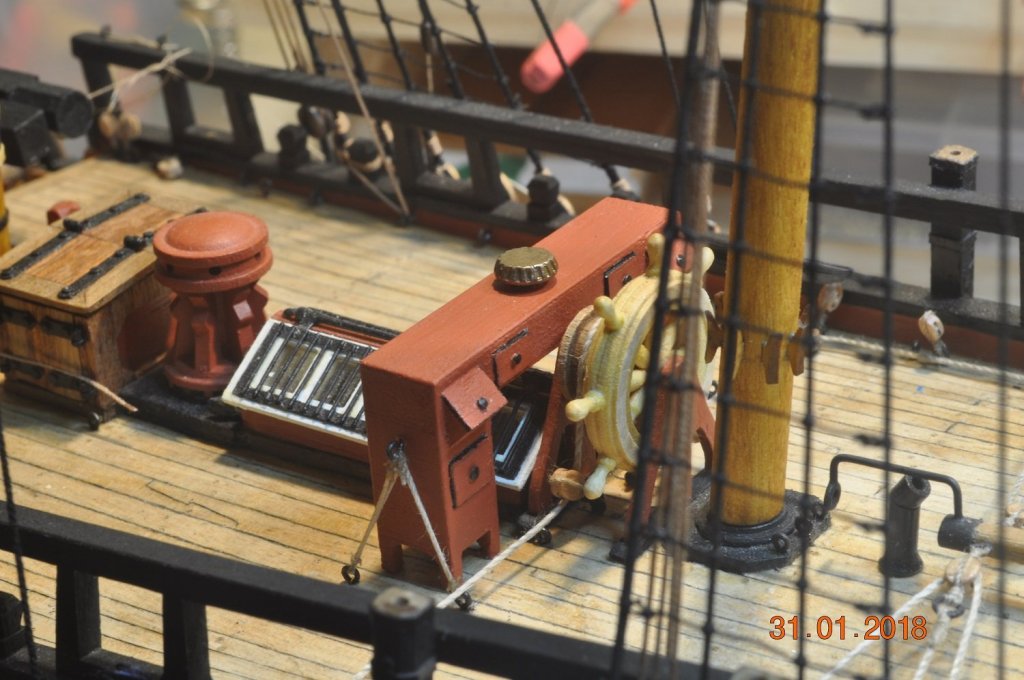
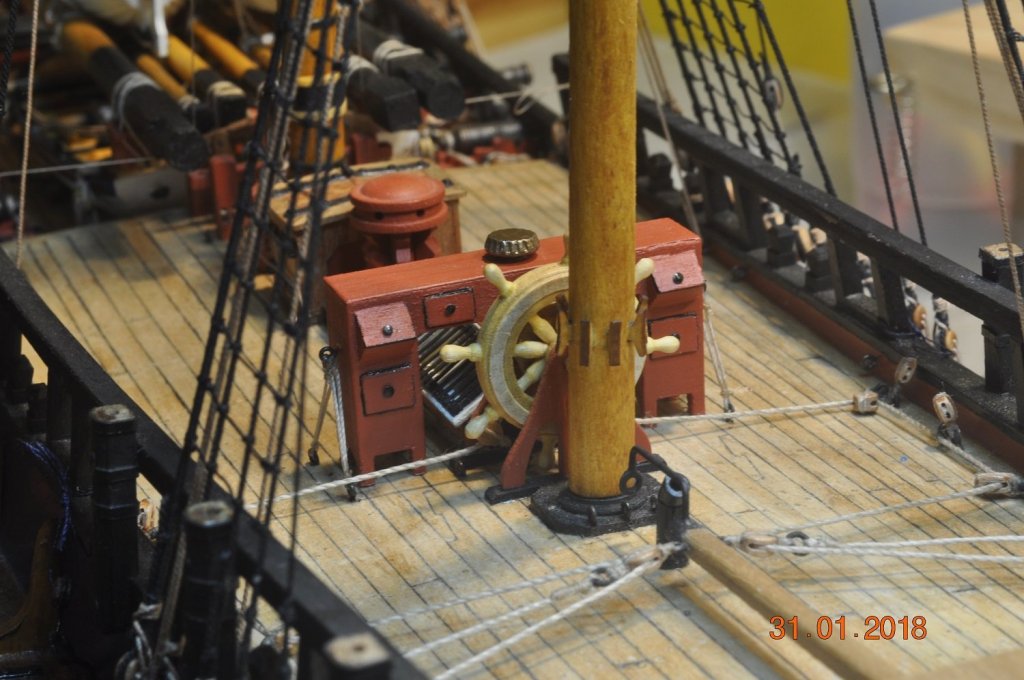
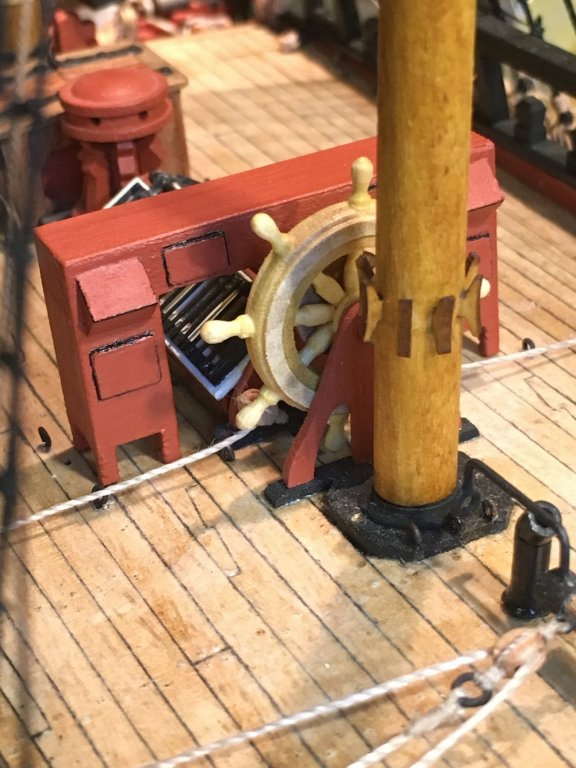
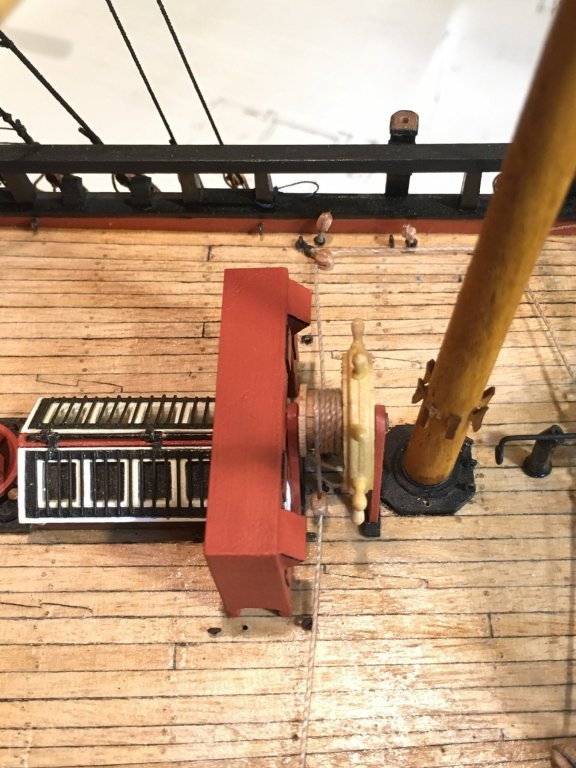
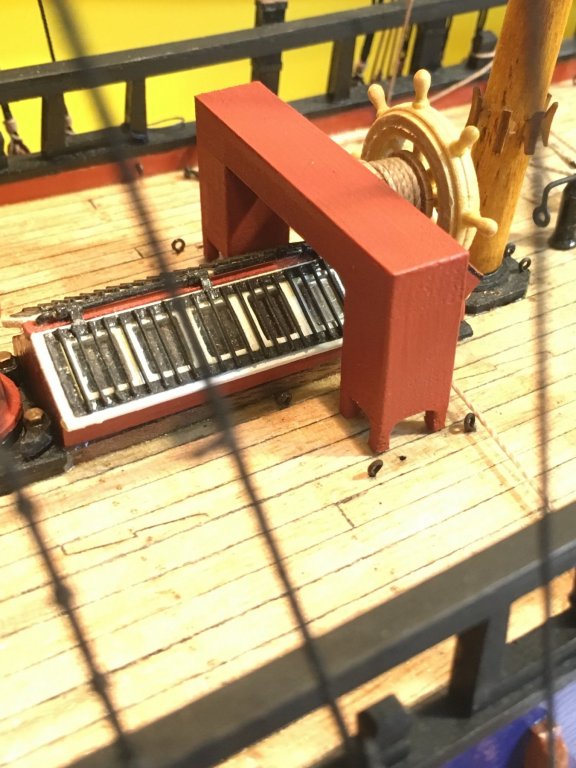
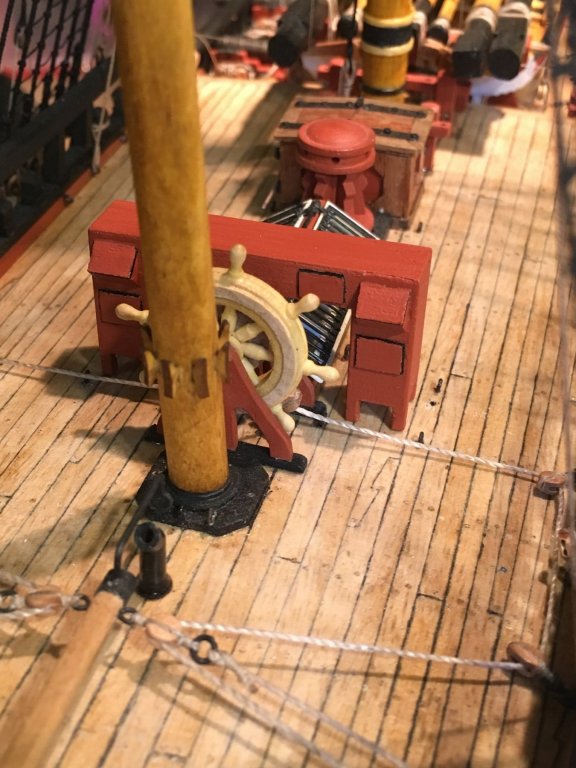
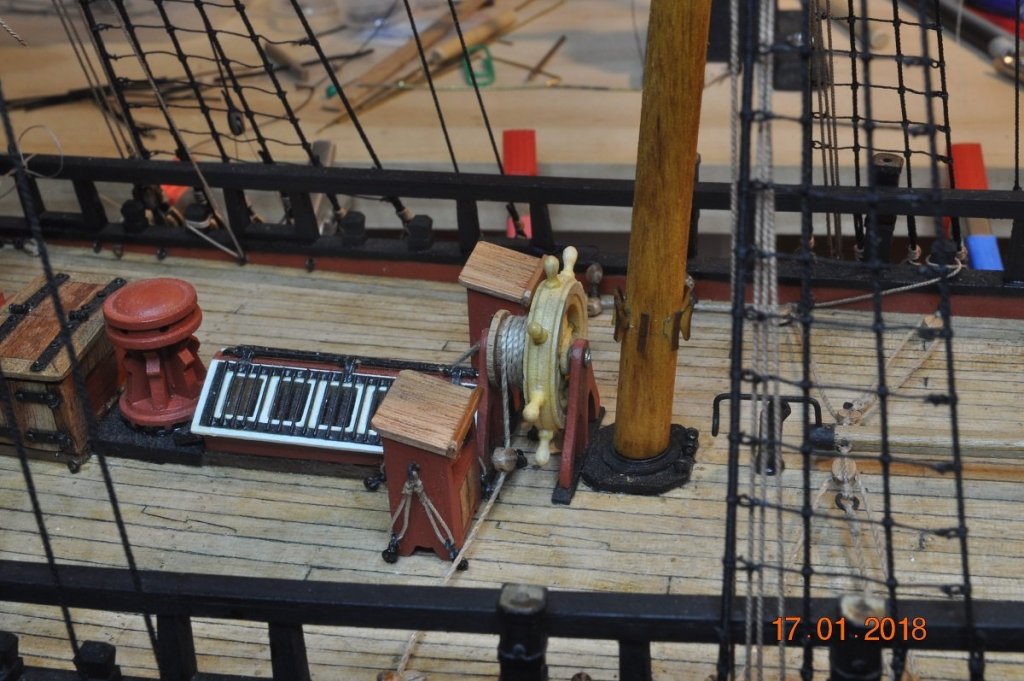
Shipyard Update: Binnacle completed: The boys in the yard have lashed down the Binnacle in it's resting spot. Finished it off with a knob on each draw and the vent in the top for the lantern fumes. Well that's the intent. Next was to add cleats to the Shrouds.
-
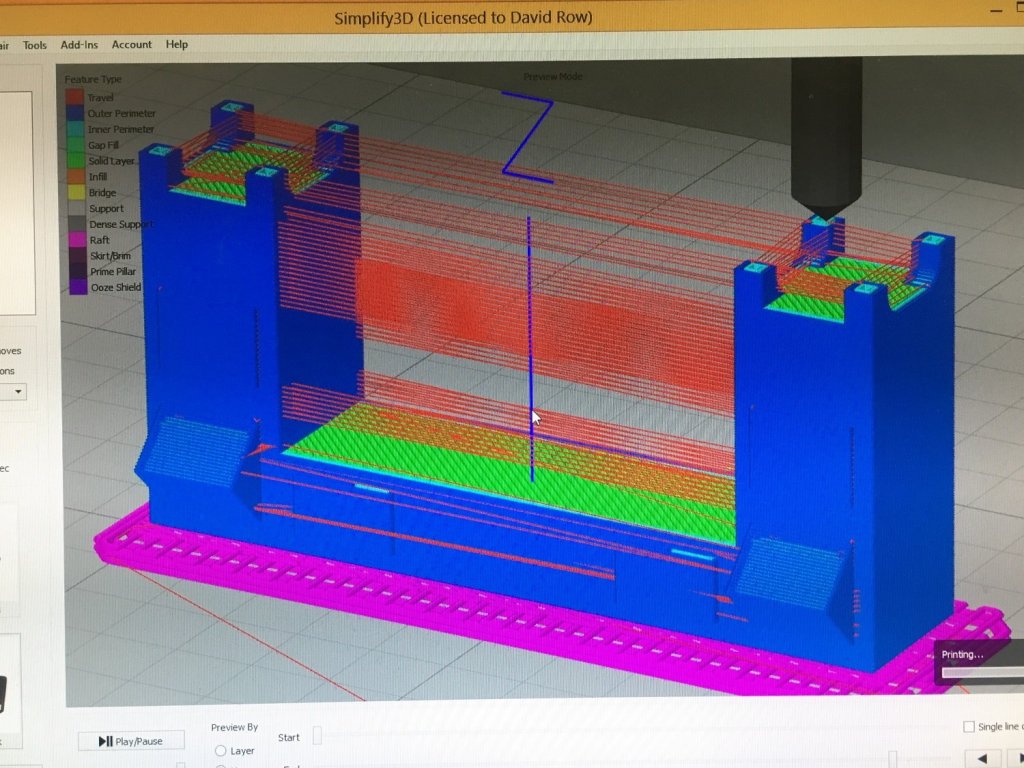
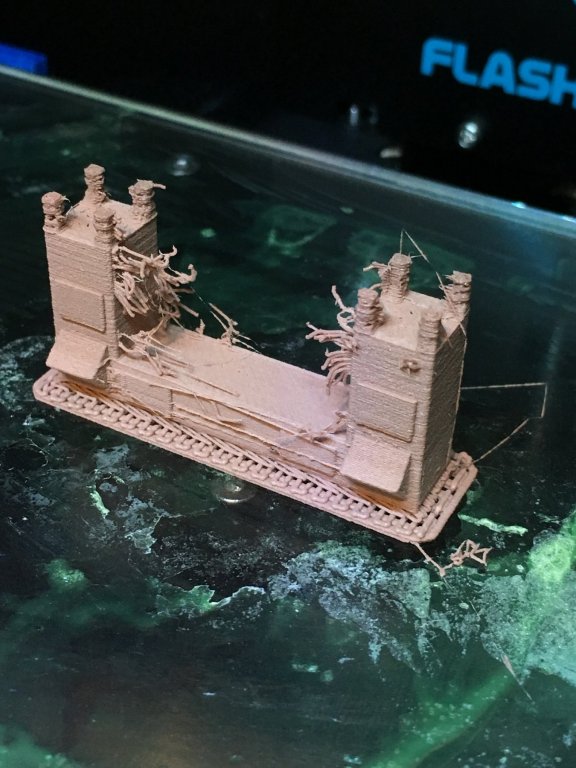
Hi Pat, Not sure about the "future of modelling" Certainly has a benefit of reuse of the 3D model to produce at different scale/s. I produced a couple of test Binnacles with the ABS filament, which printed well, then the wood filament was in PLA, a whole different learning curve. Below is a test 3D print (just after last layer), still on the heat bed. After many changes to settings improved the final print to produce a fairly good final product I was happy with. Still needed some cleanup though, but at least all surfaces were 99% true. 3D printing may not suit all items. Complicated shapes with overhangs fine/thin sections are a challenge. I printed the Binnacle upside down for the above reason. I believe the test is to make the item with 3D printer, finish it off(paint, fixings), add to a model and see if it compliments the build in very way.
-
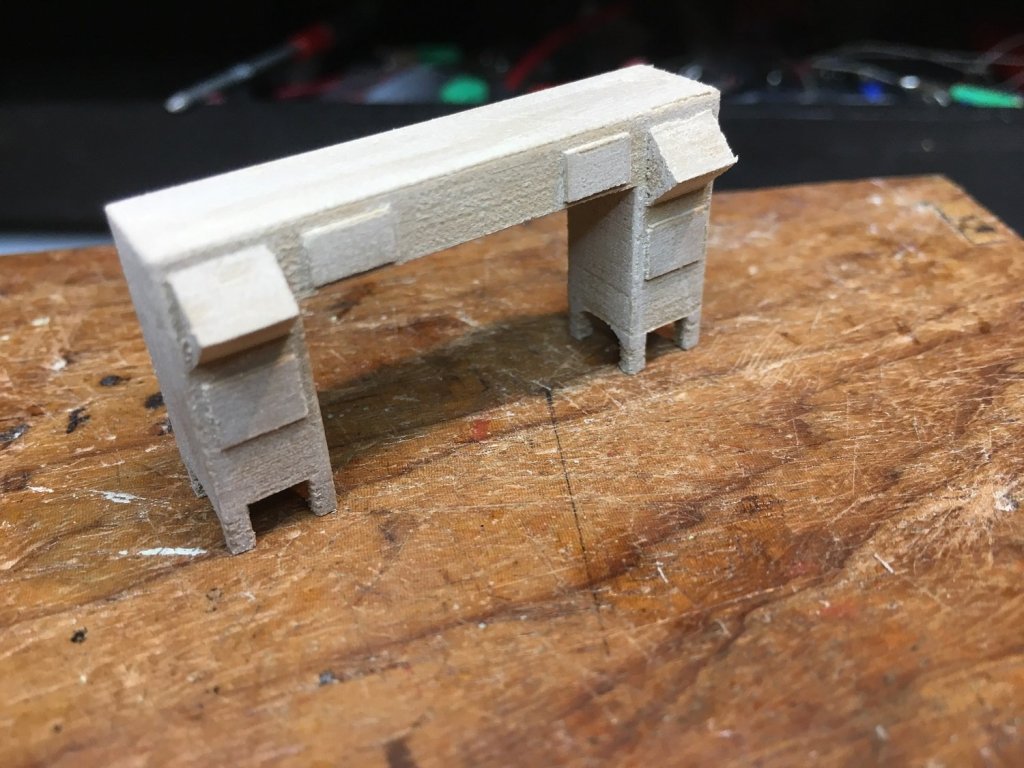
Shipyard Update: Binnacle: I created a 3D model of the Binnacle and printed it on my Creator Pro 3D printer with a PLA wood filament. Below is the finished 3D print after some tidy up of the print, before paint-job. Below the Binnacle with paint-job in position - ready for tie-down. Back to the Rigging.
-
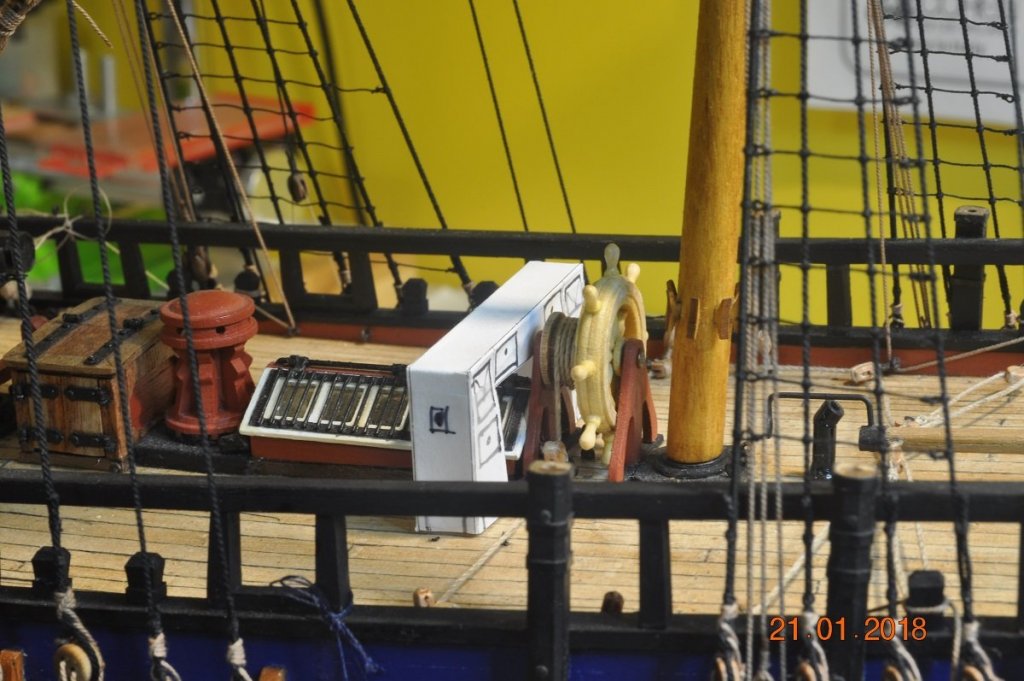
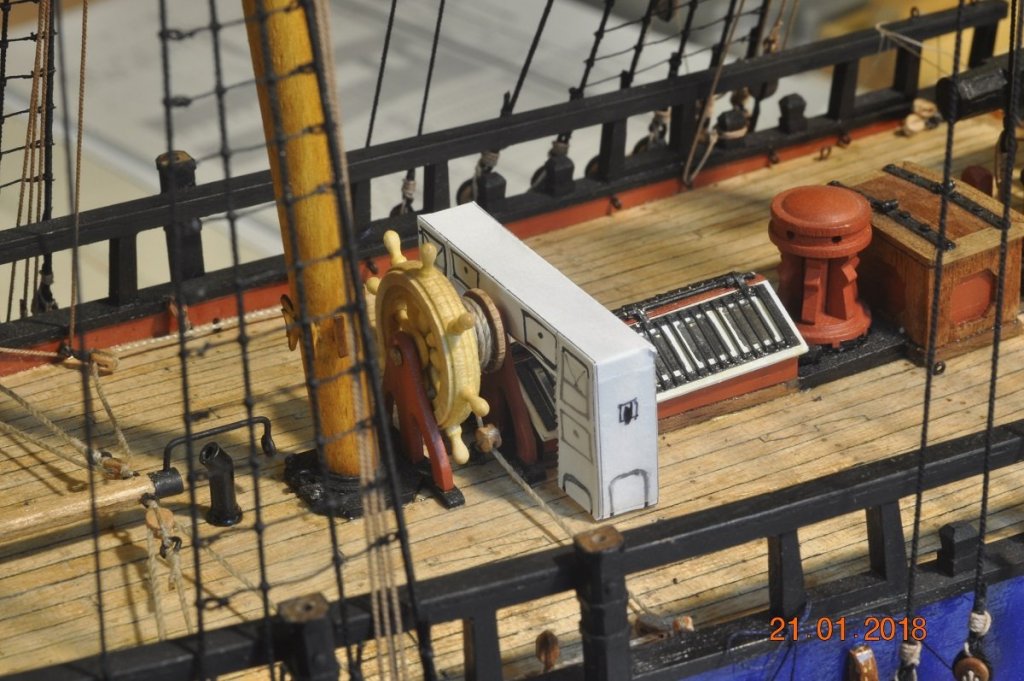
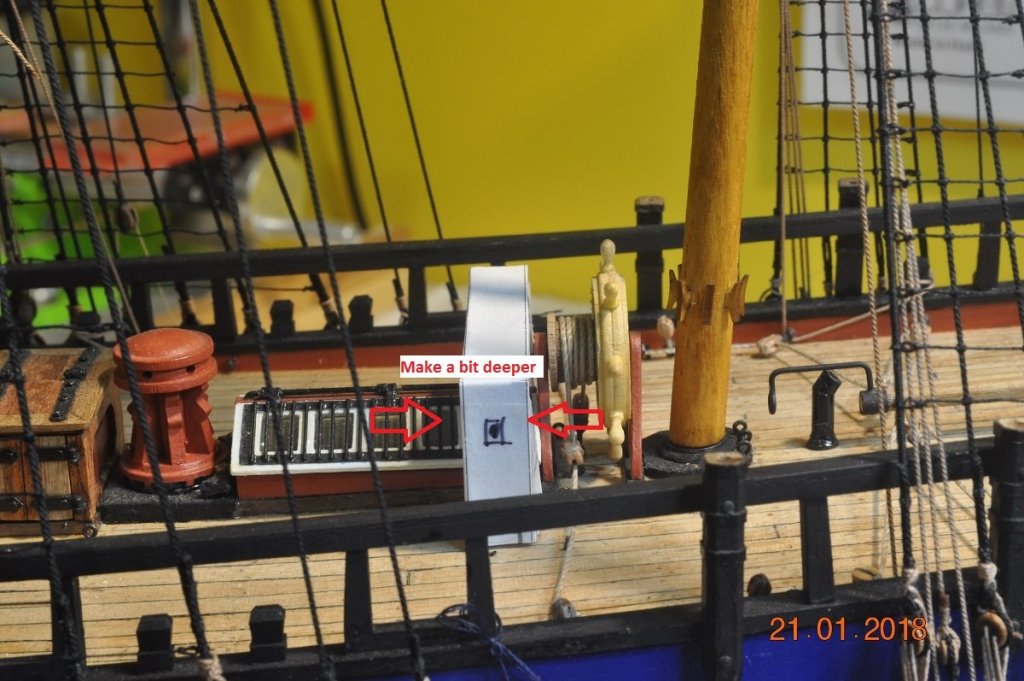
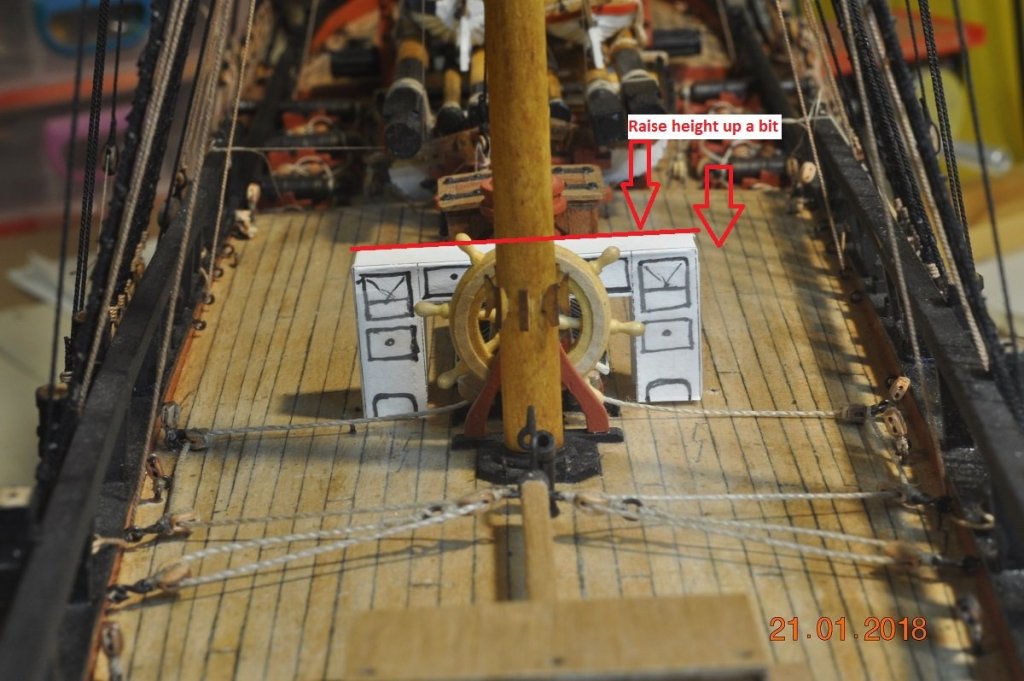
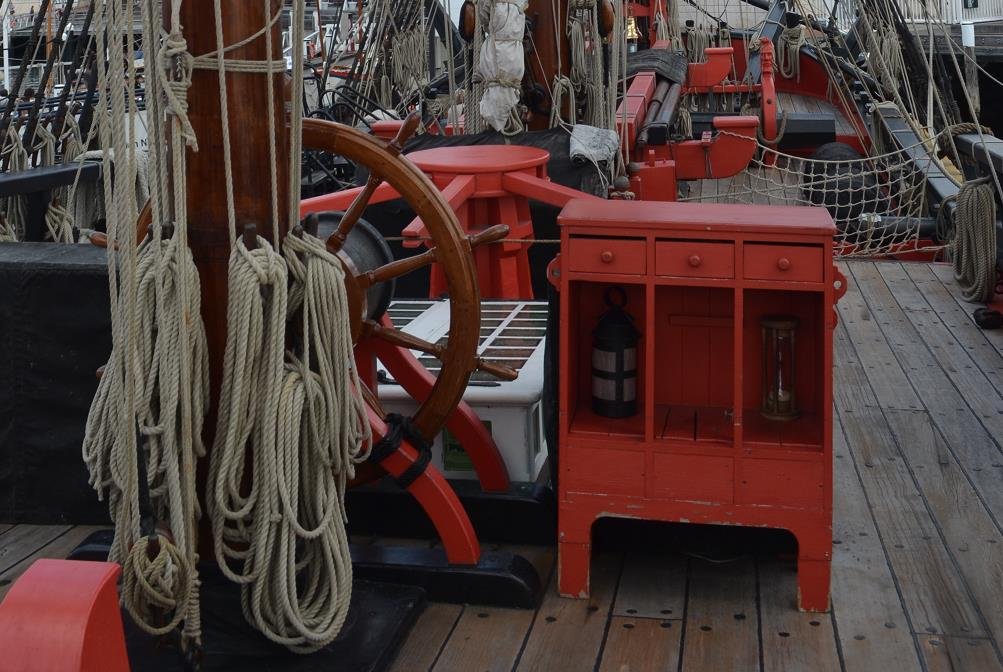
Shipyard Update: Binnacle/s: For those who recently have dropped in, following my build. I decided to remove my first attempt of the single Binnacles beside the skylight, in front of the steering wheel. What was I thinking ?!%$##@ I contemplated enlarging each, but my mind kept drifting to the design in the AOTS, the ability to open the hatches of the skylight, the fixing of the binnacle/s to the deck, the functionality as Pat pointed out and to the storage of navigation equipment. The Replica seems to have at least 1 Binnacle(pictured in post above) resting on the deck, to one side and aft to what appears to be a modern day Binnacle. No indication of how this item is tied down. Which brings me to think it is placed on deck for historical purposes whilst in port. Further posted above(Jim Lads post) is the Replica at sea, with the 2 single Binnacles in use, nav. equipment in use either side for the helmsmen to use. Each is permanently fixed to the deck. I assume to cater for the wiring of the Nav. gear(coms. and power). Modern version, not historically correct ? Therefore I'm drawn back to the design in the AOTS, which Marquardt has depicted(at no scale) on page 69. Page 14 of the AOTS describes reasoning behind a Binnacle which straddles the skylight. "The common Binnacle of the period was described by Falconer, 'a wooden case or box, which contains the compasses, log-glass, watch-glasses, and lights to shew the compass at night". It was necessary to have the 2 compasses 7ft apart to prevent reciprocal interference...... The Binnacle was usually placed directly in front of the steering wheel, so that the compasses could be easily read by the helmsmen on one side and officer of the watch on the other side. Got to agree it all makes sense and decided to construct a paper mock-up of a Binnacle(second attempt) to see how the above will work in the area in front of the wheel. I believe it would allow the skylight hatches to lift up horizontally, and house the 2 compasses and lantern. Might need to be slightly deeper and possibly a little higher. I don't want it to be overpowering in size though. The 2 x compass housed in each top outer compartments(external raked lid to inside), draws below and to the inner bridge. Lantern housed in middle of bridge. My wheel drum blocks the back of the middle section of the bridge, so lantern lowers into the middle from top ? All too much I know, most will look at it and see it as a red box in front of the steering wheel. Might have a go at making it on my 3D printer with wood filament !. Again open to suggestions.
-
Hi their OC, Build coming along very nice. Transom, you made it look pretty dam good considering it is metal.
- 455 replies
-
- slightly modified
- greyhound
-
(and 1 more)
Tagged with:
-
Thanks Pat and Jim for looking in and I take those fine comments on board for the shipyard designers to contemplate. I reckon a rework of a 2 Binnacle solution is in order. Each Binnacle wider and flat top. Low and behold, I actually found a picture of the one on the Replica(below) that I got from Greg Chard. When I visited the Replica - my photos show no Binnacle on deck. Sits behind the engine boxes(under the black covers), straddles over the steering rope by the look of it, and is clear of the skylight. Now I'm thinking 1 or 2 ? off to the workshop.....
-
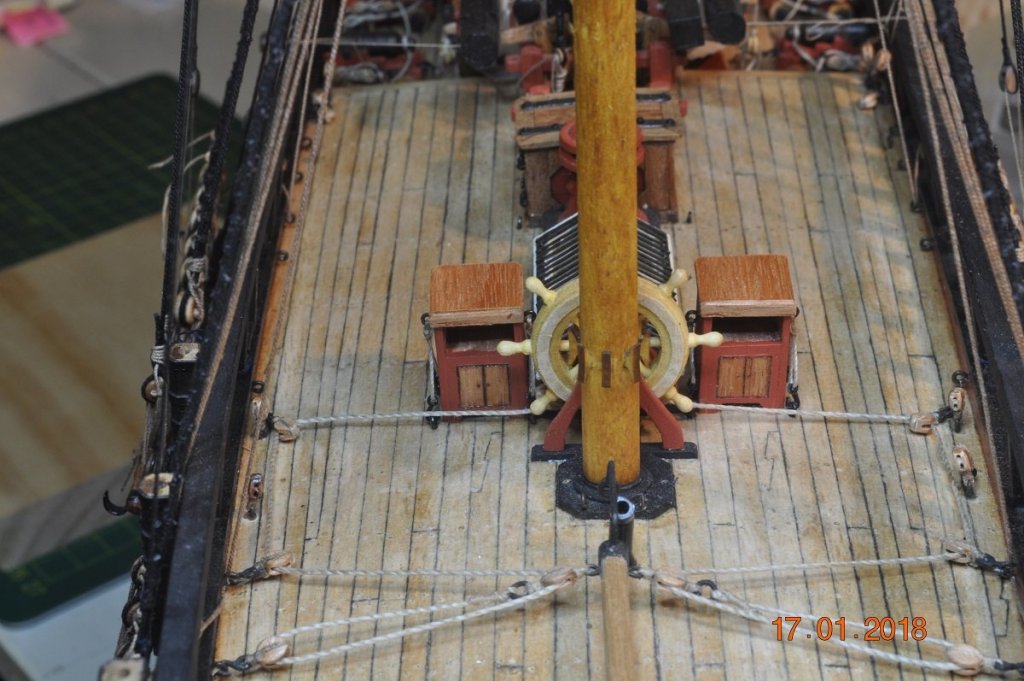
Shipyard Update: Binnacle: The AOTS shows 1 Binnacle, which straddles the skylight. The above arrangement seemed quiet large, and appeared it would interfere with the skylight top/s swiveling up in the open position ? I went with 2 smaller Binnacles 1 each side of the skylight, however once installed, not convinced I have the right design. eg where would the compass go ? Open to suggestions, thinking of linking them up with a raised bridge between each ?
-
Shipyard Update: Ratlings: Well finally(I hope) have completed the Ratling lines by completing the Futtocks with Ratlings. Fore Futtock: Main Futtock: Mizzen Futtock: Next step I will work out how to mount my Binnacle's in front of the steerage wheel.
-
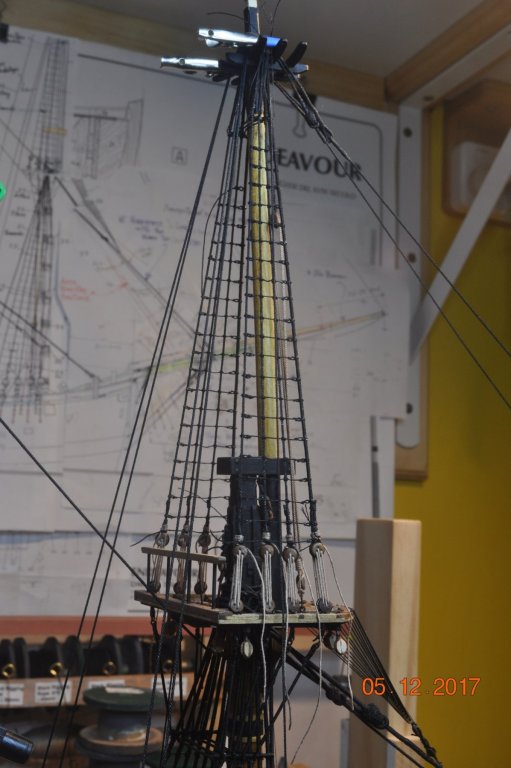
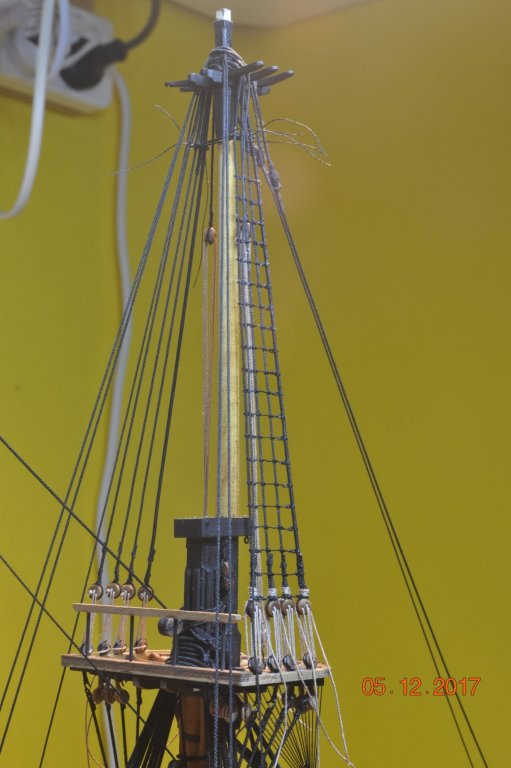
Shipyard Update: Ratlings: Been a another while since my last post. Finally got all the TopMasts 99% completed. Fore TopMast Ratlines. Main TopMast Ratlines. Mizzen TopMast Ratlines. Futtock Ratlines: Main Futtock Ratlines "bird nest" underway.
-
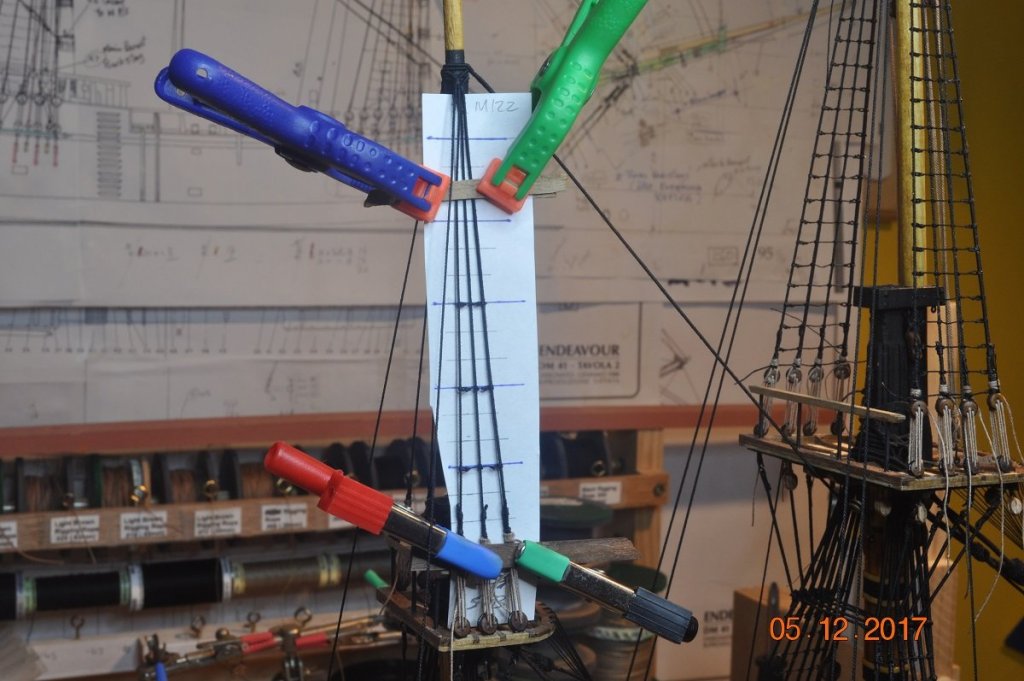
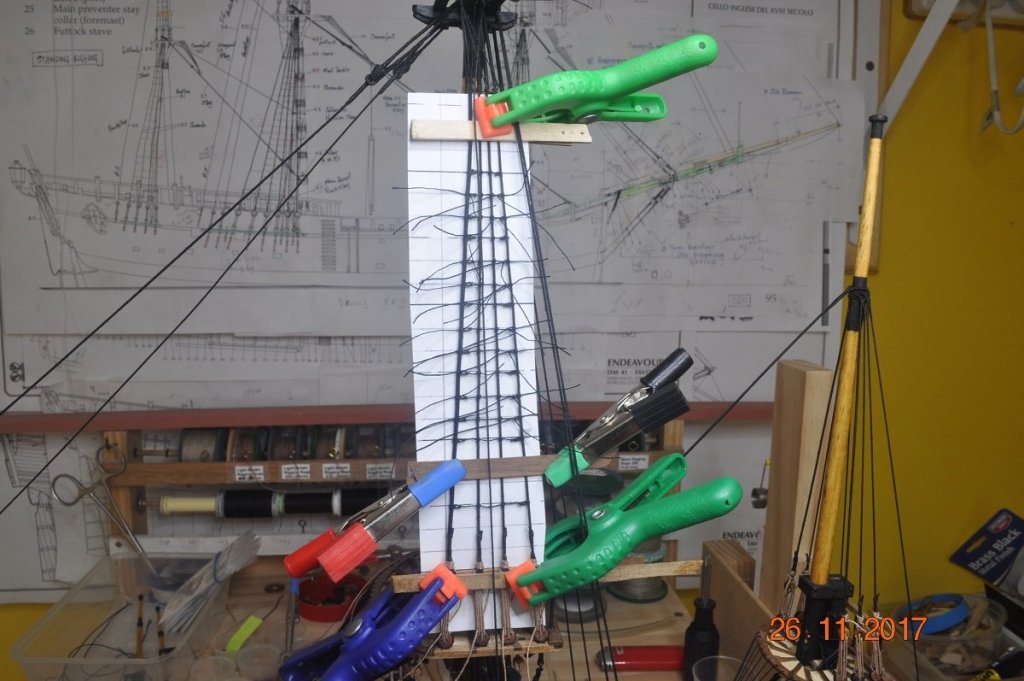
Shipyard Update: More Ratlings(yes I am still at it): Been a while since my last post. Slow going with the Ratline knots. Up to the next level > the TopMasts. Made the templates and well, >> sit for hours and chug away at tying the half-hitches. I will be glad when this phase is completed, aim is by Christmas. Finished 95% the Main TopMast both sides: I've left the top row off -> to see where the TopGallant shrouds tie off. Main TopMast Port Bit of a mess at times, knots tied before trimming. The ForeTopMast Starboard done: I've left the top row off -> to see where the TopGallant shrouds tie off. Currently working on the MizzenTopMast Starboard: I'll have to count up the number of half hitches at the end of the Ratlines. 120 each side of the Main Shrouds, then ++++++ for the others. Well more to do.... however >> The shipyard will be closed all next week, as I head to Fremantle W.A. to visit my eldest son for his Graduation from Bachelor of Medicine(Doctor).
-

HMCSS Victoria 1855 by BANYAN - 1:72
DaveRow replied to BANYAN's topic in - Build logs for subjects built 1851 - 1900
Hi Pat, Some very nice things happening your workshop. Your craftsmanship is developing very nicely their.- 1,013 replies
-
- gun dispatch vessel
- victoria
-
(and 2 more)
Tagged with:
-
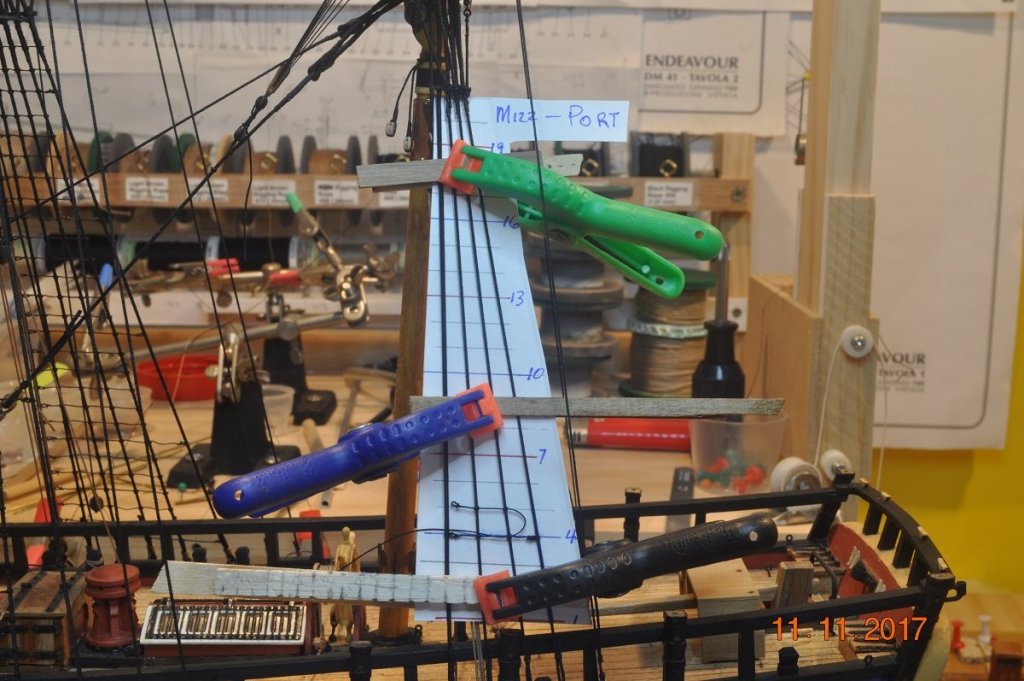
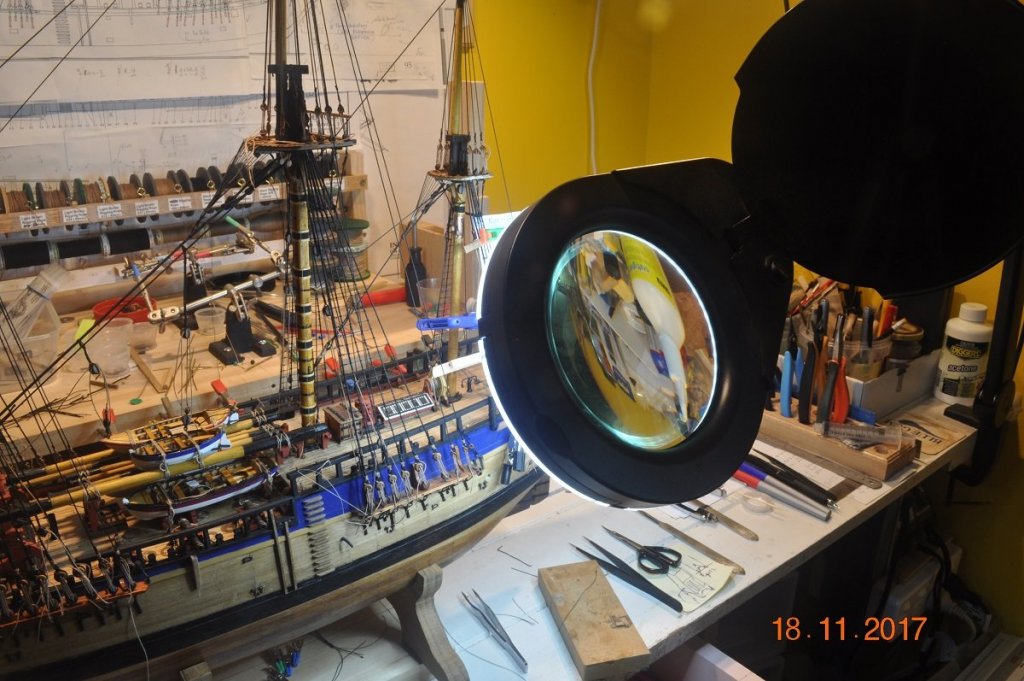
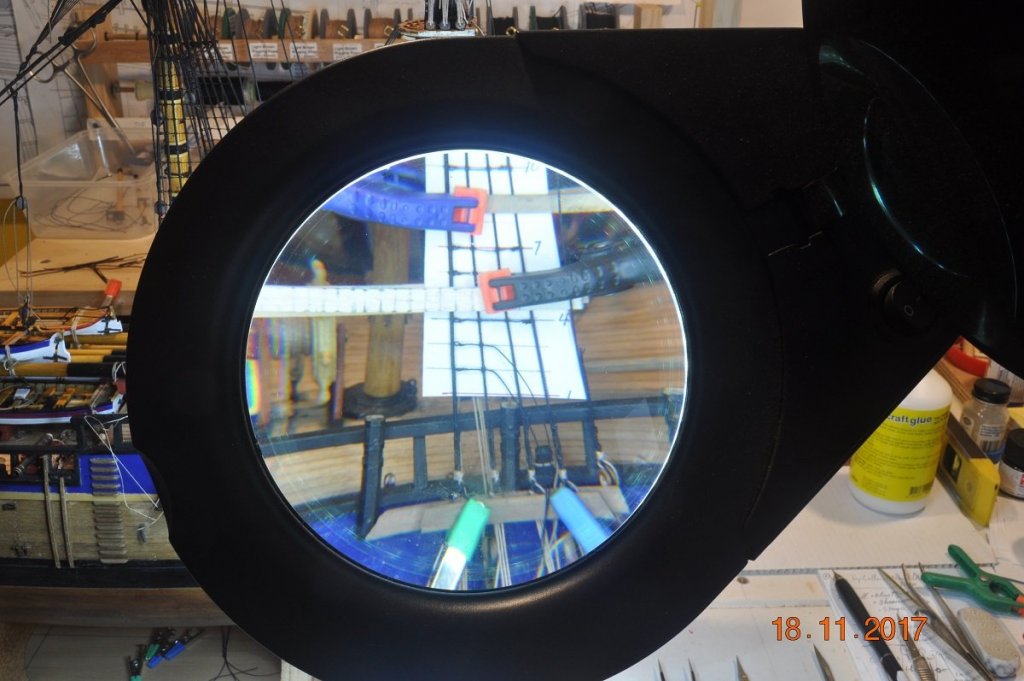
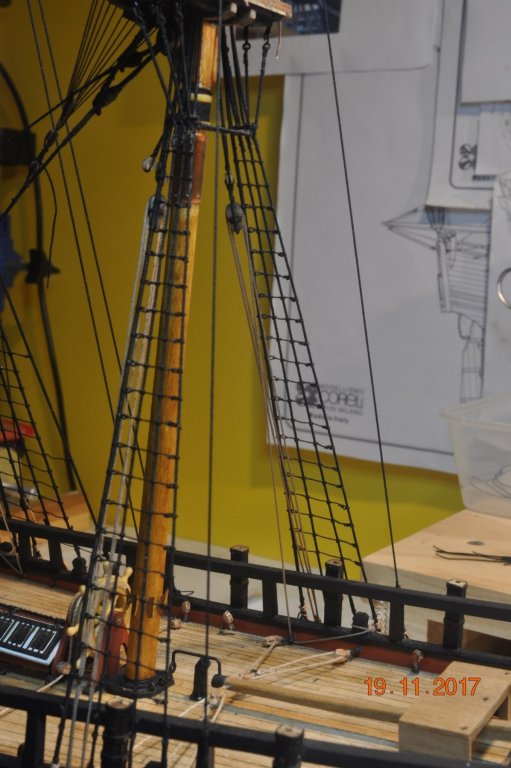
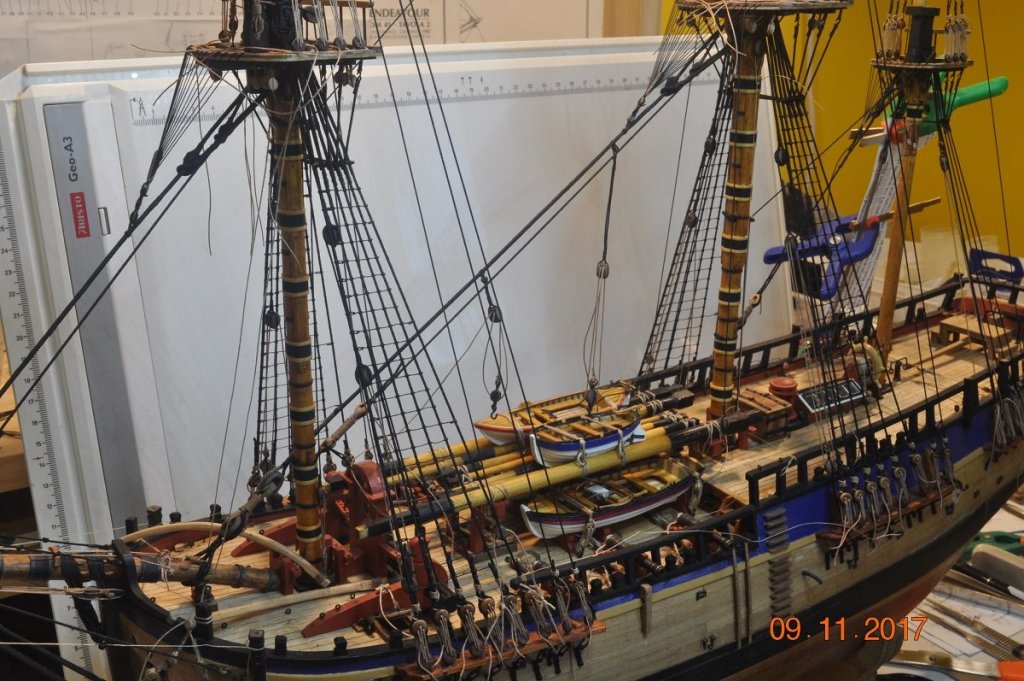
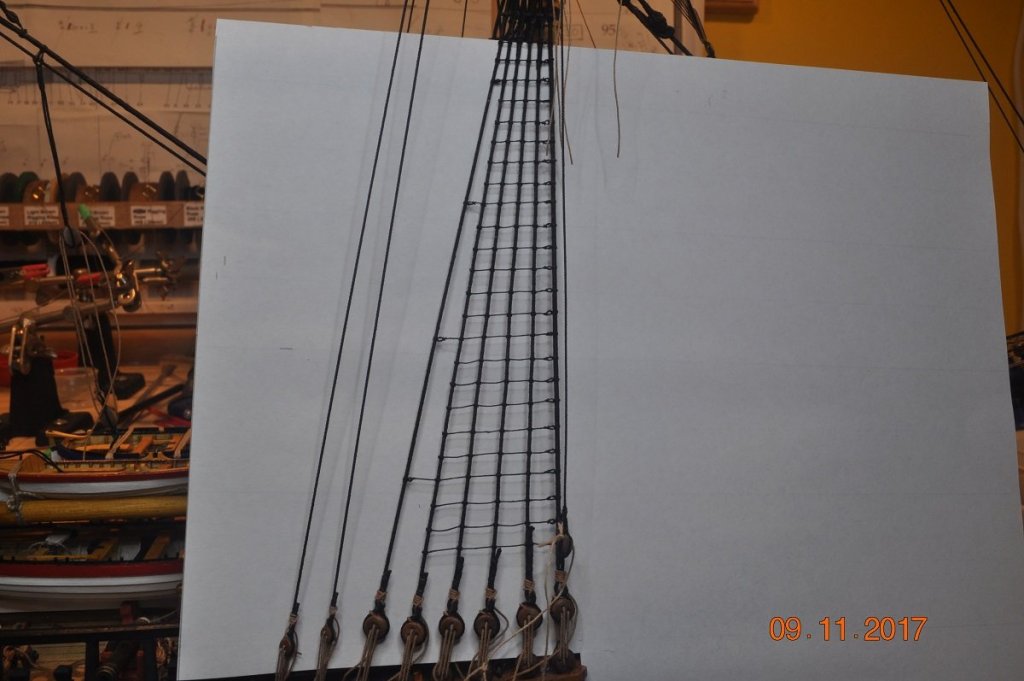
Shipyard Update: Ratlings: Finished the Port Mizzen Ratline. A few pictures along the way below. Below is my Magnifier which has been used for every knot for the ratlins. Both Mizzen sides completed.
-
Michael, This is the Magnifier I use. https://rhinotools.com.au/product/led-5-dioptre-black-magnifying-lamp-smd/ Have been using it for approx. 2 years now. Hands are just in front of the magnifier, LED light is good as well.
-
The Knack ?? >> Edward Scissorhands comes to mind. Using tweezers in both hands to tie those knots has come natural to me.
-

HMCSS Victoria 1855 by BANYAN - 1:72
DaveRow replied to BANYAN's topic in - Build logs for subjects built 1851 - 1900
Pat, Those cable stoppers are fantastic. Keep the good work up.- 1,013 replies
-
- gun dispatch vessel
- victoria
-
(and 2 more)
Tagged with:
-
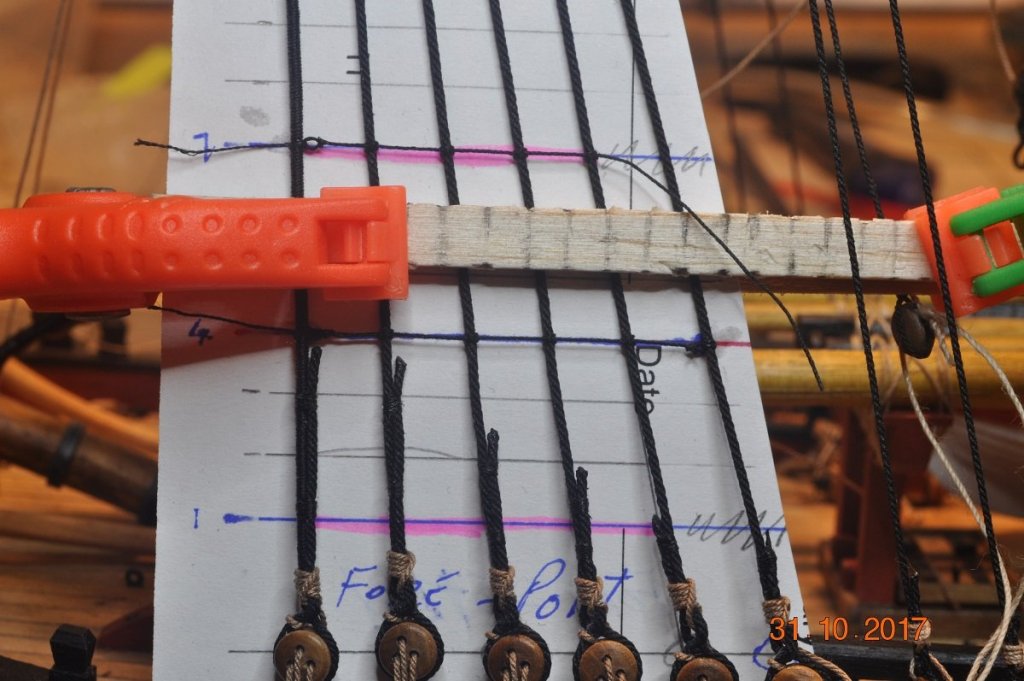
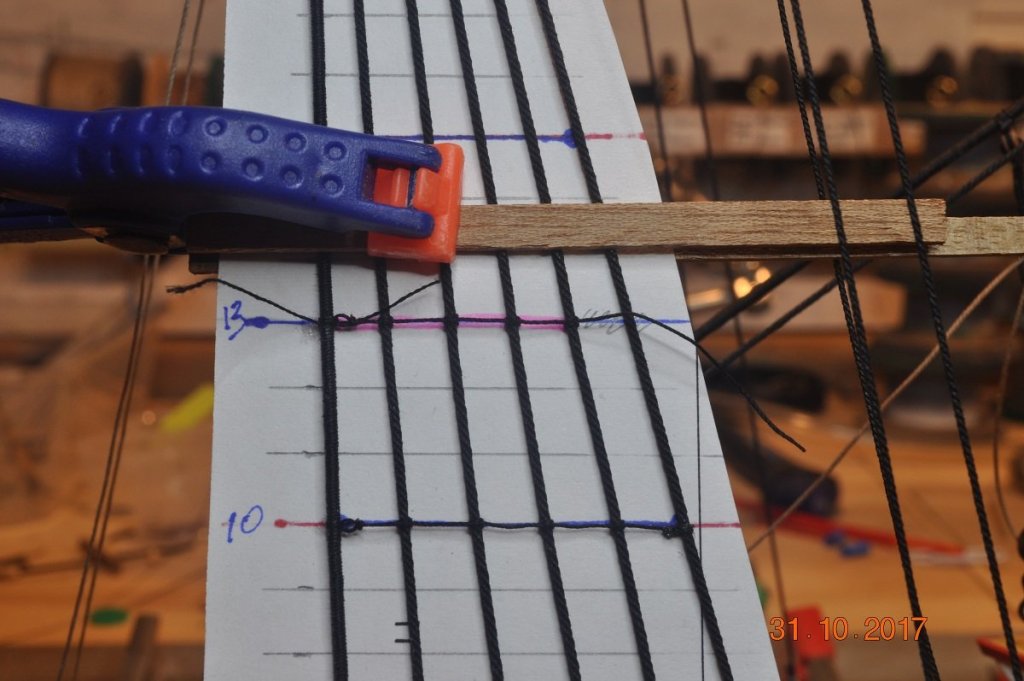
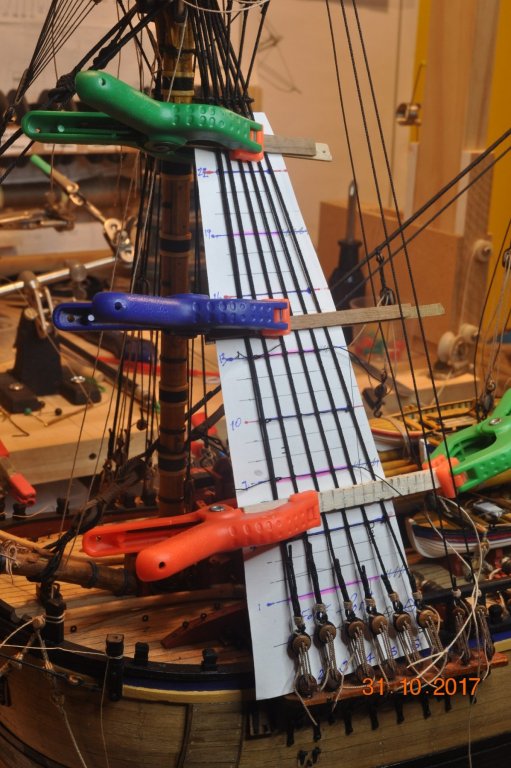
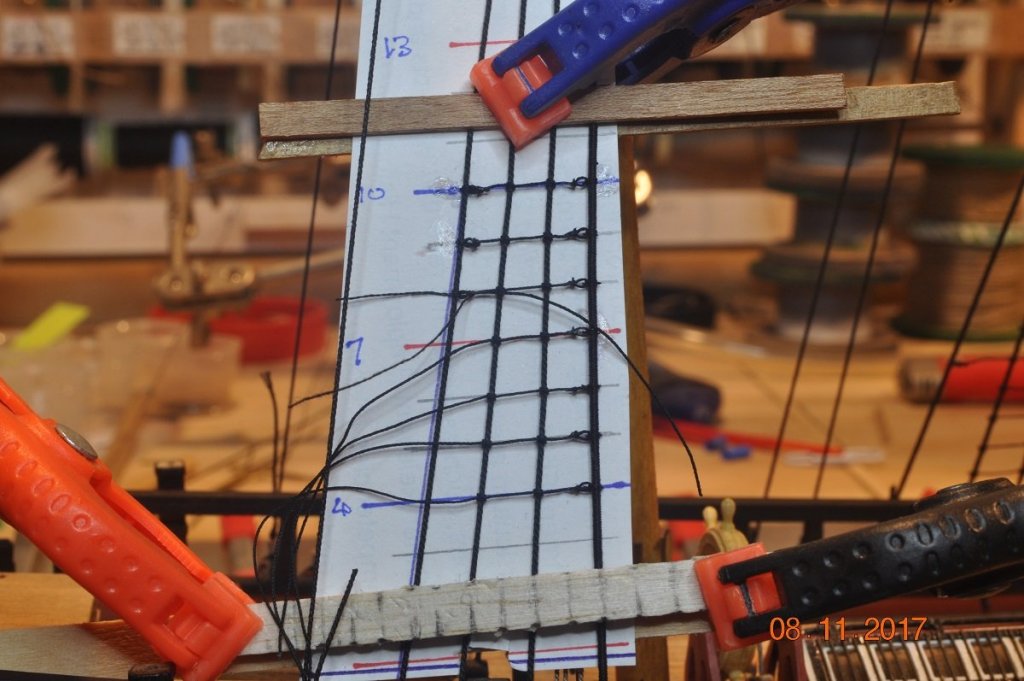
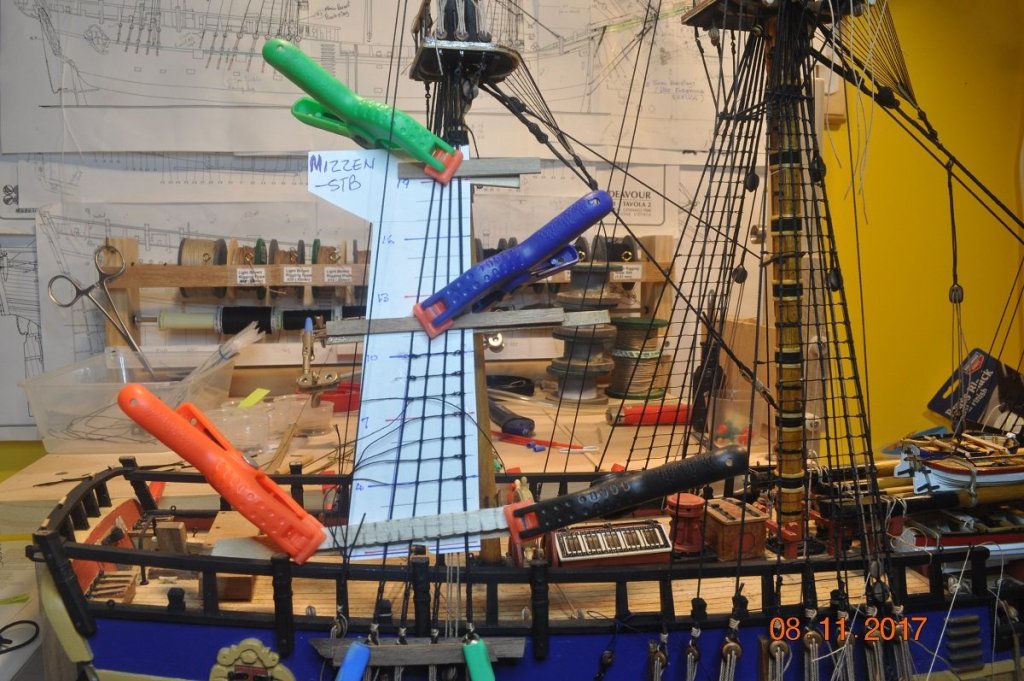
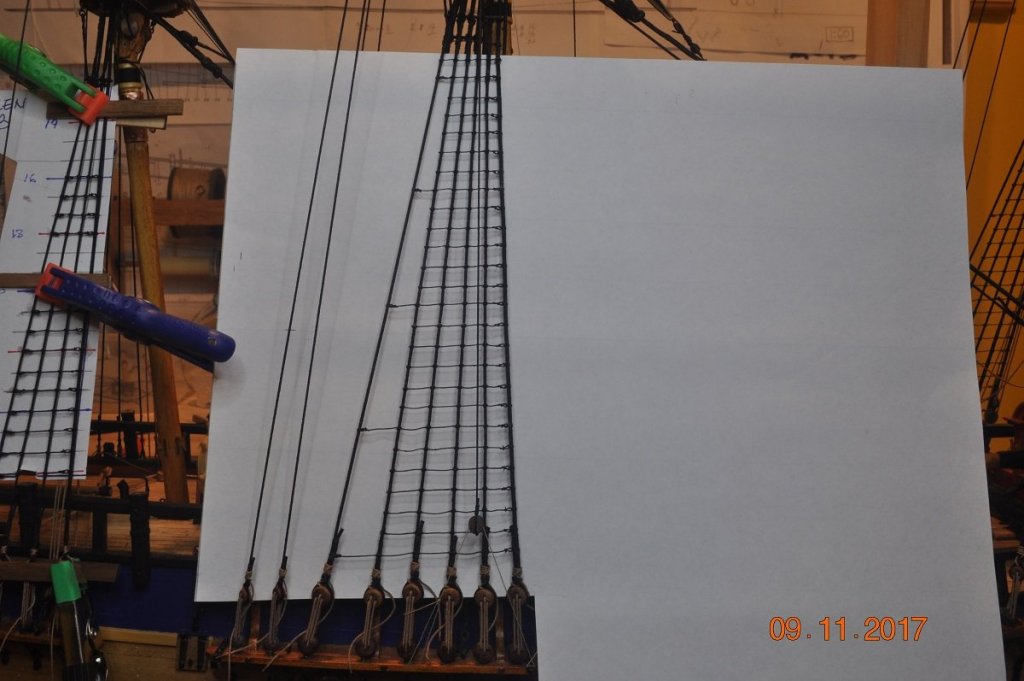
Shipyard Update: Ratlings: A bit of an update to where the "rats" are at. A good two weeks of part time tying knots > the Fore and Main mast lower shrouds are done. Taking shape with lower ratlines on Fore and Main Masts Fore Mast Stb Ratline Main Mast Starboard Ratline Some close ups of the ForeMast ratline - knotting in progress. Above: The process I followed was to tie every 6th full length ratline first(loops each end), followed by the intermediate 3rds(shorter by 1 shroud). Aim being to hold the shrouds evenly, then fill in the pairs between(where the clamps were). Above: Each ratline from the jig was tied to the shroud with 2/half hitches to the loop, then 2/half hitches about each inner shroud towards the rear. Every 6th looped to the back shroud. The 5 ratlines between the 6th's, half hitched 1 shroud back. At the bottom, every 6th first (red end line #4, blue length) and then the 3rds (blue #1 & 7, with pink highlight for the length) Above: Further up, every 6th first (red end line #10) and then the 3rds (blue #13, with pink highlight for the length) This way I kept track of the type and length of each ratline I added. Mizzen Shroud Ratlines: Setup the paper template on the Starboard shrouds, and made a start this week. I decided to loop each end of the Mizzen ratlines to the shrouds. Close up of the end loops. Shows the loose ends not cut cleanly though. Hard to trim them off close without cutting the loop. Plenty more to go.
-
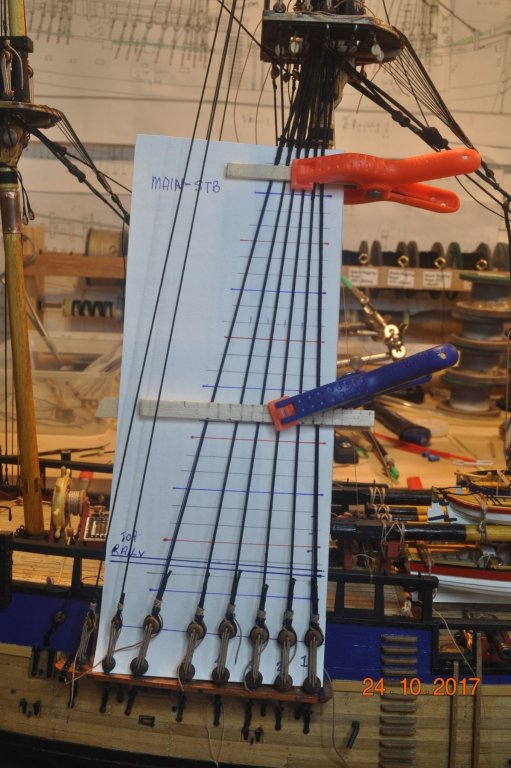
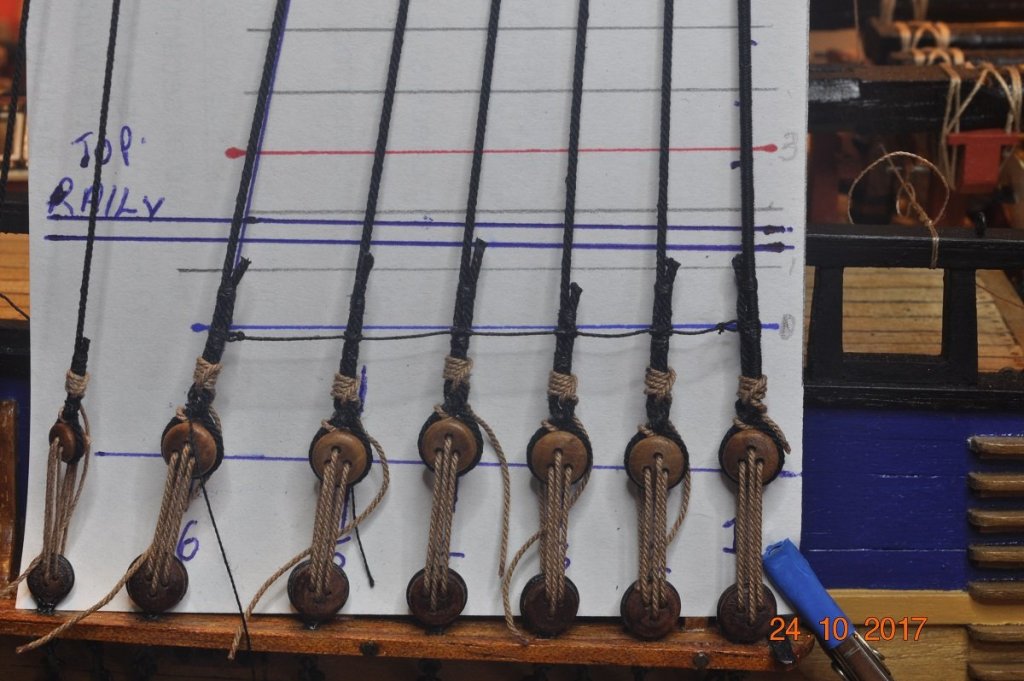
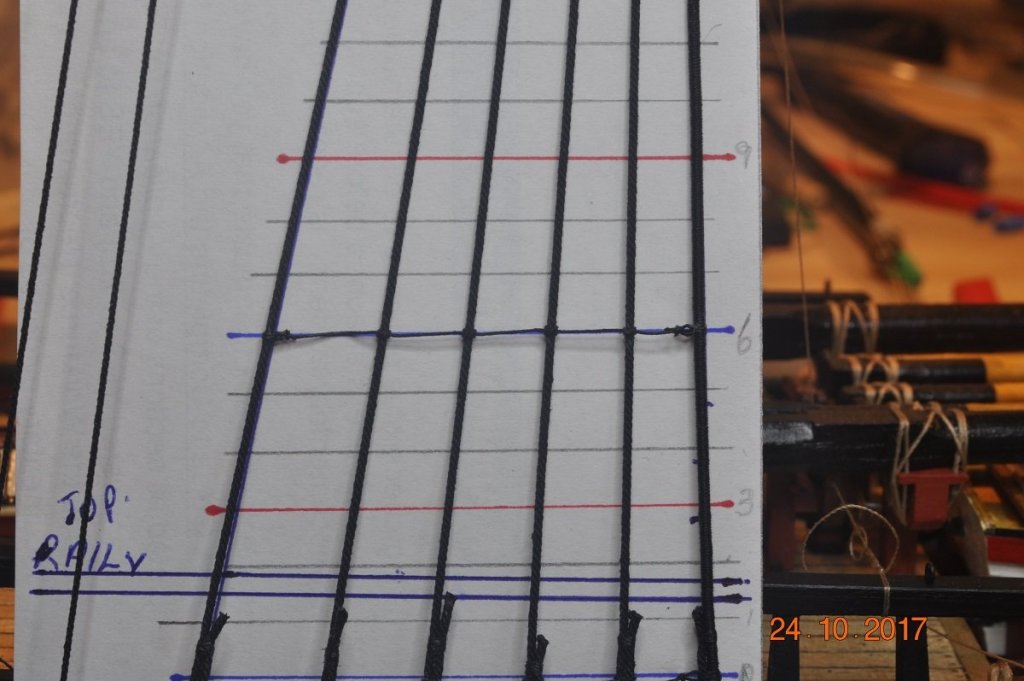
Shipyard Update: Ratlings: Nothing new here for those who have done ratlines. Below applies to the Fore and Mizzen mast shrouds. Main Shroud Ratlines: I used a sheet of plain white A4 paper to mark out lines for the shroud locations(they are behind the shrouds), with the fore edge vertical to the waterline. The ratlines will be tied to the shrouds, level with the waterline. The horizontal lines are 6mm apart(equates to near enough to 15" rungs) are: - Blue every 6th -> tie these first. - Red min-way between the blue lines -> tie these second. - Pencil, 2 between the reds and blues -> tie these third. I used lengths of left over planking behind and in front(can slide up/down) of the shrouds to hold them firmly near the ratline being added. I used the Stave, as the start and a 6mm drop to the first ratline. The first Ratline added just above the dead eyes to hold them in line. I used the 1st one from the Jig. Loops both ends. The next Ratline 6th one up, so I use the 6th Ratline from the same side of the Jig. And so it has started, Ratline and more Ratline to go > how many hours ahead. !
-
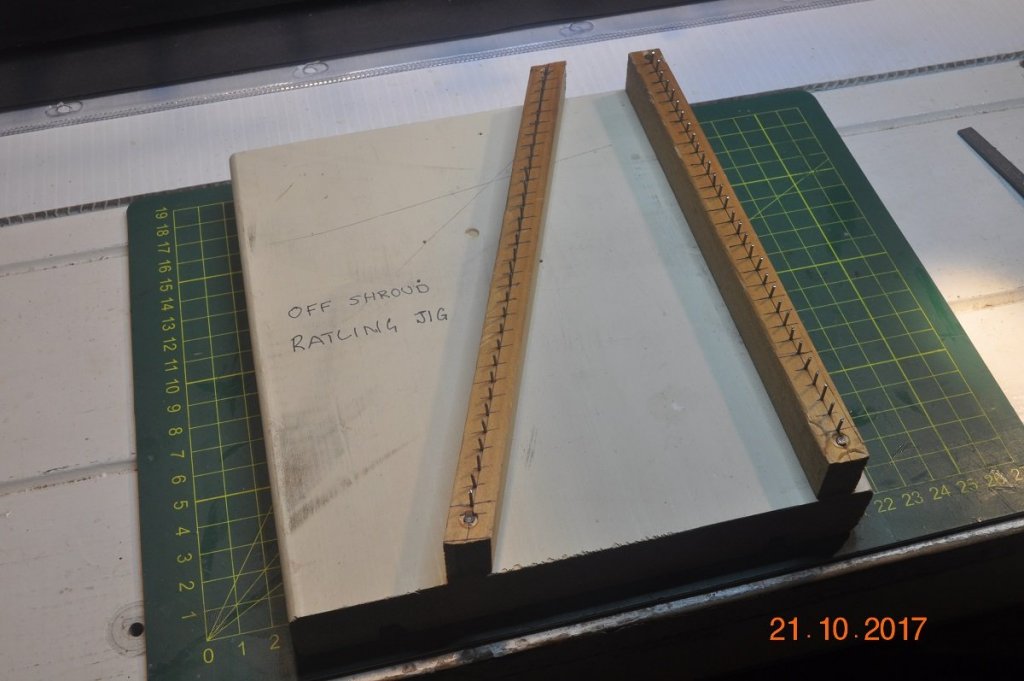
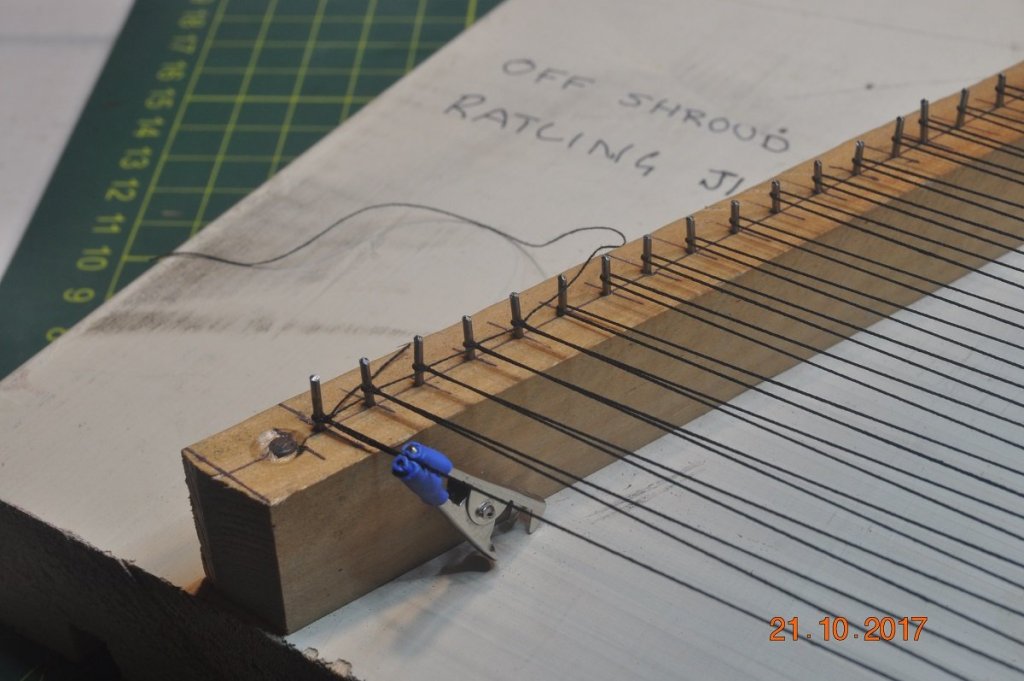
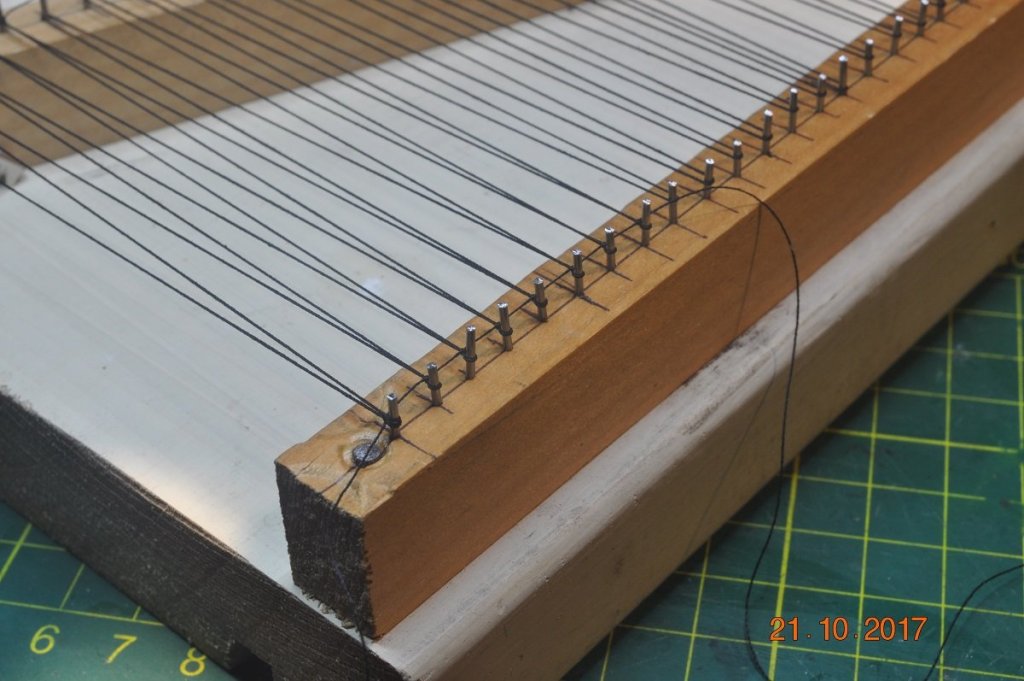
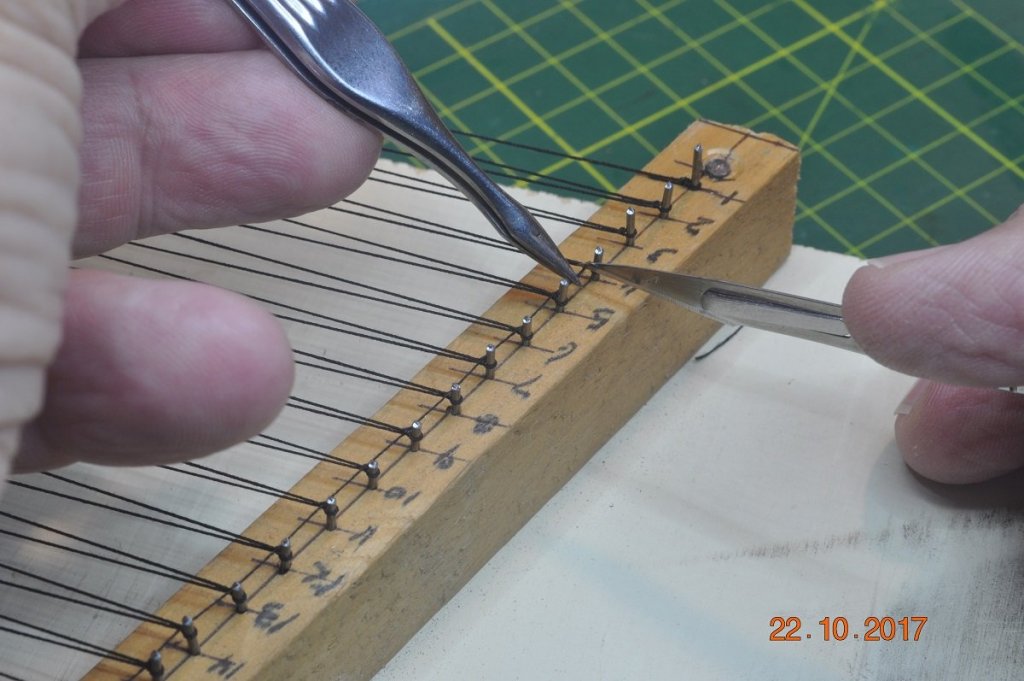
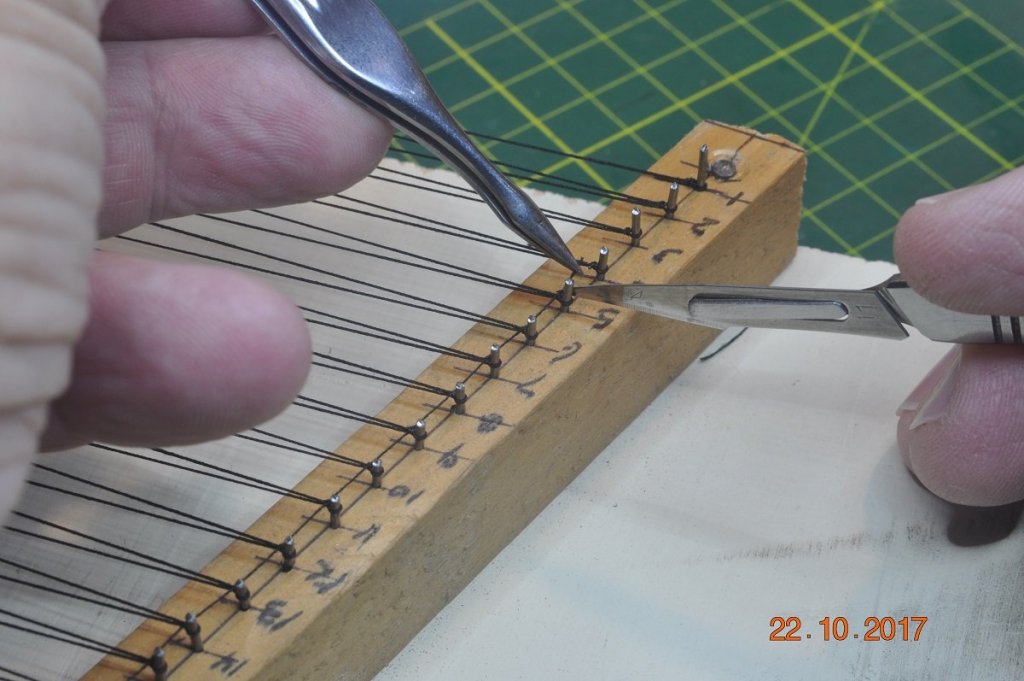
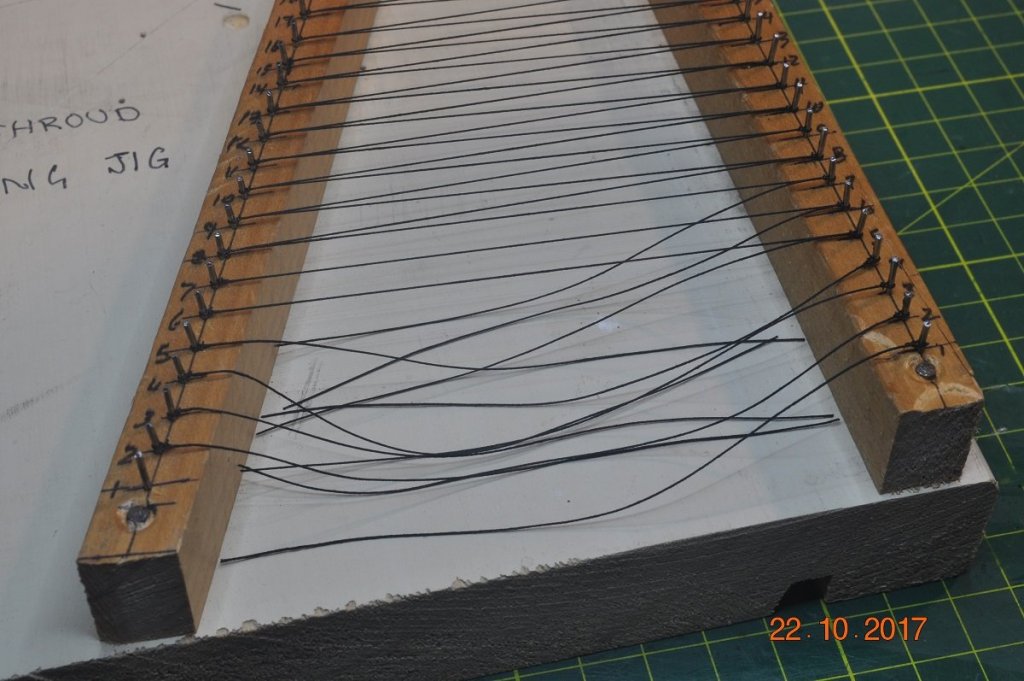
Shipyard Update: Shroud Ratlings: Time has come to delve into the Ratlings. I have read a lot of members posts to gain as much information and instructions of how to do the Ratlings. Many great systems have been described, shared. Many thanks to all for those posts, it has made my life ahead much easier. Ratlings: I made a Jig to pre-loop one end of each ratline for a mast. 2 pcs of 19mm pine with small brad nails set at 6mm apart(on the vertical right side). The head of each nail cut and filed. Next stage was to wind the ratline rope(at my model scale = 0.2mm) from side to side. Then on the inner side of each nail, 2 x half hitches were tied, then onto the next and next till the end nail. Same for other side. Then the twine between each ratline/mail was removed, carefully. Both sides. Last stage was to cut one side of the loop on the nail. All one side on 1 set of mails, then the opposite on the other set of nails. Hope that makes sense. Basically you want to end up with 2 sets of Ratlines(with a loop one end) like below. 1 set each for the Starboard and Port Shrouds of a Mast. You only need to make the set you need for the number of Ratlines for a Shroud Set, and the length is the tricky one to work out. I'll leave that for you to ponder on. I ran a test one for the longest to work out the length. Next >> fitting them.
-
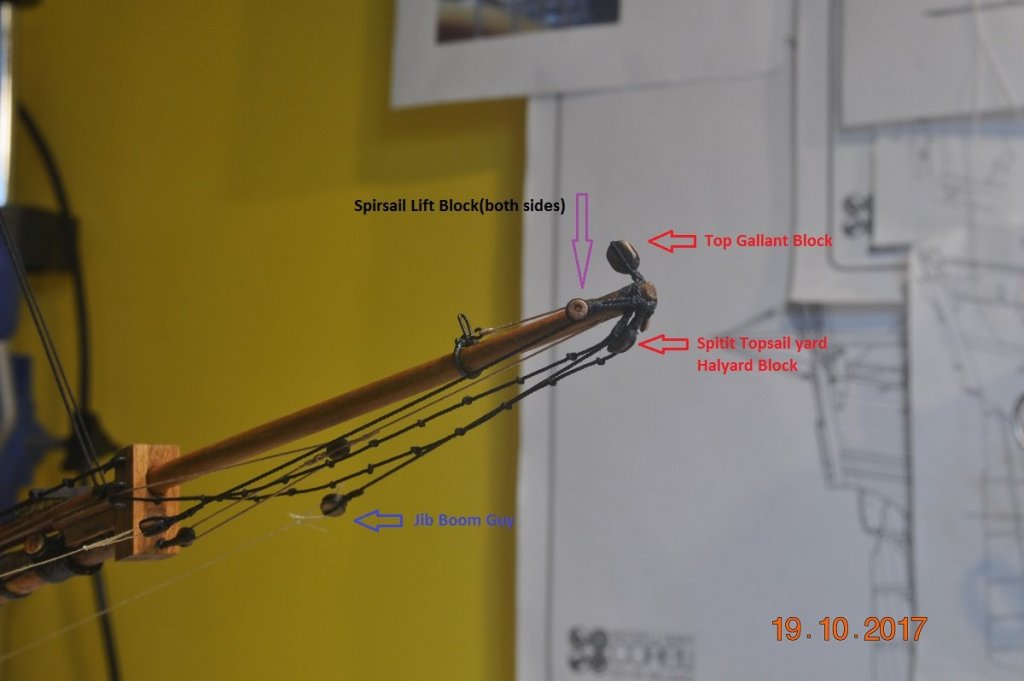
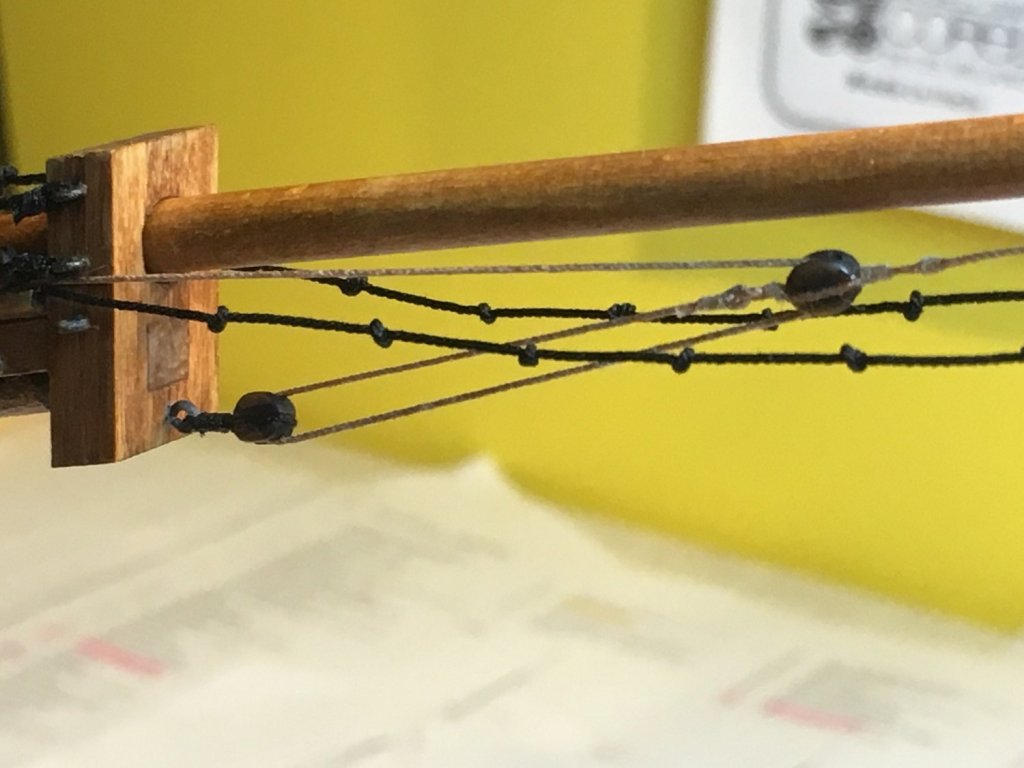
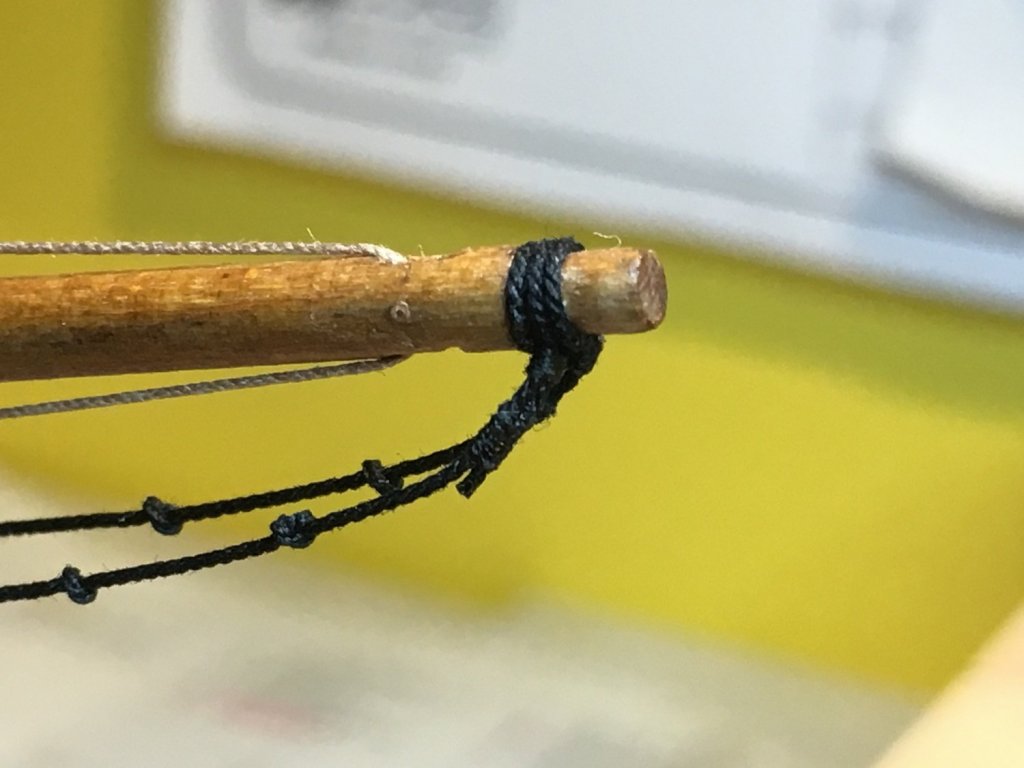
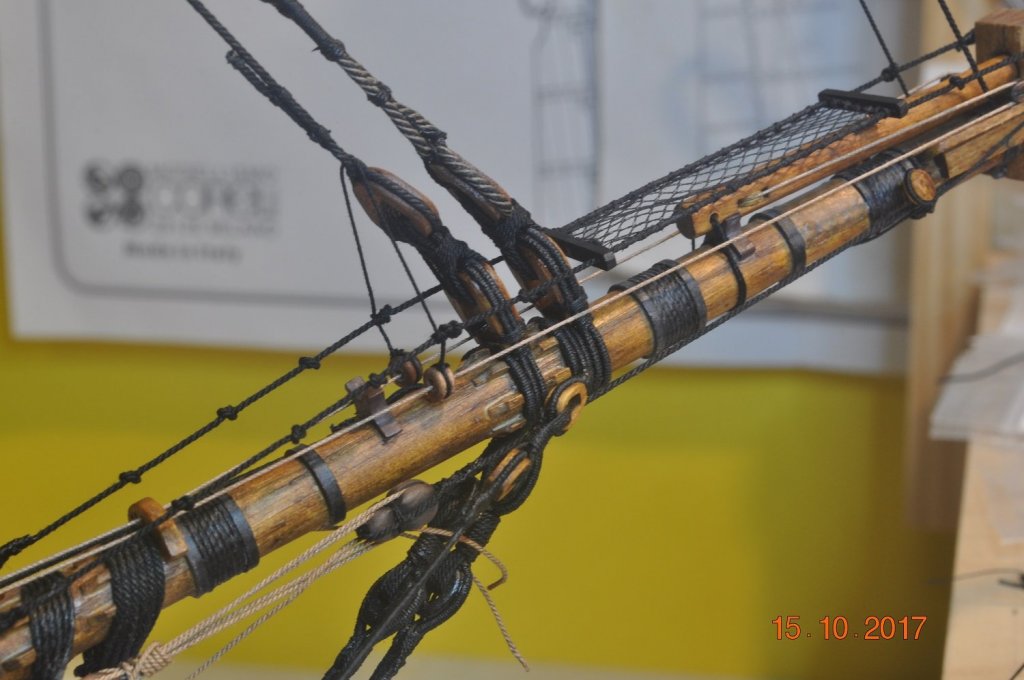
Shipyard Update: End of Jib Boom Blocks: Added on the end of the Jib Boom several blocks for future rigging. Got quiet crowded on the end.
-
Hi Mr Dashi, It has been some time since your last post. Good to see you have progressed some on the model. Looking very impressive, with some fine detail on the rear deck. Health issues seem to play a part in the things we enjoy the most as we get older(or from past wounds). What a bugger I reckon.
-
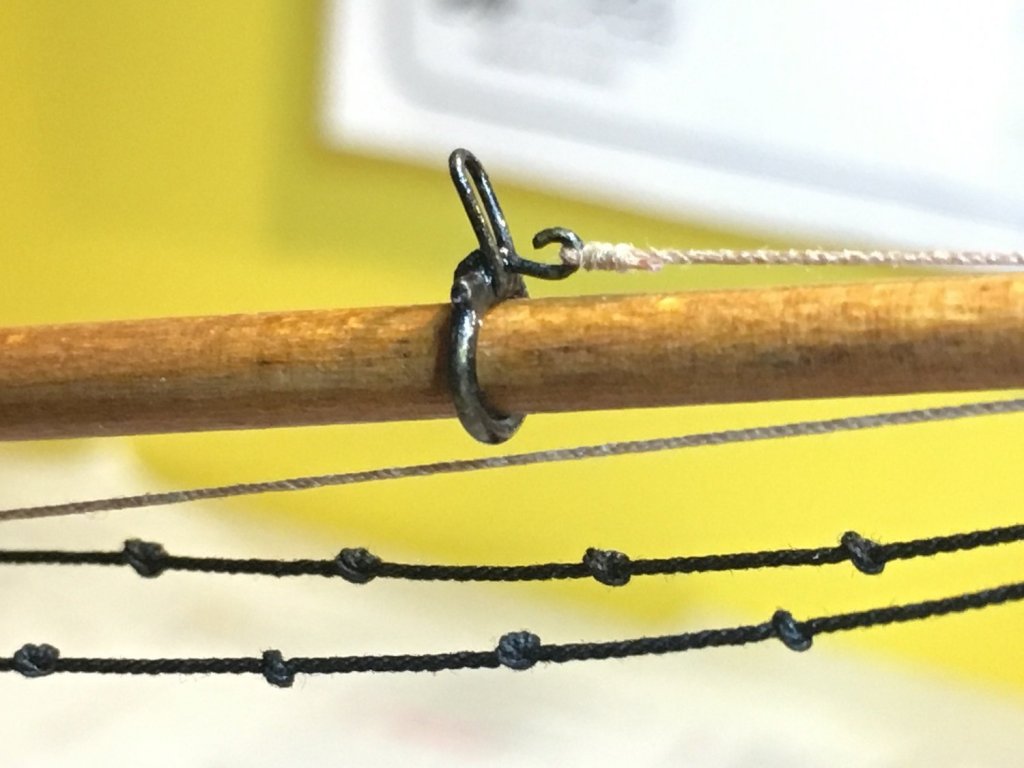
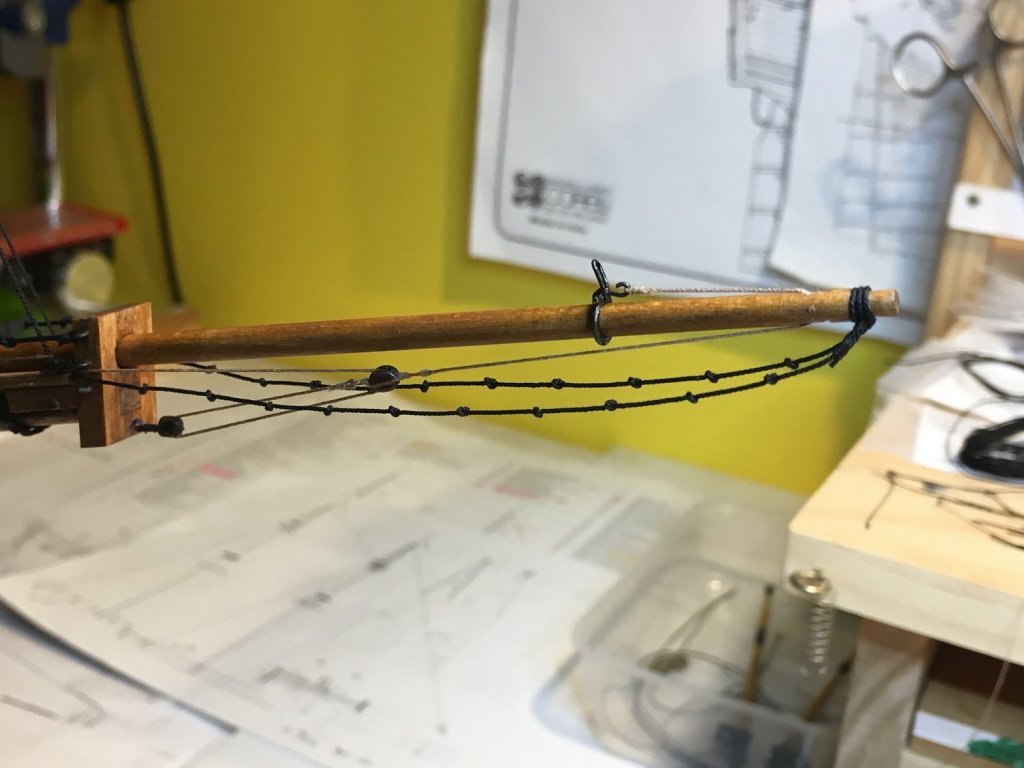
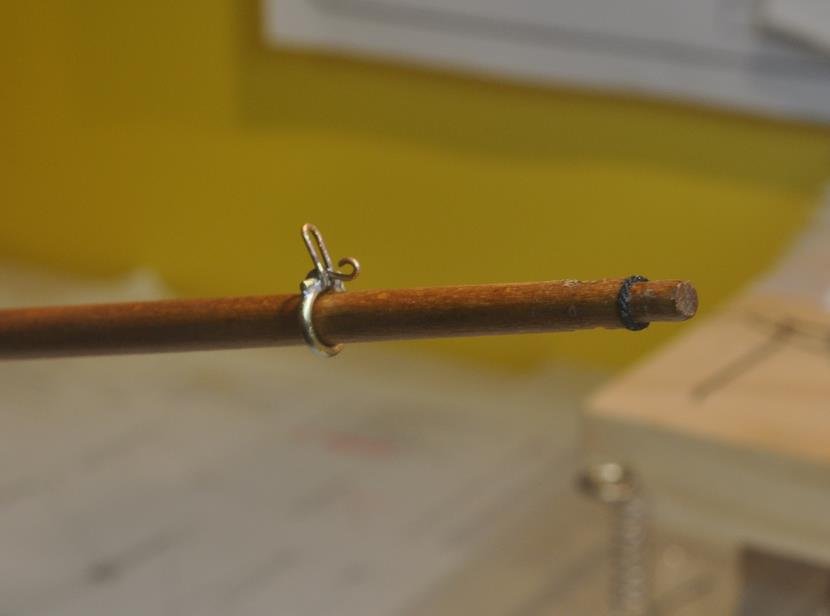
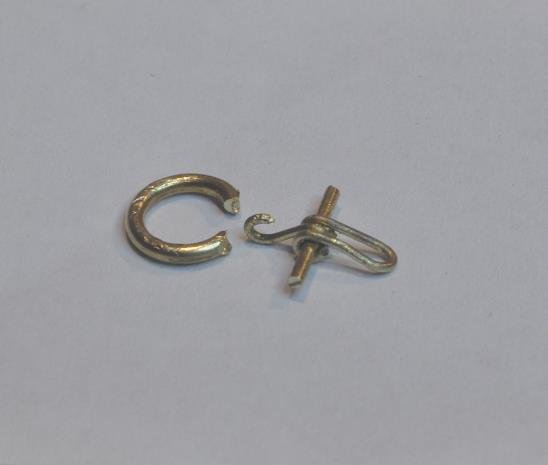
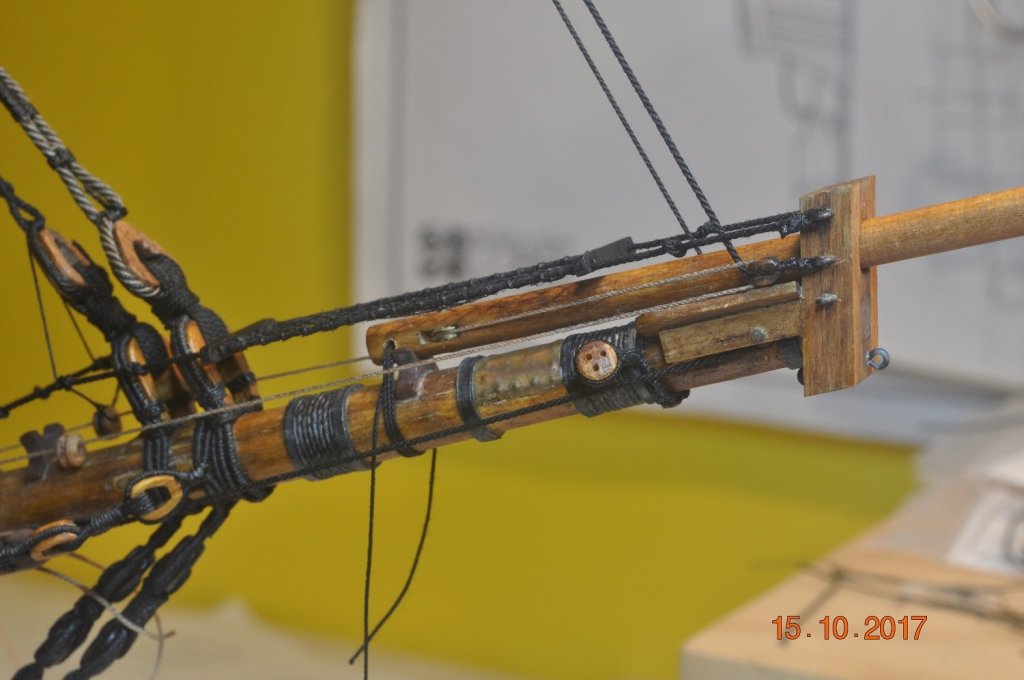
Shipyard Update: Bowsprit and Jib Boom: Me and the shippy's been working on getting the Jib Boom into shape for the TopGal rigging to attach to. A traveler has been added to the Boom (for a Jib) with the tackle under. A couple of pictures of the parts, welded and on the boom, and then tackle attached. The above: I cut a slot in a ring, formed a hook and a loop, slid onto a piece of bar ready to weld up. I was hoping the hook and loop would rotate on the bar, but that went out the door when the solder ran. Traveler in place on the boom, will do the job. Shipyard spent hours to get it to this stage. End of the Boom taking shape with traveler tackle rope, 2 Horse ropes over the end. I counted another 4 more ropes to go onto the end. Traveler blackened and painted black, rope attached. Traveler tackle attaches back to the middle of the Bowsprit head. A couple of items onto the Bowsprit Added two(2) thimbles back behind the Fore-preventor stay to hold the ropes coming back, similar to on the Endeavour Replica. Added Tackle to the Jib Boom end for extending the Jib Boom out when retracted. Probably add the rope/blocks on the end of the Jib Boom next.
-
Hi Pat, The peg board, I got from J-Car Electrical. I have a block of timber under it, which I drill holes in for the brass pegs to drop in(glue) for fixed positions. For bending hooks around. The wood is soft enough for the drawing pins to push into firmly for temp positions, then pull out.
About us
Modelshipworld - Advancing Ship Modeling through Research
SSL Secured
Your security is important for us so this Website is SSL-Secured
NRG Mailing Address
Nautical Research Guild
237 South Lincoln Street
Westmont IL, 60559-1917
Model Ship World ® and the MSW logo are Registered Trademarks, and belong to the Nautical Research Guild (United States Patent and Trademark Office: No. 6,929,264 & No. 6,929,274, registered Dec. 20, 2022)
Helpful Links
About the NRG
If you enjoy building ship models that are historically accurate as well as beautiful, then The Nautical Research Guild (NRG) is just right for you.
The Guild is a non-profit educational organization whose mission is to “Advance Ship Modeling Through Research”. We provide support to our members in their efforts to raise the quality of their model ships.
The Nautical Research Guild has published our world-renowned quarterly magazine, The Nautical Research Journal, since 1955. The pages of the Journal are full of articles by accomplished ship modelers who show you how they create those exquisite details on their models, and by maritime historians who show you the correct details to build. The Journal is available in both print and digital editions. Go to the NRG web site (www.thenrg.org) to download a complimentary digital copy of the Journal. The NRG also publishes plan sets, books and compilations of back issues of the Journal and the former Ships in Scale and Model Ship Builder magazines.


