DaveRow
-
Posts
691 -
Joined
-
Last visited
Content Type
Profiles
Forums
Gallery
Events
Everything posted by DaveRow
-
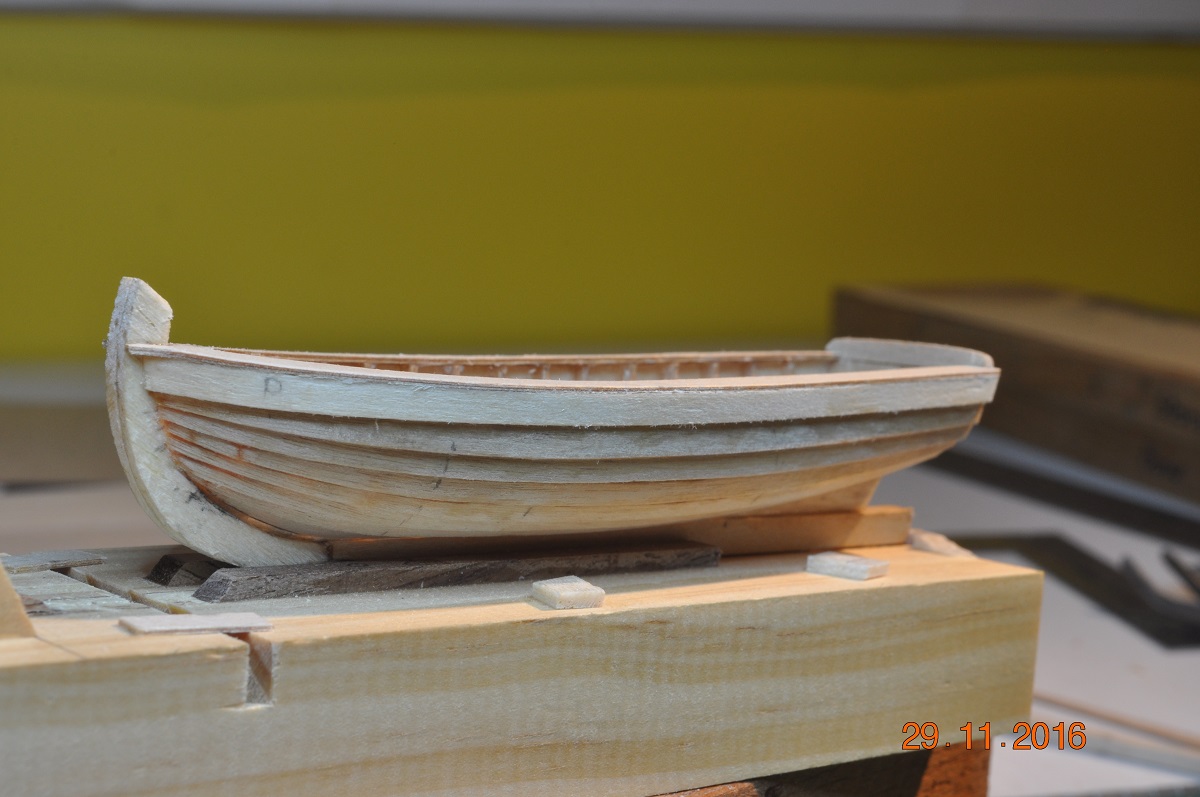
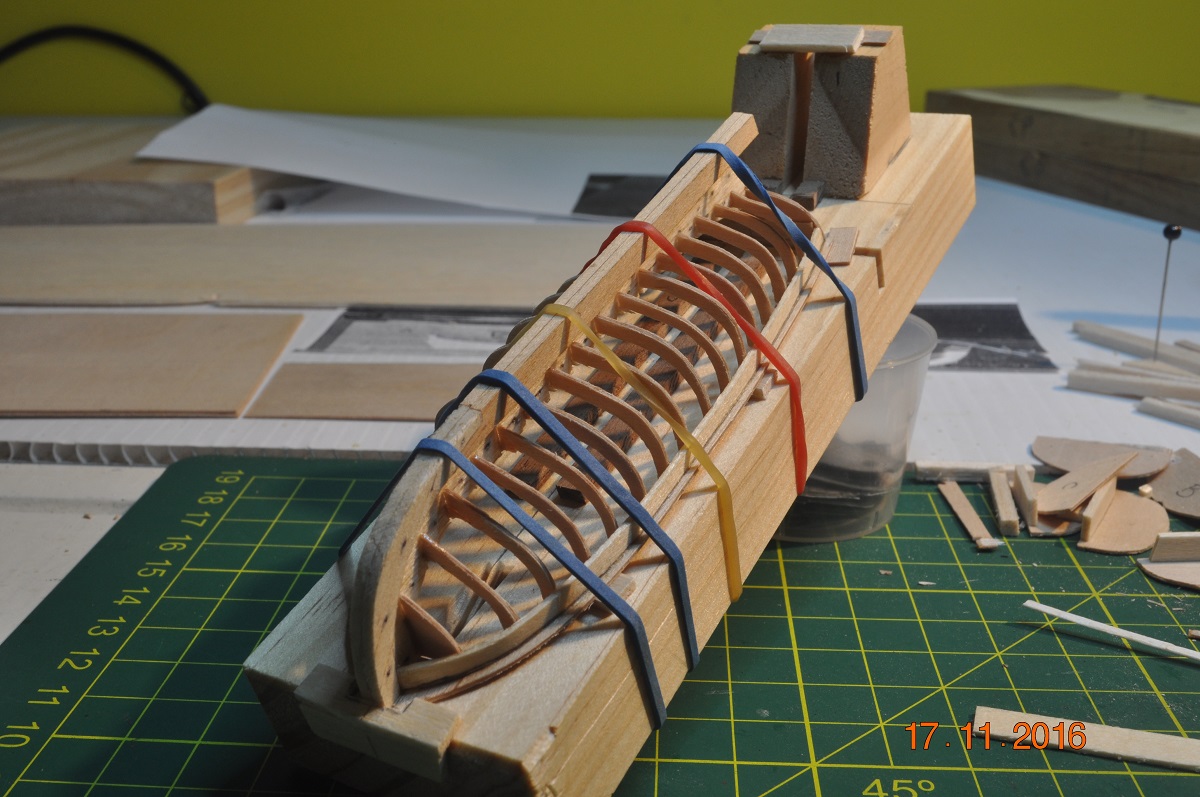
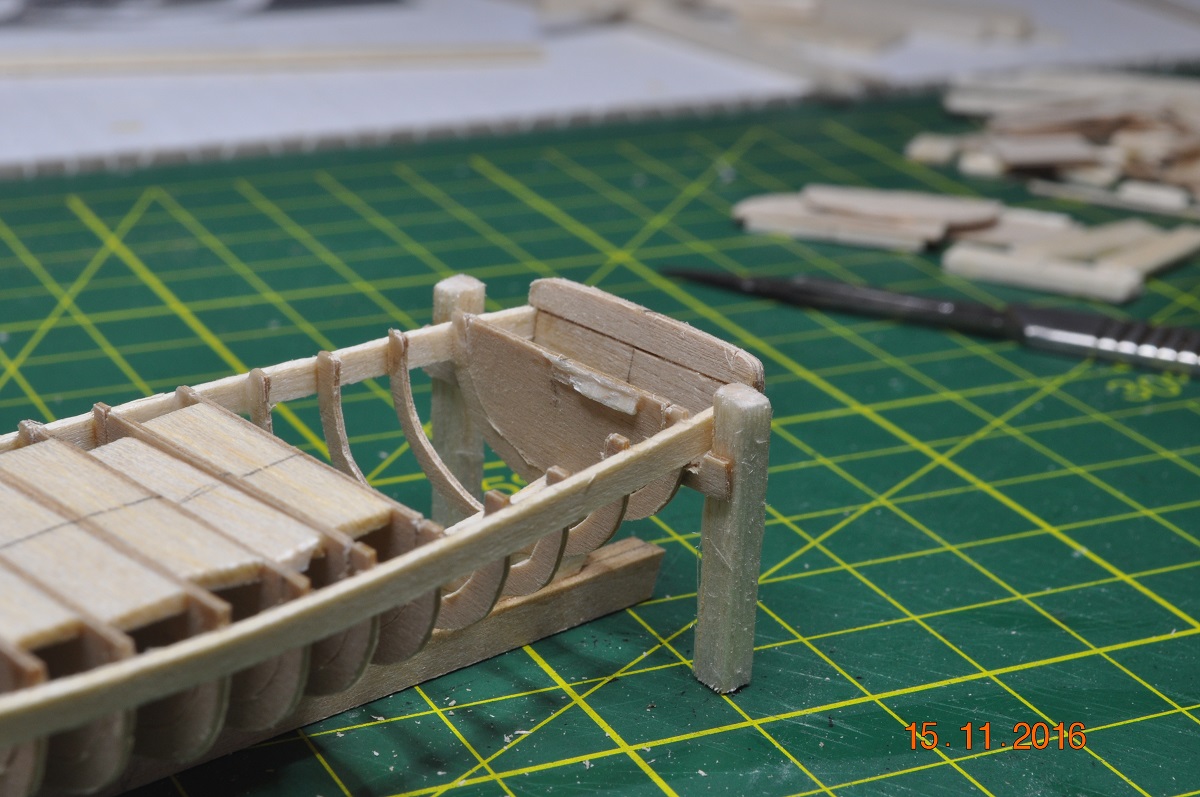
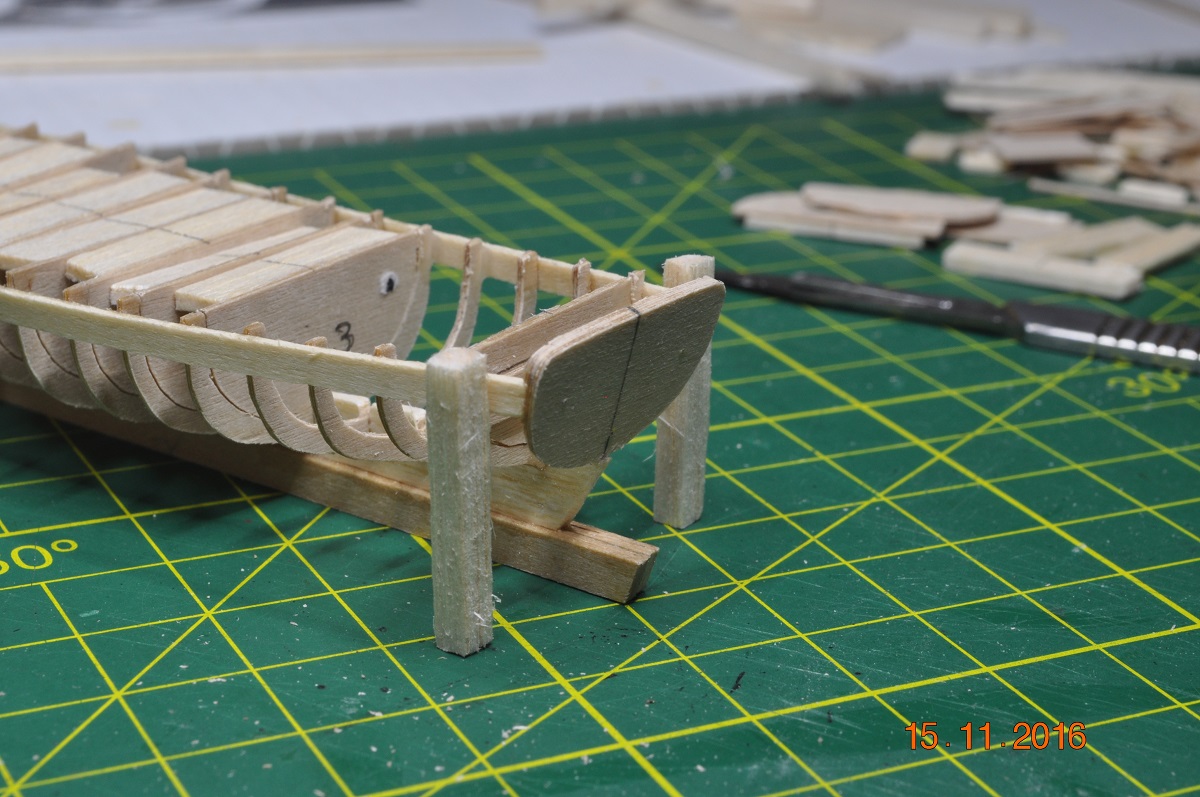
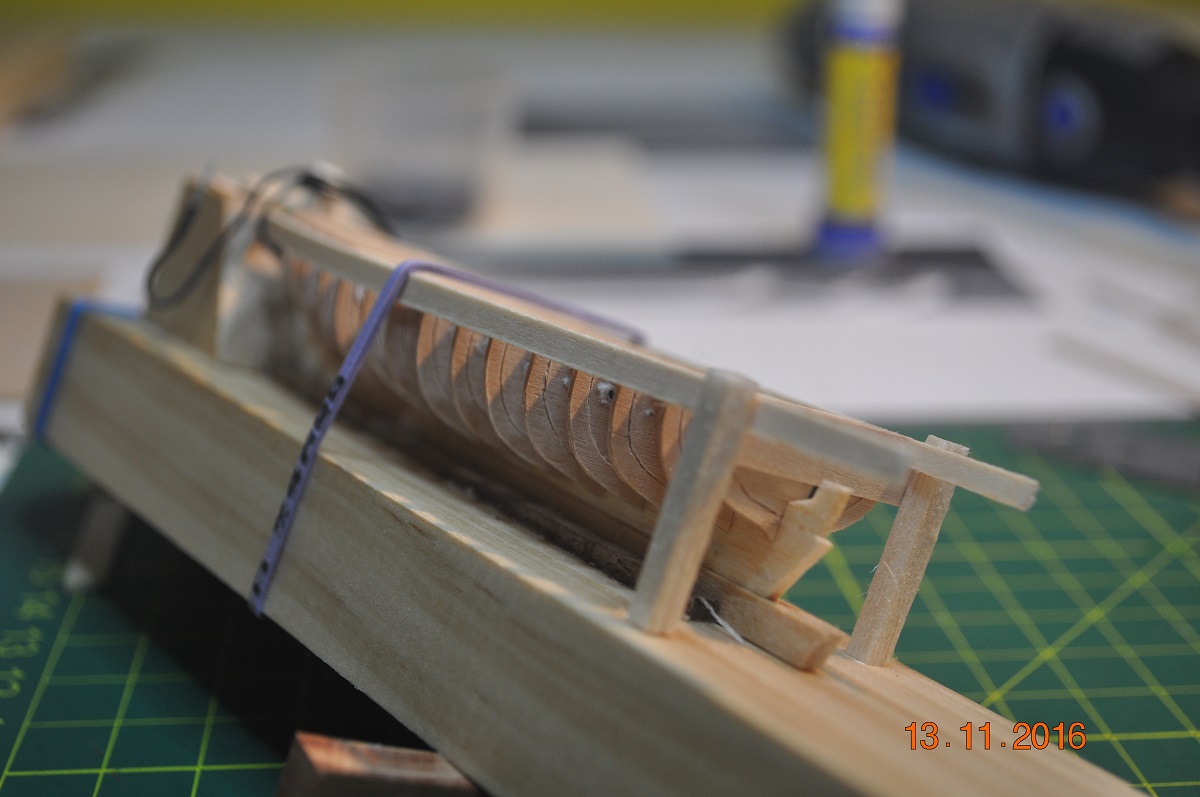
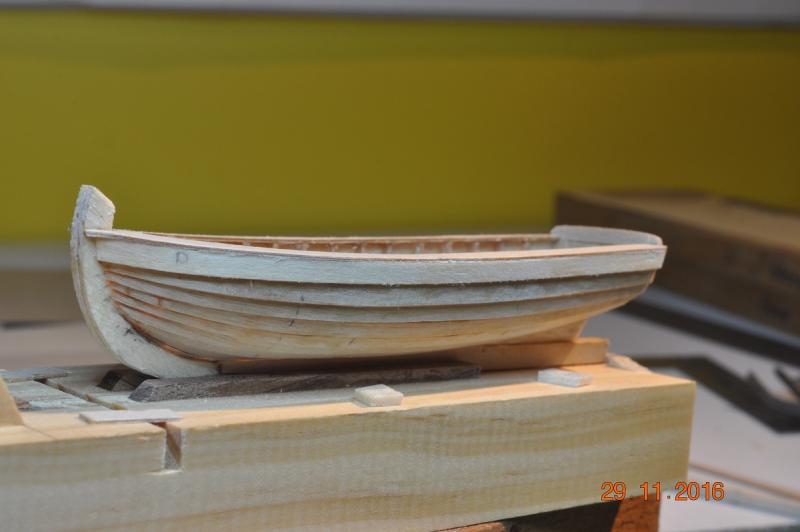
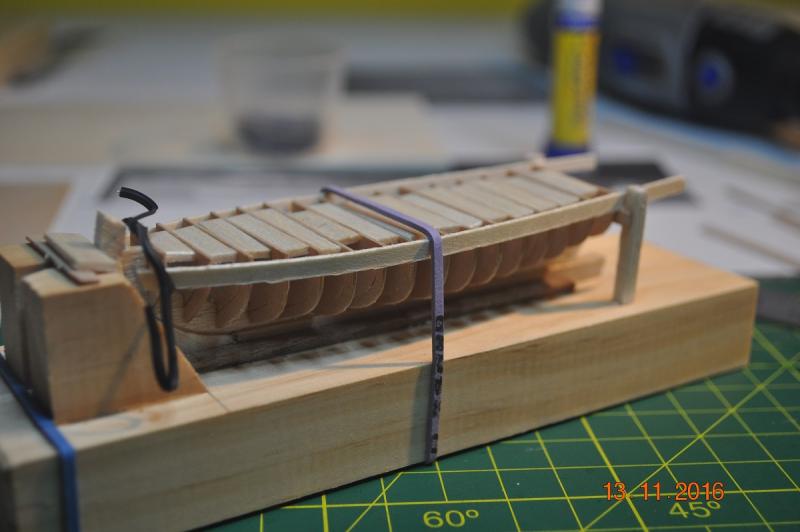
 Ships Boats by the Shipyard Some more progress. Longboat Episode 4: The lads in the yard did some work on the internals. Added the footwaling, windlass, stern bench and knees. Loose fit the thwarts, a bit too high but too late to change now. Having a break for now on this one to move ontot he other 3 boat hulls. Plan is to get all the hull basics similar and fininsh off the "little things" in one go. Rudder, masts, oars etc. Dave R
-
Hi Don, Just caught up with your beautiful log on the Trabakul. What a great build you are constructing. Love your details. No snow in Brisbane Australia, so absolutely loved the outdoor snow scene pic. Keep up the excellant work. Dave R
- 653 replies
-
- 5
-

-
- trabakul
- marisstella
- (and 1 more)
-
Hi Chris, Too kind, more a dabbler of many things, master of none more likely. Very fiddly work at such a small size, mostly under a magnifier. I've found that I need to take a break after a couple of hours, as my eyes play up. Slow and steady like a turtle, that's me. Dave R
-
Bow and Stern pics. ? See how your planking expertise went on the tricky bits. ! Dave R
-
Pat I installed my TC Delux yesterday. Going to be some getting used to, matter of finding out where the commands are that I was used to with Autocad(years ago). Dave R
-
Hi Pat, Looks like you got the hang of TC. Very impressive. Dave R
-
Come up very well. Dave R
-
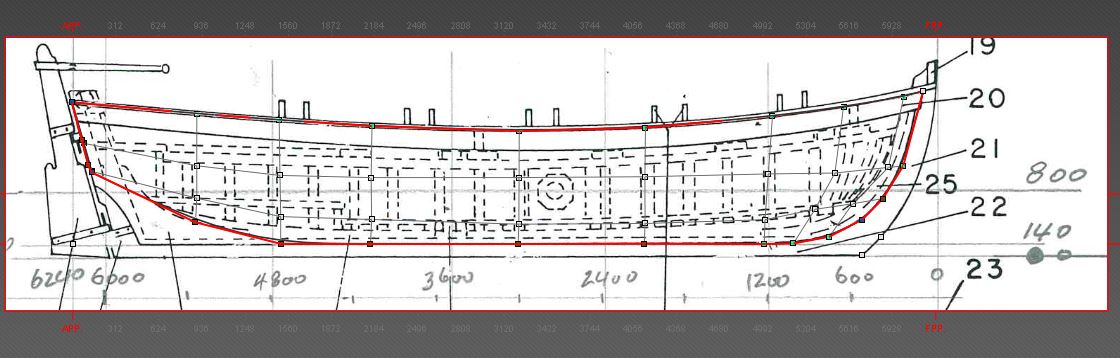
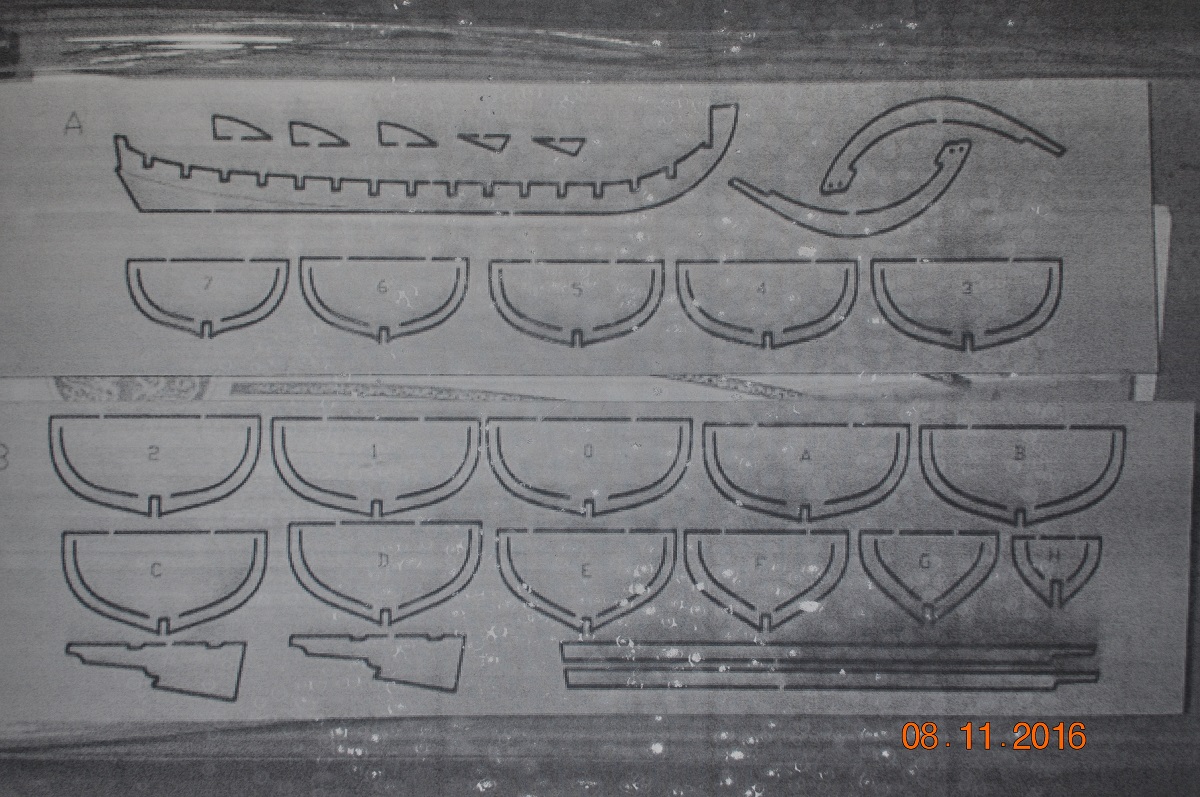
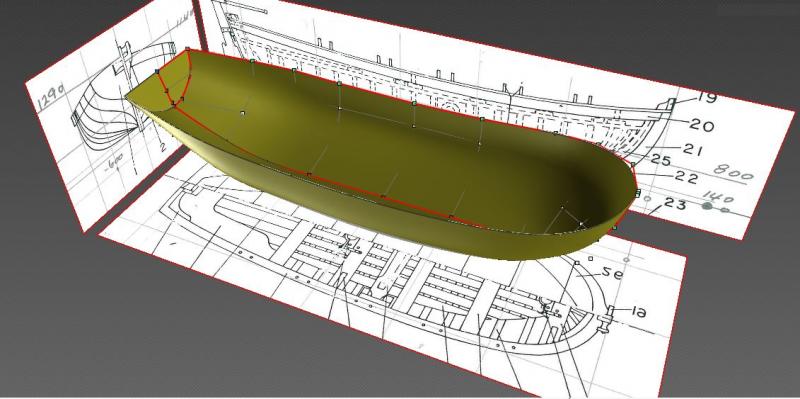
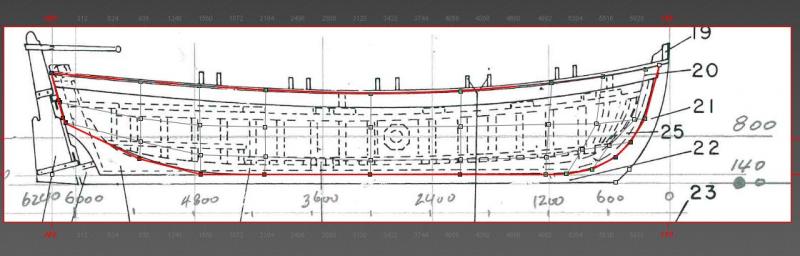
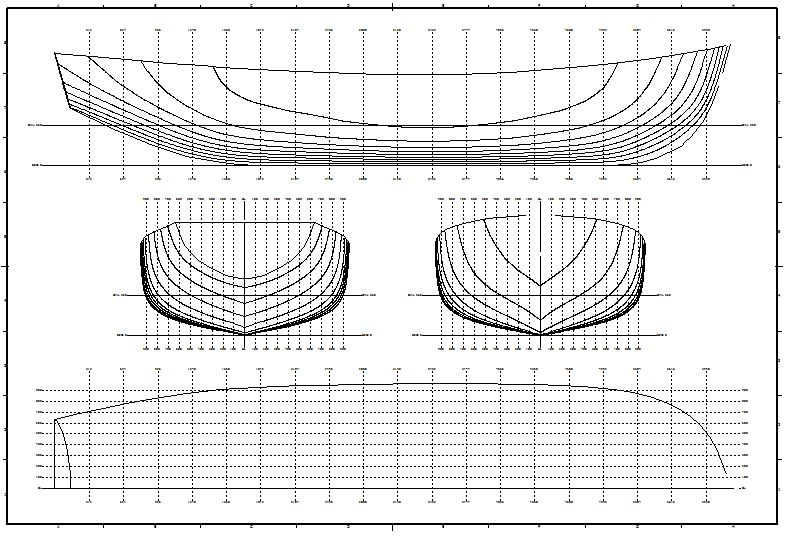
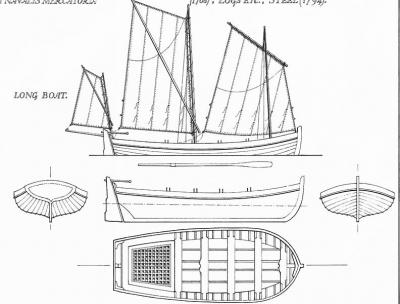
DELFTship Longboat model I found that some members use DELFTship to model ship hulls. I downloaded the free version and after I worked out how to and got the hang of the software, I created a hull shape of the longboat from the Endeavour AoTS pictures. Side view of the wire frame overlaid to the longboat hull shape. Perspective view. Basic hull wire frame which can output the frames/stations as in the picture below. Lines Plan output from DELFTship. I plan to use the other ship boat plans(in the AoTS) to develop other hull/frames. Probably dxf the DELFTship model out to TurboCAD(which I have bought) to develop a set of individual frames. See how that goes. Fun. Dave R
-
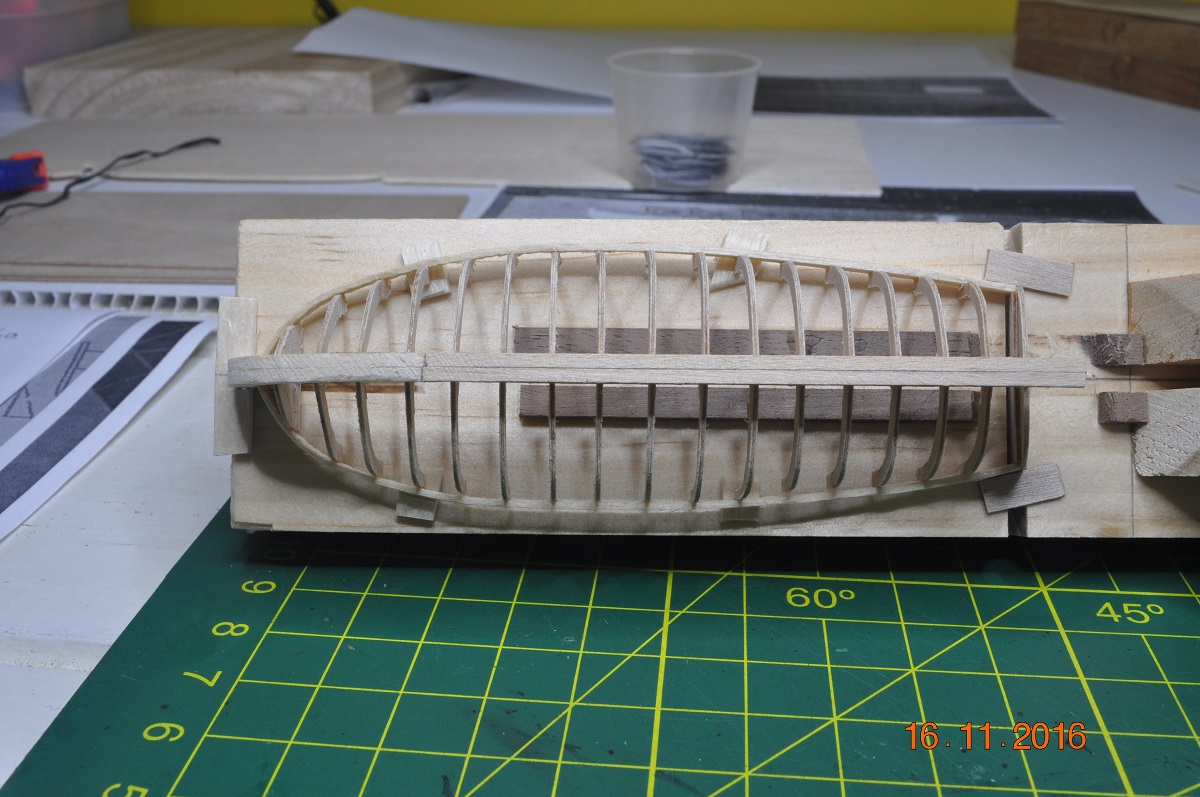
Ships Boats by the Shipyard Some more progress. Longboat Episode 3: Clinker planking finished and Wales added. Onto the internals. Dave R
-
Pat, Added a bow shot showing the clinker planking. The P and S shots don't show it up. Dave R
-
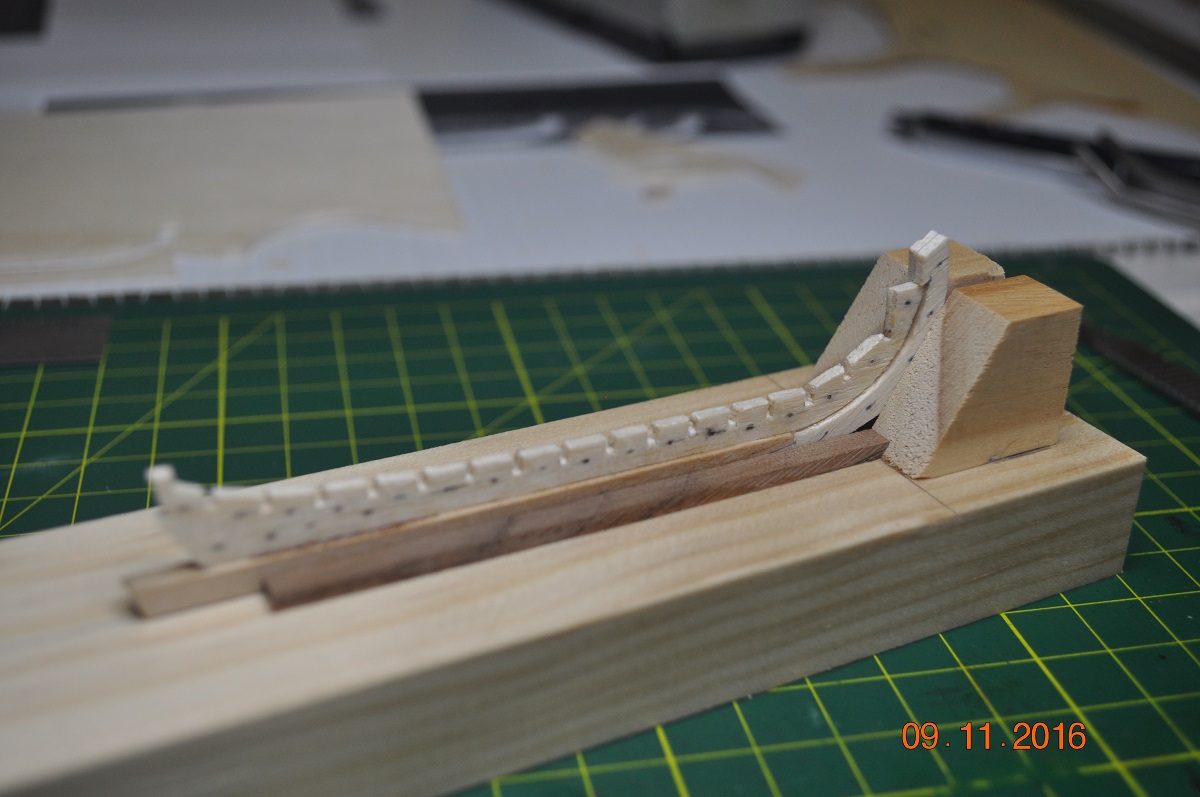
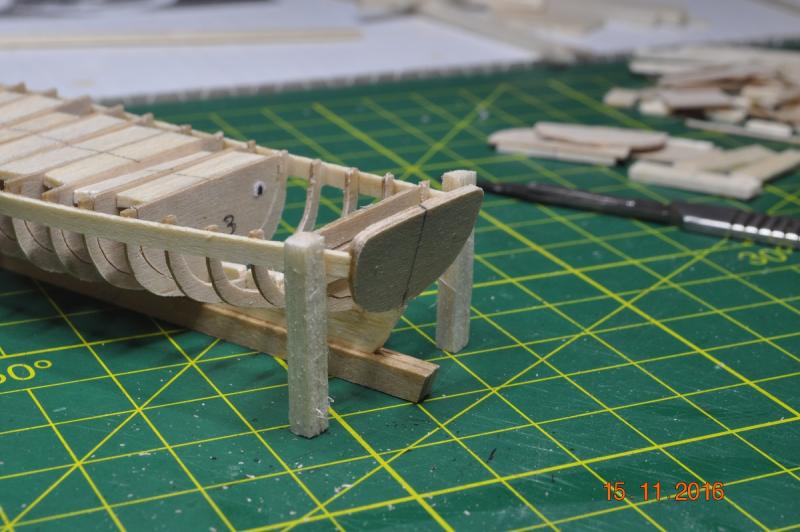
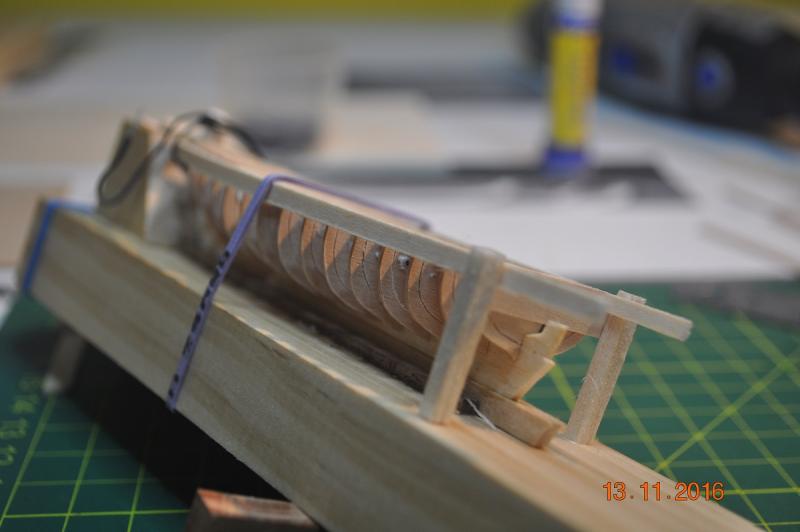
Ships Boats by the Shipyard Some progress. Longboat Episode 2: I modified the Longboat Jig to hold the framed boat upside down for Clinker planking. Gunwale To strengthen the wales, I added the gunwale(oversize at this stage) which will be trimmed at a later stage. Back in the Jig. Clinker planking: The garboard plank added to both sides. Starboard hull: Half way over the hull, slow going as each is fitted. Port hull: Each plank is 3.5mm max width in the mid frames, with a 0.5mm overlap equates at 1:60, 180mm of exposed plank width. Visually shold give the desired affect. PS(edit) Bow: Shows the Clinker planking. Dave R


-
Hi Pat, So the aim is to produce 3D parts from a 3D printer. ? Will be interested what you come up with and think on the time and costs down the track. When I/we think of all the cost to buy the many parts, it comes into play, does one make our own to suite. ? I had thought, after my Endeavour build, if I decided to build another ship model, 3D printer production of parts would be an interesting way to go. Their would be numerous items one could produce, although care that they do not look out of place. PS. I used CAD (Autocad) extensively as a design draftsman back in the 80's and 90's. Brings back lots of memories. Dave R
-
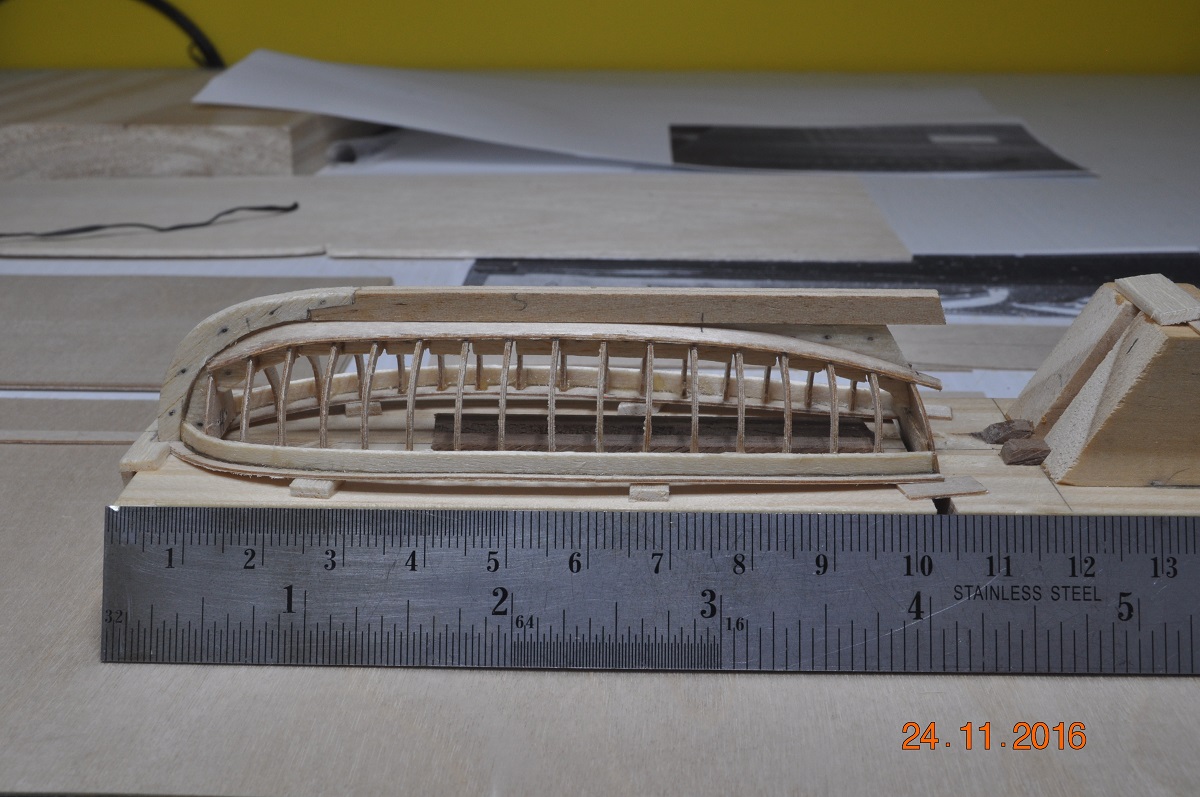
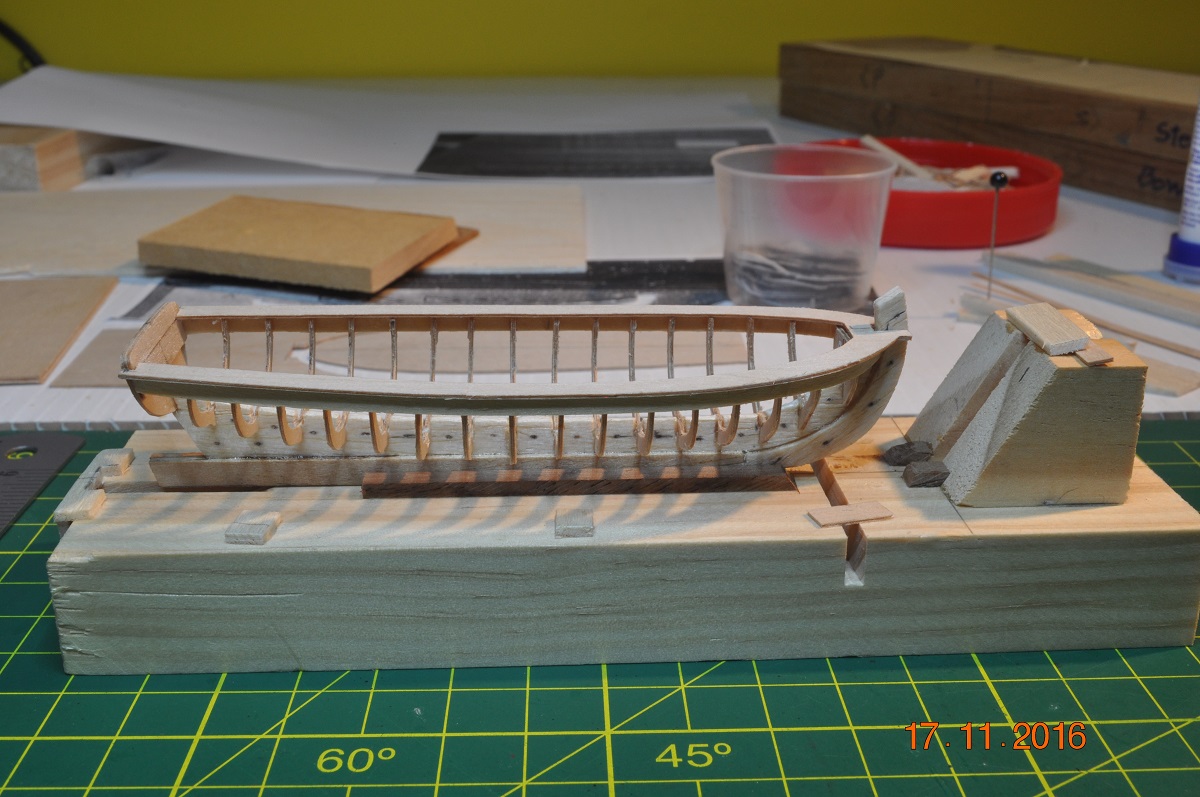
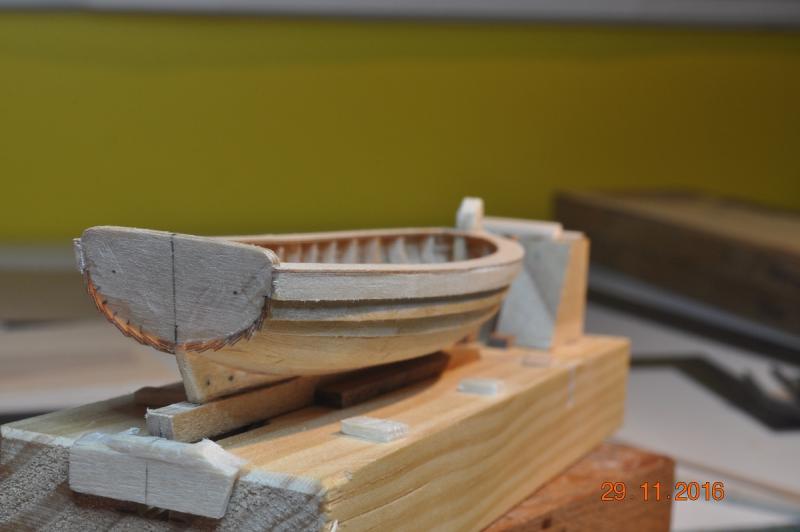
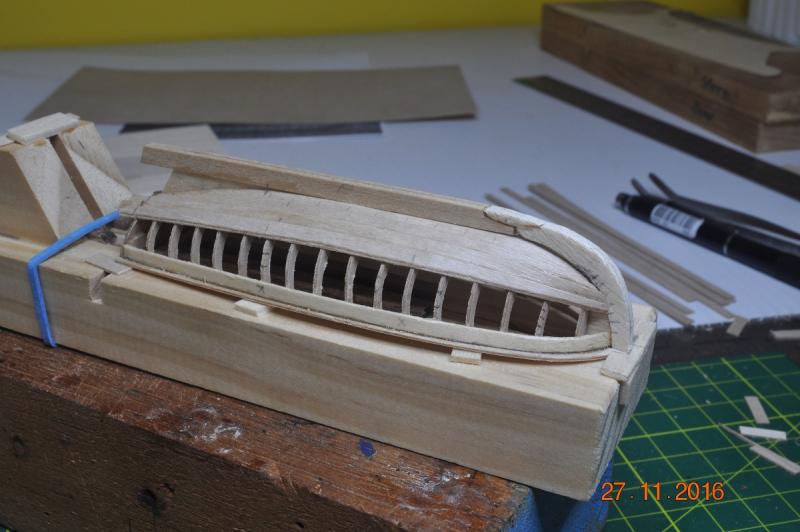
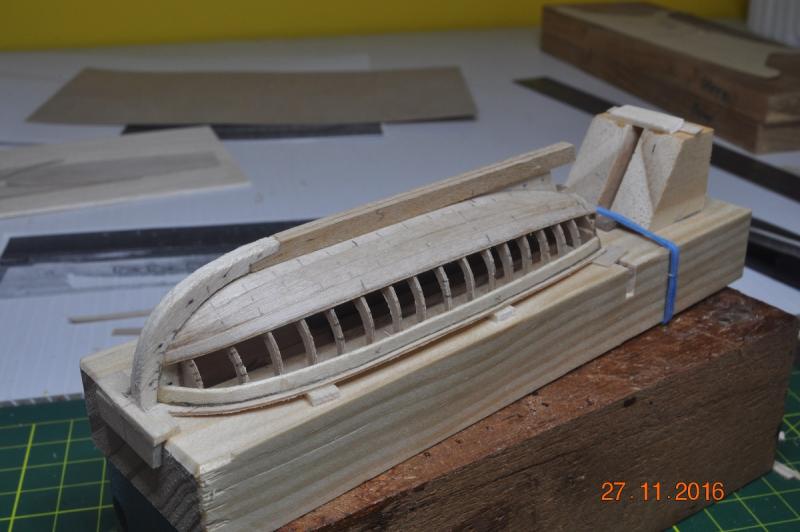
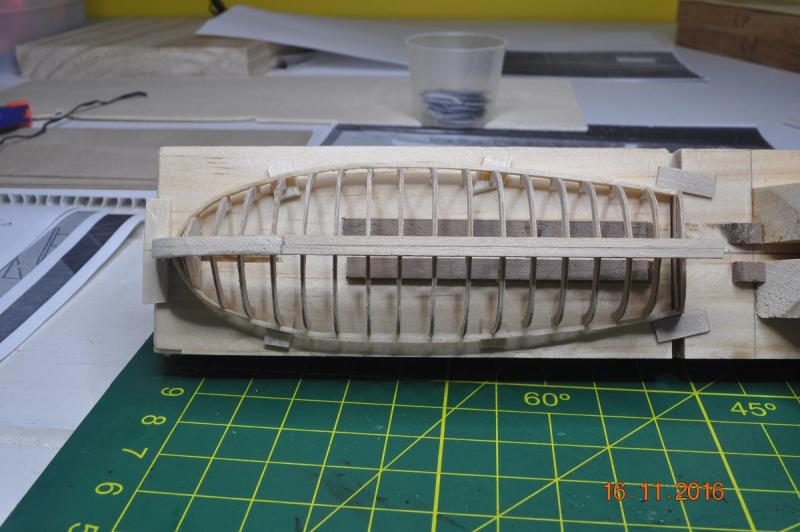
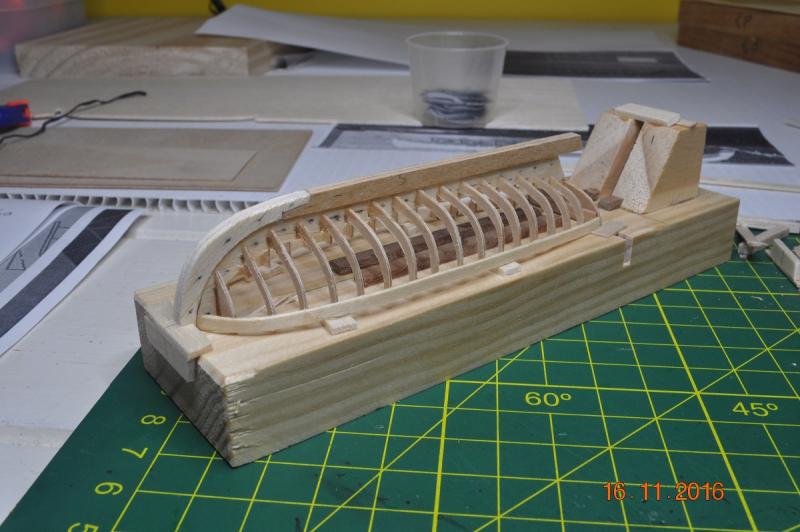
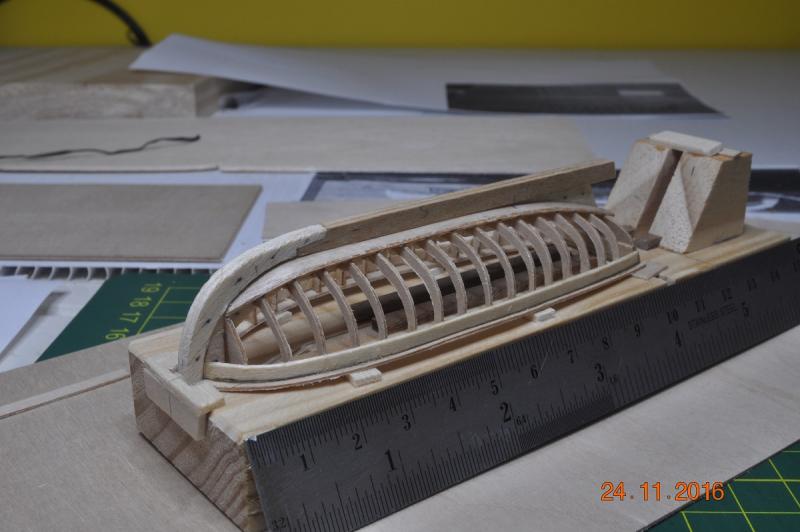
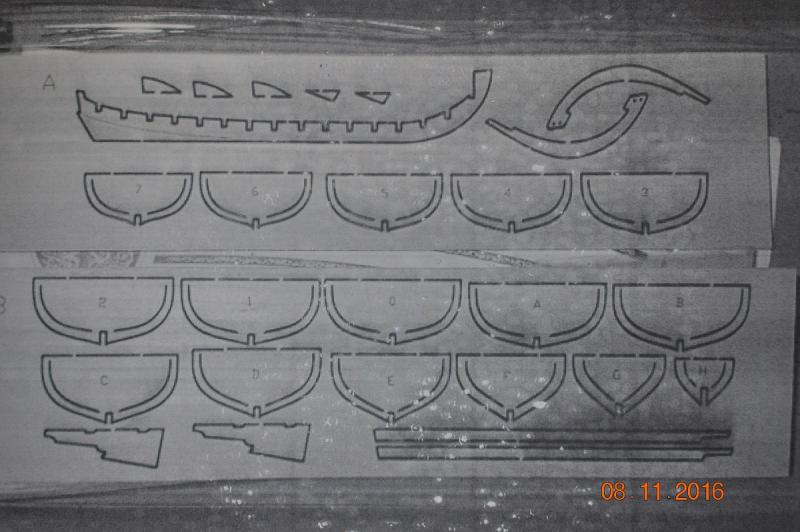
Ships Boats by the Shipyard My kit came with 1 hollowed out hull for a small boat. It does not match close to any of the boat details in the Endeavour AoTS. According to the AoTS, there were 4 boats: - Longboat - Pinnace - Cutter - Yawl Longboat I will aim to re-create the Endeavour's Longboat as shown by Karl Marquardt in the AoTS. What to use to built the longboat: I had a look through logs of other Endeavour builds and found a frame set for a longboat. I scaled the picture for a longboat (94 mm x 35mm x 20mm) which Banyan had noted in his log, for Ray Parkin's version for the construction of the longboat. This size will fit nicely I made and laid the keel, mounting it in a jig for the hull construction. Frames: The frames were cut from 0.6mm ply. 16 in total with balsa spacers on the top to keep them parallel. The 2 legs at the back keep the frames vertical over the keel. Stern: I added a double thick ply stern. Started removing the mid sections of the frames. The hull will be carvel planked directly onto the frames. As per Banyan's Endeavour log: Parkin had mentioned the longboat would have been clinker built rather than carvel. This would provide a boat more robust which could be used to conduct the intended close-in coastal surveying (which I am assuming Cook would have wanted). So much more work for the shipyard to get into for this one little boat. 3 more to decide on. Dave R


-
2 months Dashi ? what's cook'in. Dave R
-
Hi Michael. post #520 in the log. I made them from copper wire(wire from inside power cables) I made all the lower ones as well. My kit provided pre-fabricated ones which did not allow a deadeye to slip in at all. I haven't used much of the metal parts in the kit at all. Either not of the era, size is wrong or non existent. Dave R
-
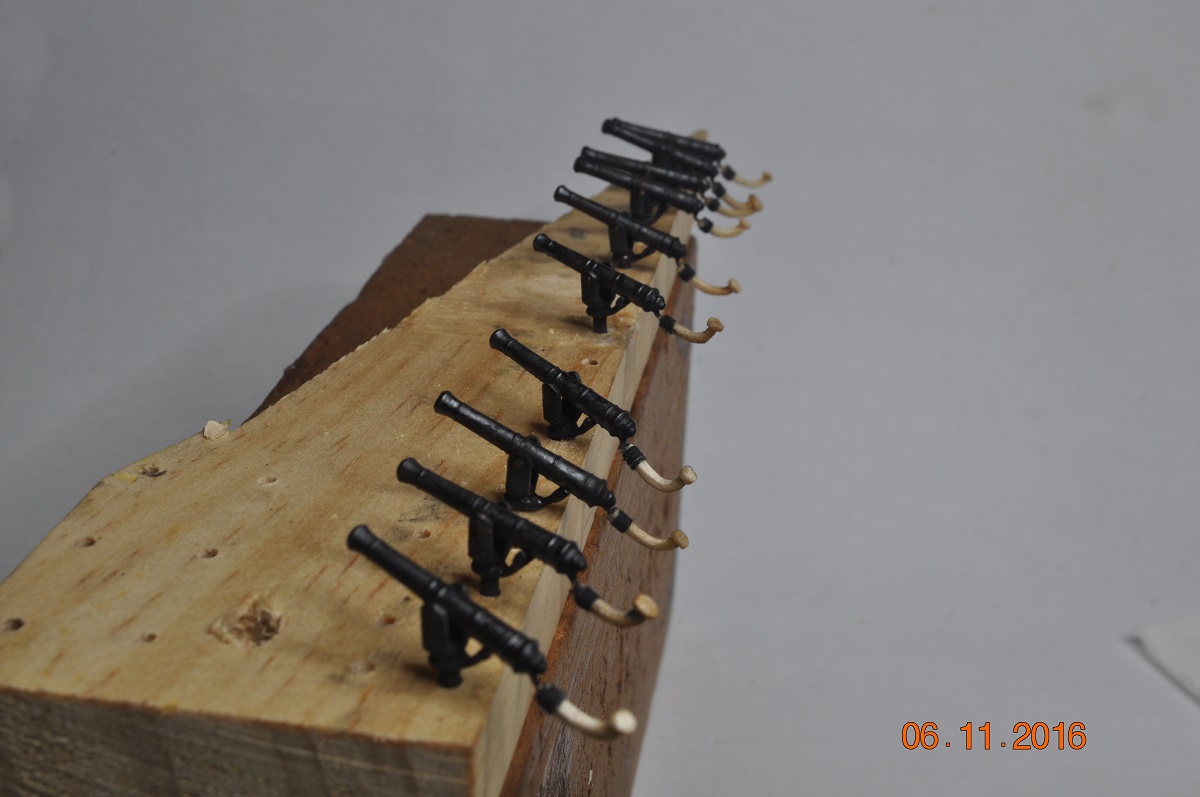
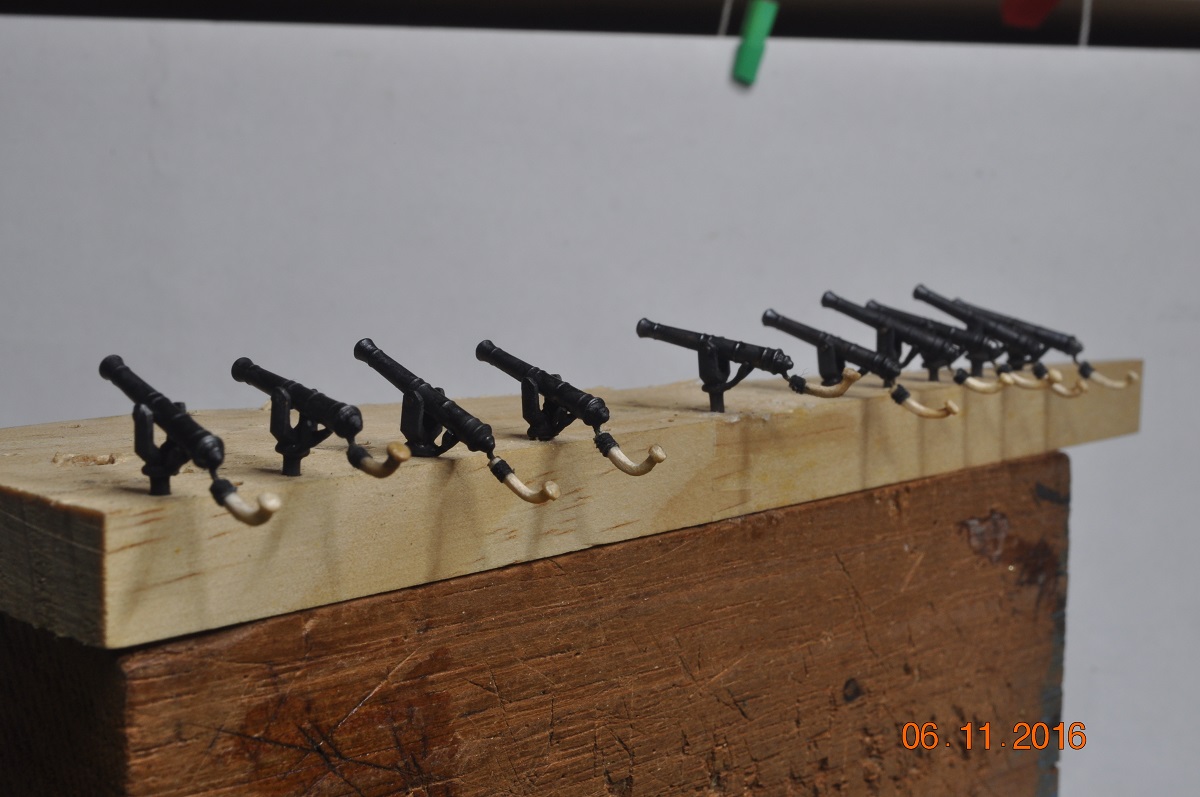
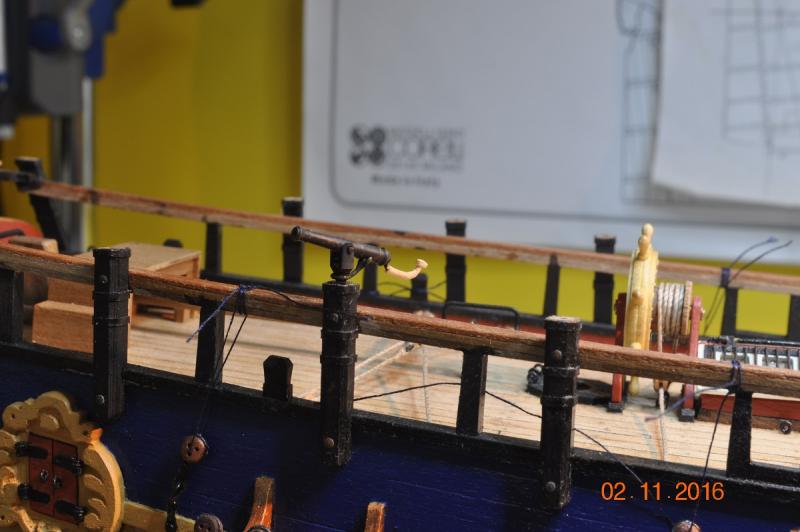
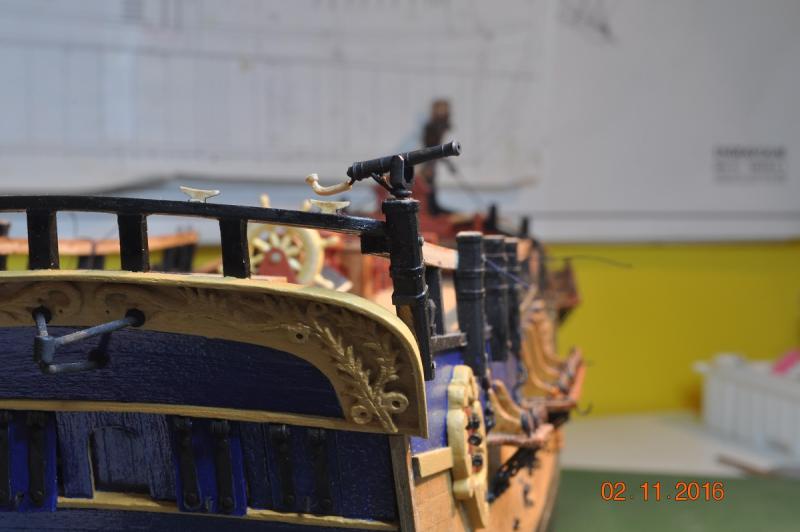
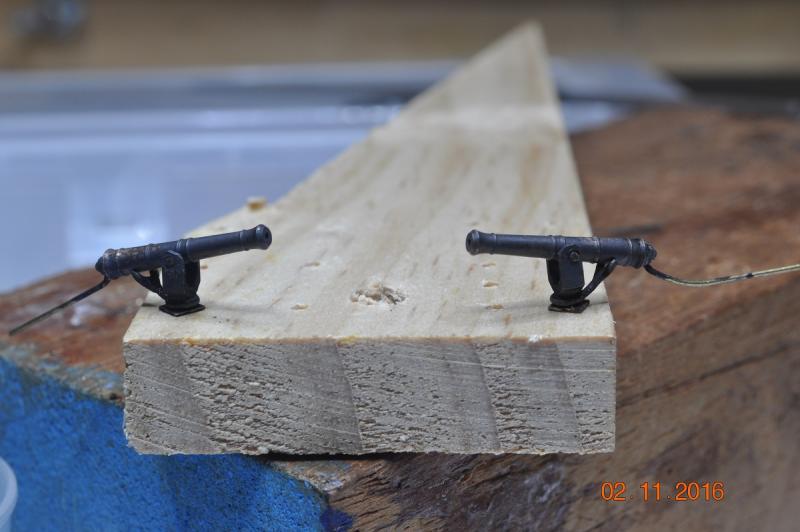
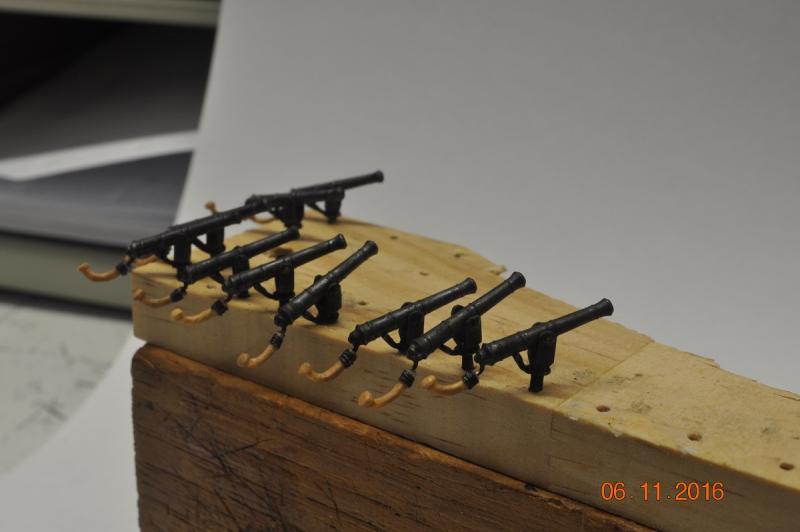
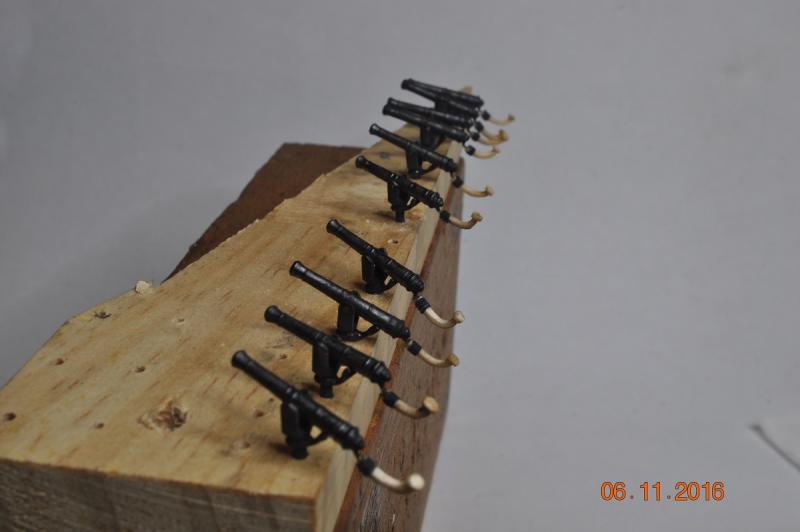
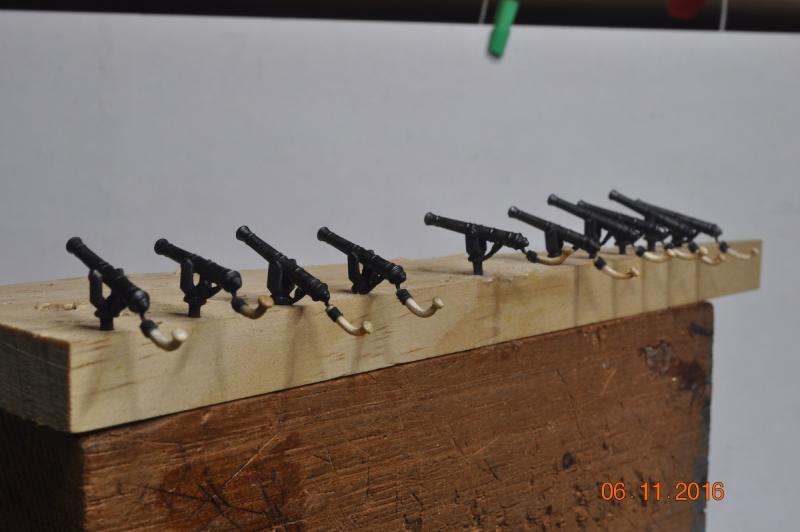
An update from the Shipyard Foundry. Before I forgot, and let time slip by, the wee lads and myself got stuck into the swivel Guns. 10 in all 5 port and 5 starboard. All the individual metal items: 1. we have a square washer which will sit on the top of the gun stock(post). 2. a fork, which came with the kit(one of the few metal items I am actually using), with the pin filed down to 1.5mm. 2mm looked to big. 3. an eye bolt which I turn the pin end into another loop to make 4. a double ended pin for a gun housing. One end slips over the fork pin and weld in place > 5. the ring end is cut and shaped to a "U" for the gun to rest in 6. missing i picure, is a larger 1mm pin for the gun to mount to the fork. I cut 1mm pin as guns are different than kit supplied, too long and shape wrong. I also needed to drill out the holes through the gun, as it was much smaller than the fork side holes. Looks like I envisaged, the fork and housing is larger than that dipicted in the AOTS. I do not mind mine being larger, as the shot forces form the gun ? nessitates a sturdy fork and housing. Production line, make 10 sets all up. Handle - farther down. Swivel Gun - mockup(less the handle) Added a thin 0.5mm wire to the of the gun for handle to "slid" on - cut to length later on. Blackened 1st dip, to all the pieces, then assembled 2 gun sets to see they shape up. Next making handle. So small - 6mm long ! Mounted on stern post: Drilled holes in the outboard posts for pin, Note: do it now not when rigging done. Timber handle added, to see how it looks. I'll stick to this size bit less than 1.5mm dia, very small and any smaller, bound to break it. 9 more to make. Mounted on starboard post: Happy with the look. Few more hours for handle making. Assemble, blacken or paint touchup and store away to fit near end. Edit: Some final touches to the handles: Rope wrap about the end and paint/clear. Paint and clear to the rope end. "Tick a box", another set of items done. Dave R

-
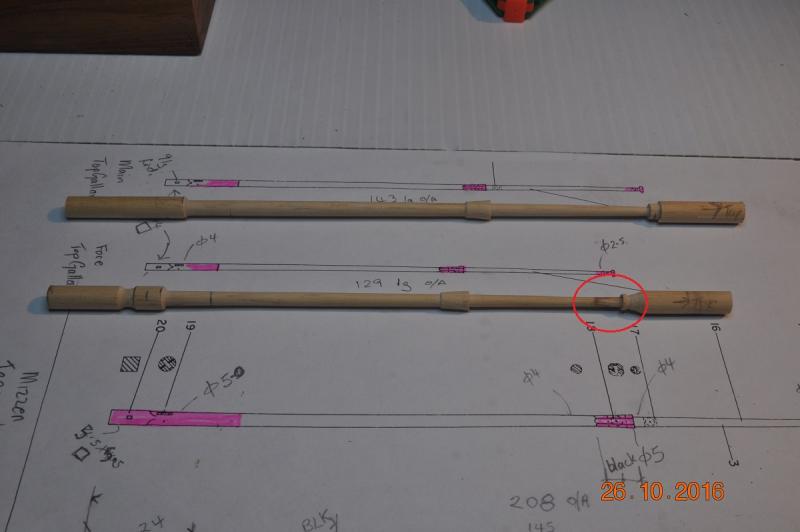
Thanks Michael, A Lathe is great, however a lot of post work, carving, nibbling, sanding to knock the spars into final shape. Then the drilling gouging for the pulleys, which are all fake on my masts(2 holes either end and a recess at the sides) Dave R

-
Thanks fellas for looking in. I've taken all those valuable lessons you guys have come by on board at the "shipyard cronicles". As I am sure others do, I spend as much time researching as doing. I will be, as Paul pointed out, raising the masts, section by section, adding the standing rigging on in the traditional way. I plan to add some running rigging, blocks and ropes, however jury is in session as to sails. Been toying with having sails rolled and lashed up on spars as if at anchor. Just another level of complexity and by the time I get to it, a retirement task. Dave R
-
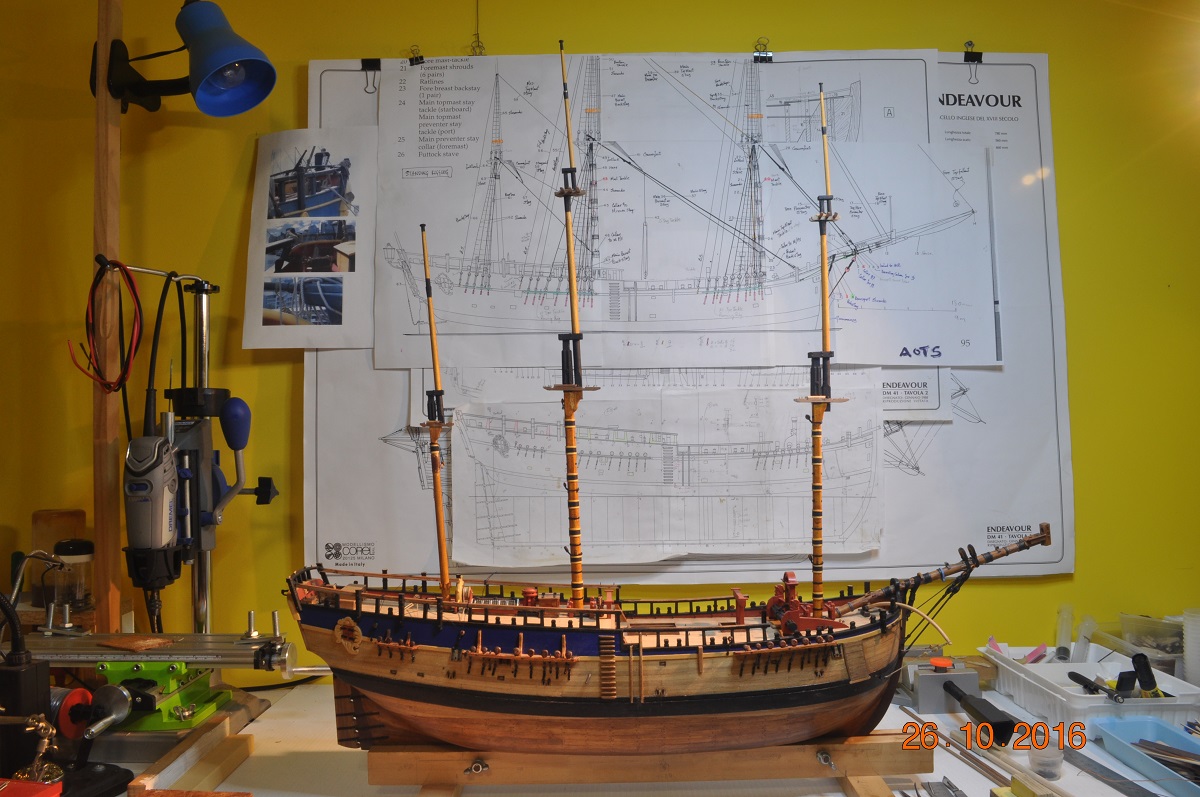
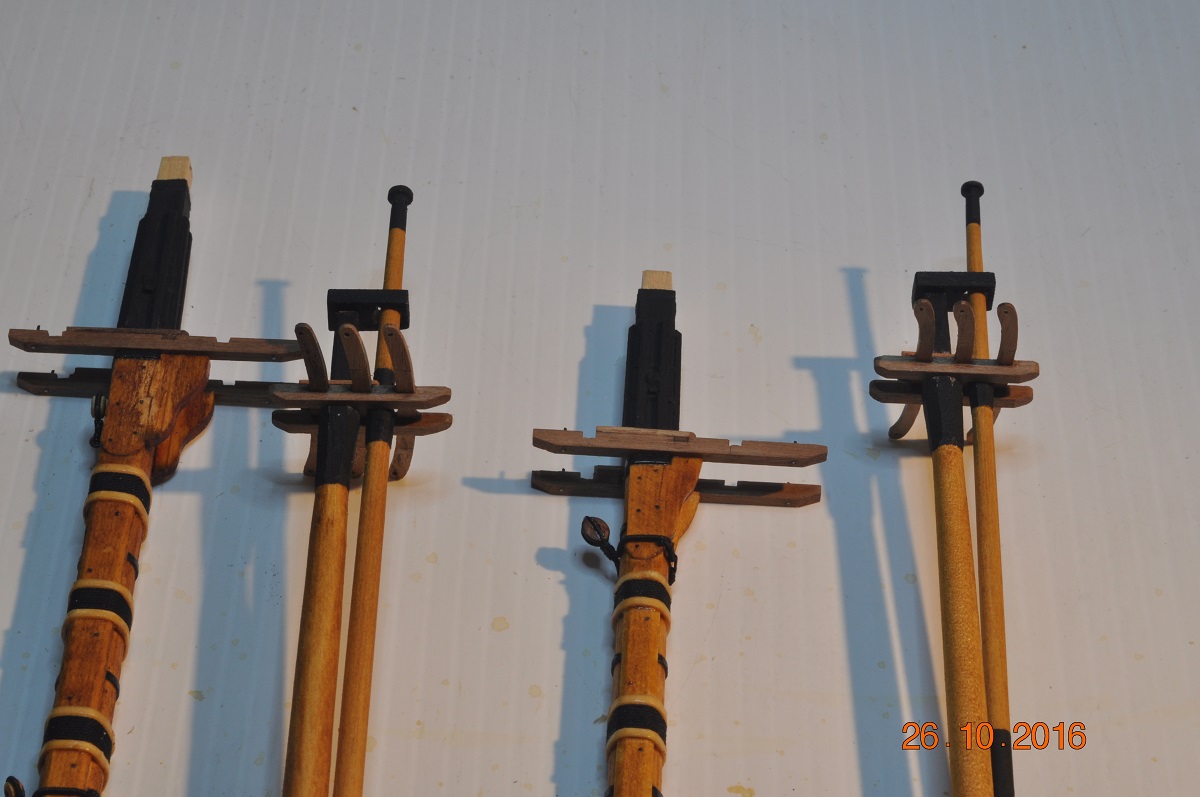
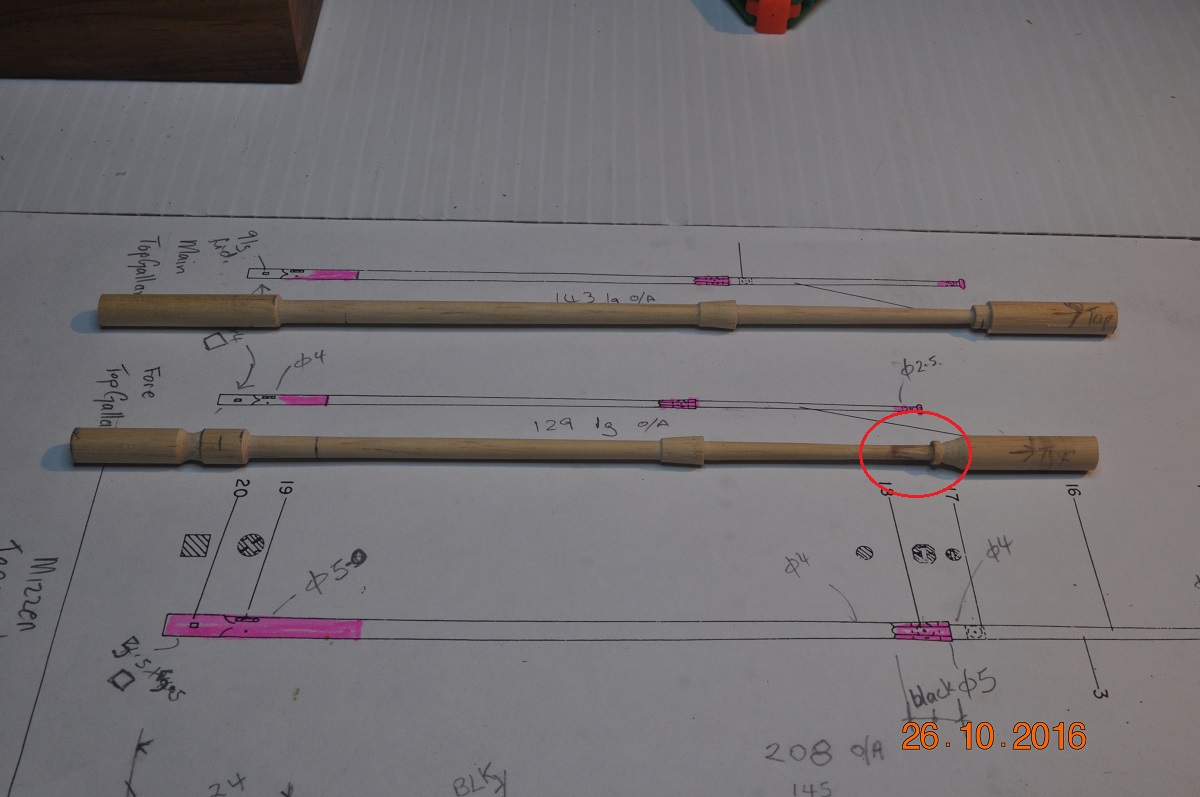
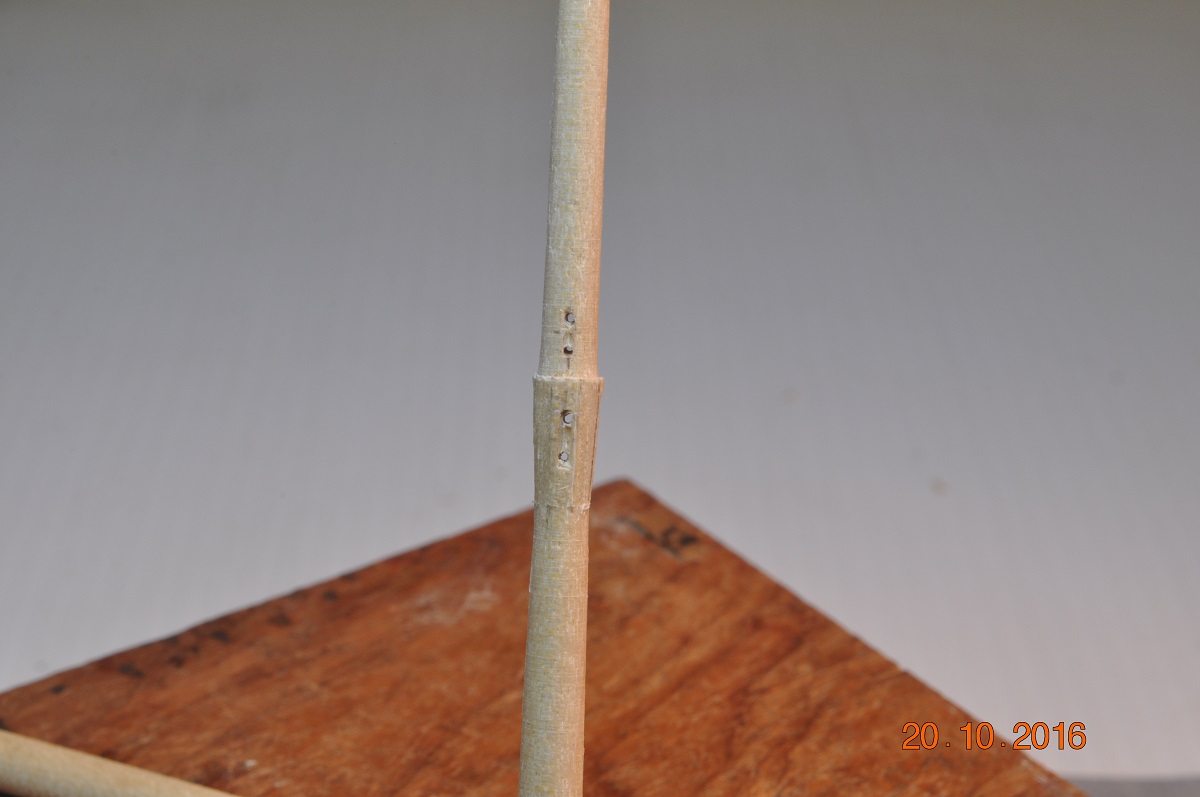
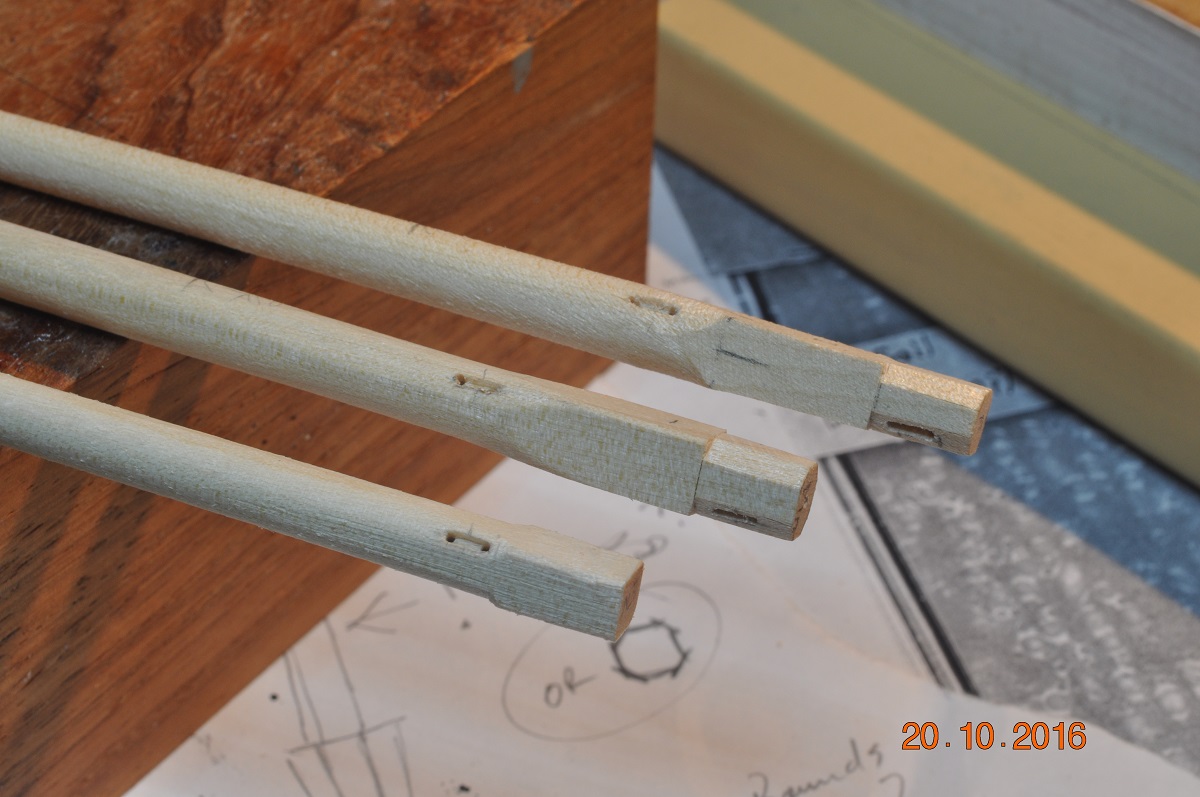
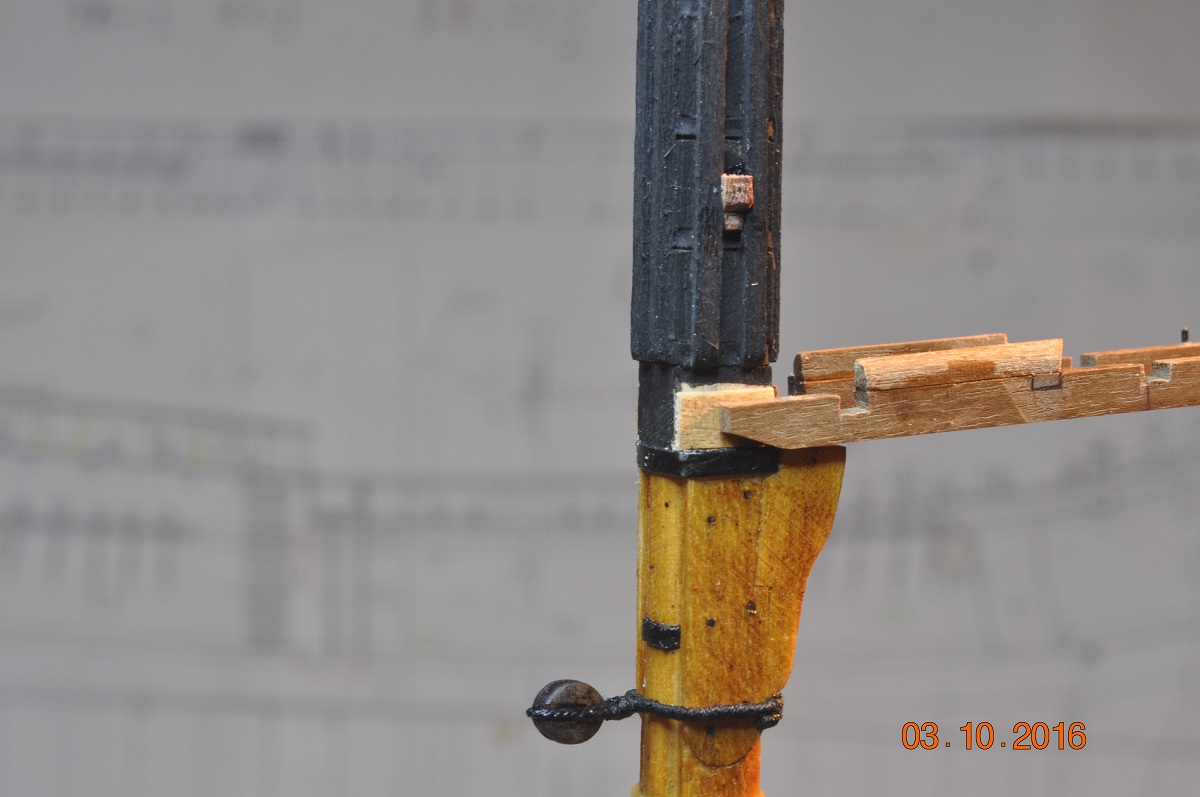
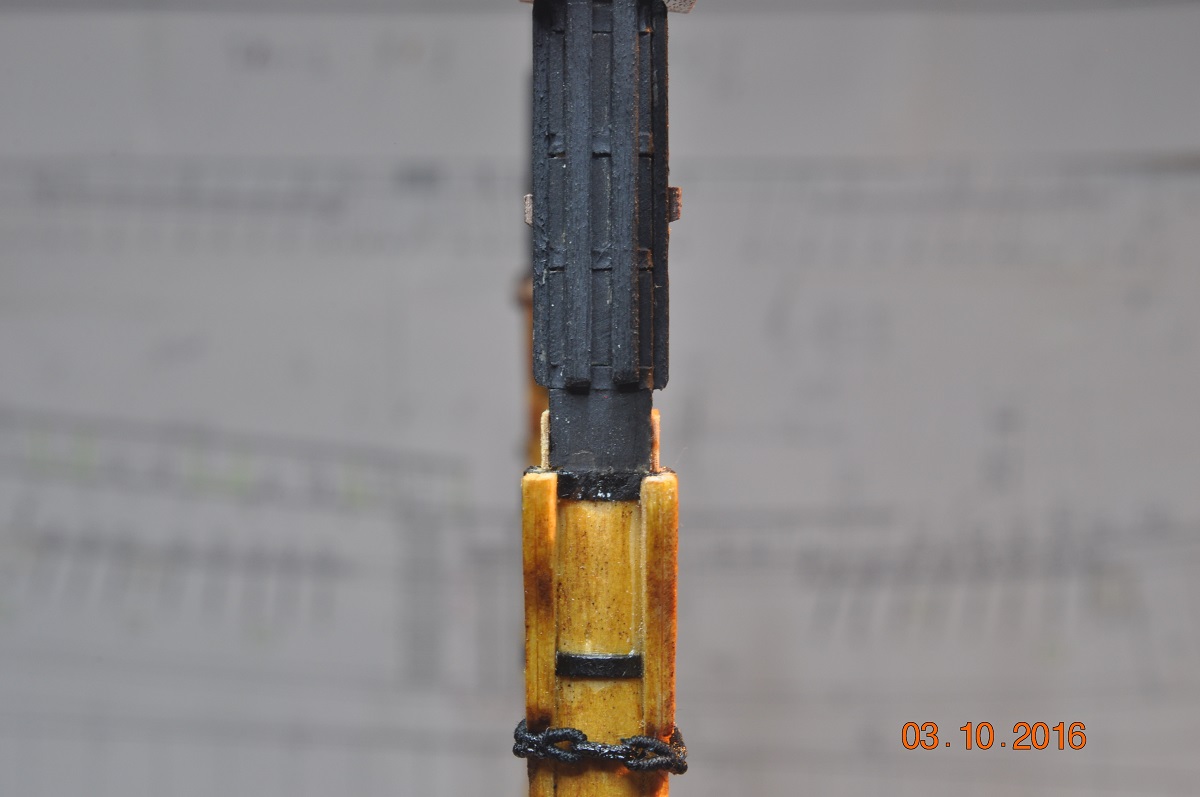
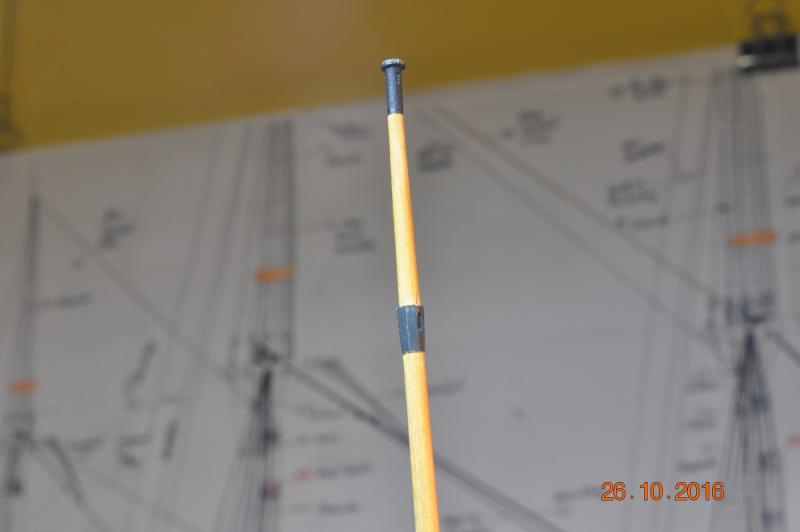
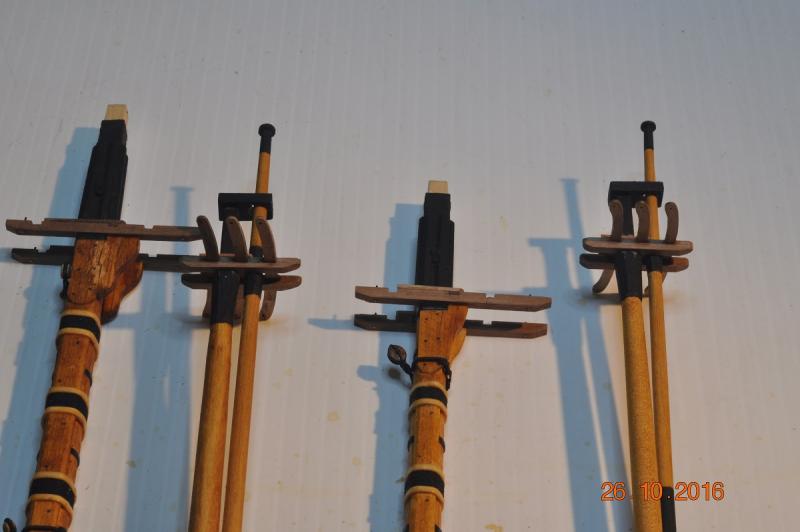
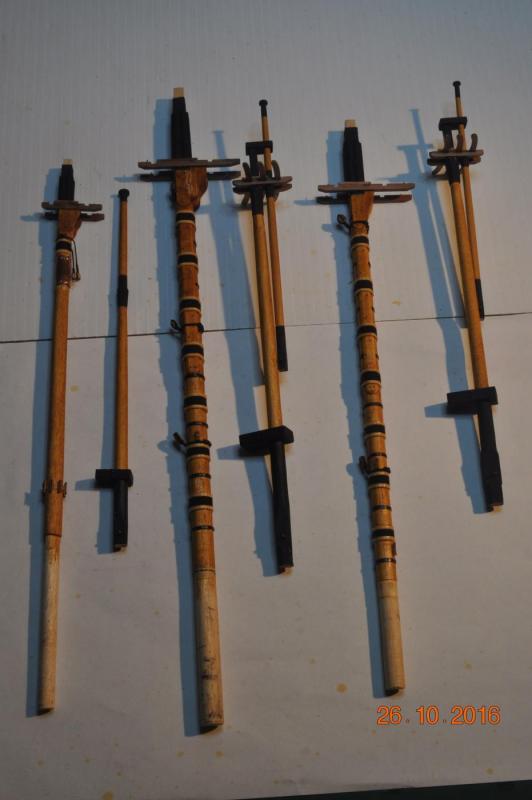
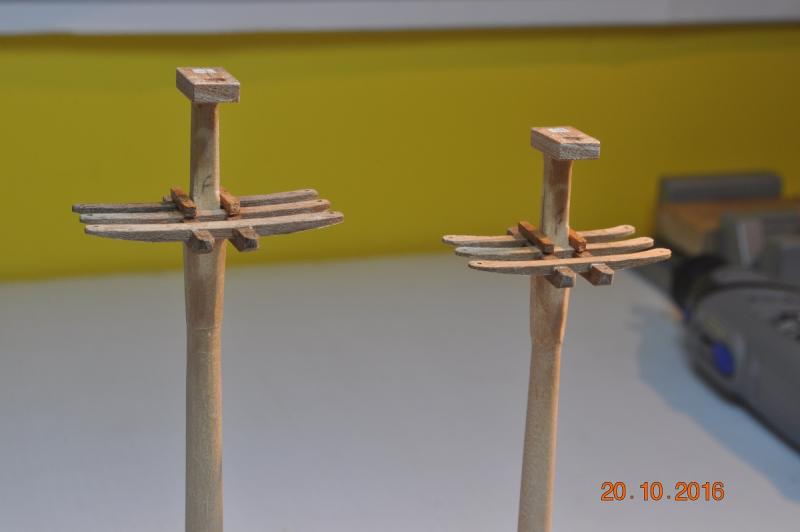
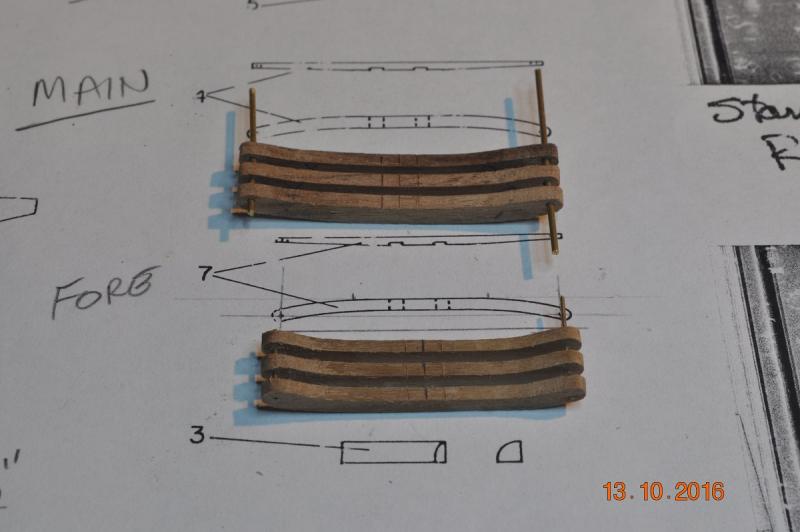
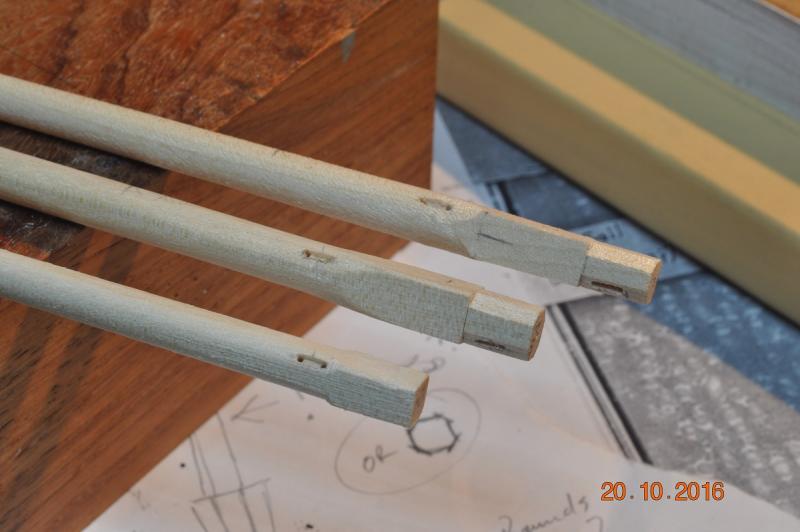
In the Shipyard Update After what seems a very long time, we have raised the mast sections to see how they are taking shape. Loose fit for now, until the fun starts adding the standing rigging. Some close ups to show the warts. Top Gallant sections These are straight off the Lathe. Well nearly, the top of the Fore TG, twisted off as the lathe slowed down. The top is only 2.5mm in diameter and I guess the torque was too much. Some glue and filler, sanding and after a coat of black, won't know it was brocken. Mast Sections: The mast sections all basically made. Each of the top mast sections do slide up through the mast caps. Trestle-Trees & Cross-Trees: Where all the action takes place. Fore Mast Trestle Cross Trees: Fore Mast > Topmast: I filed a section of brass rod down to a rectangle, for each "Fid" pin at the bottom of each top mast. No Fid plate, might look at adding some in(not that it will be noticable later on at the small scale) The top of the Fore Mast - Top Gallant: Needs some touchup of the paint work. It got scratched working its way through the "caps". All the black on the masts needs a touchup. It was this top that broke(slowing down in the Lathe), came up good thank god, I didn't wish to turn up another. Looking down on the Fore Mast Top. Things will get very busy around these mast tops - well one day I hope it will. I might take a break from the masts for a while. The rope, block and tackle, as much as I am looking forward to it, will just have to wait some. Time to finish off the deck furniture and other works, to "clear the decks" for the rigging stage. Maybe try my hand at the "ships boats". Only 4 to make, how long could that take. ?? Dave R


-
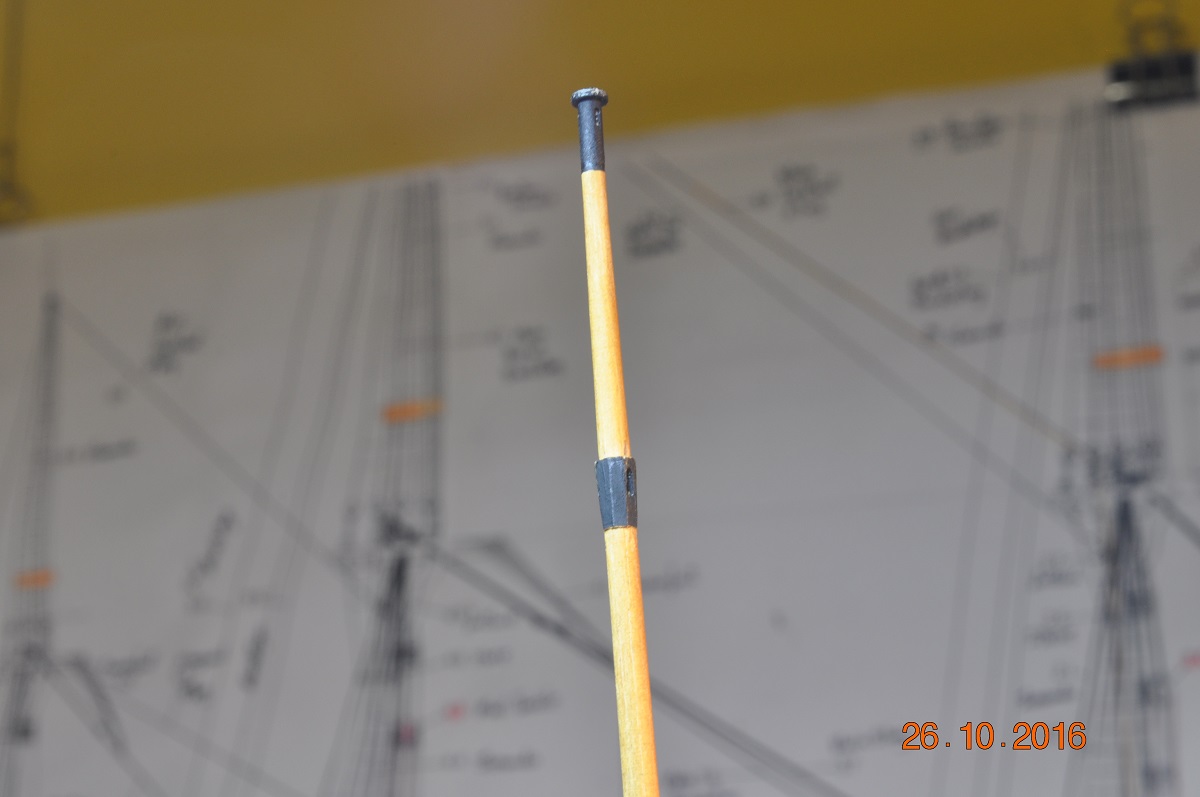
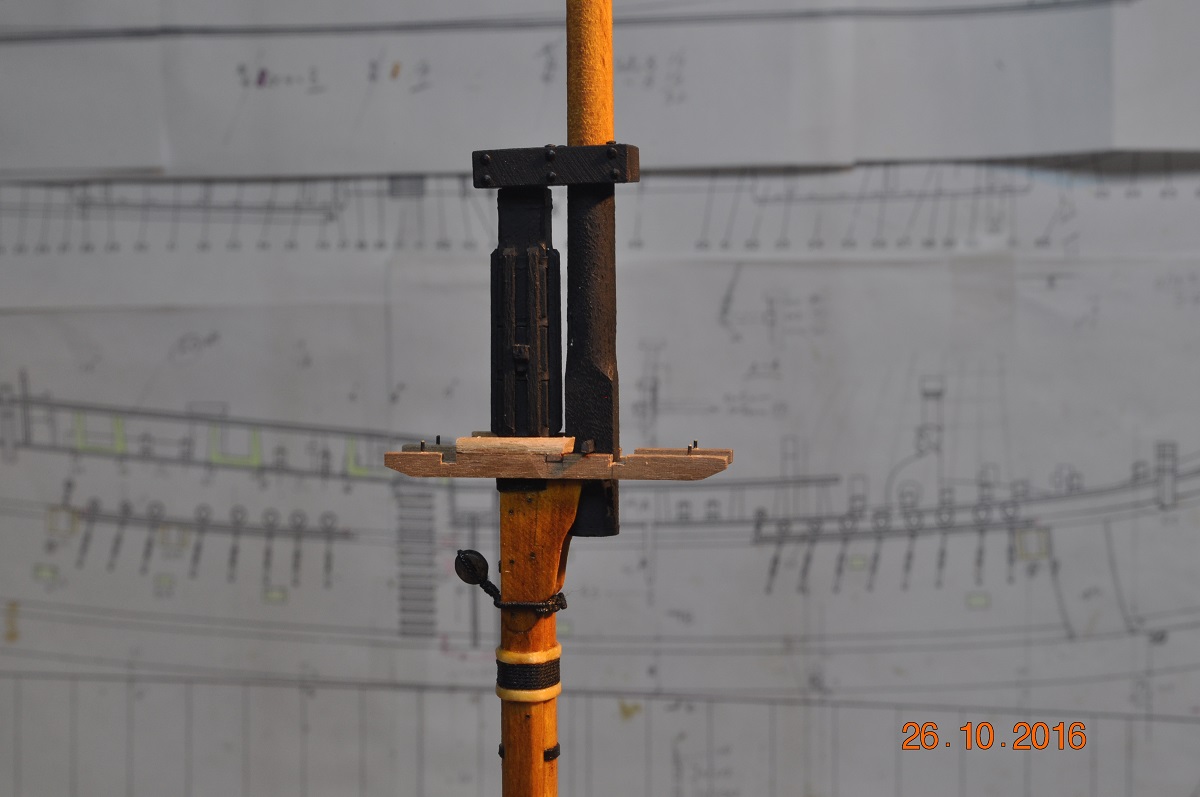
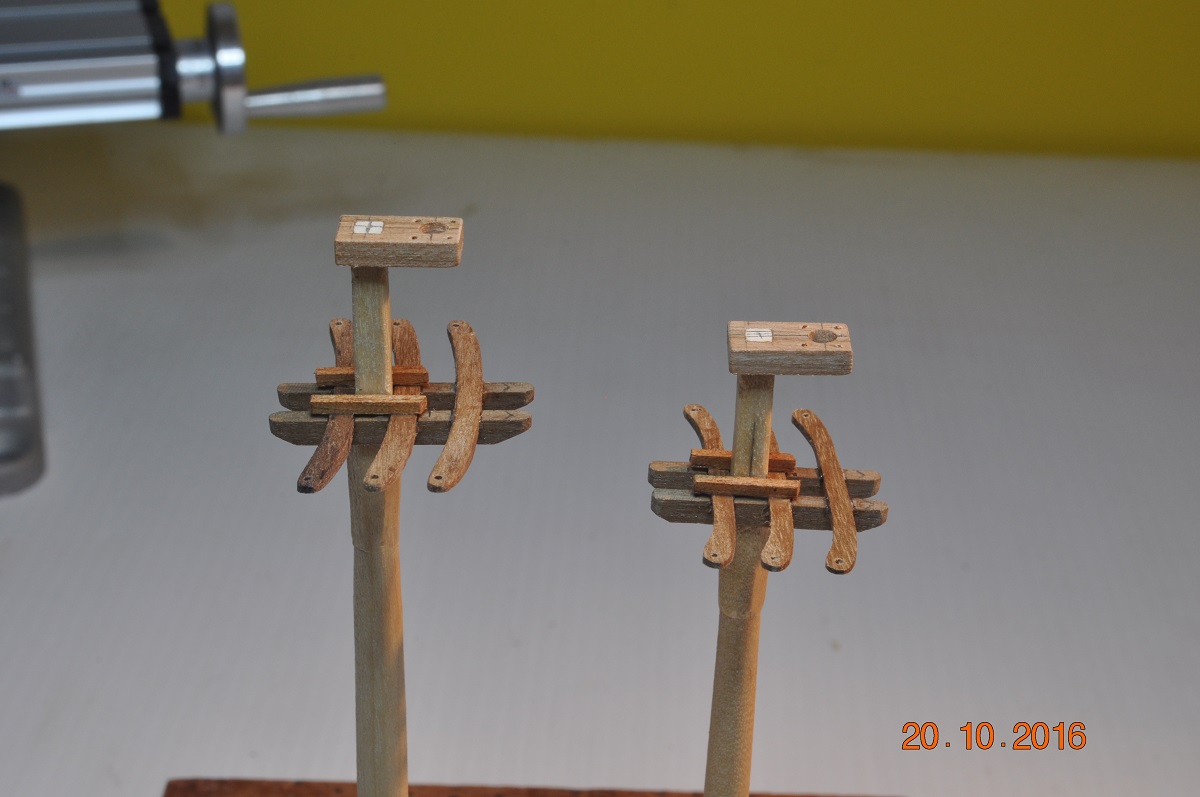
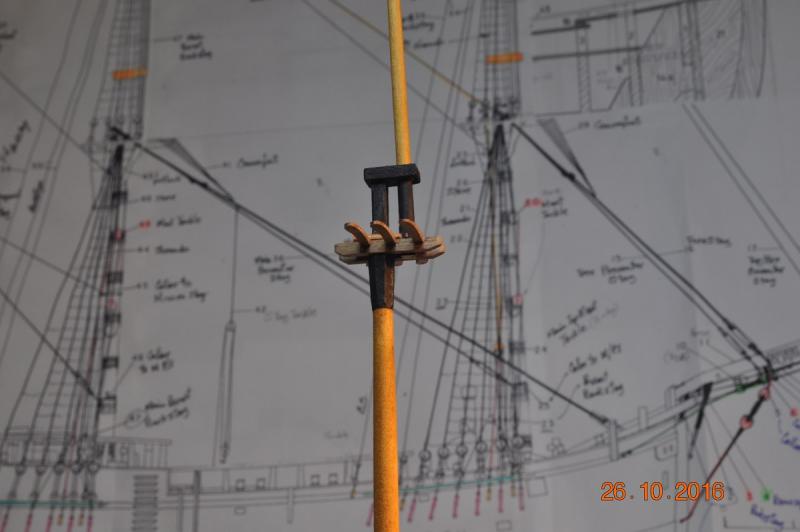
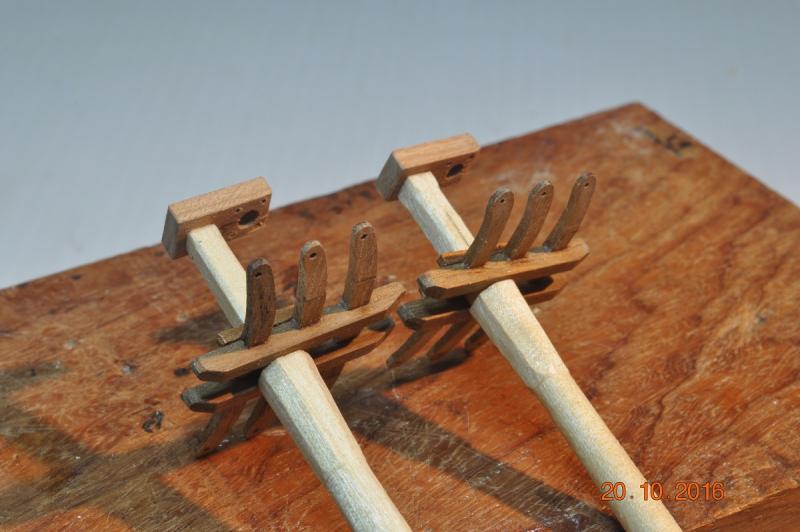
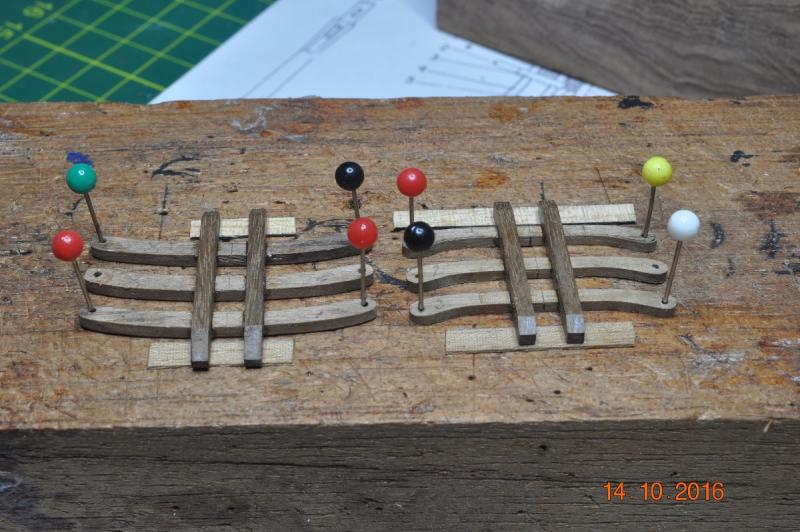
TopMast Trestle & Cross Trees Cross Trees Hand carved from larger section, kept in place with rods at each end(tip from Greg Lester) Decided to glue the Trestles and Cross pieces as one(1) unit - they are fairly small. All pieces are checked into each other. Eack will slide as one unit down the top-mast heads onto the top of the hounds(Hex). Tip Dave: don't glue the caps on yet ! TopMast Trees Made the caps(same as the lower ones, only smaller(much smaller), but with out pins) Fit snug onto the topmasts. Bolsters either side glued in place. Tapered ends and a hole on end cross tree. Be a shame to paint these black. ? Maybe not ? Now to a sheave issue or maybe not. The top mast sections have some sheaves built into them. Different sizes. I've only managed to get 2.5mm and 4mm diameter x 1mm wide sheaves. But not sure if I should use them ? The Mizzen Topmast being a small diameter, can be weakened by the tunneling through to create a sheave recess. So for now I cut a recess either side and a hole top/bottom(for rope to pass through). How does this look ? Maybe add a pencil led either side for shaft ? Same for the bottom of the topmasts. Although a larger diameter, once in place, not used. Just noticed >> fid holes and pins to make. Next to make the thin !! topgallant masts, this will be interesting. Dave R


-
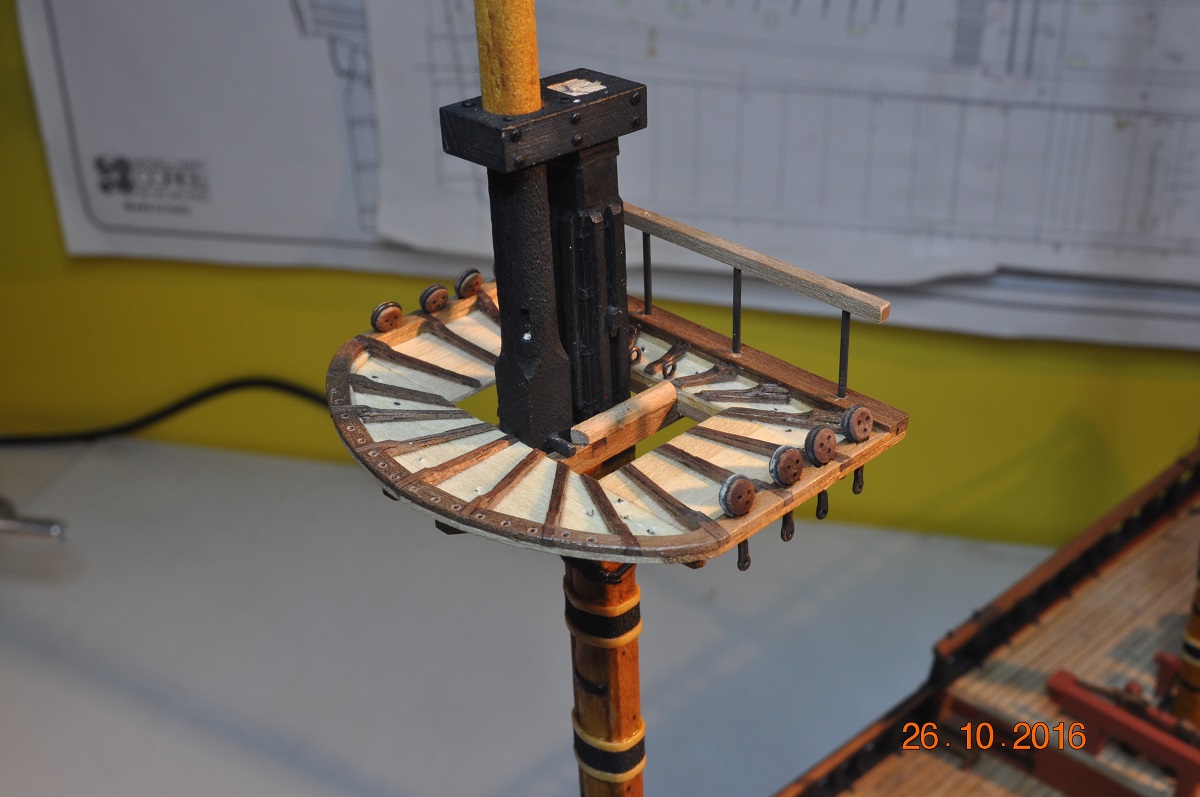
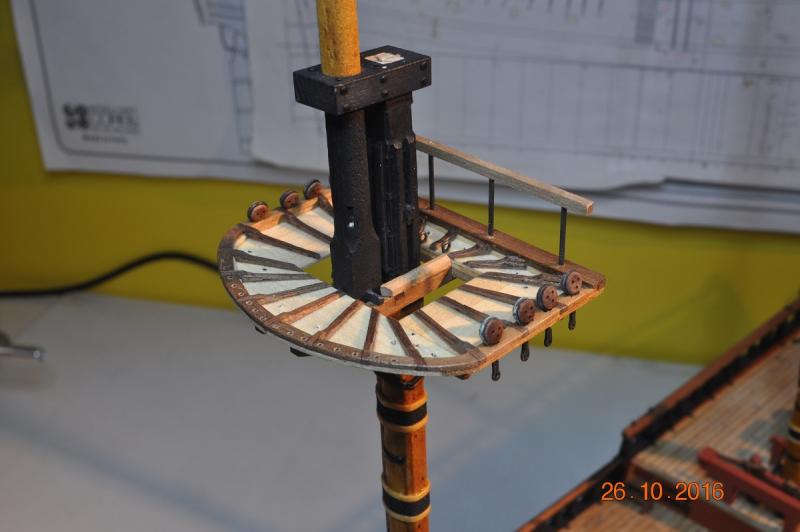
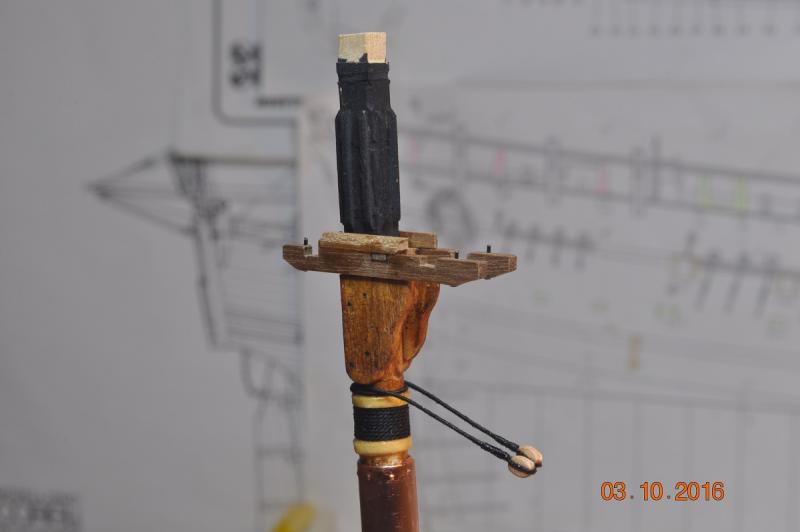
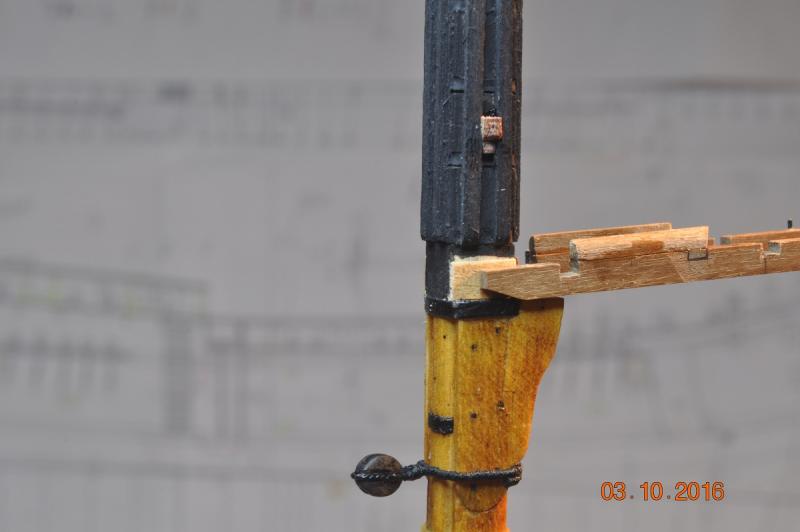
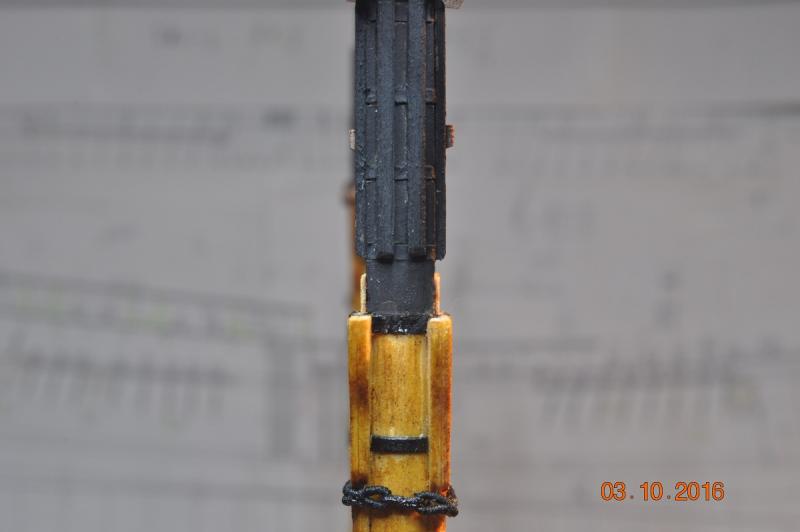
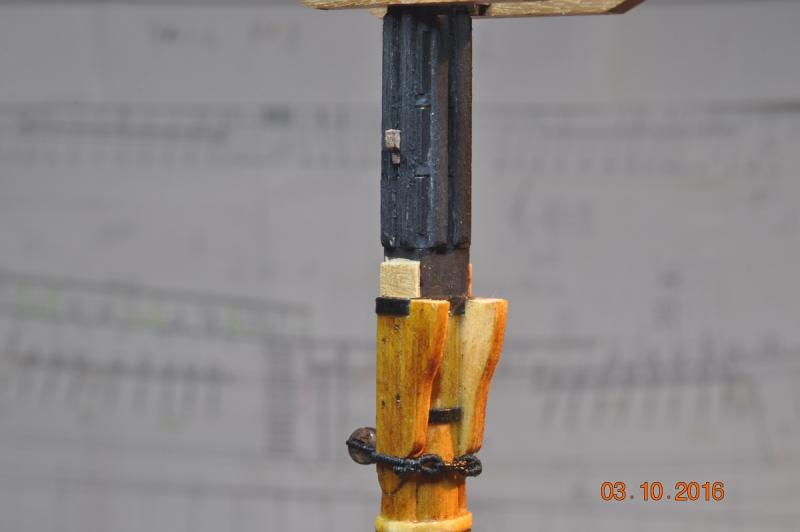
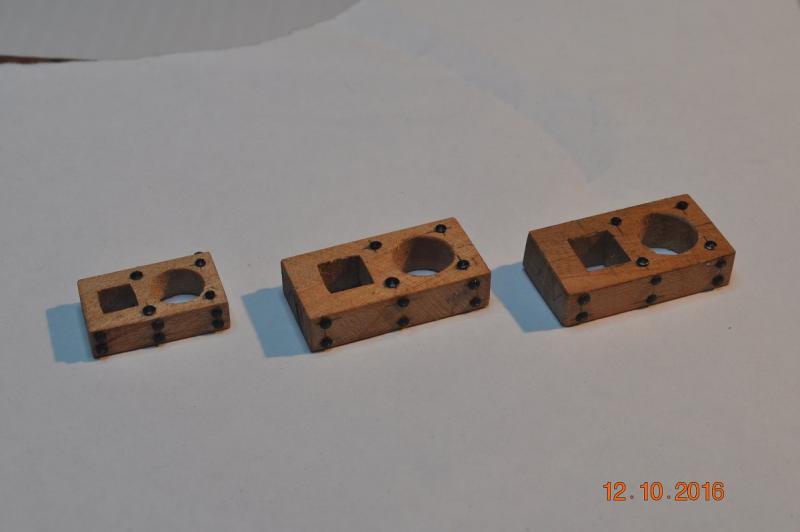
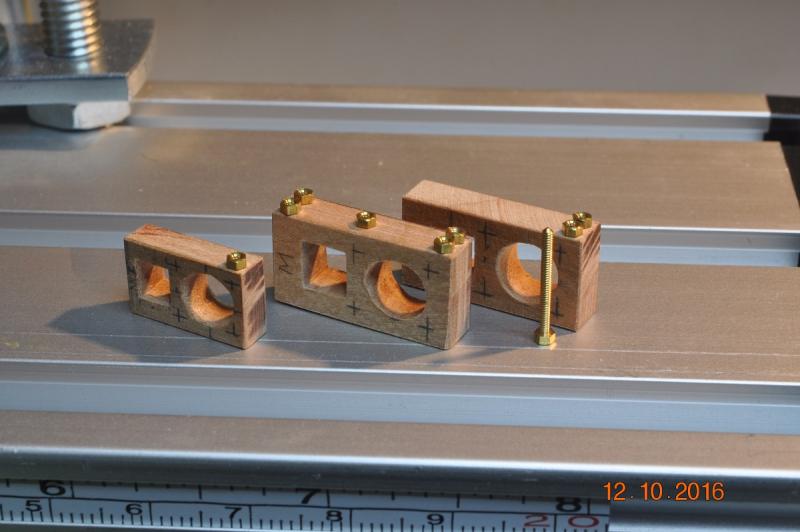
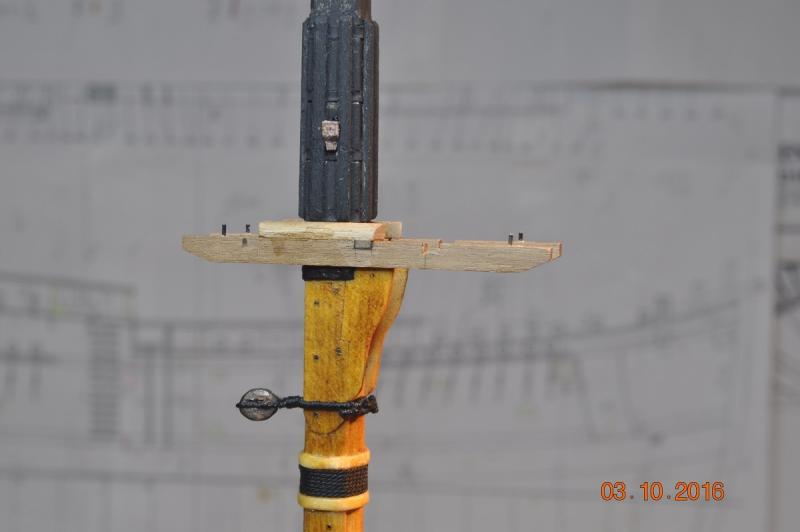
Shipyard - Trestle Trees & Mast Caps Well the shipyard is slowly moving up to the dizzy heights of the masts. We have fitted the Trestle Trees to the 3 masts. The fore needed packing to make a snug fit, won't been seen when all said and done. Fore Trestle Tree fitted: Mizzen Trestle Tree fitted: 3 Mast Caps: Each is hand crafted from pear wood. The ones supplied in the kit very grainy and mismatched sizes. I had a some small bolts, but not small enough to use - bugger Decided to use a small pin with a cap head for the bolts. Heads lost in the black paint. Although one cannot see, the underside of each cap has pre-drilled holes for the 4 eye bolts on each cap head. The eye bolts fitted when the tackle/pulleys made. I have learnt to hang off on gluing on some things. Dave R

-
Hi Bob, Have you left room for the rudder stock to pass up to the deck ? and room for the rudder to pivot. I added extra supports either side, for the planks to glue to and the hatch between. Dave R