DaveRow
-
Posts
691 -
Joined
-
Last visited
Content Type
Profiles
Forums
Gallery
Events
Everything posted by DaveRow
-
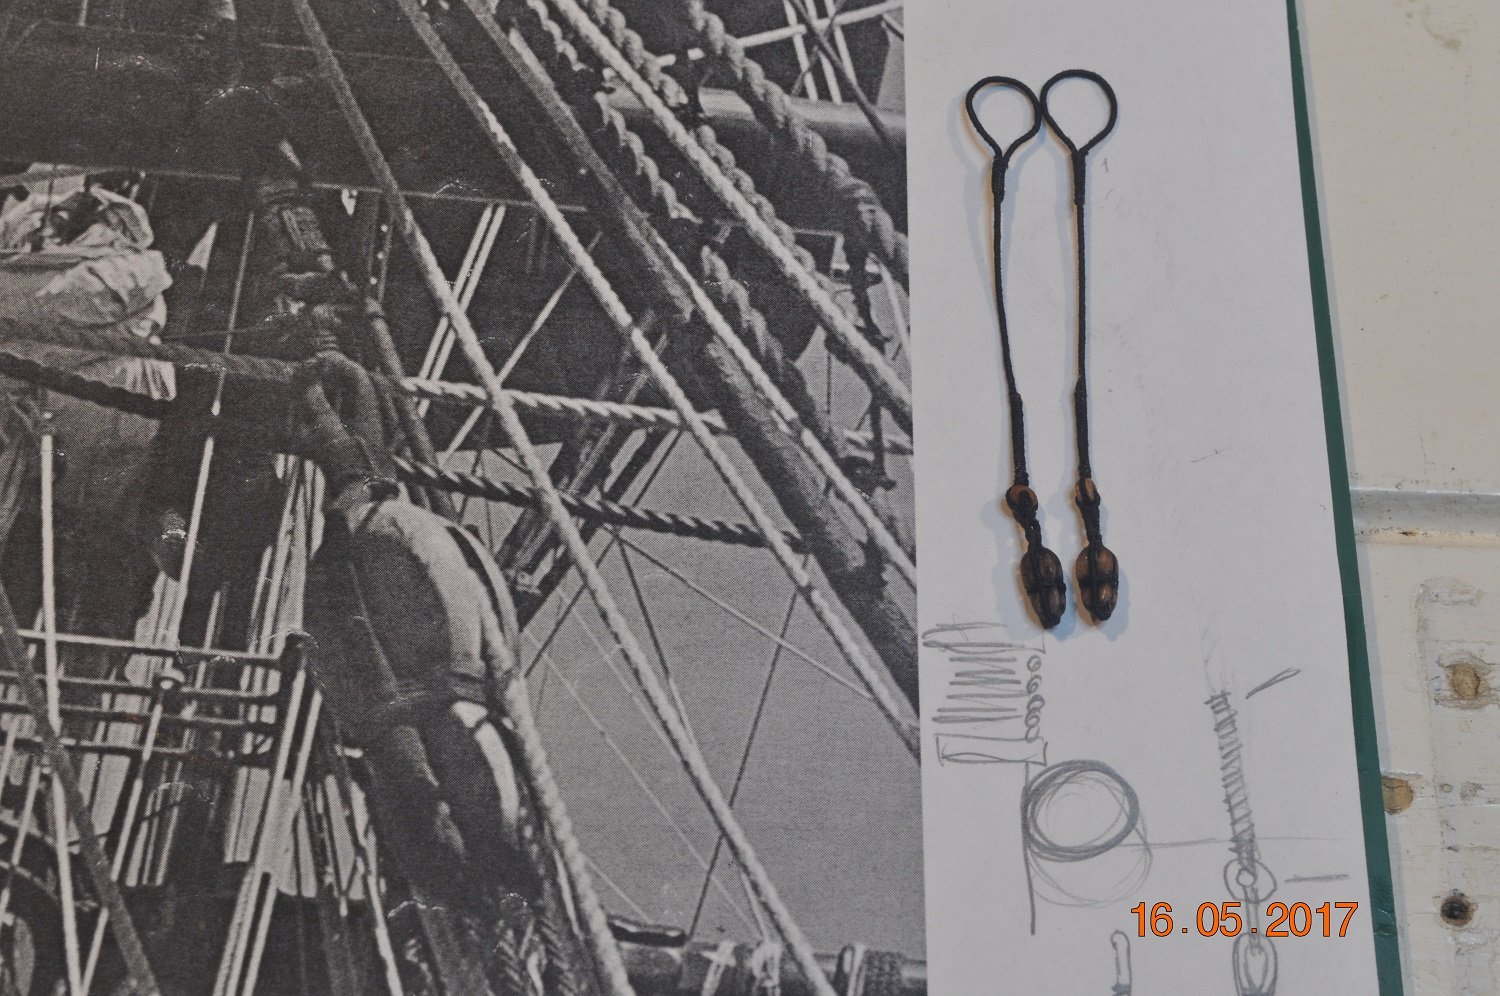
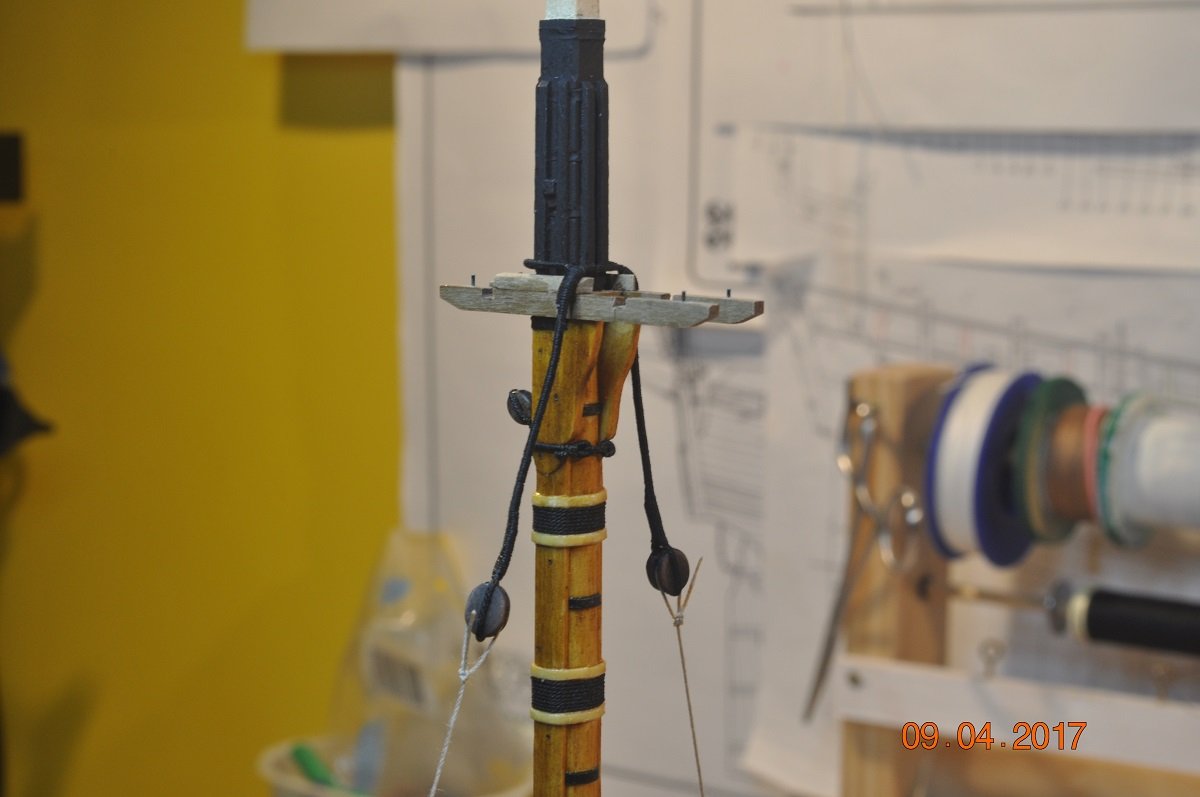
 Shipyard Update Fore-stay: I had the fore Stays looped over(on top of) the shroud loops like this: However I believe after some investigation they should be like this(resting lower and more around the sides of the shrouds): Hope I have it right now. MIZZEN MAST And the Mizzen, have made and added the Burton Pendants. The picture on the left is of the Endeavour Replica, Mizzen Pendants. Mizzen Pendants on my model: Onto the mizzen shrouds next. Dave R
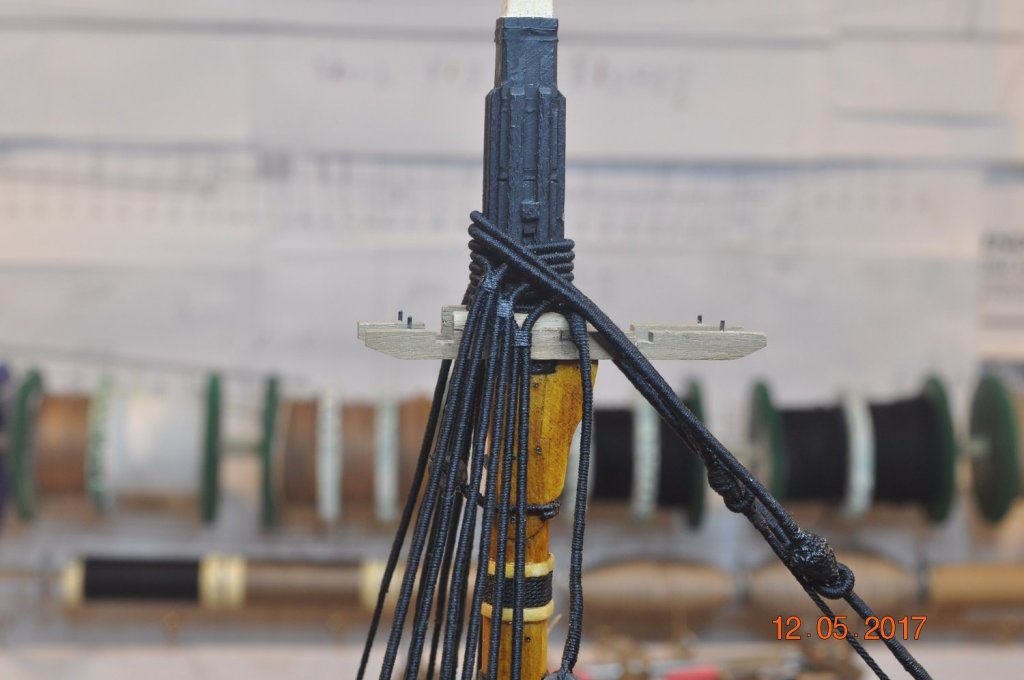


-
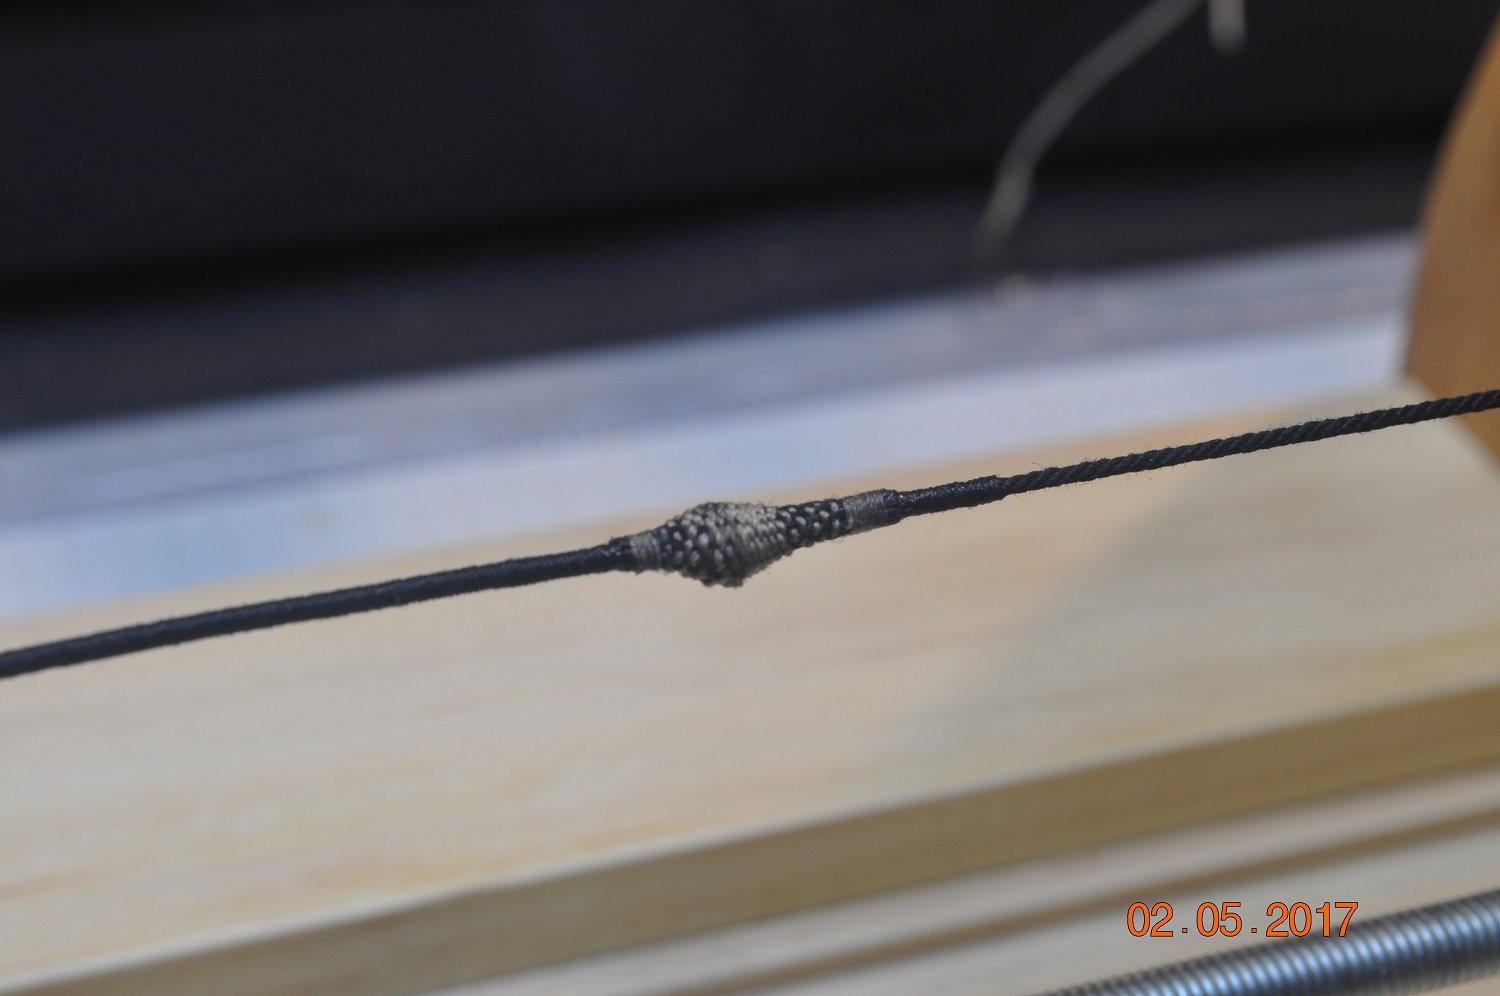
Shipyard Update Fore-stays: I've fitted to length with hearts the Cable Stay and Preventer stays, trial fit(shrouds to be lashed in place yet). I with the cable stay significantly larger in diameter, I wanted it to stand out more. May of went a bit too far ? I decided to "worm" the Cable Stay with a lighter thread as described in Steel's Rigging, WORMING. Wind a small rope in the cuntlines of the strands of cables, shrouds, or stays; and spun-yarn in those of ropes four inches in circumference and above. Dave R

-
Hello Rowan, Look forward to your pics and where you are up to. Dave R
-
Shipyard Update Thanks for you all Greg, Steve, Mike and Pat for looking in on my log. You guys all provide inspiration. More making Stay's Mouse Second weaved mouse for the Main Mast Preventer Stay. Getting the hang of the weaving. Pat, Odd numbers are good. Still a bugger to weave through them though. Might try a light/dark longitudinal's for next one. Dave R

-
Hi Chris, I tried the fabric band-aid's. I just couldn't get it to work out neat enough. Probably was ok, but the weaving method is coming along fine now, comes up better. Thanks Dave R
-
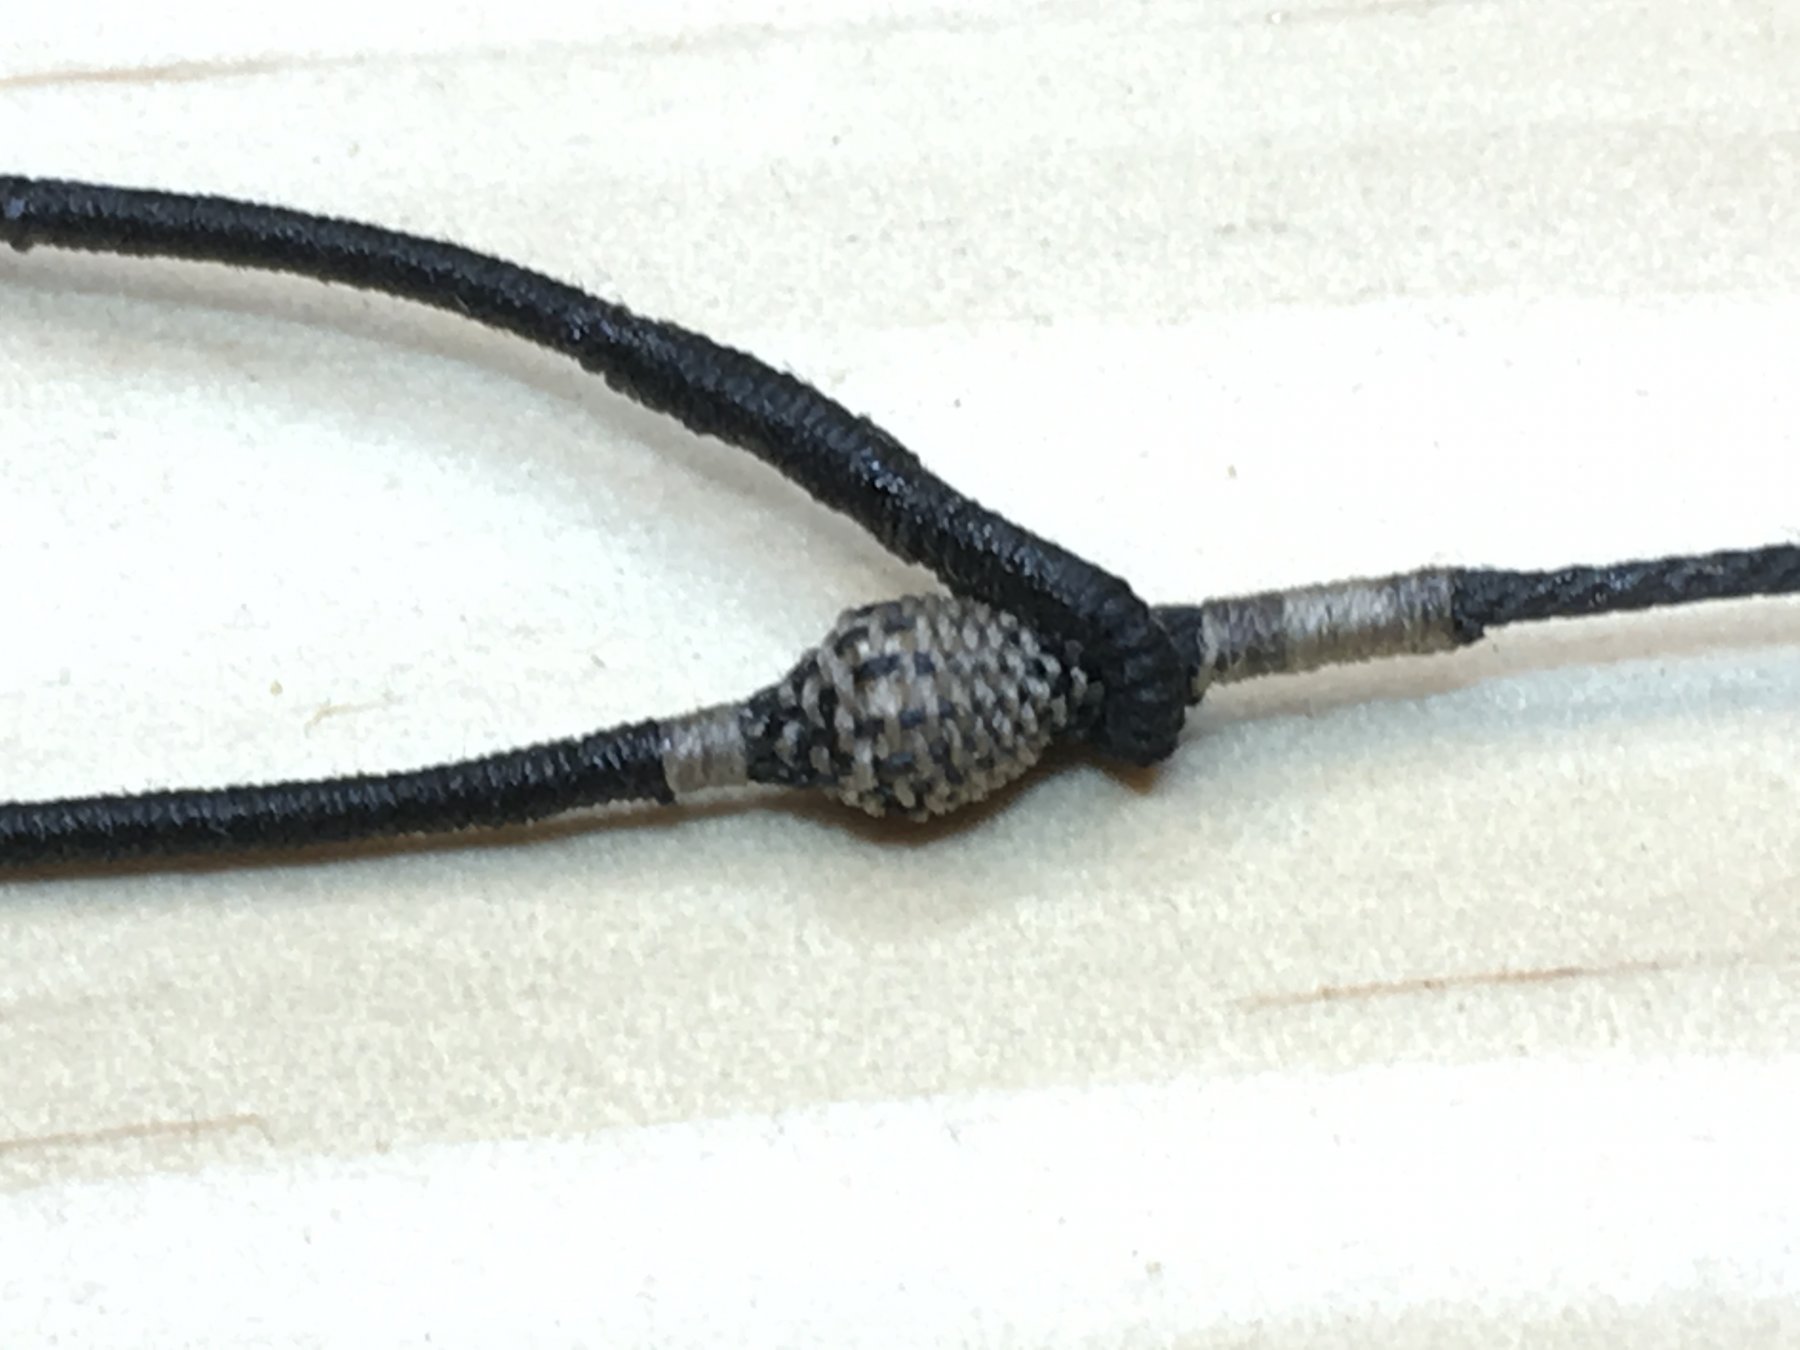
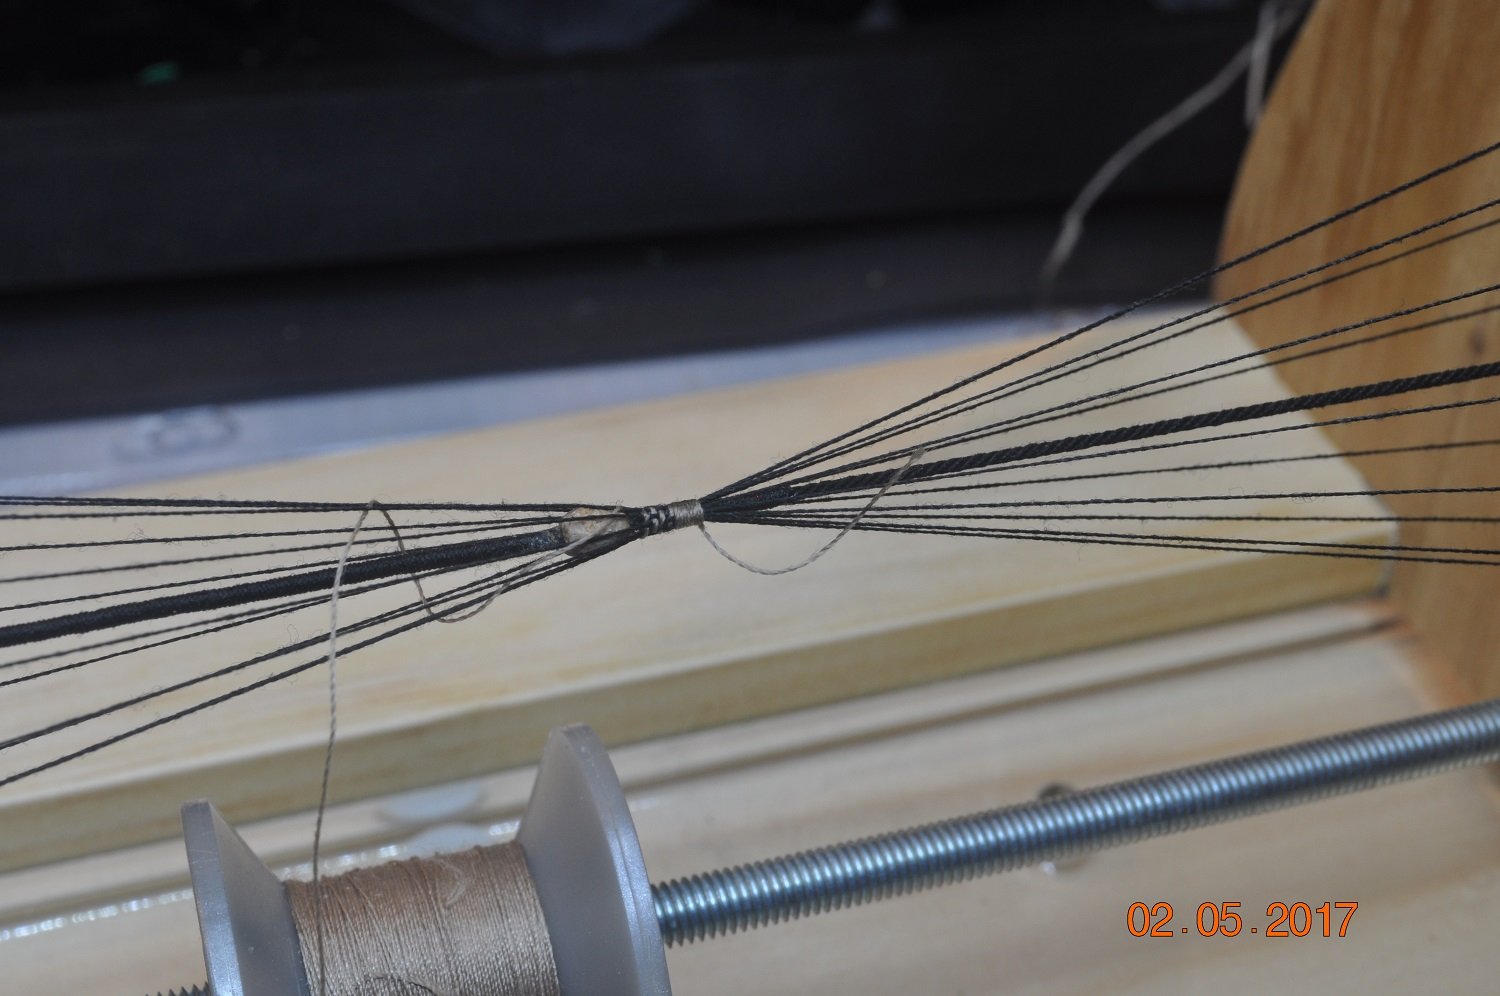
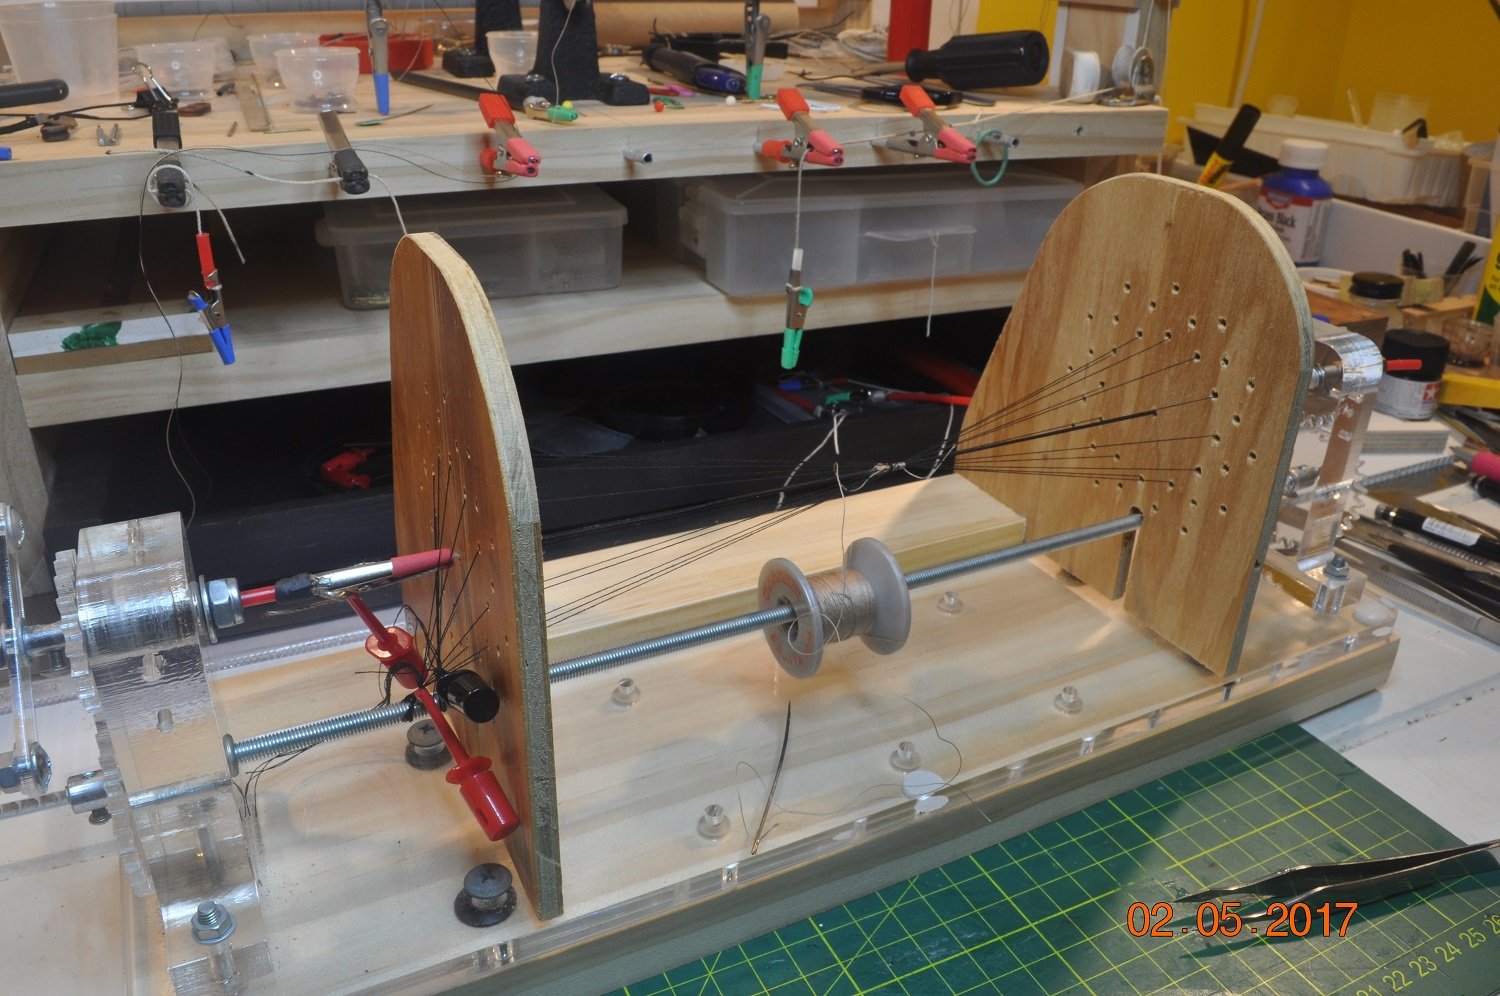
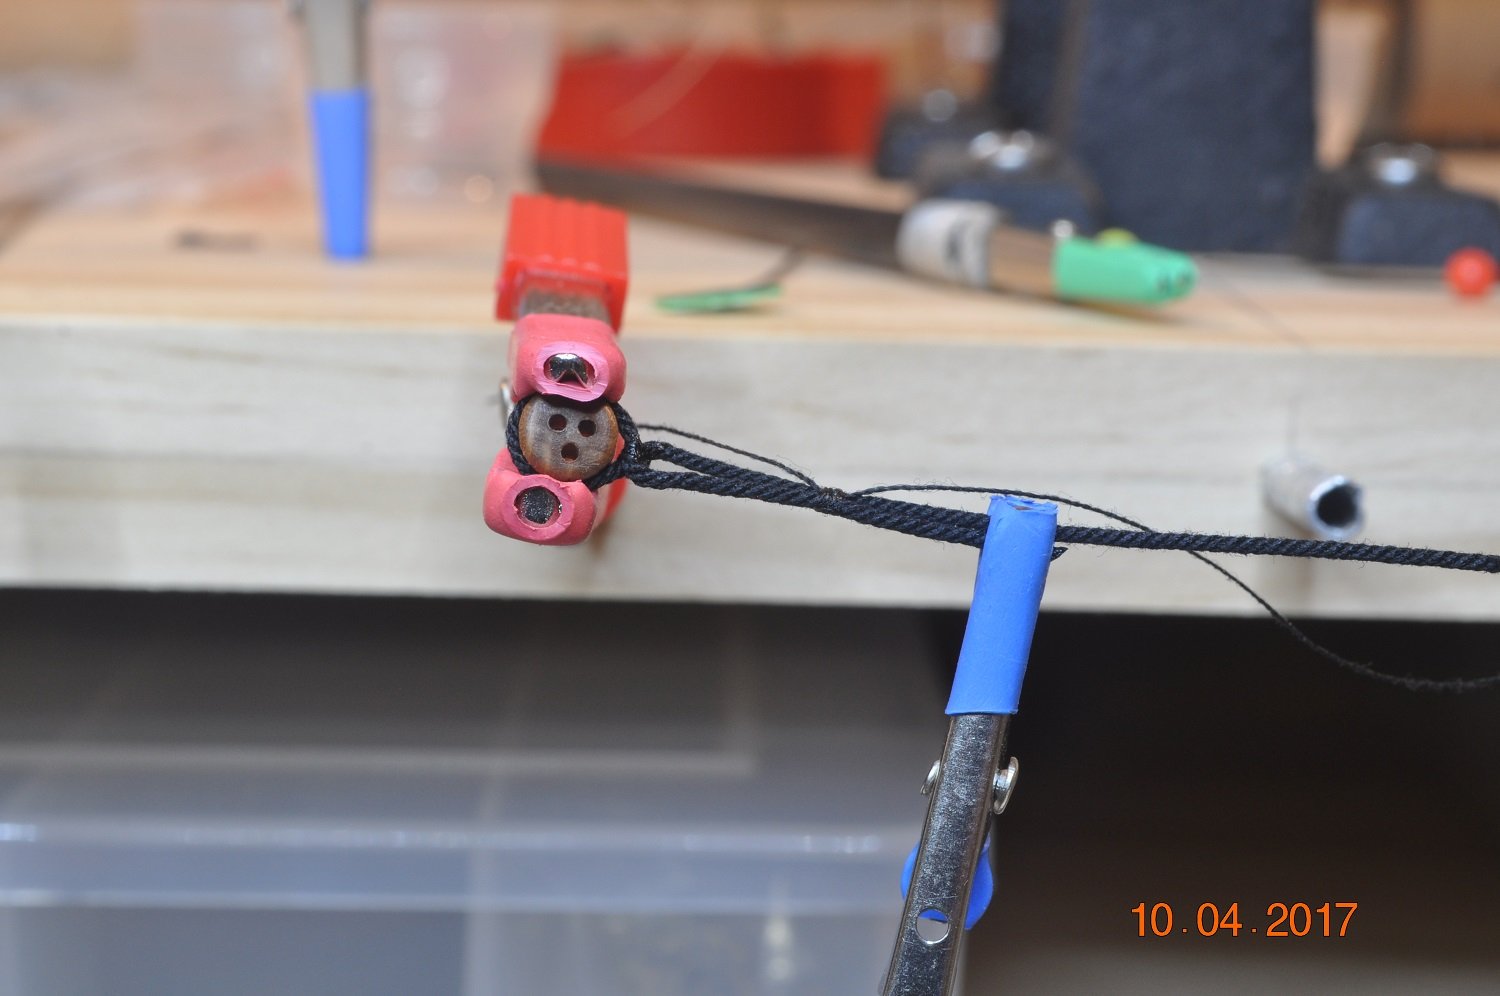
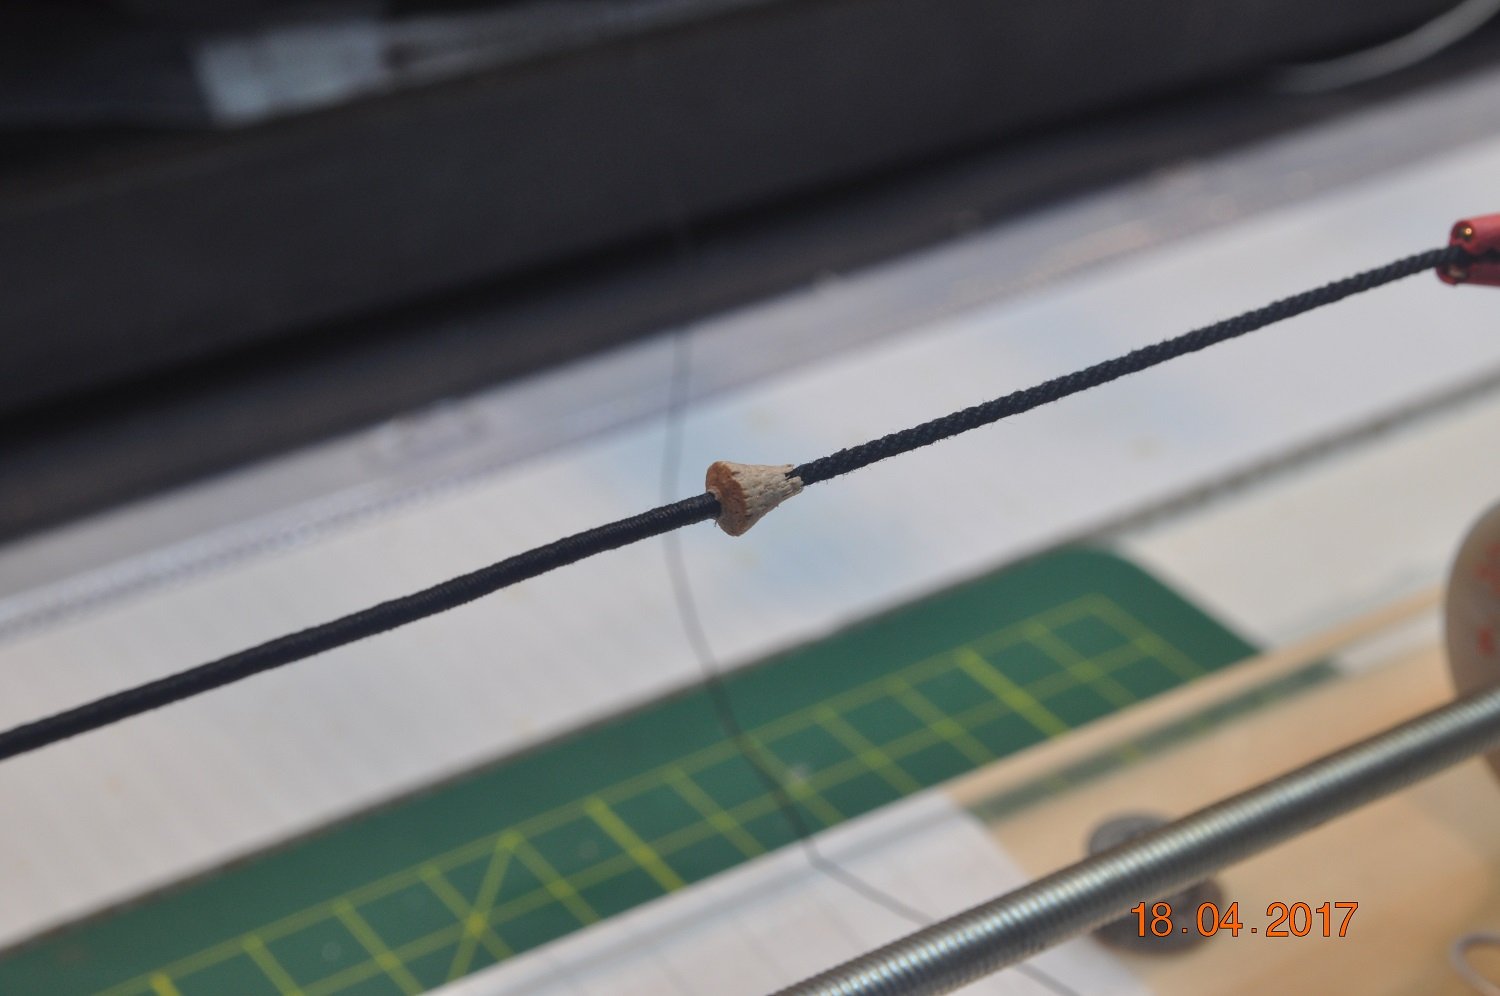
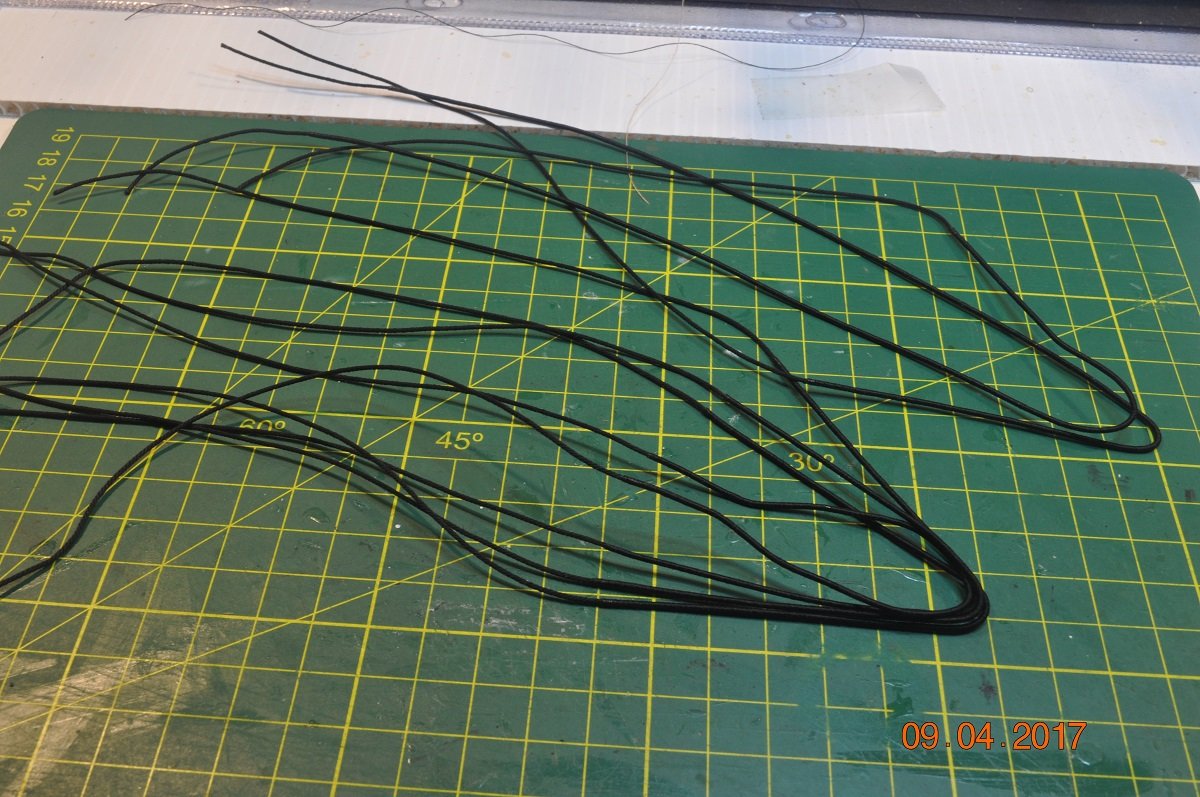
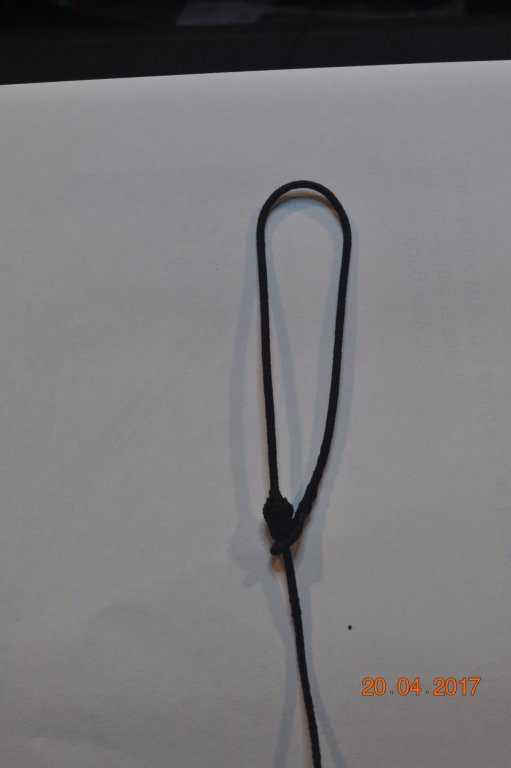
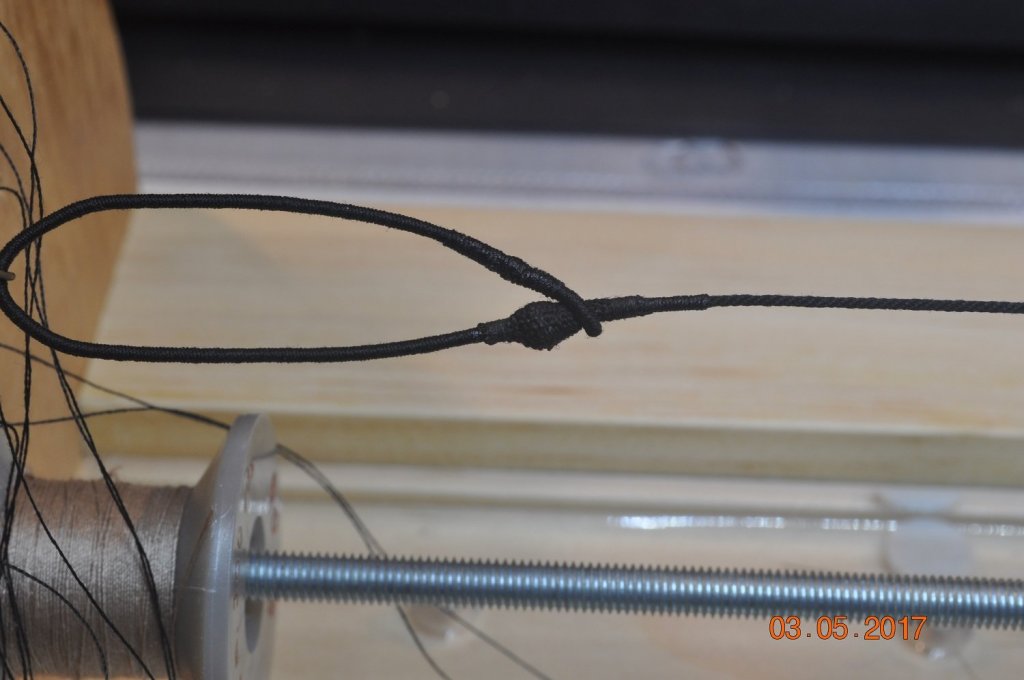
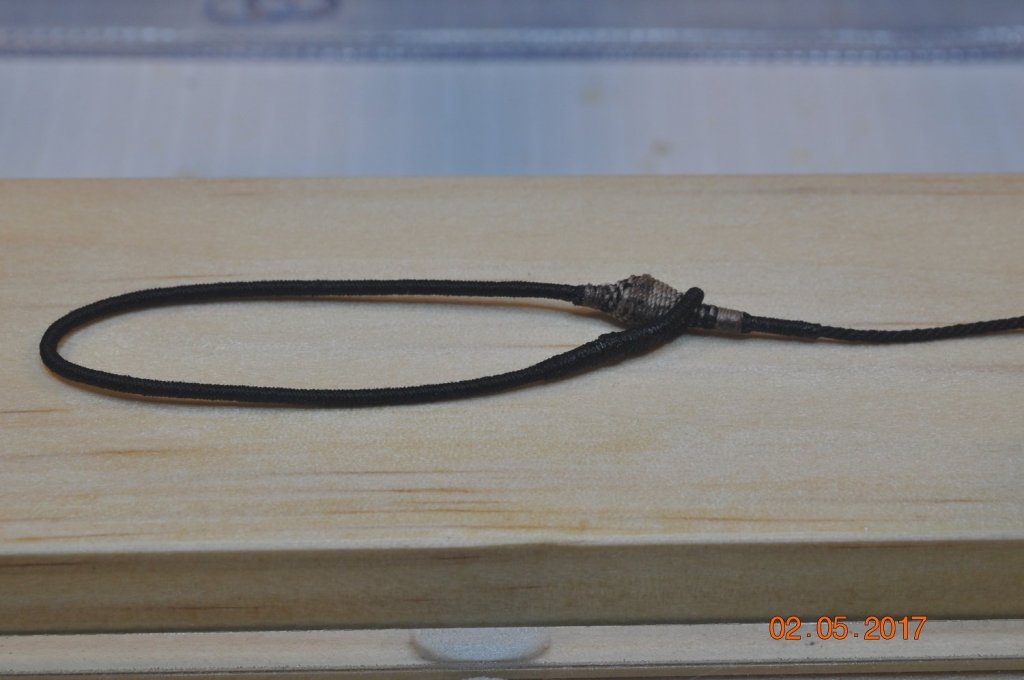
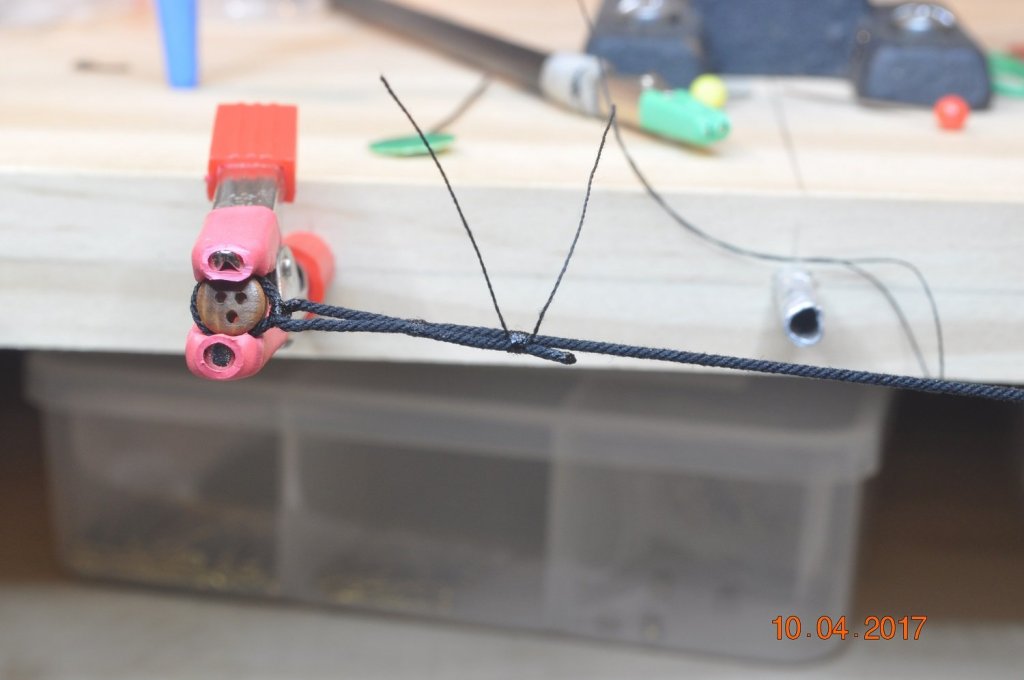
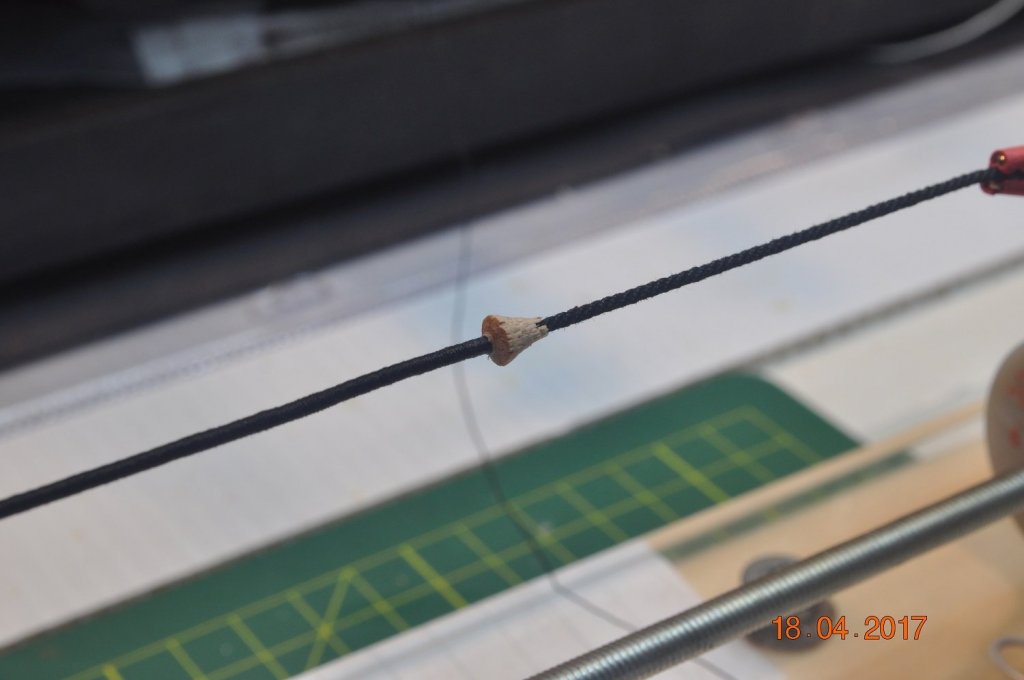
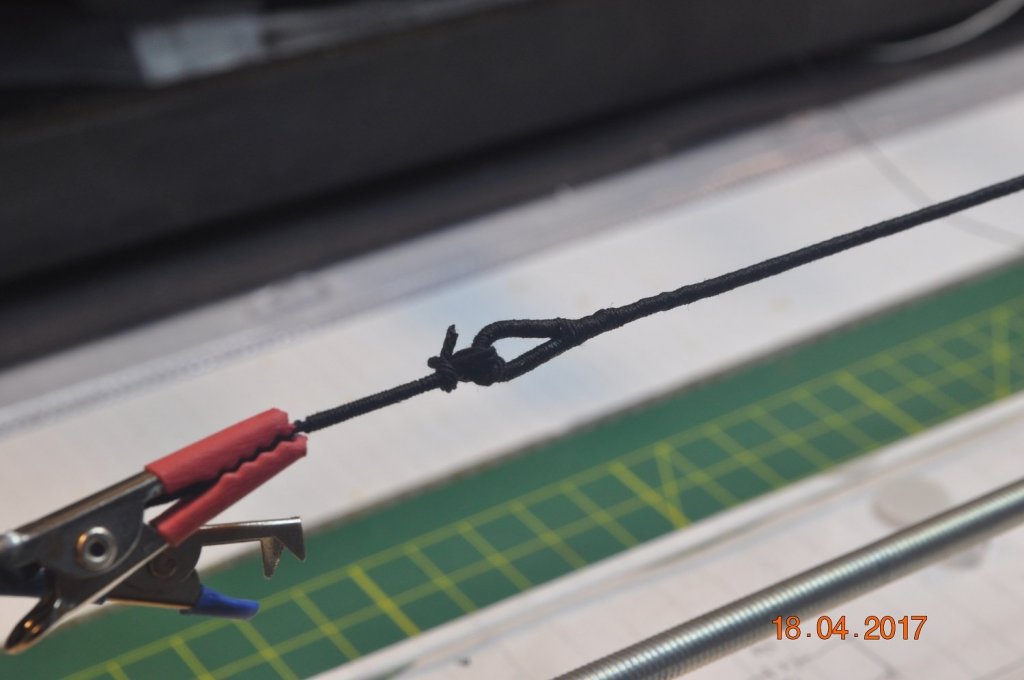
Shipyard Update Making Stay's Mouse In one of the other Endeavour Logs, I noticed Elastoplast Fabric was used to wrap around the mouse cone to create the effect of the rope-yarns. I decided to trial this for the stay mouse. I made the Fore Stay and Preventer mouse, using the Elastoplast Fabric - wrapped about the mouse "cone". I used a course type for the Stay and a finer type for the Preventer. <picture below> Whilst the Stay came out not too bad. The preventer mouse fabric seemed a bit too fine(no rope definition) so decided to have a go at the traditional weaving method(of sorts). Below is the Fore Stay loop and mouse, which I am probably going to stay with. I mad up a Jig to drop over my Serving Machine, use the clamps at ends. Making the Fore Preventer Mouse - weaving threads(sewing thread). I had 12 long threads(mistake), next time will try to remember and use a odd number to weave under/over properly. Used different color twine to make it easier to follow the weaving. Finished first ever weaved mouse. Considering, I cut the old Fabric off the mouse cone whilst on the rope, and weaved the new about, came out not too bad I think. Ends are served over the previous served twine(ending up with a large diameter, bugga). Next one we do should come out better. Looped ready to paint black. The picture does not show, but I tightened up the loop(served over) so it just slides over the start of the "mouse". Looped and painted, ready to be hoisted atop. Took me hours to get the first one done. more to get onto. Dave R


-
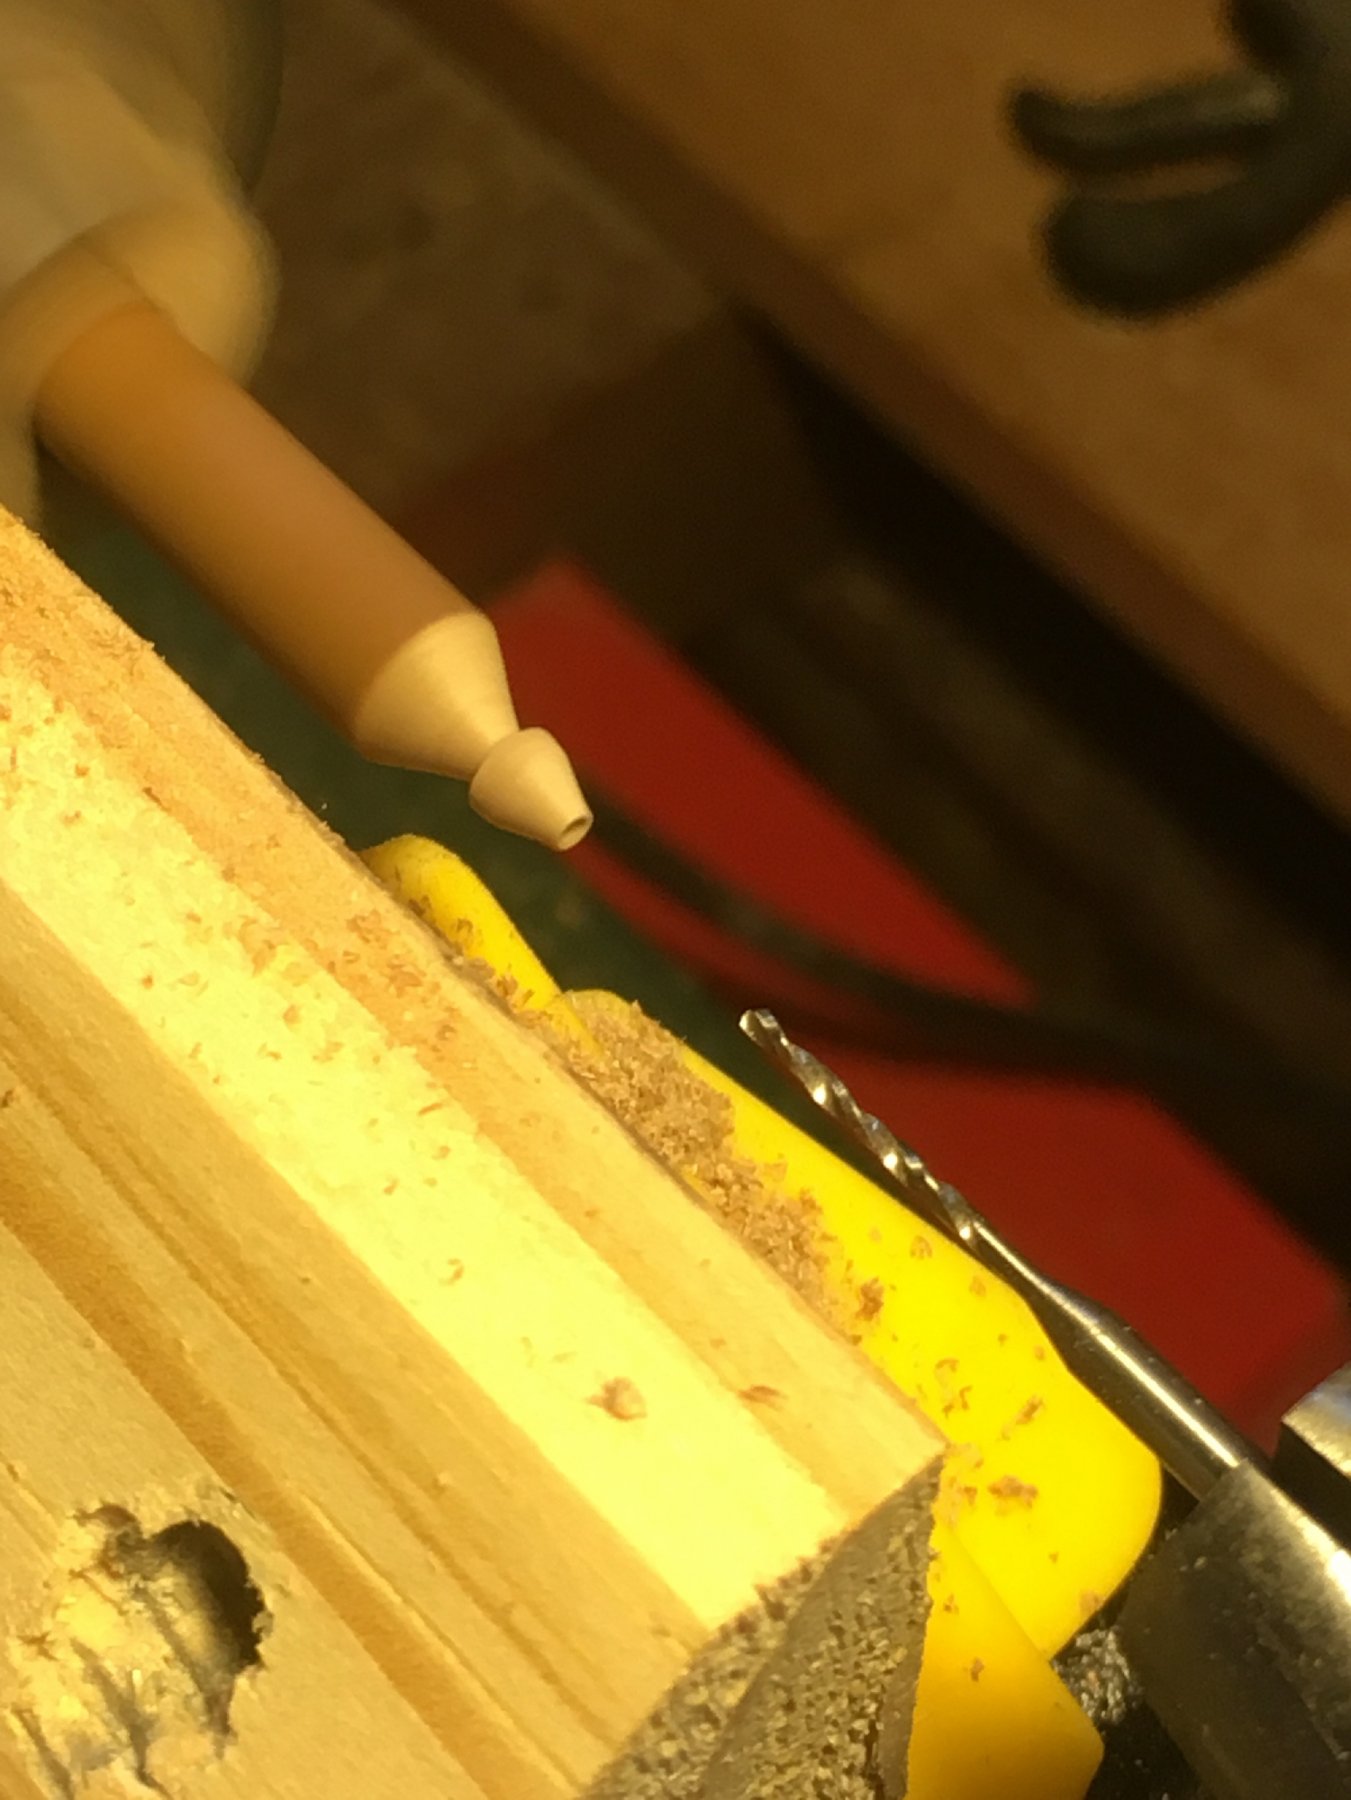
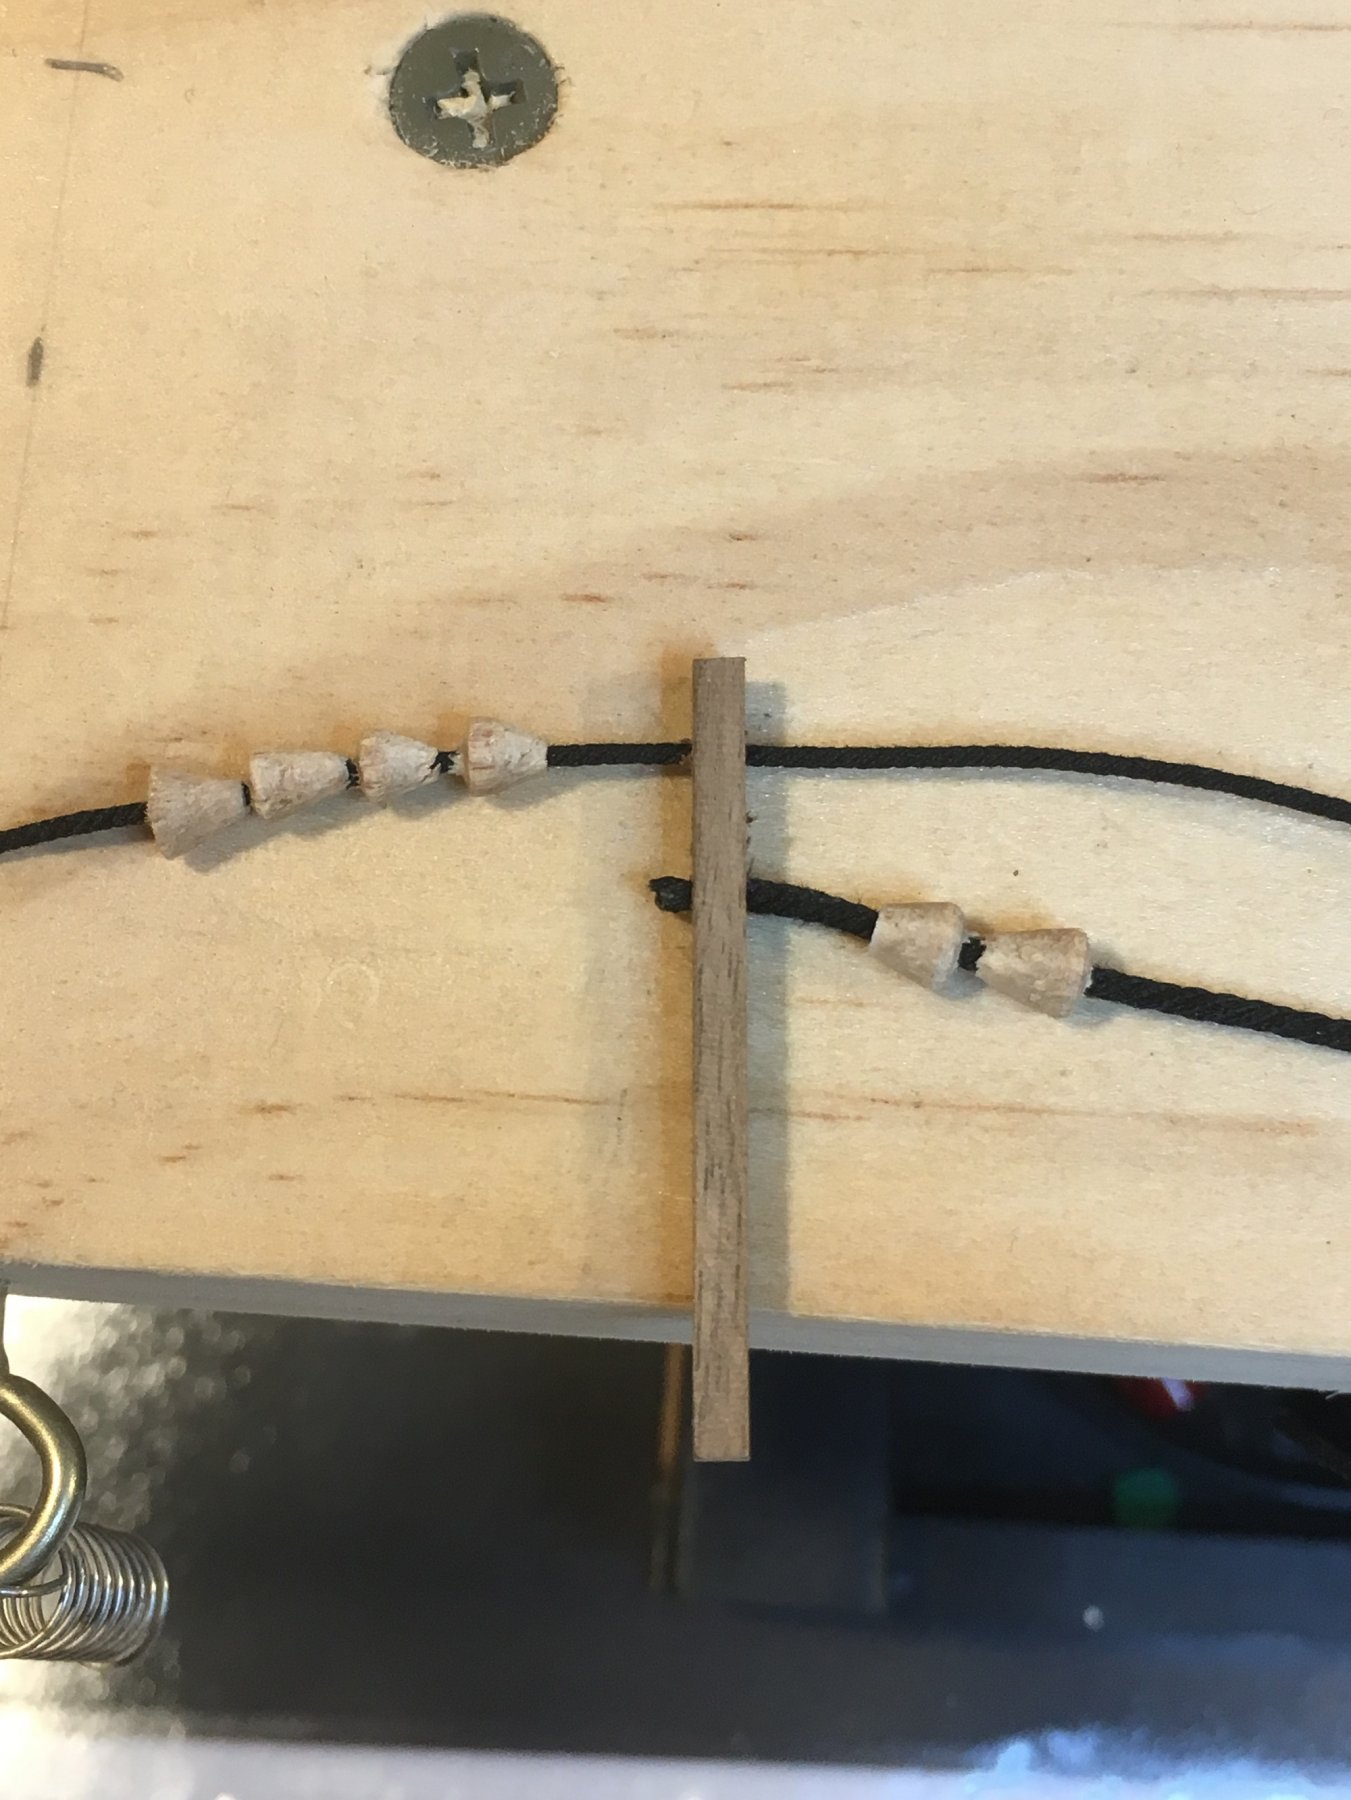
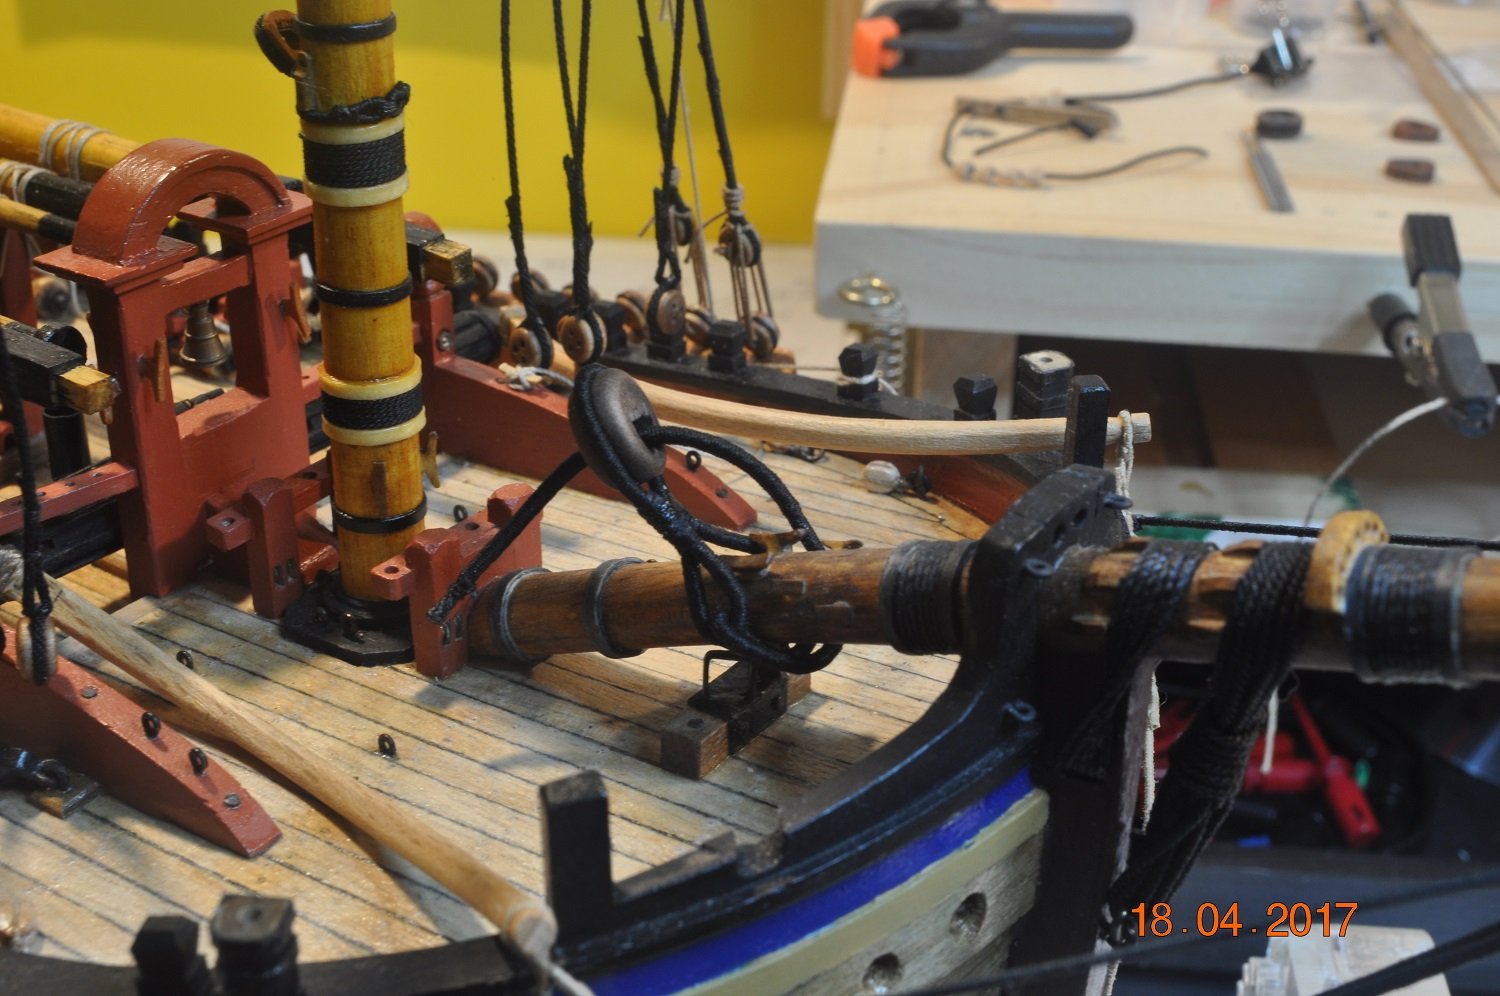
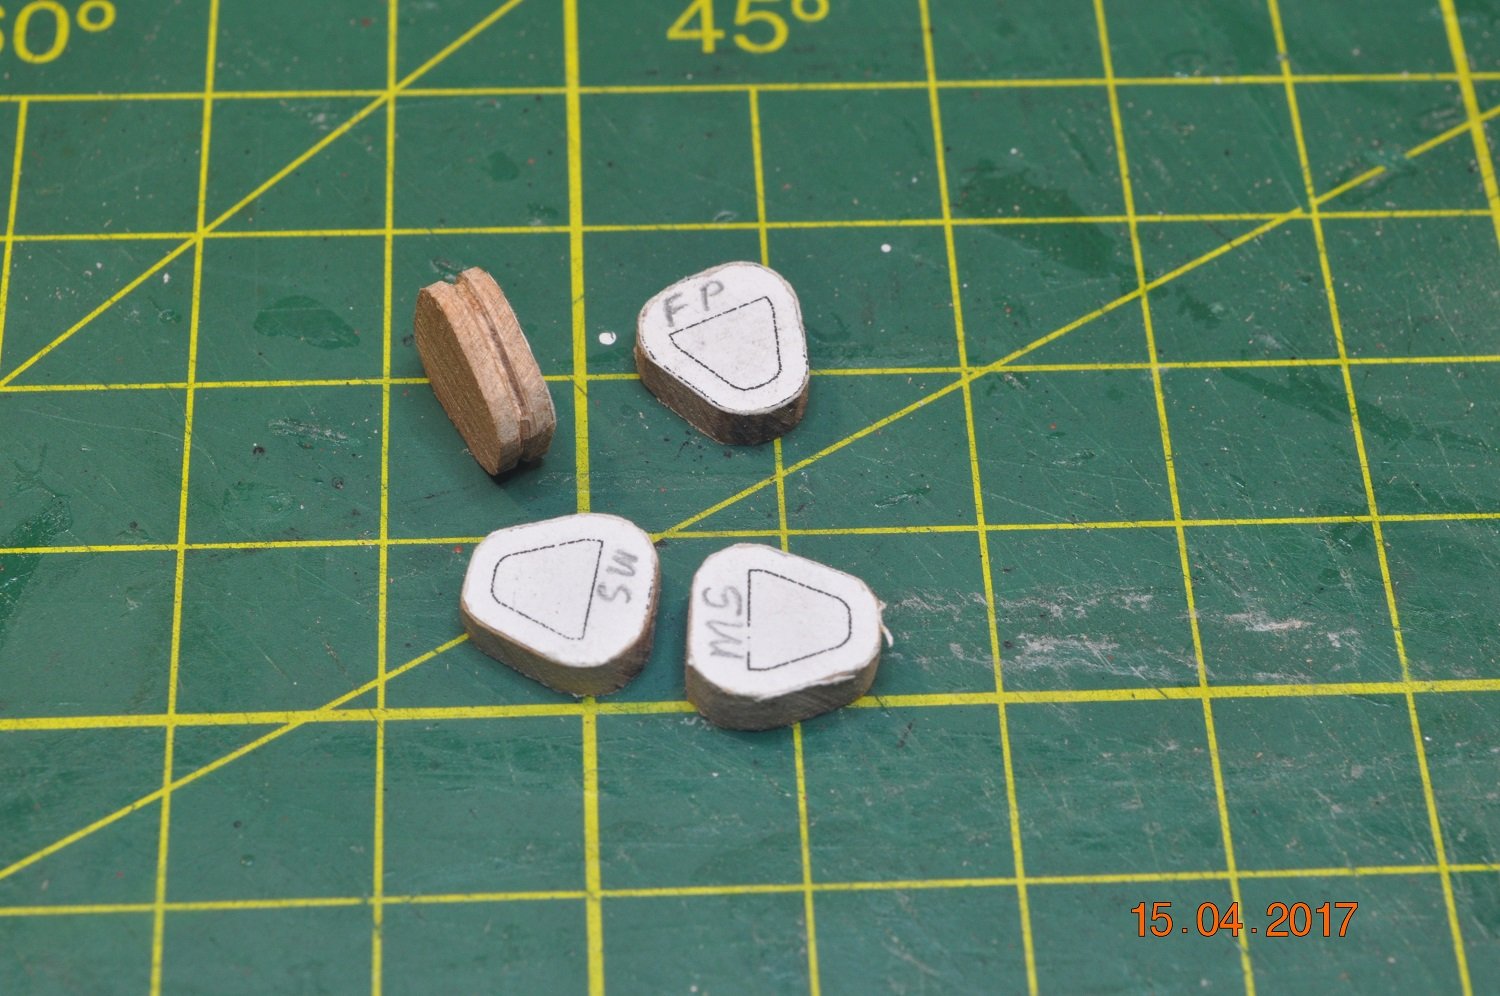
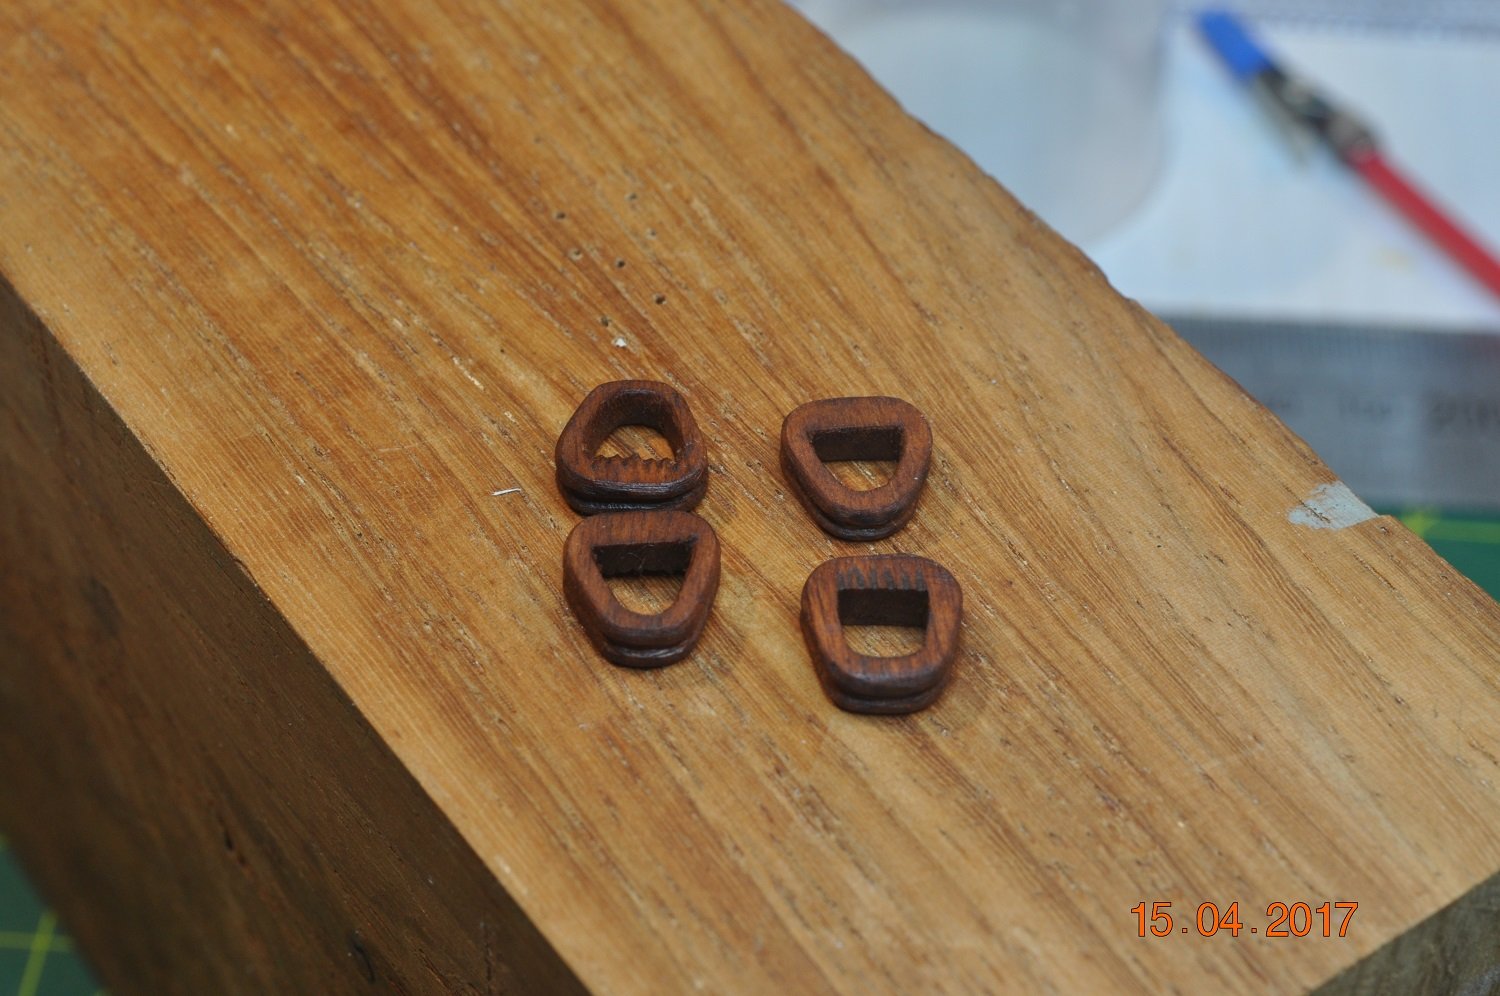
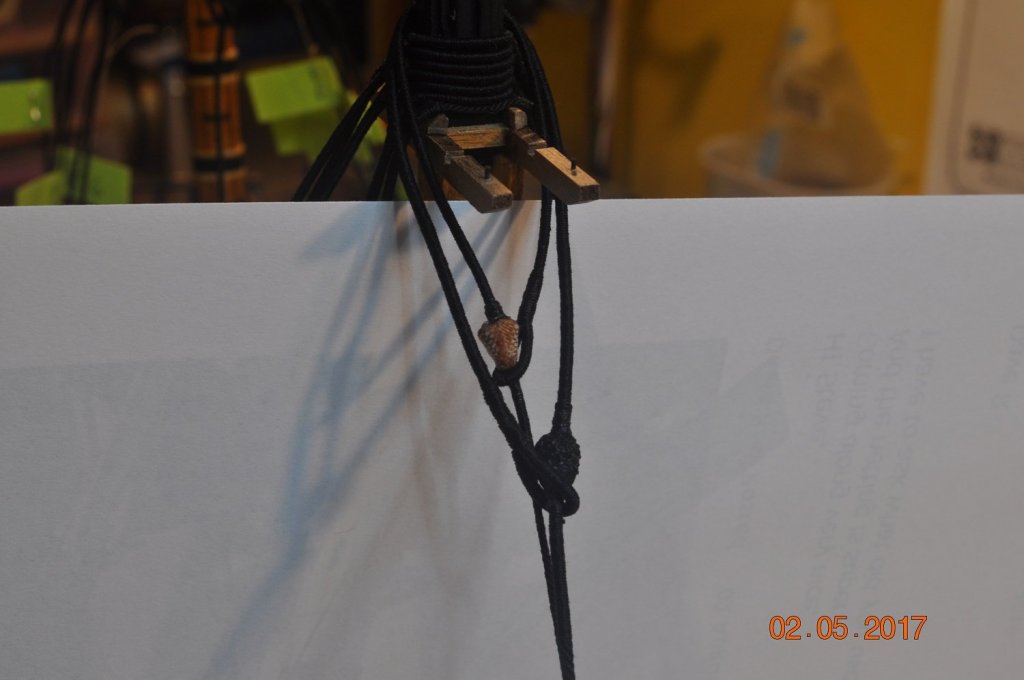
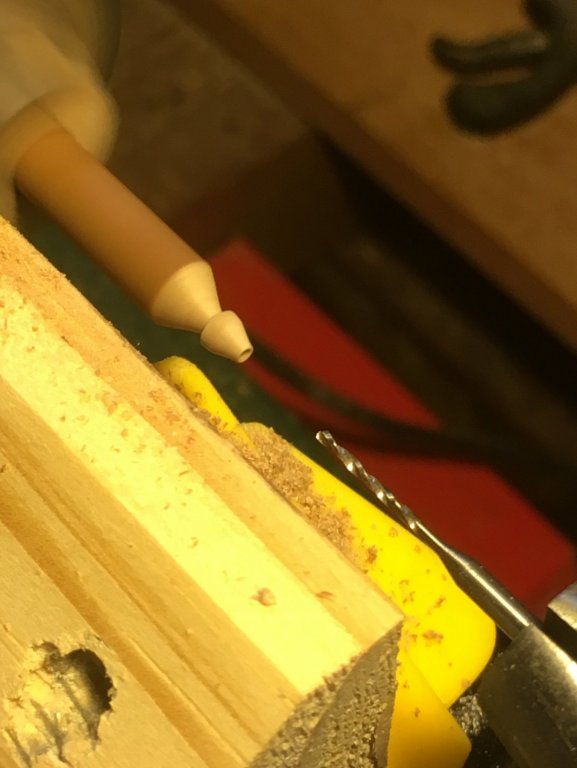
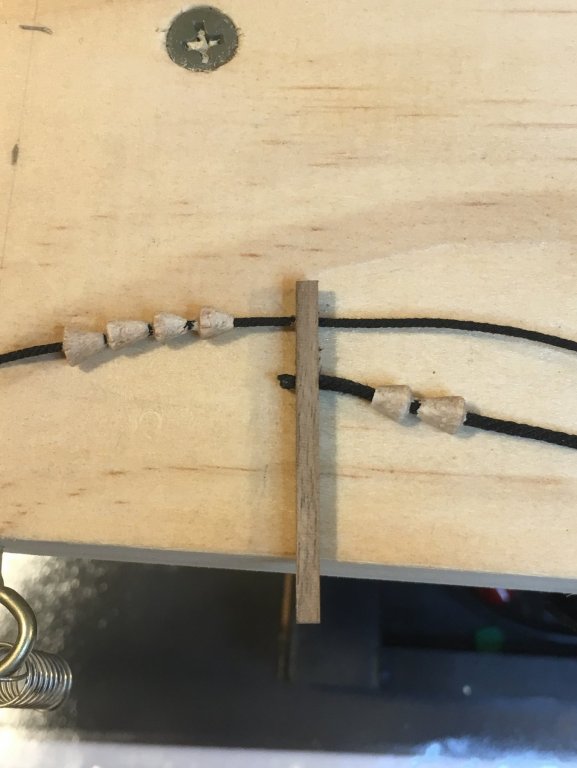
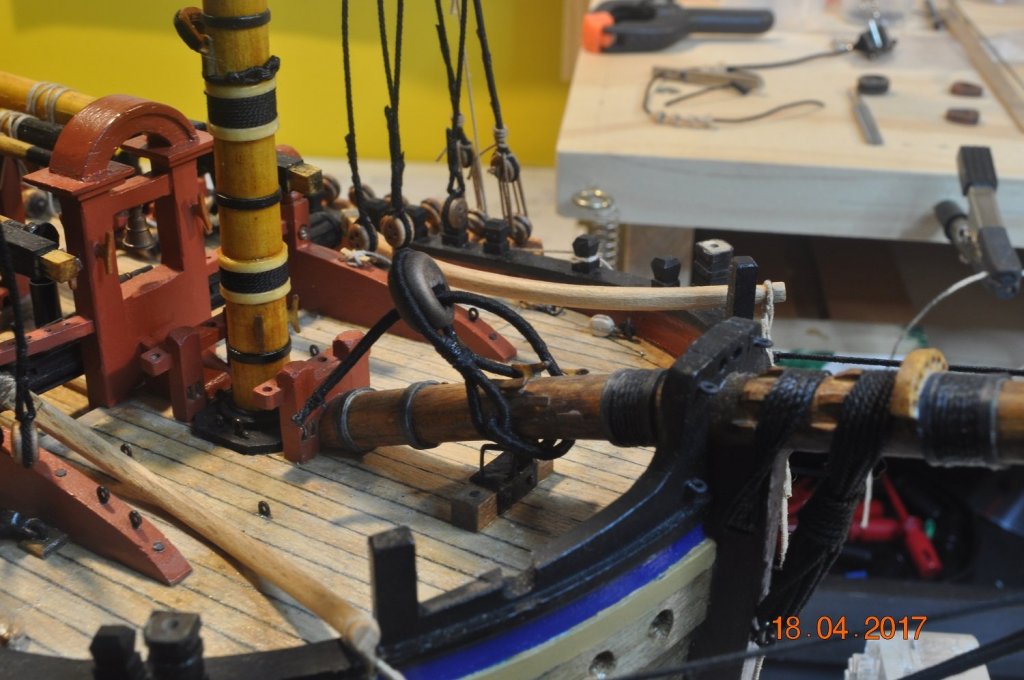
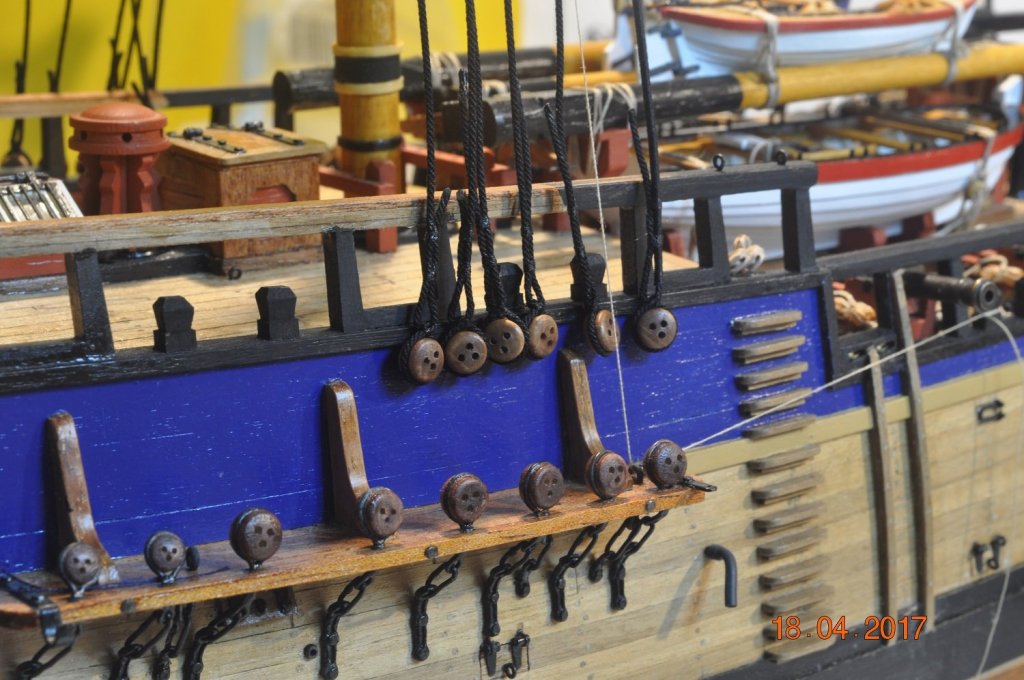
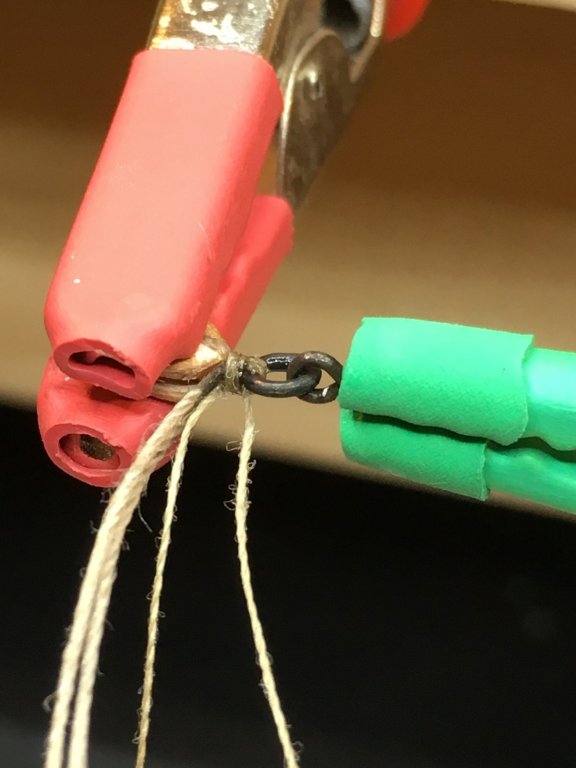
Shipyard Update Making things. Shroud Dead Eyes(Turned in Dead Eye): This is the process I use in tying off the shrouds around the Dead Eyes. Here I have already got ahead for the pictures, the shroud is already been whipped 4 times around the dead eye(throat seizing) and a dab of CA glue applied and whipped before drying to leave the seizing looking like thread/rope. Trick is I found was to remove the assembly before drying and squeeze the shrouds together before the CA completely dries, so the ropes were close together. The earlier shrouds ended up a bit wide at the throat. I then hold the dead eye in the clamp and whip the mid seizing 5 times. Each seizing is started with a loop from the green clamp, around a hook and then back to the seizing point, where I hold the twine with tweezers and start to wrap around. After the turns the twine is fed through the loop and pulled under the wrapped twine(to hide the join under the seizing). This picture shows just before "pulling" the twine under the wrapped twine. Dab of CA glue applied(wiped off before drying) around the twin/seizing to hold in place. Trim to 2 ends and finished. Well maybe not > I think I was too smart for myself as I now find in looking at the replica pictures the seizing was wrapped around between the shrouds. Oops. Stay Mouse's(or is it Mice's): Used the Lathe to turn up some Mouse's for the Mast Stays. Drilled a hole(for rope size) in dowel and then turned down to size(a guess really) Made a few for the Mast Stays and the Preventor's. Not sure how they will work out ? Large Hearts I made some custom Hearts for the Stays(from Pear Wood), for the Fore Stay and Preventor to the Bowsprit. Aim is to match the other custom half hearts on the Bowsprit which allow the Jib-boom to retract through these ones. Made a pair for the Main Stay, but ended up too big. Grooved and stained. Two types, narrow & wider tops. Main Stay Started the Main Stay between taking a break from the Dead Eyes on the ends of the Shrouds. Mouse on the stay ready for next stage. (yes it is wrong way about) Eye at the top end to loop over the stay. The Heart loosely about the Bowsprit for now. I didn't use the ones I had made, bit too big(wide) I think it was Steve said "bugger to tie off", it will be. Main and Fore - Starboard Shrouds ready for Laniards Used a tan rope for the Laniard, bit of contrast to the black shrouds. In the voting stage as to keep it tan or go black. Open to suggestions.! Well, lots going on, more to go. Dave R


-
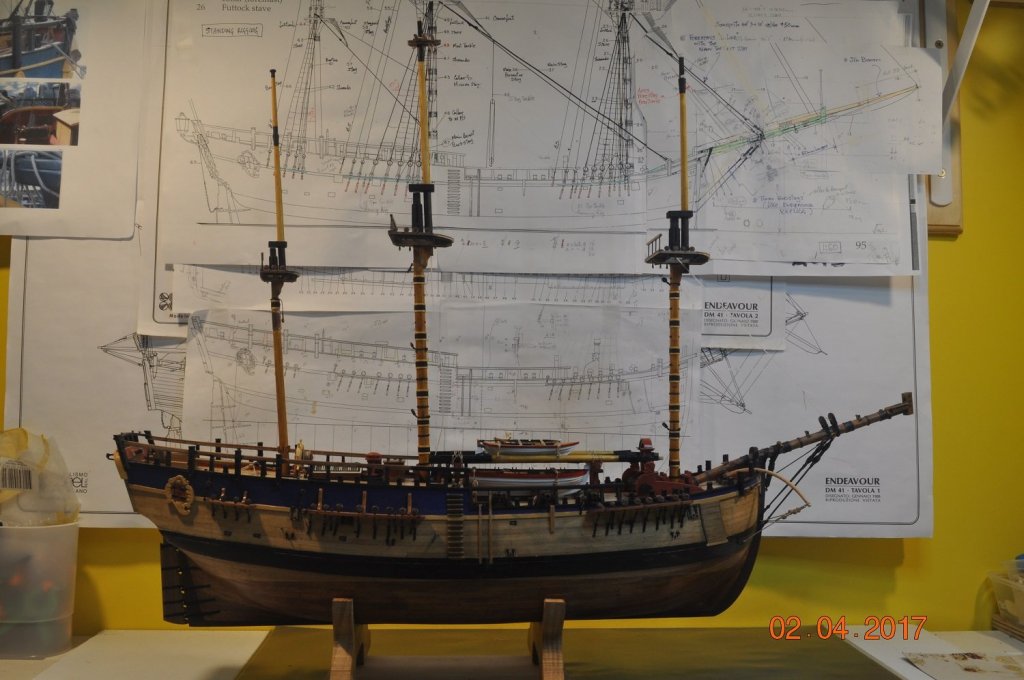
The longer Bowsprit(50mm) makes the difference, and the taller Mizzen all looks right. The sails is a interesting point. Not under full- sail, however I was considering having the sails furled on the spars, at anchor. Just another level of detail and work to undertake. Dave R
-
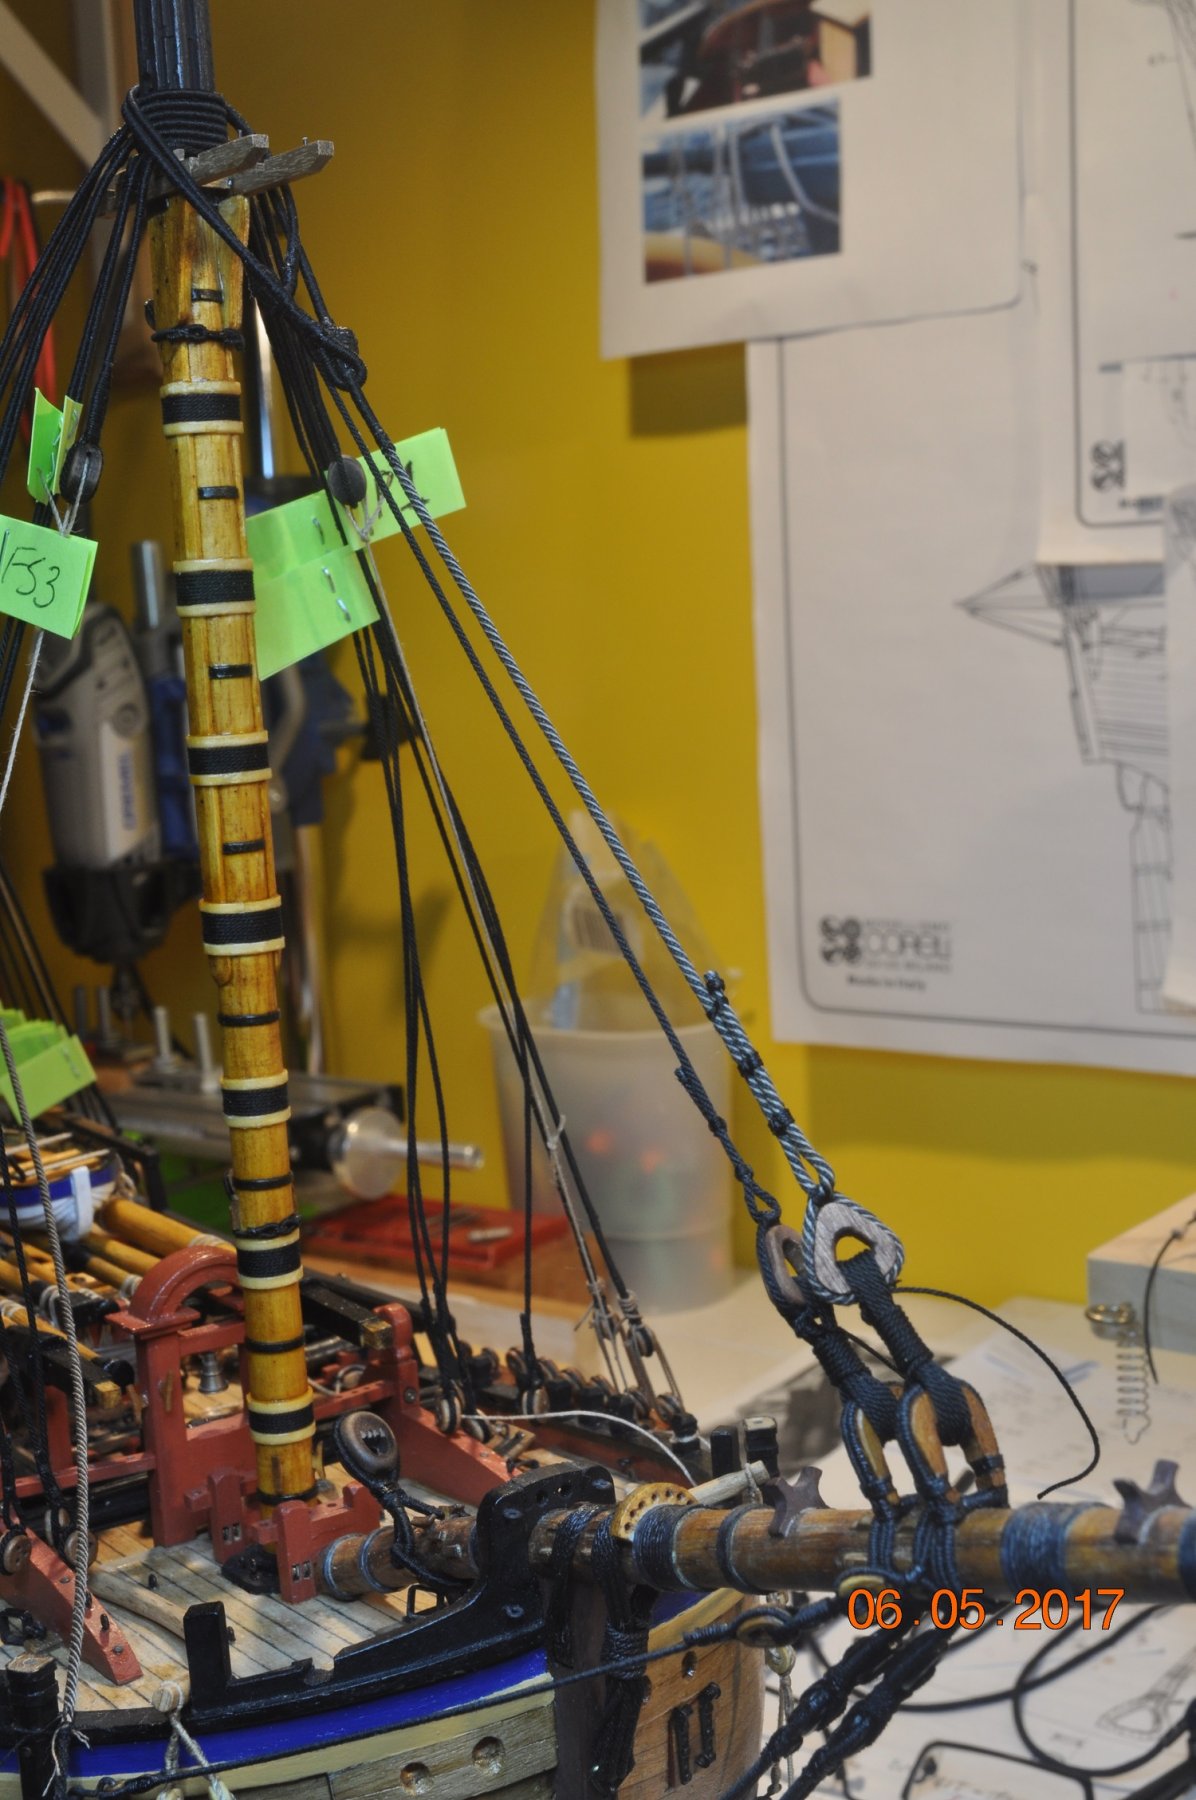
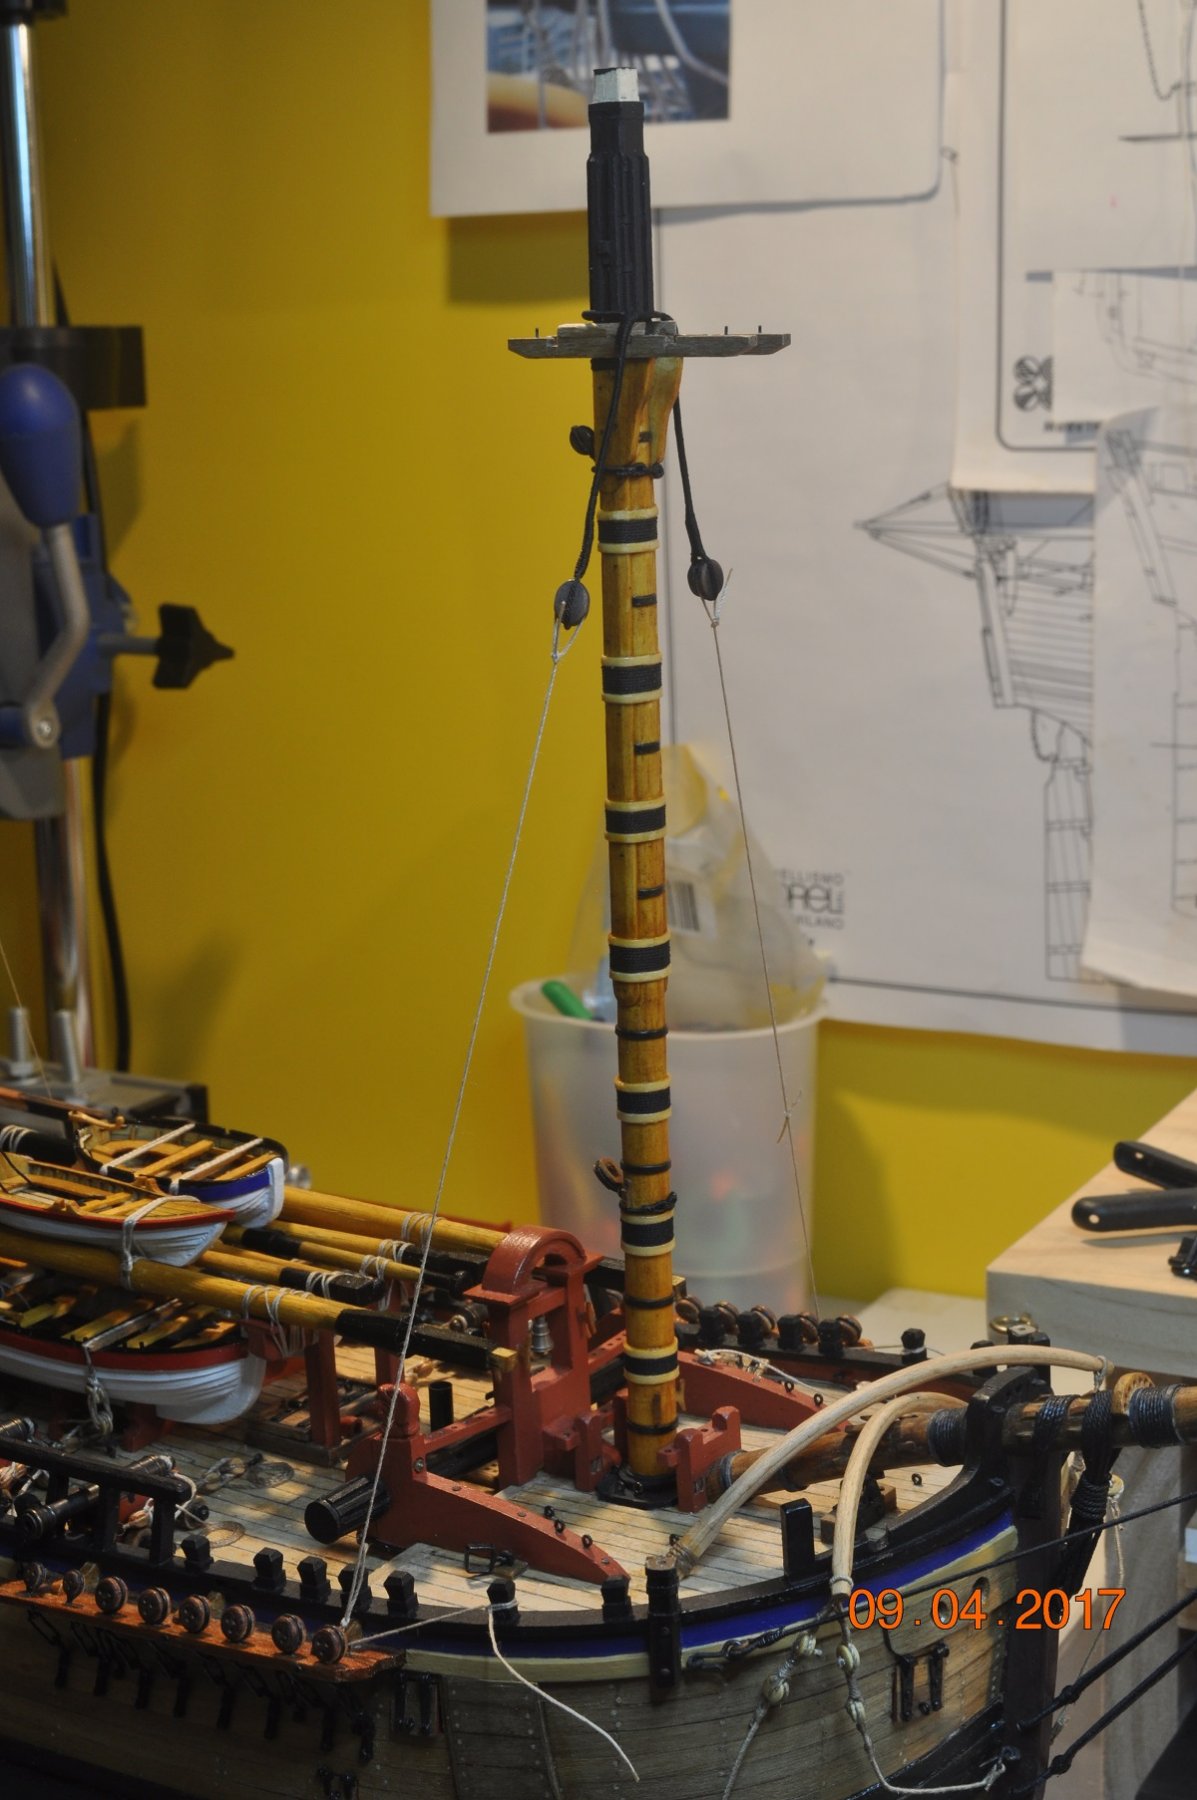
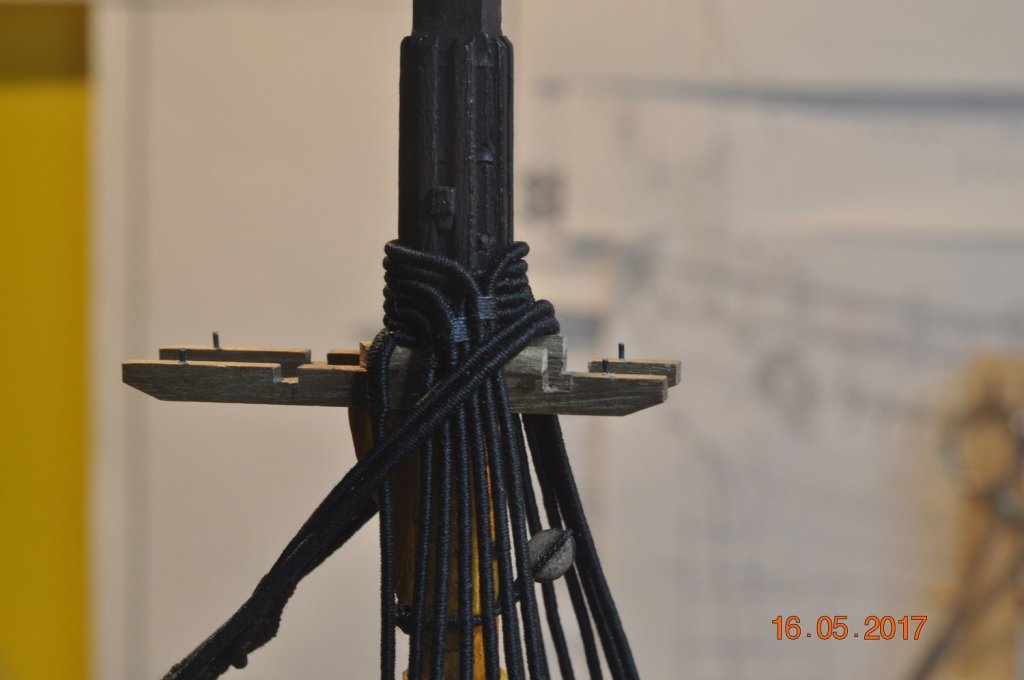
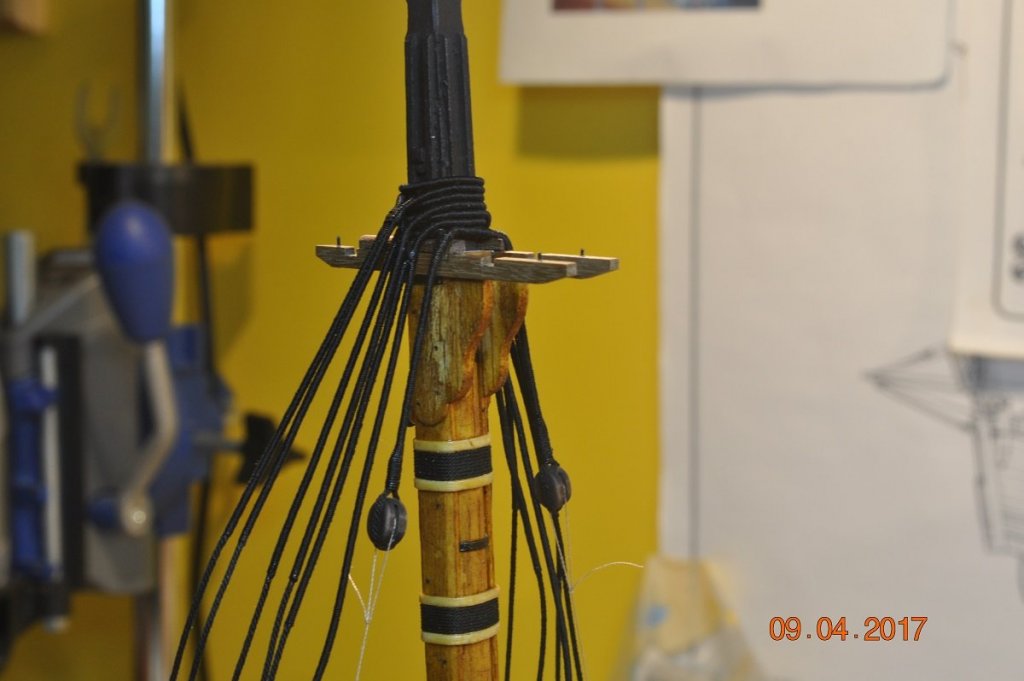
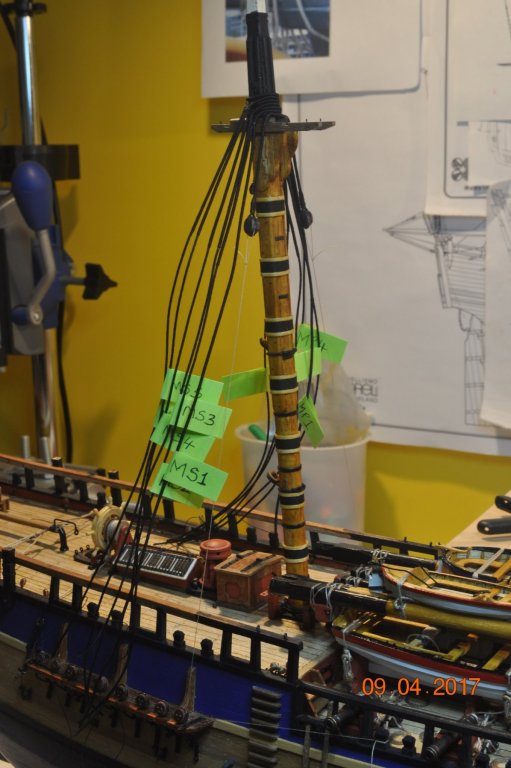
Hi All, Thanks Anton, Steve & Pat for providing background to the Shroud configurations. After checking on several sources, I must admit I followed the AoTS, early in the build. So this is why my Endeavour has on: Fore Mast: 6 large dead-eyes for shrouds, 2 smaller dead-eyes for backstay's on the channel, 1 top-gallant backstay on the hull Main Mast: (same as above) Mizzen Mast: 4 small dead-eyes for shrouds, 1 mizzen backstay on the hull I would lean to agree the Main & Fore(based on the Deptford draft), these masts probably had 7 shrouds, the rear shroud being a swifter. With single backstay's to the top-mast and top-gallant. However, as much as I would like to correct my channel/dead-eye configuration, a big change now, which I am not prepared to undertake. So an update to where the shipyard is at. Placed all the masts into position to see how they look. The ForeMast Pendant Tackle - temp. held down for the shrouds to go over. Shrouds from "Chuck's rope" 0.89mm shroud with 0.2mm serving. 1 of 2 sets made so far. Main Trestle-Tree with MastTackle & Shrouds I've tagged each shroud, each will be a different length to the dead-eye. Plan is to: - tie a length of seizing to the shroud, at top position of the dead-eye - take all the shrouds off the mast then - finish the seizing to the dead-eyes on my rope making jig, where I can clamp and have many hands at work. This is going to take some time..... 3 masts, 32 shrouds, 96 seizings to the shroud dead-eyes. How long can that take. ?? Dave R


-
Yes have read it a few times. Send pm re this. Dave R
-
Thanks Anton, Greg, Michael and Pat for looking in. 2 pair of long nose tweezers makes the fat fingers work "thinner" to tie knots. Glad this is area is done and out of the way. That Tropical Cyclone "Debbie" came down from up north, lucky at home here we just got some medium rain then a wack of wind at the end. Not much damage at my place, however around us may trees down, some on houses. Dodged the bullet. Researching the shrouds to the lower masts at the moment. Been looking at the previous Endeavour build logs, the AoTS and Steel's to work out the rope, block, seizing sizes and all the other intricacies. Cheers Dave R
-
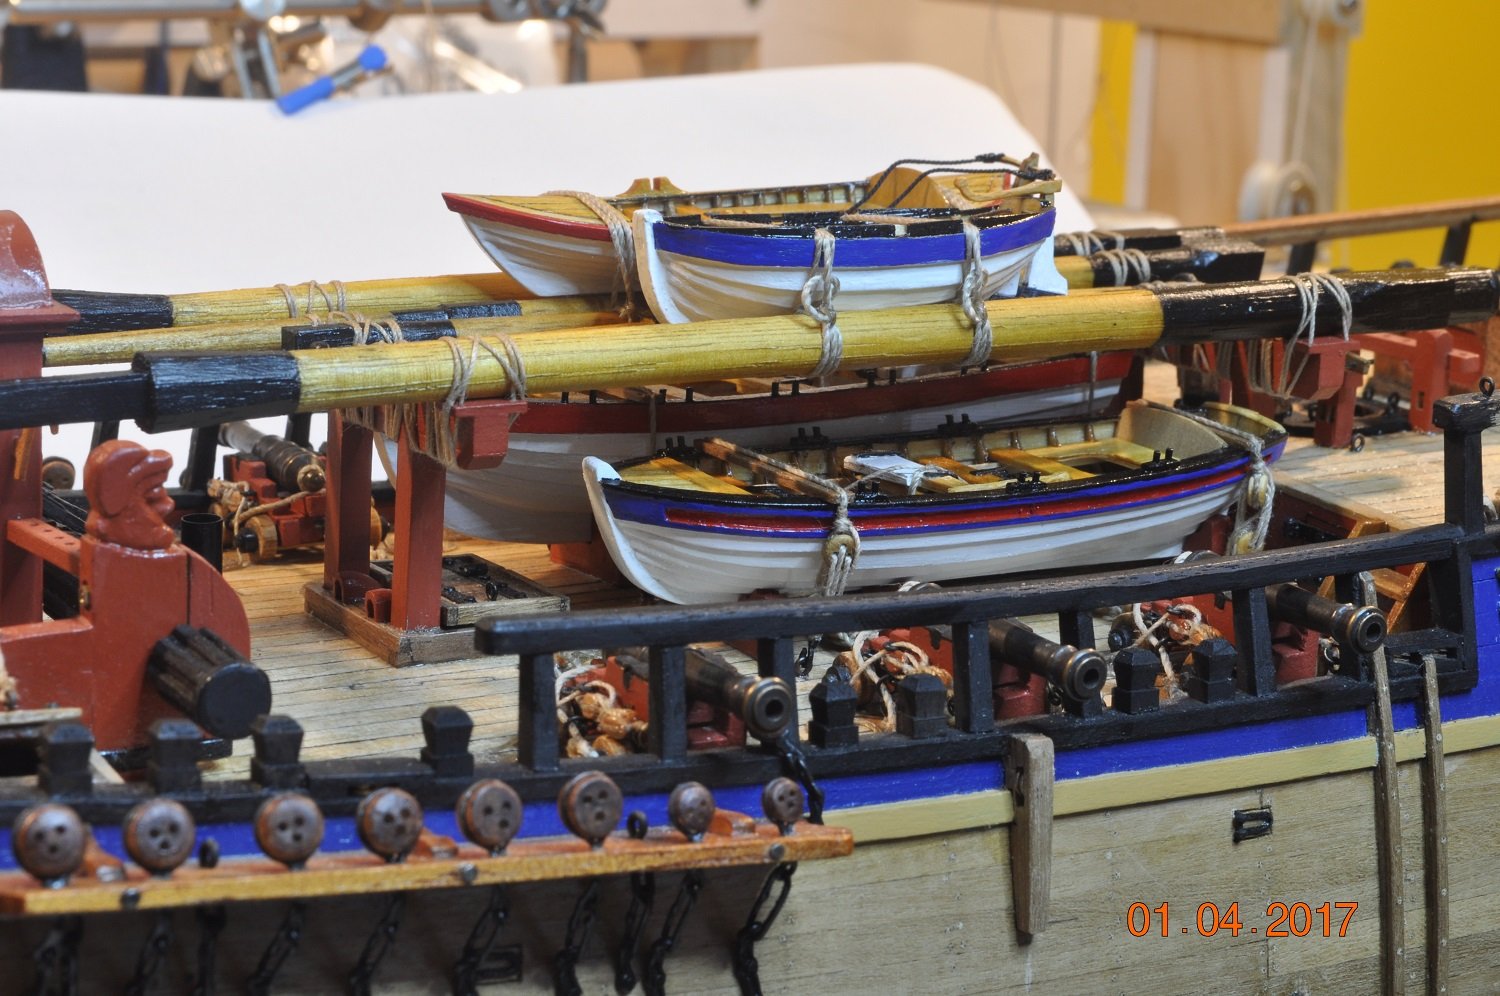
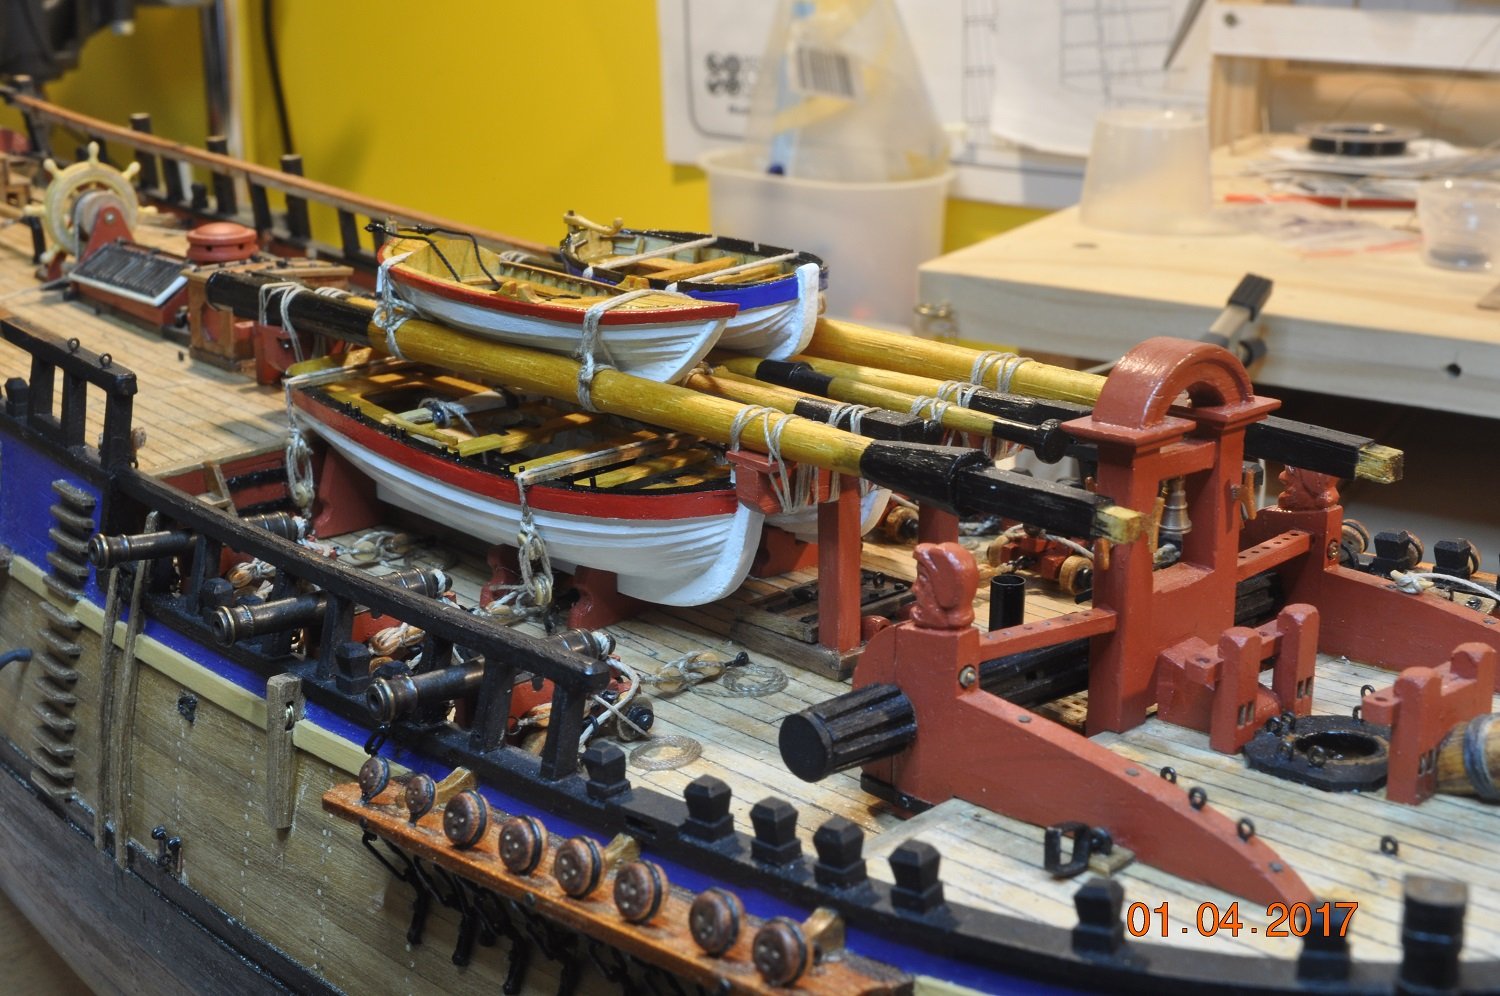
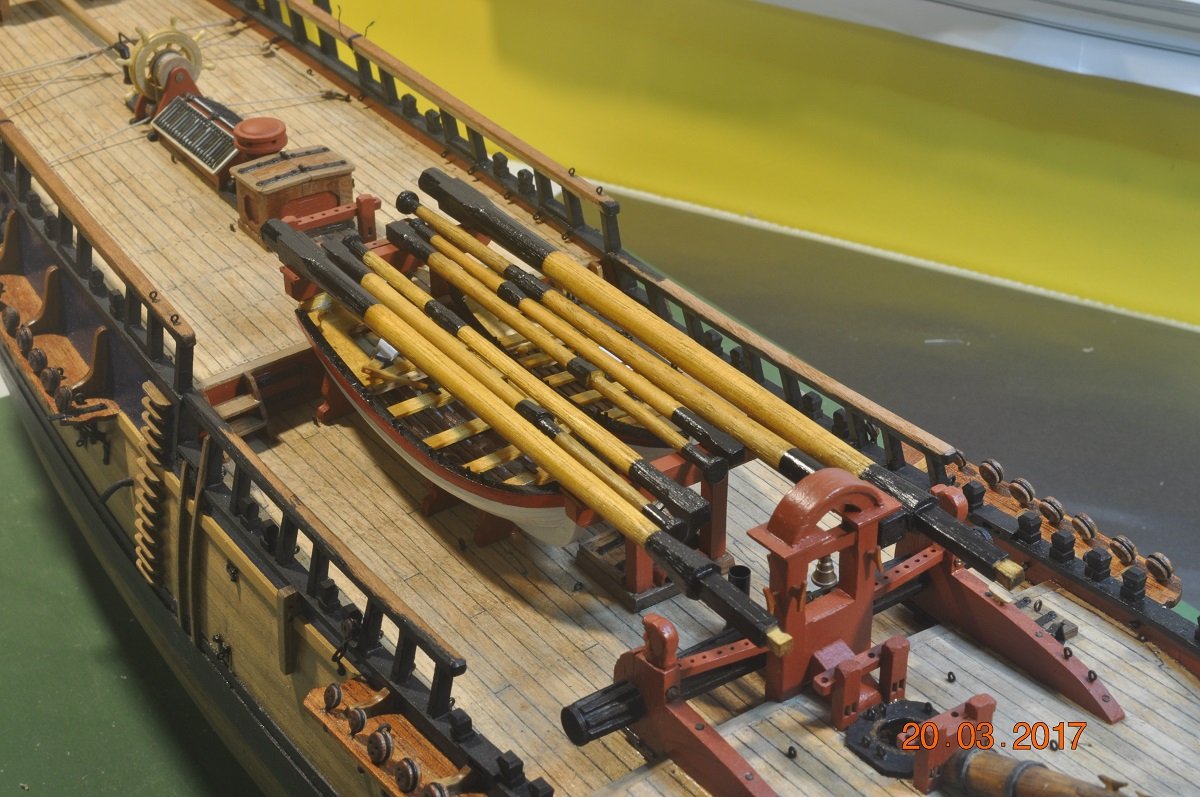
4 ships Boats Lashed down What does one do when stuck inside during the tropical cyclone "Debbie" makes its way past. Lashed all the reserve spars onto the gallows and 2 smaller boats on top . A little rest to work out what to do next. Dave R


- 869 replies
-
- 10
-

-
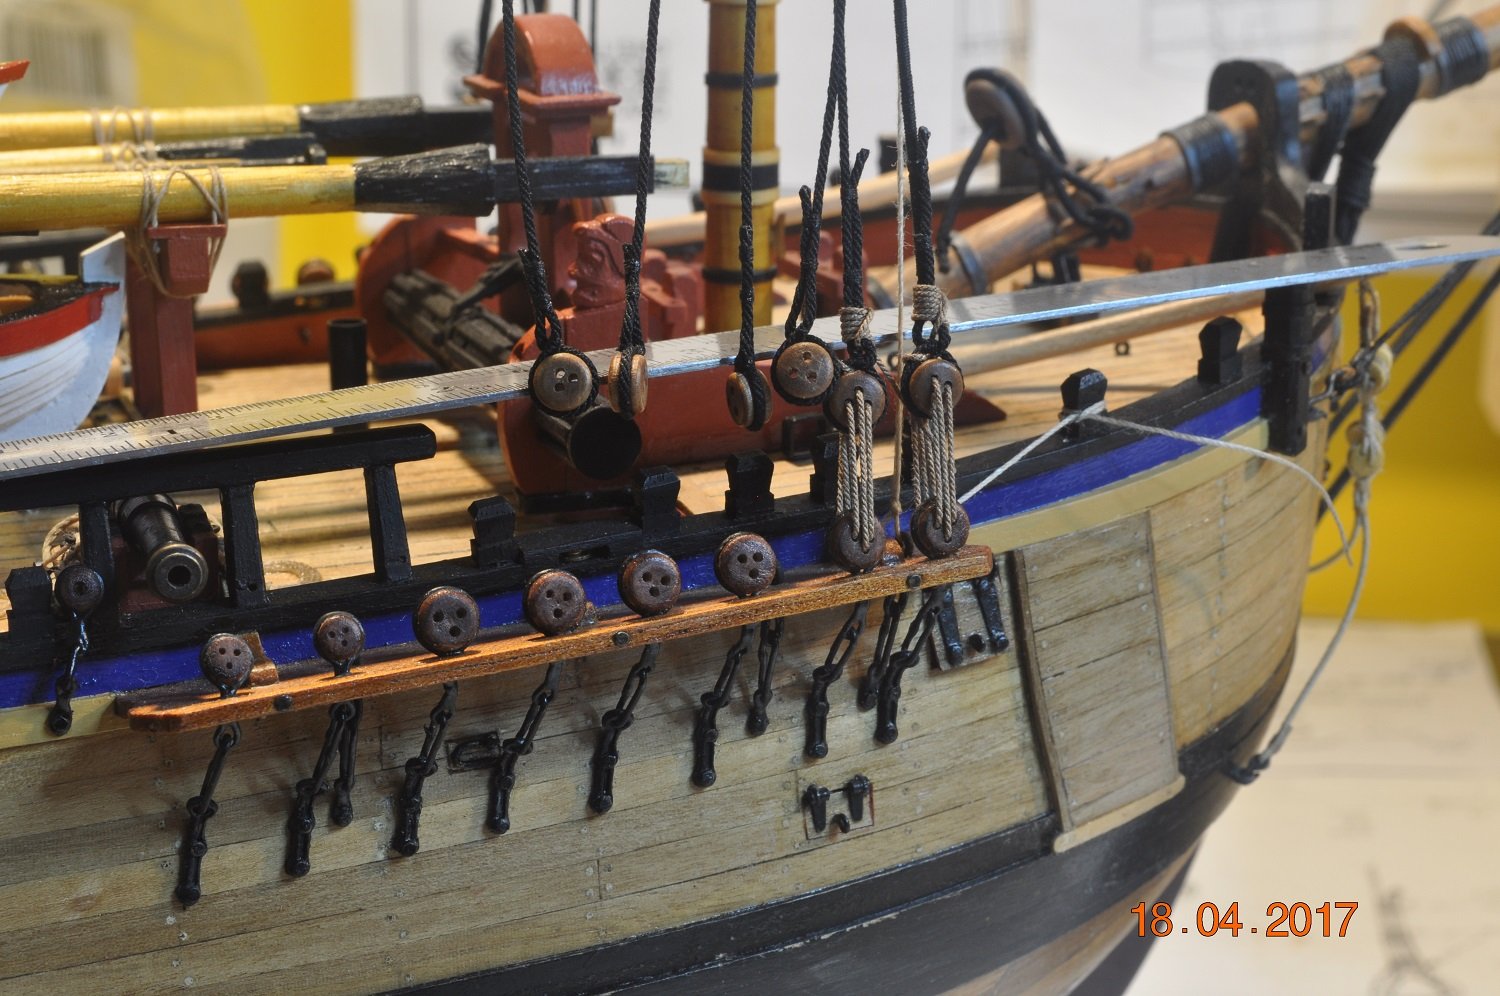
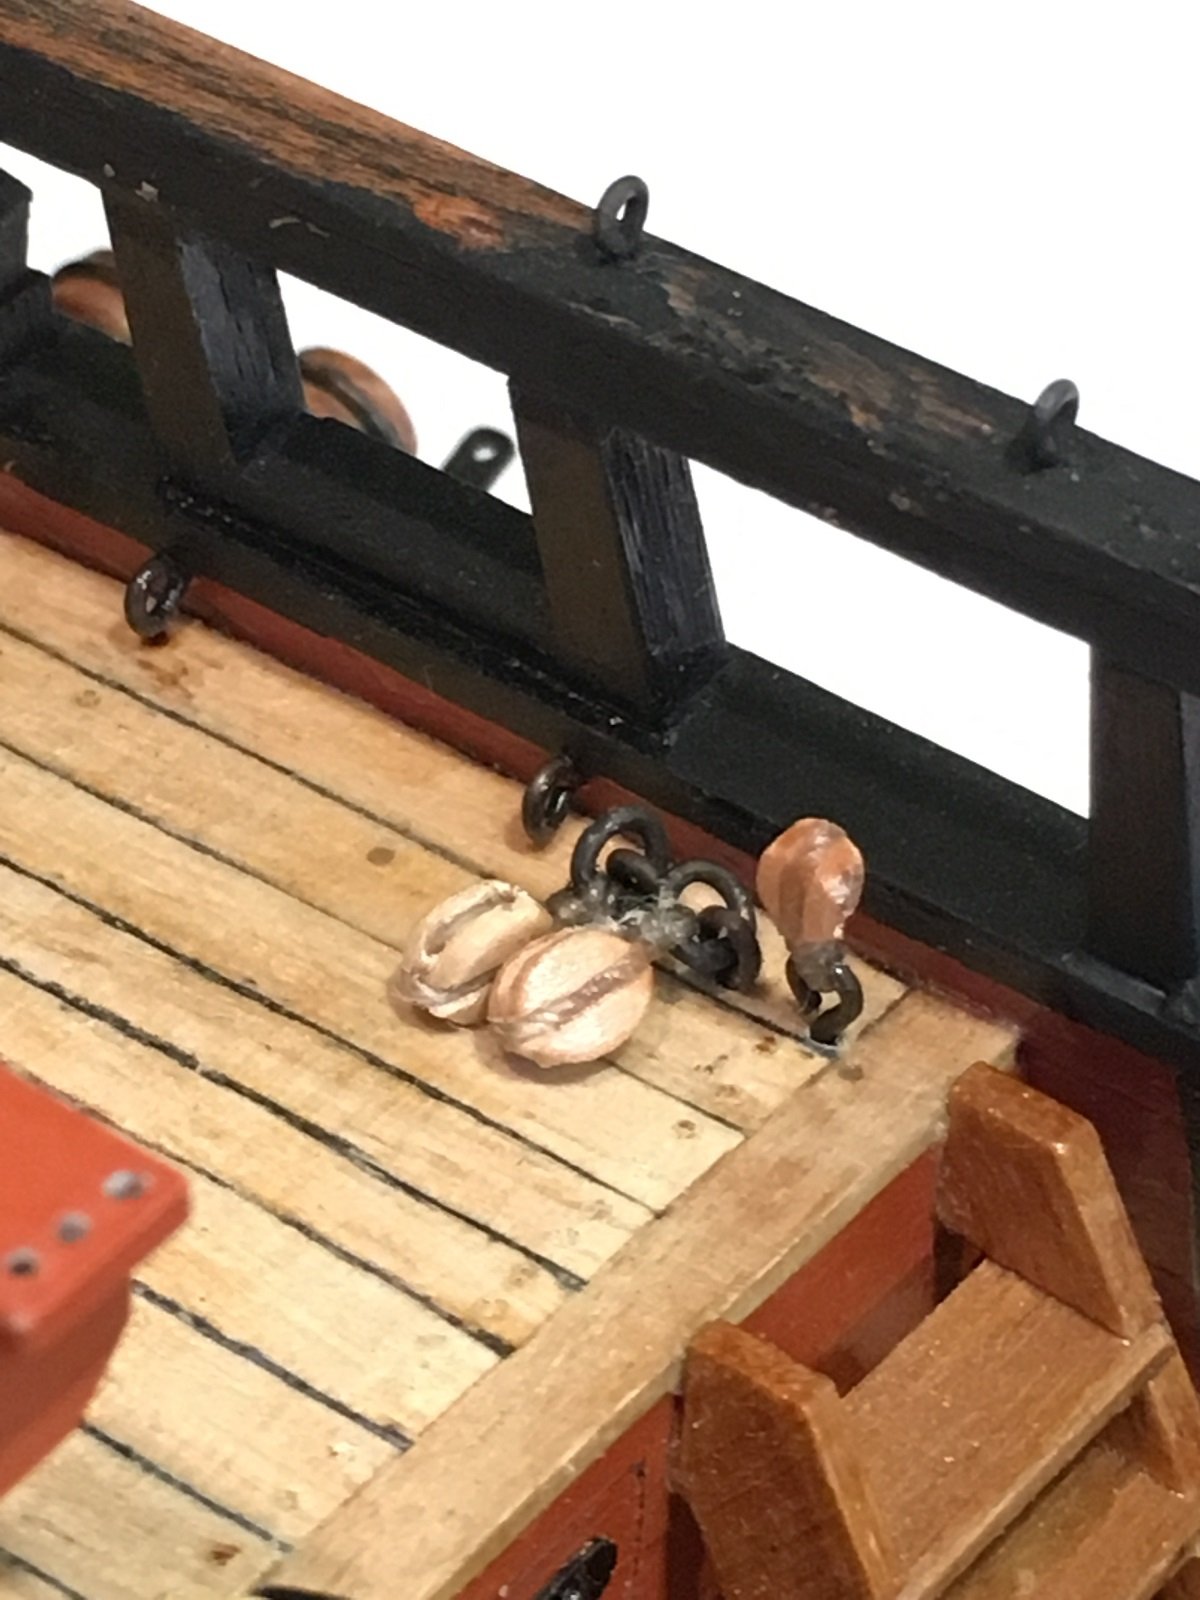
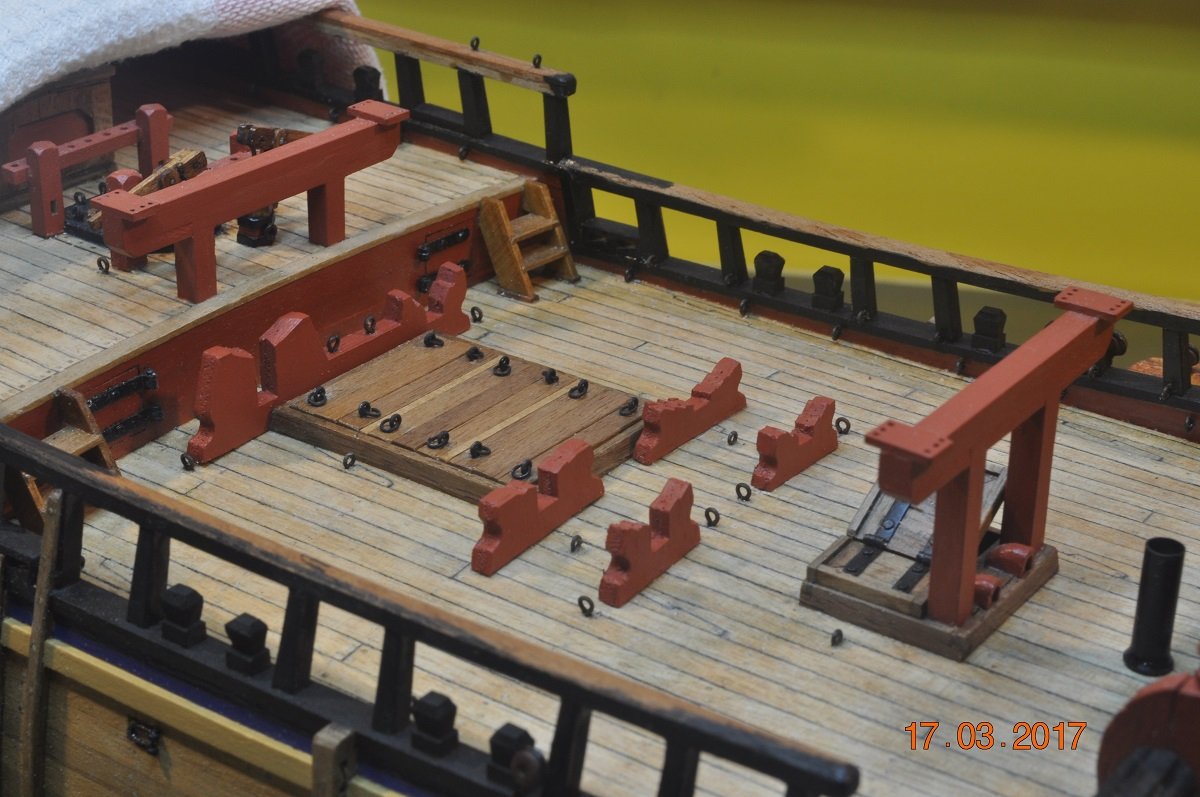
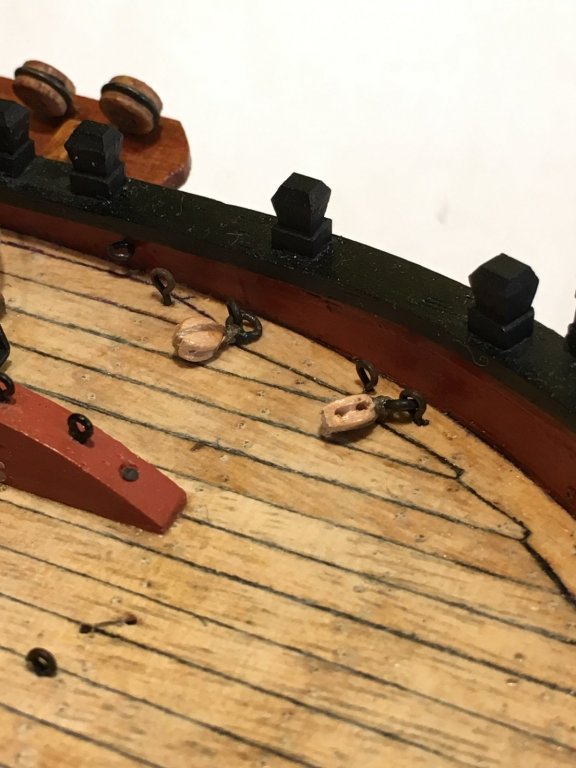
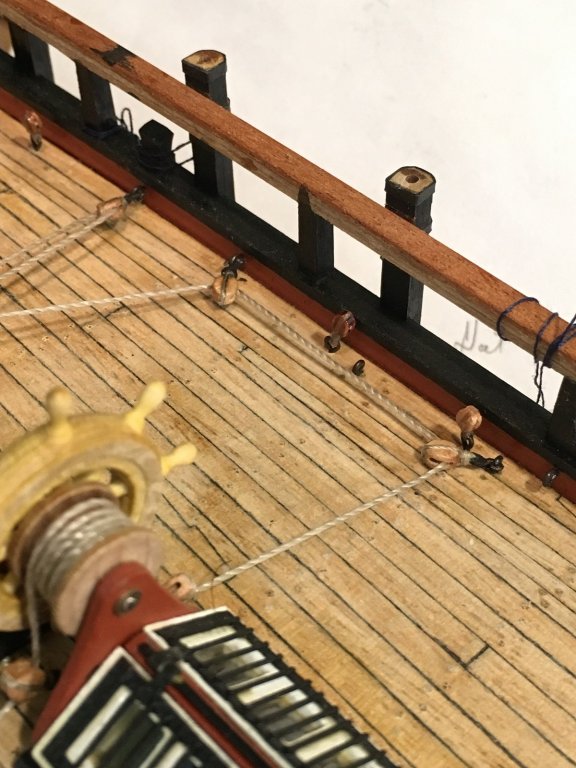
Running Sheets Extra Blocks on the Decks /Mounting Following on from my post #593 I added in more sheet blocks and eye-bolts to the decks. Left them "loose" for now, glue in later if I need to take out to thread or attach ropes. Fore Deck: 2 x 4mm singles, 2 x eye-bolts Mid Deck: 2 x 4mm & 1 x 3mm single Rear Deck: 3 x 3mm single, 2 x eye-bolts PS I now have a multitude of eye-bolts, some with blocks, and even some extra holes I drilled about the Mizzen mast, just in case I have missed some fixing points. How many, dozens of them. Adding Blocks to Eye-Bolts Thought I share my process to make the block/eye-bolt work. This is a 4mm single block, ring and eye-bolt. Held either end which allows me to use both hands to thread ropes around and tie off. Dab a drop of CA fast drying glue about the thread, which soaks in to seal the thread and holds it all together pretty much solid. After the CA glue dries, trim the excess threads off. Ready to mount on the decks. I didn't add a ring to the 3mm blocks, direct to the eye-bolt, very small and without the ring they stand up. Onward and upwards..... Dave R

-
I don't know how it all could of worked out on board. At sea on long legs, maybe the cannons were moved down into the hull, more weight lower for ballast ? Then bring em' up when closer to land. All I can say it must of been overall, very crowded on board the ship. Dave R
-
Next Steps. Before I get too far along adding items to the deck, I will double check I have accounted for all the Standing and Running deck eye bolts. Will add blocks to the eye-bolts now, so later all going well, run the ropes, sheets through. Well that is the plan, as I note with thanks to the many who have rigged the Endeavour "commented in the build logs", have with somewhat difficulty, "add eye-bolts and blocks" along the way. Dave R
-
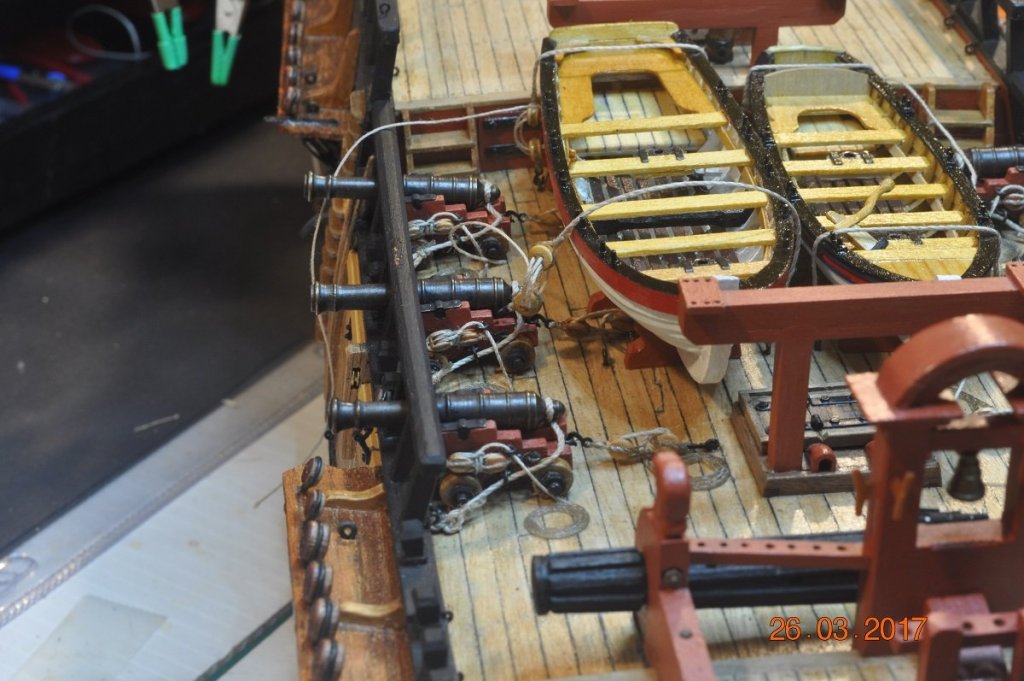
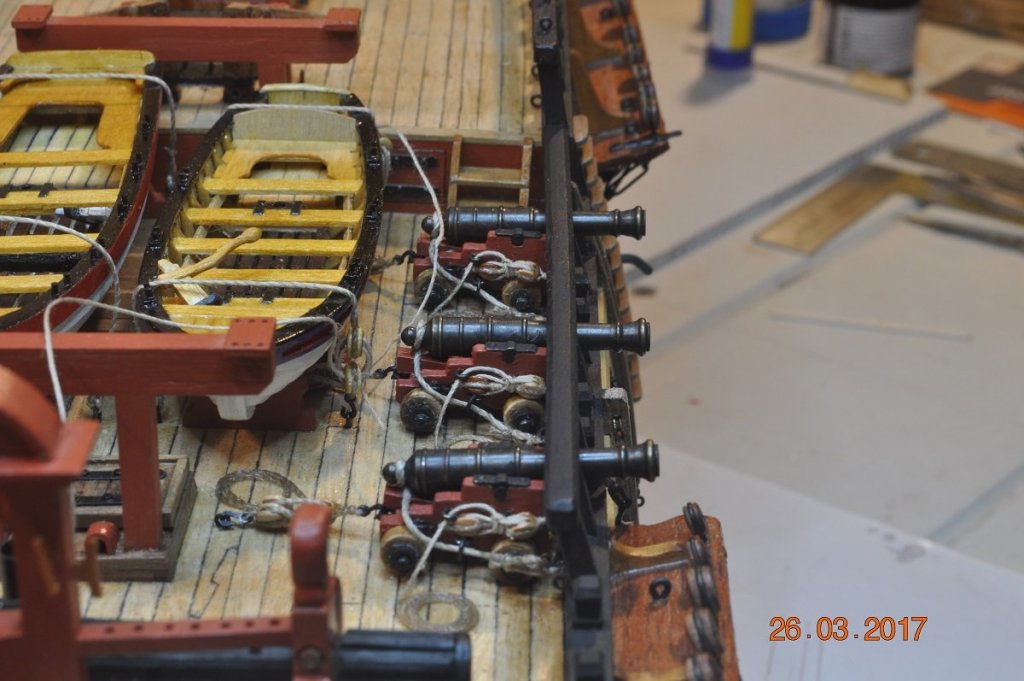
Ships Cannons Update Mid Deck Mounting The boys in the shipyard retrieved the 6 cannons out of storage(made in April 2016) and fitted them in place on the mid deck(as per AoTS). With the Longboat and Pinnace in the middle, the deck is getting crowded. Down the middle - from the Bow. Did my best to spool the rope ends on the deck. Starboard Side. Post side. Dave R

-
Thanks Steve, Found the page with the spars. I do remember seeing this page, months/year ago when doing some research. But time gets away and so much passes in/out of the mind. Dave R
-
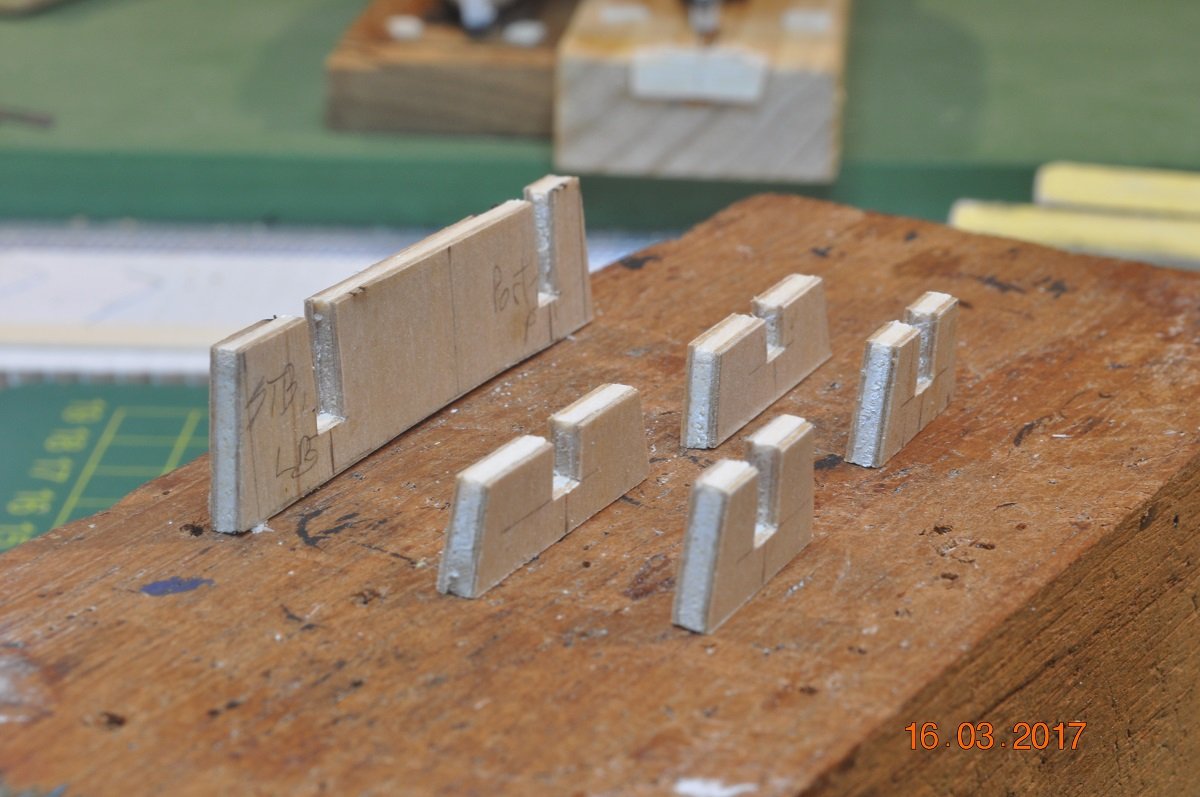
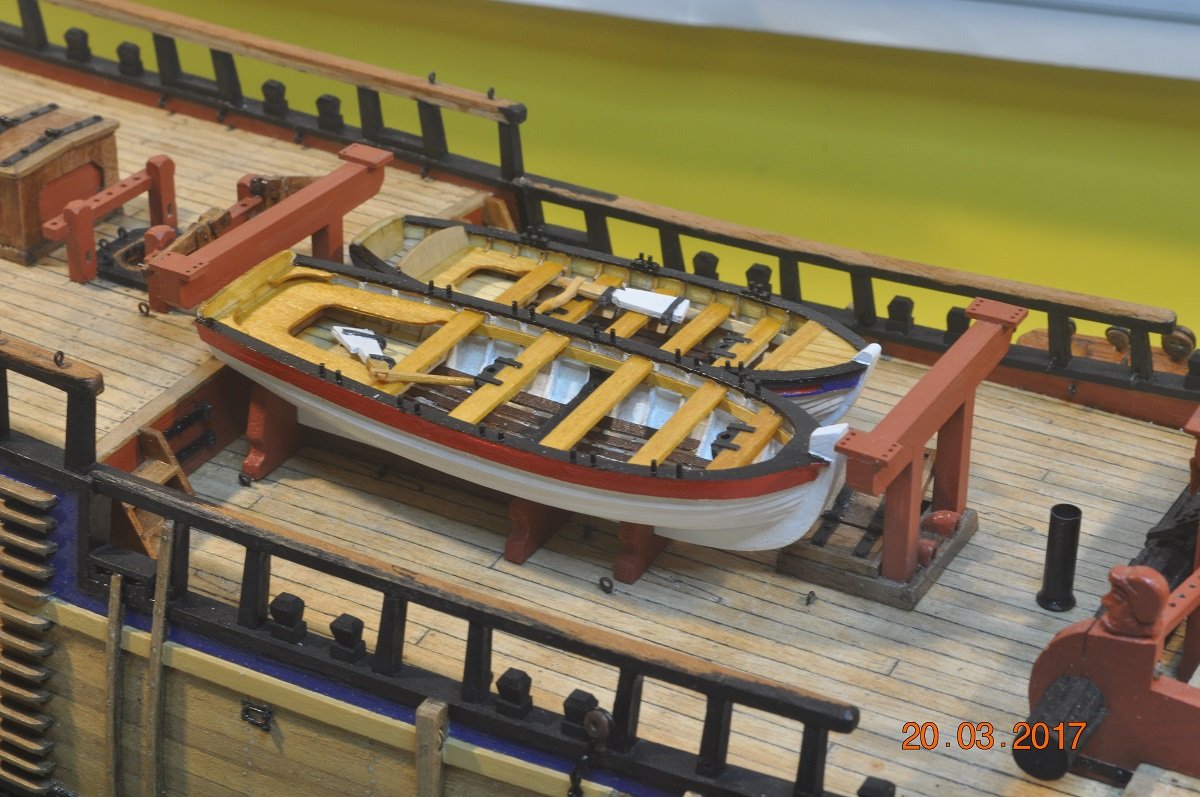
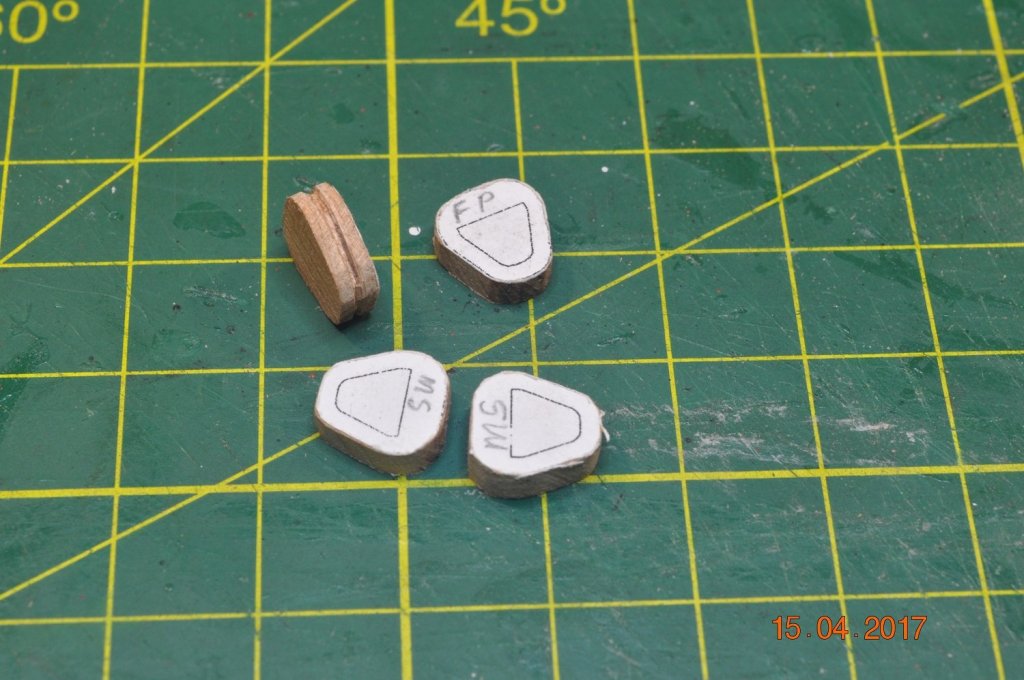
Ships Boats Update Mid Deck Mounting The AoTS indicated 3 boat chocks each for the 2 lower boats to be strapped down onto. Each consists of laminating 0.6mm ply either side of balsa. Chocks painted and in place for boats. 2 largest boats just fit in between the Gallow Frames. Reserve Spares I had enough dowel to make 7 Spare Spars: - Fore Top Mast - Main Top Mast - Mizzen Top Mast - 2 x Fore Top Gallant Mast - 2 x Main Top Gallant Mast The reserve spars arranged(trial fit) on the gallows top beams. Next > onto the tie down lashings. Dave R


-
Very very nice Steve. Time and patience is your virtue. I'll be taking on board the battens about the yards. Nice touch! Dave R
-
Pat, Greg, Michael & Mindi. Thanks for your kind comments and thoughts. I sometimes think, so many others have made the components for the Endeavour, and there is always room to be creative for us all. Dave R
-
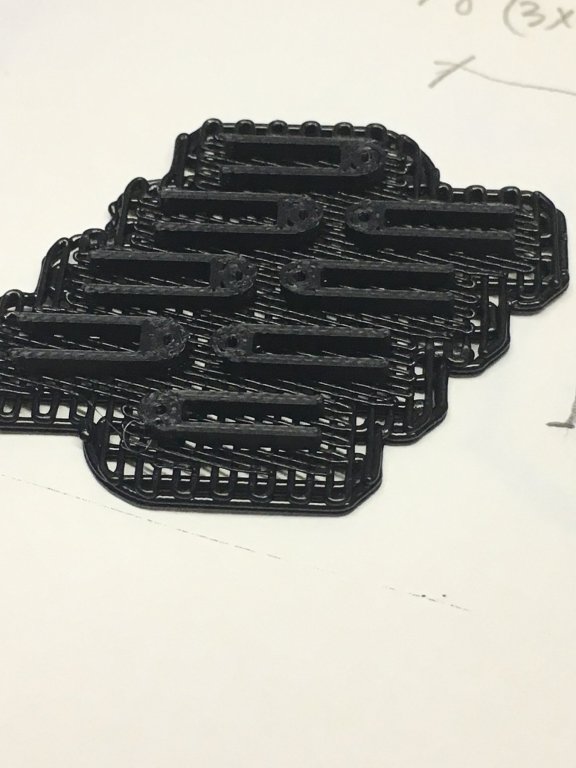
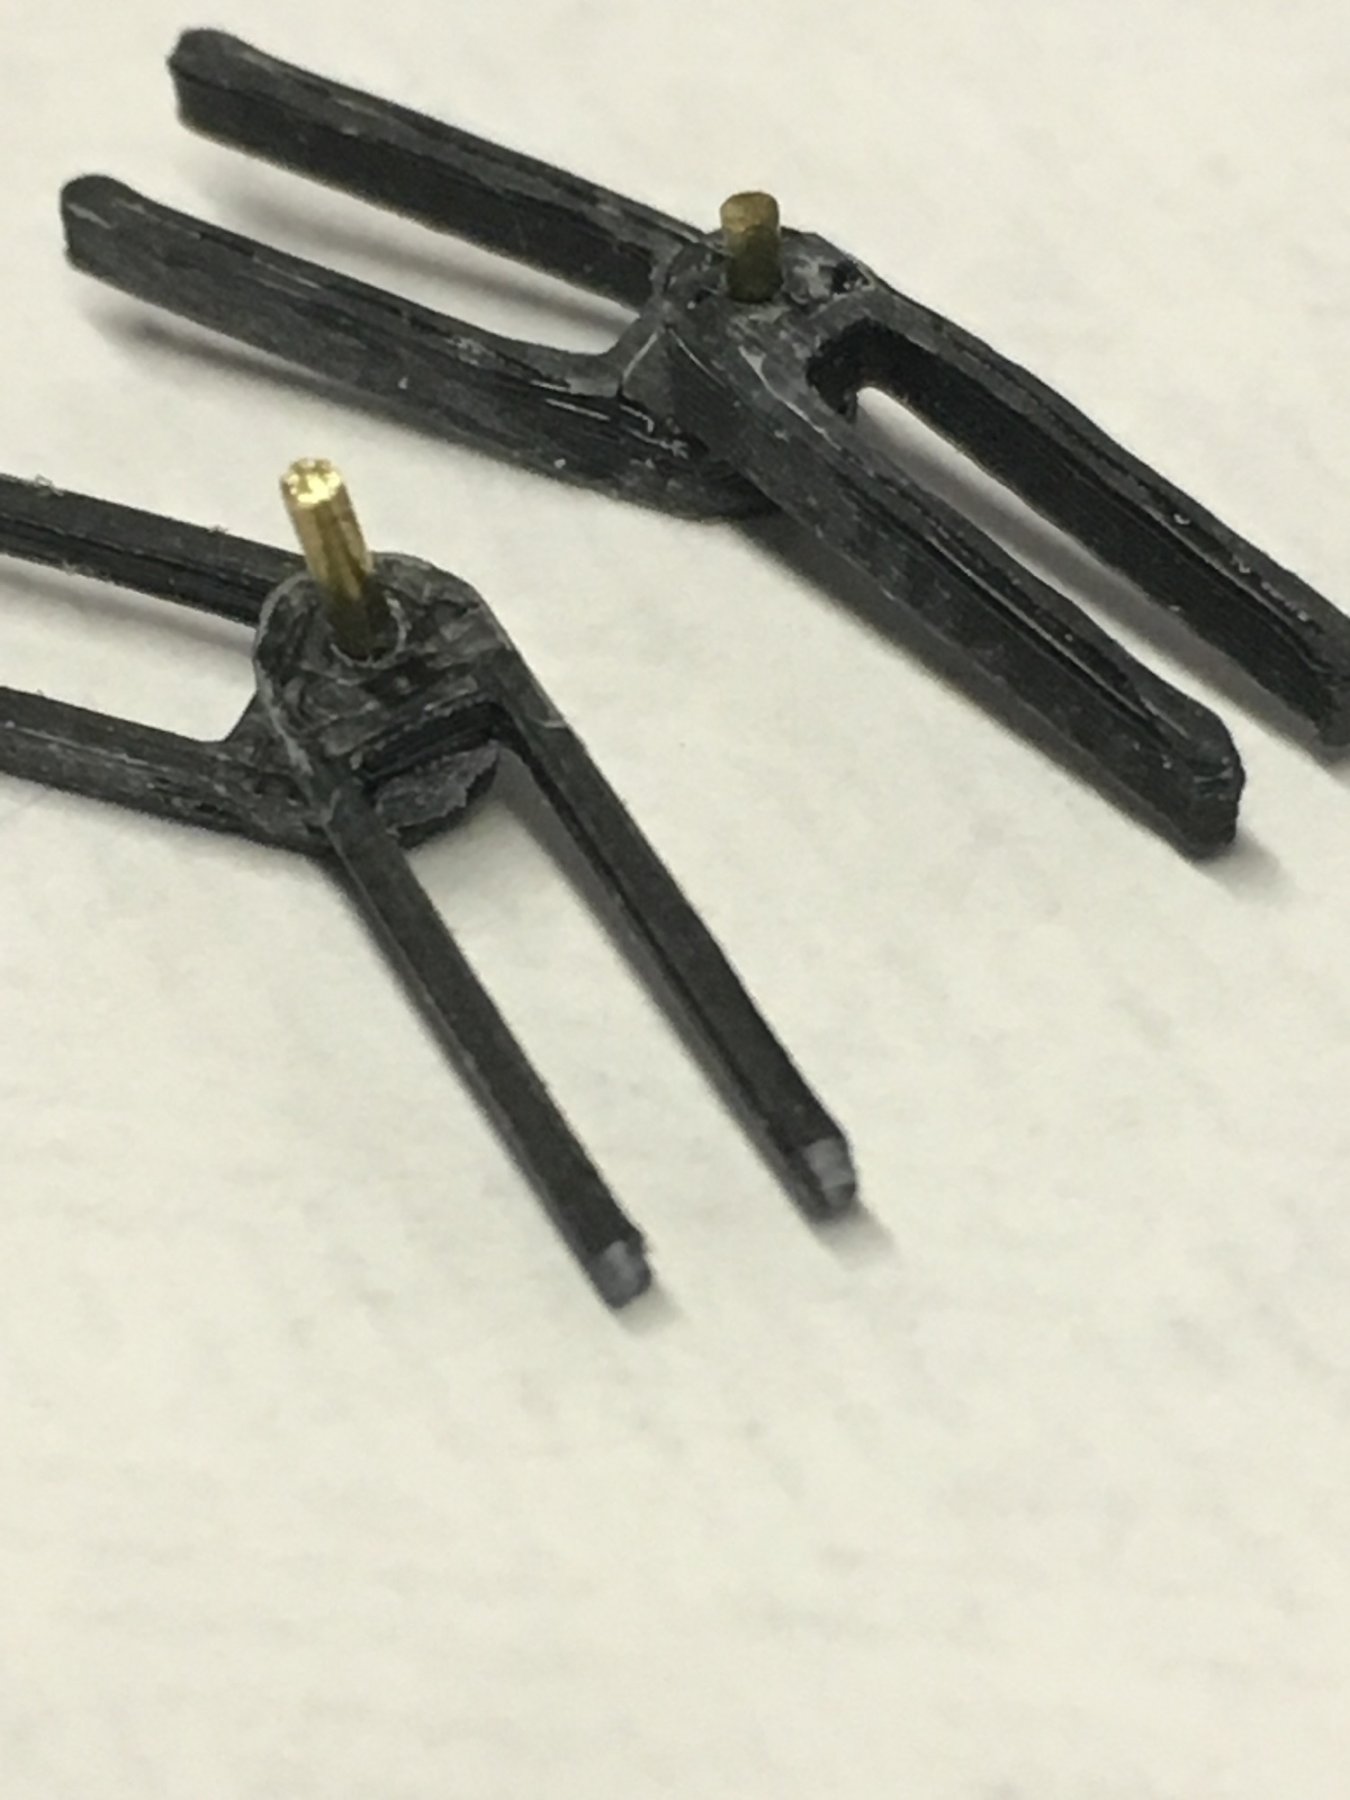
Correct, the mast block in ABS 3D printed.
-
I found this section in Captain Cook's Journal 1768-71 P75 when in TAHITI - May 1769 Wednesday, 24th. Fine clear weather all this day. Having found the Long boat Leakey for these few days past, we hauld her ashore to-day to stop the leakes, when, to our great surprise, we found her bottom so much Eaten by the Worms that it was necessary to give her a new one, and all the Carpenters were immediately set to work upon her. Thursday, 25th. Most part of these 24 hours Cloudy, with frequent Showers of Rain. Friday, 26th. Some flying showers again. This morning we hauled the pinnace a Shore to examine her bottom, and had the Satisfaction to find that not one worm had touched it, notwithstanding she hath been in the water nearly as long as the Long Boat. This must be owing to the White Lead with which her bottom is painted, the Long boats being paid with Varnish of Pine, for no other reason can be assign'd why the one should be preserved and the other destroy'd, when they are both built on the Same sort of Wood and have been in equal use. From this Circumstance alone the Bottom of all Boats sent into Countrys where these worms are ought to be painted with White Lead, and the Ships supply'd with a good stock in order to give them a New Coat whenever it's necessary. By this means they would be preserved free from these destructive Vermin. The Long boat's Bottom being so much destroy'd appear'd a little extraordinary, as the Dolphin's Launch was in the Water at this very place full as long, and no such thing happened to her, as the Officers that were in the Dolphin say. So: the Pinnace had White Lead paint on her bottom at this time the long boats(note the plural inc. the Dolphin's Launch) > paid with varnish of pine (the worms got into the Endeavour's Longboat bottom, and was replaced) the other 2 boats(Yawl & Skiff ?) I could not find mention of the bottom's finish ? Also I found it very interesting... Nov 1770 whilst at Batavia they found considerable worm damage to the keel Friday, 9th. In the P.M. hove the Larboard side of the Ship, Kiel out, and found her bottom to be in a far worse condition than we expected; the false kiel was gone to within 20 feet of the Stern post, the main Kiel wounded in many places very considerably, a great quantity of Sheathing off, and several planks much damaged, especially under the Main Channell near the Kiel, where 2 planks and a 1/2, near 6 feet in length, were within 1/8th of an inch of being cut through; and here the worms had made their way quite into the timbers Wonder they go that far..... Dave R
-
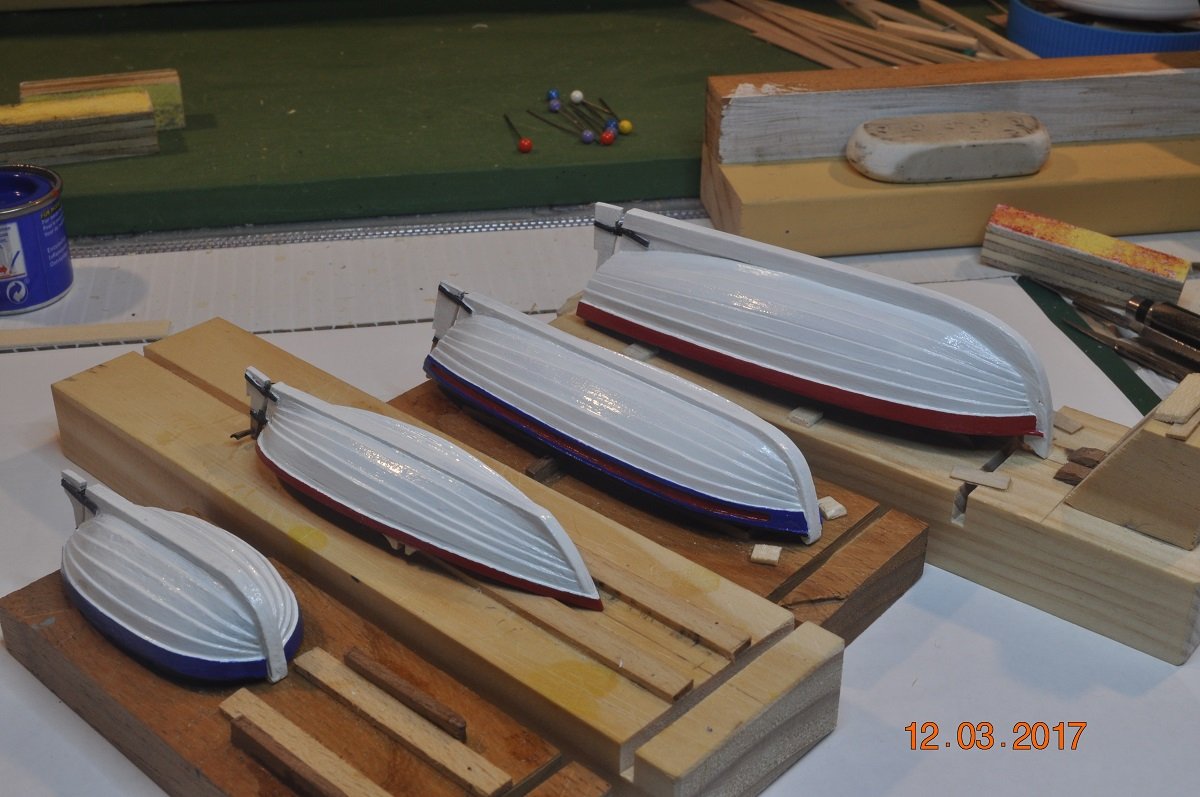
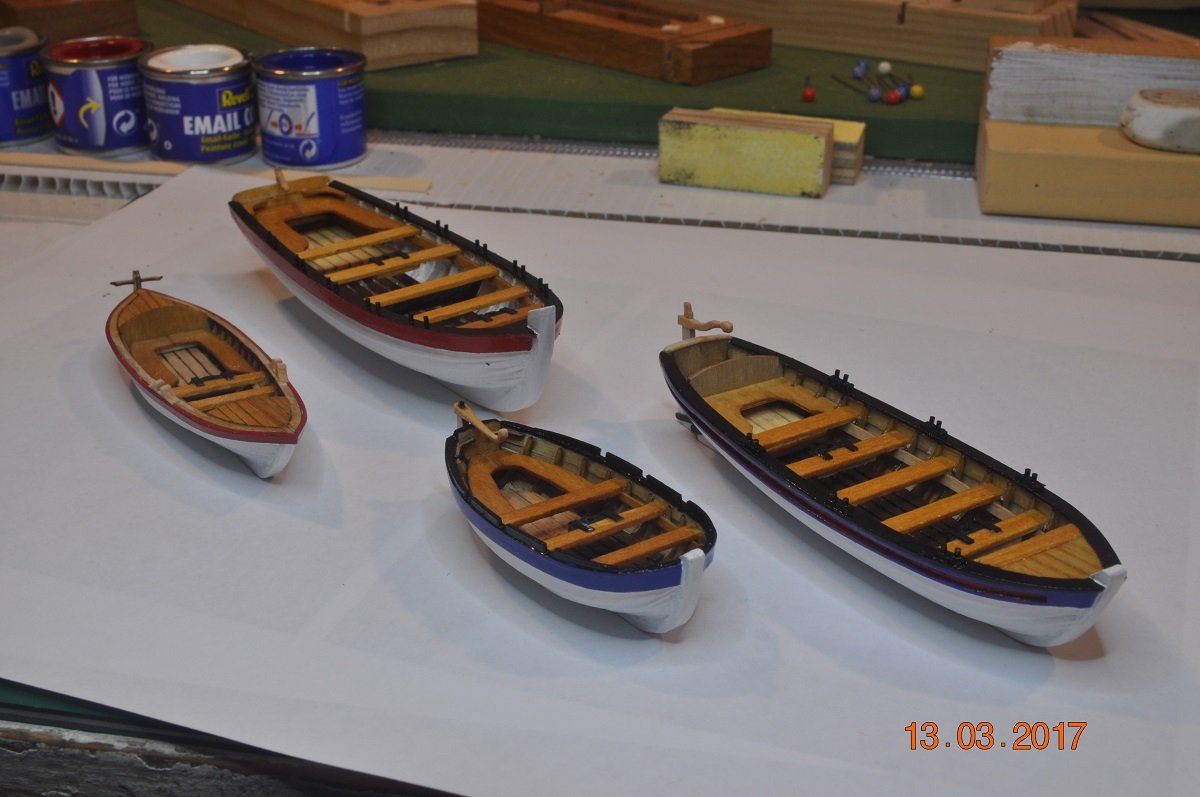
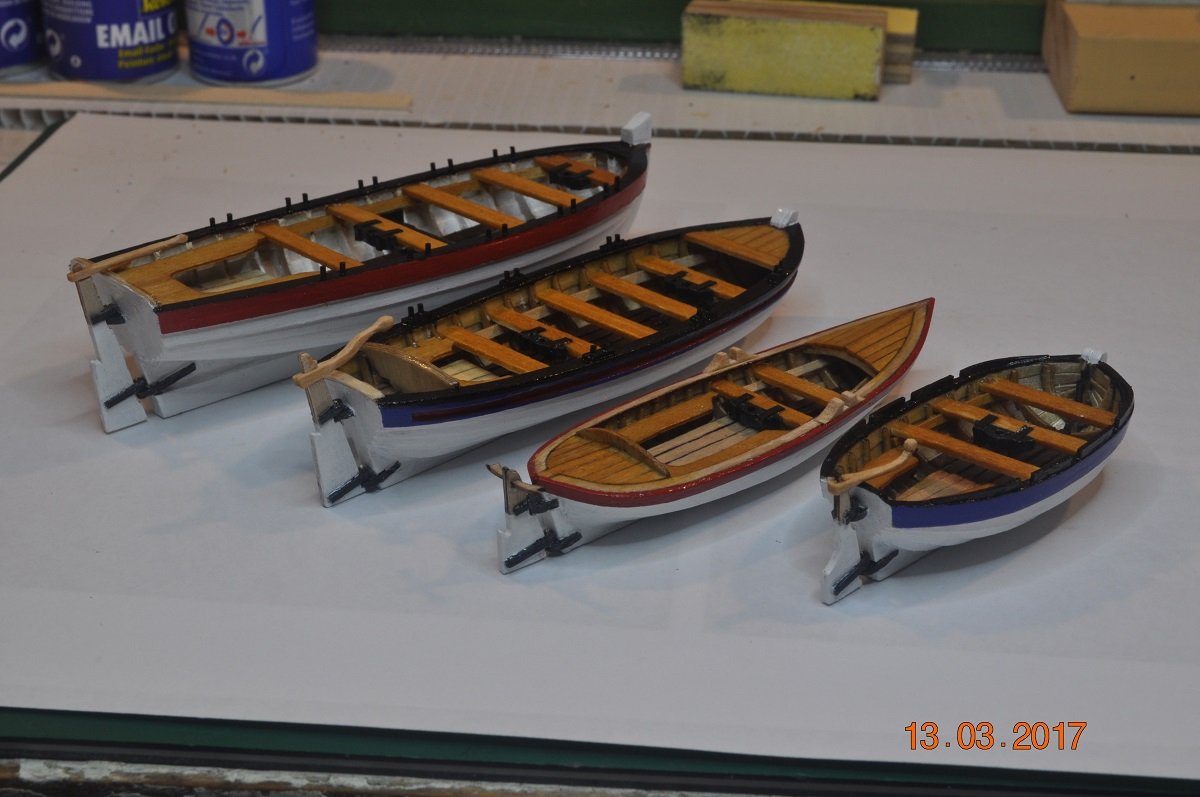
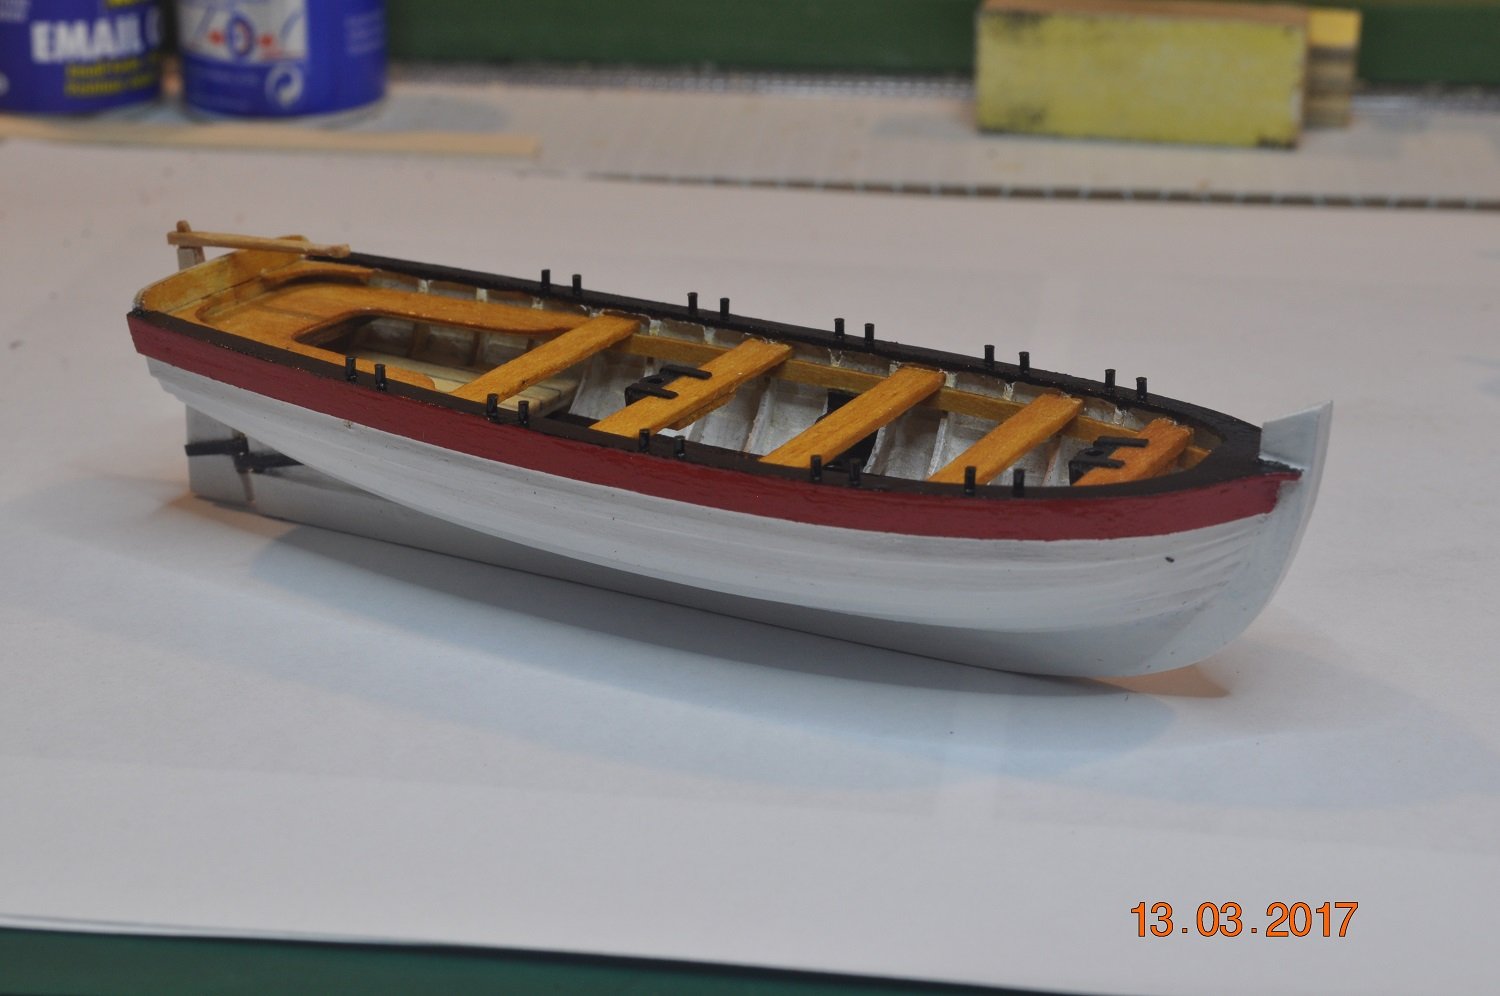
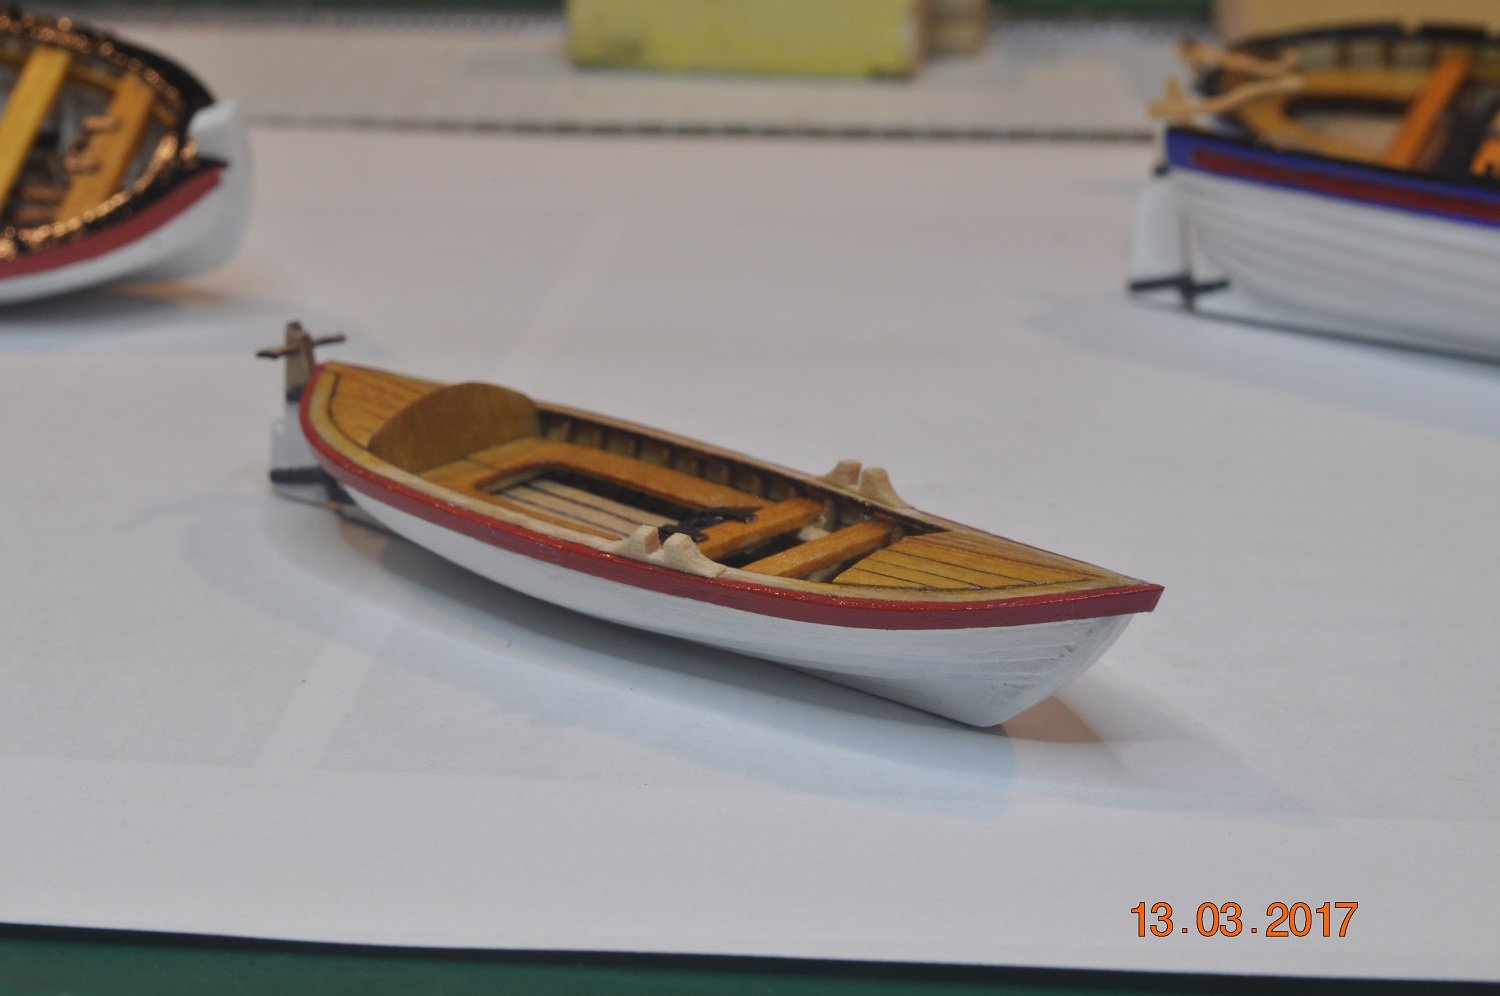
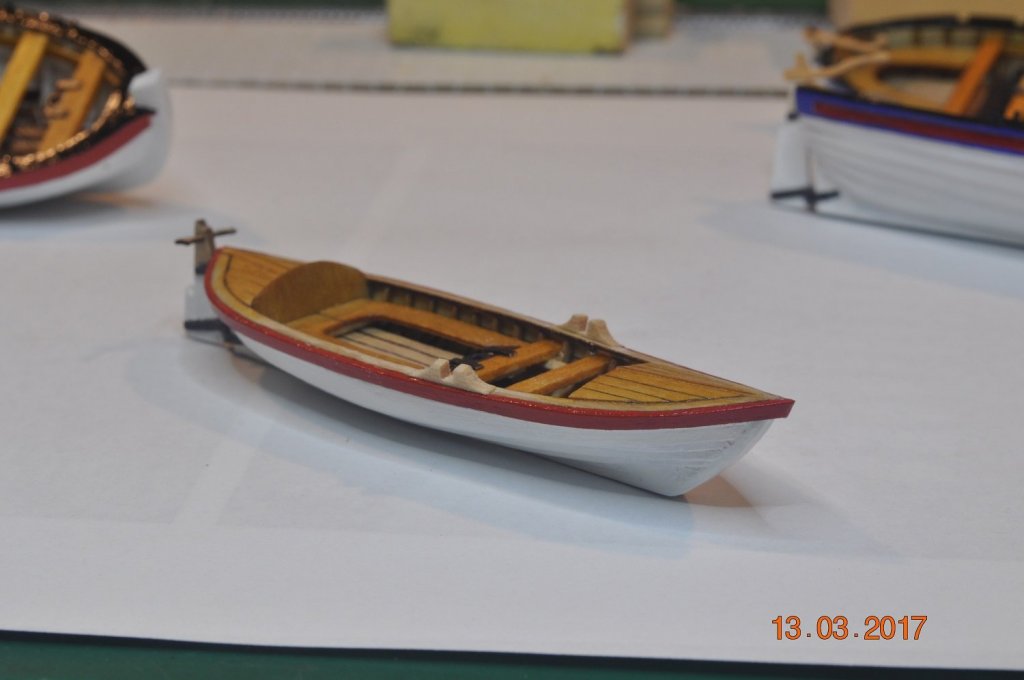
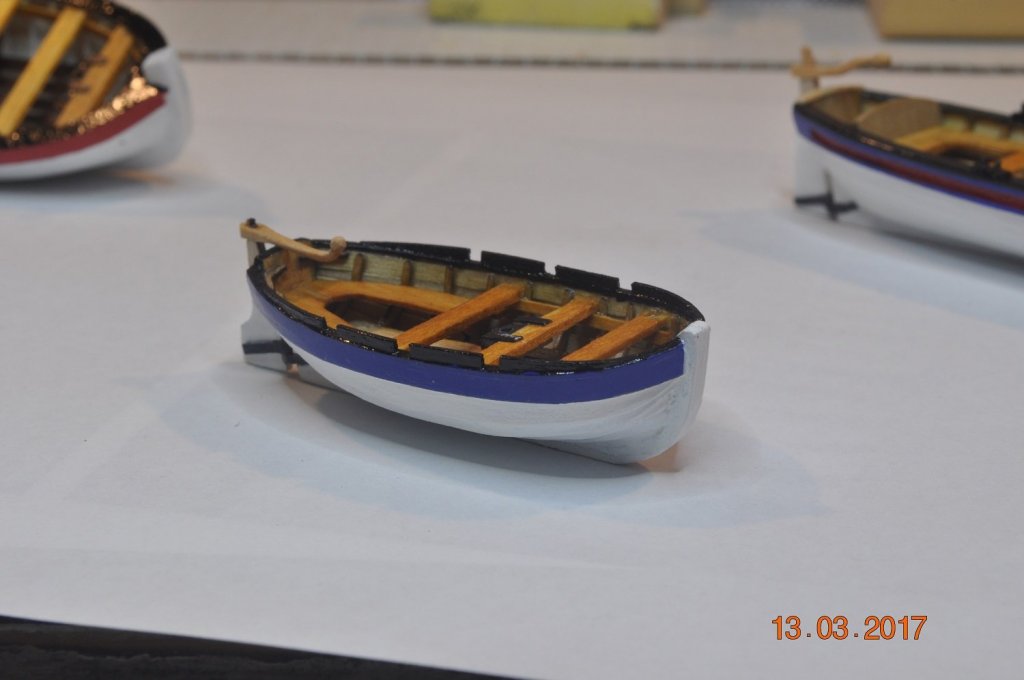
Ships Boats Update Painting Well it has taken nearly a full week on/off working on the final painting of the 4 hulls to a stage I am happy with. The boats are for 1:60 model. the largest(hull) Longboat being ~ 94mm long I've painted all the hulls white, "gloss" white as I wasn't happy with flat or matt. It took me a while to decide the color scheme for each. Rudders on the back of each boat. I followed the style from the AoTS. Longboat Pinnace Skiff Yawl I must admit, building these was really, really time consuming. The Longboat and Pinnace I am really happy with. The Skiff and Yawl, the proportions are not quiet correct, they just don't look right. But I was so far down the "build track", they will just have to do. Next to make some oars, housings on board, and hoist onto the Endeavour. Dave R


-
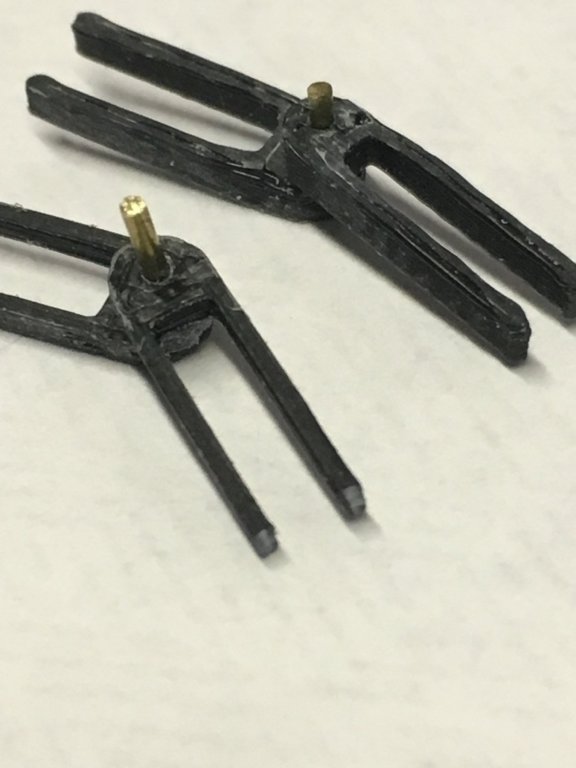
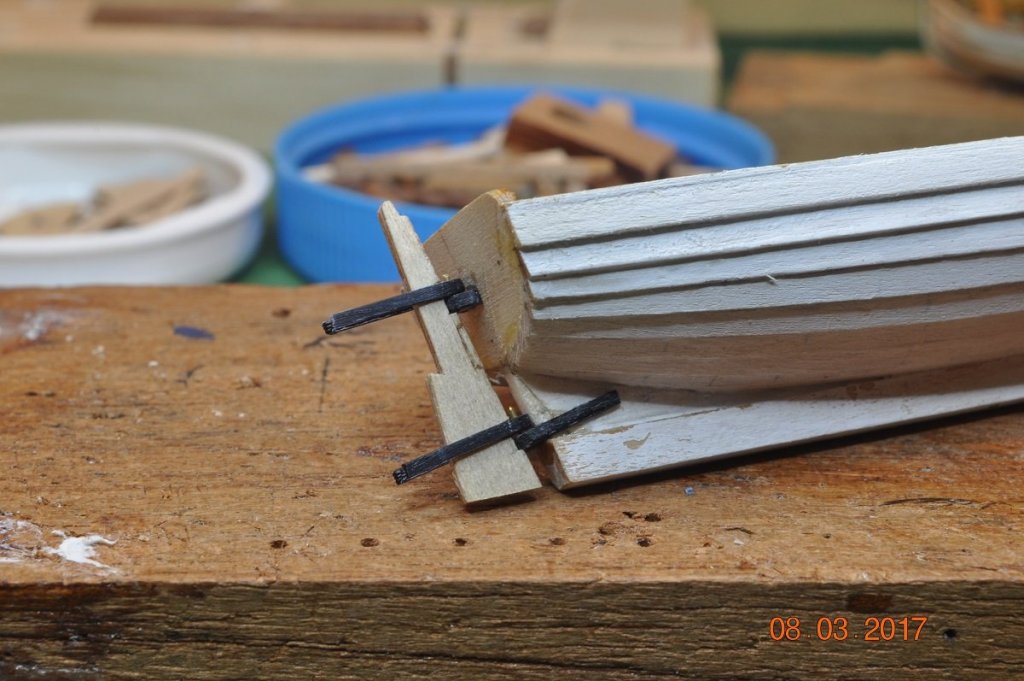
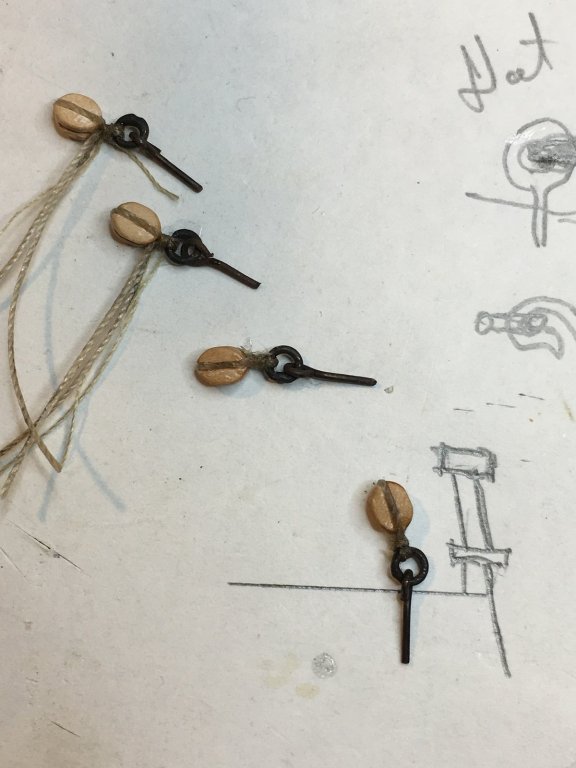
Ships Boats Update Gudgeon For the 4 ships boats, I designed small Gudgeons in 3D and printed them on my 3D printer. Yes they are plastic. Printed in ABS, 2 pieces per set. Once I was happy with the print settings, it was a matter of fine tuning the 3D model smaller and smaller to see how far the printer can "make" them. Printing several at a time worked better than once off. Below is a sample of the 3D printing, of the Gudgeons on a build bed. Once removed, tidied up a bit, trial assembled. These 2 below are earlier versions, which I was happy with, but persisted to get them smaller and smaller. As you can see by the picture below, I can cut the Gudgeon "legs" to length or off to fit the rudder to the stern. In the follow post, you can see how they turned out. Dave R