DaveRow
-
Posts
691 -
Joined
-
Last visited
Content Type
Profiles
Forums
Gallery
Events
Everything posted by DaveRow
-
 Hi Steve, I am not 100% familiar with all the Tackle and Pendant types, and find I spend hours shifting page by page trying to understand what may be applicable to the Endeavour(each mast/s), understanding the AoTS is not gospel. The topmast tackles you refer above, are they the Burton Pendant/Tackle ref: 29 & 50 p95 of AoTS ? and possibly 61 ? Dave R
 -
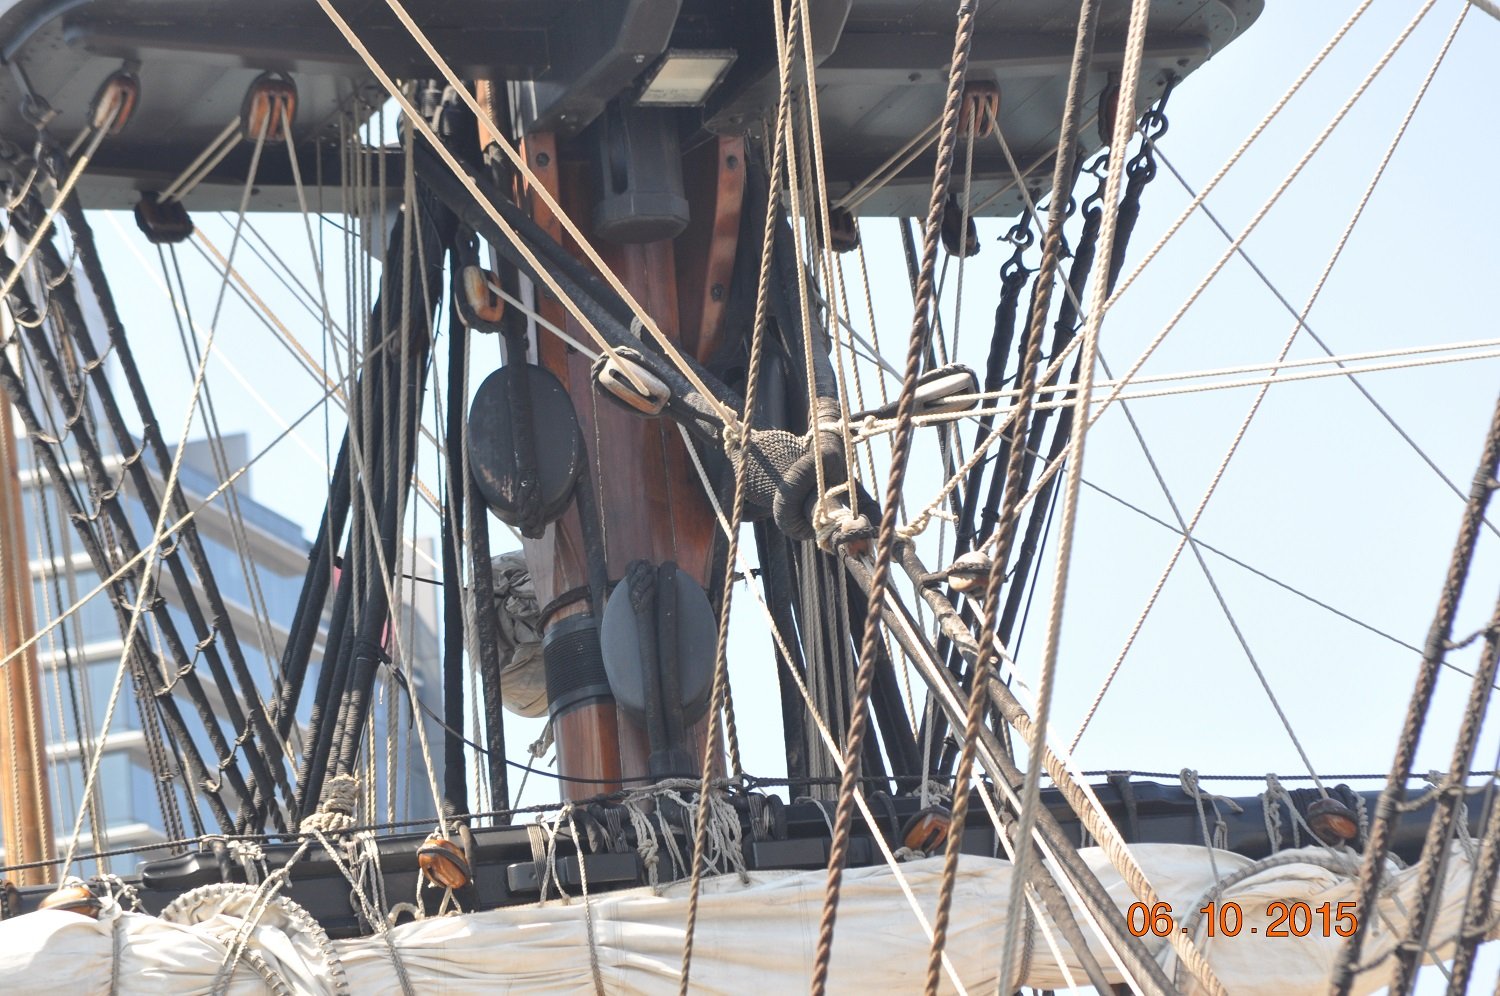
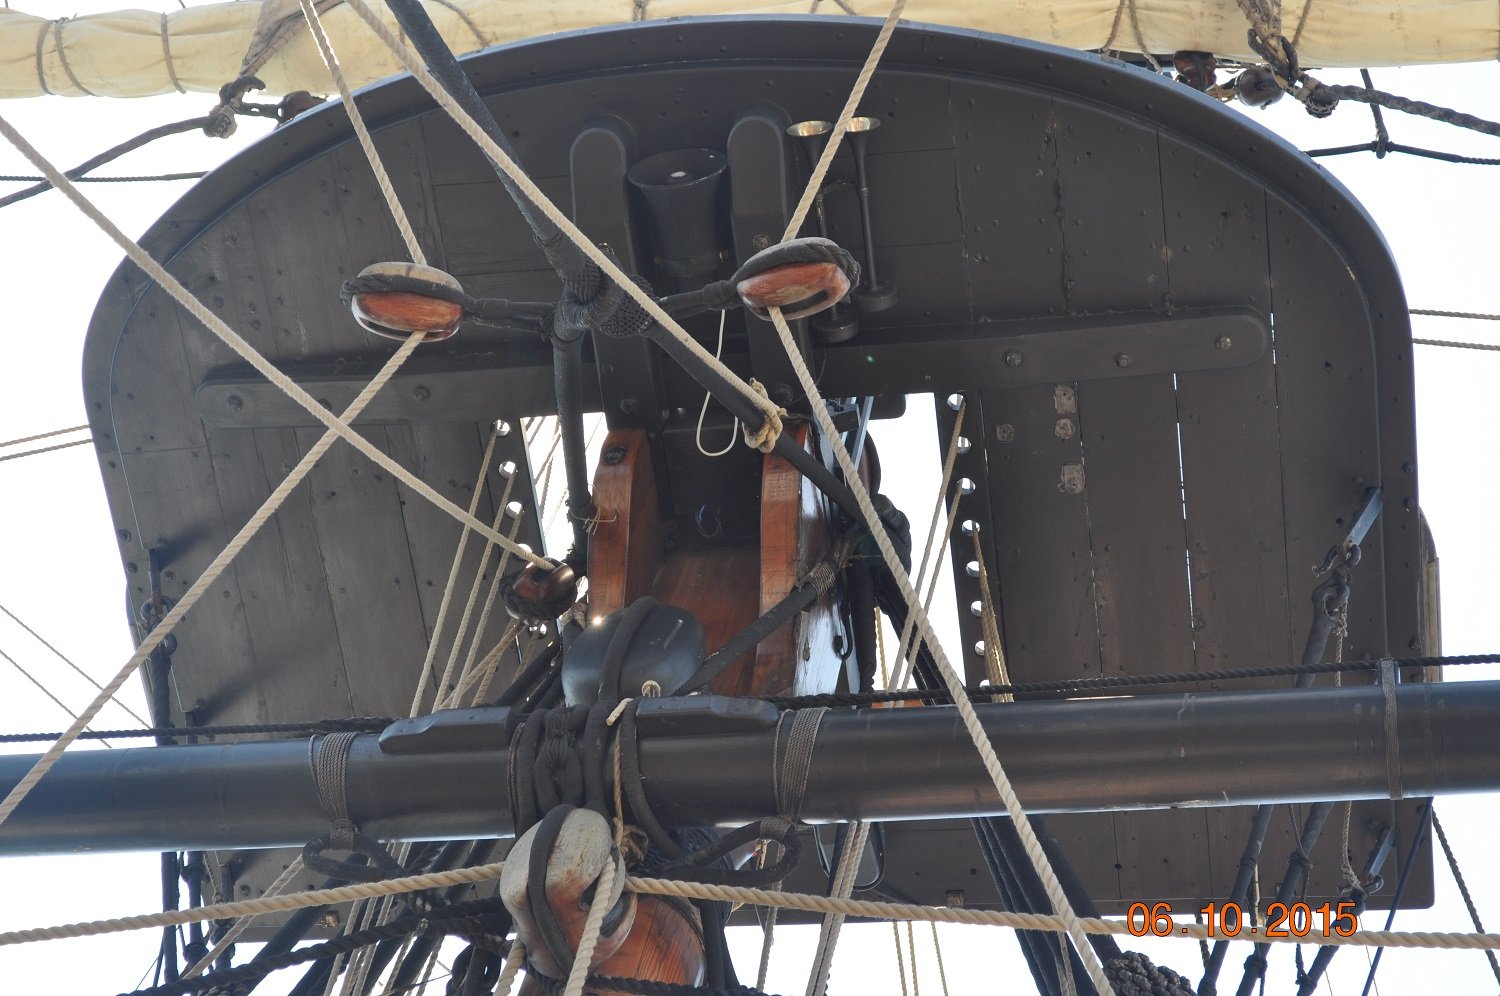
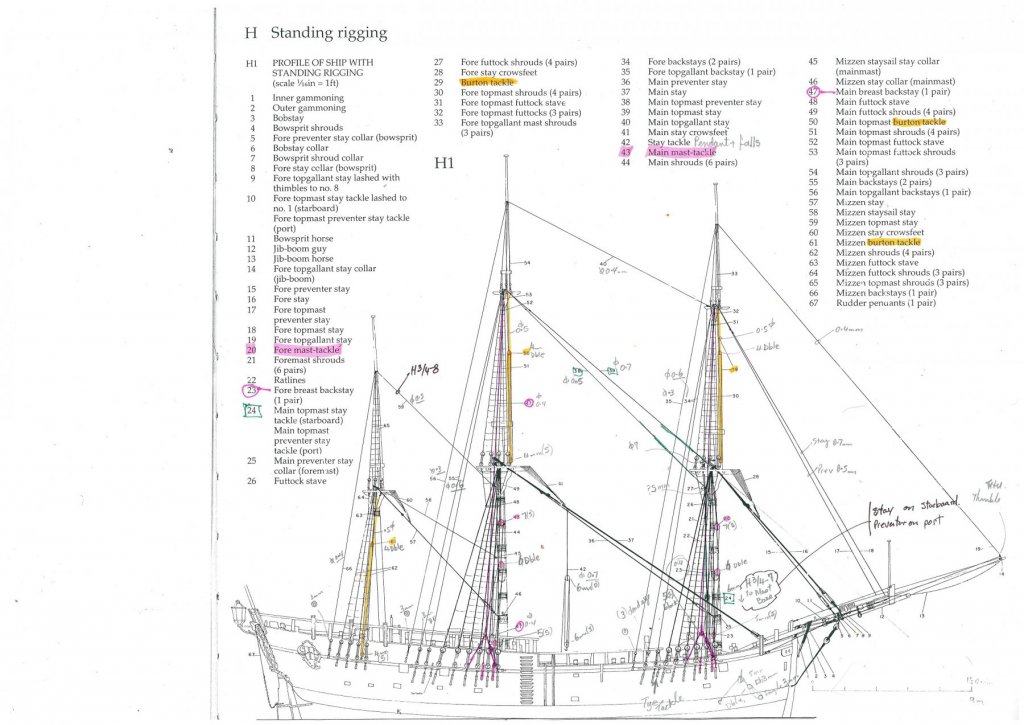
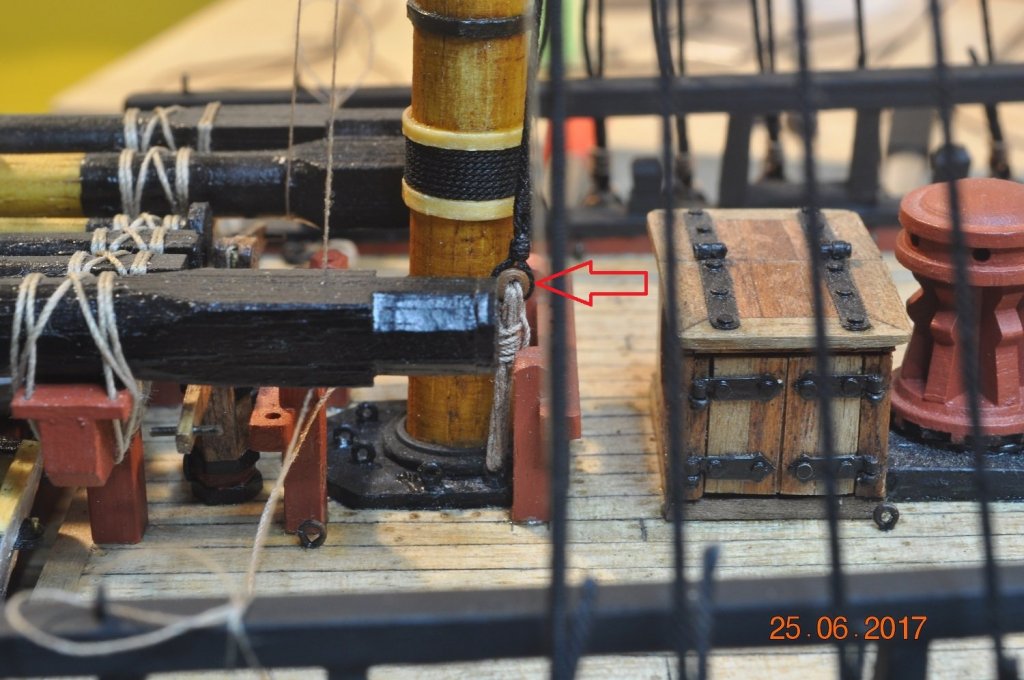
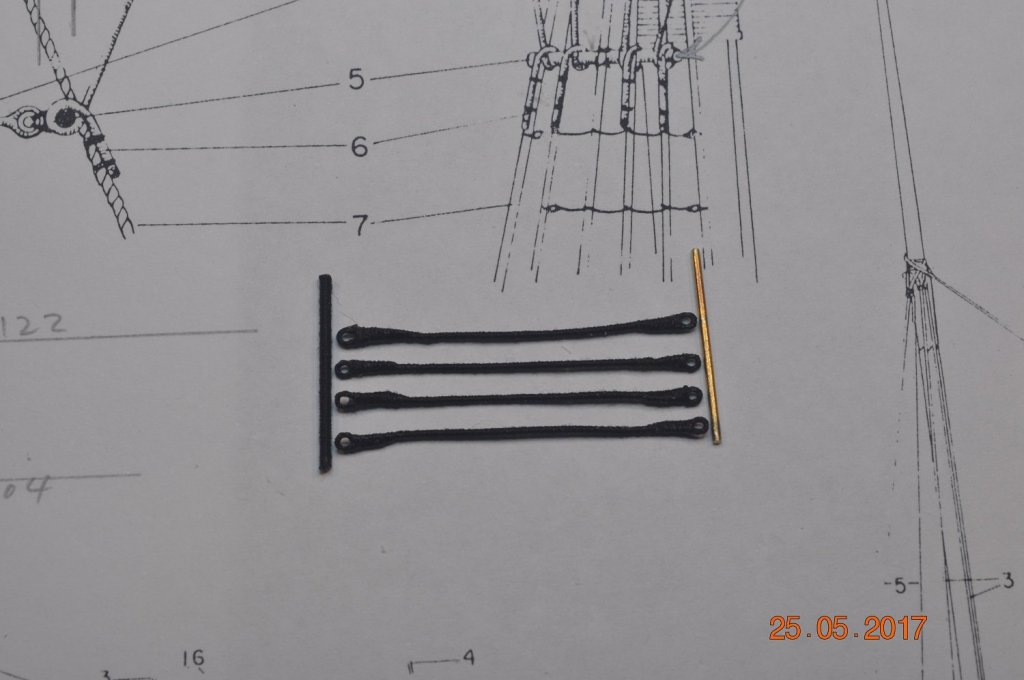
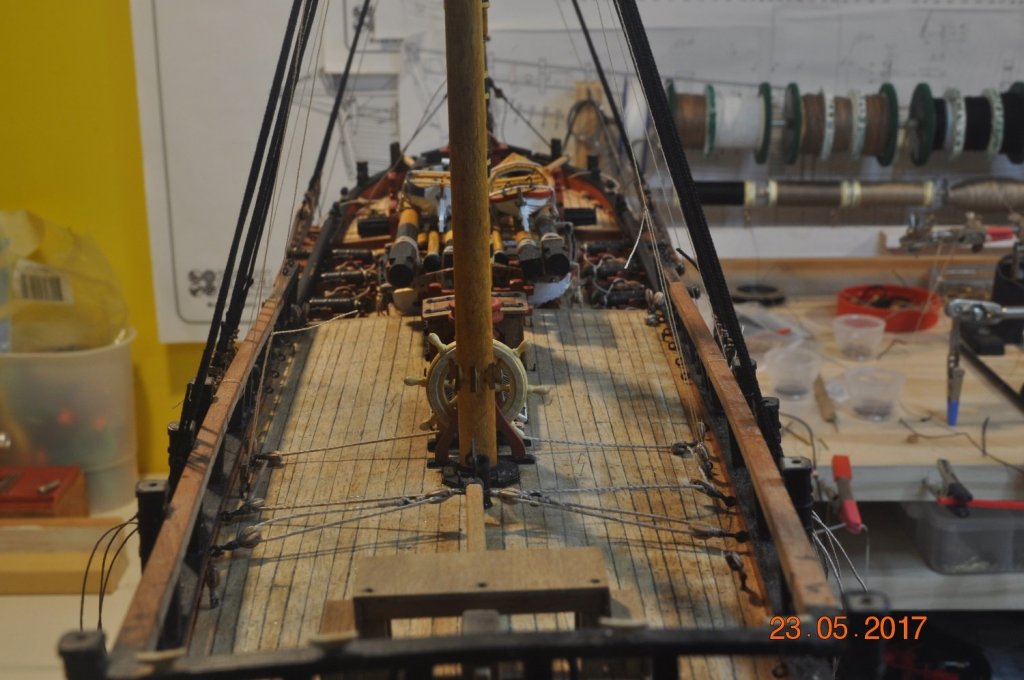
Shipyard Update Mast Tackles: I replaced the Fore and Main Mast Tackles with longer strops. After looking at the AoTS Standing Rigging Plan for the umpteenth time, I realised I had the fore and main mast tackles too short, each would be about the same height as the yard. So replaced each with longer stropped Single 7mm blocks. New Pictures: Fore Mast Tackle - AoTS Standing Rigging H1/20 Main Mast Tackle - AoTS Standing Rigging H1/43 Dave R
_01.thumb.jpg.a9397aa238746a165e8a7db53ae25211.jpg)
_01.thumb.jpg.5c50fd7ac128947cb55109f2a82efd2e.jpg)
-
HMCSS Victoria 1855 by BANYAN - 1:72
DaveRow replied to BANYAN's topic in - Build logs for subjects built 1851 - 1900
This project will keep you busy Pat. You make an excellent "sleuth"(investigative modeling variant) Dave- 993 replies
-
- 1
-

-
- gun dispatch vessel
- victoria
- (and 2 more)
-
Hi Ed, Just found your build log of the "Young America - extreme clipper 1853" What a superb build and example of workmanship. Love your details which you share to the community. Dave R
- 3,618 replies
-
- 3
-
-
- young america
- clipper
- (and 1 more)
-
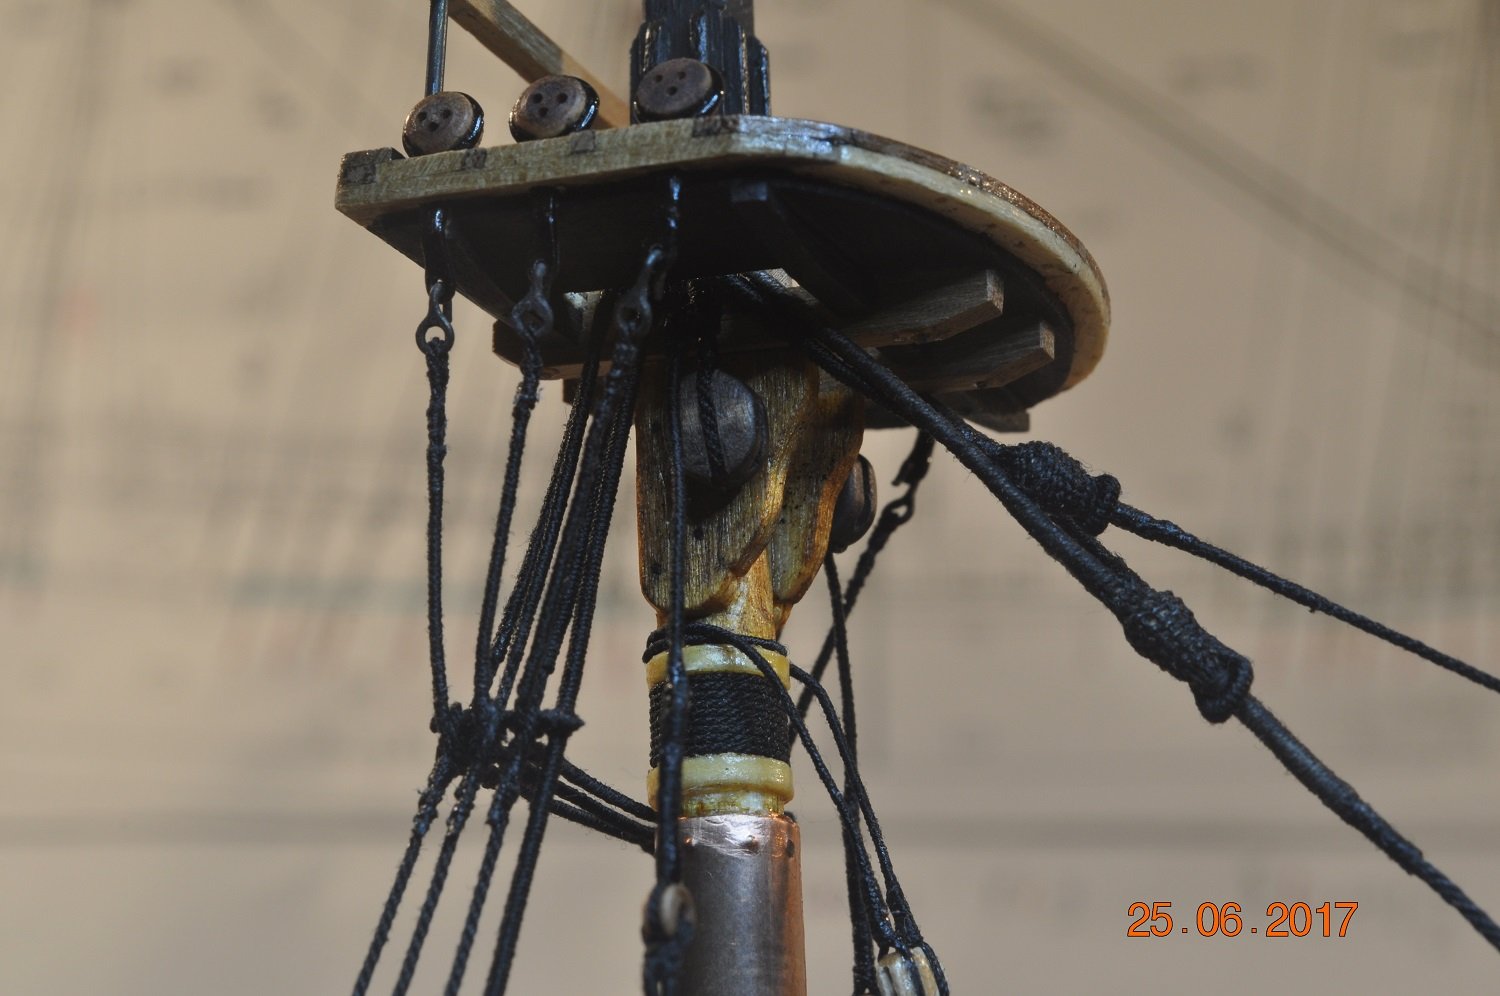
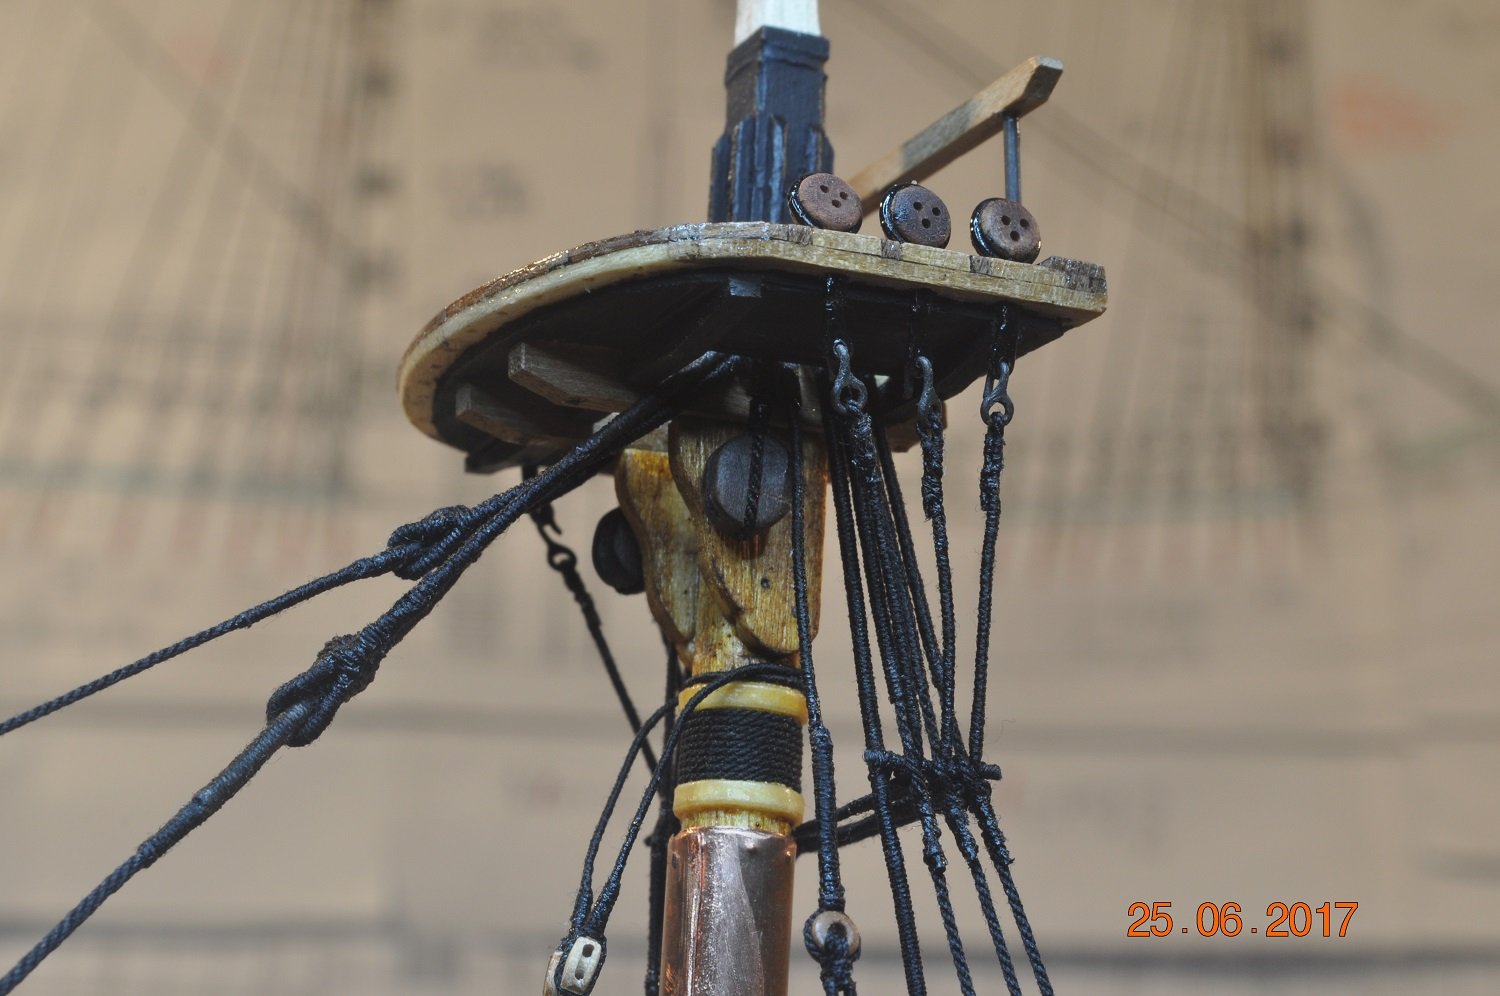
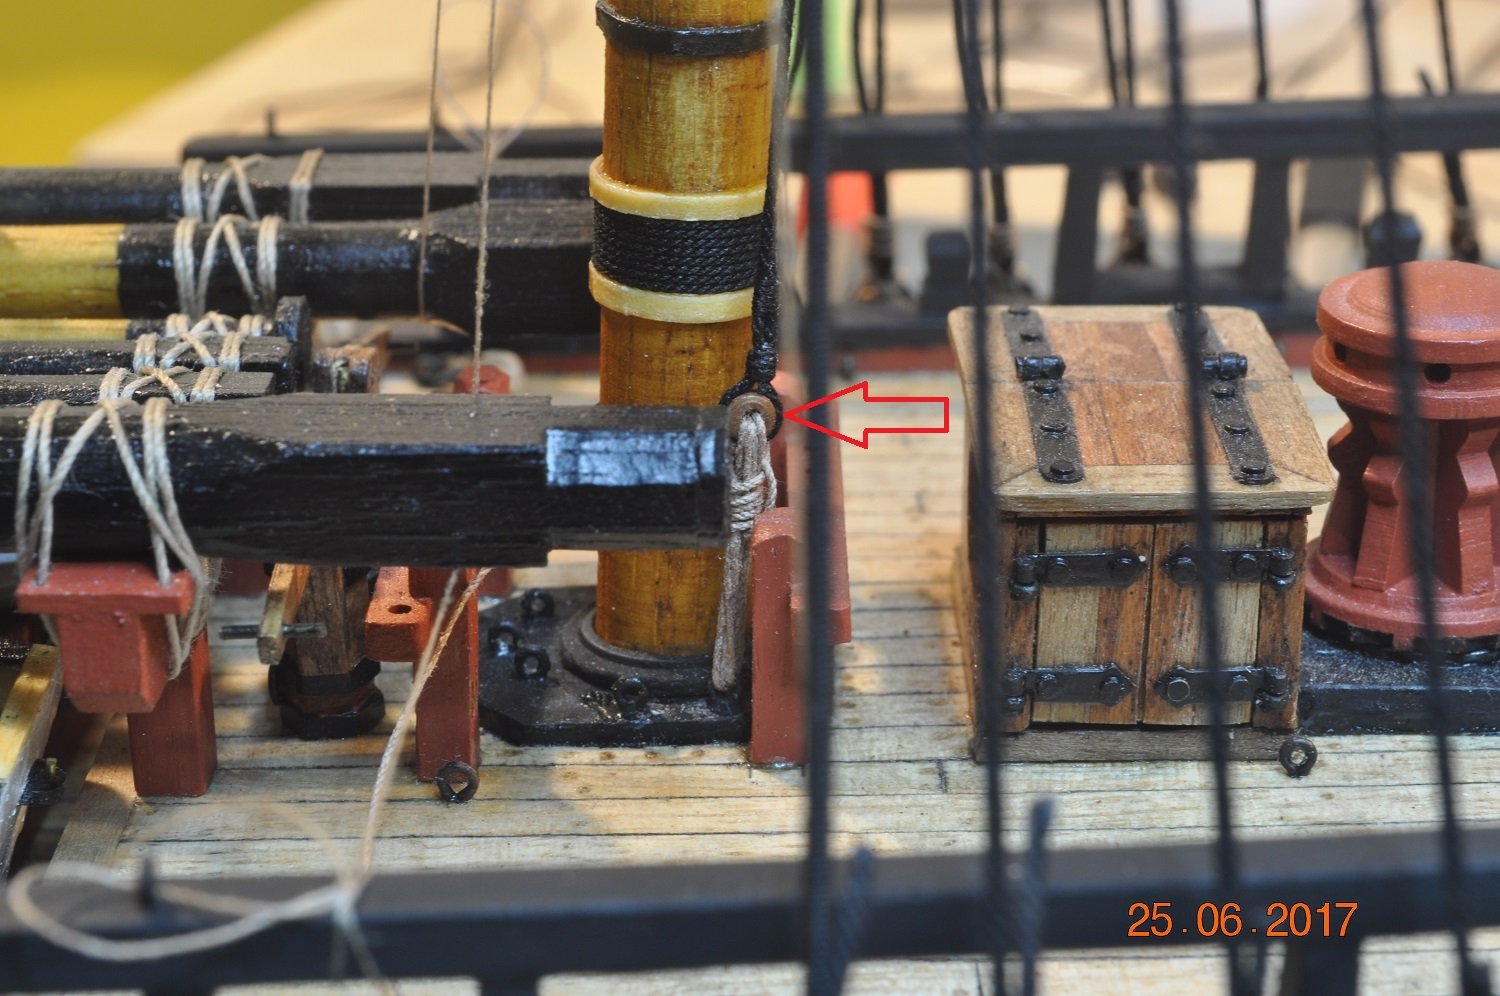
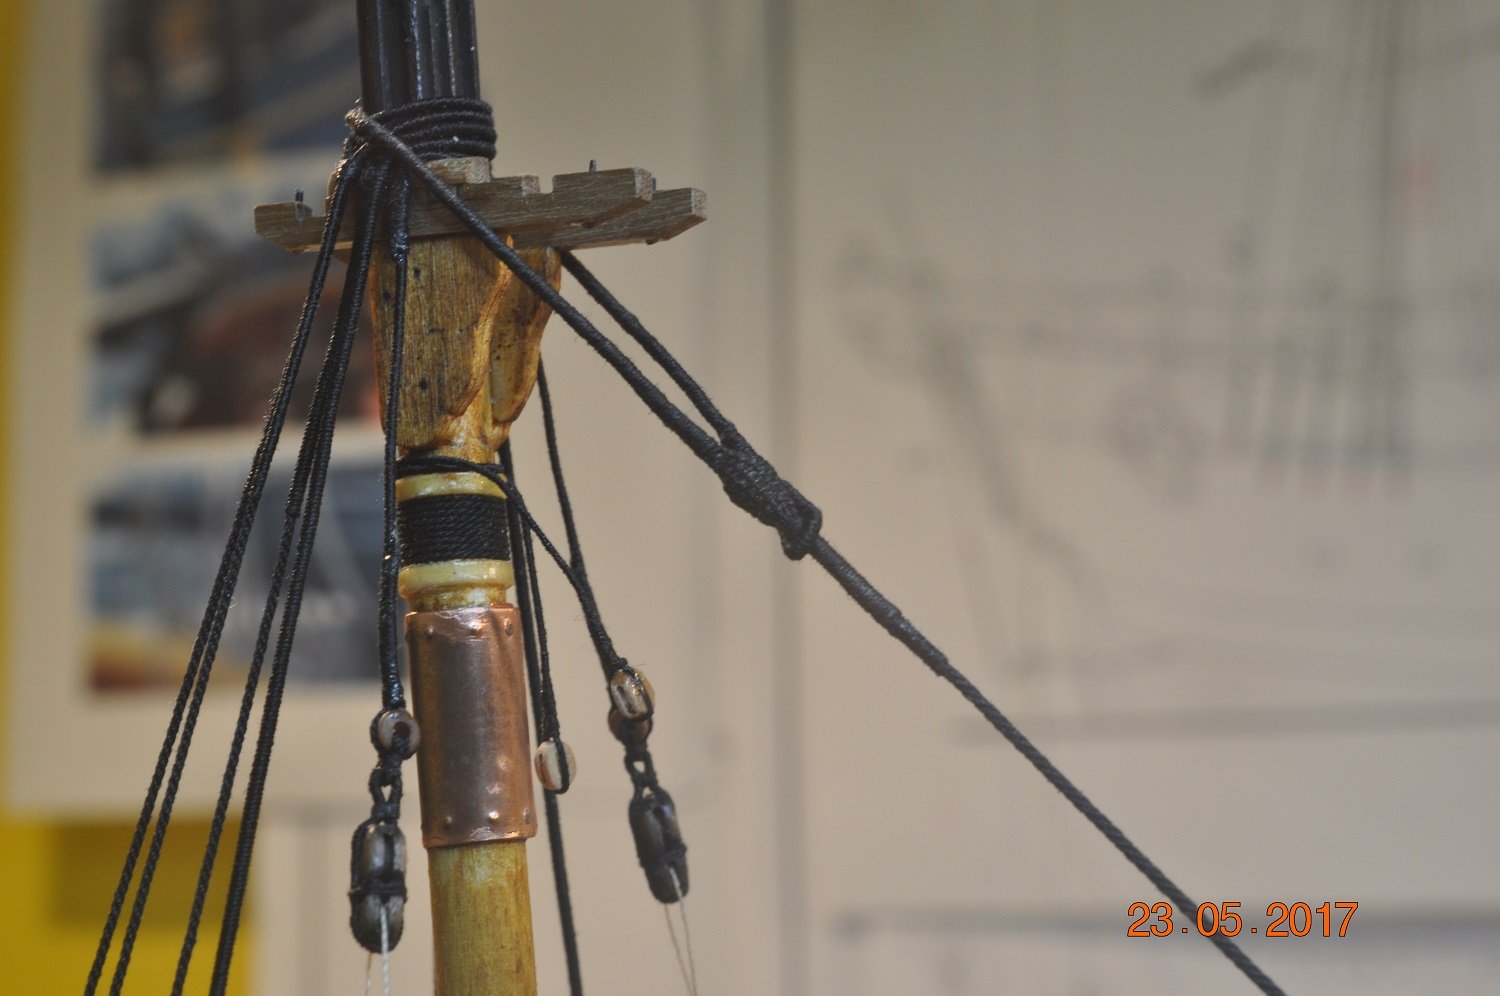
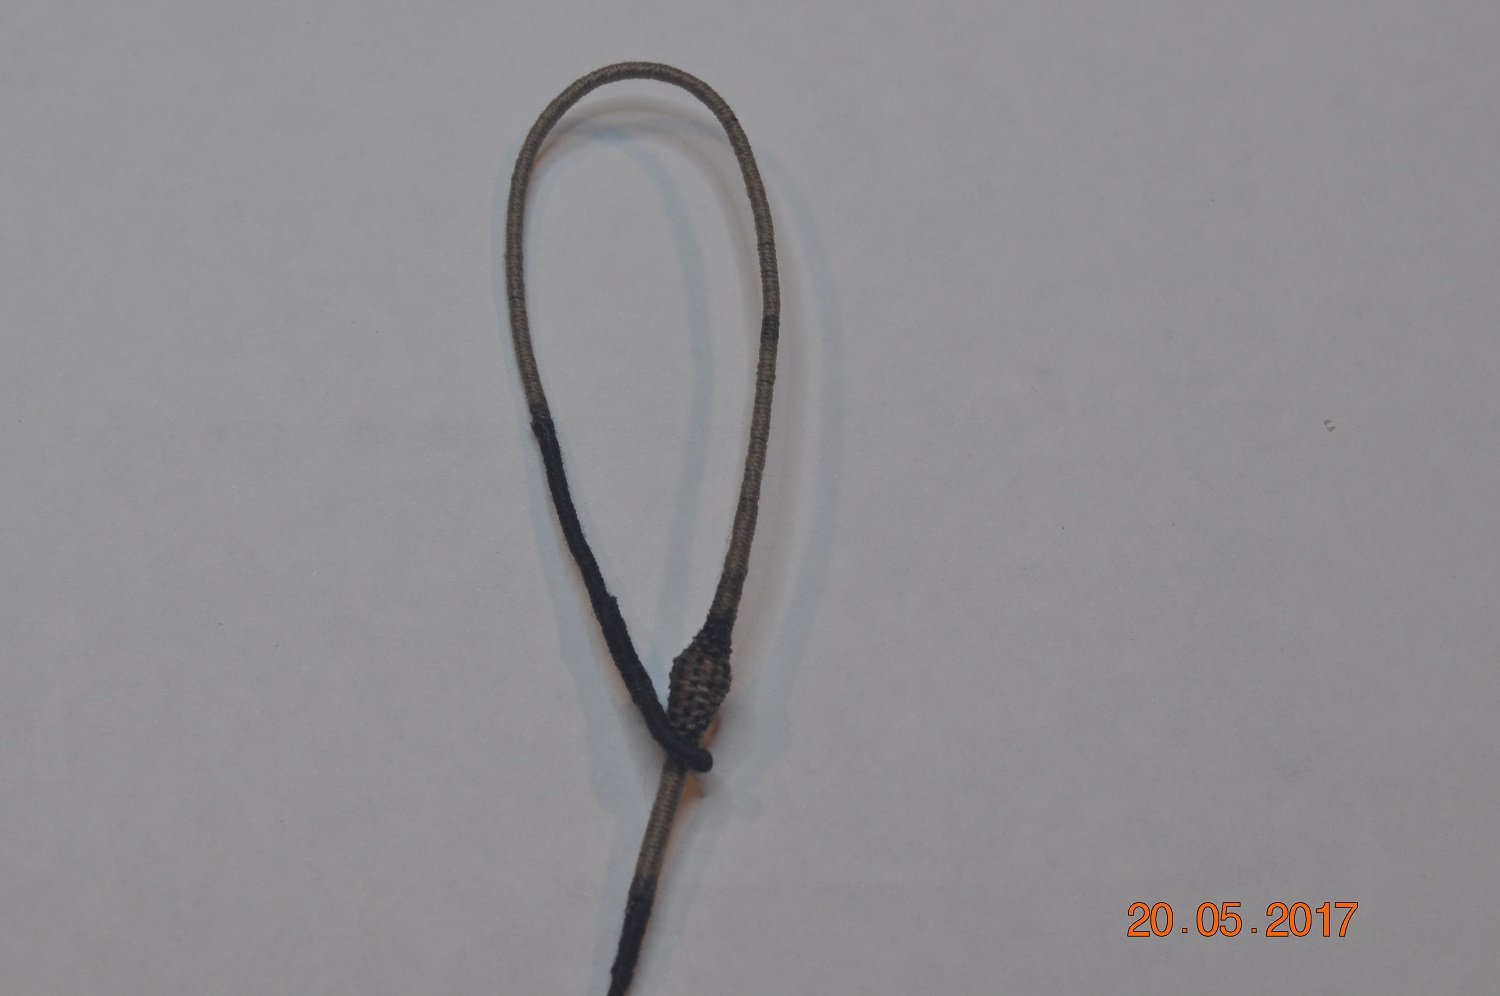
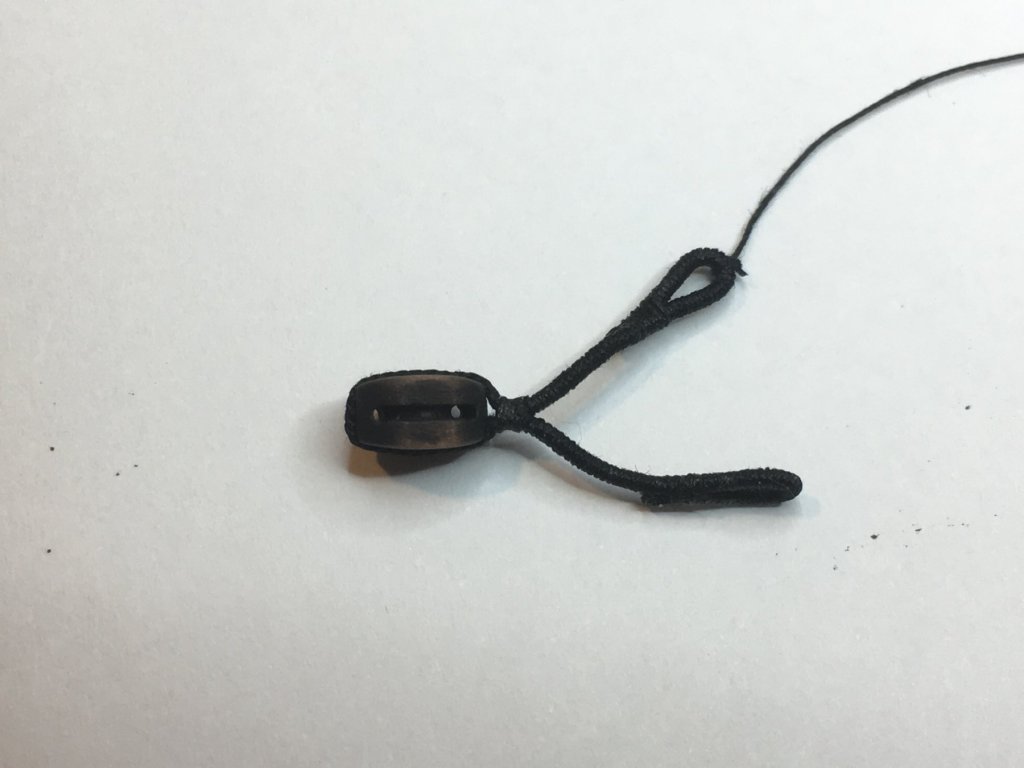
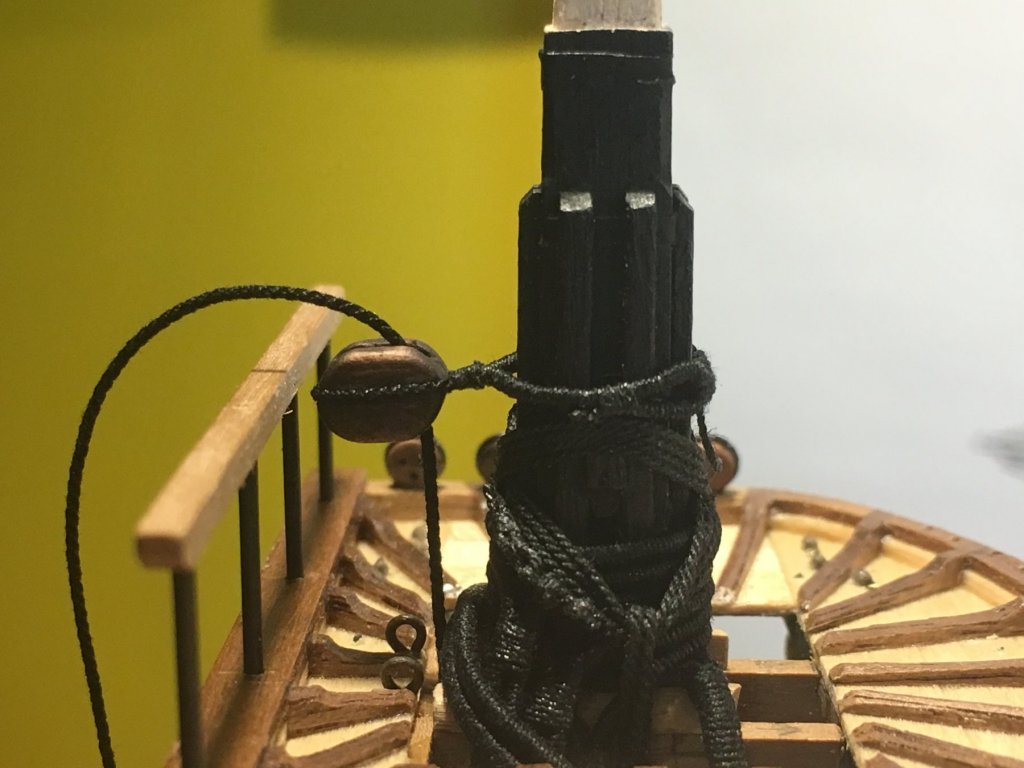
Shipyard Update Main TopMast Stay: A Single 7mm block added to the top of the Fore Mast for the Main Top Mast Stay(will be using 0.64mm rope) to run through. The stay runs down the mast, fixed via a tackle to an eye on the Starboard side(H1-10 AoTS) of the mast step. For the collar I used 0.45mm rope, seized leaving a gap to go around the block, the seized ends to form the end loops. The block ready to be fixed to the fore mast top: And the block lashed in place: The block/collar may be a bit too high up for the Main and Fore stays to be perfectly in alignment. ? Dave R
-
Hi Michael, Below is a sketch of the 3 lower Masts, shroud rope sizes I used. Haven't done the Fore or Main TopGallant Masts yet. Sketching up these diagrams is just the start of understanding how the rigging all goes and works together. The shrouds and stays are the easier ones to follow, the more I get into it, wow it gets interesting. Cheers Dave R
ShroudSizes_v1.thumb.jpg.578b9198c2c56bf16b1aab1687f7921b.jpg)
-
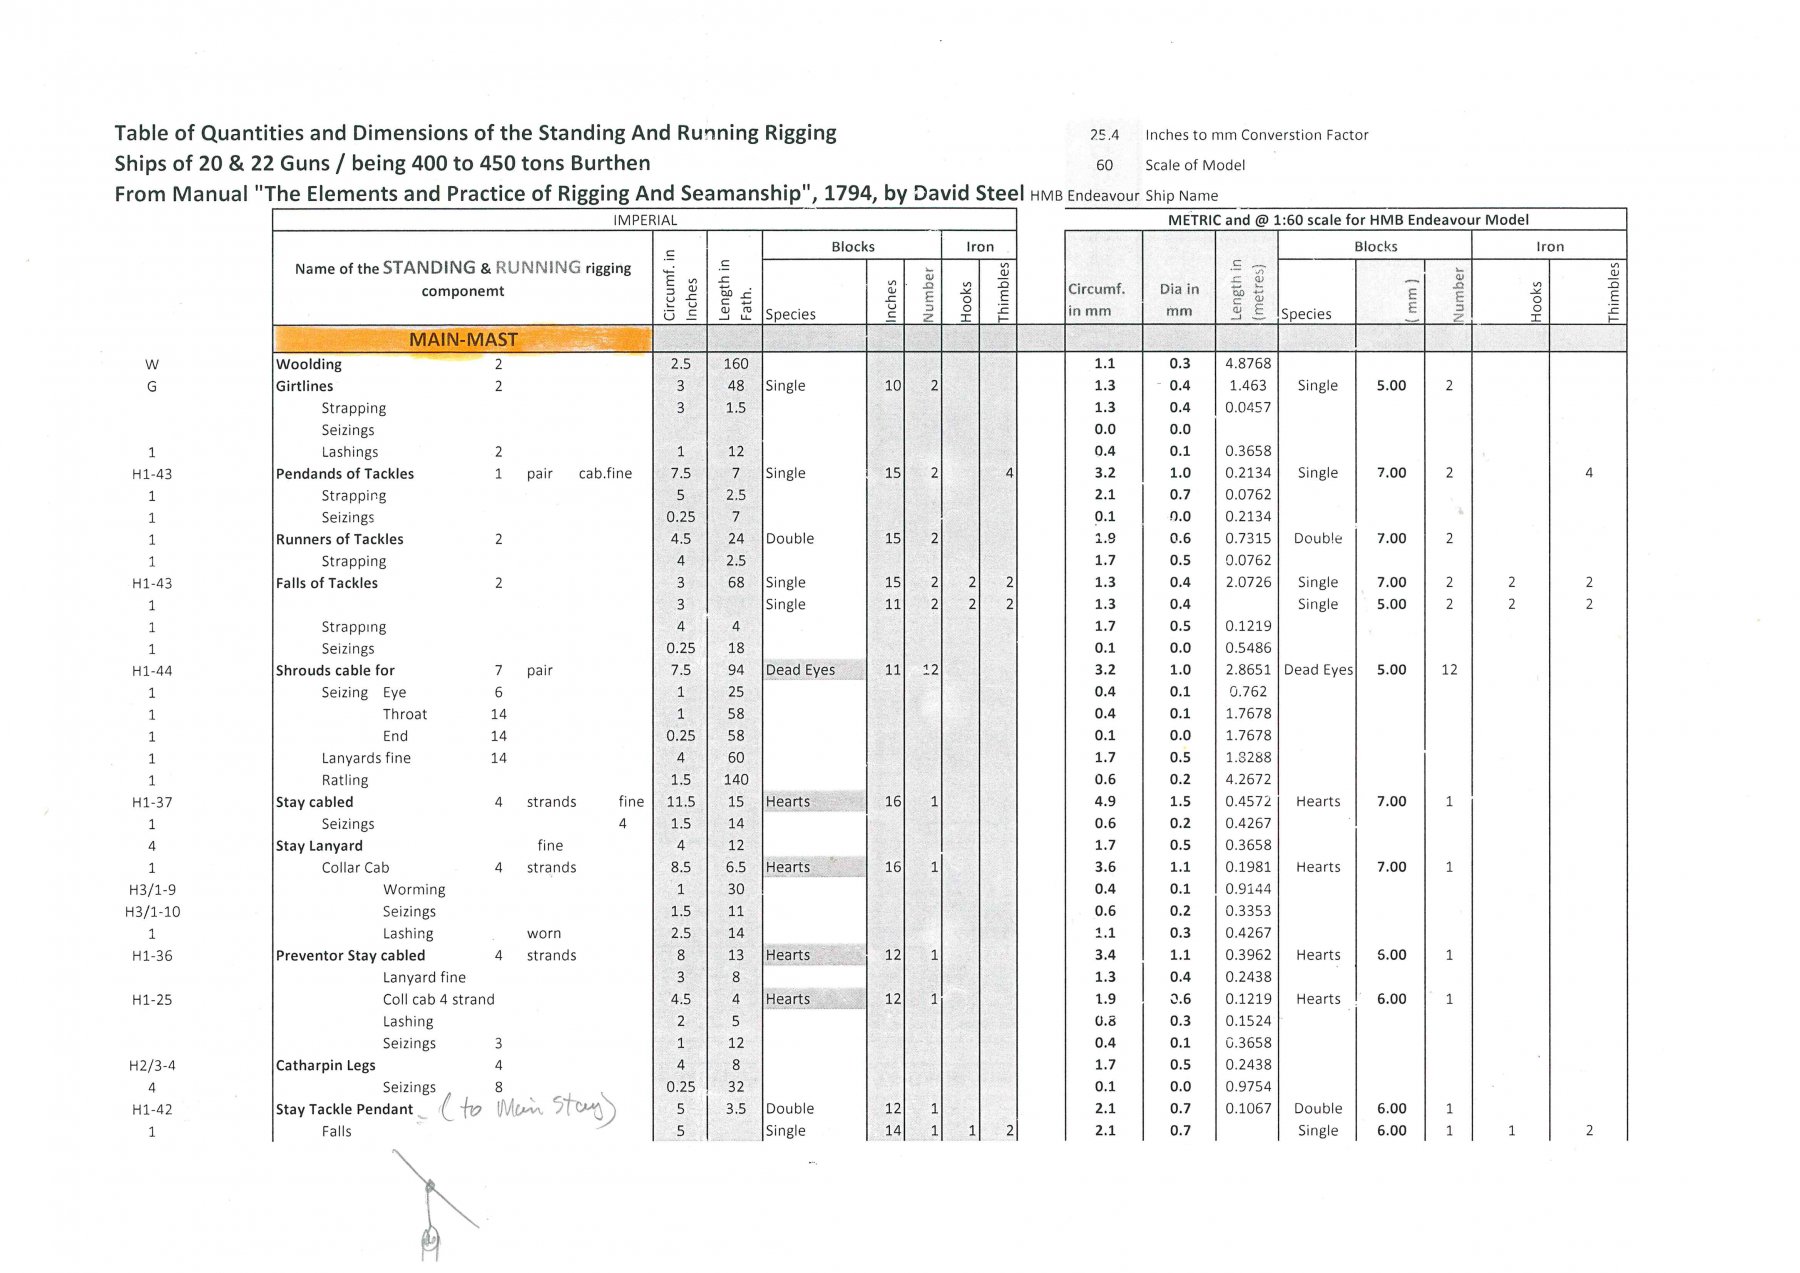
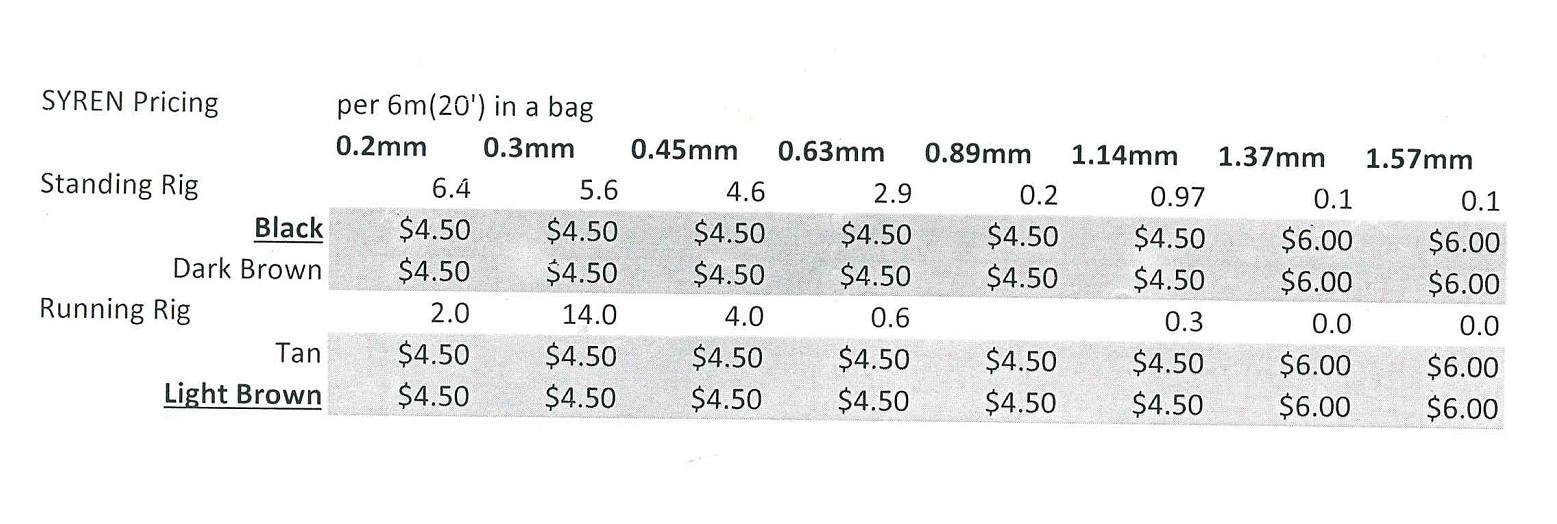
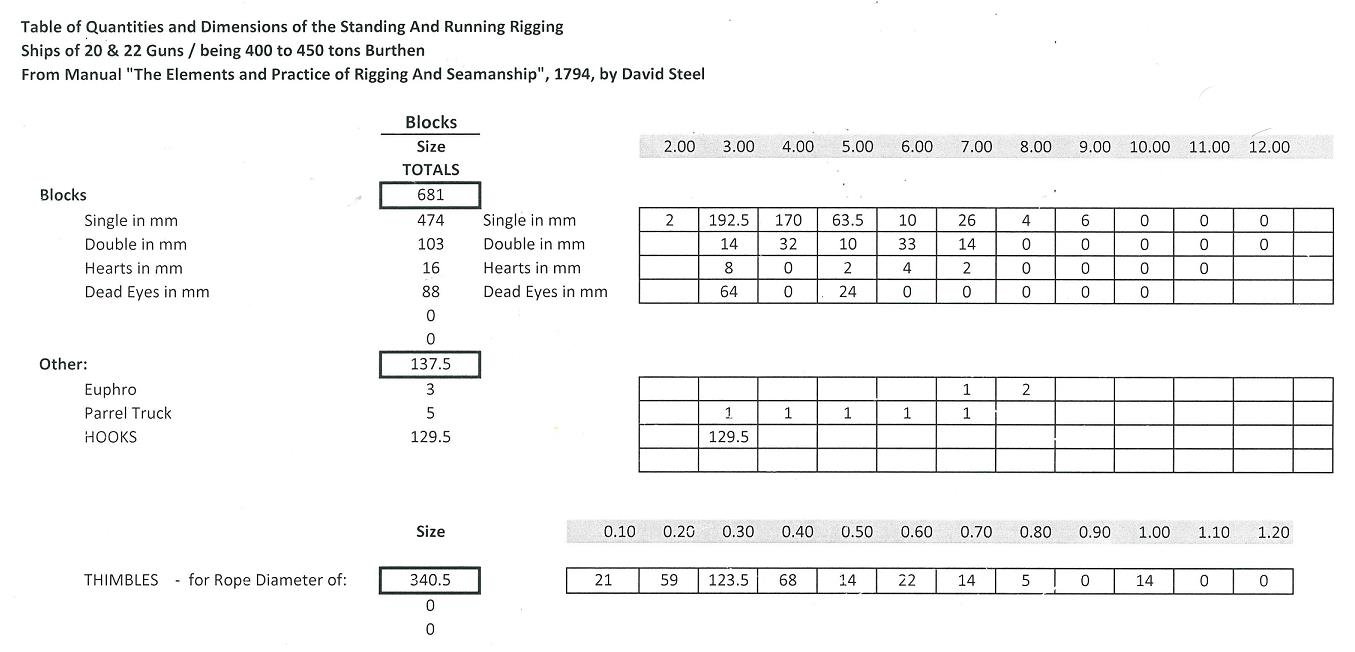
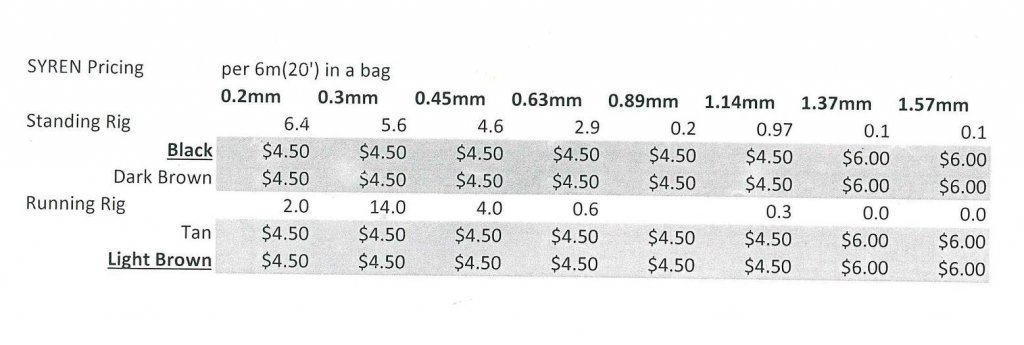
Hi Pat, I had a look at the same Rigging Spreadsheet of Danny and John you mentioned. It is great, produces the rope sizes, however I may be wrong, not the blocks ? am I correct ? I did something similar(using David Steel's) which produces rope sizes, and also the block types and sizes. When I first looked about what seems like years ago, I wanted to find out how many block types & sizes I'd need, I could not find a source at that time. The spreadsheet converts the imperial to metric at an entered scale and is based on the "Ships 20 to 22 guns.... closest tons to Endeavour. I've added a AoTS Ref to the left side for what I used. The spreadsheet also works out the totals for: - lengths of rope sizes for the standing and running rigs and - type and sizes for blocks Samples below > first Main-Mast page, (1 of 24 pages of data) And produces a Summary of Blocks: Note: Of interest, the number of blocks the spreadsheet indicates(681) is pretty close to a number mentioned in an article "Rerigging Endeavour Part 2" by: Anthony Longhurst, ANMM leading-hand rigger and shipwright on the Replica, mentions "Add to this the oiling and upkeep of nearly 700 blocks" And a Summary of Ropes to order: based on Chucks packages (each 20'), I hope I don't get into strife showing a suppliers price/name. Just what I used to work out what to order and how much. Disclaimer: Above may not be accurate and is purely what I have used for my Endeavour. Use at your own risk. Enough, back to the real work.... Dave R


-
I have the charts/sketches for the 3 lower masts. I'll get them from my log book and post. I keep a log book, details on how to make items, sketches, sizes and calculations etc. As for working neat and tidy. ? I just try to make neat cuts, go slow and steady and if not up to scratch, I redo things. I plan ahead and quiet often, I make something as a trial run to see how it goes, make changes if not 99%, even work out a number of processes(even making jigs) to mass produce the same item a number of times. I am sure many others do the same things above. I mostly use a magnifying glass with Leds for all the small items. All takes time, hence many hours of work sometimes produces very little in the end. Dave R
-
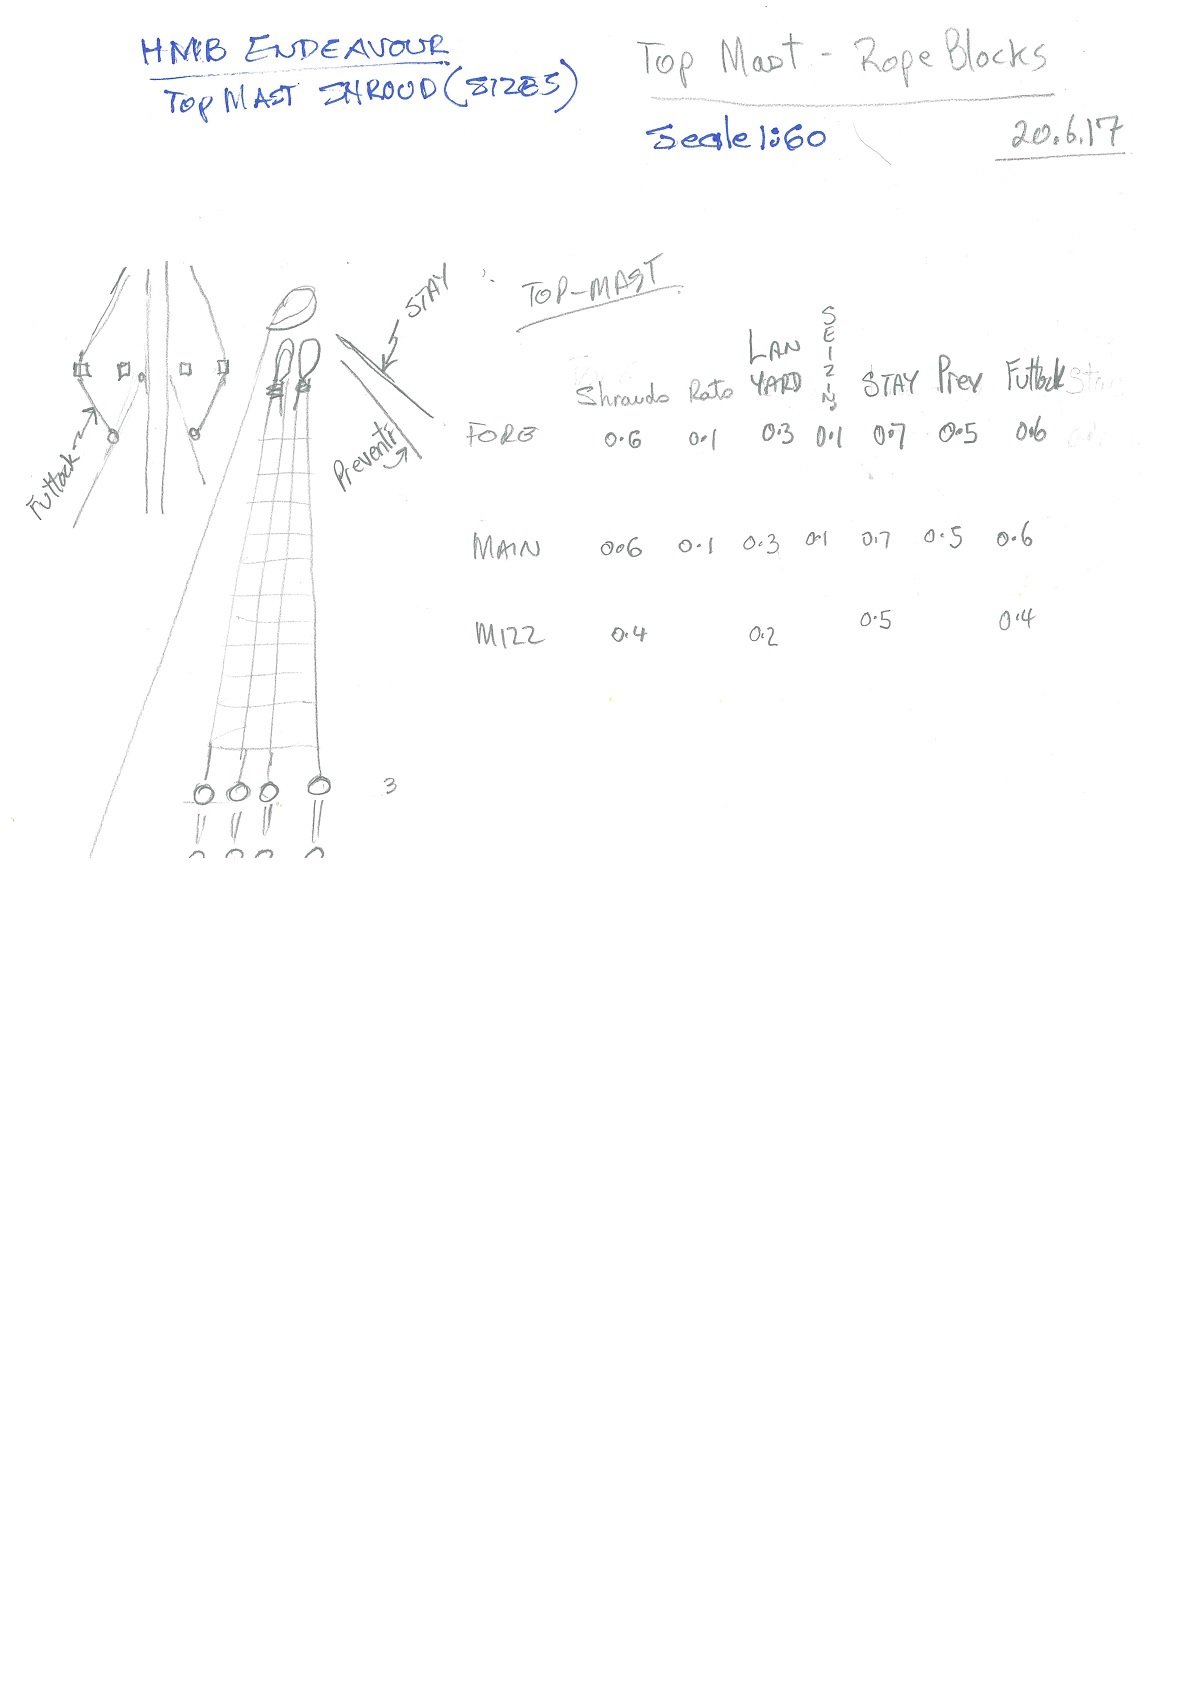
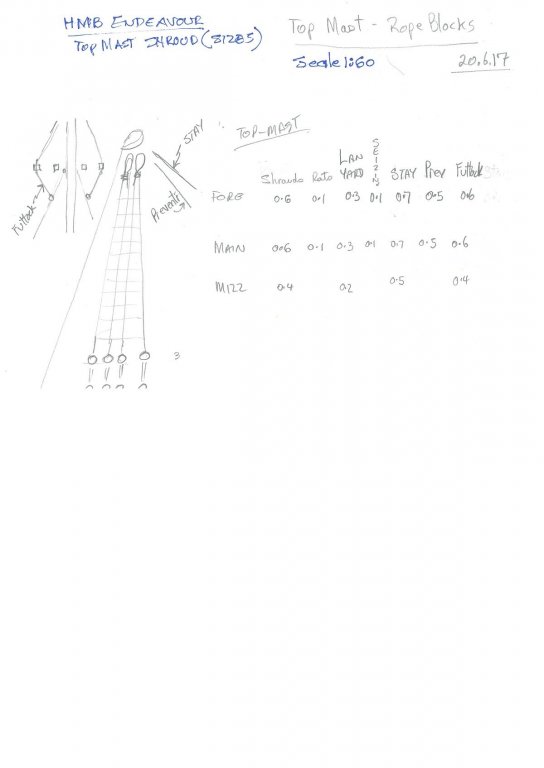
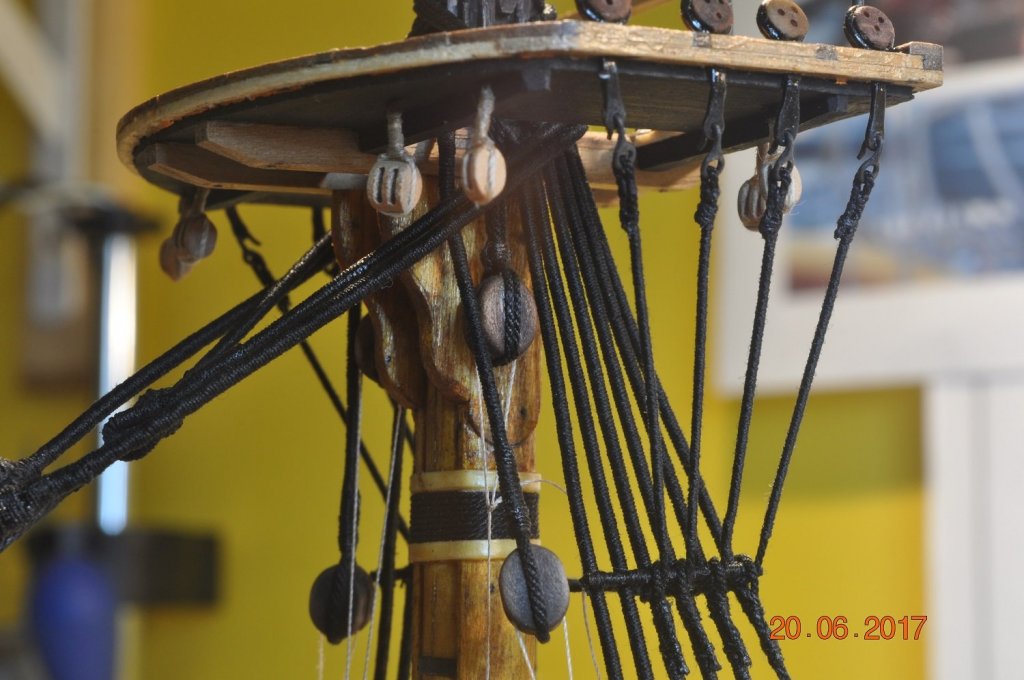
Hi All, Thanks for your comments Michael, Pat and Greg and others for looking in. I thought I share something I am sure most if not all of us model makers do. Planning ahead, don't we ? I am getting ready for the upper mast Standing Rigging. Killing some time as I have more ropes from Chuck to arrive soon. I've marked up on a copy of the AoTS Standing Rigging page(for 1:60), with as many as possible rope and block sizes for easy reference. At times I sketch up a specific task ahead of the sizes. Below is a sketch and tables for the TopMast ropes and block sizes. Cheers Dave R
-
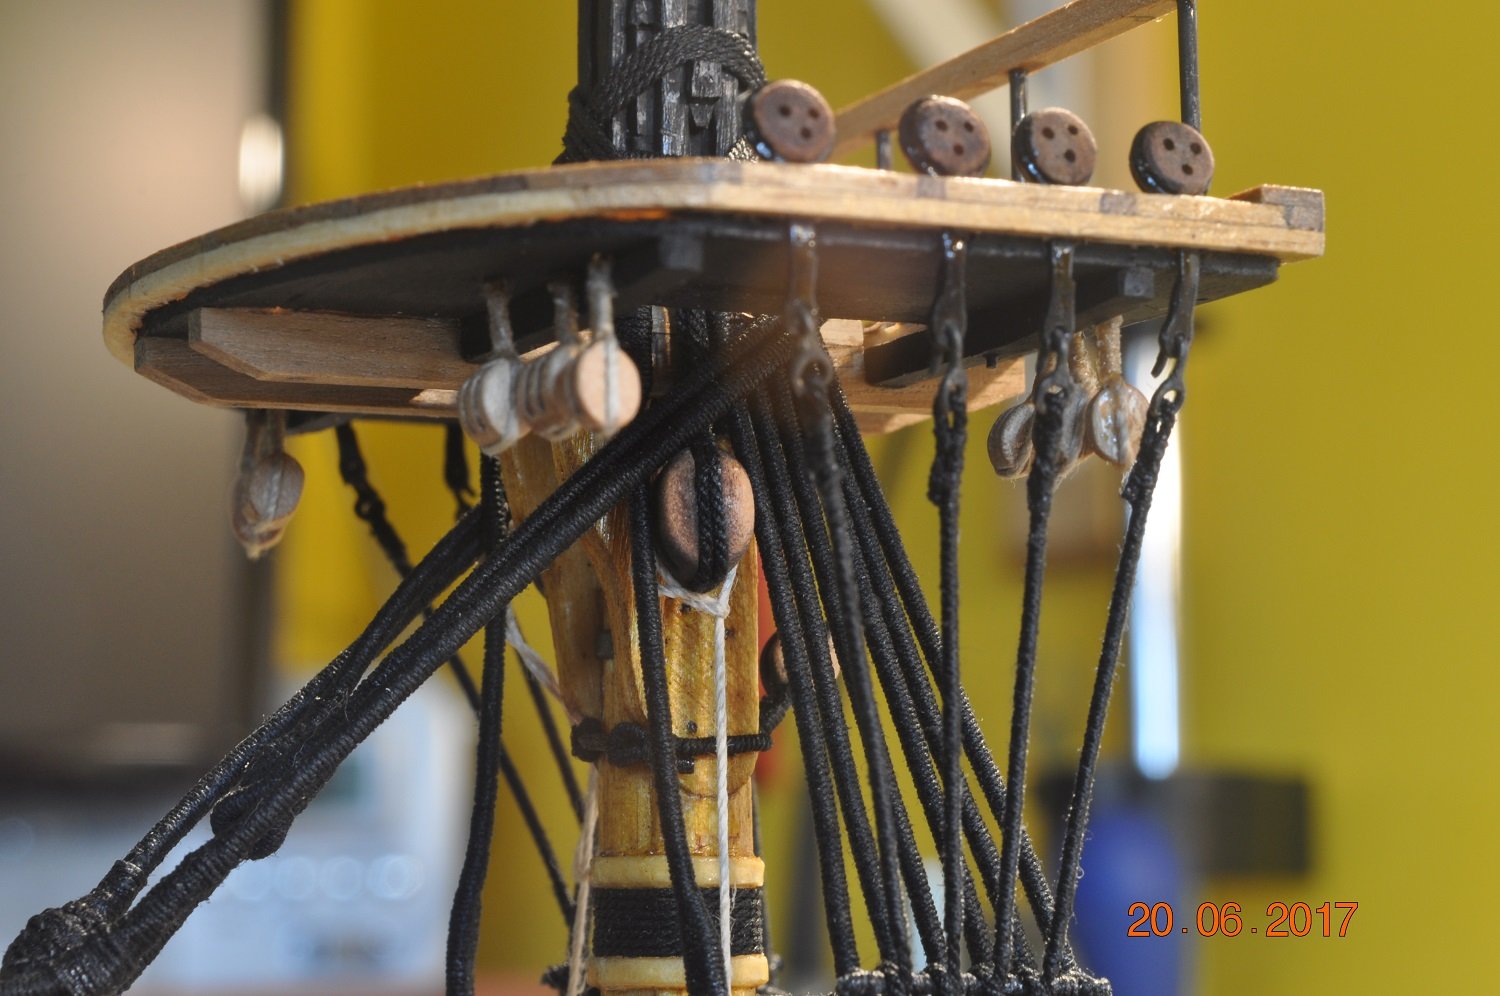
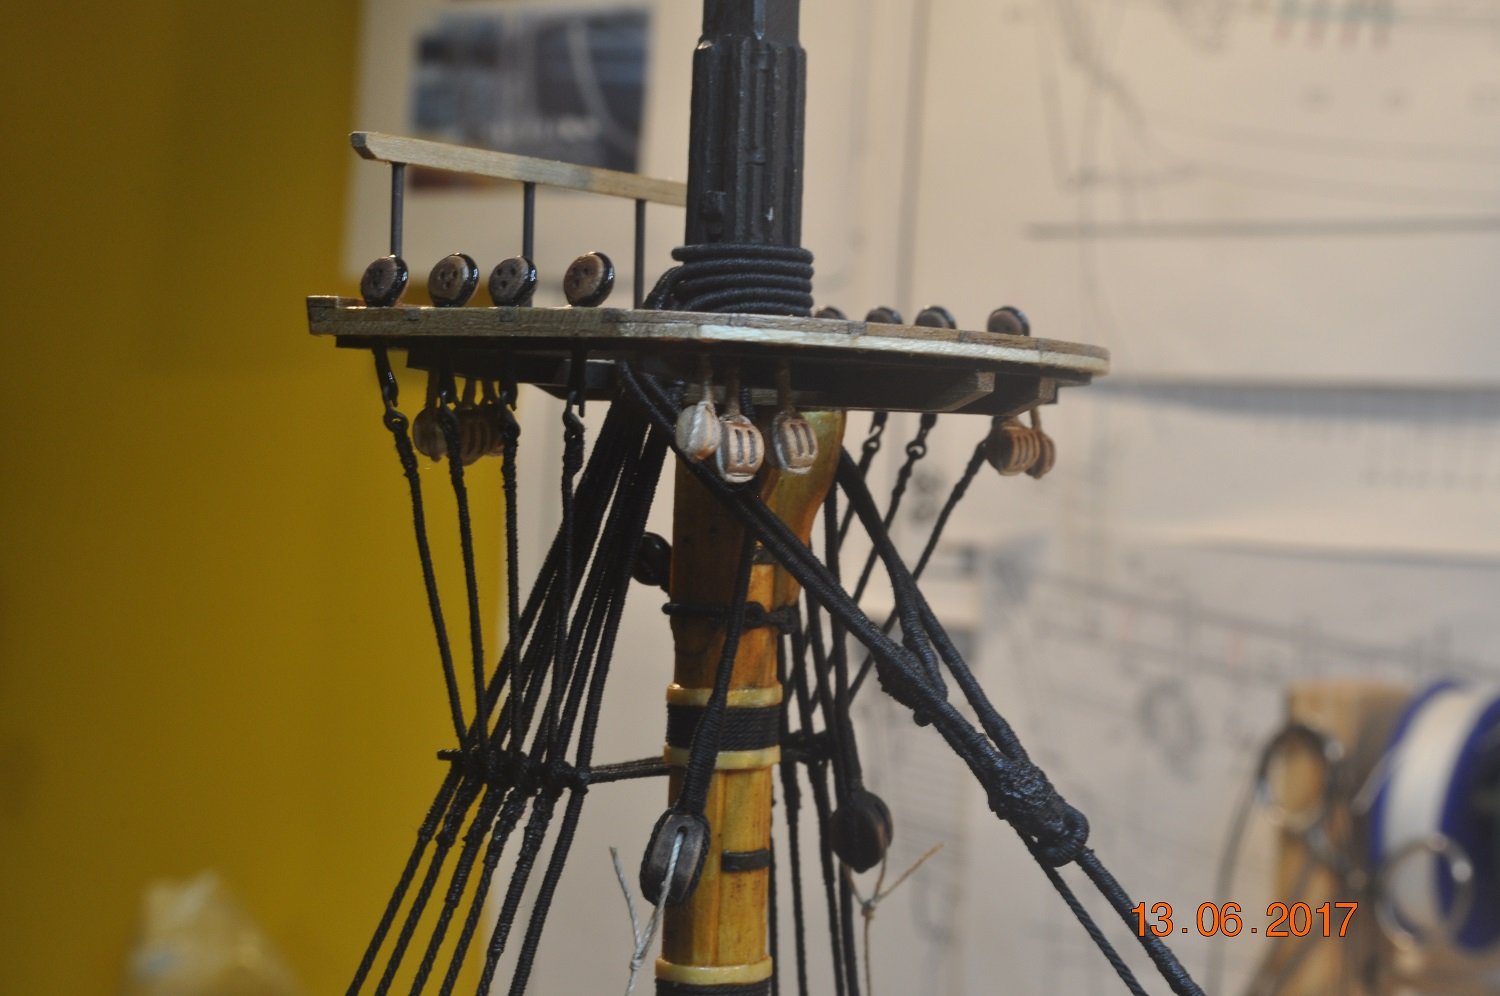
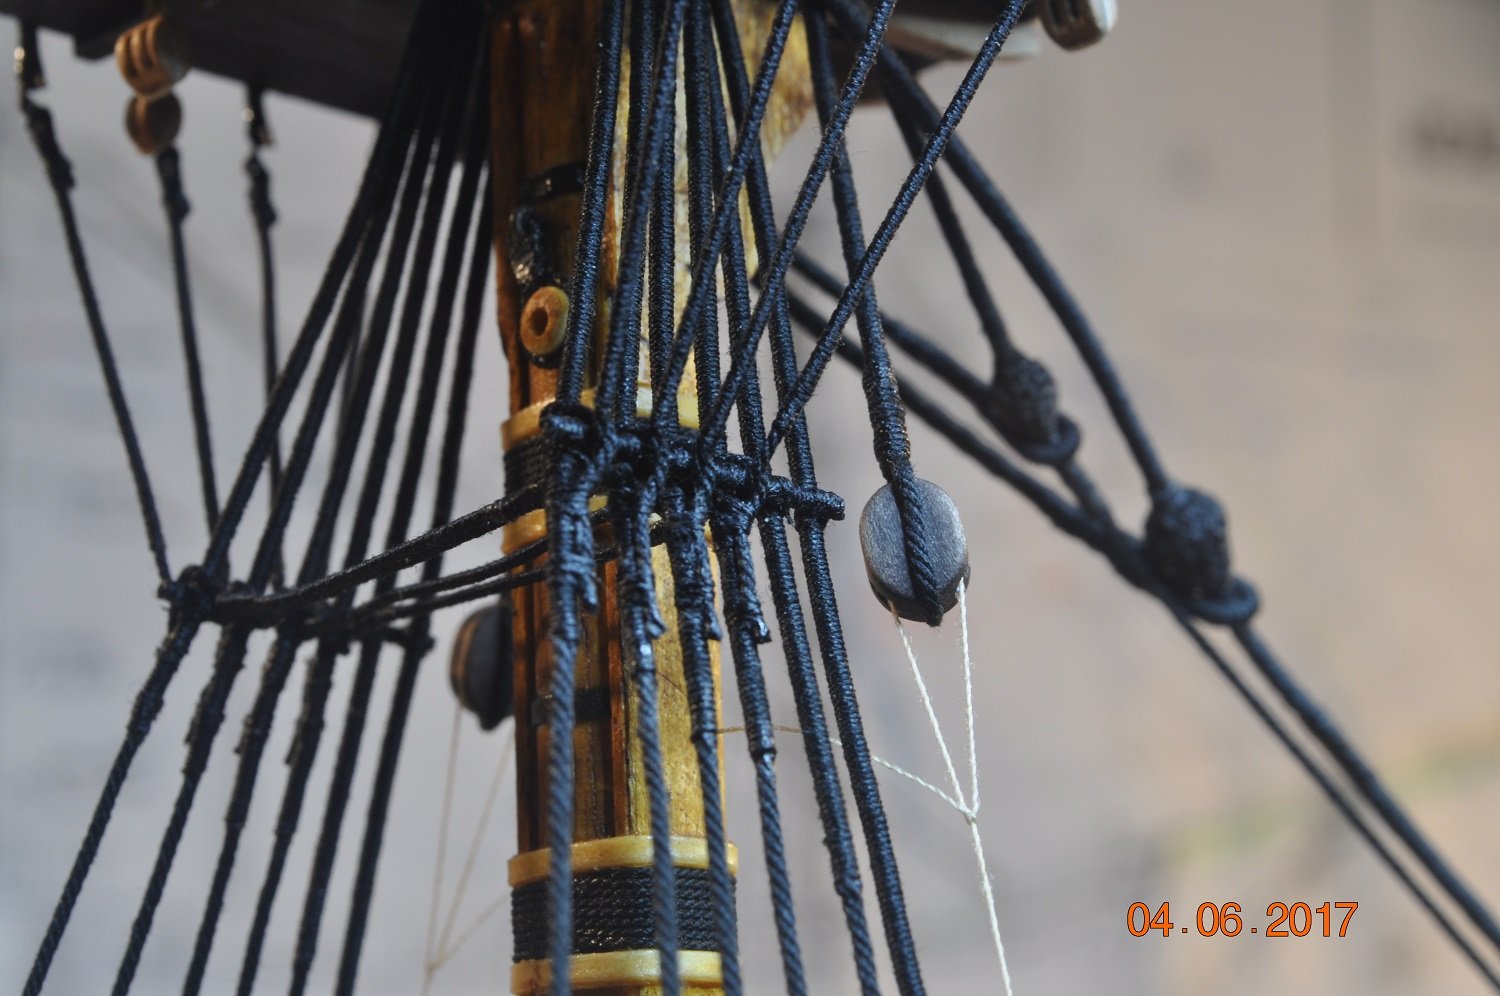
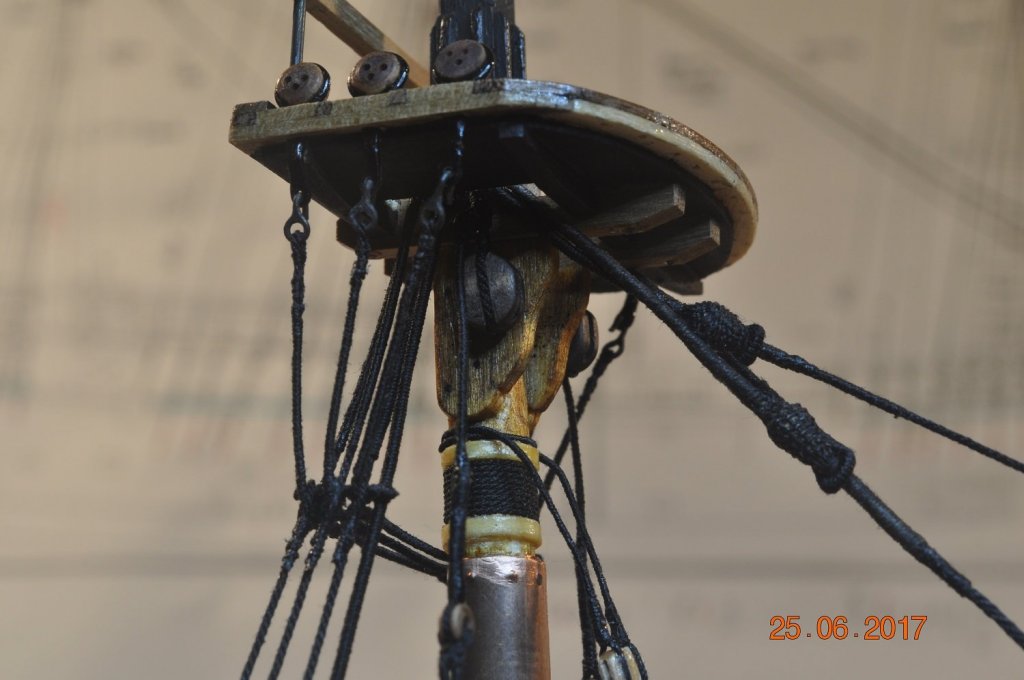
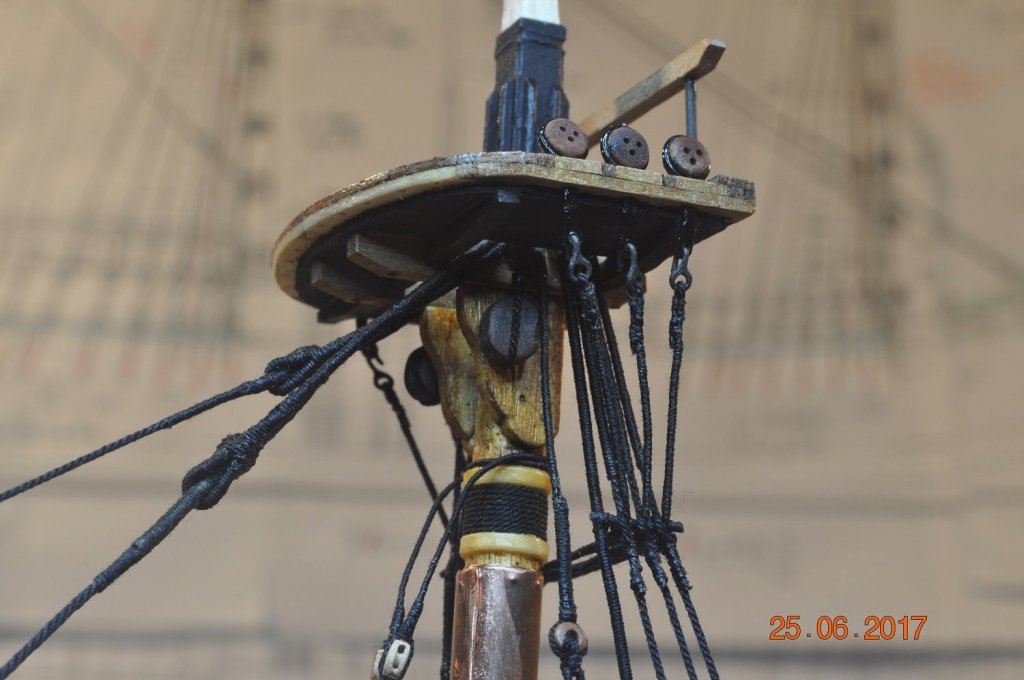
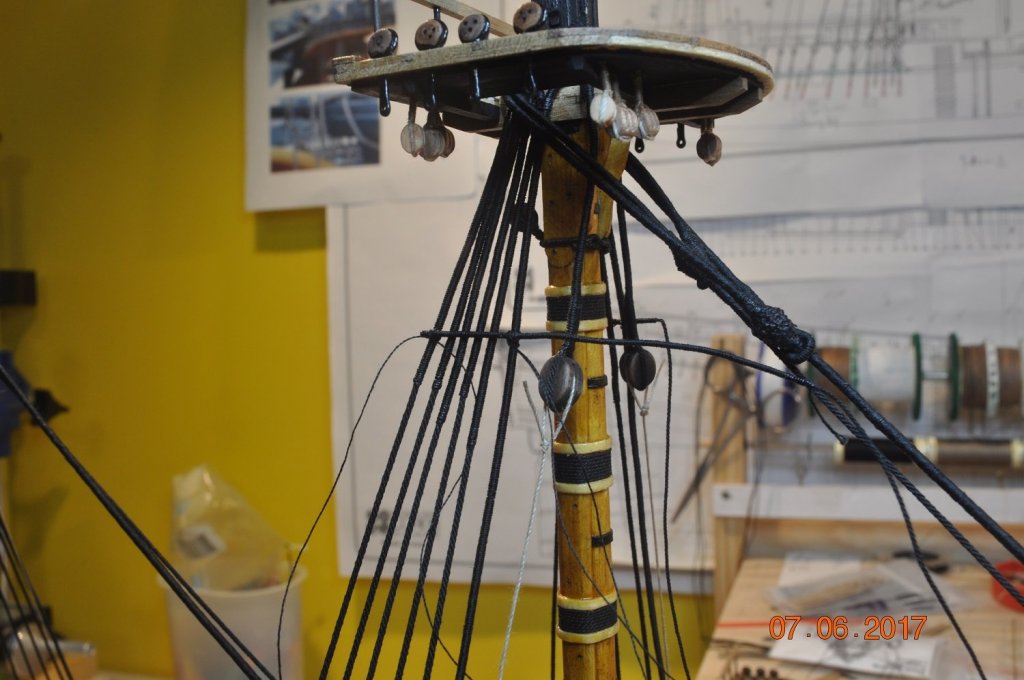
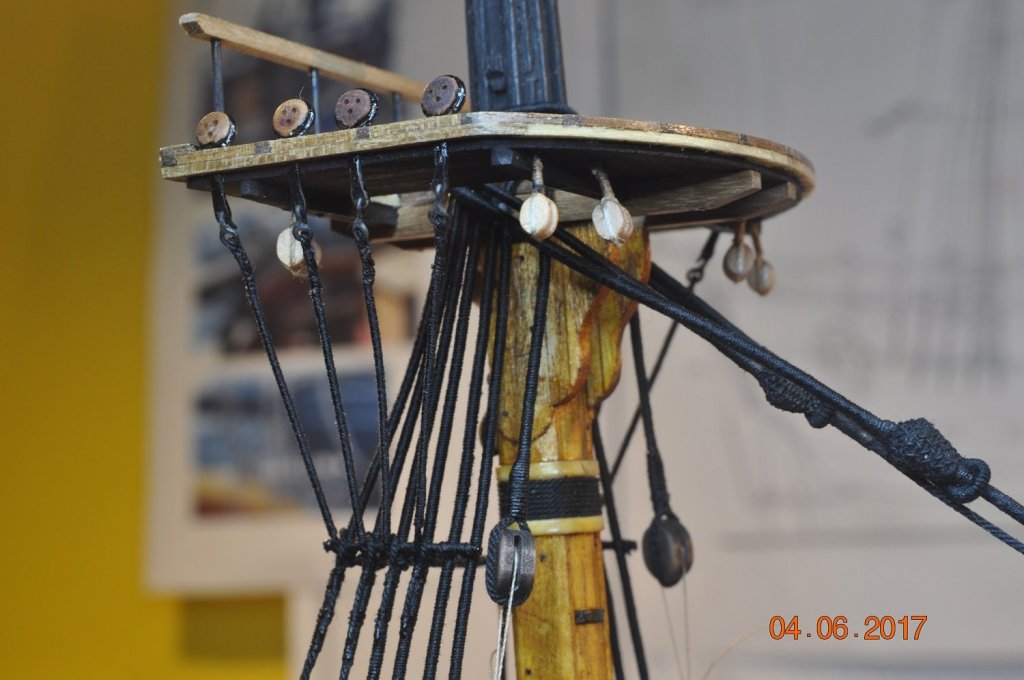
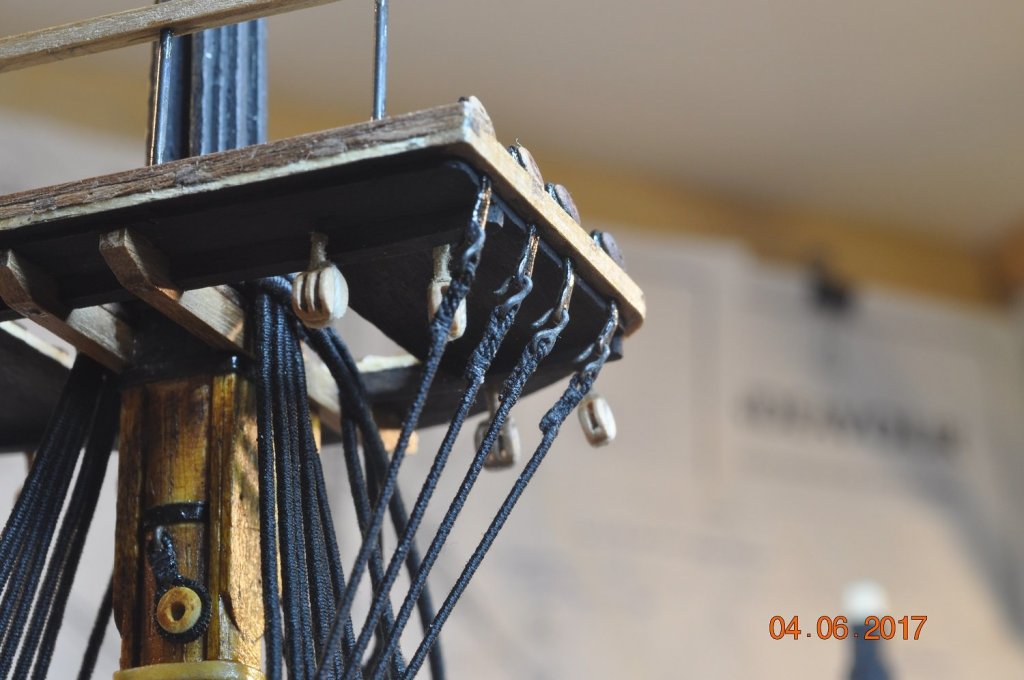
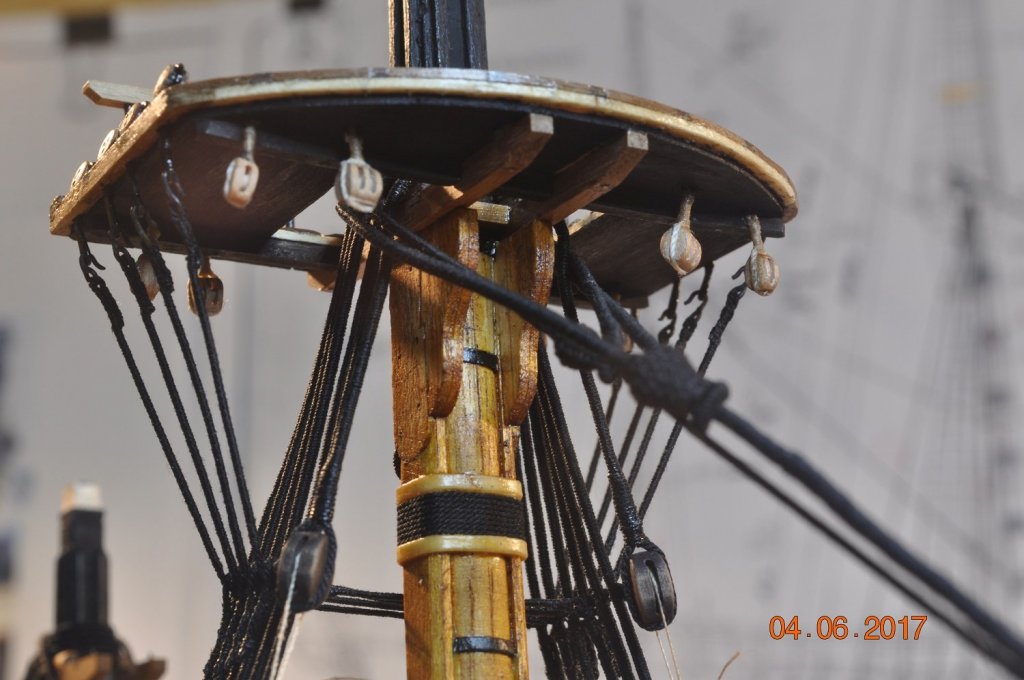
Shipyard Update Jeer Blocks for the 3 Masts: I had a look at the Endeavour Fore and Main Mast Jeers single blocks. Each has 3 single blocks. The AoTS p103 indicates doubles on the yard and mast. The Endeavour Mizzen just 1 single on the yard, stropped around the mast. And the AoTS p105 indicates similar. But how it was raised ? does not indicate. Therefore I am using the following: Added in the Jeer Blocks to raise the Yards up to each of the 3 Masts. Fore Mast: 7mm double blocks either side, with lashing to the mast and the block double stropped. The Yard will have 2 single 7mm. Maine Mast(same as Fore): 7mm double blocks either side, with lashing to the mast and the block double stropped. The Yard will have 2 single 7mm. The Mizzen Mast: For this block I deviated from the AoTS and Endeavour, to have blocks either side, so the mizzen yard can be raised by these. Note: The mizzen topmast topsail yard has single blocks either side of the mast and a double on the yard. Page 104 AoTS. I used a 6mm single block either side. The Yard to have 1 x double 6mm. Might have a look at the crowsfeet and Main Stay Tackle next/soon ? Dave R


-
Shipyard Update Mizzen StaySail Stay: Me and the fella sin the yard have managed to add the StaySail Stay to the Mizzen Mast. First we made a few more mouse blanks to weave for the stay and for TopGallant Stays a little down the track. The Stay fixed to the foot of the Main Mast. Next the Jeer Blocks. Dave Row
-
Greg, It is my first wooden Boat Model to this detail. However as a young fella, made plenty of plastic models(dozens of them). Been about boats and yachts most of my life, so maybe it is in my blood. Crows Foot, rattlings all to come. I want to make sure I've got all the blocks etc. under the tops before I go adding the crows on. Dave R
-
Came up not too bad. Rushed the Mizzen and close up bit rough. No white card for the Futtock Shrouds. Plan to do it for the ratling ropes though. Looking at the Jeer Blocks next. Should get all the blocks I know off onto the lower mast first before going up. Dave R
-
Looking very authentic. You do justice to the varied colors to make things look real. Dave R
-
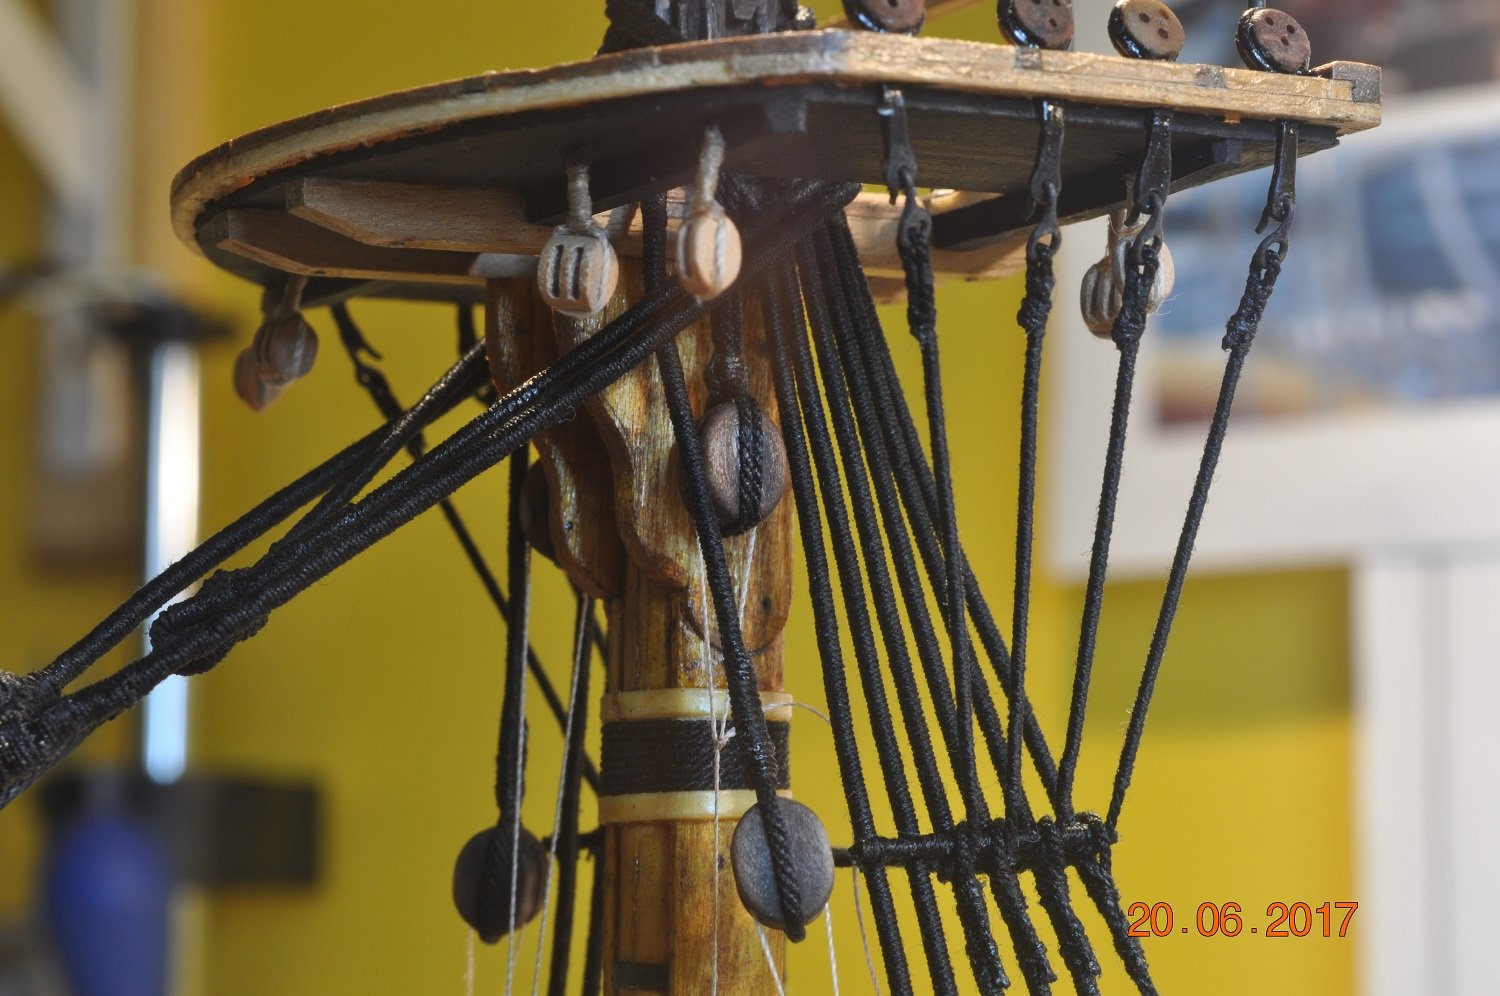
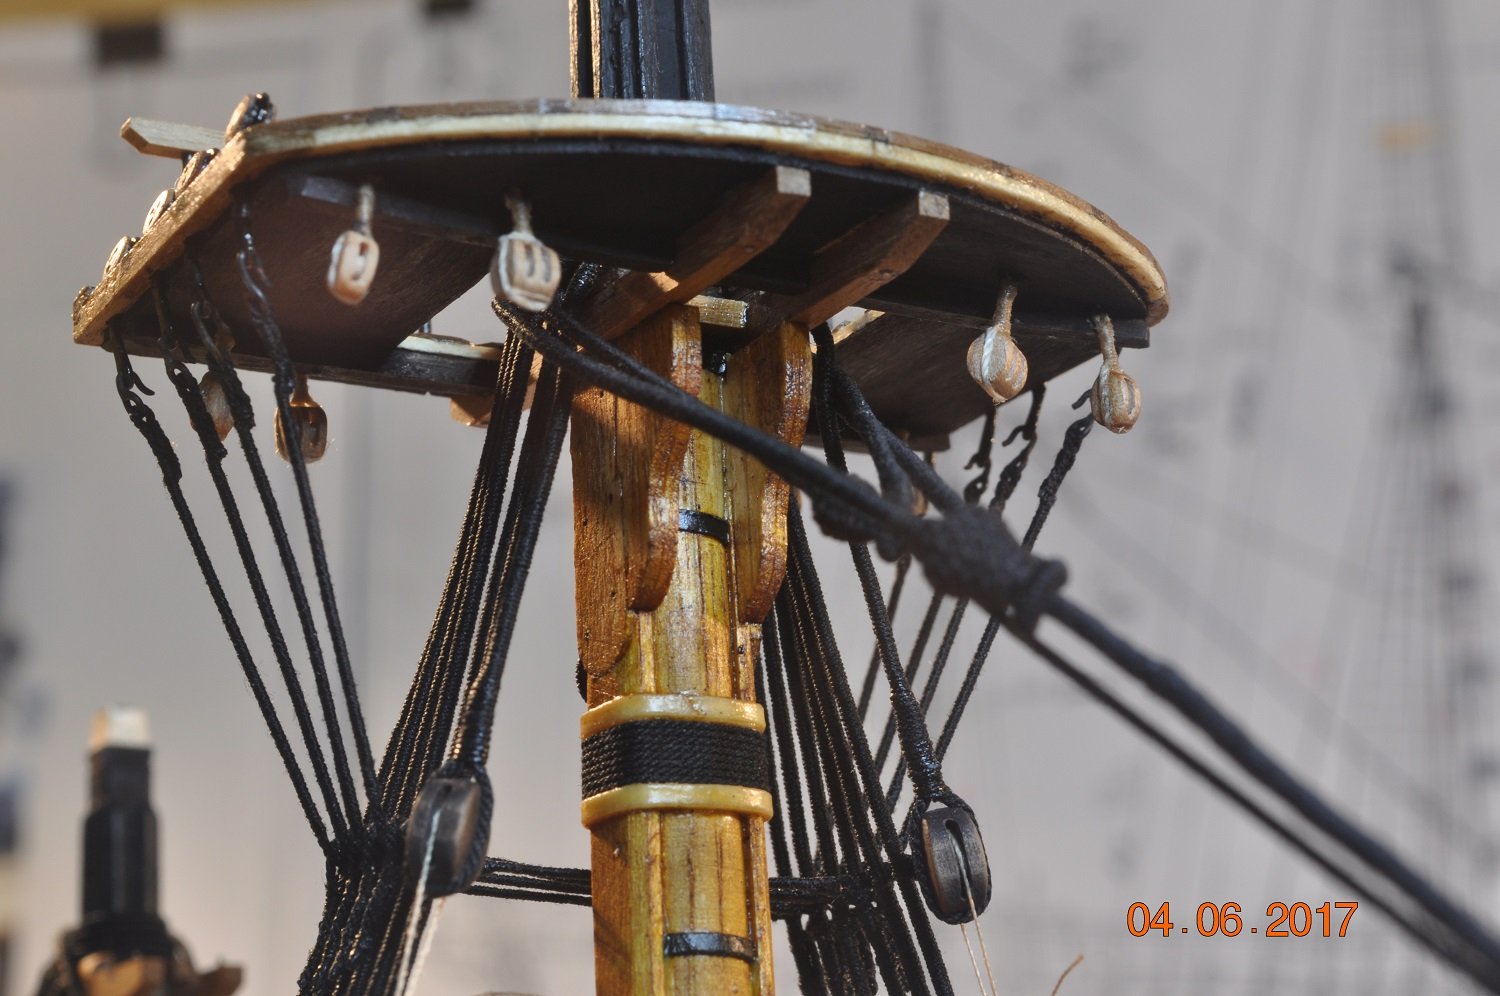
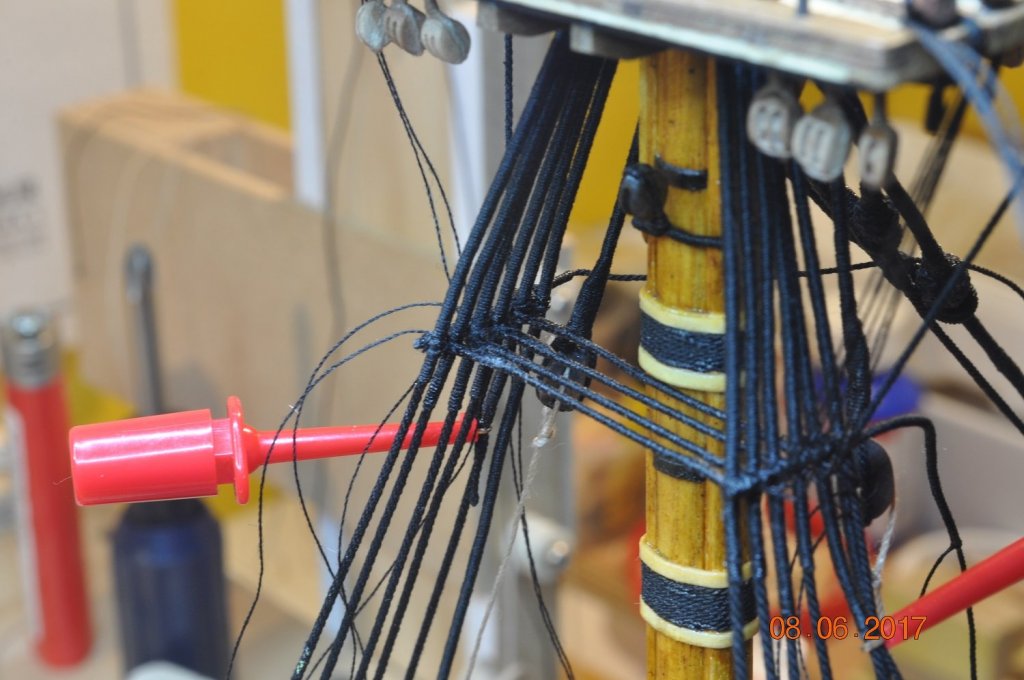
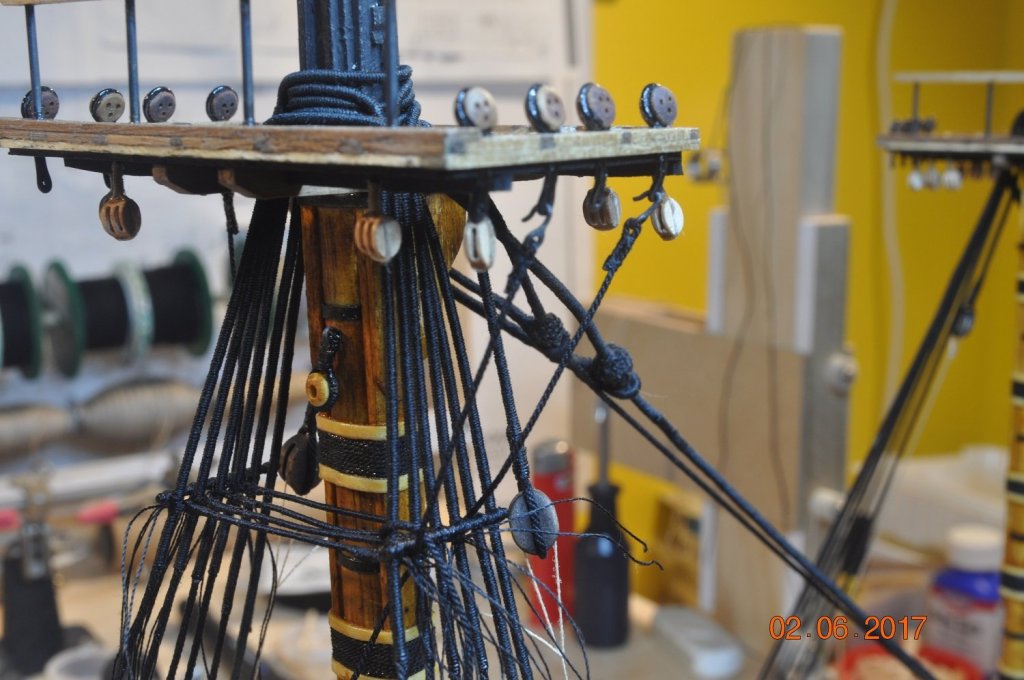
Shipyard Update Fore & Mizzen Mast Futtock Shrouds: Finished off the Futtock Shrouds to the top of the Fore and Mizzen Masts. Fore Mast I start by attaching the Futtock Stave either side to the mast shrouds. I used 0.5mm black rope and seized with cotton this time(used brass rod for the main mast stave) Then add in the Catharpins, attached to the middle 4 mast shrouds under the stave. This leaves room for the Futtock shroud to loop under the stave, over the Catharpin, around the Futtock and back over the stave and down onto the main shroud. Can get fairly busy with the trying cords. Making the ForeMast Futtock Shrouds. Attached to the Fore Mast. Mizzen Mast Mizzen the same but 3 shrouds per side, attached to the 3 rear mast shrouds. And we now have the tops and Futtock Shrouds on each mast. I'm glad the Futtock's are out of the way. Doing my eyes in. I suppose it is onto the Ratings next ? or maybe not until I raise the runners ? Dave R


-
I agree, and I have only done 1 set. Dave R
-
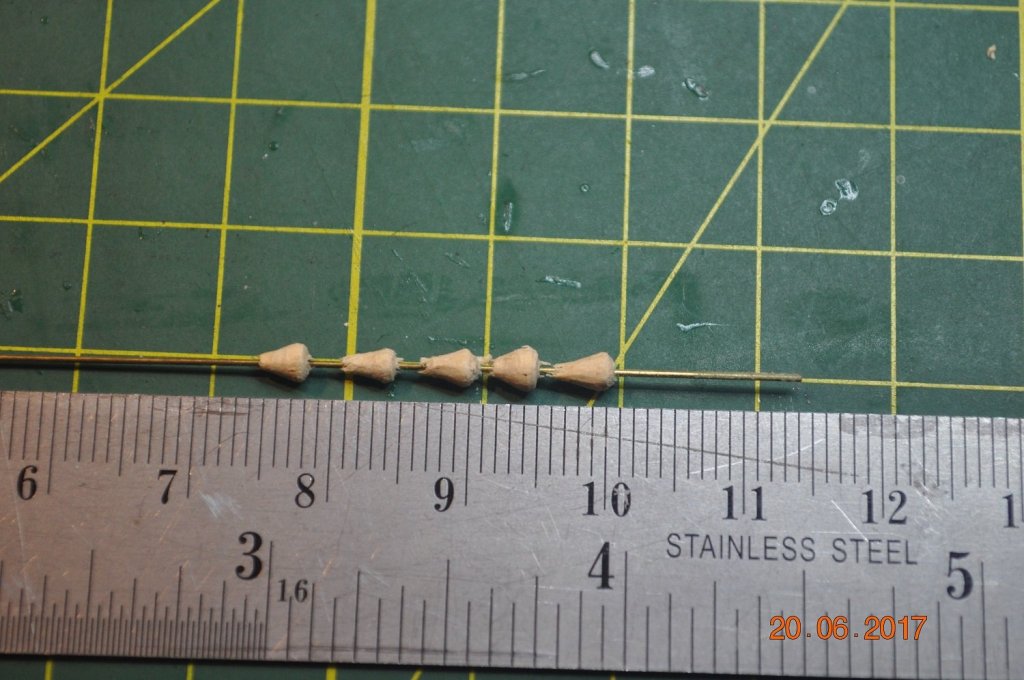
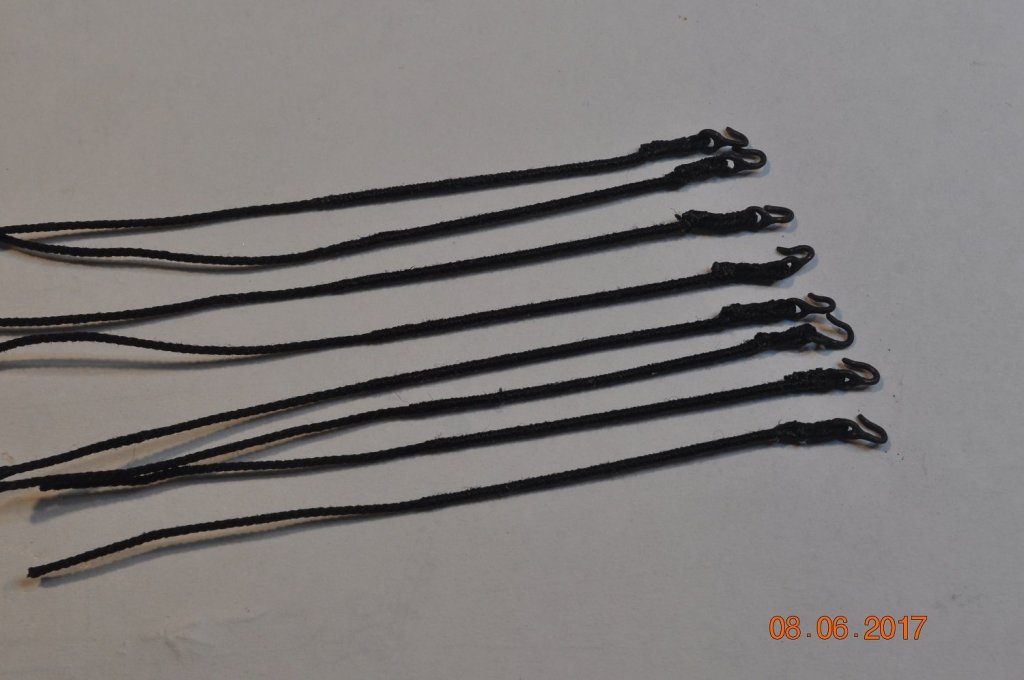
Shipyard Update Main Mast Futtock Shrouds: Finished off the Futtock Shrouds to the top of the Main Mast today. Futtock Stave and Catharpins 2 Futtock Stave(I wound thread around brass bar for mine) 4 Catharpins from 0.5mm rope wound with black tread Below shows the Catharpins tied between the shrouds, the Futtock Stave tied to the stays. Starboard view of the Main Mast top. Top end of the Futtock Shrouds. I made small brass hooks from 0.5mm bar, shaped and welded a loop in one end. The lower end of the Futtock Shrouds. Looped around the Stave and Stay then tied below to the Stays. Up and under. More to go... Dave R

-
I've got the promise of rum and wild women for the apprentices at the shipyard if they get a move along. Been adding tension to the shrouds, port/starboard to align the mast tops, and adjusting the stays fore/aft to set the mast rakes. Nothing broken yet, the lads doing a fine job. The rum awaits..... I believe I am looking forward to the fine work required for the Futtock Stave and Shrouds, the Catharpins and Rattlings. I tell myself this anyhow. Maybe I need the rum. ? Dave R
-
Yes Steve. The longer bowsprit will come together nicely with the Main Topmast. With all going to plan, straight stay lines. Dave R
-
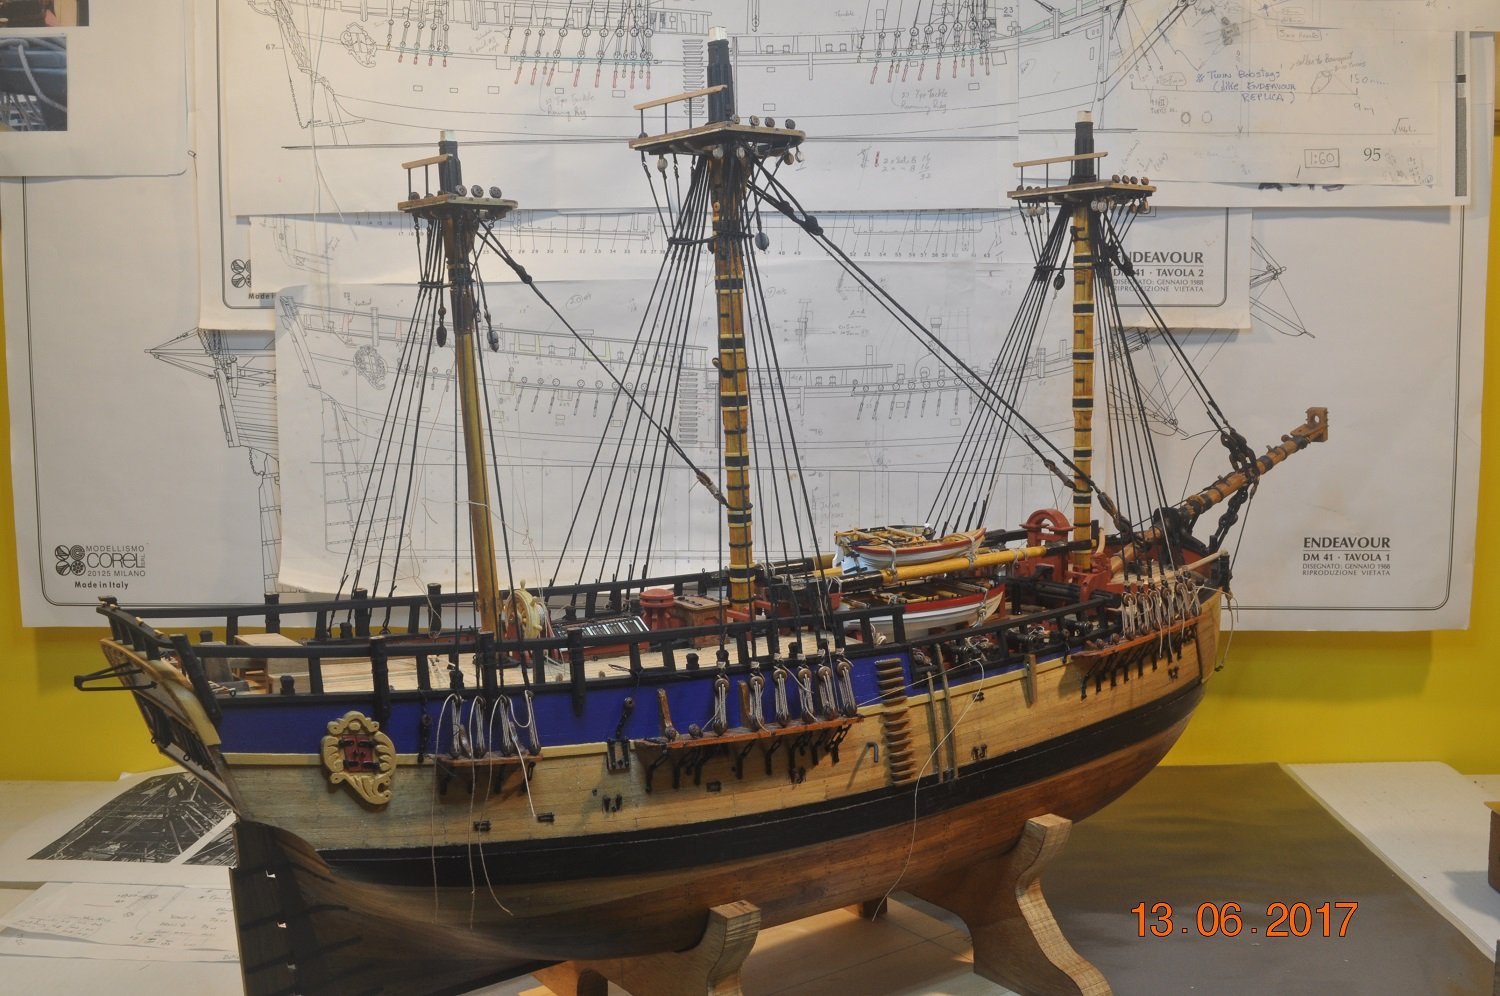
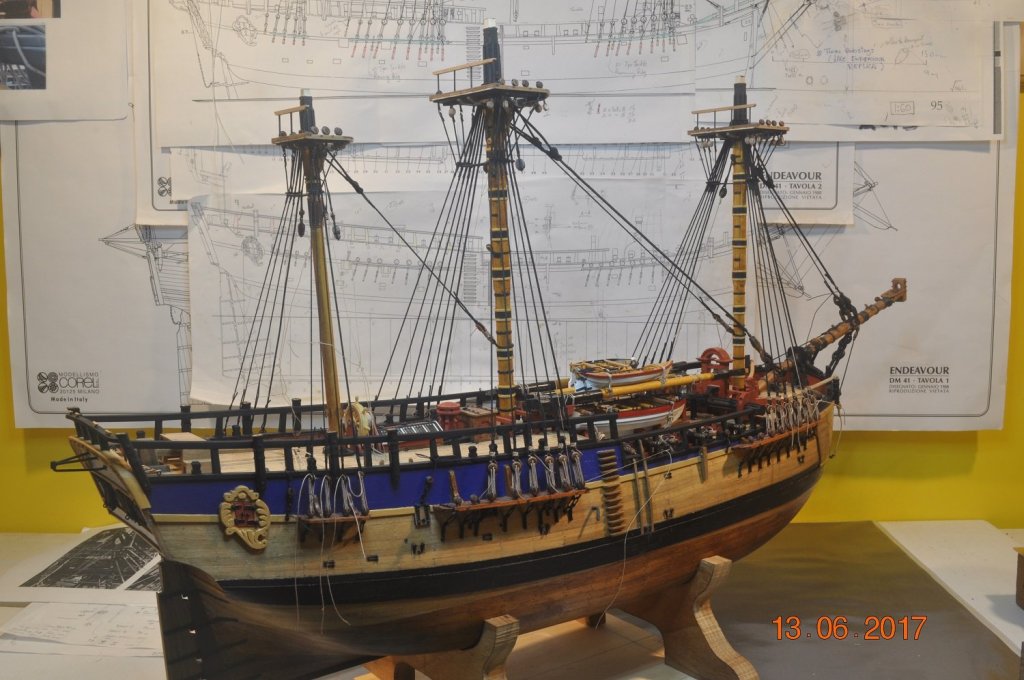
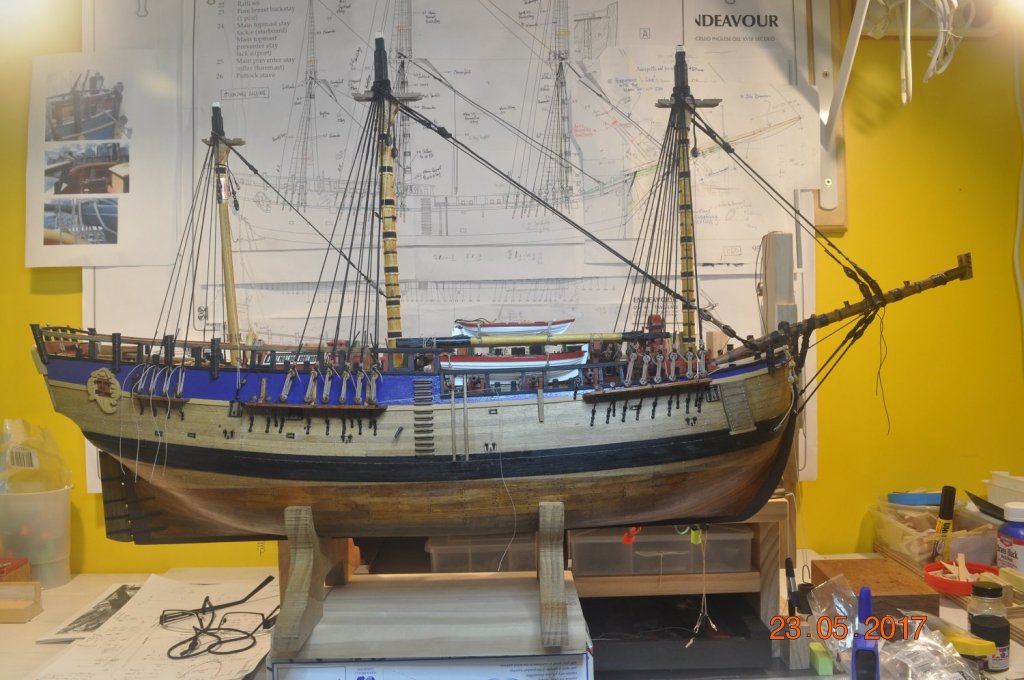
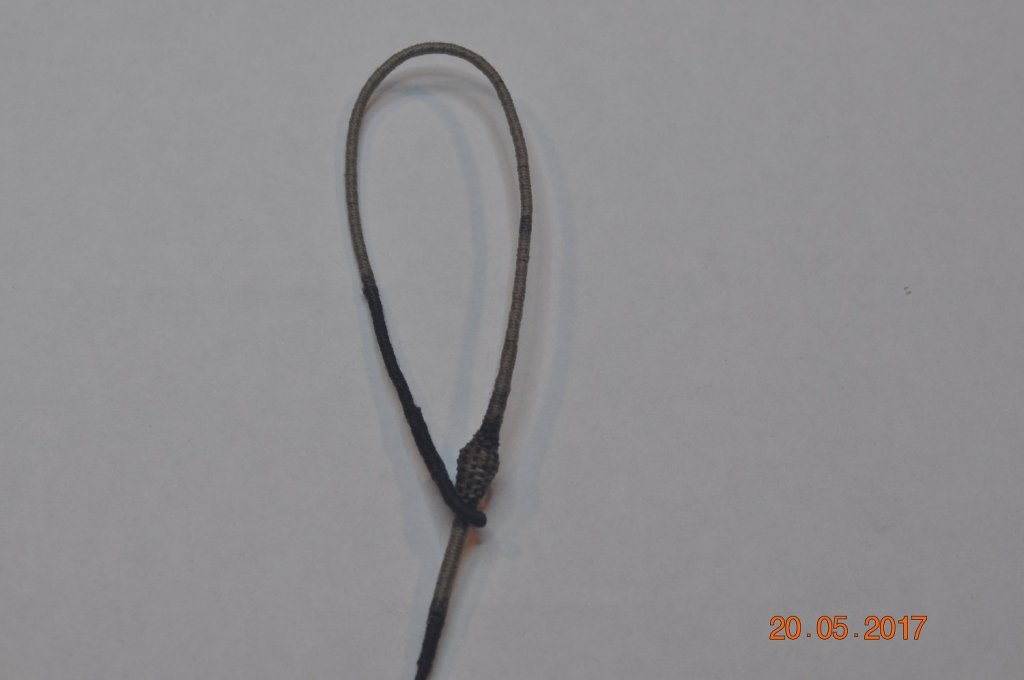
Shipyard Update Mizzen Mast Shrouds and Stay: Been slow going, checking and preparing ropes sizes and making the ends. Mizzen Shrouds: Shrouds made and hoisted at-top the mizzen mast. All just clear the top rail either side, just how they should be. Mizzen Stay: Made the Mouse on the serving machine(with mouse jig) and looped for the top of the stay. Hoisted the stay in place. 3 years and 1 month after starting the build: An side on view of the 3 Lower Masts hoisted with Shrouds and Stays on. I believe I can now see the light at the end of the tunnel ahead. Dave R


-
Looking good Rowand. Dave R
-
Good Job Glad you got some paying work. Lessons learn't on planking of 1st layer will come in handy for 2nd. Great effort. Dave R
_01.jpg.0cb5825d5194d4c7335513d49298fb09.jpg)
_01.jpg.ee60d82dca97ea88478de87dbc0120ec.jpg)


ShroudSizes_v1.jpg.f6a04af19255abed85531cd985ee4428.jpg)