


JSGerson
-
Posts
2,168 -
Joined
-
Last visited
Content Type
Profiles
Forums
Gallery
Events
Posts posted by JSGerson
-
-
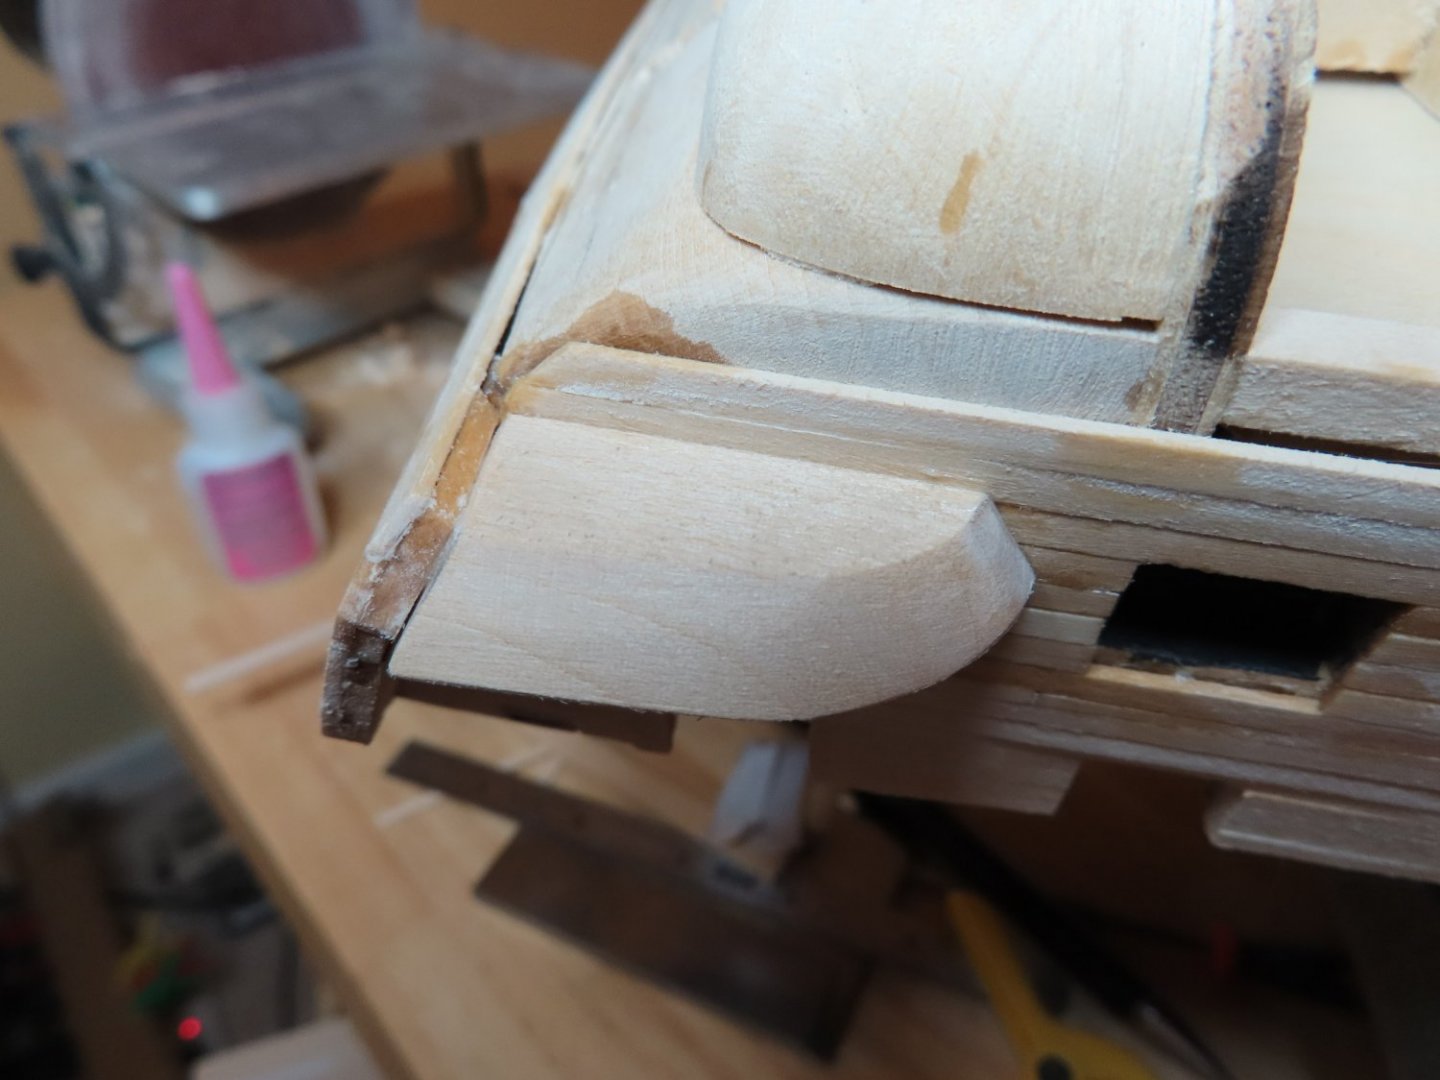
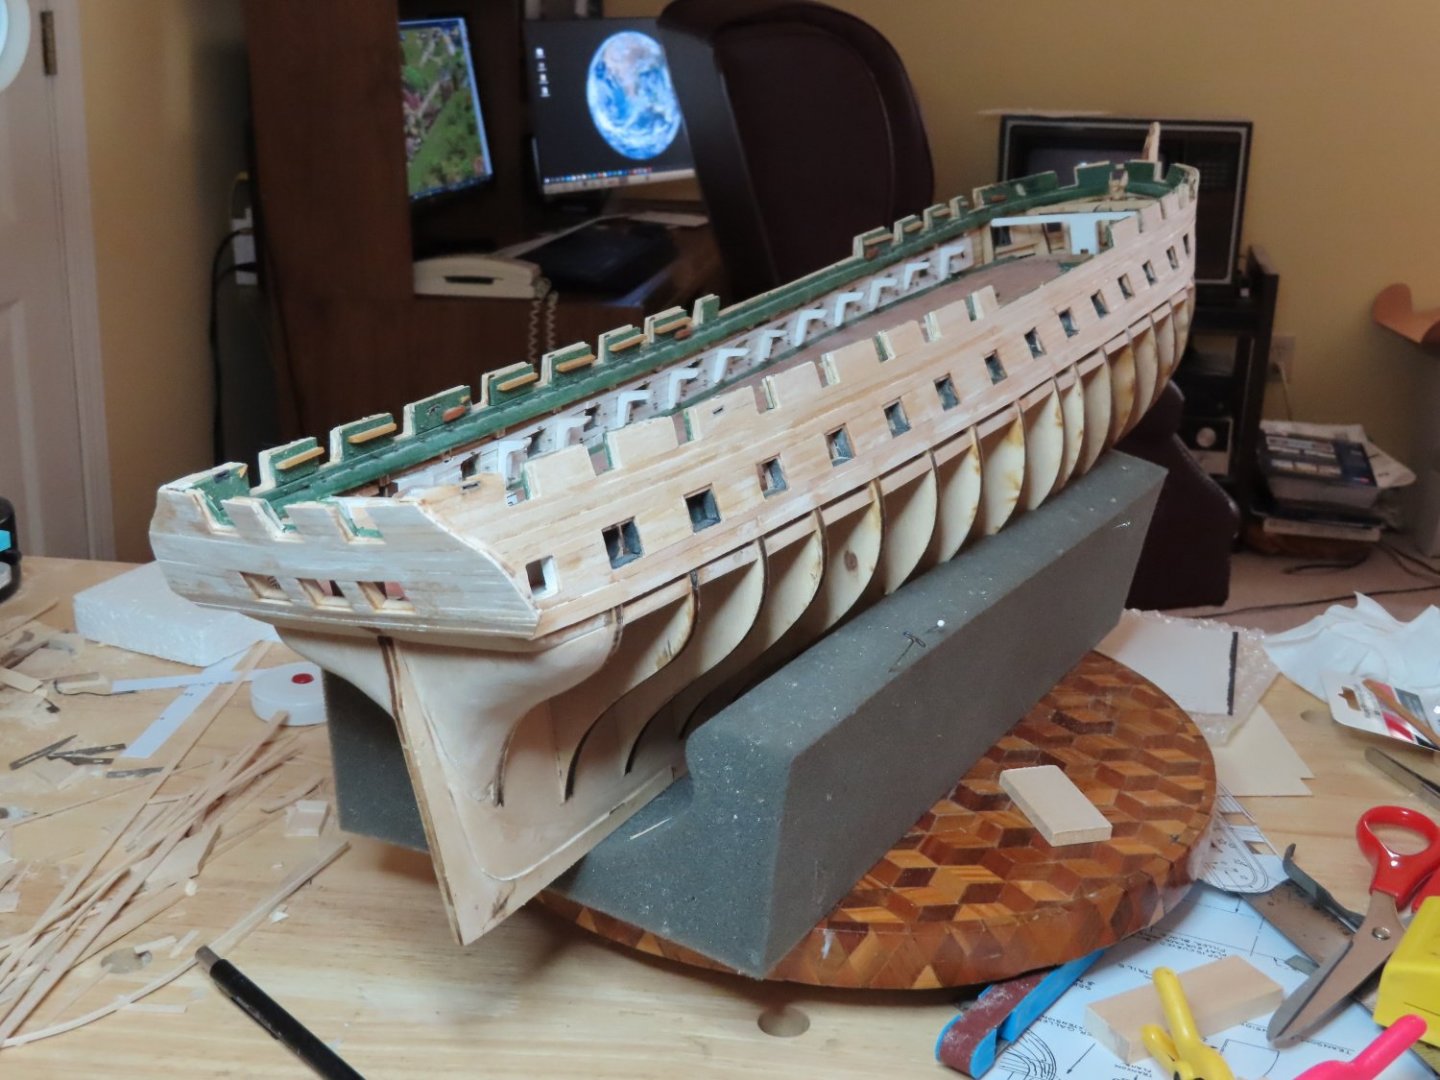
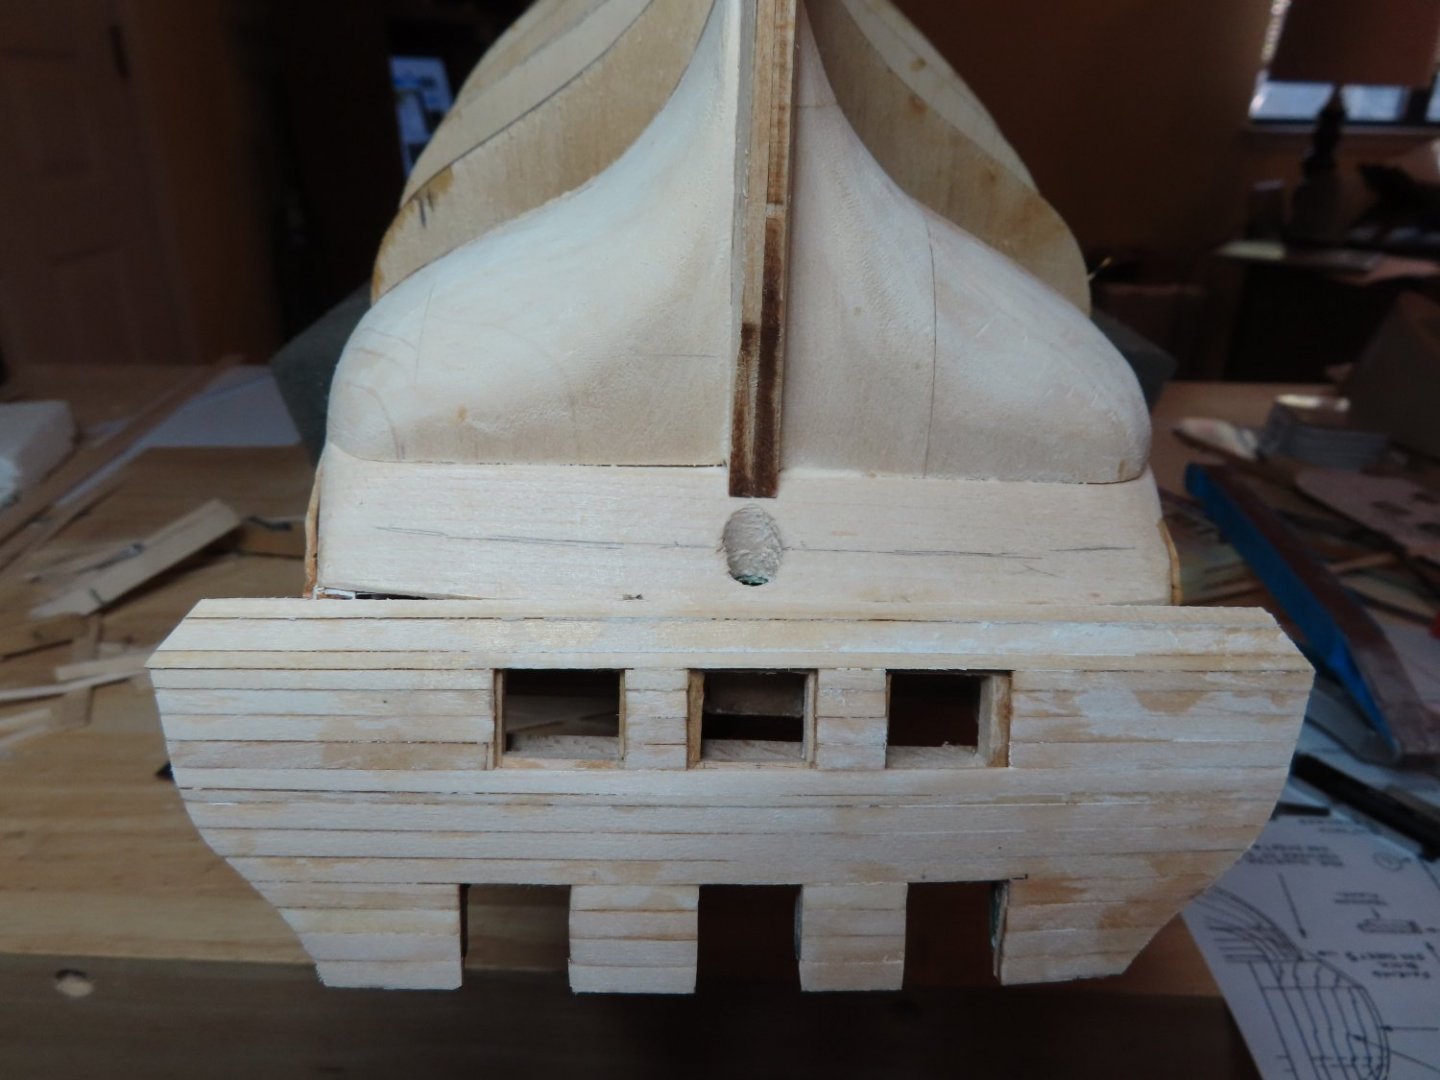
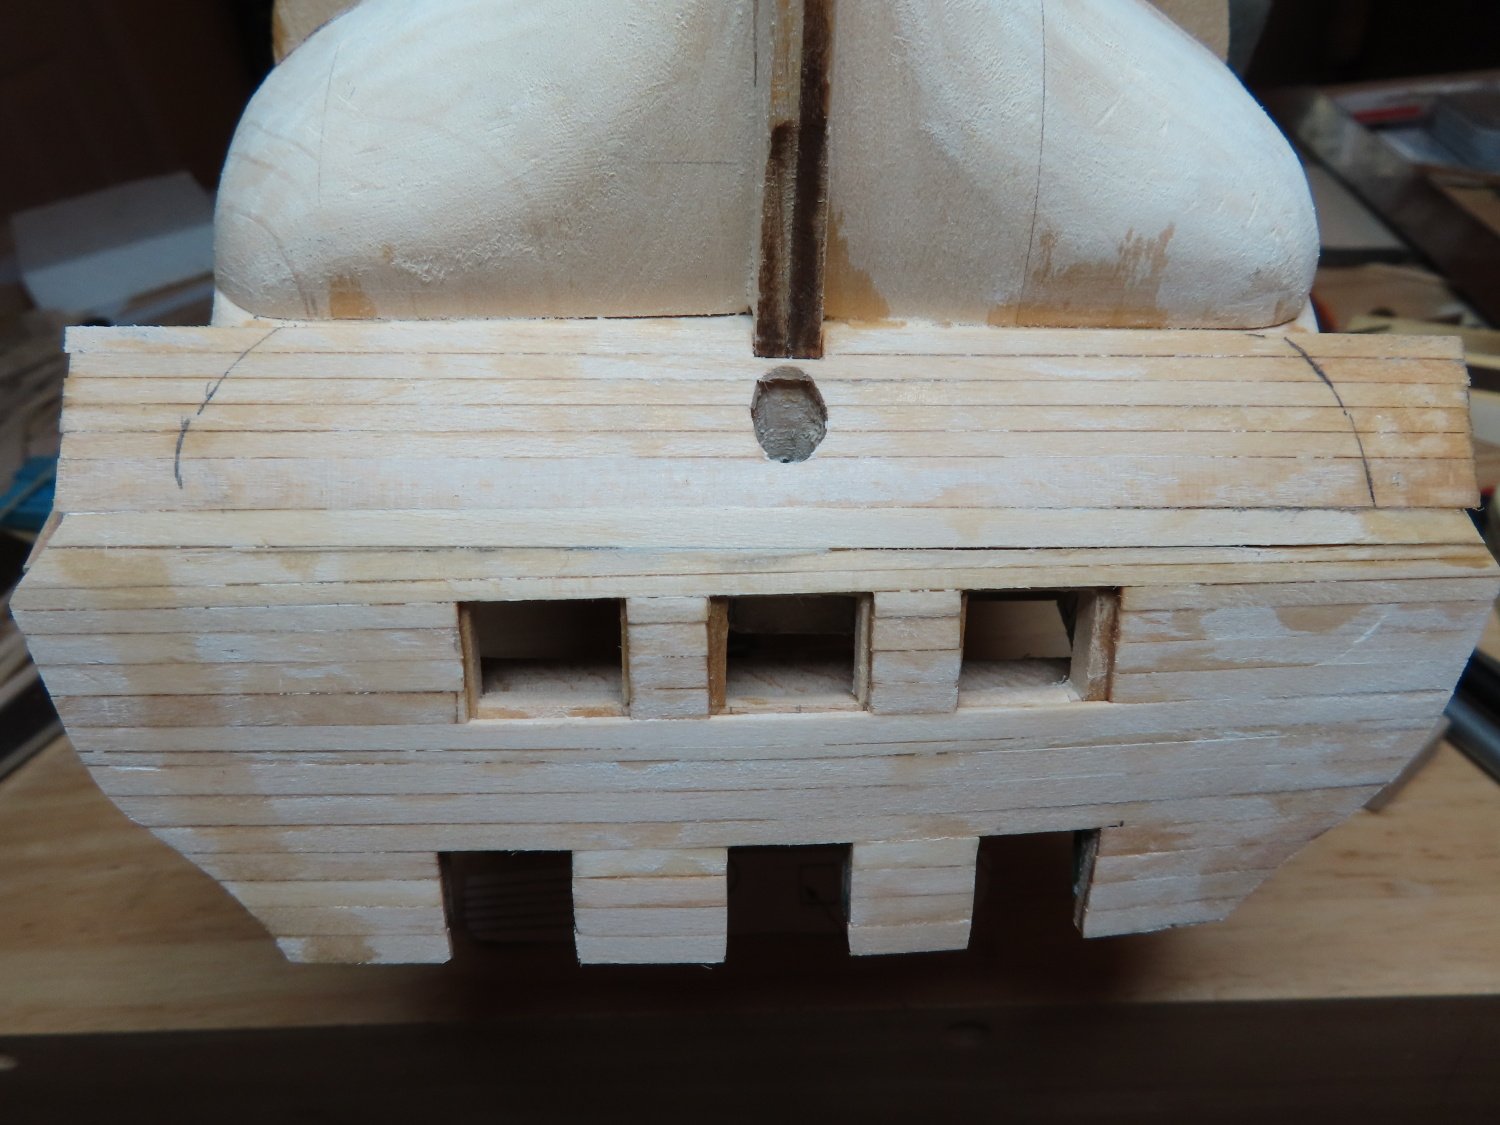
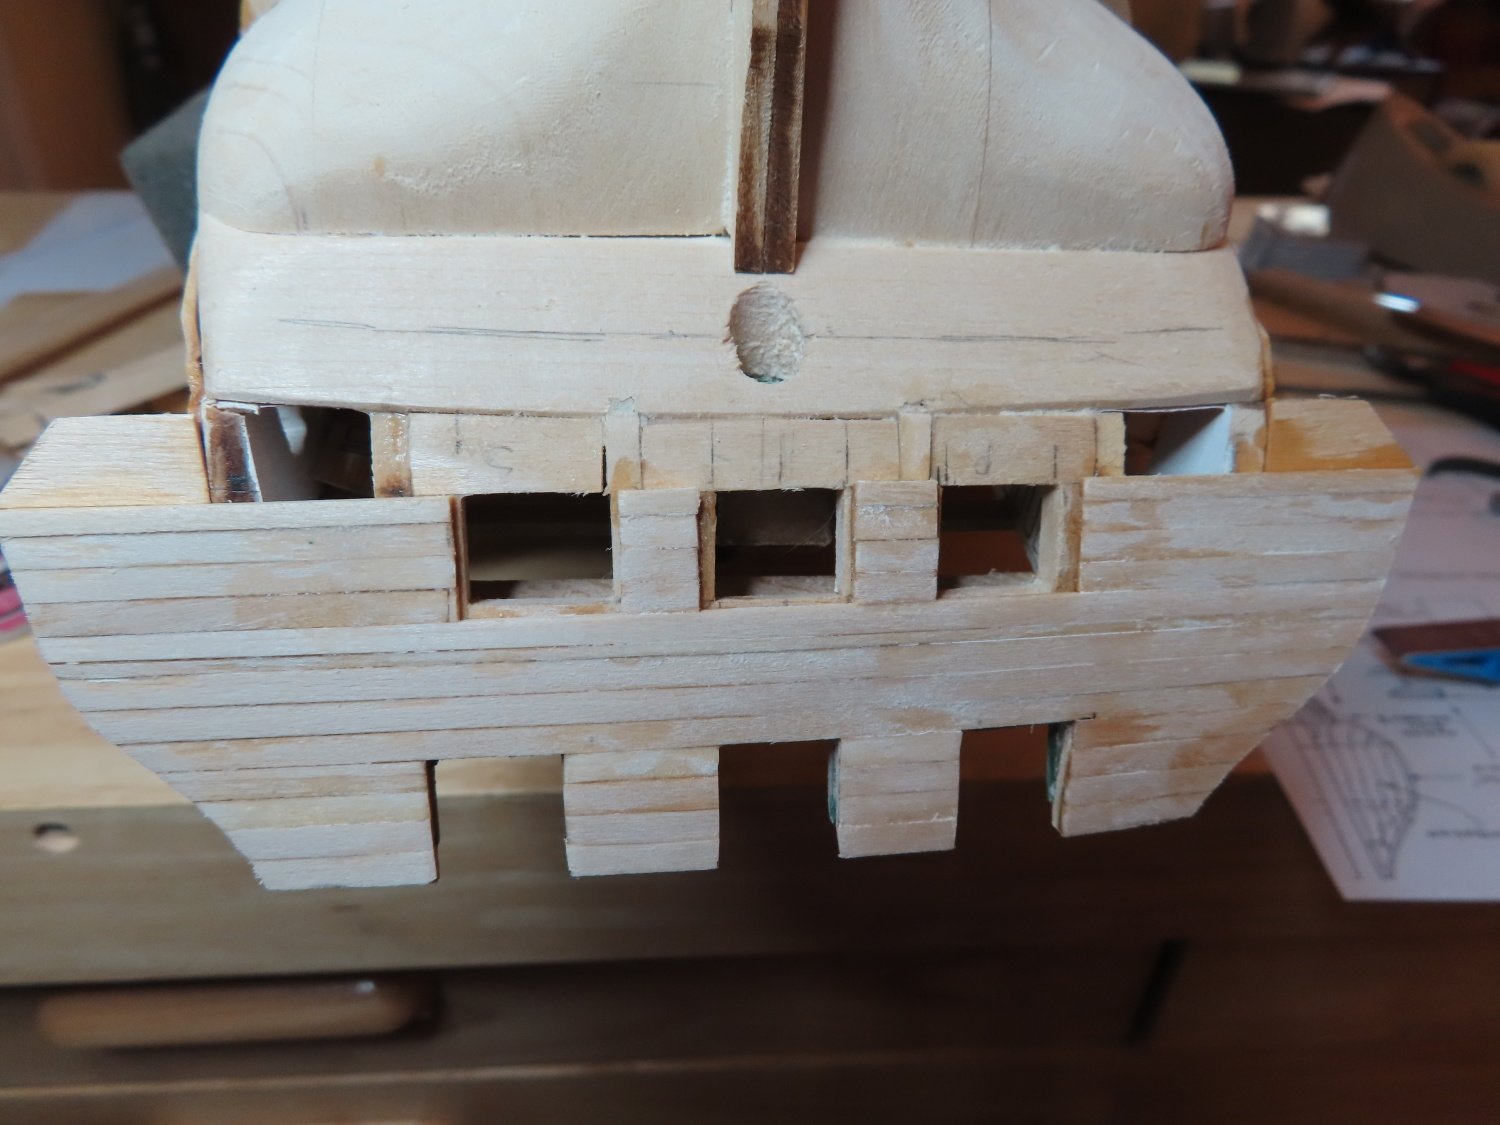
The Lower Transom Counter
To finish the planking the lower transom counter, the practicum states:
Quote“Now, simply transfer the pattern [from the plans] to the counter planks and trim with the Exacto as shown in photos…”
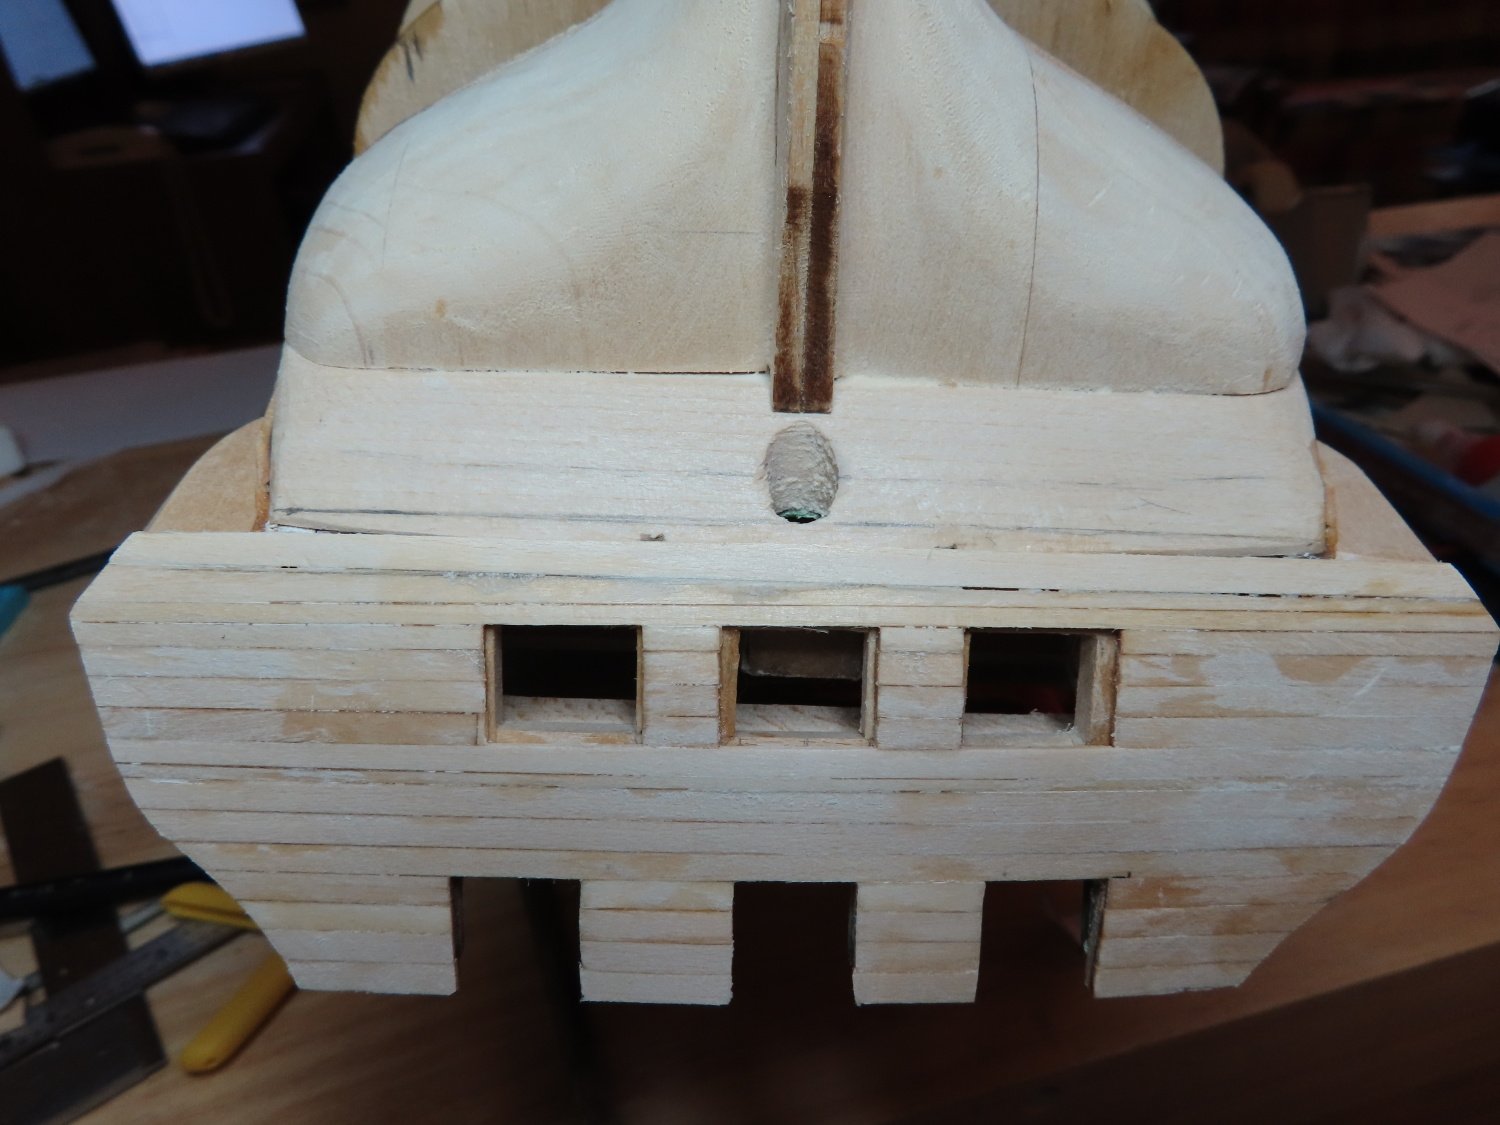
If one takes that statement at its face value, you will run into a problem. The plans show an elevation view. The lower counter is angled away from the viewer and thus is foreshortened. I had to stretch the image vertically so that its height matched the true length of the counter as seen from the side. I ran into this identical problem with the transom when I built the Rattlesnake. I’ve traced out the trim line onto the lower planks but am reluctant to do the trim until I have completed the wale, which it butts up against. Note, there are still two windows which need to be constructed below the gun deck gun port.

- Ryland Craze and GrandpaPhil
-
 2
2
-
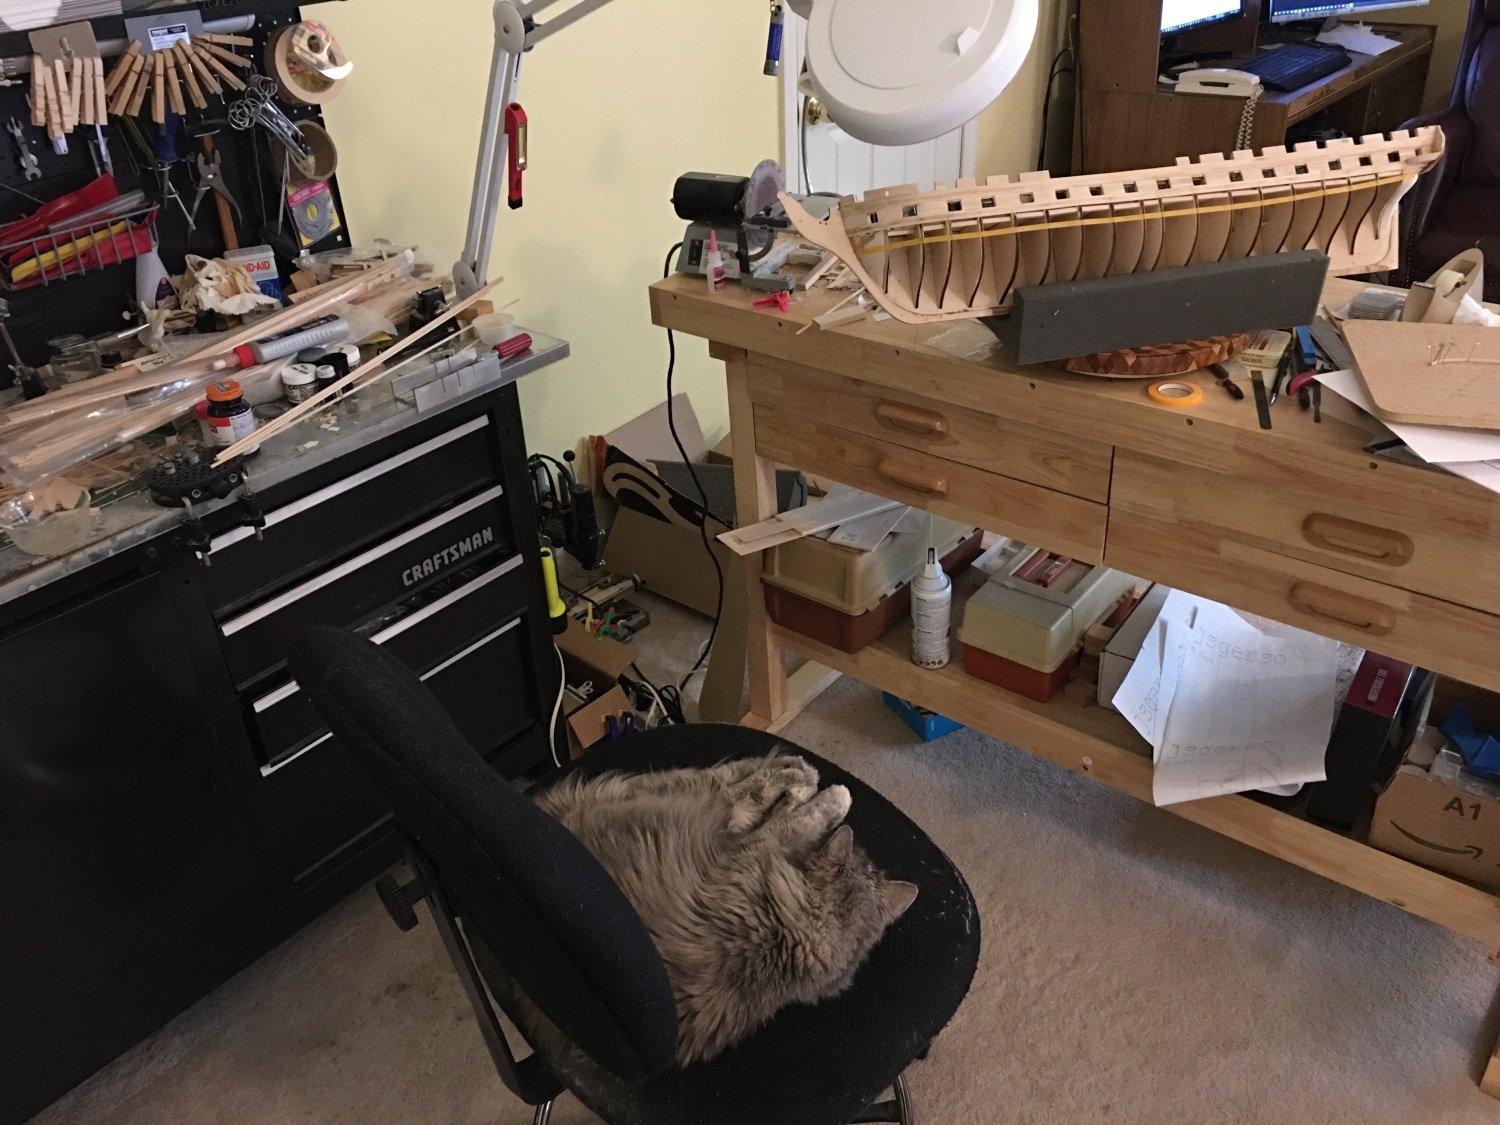
About a month and a half since my last post; I hope everyone is healthy. As many of you know, molasses on a cold day or ketchup pouring from a bottle are faster than I work on my model. One my excuses is illustrated below.
- Ryland Craze, GrandpaPhil and J11
-
3
-
Just discovered your build log and that you were inspired somewhat by my build. Just remember, this is only my second square rigged ship build and am prone to make mistakes that I only discover a long time down the road. You are at the point where I believe I made one of those errors. I think my stern filler block (the one where the rudder stem goes through) was too thick. I failed to check the dimensions of the raw block of wood thickness dimensions which I believe lead to my problems with the stern. At the pace you are going, I'll be following you for inspiration.
Jon
-
Bob - You are correct in that the instructions leave something to be desired. That is why I am using Robert Hunt's Practicum as a guide, supplemented with various parts of the wonderful build logs on this site. I don't think I would have started this model without their help. I will say this, the kit plans of the ship follow the US Navy plans very closely.
Unegawahya - It looks like I will be following you now (assuming you will post a build log), now that you have moved ahead of me in your build. You've done beautiful work. Unfortunately, when I get to the gun deck guns, mine won't be as "easy" as yours. Somehow, my gun deck is either too low or my gun ports are too high which will force me to adjust the gun carriage heights (see early posts).
Thank you for showing me your build and I plead with you, post a build log of your work.
Jon
- J11 and usedtosail
-
2
-
Very nicely done. Just a point of caution, the gun port lids are very delicate, based on my experience with my Rattlesnake build. They have a nasty tendency to get knocked off due to all of the handling the model goes through continuing the build. Not having reach this point yet in my Conny build, I really don't know if it is better to wait and add them on near the end or do them now as you have because it might not be so easy when all the other stuff is added. Only time will tell.
Jon
-
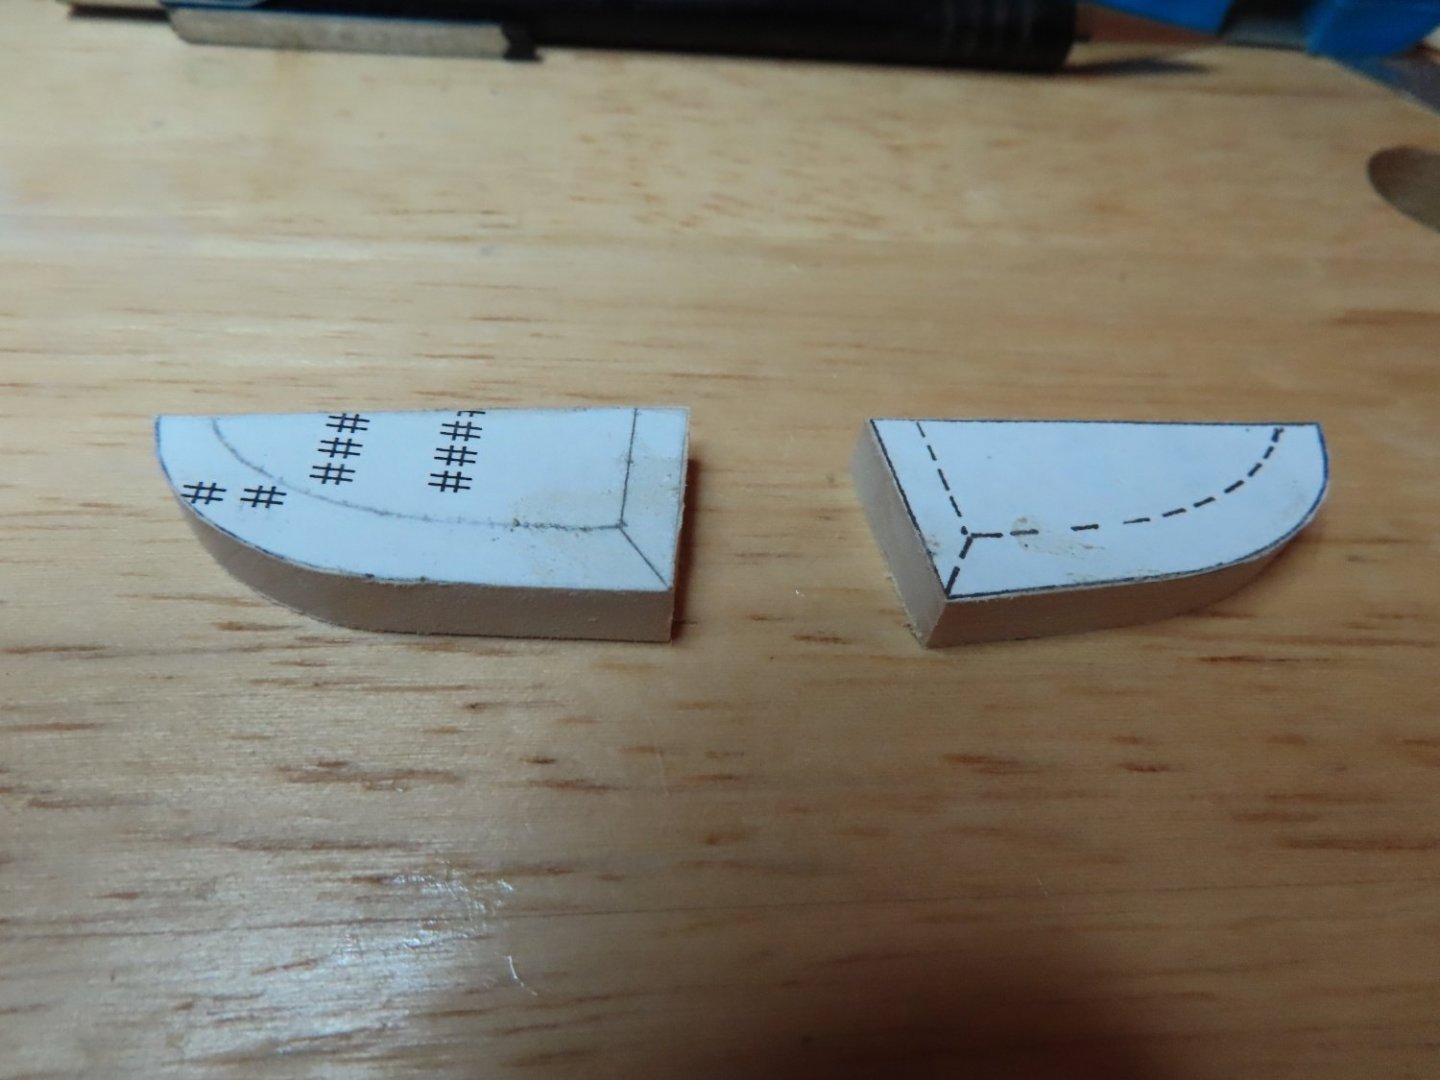
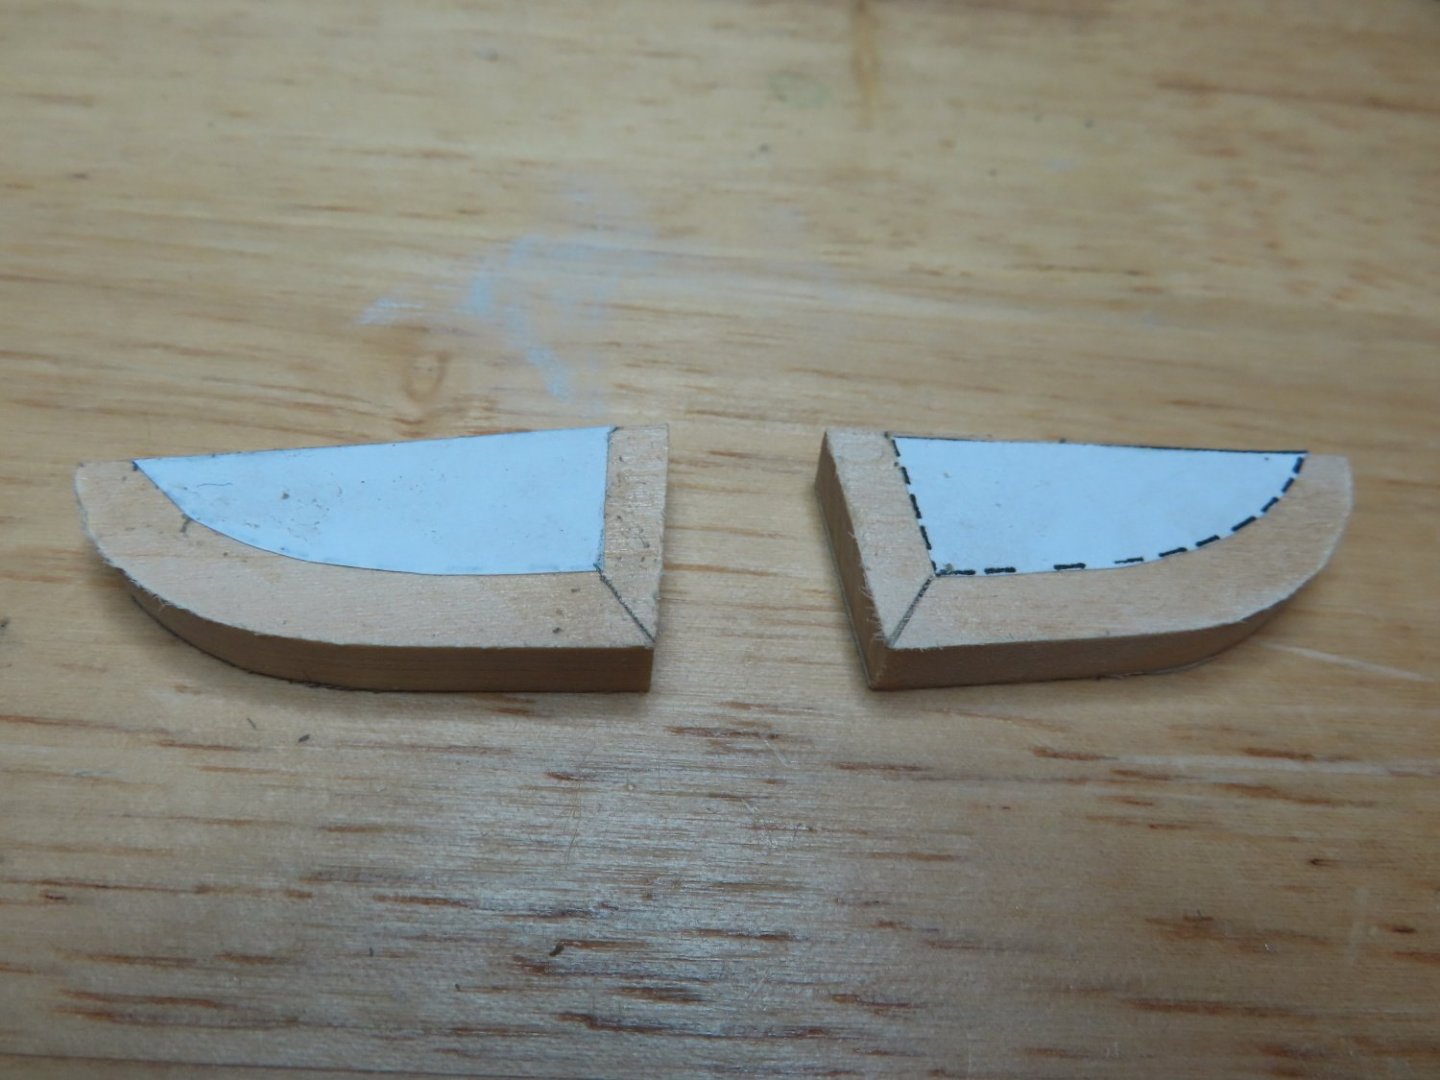
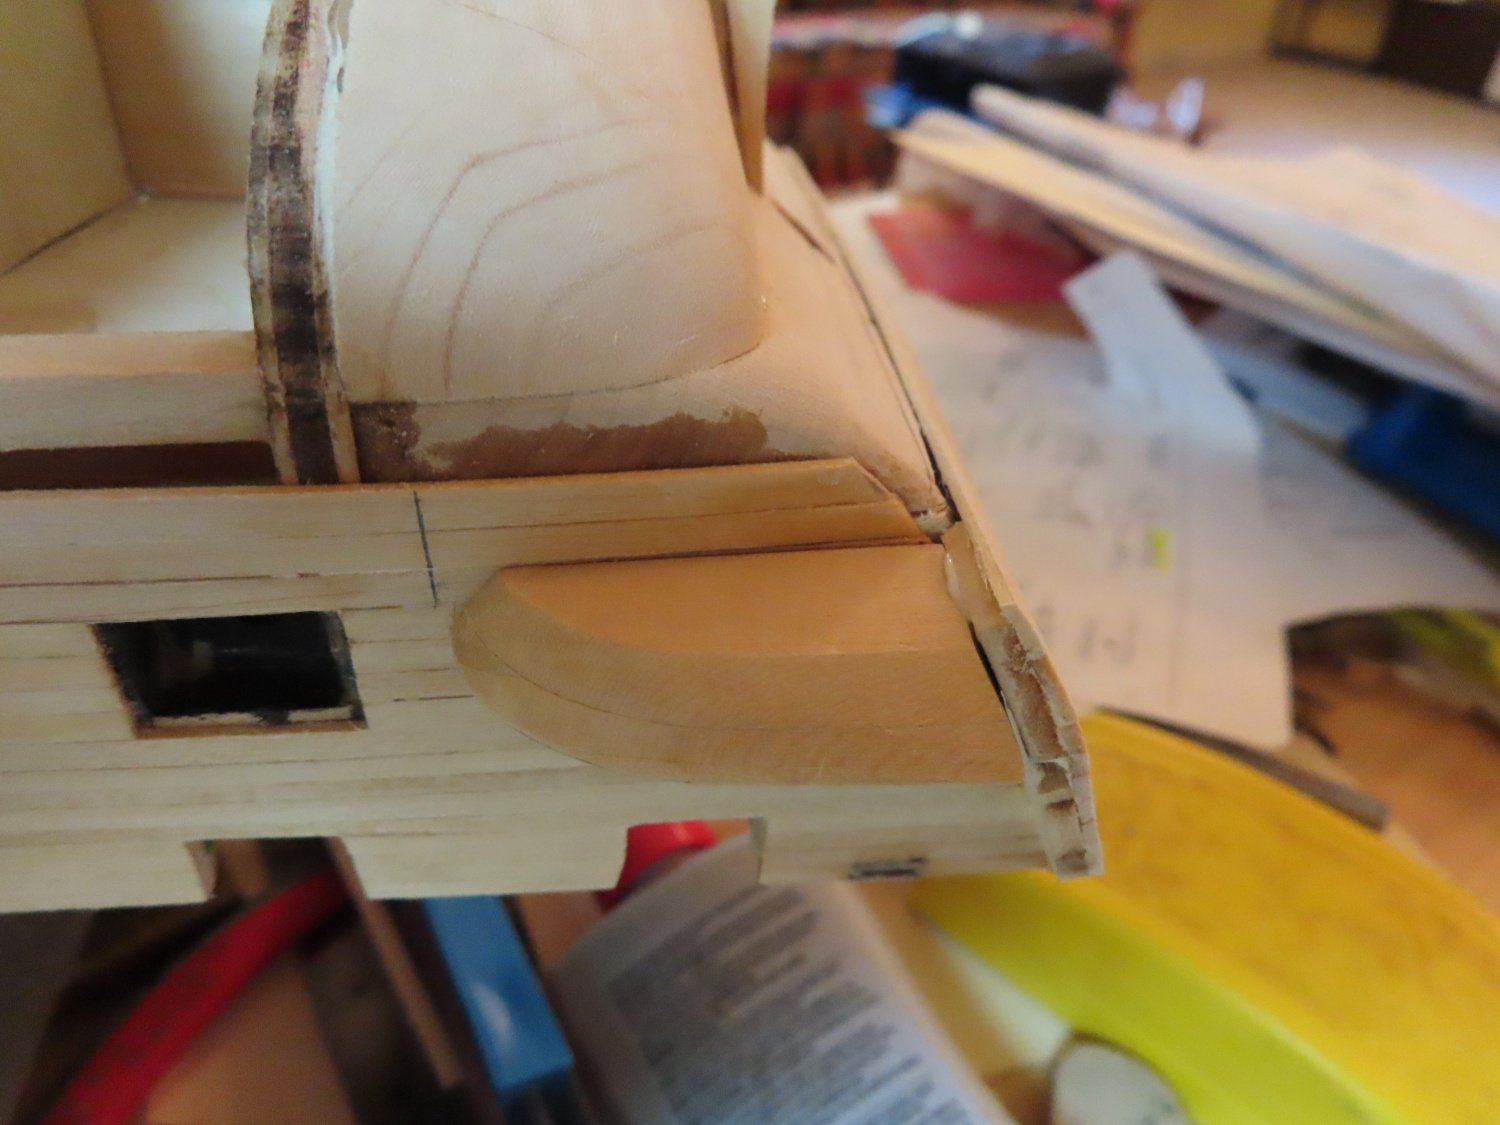
The bottom quarter galley filler pieces were then trimmed slightly and then glued into place as described by the practicum. Hopefully any errors that remain, and I’m sure they do, are small enough that they can be handled without too much consternation


- J11, usedtosail, JeffT and 1 other
-
4
-
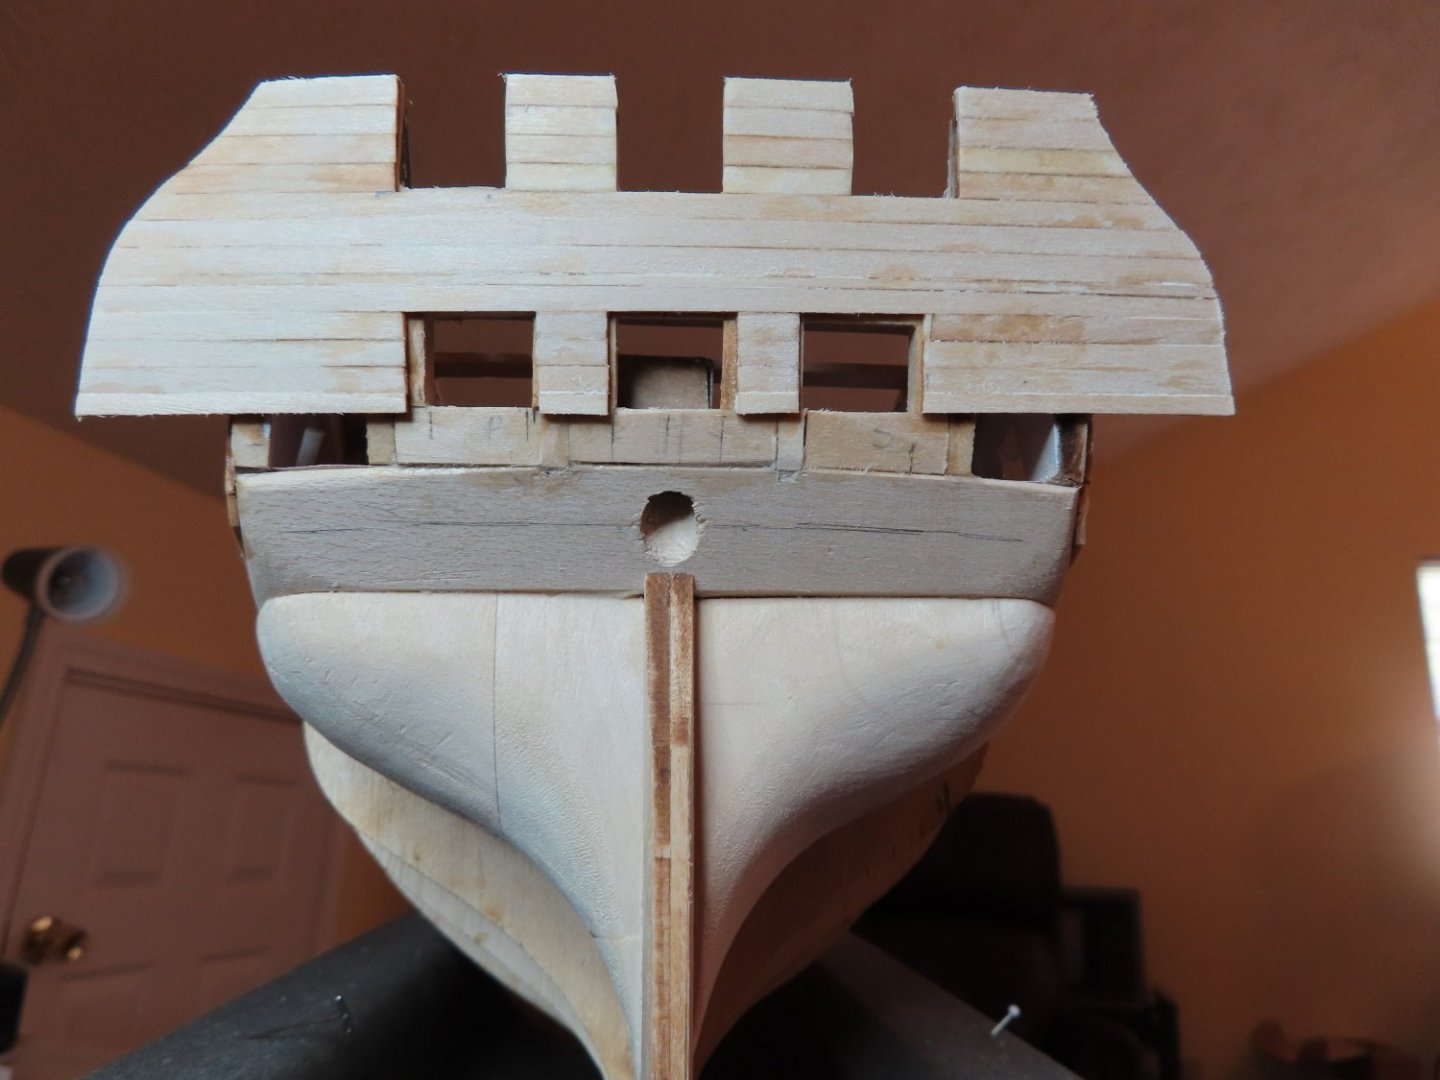
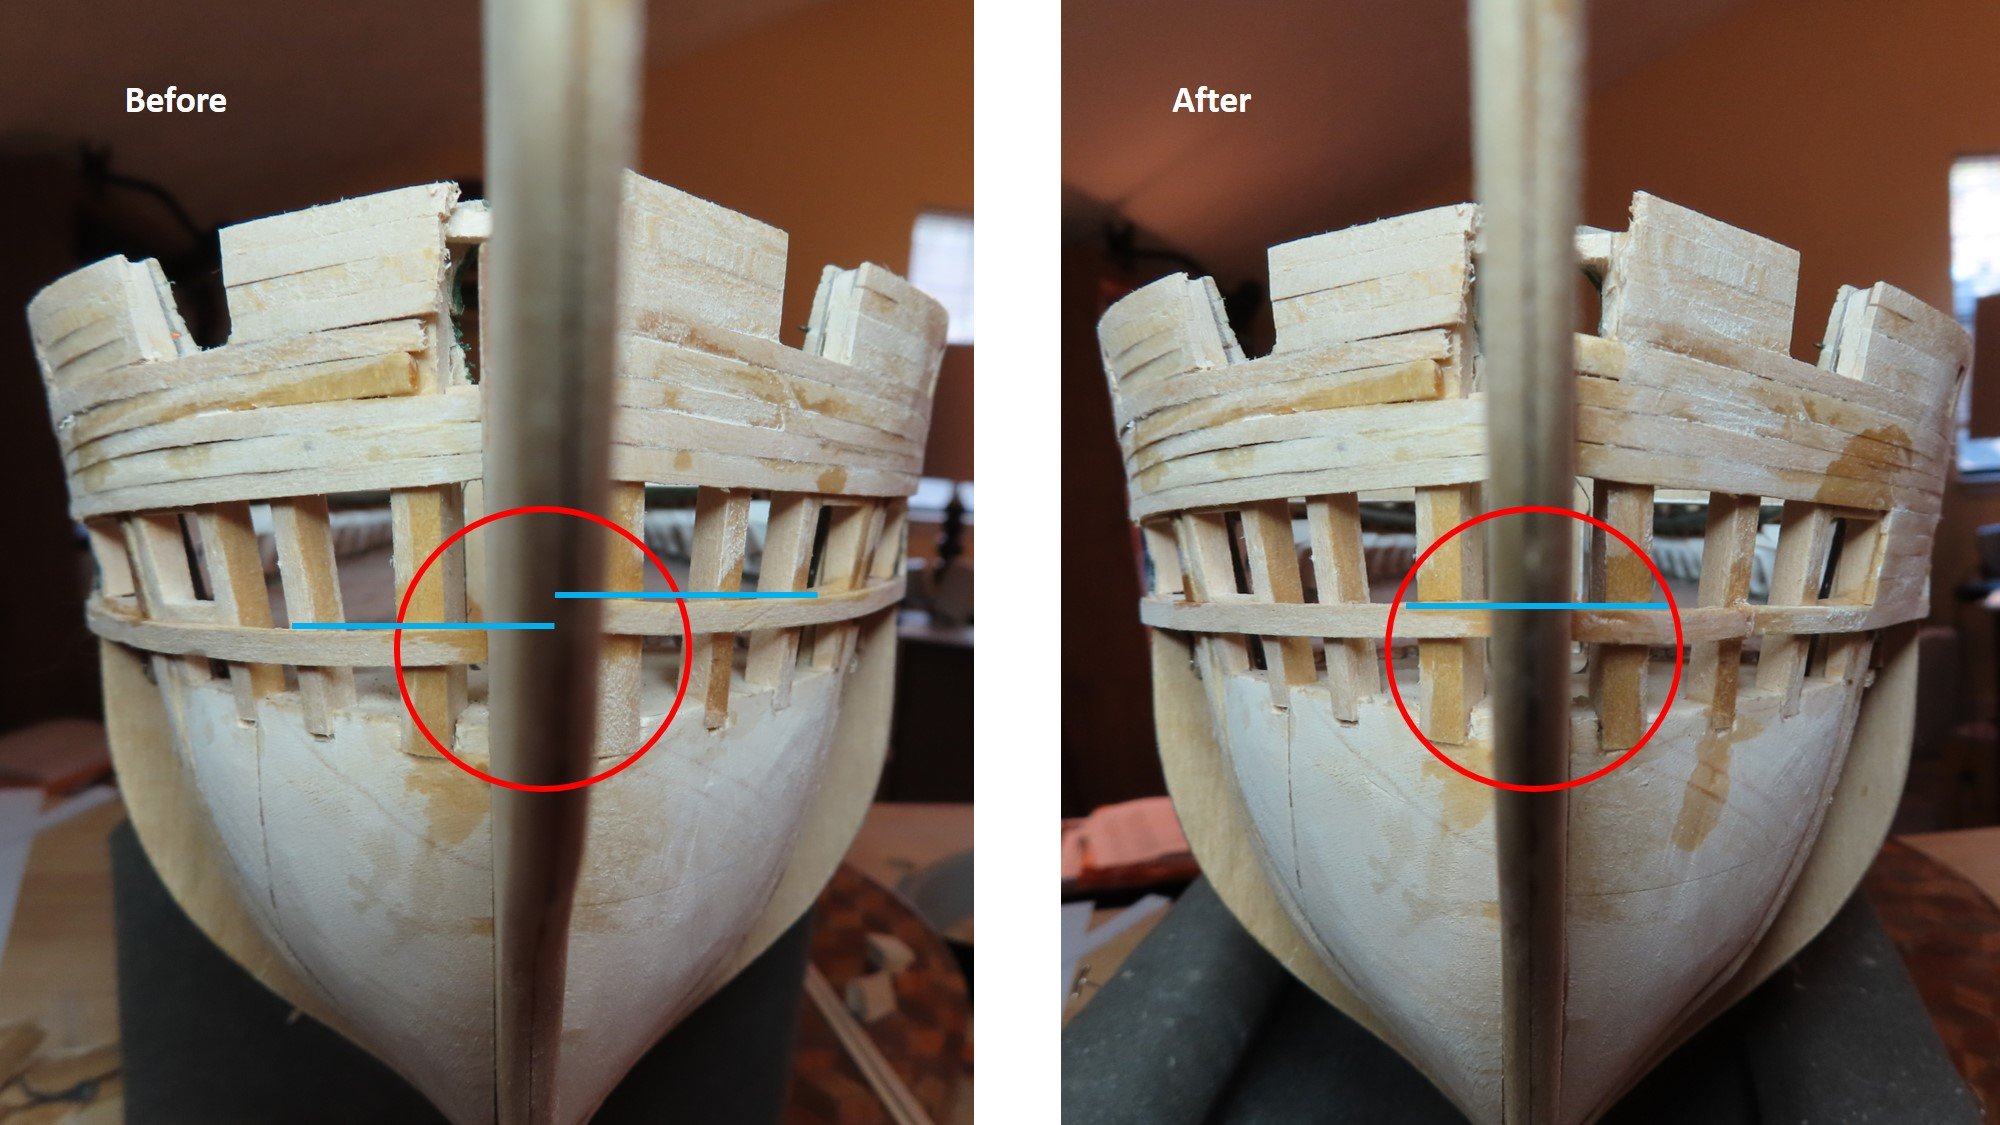
I was able to pry off the bottom two transom planks without too much effort. The new planks were shaped and glued in their place so that at least from the transom point of view, it now level at the bottom edge.

- GrandpaPhil, JeffT and J11
-
3
-
My model is close to following the plans, but not exact enough it seems. The back end of this model has virtually no straight edges from which to measure and the structure is full of curves. My transom seems to be just a bit narrower than the plans so that the filler blocks are a bit too wide to fit as I had cut them out (see my pencil marks on the filler piece). In addition, either my transom is a bit crooked or the area below it is a bit off. See the line I drew just below the rudder post opening. Either way, I’ve got some work to do.
- Ryland Craze, GrandpaPhil, J11 and 1 other
-
4
-
That went off without a hitch…so something must be wrong. It’s never that easy. It didn’t take me long to find out what. When I dry fitted the fillers into position, the troubles I had with the transom came back to haunt me.
- JeffT, J11, Ryland Craze and 1 other
-
4
-
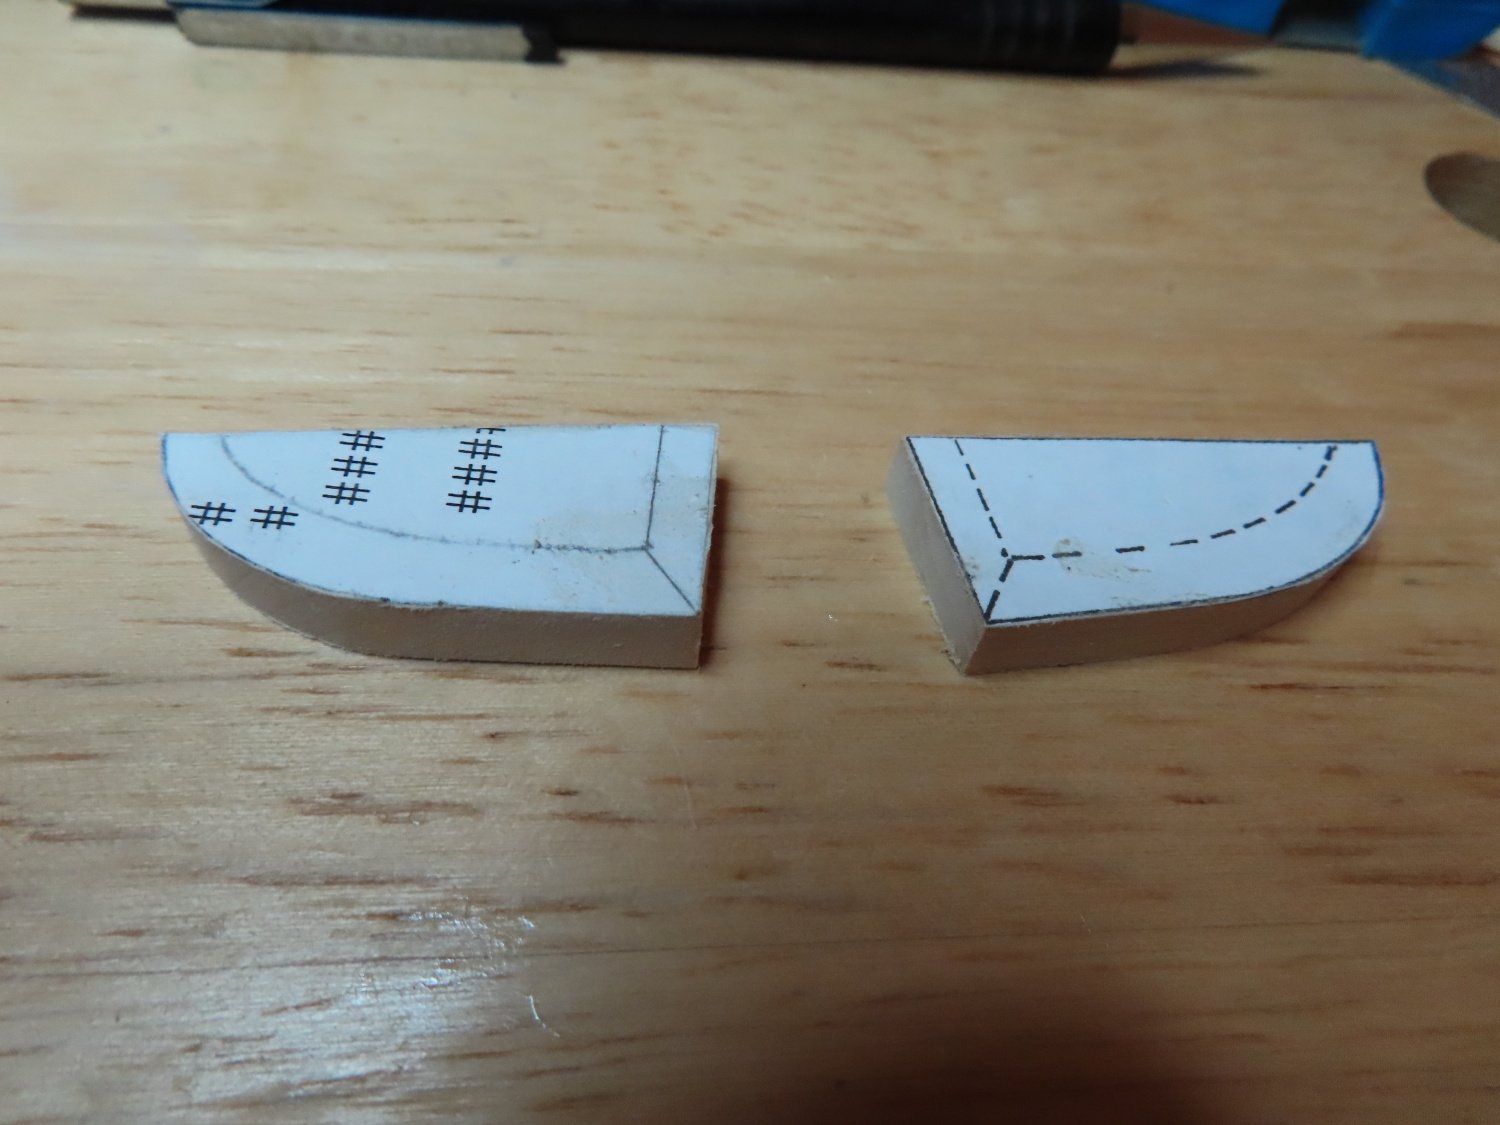
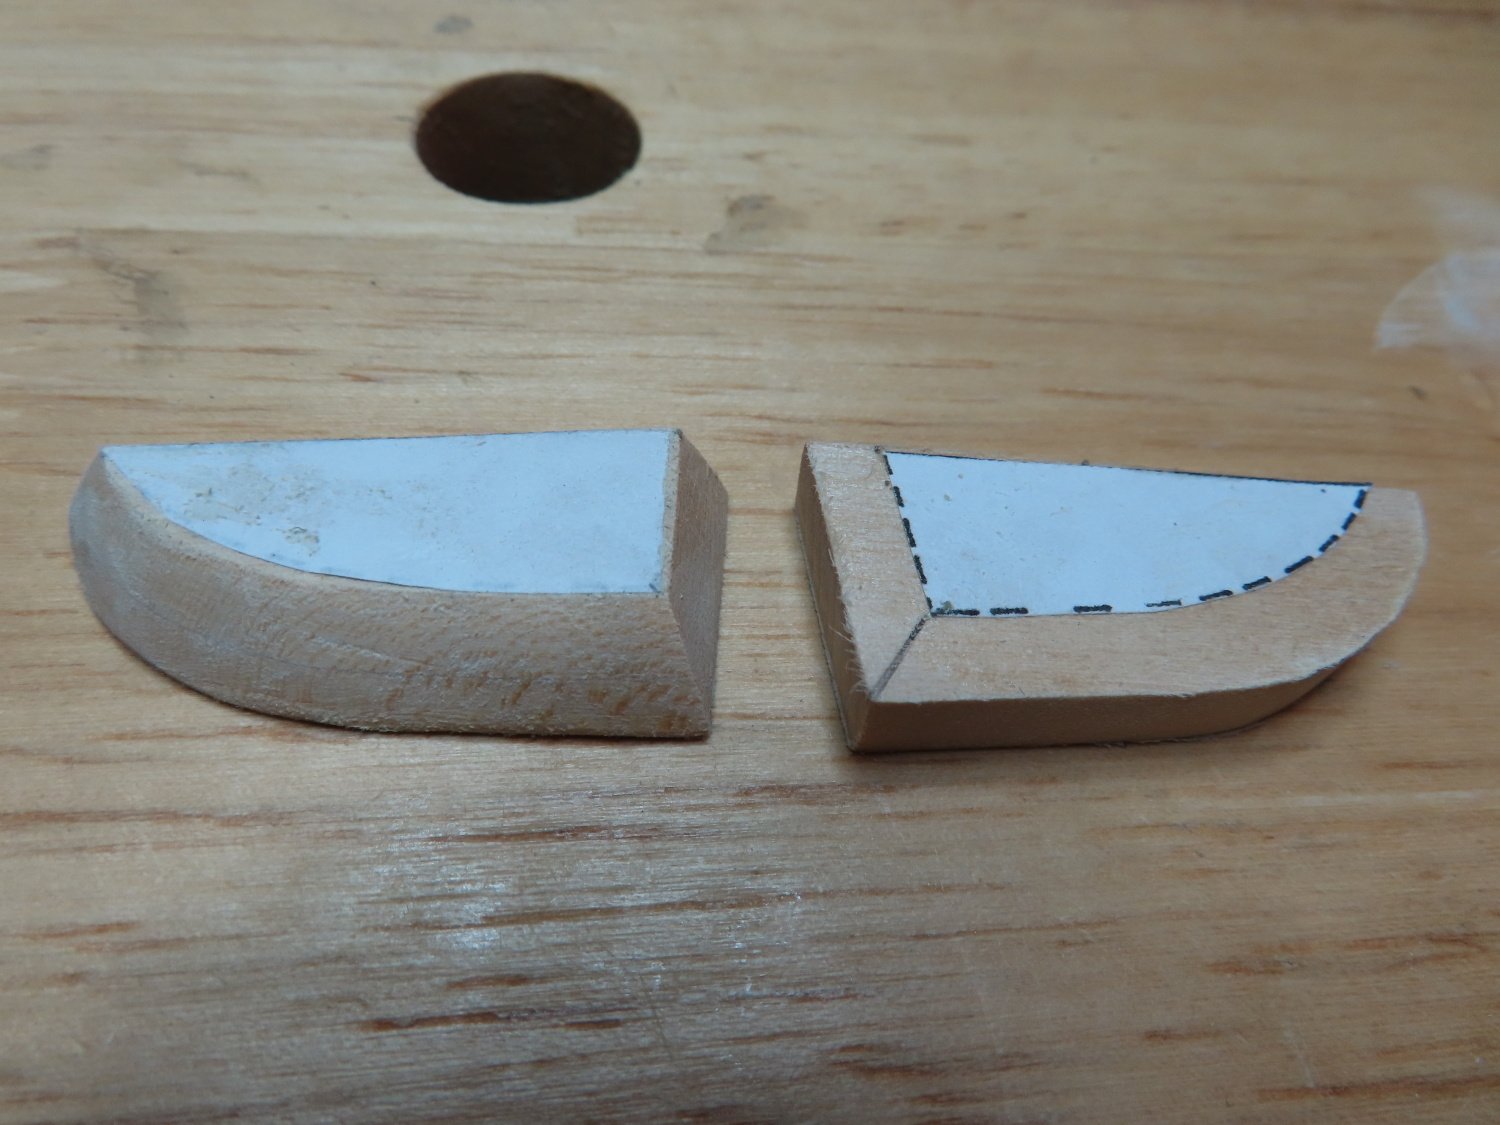
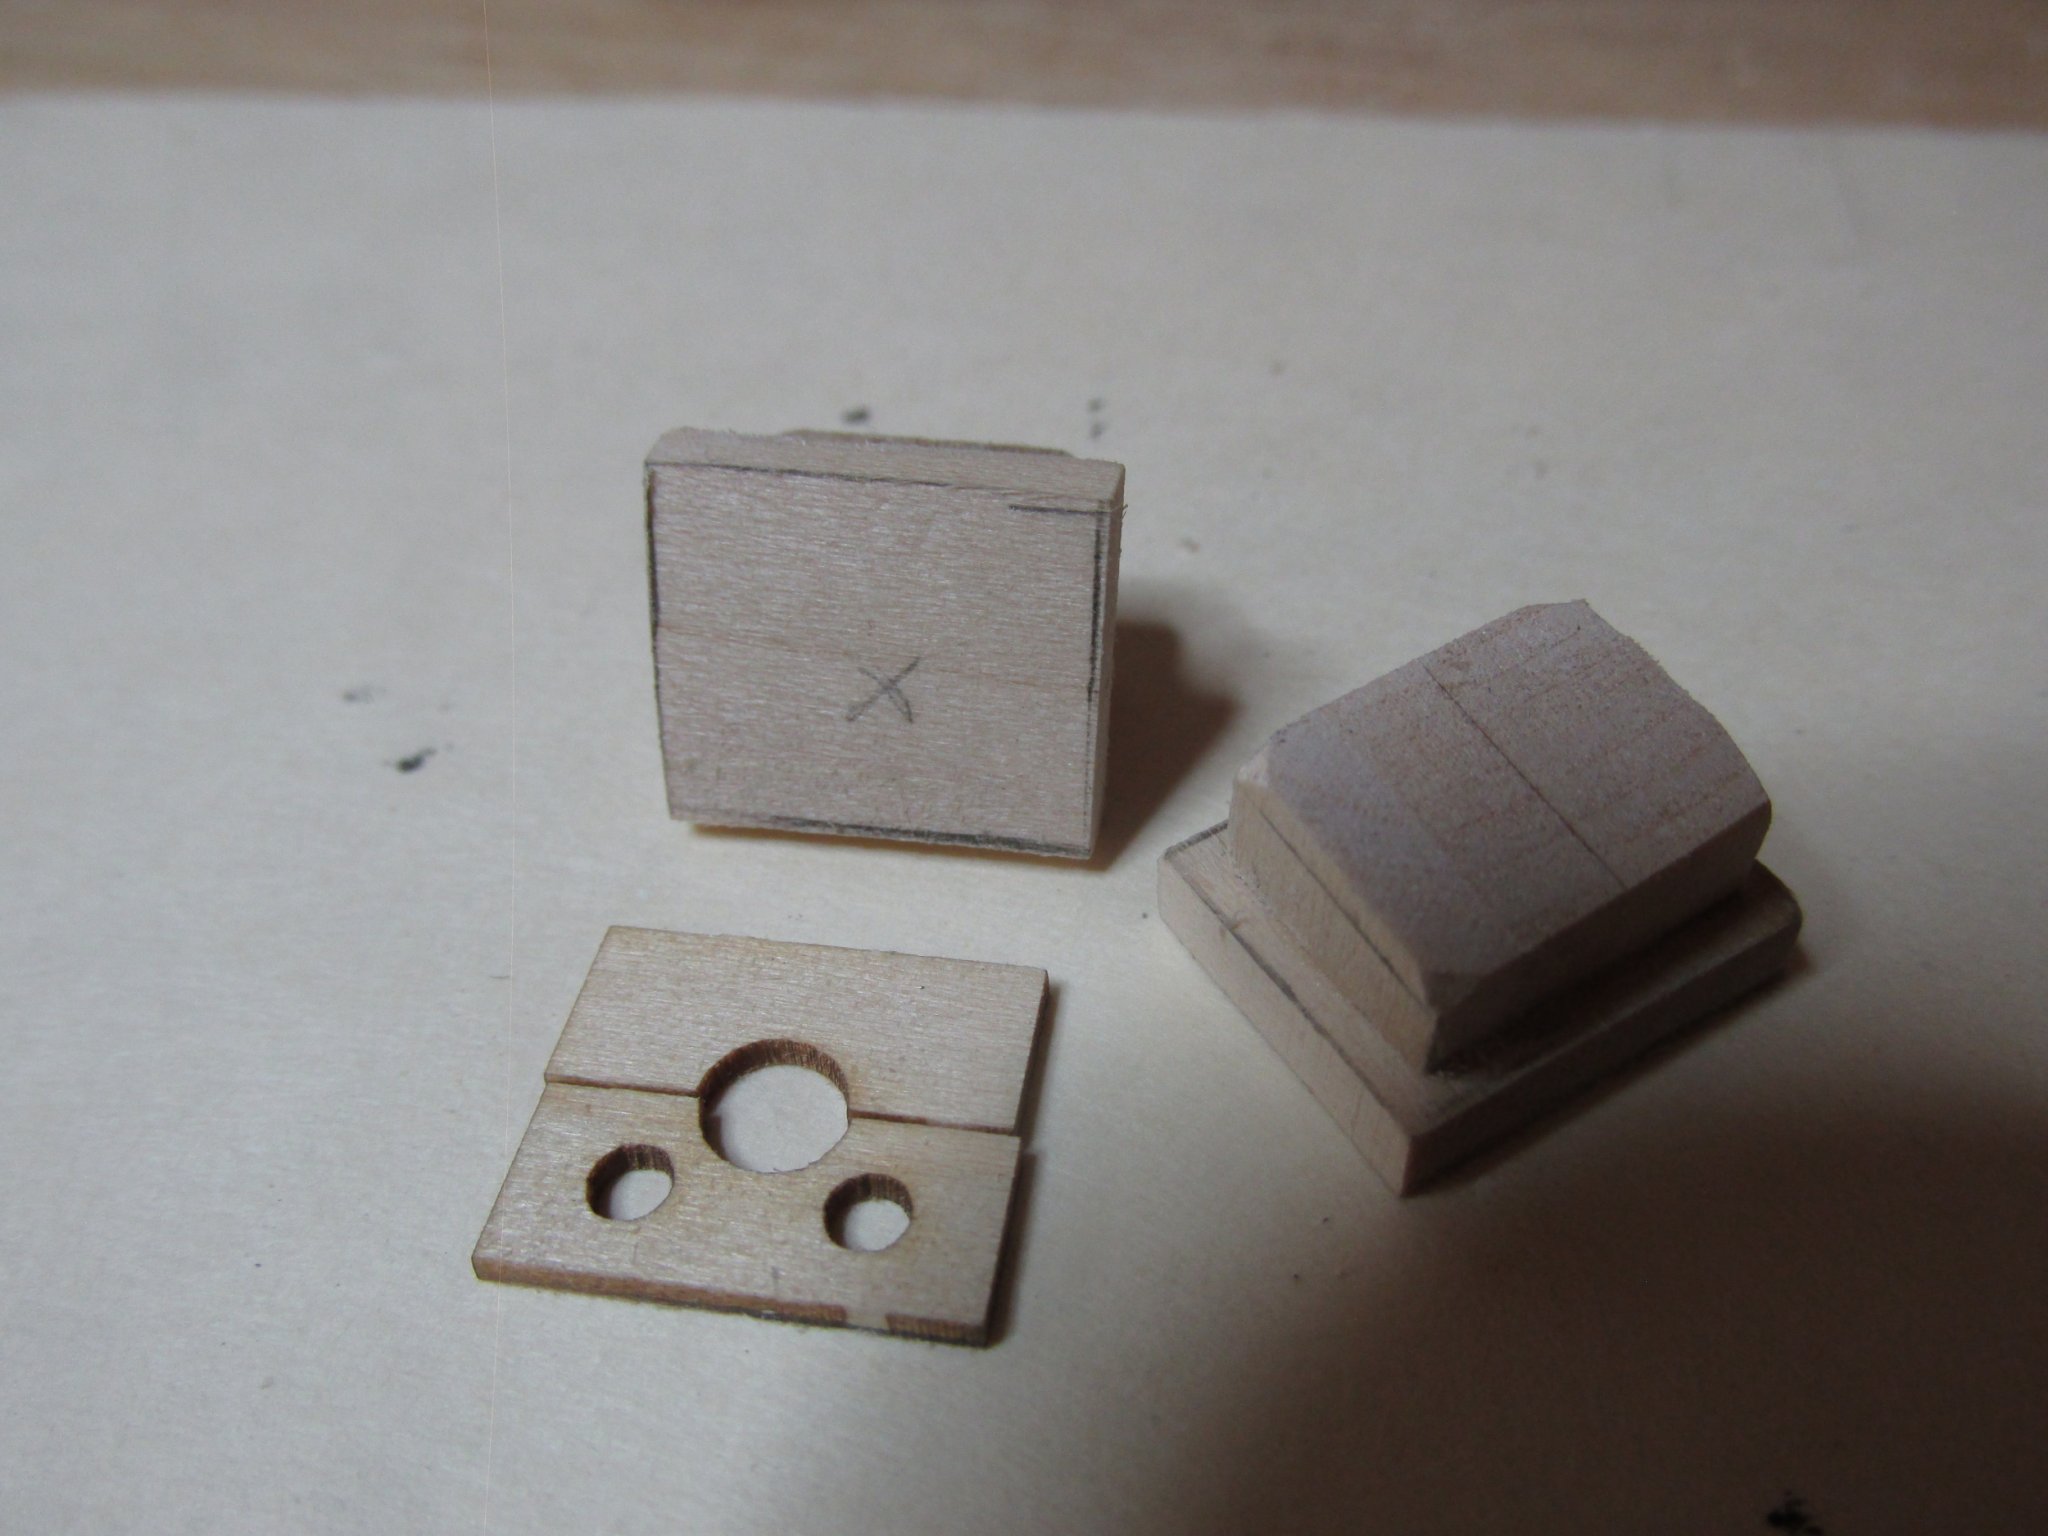
Templates for the bottom filler pieces were made from the plans. First the larger of the two templates and cemented to the billets and cut out. Then a second set of templates were cemented to the bottom of the just cut pieces. Using my disk sander, files, and sandpaper, the bottom filler pieces were formed.

- Ryland Craze, J11, GrandpaPhil and 1 other
-
4
-
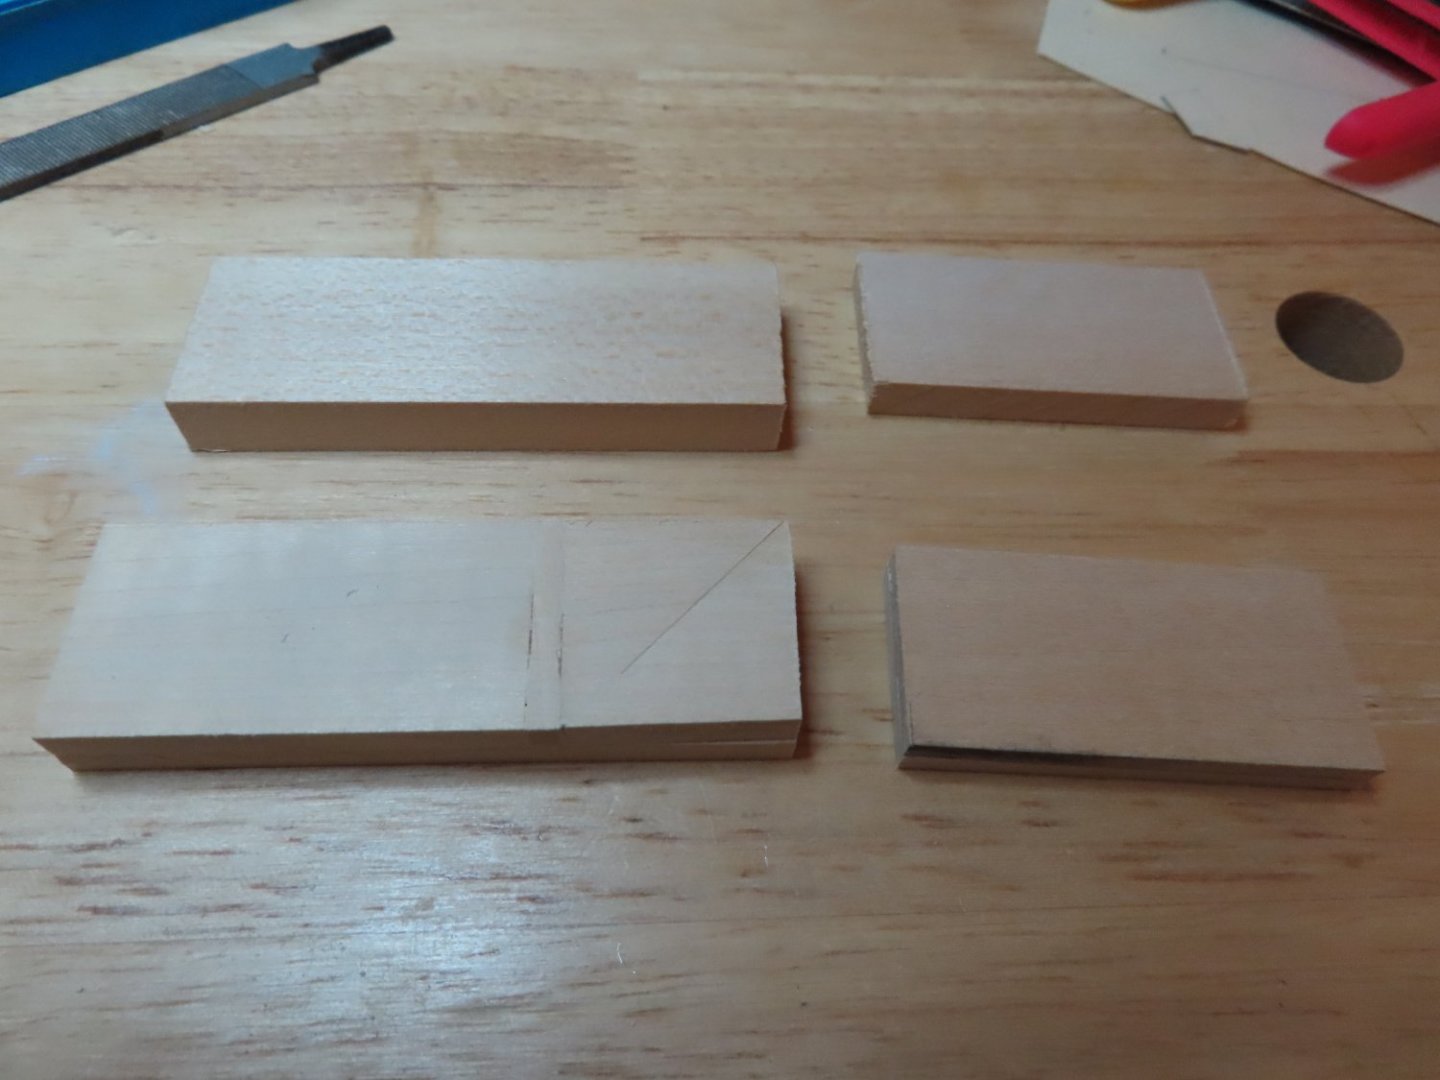
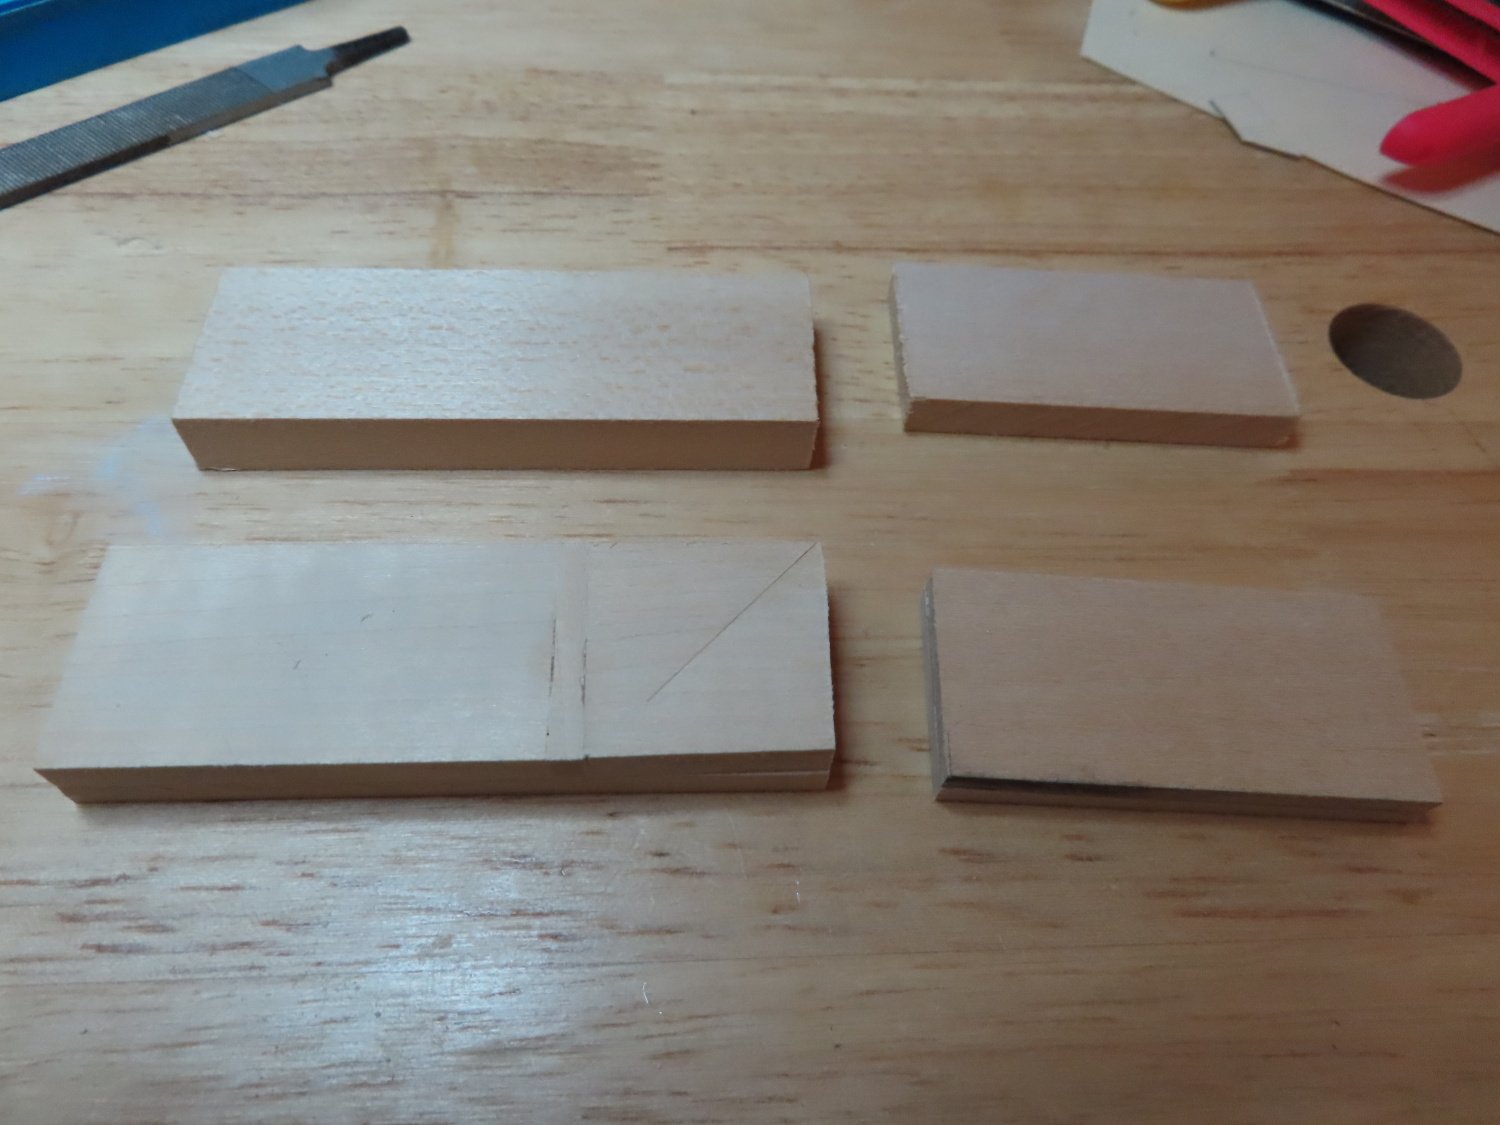
Now for the hard part: The Quarter Gallery Structures. Following the practicum, Mr. Hunt indicated that the kit does not provide enough basswood billets, which I found true. The kit provides one filler block 3/8” x 1” x 3” for the lower side area and one ¼” x 1” x 2” filler block for the upper side of the quarter gallery. That’s only enough for one quarter gallery, there are two. So, he tells the builder to buy more wood. In normal times buying wood is easy, just run down to the hobby store and buy some. But in this newly strange world of the pandemic that’s not possible especially when you live in a small town and all you have is Hobby Lobby. I could have ordered on-line but that adds too much cost due to shipping and you have to wait.
However, I did have scrap wood, so I made the additional billets by lamination.
- J11, GrandpaPhil and JeffT
-
3
-
That was the easy part.
- J11, Tigersteve, GrandpaPhil and 2 others
-
5
-
Then the lower transom extensions were added and then planked

- J11 and GrandpaPhil
-
2
-
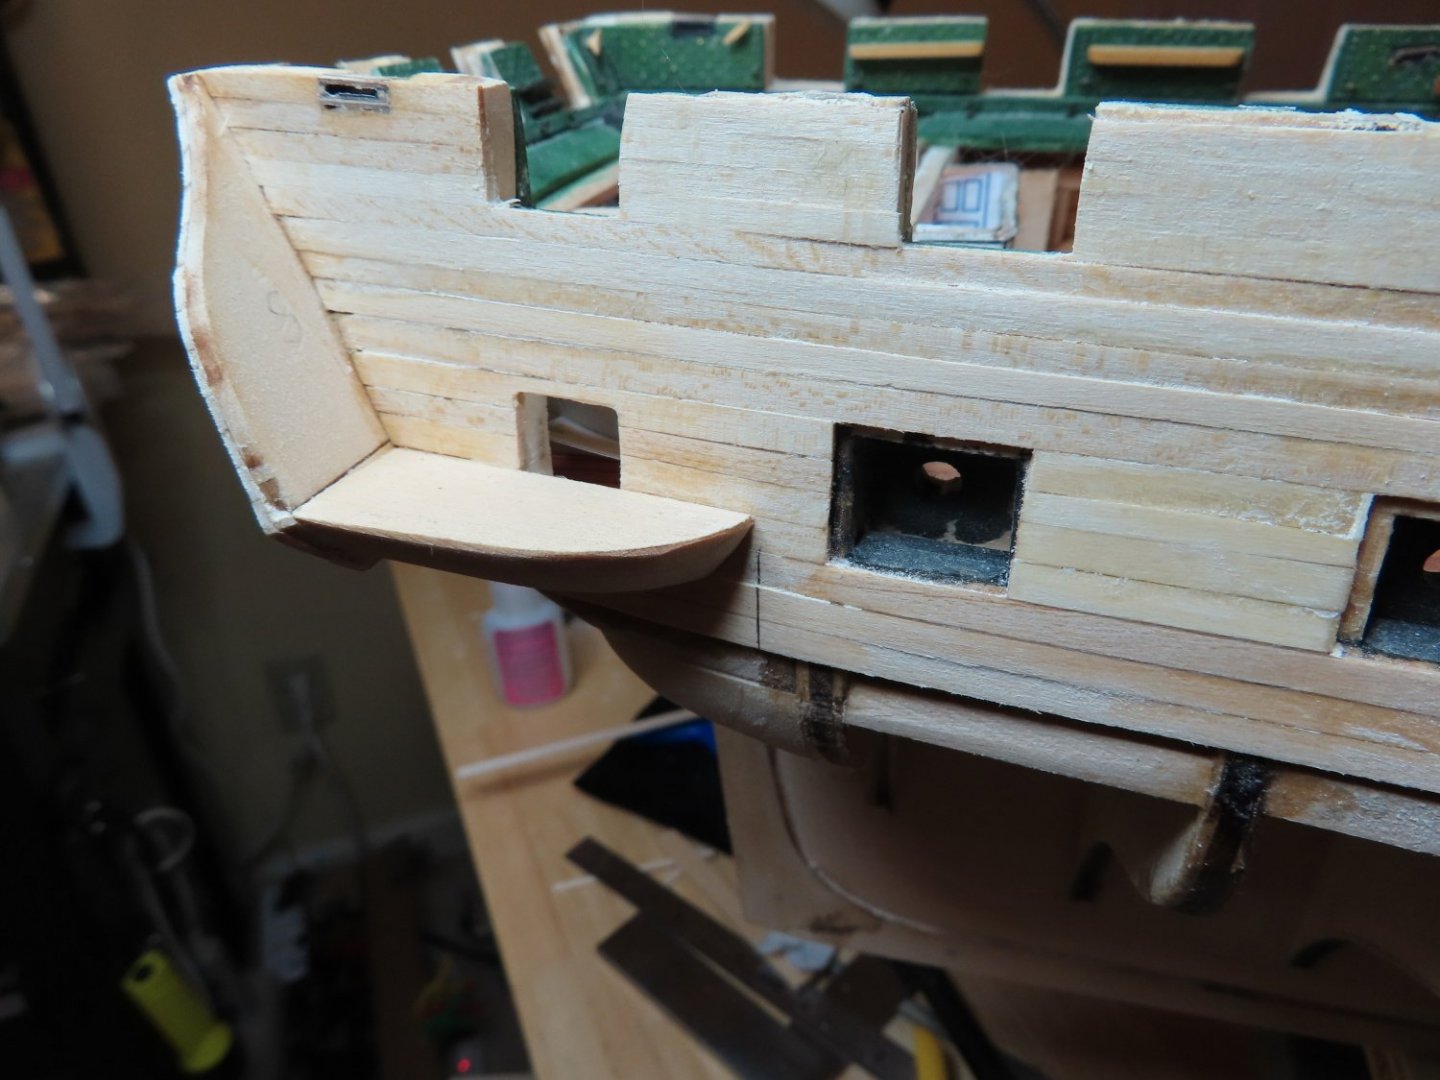
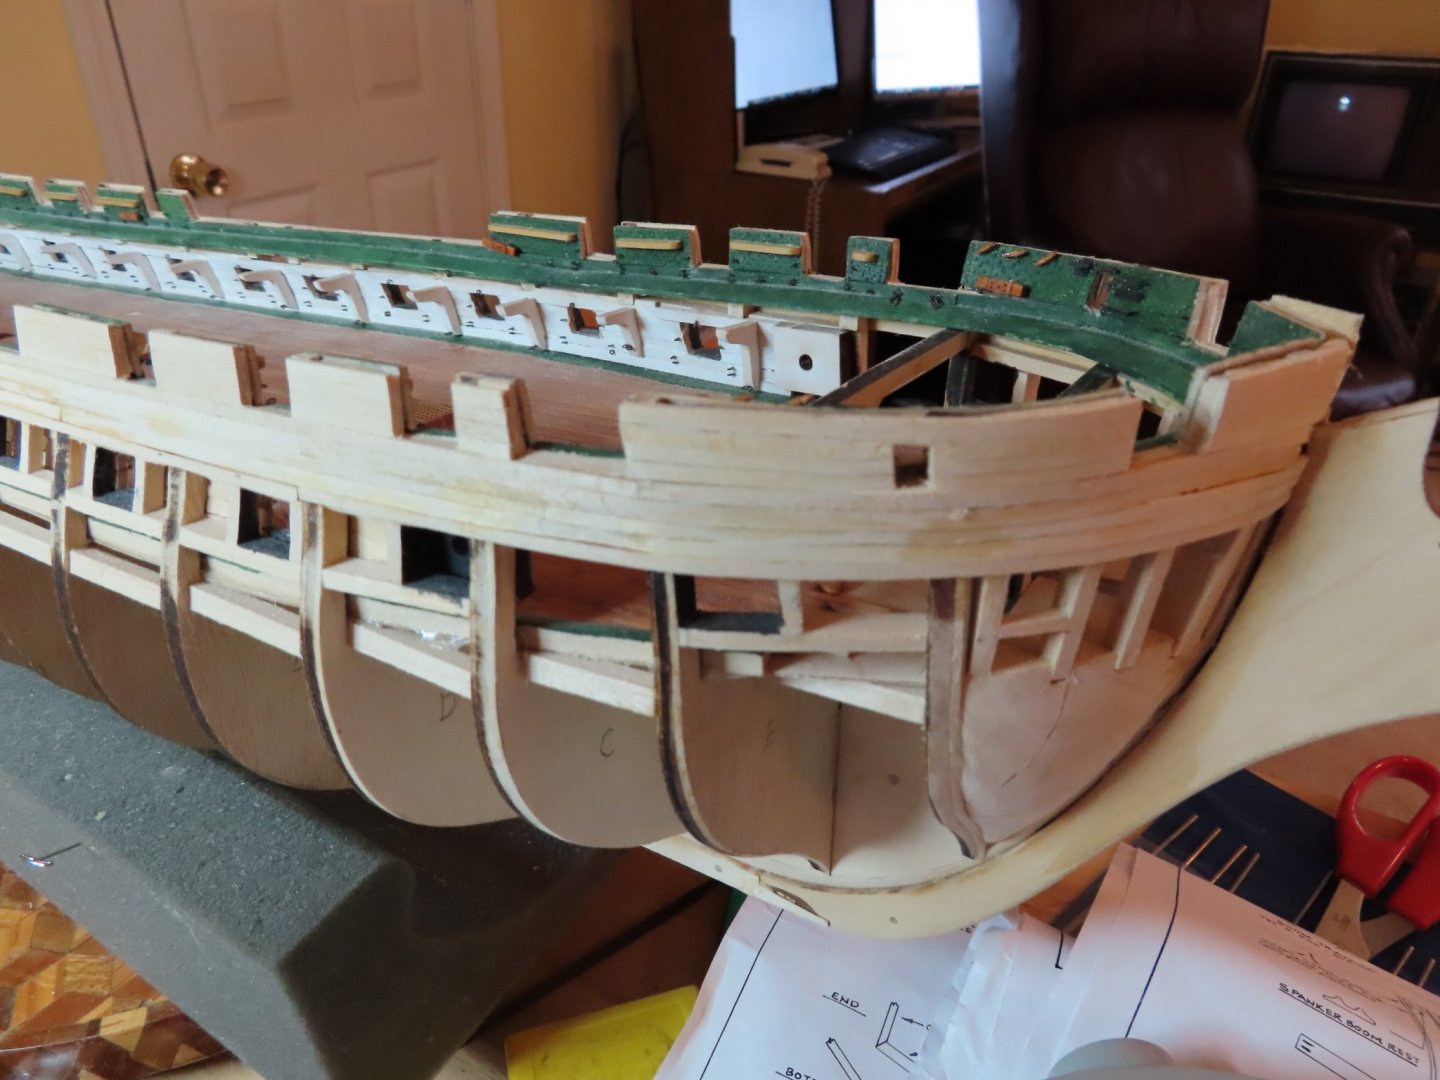
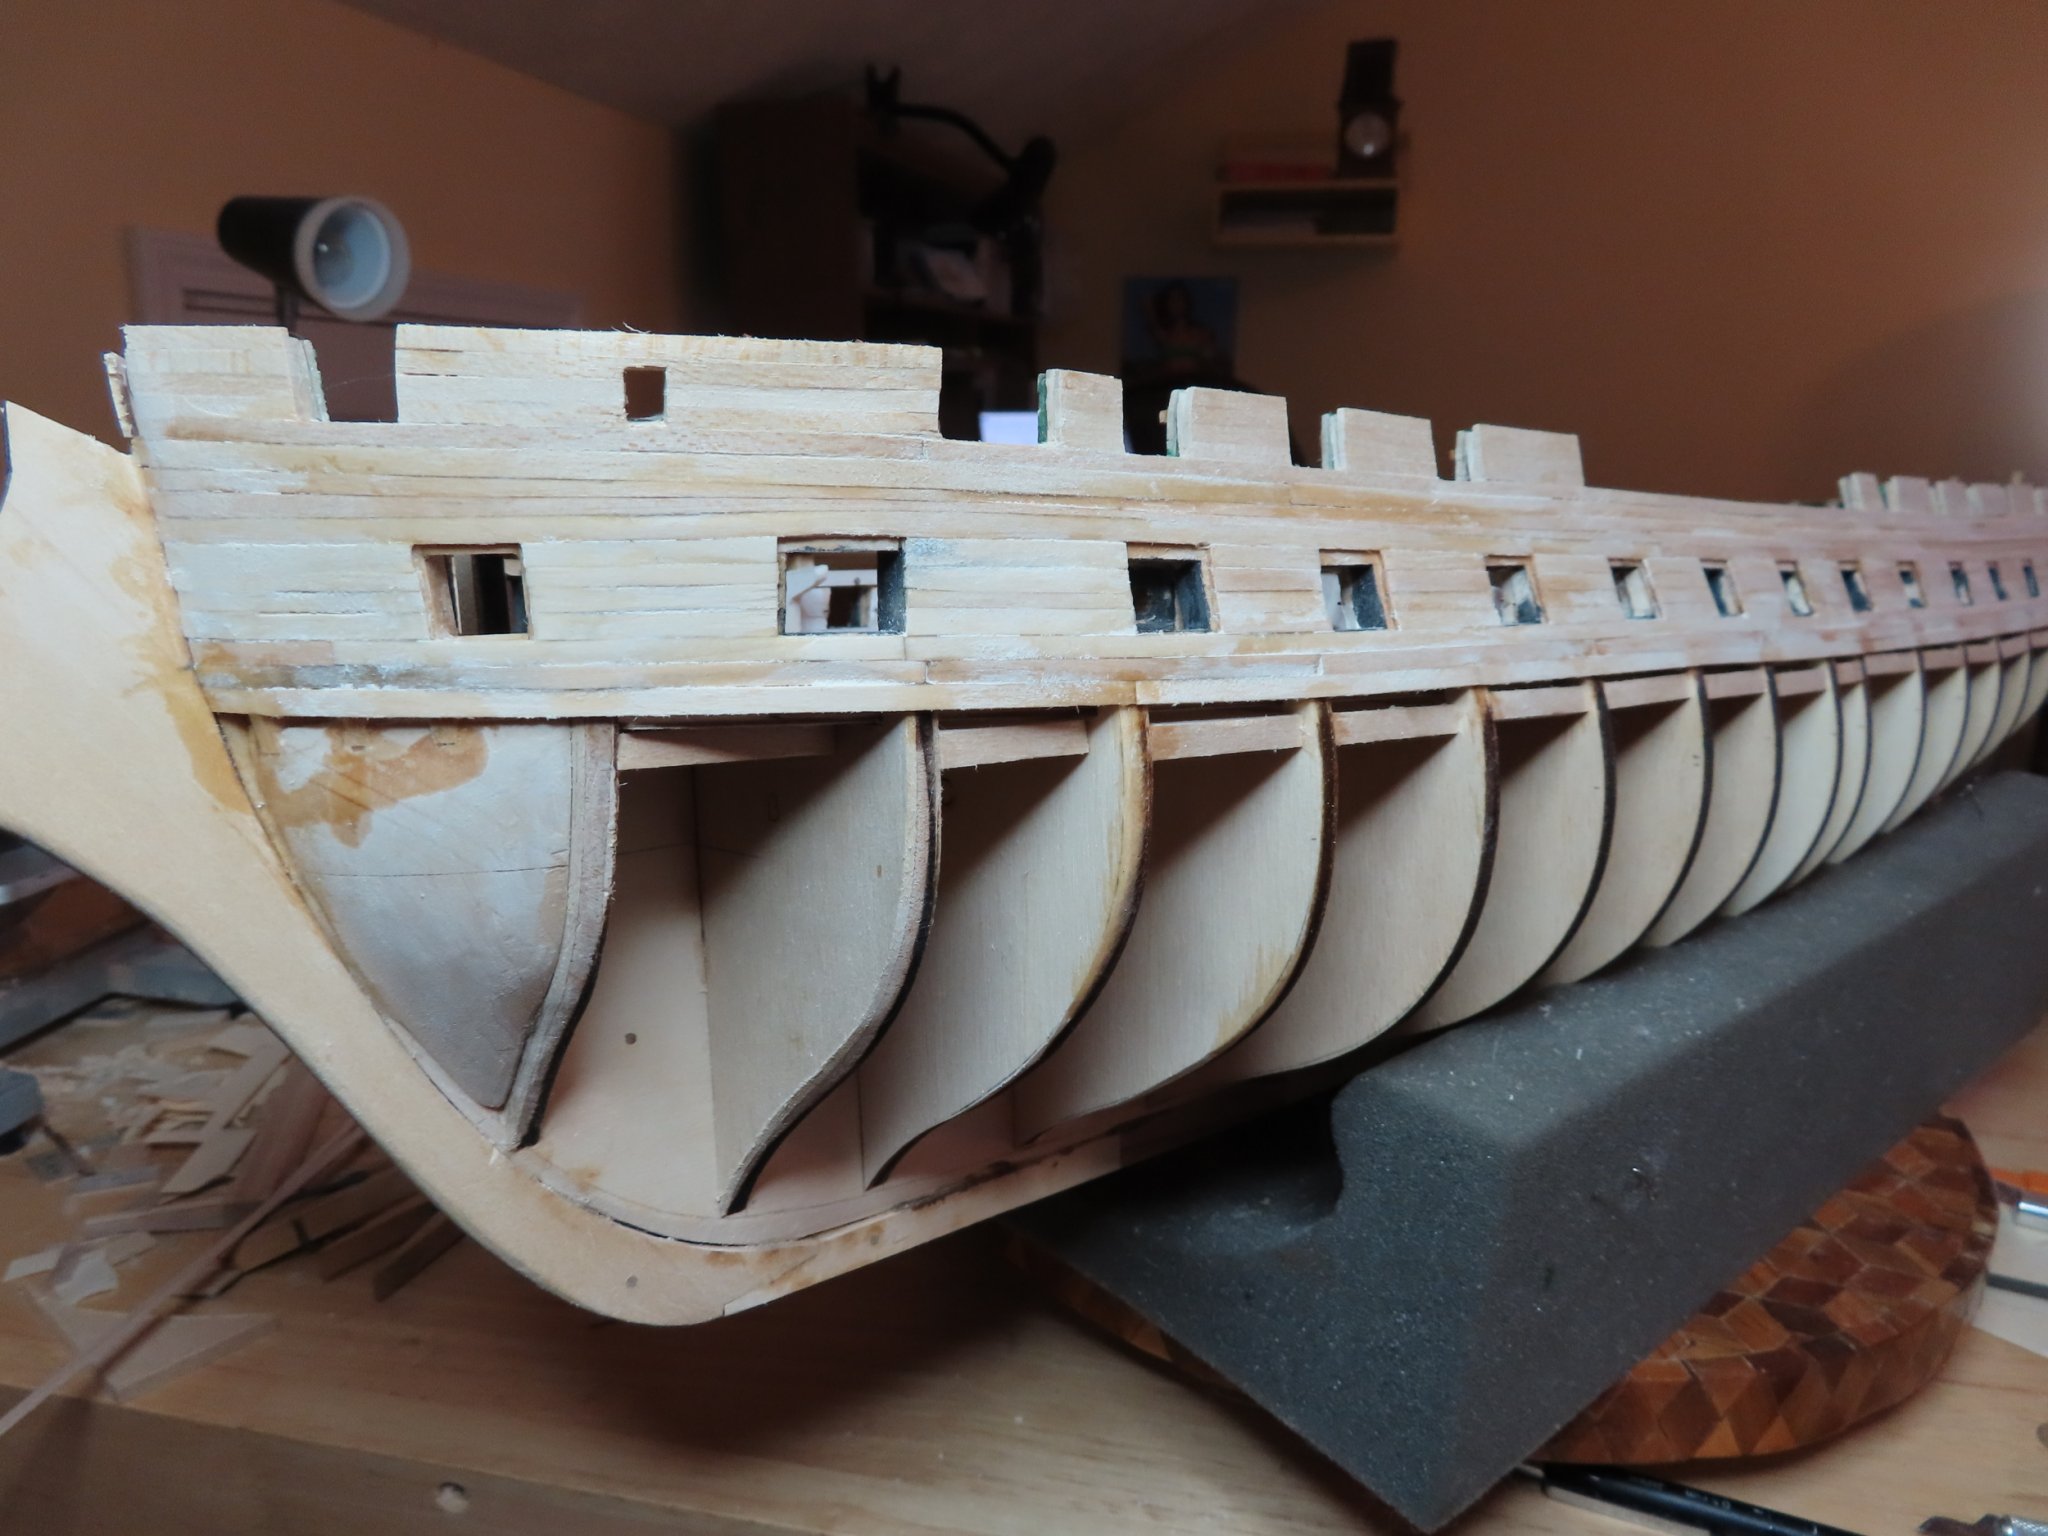
Finally, I got to work on the transom and the quarter gallery structures. Here, I am paying close attention to Robert Hunt’s practicum because the quarter galleries are a complicated construction.
First the transom gun port area (spar and gun decks) were planked.
- J11 and GrandpaPhil
-
2
-
Any chance you have photos of your "wringer" set up? I'm still debating in my mind how I'll will do the nail impressions when I get to the copper stage.
-
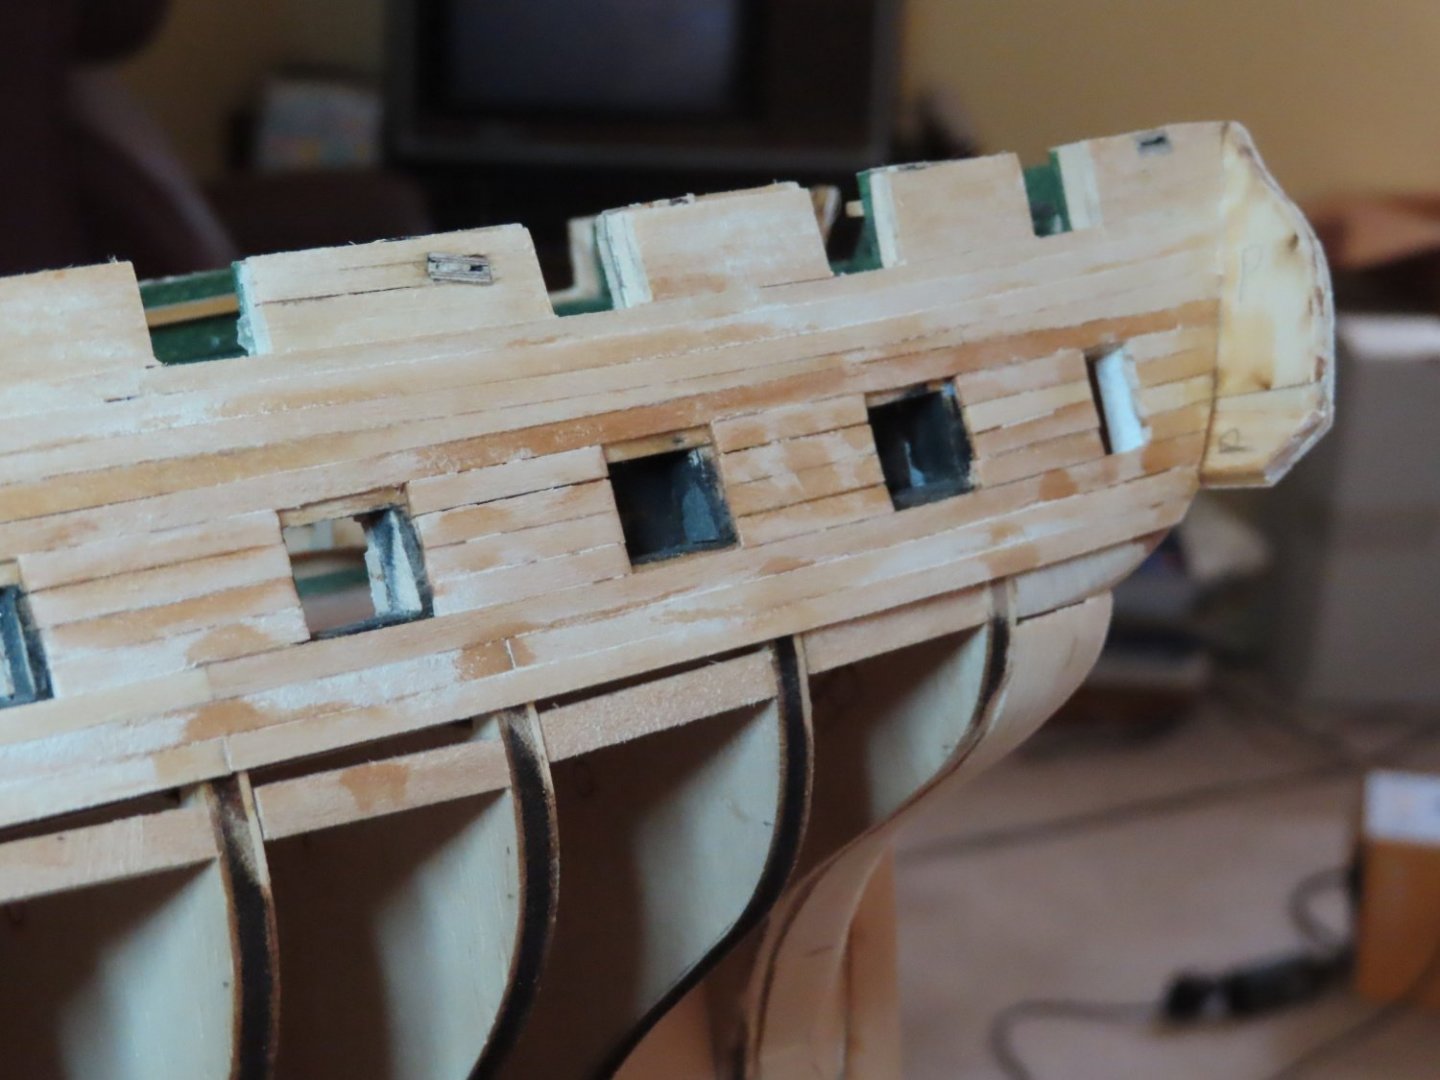
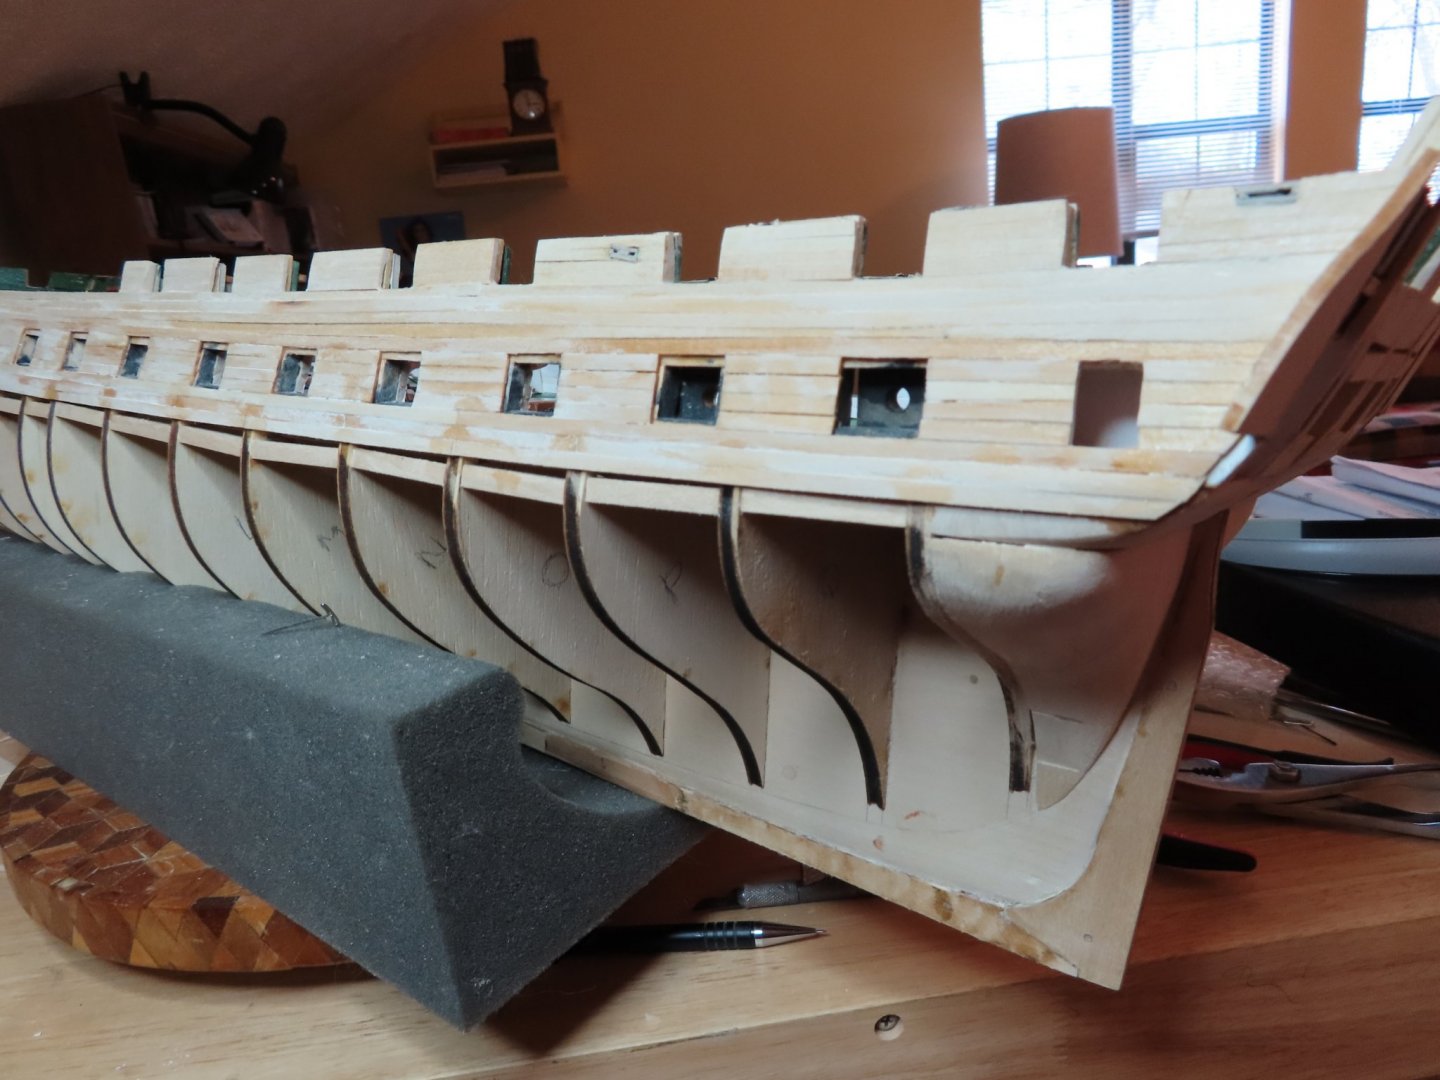
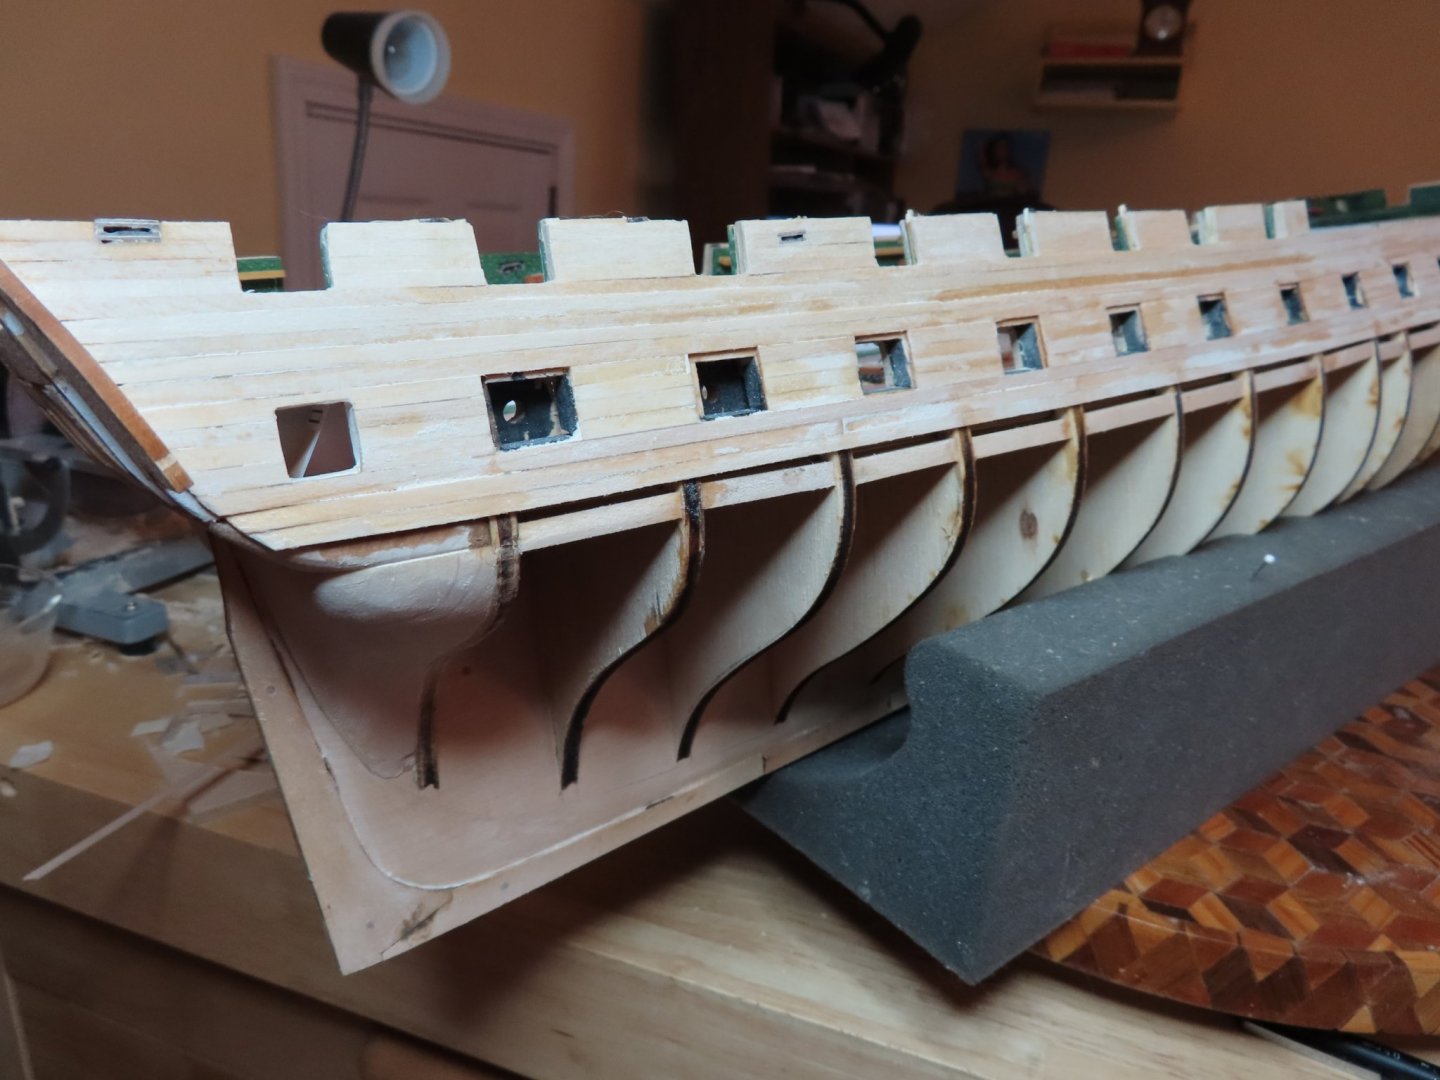
I finally finished the gun port planking plus three additional planks below the ports. The planking will work as it will be painted covering up all the “uglies.” If this were to be a natural wood finish, I would not be too happy. My only excuse (and not a good one) is that this is only the second hull I’ve ever planked.


- Ryland Craze, J11, GrandpaPhil and 5 others
-
8
-
It’s been about a month and a half since my last post. Wow have things changed in the world around us. Everyone is warned about leaving the house. Luckily, we have an indoor hobby. I’ve been busy but not always with the model and as usual, I’m slow as molasses with the model building.
Continuing on with the hull planking, I added the gun deck, gun port, sill planking on each side of the hull. As final check before I started to plank in between the gun ports, I noticed that I wasn’t careful enough with how I place those planks. Looking from the bow, one could see they didn’t line up. I had to carefully cut out a couple of inches worth of the sill plank on the port side and do it again.

- JeffT, Tigersteve, GrandpaPhil and 3 others
-
6
-
Dan - She's been a favorite of mine too. I grew up in Newton MA, a suburb of Boston, and visited her on numerous occasions. I would like to to see build log of your efforts as I look at just about any blog I can find looking for that detail, technique, and problem solving that would help me me in my efforts.
-
Very nice. I hope mine looks as good as your when I finally get to this point.
I'm using Robert Hunt's practicum as a guide (as well as following numerous other builders) and he substituted boxwood for the fife rails because the basswood laser cut pieces were so delicate, you were also guaranteed to break them. When I purchased my kit, Hobby Mill was still in operation and they offered a wood supplement kit based on Mr. Hunt's laser cut parts substitutions in his practicum. So, I bought it and as a result I've always planned on replacing the parts you discovered the hard way.
Look forward to your next posting.
Jon
-
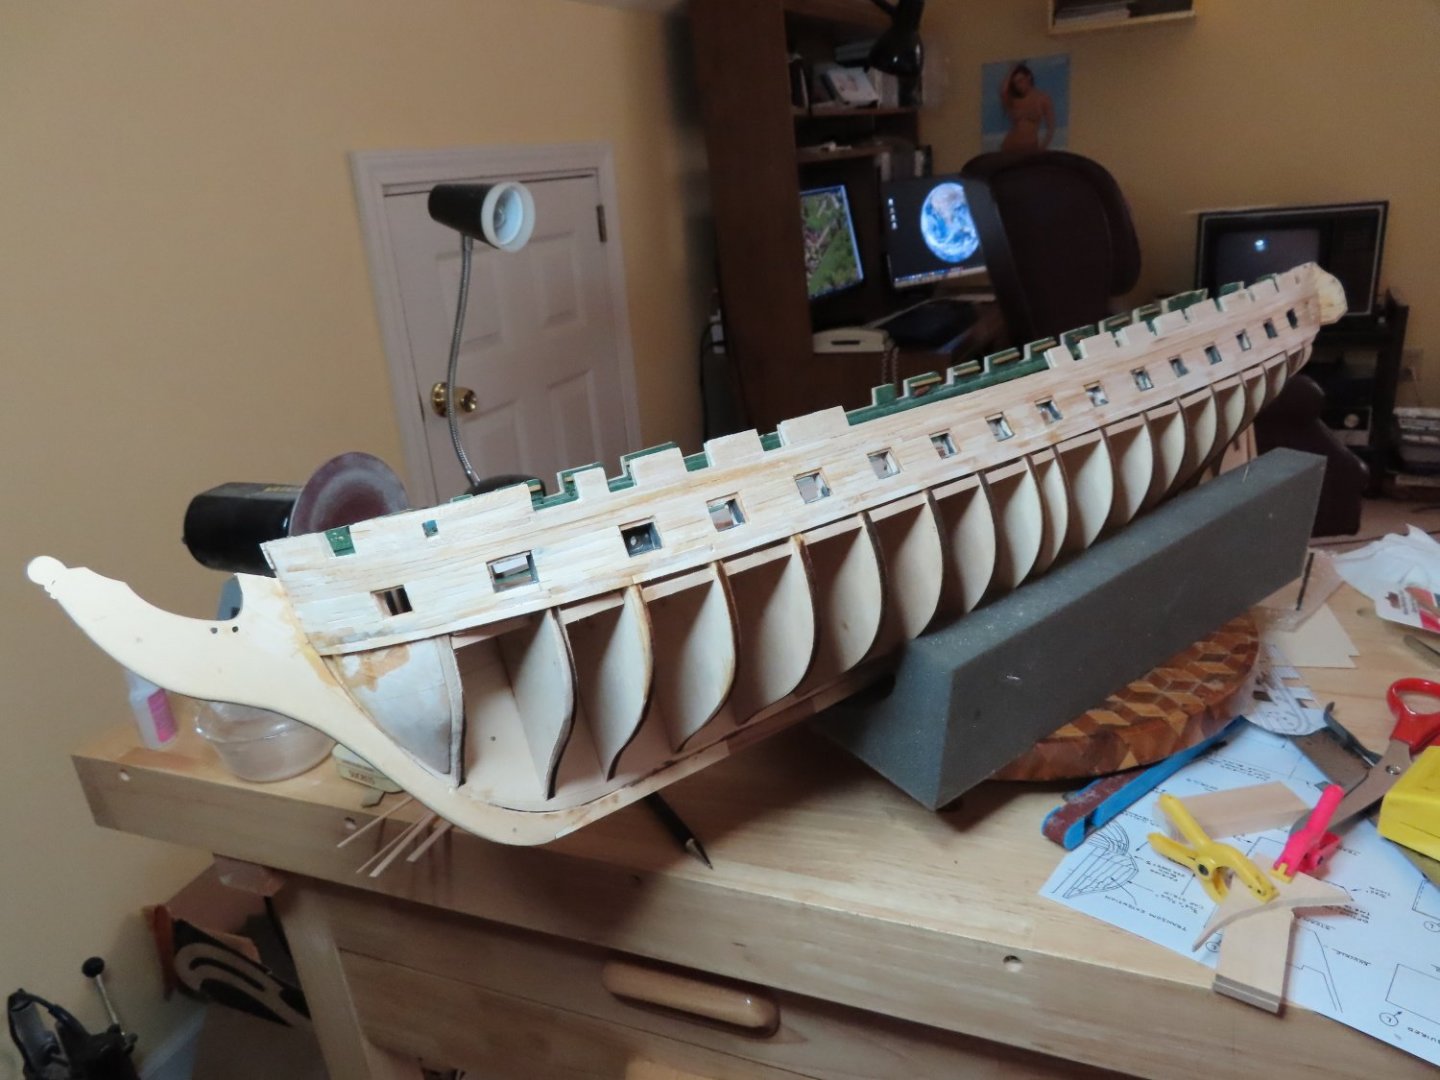
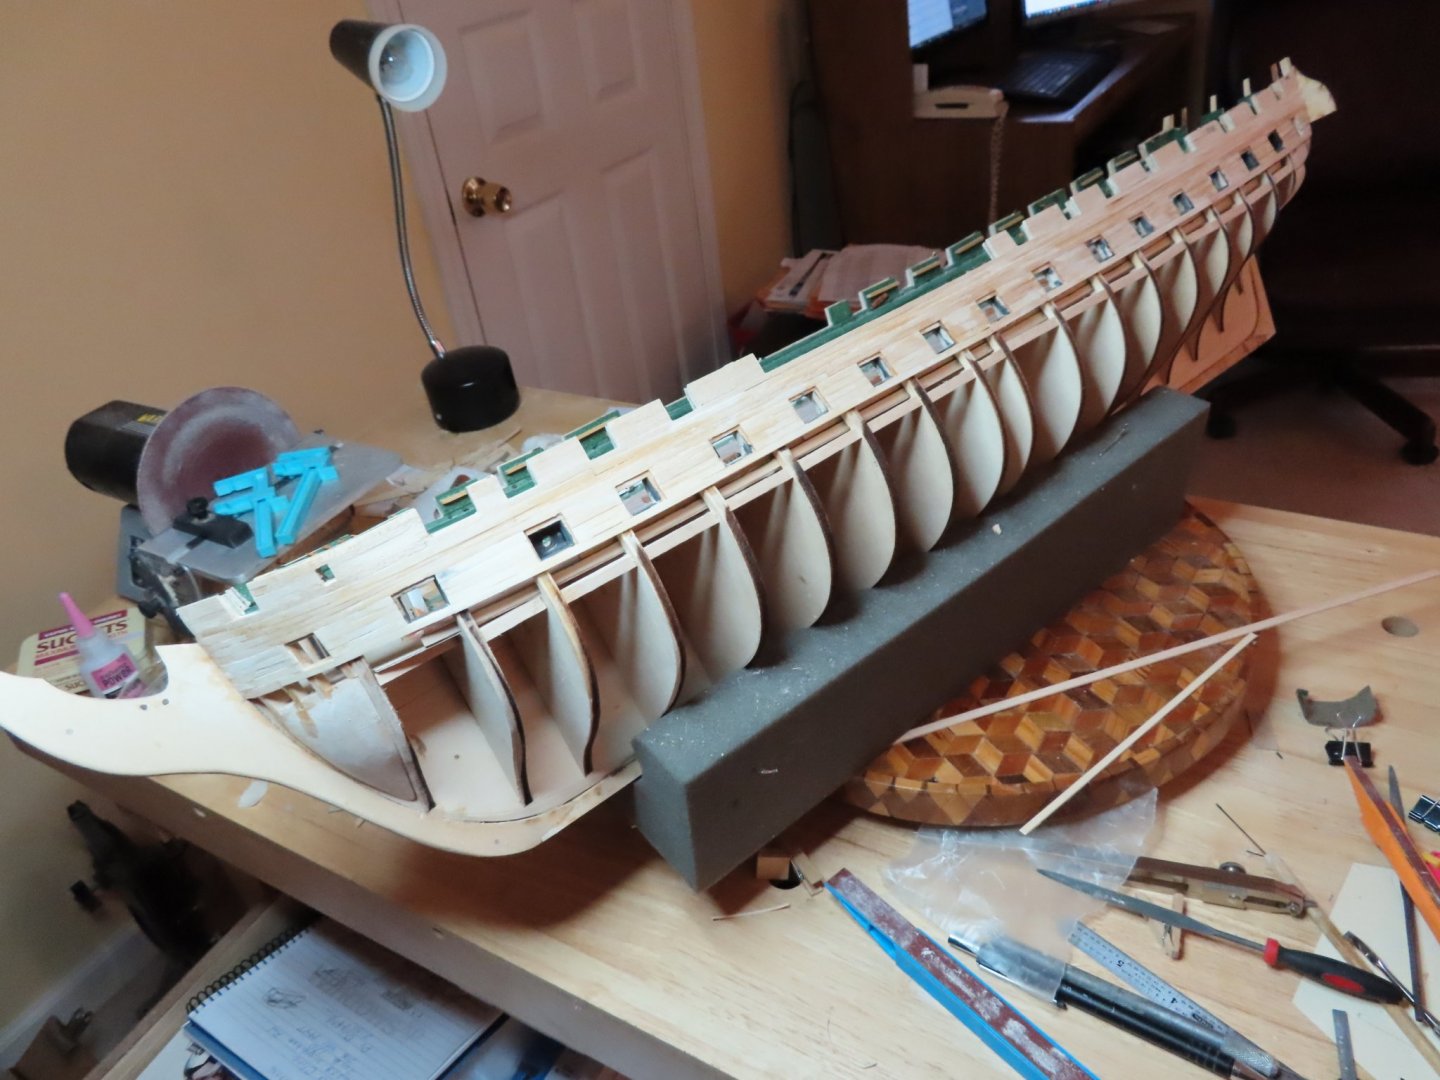
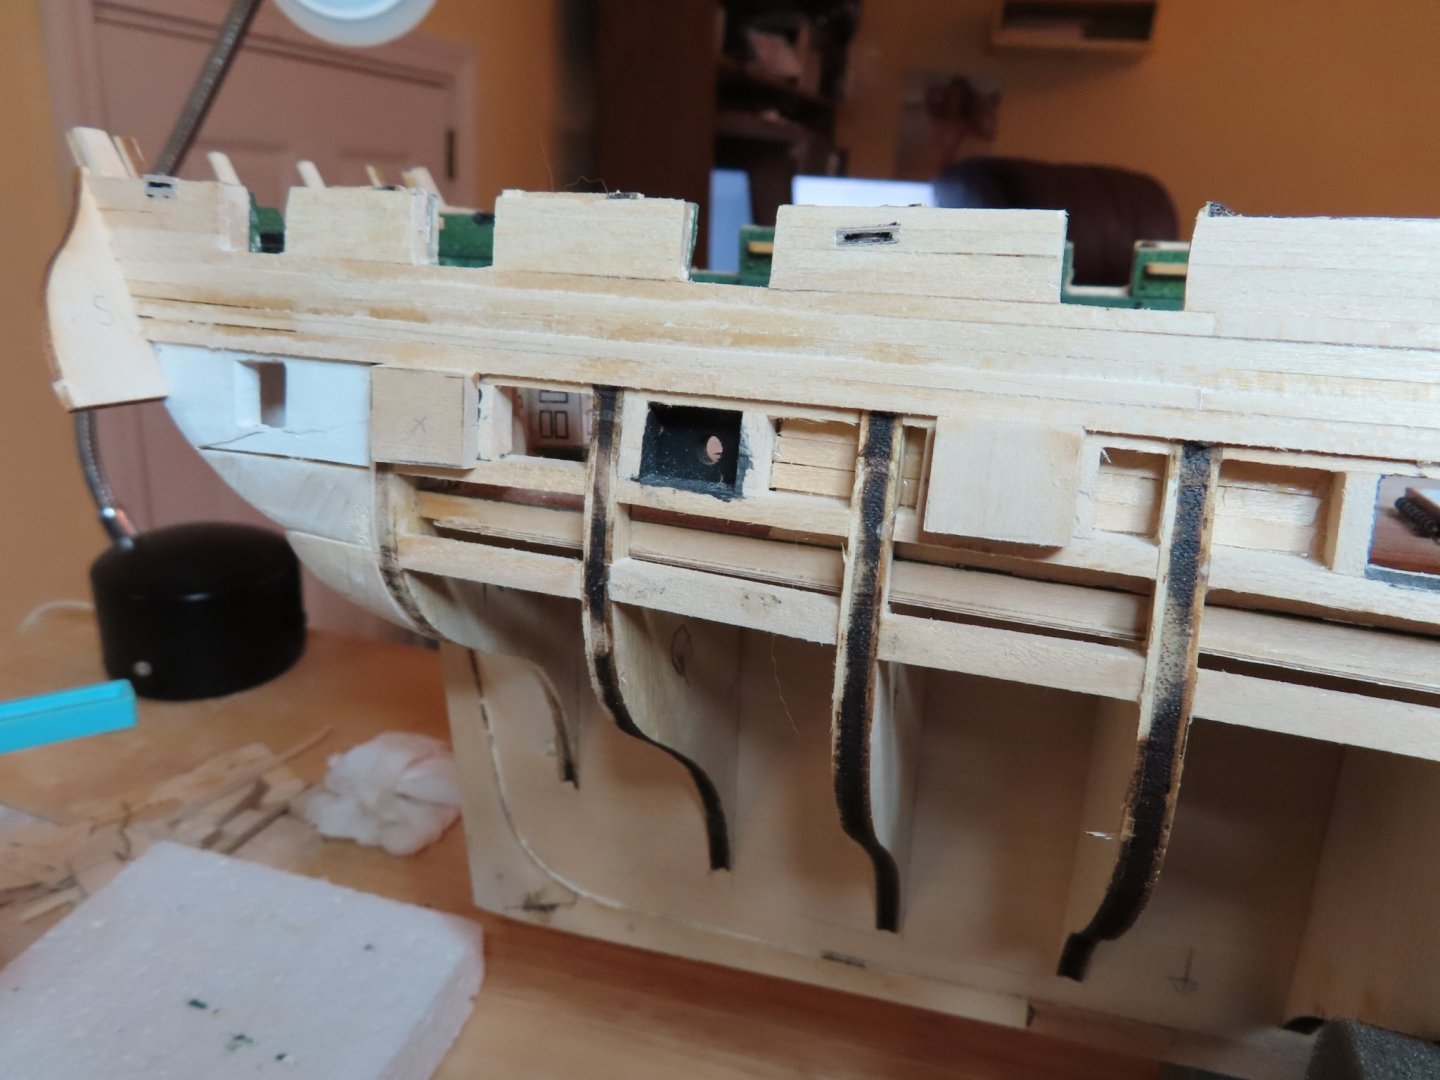
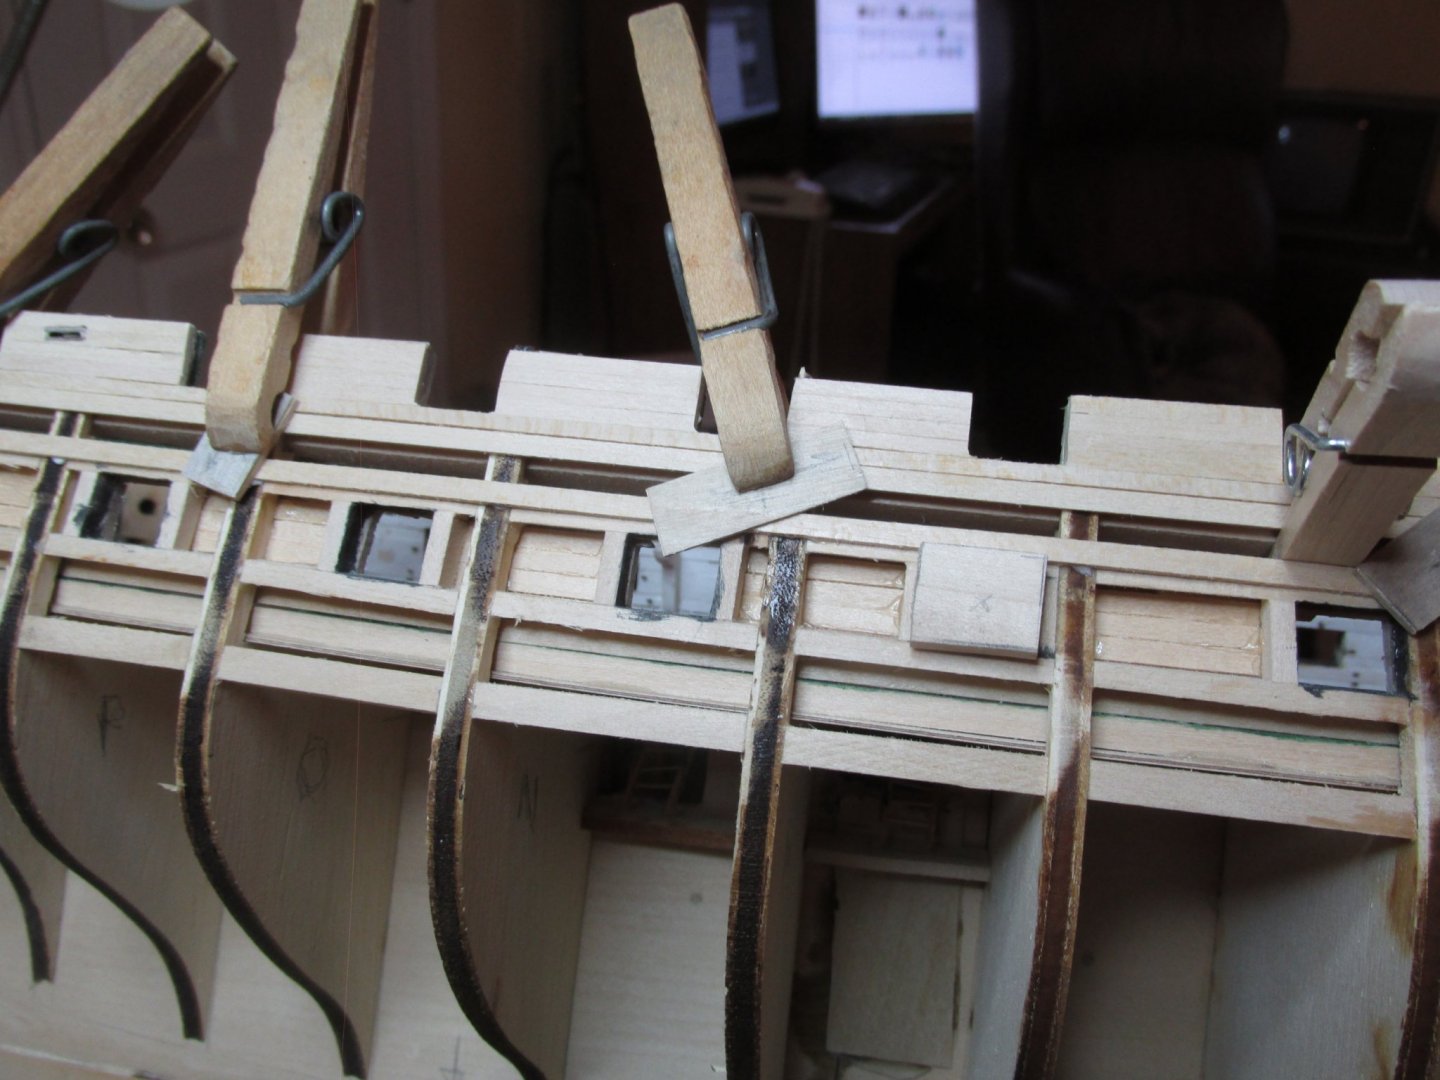
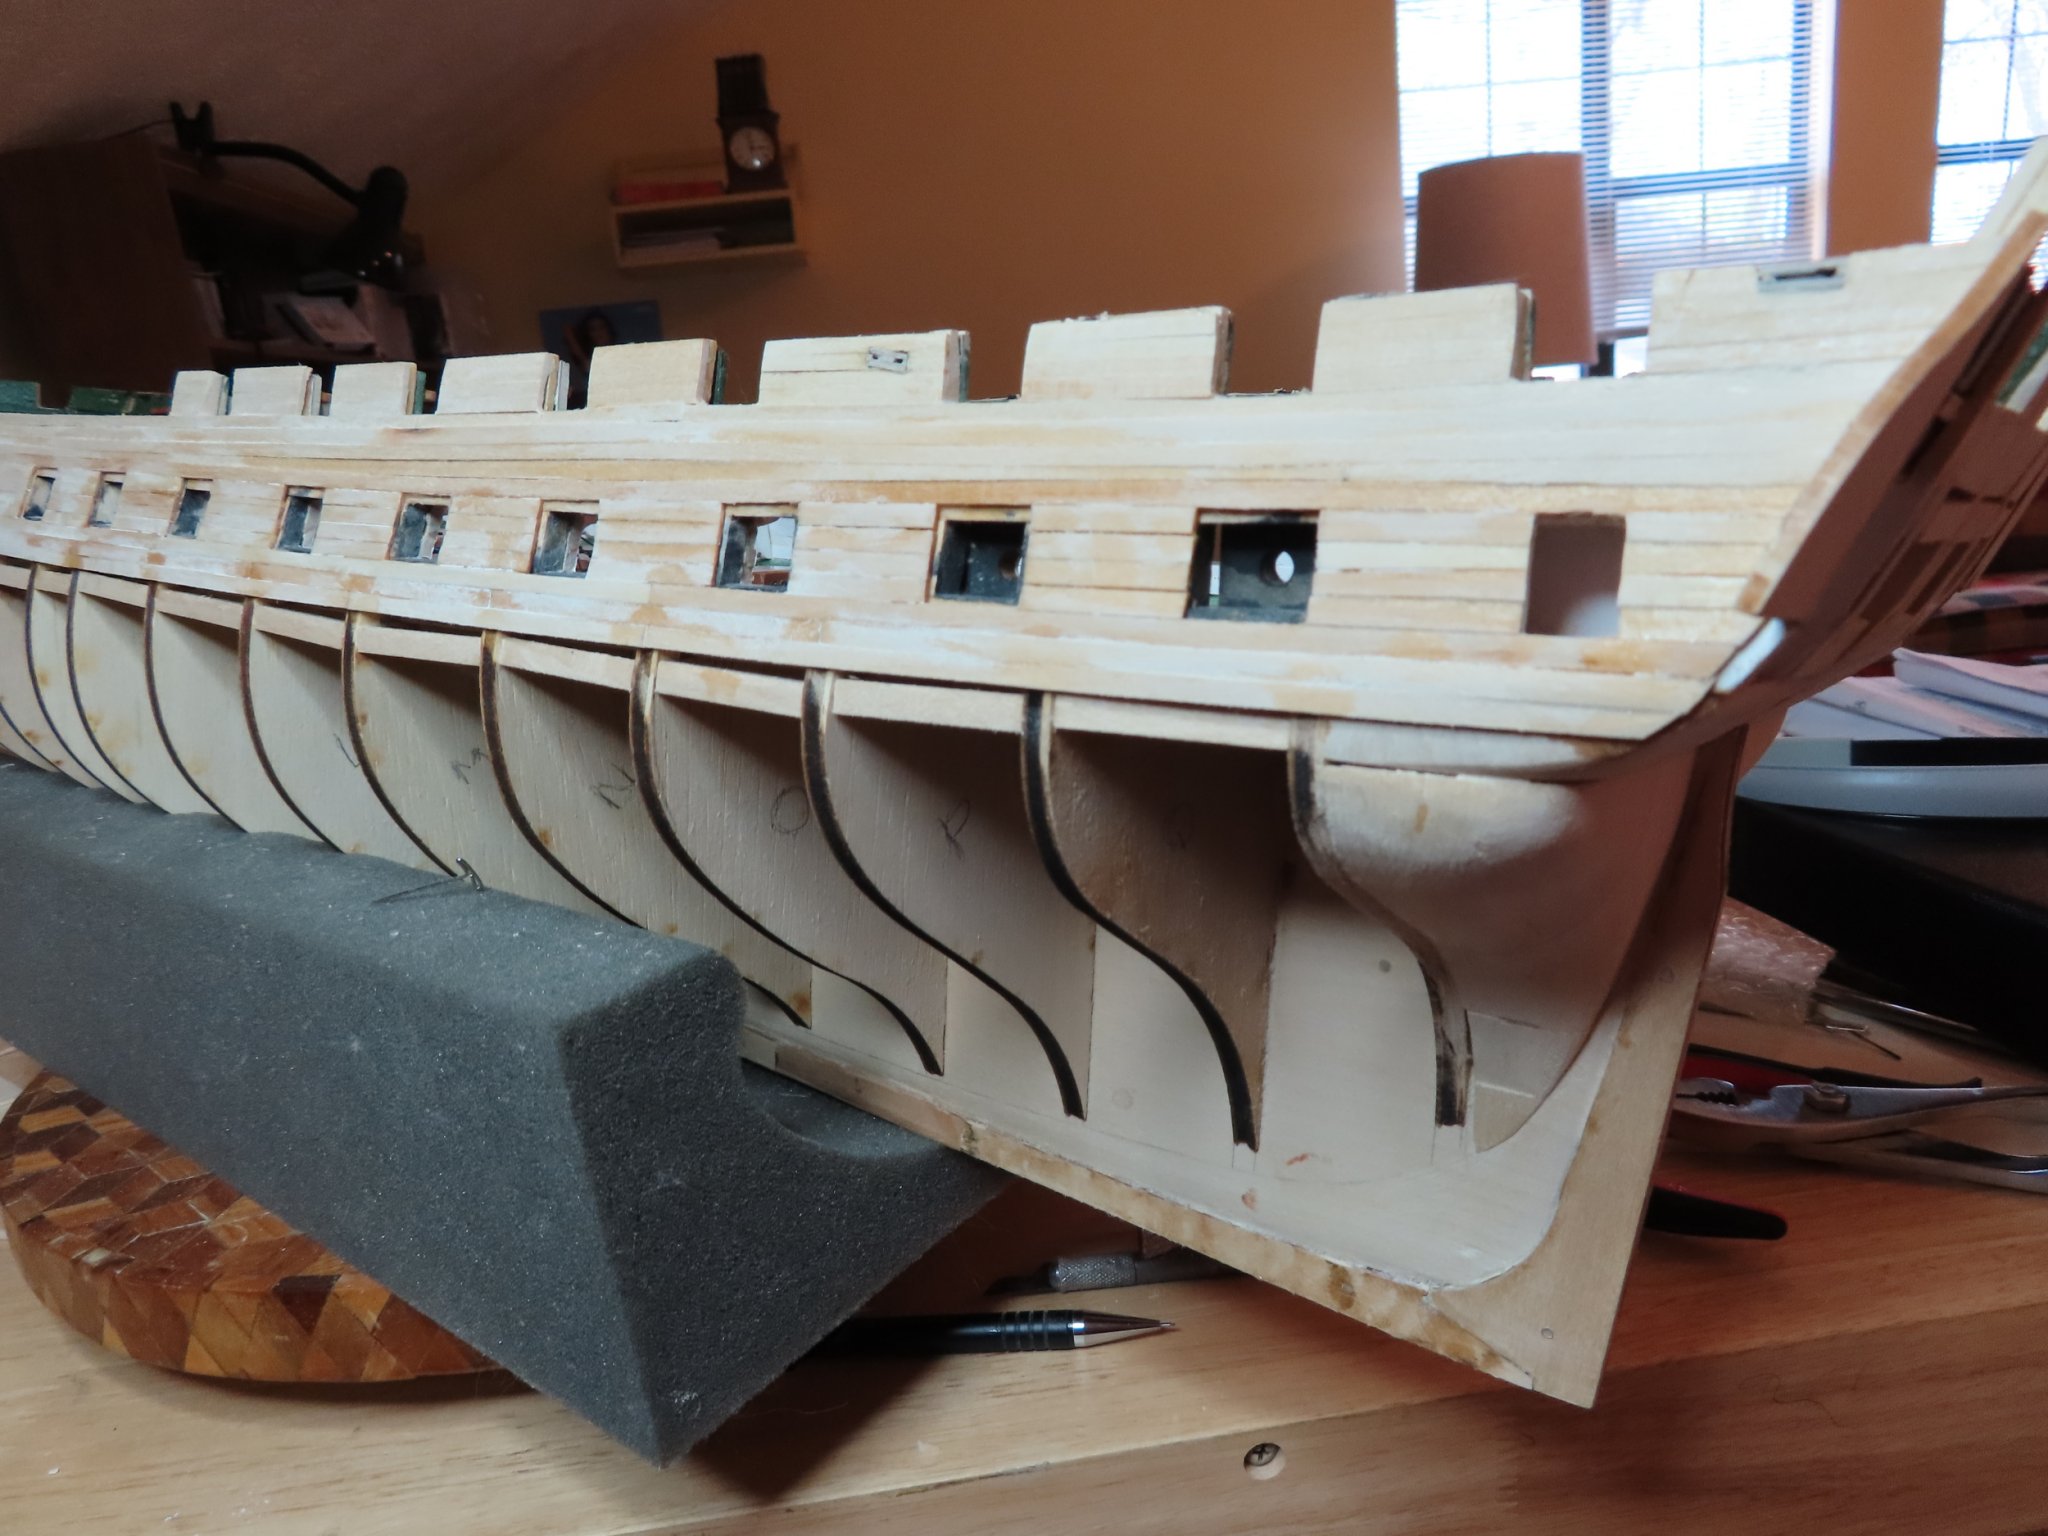
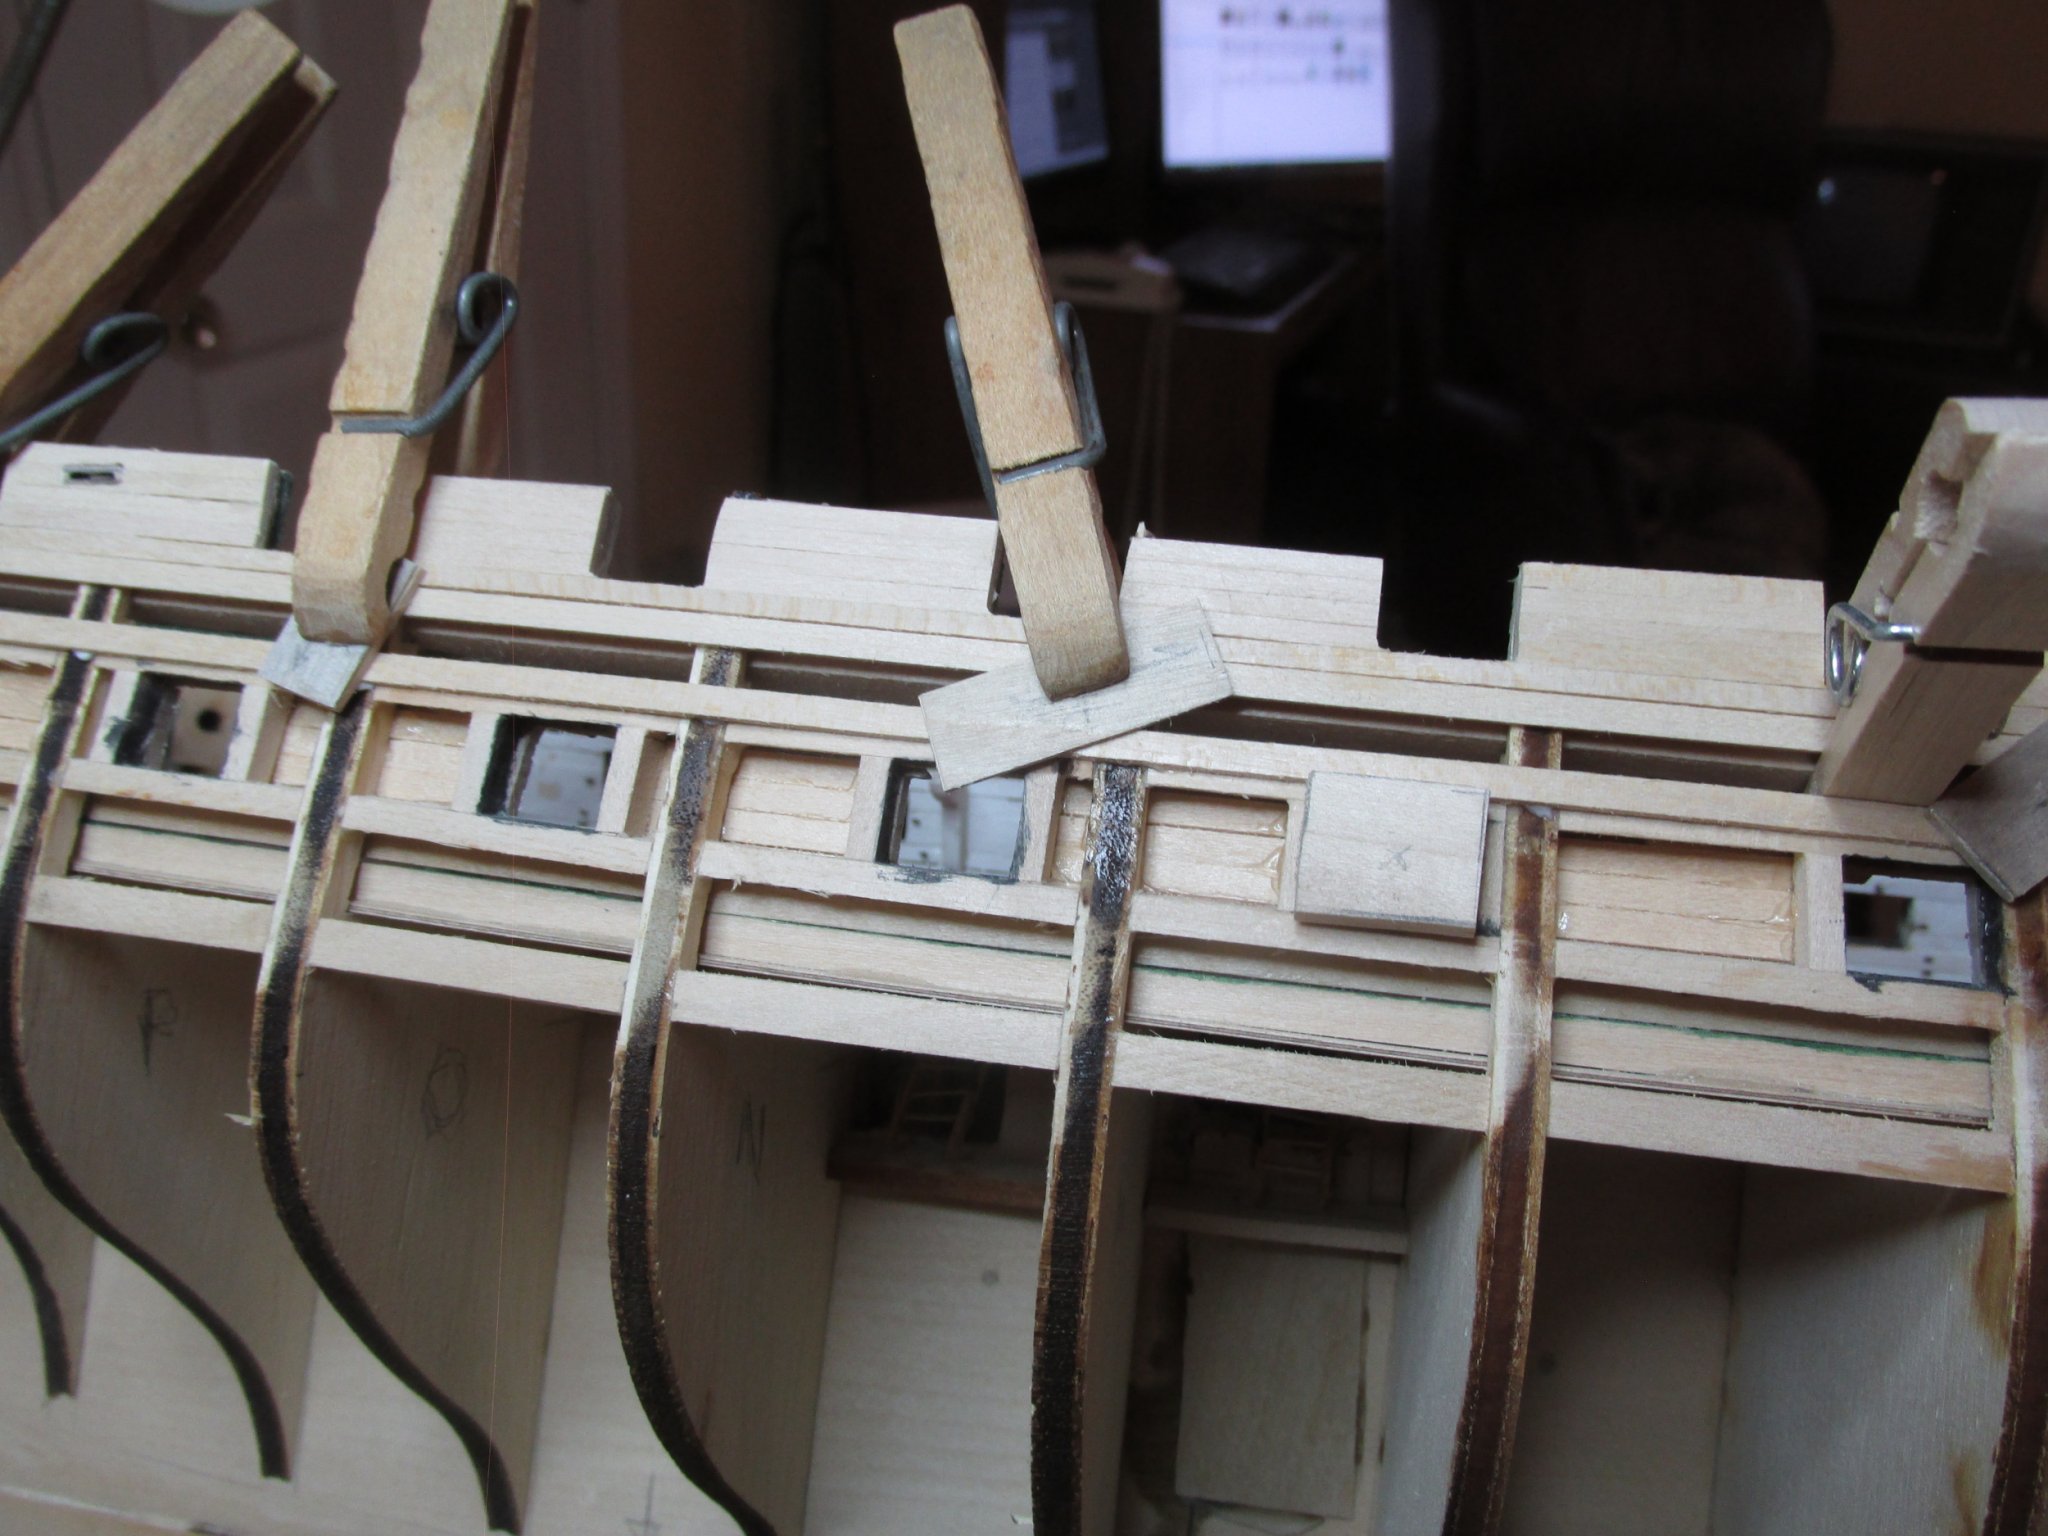
The first line of planking for the gun deck ports was started at the top of the ports with a line of planking resting on the jigs. Then three additional lines of planking were fitted above that so the were snug against the spar deck gun port planking. Next is planking in between the ports and just below them.

- Matt D, J11, Nunnehi (Don) and 6 others
-
9
-
The build was put aside for a bit while I and my sister made a final trip to Florida to deal with the sale of my Mom’s condo and the disposition of her possessions. It was not something that I looked forward to, but it was done. We accomplished what was needed. After returning home and digesting the past events, I was ready to open the shipyard again.
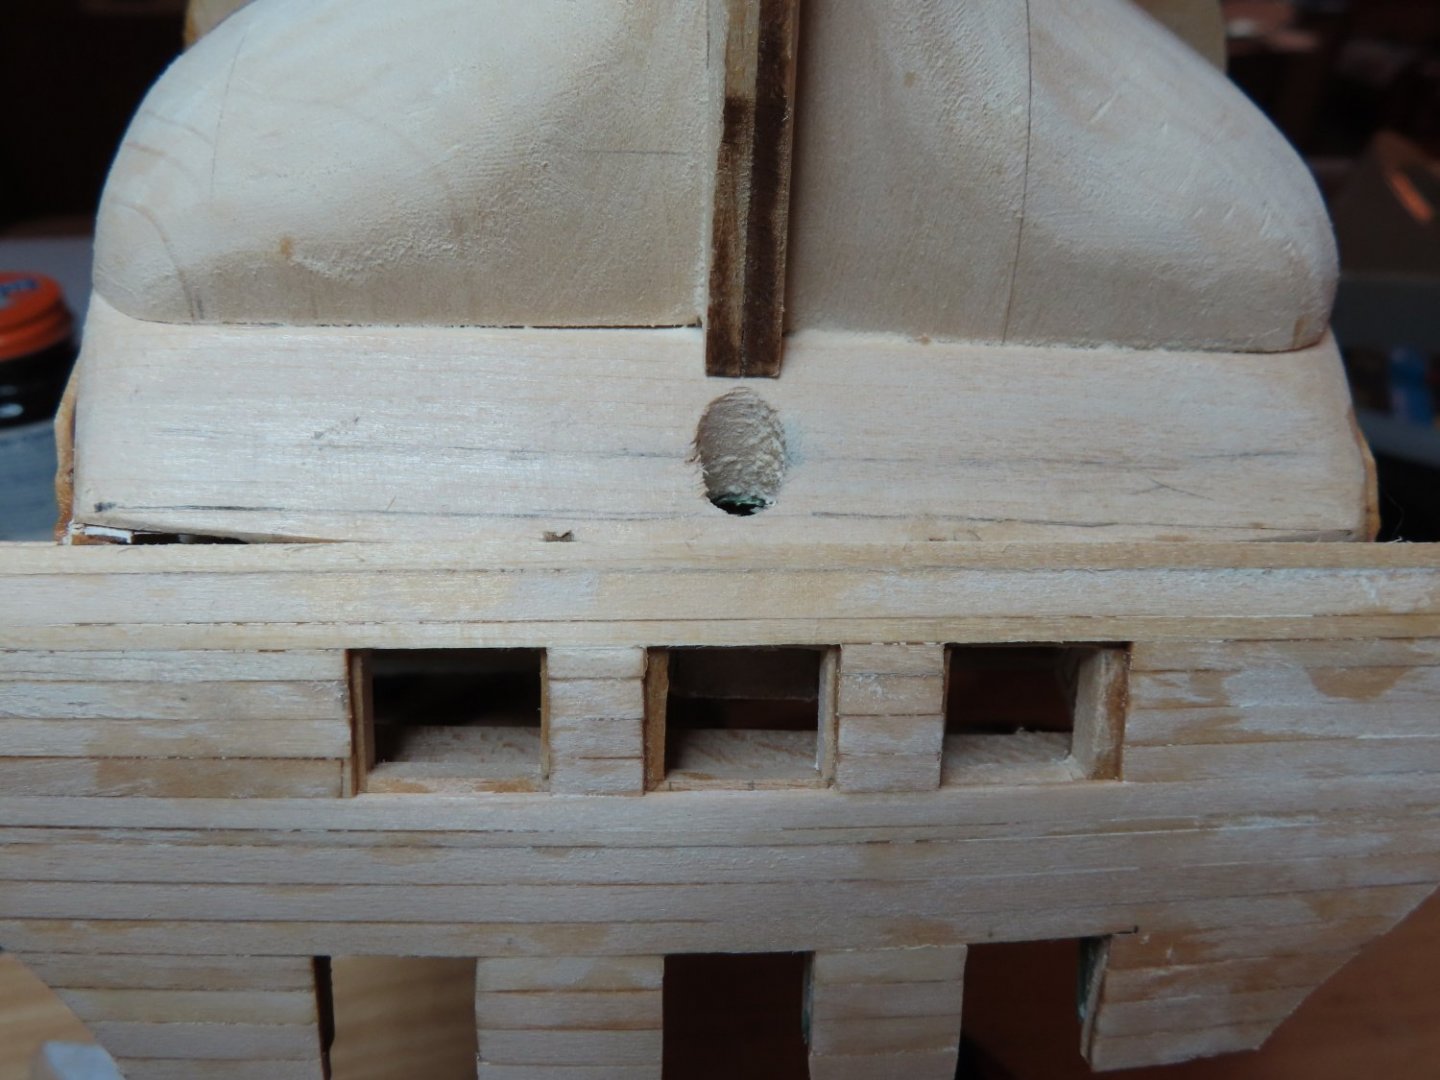
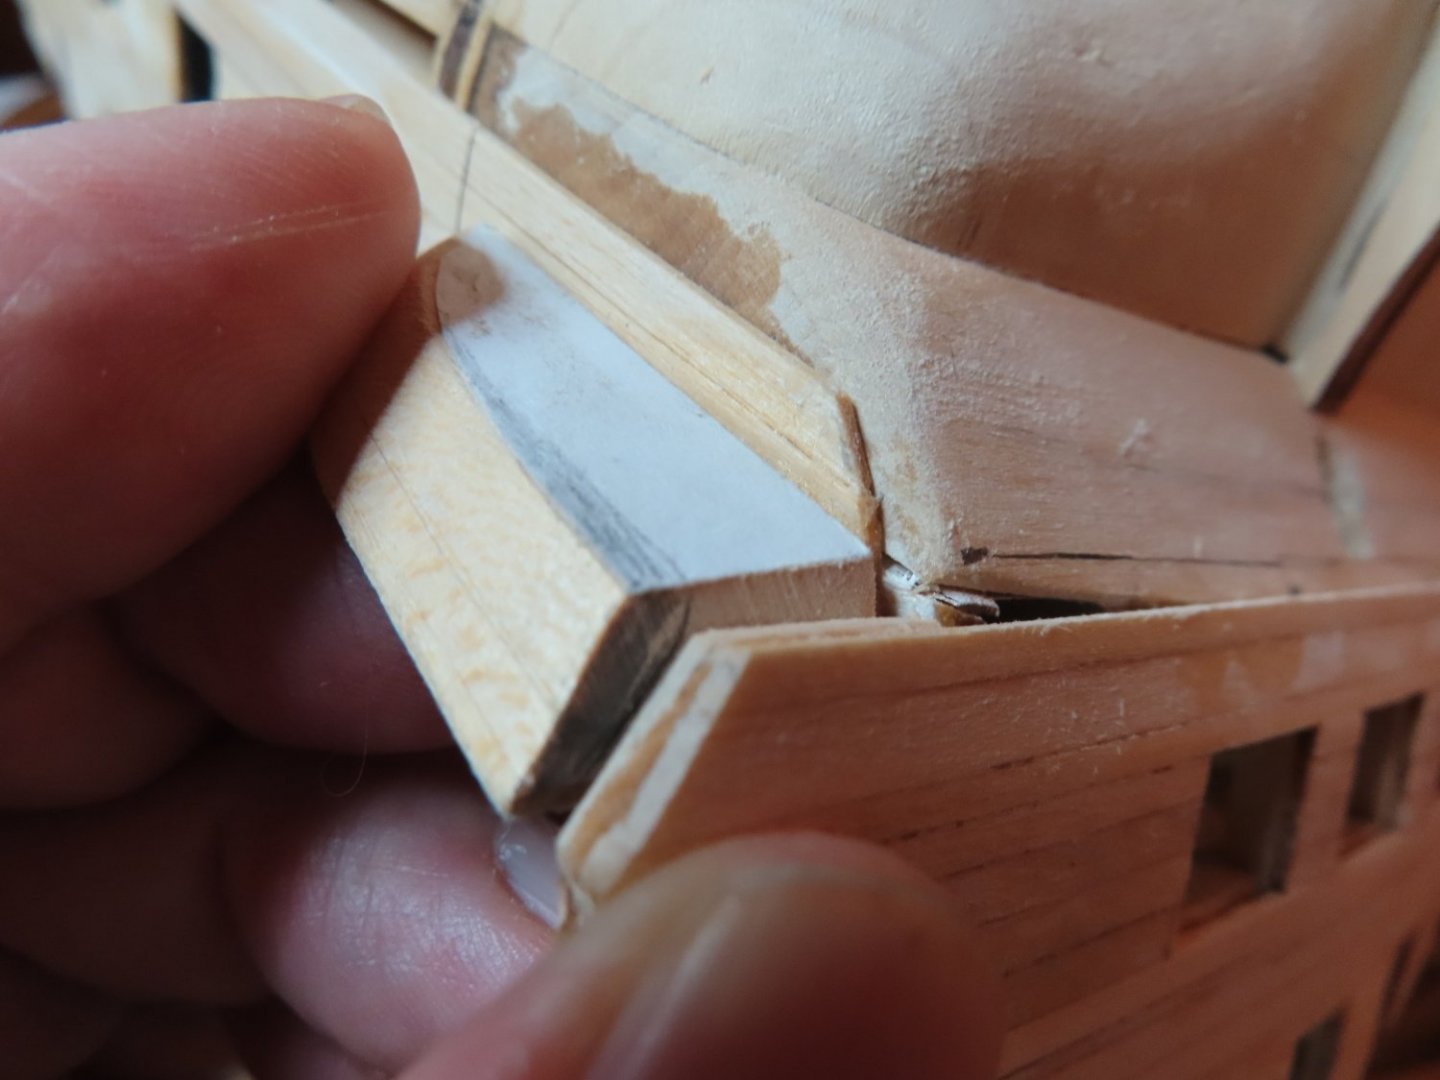
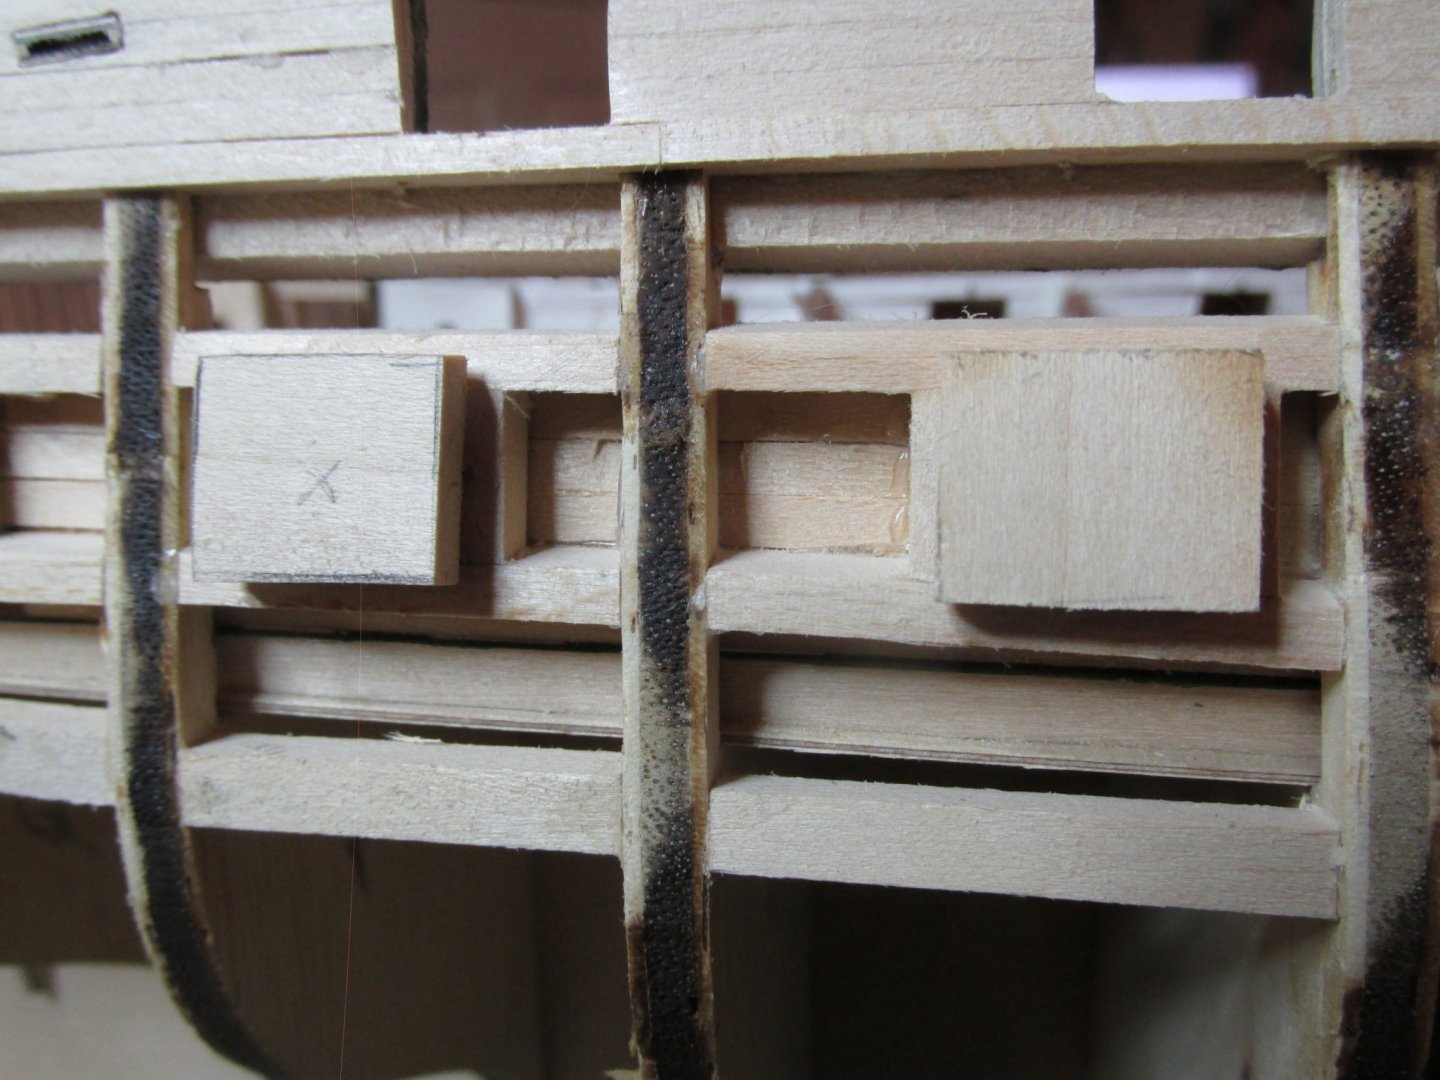
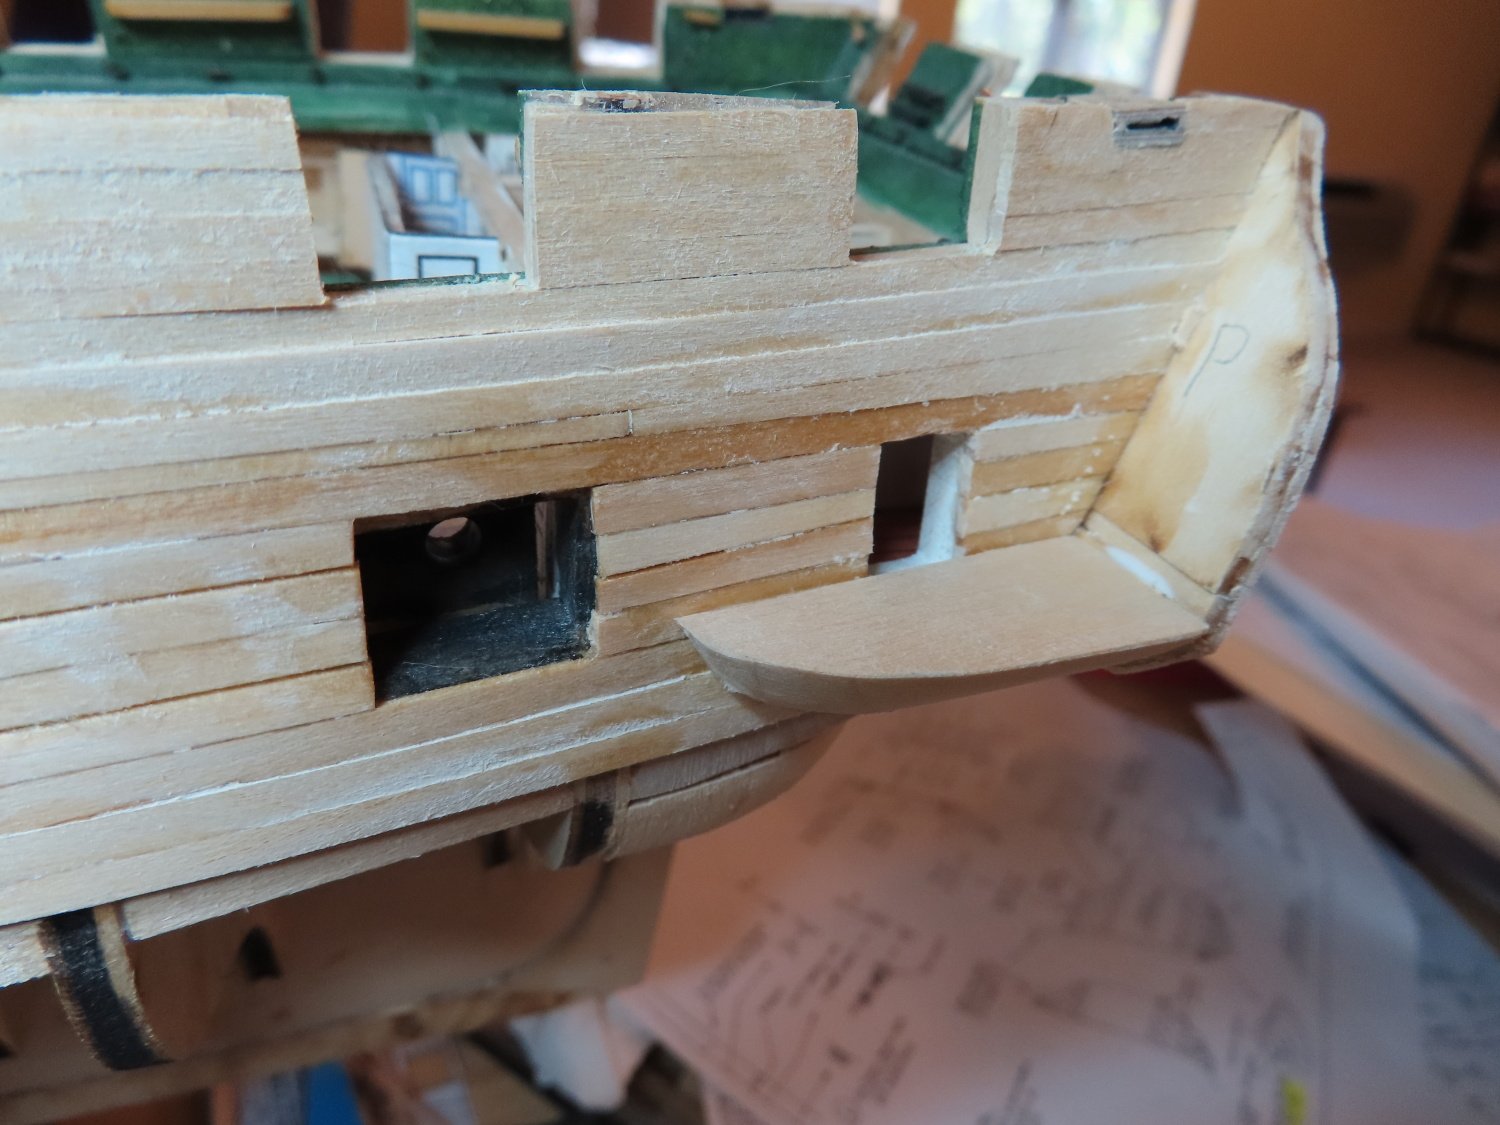
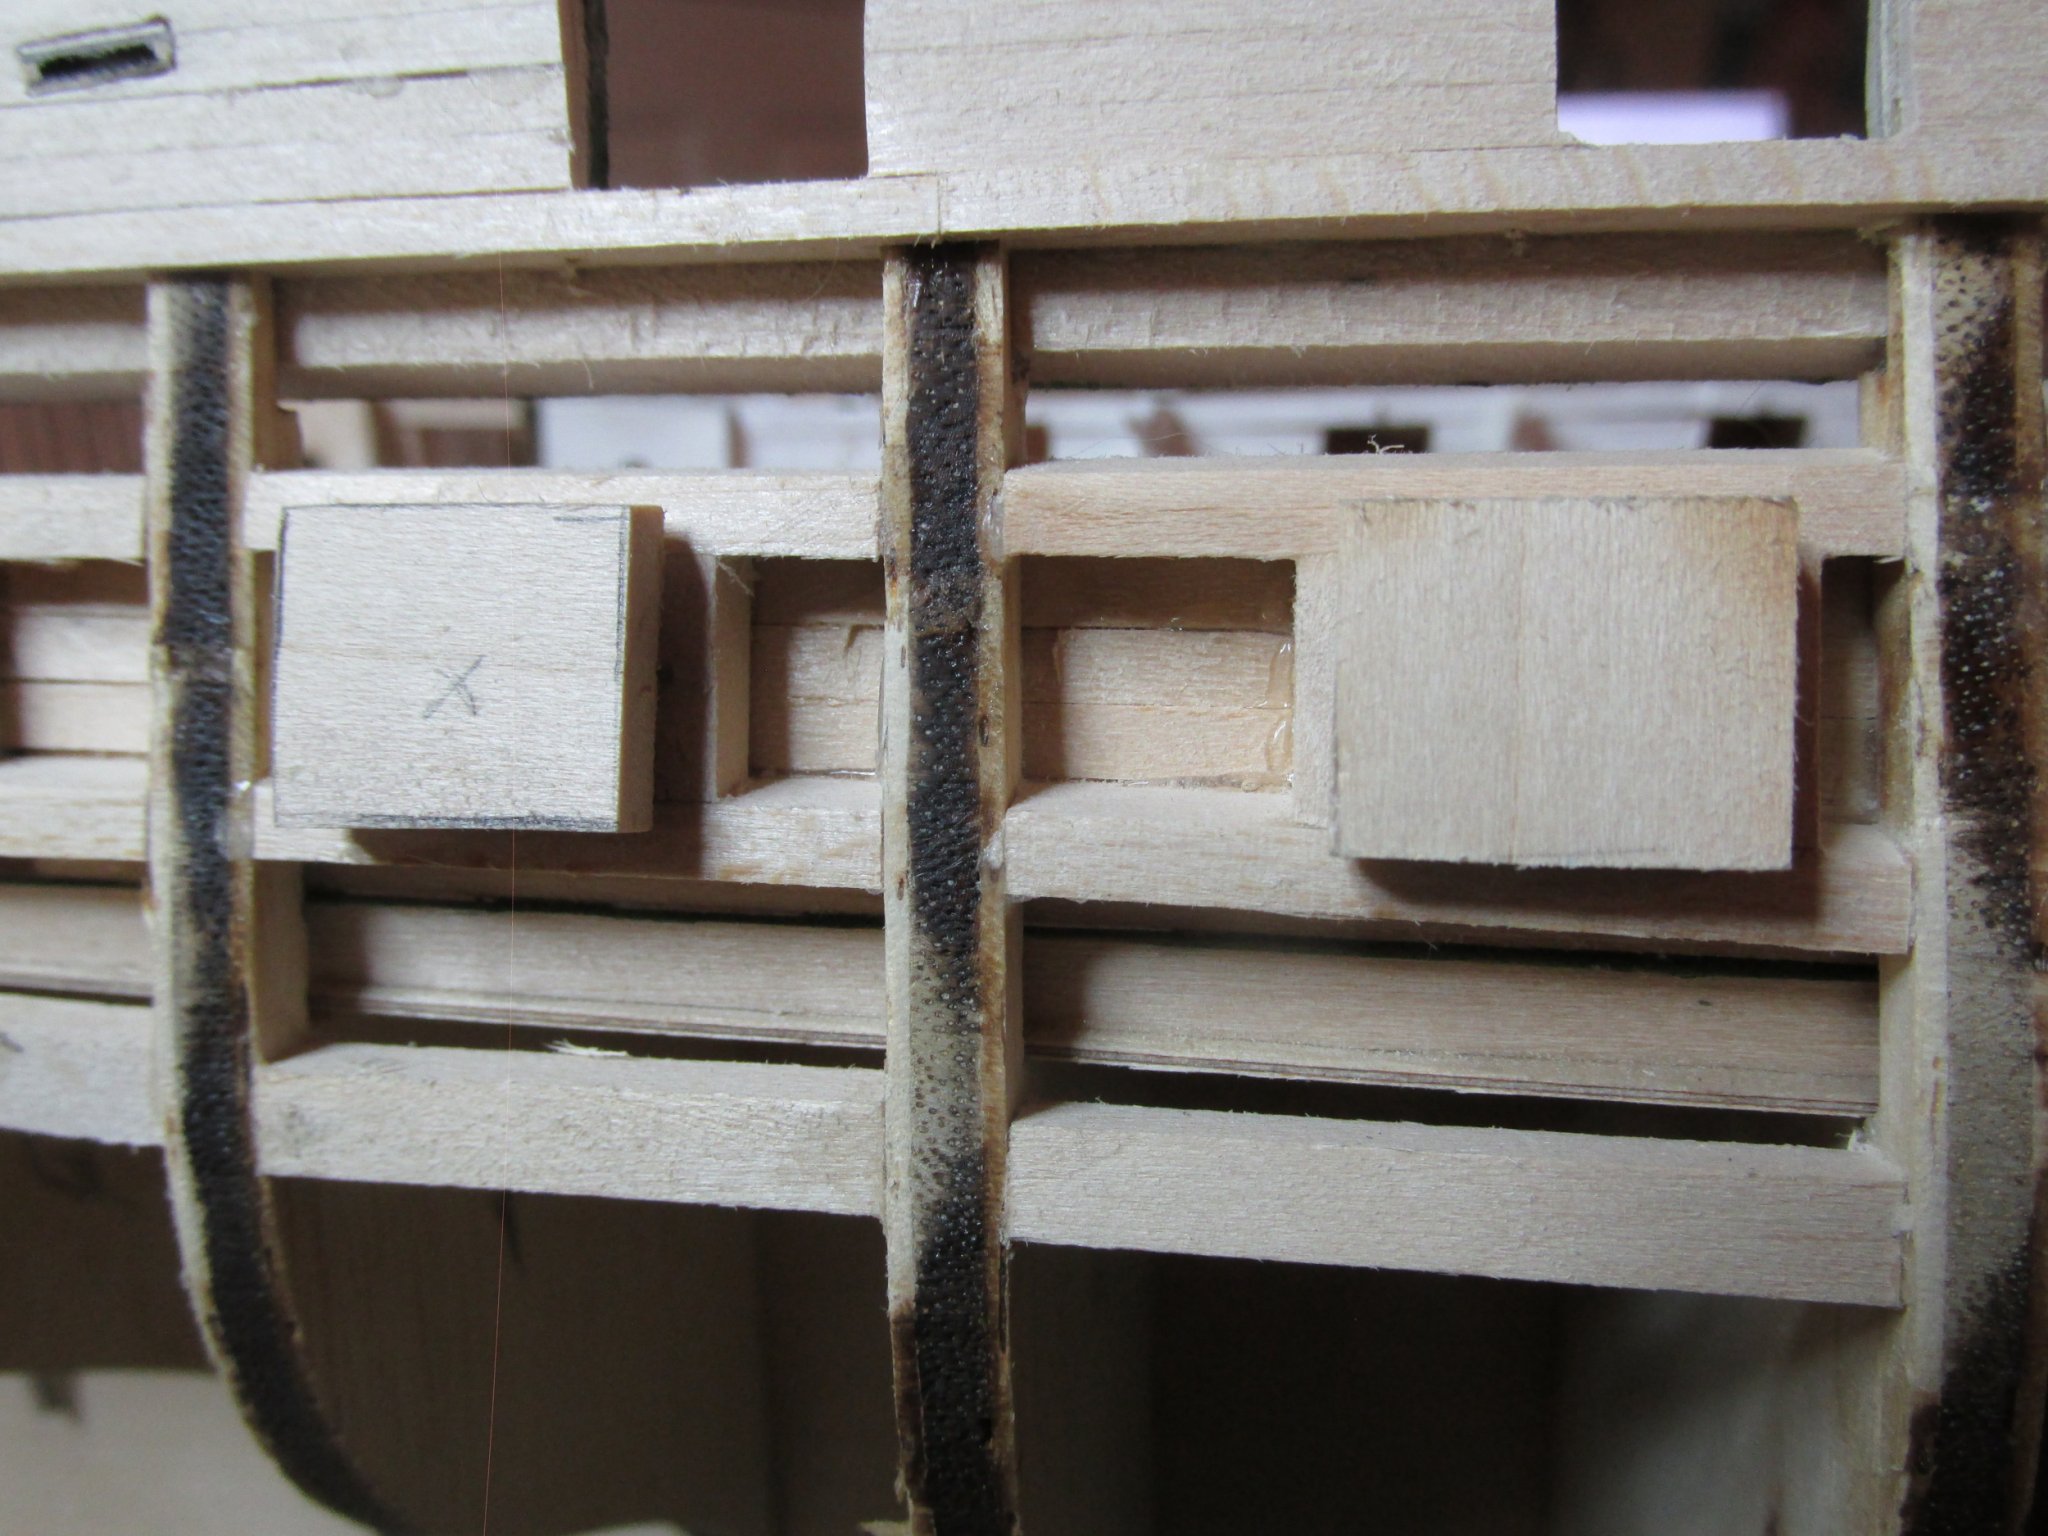
The next band of planking was the area of the gun deck ports. These are straight forward enough except that a 1/32” space must be provided around the gun port openings for the gun port lids. A simple jig was fashioned from the spacer block that was used to form the openings in the first place. A short piece was cut off and a second piece with the exact dimensions of the lid was made. The two were glued together so that when the jig was inserted into the gun port, it would create a void in the planking big enough for the lid to fit. It would also create a smooth border. Two were made.

- Ryland Craze, GrandpaPhil, NWSailor and 2 others
-
5
-
You could offer to pay for the postage if they would send the parts. They are very reasonable. BYW, you are moving at a very reasonable clip, much faster than me, and I'm retired and a bachelor. There is always other parts to work on while you wait for the mail delivery.
-
It's been a while since I checked up on you. You do work under some adverse conditions. You might have saved some extra work/grief if you had contacted Model Expo. They have a no questions asked parts replacement policy. I'm sure they would replace any of the pre-cut wood you lost for what ever reason. What I don't know is their over seas postage policy.
Jon
-
Thanks Kmart and Bob. That was just what I needed to know
Jon


USS Constitution by JSGerson - Model Shipways Kit No. MS2040
in - Kit build logs for subjects built from 1751 - 1800
Posted
The Wale
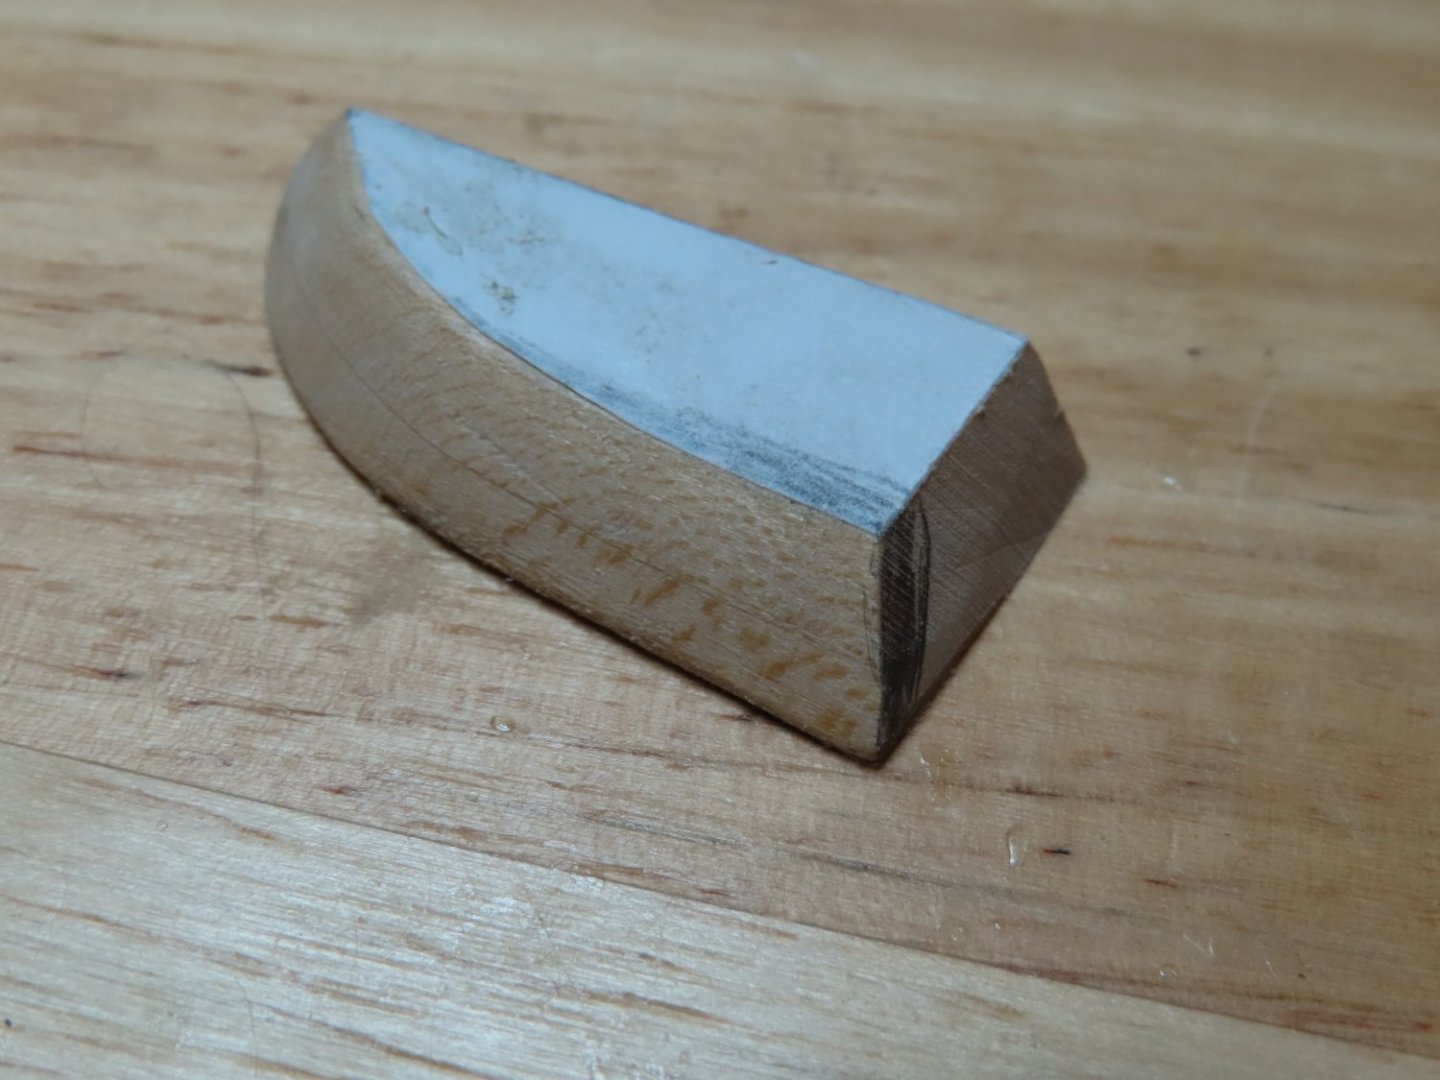
The wale is the next band in the hull planking process. The wale is made of seven 3/23” wide x 1/8” thick planks. According to the practicum, these planks have no variation in width from the bow up until bulkhead N where they begin to narrow.
I had anticipated the plank width variations and had ordered from ebay proportional dividers for this purpose at a price below what Micro-Mark was selling theirs. What I didn't realize was that the supplier was in India. After waiting almost 4-5 months for delivery, I chalked it up as a bad buy and ordered the one from Micro-Mark, which arrived promptly. It looked and operated the way I expected, and I put it back in the box almost two years ago until I was ready to plank. Nine months after my original ebay order, the India dividers arrived! I suspect it got tied up in Customs. I had tried to contact the Seller but all they would state was that it shipped. Now I had two of these dividers. The Indian one was a little bit larger and not as finely finished.
When I went to use Micro-Marks', I could not get it to divide as marked on the scales. When I set it to divide by four for example and placed one pointer on the 1' mark and the other on the 5" of a ruler (4" of measure), I'd flip it over and measured with the other end. It should have shown 1" of measure on the ruler. It actually read about 1/32" to 1/16" short. Part of the problem may lie in the fact that I could not lock the legs so they wouldn’t move as I handle the instrument. Where the legs cross there is a tightening screw, but that is for locking fulcrum point not the legs. It was even worst for the Indian made dividers which has cruder increments and the pointers are thicker are blunter. So, either both these proportional dividers are poorly made/designed or I'm doing it wrong. Either way, I'm out a chunk of change as they are useless to me.