72Nova
-
Posts
677 -
Joined
-
Last visited
Content Type
Profiles
Forums
Gallery
Events
Everything posted by 72Nova
-
 Thanks for that link Marc, that model looks wonderful, what I find interesting though with all the modifications is it appears the railings were left untouched as they do no represent the railings on the ship and museum model, also the addition of the ladders on each side for which the ship and model lack. I doubt I will be making new masts and yards unless they are so grossly off. Unfortunately scale decks does not offer wood decks for this kit, but my hopes are high after speaking with John as they would like too, I need to email him with some info. Michael D.
- 222 replies
-
- 1
-

-
- reale de france
- heller
- (and 1 more)
-
Thank you gentlemen. You're right about the blocks Kirill, I'm confident the 2mm - 3mm blocks will suffice for deck, lower course maybe top mast rigging, but for everything higher up and spritsail area I will need to fabricate my own blocks/hearts. Regarding the Reale I read when the sails are furled in war time the yards are made safe to the mast with chain, would you have any illustrations of this in your vast library Kirill?. Michael D.
- 222 replies
-
- 1
-
-
- reale de france
- heller
- (and 1 more)
-
Looks astonishing!! and your rope work is exquisite!! Kirill👍 Michael D.
- 228 replies
-
- 3
-
-
- spanish galleon
- lee
- (and 1 more)
-
`Not much of an update, but yet another crowning moment in finishing up the railings and continued work on the davits. With this build nearing it's end...many months from now...I've been gearing up for the Airfix Vasa buying blocks, books Etc. Michael D.
- 222 replies
-
- 5
-
-
- reale de france
- heller
- (and 1 more)
-
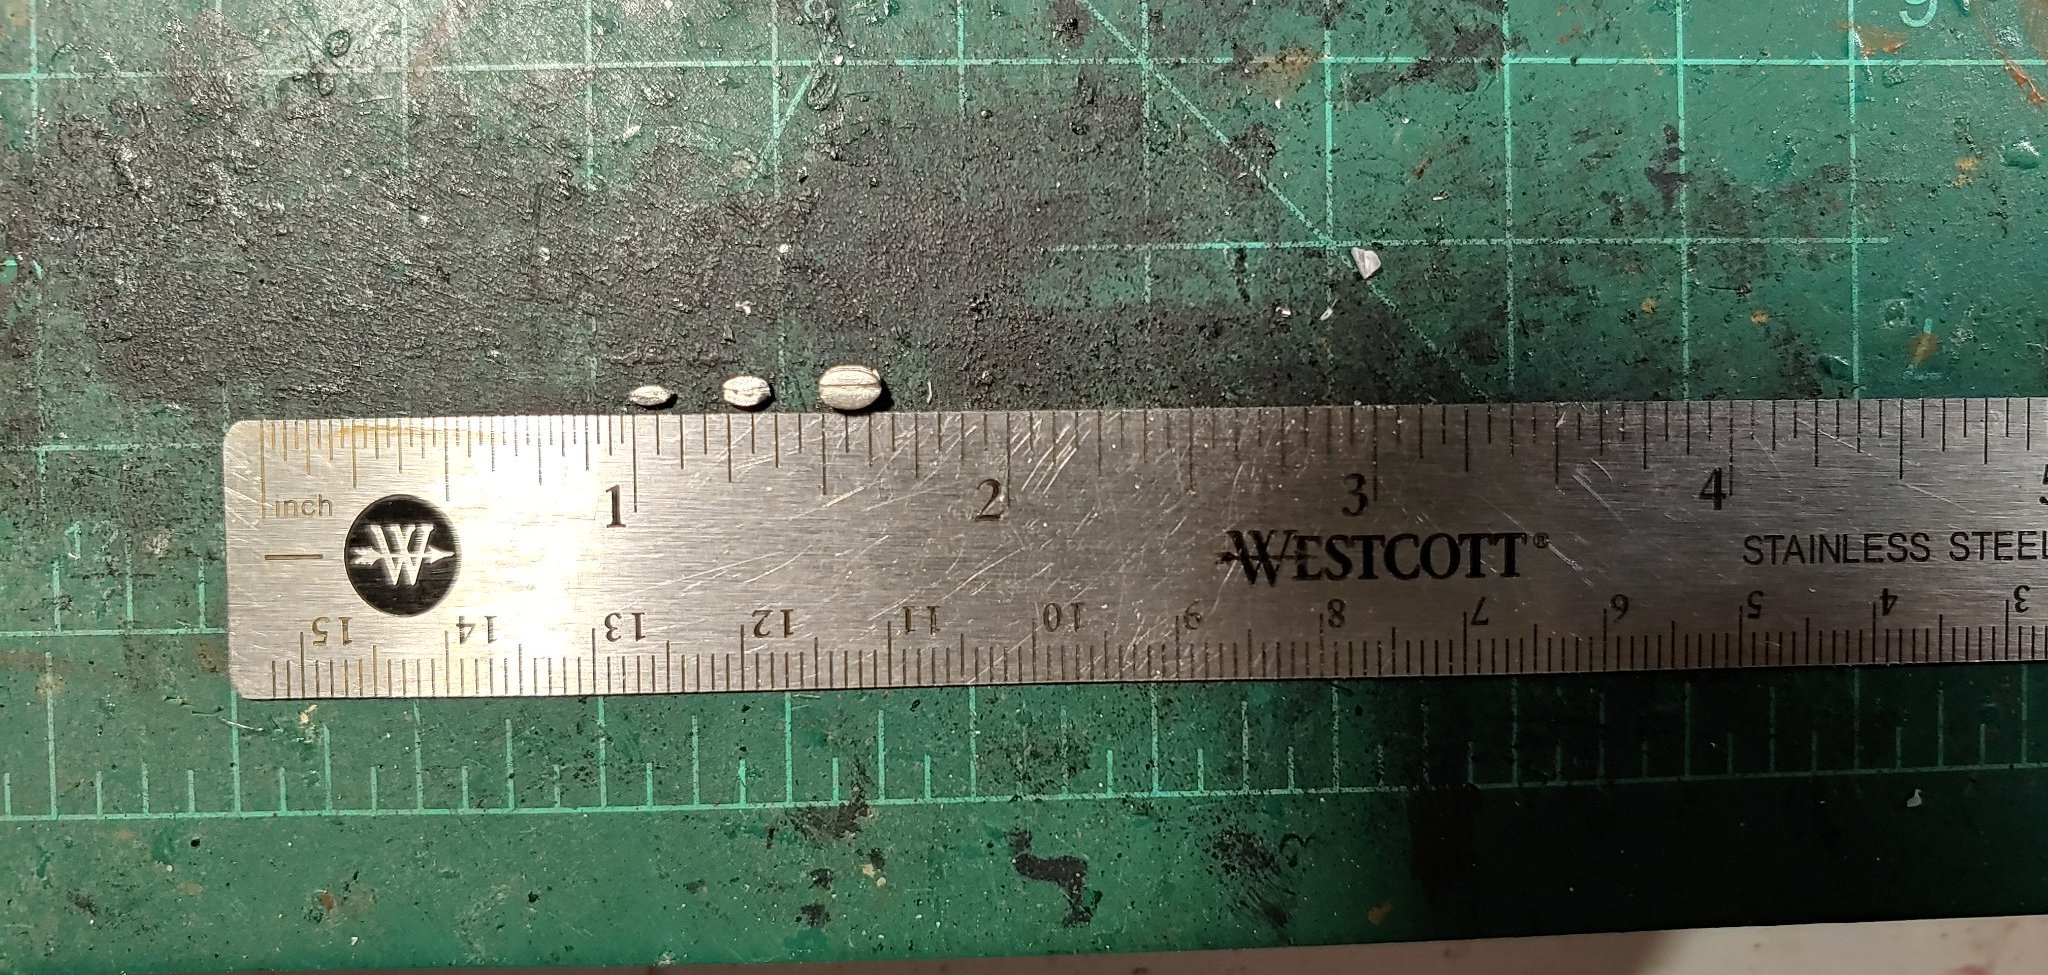
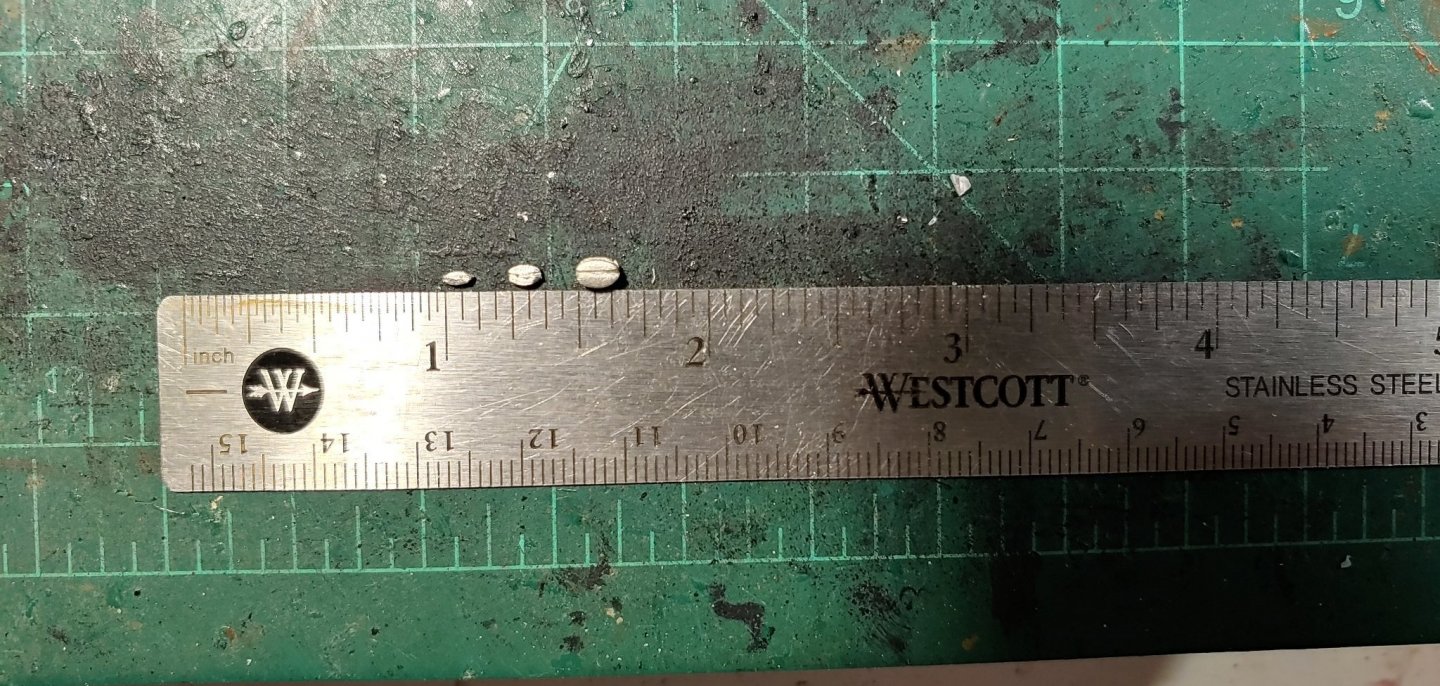
Bill you could very well rig the lids like that and be perfectly acceptable or rig one eye bolt. Blocks that small would almost be impossible to mold on a sprue would be my guess, I will be using these from bluejacket ship crafters in 3/32, 1/8, 3/16 and maybe 7/32, the single 3/32 blocks only measure 0.0485" wide. For the lower hearts I will use the 1/8 dia ones and fabricate the topmast ones. For the rigging that link Kirill posted is excellent along with the book by R.C Anderson the rigging of Ships in the days of spritsail topmast 100-1720. Michael D.
-
Agreed, just wanted to illustrate it is possible to rig them complete at this scale if one wanted to do so, reality is most would not. Mine will be displayed with closed, fully and partially open lids. Michael D.
-
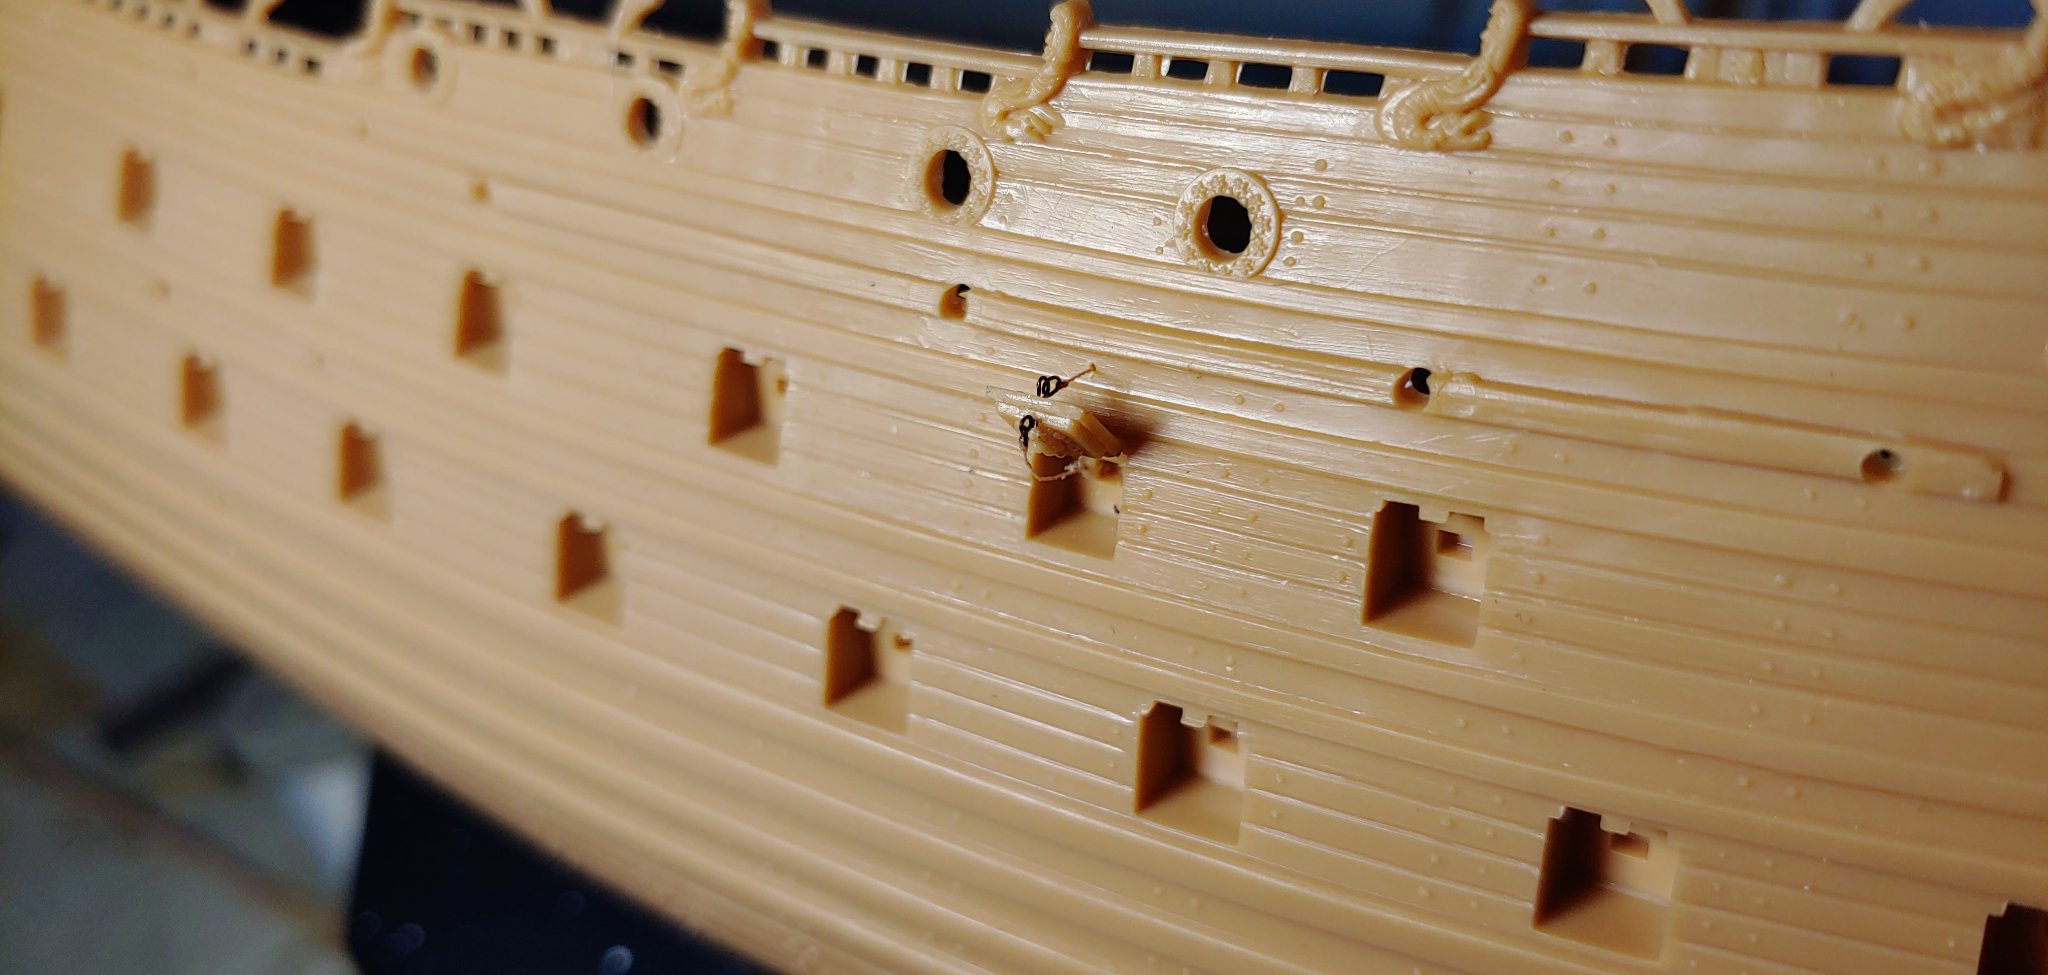
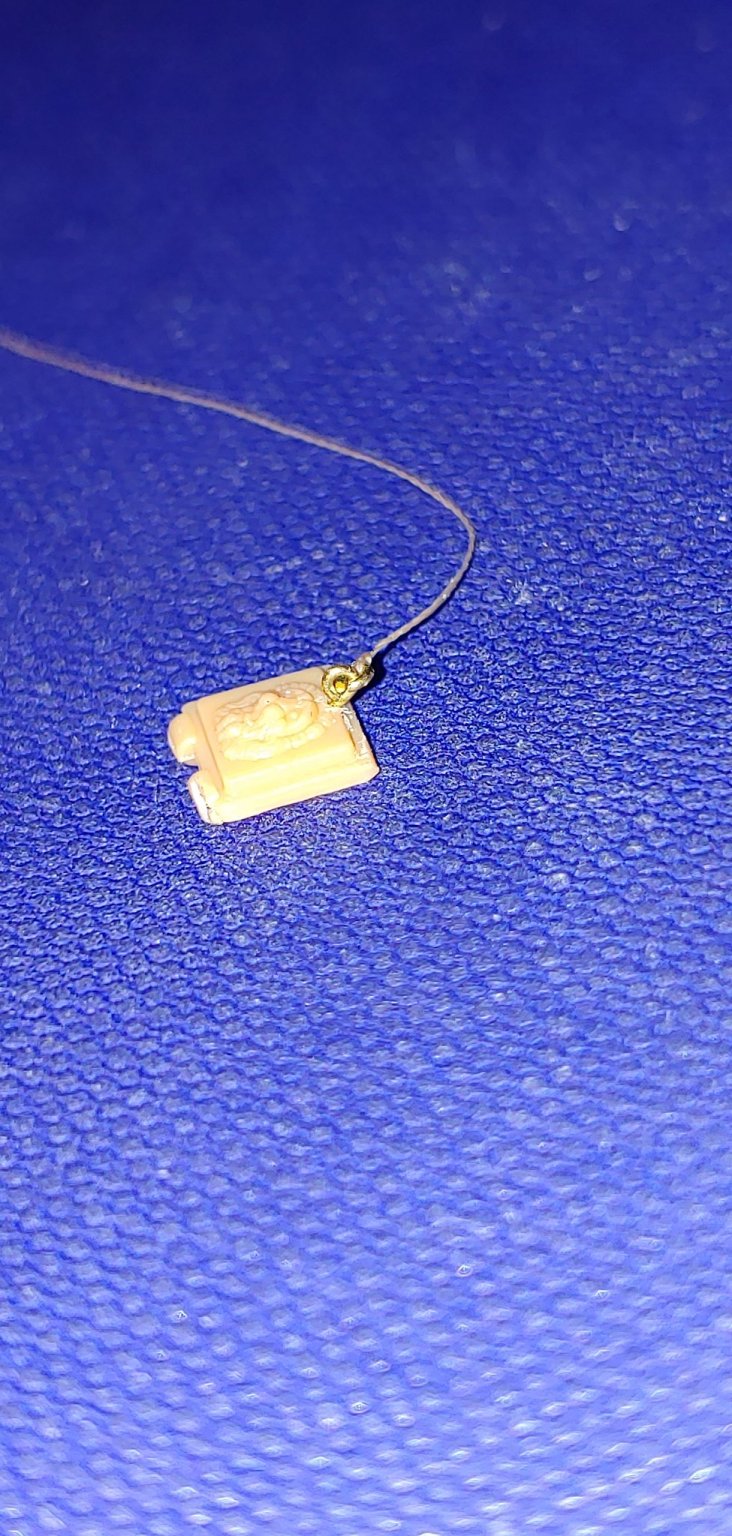
I like your fix for the deadeye's Bill. Here's the mock up of the gun port ropes, I used .032 awg wire and #60 bobbin thread and looks much better to scale. Michael D.

-
Wonderful work Kirill, just so much detail!👍 Michael D.
- 228 replies
-
- 1
-
-
- spanish galleon
- lee
- (and 1 more)
-
Thank for the compliment EJ. I pondered a couple of theories and both consisting of some kind of tackle to hoist the individual or ladder up to the mast head and put away when not in use. Michael D.
- 222 replies
-
- 1
-
-
- reale de france
- heller
- (and 1 more)
-
And what might be your next masterpiece Kirill? Michael D.
- 228 replies
-
- 1
-
-
- spanish galleon
- lee
- (and 1 more)
-
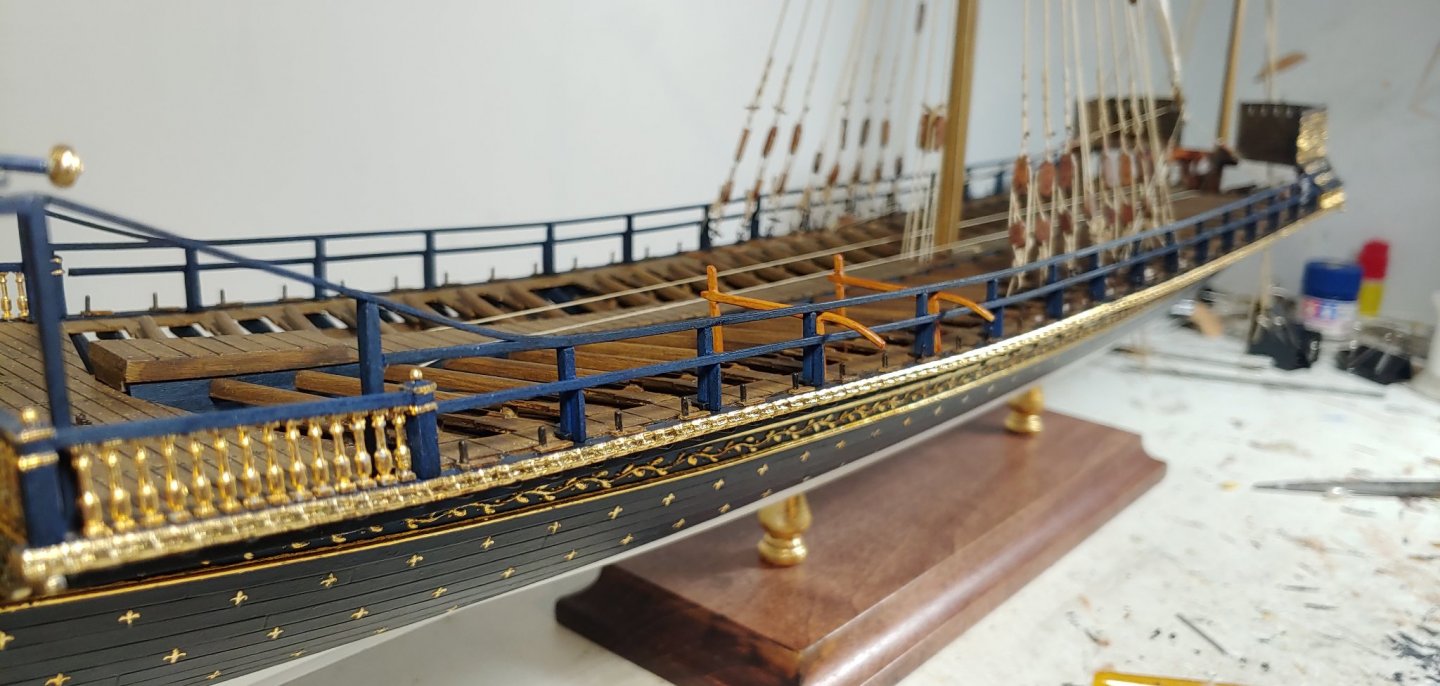
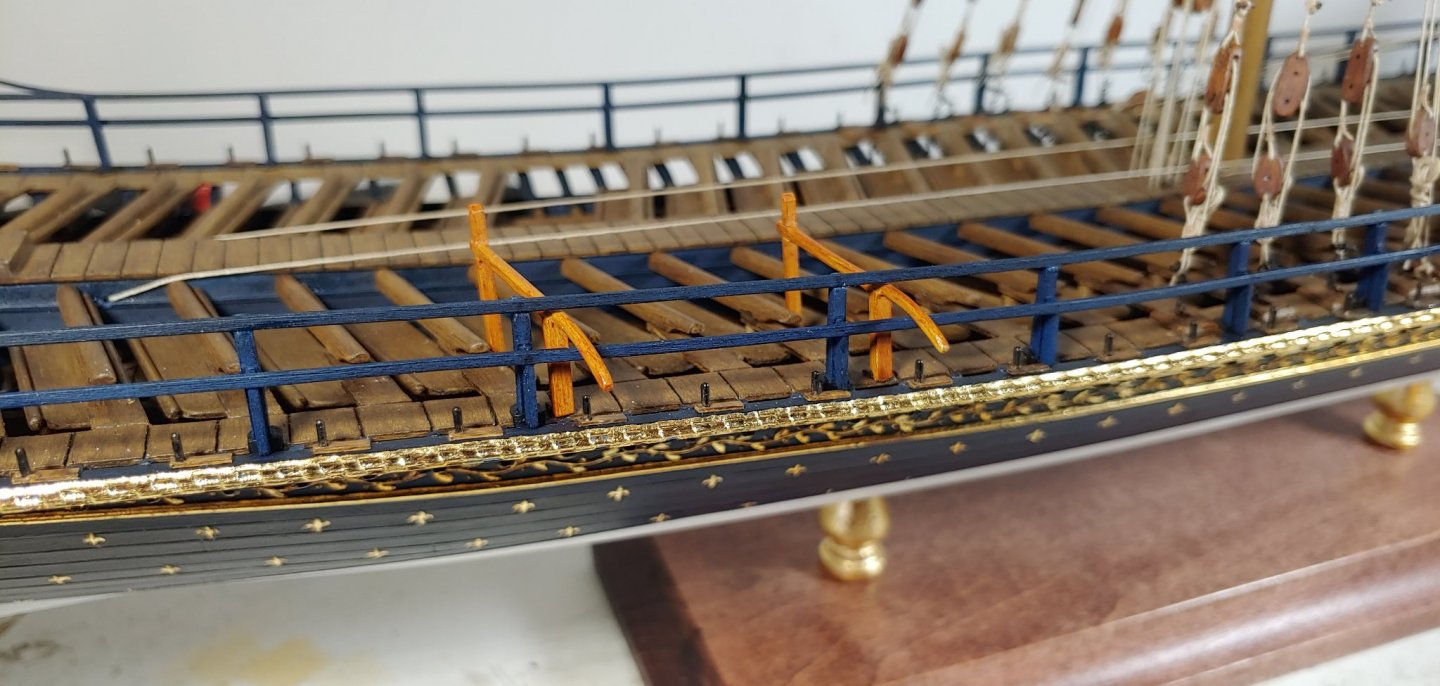
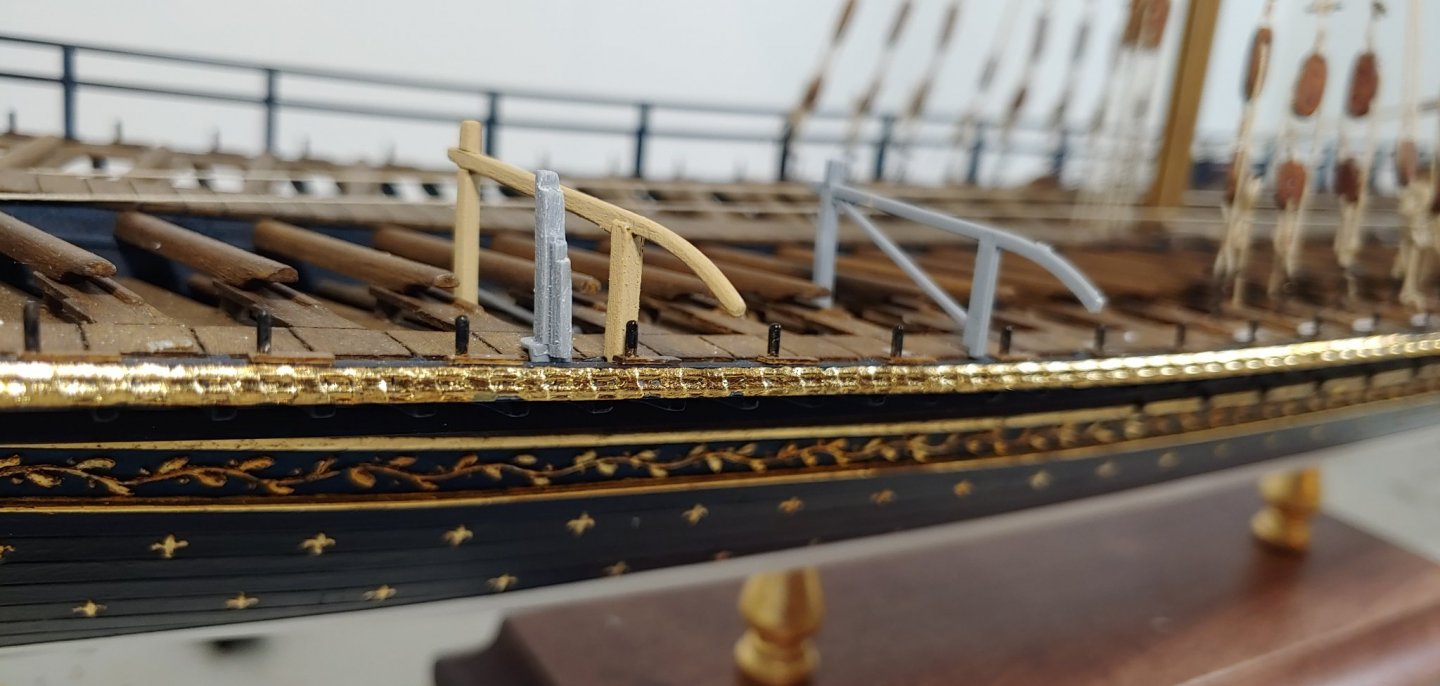
I figured it was a good time to work on the davits and started the modifications by eliminating the diagonal support and adding misc styrene on the underside of the rail to create a tapering effect and modifying the front support, a steel rod will replace the support, the picture should show the work in progress modified version vs the kit version. A mock revealed the davits follow the same angle as the benches which surprised me as one would think they'd be perpendicular to the rails, but in this case the stanchion is in the way and since I already have the port side railings installed I'm okay with this. The other thing I wanted to check is the clearance between the sheet line and boat and looks like I have plenty. Back to the ship yard. Michael D.
- 222 replies
-
- 7
-
-
- reale de france
- heller
- (and 1 more)
-
Hi Bill, Yes it will be similar and I'll do a quick mock up for you of that as well, plus it gives me a chance to see how it actually looks on the model and make any necessary adjustments to suit the eye, at this scale one could eliminate the ring and just use the eye bolt and look good. Michael D.
-
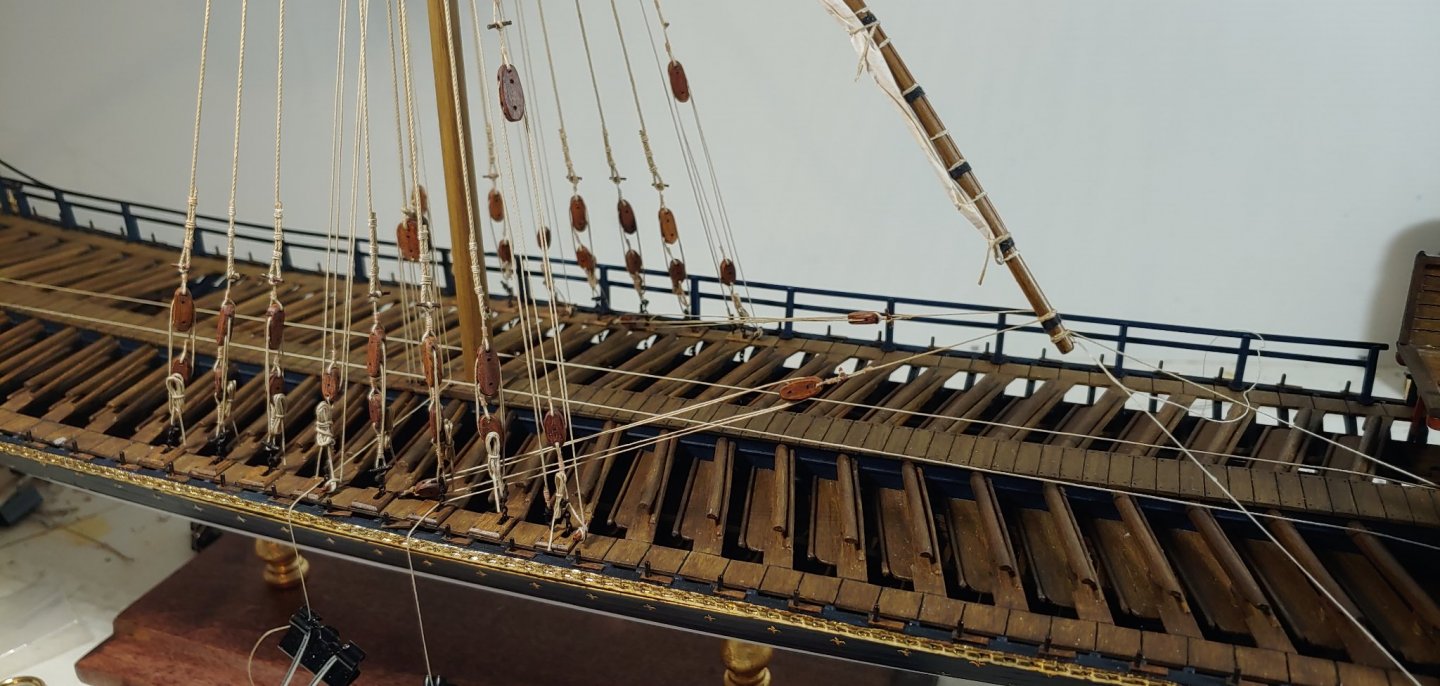
A picture of the completed bowline and braces, tied off all the rigging thus far and glued in the fore mast. Michael D.

- 222 replies
-
- 5
-
-
- reale de france
- heller
- (and 1 more)
-
You're welcome Bill, There's 2 separate ropes, I just illustrated the inside rope that would be lead through the gun port. I do not like those deadeyes, but if you want to use them it should not be hard to make your own back piece to create that groove. The smallest deadeyes I've found are 2.5mm and might look ok. Michael D.
-
Here ya go Bill, I used 2mm eye bolts with reduced dia, wire thickness is 0.36mm and #60 bobbin thread on the smallest gun port lid, actually looks pretty good and not too far out of scale, I have to tell you I wouldn't want to work with any smaller scale then this. Hope this helps. Michael D.

-
You nailed Kirill, looks very nice and functional.👍 Michael D.
- 228 replies
-
- 2
-
-
- spanish galleon
- lee
- (and 1 more)
-
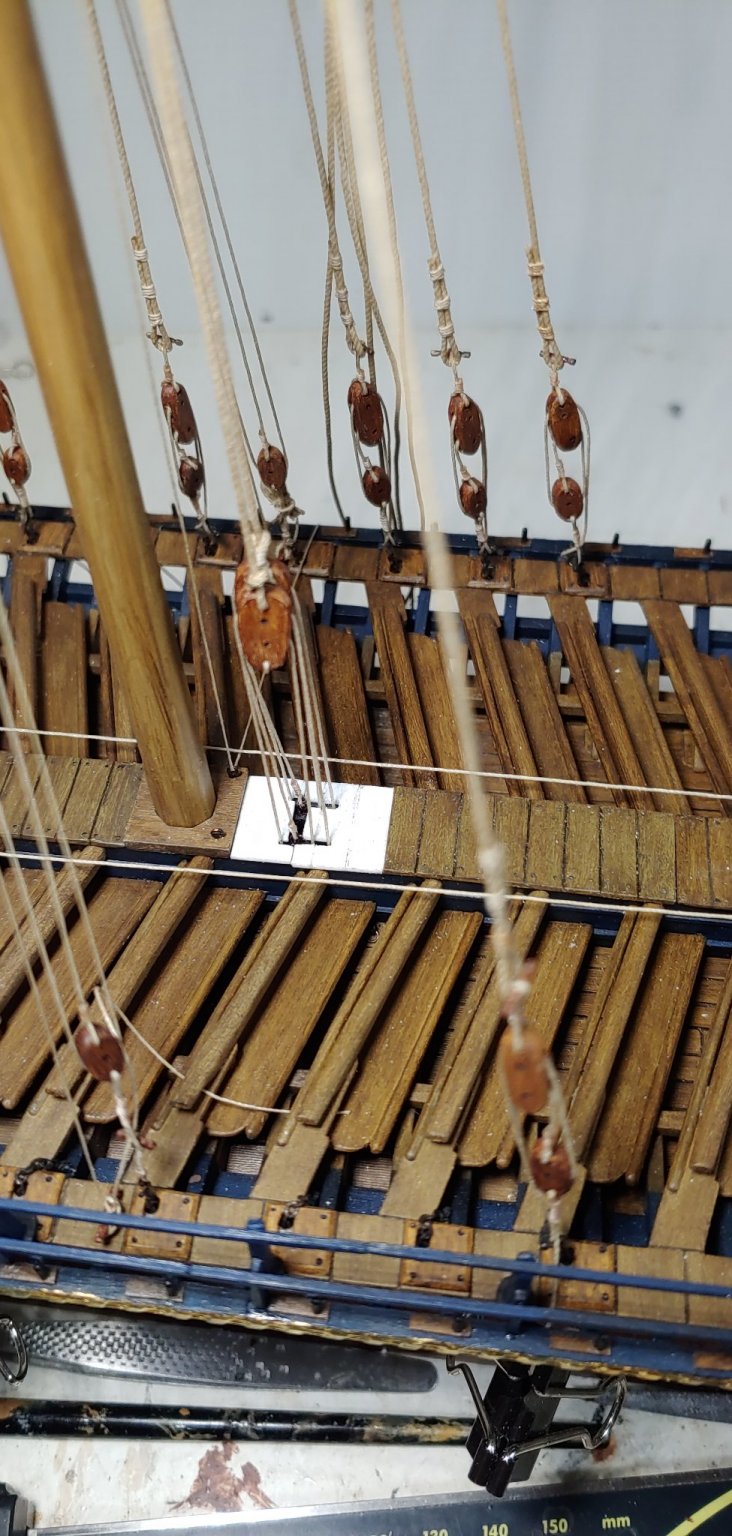
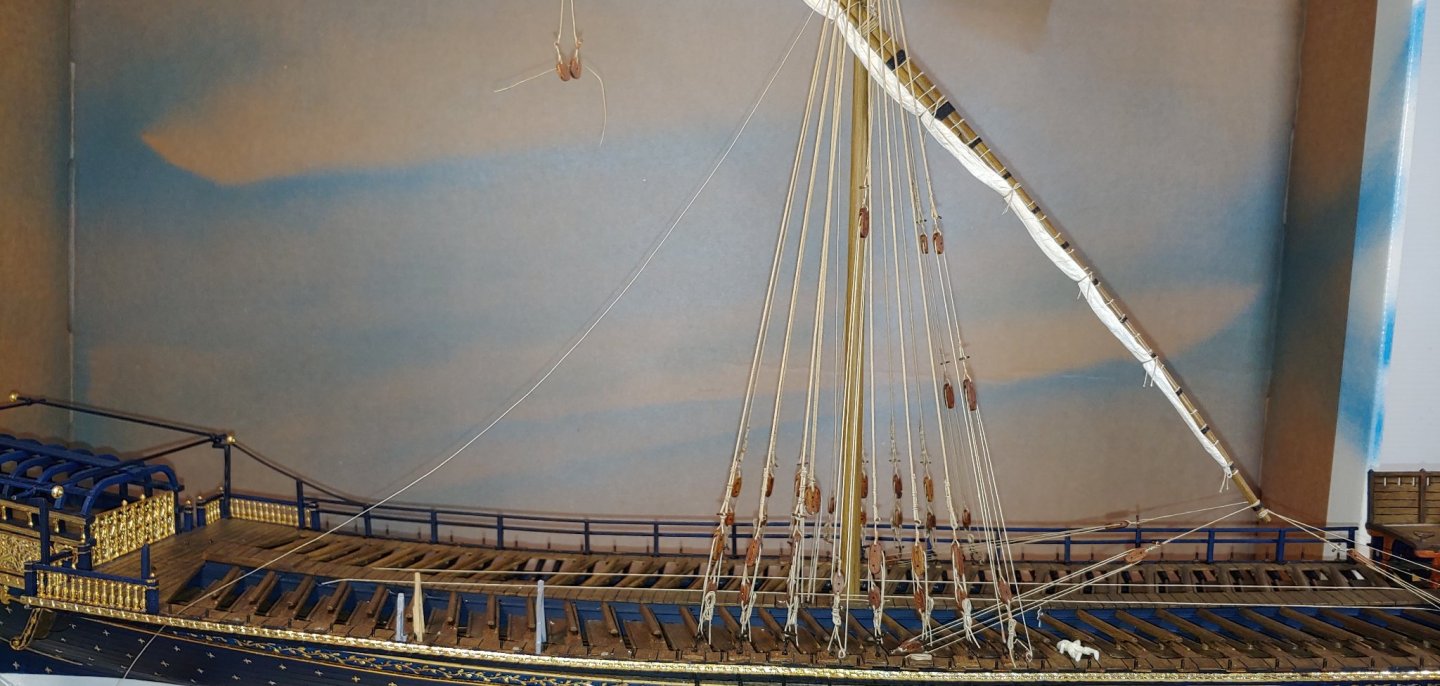
Thank you Frank. A crowning moment in finishing up the main shrouds and lanyards and started the bowline along with temporary lines and weights on the vangs to somewhat stabilize the yard while I rigged the braces, a single block stropped and tied to an eye bolt in the deck, the line is tied to the bight of the strop and lead through the double block and will be tied to the chain, I still need to add the tackle at the end of the yard and complete the tackle for the vangs before finishing up the braces. Michael D.
- 222 replies
-
- 5
-
-
- reale de france
- heller
- (and 1 more)
-
Superb display of your craftsmanship , well done Maurice!! Michael D.
- 185 replies
-
- 2
-
-
- queen anne barge
- Syren Ship Model Company
- (and 1 more)
-
Bill, Looking at your picture I'm confident I can make it work, I'll do a mock up on a gun port lid and let you be the judge. Michael D.
-
Clever use of some spare parts there Bill, looks good👍. I will be using 2mm eye bolts and nip a section out of the eye and close it back up and should look very close to scale. Michael D.
-
Well done Kirill, did you use a modeling clay for the muzzle? Michael D.
- 228 replies
-
- 1
-
-
- spanish galleon
- lee
- (and 1 more)
-
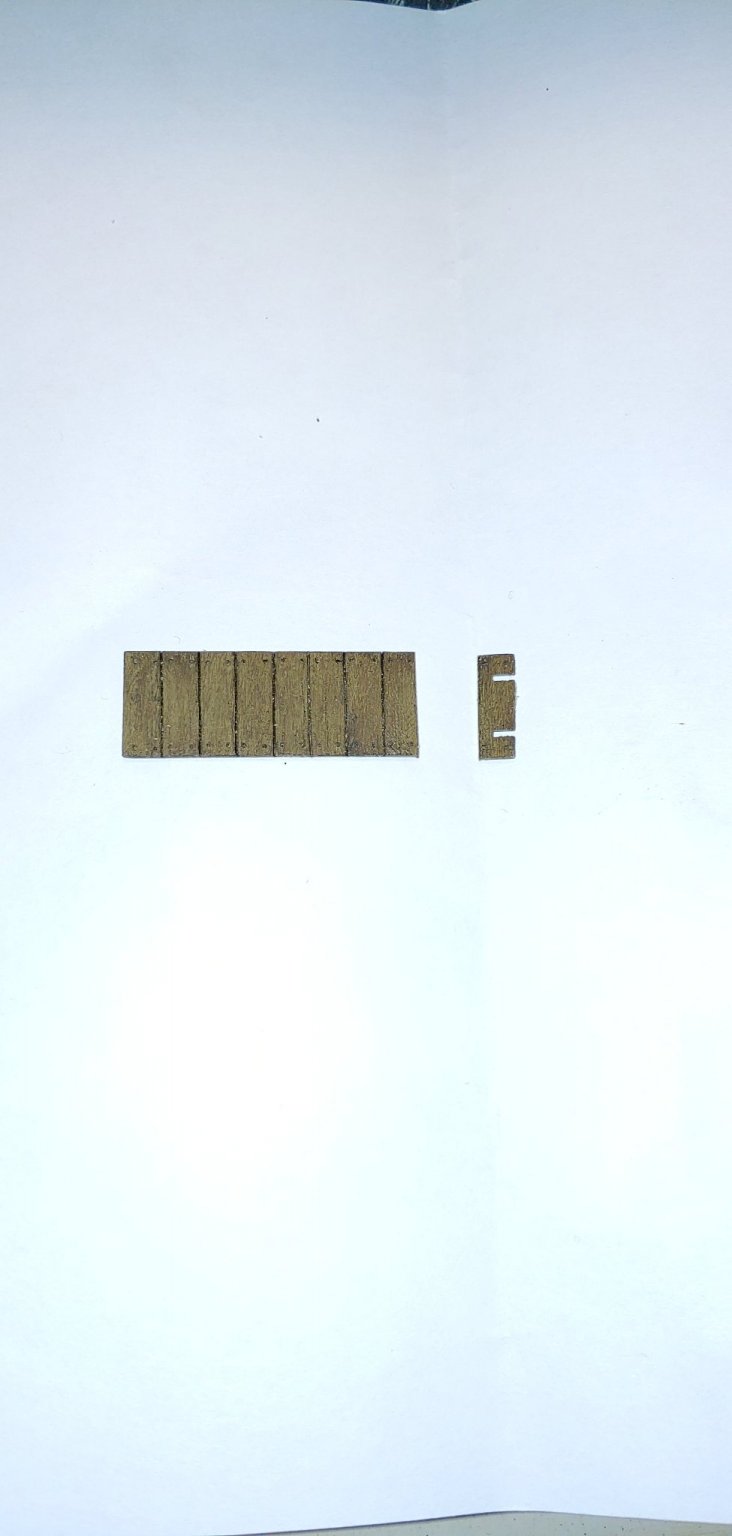
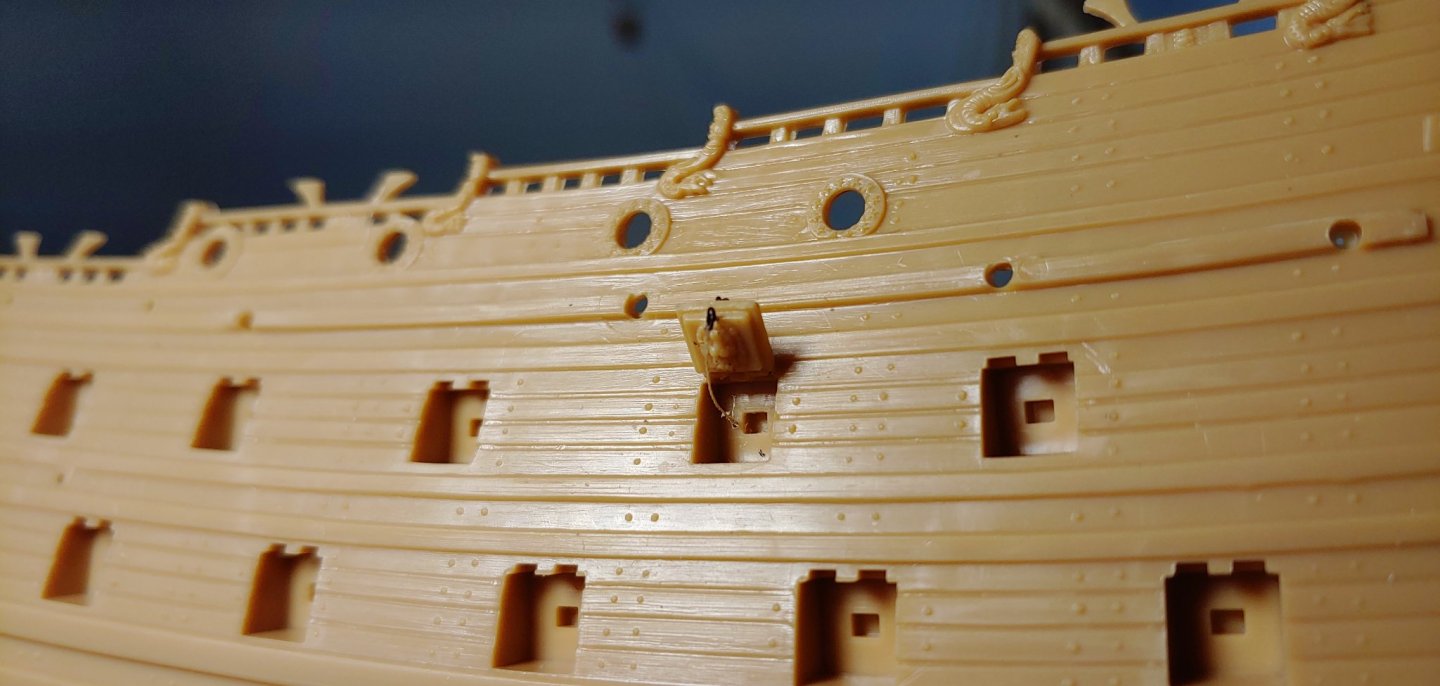
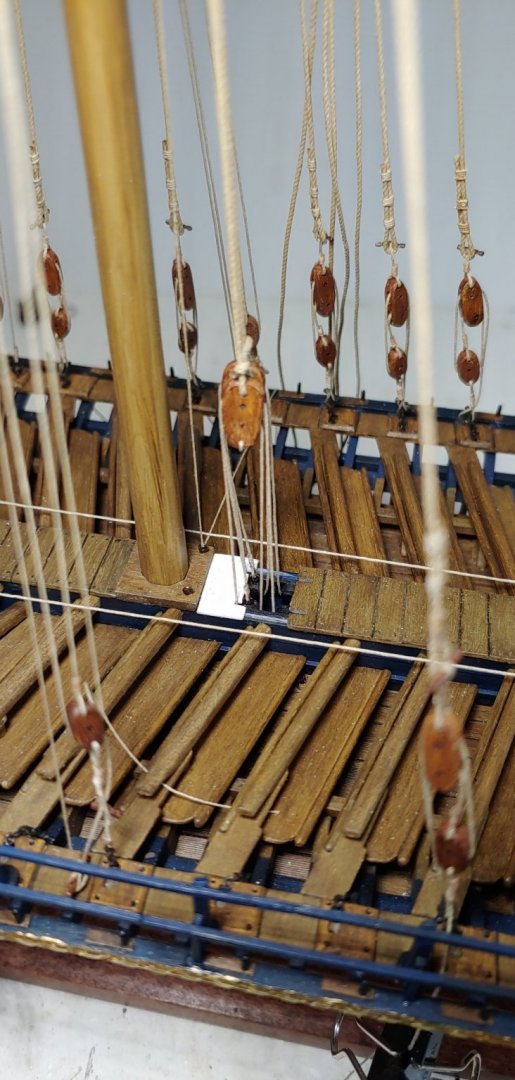
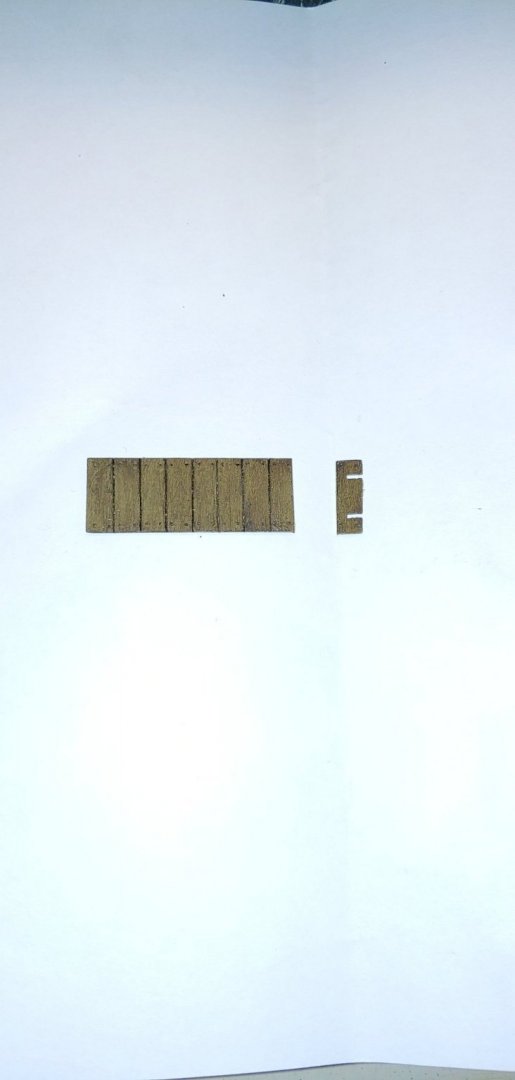
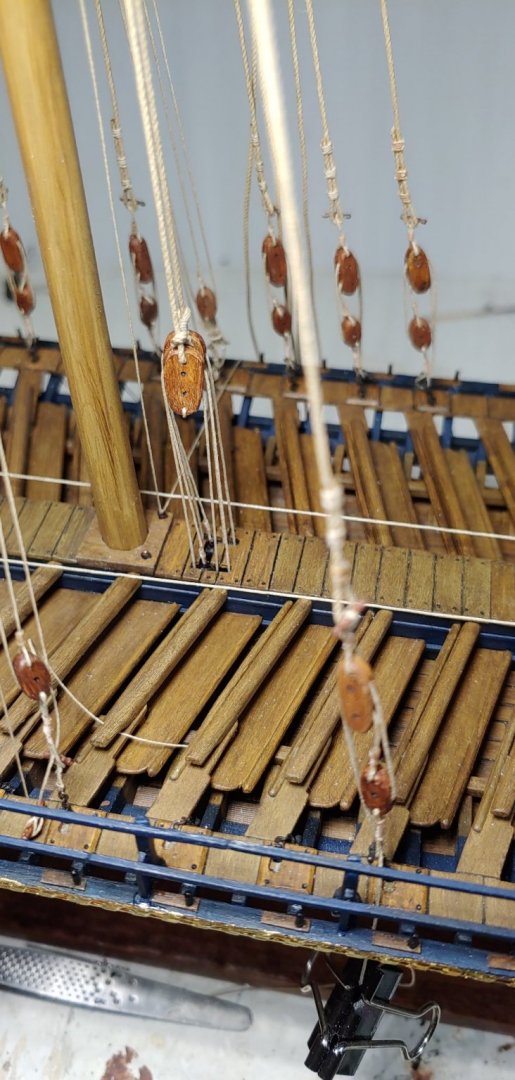
I addressed an area in the middle deck that's been annoying me for a while, the Heller deck section stops far too short and leaves a void so I fabricated 2 sections cover the area, I still need to fashion some handles as these would need to be removable to access the tackle..all in all it's looks ok. Michael D.

- 222 replies
-
- 5
-
-
- reale de france
- heller
- (and 1 more)
-
Brilliantly done Marc or should I say Michael Angelo!!. I assume you're using mostly fresh exacto blades or equivalent?. I struggled a bit figuring out how I was going to tackle Victory's figurehead and settled on sculpy modeling clay. Quite the master piece you have there. Michael D.
- 2,699 replies
-
- 4
-
-
- heller
- soleil royal
- (and 9 more)
-
Hi Kirill, I totally agree with you on all counts and really the only resolution is to scratch build the ship to as exact scale as possible and one can spend a decade and easily more on such a project. I thought I provided a link in Marc's build log?, granted It's only pictures....HMS Victory of 1765 - Google Photos Michael D.
- 228 replies
-
- 2
-
-
- spanish galleon
- lee
- (and 1 more)