


palmerit
-
Posts
893 -
Joined
-
Last visited
Content Type
Profiles
Forums
Gallery
Events
Posts posted by palmerit
-
-
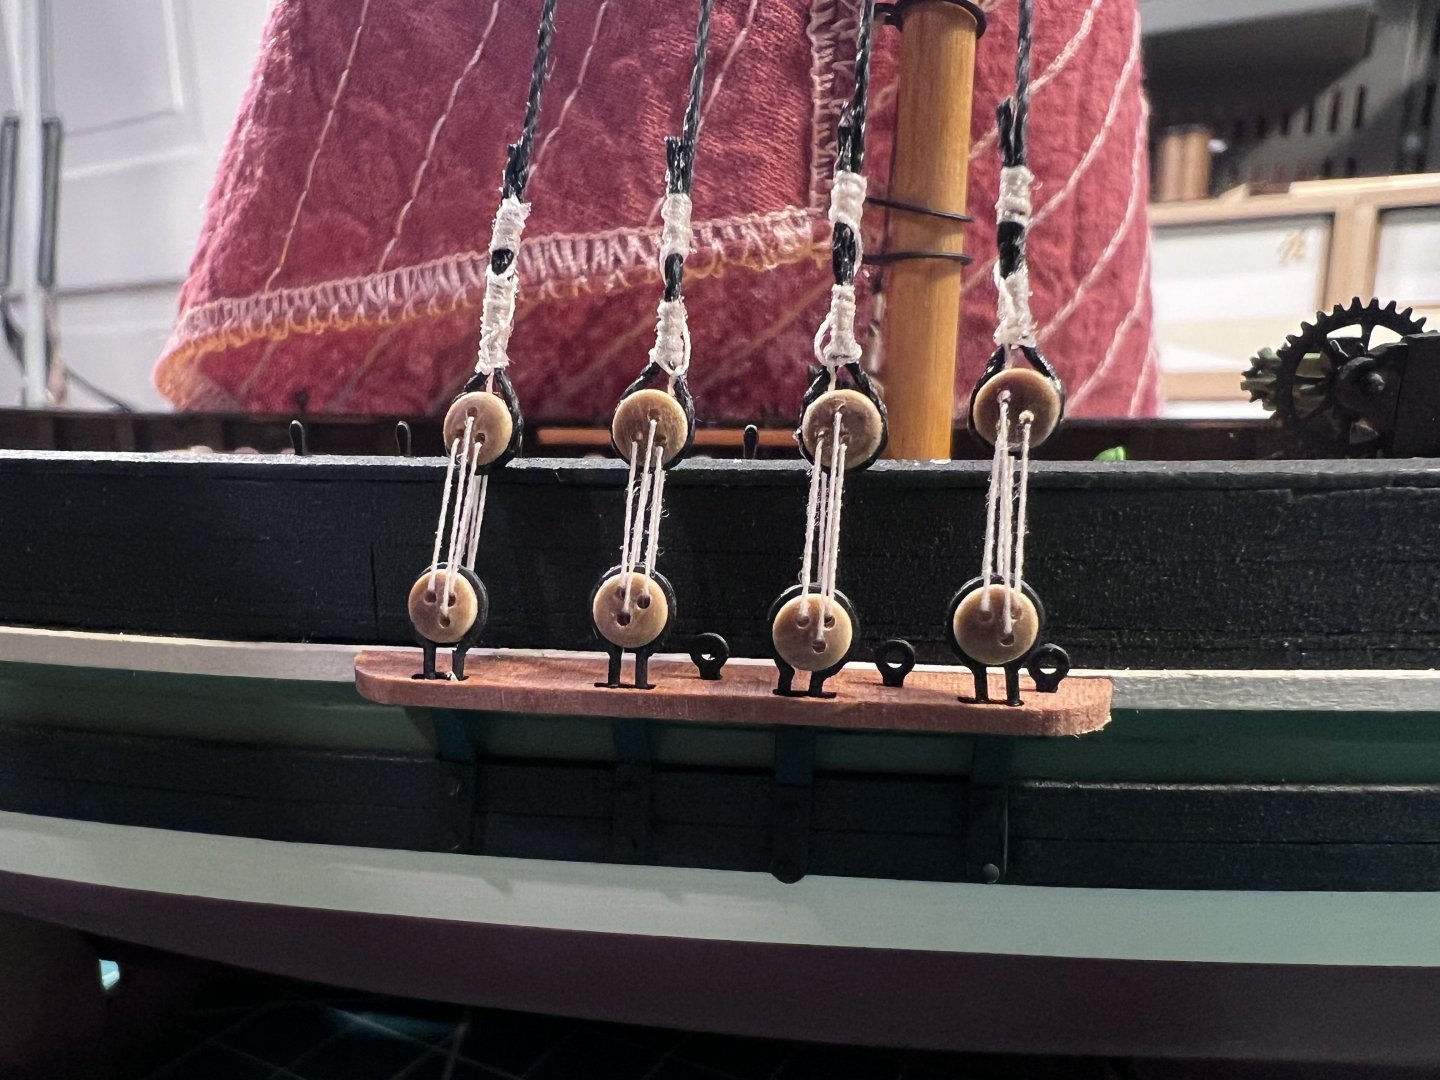
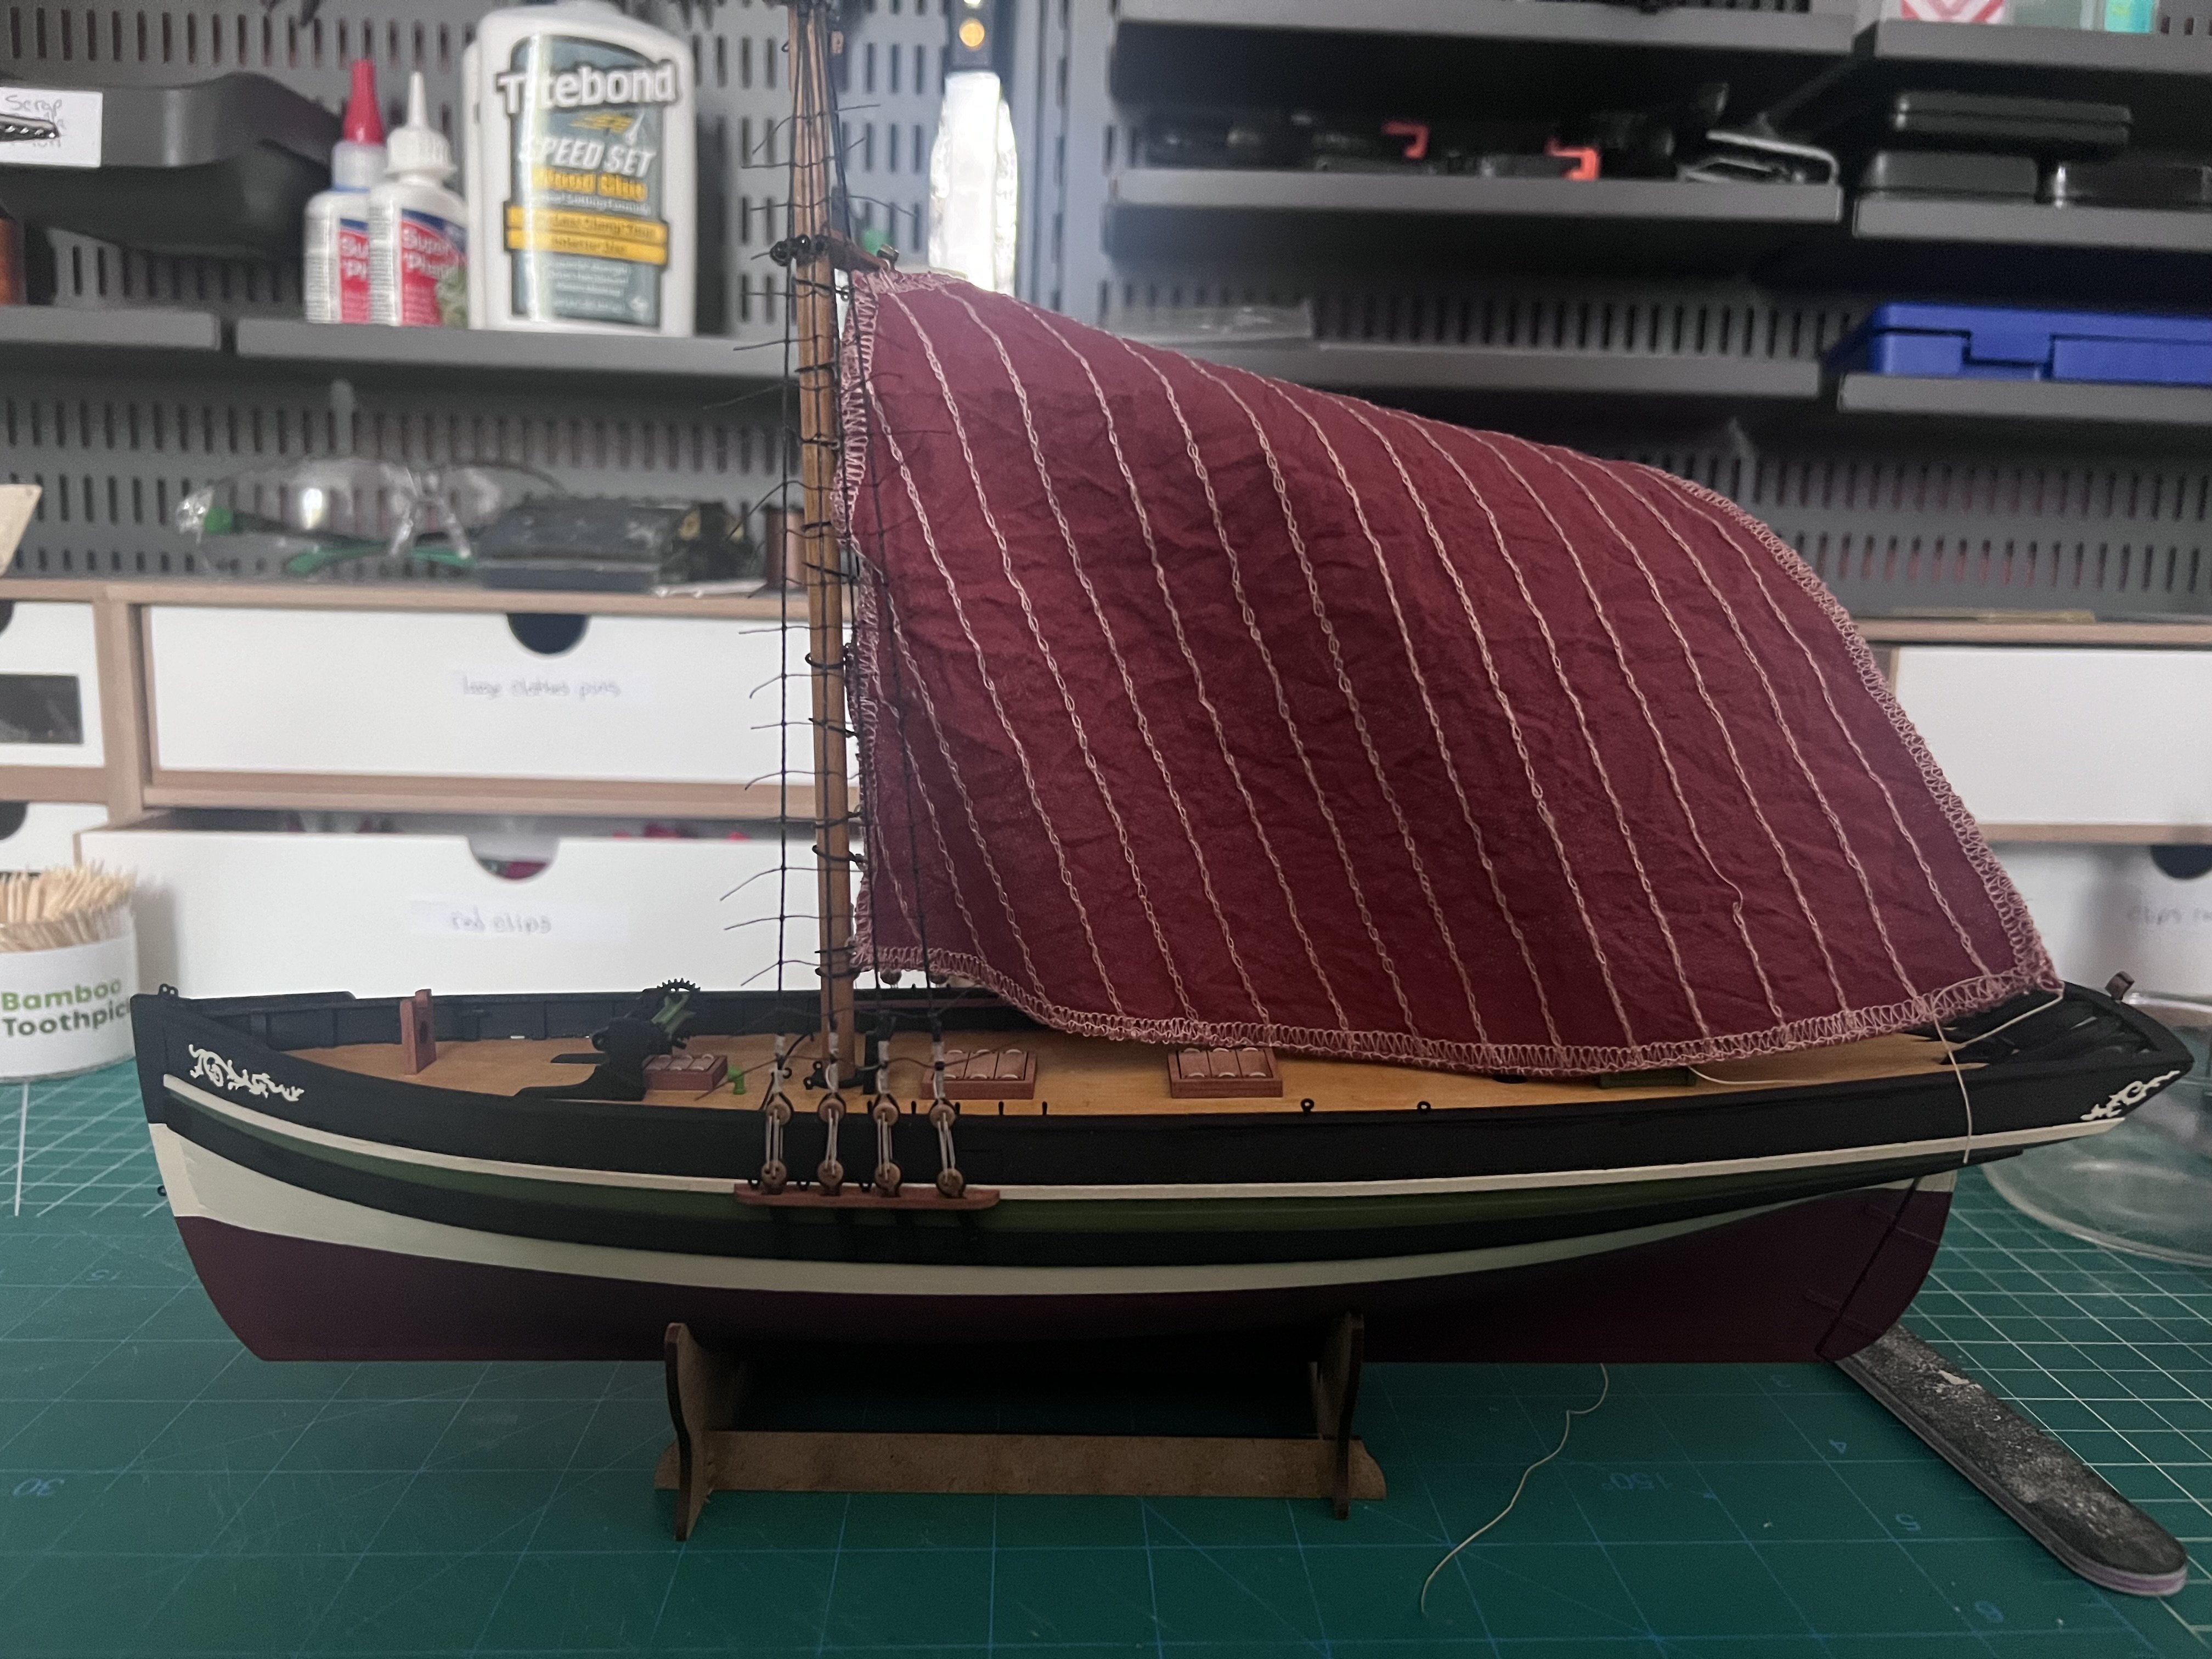
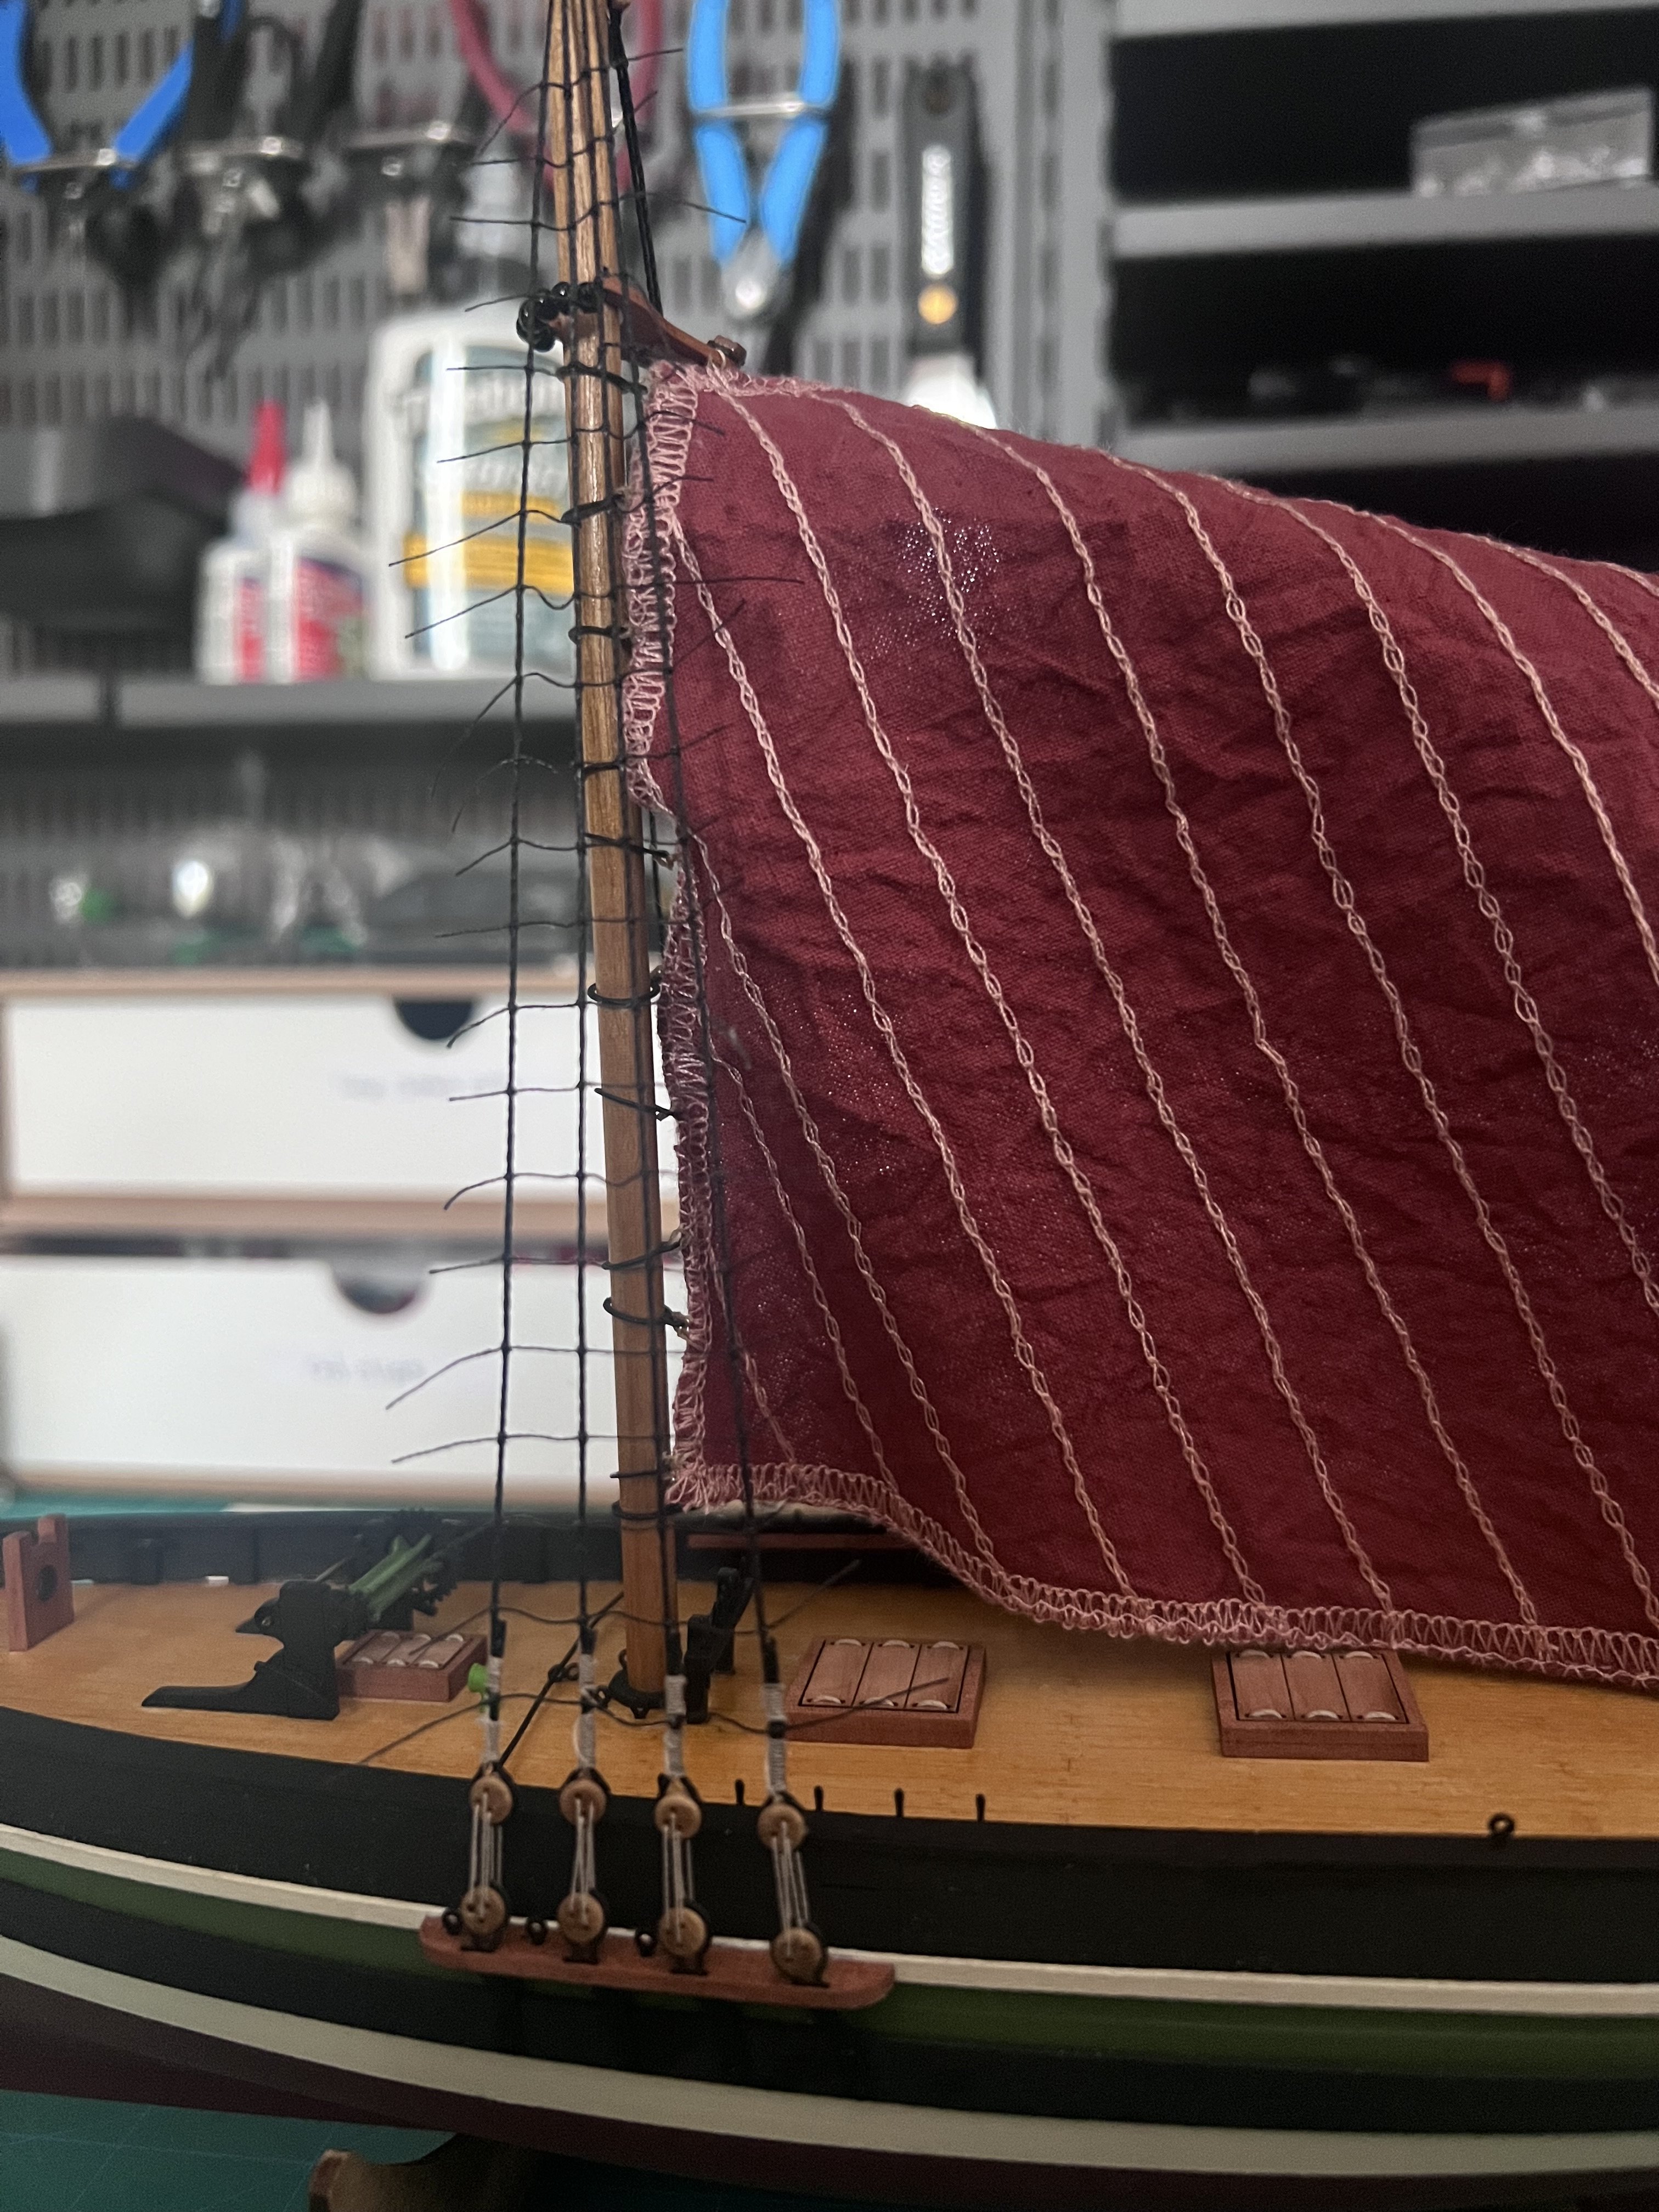
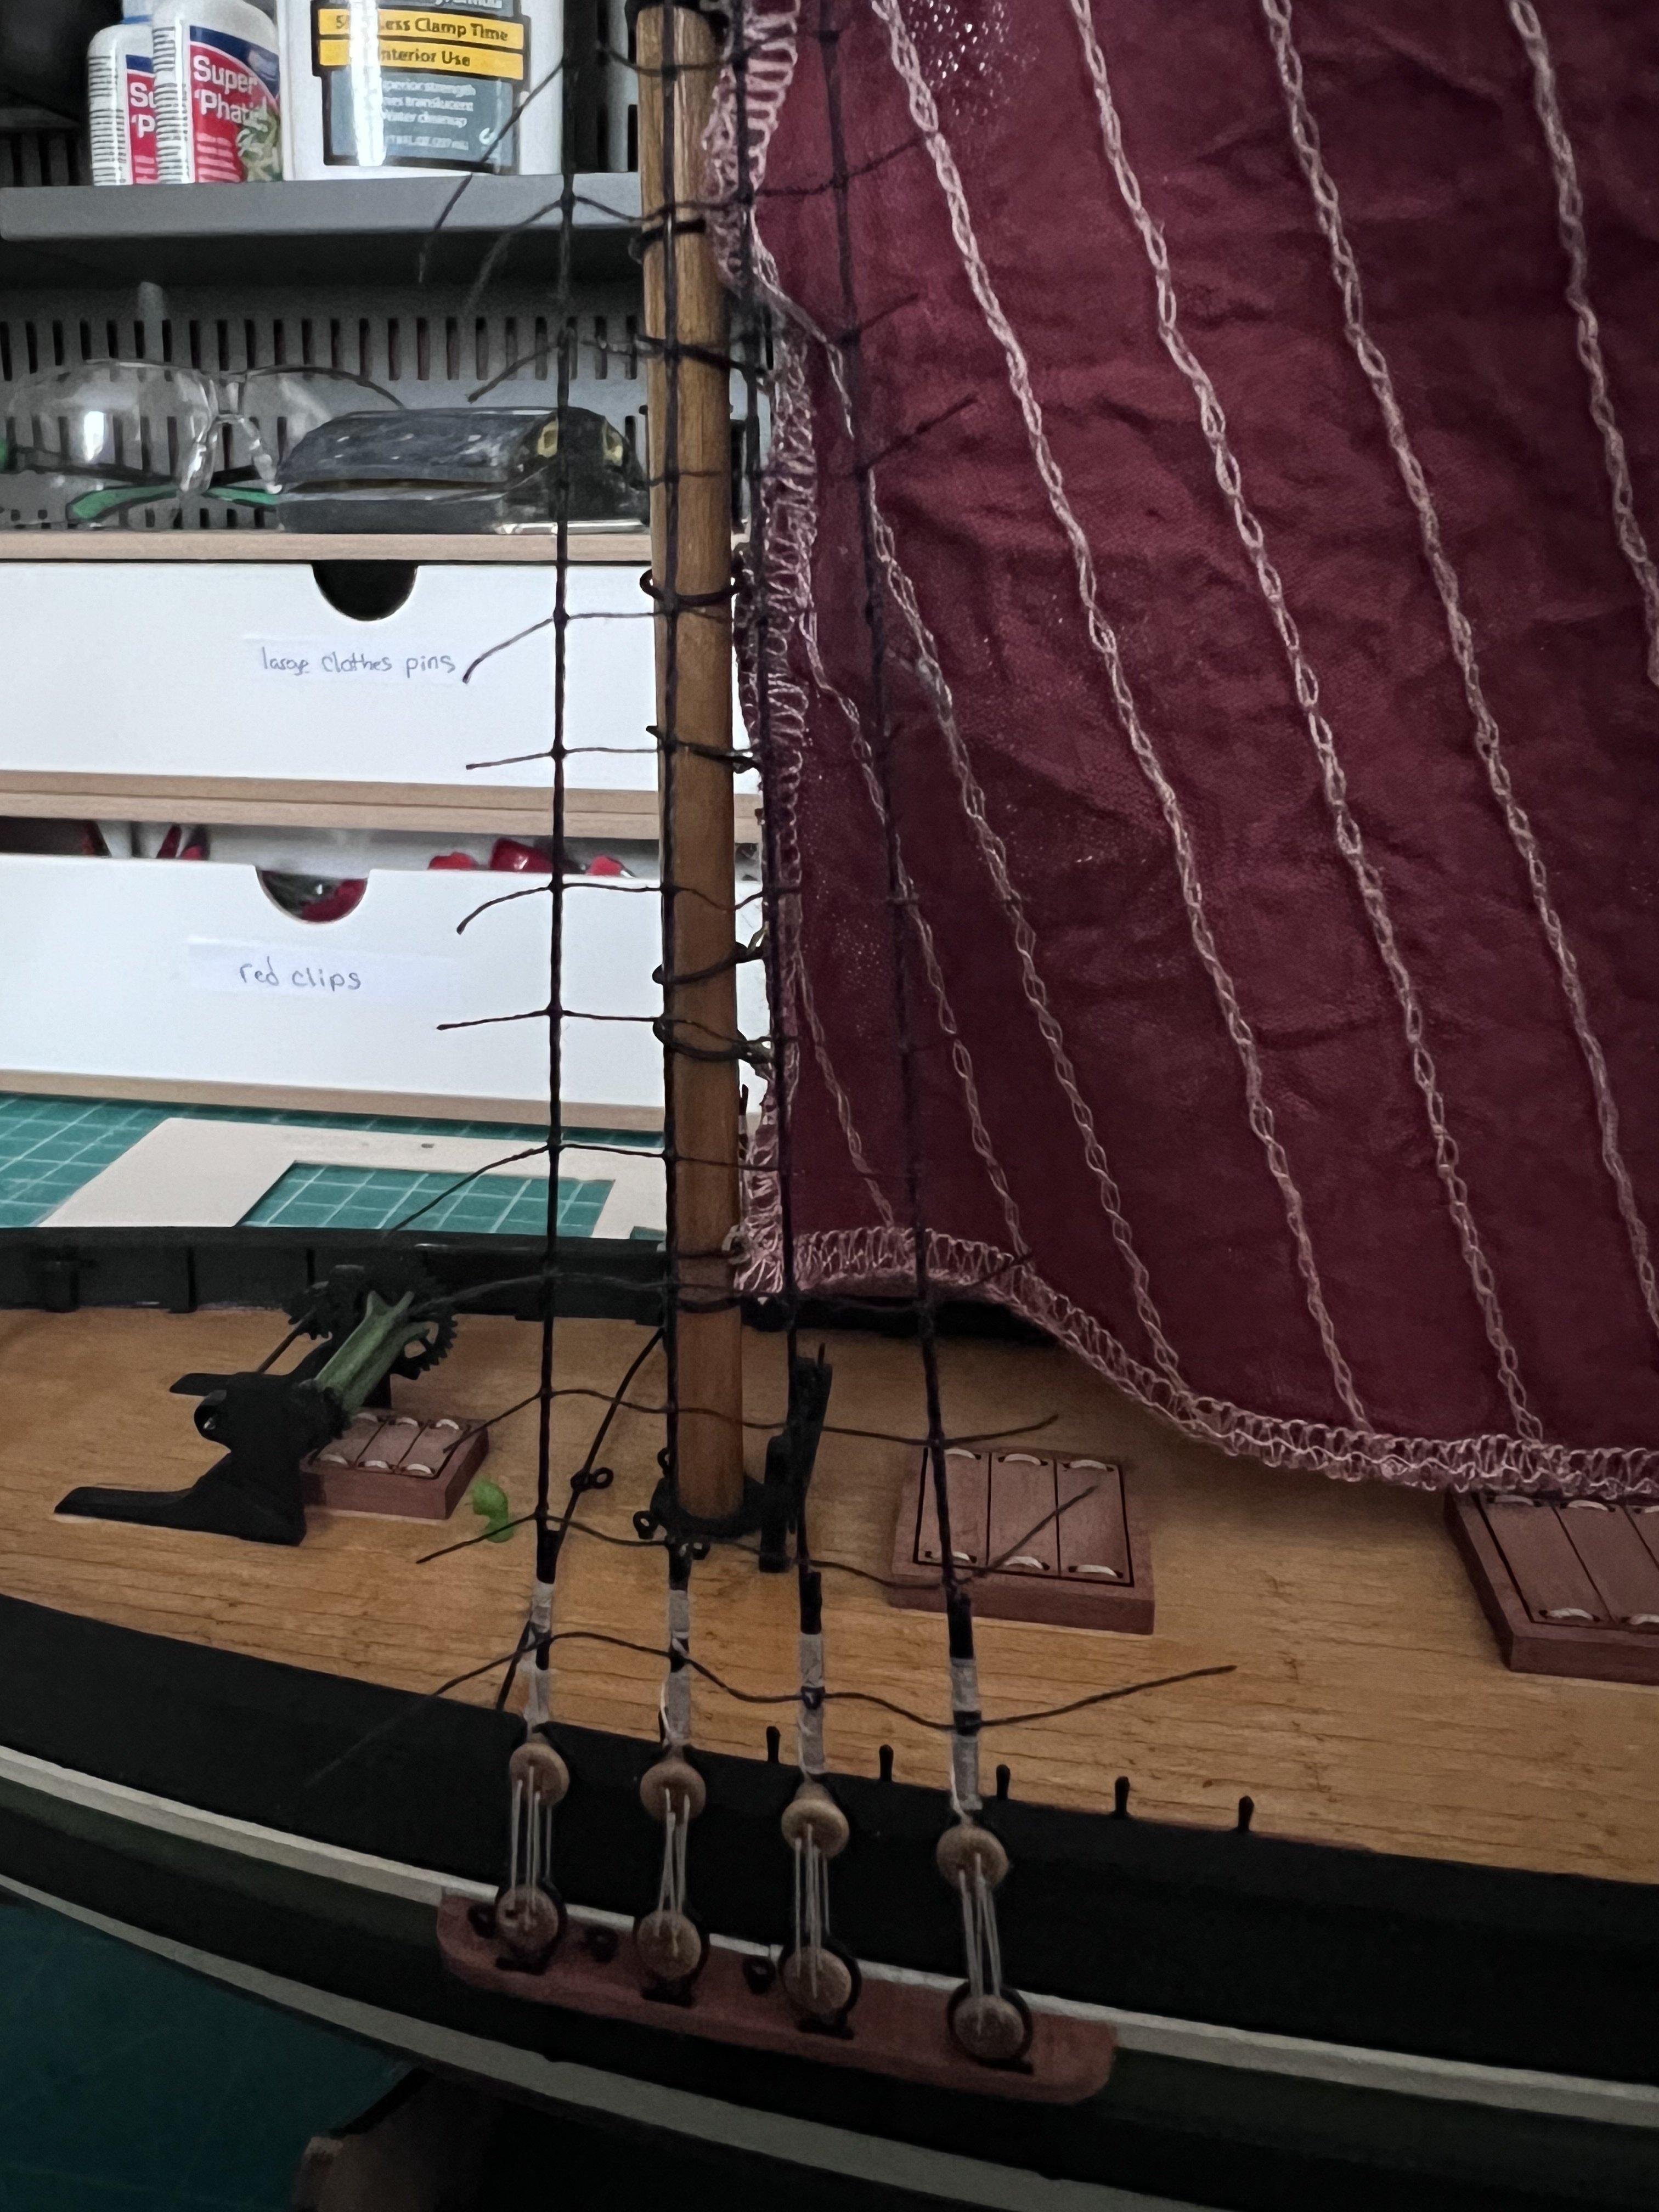
A lot of the rigging on this “interacts”, making it important it seems not to prematurely tighten a lot of it. It’ll be quite the acrobatics to tie some of this off.

-
More progress with the rigging.
I use flat (without teeth) alligator clips to hold the ends of the lines (that will be tied off later on pins and cleats) so I can tie everything tight into place later in the process.


-
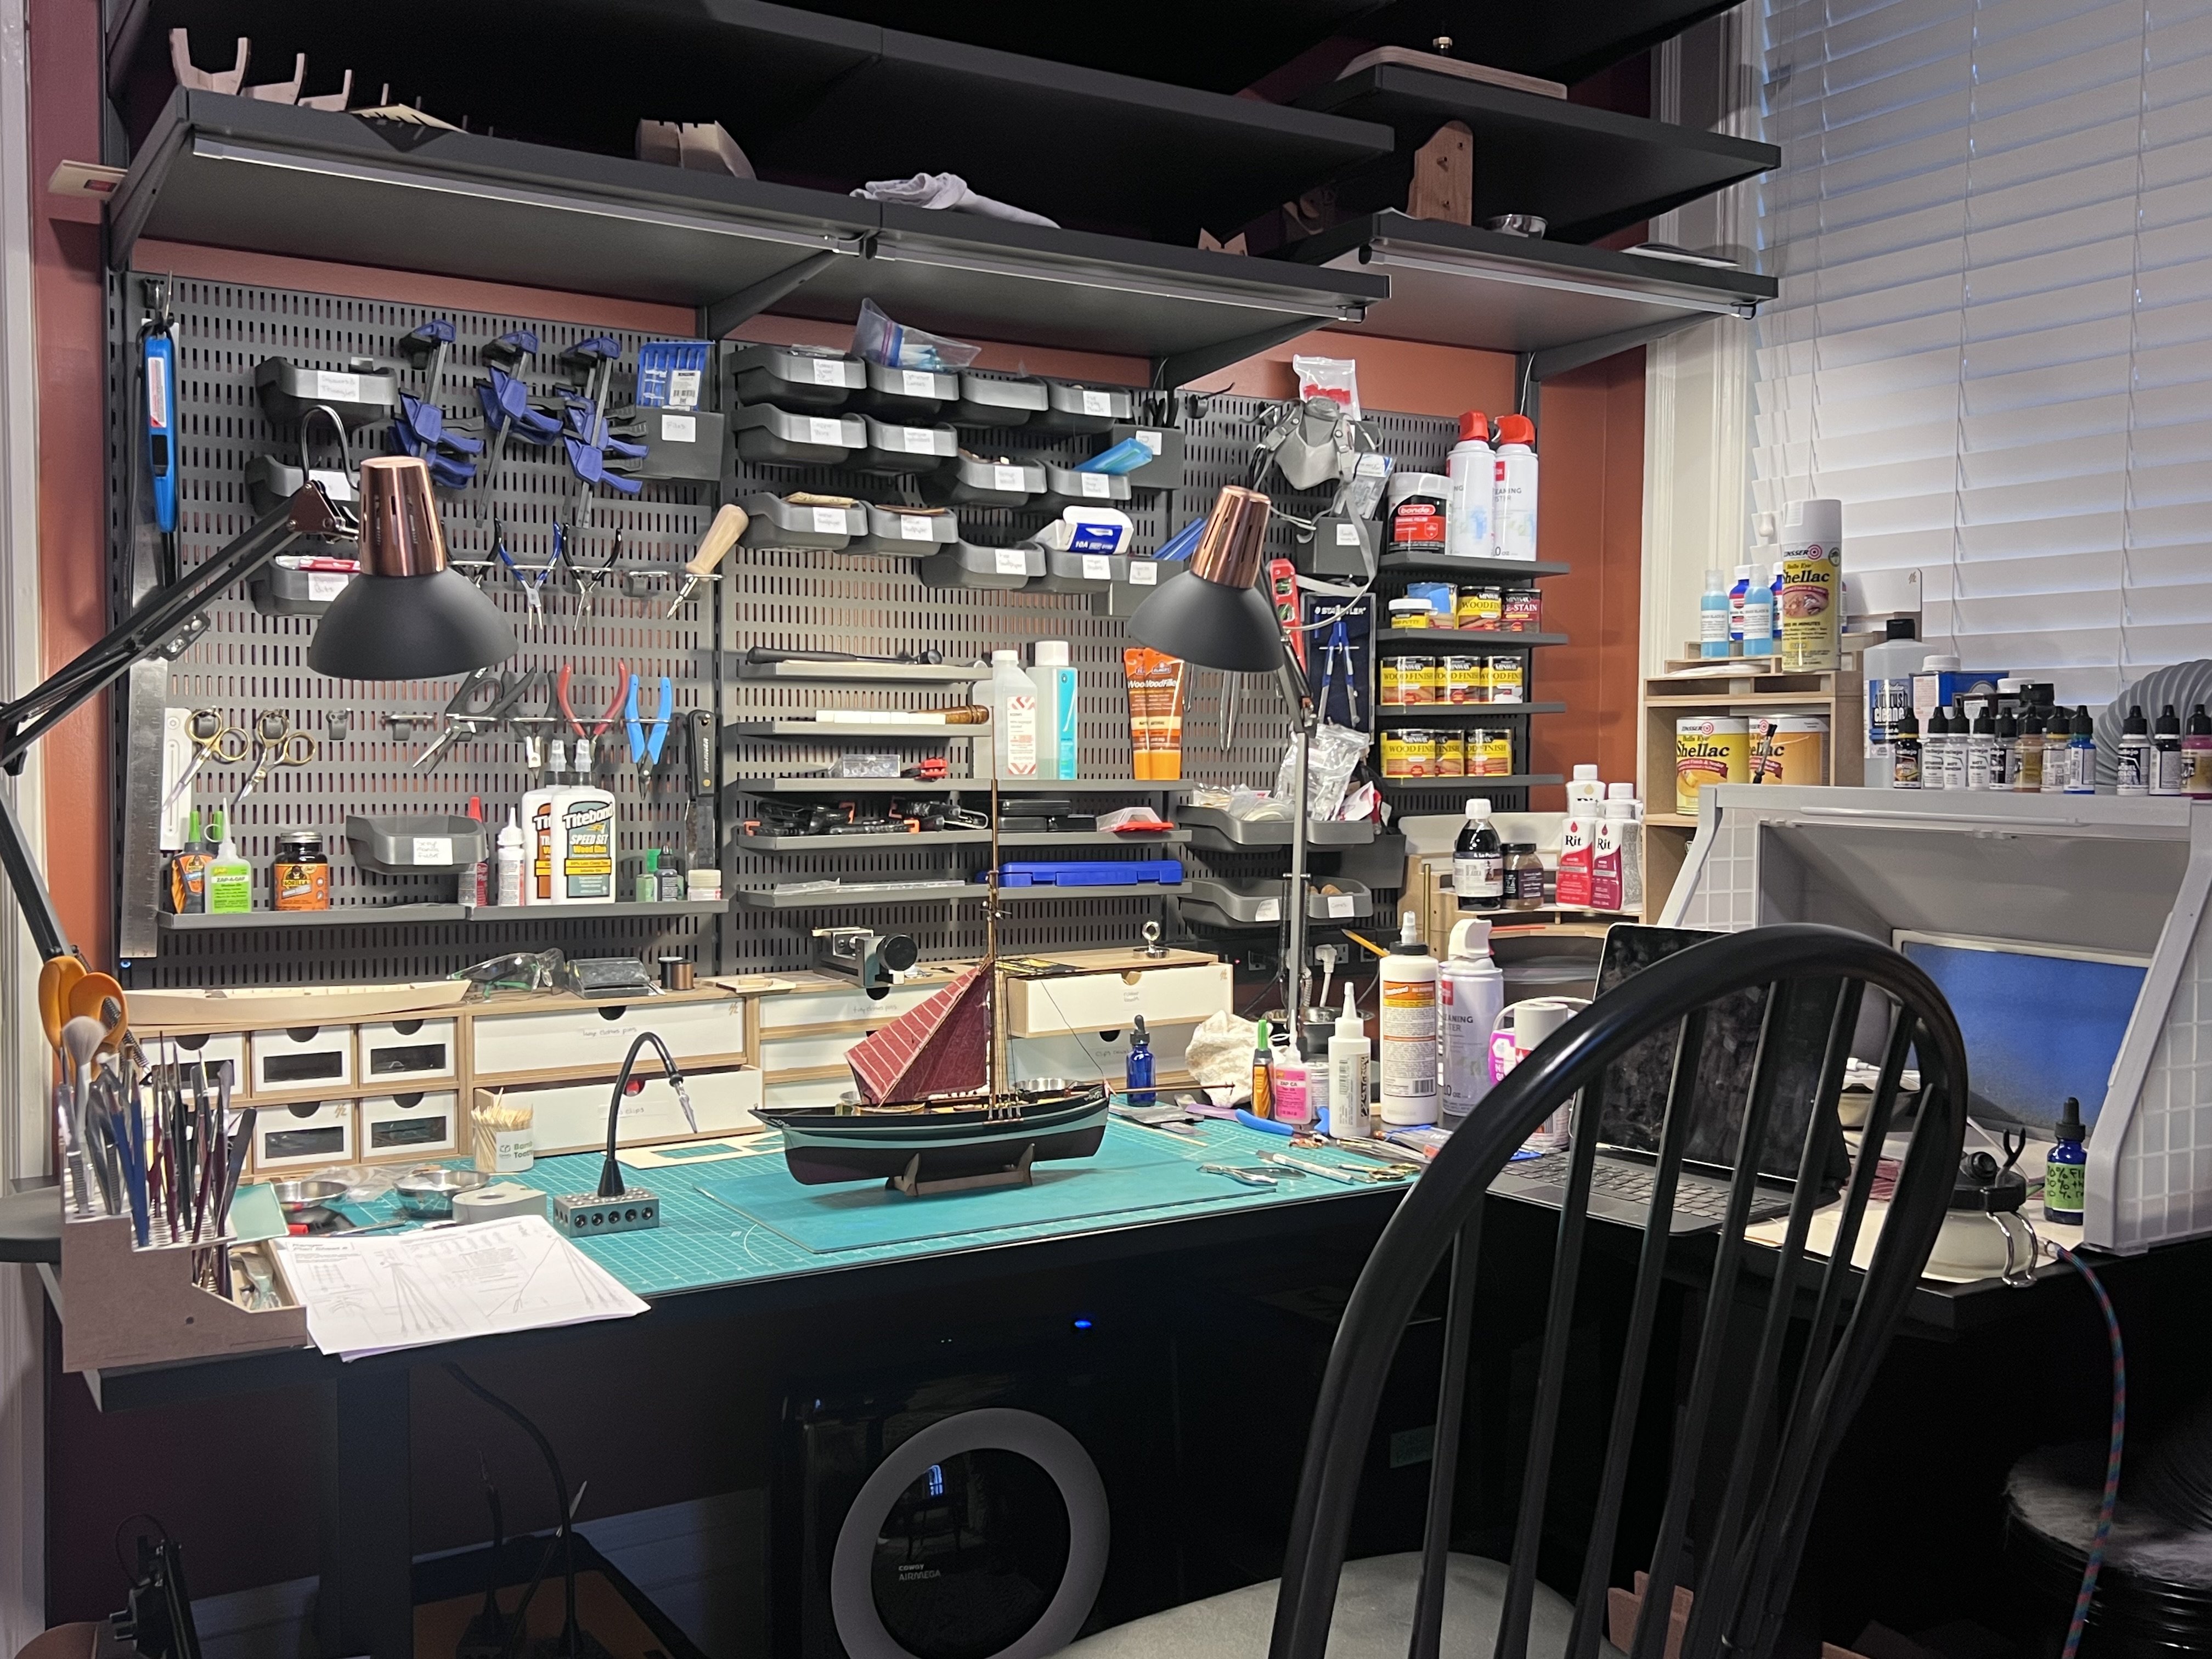
Legos, clamps of all sorts, rubber bands of various sizes. And micro squares and triangle. Care and patience.
(I find a lot of uses for 1-2-3 block - as small weight, as bases for magnetic quad hands - and for keeping things square. Just note that real machinist squares will often be covered in a light oil to prevent rust, which can discolor wood.)
-
-
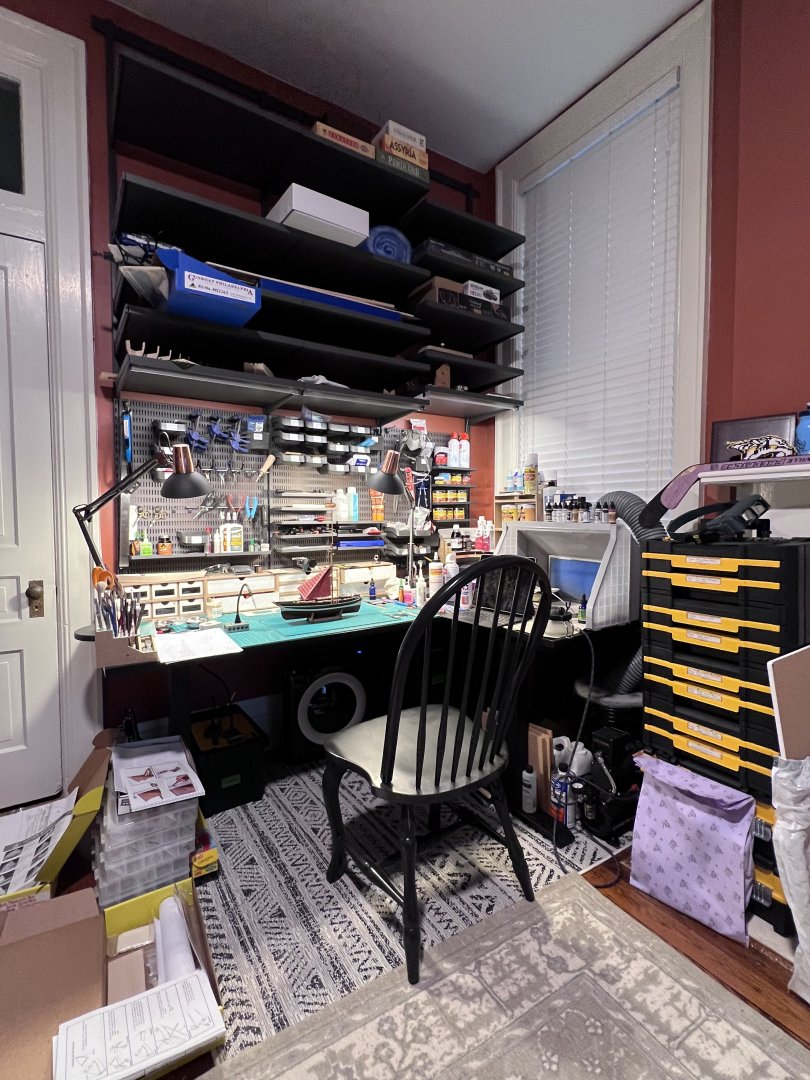
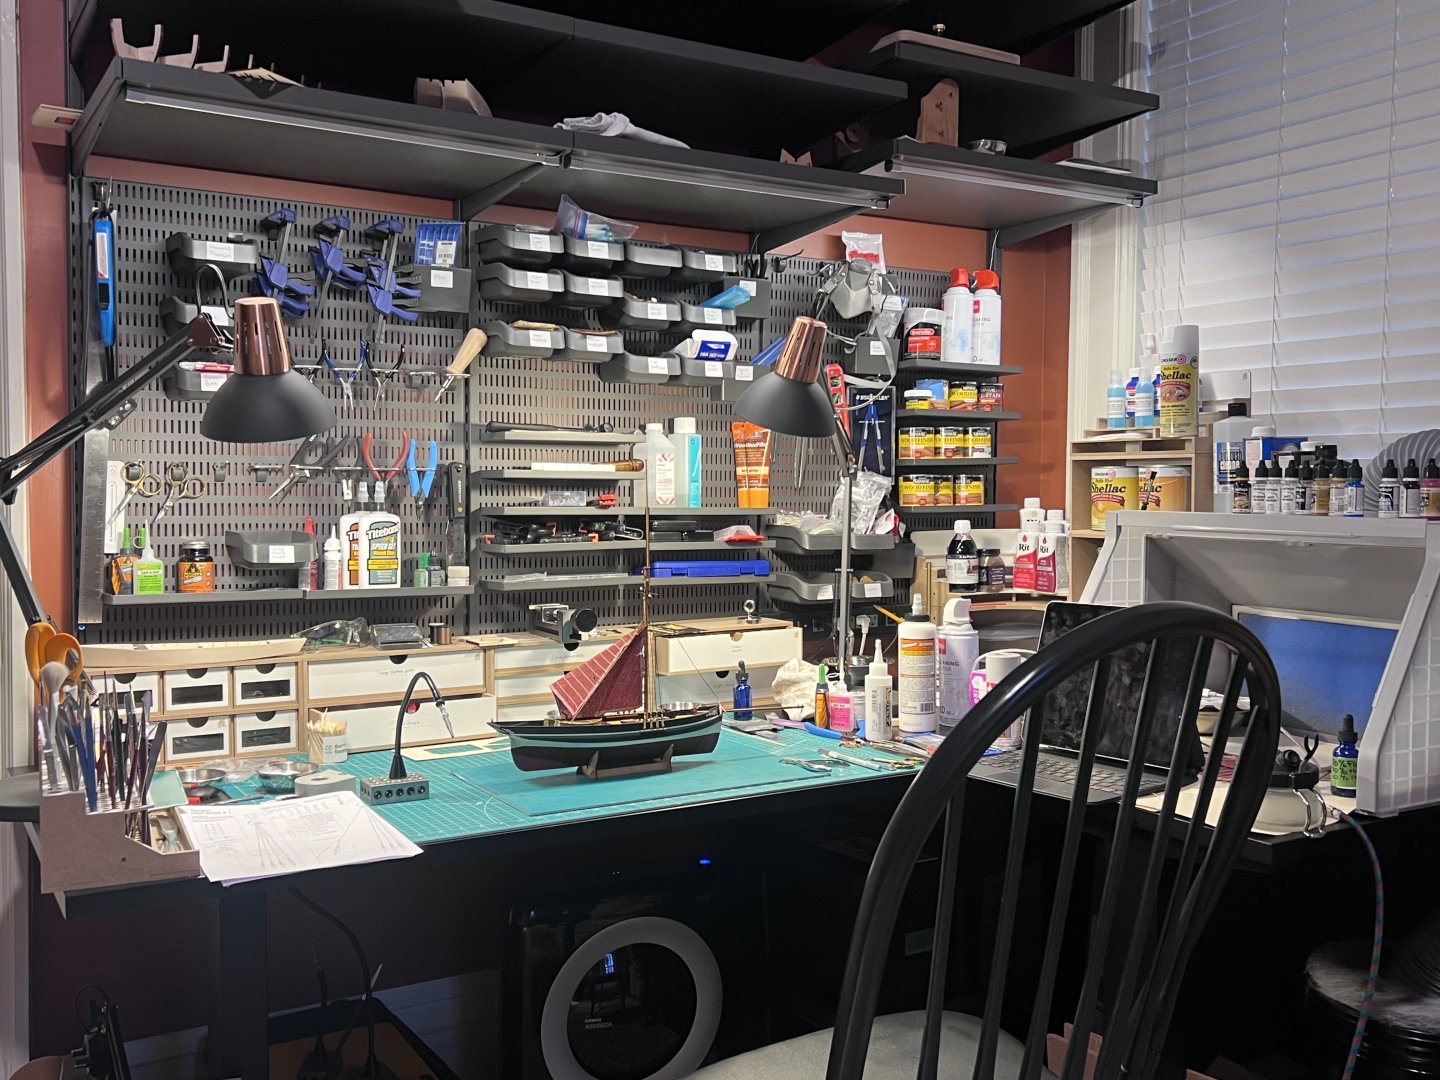
After quite a while using a couple of folding tables and a drop cloth in the middle of my younger son’s room - while at college - after moving in there from the dining room, we redid his bedroom and I got a corner as my work area. It’s densely packed but (somewhat) organized.
- CiscoH, JohnB40, GrandpaPhil and 11 others
-
 14
14
-
-
I'd go with an airbrush. You can do multiple light coats and the etching on the pear pieces really does come through. You could probably get the same result by thinning down paints and applying with a brush but I haven't tried that on a Vanguard model. I do touch ups with a brush, but I haven't painted a full Vanguard ship with brush paint. I did use brush paint on some of the Model Shipways models I built, and their paint was pretty thick, but it seems to look okay given that these were larger scale work boats. I think at a small 1:64 scale, it would be harder to not show brush lines that would be completely out of scale I think.
If you already have non-airbrush paints you'll want to play around with how much to thin them to get the right consistency so that you don't clog the airbrush. I like Vallejo Air paints, which are formulated for an airbrush. I still thin them with a combination of thinner, retarder, and something else - the formula I use is on my Sherbourne log.
I have an Iwata Eclipse HP-CS airbrush which is highly recommended. It's not cheap (not the most expensive, but up there). I've seen Badgers recommended that are cheaper. I would steer away from an Amazon no-name when it comes to airbrushes and get a real one from a reputable brand. Airbrushes have high engineering tolerances. You might get luck with an off-brand, you might not. There are tons of good web sites and YouTube reviews on air brushes - what to buy, how to use them, how to clean them after they clog (and they will sometimes clog).
I did get a no name compressor. Literally, it's "NO-NAME Brand". https://spraygunner.com/products/cool-tooty-airbrush-compressor-with-tank-by-no-name-brand It's worked well for me.
I also got a spray booth so I could spray in the house. https://www.amazon.com/dp/B07MGGYH2W?ref_=ppx_hzsearch_conn_dt_b_fed_asin_title_2&th=1 I can't say this is the best version out there, but it works for me, and I when I bought it it had a pretty good discount price on it. I followed the prices for a while to get a deal. I don't have the exhaust vent going outside but into a large bucket with some water and detergent in it. I googled around and found that as a way to spray inside when you can't easily vent outside. I started with a "spray booth" made from a cardboard box in the cellar but then decided to move back into the house.
wrt the PE parts, I'd definitely look into blackening. My first attempt I just airbrushed them and the paint peeled right off. Second attempt I used Vallejo primer and then painted and the paint peeled off again. More recent I've used Tamiya enamel thinner in a shake can (I don't want to mess with enamel in my thinner) followed by Vallejo air paints and it worked a lot better doing that with little thinning. A Fine Scale Modeler YouTube video showed different ways to airbrush PE, which is how I found the Tamiya shake can. But since you kind of need to keep the PE parts in the sprues when air brushing, you end up having to file the parts after you remove them from the sprues and then need to try to repaint them, and that's a bit of a pain. If you just take them off, file off the debris, and then blacken them, that's probably the easiest to do (and likely ends up with the best look) - I have to say I haven't tried blackening myself yet. Next model.
-
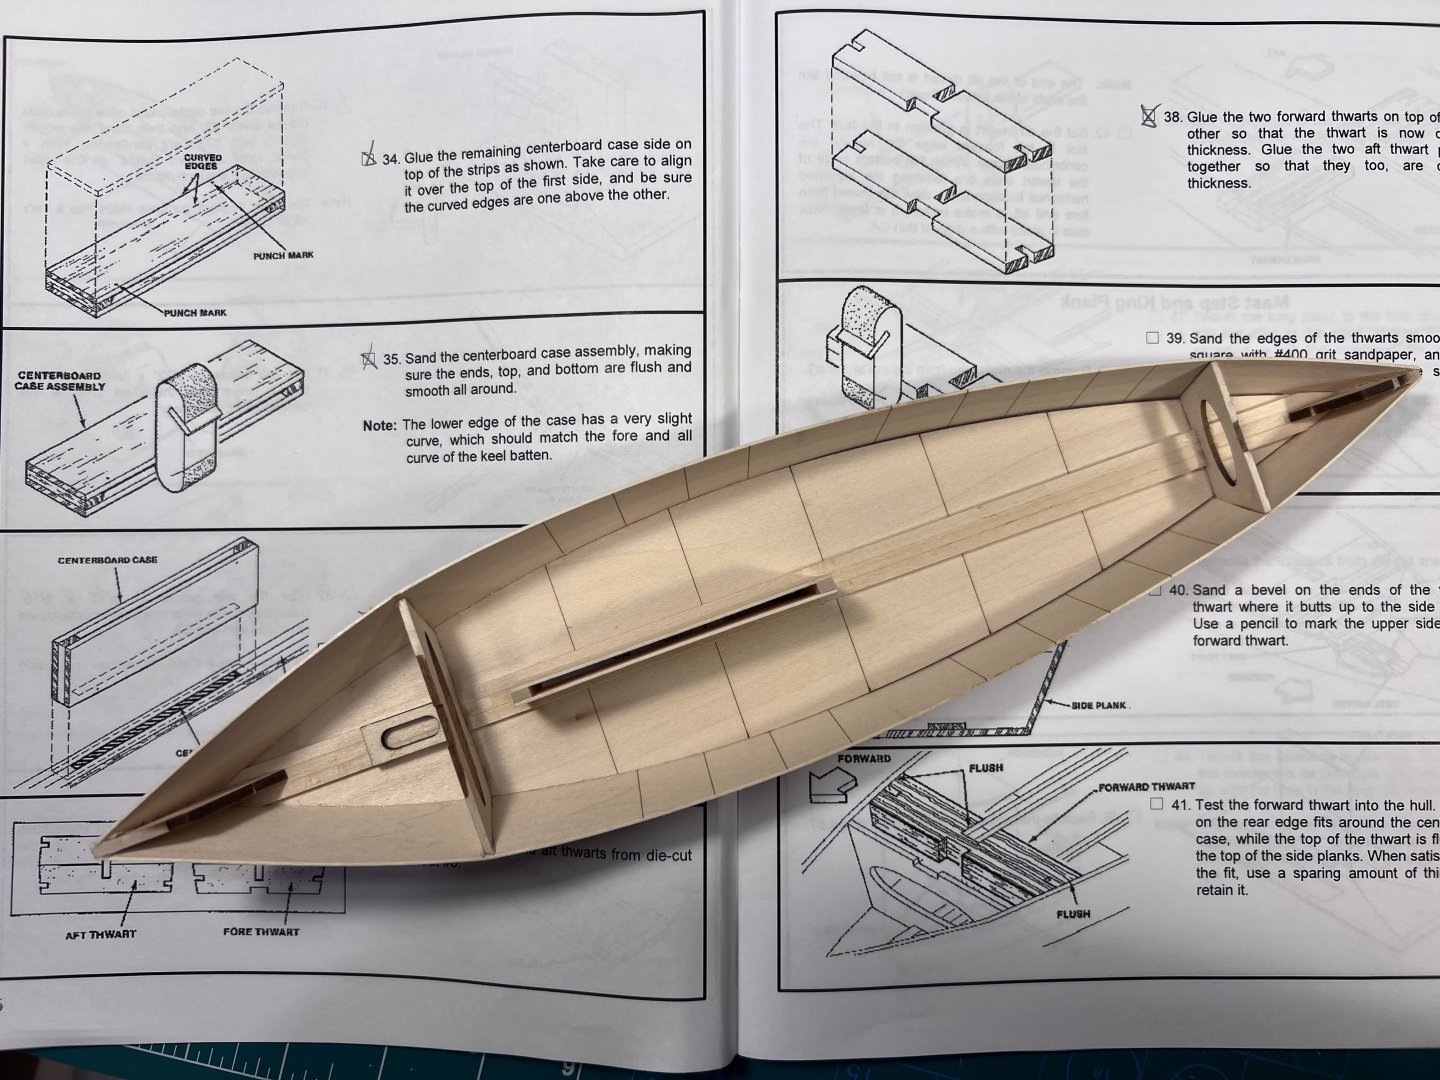
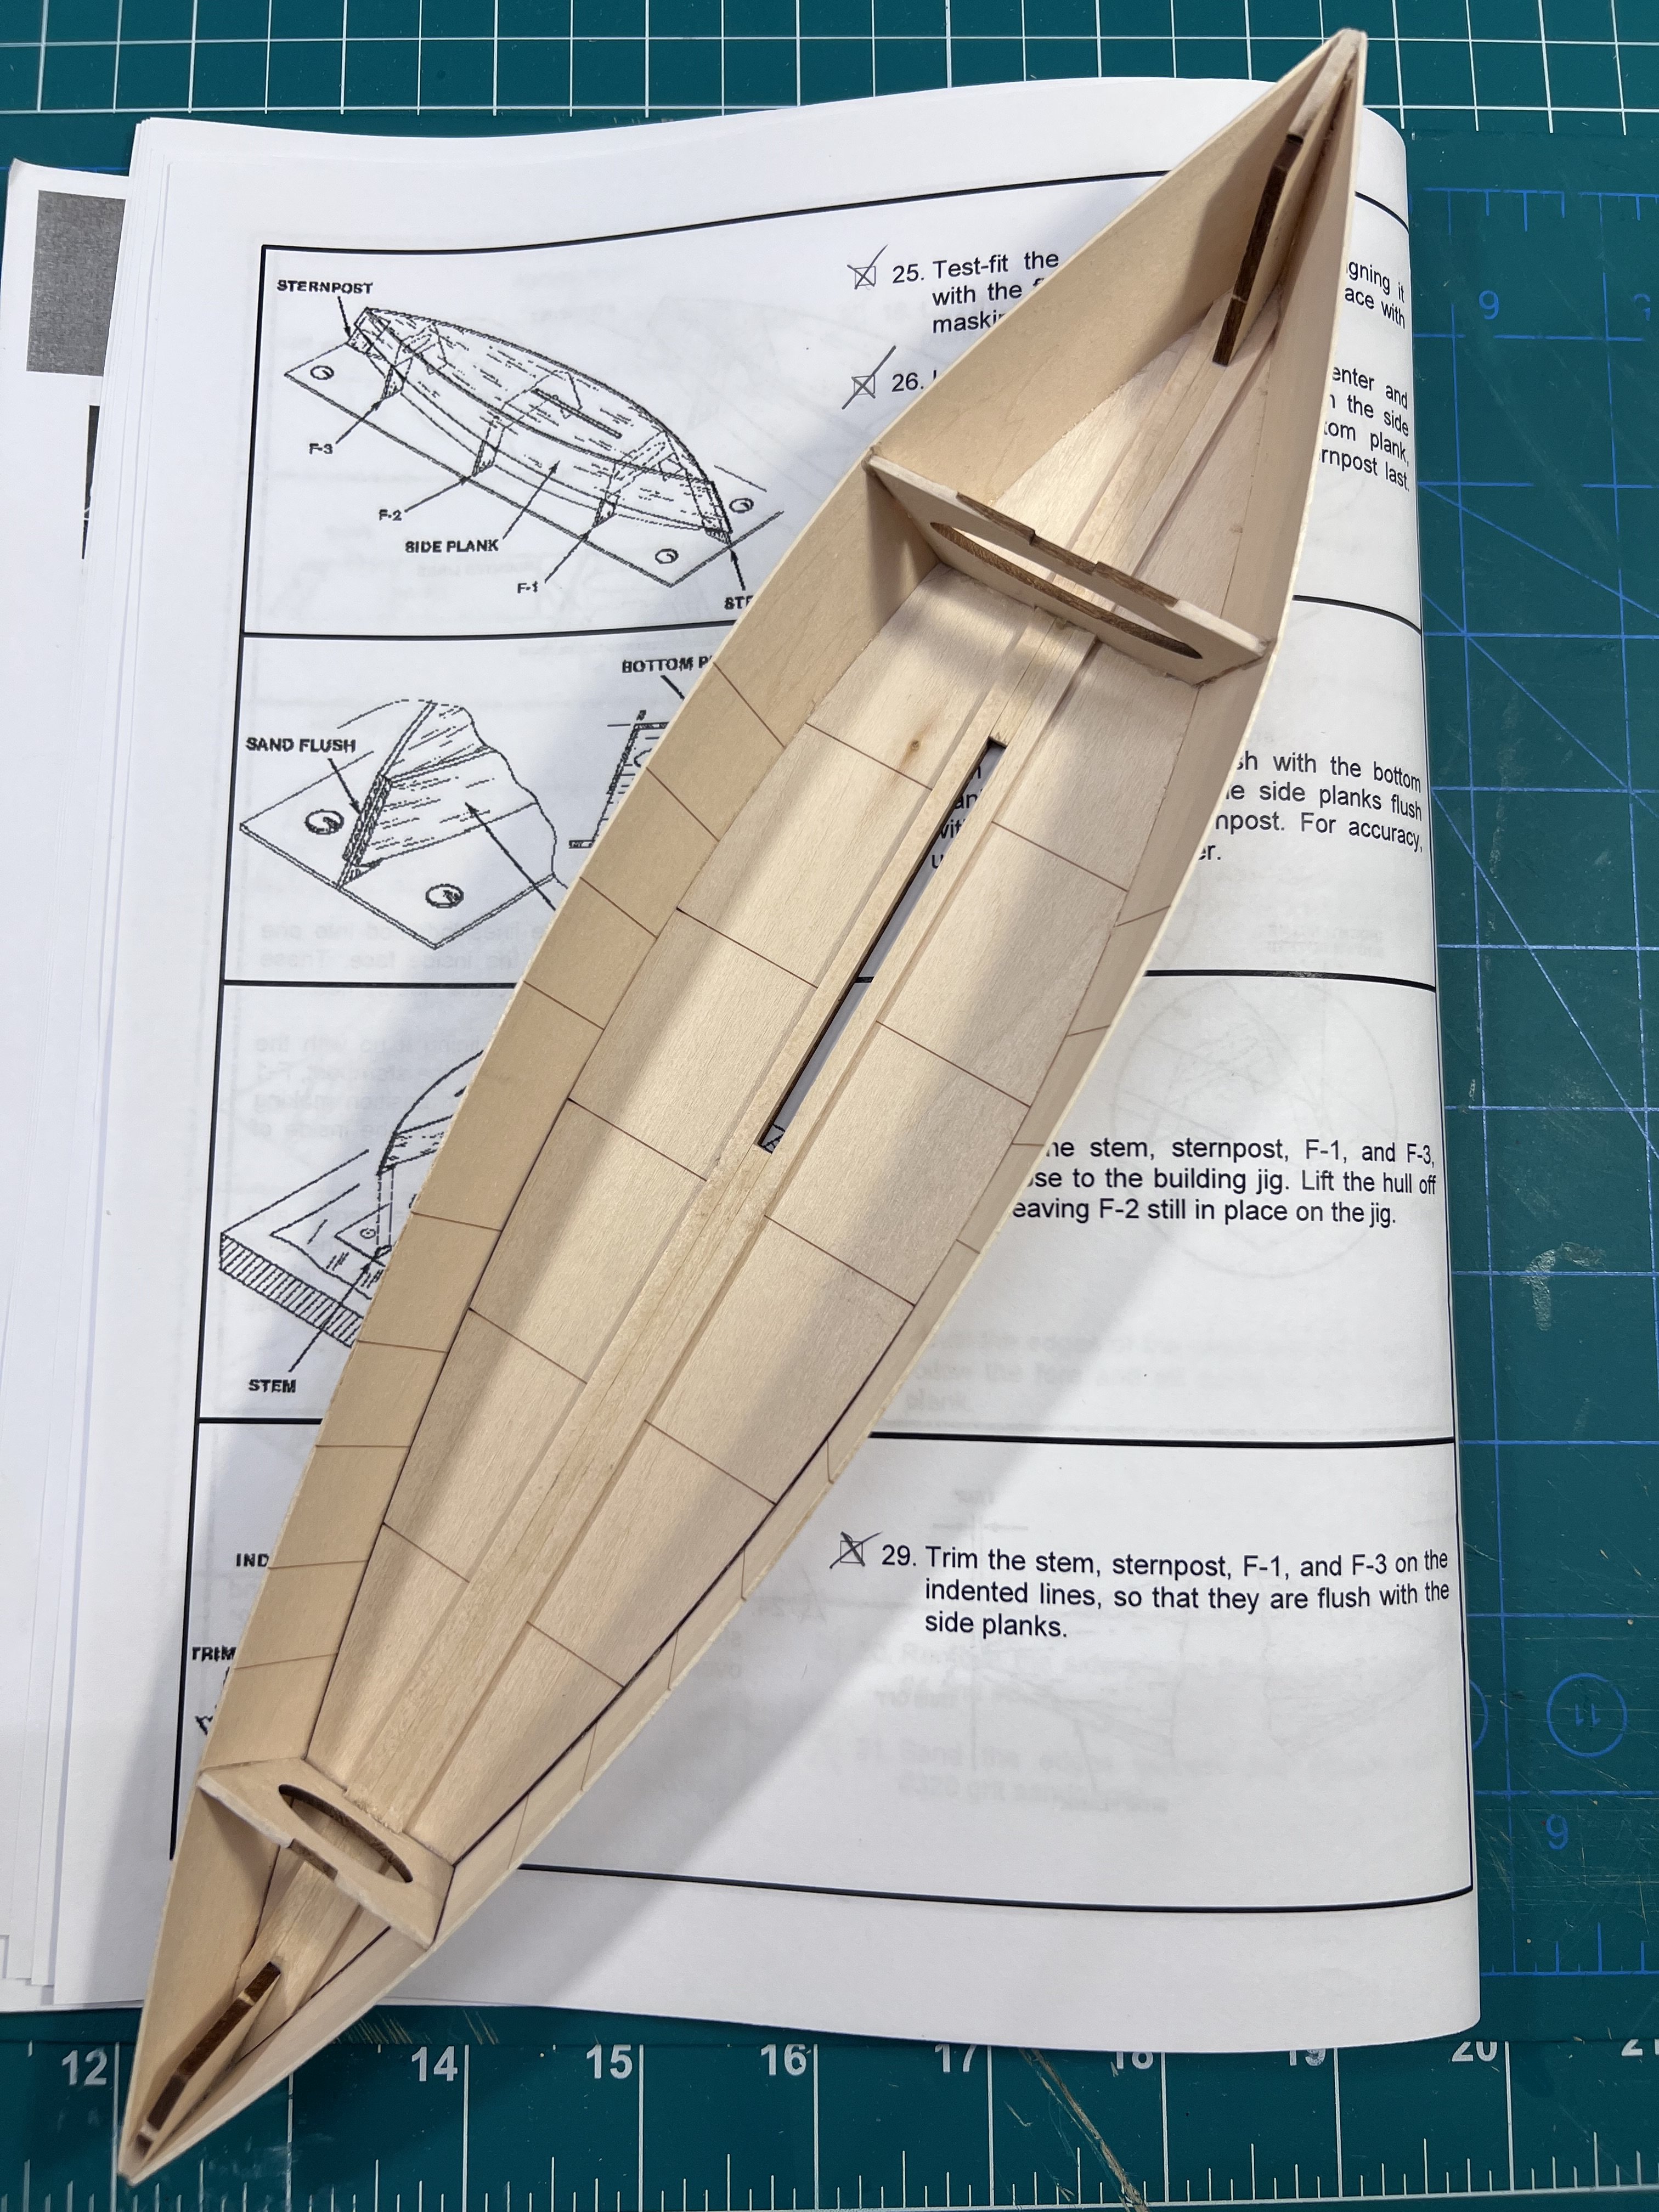
It’s also weird that the thwarts have a small notch on the sides but nothing goes through the notches. I’m guessing those should have a side frame going down through them?

-
Thoughts? Shouldn’t a boat like this have a thin “deck piece” that goes above the side frames? The model has the thin side planking and the side frames but nothing on top of the side frames. Just a thin planking and the side frames with the only decking at the front and back, not along the sides. I googled around and some versions of skiffs have thin decking around the side. I don’t know if this is modeled after a skiff with no thin side decking or if it was designed that way because this is a relatively beginner model. Thoughts?

-
Note that the order of instructions have you adding the thwarts (the dark wood seats) BEFORE adding the chine battens along the bottom at the sides. The illustration doesn't show the thwarts in the way. But they are. For any future builders, I recommend adding the chine battens before adding the thwarts. I tried to carefully bend the batten under and around the thwarts, but one of them cracked a bit. I don't think anyone can see if but me, but it was still frustrating. Logically, the battens should be added first.

-
Check out my Sherbourne first planking. It was a complete mess compared to what you did. My second planking was also terrible. Especially if the hull is being painted, it’s amazing what you can do with filler and sanding, filler and sanding. If you treat every opportunity to plank as an opportunity to just leave the planking bare, maybe with some oil or shellac, eventually you’ll develop the skill to want to leave the planking bare with just some oil or shellac.
-
You don’t have any clinkering - steps in planks or planks that want to pull away - which is nice. Even though you will be adding a second planking I’d probably not hammer in the nails all the way but use them to hold a plank in position then remove them. But maybe it doesn’t matter.
The little I’ve watched of the Occre videos they seem to just have planks cover the hull even if it mean adding pointy planks. One potential issue is that there will be some places where a piece of planking ends between bulkheads rather than on a bulkhead.
I’d say to just plug ahead to get the first planking done and then look at other resources how how to do planking the “right” way. I don’t think you need to rip out.
The one planks need to be tapered, especially at the front end, which is why you ran out of room. The instructions for Vanguard models (which you can download) have some photos showing how to do this. Lots of other great resources out there showing the “right” way to plank.
- John Ruy, Paul Le Wol and Ryland Craze
-
3
-
6 hours ago, Blue Ensign said:
That is unless you decide to open up the lower deck areas of the Fish hold and the cabin space.
Is the plan just to paint the interior a matte black so you can have an open door or hatch?
-
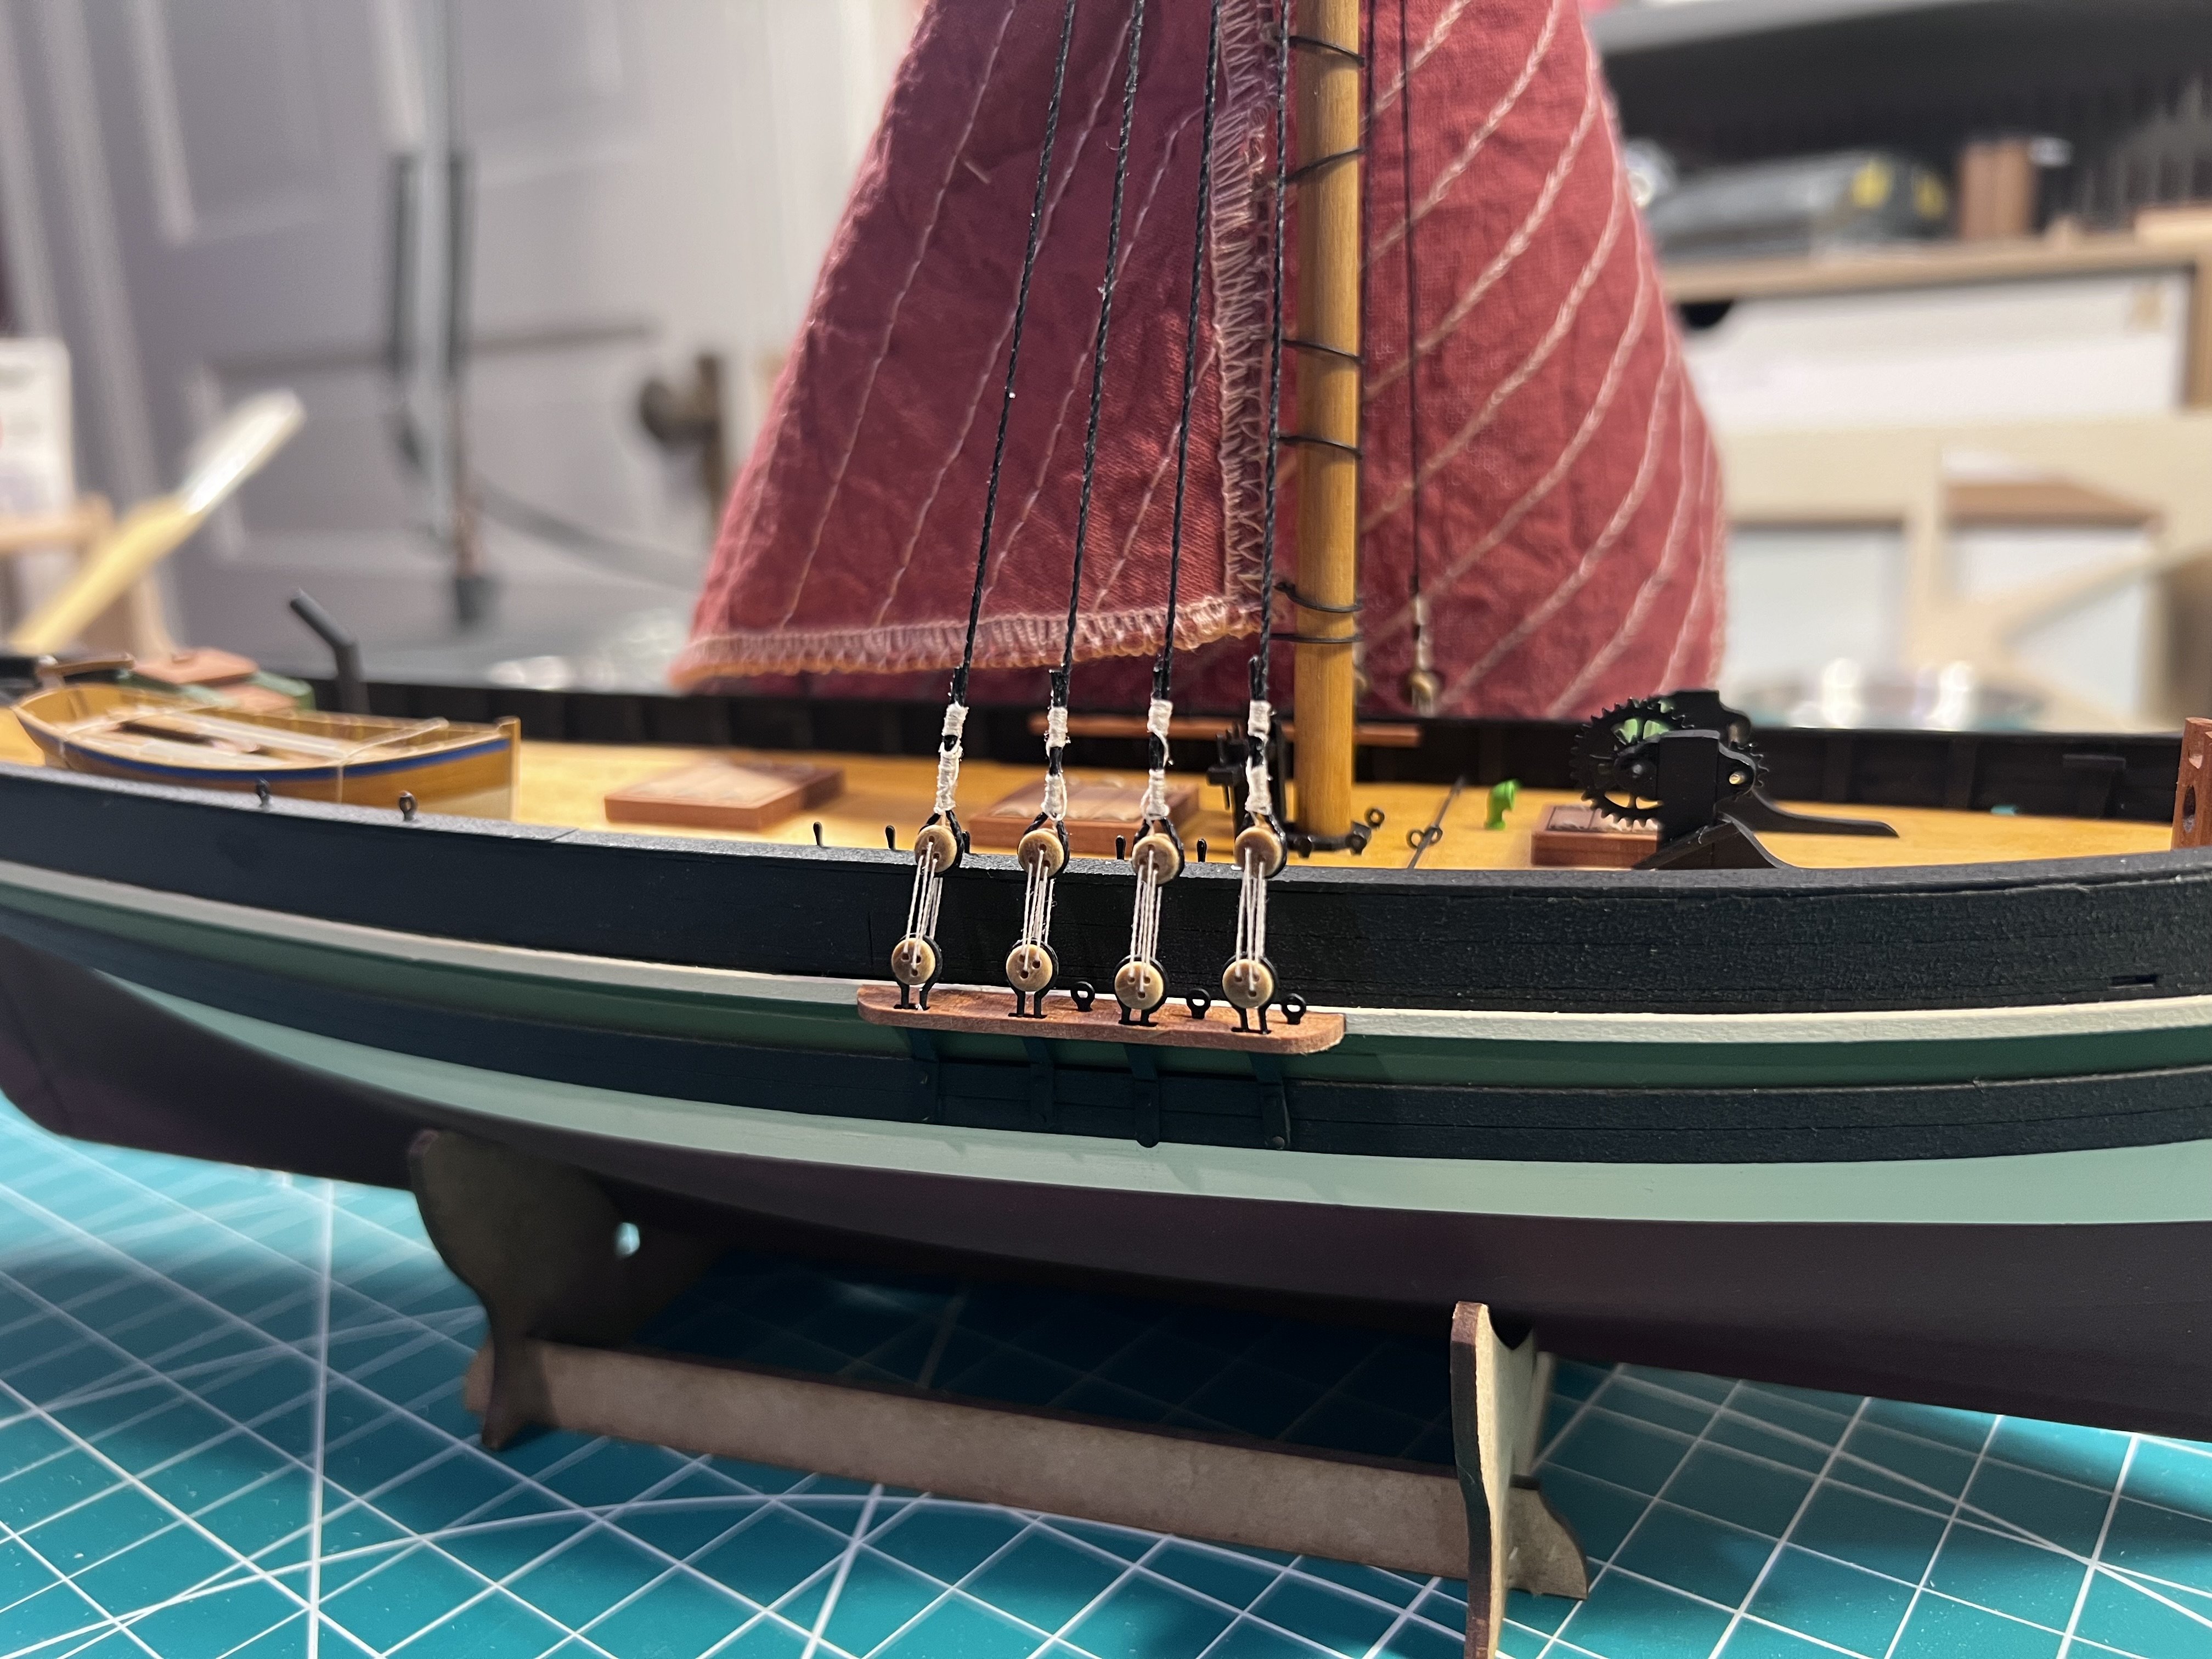
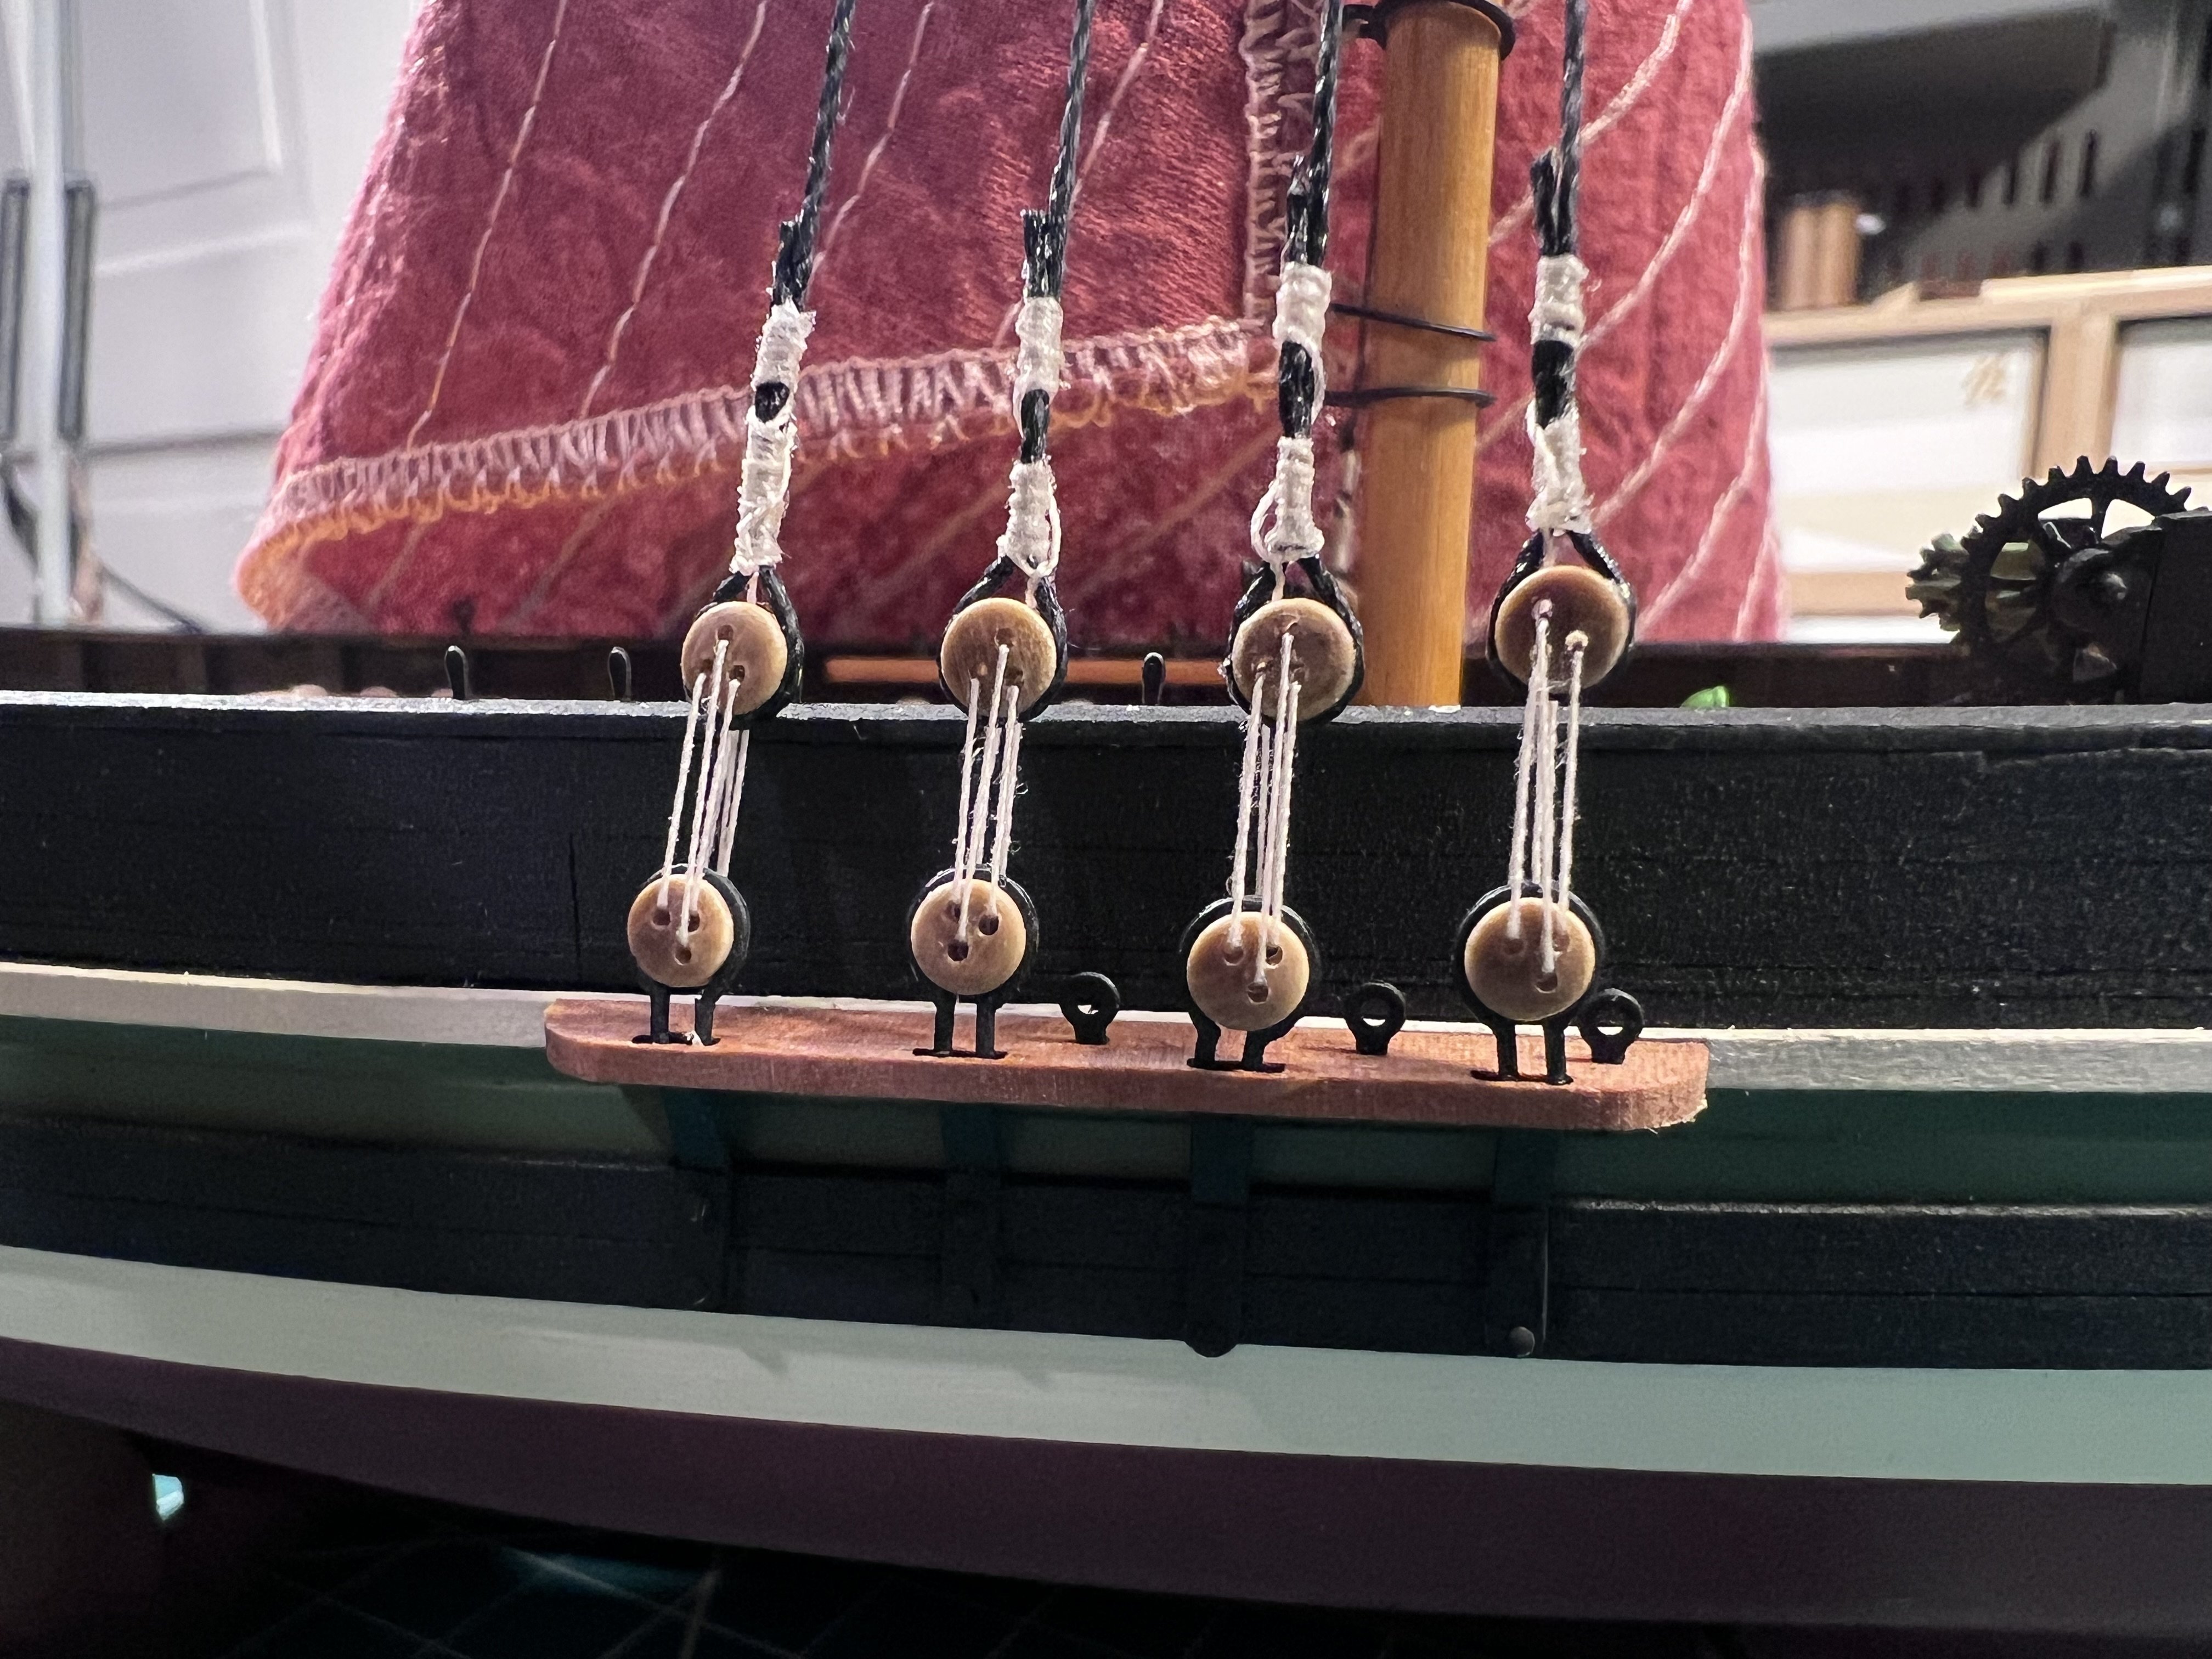
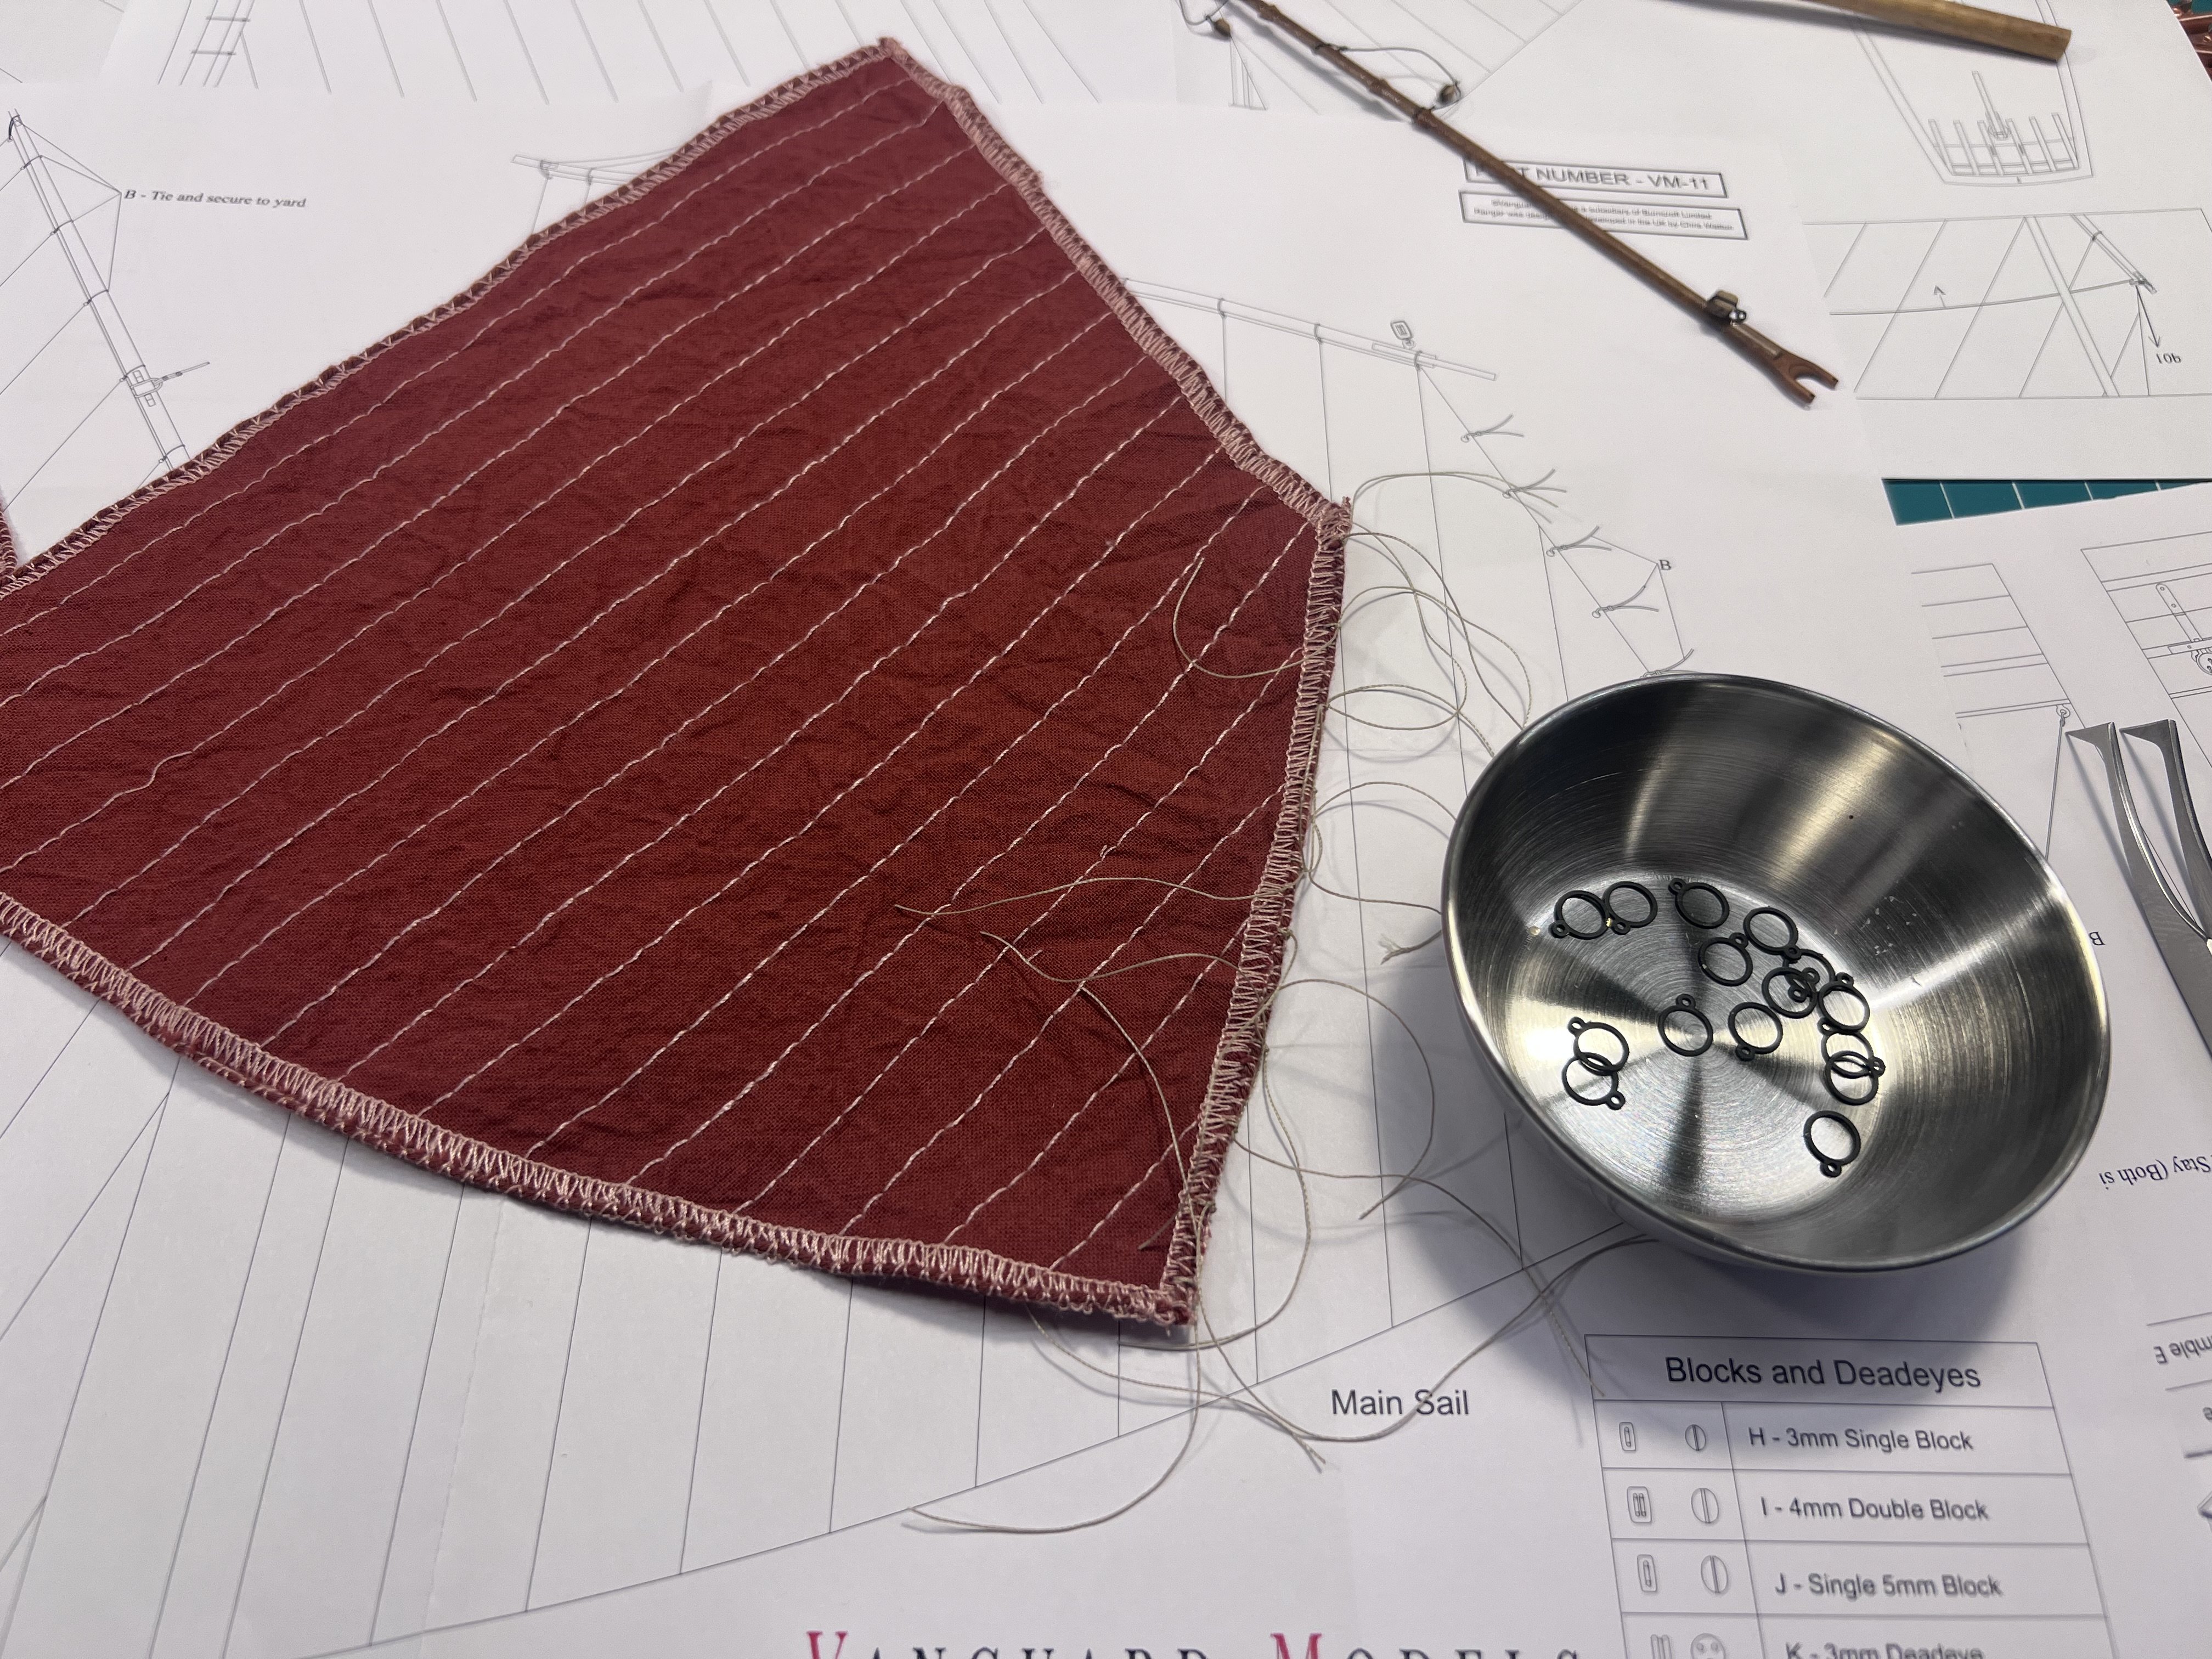
Added shrouds and deadeyes. Have one more pair to go.
I know my seizings are too long. I was trying a new approach and once I had the first pair and realized, I didn’t really want to take them out and start over.
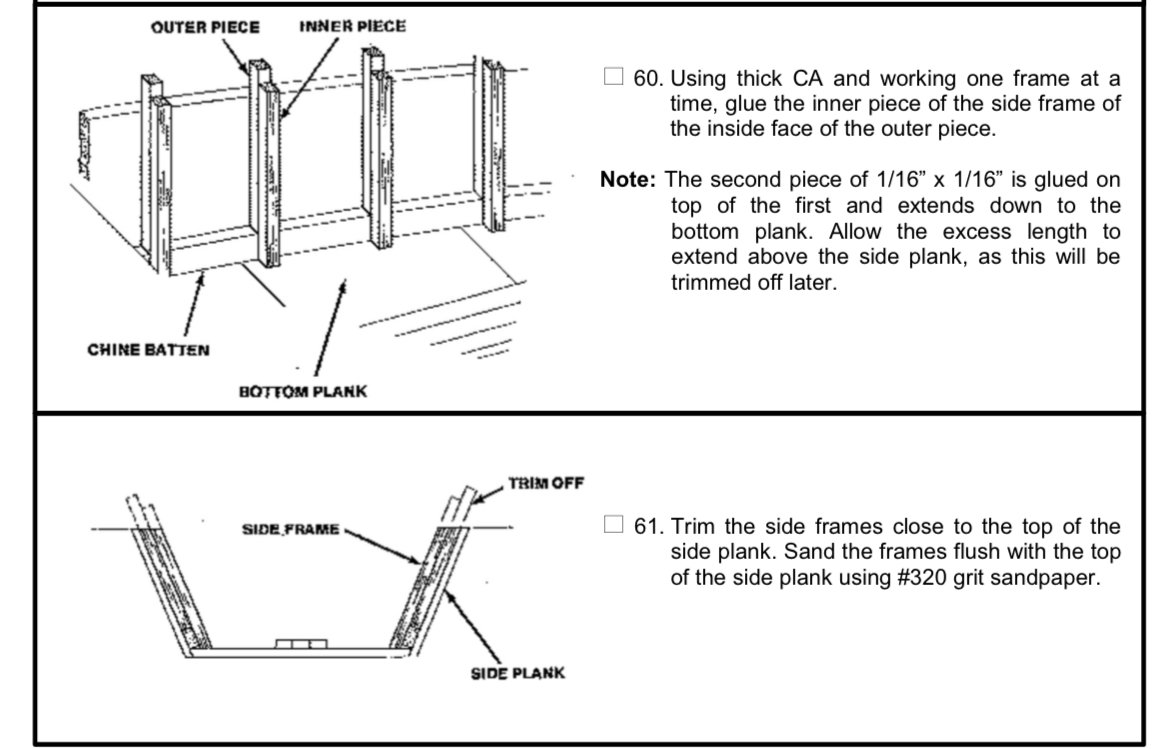
- Ronald-V, SiriusVoyager, robert952 and 5 others
-
8
-
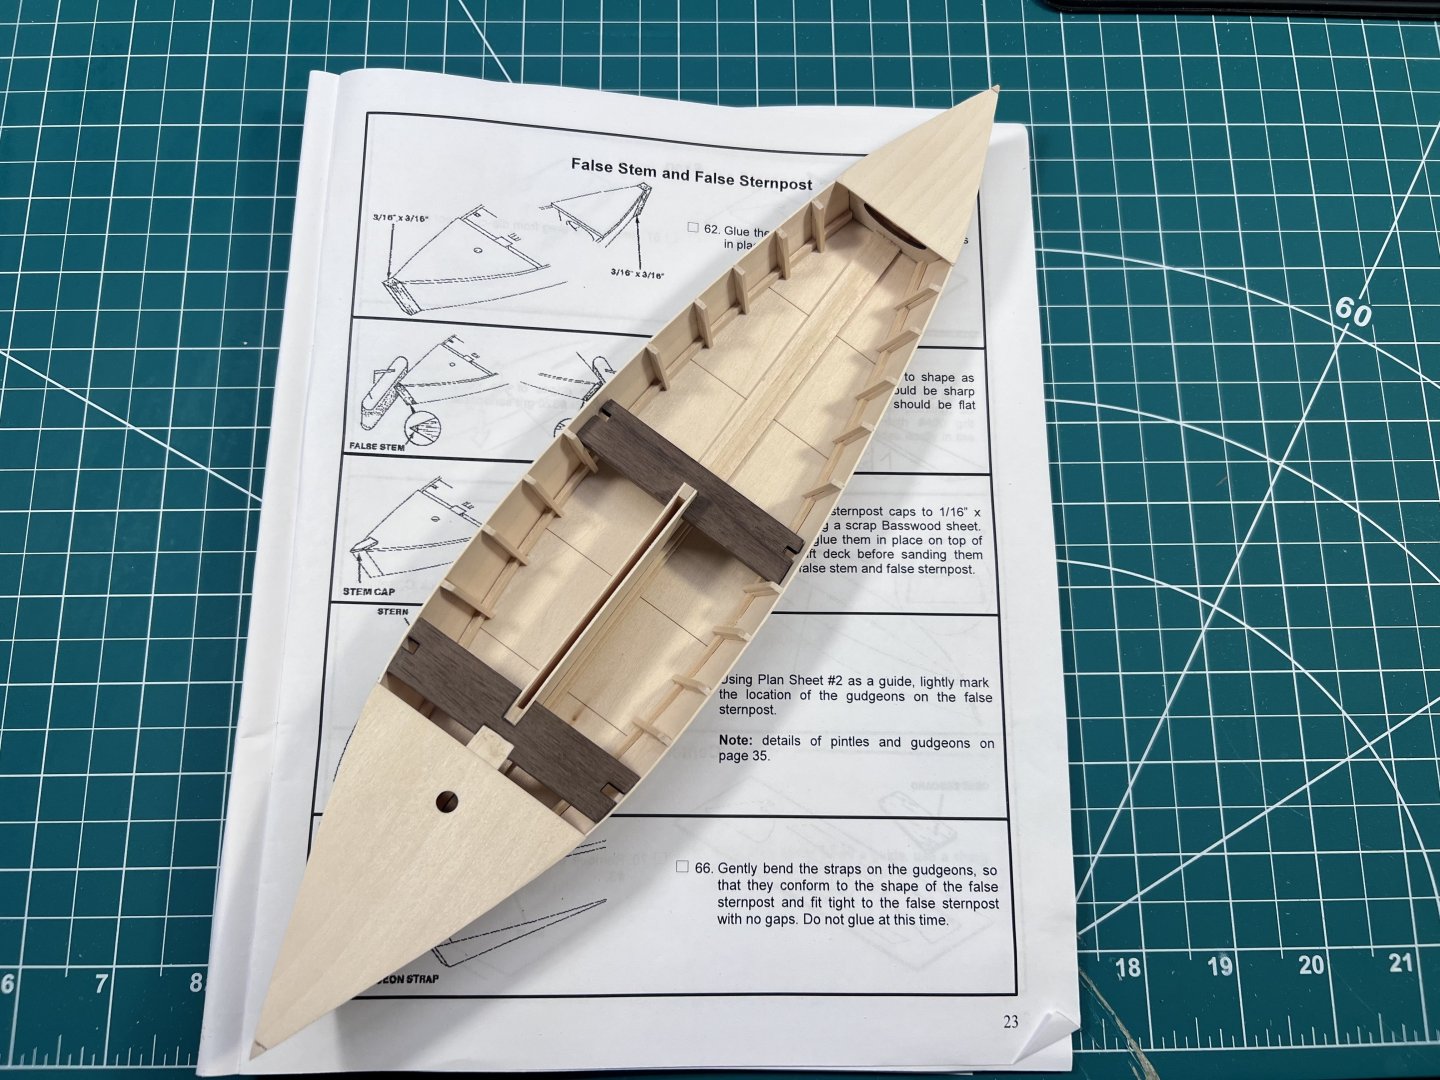
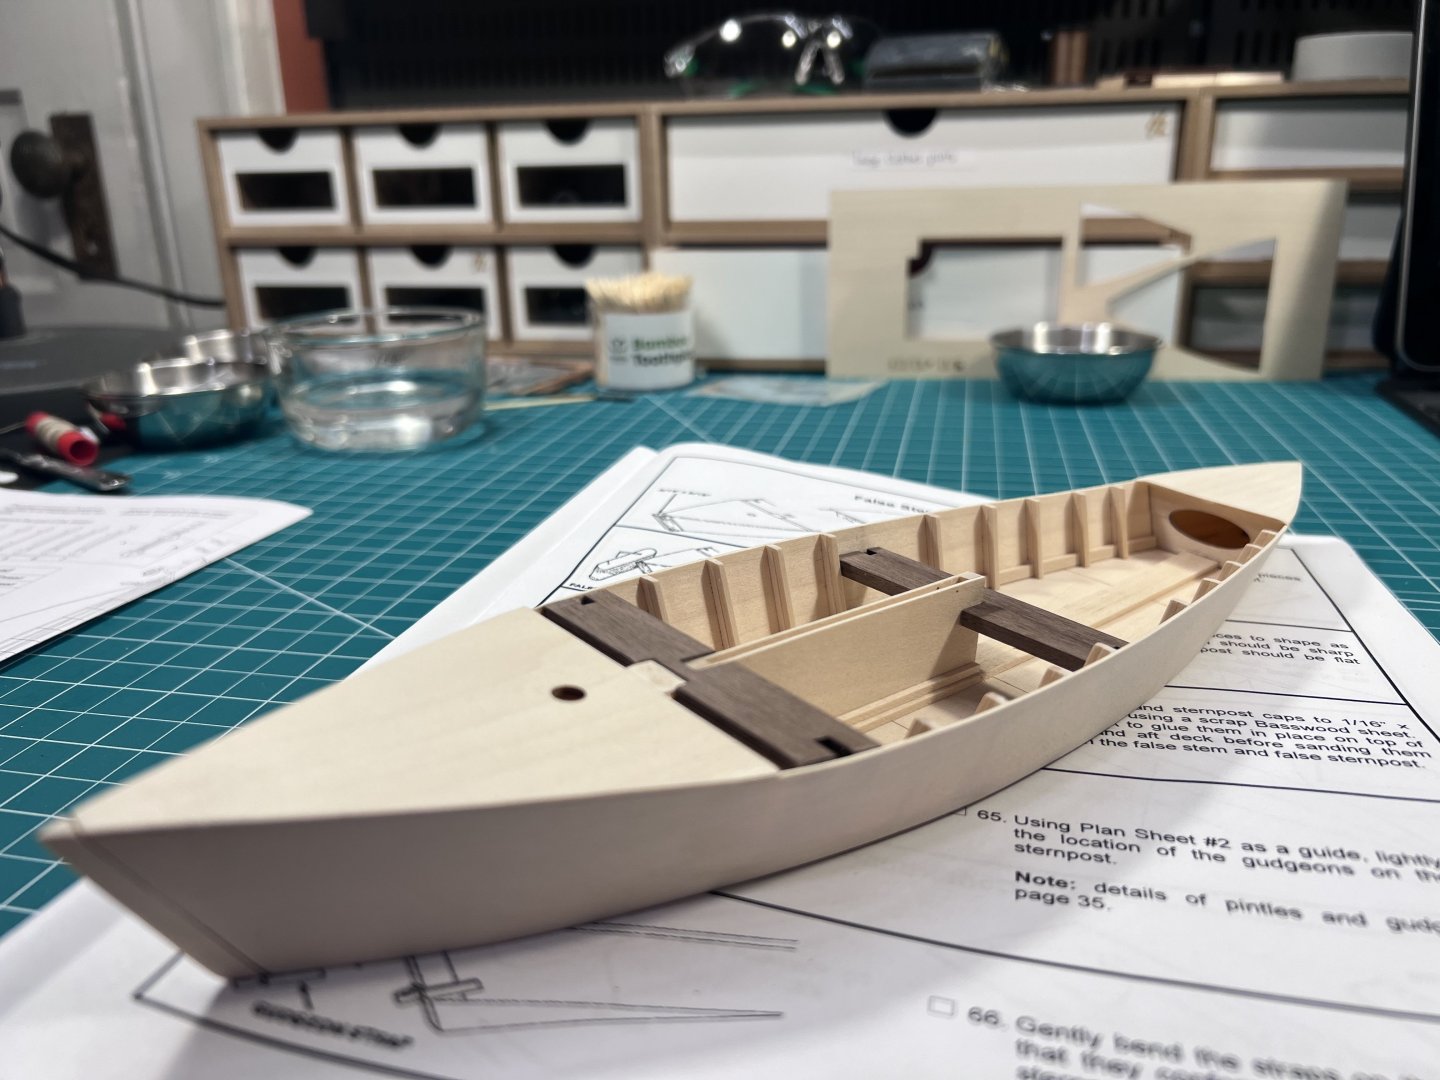
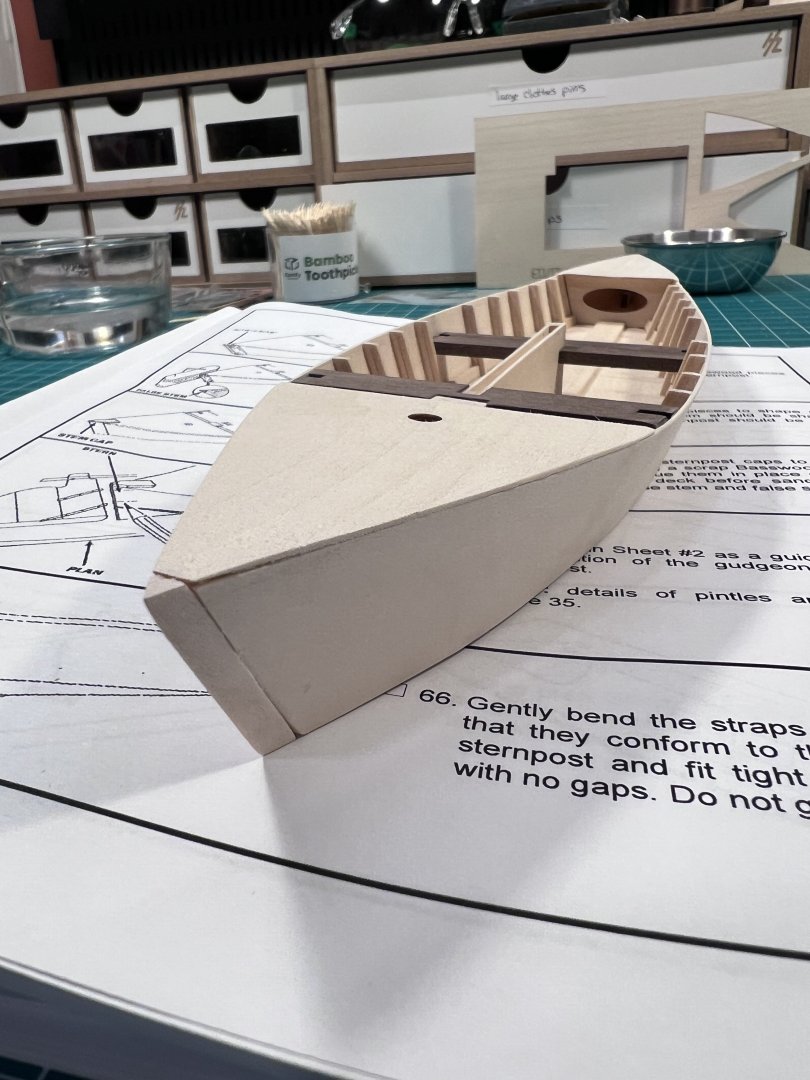
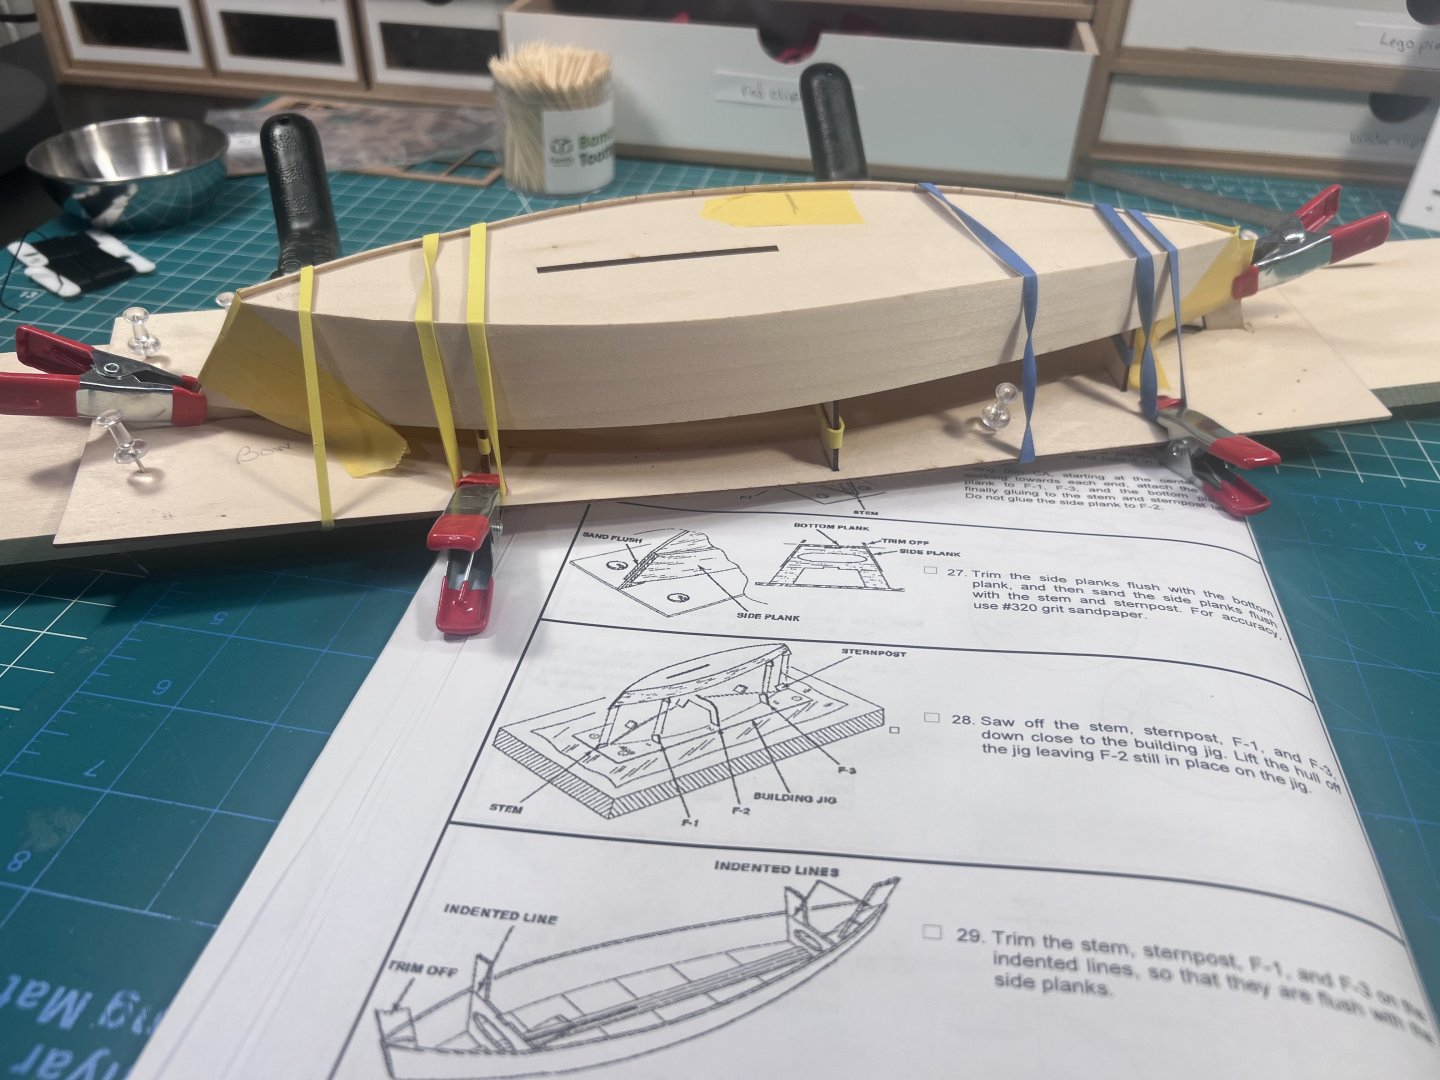
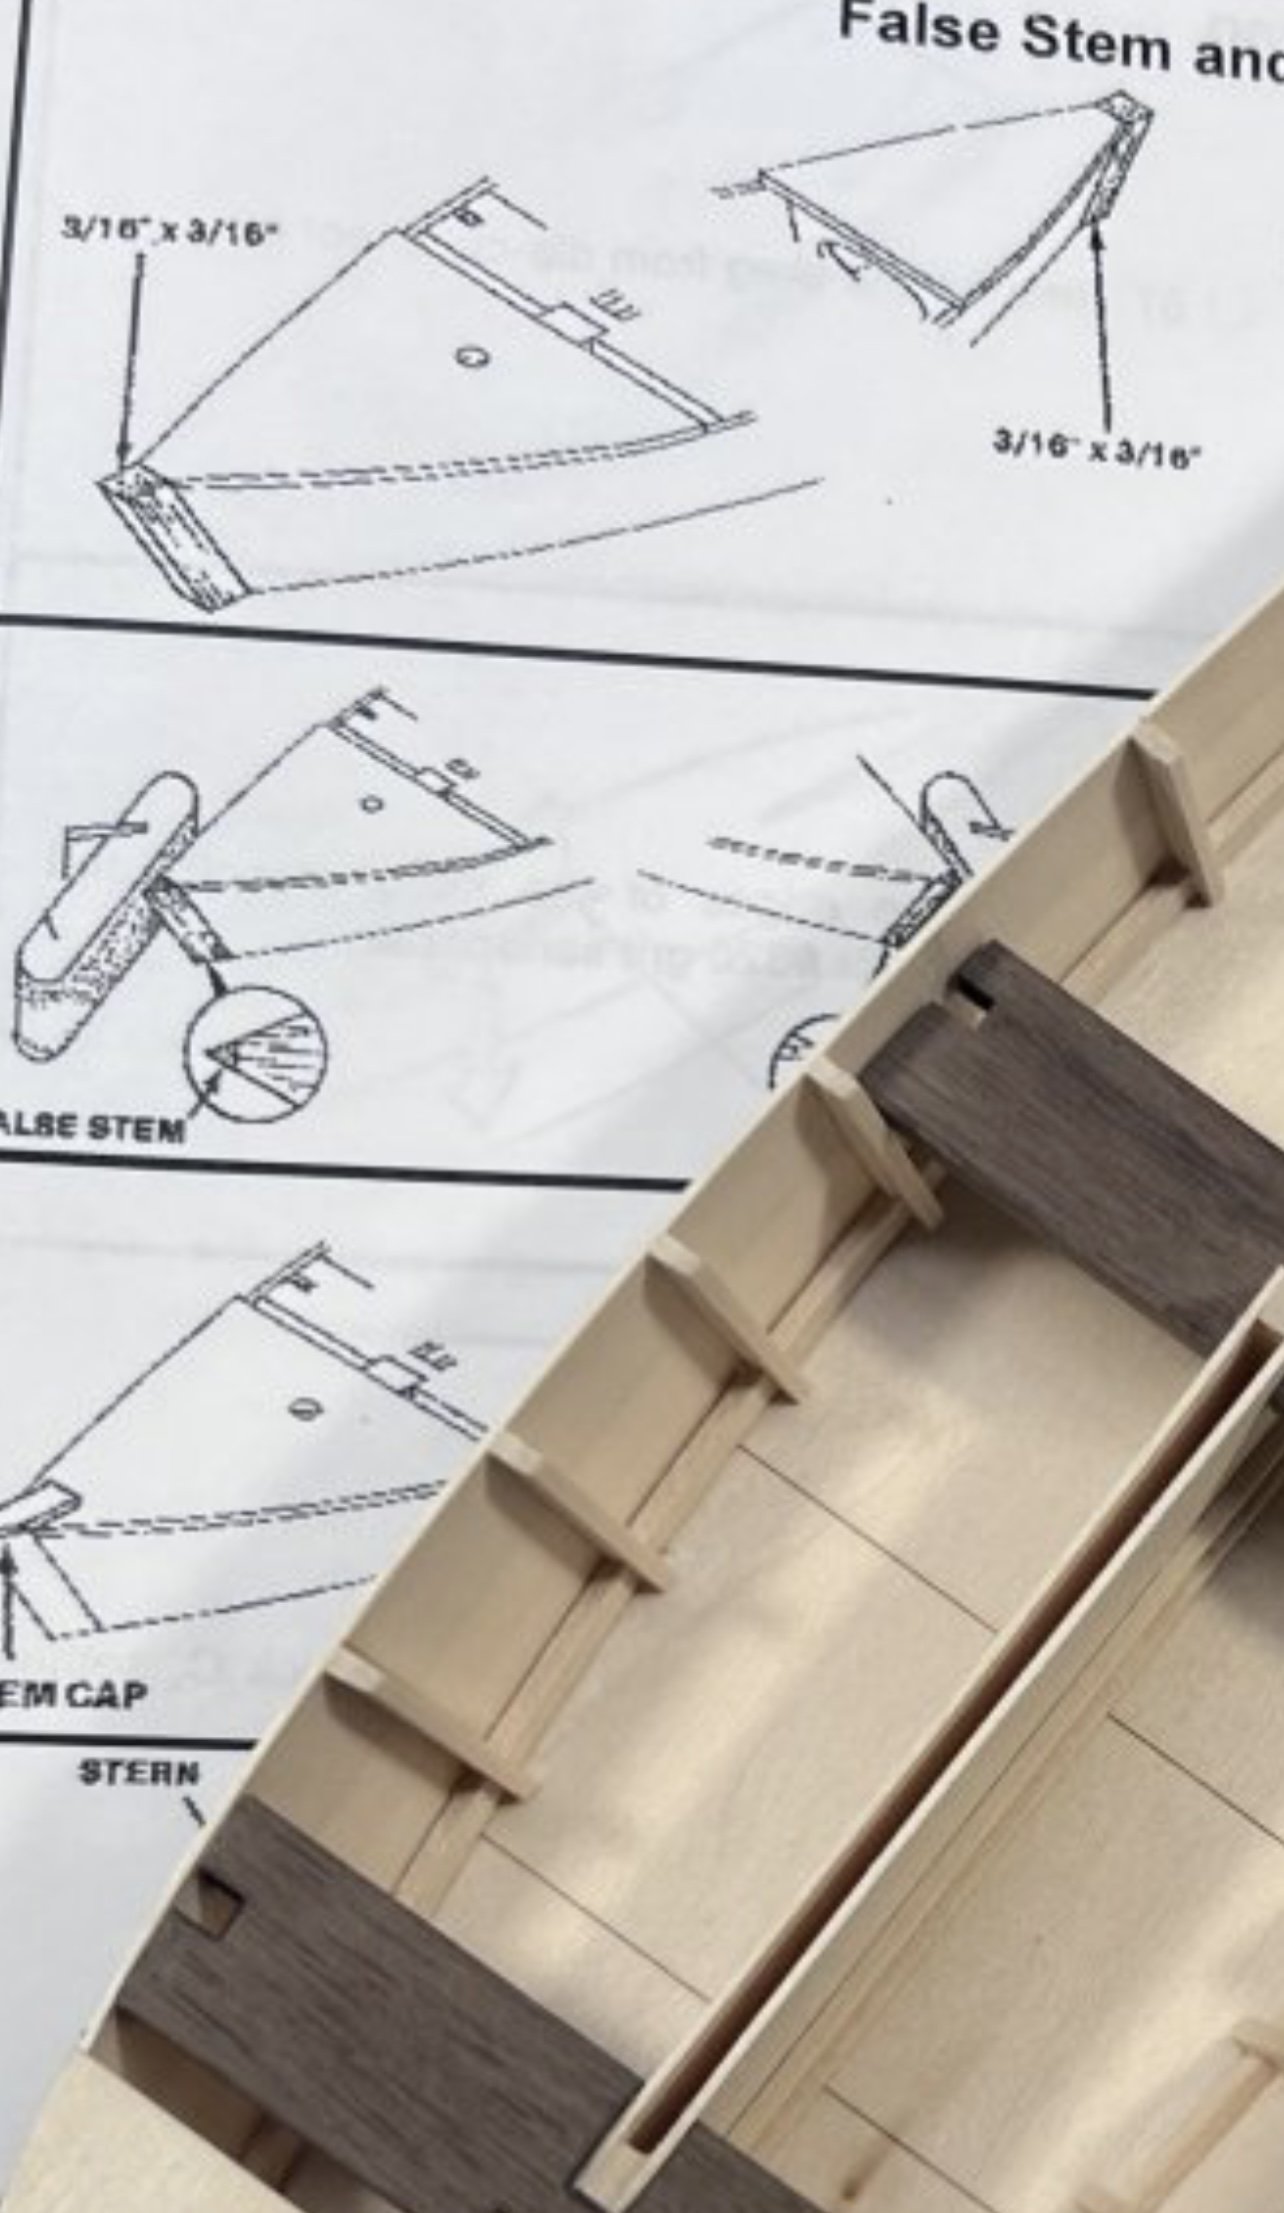
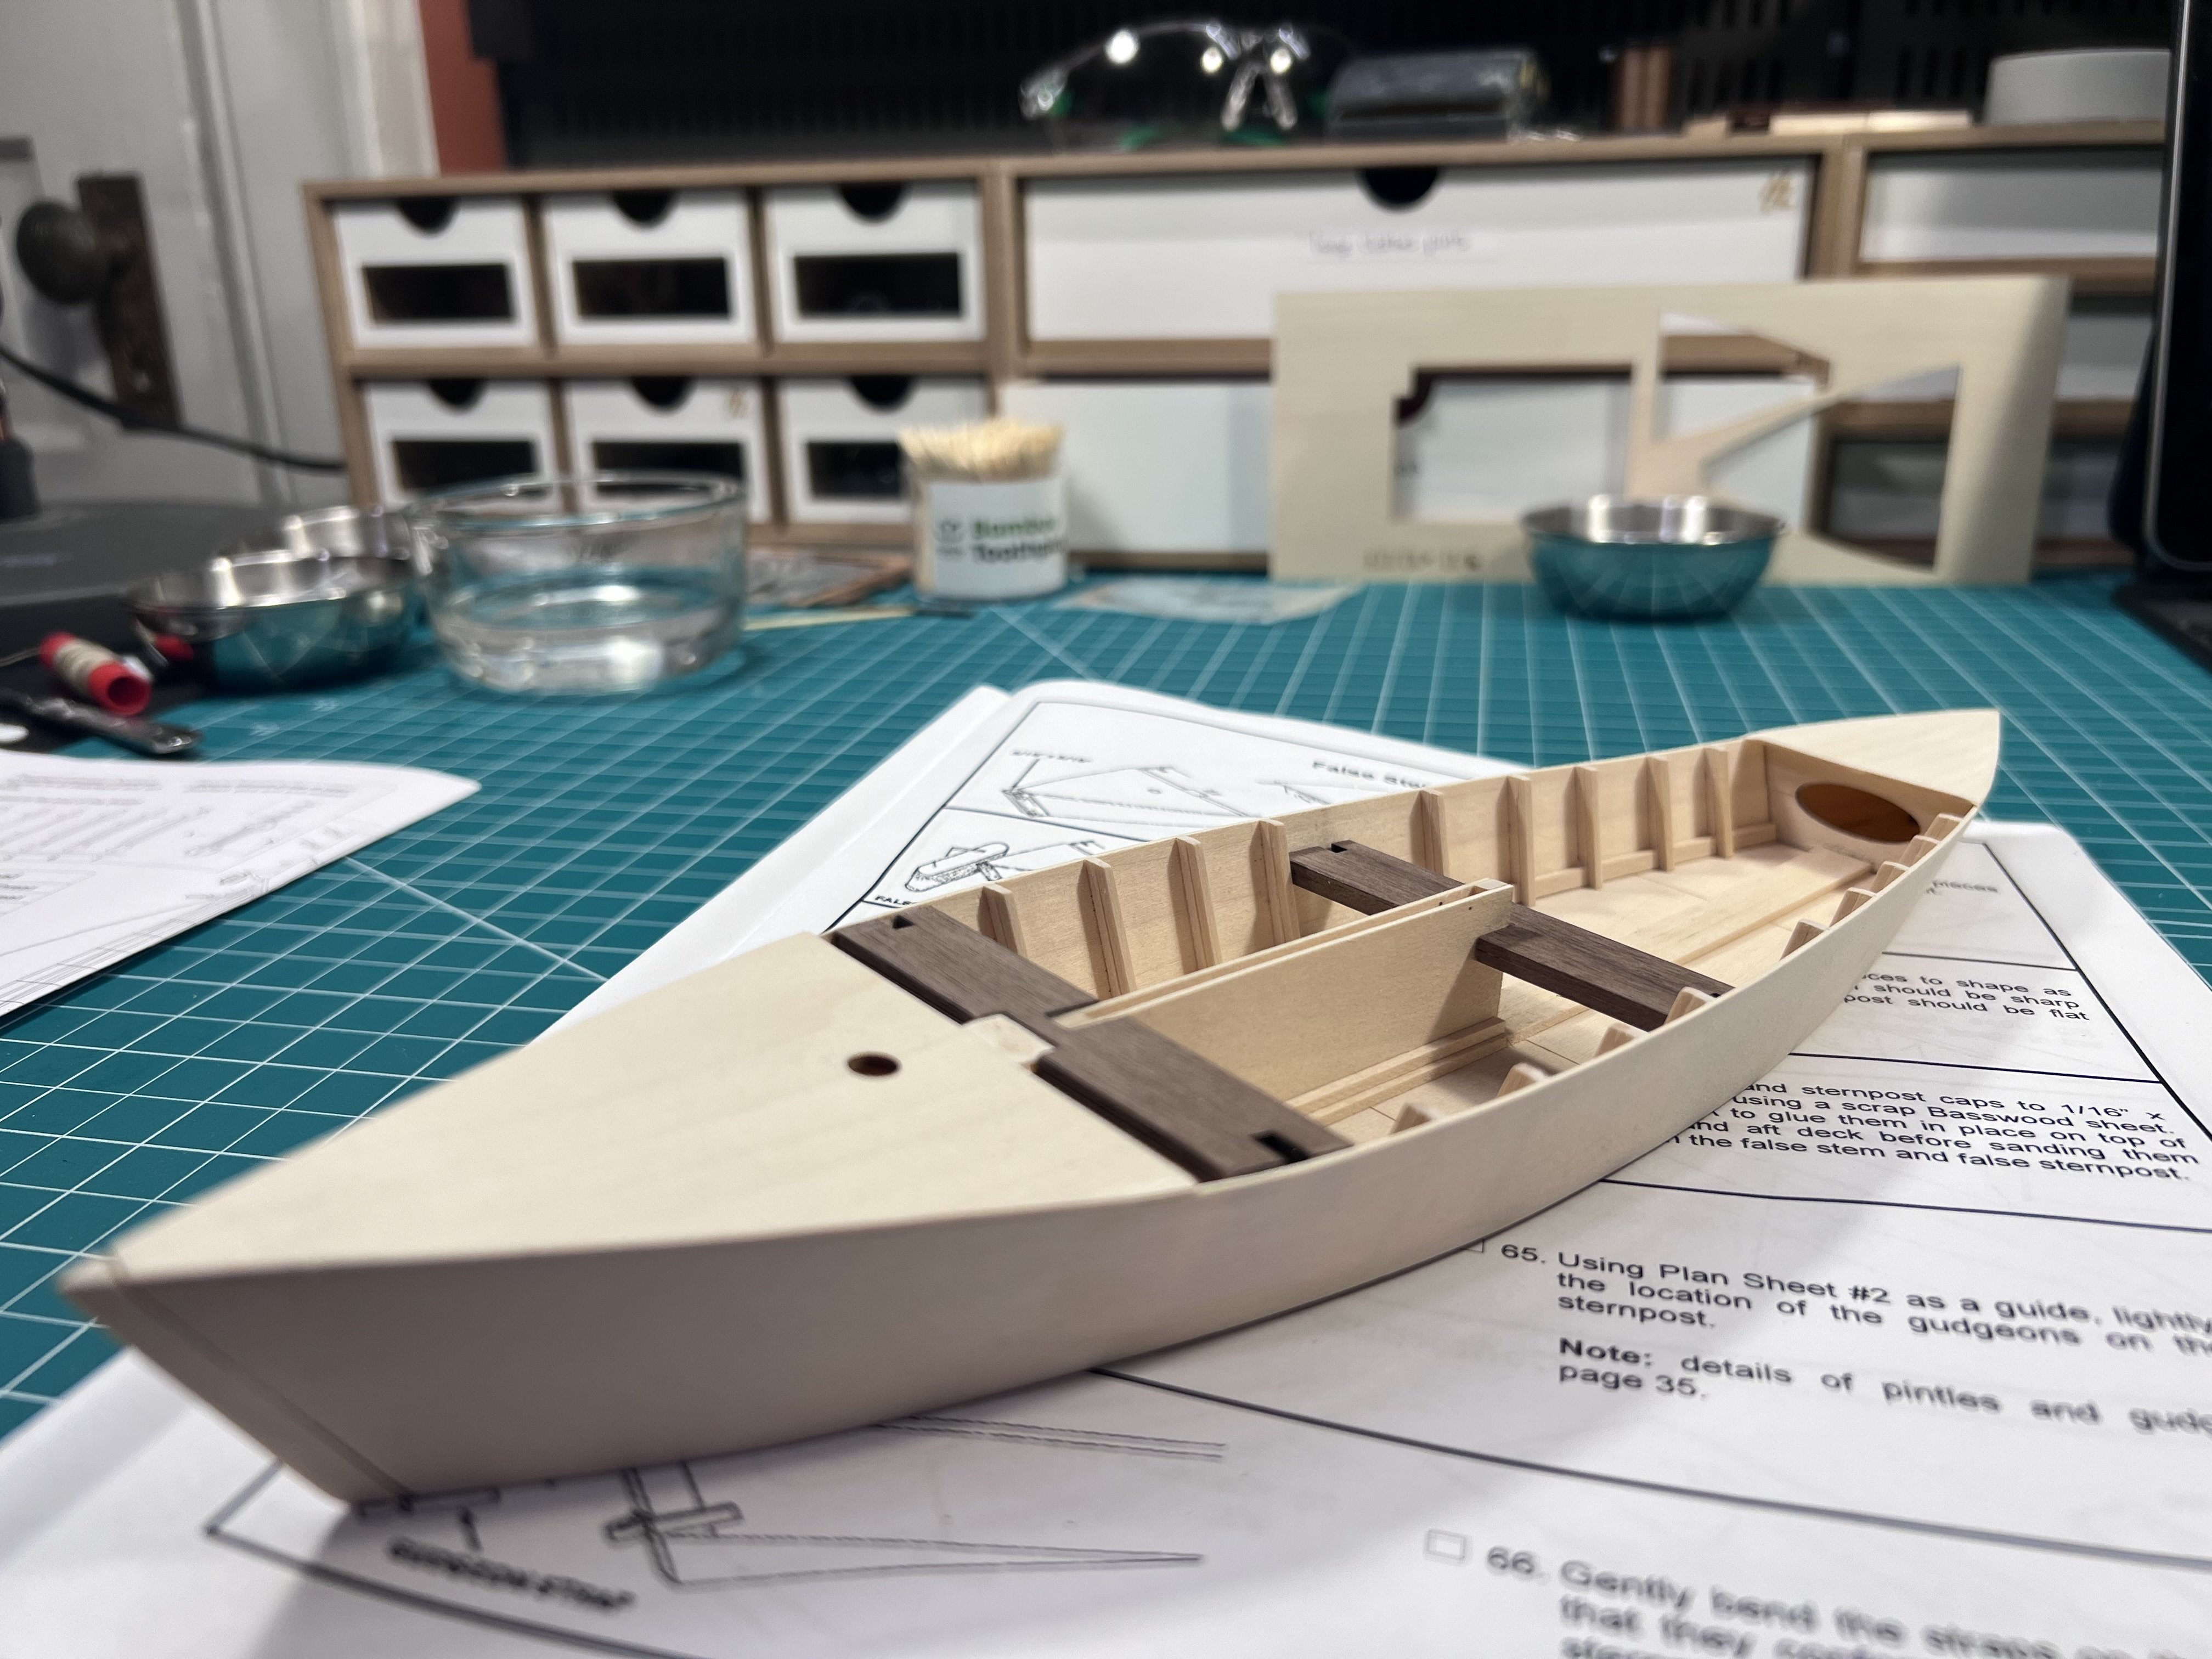
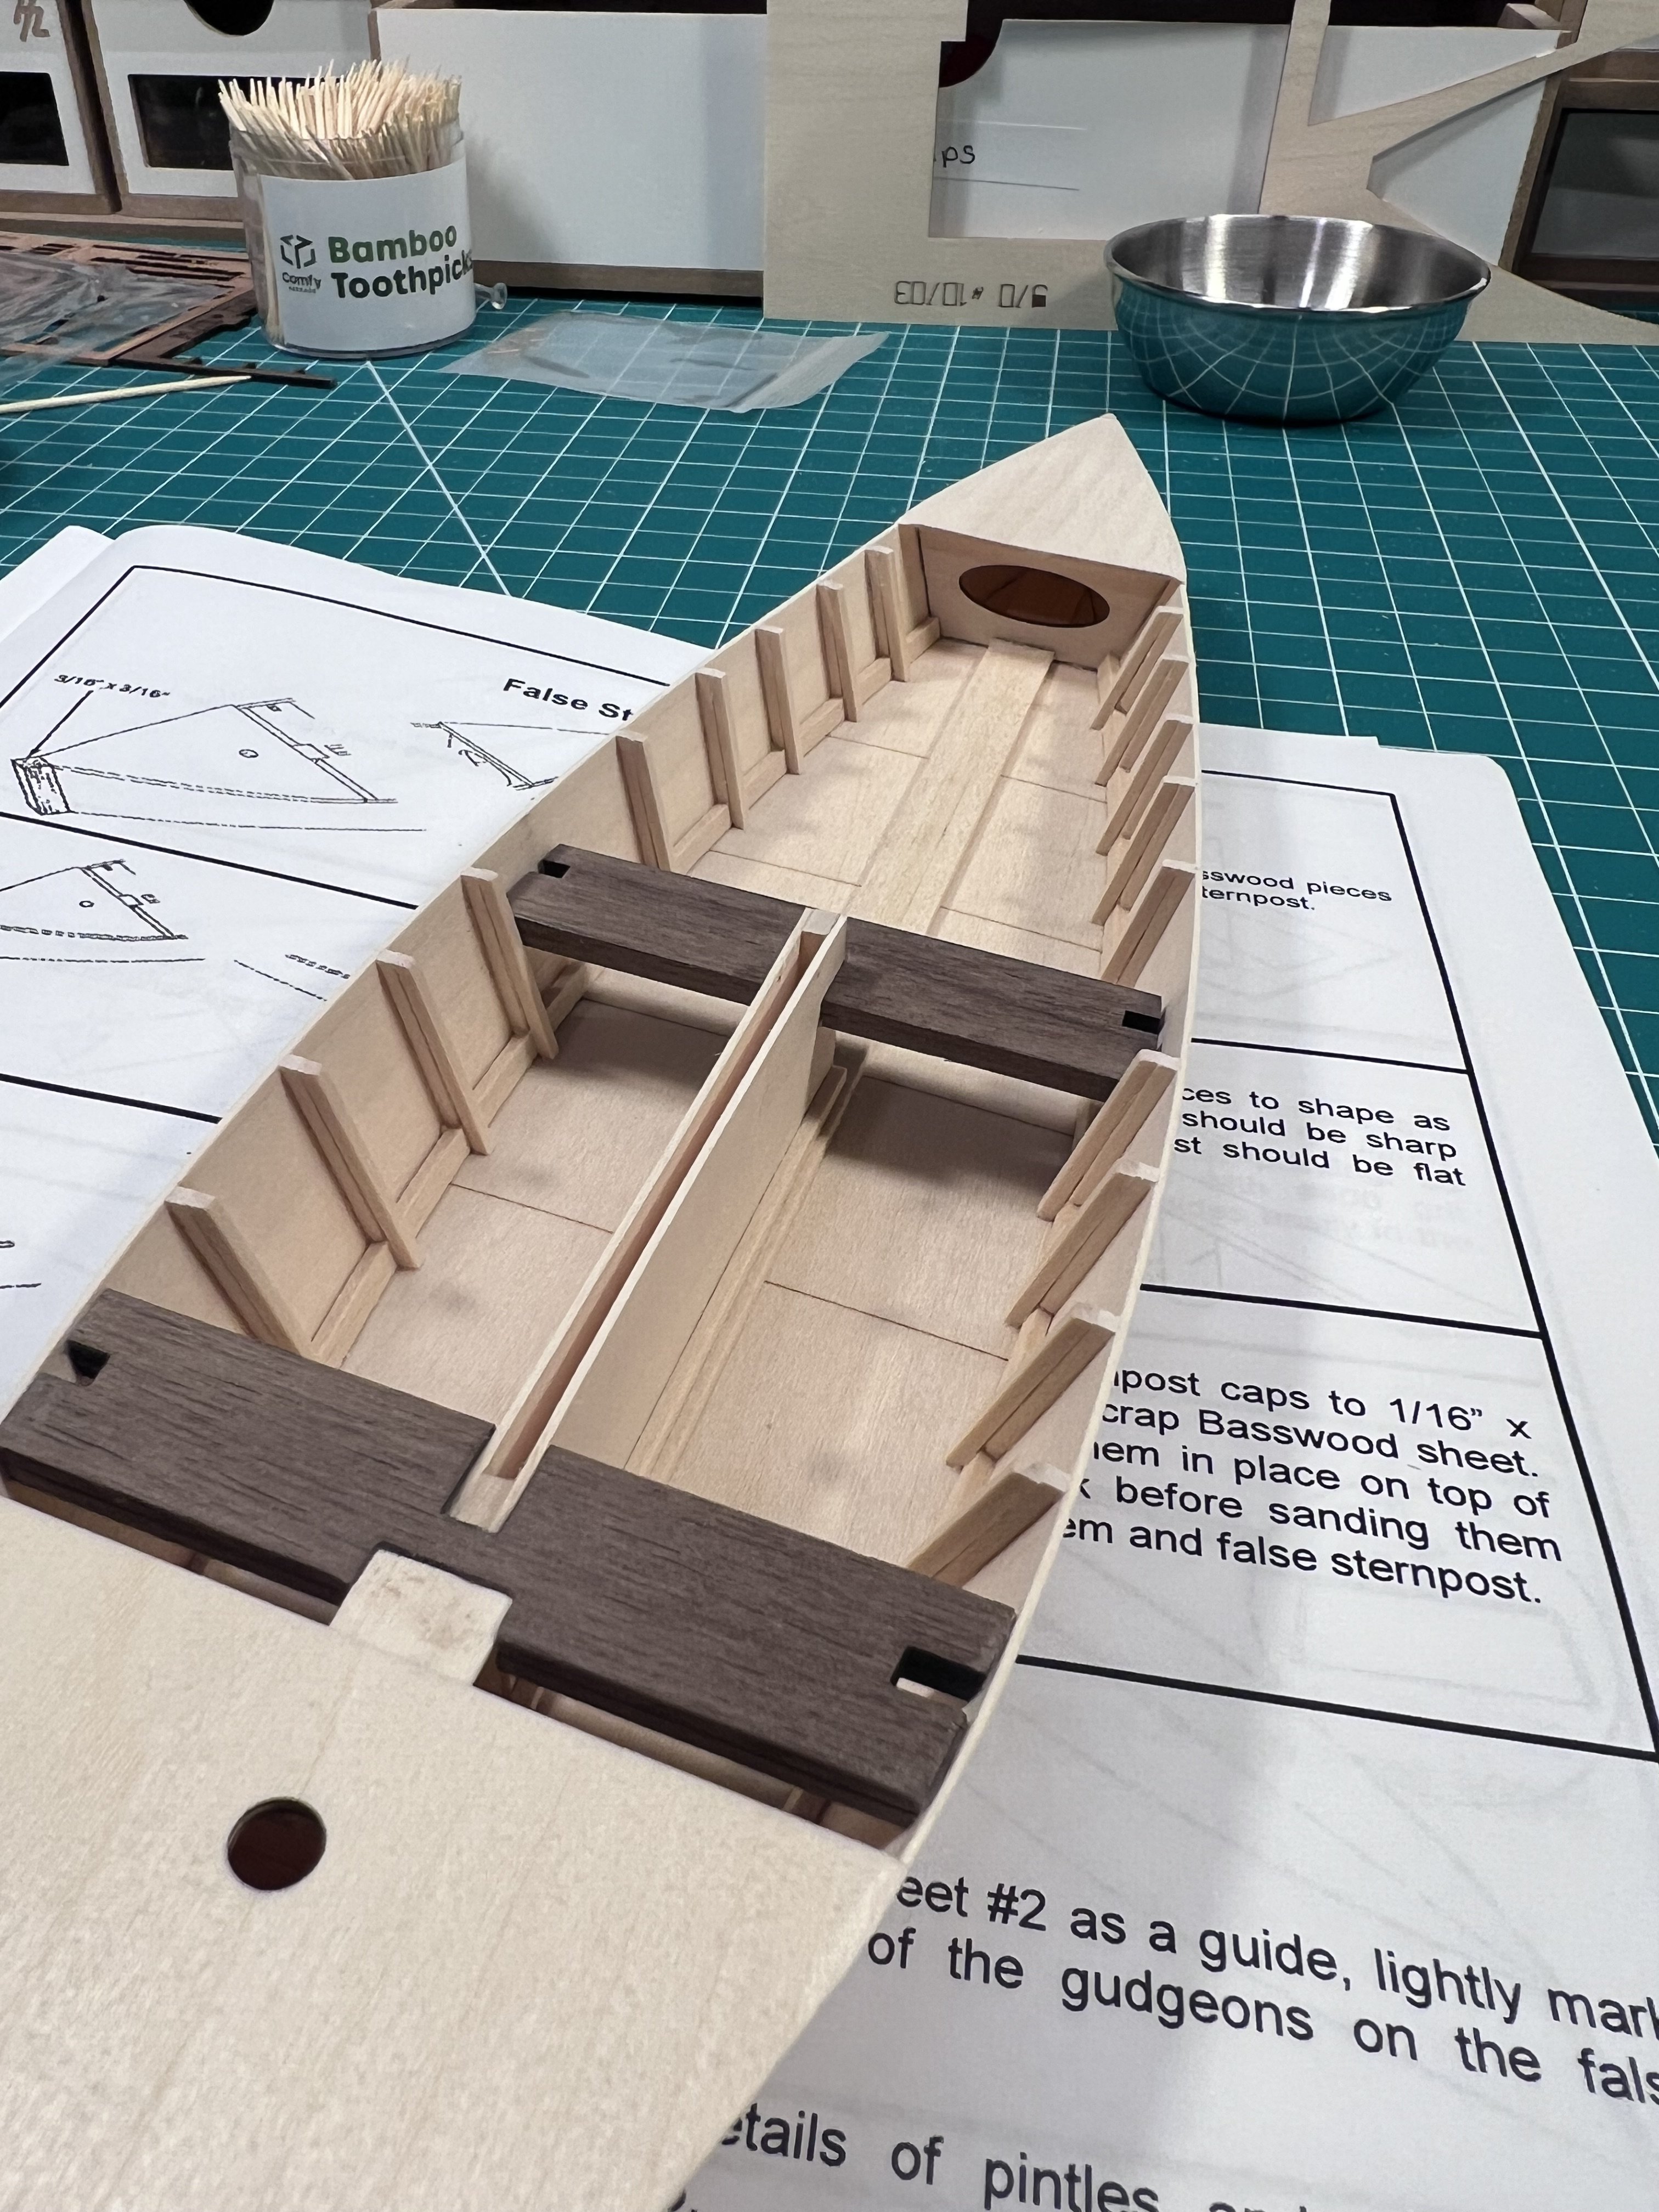
More progress on the skiff. Added the deck pieces, interior side frames, and false stem and false sternpost. Lots of sanding.

-
I have this in my stash too. After the Ranger I'm working on now, I'm doing the Zulu 'Lady Isabella'. Then the Erycina. I got all three of the larger Vanguard fishing vessels during an agesofsail sale last year. The first two are "Novice" boats, the Erycina is "Amateur" - maybe because the Erycina has two masts? It'll be interesting to see if there's anything else on this one that is more challenging than the others.
-
So I'm continuing to try to understand shellac, staining, and painting. On one of my current models (Chesapeake Bay Crabbing Skiff), I'm planning to use shellac on the interior (it has open interior), trying out a few options on scrap wood.
When the interior is done should I apply (1) wipe-on-poly (WOP) or (2) airbrush on Vallejo acrylic matte varnish or (3) Neither? What are the advantages or disadvantages of each - do I need either?
-
Making progress on the hull.
- SiriusVoyager and robert952
-
2
-
-
Sanded down the rough edge and cut the hull from the build board.


- JacquesCousteau, robert952 and Peter S
-
3
-
Maybe trying a model at a relatively larger scale? Olha Batchvarov is doing a group build of the Model Shipways Gunboat Philadelphia at 1:24. It's not a lot of small fiddly pieces. No tiny thin planks.
And maybe having the videos may help - not that you don't know what you're doing, but watching someone do it might help remind your hands how to do something.
I'm a neuroscientist (not a physician, not a neurologist) and with brain damage from surgery or stroke from my understanding it's trying to rewire (literally) your brain. It's slower to happen as an adult, and may depend on what brain areas were removed and what areas are close by, but other brain areas can sometimes take over lost functioning to some degree, but it takes practice. If you're seeing a physical therapist, especially one focusing on fine motor skills, you might ask them about what things you might want to do to transition back into your hobby. They might even see model building as a form of PT. Lots of people don't do their PT homework - having done a little myself for a relatively minor problem I know doing my "homework" was a chore - whereas building a model is a hobby.
Best of luck!
- Keith Black, CDR_Ret, Some Idea and 5 others
-
8
-
Ok, so as much as I said it was nuts to use CA, I ended up using medium gel CA to attach the plank (there’s a single plank on each side of this model) just to the middle of the base, then when it was set I used wood glue and clamps and rubber bands to attach the plank to the rest of the base and to the front and rear frames (the middle frame is removed). Need to be careful because basswood is soft and thin so easily deformed and dented.
- ccoyle, robert952 and JacquesCousteau
-
3
-
Curtis_Wooden_Shipyard has a nice video on attaching shrouds and deadeyes.
- Keith Black and robert952
-
2
-
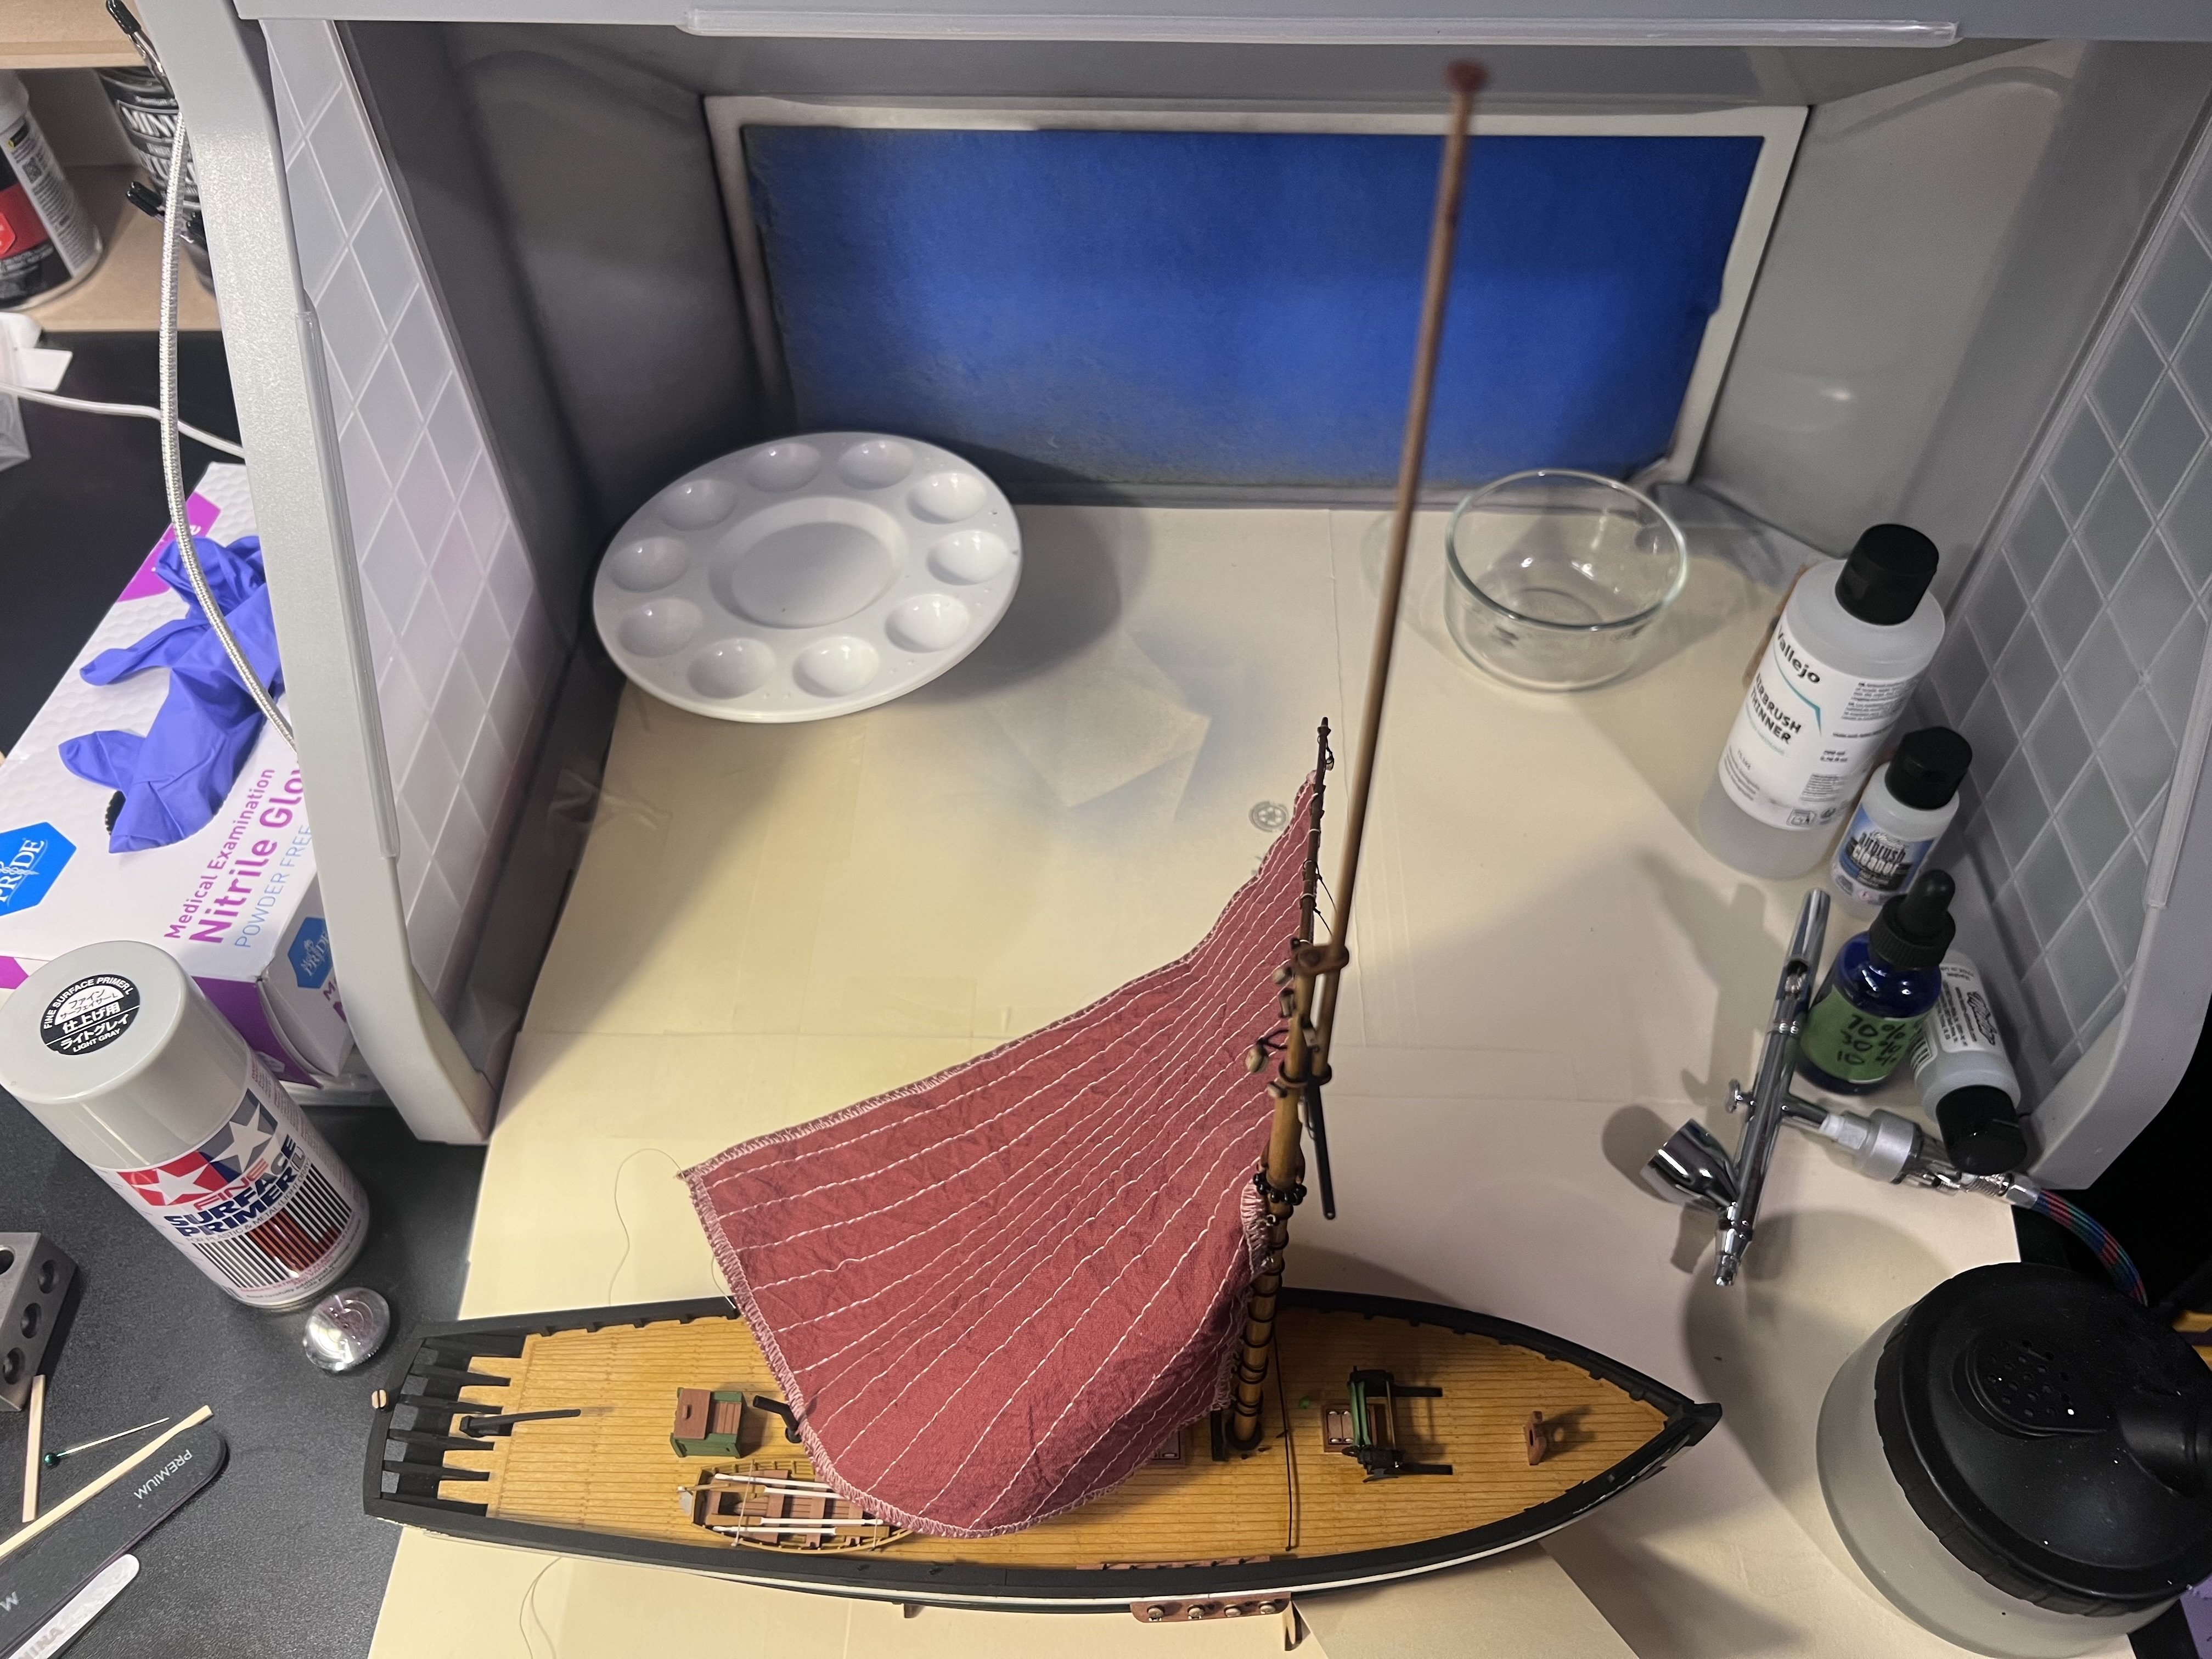
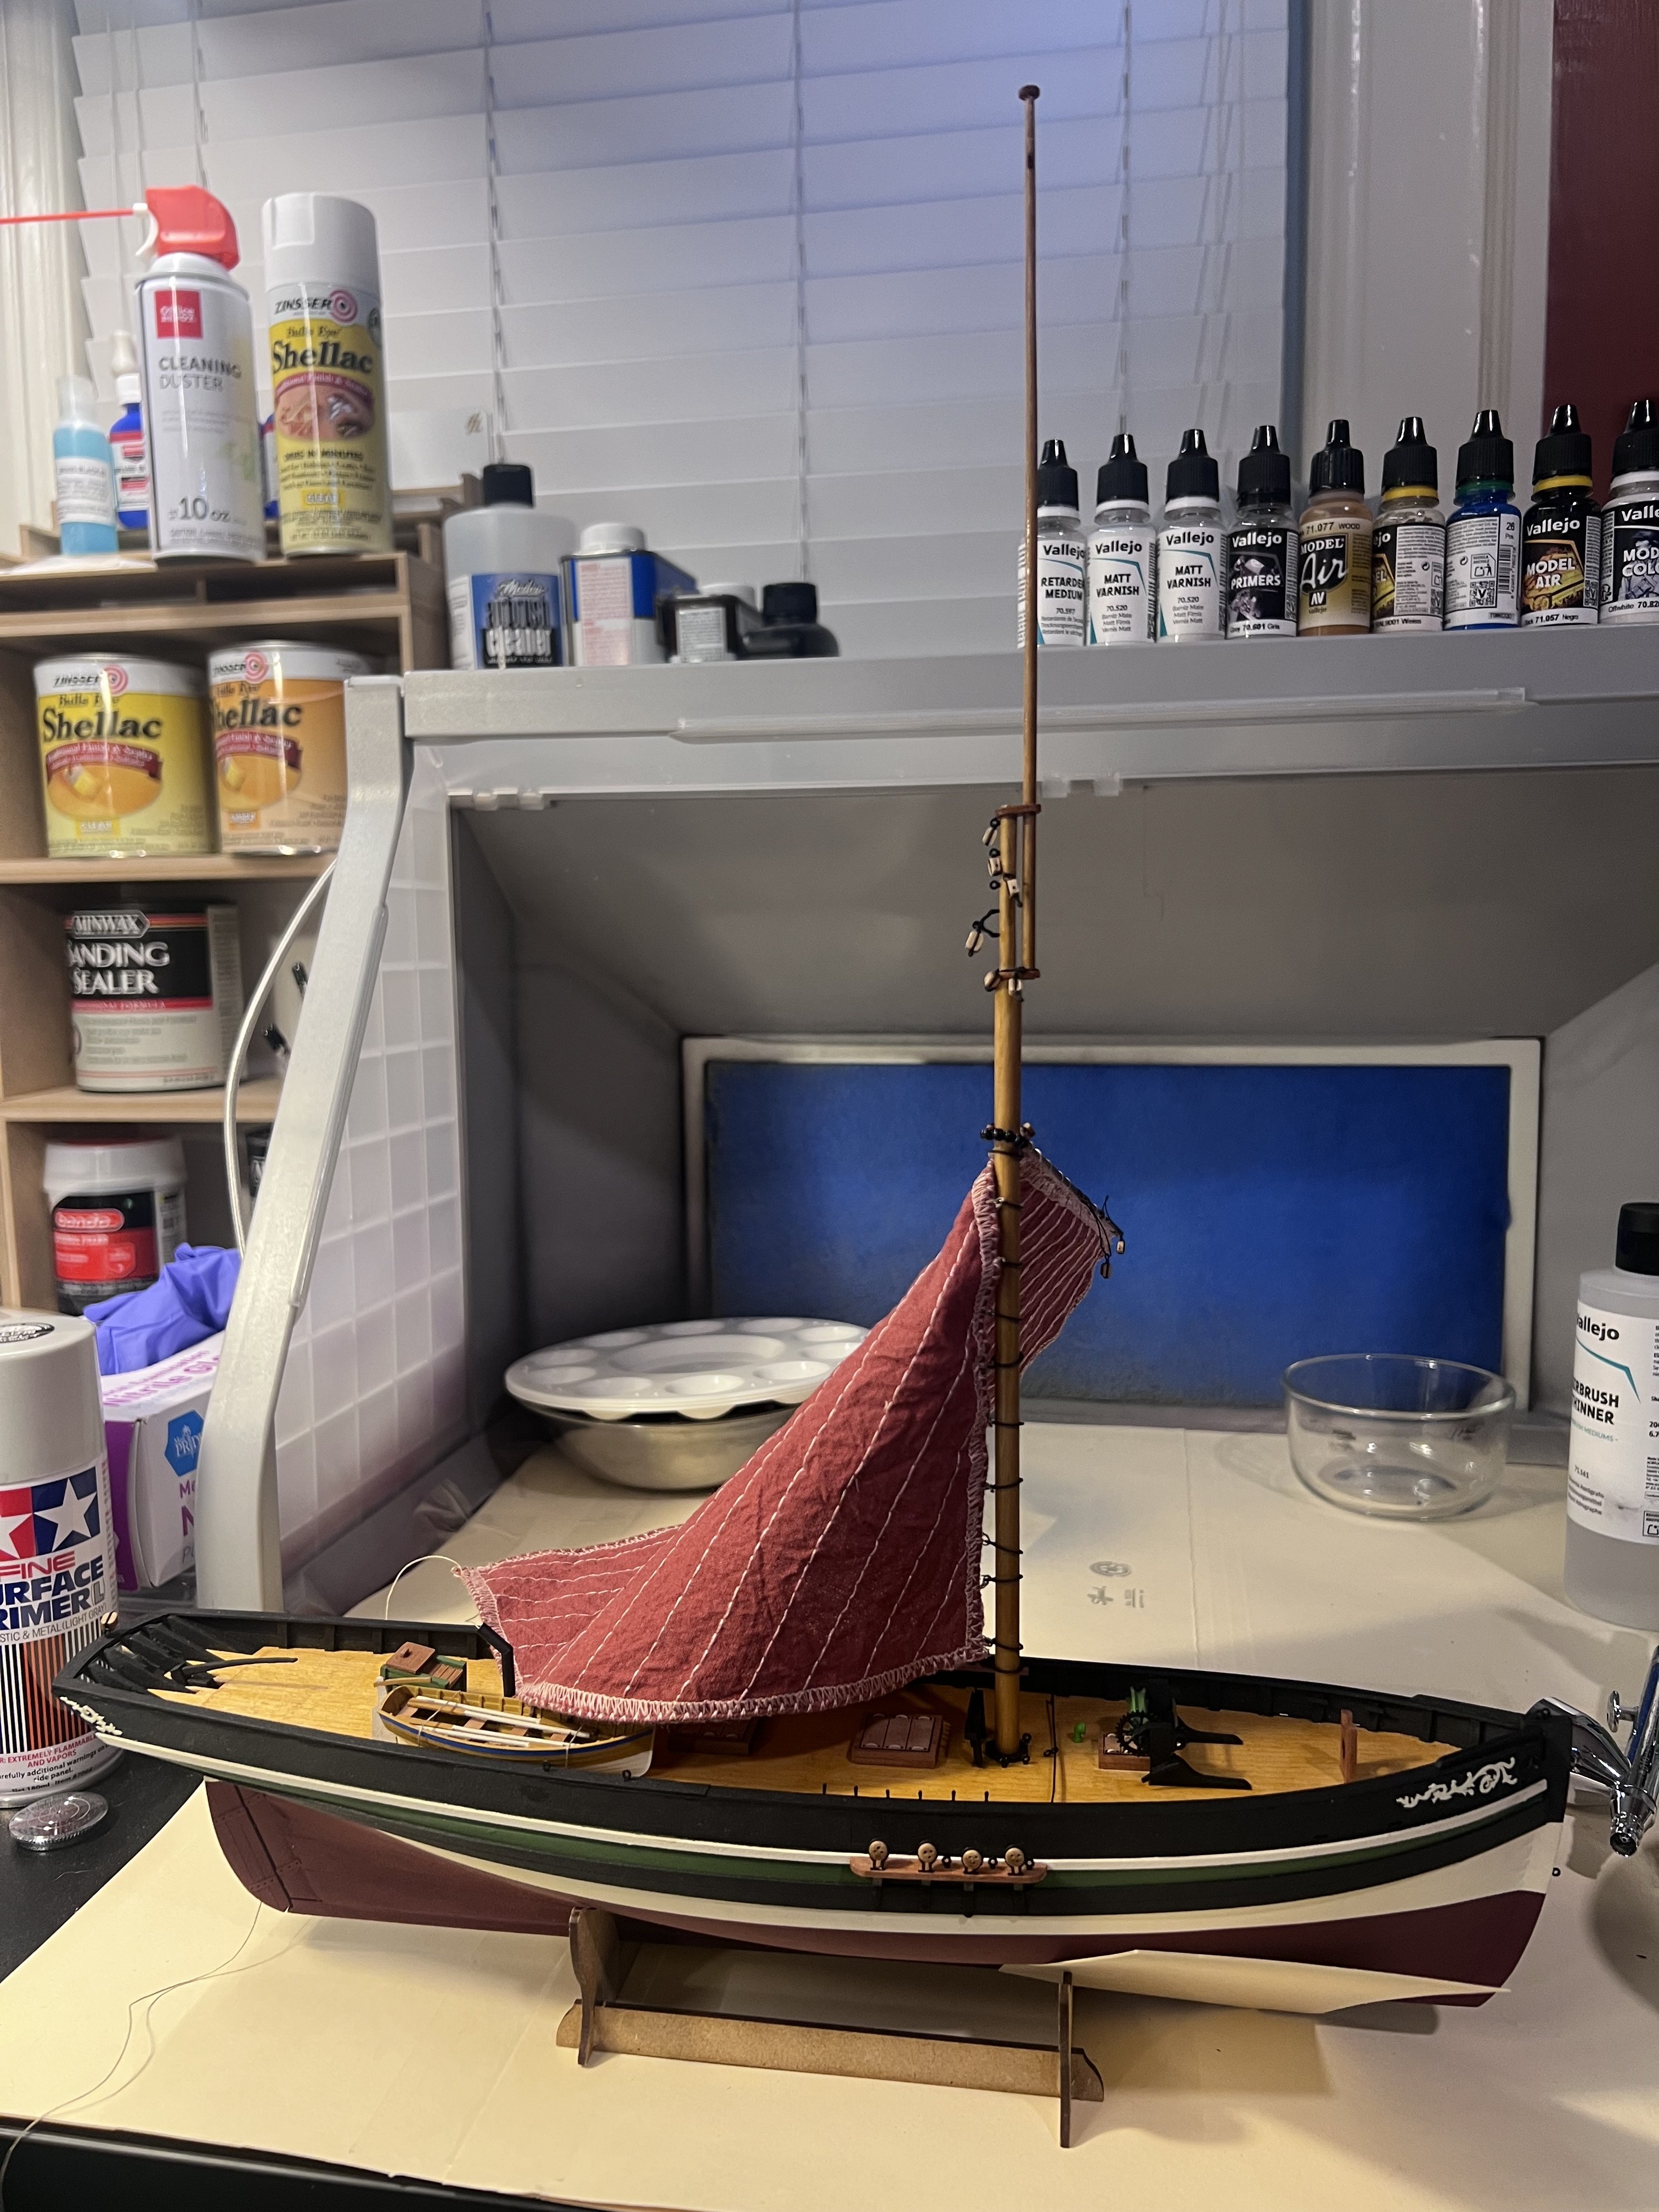
Getting ready to add the mast, start the rigging, and add the sails.


- Keith Black, robert952, Knocklouder and 1 other
-
4


Occre Soleil Royal Model Ship
in Wood ship model kits
Posted