
Supplies of the Ship Modeler's Handbook are running out. Get your copy NOW before they are gone! Click on photo to order.
×


Piet
-
Posts
3,568 -
Joined
-
Last visited
Reputation Activity
-

 Piet got a reaction from Kevin in Hr. Ms. O 19 1938 by Piet - FINISHED - scale 1:50 - submarine of the Royal Navy Netherlands in service 1939 - 1945
Thank you all for visiting and your likes.
Today, or at least this morning, I could spend some time in the shipyard. I managed to put the caps on 30 stanchions and started to make the diagonal braces for three of them, The most forward and aft stanchions need just one. Then the stanchion even with the forward edge of the con, about midship, needs a double brace, one facing forward and the other aft. That's the stanchion where the railing cable is tightened with turnbuckles. I'll have to simulate the turnbuckles with some pieces of tiny brass of tubing.
There is some progress folks but we're getting there.
I attached the diagonal brace to the most forward stanchion as well and prepped the one with the double braces. It is ready to be soldered, perhaps tomorrow afternoon???? If not then Sunday will do just fine.
Gwen needs to go to the surgical clinic for her carpel tunnel cleaning operation in the morning and won't be home till about 13:00 hours. Looks like we'll have a late lunch.
Here we have the most forward stanchion with its diagonal brace facing forward, of course. That's the stanchion where the railing cable is hooked to and tightened amidship with a turnbuckle. I was pondering whether to put the stanchion 90 degrees to the deck or to the waterline. I think that 90 degrees to the deck would look better. Right now they are all just stuck into the holes. They all have to be set at 25 mm above the deck and then secured with two part epoxy cement.
Cheers,
-
 Piet got a reaction from Adrieke in Hr. Ms. O 19 1938 by Piet - FINISHED - scale 1:50 - submarine of the Royal Navy Netherlands in service 1939 - 1945
Hello again. This morning I took the bull by the horns and removed all the old decals. If I have to repaint the effected areas then so be it. As it turned out I only had to repaint both sides of the con and the starboard bow. The paint on the con was discolored under the decals and with placing one before, the paint just looked terrible because i used a brush to repaint it. Just a sanding with some fine sandpaper, then wiping with a damp rag with enamel paint thinner, masking the area and shoot with a few coats of enamel paint.
Sorry Remco, I was going to send you a personal message regarding this but got so wrapped up with this that it was your bedtime by the time I finally had a minute. Had to help Gwen too, well you understand how that goes.
It only took an hour or so and I now have a good looking finish for the decals.
As the paint was drying I started to paint the railing stanchions and could only complete the starboard side. The port side will come tomorrow and then I need to give the railing cable a coat of dark grey paint. I have no clue what color they used way back then but the dark grey may off-set it nicely with the light grey.
I made a few before and after pics of the repainting project for my own records and archive.
This shows the masking off of the forward part of the bow. I could use the hull plating lines to prevent a paint ridge. I have added three coats of enamel paint.
This shows the masking of the con. Here I could not prevent a paint ridge at the aft end but it worked out that the very thin ridge kinda looks like a weld seam.
Here I have just removed all the masking. This pic was taken with flash and it shows the ridge at the red bottom and a few specs I need to address yet. I want the paint to dry and harden for a few days before i can work with it. It looks very good op close and I'm happy.
Yes Andy, the nav lights or side light as you call them, will get their correct colors and perhaps a lamp too.
Here is the con with all masking removed. Both sides look very good, better then before I must say. The sanding helped smooth it out quite nice.
Now comes the tricky part, putting the decals on - - - correctly!
Cheers,
-
 Piet got a reaction from FreekS in Hr. Ms. O 19 1938 by Piet - FINISHED - scale 1:50 - submarine of the Royal Navy Netherlands in service 1939 - 1945
Hello again. This morning I took the bull by the horns and removed all the old decals. If I have to repaint the effected areas then so be it. As it turned out I only had to repaint both sides of the con and the starboard bow. The paint on the con was discolored under the decals and with placing one before, the paint just looked terrible because i used a brush to repaint it. Just a sanding with some fine sandpaper, then wiping with a damp rag with enamel paint thinner, masking the area and shoot with a few coats of enamel paint.
Sorry Remco, I was going to send you a personal message regarding this but got so wrapped up with this that it was your bedtime by the time I finally had a minute. Had to help Gwen too, well you understand how that goes.
It only took an hour or so and I now have a good looking finish for the decals.
As the paint was drying I started to paint the railing stanchions and could only complete the starboard side. The port side will come tomorrow and then I need to give the railing cable a coat of dark grey paint. I have no clue what color they used way back then but the dark grey may off-set it nicely with the light grey.
I made a few before and after pics of the repainting project for my own records and archive.
This shows the masking off of the forward part of the bow. I could use the hull plating lines to prevent a paint ridge. I have added three coats of enamel paint.
This shows the masking of the con. Here I could not prevent a paint ridge at the aft end but it worked out that the very thin ridge kinda looks like a weld seam.
Here I have just removed all the masking. This pic was taken with flash and it shows the ridge at the red bottom and a few specs I need to address yet. I want the paint to dry and harden for a few days before i can work with it. It looks very good op close and I'm happy.
Yes Andy, the nav lights or side light as you call them, will get their correct colors and perhaps a lamp too.
Here is the con with all masking removed. Both sides look very good, better then before I must say. The sanding helped smooth it out quite nice.
Now comes the tricky part, putting the decals on - - - correctly!
Cheers,
-
 Piet got a reaction from Elia in Hr. Ms. O 19 1938 by Piet - FINISHED - scale 1:50 - submarine of the Royal Navy Netherlands in service 1939 - 1945
Thanks to everyone who visited and your like votes and all those who commented.
Hi Andy, Okay, it's dyslexia I tell you, dyslexia you understand- - - and I'm sticking to that excuse Hey, stupid is as stupid does. Thanks for the find. It'll be fixed tomorrow morning.
Hoi Remco, thanks for the compliment and re the decals? They are history my friend. I removed all the old decals this morning. The only areas I needed to repaint were the con. The decals kinda bleached the paint underneath, so I just sanded it down with extra fine sandpaper, masked it out and resprayed it. I did the same with the starboard bow section. The port bow and both sides on the stern are okay. I'll let the enamel paint cure for a day or so before I put the new decals on.
Hi Wacko Joe, that's a very nifty way of remembering what's port and what's starboard. That doesn't work in Dutch though Hmmmm, can I use that for an excuse - - - nah, I'll stick with dyslexia - - - to safe face
Hello Harvey, good seeing you here again and thanks for the compliment. Yup, the torpedo that's hanging in the sling is from wood and is a little light. Actually, I'm way ahead of you. I just happen to have purchased an aluminum rod for that purpose. I'll be making an aluminum torpedo to hang in that sling so it'll look more realistic. The wooden ones are for display on the final display board with some other stuff I already have two torpedoes loaded in the deck launcher.
Hmmm, that means that the dingy may also be too light. ummm, a brass dingy????
Hi Piper Joe, thank you for the compliment and you are always welcome here in my shipyard. Yes, I like to think that my father would approve of the model. Of course there are a few folks here who have helped in this effort and also keeping me straight on errors.
Well hello Andrieke, it's so good seeing you here, we missed you greatly. We even send an APB out to find you. Looking forward to updates on your build. Thank you for the compliments my fiend. Stay well.
Hi Popeye, thank you for the compliments, appreciate it very much.
Hello Michael, thank you as well and also for the URL. I may just buy a few items from them. Some of the things I didn't make because it's just too difficult and time consuming can still be replaced with store-bought parts to enhance authenticity. As I mentioned in several posts, I strived to making everything myself or have friends make them, rather then buying parts from vendors. It's perhaps my stubborn streak in using only "homemade" parts. Raw material is of course understandable.
Hoi Hans, van harte dank voor de compliment - - you are most kind.
Hallo Sjors - - Piet op de O19 rapporteert, over. Hell Sjors, Piet on the O19 checking in, do you read?
Thank you my friend, she's slowly taking shape.
Hi Pete, thank you !!!
Hello Dave, also my thanks to you for your kind words. Yes, it was / is indeed a fun and challenging build. There's still a lot more planned for her, we are not done yet but those things will be on the back burner.
Cheers to all,
-
Piet got a reaction from Elia in Hr. Ms. O 19 1938 by Piet - FINISHED - scale 1:50 - submarine of the Royal Navy Netherlands in service 1939 - 1945
Hello friends,
I have been quietly and slowly working on the O19. I finished the starboard railing, which worked out better then the port side. At least I didn't have to go back and redo two stanchions All of them are as close to being correct as possible, at least I'm happy with the results.
Then it was off to installing the sense antenna. This one is laced to a steel cable that runs from the port side of the con to the bow and back to the starboard side.
I used 0.2 mm brass wire for the support cable and stretched it to make it harder and stiff. I had already made the bow attaching hook a few months ago but now I had to put both ends of the support cable into the hook assembly and solder them. I also cut a bunch of 1 mm brass tubing into 0.5 mm pieces to act as simulated tension devices. (sorry Amateur Jan, just simulated ) The antenna cable tensioners I used when I was running an aircraft repair facility were some ver nifty gizmos. The were internally spring loaded and the cable is attached at one end and the other end to the airframe.
These were all soldered to the support cable at their appropriate locations per the drawings I have. I took the finest black sewing thread for the actual antenna cable and laced that to the support cable at set intervals. The lacing cords I made up from splitting the sewing thread and used the two nylon filaments inside the tread. This is thinner then fly-tying thread and strong too.
I used clear nail polish to secure the lacing to the support cable with the antenna cable and tried to leave a few sagging like loops. In real life the weight of the antenna cable will sag naturally between the lacings.
Well, it looks like that most of the hard work is done except for painting the railing and general paint touch-up, the replacement of the ship's numbers, the boarding ladder and the dingy.
Remco was able to obtain new white numbers with black outlines that are printed on clear decal paper. I am mighty obliged to him for his help. He was not happy himself with the color mismatch and now I can just put these new decals right over the paint, awesome
That'll be my next project before painting. I don't know how much damage I may occur by removing the decals. I did already spray them with a sealer so soaking with water may not work. But then again, touching up paint is not a big problem for me. After I'm done no one will ever notice
Okay, here are a few pics of my efforts of the last few days.
This shows the antenna installation and the starboard railing. Emphasis is on the antenna. The details I mentioned above may be visible when you enlarge the picture. We can now find our way by using radio beacons or low frequency broadcast stations. On the last picture you'll see the DF antenna.
I made a close-up for a more detailed look at where the support cable is attached to the torpedo loading boom bridge. Those two and three little humps are the tensioners.
This is a detail pic of the con side antenna hoop-up. You can see where the antenna cable is routed through a conduit down to the radio / navigation room. That round black thingy is the Direction Finder antenna or DF for short. It works real well after you get used to it, "flying the nul" as we called it. When I learned to fly I learned how to operate it and of course the VOR. Things have evolved to Satellite Navigation and now to GPS. But when my father sailed on this boat this was the best available with "shooting the sun or the stars."
If anyone sees anything that needs attention or fixing please tell me now or forever hold your peace
Cheers,
-
 Piet got a reaction from PacificCrossRoads in HrMs Tromp 1937 by PacificCrossRoads - FINISHED - 3D rendering for kit prototype - as she appeared on 19.02.1942
Hello Boris,
I'm looking forward seeing the real 3D model coming together. She's one very impressive model of a brave ship.
Cheers,
-
 Piet got a reaction from popeye the sailor in Hr. Ms. O 19 1938 by Piet - FINISHED - scale 1:50 - submarine of the Royal Navy Netherlands in service 1939 - 1945
Thanks to everyone who visited and your like votes and all those who commented.
Hi Andy, Okay, it's dyslexia I tell you, dyslexia you understand- - - and I'm sticking to that excuse Hey, stupid is as stupid does. Thanks for the find. It'll be fixed tomorrow morning.
Hoi Remco, thanks for the compliment and re the decals? They are history my friend. I removed all the old decals this morning. The only areas I needed to repaint were the con. The decals kinda bleached the paint underneath, so I just sanded it down with extra fine sandpaper, masked it out and resprayed it. I did the same with the starboard bow section. The port bow and both sides on the stern are okay. I'll let the enamel paint cure for a day or so before I put the new decals on.
Hi Wacko Joe, that's a very nifty way of remembering what's port and what's starboard. That doesn't work in Dutch though Hmmmm, can I use that for an excuse - - - nah, I'll stick with dyslexia - - - to safe face
Hello Harvey, good seeing you here again and thanks for the compliment. Yup, the torpedo that's hanging in the sling is from wood and is a little light. Actually, I'm way ahead of you. I just happen to have purchased an aluminum rod for that purpose. I'll be making an aluminum torpedo to hang in that sling so it'll look more realistic. The wooden ones are for display on the final display board with some other stuff I already have two torpedoes loaded in the deck launcher.
Hmmm, that means that the dingy may also be too light. ummm, a brass dingy????
Hi Piper Joe, thank you for the compliment and you are always welcome here in my shipyard. Yes, I like to think that my father would approve of the model. Of course there are a few folks here who have helped in this effort and also keeping me straight on errors.
Well hello Andrieke, it's so good seeing you here, we missed you greatly. We even send an APB out to find you. Looking forward to updates on your build. Thank you for the compliments my fiend. Stay well.
Hi Popeye, thank you for the compliments, appreciate it very much.
Hello Michael, thank you as well and also for the URL. I may just buy a few items from them. Some of the things I didn't make because it's just too difficult and time consuming can still be replaced with store-bought parts to enhance authenticity. As I mentioned in several posts, I strived to making everything myself or have friends make them, rather then buying parts from vendors. It's perhaps my stubborn streak in using only "homemade" parts. Raw material is of course understandable.
Hoi Hans, van harte dank voor de compliment - - you are most kind.
Hallo Sjors - - Piet op de O19 rapporteert, over. Hell Sjors, Piet on the O19 checking in, do you read?
Thank you my friend, she's slowly taking shape.
Hi Pete, thank you !!!
Hello Dave, also my thanks to you for your kind words. Yes, it was / is indeed a fun and challenging build. There's still a lot more planned for her, we are not done yet but those things will be on the back burner.
Cheers to all,
-
 Piet got a reaction from Sjors in Hr. Ms. O 19 1938 by Piet - FINISHED - scale 1:50 - submarine of the Royal Navy Netherlands in service 1939 - 1945
Thanks to everyone who visited and your like votes and all those who commented.
Hi Andy, Okay, it's dyslexia I tell you, dyslexia you understand- - - and I'm sticking to that excuse Hey, stupid is as stupid does. Thanks for the find. It'll be fixed tomorrow morning.
Hoi Remco, thanks for the compliment and re the decals? They are history my friend. I removed all the old decals this morning. The only areas I needed to repaint were the con. The decals kinda bleached the paint underneath, so I just sanded it down with extra fine sandpaper, masked it out and resprayed it. I did the same with the starboard bow section. The port bow and both sides on the stern are okay. I'll let the enamel paint cure for a day or so before I put the new decals on.
Hi Wacko Joe, that's a very nifty way of remembering what's port and what's starboard. That doesn't work in Dutch though Hmmmm, can I use that for an excuse - - - nah, I'll stick with dyslexia - - - to safe face
Hello Harvey, good seeing you here again and thanks for the compliment. Yup, the torpedo that's hanging in the sling is from wood and is a little light. Actually, I'm way ahead of you. I just happen to have purchased an aluminum rod for that purpose. I'll be making an aluminum torpedo to hang in that sling so it'll look more realistic. The wooden ones are for display on the final display board with some other stuff I already have two torpedoes loaded in the deck launcher.
Hmmm, that means that the dingy may also be too light. ummm, a brass dingy????
Hi Piper Joe, thank you for the compliment and you are always welcome here in my shipyard. Yes, I like to think that my father would approve of the model. Of course there are a few folks here who have helped in this effort and also keeping me straight on errors.
Well hello Andrieke, it's so good seeing you here, we missed you greatly. We even send an APB out to find you. Looking forward to updates on your build. Thank you for the compliments my fiend. Stay well.
Hi Popeye, thank you for the compliments, appreciate it very much.
Hello Michael, thank you as well and also for the URL. I may just buy a few items from them. Some of the things I didn't make because it's just too difficult and time consuming can still be replaced with store-bought parts to enhance authenticity. As I mentioned in several posts, I strived to making everything myself or have friends make them, rather then buying parts from vendors. It's perhaps my stubborn streak in using only "homemade" parts. Raw material is of course understandable.
Hoi Hans, van harte dank voor de compliment - - you are most kind.
Hallo Sjors - - Piet op de O19 rapporteert, over. Hell Sjors, Piet on the O19 checking in, do you read?
Thank you my friend, she's slowly taking shape.
Hi Pete, thank you !!!
Hello Dave, also my thanks to you for your kind words. Yes, it was / is indeed a fun and challenging build. There's still a lot more planned for her, we are not done yet but those things will be on the back burner.
Cheers to all,
-
 Piet got a reaction from pete48 in VOLVO OCEAN RACE Open 70 By Pete48 - FINISHED - Scale : 1/4" = 1' - 0"
Thanks for the explanation Pete, very compact indeed and yours looks VERY realistic. Does your homemade GPS work Kidding!
Cheers,
-
 Piet reacted to pete48 in VOLVO OCEAN RACE Open 70 By Pete48 - FINISHED - Scale : 1/4" = 1' - 0"
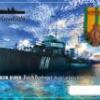
Hi Piet, At the back of the Transom ,is the communications tower , wich has 2 Lifeboat boxes , and the Sailor 500 Inmarsat Fleet Broadband , wich is for Voice and Data Communications, there is a GPS dome at the top of the tower ( wich I made today ) here is what it looks like
Best Regards,
Pete
-
 Piet got a reaction from piperjoe in VOLVO OCEAN RACE Open 70 By Pete48 - FINISHED - Scale : 1/4" = 1' - 0"
That's one awesome looking model Pete! I really like the color combination with the logos, vivid and eye catching.
Question if you don't mind my ignorance on boats, what's that thingy at the stern that looks like a lemonade cooler? Forgive me, I'm an airplane guy and they don't have those thingies. Is that perhaps for GPS navigation?
Cheers,
-
Piet reacted to SawdustDave in Hr. Ms. O 19 1938 by Piet - FINISHED - scale 1:50 - submarine of the Royal Navy Netherlands in service 1939 - 1945
Such a fun build to watch.
-
Piet reacted to pete48 in Hr. Ms. O 19 1938 by Piet - FINISHED - scale 1:50 - submarine of the Royal Navy Netherlands in service 1939 - 1945
Hello Piet, I am with everyone else just Stunning, Beautiful work
Best Regards,
Pete
-
Piet reacted to Sjors in Hr. Ms. O 19 1938 by Piet - FINISHED - scale 1:50 - submarine of the Royal Navy Netherlands in service 1939 - 1945
Sjors is calling Piet.......Sjors is calling Piet........Sjors is calling Piet.......
Can you hear me Piet ?
Great job on that antenna stuff....now let's see if it works.
Sjors
-
Piet reacted to *Hans* in Hr. Ms. O 19 1938 by Piet - FINISHED - scale 1:50 - submarine of the Royal Navy Netherlands in service 1939 - 1945
How many likes are possible on one post? Stunning work!
-
Piet reacted to michael mott in Hr. Ms. O 19 1938 by Piet - FINISHED - scale 1:50 - submarine of the Royal Navy Netherlands in service 1939 - 1945
Piet the model continues to improve with all the details she is looking great.
Piet you could have a look at these Turnbuckles that are for 1:87 scale
Glad to here the surgery went well on the carpel tunnel, from personal experience I know that in a few weeks she will be a much happier camper.
Michael
-
Piet reacted to popeye the sailor in Hr. Ms. O 19 1938 by Piet - FINISHED - scale 1:50 - submarine of the Royal Navy Netherlands in service 1939 - 1945
love how you did that Piet..........communication up and running........and looking REAL good!
-
Piet reacted to Adrieke in Hr. Ms. O 19 1938 by Piet - FINISHED - scale 1:50 - submarine of the Royal Navy Netherlands in service 1939 - 1945
wow Piet
absolutely stunning
-
Piet reacted to harvey1847 in Hr. Ms. O 19 1938 by Piet - FINISHED - scale 1:50 - submarine of the Royal Navy Netherlands in service 1939 - 1945
WOW Piet!
It´s amazing to see al last that beauty with all the stuff on the deck and everythin done. I don´t know how many tons weights a torpedo but i would put some more "tension" on that little rod (chain) that holds it by making it on a "V" and sharp shape rather than the smooth curve that it does.Don´t know if I have explaiened myself...
Best wishes Piet!
-
Piet reacted to WackoWolf in Hr. Ms. O 19 1938 by Piet - FINISHED - scale 1:50 - submarine of the Royal Navy Netherlands in service 1939 - 1945
If anyone would pick up on the light's being on the wrong side it would be Andy, good eyes Andy. It's just like Port is spell with 4 letters and left is spelled with 4 letters. LOL
-
Piet reacted to Remcohe in Hr. Ms. O 19 1938 by Piet - FINISHED - scale 1:50 - submarine of the Royal Navy Netherlands in service 1939 - 1945
The antenna installation looks great.
You might opt for not removing the decals but just repaint them?
Remco
-
Piet reacted to realworkingsailor in Hr. Ms. O 19 1938 by Piet - FINISHED - scale 1:50 - submarine of the Royal Navy Netherlands in service 1939 - 1945
Yeah.... Uh.....your sidelights are backwards.... Red goes on the left (port) side, and green on the right....
Andy
-
Piet reacted to PacificCrossRoads in HrMs Tromp 1937 by PacificCrossRoads - FINISHED - 3D rendering for kit prototype - as she appeared on 19.02.1942
Hi Piet.
I hope next week to complete the 3D model. And I will start doing the master model ...
Wishes.Boris
-
Piet reacted to popeye the sailor in Holiday Harbor by popeye the sailor - 1:20 scale - multi build
well.......think of the Vic.......that is ONE complex ship your working on I think that if I had gone in the direction of sailing ships, I'd even call MYSELF 'looney' for doing so many. your build looks so good........simply because you've devoted you complete concentration on her.......period. my thing is.......my kid in a candy store / bull in a china shop mentality. I see so much......love to apply them to my build, but most of the ideas don't fit {I learned this from the lobster boat build}. so, I created other hulls to try them out on........funny how an experiment can backfire in unexpected ways I enjoy doing these multiple builds though......now if I come up with a crazy idea, I can throw it at a build and see if it sticks.
thanks for saying such nice things...your very kind with your Vic almost finished, I would have imagined you'd be stock piling wood and supplies at this time. have you thought about the fittings you'll need......scratch built or ordered? the finish line is in sight...it won't be much longer now thanks for the good word Lawrence.......I should have an update soon.
-
Piet reacted to pete48 in VOLVO OCEAN RACE Open 70 By Pete48 - FINISHED - Scale : 1/4" = 1' - 0"
Thanks Bob, it's the shadows , I see what you mean , that's pretty cool
Best Regards,
Pete