


Louie da fly
-
Posts
7,985 -
Joined
-
Last visited
Content Type
Profiles
Forums
Gallery
Events
Posts posted by Louie da fly
-
-
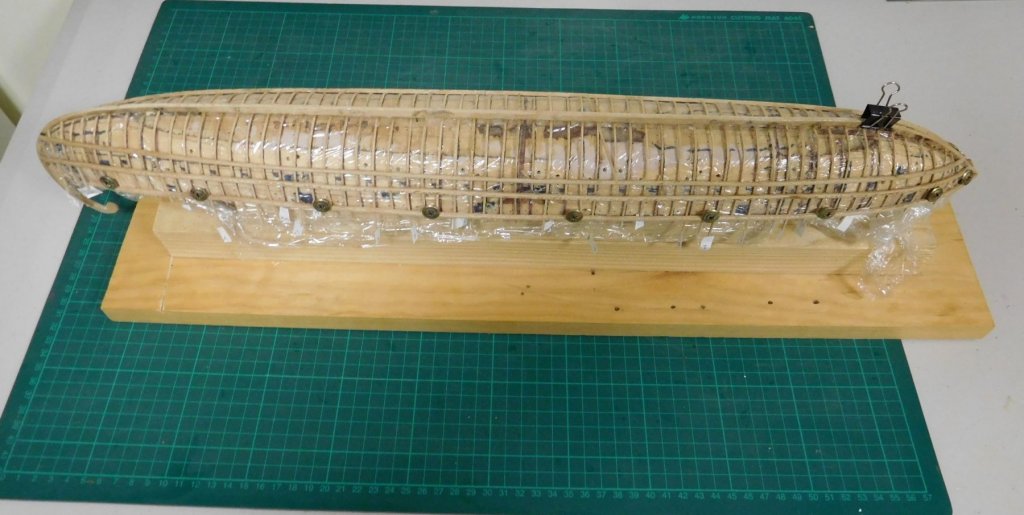
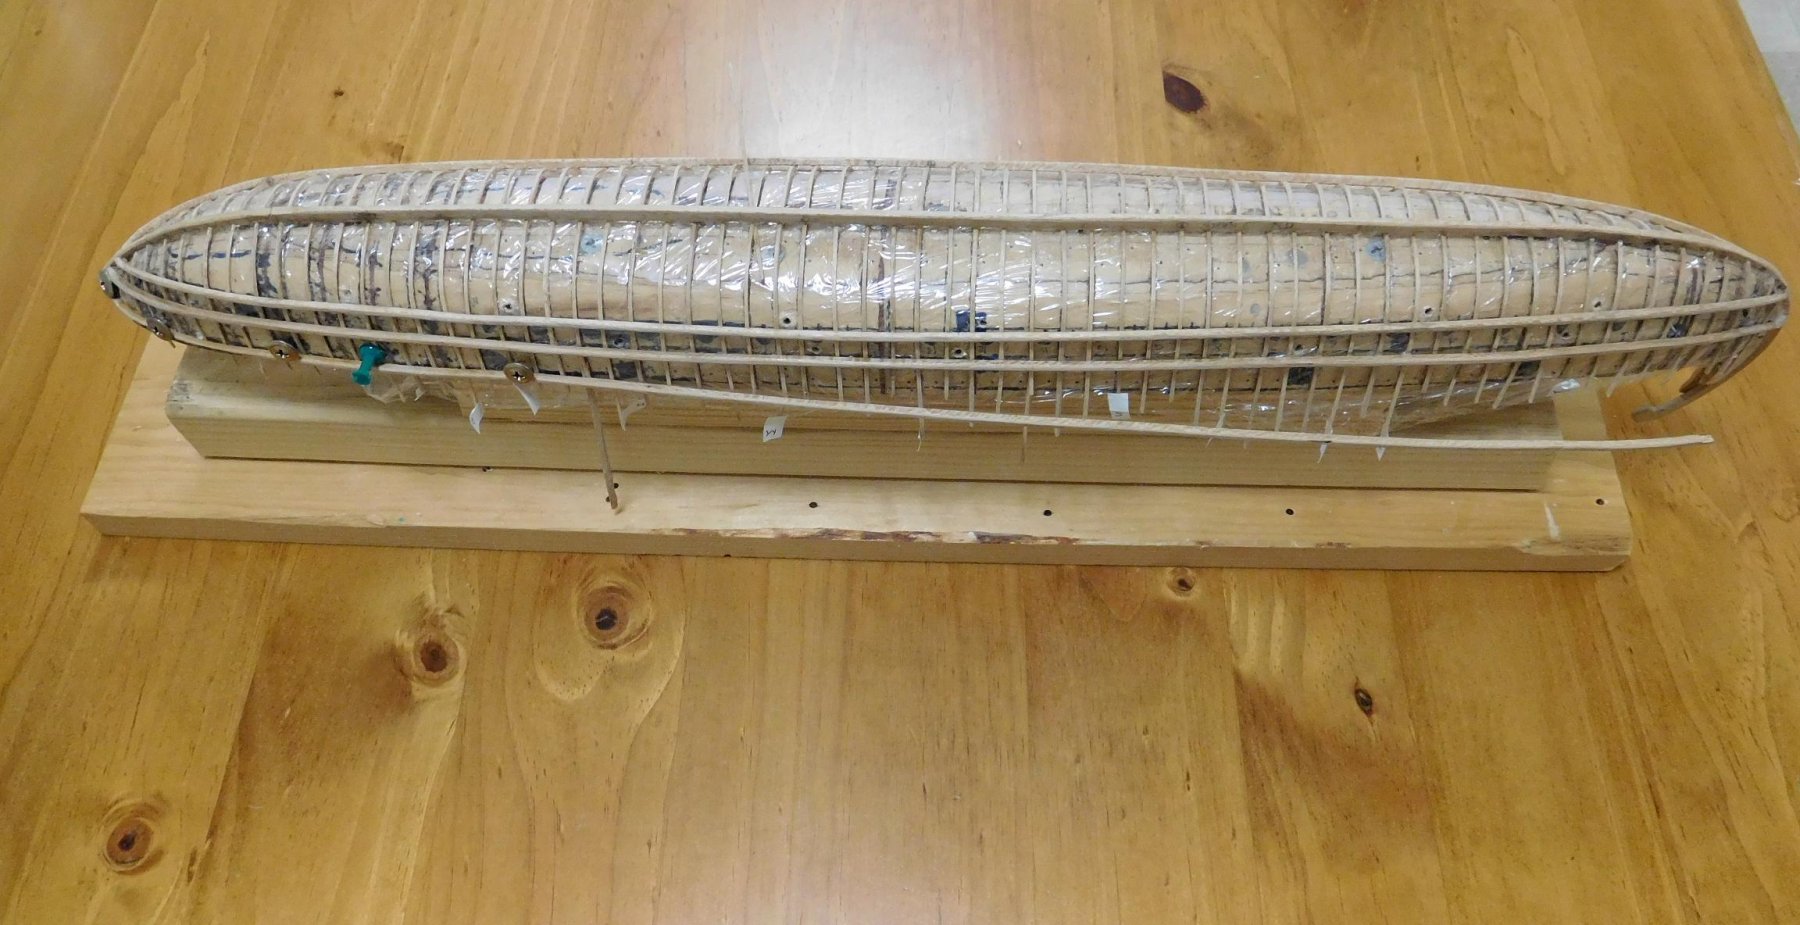
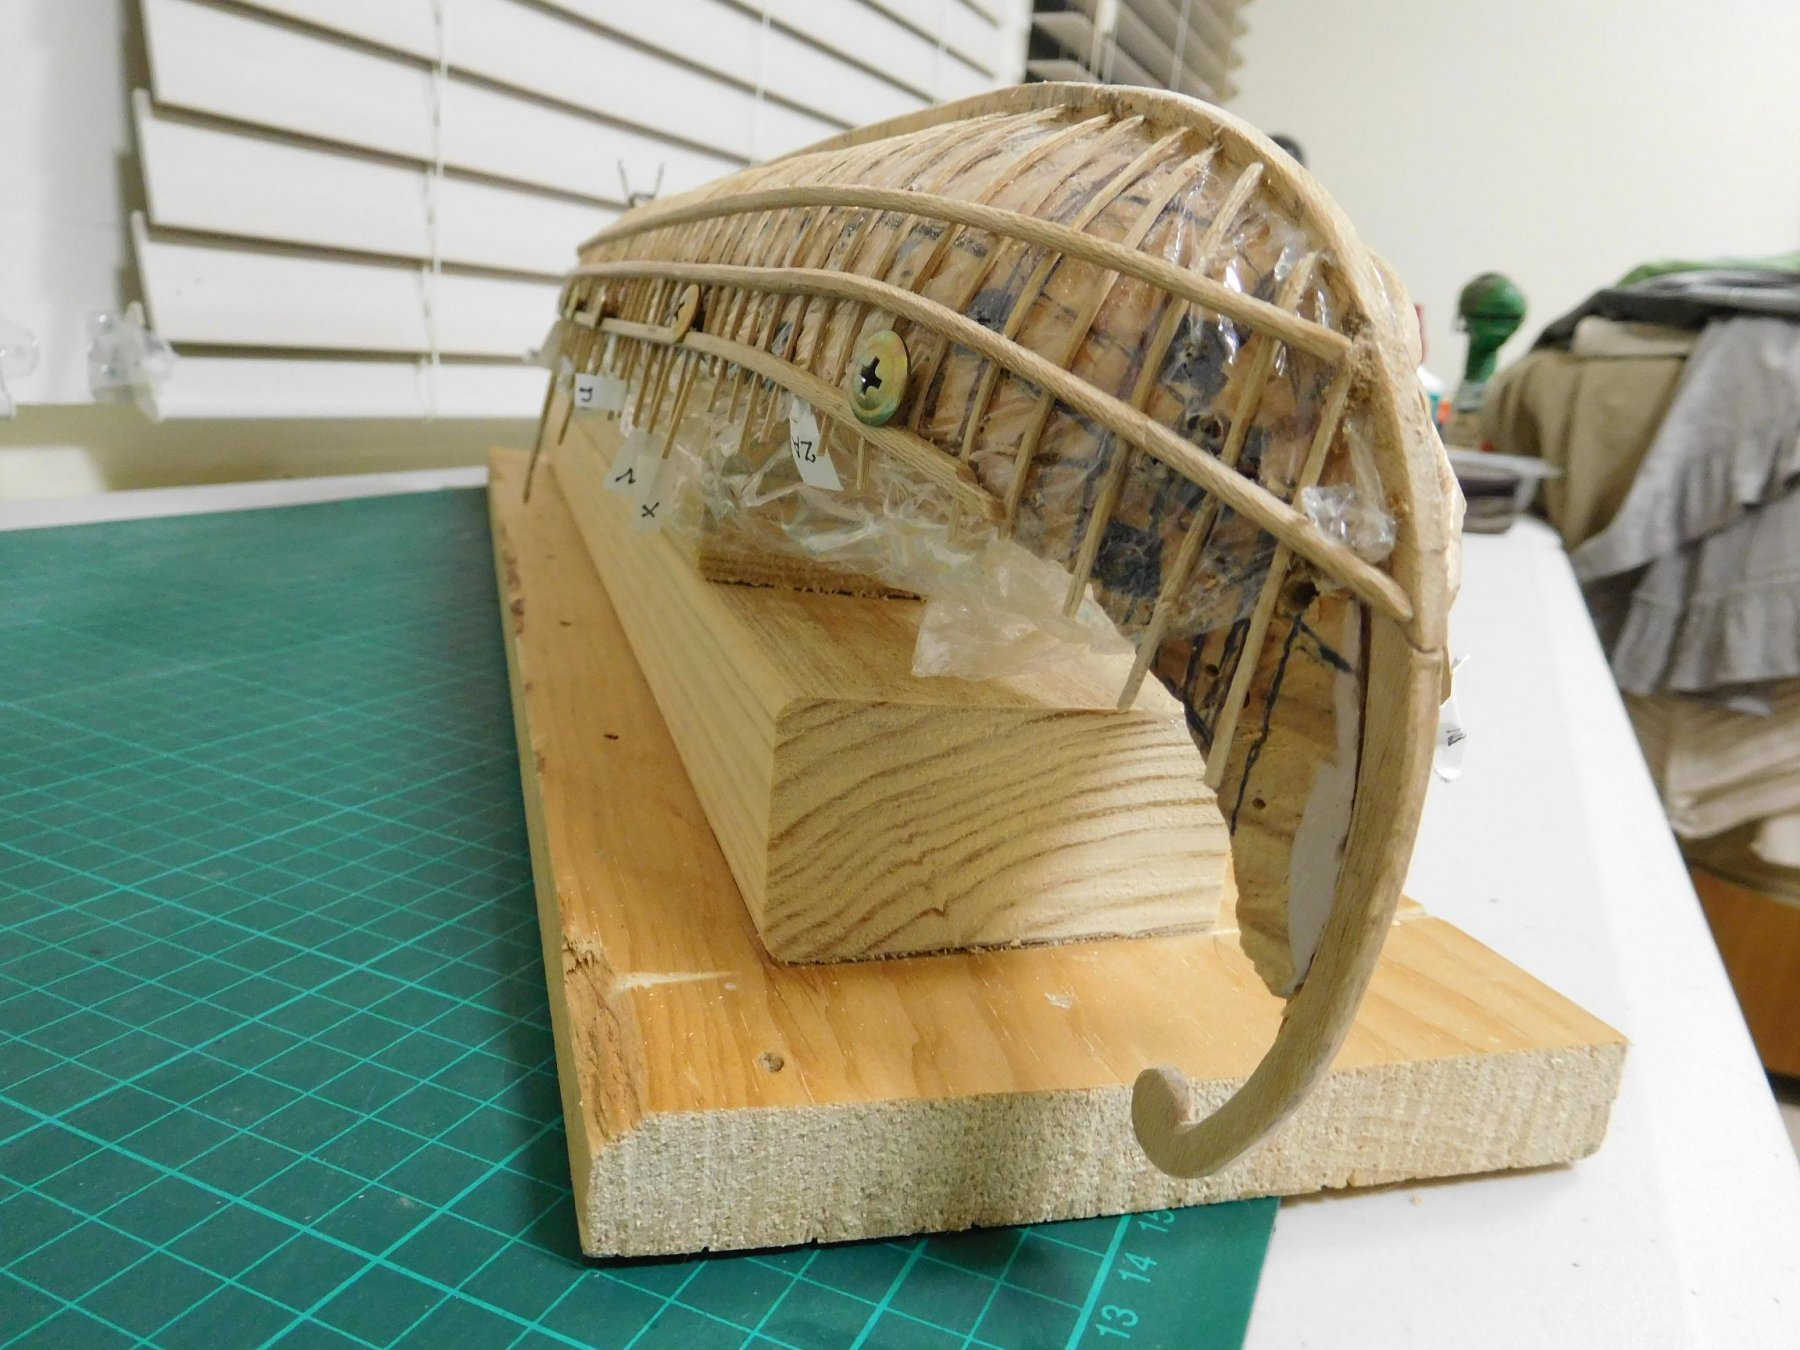
I've now made and fitted all the wales, including the gunwales, which are currently in the process of being glued in place.
I just hope the cling-wrap enables the hull to come away from the plug smoothly when the time comes, and that there aren't any pieces glued to the plug itself.
Here is the ship with all the push pins removed (except one, which was being used to hold a vagrant frame in place) and the starboard gunwale fixed at the bow.

I've replaced pushpins with large-headed screws which hold the wale in position.

I'm pretty happy with the symmetry of the wales and the line they take. A good ship should look beautiful - the lines should be attractive to the eye. Funny, till I saw the end-on photo I hadn't notice the slight inequality in the line of the keel and stempost. I think I can live with it, or perhaps change it a bit. (On looking at it again, it turns out to be that the keel and the stempost are a bit too big in the vertical direction where they join - I've trimmed down the join and it looks better now).

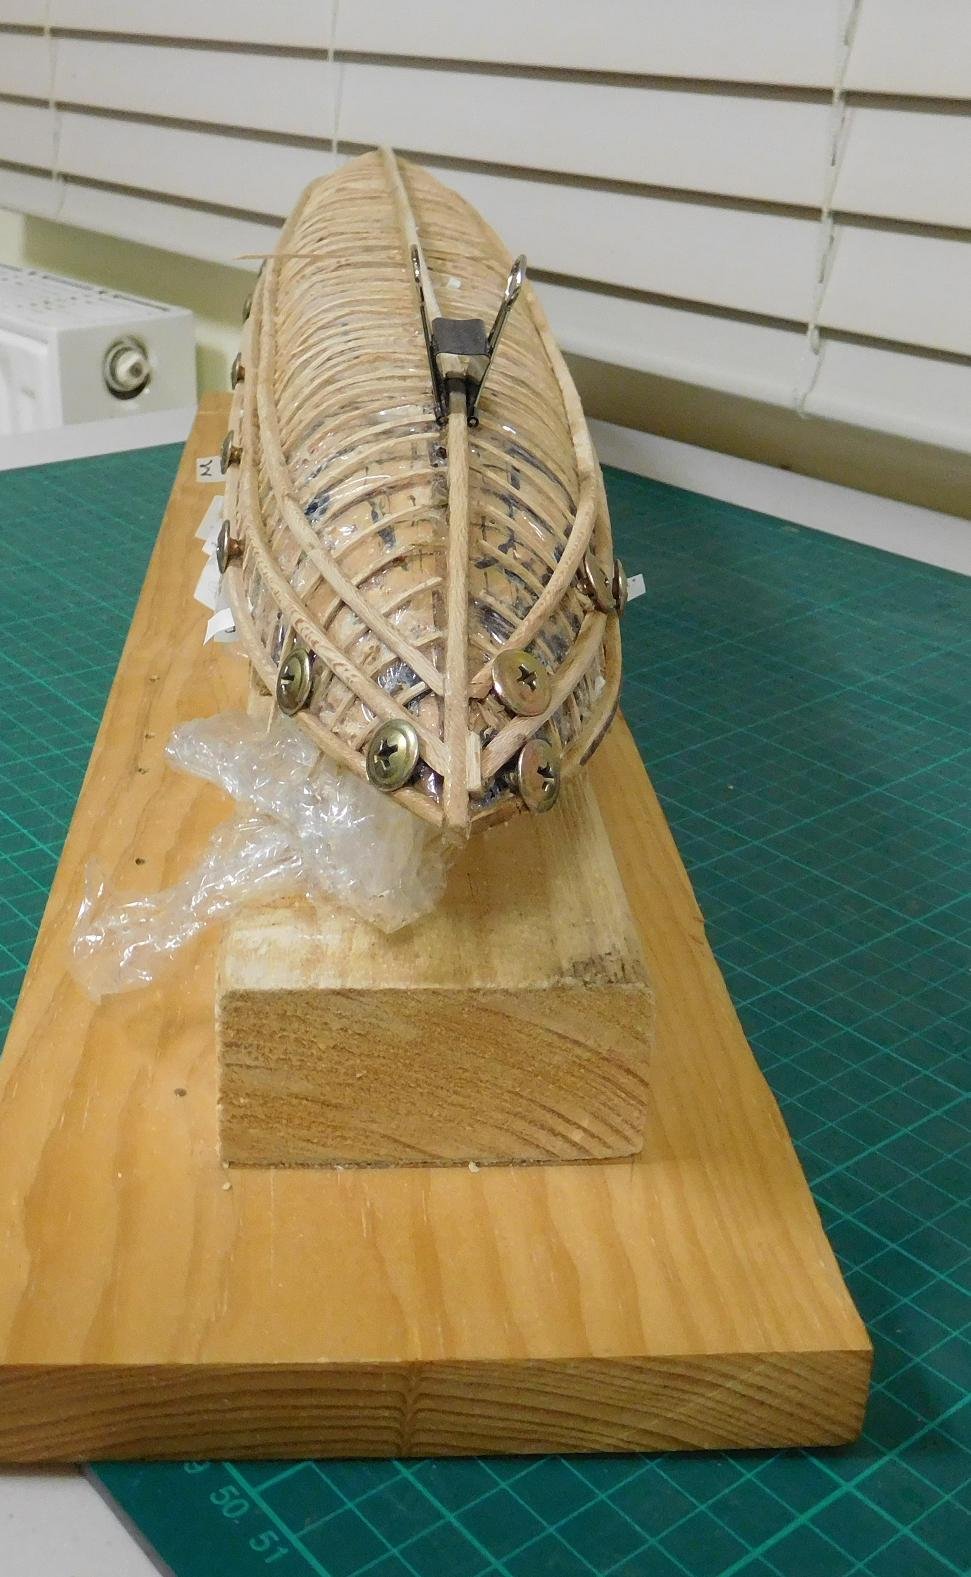
And here she is with both gunwales dry-fitted and held in place with screws (the bulldog clip is holding yet another vagrant frame in place while the glue dries).
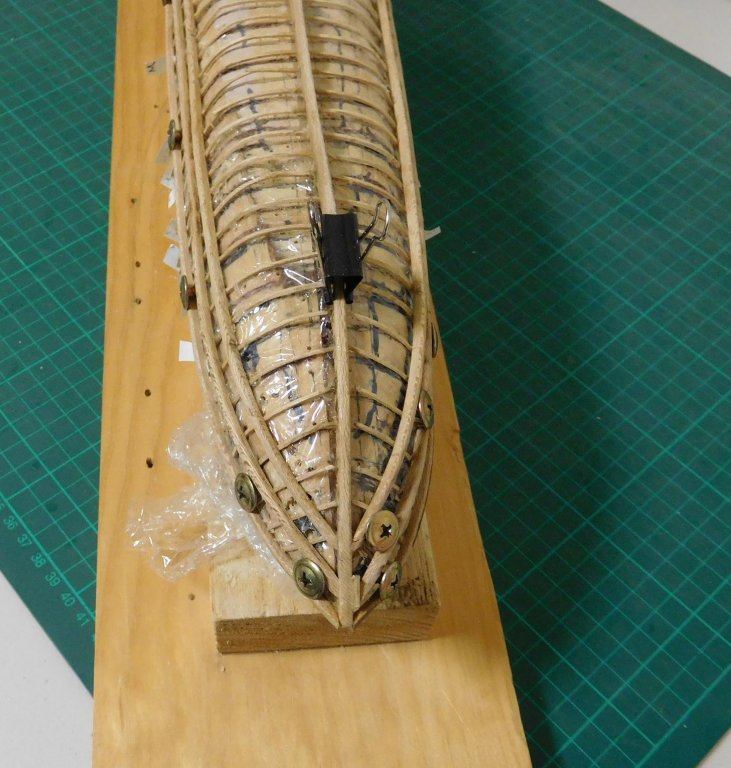

You can see from the bow view that the starboard gunwale is just a little too short. I cut it to length then discovered that the wale was a little out of place in the middle. When I adjusted it, the length was now too short. I've put in an extra piece of wood to fill the gap, which I'll carve to follow the shape of the gunwale. As I'm planning to paint the model, it won't be visible when she's finished.
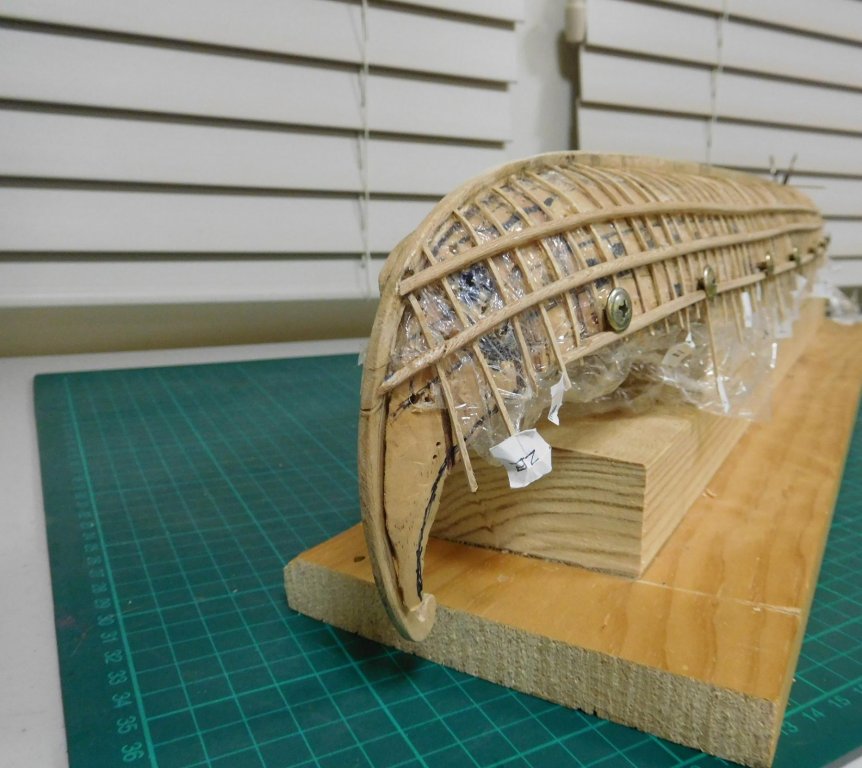
The gunwales are in two pieces - one runs most of the length of the hull, the other is not in place yet - the "tail" which is a tight curve as can be seen at the stern and will be fixed to the main part of the wale with a scarph joint.
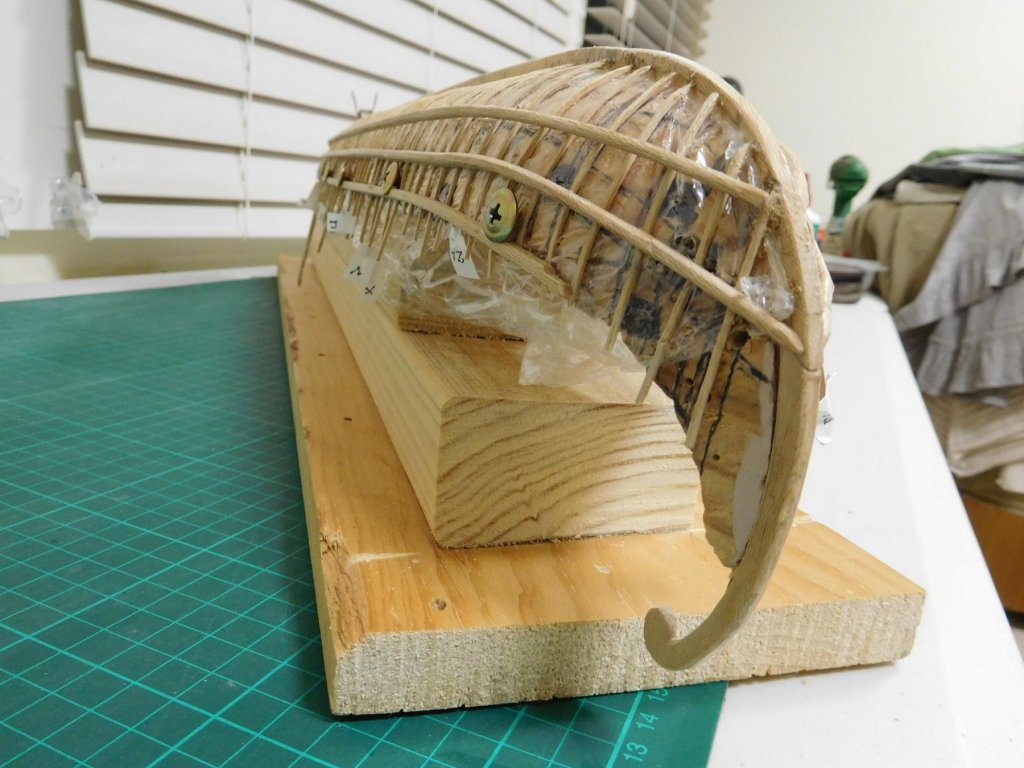
An interesting thing that I thought might happen - when I released the push-pins holding the ends of the frames to the plug, their natural springiness pushed the gunwales outward, even though the frames are only 1mm square in section. But after all, the wales are only 3mmx3mm, so they're not all that resistant to being bowed.
I've worked out how I can fix this. The ship is to be fully decked, so the deck beams will act as transverse braces to pull the wales back into place (I'll have to make a jig to hold the hull in shape while the glue dries). But I don't want to put the deck beams in until I've done some work inside the hull - in particular making a framework to hold the lower bank of oars in place and putting in the mast step(s). The extra bow is only about 3mm (1/8") on either side, so it's not as serious as I feared, and may not affect the work I need to do before the deck beams go in. If I'm worried about it, I'll make some temporary braces to hold the gunwales in place while I work inside the hull.
Overall I am very pleased with the way she looks, particularly with line of the stern. I think she's going to be a very beautiful model.
Steven
- flying_dutchman2, woodrat, Eddie and 7 others
-
 10
10
-
Very nice, Dick.
Did you do the cross stitching with a stylus of some sort?
The example above has painted decoration on the sail, which seems to have been fairly rare, but not unknown. Are you planning to do any on your own nave's mainsail?
- CaptainSteve, cog and mtaylor
-
3
-
Nice work, Rick. The Enterprize is a great first scratch build. Not too difficult, but with plenty of challenges. I like your workmanlike approach to fixing things that didn't quite turn out right - just fix it and get on with the build.
I think I saw the full-size Enterprize not that long ago in Geelong. She's a beautiful vessel, but I hadn't realized there was so much of her below the waterline!
Enjoying watching your progress,
Steven
- mtaylor, Omega1234 and vossiewulf
-
3
-
-
-
-
-
Beautiful work as usual, Dick.
- CaptainSteve and mtaylor
-
2
-
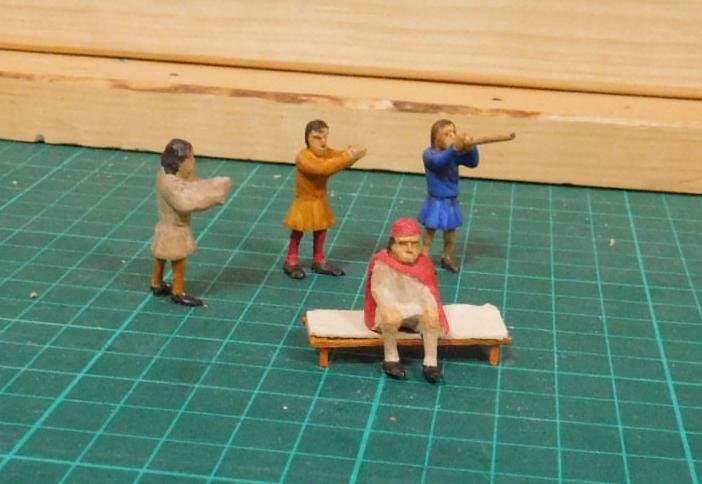
Well, he is the captain - he's probably got a right to be grumpy. On the other hand, I'm thinking of replacing him on the bench with Emperor Alexios Komnenos and have a few courtiers as well, and perhaps some bodyguards, so I can indulge my obsession with Byzantine splendour. If so, I'll have to make a new (standing) captain - he can't very well sit down if the Emperor is present.
Steven
- mtaylor, woodrat, CaptainSteve and 2 others
-
5
-
Back again after far too long. Work and family (baby sitting the daughter's 20 month old, and a new one almost here) have meant I couldn't spend anything like the time I'd like to on the ship.
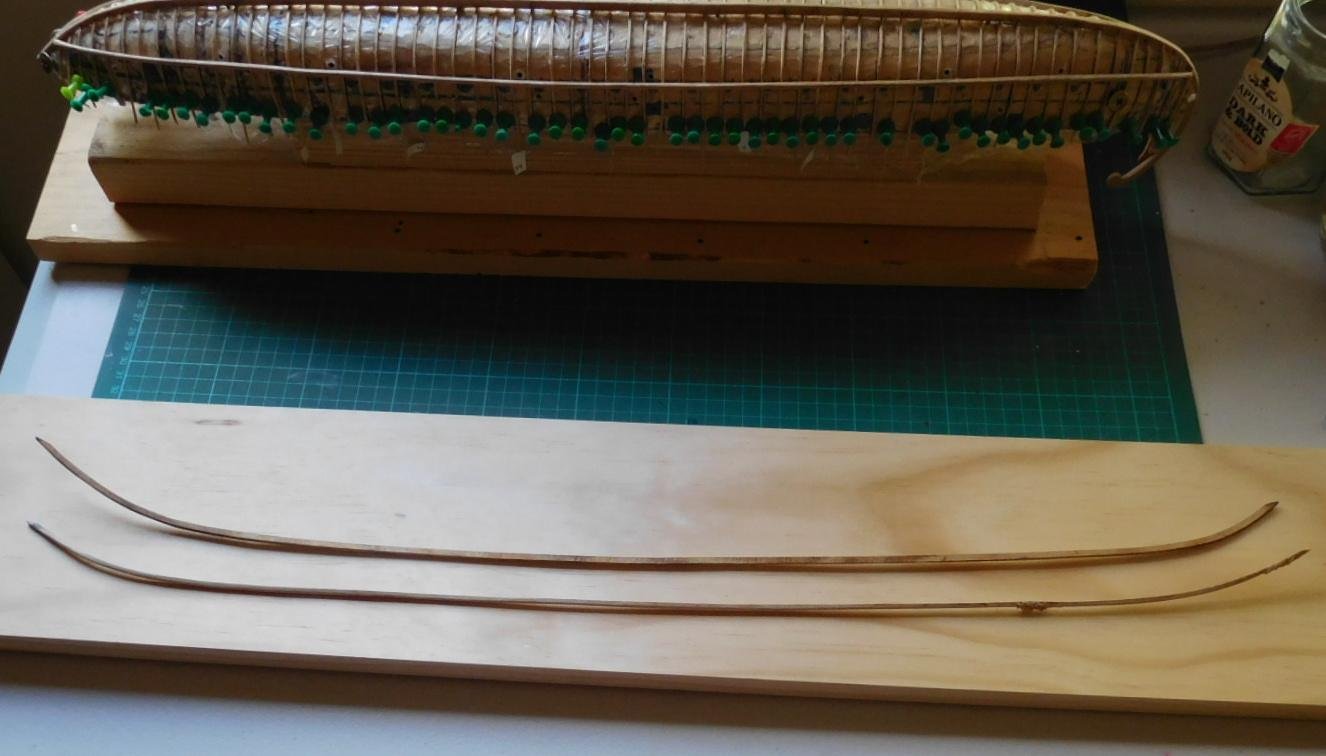
My last post had a photo of the lowest pair of wales just attached. Unfortunately, though the port one was good, I've had to carefully slice through the glued joins between wale and frames almost all the way along the starboard one, re-position the wale and re-glue it - it was in place on the ends, but rather wrong in the middle - even though it looked pretty good by eye. It became blindingly obvious when I tried to place the next pair of wales.
I realised that I'd been making it hard on myself when bending the wales. Firstly, instead of bending them all the way along to roughly approximate the line of the ship and then 'tweak' them at the ends, it's much better to start at one end and get it perfectly in line bit by bit until it lines up from end to end. Secondly I've been using a single piece of wood for a 30 metre (90 foot) wale, instead of making it in sections as I'm sure was done in the day. Well, the most painful lessons are the ones that stick in the mind.

These are the second pair of wales. Note only one wale has been smoothed off in this photo and I've used a mix of white glue and sanding dust to fill a couple of flaws in it.
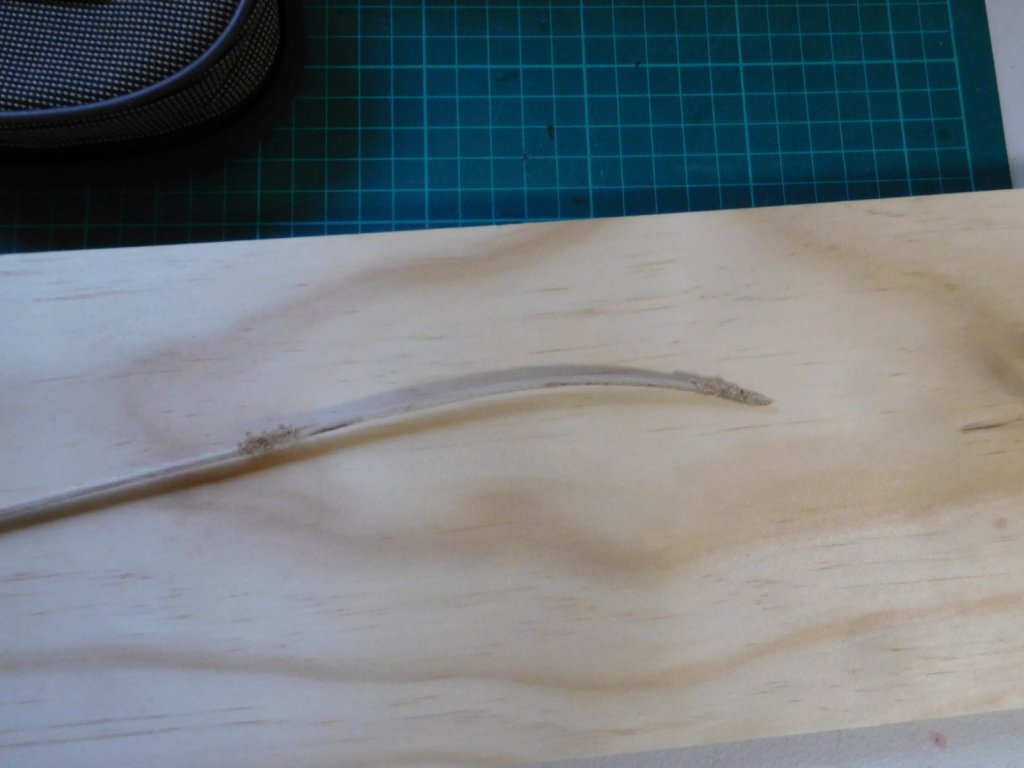
I've now filed and sanded off the rough filling and it's nice and smooth.
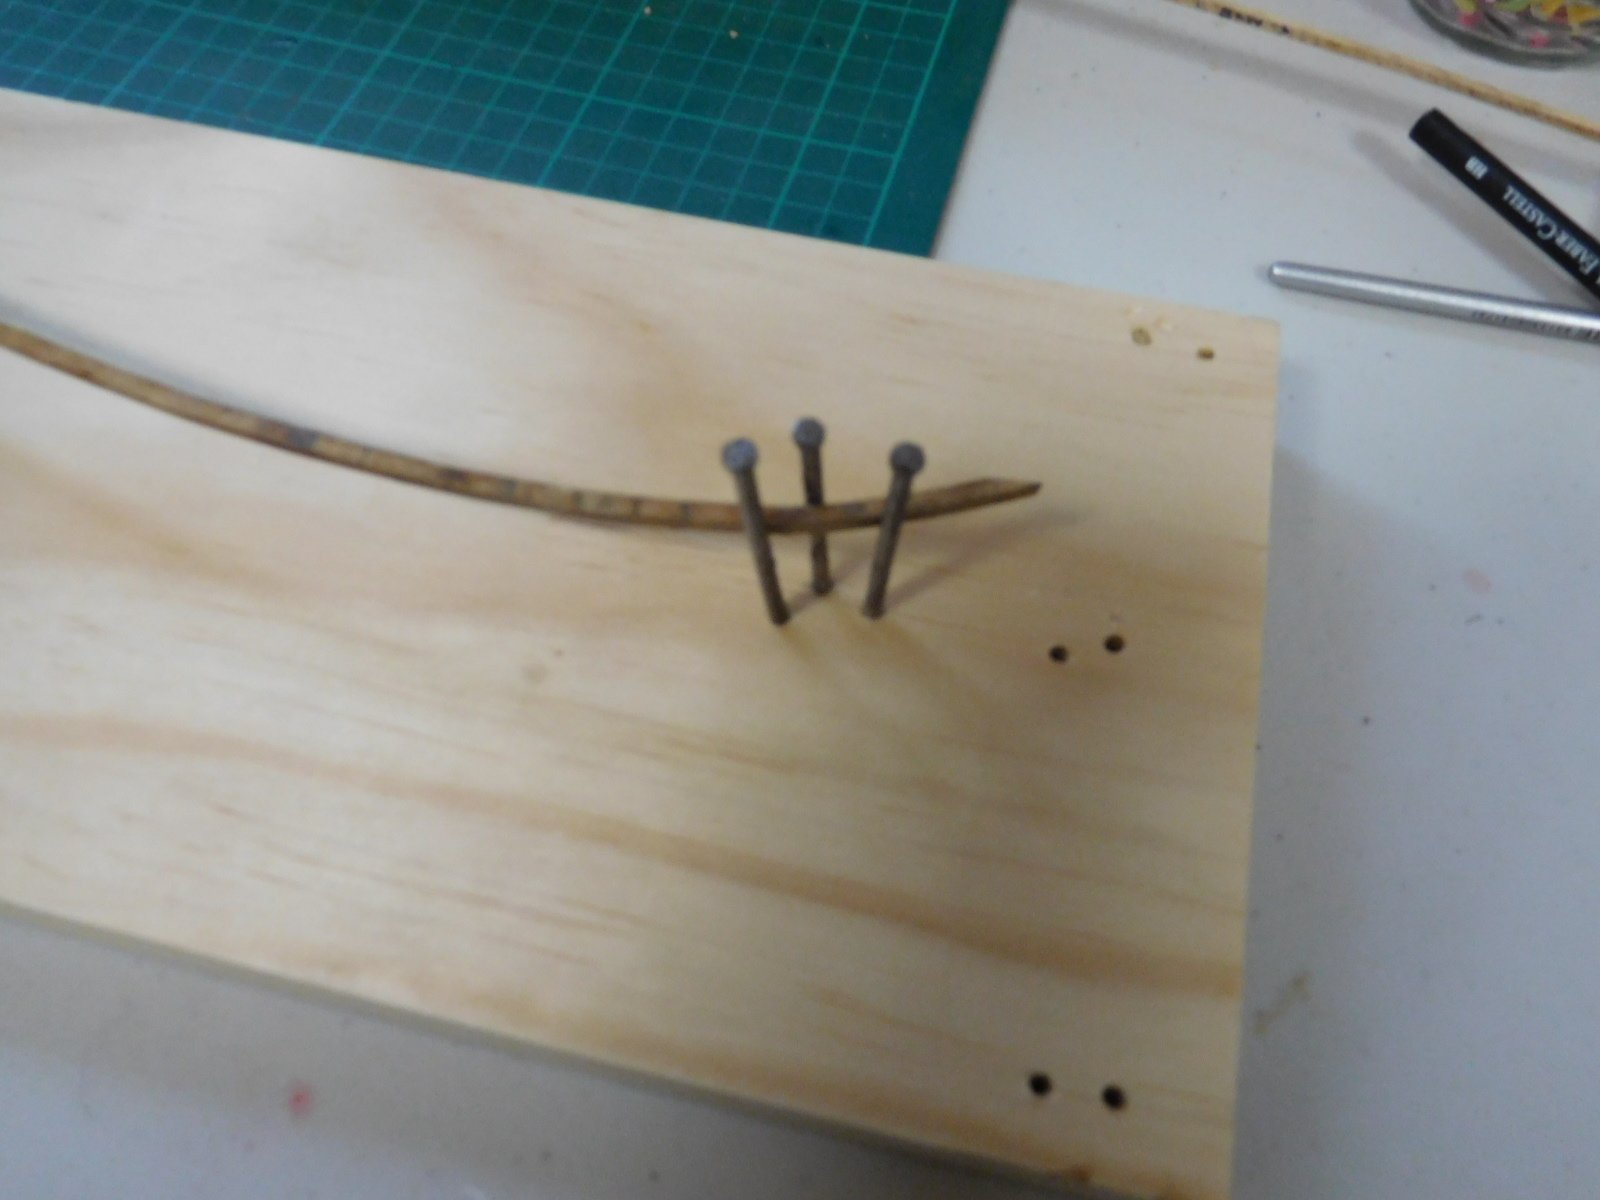
The second wale took a lot of getting right. Here it is in the jig for heat bending. I wetted it a bit and put it in the jig and played a heat gun on it. Prior to that I was trying to bend it by putting it between two nails and bending it with my fingers while using the heat gun. Too painful. For future builds I think I'll get a proper bending heater as shown here. It looks much better than what I've been doing.

The second wale is now smoothed off and both are ready to glue to the frames.
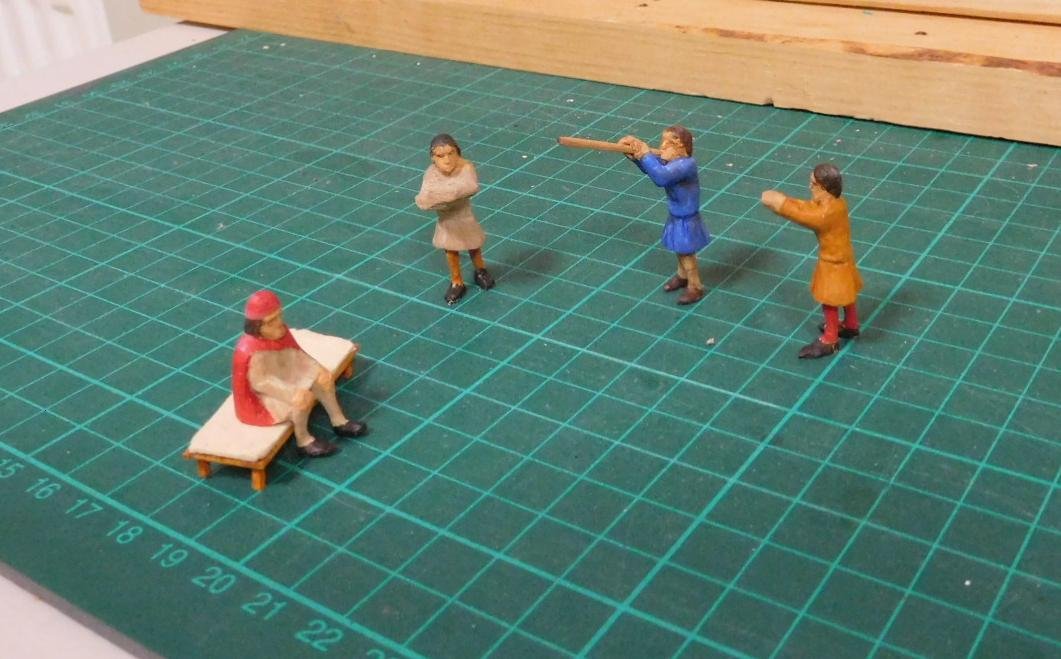
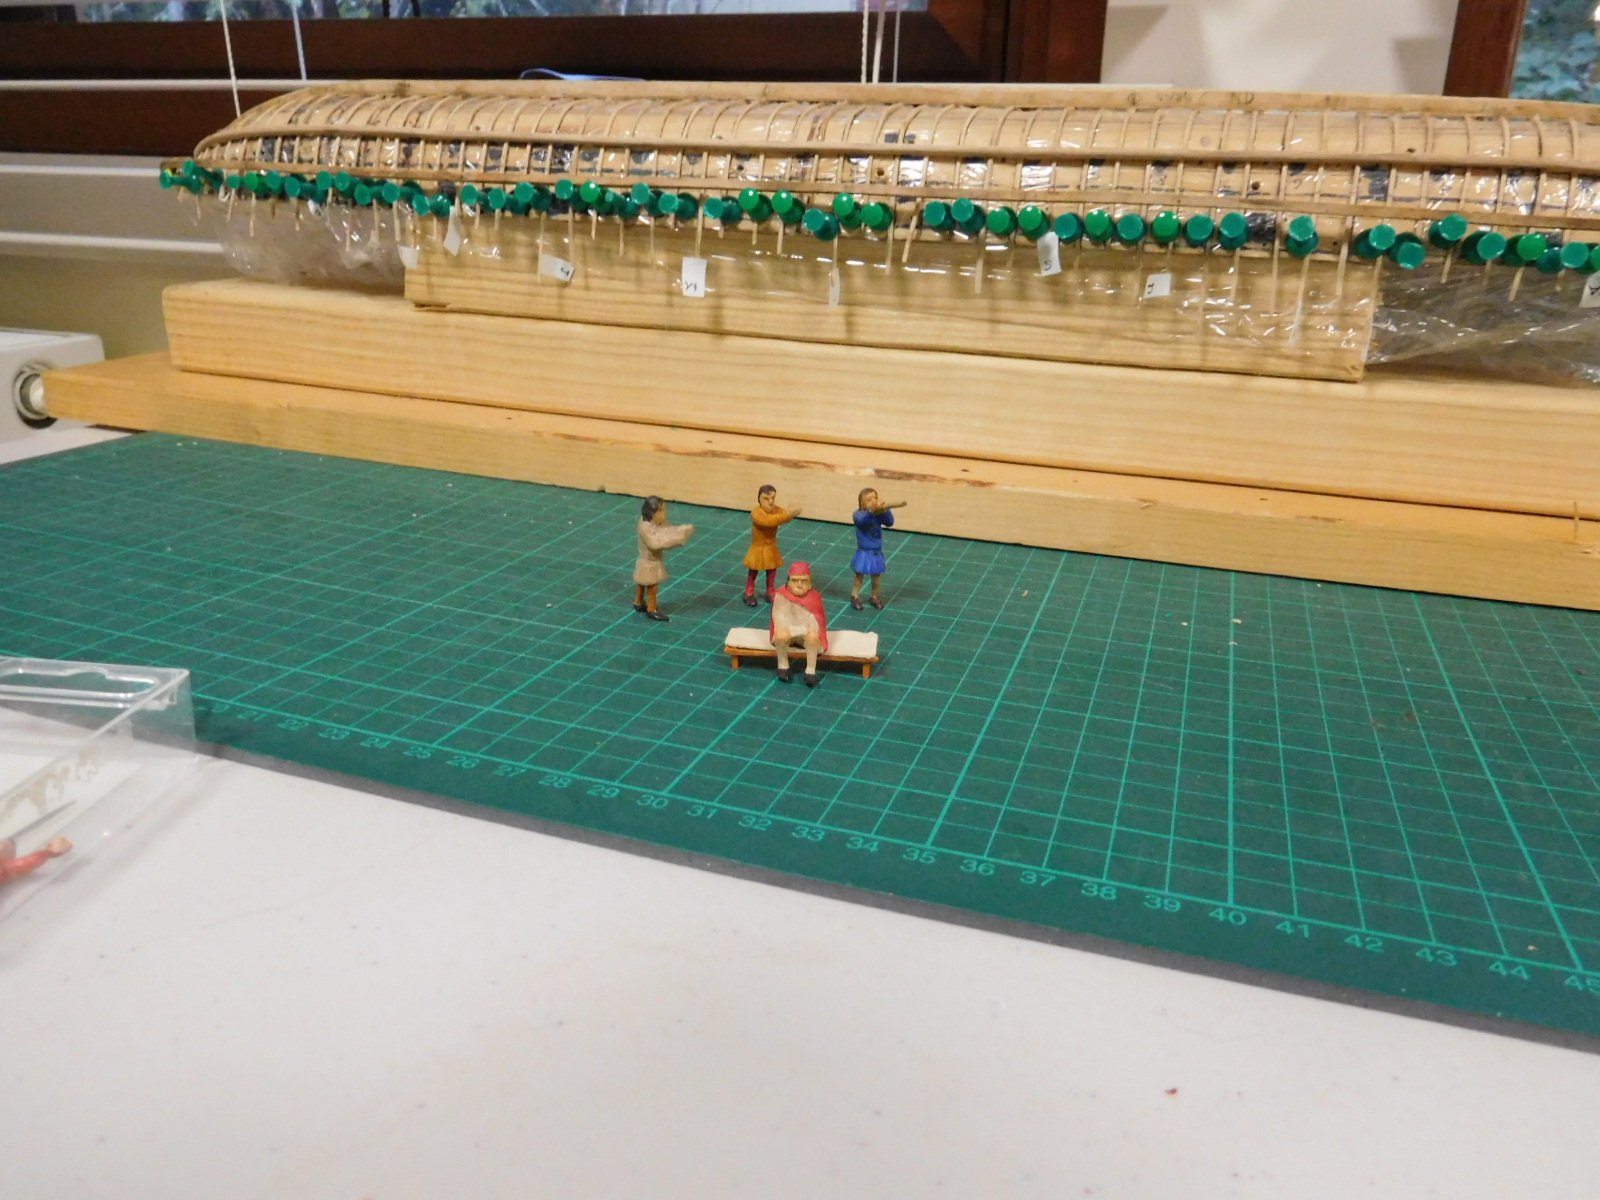
And I've been painting up some of my crew members. As well as a very good tutorial on the MSW site I found another for 1:35 military figures at https://www.youtube.com/watch?v=no2zBike6Q0 that was very helpful. I think I still have a long way to go with carving figures, particularly faces, but I'm learning all the time.


Steven
- flying_dutchman2, Bedford, woodrat and 7 others
-
10
-
A very instructive and informative couple of photos, Dick. Are you going to use a parrel to support the yard?
Steven
- mtaylor, CaptainSteve and Vivian Galad
-
3
-
-
You're off to a good start, Valter. What kind of timber is that?
Steven
- mtaylor and kees de mol
-
2
-
Beautiful work, David
-
Thanks Martin. That looks fantastic. I'll have to get one when I can fit it in the budget. Tired of burning my fingers with the heat gun. Fortunately for my current build it's only the wales that need bending and I'm nearly finished. (The planks are only about 0.5mm thick, as it's a very lightly built craft).
Steven
- mtaylor, Canute and thibaultron
-
3
-
This is a very useful and worthwhile tutorial. I'm eagerly looking forward to the one on two-piece moulds. I've got 50 oarsmen to make and I've never tried moulding with rubber and resin.
- mtaylor, thibaultron and Canute
-
3
-
This is a really brilliant video. Unfortunately my frames are so thin that I can't put pencil marks on them that are visible. Serves me right for trying to build a dromon with scale thickness frames.
But it's very clear and easy to understand. I'll be sure to use this technique in subsequent builds
-
What is that amazing tool? It seems to be an attachment for a soldering iron? If so what is it called and where can I get one?
- mtaylor, thibaultron and Canute
-
3
-
-
A very worthwhile project, John. There's a fair bit of detail in these paintings, which should be helpful.
I take it you're going to convert plans for other, similar ships to construct the model?
- Piet, thibaultron and mtaylor
-
3
-
On 2/27/2017 at 1:10 PM, michael mott said:
Simple answer it was knocked over, the base was tall with a very narrow longitudinal footprint.
Michael
I don't know if it would be acceptable as this is a repair, not a "renovation", but would you consider making a new, wider base to help prevent a re-occurrence of the accident?
- mtaylor and thibaultron
-
2
-
-
I never cease to be astounded and impressed by the level of research that's gone into your build, Dick. I takes me hat off to you, sir.
- JesseLee, mtaylor and CaptainSteve
-
3
-
On 2/9/2017 at 7:34 AM, husky1943 said:
Wow, I thought of another question; do the ratlines actually support the masts or are they simply for access aloft?
Rob, I think this might be a case where the wrong nomenclature is being used as you mentioned above. The (almost) vertical ropes running from the masthead to the deadeyes are the shrouds, and yes, they are used to support the masts. However the shrouds also form the sides of the "rope ladders" for access aloft. The ratlines are the thinner ropes used as the "rungs" .
- Canute, husky1943, pythagoras and 2 others
-
5


Enterprize by Rick01 - FINISHED - scale 1:48 - Topsail Schooner
in - Build logs for subjects built 1801 - 1850
Posted
Coming along nicely, Rick. A very interesting build.
Steven