


Louie da fly
-
Posts
7,980 -
Joined
-
Last visited
Content Type
Profiles
Forums
Gallery
Events
Posts posted by Louie da fly
-
-
An unusual model that looks like being a lot of fun!
Steven
- gjdale, mtaylor and thibaultron
-
 3
3
-
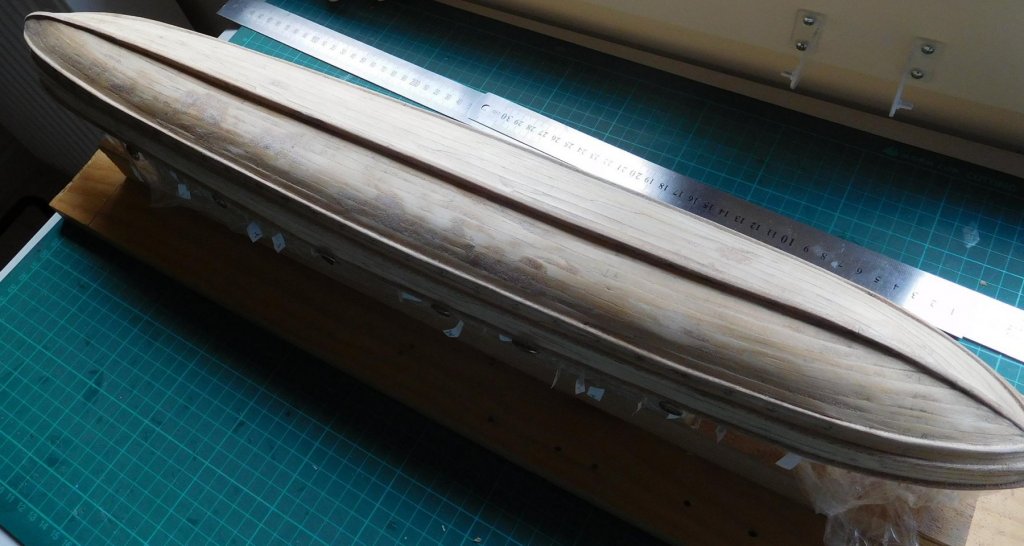
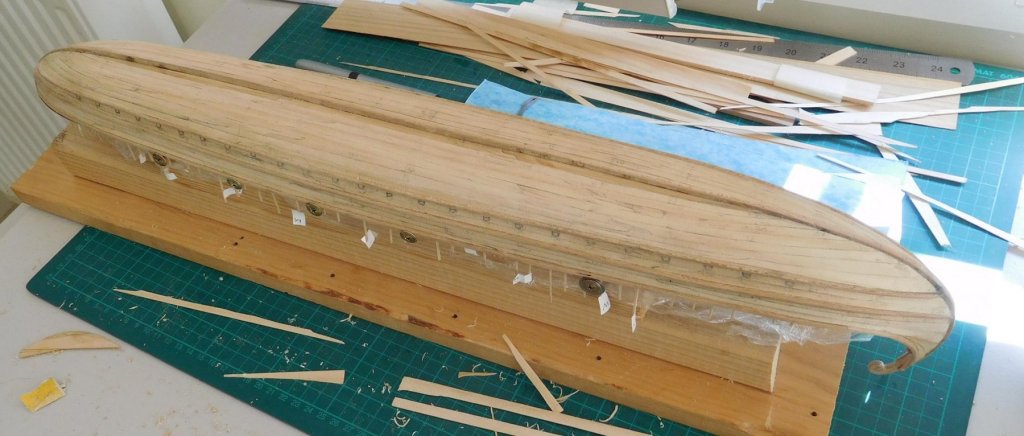
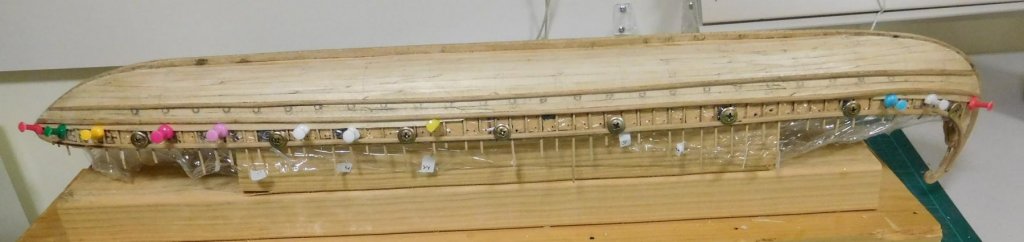
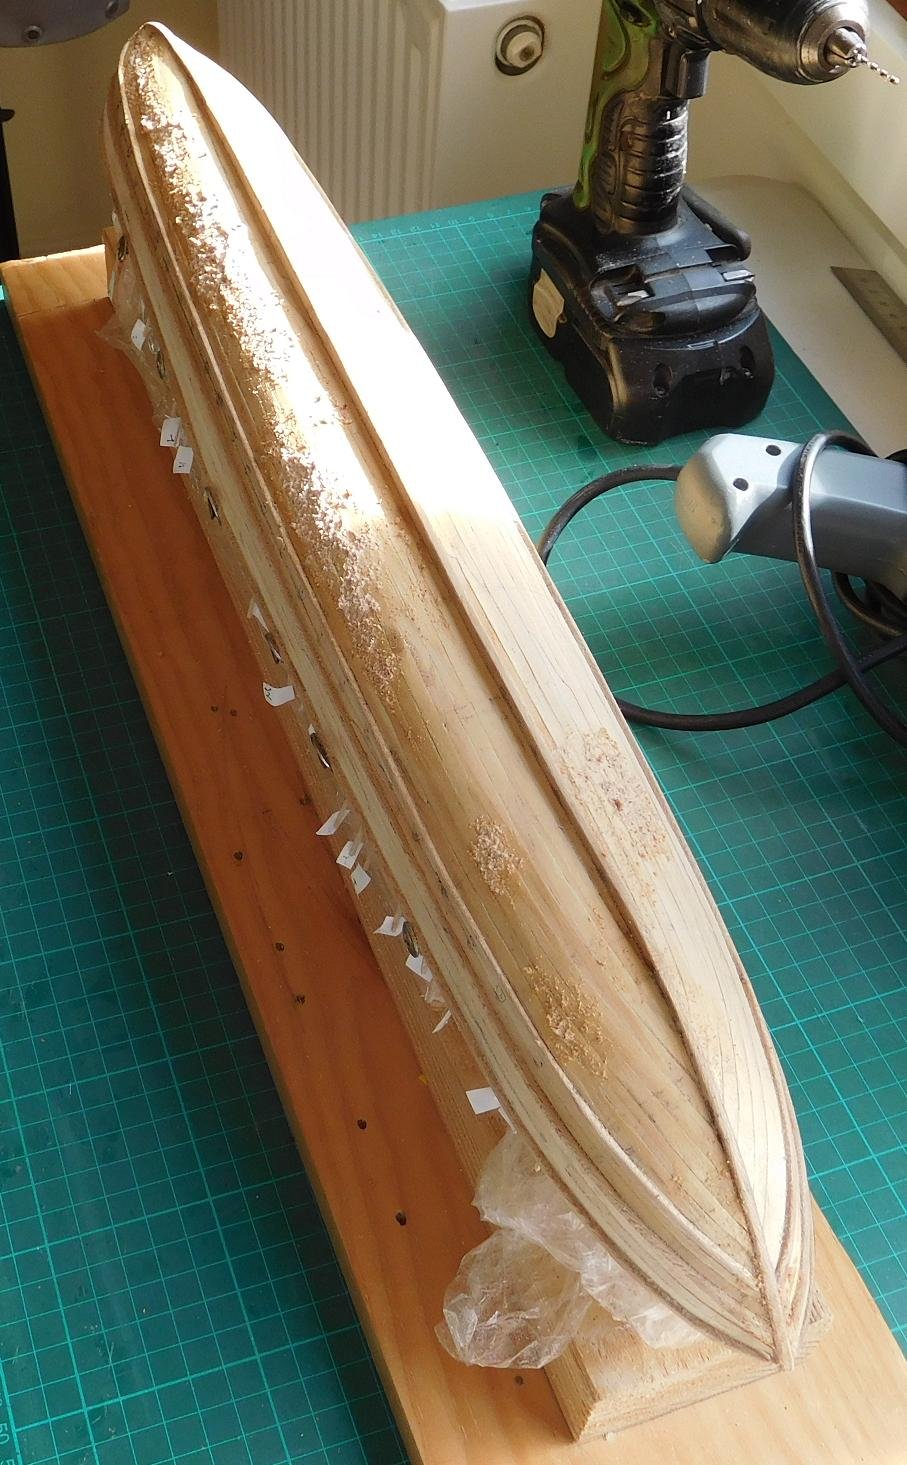
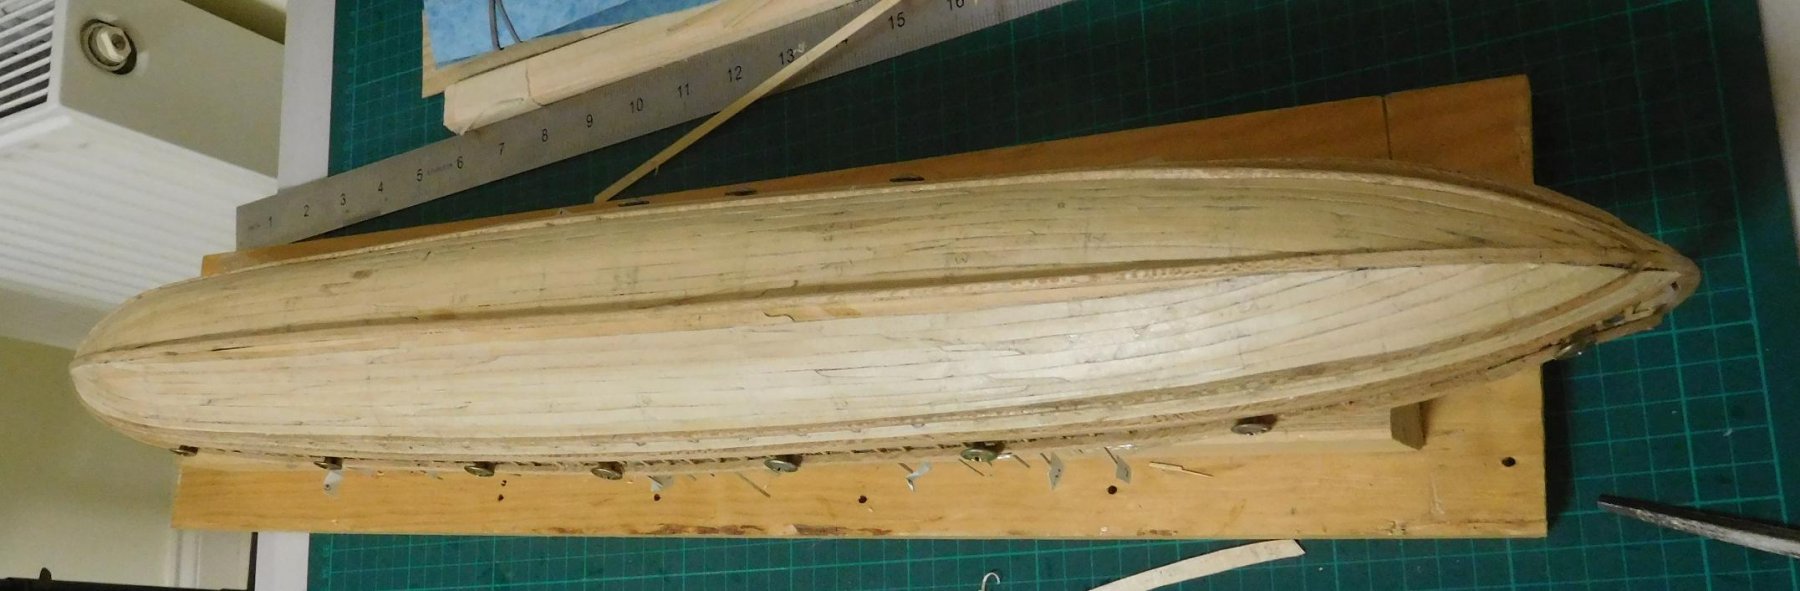
I made filler out of sawdust and white glue, though in some places I was trying to build up the shape rather than just fill gaps. The planks are pine, and I could have colour matched using pine sawdust, but I felt it would be better for the filler to stand out somewhat so I could tell better where the sanding was needed. So I used plane-tree sawdust, of which I had huge amounts. It was all a bit gloopy, but sanding smoothed it down nicely. It's still not quite perfect, but I think it's as good as I can realistically expect to achieve.

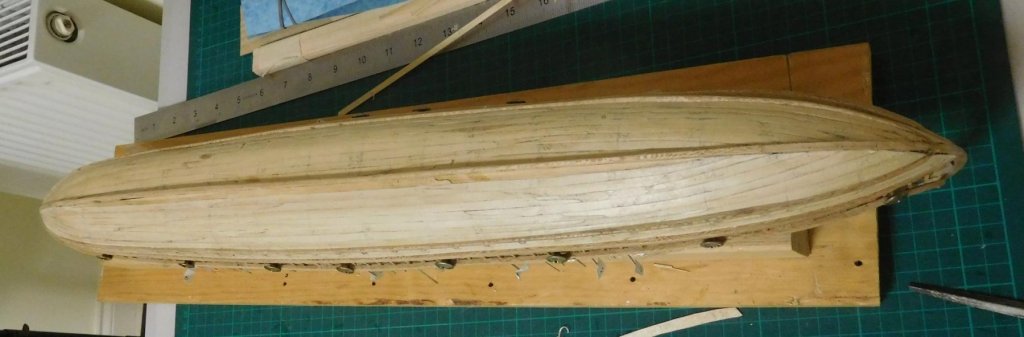
The very first strakes I put in pace were a bit mis-aligned so the carvel planking looked more like clinker, and I had to use the filler to build the hull up a bit to create a smooth surface after sanding. Here you can see the hull after filling and sanding. The darker areas are where the filler is.
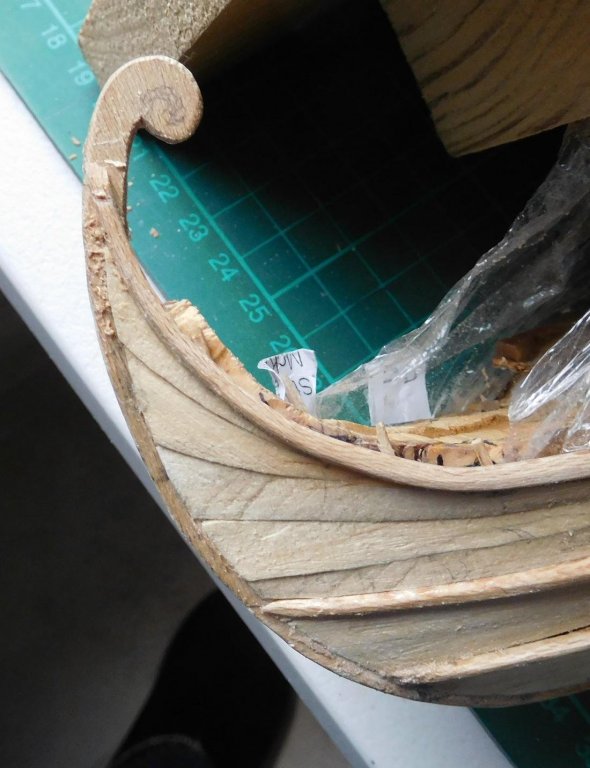
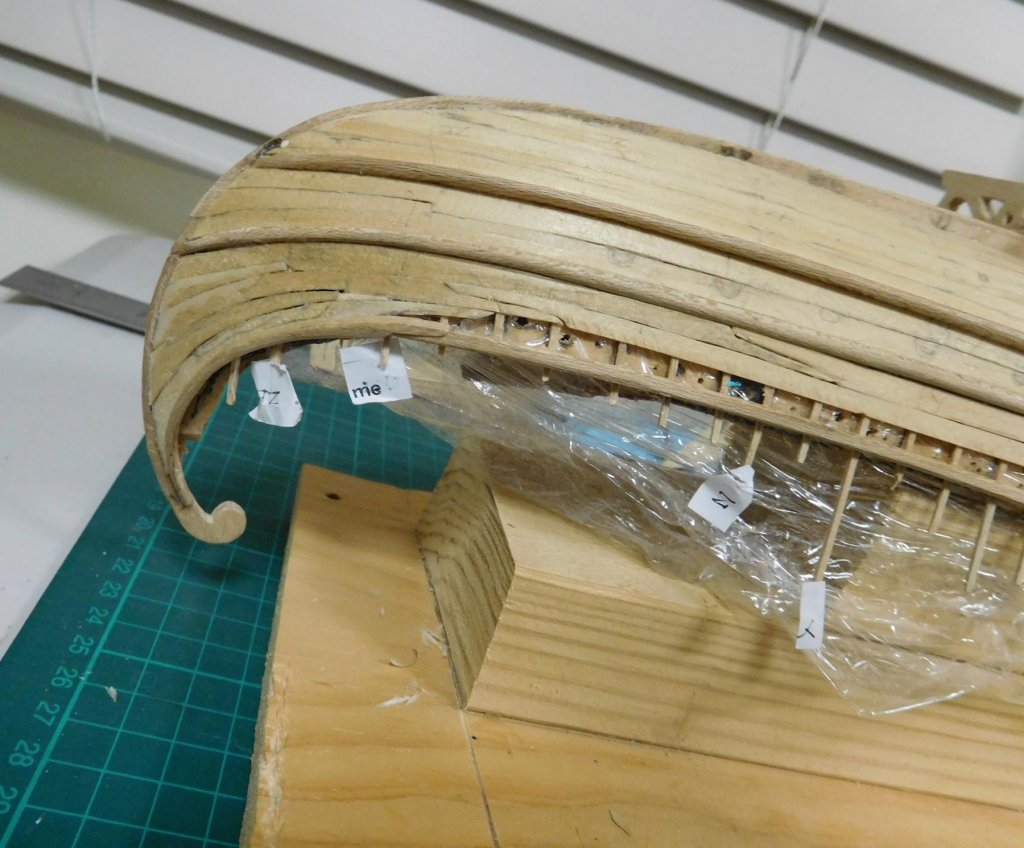
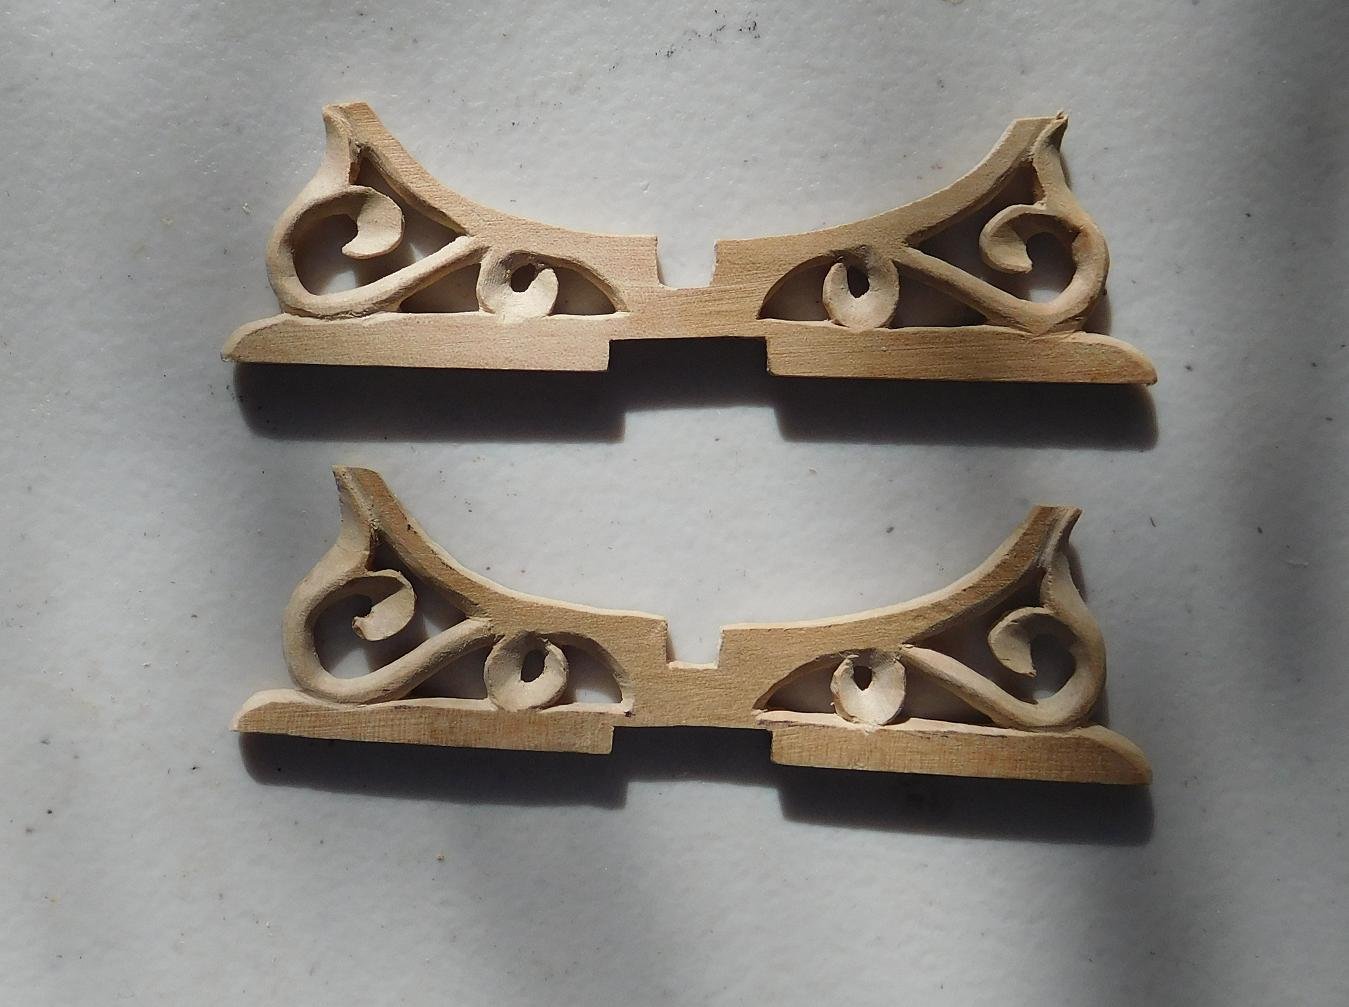
And the gunwales at the "tail" were a little different from each other in shape, so I used filler to build up the one I didn't like, then file and sand it down to the same shape as the other. This is the "good" one, bent directly to shape: (there's a bit of filler on the sternpost, but that's just to fill a small gap between the post and the ends of the strakes)
And here's the other one fudged to the same shape with filler.
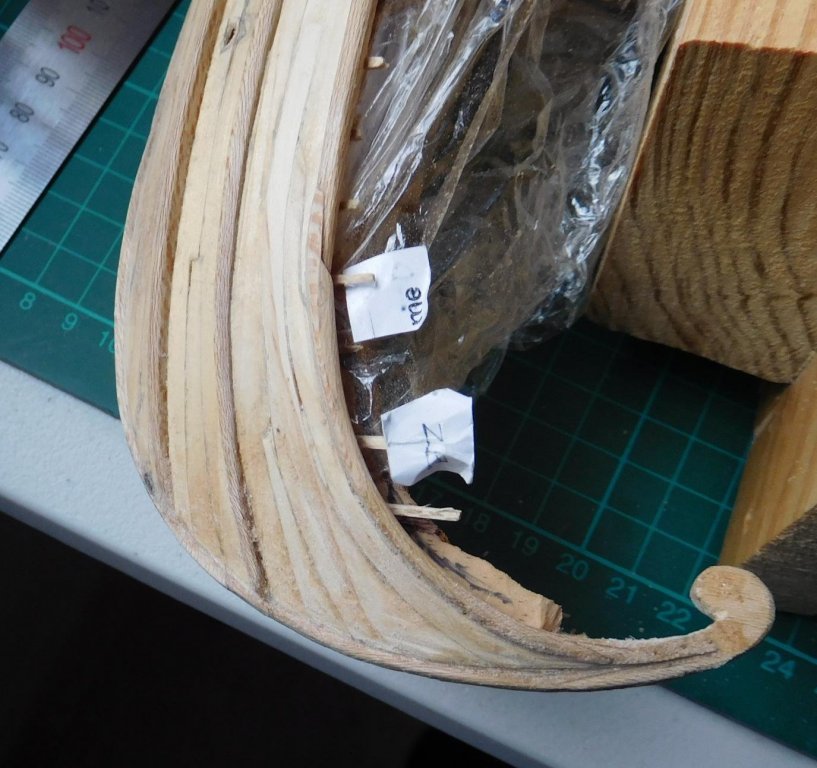
Yes, I know it's cheating, but I felt justified in doing it this way rather than trying to make another wale with as little likelihood of duplicating the other one as I'd had the first time. There were also gaps in various places that the filler helped fix.
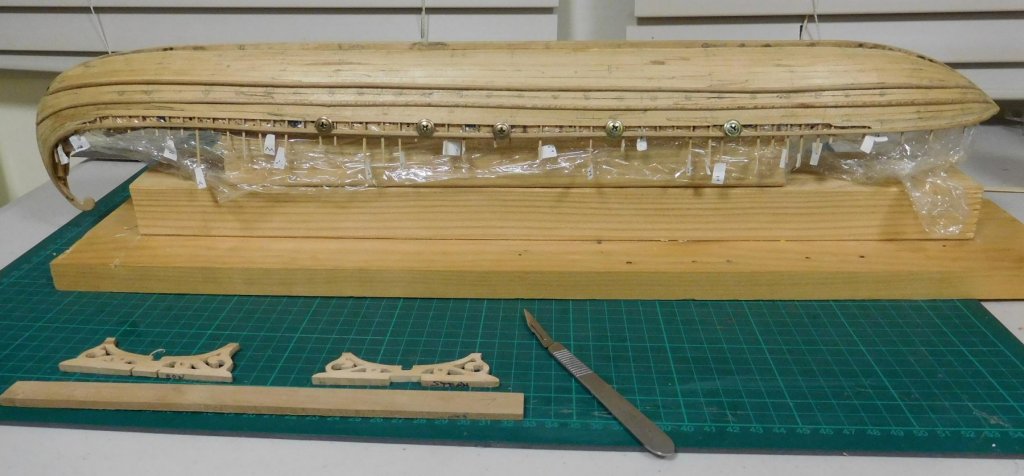
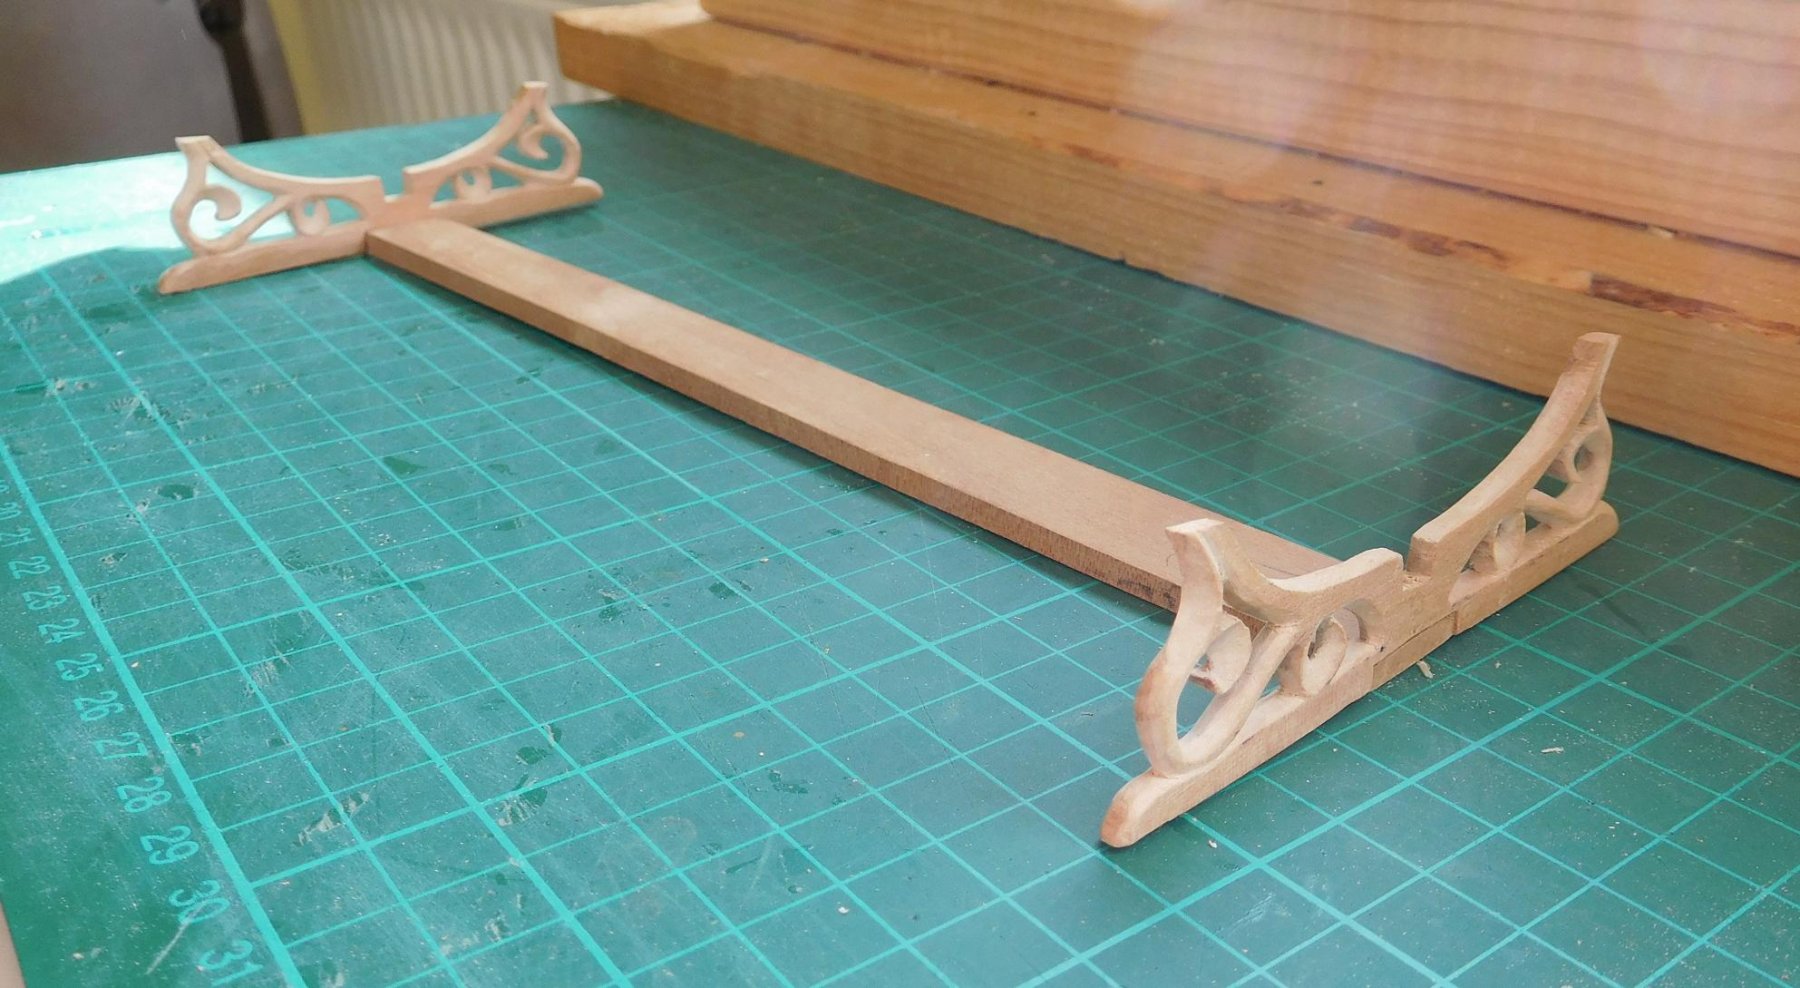
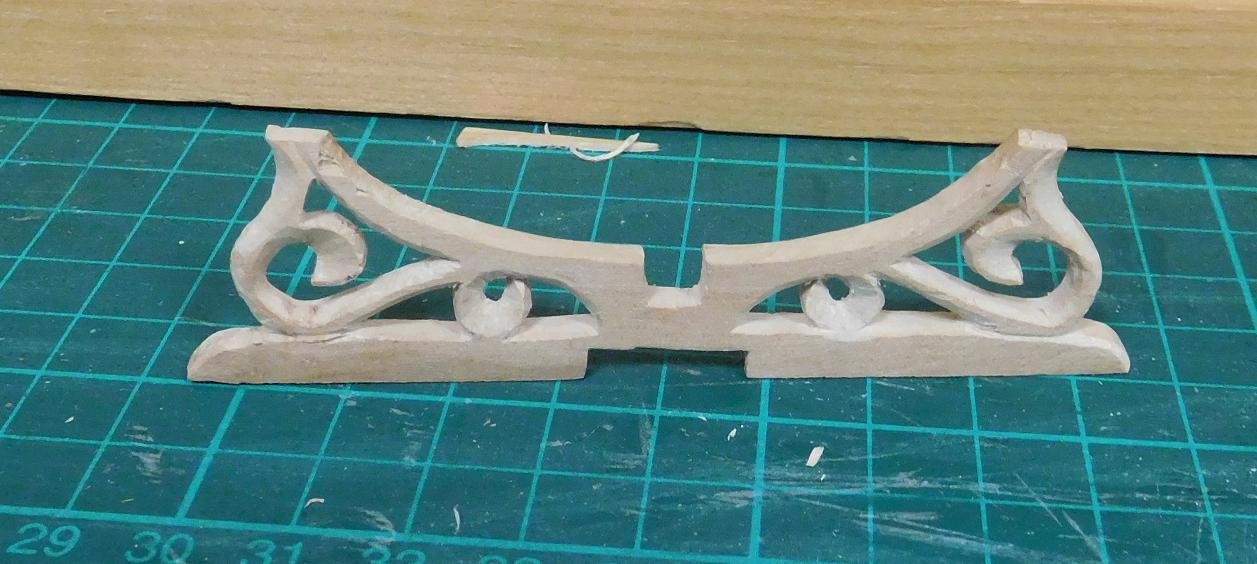
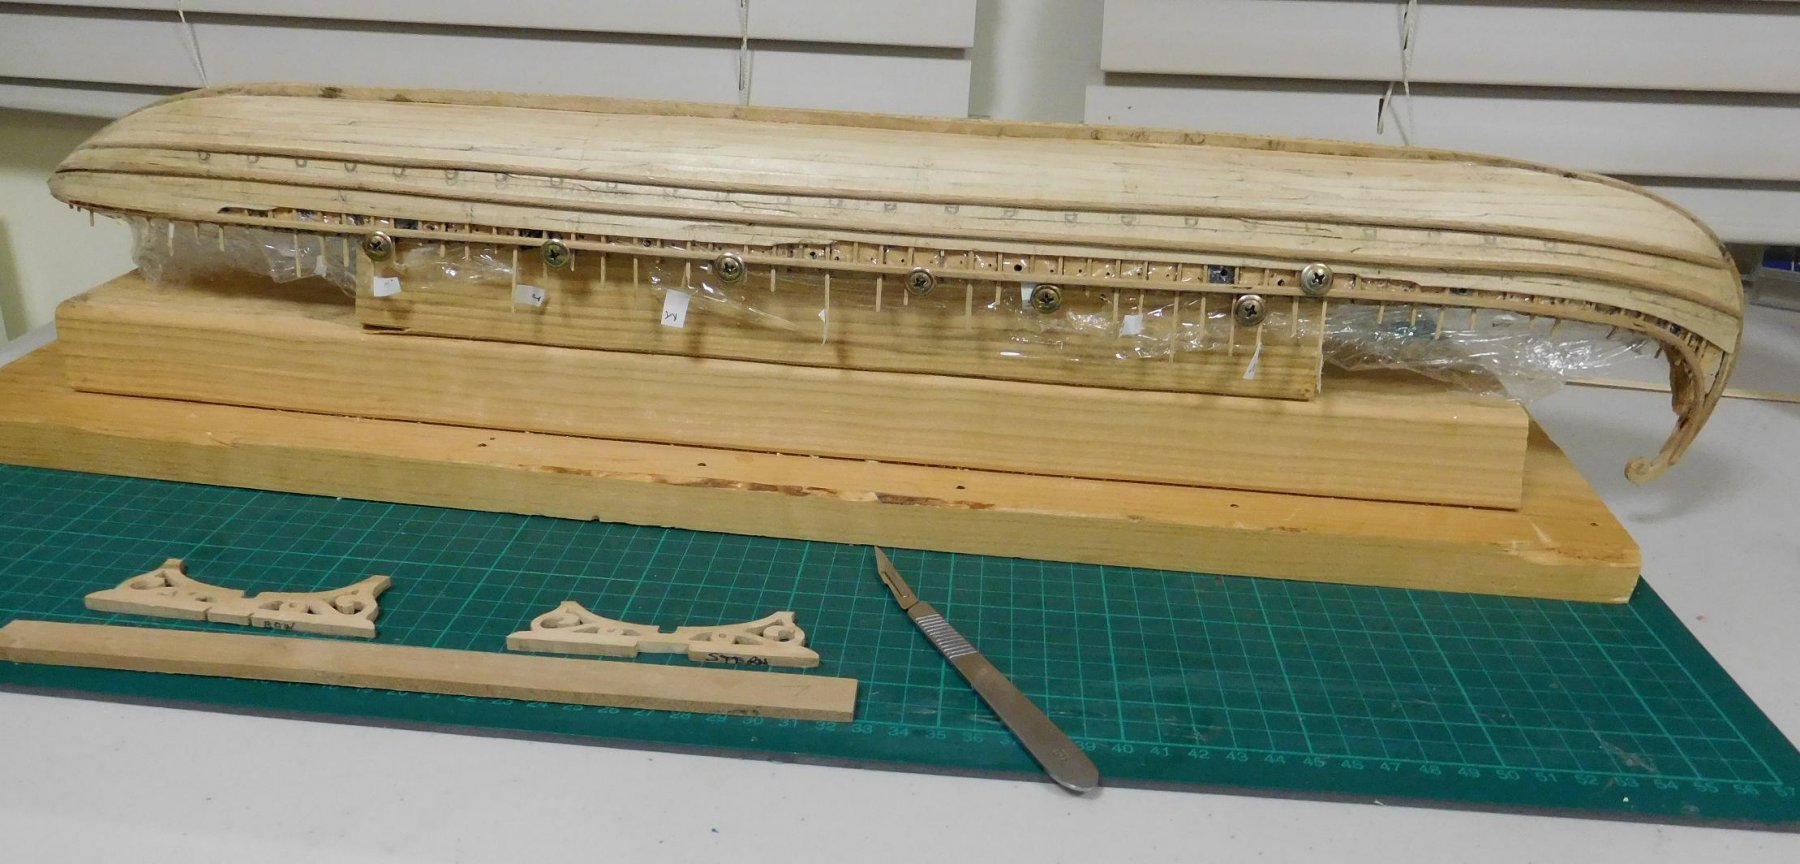
I've finished shaping the ends of the stand and sanded them smooth.
And I've glued the stand together.

As well as white glue, I used a small escutcheon pin to hold each end to the connecting beam. Once the glue is dry, I'll paint the stand gold (there'll be gold on the model itself, so it will fit right in), and then I'll have somewhere stable to put the hull so I can (finally!) take it off the plug.
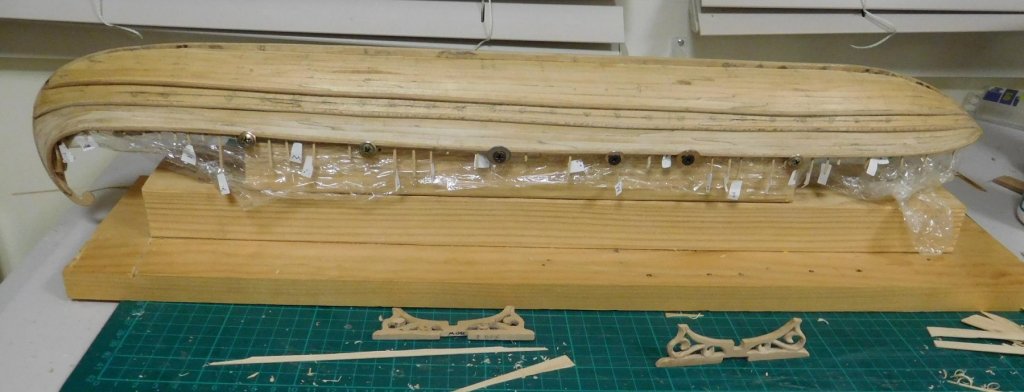
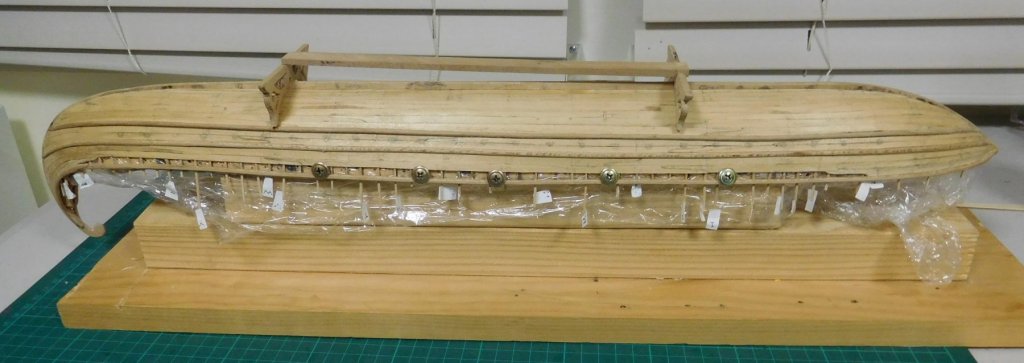
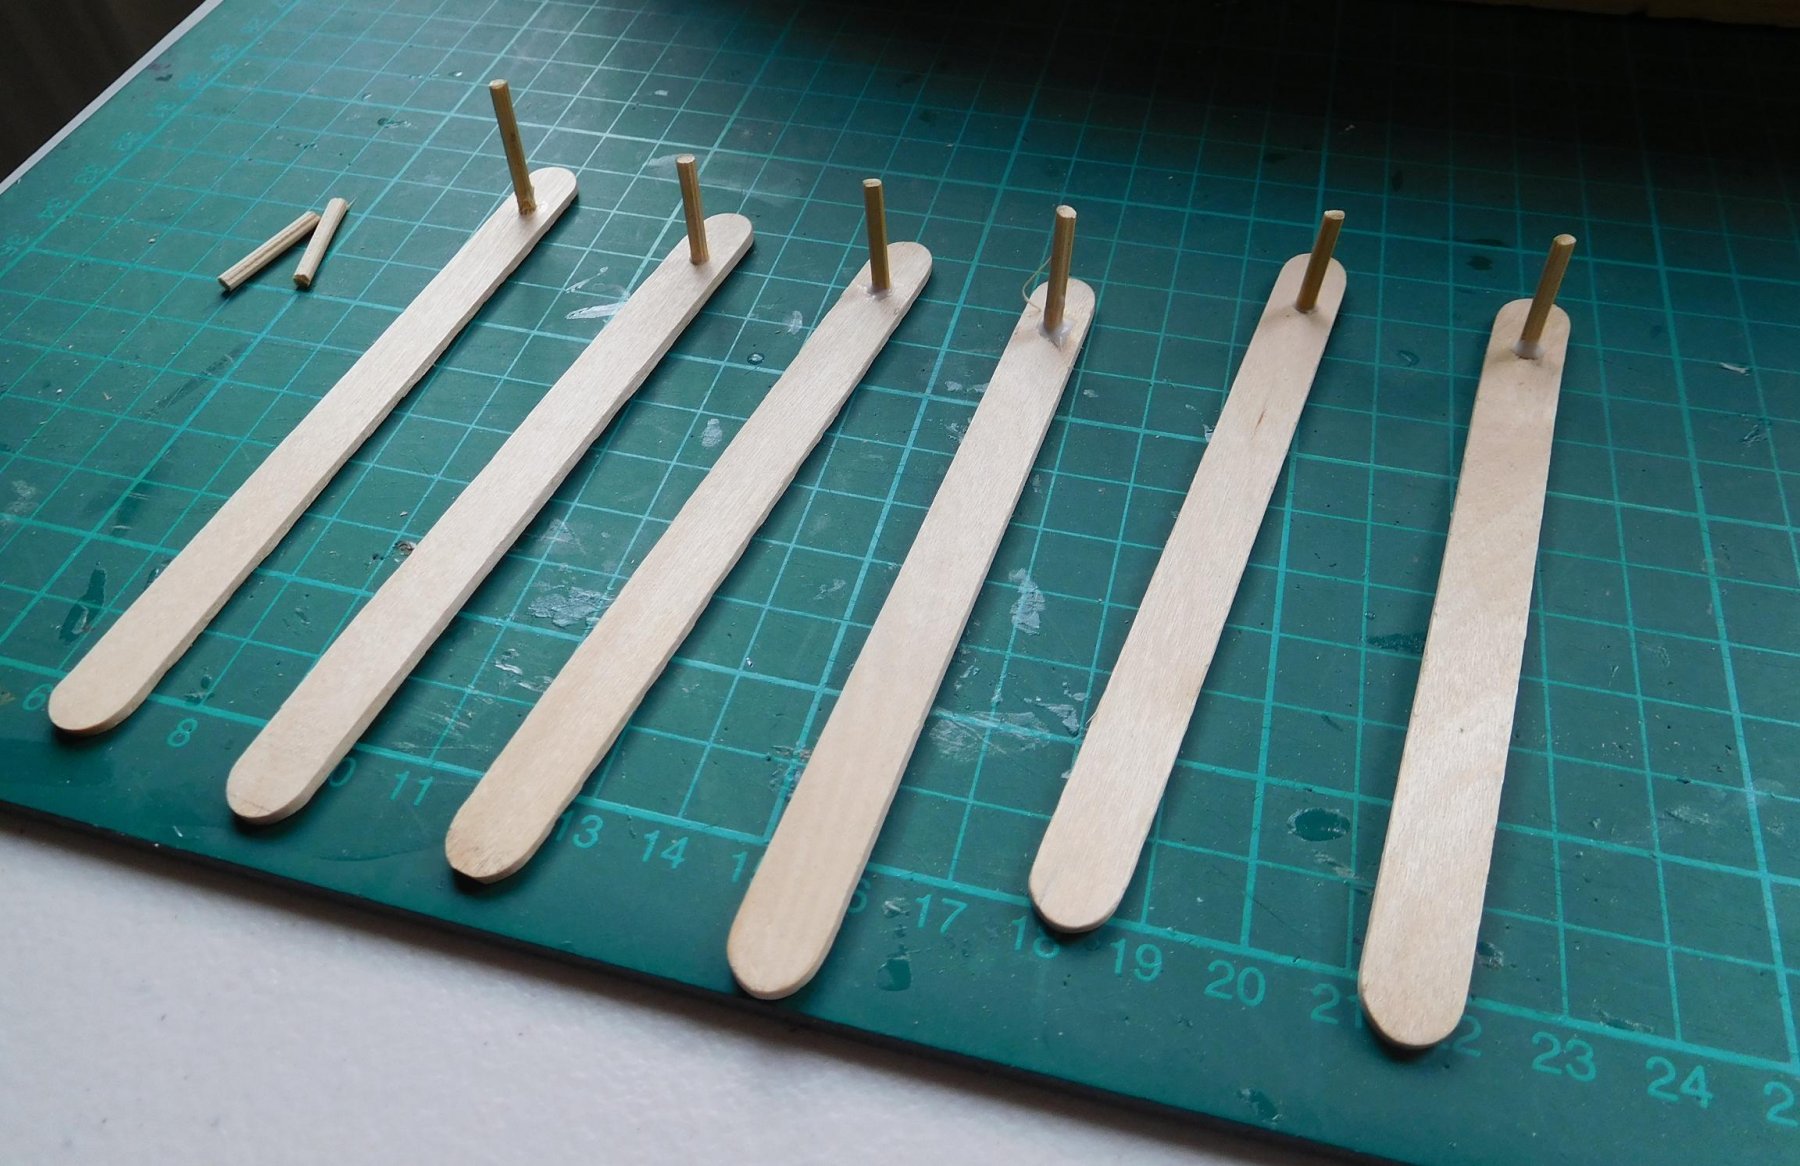
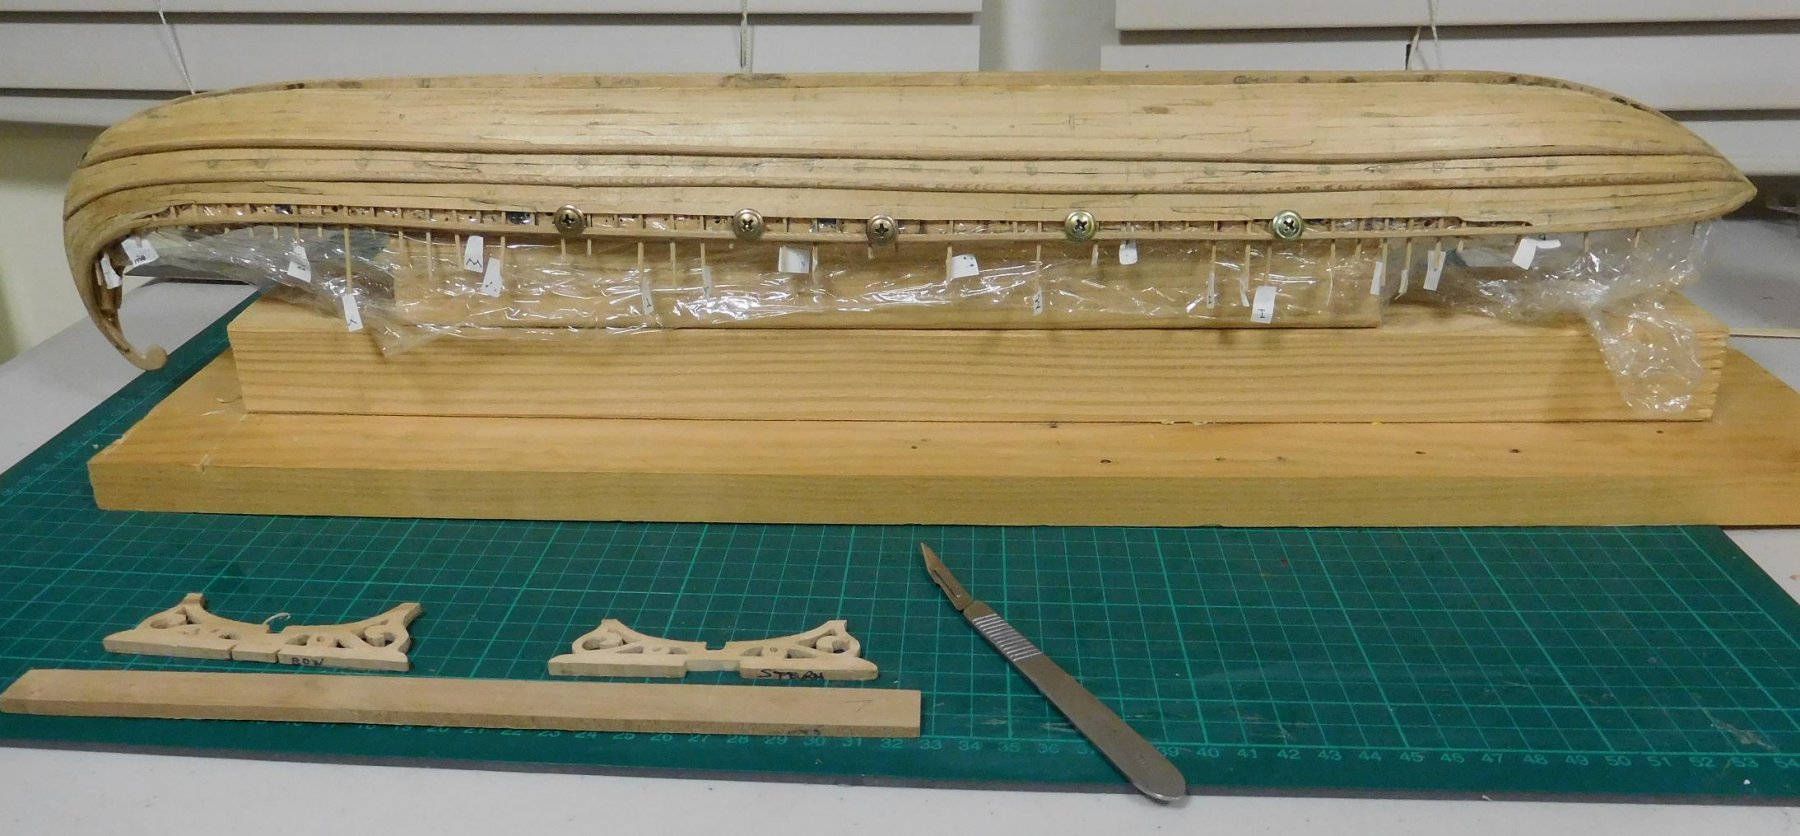
But there's another issue to solve when I do that. It's been a worry to me that the springiness of the frames has forced the gunwales outward by about 3mm (1/8") each side compared to the shape of the plug. At the moment I've got the gunwales held in place with temporary screws in the plug (see second photo above), but at some point they have to be removed. So I devised a set of temporary clamps to slip over the gunwales at strategic points along the hull. They are made of popsicle sticks with a bit of bamboo skewer through a hole at one end,
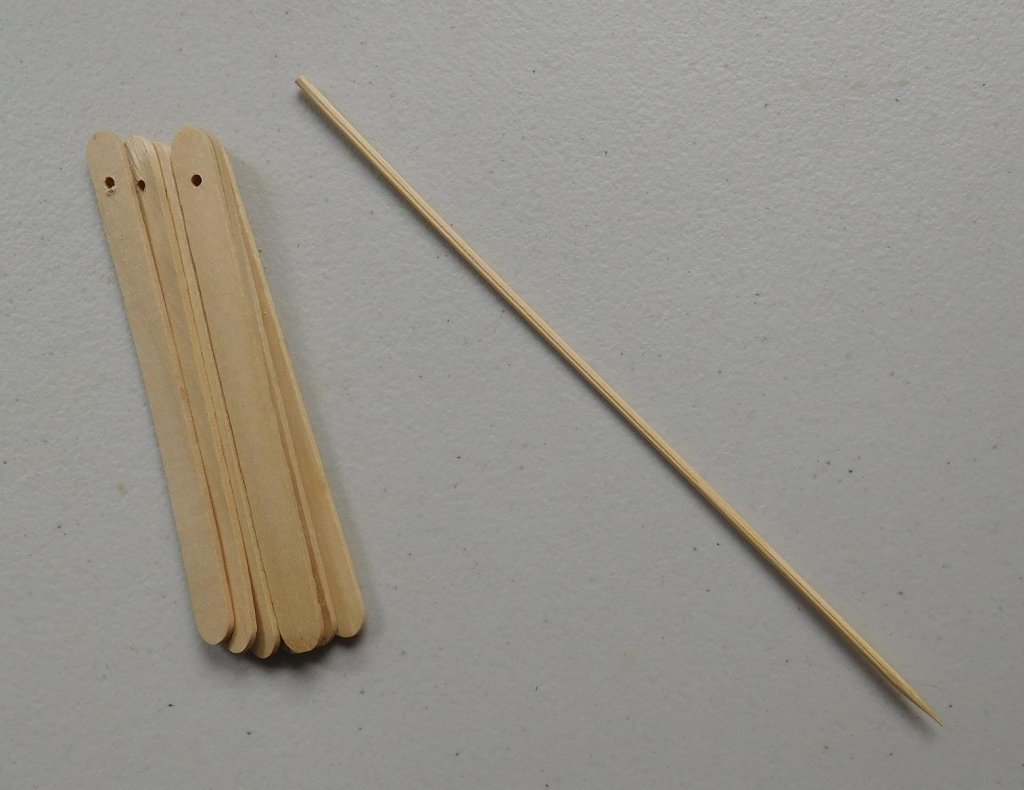
and there'll be another bit of skewer on each, in the right place to hold the gunwale in position at its particular location along the hull.

Naturally, I have to determine the correct width for each clamp, as the width of the gunwale varies depending on position. These clamps will stay in place until I can glue in deck beams, which will permanently hold the gunwales in their proper position.
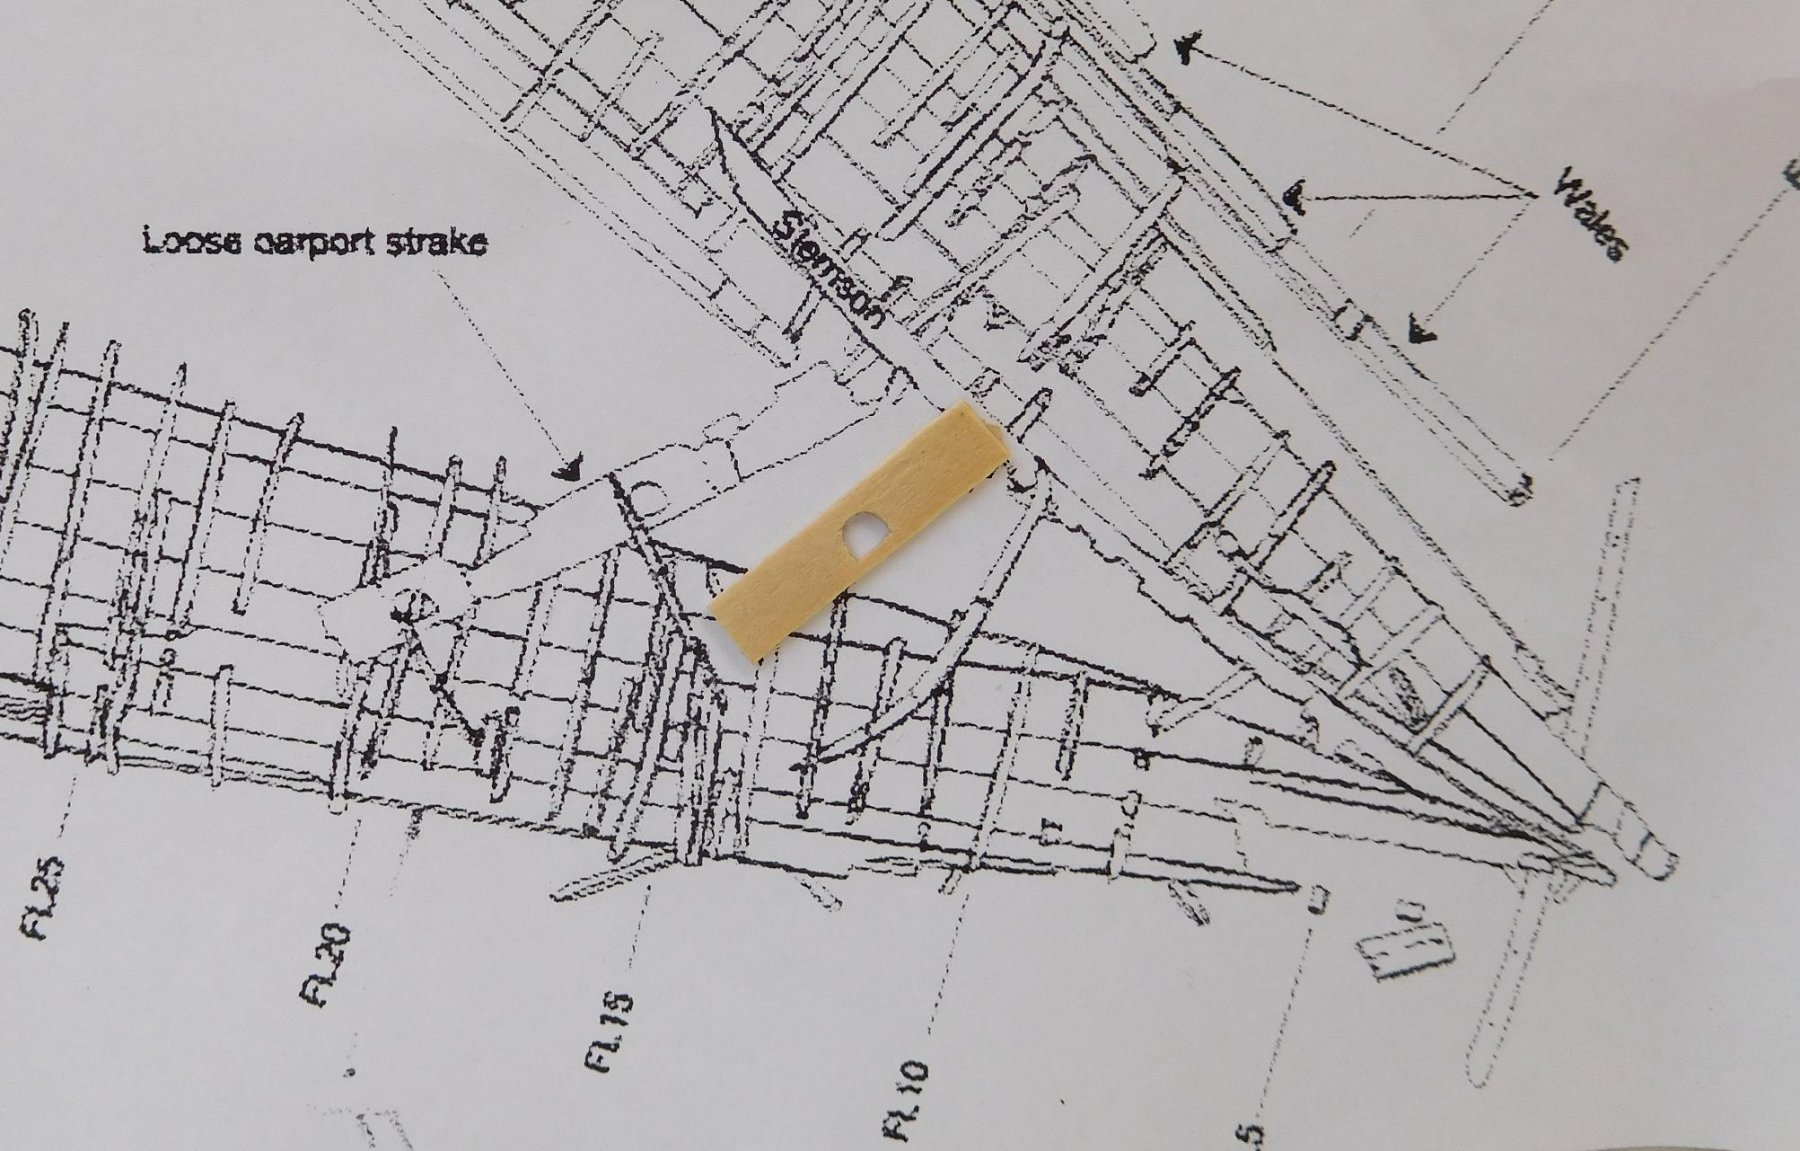
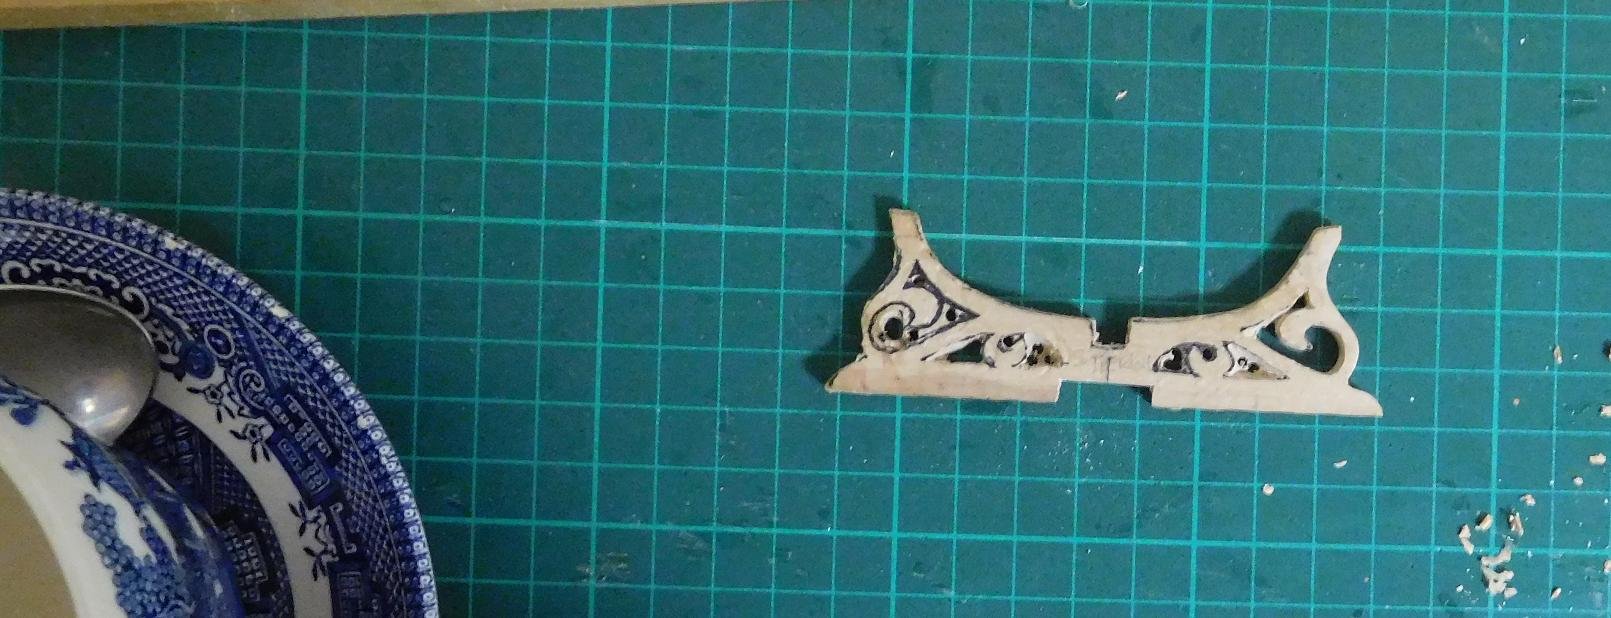
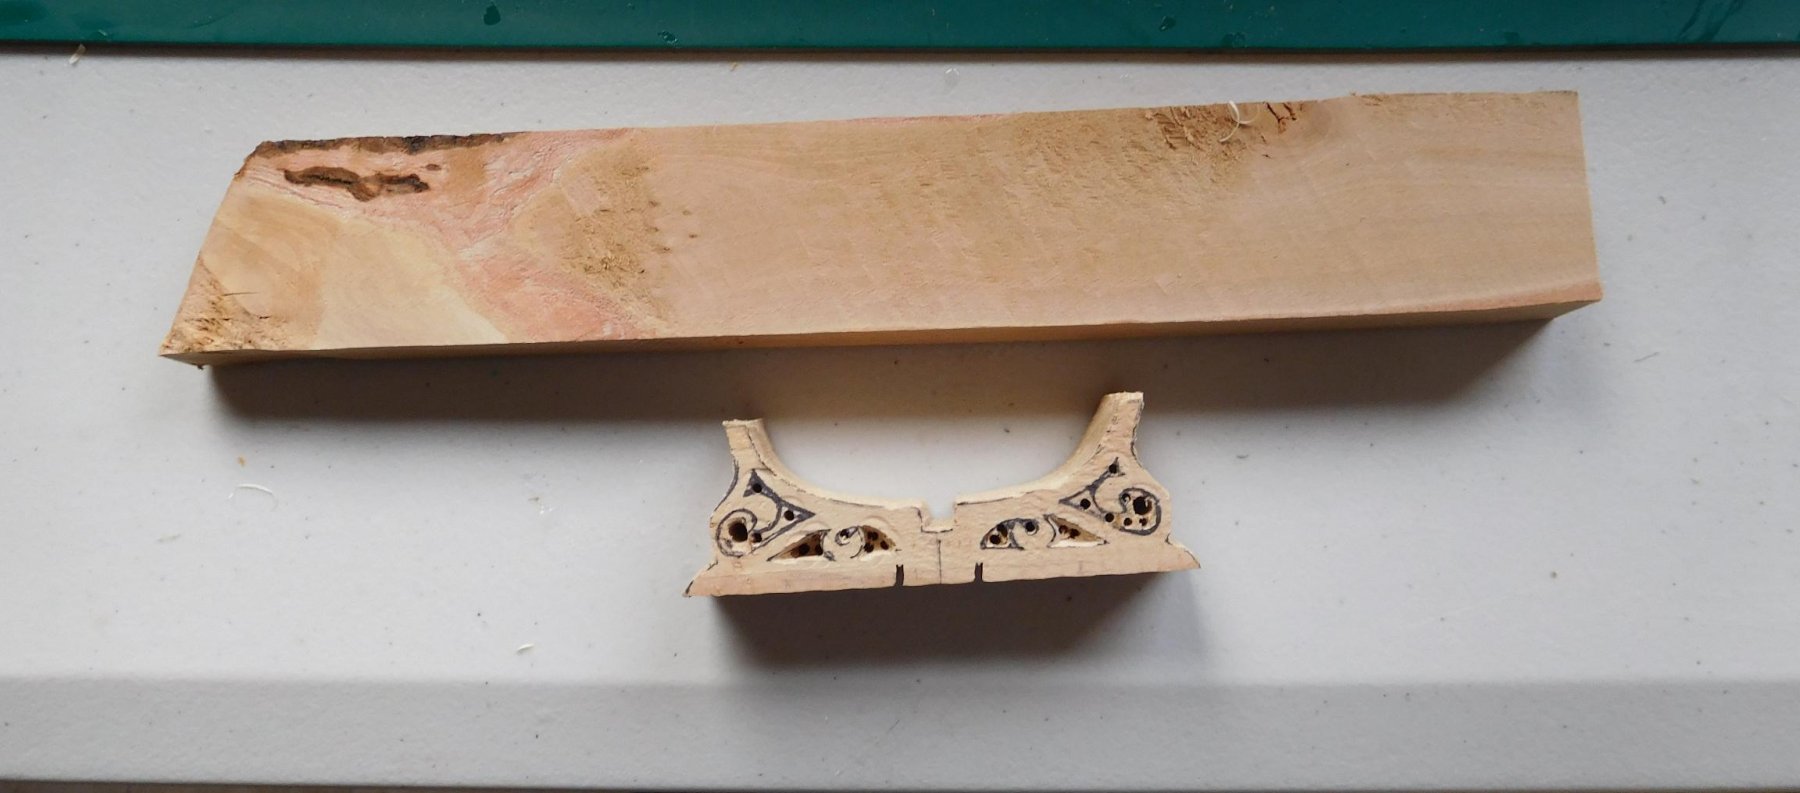
Finally, after a lot of agonizing and soul-searching, I've come up with a simple, elegant jig to mark out the oarports for the lower bank of oars. Fortunately, a fragment of oarport strake has survived on one of the galleys discovered at the Yenikapi site in Istanbul, with one damaged and two intact oarports. I blew up the archaeological drawing of the strake to the same scale as the model and made the jig you see here.
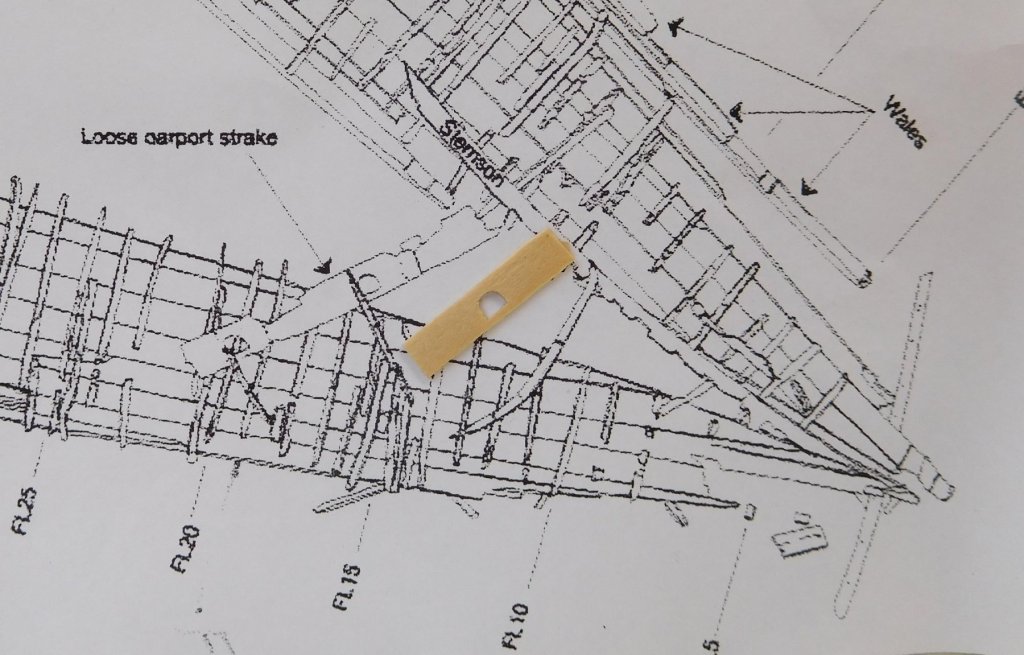
Its operation is simplicity itself - just rest the jig on the wale below at the location of the oarport, and trace through it onto the hull with a (very sharp!) pencil. No need to laboriously measure up from the wale each time, or try to get a line exactly parallel to the wale. Just rest the jig in place, trace through, and bingo! you have a guideline to cut the port.
When it came to making the jig I discovered the oarports were quite a bit smaller in reality than I had believed. In fact the oars I'd made previously wouldn't fit through the hole in the jig. I thought I was going the have to re-make (or at least drastically alter) the 50 (upper bank) oars I'd made.
But using the only lower bank oar I've made so far, I discovered a very small amount of sanding of the blade would narrow it enough to go through the port, and an equally small amount of thinning allowed the loom to fit through the port in its proper location with enough room for full freedom of movement for the oar. And the difference is almost undetectable to the naked eye.
I can justify not altering the upper bank oars by telling myself that they are longer than the lower bank oars and subject to greater forces, so it's ok for them to be a little thicker in the loom (and they don't need oarports, as they are on the upper deck). And the difference in blade width - well, maybe the upper oars need wider blades to get more purchase in the water (a bit thin, I know, but what the hey - I really don't think it'll be noticeable anyway - this is just in case someone asks awkward questions . . .)
Steven
-
Not a problem. Hope it helps. I stumbled across this book a few weeks ago and was very favourably impressed. It's not a very big book, but I found it very informative and comprehensive. There's all too little information around on these craft, and the author has not only assembled pretty much everything in the historical record, but also done his own research and recorded such things as local variations (such as the prevalence of double canoes in the South Island because of the lack of trees of sufficient girth for single ones) the recent upsurge in Maori interest in these vessels, and the building of new ones in the last couple of decades. They were in danger of becoming yet another extinct vessel, but now their future seems good.
Steven
-
I just finished reading a very informative book on the Waka in my local library, with a wealth on detail on the canoe's history and construction with a part by part description of the parts of the vessel, how trees were selected, cut down, hollowed out (part cutting, part burning), superstructure, the role of tabu in the shipbuilding process, you name it.
It's by Jeff Evans and is called "Waka Taua: The Maori War Canoe". Published 2012 ISBN 9781875514401. I recommend it highly. I had no idea these vessels were so sophisticated.
Steven
- Omega1234, CaptainSteve, mtaylor and 3 others
-
6
-
-
Dick, every time I think it can't get any better you come up with something new and amazing!
Really looking forward to seeing her spread her wings.
Steven
PS: Thanks for the comment on the dromon
- CaptainSteve, cog and mtaylor
-
3
-
Thanks for all the likes and the comments.
Bearegalleon said
Would it have any runes scratched into the railings by bored vikings? I think there are some in the Hagia Sophia.Nope, not on this one, though one of the guys I've carved to be part of the crew is a Varangian Guardsman (He's the tall one). I've been in Hagia Sophia and taken photos of the famous runic graffiti - it says something like "Halfdan was here". But there's graffiti everywhere in Hagia Sophia! Including some ship names and dates from the 18th century on one of the marble columns on the southern gallery, plus another of a ship I think is 15th century scratched on another column (I have photos!)
Steven
-
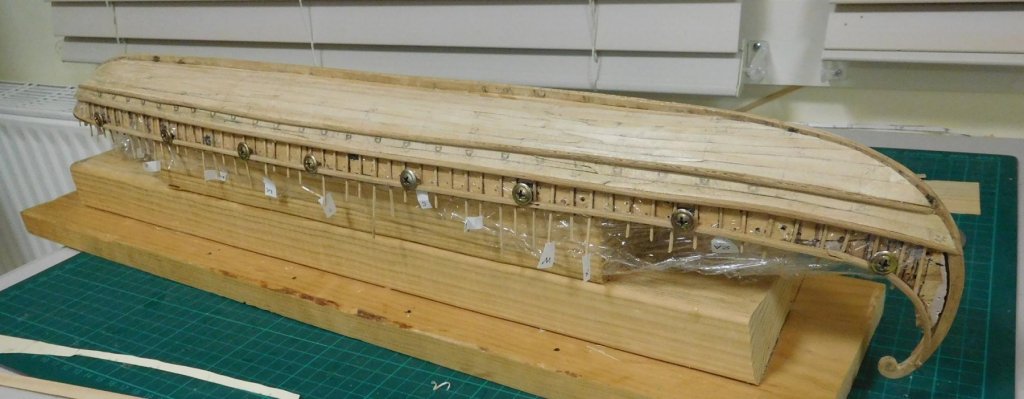
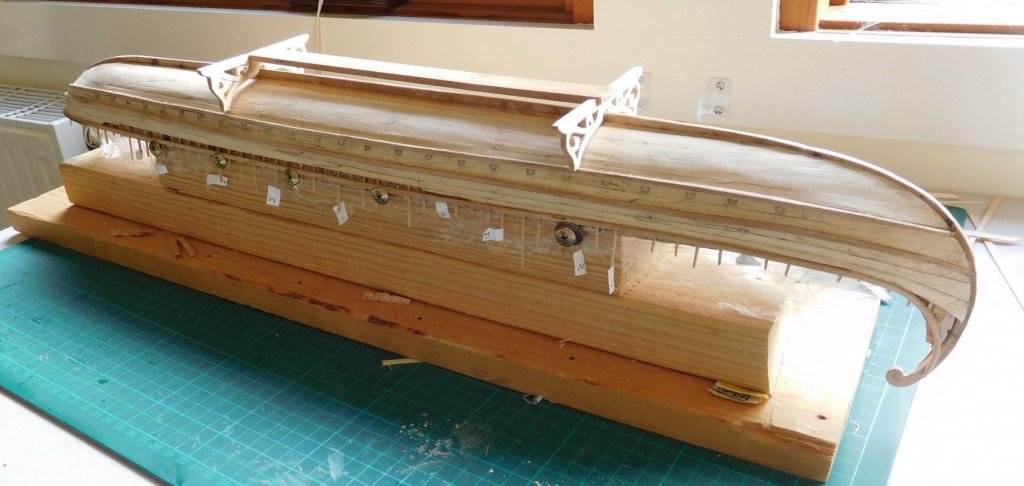
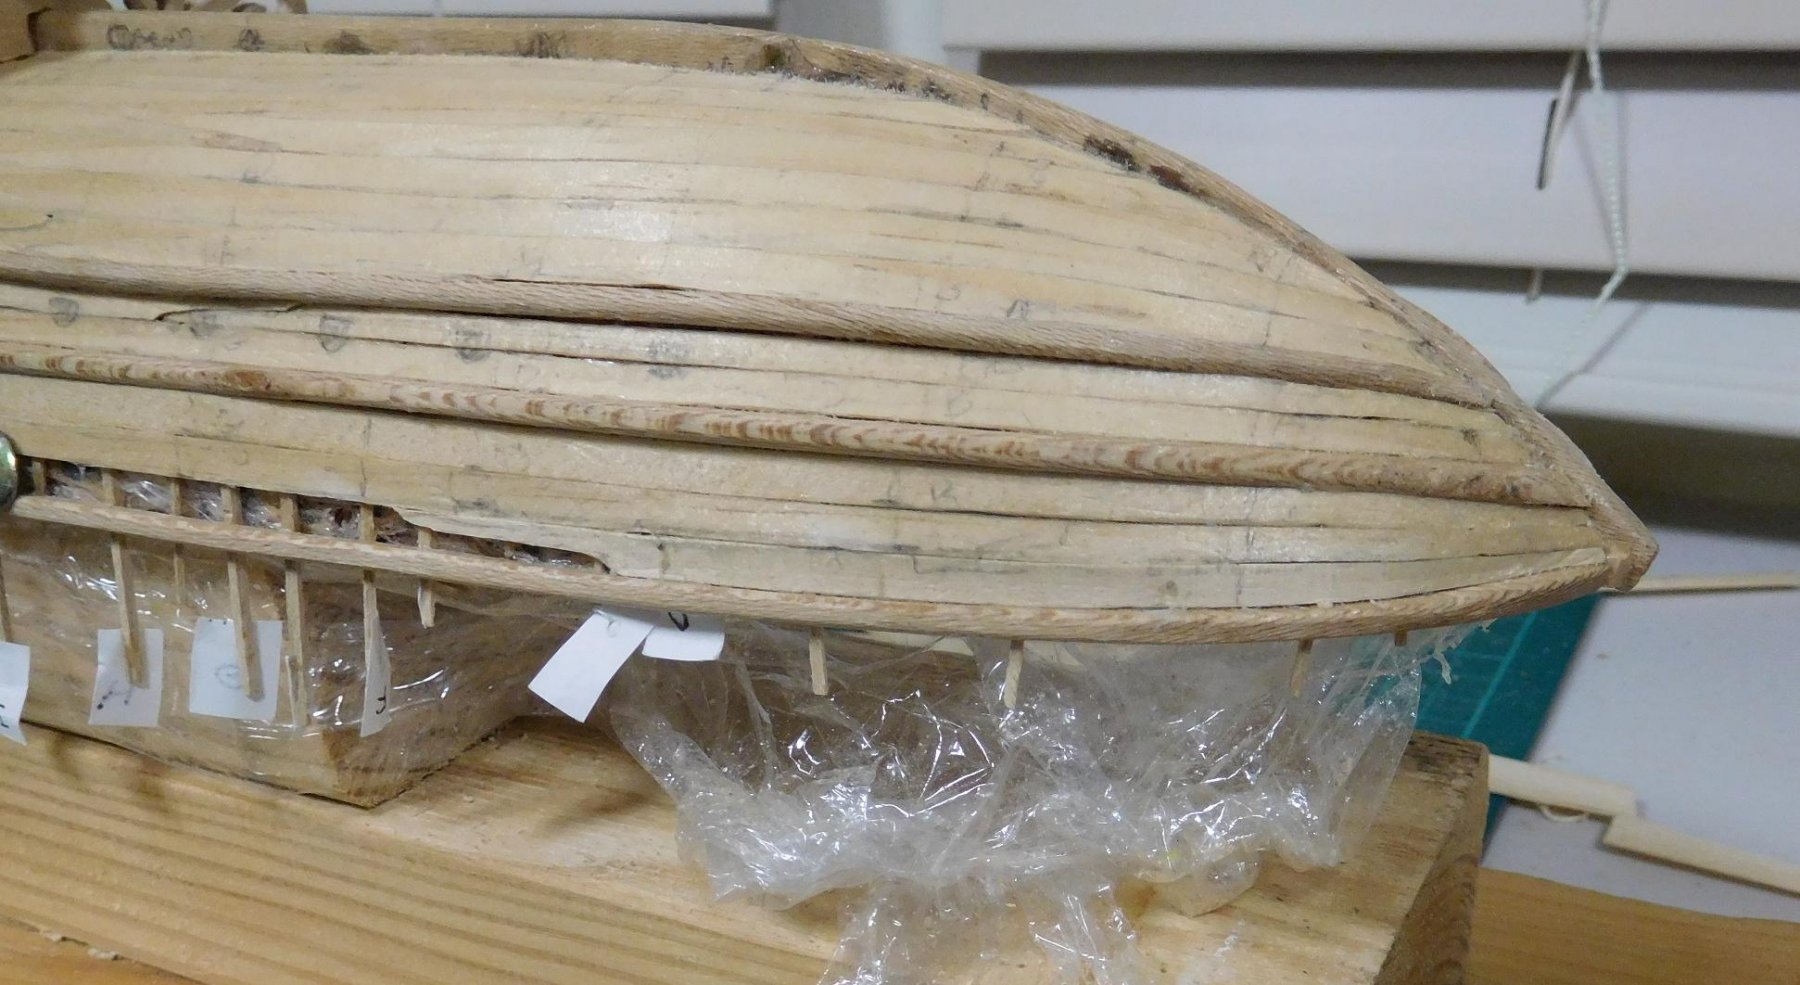
Finally, the planking is complete! (breathes sigh of relief). Funny, the ship seems rather taller than I was expecting while I was putting the planks on. But of course it includes the part of the hull which would normally be underwater.
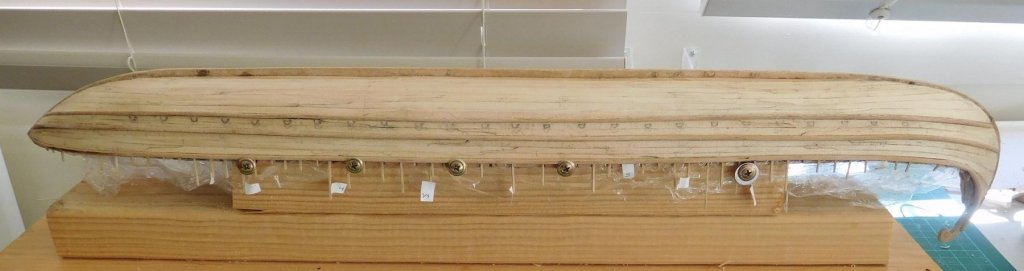
Next I'll fill gaps and smooth off the hull, and cut the oarports, and then I'll be ready to take the hull off the plug.
There's still a lot left to do, but there's quite a sense of achievement in getting this far (even though at times I felt it would never happen). Thanks to everybody who encouraged me with likes, comments and advice, and I particularly have to thank Woodrat for his generosity in cutting the timber sheets I made the planks from and sending them over from the other side of the continent. It's finally borne fruit, and I even have enough left over to plank the deck as well!
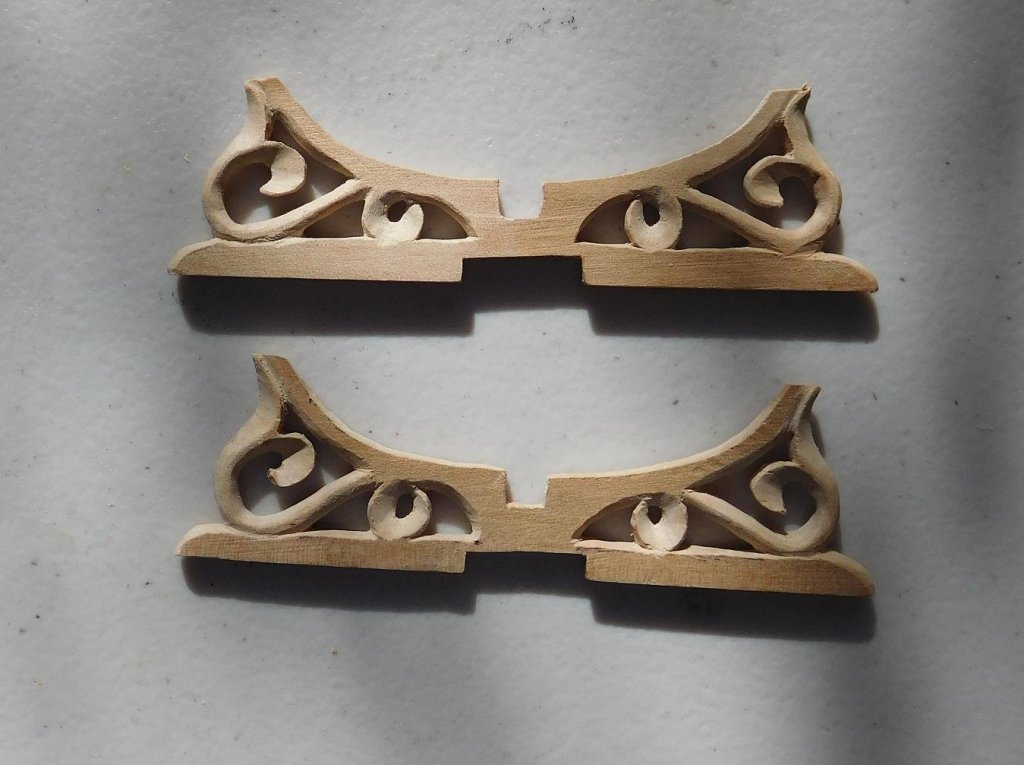
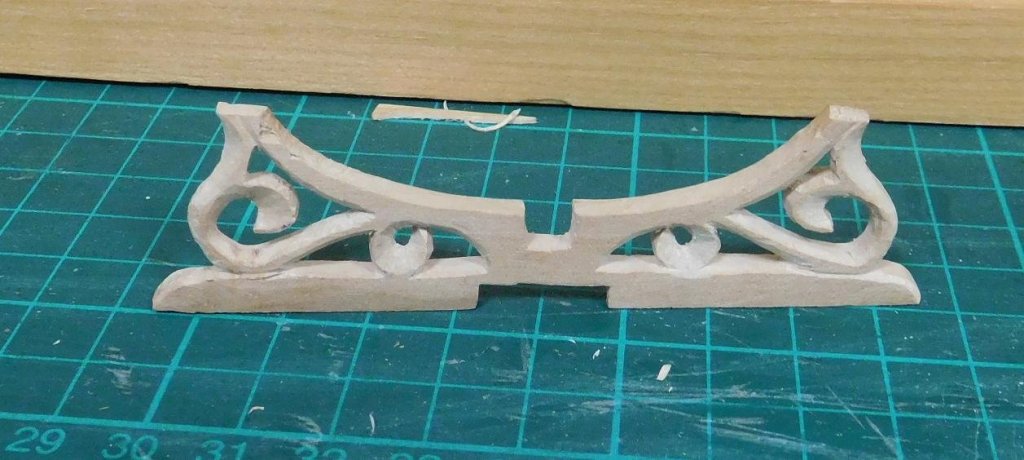
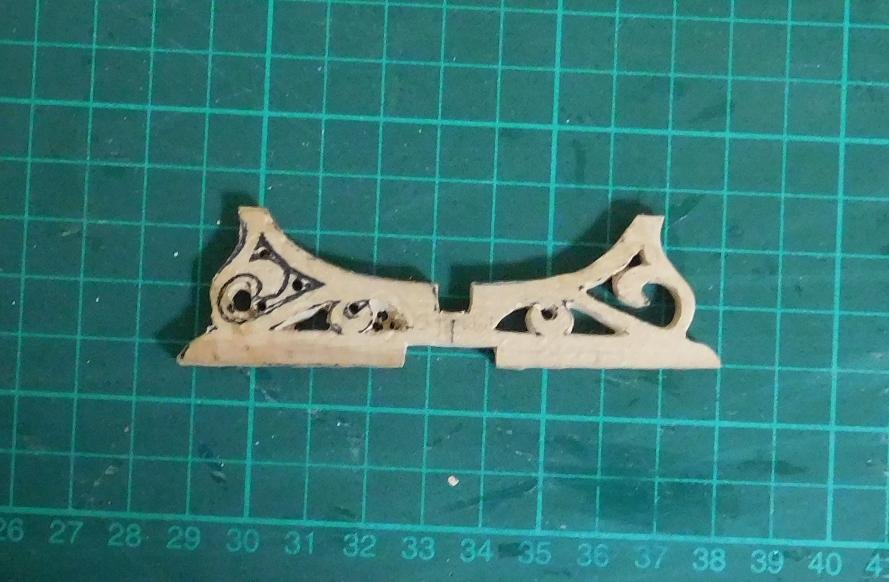
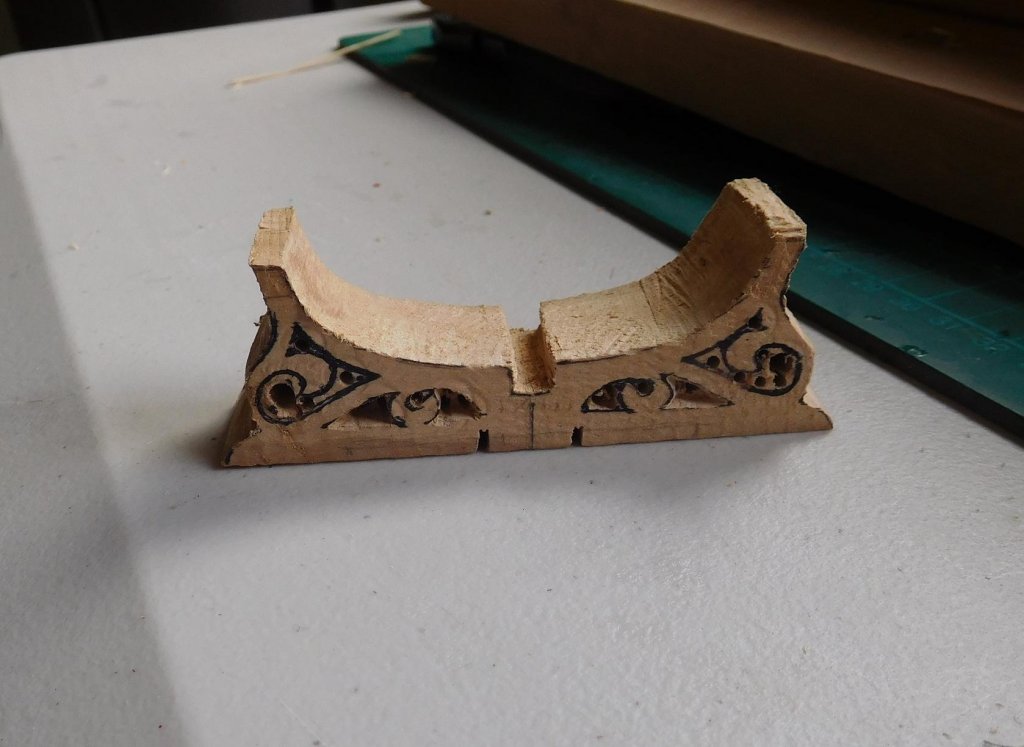
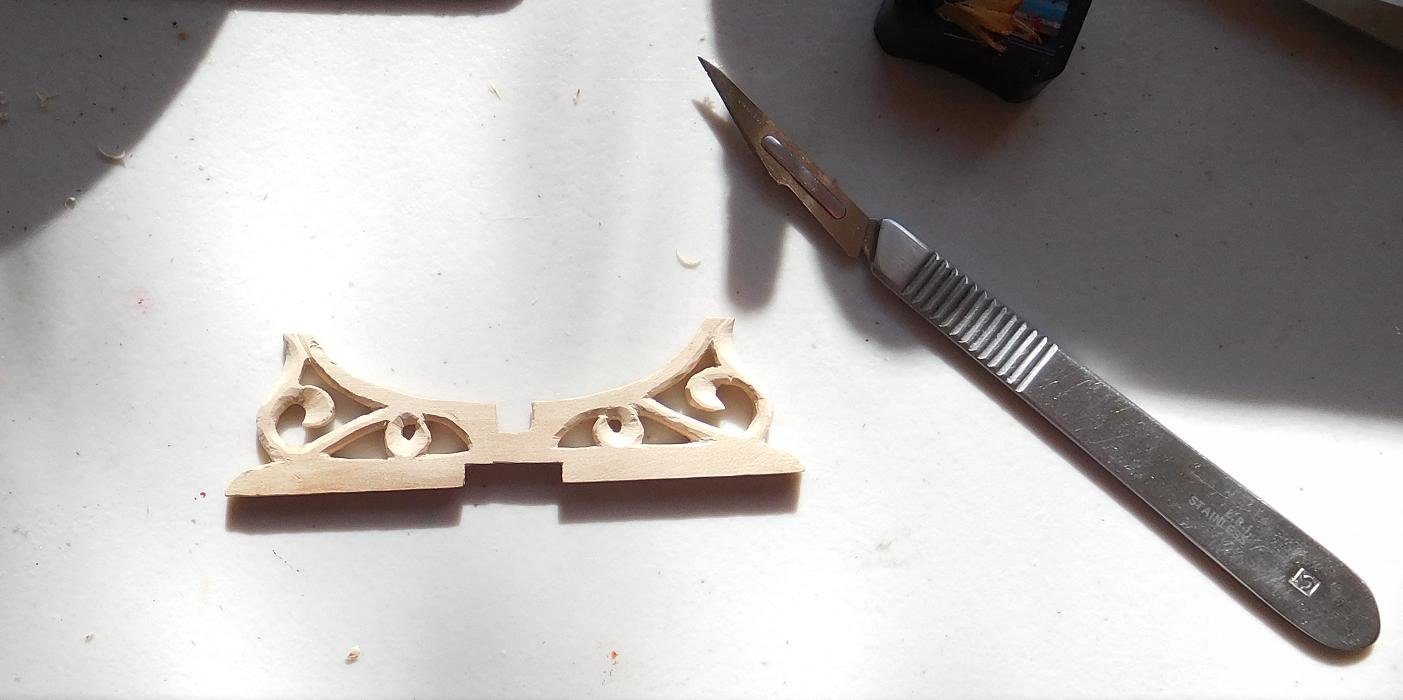
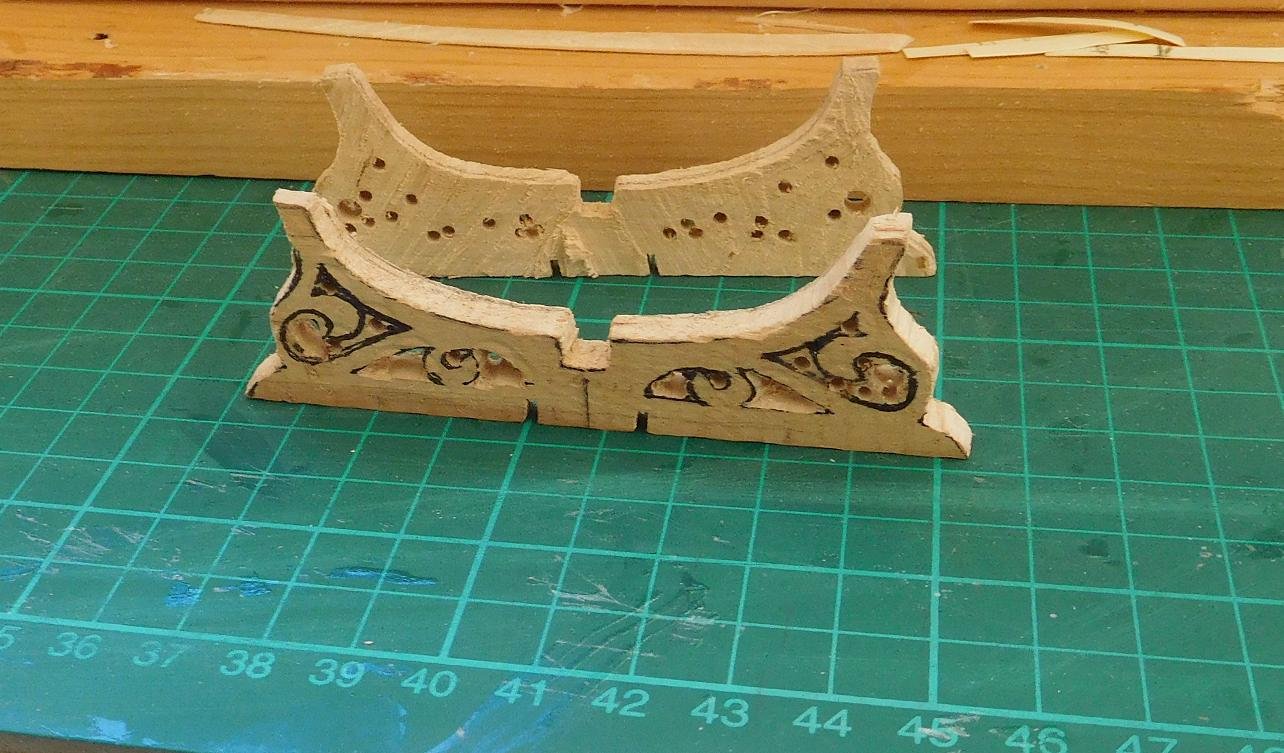
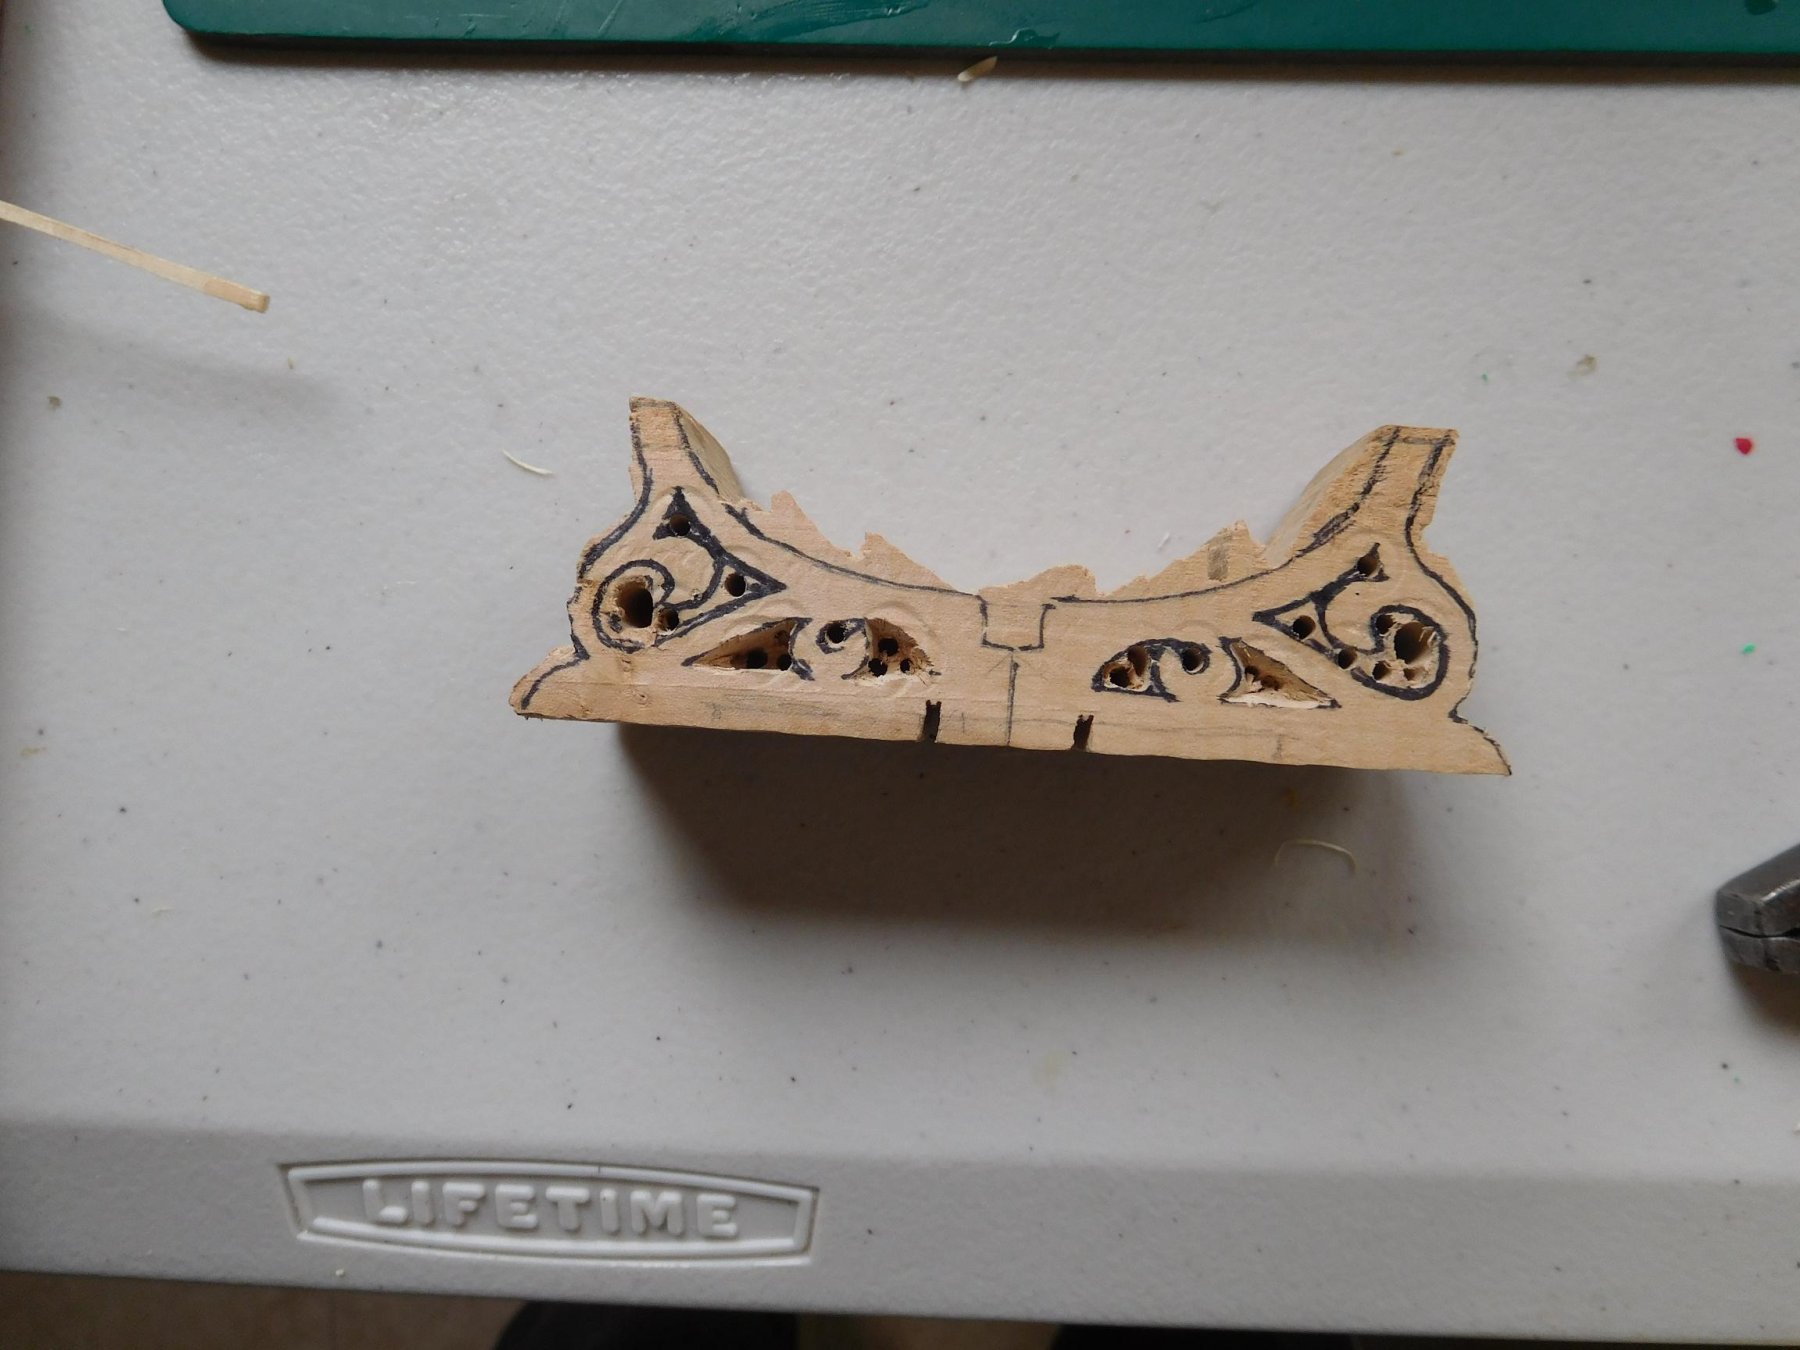
And I've also been working on the stand - I've started carving the vines and leaves into 3 dimensions. One end piece is roughed out and I've just made a start on the second one.

Steven
- woodrat, kees de mol, IgorSky and 14 others
-
17
-
-
-
Beautiful work, Patrick. And the depth of your research is very impressive. It is wonderful to see someone putting so much time and effort into assembling all the information available to get a model as close as possible to the reality, especially when the information is so scarce. I feel the same about research - I think it is at least half the fun of modelling.
Steven
-
Finally got a chance (and the energy) to get to the computer and update the build log.
I've come to terms with the fact that the planking isn't and won't be perfect and decided to do the best job I can to make a worthwhile model, even if there's a bit of behind-the scenes bodge that only I know about. Really, looking at it again, its' a damned good-looking ship and definitely worth the extra work to bring it up to scratch. I think a bit of filling and sanding will make all the difference. And I've learnt a lot that will stand me in good stead for the next build.
So, apart from a bit of tweaking still needed around the "tail", I'm almost finished planking. Here are some progress pics
This (above) is the bit I'm least happy with. If I can get this straightened out I think I'll be a lot happier with the build.

Up to the antepenultimate plank . . .
And the stand is making good progress - not yet where I want it to be, but looking good. I may put some three-dimensional work into it - the vines and leaves - rather than just leaving it as a flat surface.


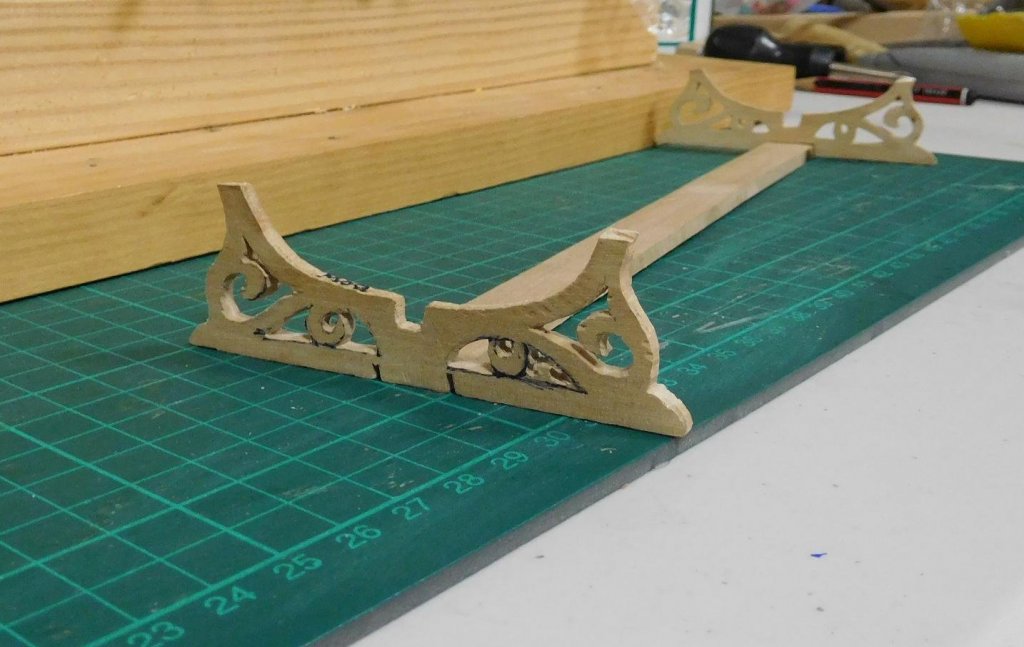
Just dry fitted at the moment, until I finish all the carving. But I think it will be a fitting adjunct to the model itself.
More updates in due course.
Steven
-
Hi Martin,
I've got about three planks to do, plus a bit of tidy-up (well, bodge, actually) to fix an earlier miscalculation.
I've been meaning to post progress pics, but with pressure of work in my new job all I want to do at the end of the day is lie down on the couch and veg out (for non-Australians, that's acting like a vegetable - lie there doing nothing).
Give me till the weekend and with a bit of luck I'll be able to summon the energy to complete the planking. I'll still have to do some filling and sanding to smooth off the surface, but overall it's starting to look pretty good.
Then I can move on - first cut the oarports, then take the hull off the plug and put in the other half of the frames (between every pair of the existing ones).
Then I can work out what to do next - I'll probably put in the mast steps first and then work up a structure to hold the lower bank of oars in position.
Still a long way to go before she's complete, but little steps, little steps . . .
Steven
-
That sail looks magnificent. I can't wait to see it in place.
Steven
- mtaylor and CaptainSteve
-
2
-
-
That's very impressive, Dick.
So what did you finally use to make the sail, and is there a chance of a tutorial in the future for those of us who want to follow your lead?
Steven
- cog, JesseLee, Salty Sea Dog and 1 other
-
4
-
I've missed this topic. The Warrior is really looking good. And if you want to get some information on some obscure detail, Wiltshire's not that far from Portsmouth (he says, as an Australian where a trip of 878 km between Melbourne and Sydney is all in a day's driving).
By the way if you want to continue the Portsmouth collection without having to build the Mary Rose (as dicussed earlier), there's always https://en.wikipedia.org/wiki/HMS_M33
Steven
-
At least I can answer the one about the preventer stay - it was a back-up for the stay itself in case it broke. Instead of an almighty disaster you'd have a nuisance - you'd still have to replace the stay itself as soon as possible, but in the meantime the preventer stay would hold the mast in place.
Steven
- DaveRow, mtaylor and Bluto 1790
-
3
-
I doubt there were many "well-built" crewmen on a carrack - at least among the topmen. The cook, maybe . . .
By the way, Dick, I really ought to take the opportunity to say how good that ship looks, and how well she resembles the contemporary pictures. That last profile picture of her really shows up what a magnificent job you've done.
Steven
-
Thanks, Carl, but I've gone too far now to change tack (sorry!). Anyway, the faults aren't all that obvious to the naked eye and should respond very nicely to a bit of judicious filling (By the way, anybody recommend a good filler? Otherwise I'll use thinned white glue and sawdust from the build - I've got oodles of it!). And once filled and painted, they should vanish.
The thing is, with the wonderful examples on this forum I'd set my sights pretty high for what was really my first serious set of planking. That I didn't reach that exalted level first time isn't really anything to be upset about. Though I'd have liked the planks to run more smoothly together like the ones the experienced guys do, I'm actually rather proud of the results I've got.
Steven
- Jack12477, cog, Farbror Fartyg and 2 others
-
5
-
I've been working on the stand for the ship in between times. Here are some progress pics.

Roughly sawn to shape and holes drilled for the openwork, which I've made a start on. The timber is pearwood, from the neighbour's tree. Once it's shaped I'll cut two layers about 4 or 5mm thick to make the ends of the stand.

Smoothed off the outside shape somewhat, and roughed out a bit of pearwood to make the joining strip from. It will fit in a horizontal slot at the bottom to join the two parts of the stand.
When I'm planking sometimes the heads of the pushpins are too big to fit in the space available, so I've been trimming them down with a Stanley knife.
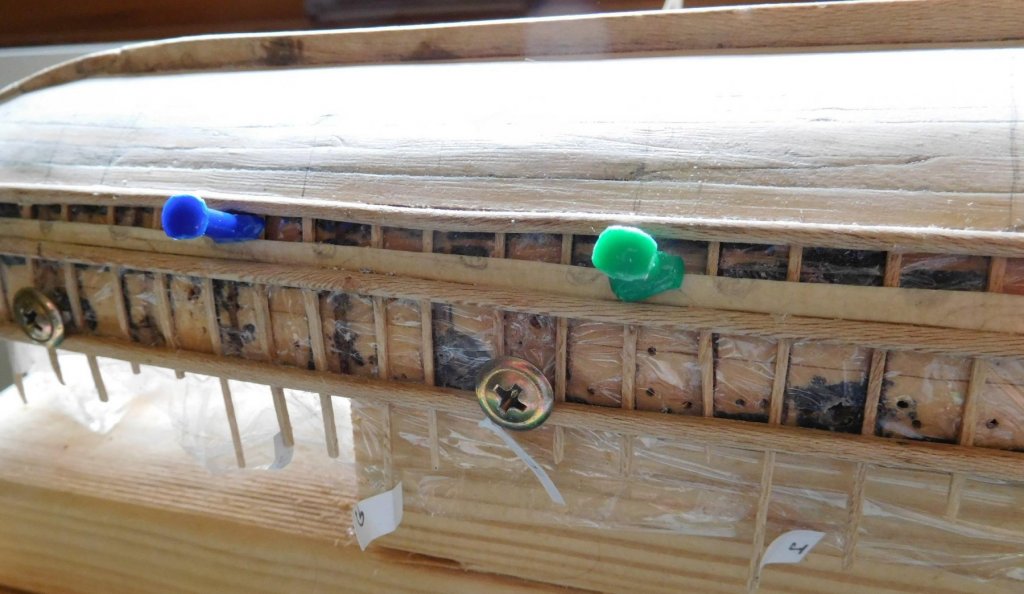
Unfortunately they aren't all that strong and when you try to adjust the position of one, or take it out with a pair of pliers . . .
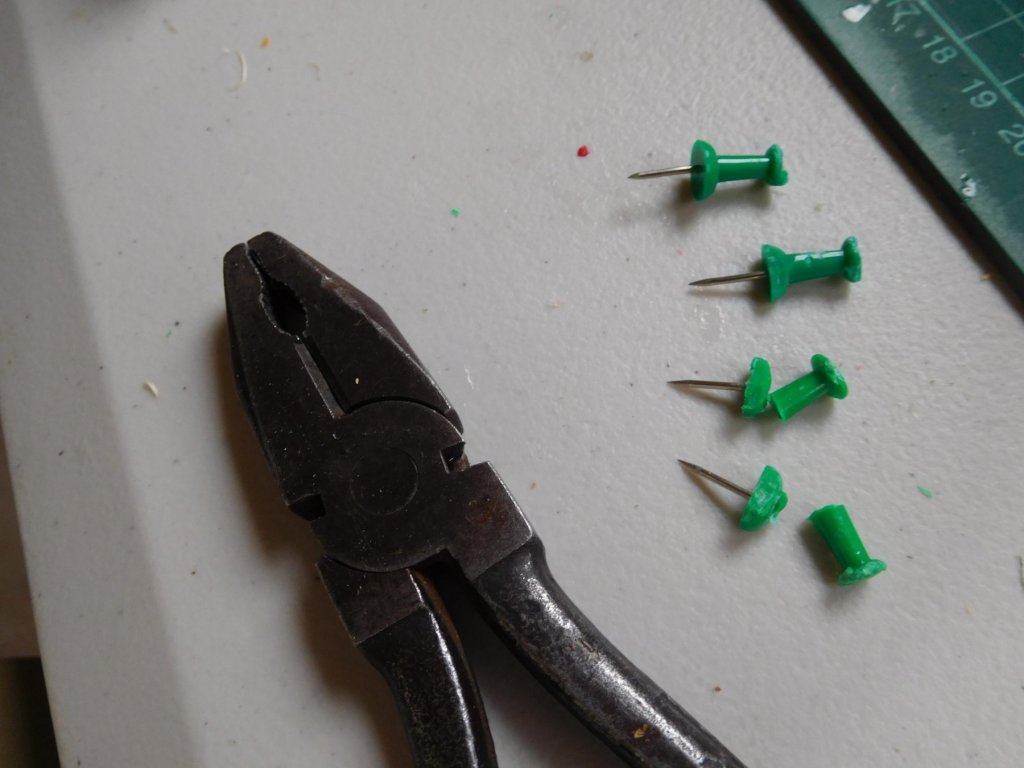
It's great fun trying to lever half a push pin out of the plug with a knife blade, without destroying the planking adjoining it.
Steven
-
-
4 hours ago, RGL said:
Thanks Mr Fly but I just glue stuff together and paint it.
As the hero of The Castle said "Yeah, but you've done something to it . . ."
")
That's worthy of going into the Pool Room along with the jousting sticks . . .
Steven
- RGL, Captain Slog, mtaylor and 1 other
-
4
-
Greg, you never fail to amaze me with the quality of your work. Lesser mortals like me can only gasp in awe.
Steven
- mtaylor, popeye the sailor, RGL and 1 other
-
4


10th-11th century Byzantine dromon by Louie da fly - FINISHED - 1:50
in - Subjects built Up to and including 1500 AD
Posted
Thanks everyone for the likes.
Druxey, it's a bit hard to know. The oars are based on very conventionalised pictures by monks from the 12th century AD, showing the blade almost indistinguishable from the loom - it just sort of tapers gently outward at the end. I tweaked them to make them a shape I thought more likely to have worked. But I have no idea how close they are to the originals, if at all.
All I have that I can rely on is the size of the oarports, and they are are roughly semicircular with a 2.5mm (3/32") diameter, which converts at full scale to 125mm (just under 5"). Check it on a ruler - in my opinion that's a very narrow oarblade to drive a 90 foot ship, even if you have 100 of them. I expect the oar would go through the port more easily on an angle, but it still wouldn't be able to be all that much wider than 5". Perhaps the original pictures are closer to the reality than I thought.
Steven