Louie da fly
-
Posts
7,990 -
Joined
-
Last visited
Content Type
Profiles
Forums
Gallery
Events
Everything posted by Louie da fly
-
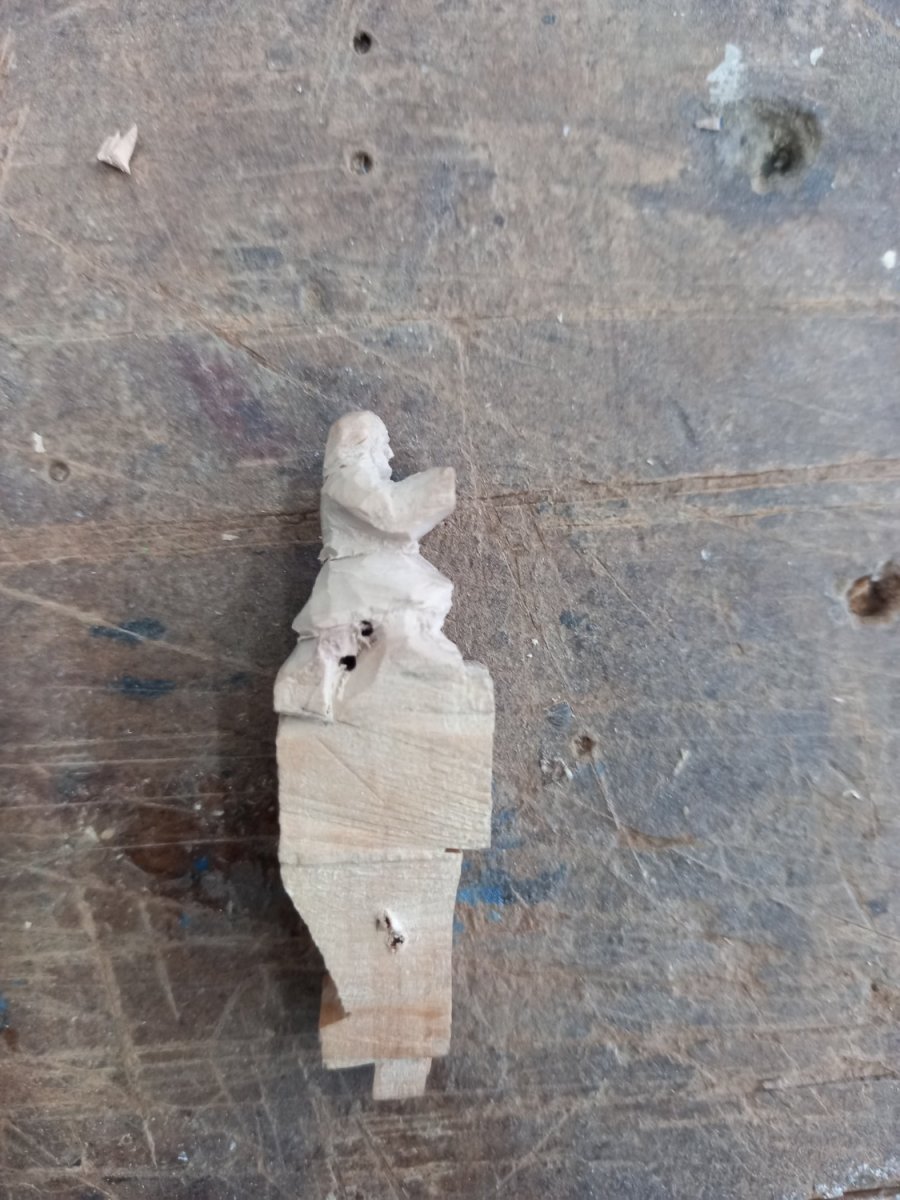
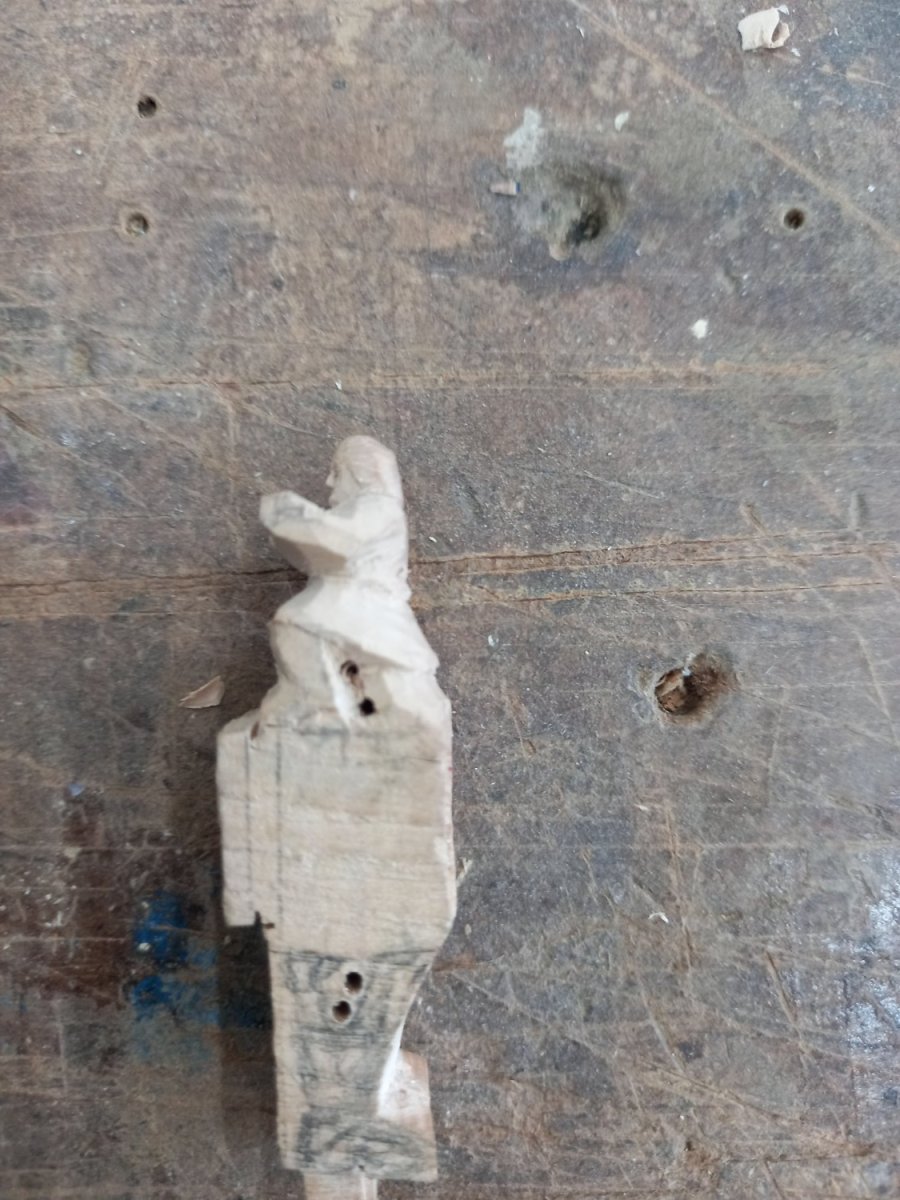
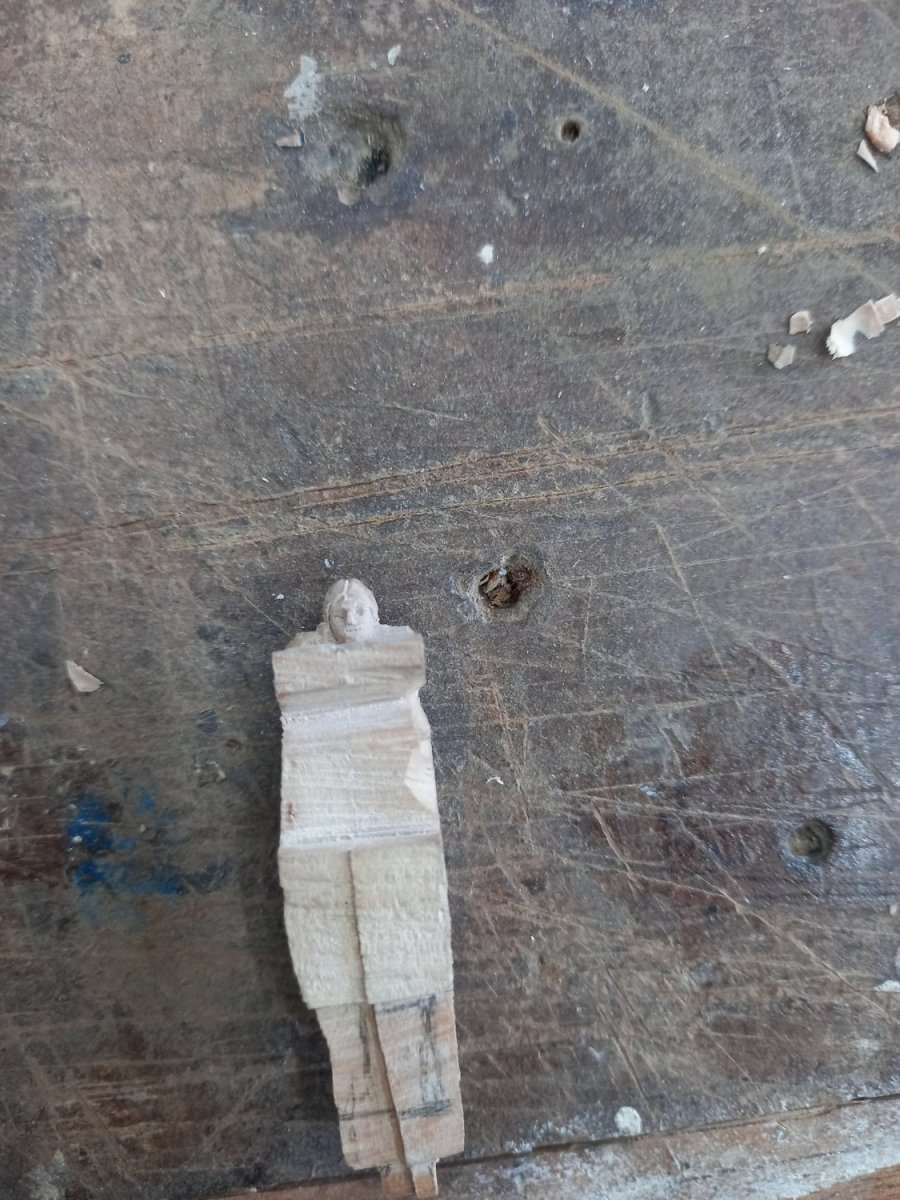
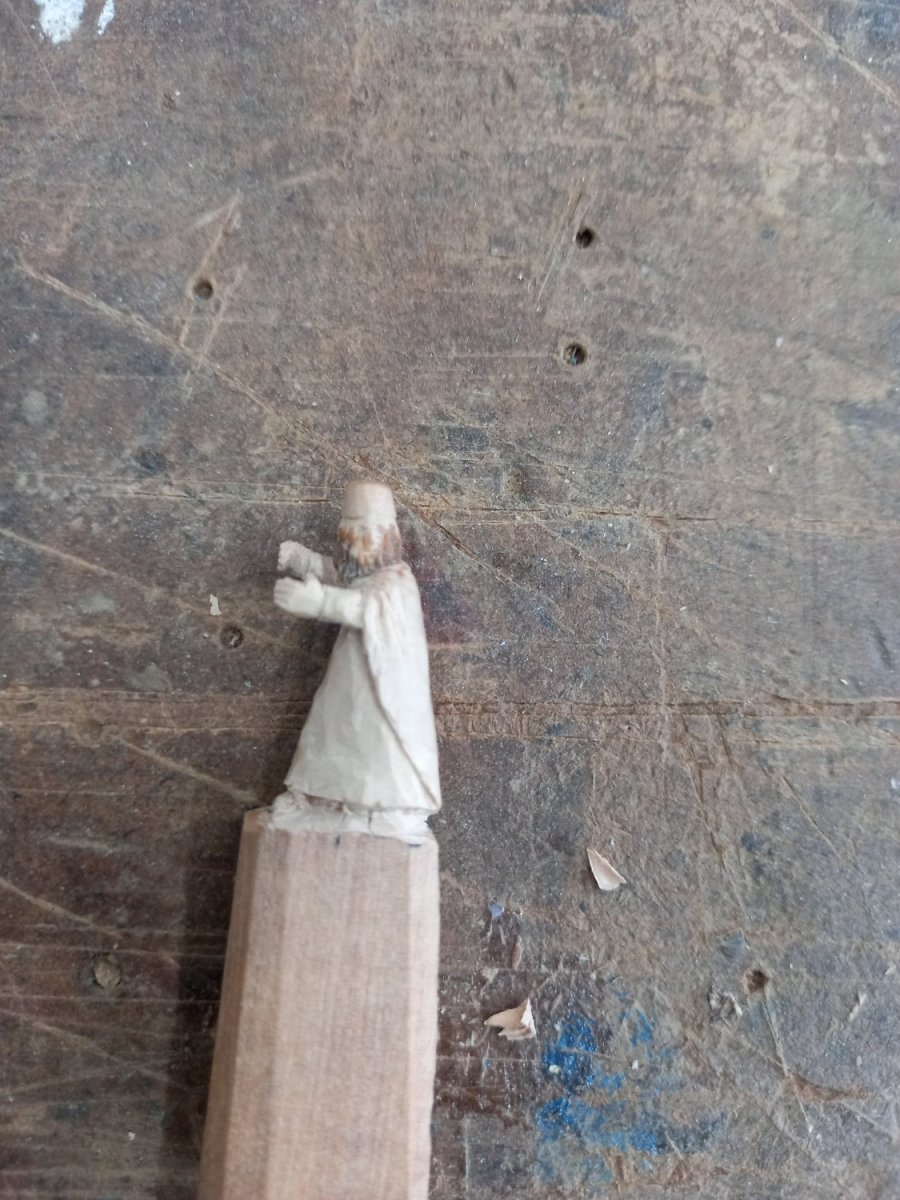
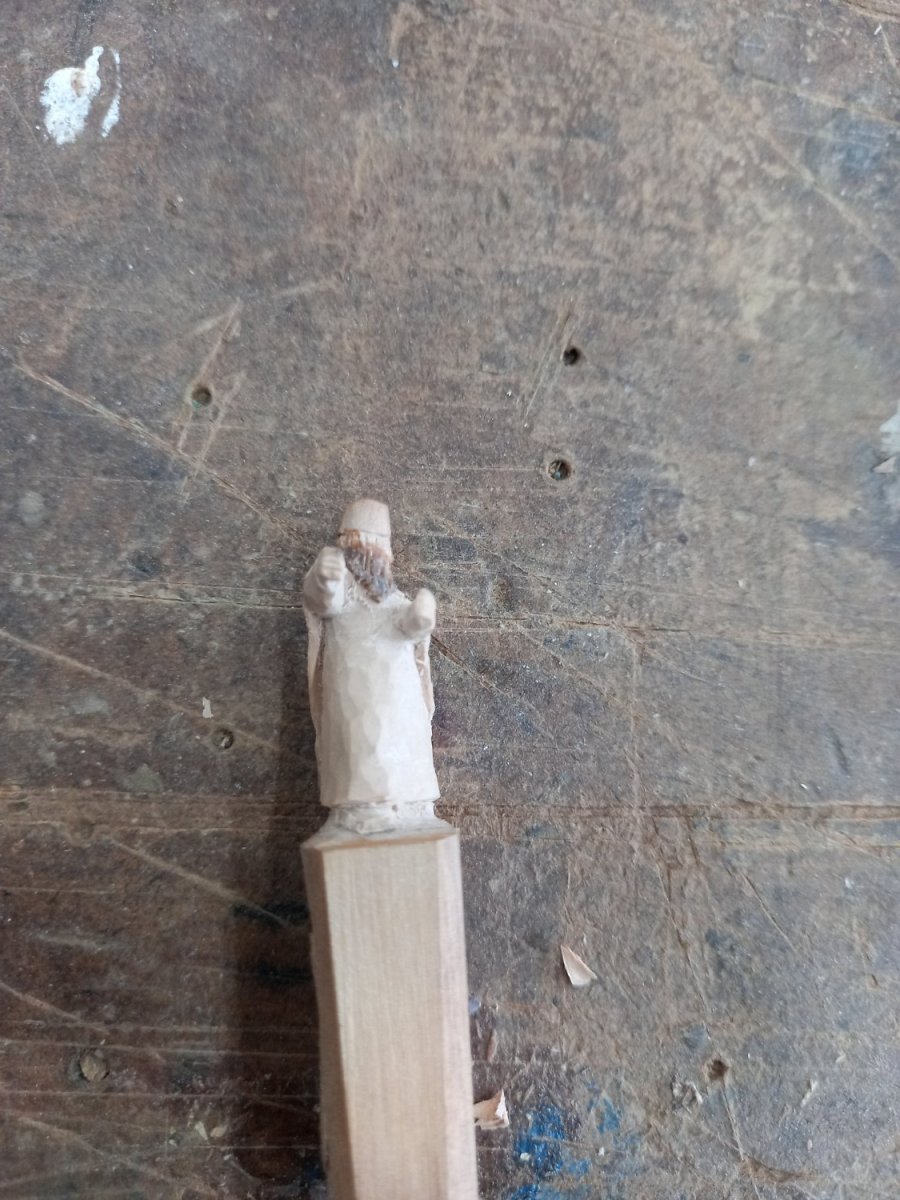
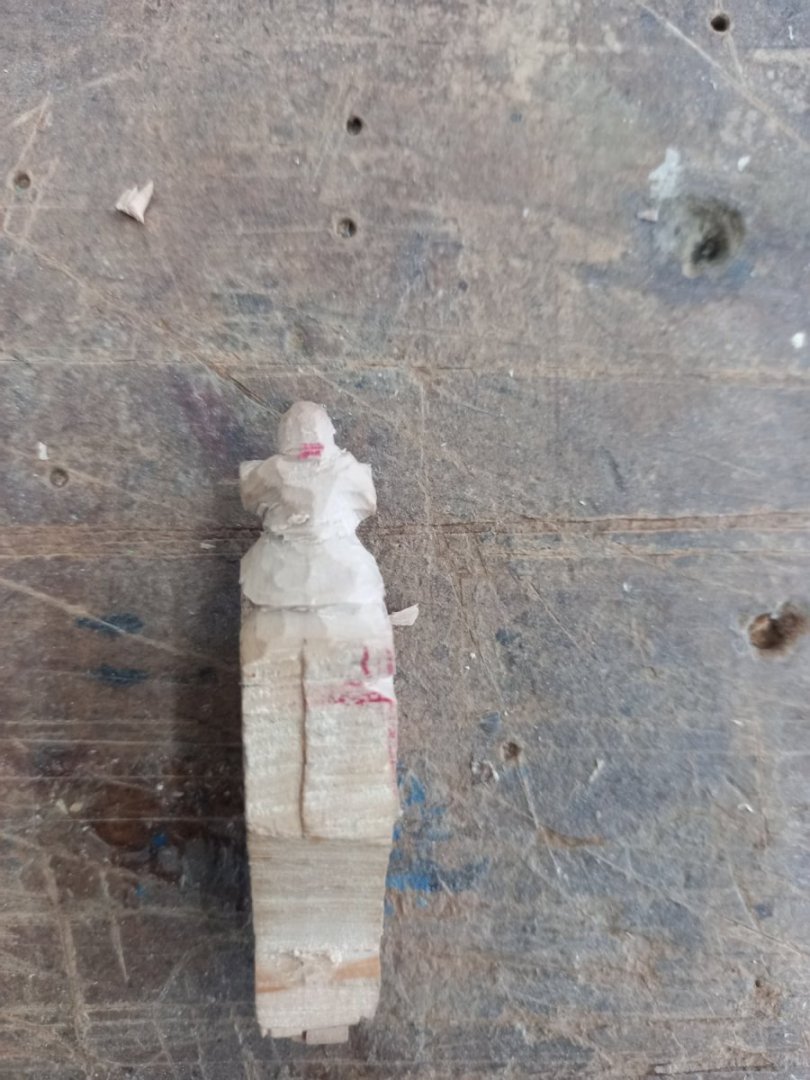
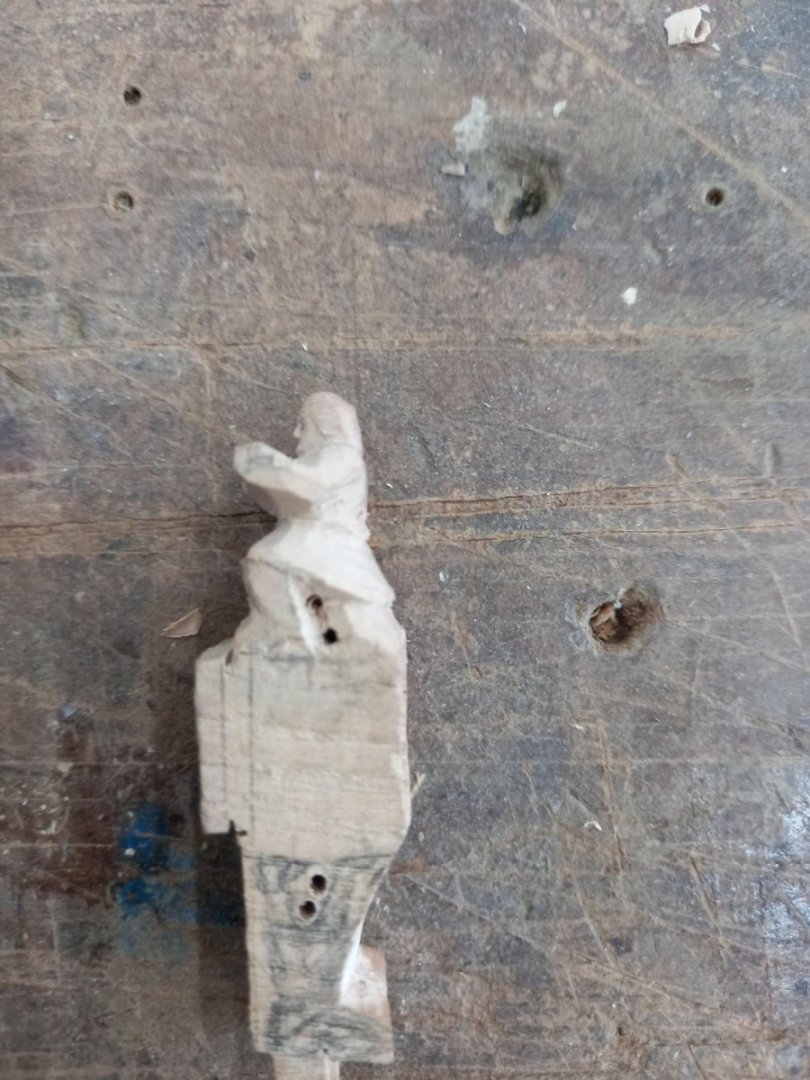
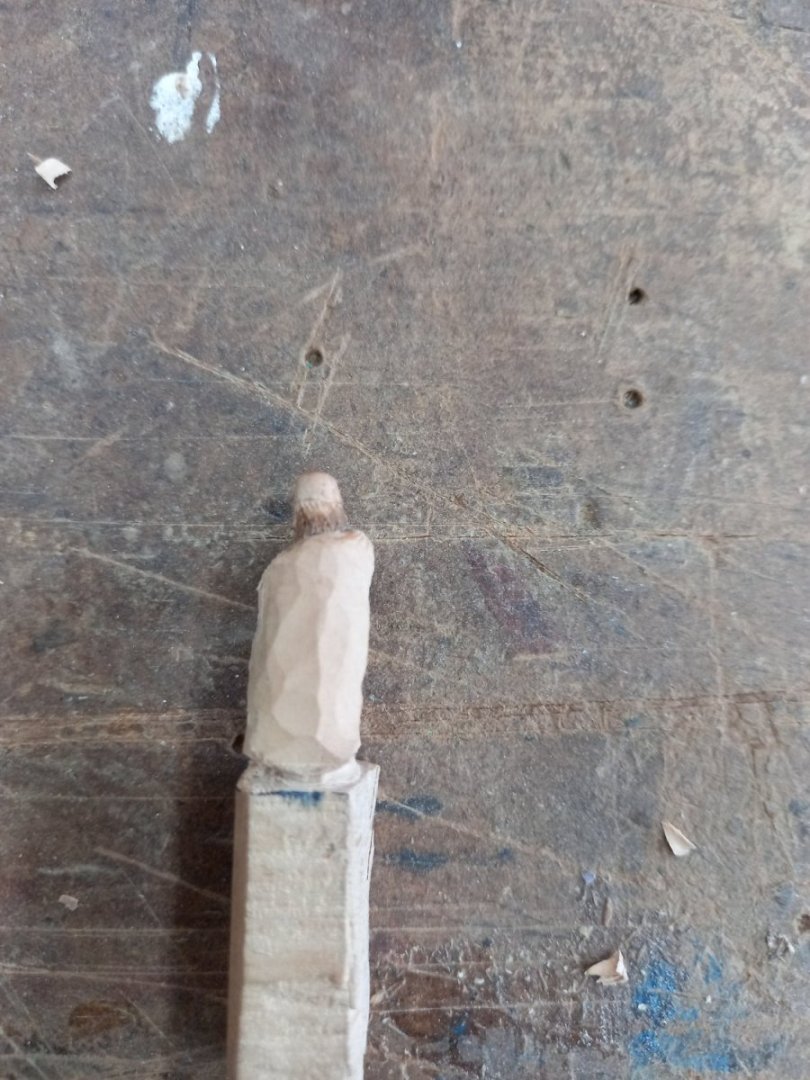
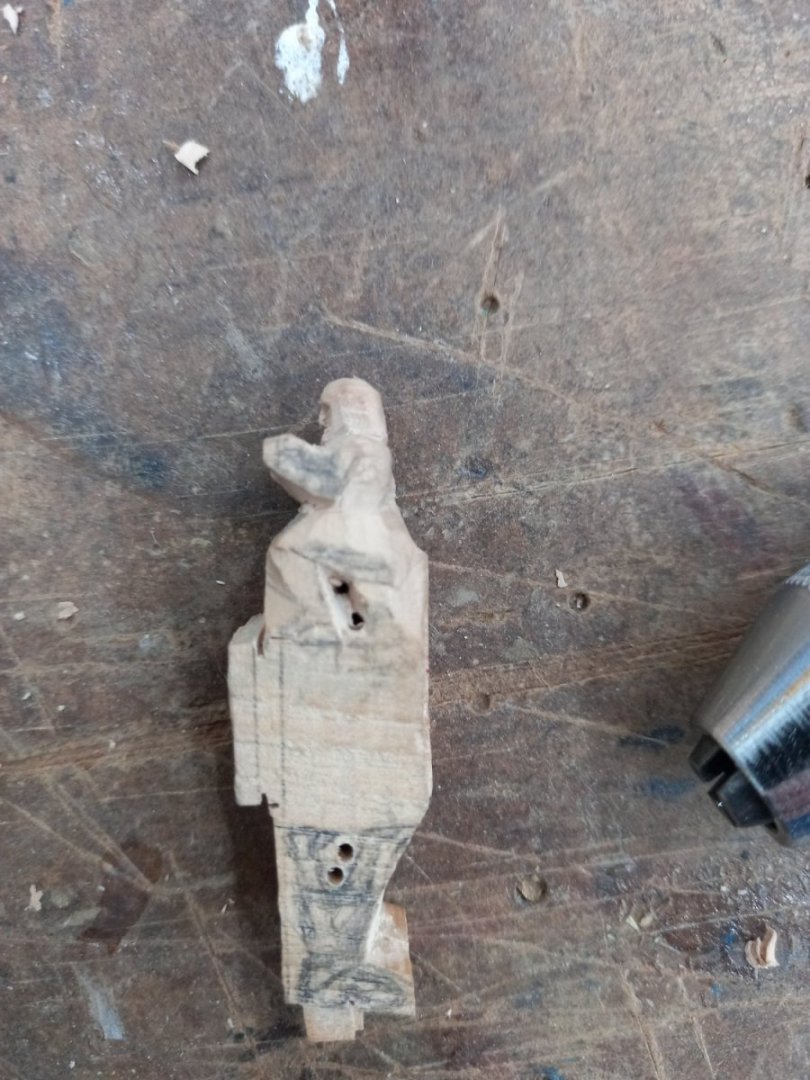
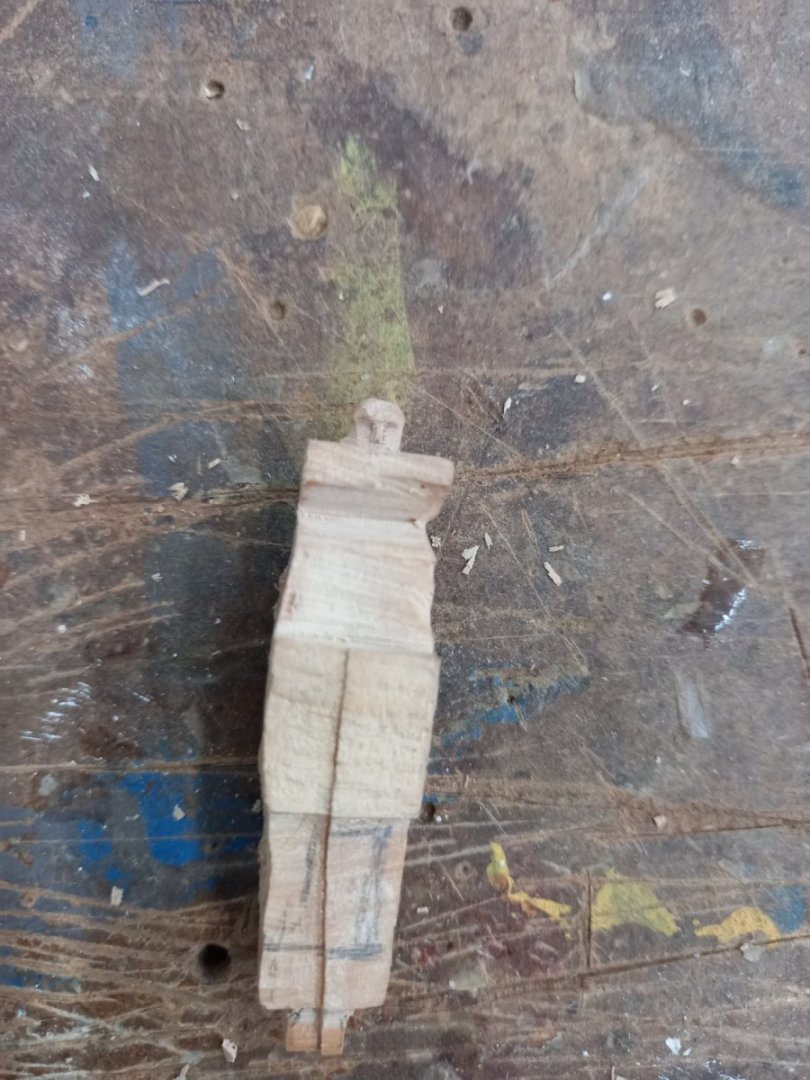
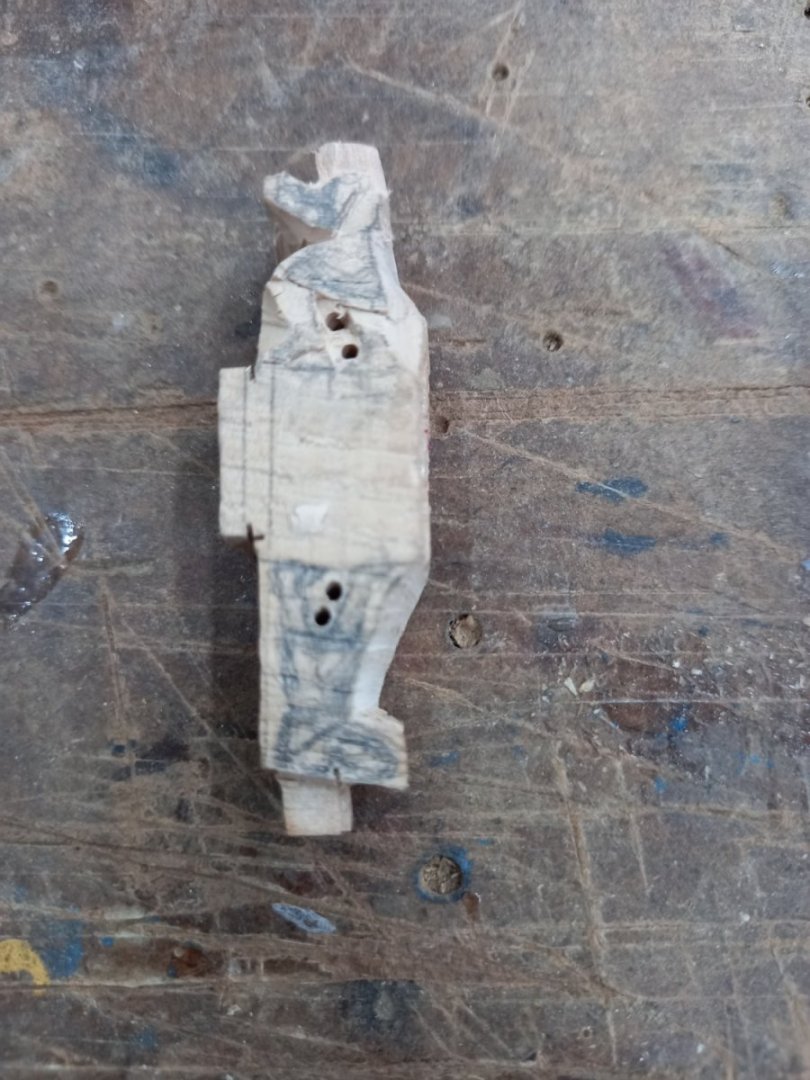
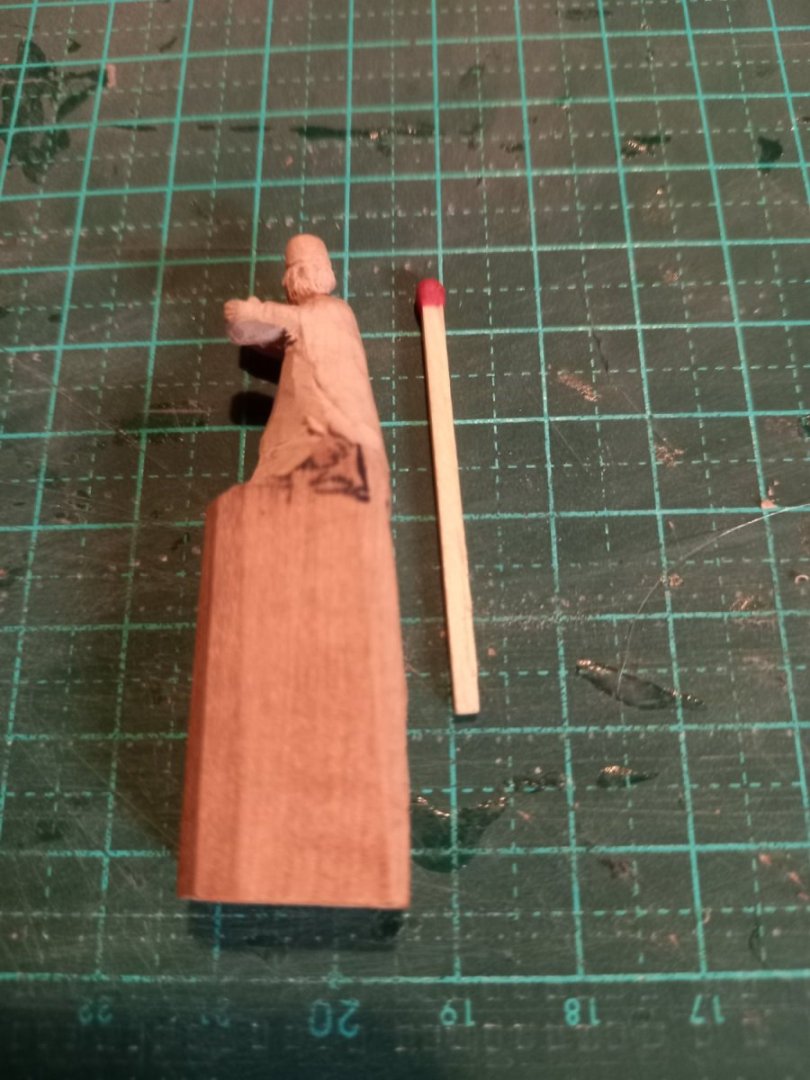
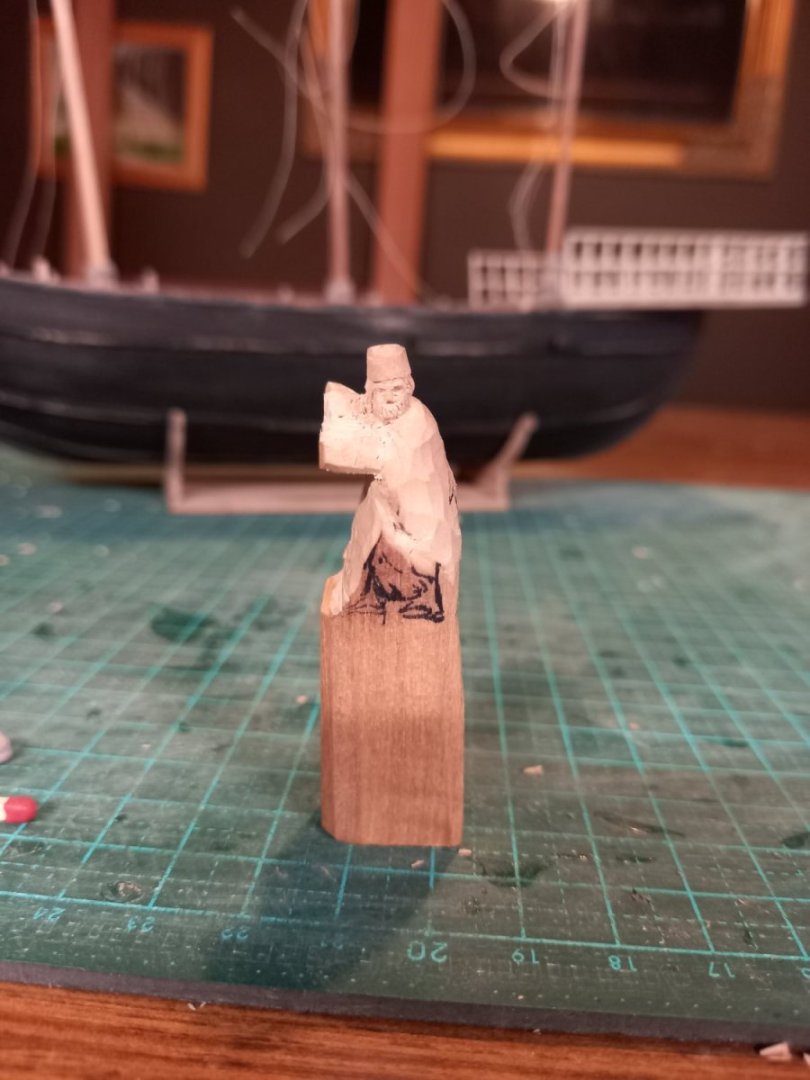
 A few other tips regarding carving. The type of wood you use has a huge effect on the ease and precision of carving - I've got good results with the wood of fruit trees - pear wood is good, but I've found the grain of apricot is finer and the results better still. I'm told English box (box) is best of all, but I've not had a chance to try it so far. Also I find it useful to make your piece of wood longer than needed so you have a 'handle' to hold it by while you work on it. Sometimes I put two figures on opposite ends of the same piece of wood, so each acts as the handle for the other. Cut around the outline of the figure with a hand powered coping saw or fretsaw, making sure you leave *plenty* of room around the outline so you've got some room for error. It's easier to trim off extra than to make up for cutting off too much. I cut each side of the head as well, making sure there's *plenty* of extra wood - make the head too wide, and the shoulders much too wide, so you can trim both down to the size you want. Drill holes for openings such as between the legs, making sure you don't remove too much wood. Working on the head, I first cut the features roughly to shape. It usually looks like Megatron at the beginning. Then gradually remove sliver by sliver, refining the shape, defining the nose, forehead, cheeks, chin etc. Then onto the body Here's one figure almost to completion. Just needs a bit of tidying up. Note. The difference in colour is from home-made wood filler (fine sawdust and white glue) because I realised I given him too little hair and beard. Steven
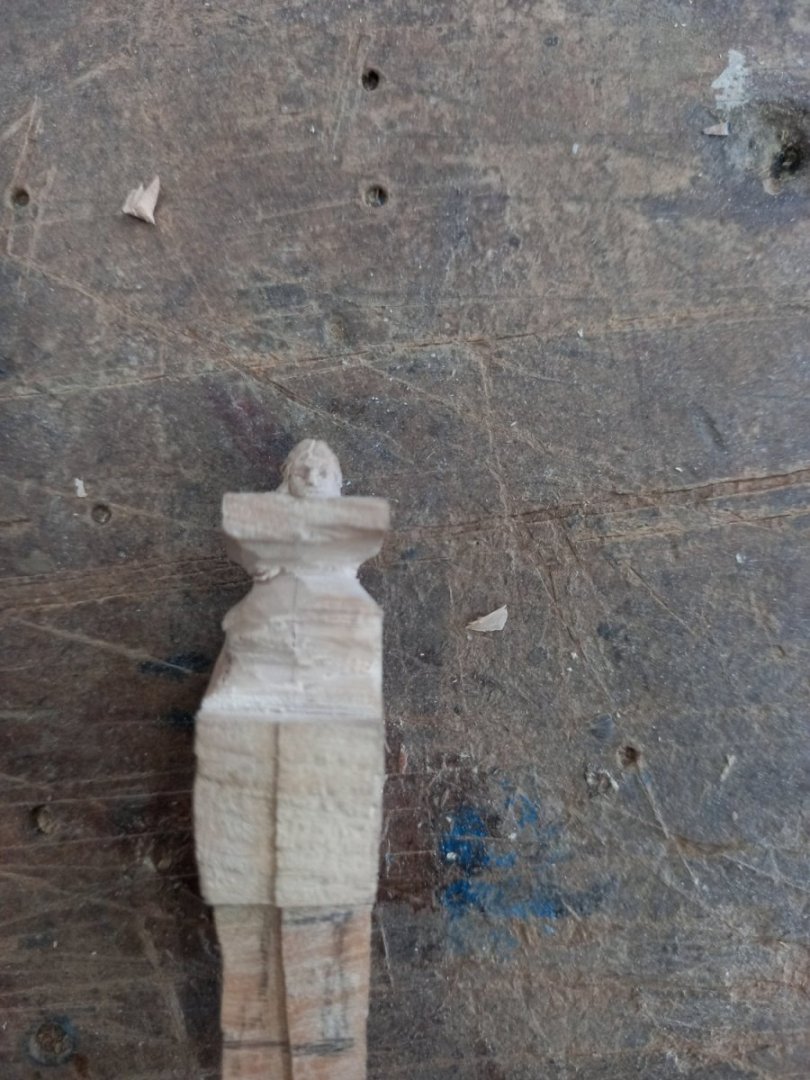


- 508 replies
-
- 13
-

-

-
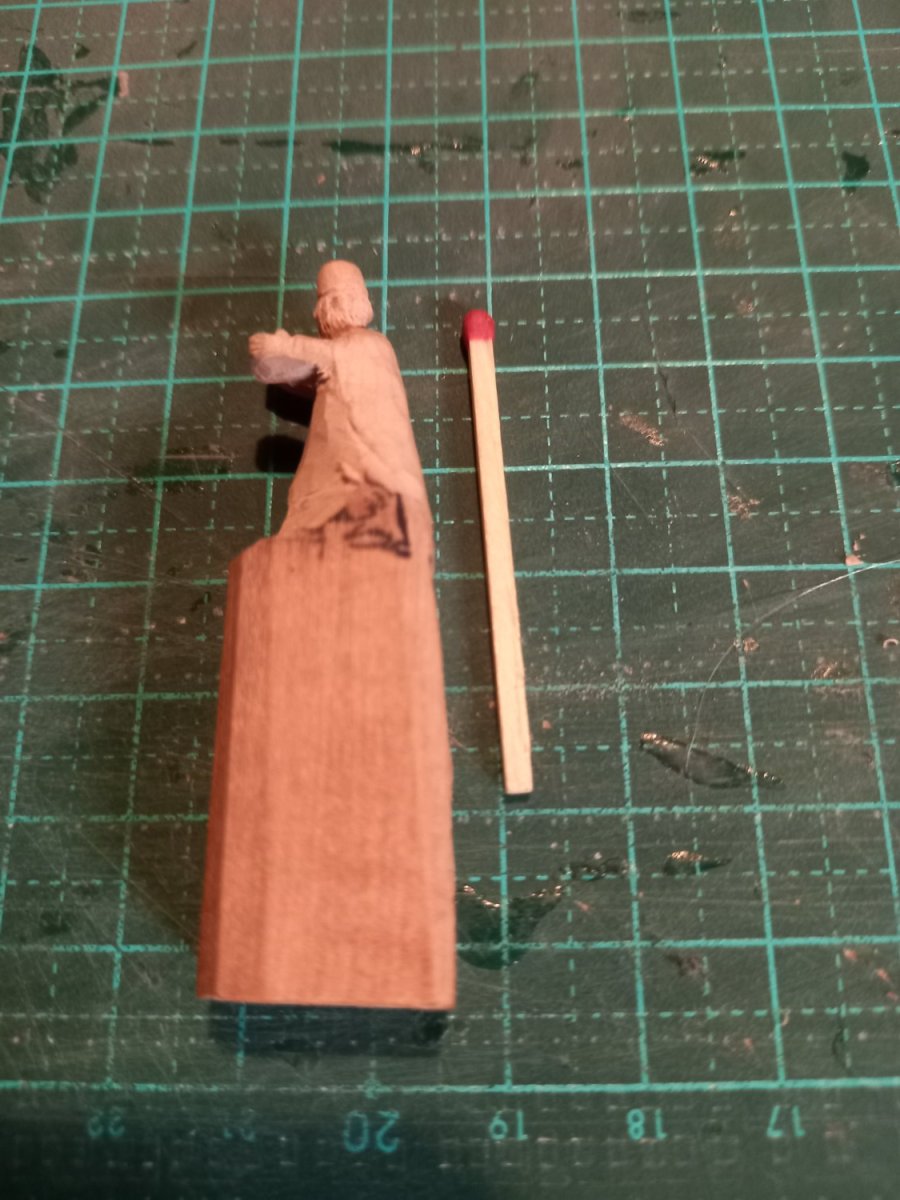
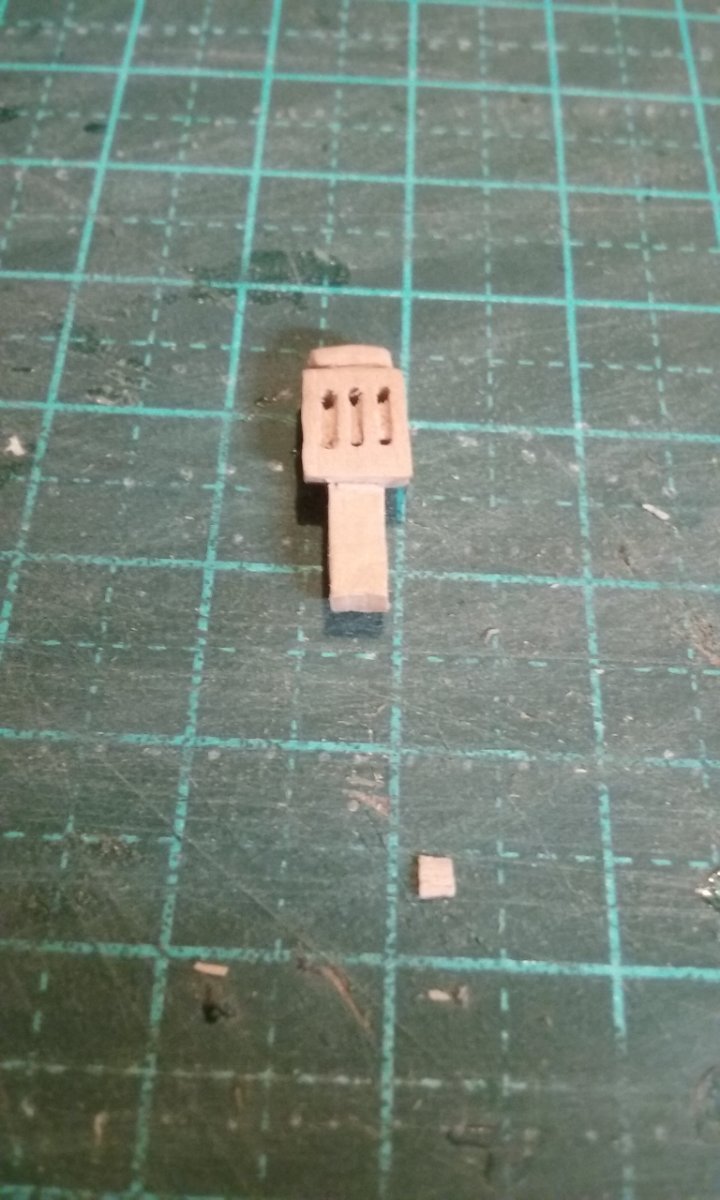
Chief Mark, it's good to hear you're considering embarking on the endeavour of carving. It can be very frustrating but even more rewarding. I've carved figures at 1:200 scale, so I know it's possible. They don't have a lot of detail at that scale, but then the eye can't see all that much detail anyway. I started out at 1:50 and learnt a lot, then progressed to 1:75, which I'm using now. The 1:200 was for the Great Harry. The matchstick gives some idea of scale. I'll never build a sailing ship in that scale again . What was I thinking? Steven.

-
Thanks for the likes and comments. They're much appreciated. Glen and Mark, it's not far out of square - it's just something I (forever picky) noticed when I tried to line everything up by eye. I think the fault lies in the slightly different heights of the two gunwales - I noticed the clearance to the deck was a little different when I was installing the belaying points for the shrouds. I'm prepared to accept it, but I'll keep an eye out for this issue in future builds. And yes, it's probably within the bounds of precision that would have been used at the time - I've noticed some pretty bodgy work on some of the wrecks that have been uncovered in archaeology - not due to them being wrecks, but because they were built that way. But if I'm going to have a detail like that, I'd rather do it on purpose, not because I stuffed up. Chief Mark, I first saw the wood to approximate size and shape (after having first drawn the figure on one plane surface) then I use a No. 11 scalpel to take the rest of the wood off. I use both a "craft knife" with a No. 11 blade and an actual surgical scalpel, also with a No. 11 blade - the craft knife is better for removing wood, the scalpel is better for fine work - and it stays sharper longer - but it is easier to break if you twist it too far. Basically removing wood that "doesn't look like the finished figure" (sorry, that' the best description I can give you - it's done very much by eye and what looks right.) To see the full technique, refer to my dromon build here and subsequent pages. Nowadays I try to do the face as early in the carving as possible - if that turns out wrong there's really no point in continuing with the rest of the figure and I'm better off starting again on a new one. But I have got quite a bit better on faces with experience. I have tried using a dremel clone but I found the scalpel gave me better control. As far as being a beginner, experience is the key. Your first attempts will probably be abysmal. Have a look at the first figure I made for the dromon (page 3 of the build log). I cringe every time I see it . But with practice you do get better. I find it very rewarding, and I'd highly recommend you have a bash at it. And don't let early failures put you off - it's really worth persisting with it. Steven
-
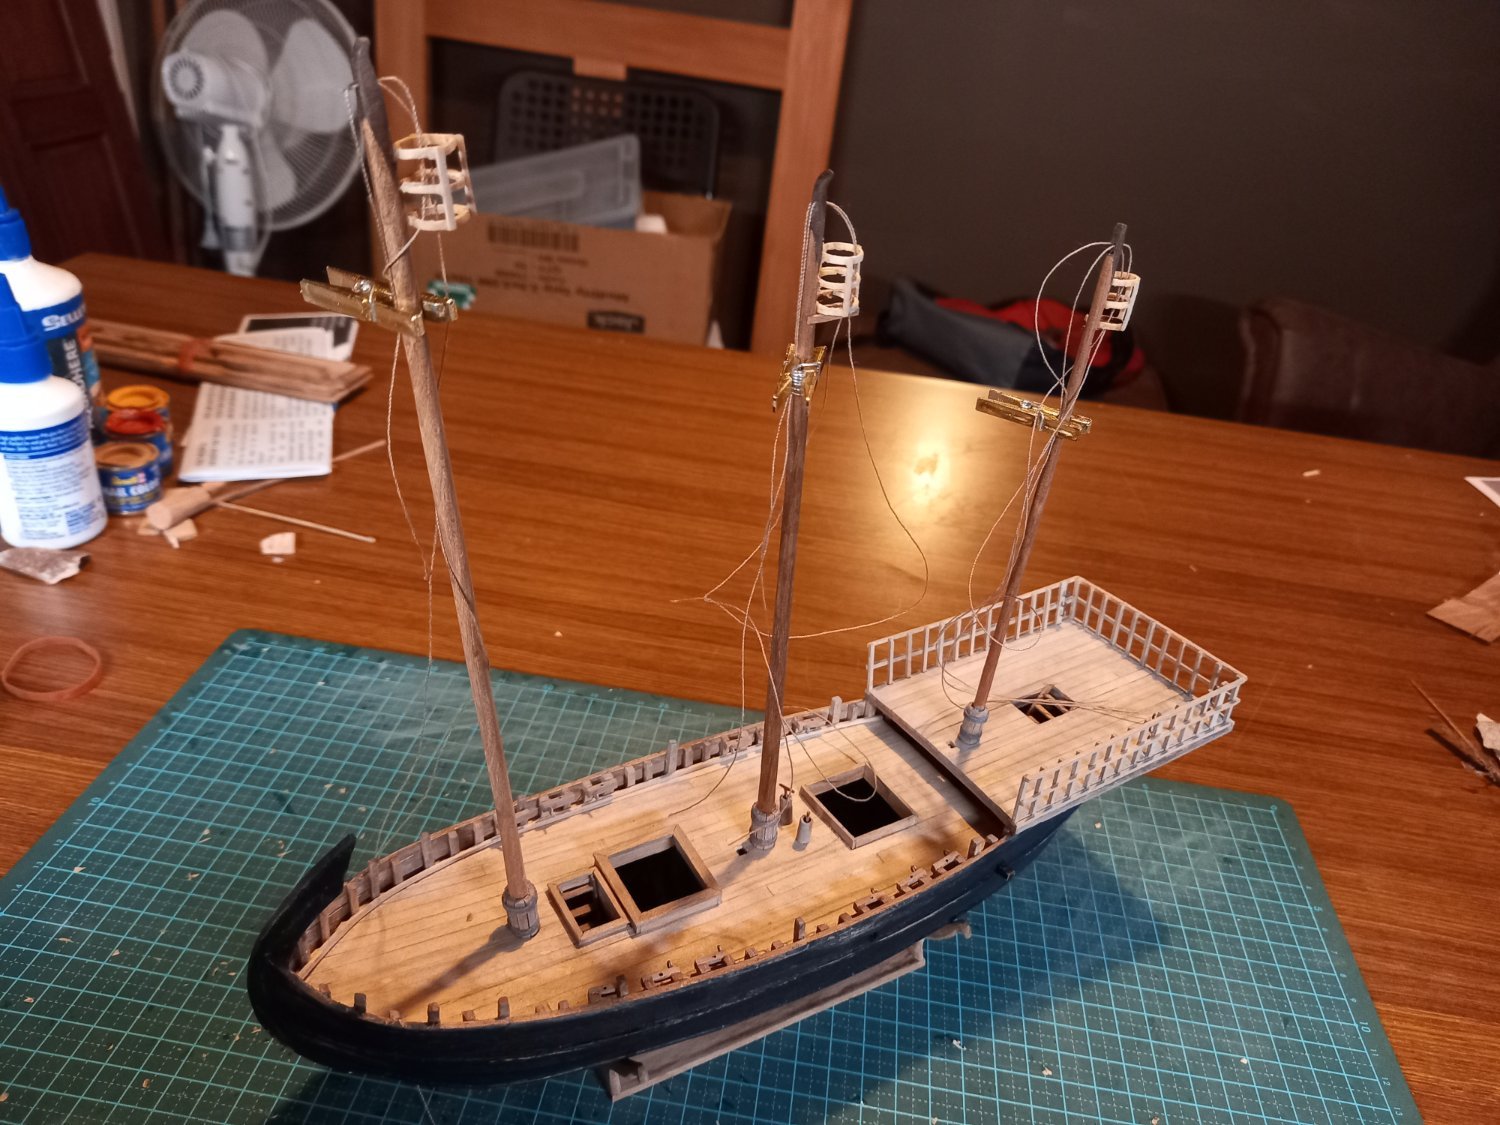
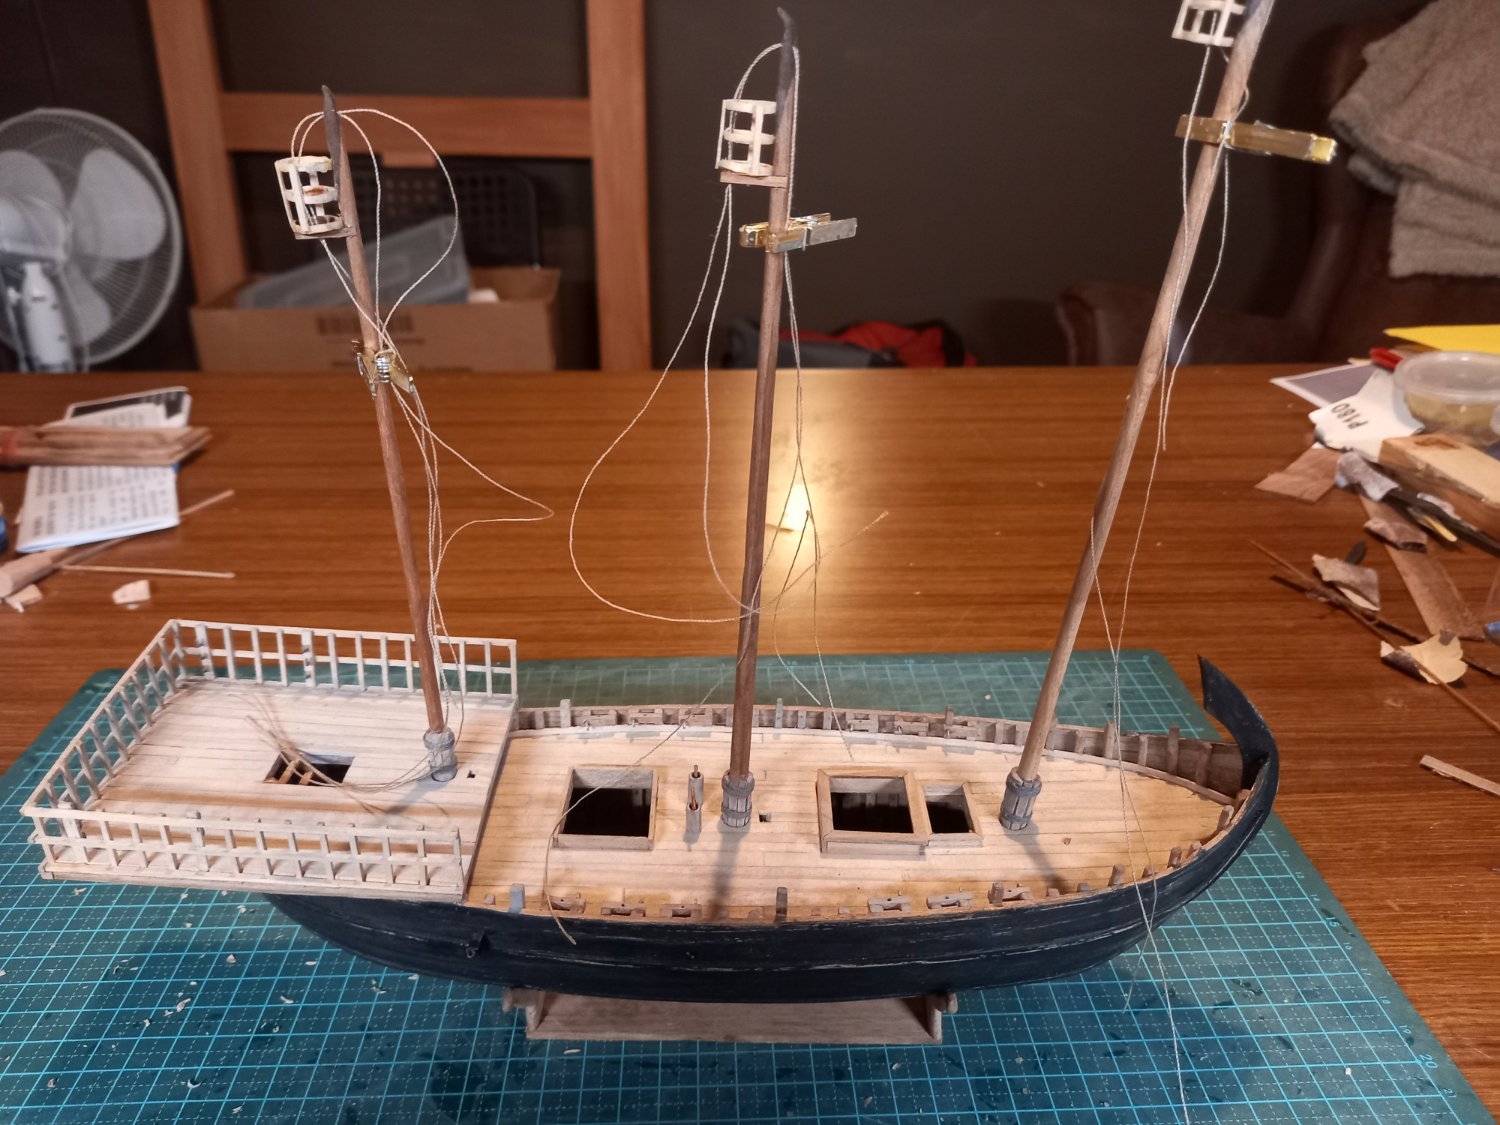
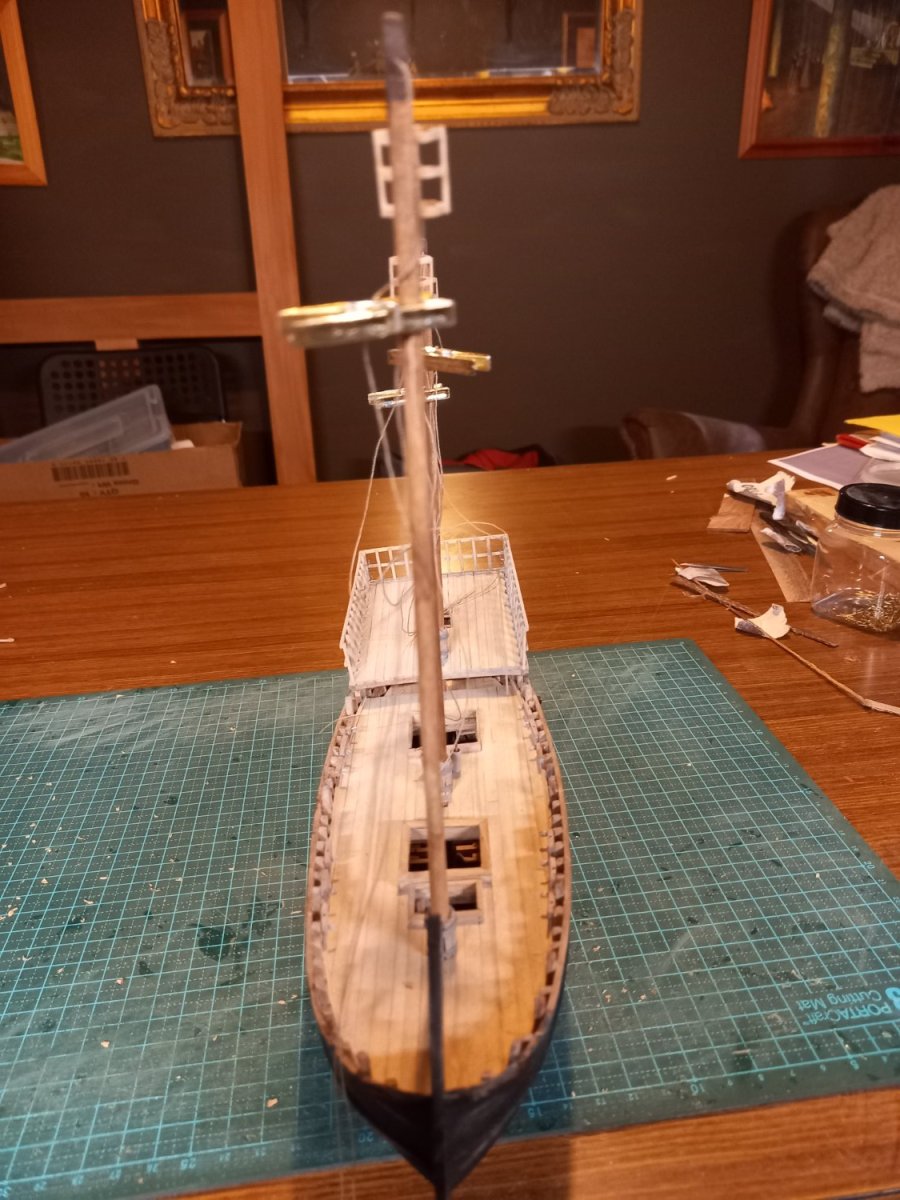
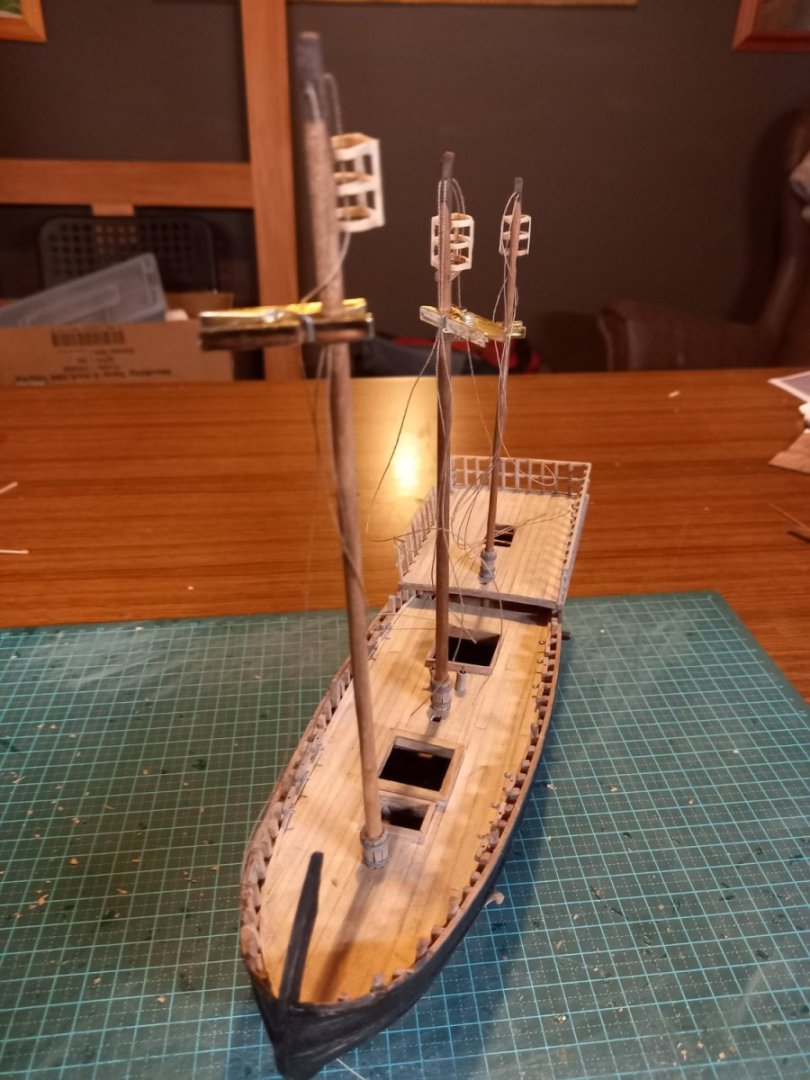
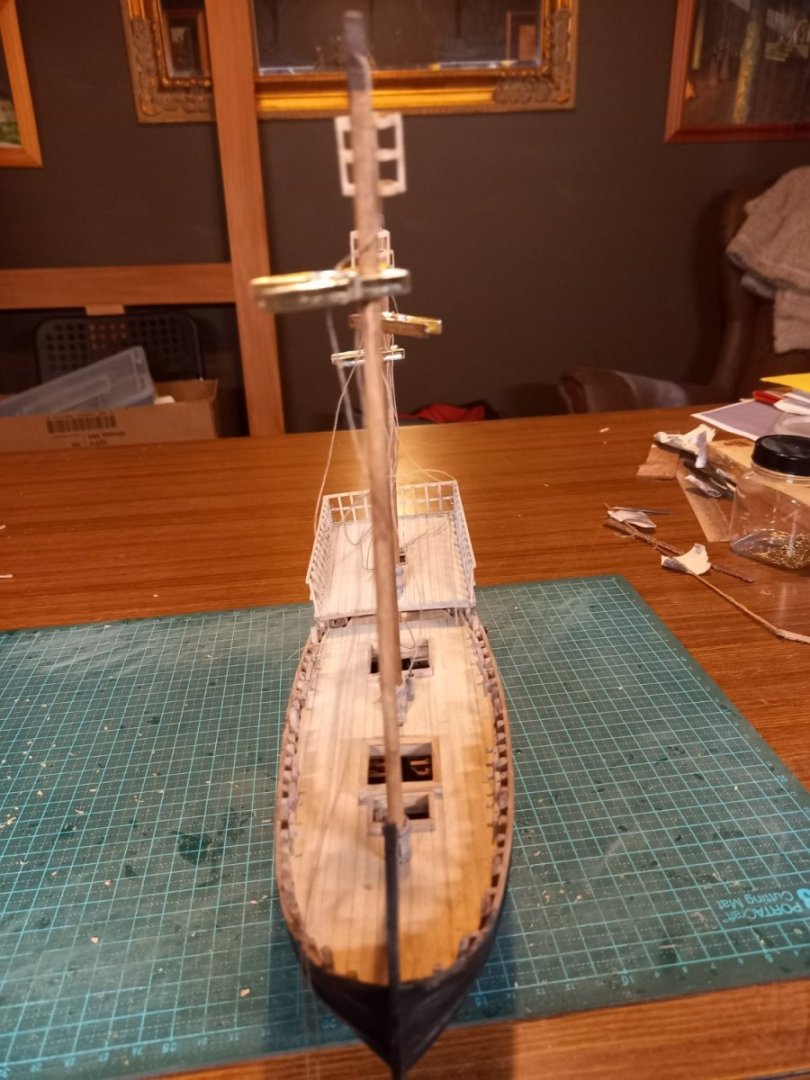
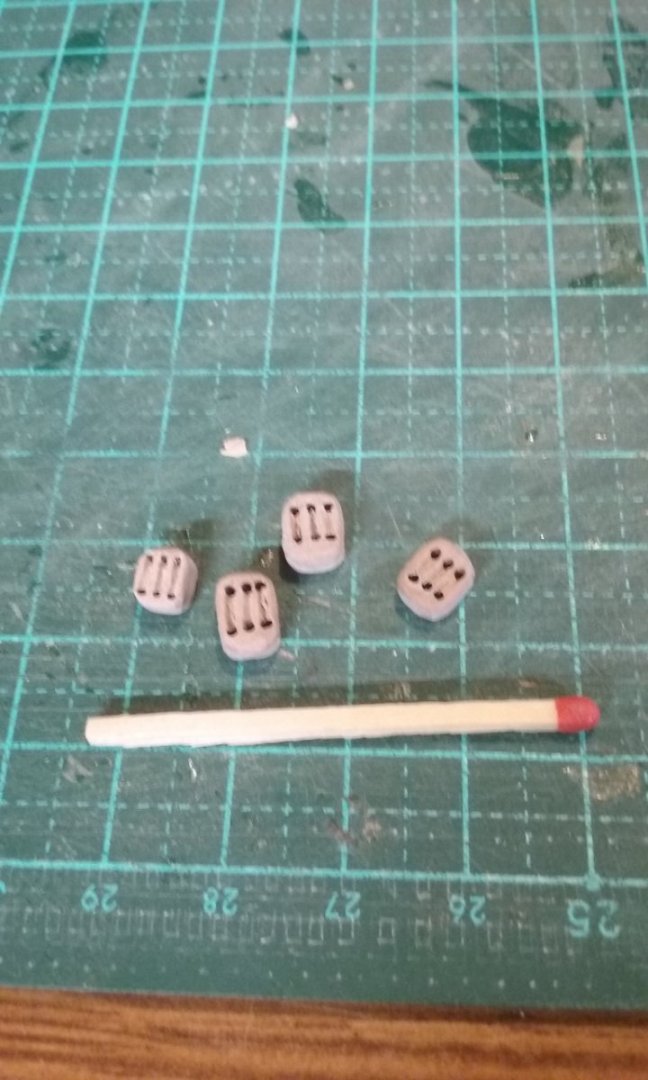
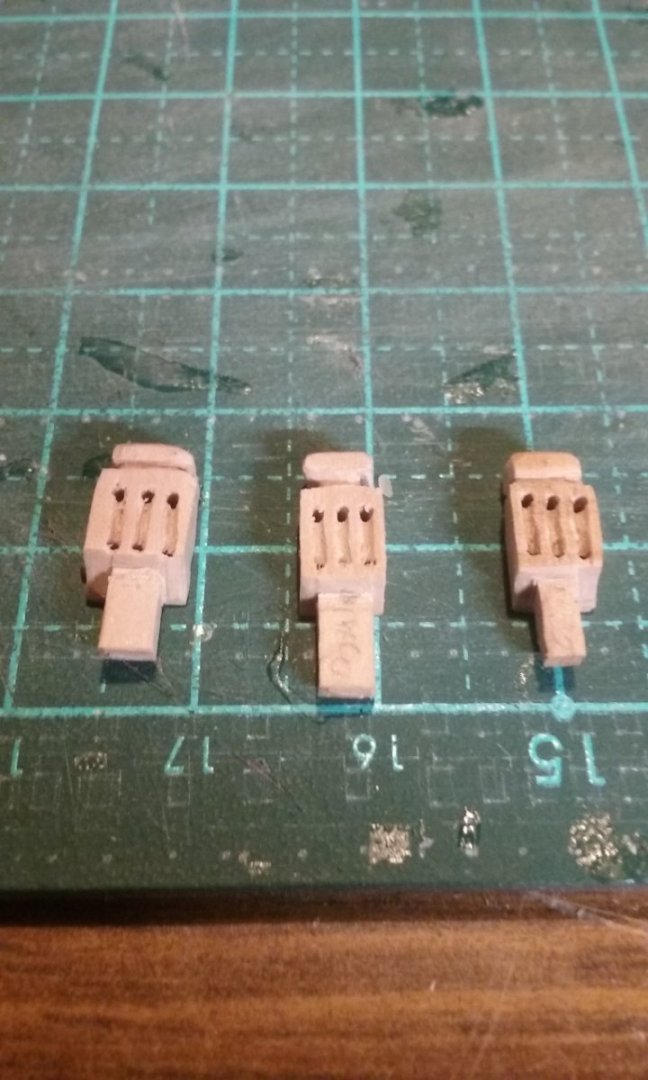
I've finally glued the aftercastle in place. To get it in the right spot I had to dry-fit the mizzen mast to make sure it was upright. Sliding the aftercastle sideways would have made the mast lean over. And to ensure everything lined up I also dry-fitted the other masts. Yep, all in line. Unfortunately either the aftercastle is slightly out of square due to the gunwales being unequal heights or, (as I aligned the masts in relation to the stempost) the stempost itself is out of square. I didn't notice this until I'd sighted along the line of the masts once the aftercastle was in place. And if it's that hard to see I'm not prepared to do all the work of changing it. Just put it down to experience and keep it in mind for the next build. And some more pics with the masts dry-fitted and the aftercastle in place. Progress on Signore Rustico, the co-owner. Unless I make HIM Buono and repaint the other guy to be Rustico. We'll see. And here are the halyard blocks I've just made and weathered. I may need to make one more, as one of these is rather smaller than the others. Steven


- 508 replies
-
- 12
-
-
-
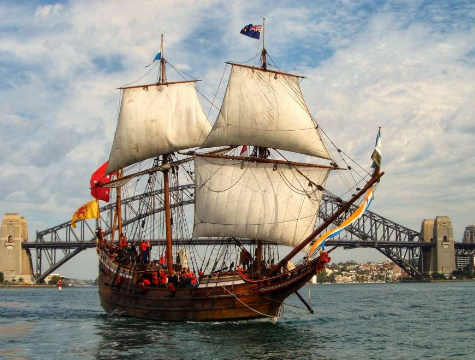
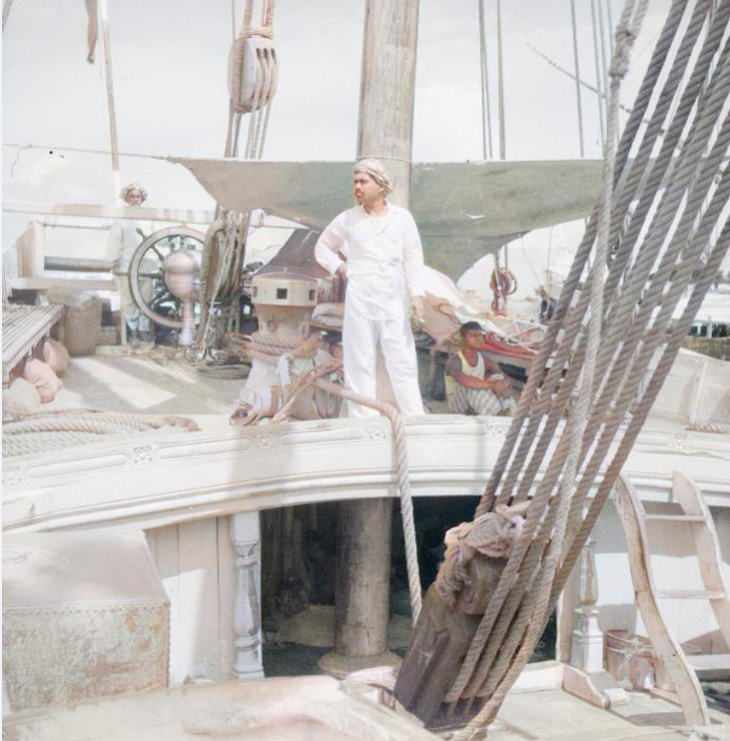
Yes, as allanyed points out you can choose to have the model completely without sails - or you could have some of the sails set and others furled. That is in fact a very common state of affairs with sailing ships, as per the photo below - somehow the background seems familiar) and I'm told silkspan is a very good medium to approximate the thickness of tails to scale - I can't speak from my own experience- I've never tried it. It is used to cover the wings etc on (flying) model aeroplanes. I've looked it up in the past on-line, but it seems a bit hard to get hold of in Oz. I've been to Brizzy a few times - last time about a year ago (we have relatives there). Nice place. I love the rain-operated fountainy thing in the centre of town - I once saw it operating in heavy rain - spectacular. A bit warmer than Ballarat, though. Steven
-
Hi Mal, and welcome to MSW. I find it's easier to add the sails to the yards first - it gets complicated otherwise trying to avoid breaking things or getting things tangled up. If you're new to ship modelling, there are a few things it would be good to know before you do so. Check out what robands are (they're the ropes that attach the sail to the yard, but there's technique that would be good for you to know of how they work.) See https://modelshipworld.com/topic/13736-robands-help/ BTW, the whole spar is called a yard. The bit at the end is the yard-arm. As Michael Caine would say "Not many people know dat". Nice to have another fellow Aussie on the forum. Where do you live? Steven
-
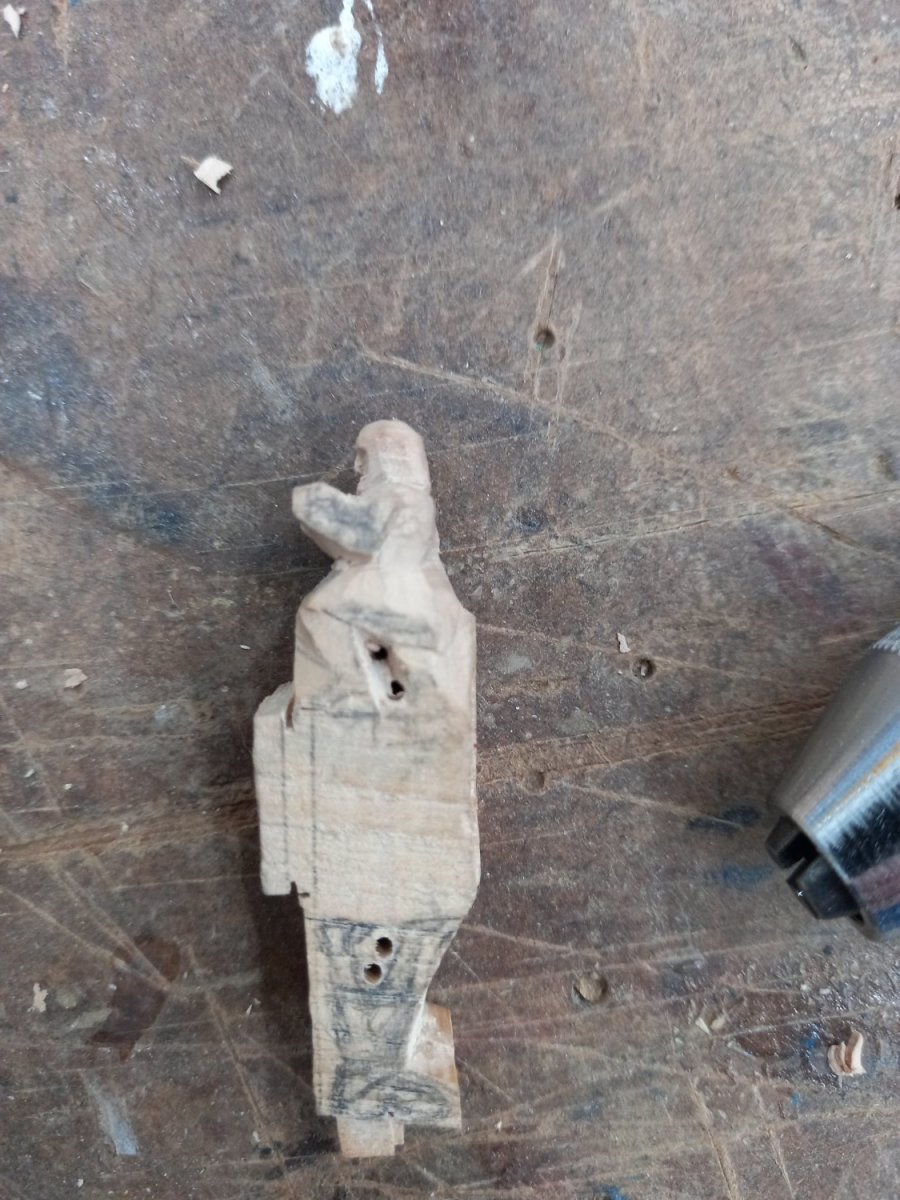
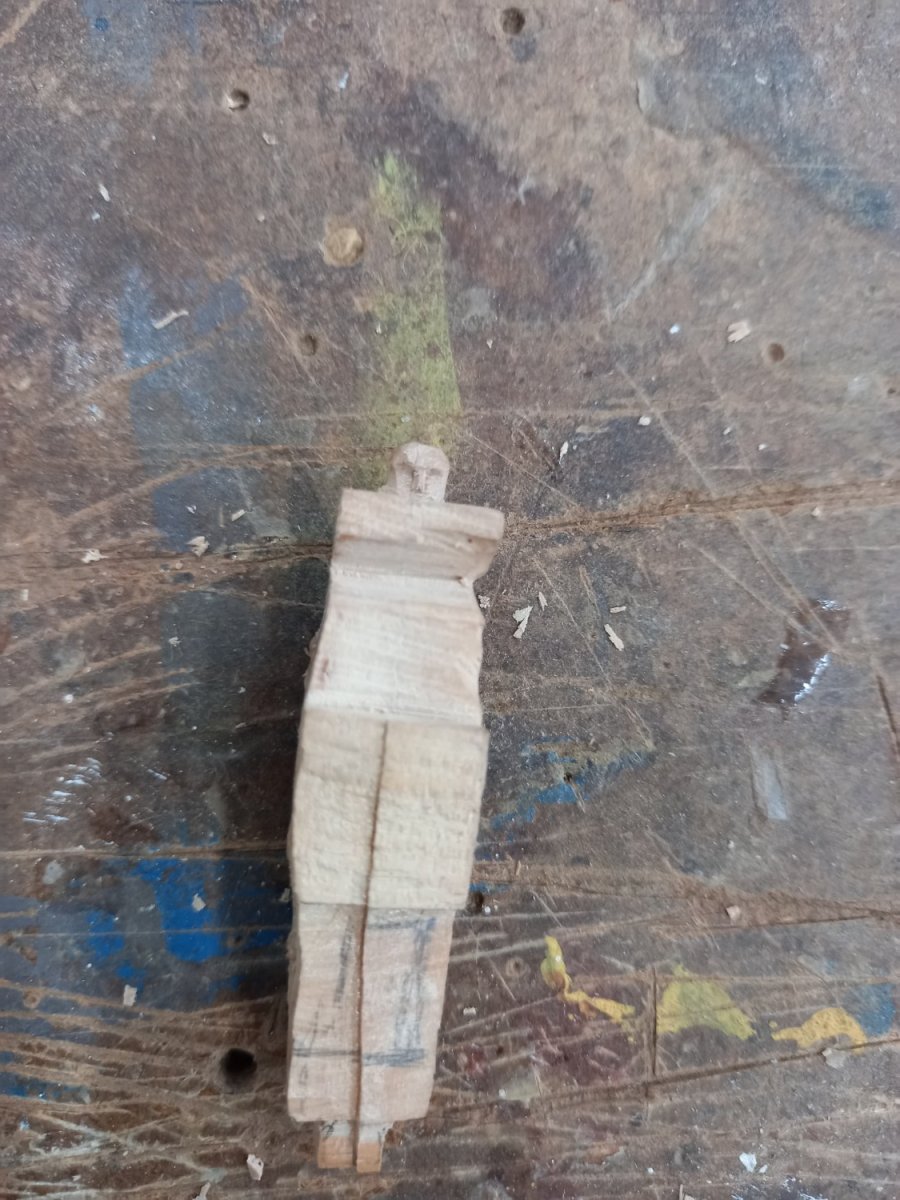
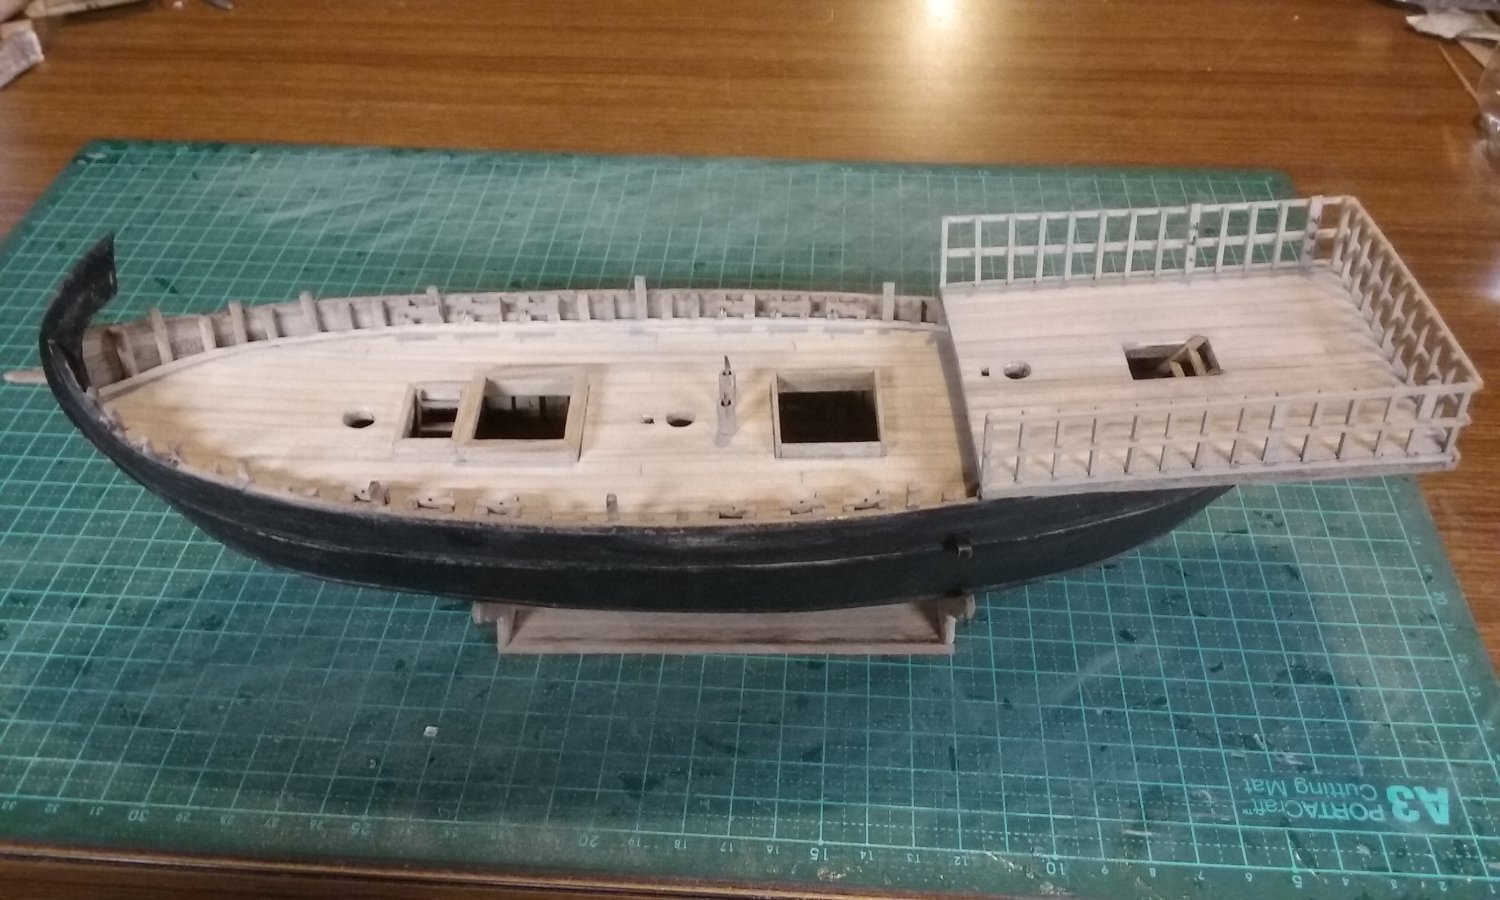
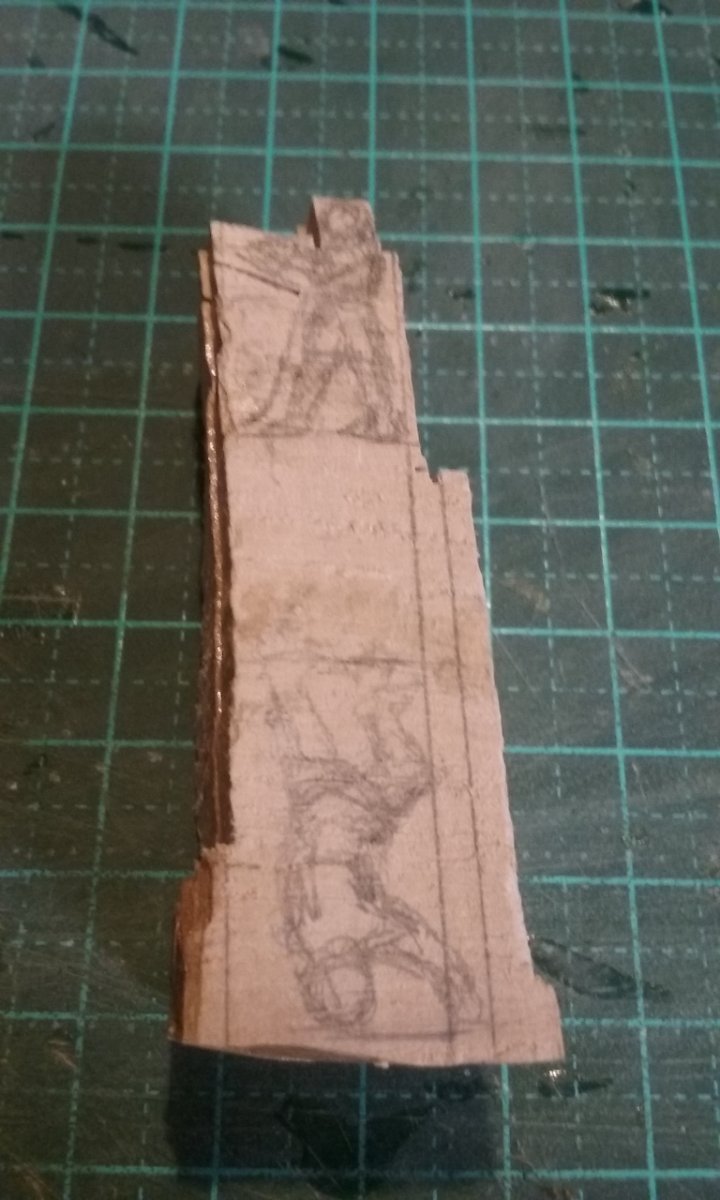
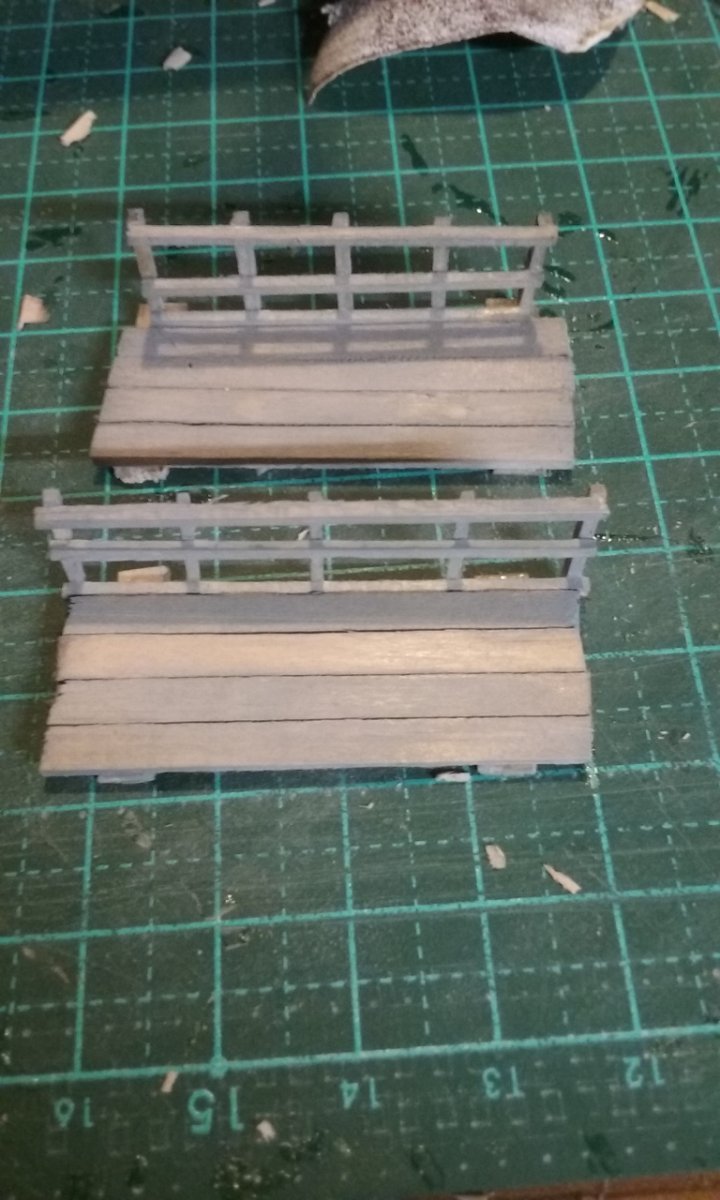
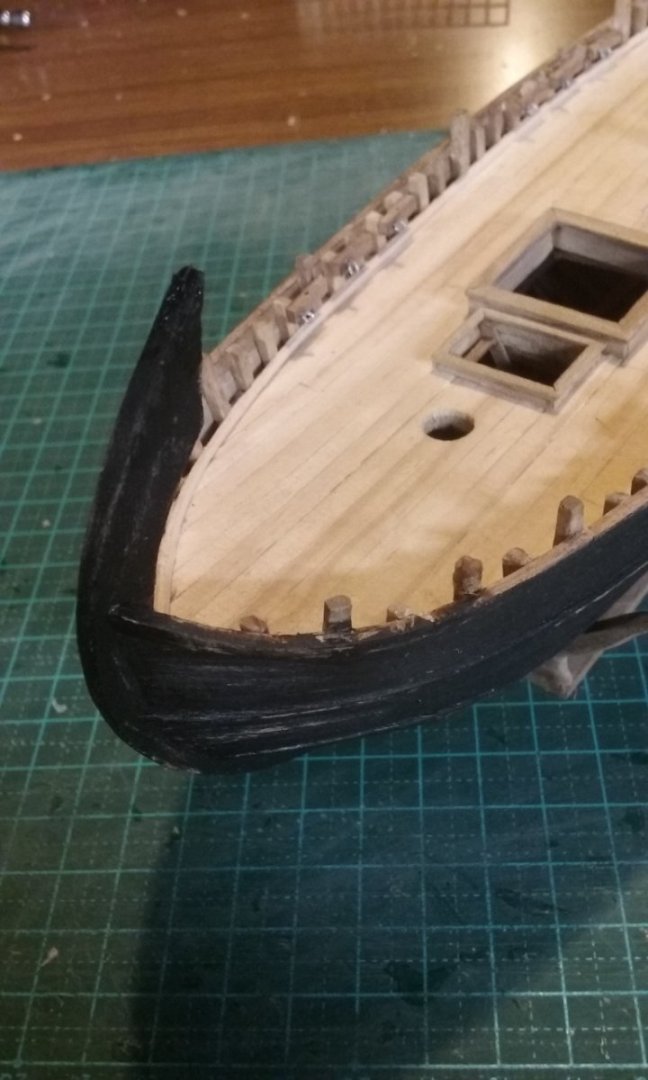
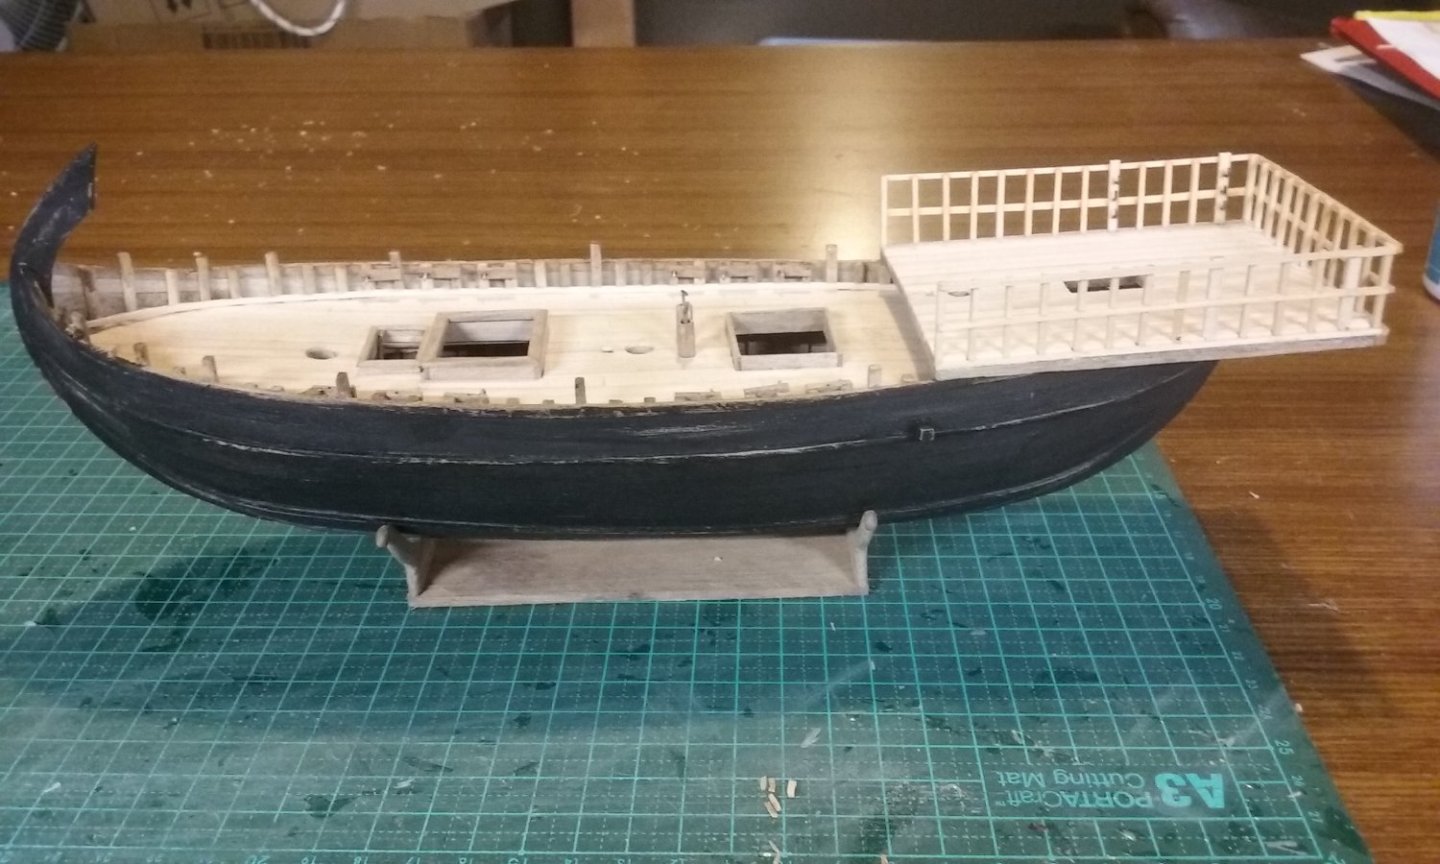
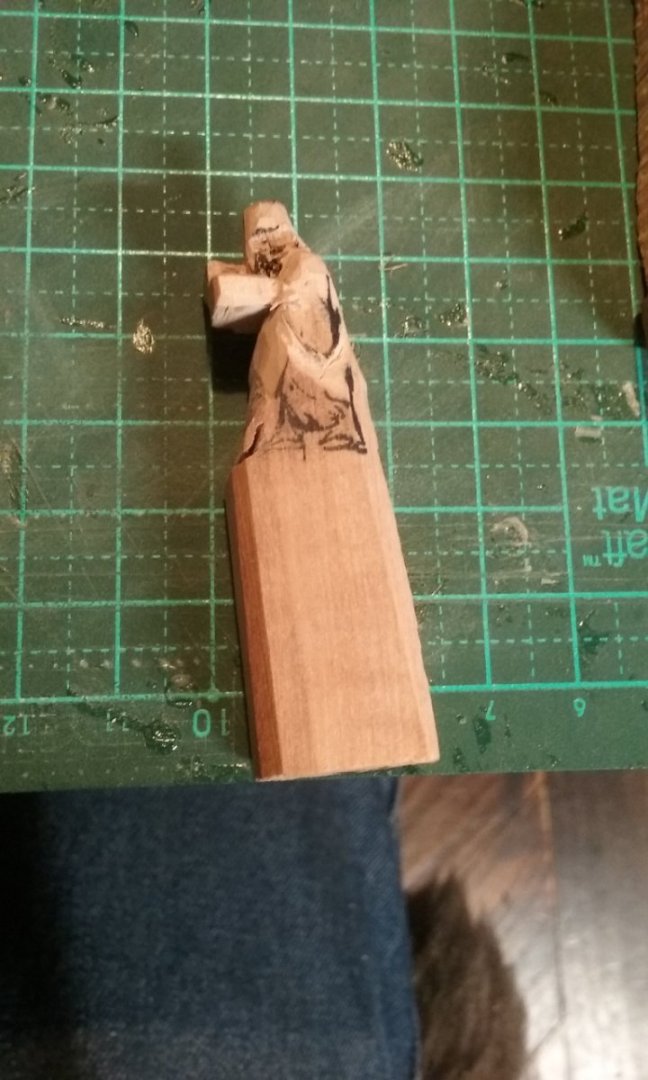
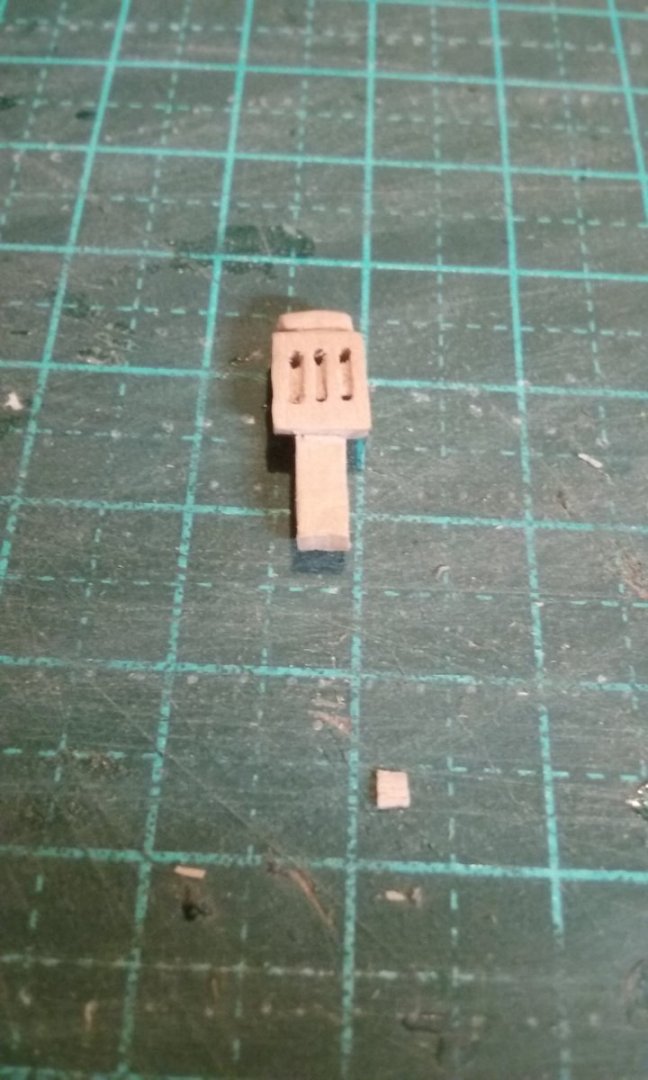
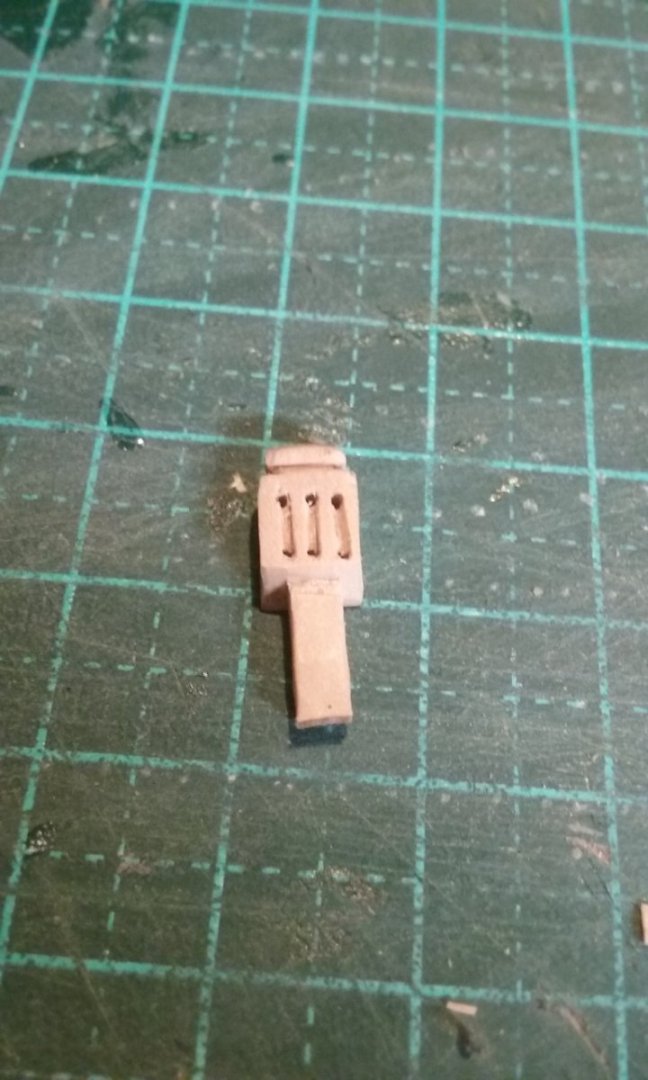
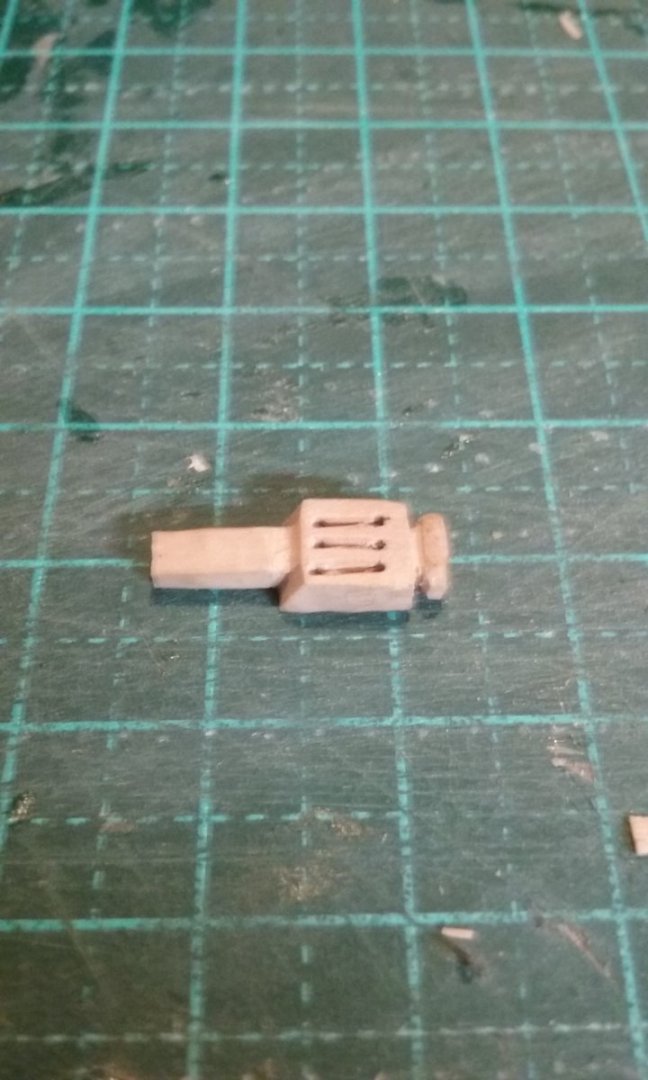
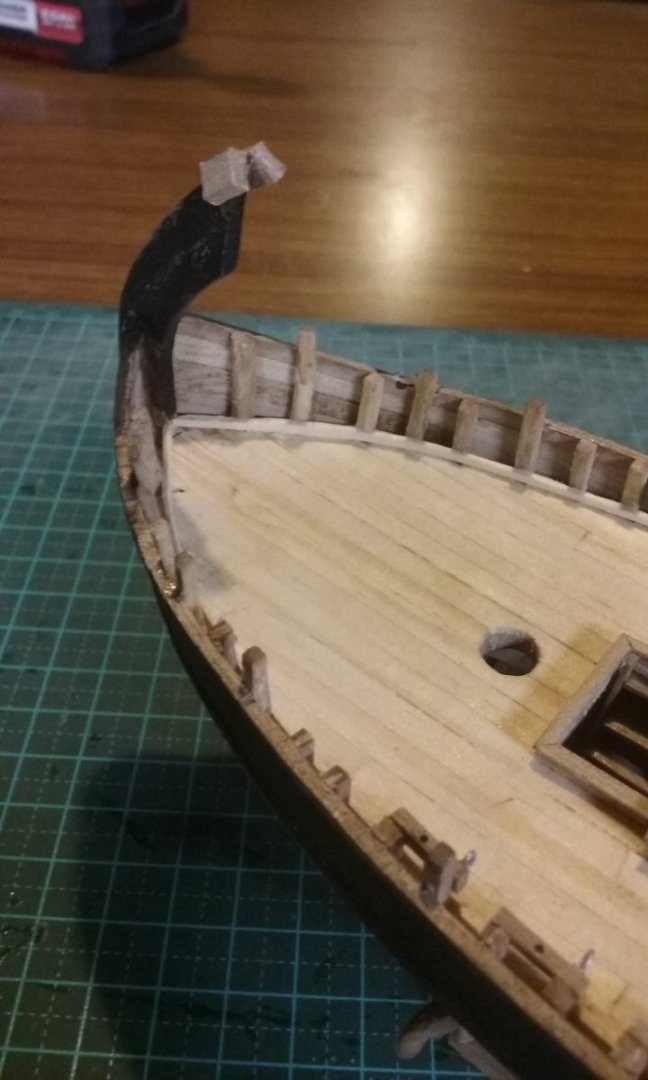
Stempost tidied up - trimmed and re-painted after the 'bow-brace' was removed. I also used filler to get rid of the mortise where the bow-brace met the gunwale, and also to smooth off the tops of some of the bitts standing up at the gunwale and some minor gaps here and there. And one last test piece for the weathering of the decks. Trouble is, with all the deck equipment in place it would be very difficult to effectively wipe off full-strength paint as I'd hoped to do, without breaking something. So I've decided to go ahead with the 'wash'of grey enamel paint I'd mixed from black and white and diluted with mineral turps, and only wipe off here and there. The back and left-hand ones are the previous test piece, using full strength paint and then wiping off. The new one is at the front in one photo and to the right in the other. Good enough, I think, to go ahead. And so I've taken my courage in both hands, full speed ahead and damn the torpedoes. Here it is with the decks weathered. Compare the colour of the decks, railing etc. with the picture above. It actually seems to have turned out well. I'm rather pleased. I also weathered the inside surfaces of the frames where they stick up from the deck as well as a few other surfaces here and there. I'll re-visit later and do some more touch-up to make it look still more real, but for the time being I'm very happy with the way it's ended up. Now on to other things. I need several more crew - I think at least half a dozen, plus the other owner, named Rustico, who also appears on the mosaics. Here he is under way. This is apricot wood from a tree in our garden that went the way of all flesh. Doesn't look much at the moment, but give it time . . . And a couple of mariners who I'll be working on simultaneously with Rustico - the piece of wood split disastrously and I had to glue it back together before I could start, so I haven't done anything on them yet. The top one is the steersman and the other will be ascending the stairs from the owners' cabin, perhaps carrying a full chamber pot. I thought of doing the same as Woodrat on his Mediaeval round ship and putting a thunder box on the poop deck (sorry!)but decided that as this is a pretty modest ship but instead there would be just a chamber pot in the cabin that some poor matelot would have to carry up to the deck and empty over the side. Steven


- 508 replies
-
- 11
-
-
-
Sounds like a plan. How thick are these shields, by the way? The real ones were usually about 12mm at the centre and thinning out to 9mm at the edges. This equates to 0.24mm and 0.18mm at 1:50 scale and is pretty hard to achieve in a model, particularly in a plastic kit, and I'm not suggesting you try it. I made my own for my dromon and though they do look right for scale, they were a lot of hassle (see post #1065 at Steven
-
Can I suggest you get rid of it entirely and replace it with a wooden one? And while you're at it, consider replacing the mainyard as well? I think this is an area where plastic ship model kits really fall down badly - plastic is just not suitable for anything long and thin - it always seems to warp or bend, and has none of the inherent resistance to sideways forces that timber has. It's also a gentle lead-in to building a whole ship in timber . . . Steven
-
Looking good, mate. Perhaps the lanyards (the ropes between the hearts/deadeyes) could have been a tiny bit tighter, but setting up these things is pretty difficult. Practice is really the only solution, and I'm sure you'll get better at it as time goes on. BTW, there are various remedies for "hairy rope" - I think these include rubbing with beeswax, or passing the rope (very carefully) over a naked flame. I do like the toggles you have between the top hearts and the shrouds themselves - a very common thing in the Mediterranean in particular, dating right back to the year dot. Steven
-
Amazing work, mate! Steven
-
Pretty much the story I'd thought of. In fact, it's all radiata (Monterey) pine, which has clear demarcation between soft and hard growth-rings, and this one must be the hard stuff. Steven
-
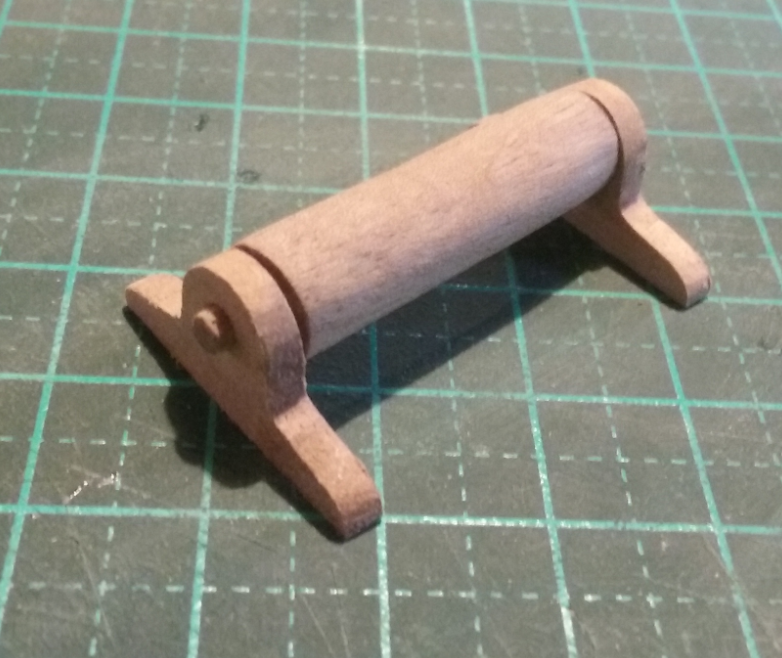
I just tried weathering the windlass and the knights. Here's the original colour of the windlass: And here it is after weathering, using the technique described above. I'm quite happy with the result. I might do a little more detail work in the weathering, so it's not all the same colour throughout. And as I weather different things at different times there's bound to be some variation in the colour of the various parts, but I regard that as a good thing as that's probably what would happen in nature. Steven

- 508 replies
-
- 12
-
-
Yes, the weathering's a bit much, but I feel that if you try too hard to fix it you'd probably make it worse. It's inherent in the kit itself. Consider it a learning experience for next time. Yes, a wooden yard as well would be a very good idea. I don't use a lathe in tapering (the yards are usually too long and thin to work on in a lathe without bowing), I just do it by hand. Or you could use the poor man's lathe - a hand-held electric drill - and sandpaper. I just checked out those Revell shields - Whoa! My eyes! Well, yes, Viking shield were probably as colourful as they could make them, but the reds would be ochre, as would the yellows. Blue was a sort of blue-grey as far as can be discovered. And yes, it's likely that everybody had a different design on his shield, though there's no proof that this was the case, the idea of everybody in a 'military unit' being distinguished by common shield designs wouldn't come in for several centuries yet. The most reliable site I've found for the patterns on Viking shields (and I've made quite a study of the subject) is https://www.scribd.com/document/171696247/The-Viking-shield-from-archaelogy . Peter's a friend of mine and he's passionate about getting historical details right. Steven
- 10 replies
-
- 1
-
-
- Viking Ship
- Revell
- (and 1 more)
-
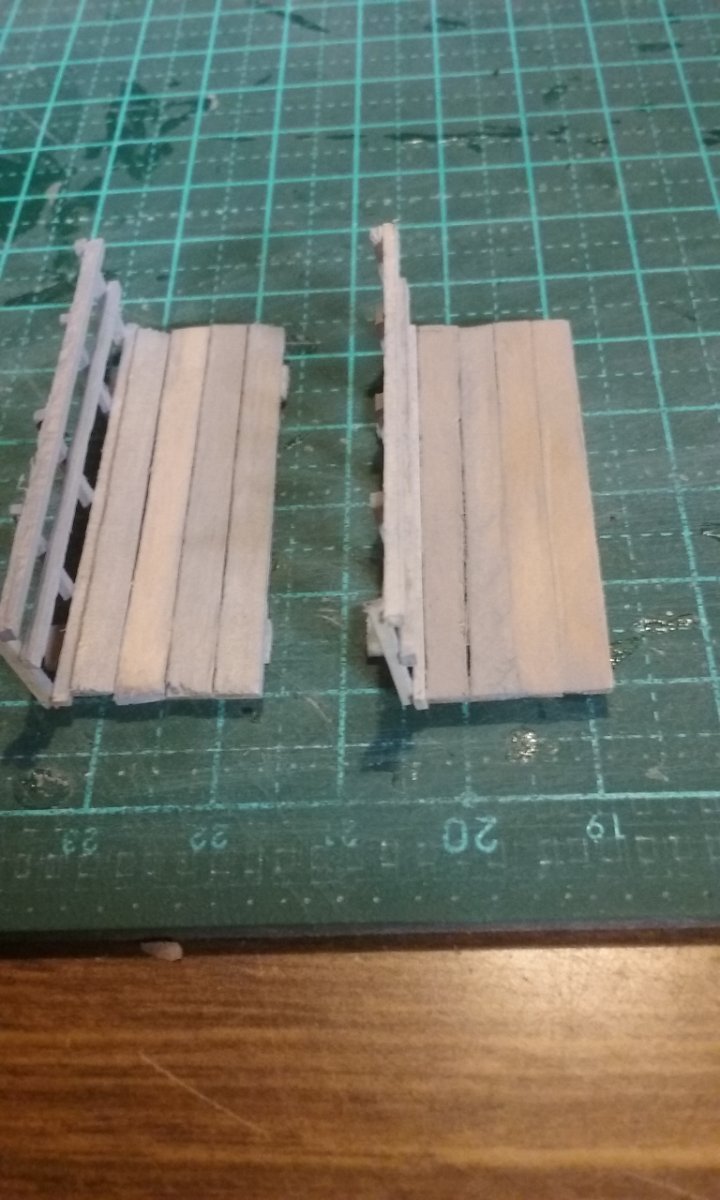
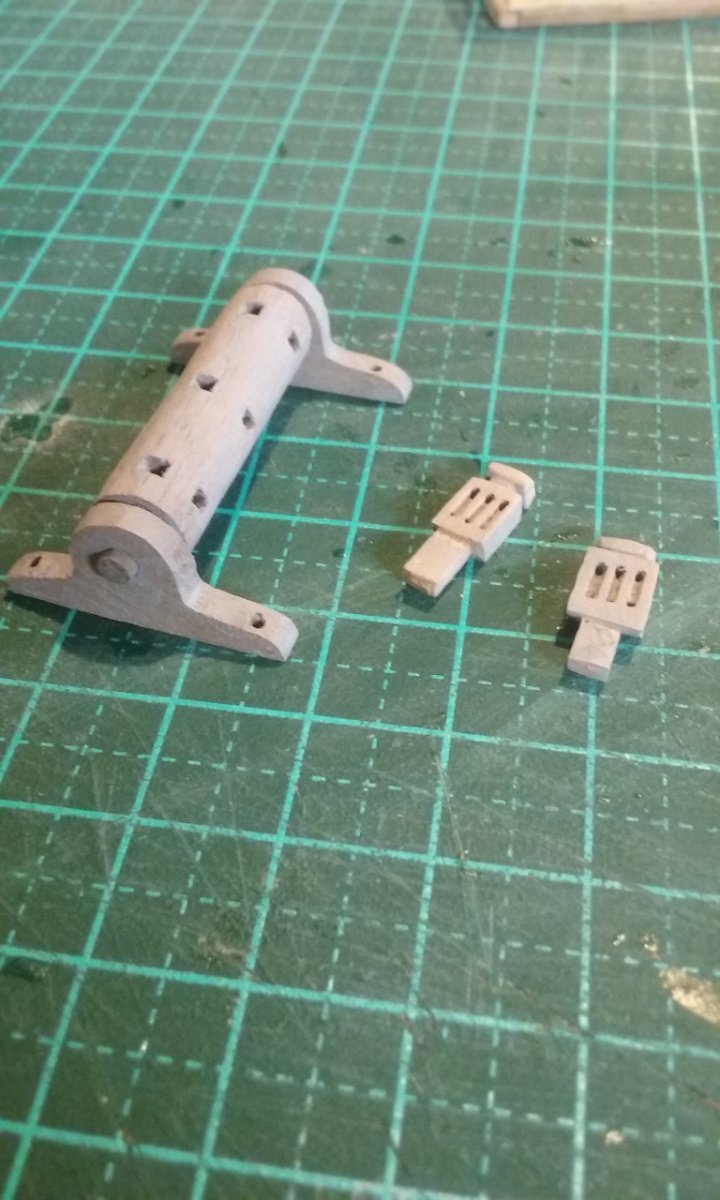
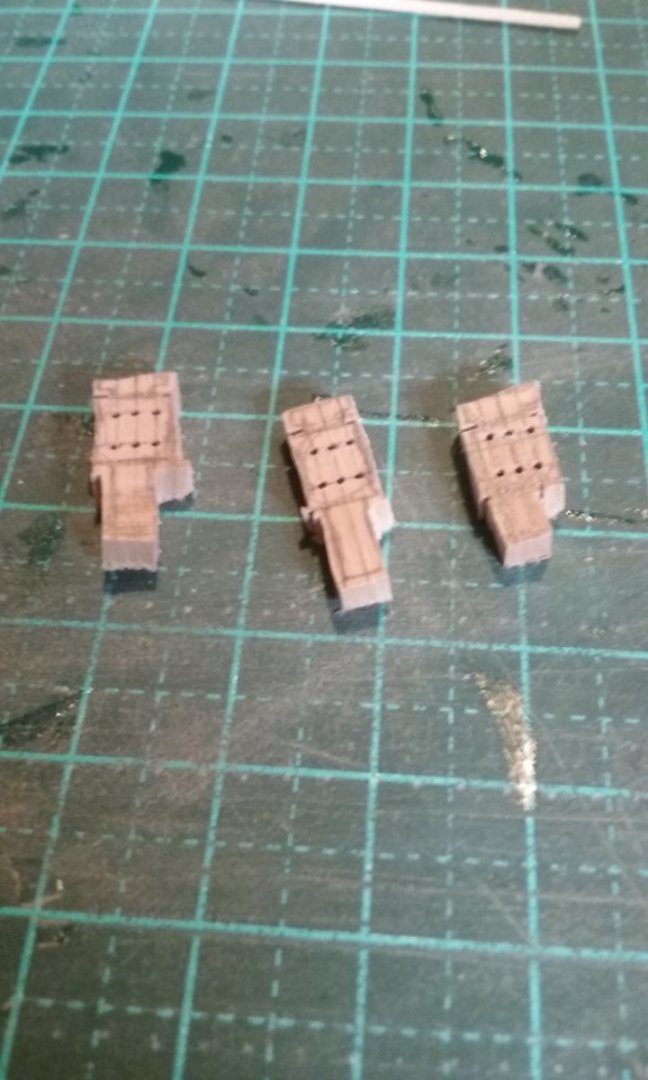
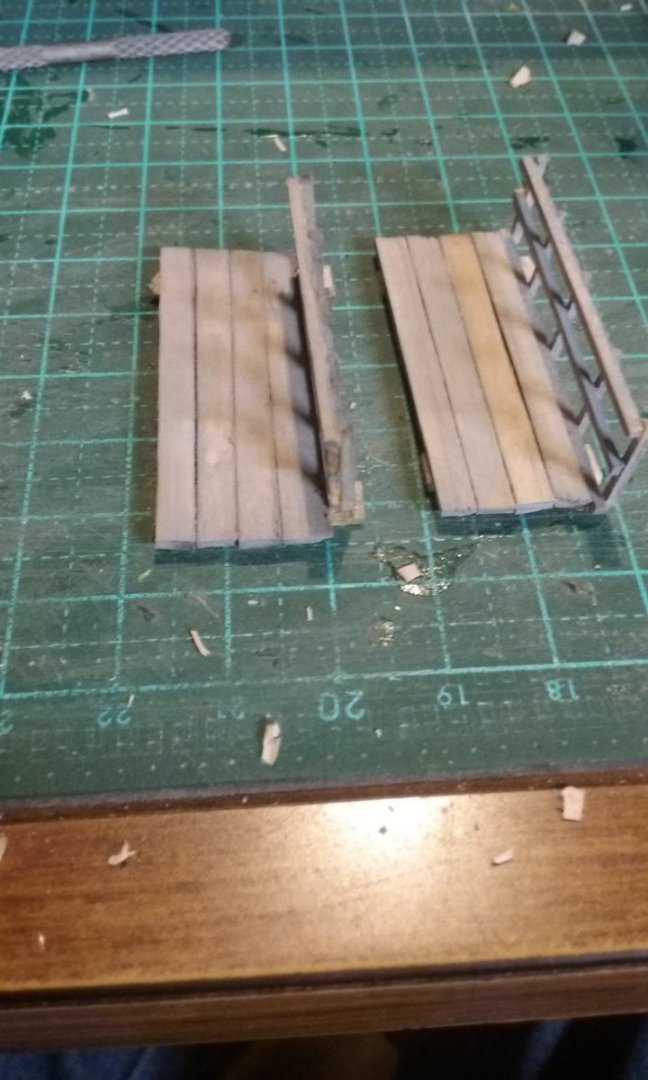
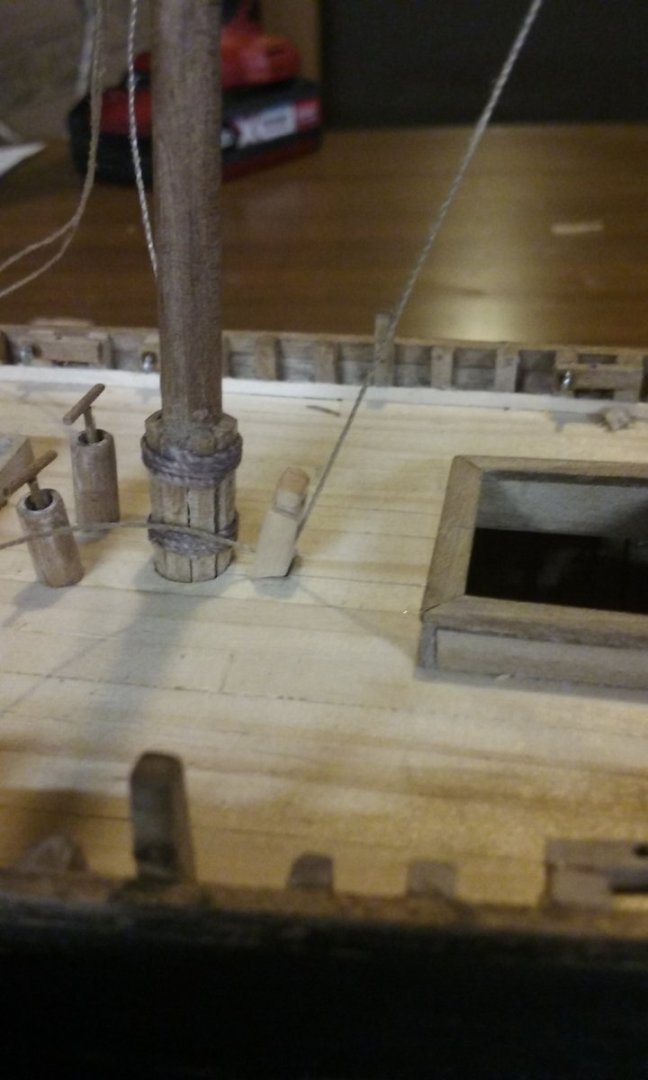
Thanks, Grandpa Phil. That Quickshade is interesting stuff. I've been doing more experimentation with the colour of the weathered wood and I think I've got a result I can be happy with. This time I mixed black and white enamel to duplicate the colour of the weathered timber in our garden (posts, fence palings etc). Then, when I was happy I had the colour right, I painted another sample piece and immediately rubbed it back off, and finally went over it with mineral turps on a brush and wiped again. I did the same thing with my earlier sample piece as well. Here's the result. The one in the foreground in the first photo and on the right in the second is the one I did newly from scratch, the other is the old sample piece I re-painted. Not that much difference, but I think the new one looks better, even though one plank seems to have resisted the paint somewhat. Still, maybe that makes it more interesting. Knights for the halyards. For the foremast (which on a lateener is usually the biggest). Note that the base is angled, because the knight follows the slope of the halyard. Dry fitted. I had to keep re-cutting the angle of the base till I got it right. Three knights complete, one for each mast. And then I realised that because knights basically go all the way down to the keel, the one for the mizzen was wrong - it's out on the poop with no structure beneath it except that of the deck. I'd wondered why why the ship in the pic below has a block at deck level for the mizzen halyard, not a knight. Now I know. Unfortunately I'd already cut a slot for the mizzen knight in the poop decking, so I had to repair it. And yes, I finally decided to removed the 'bow brace' from the stempost. As I'd cut into the stempost to locate it, I now have to restore it to shape. Once the glue's dry I'll carve these pieces down flush with the stempost. Steven


- 508 replies
-
- 12
-
-
Good to hear there were no major problems fitting the model together. It's a very elegant shape. When you ask about tiller gear, are you talking about some kind of tackle (i.e. ropes and blocks etc) to make the tiller easier to use? I wasn't aware of any information on its use in carracks. Can you give a reference? 6 inches square at the tip seems a little extreme - how do you get your hand around that? Regarding the paint colour - again, as far as I know there's no evidence for paint on caravels - certainly contemporary pictures show simple wood colour. But if you're doing it as a sort of tribute that's another thing entirely - it's your model and you can do what you like with it. Steven
-
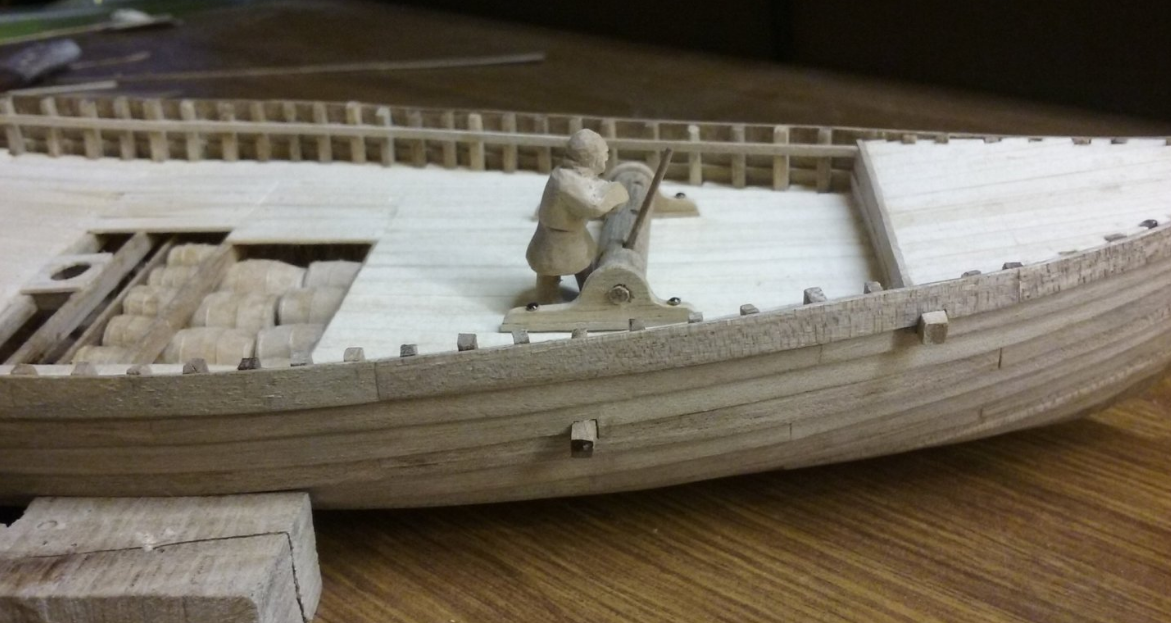
By the way, another argument in favour of having the windlass aft, particularly in a lateener, is that the halyard usually runs back diagonally (via a multi-sheaved block) to an angled block fixed to the deck (known in French as a sep de drise, and as a knight in English) , as in this picture. As you can see, there's a capstan tensioning the whole affair aft of the fixed block. It may also be used to tension the halyard of the mizzen by pulling forward, but this photo doesn't show that. We're used to the windlass being forrard because modern windlasses are used to raise the anchors but in this context it would seem to make sense to have it aft. BTW, I remembered that the town seal of Winchelsea (1274) also shows a windlass in use aft, but that's for a square rig - I think it would be even more convenient and practical to have an aft-mounted one in a lateener. Steven

-
Up to you, mate. It's one way of doing it. Checking back to your build log it appears your caravel doesn't have rails above the bulwark? Steven
-
Yep. They have theories, but they can't be sure they're right. I've seen one reconstruction drawing of it being used to haul up the yard, but as with so much in archaeology it's impossible to really know. Steven
-
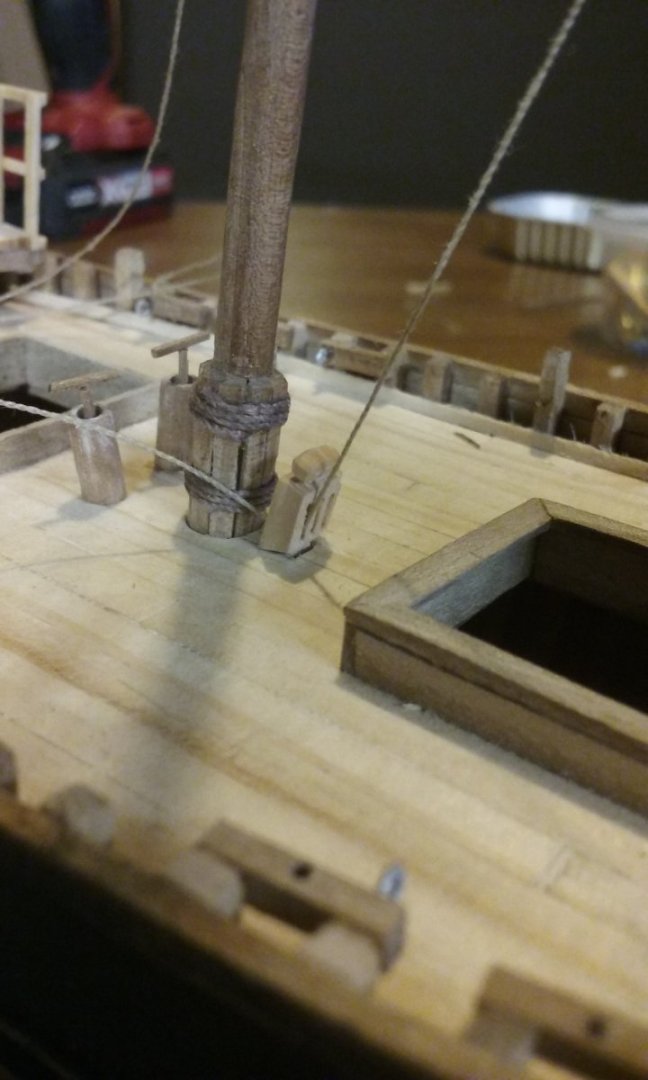
Yes, and that's (sort of) what I did on my nef, though because it didn't have a rail above the gunwale I put an inner 'rail' that ran along the inside of the frames a little below gunwale level and tied everything off to that. I considered dong the same on this build, which also doesn't have rails, but decided to try something new. There is absolutely nothing on the mosaics to show how the shrouds were fixed, so at least this would be something that works. Steven
-
The eyebolts are for the standing end of the tackle. The pegs are for the running end, so the shrouds can be loosened when tacking. Steven
-
The only archaeological info I can quote is from the Bremen cog of c. 1380 in Germany, which is not terribly apposite to your model. However, this vessel (which was 23 metres (75 feet) long had both a windlass (mounted in the stern) and a capstan (on the poop). See which shows both the original ship and a replica with everything in the same places. So, an aft-mounted windlass would make sense. Steven
-
You've done a very good job on the "woodening/weathering" of the deck. The only comment I might have is that it is perhaps a little too weathered. But that's probably being overly picky (but I'm a bit obsessed about this subject at the moment, as I'm trying to weather the decks of my own build without overdoing it). Very wise replacing the mast with a wooden one. This is a fairly common thing plastic ship modellers (the ships are plastic, not the modellers) encounter, and is often solved the same way. And you've done a nice job of it - it looks much better than the original. Steven
- 10 replies
-
- 1
-
-
- Viking Ship
- Revell
- (and 1 more)