Louie da fly
-
Posts
7,993 -
Joined
-
Last visited
Content Type
Profiles
Forums
Gallery
Events
Everything posted by Louie da fly
-
 You usual superb work, Patrick. I am continually gobsmacked by the quality of your modelling. Steven
 -
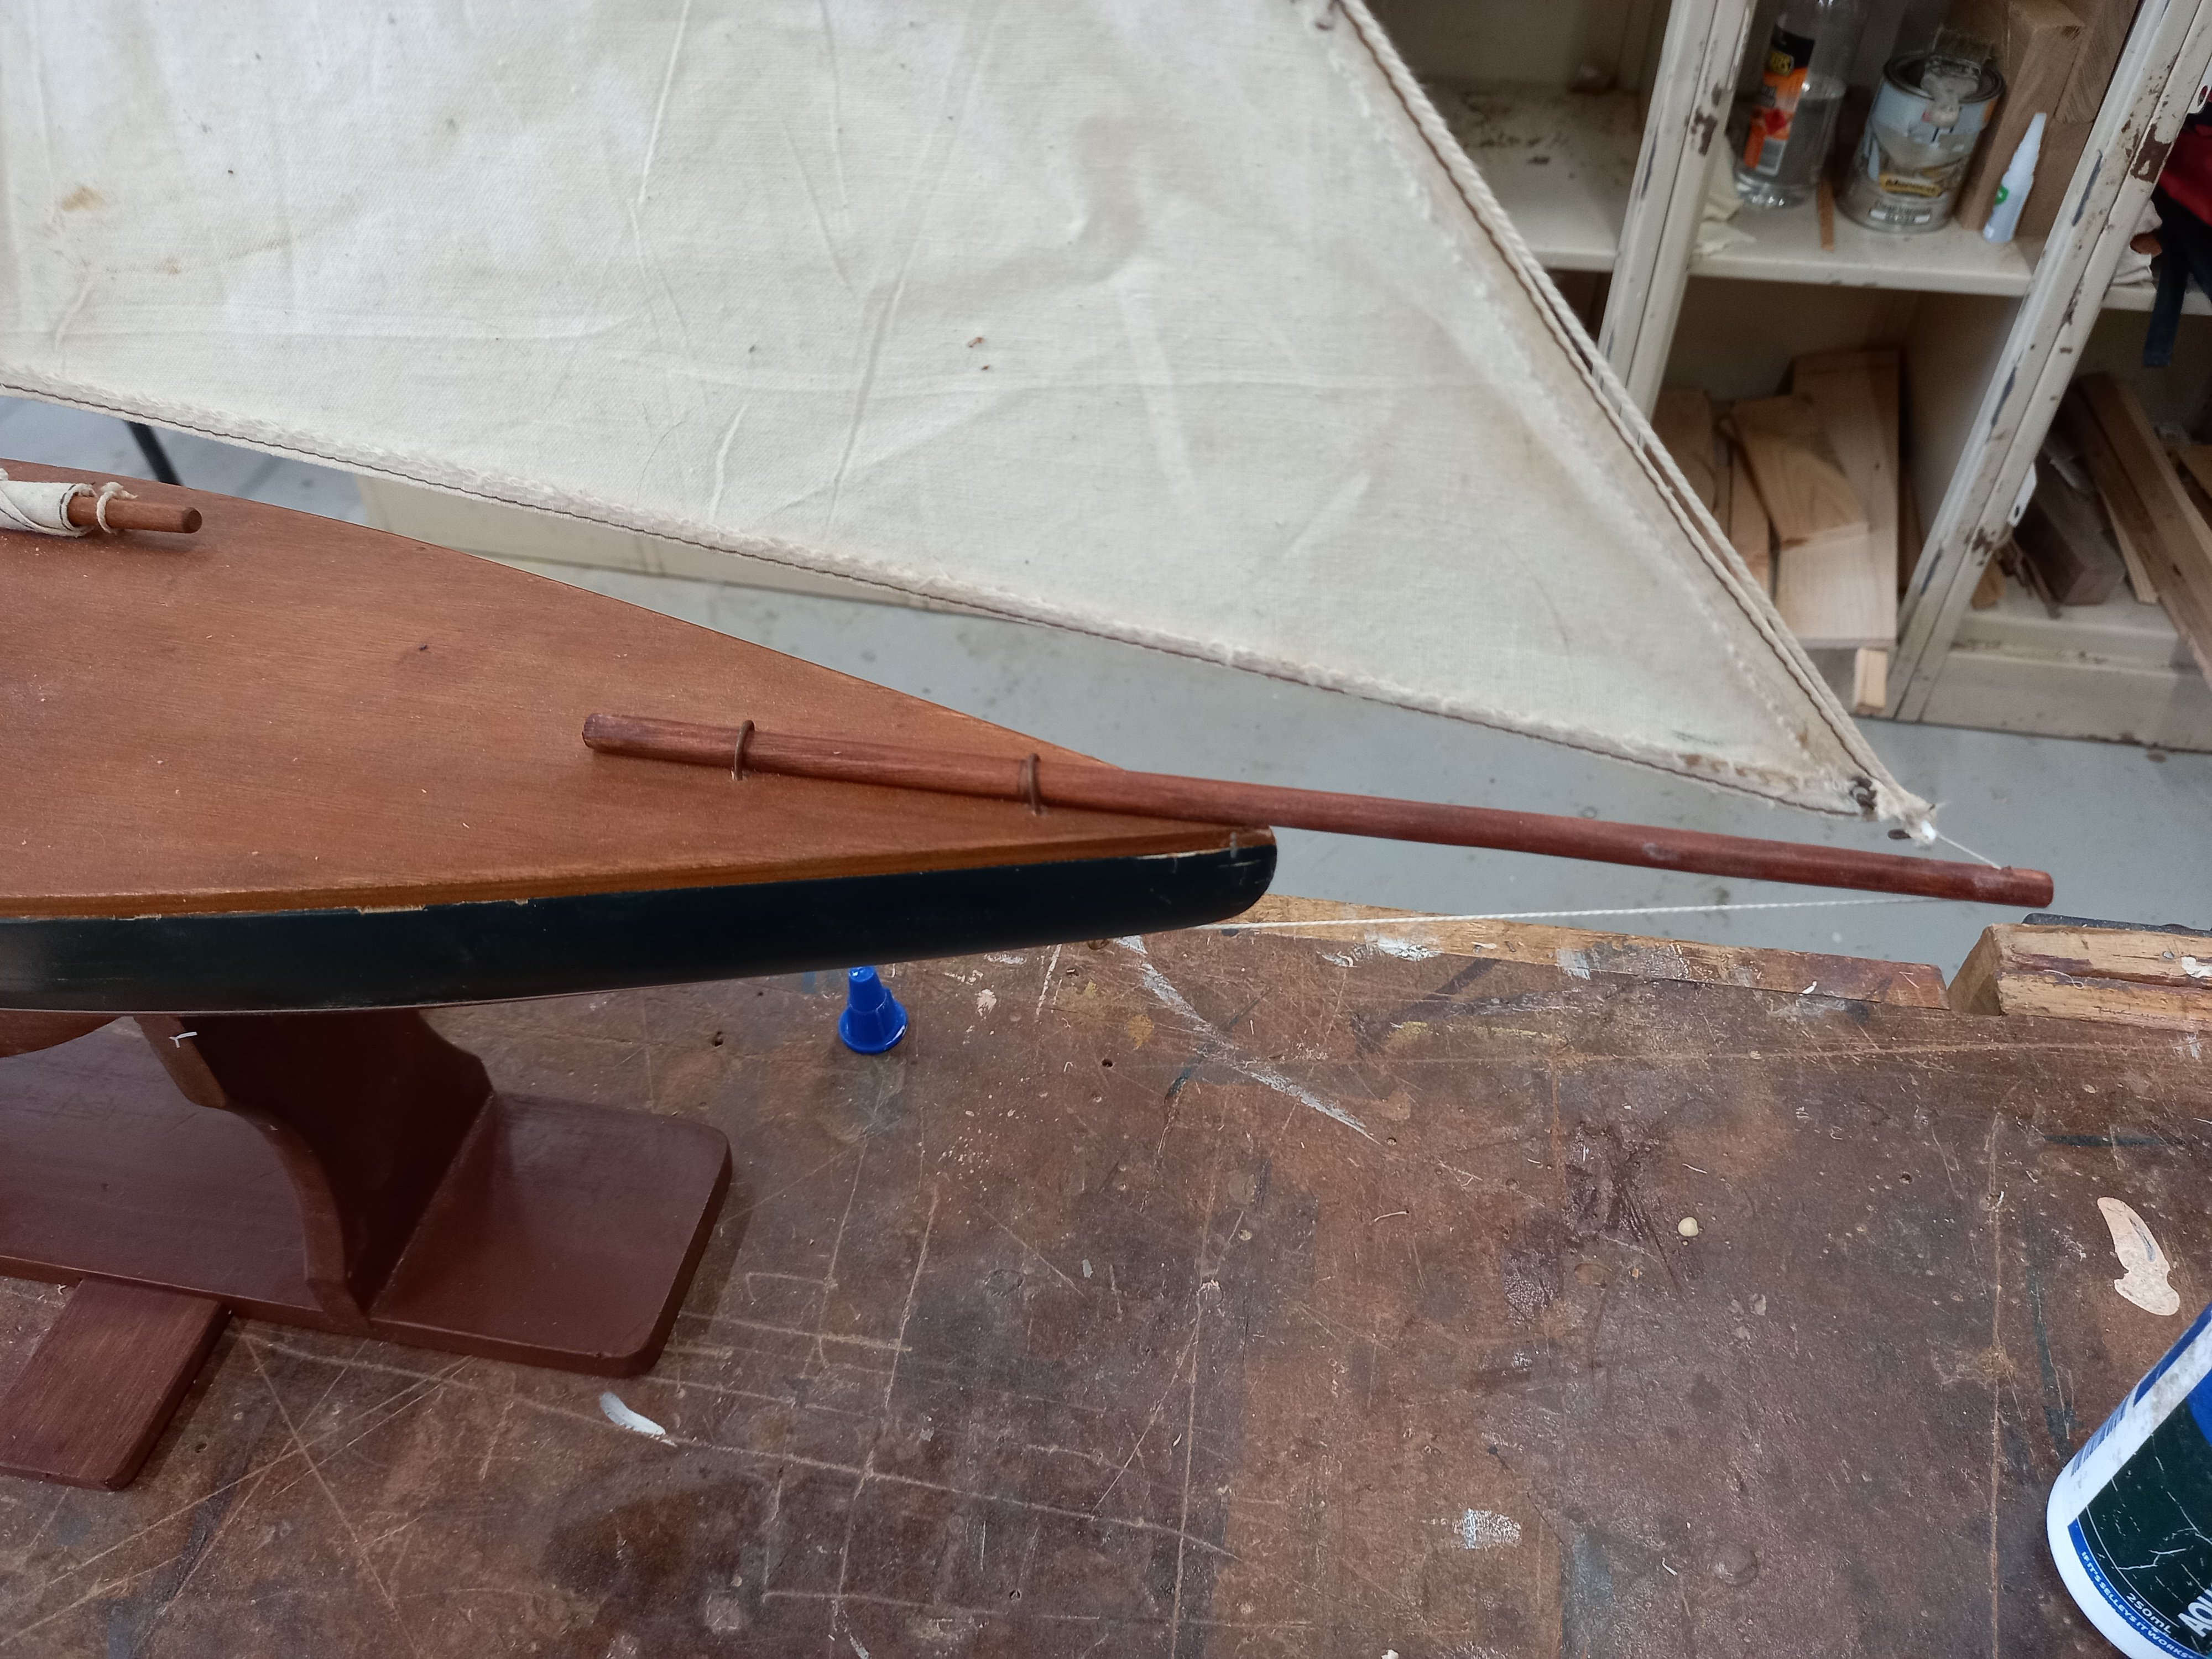
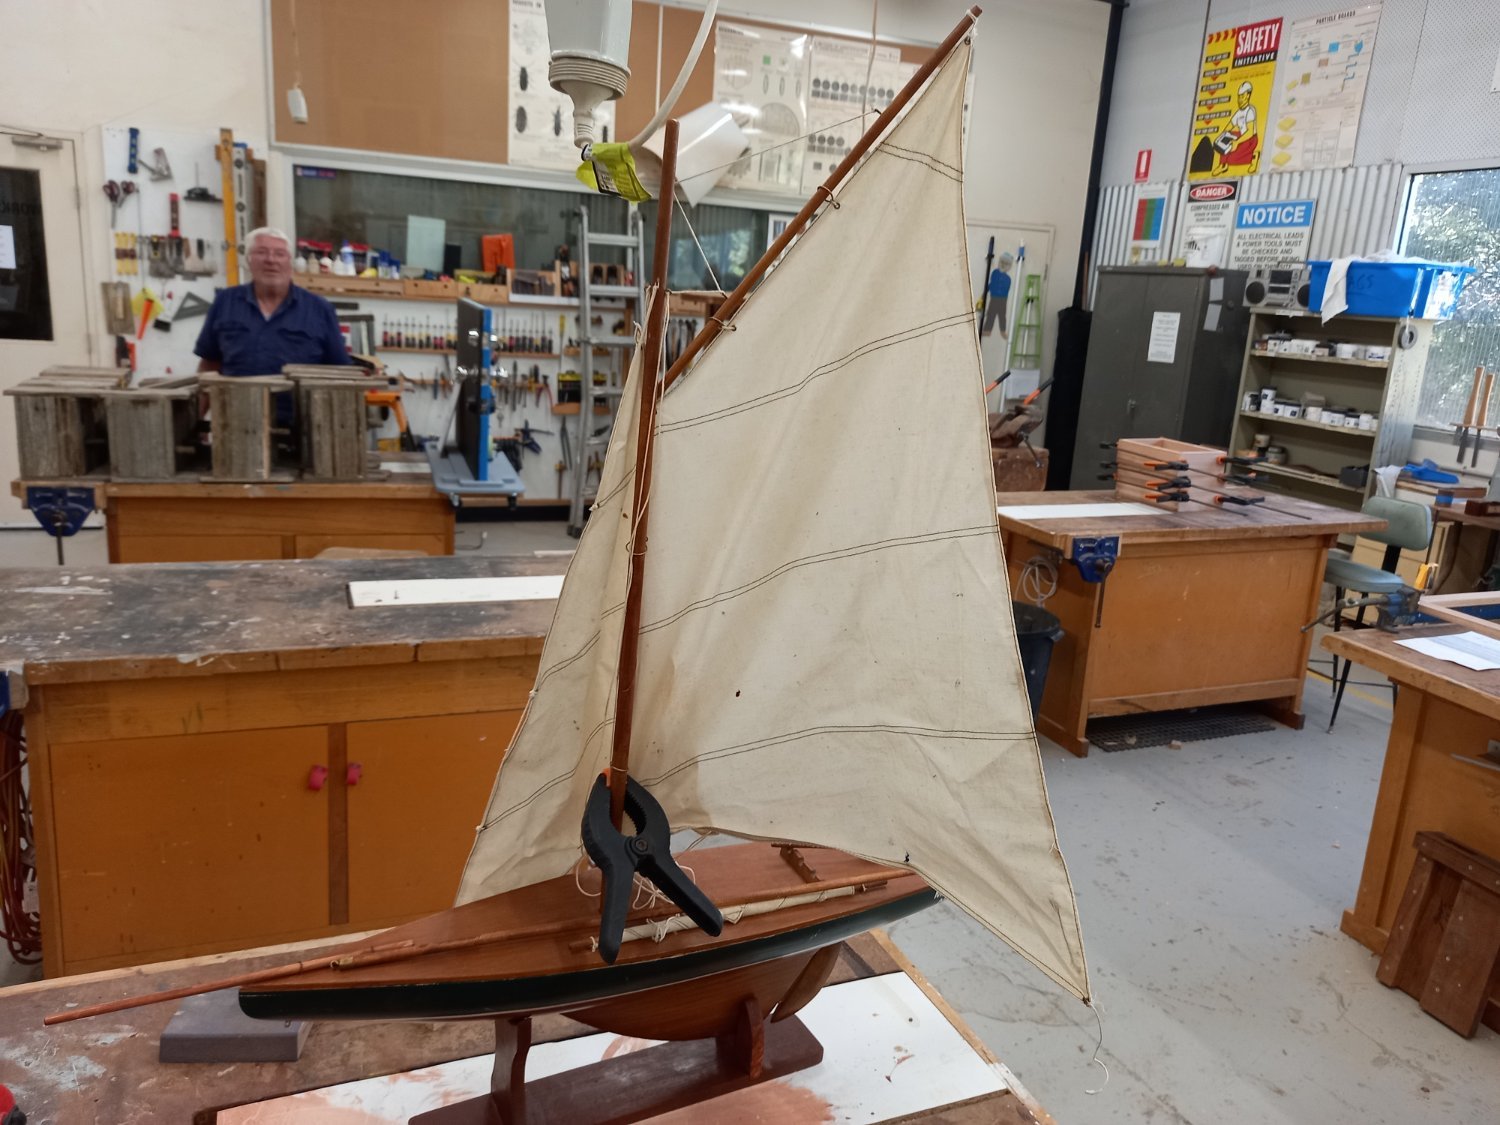
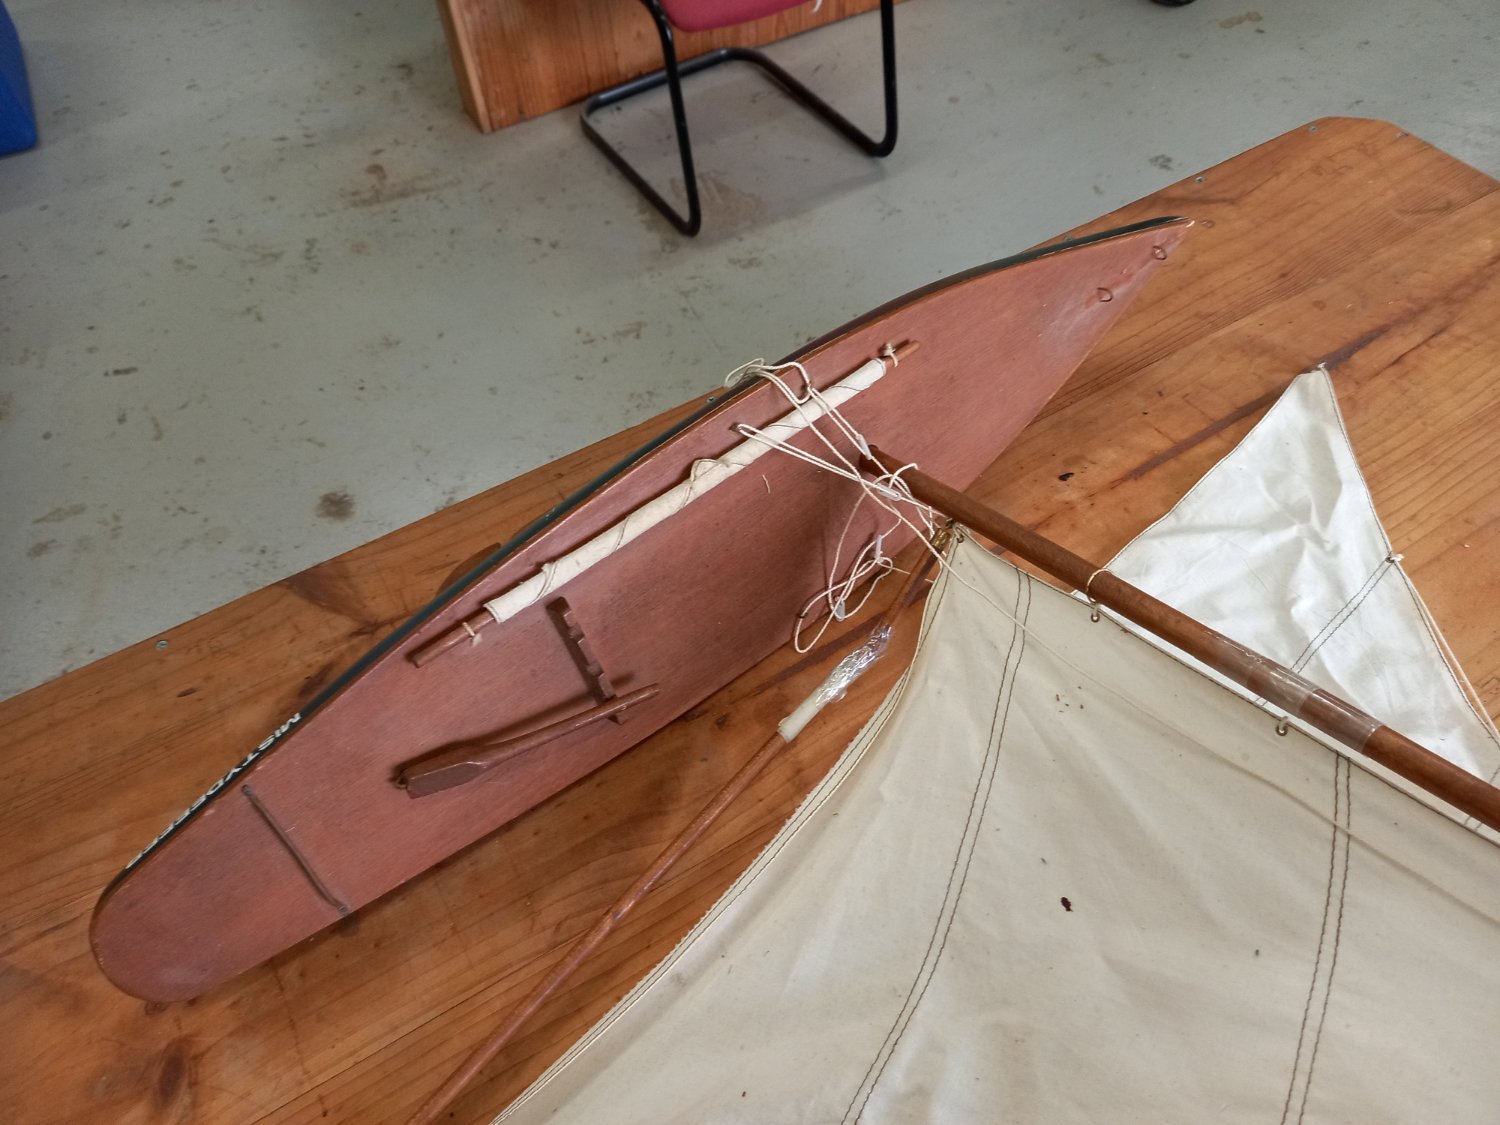
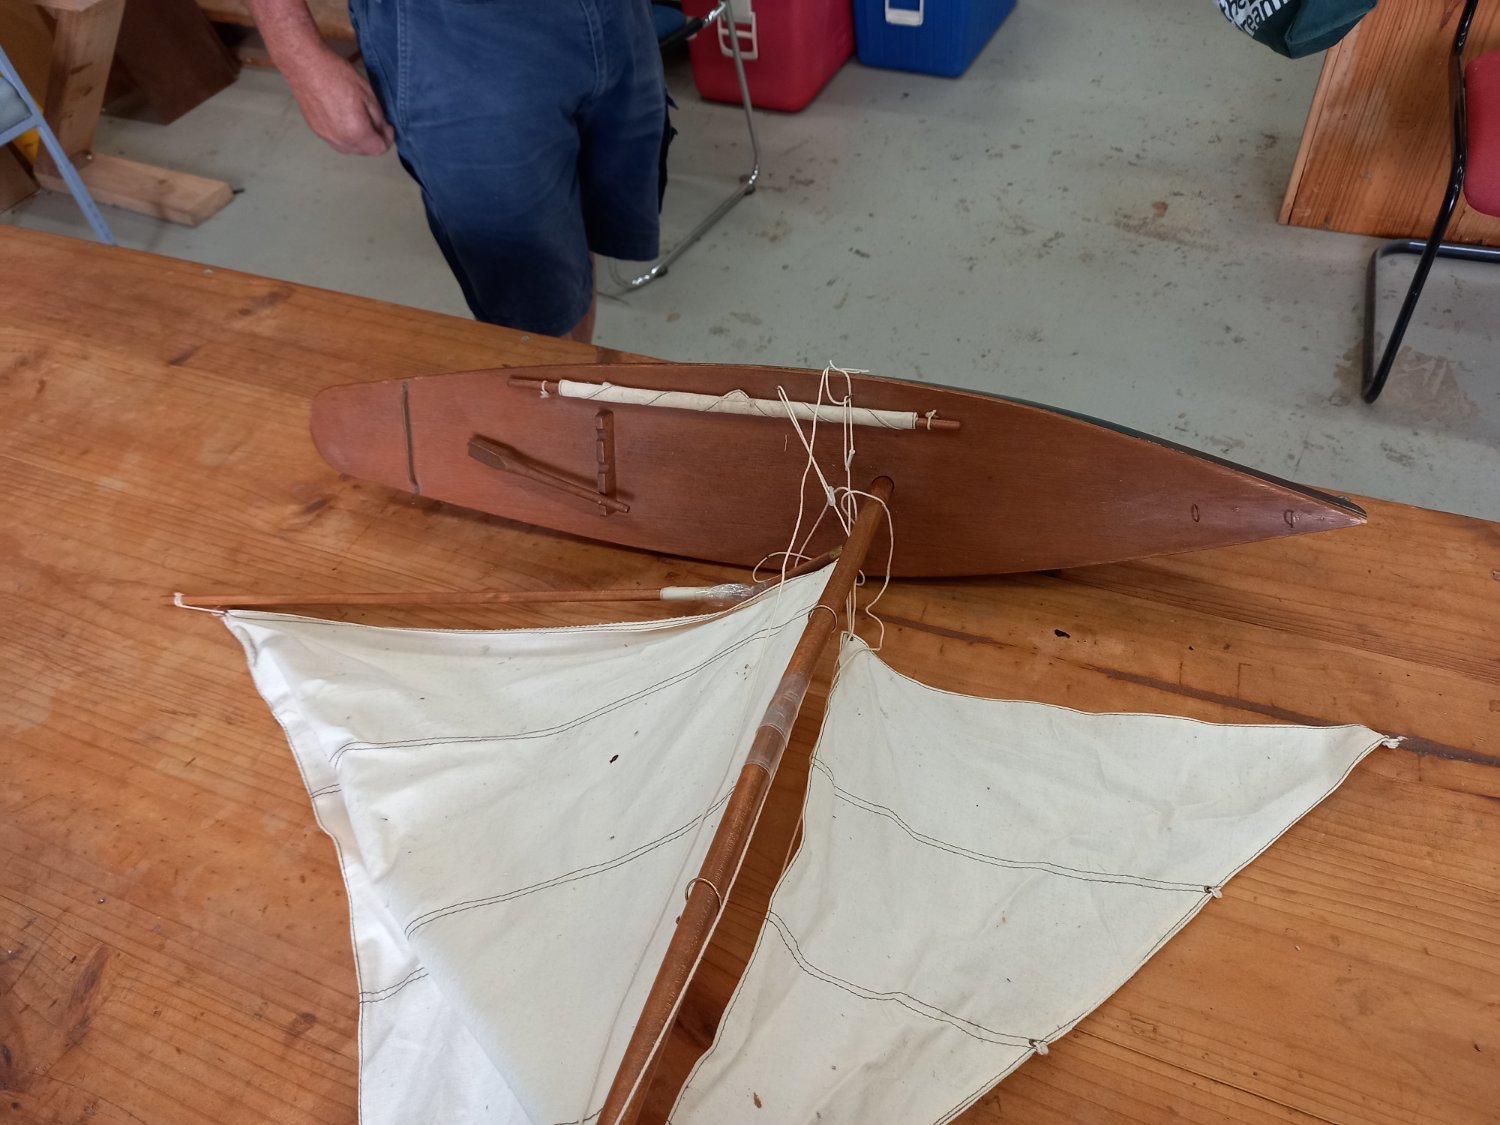
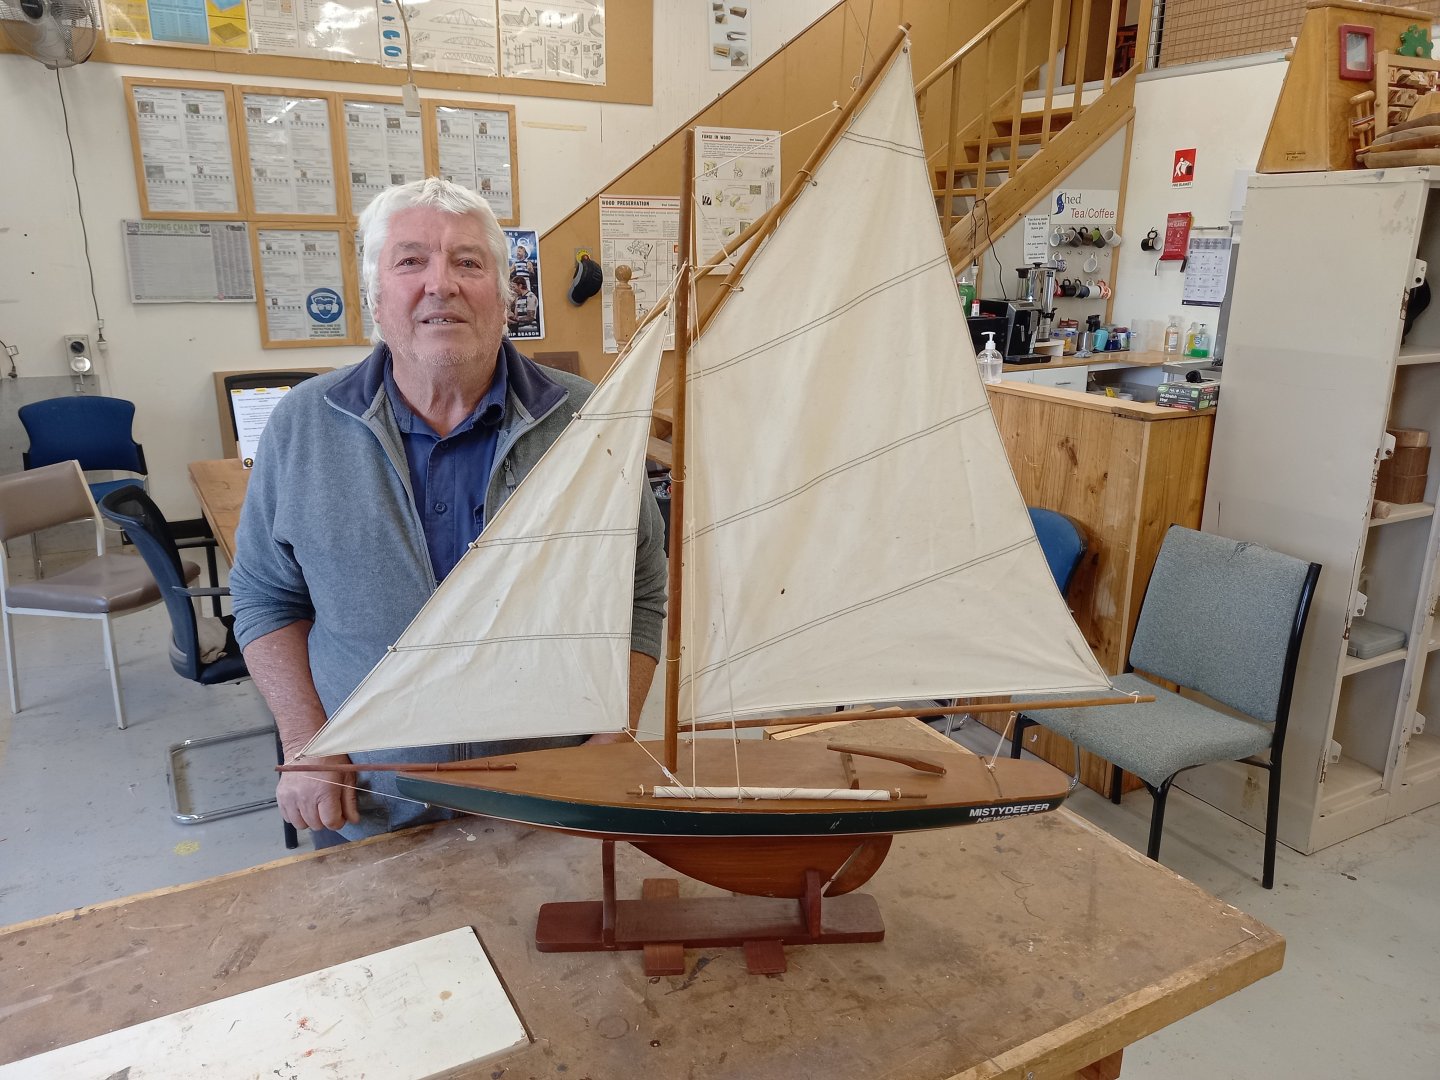
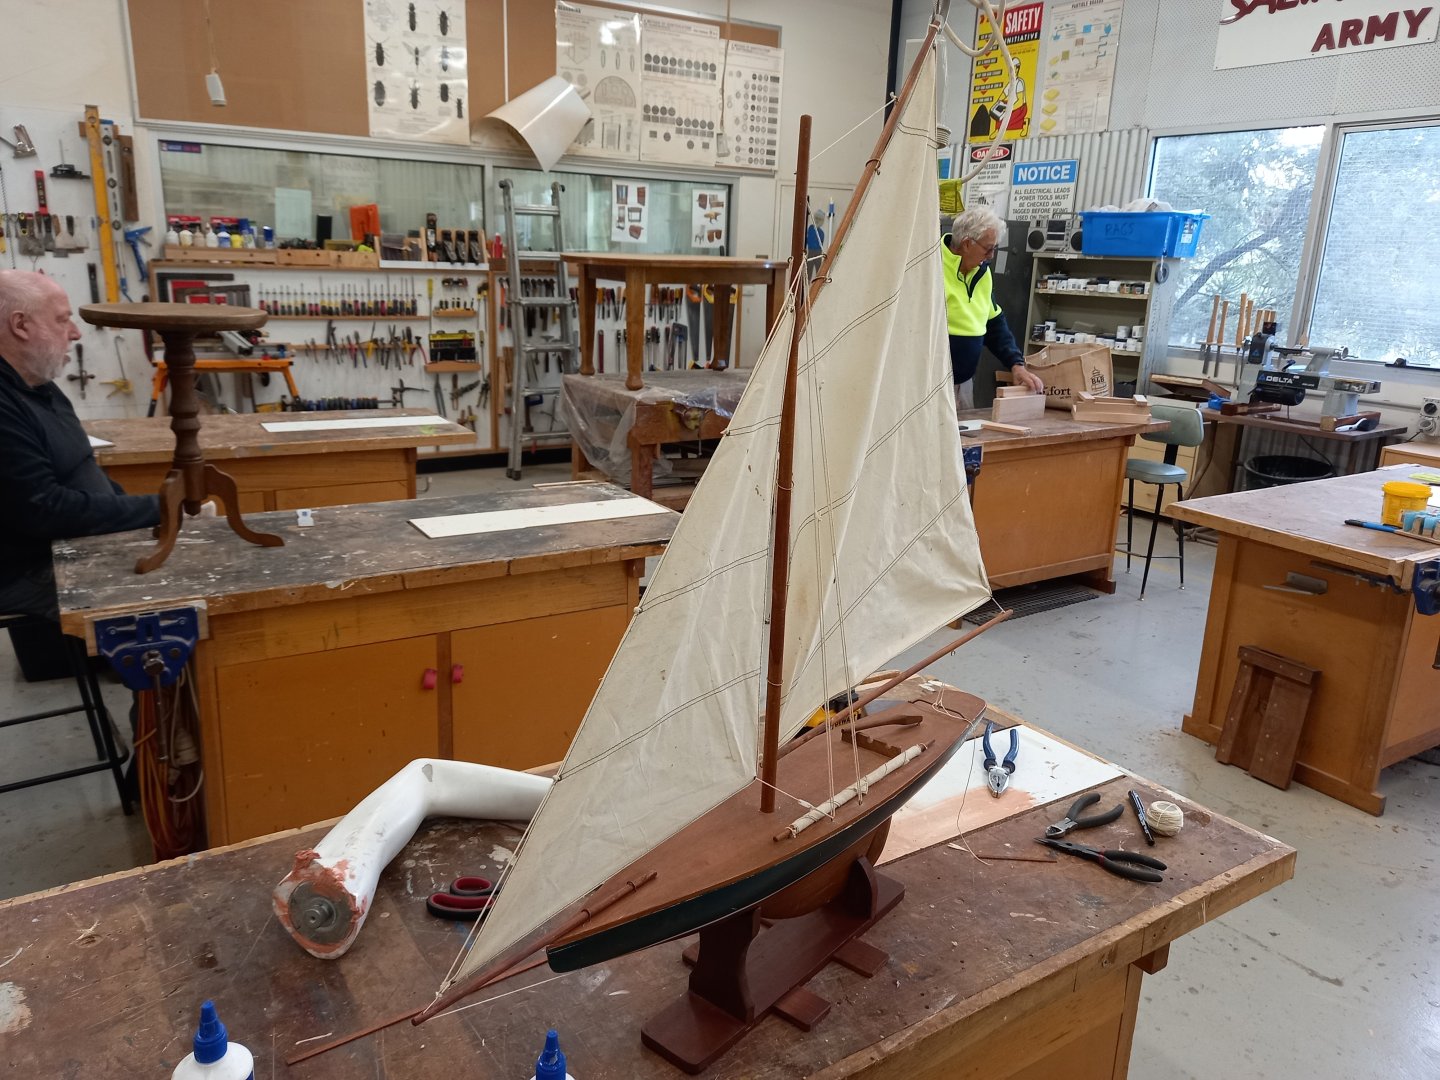
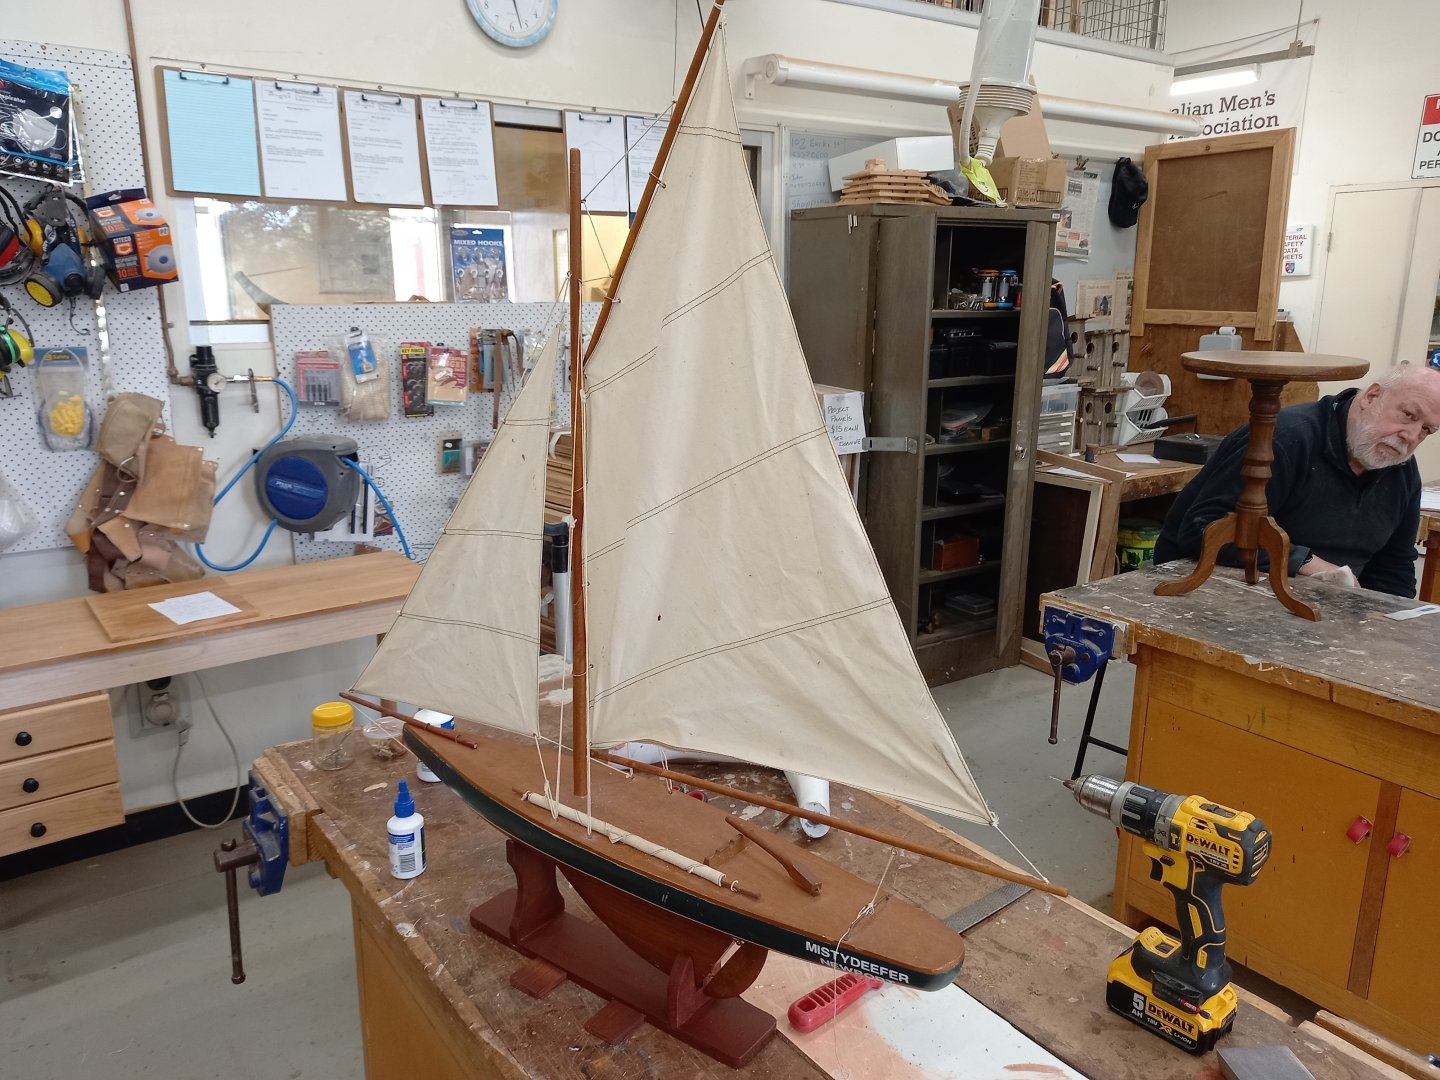
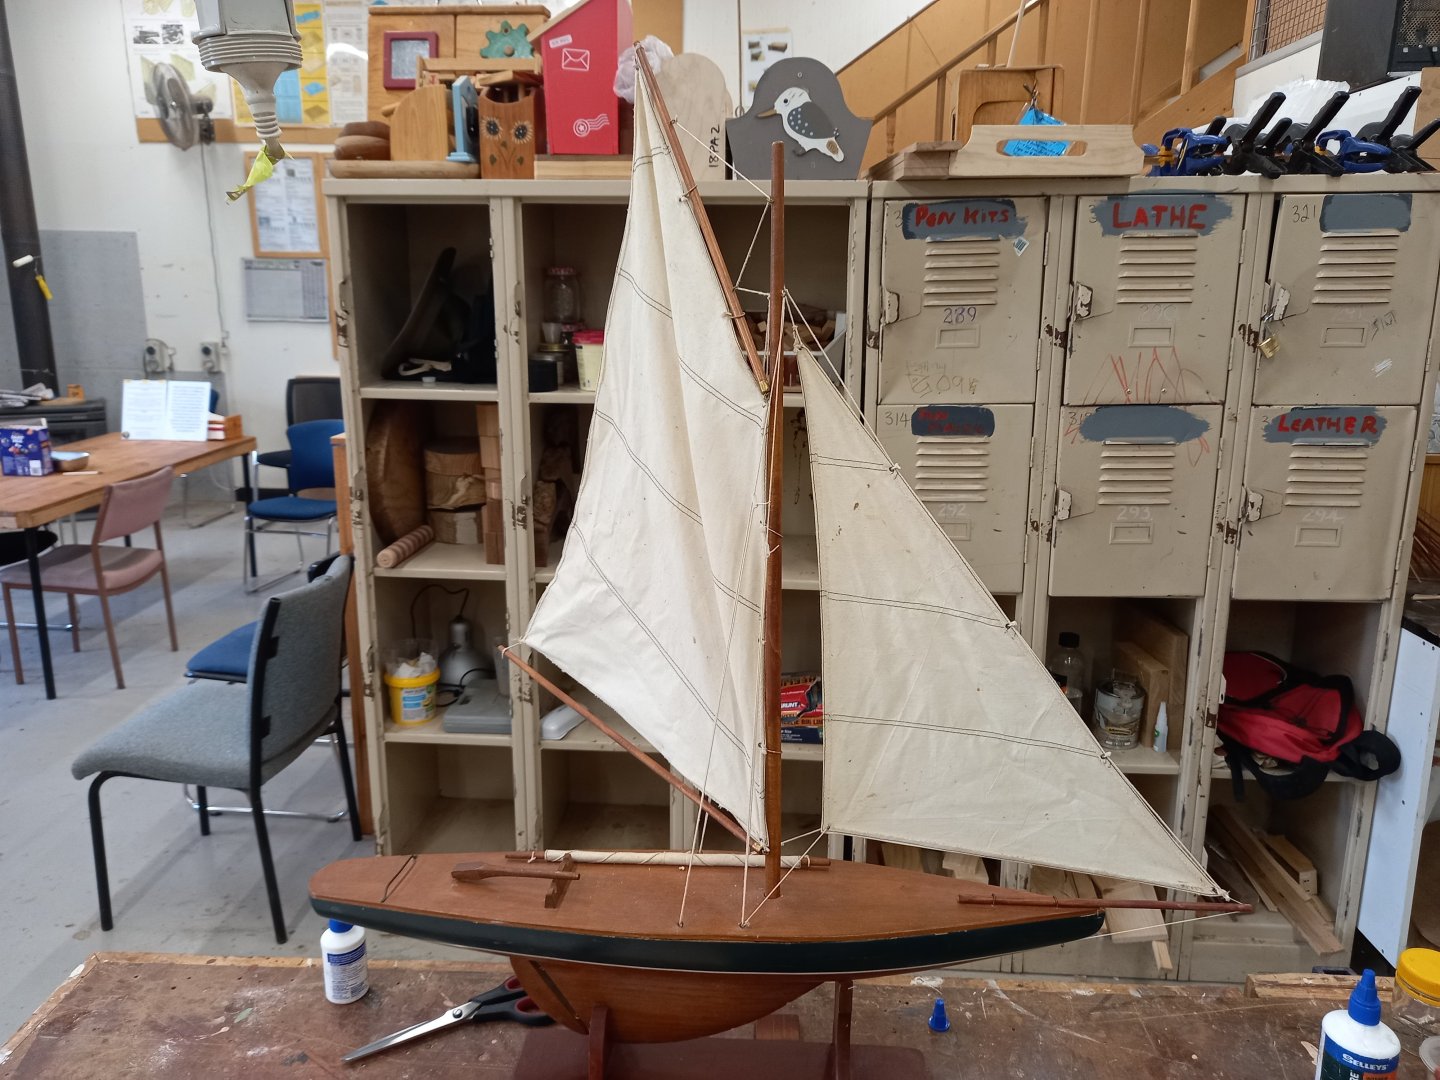
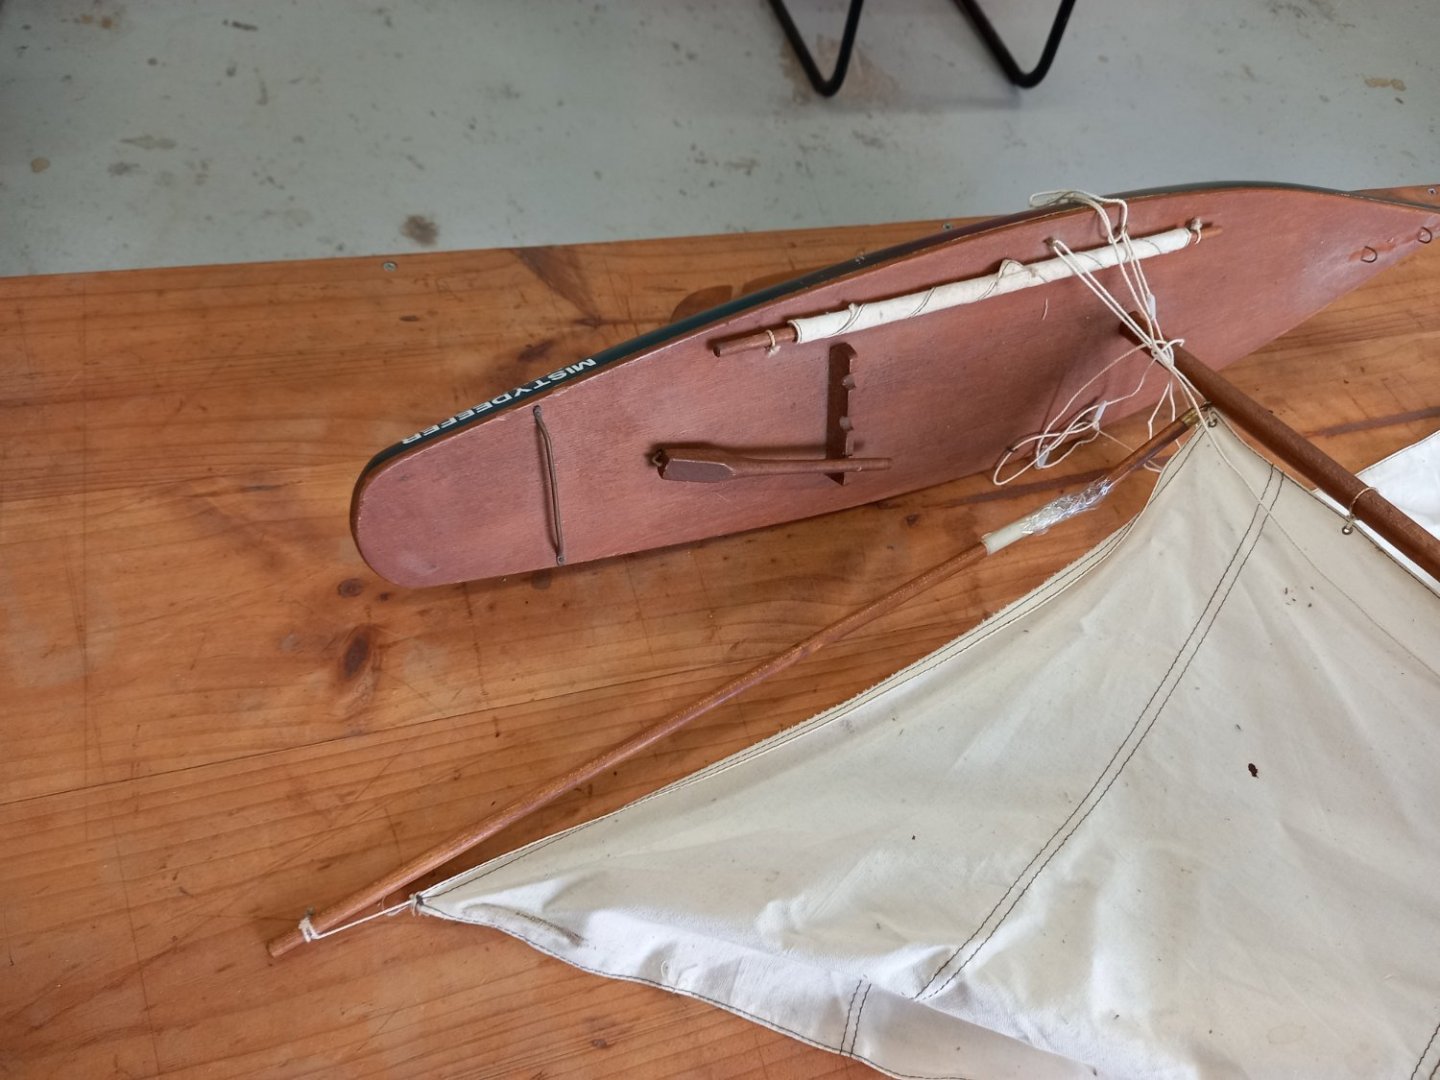
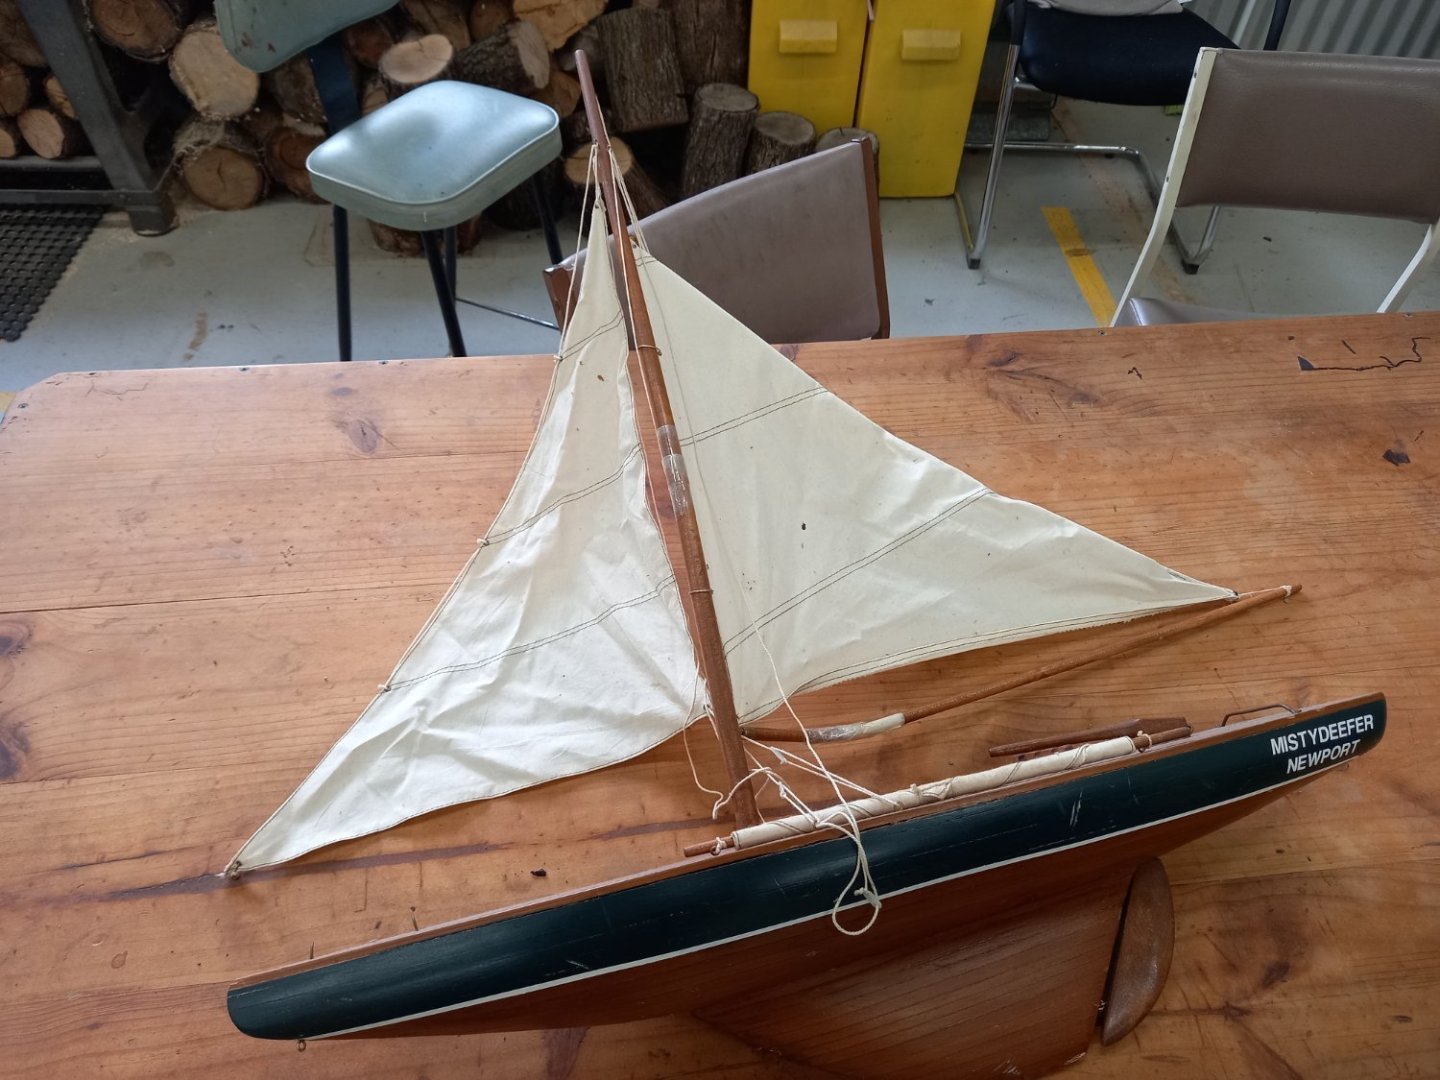
The stand was too narrow and prone to tipping over (probably why the model got damaged in the first place) so I added some cross-beams to stabilise it a bit. Also added another coat of stain so everything matched. Then I got to work untangling the rigging. Turns out -AFTER I'd undone and redone the tangles that the model had been made to be disassembled so I might have been able to untangle everything more easily by simply pulling the mast out and rotating it. Sigh. Anyway, finally got that all sorted, added the bowsprit and main boom, re-rigged her, cleaned the deck again, and *finished*! Regarding the name, I asked the owner. He had a cat called Misty and a dog called Deefer (think about it - Deefer dog). So she's Mistydeefer. The owner's very happy with it. Steven

-
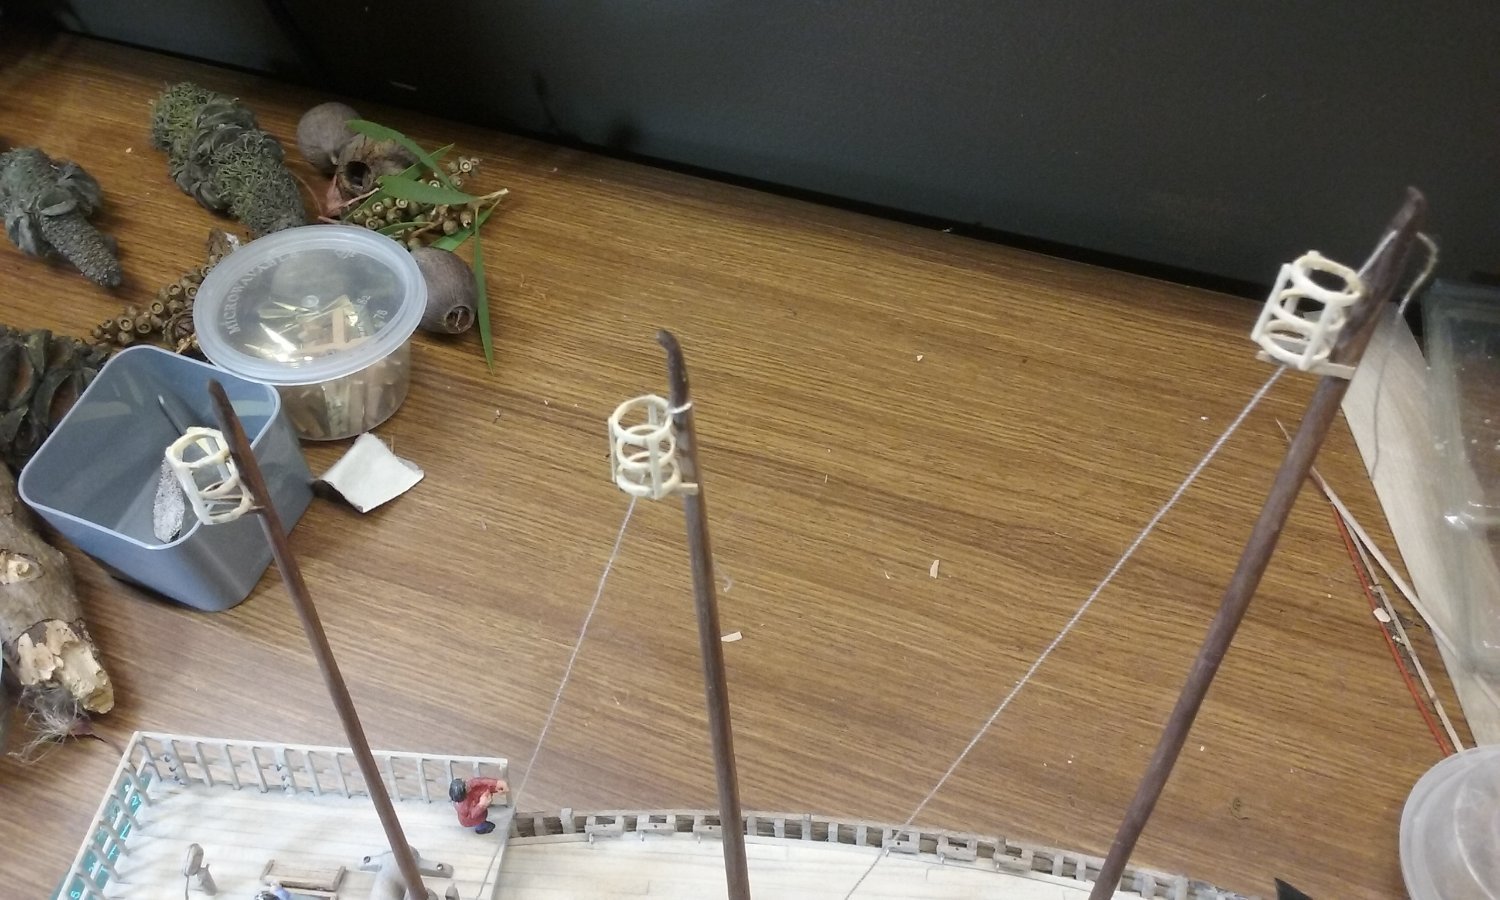
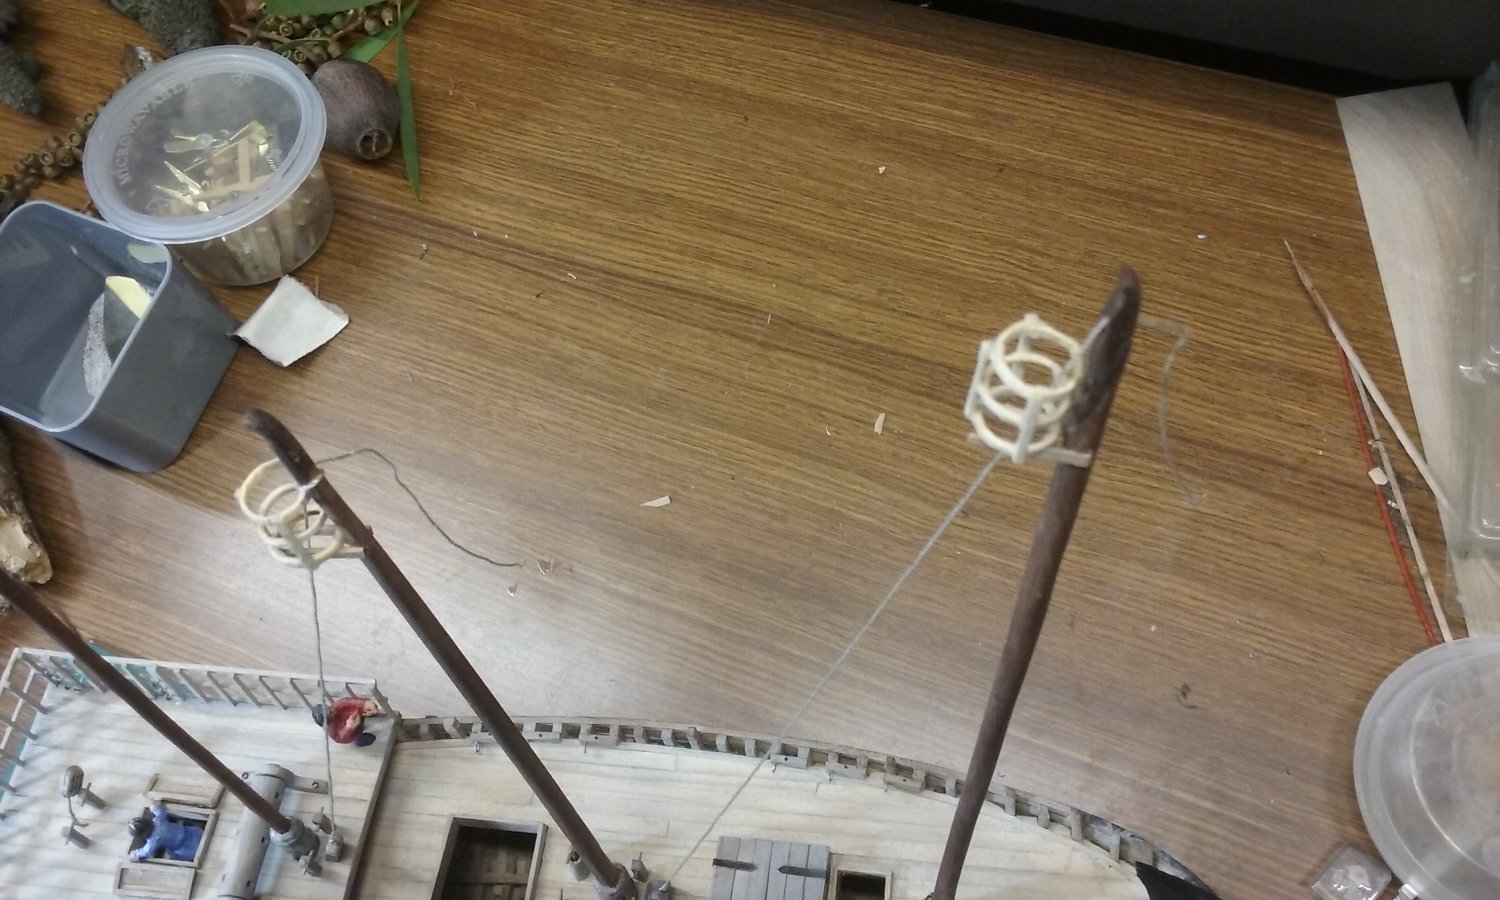
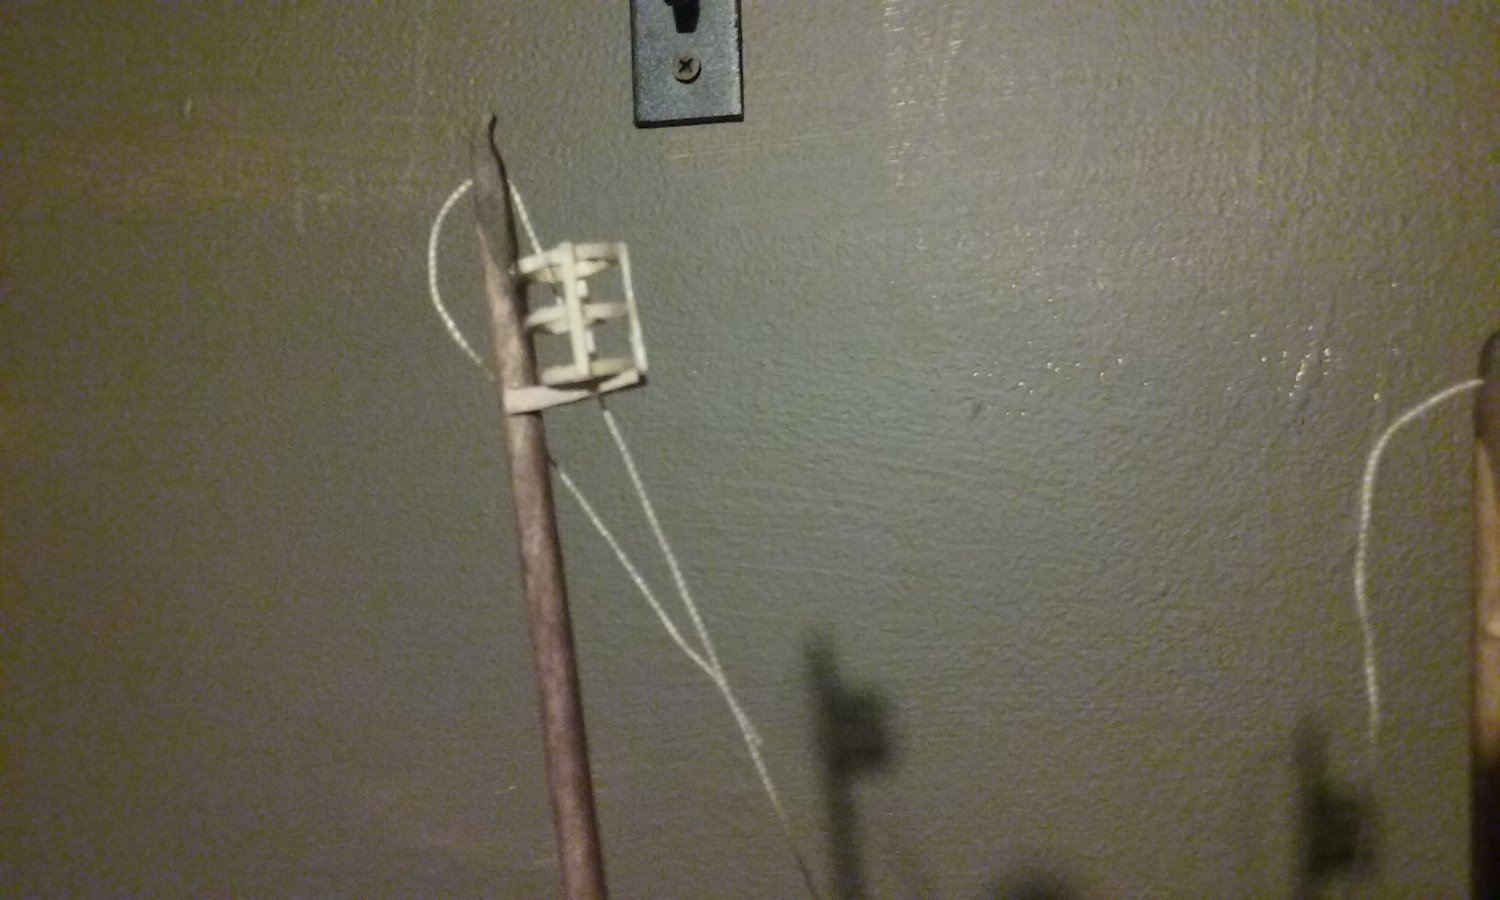
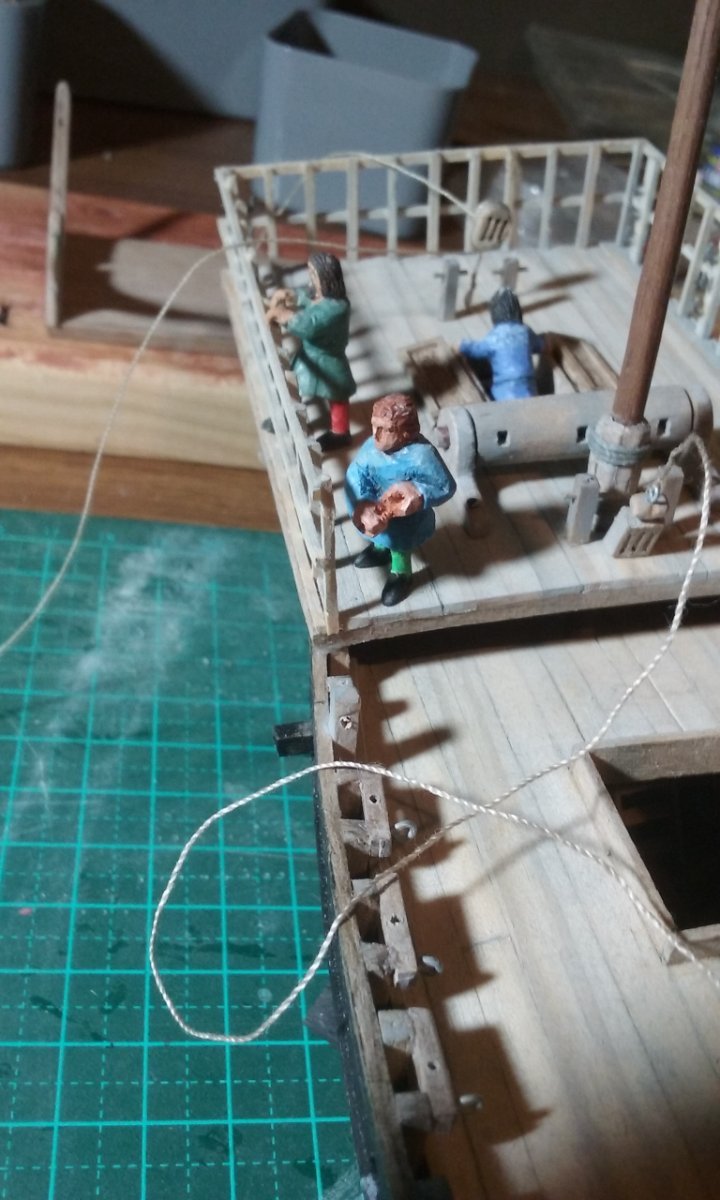
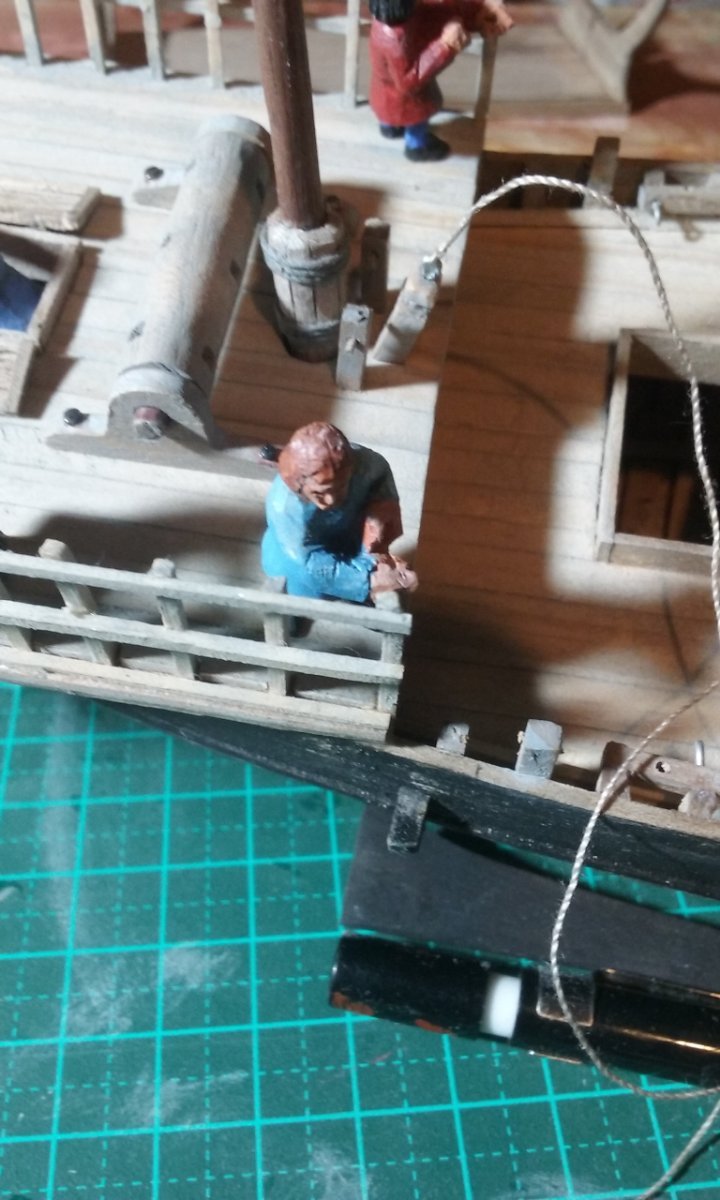
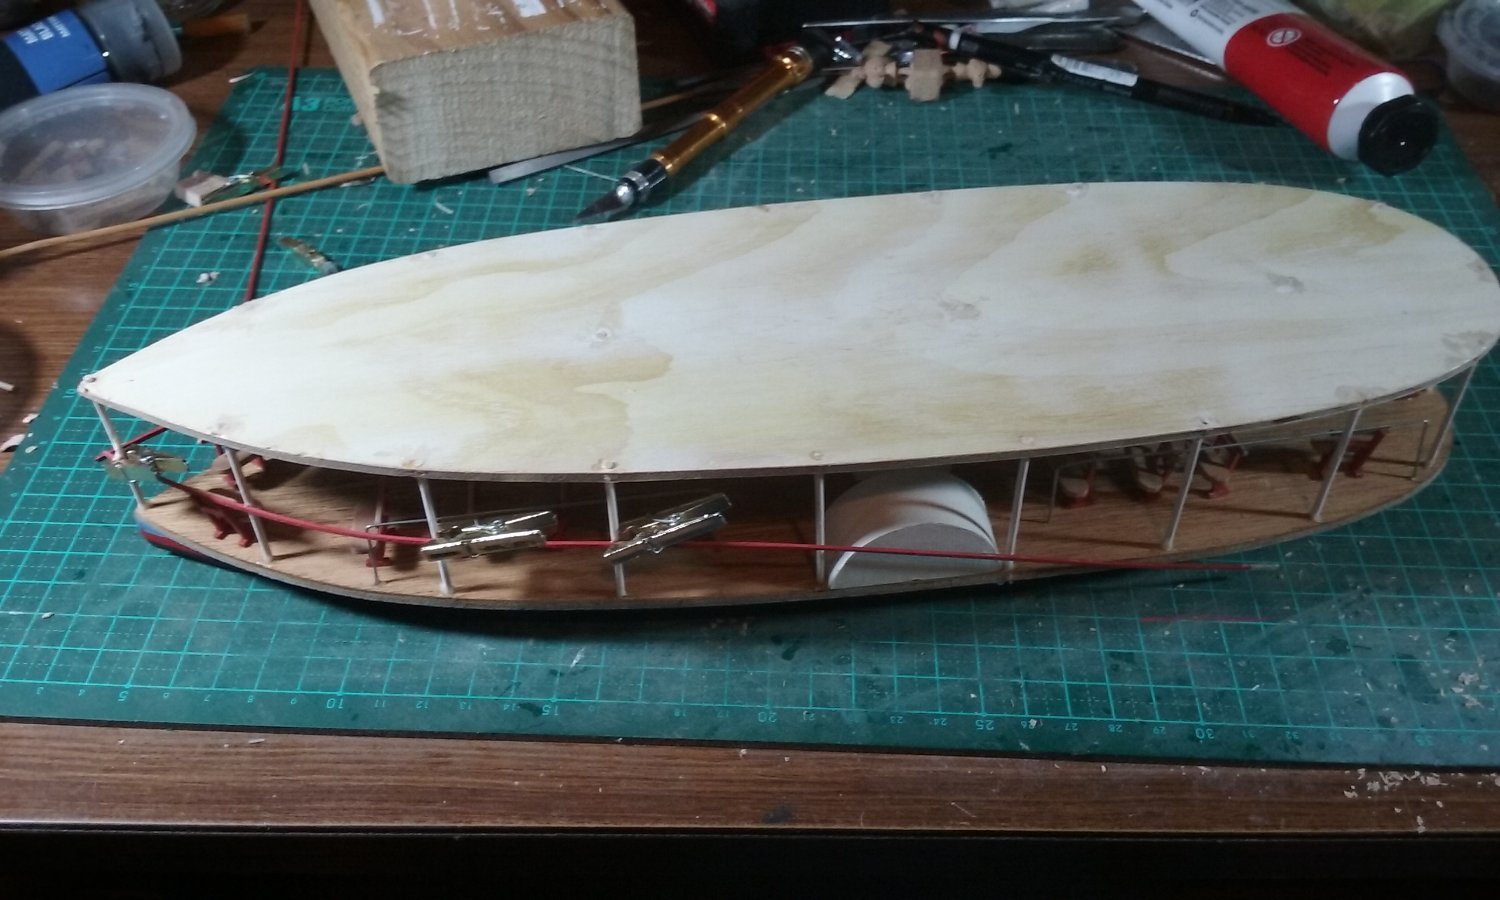
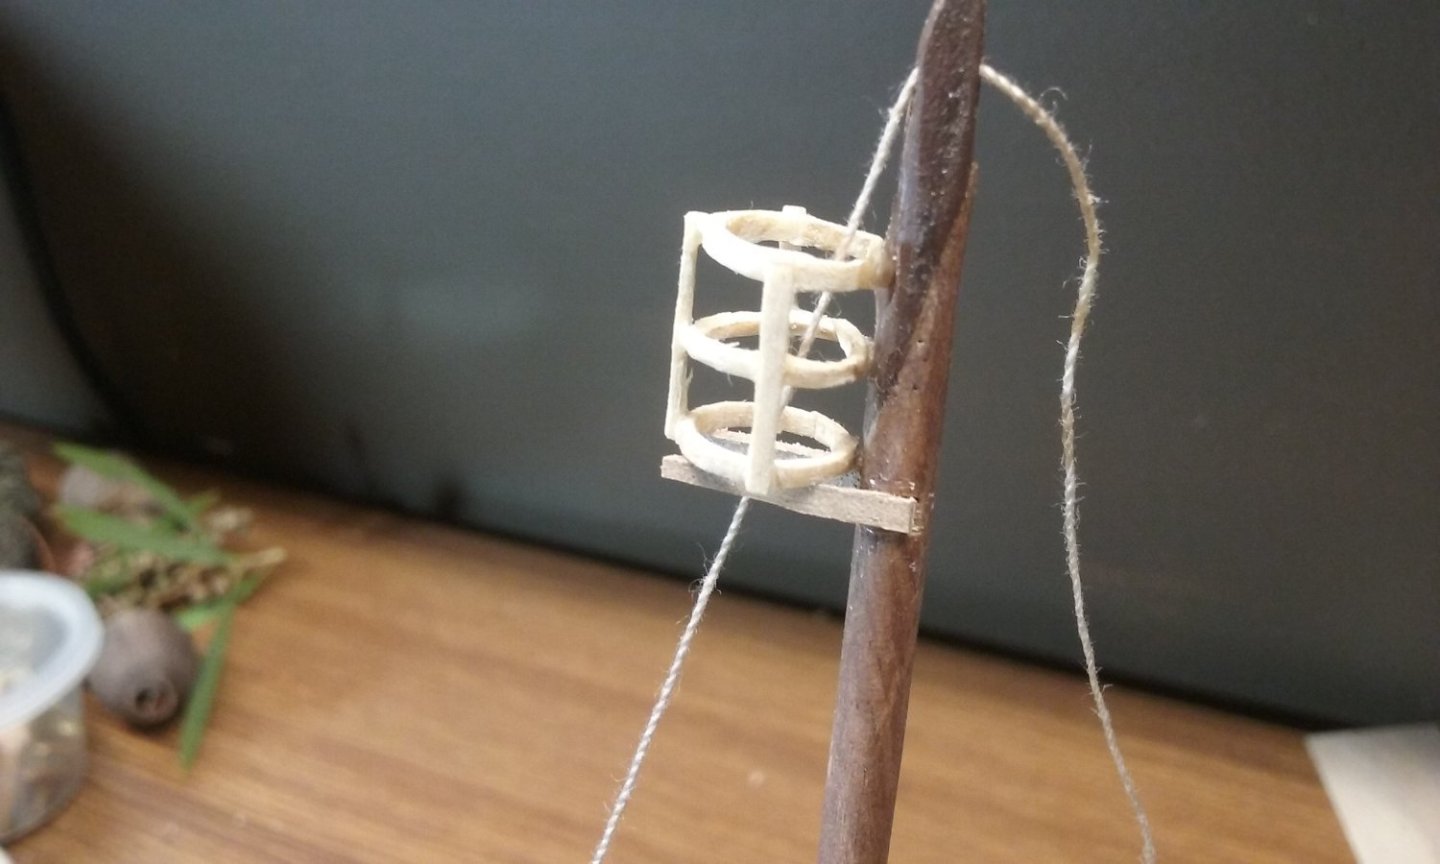
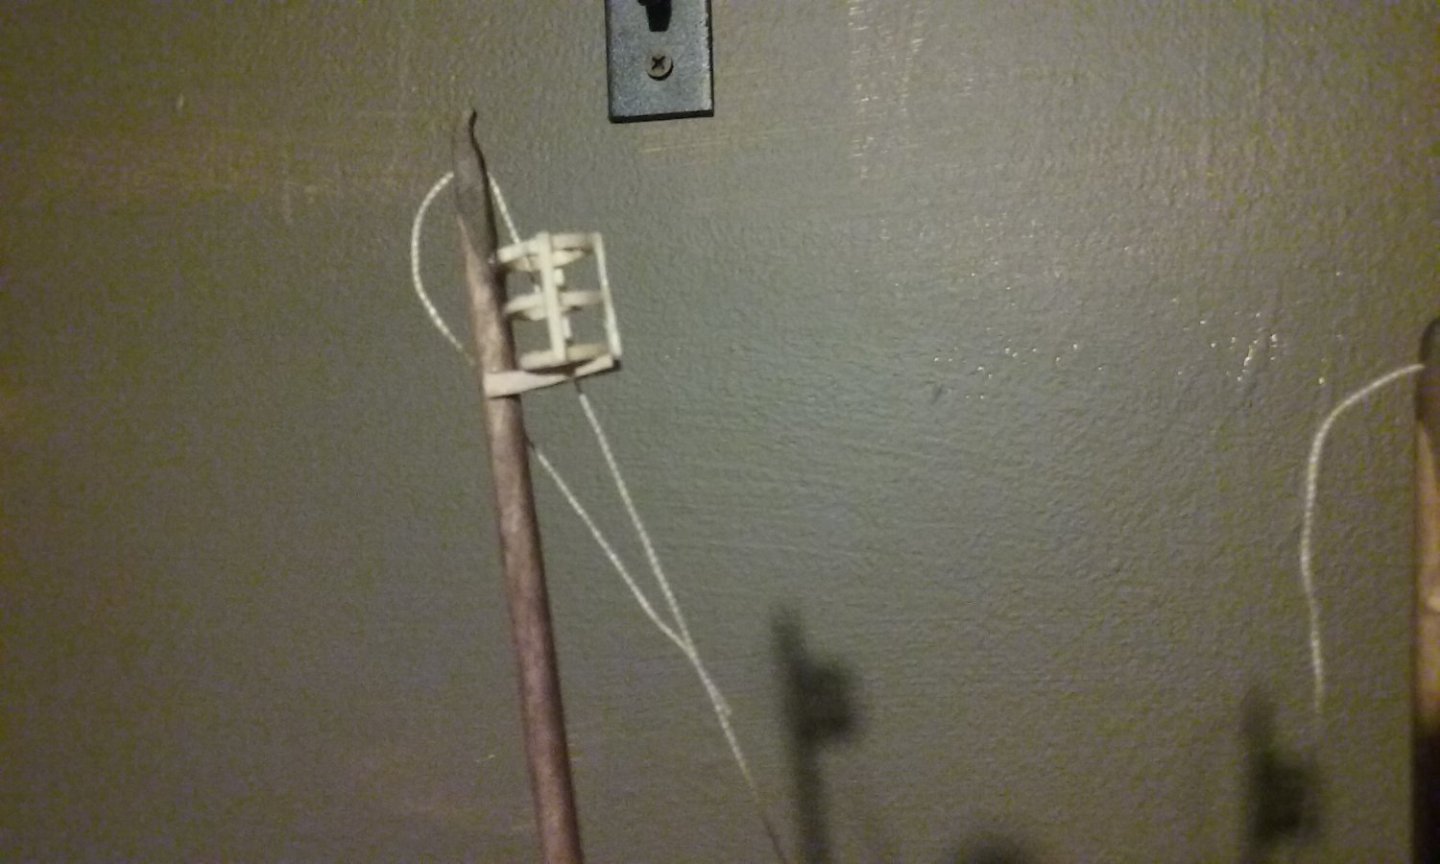
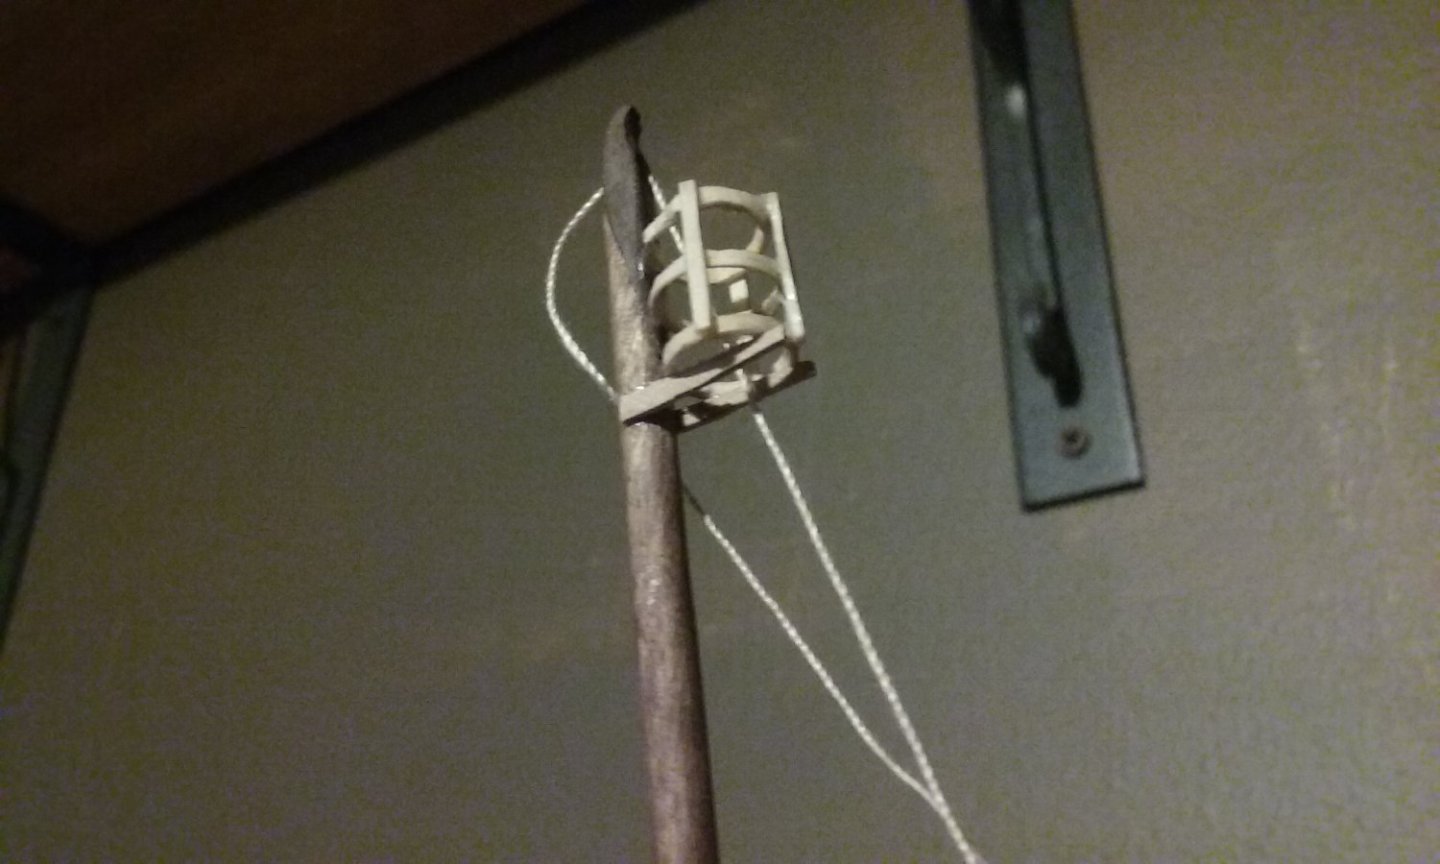
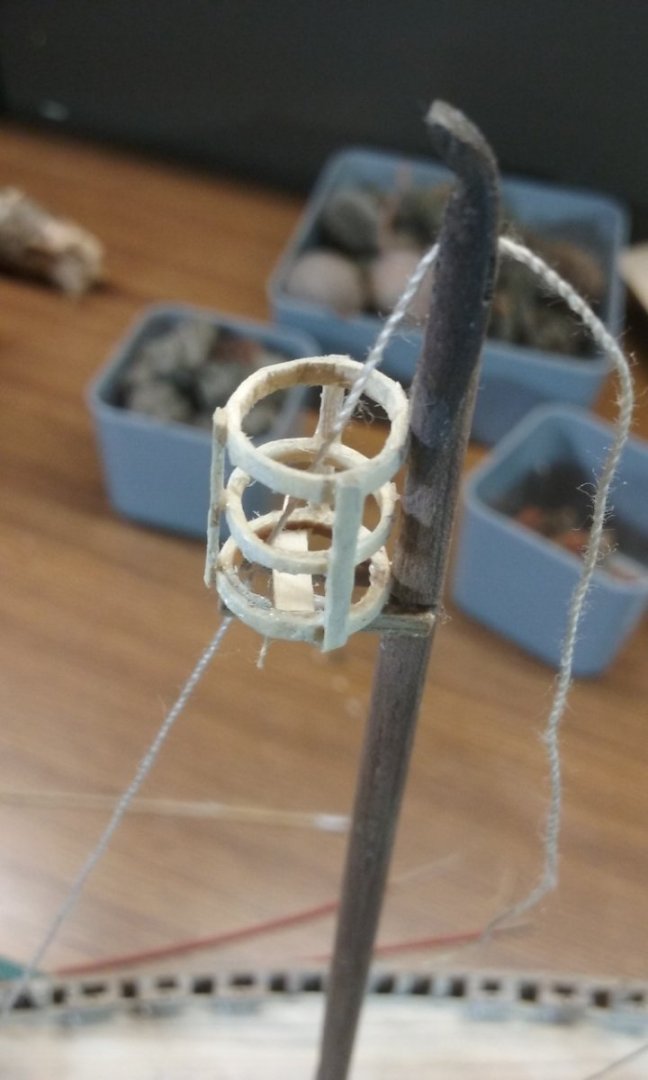
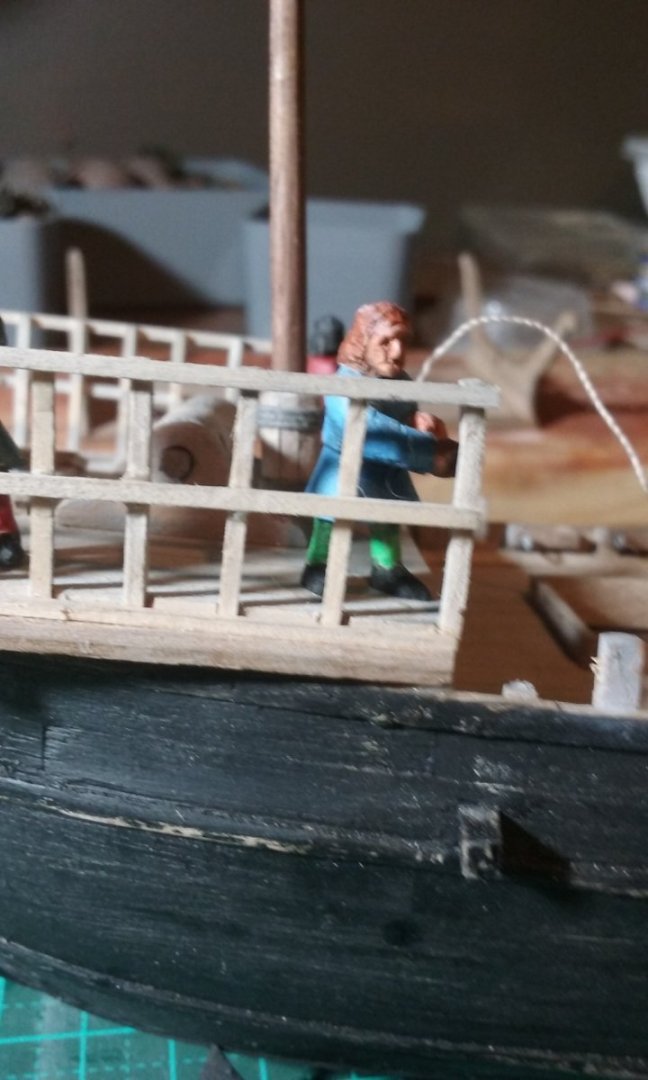
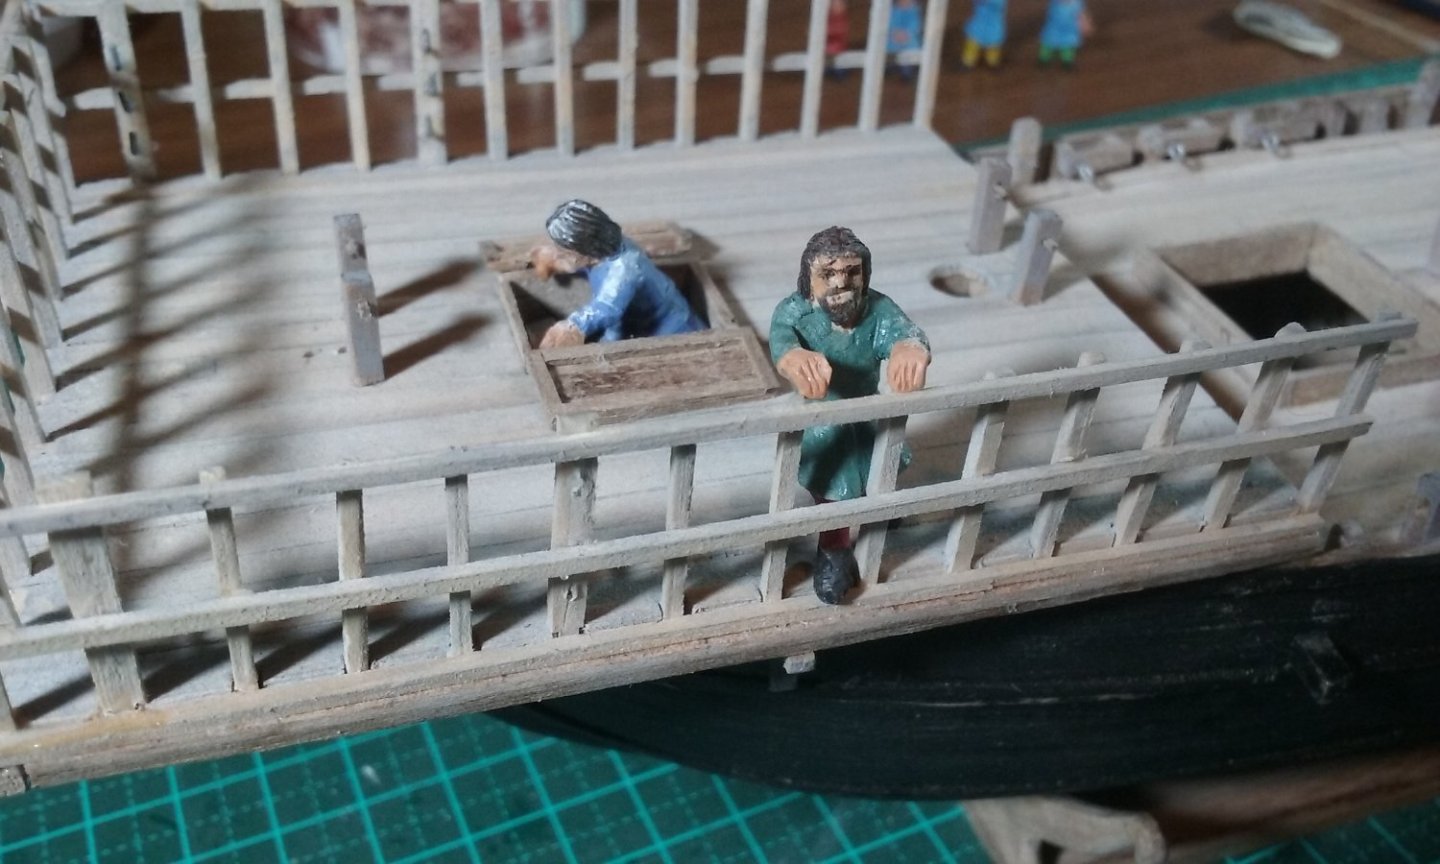
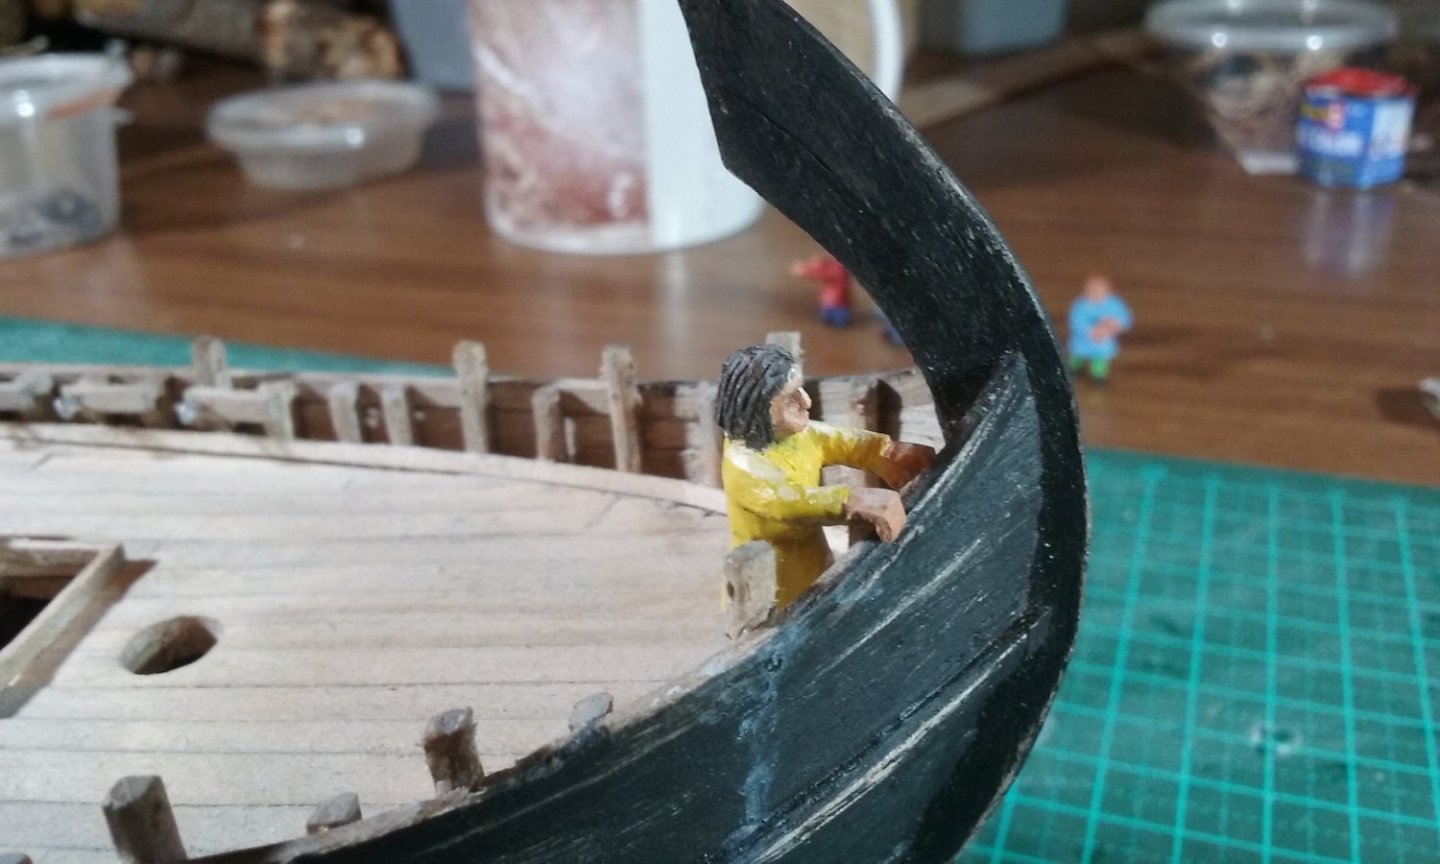
I've temporarily placed the two steersmen in their positions on the poop deck, to work out where exactly the tillers should come to. And I've been working on providing floors for the tops - up till now I'd left them open at the bottom except for a couple of beams each to support the framework of the top. The thing is, the halyards pass diagonally through the tops, so they can't have a full floor. But the poor lookouts need somewhere to stand. So after a bit of thought, I've come up with a solution - plank the floors, but with a gap for the halyard. But first I had to work out exactly where they pass through, lining them up with the sheaves of the calcets and the knights on the deck. Planking begun And complete Very fiddly, but finally got it done. Pretty happy with this solution. It may be nothing like what was really done back in the day, but it is workable. Steven


- 508 replies
-
- 16
-

-
Love the carving of the figurehead, of equal quality with the rest of the build. Steven
-
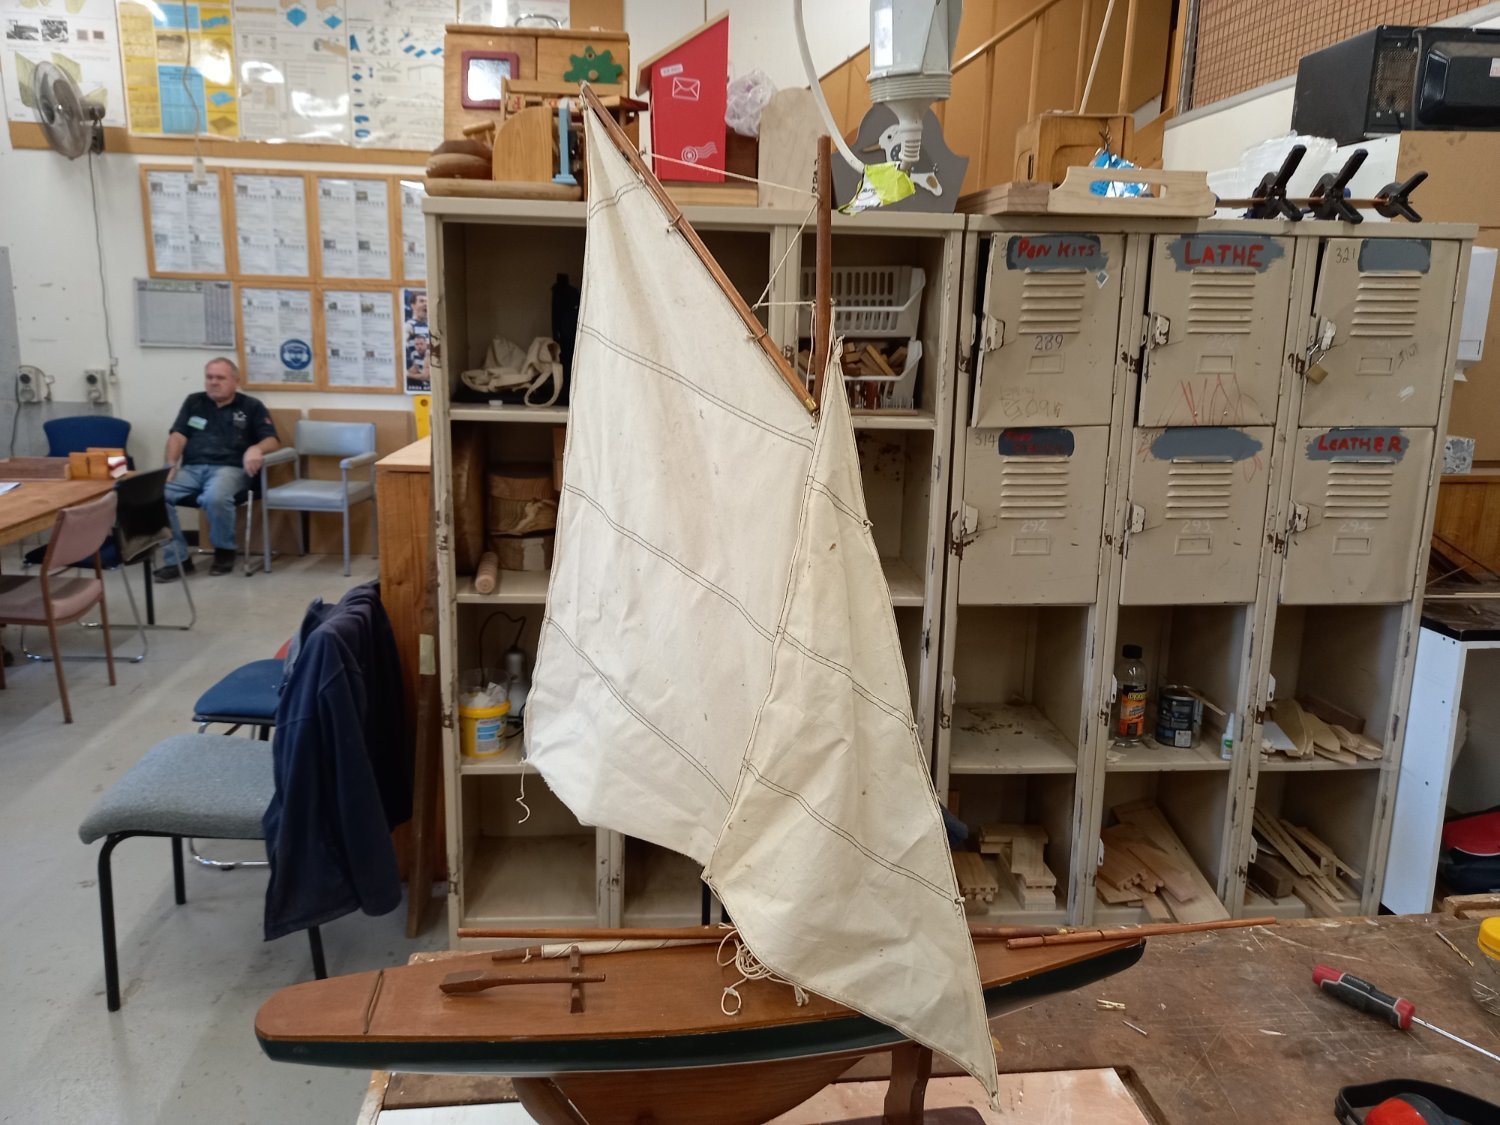
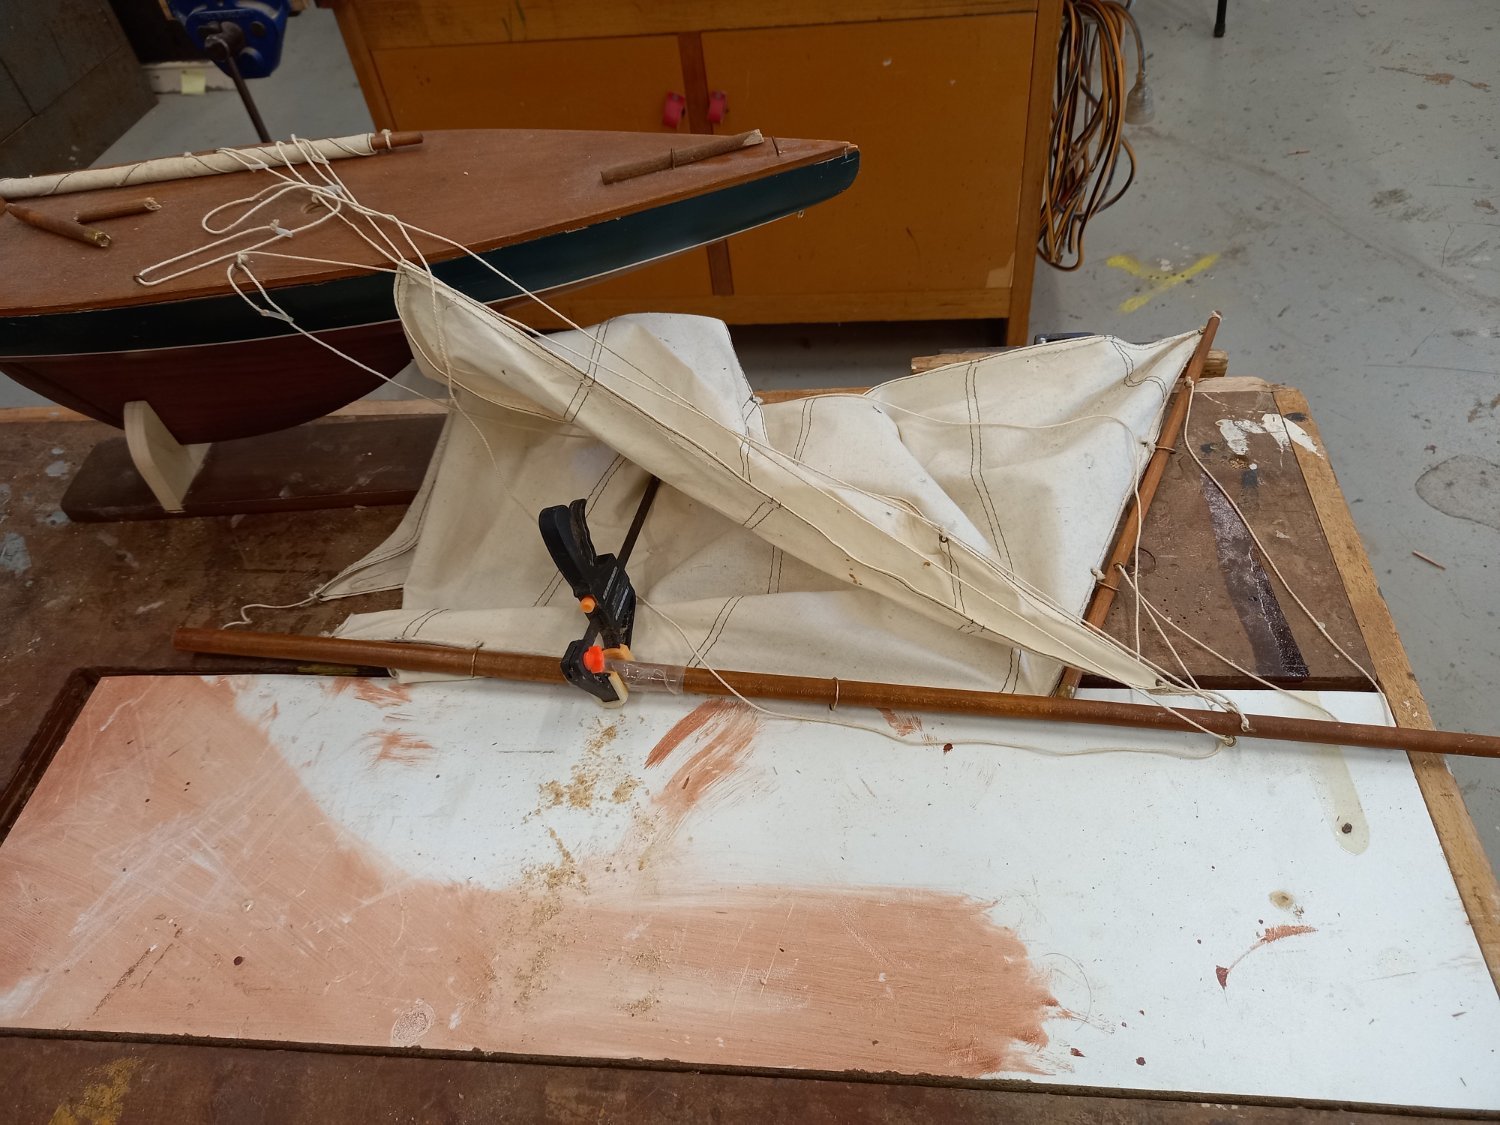
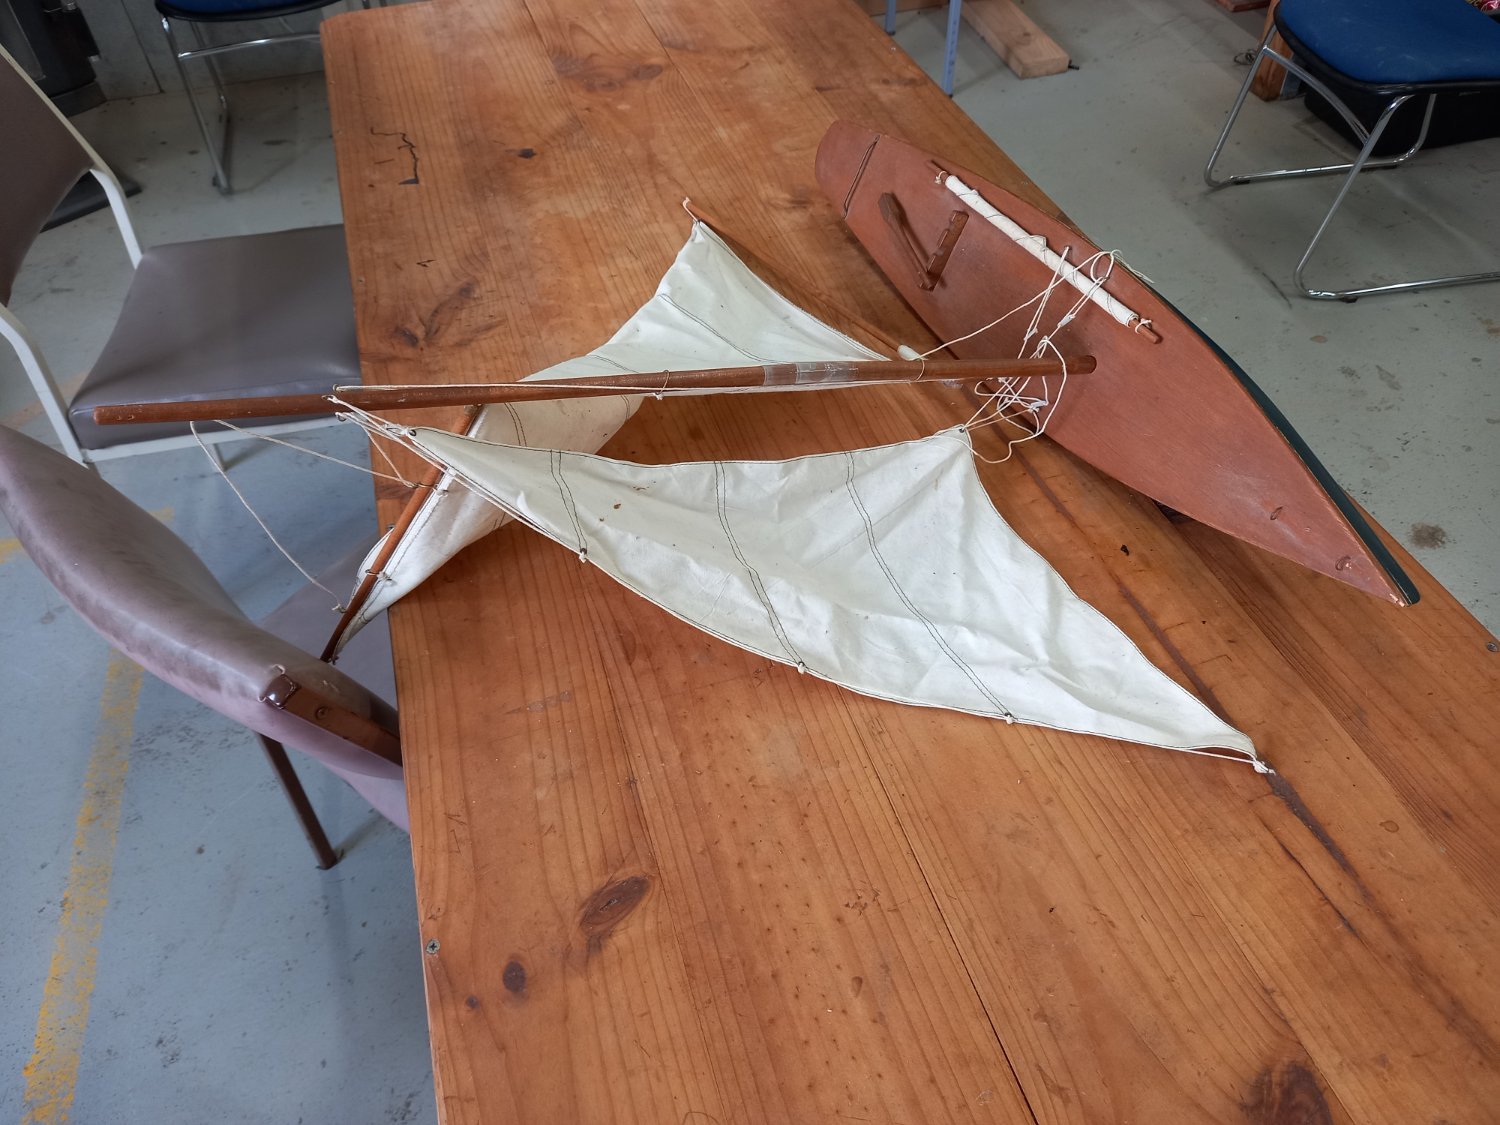
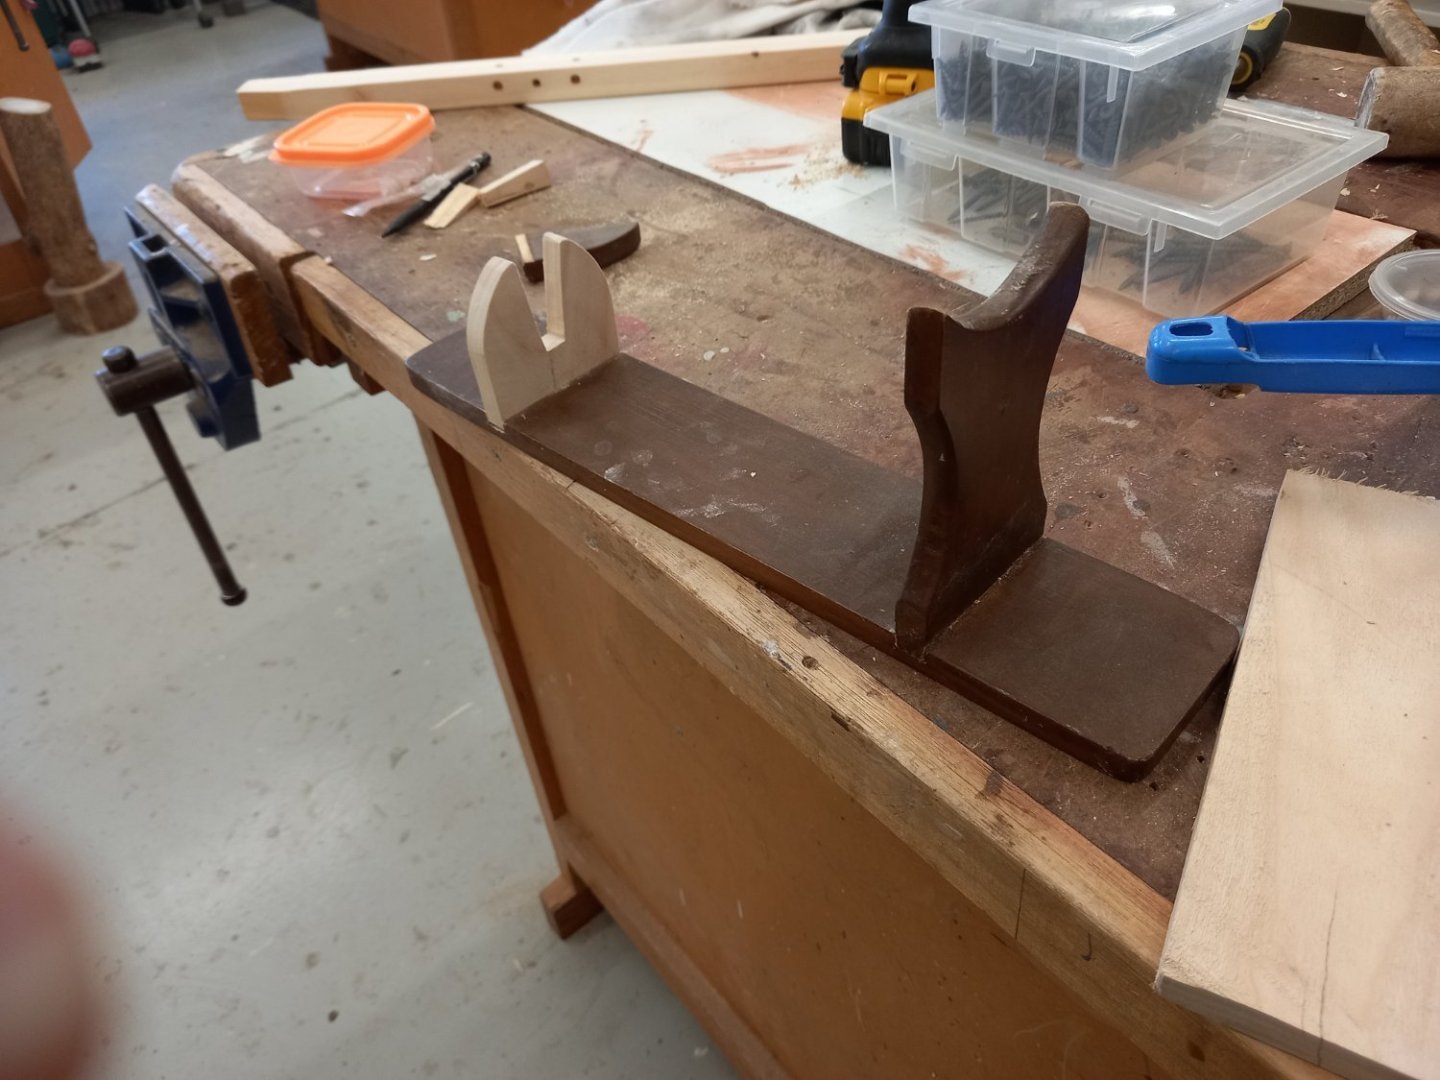
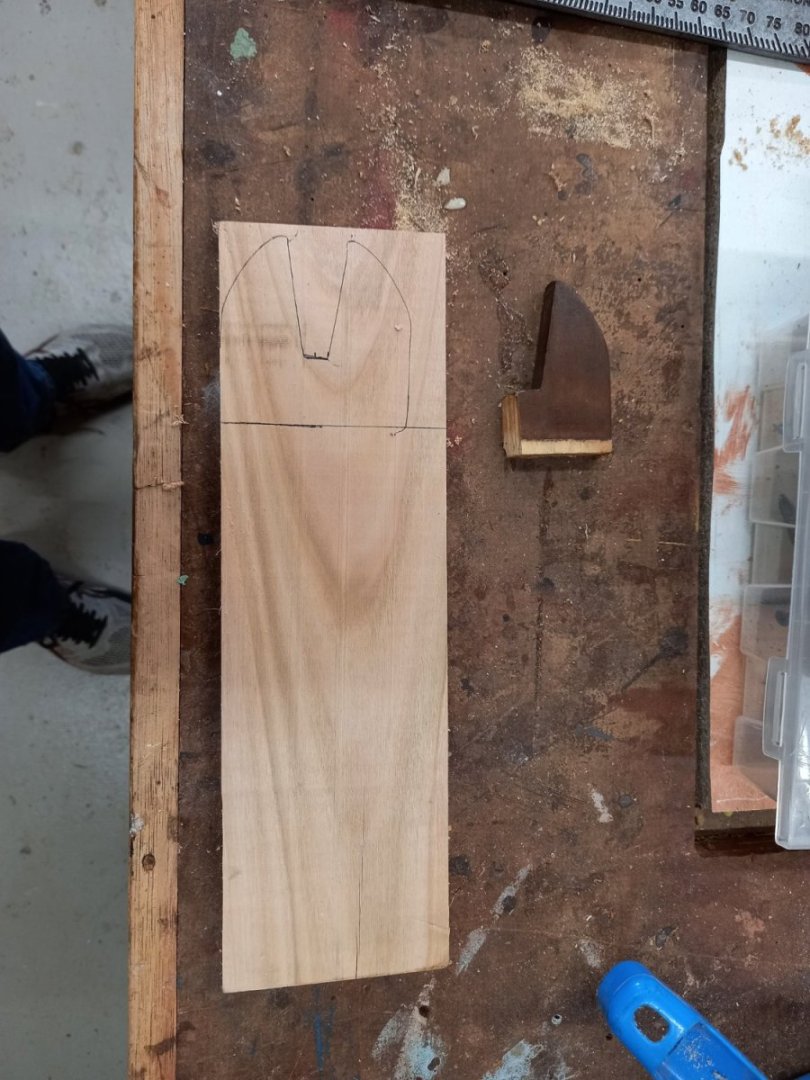
I've cleaned the hull (didn't need much work- just dusting), and the mast and boom are now glued back together and I've shaped the new bowsprit and dry fitted it. The repairs needed sanding and a bit of staining to match the rest, as did the bowsprit. The replacement piece for the stand split (mainly my carelessness in cutting out the slot) so I had to make a new one. I'm thinking of making some crosspieces for the stand so it'll be more stable - it's quite narrow and it's first damage was from being toppled off a shelf by a cat. The rigging is slowly coming together, but I'm not worrying too much about it until I've got the rest done. The backstory on the model is that it was made for the owner by a modeller in Williamstown (a harbour suburb of Melbourne) back in about 1996, and he had it in pride of place in the house - until the cat got to it. Since then it's been in storage in a back shed, and I think he'd resigned himself to it never being fixed. It appears that there was more damage while it was in storage, which he hadn't been aware of . . . So, coming along nicely. No more work on it over Easter, but it looks like only a few more days' work, all going well. Steven


-
Thanks, mate. We must see if we can get to your place in the not-too distant future. A bit difficult at the moment, but certainly haven't forgotten. Steven * Sorry, straight over my head. I thought Melbourne was named after a famous foul-mouthed opera singer , or perhaps a dessert (Aussie joke - google Dame Nellie Melba) .
-
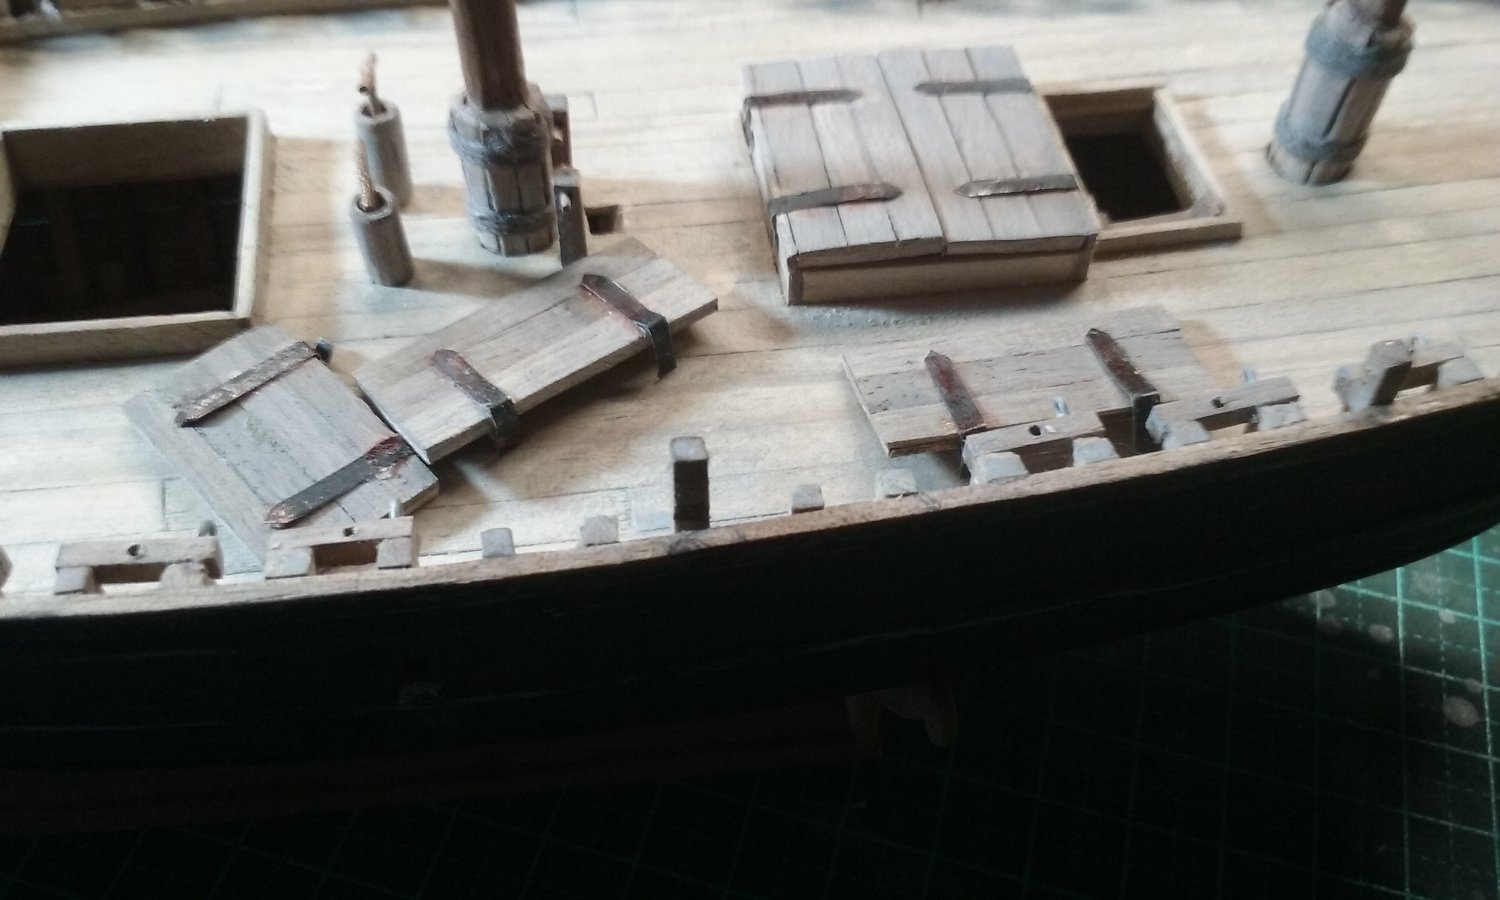
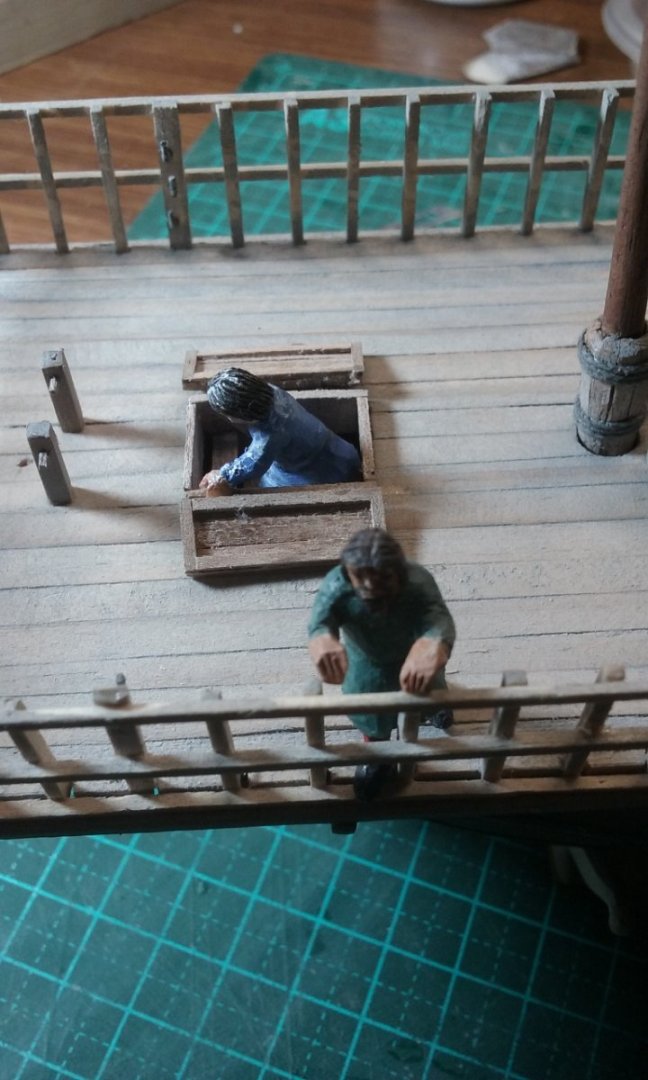
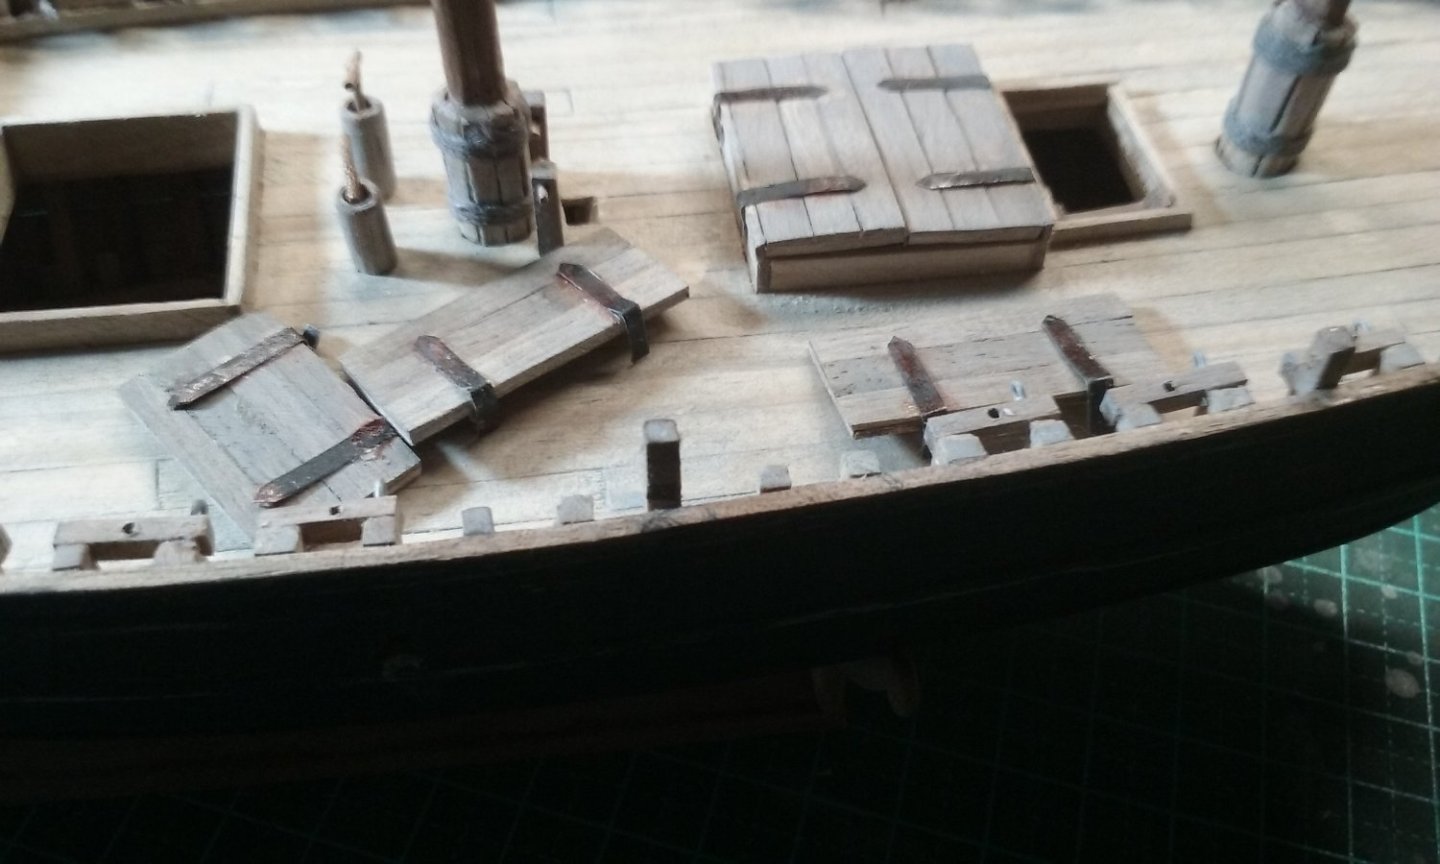
Here they are with a bit of shading. Not sure if you can see the difference between these and the way they were in the earlier post, but to me they look more realistic. And I had neglected to post photos of the hatch covers up to now, so here they are. A pair for the stairs up from the owners' cabin And covers for the cargo hatches - one in place, the others not yet added (so I can see the mast steps to locate the masts when the time comes). I've weathered the hatch covers and added a bit of "rust" to the hinges, so she looks like a ship that's see a bit of use. Currently I'm trying to chase up some 'acrylic matt medium' on Druxey's advice to glue the reinforcing strips to the silkspan sails. But I'm in a bit of a quandary as to the difference between 'acrylic matt medium' and 'acrylic matt pouring medium' (considerably cheaper, but perhaps not right for the job). Steven
- 508 replies
-
- 14
-
-
Something about it being in a back shed for years and years, and the sellotape repair of the mast he blamed on his wife/kids having broken it and tried to hide the break. At least the sellotape kept most of the pieces from getting lost. I'll have to get some more backstory from him and how it came to him, whether it's some kind of family heirloom or what, but it's a pretty cheap mass produced model - the mast and spars are just bits of dowel and the finish is pretty mediocre. I'm doing it as a "love job", which is why I wasn't prepared to buy the dowel to replace the bowsprit myself. He's getting the work for free, after all. Steven
-
As if I didn't have enough to do, a guy from the Men's Shed that I play at 2 days a week has brought in a damaged model yacht for me to fix. It's not really in terrible condition - a break in the mast, two breaks in the boom, bowsprit broken in at least three places and part of it missing, a broken part of the stand. And needs cleaning. It's a decorator model, solid hull. I've worked on it for about a day so far, allowing for breaks while the glue dries, and have made a new piece for the stand and repaired the mast and the boom. I left the sails and rigging in place as I was worried I wouldn't be able to work out how to replace them. A bit of a problem with tangled ropes as I fixed it, but I think it should sort itself out with a bit of patience. The bowsprit was beyond repair so I told the owner to buy a piece of dowel the same diameter and I'd make a new one. I'll post photos when that's done. Fortunately I was able to find some woodstain that matched the existing, so it's looking like it should all work out OK (touch wood!) Steven


-
The African Queen. My First Listing and First build here.
Louie da fly replied to a49kid's topic in New member Introductions
Hi Wayne, and welcome from sunny Ballarat, only an hour's drive (or train trip - only $9.00 for a day trip there and back) from Melbourne, but 3-4 degrees cooler, no matter what the season. For planking, see the linked tutorials at https://modelshipworld.com/forum/98-planking-downloads-and-tutorials-and-videos/ To trim planks to shape I use a No.11 scalpel and/or craft knife (blades $4.50 for 4- or perhaps 5 - blades at Bunnings). But I use pretty much the same method as you to work out the taper. Great movie, and proof that Bogie could act! Not just the ubiquitous tough guy, but a silly, weak little man who finds redemption in the love of a good woman. And of course Kate Hepburn was the perfect foil for him. I'd highly recommend you start a build log - instructions are at It's a great way to get help and advice from the friendly MSW members. I find it invaluable when I hit a problem - very often someone comes up with a solution that would otherwise never have occurred to me. Steven -
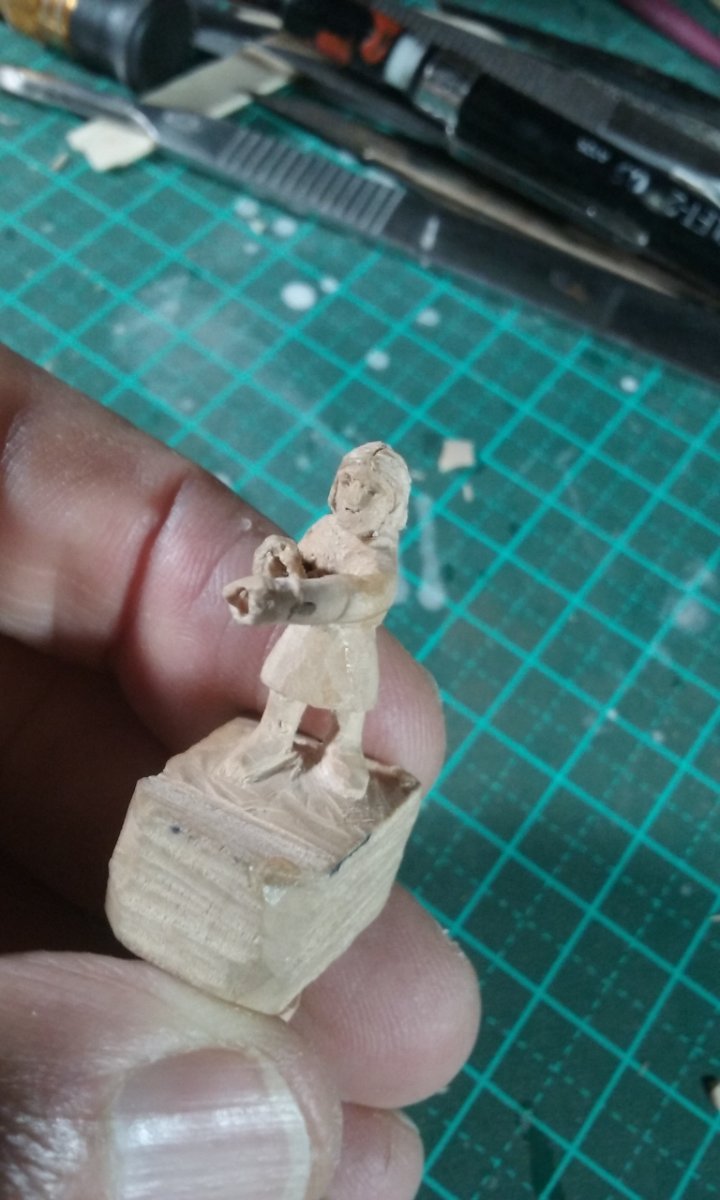
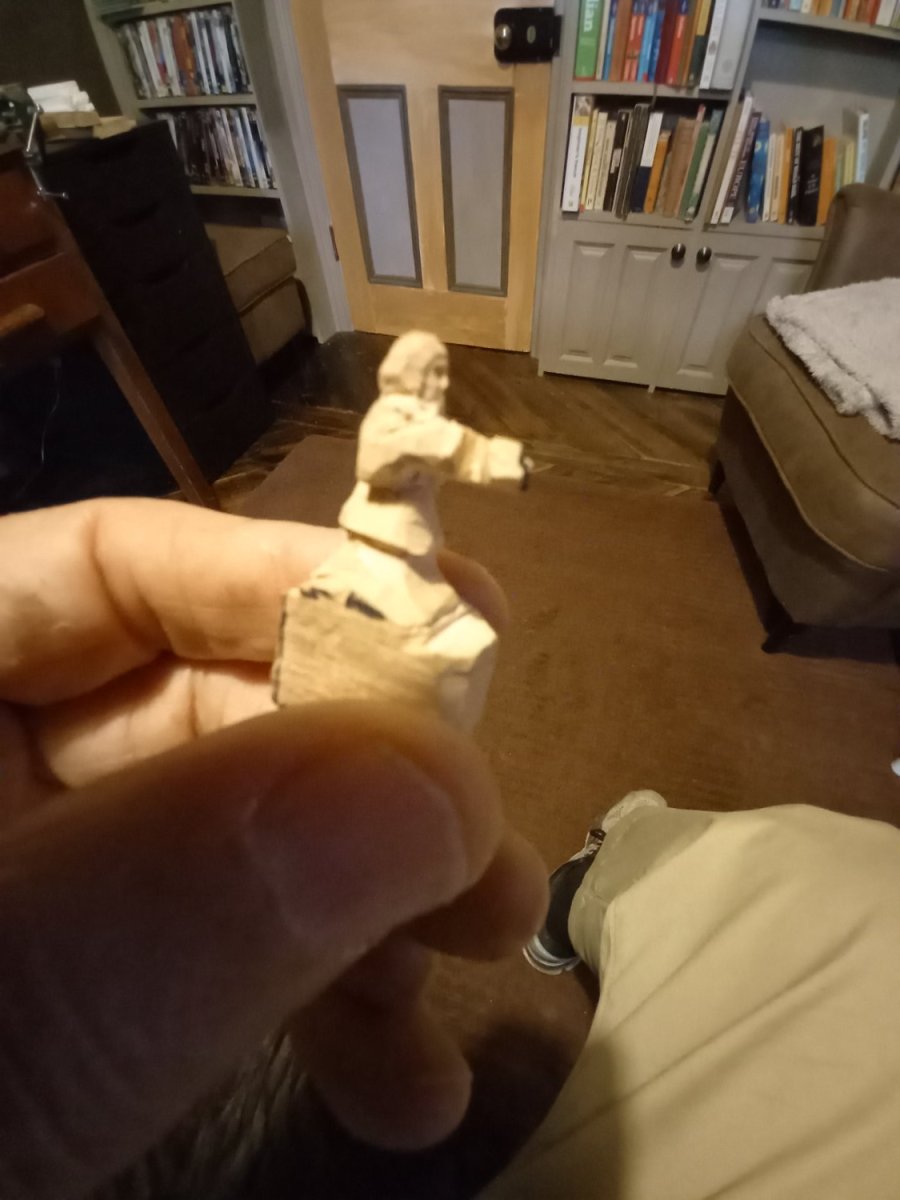
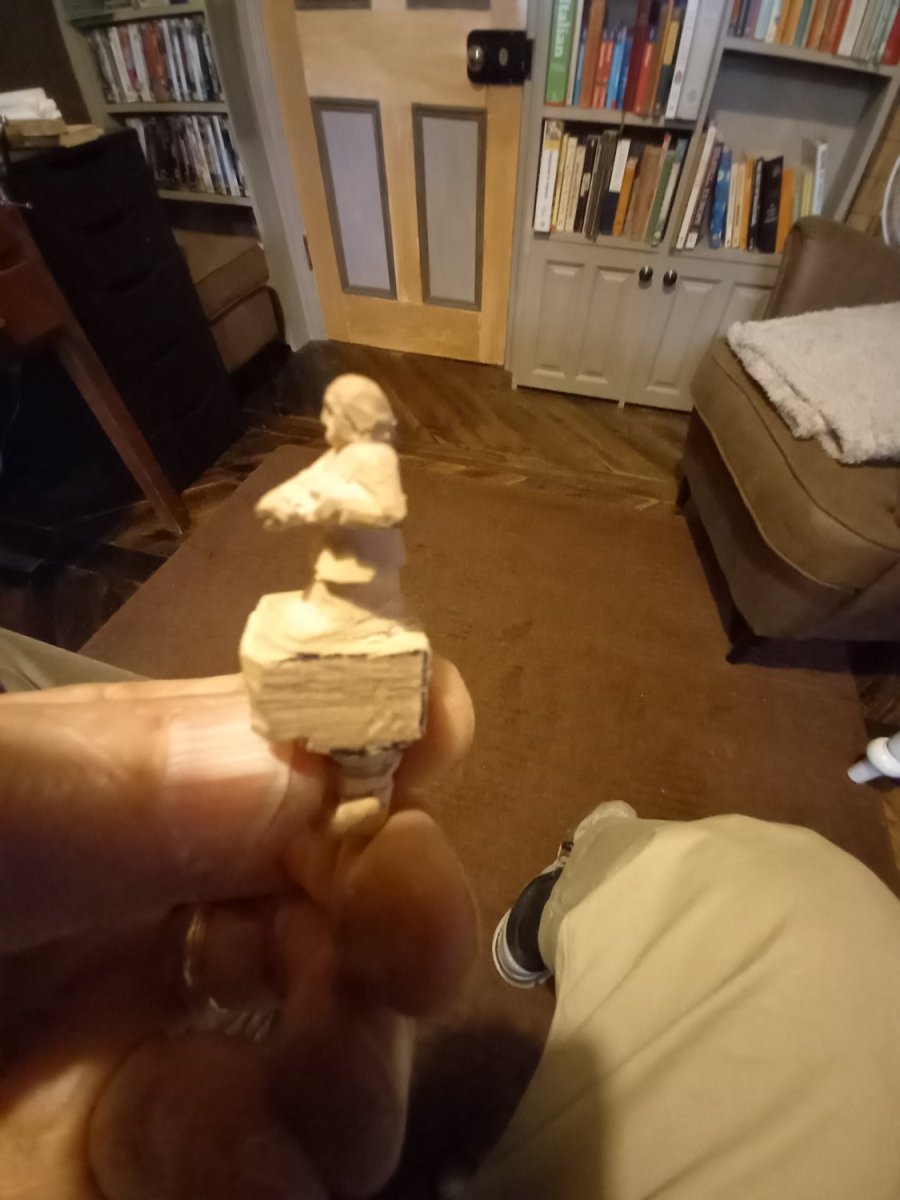
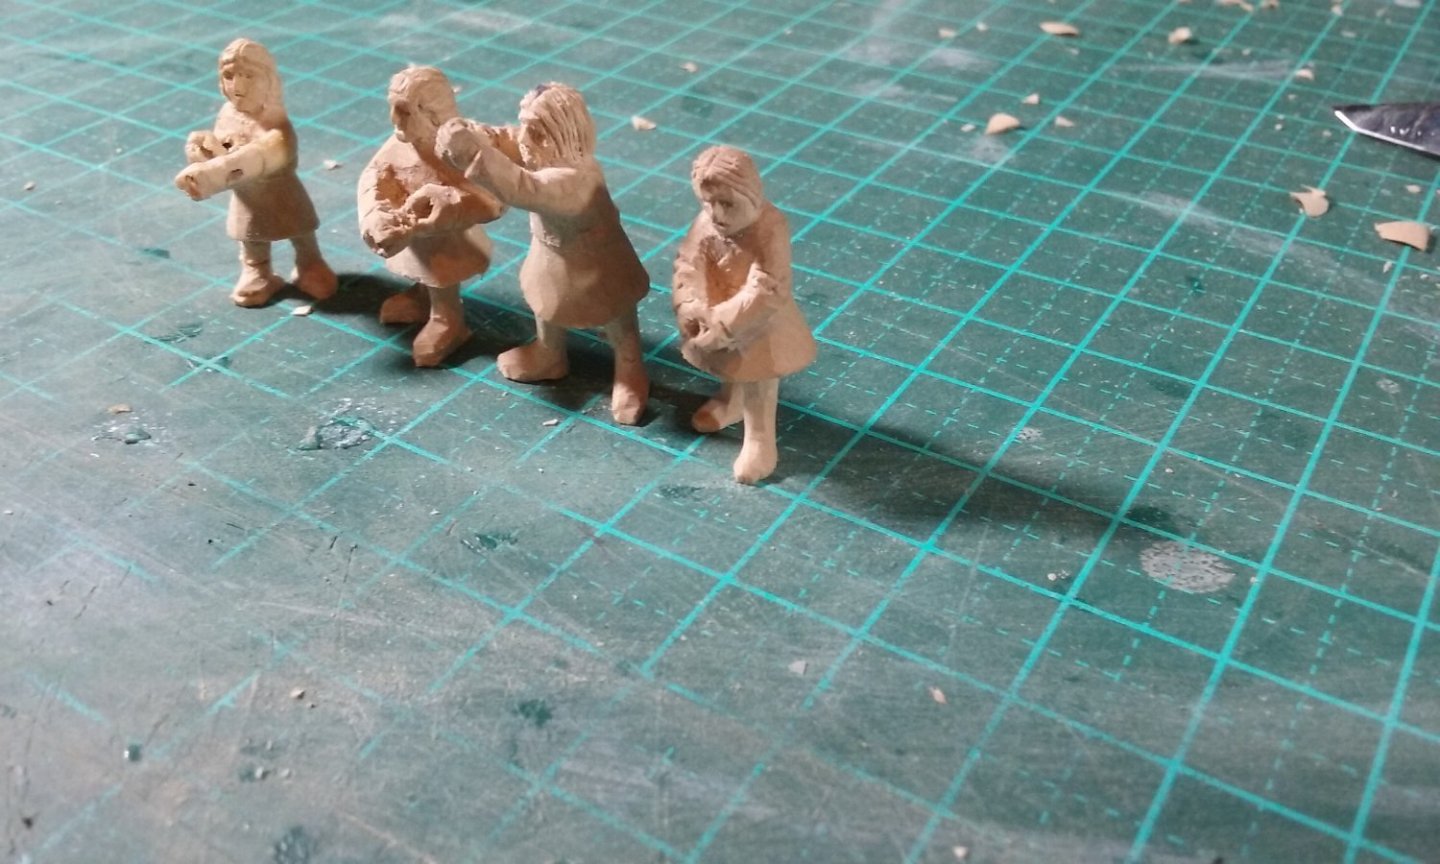
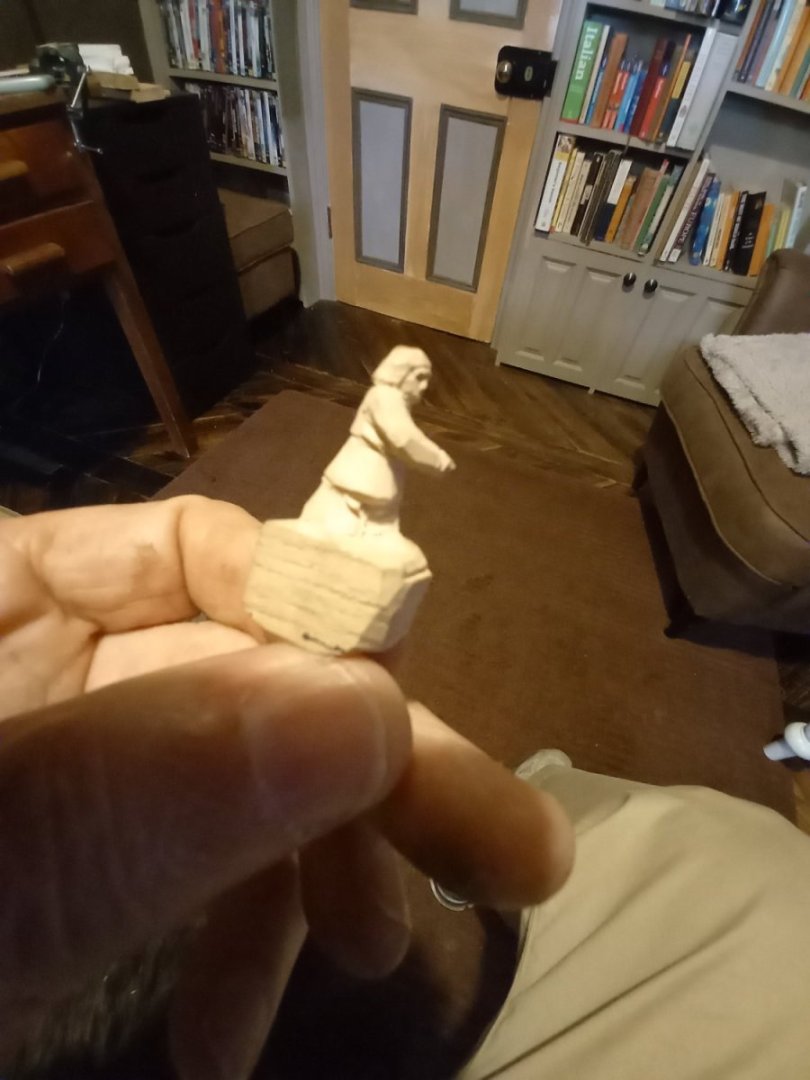
Painted and ready for shading. And I found places for my previous zombie helmsmen . . . pushing it a bit, but it would be a shame to waste them. Steven
- 508 replies
-
- 13
-
-

-
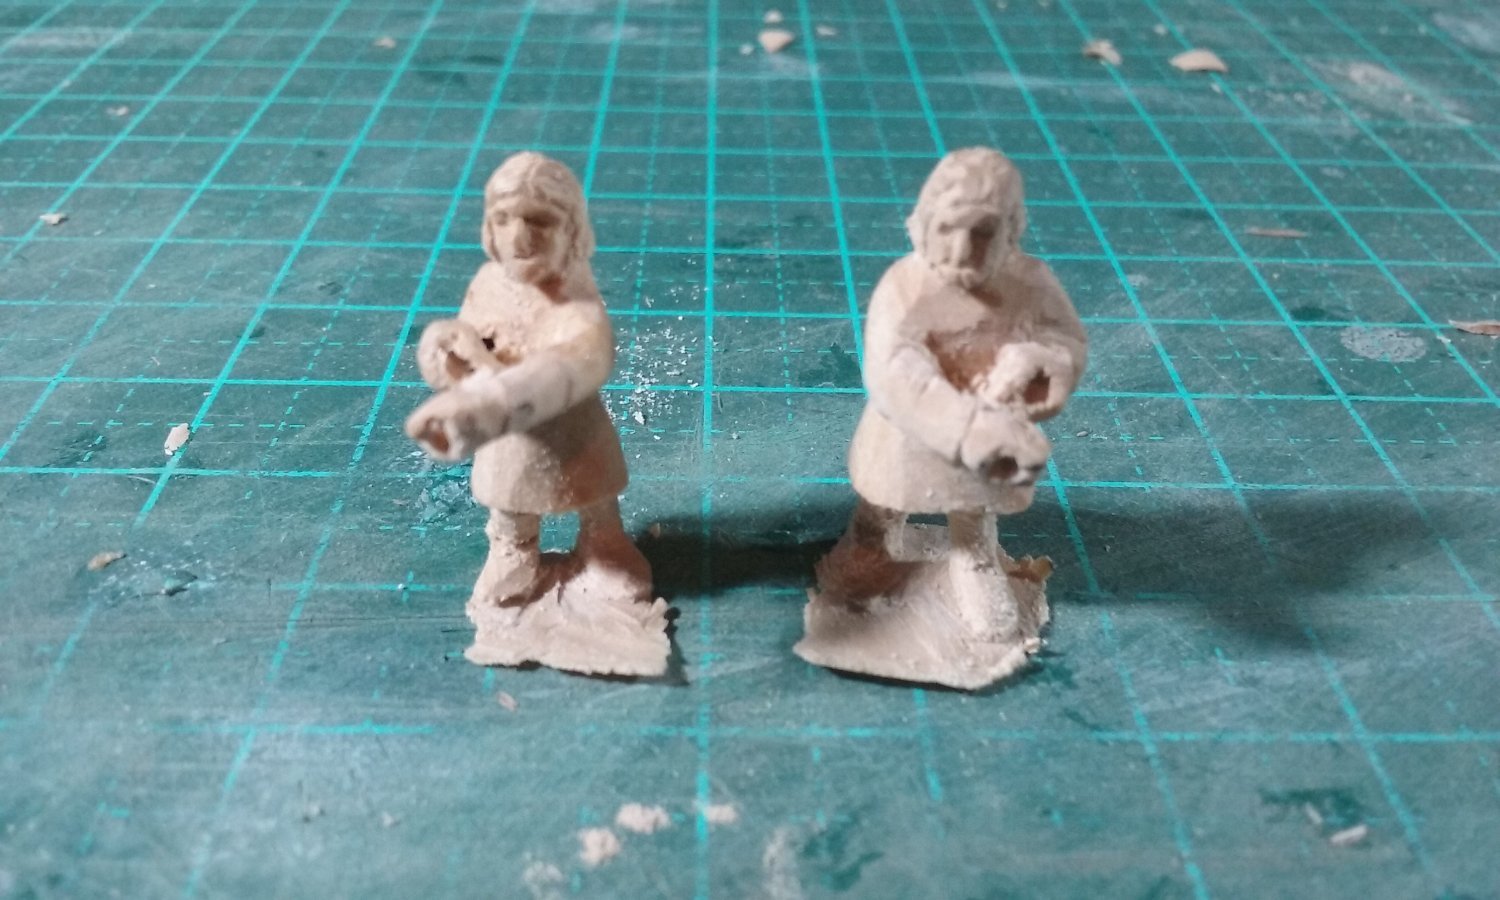
Thanks, people! I'm pretty happy with these, and I feel I'm getting better with carving hands, which have always been my biggest problem. Knocklouder, Gobsmacked is the way you say it. It's a verb - so you'd say "I'm gobsmacked". I think it comes from the slang term "gob" (which means mouth, at least in the UK and Oz) - so it means you feel like you've been smacked in the mouth. More of a British term than an Aussie one, but I use it myself because it's so descriptive. (By the way, in Oz a gobbie is a slimy expectoration - though perhaps that's a bit too much information). Steven
-
Personal choice. Either way has advantages and disadvantages, but in the long run it's your build and your decision. Looking really good, by the way! Steven
- 177 replies
-
- 2
-
-

-
- Perseverance
- Modellers Shipyard
- (and 1 more)
-
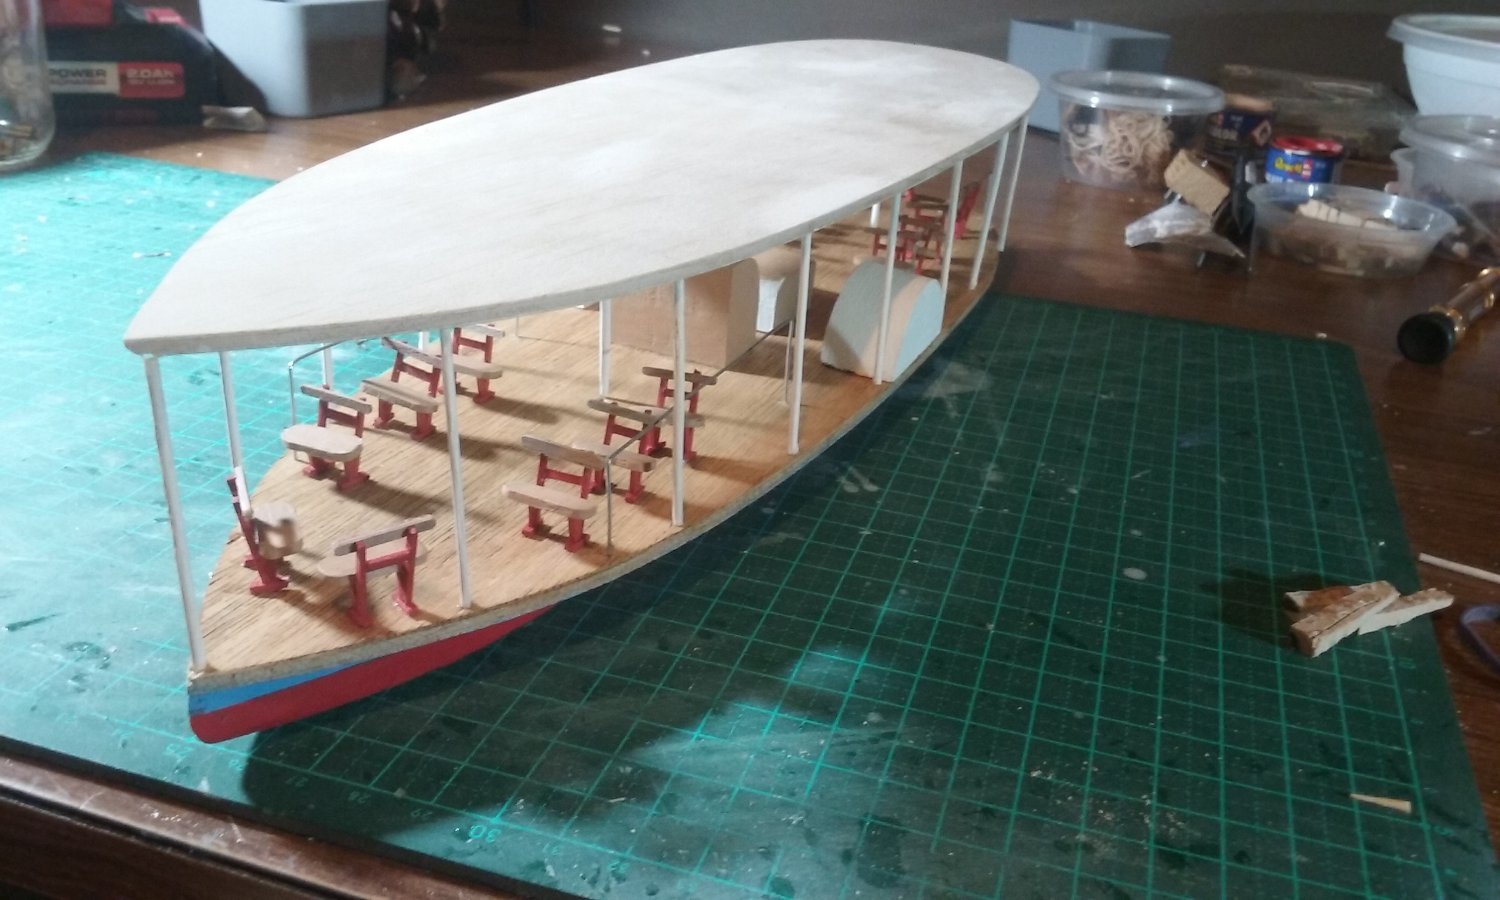
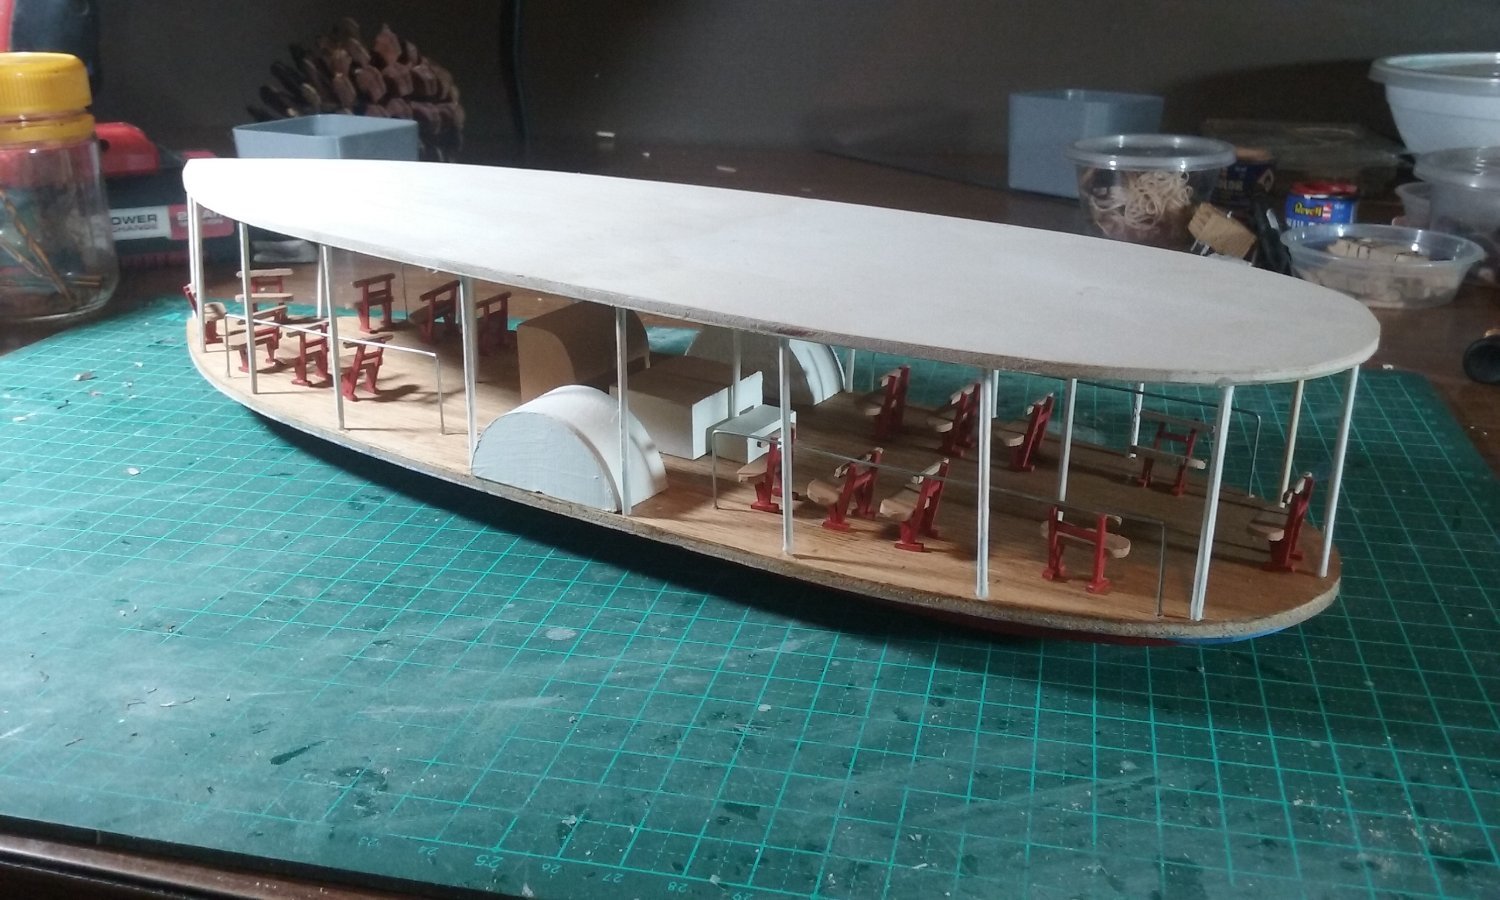
So here it is with the whole length toothpicks. And trimmed, with the railing just started. My lovely wife has solved at least one problem on this build for me - I'd wondered how to get the wavy border on the awning. Turns out she has a pair of scissors (think: a variation on pinking shears) that cuts paper and cloth with just the right wavy edge. Amazing! Steven


- 110 replies
-
- 17
-
-
-
- Paddlewheeler
- Ballarat
- (and 3 more)
-
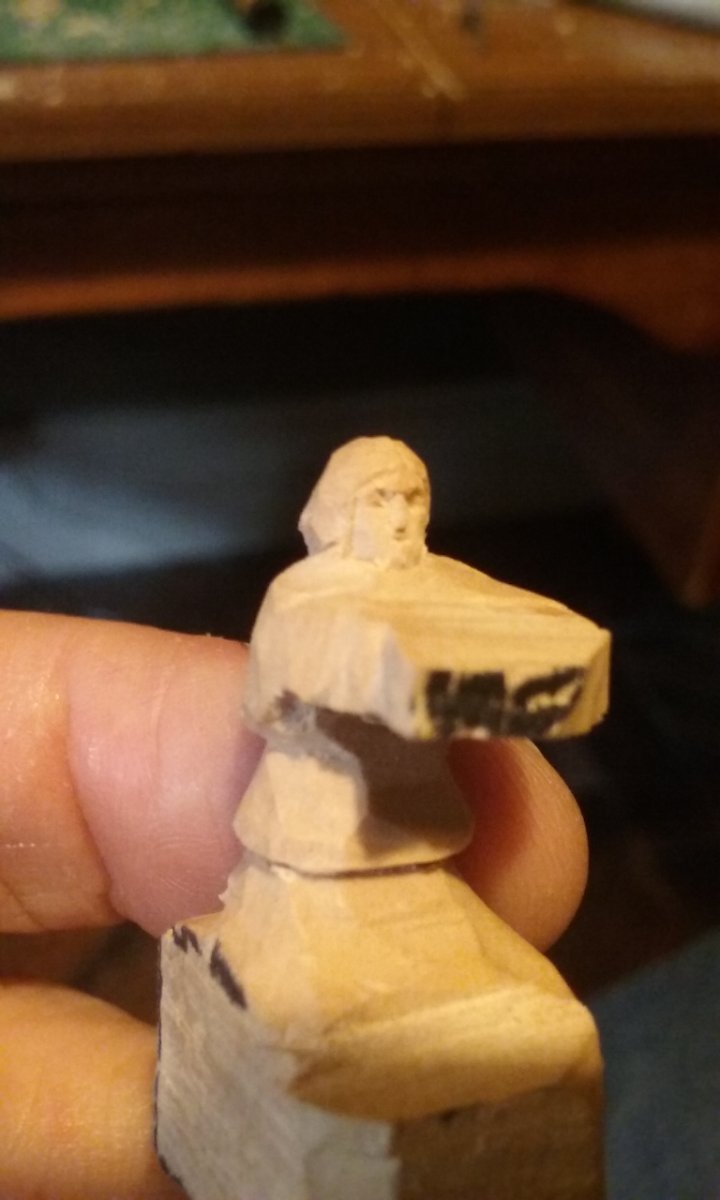
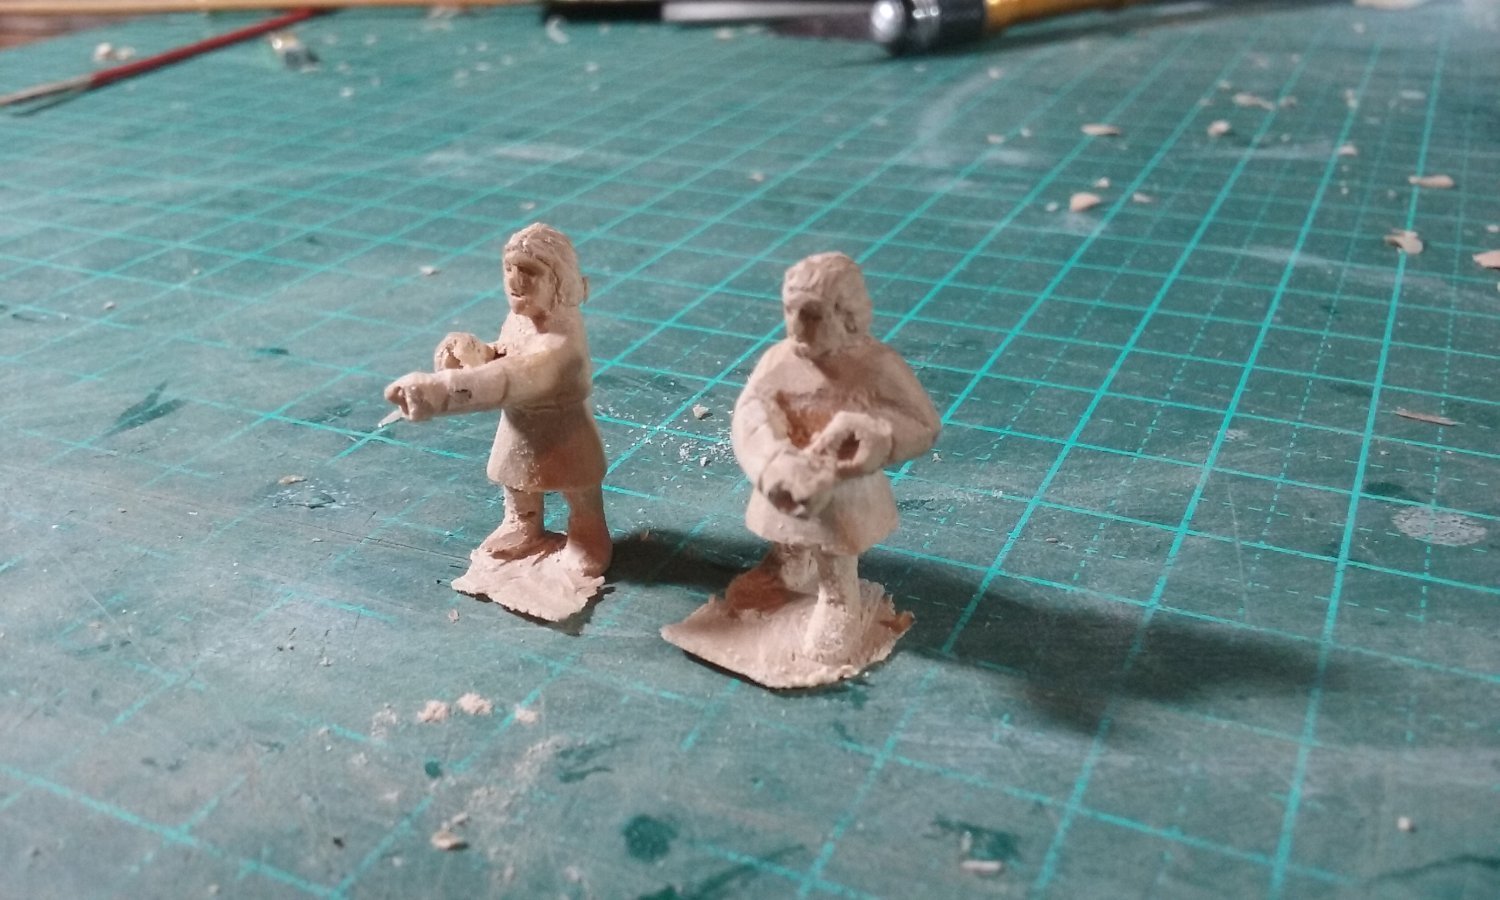
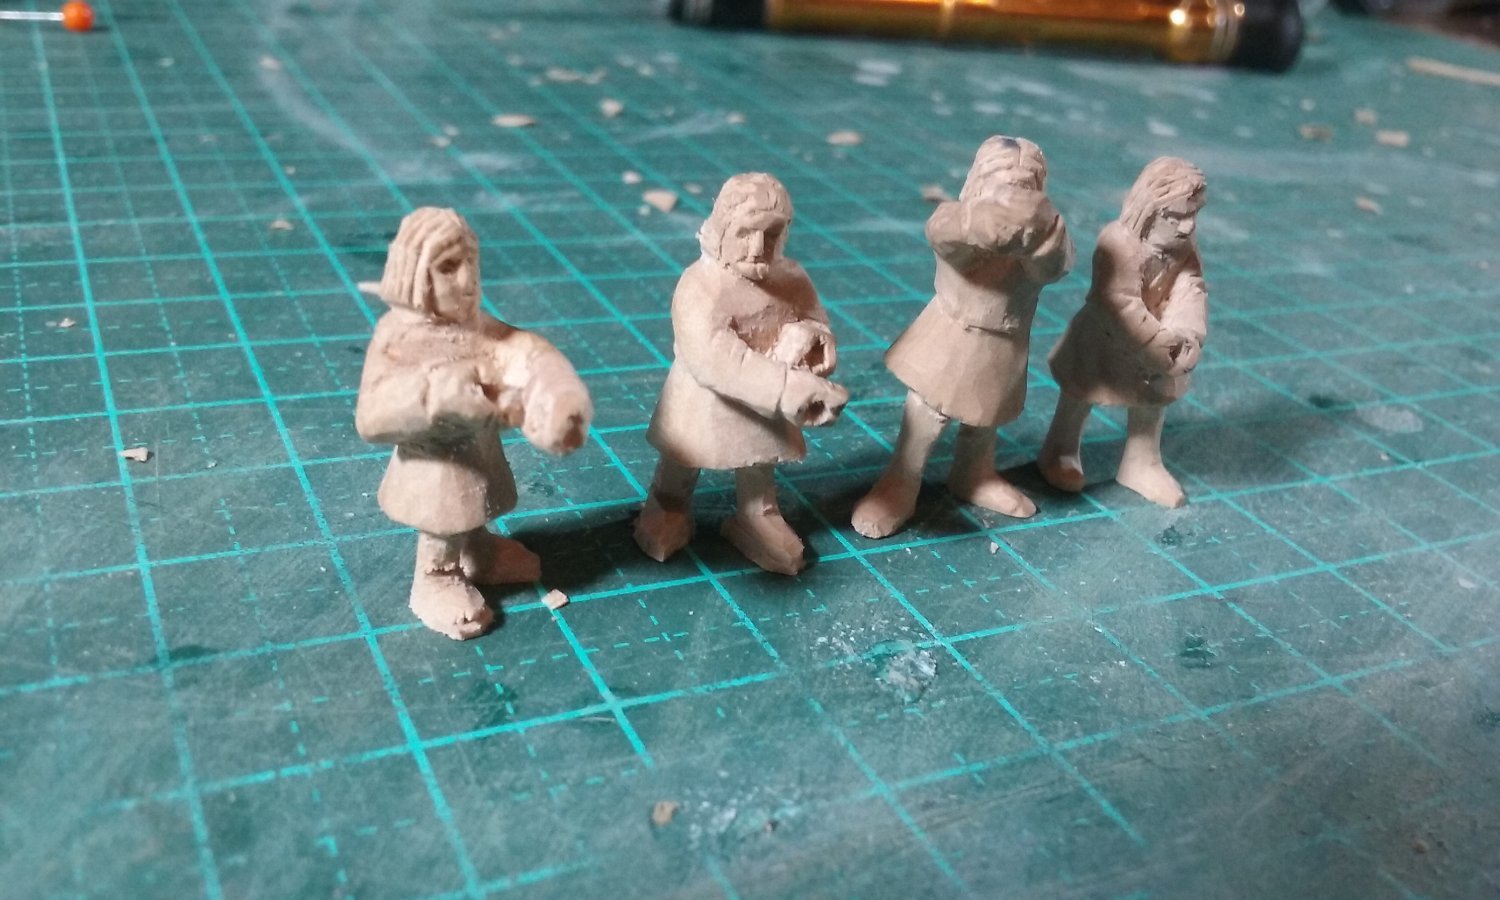
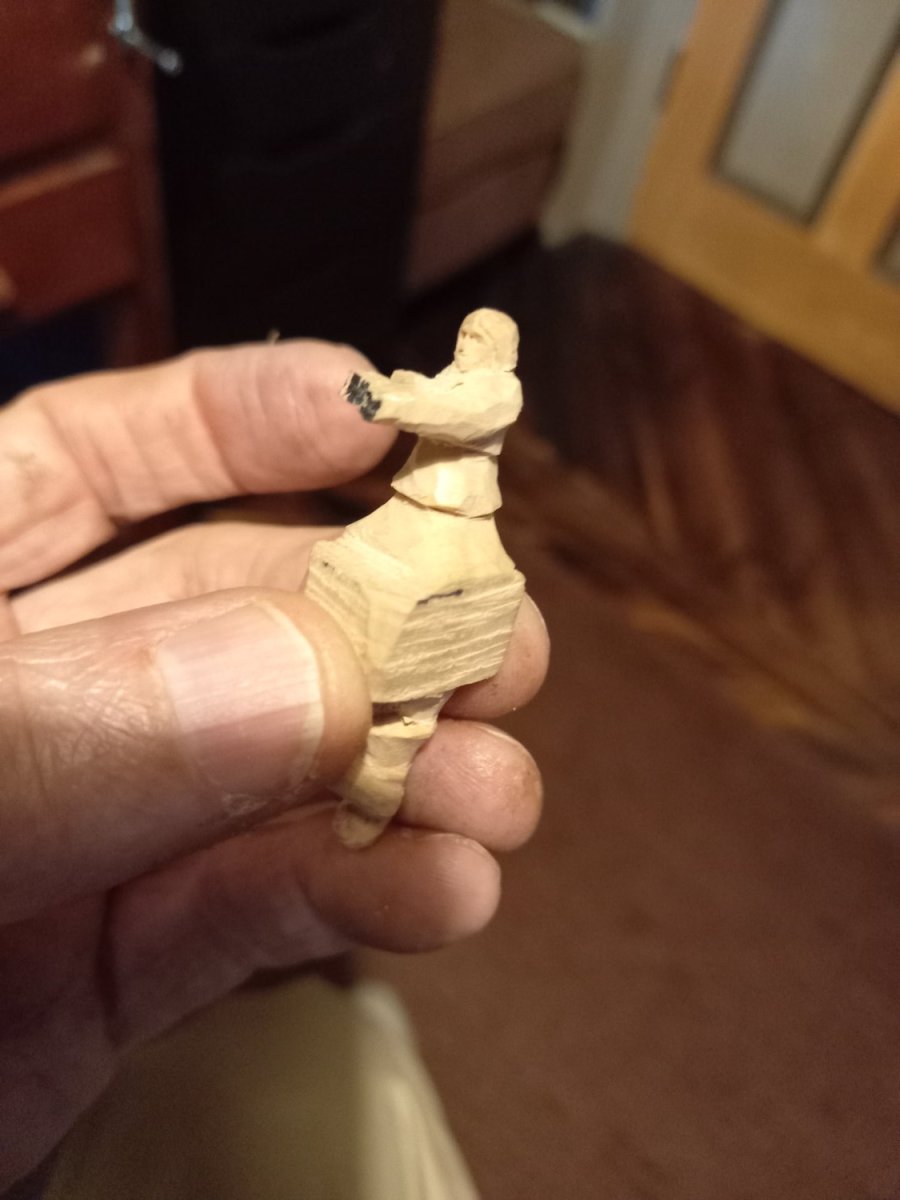
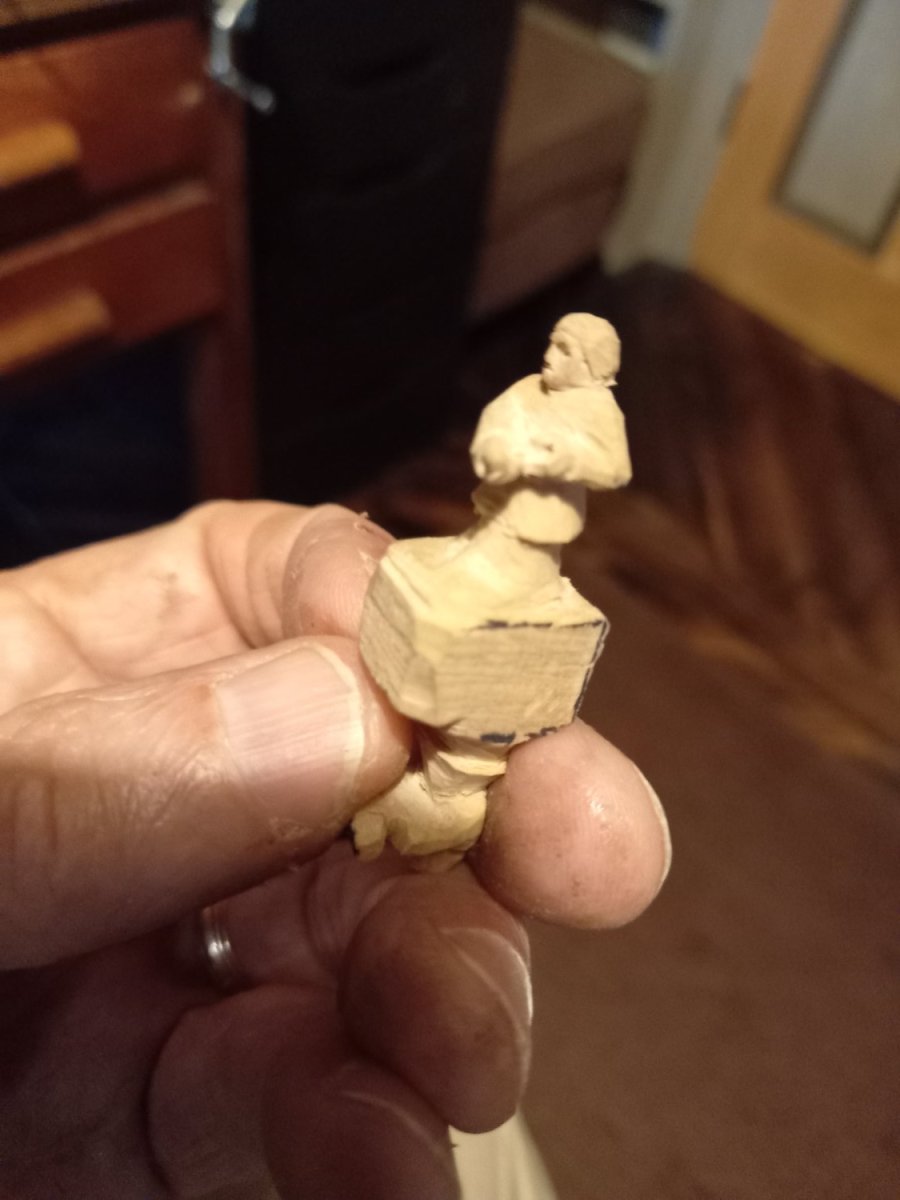
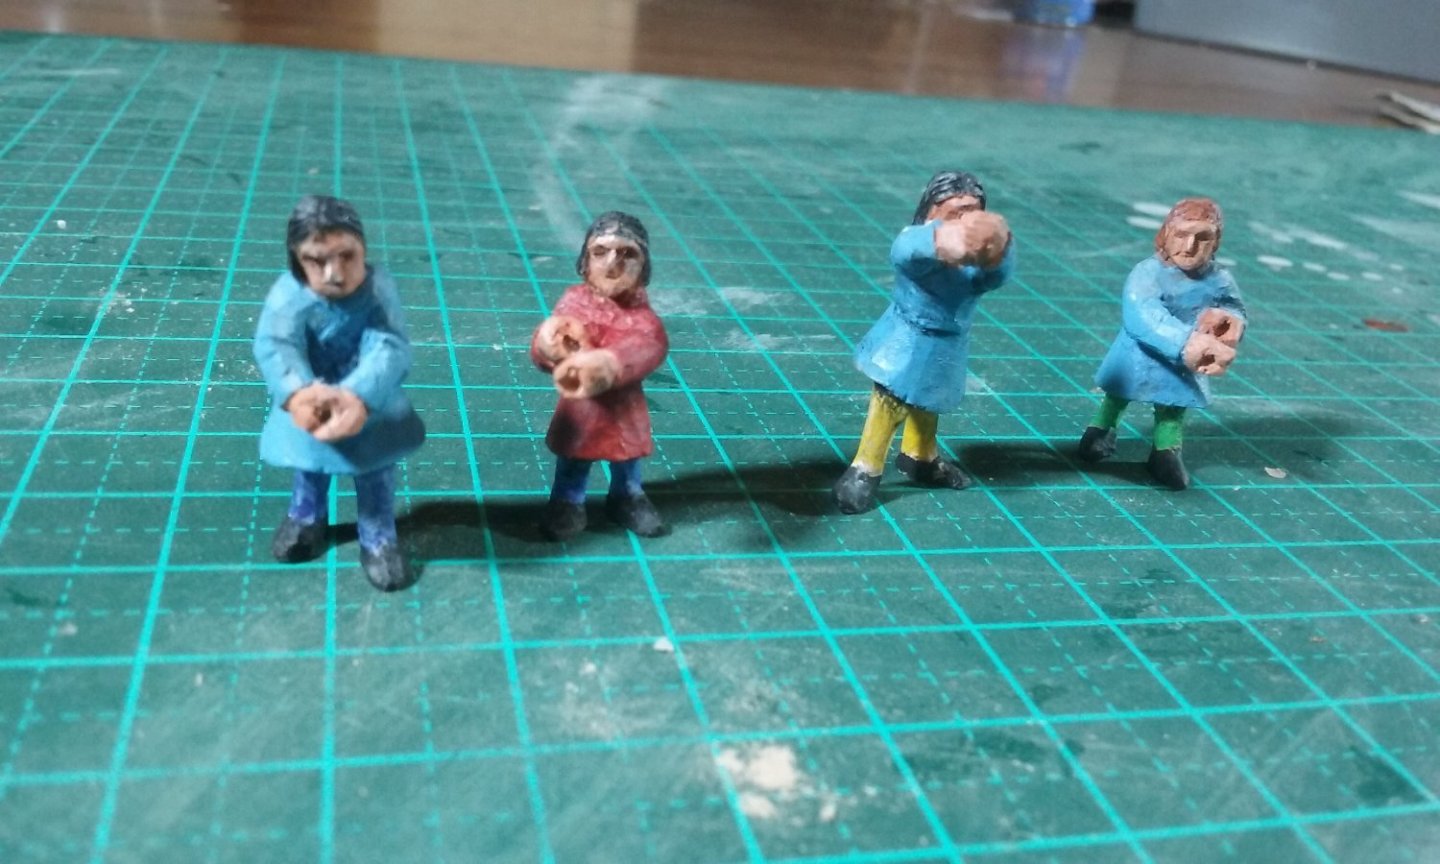
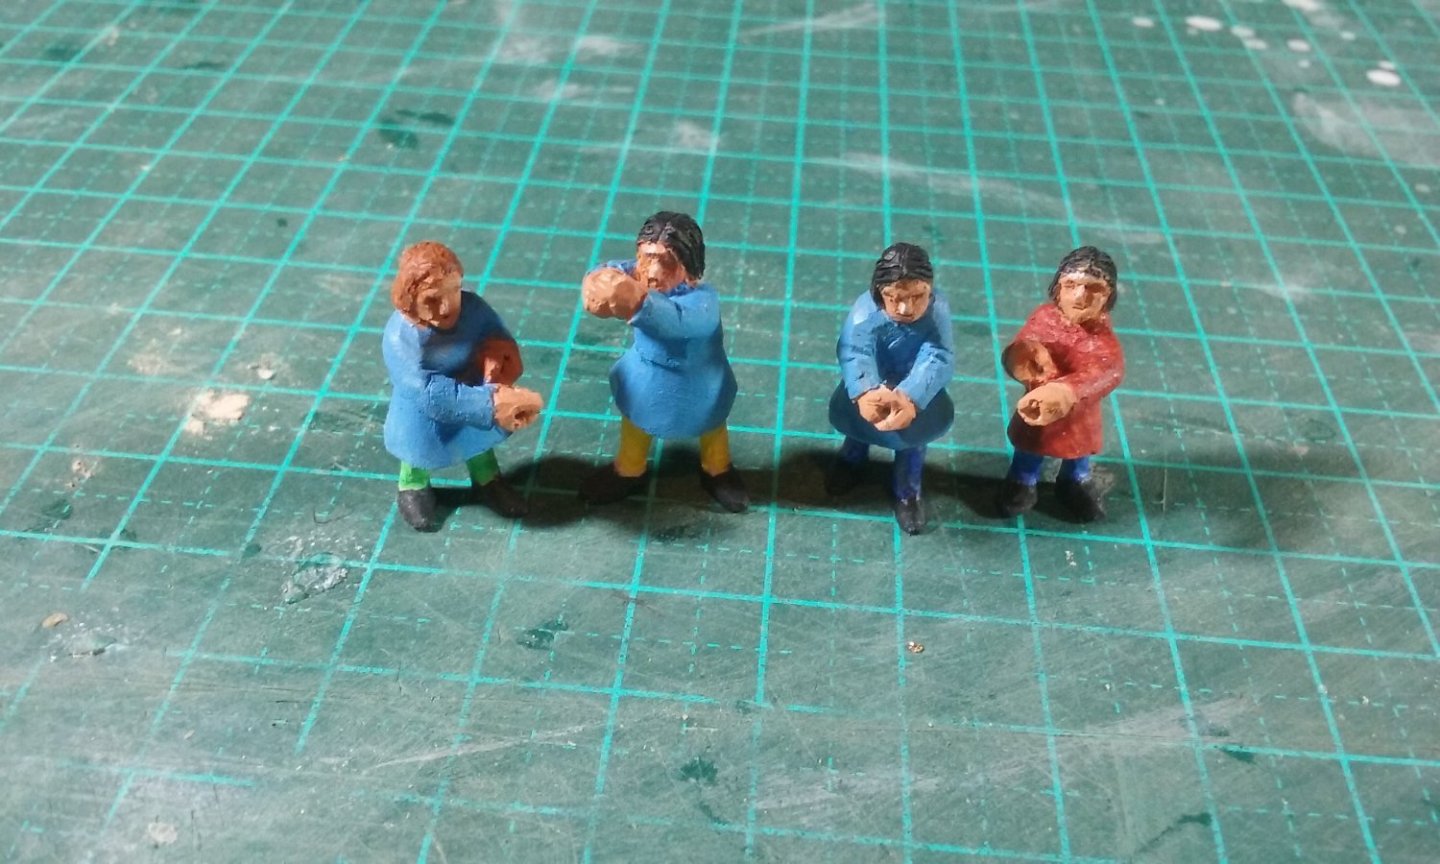
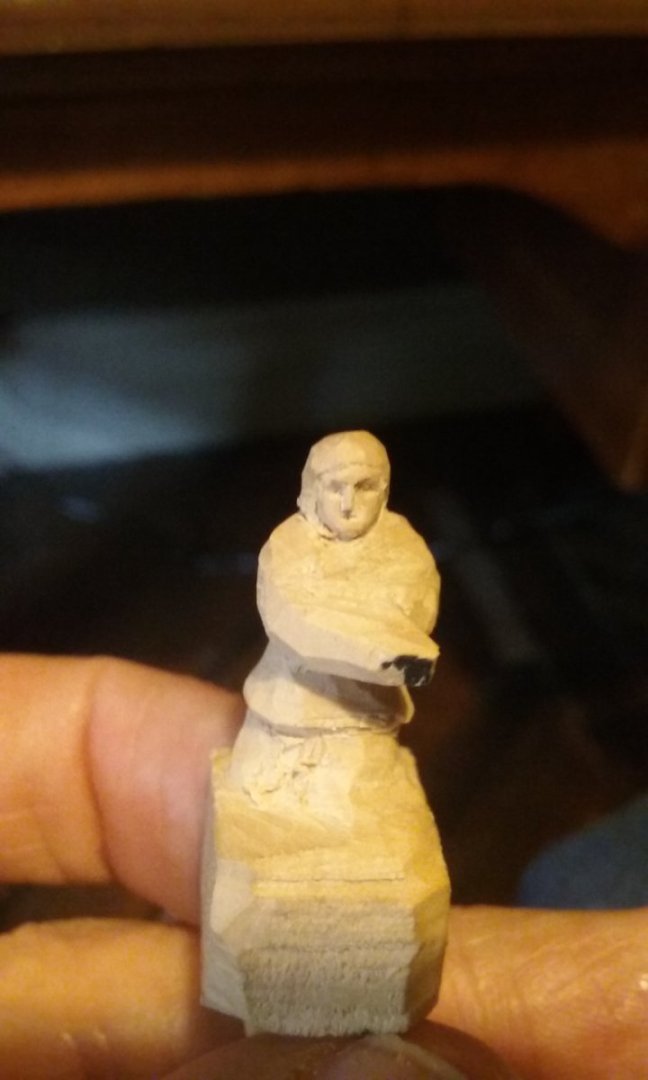
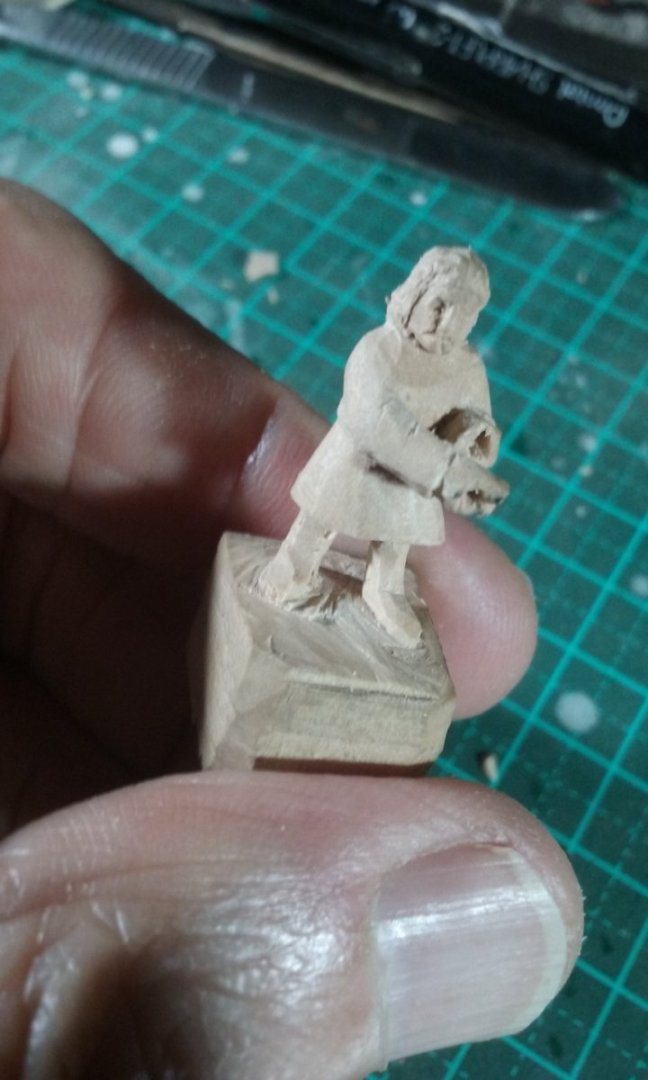
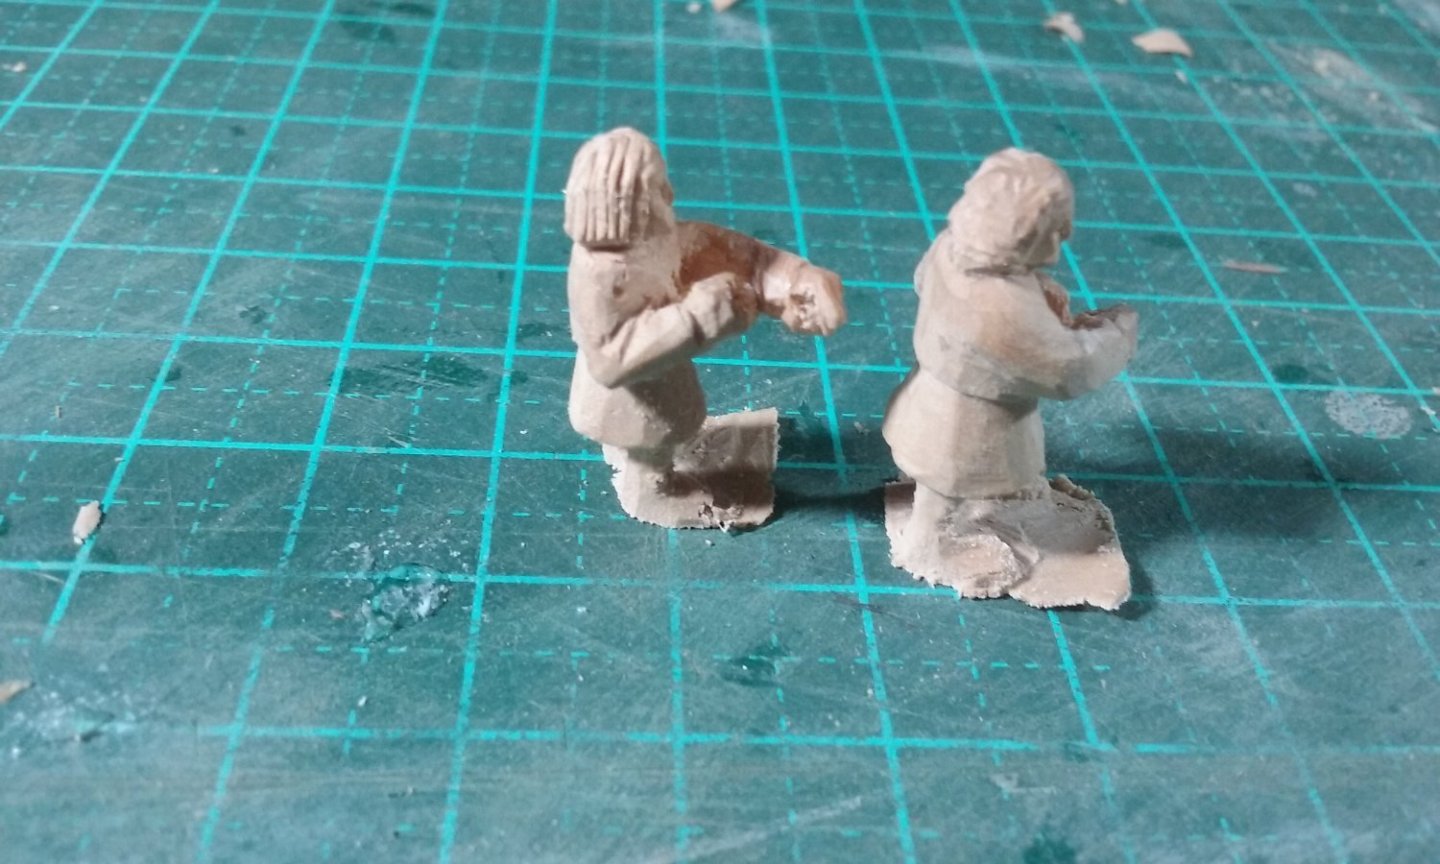
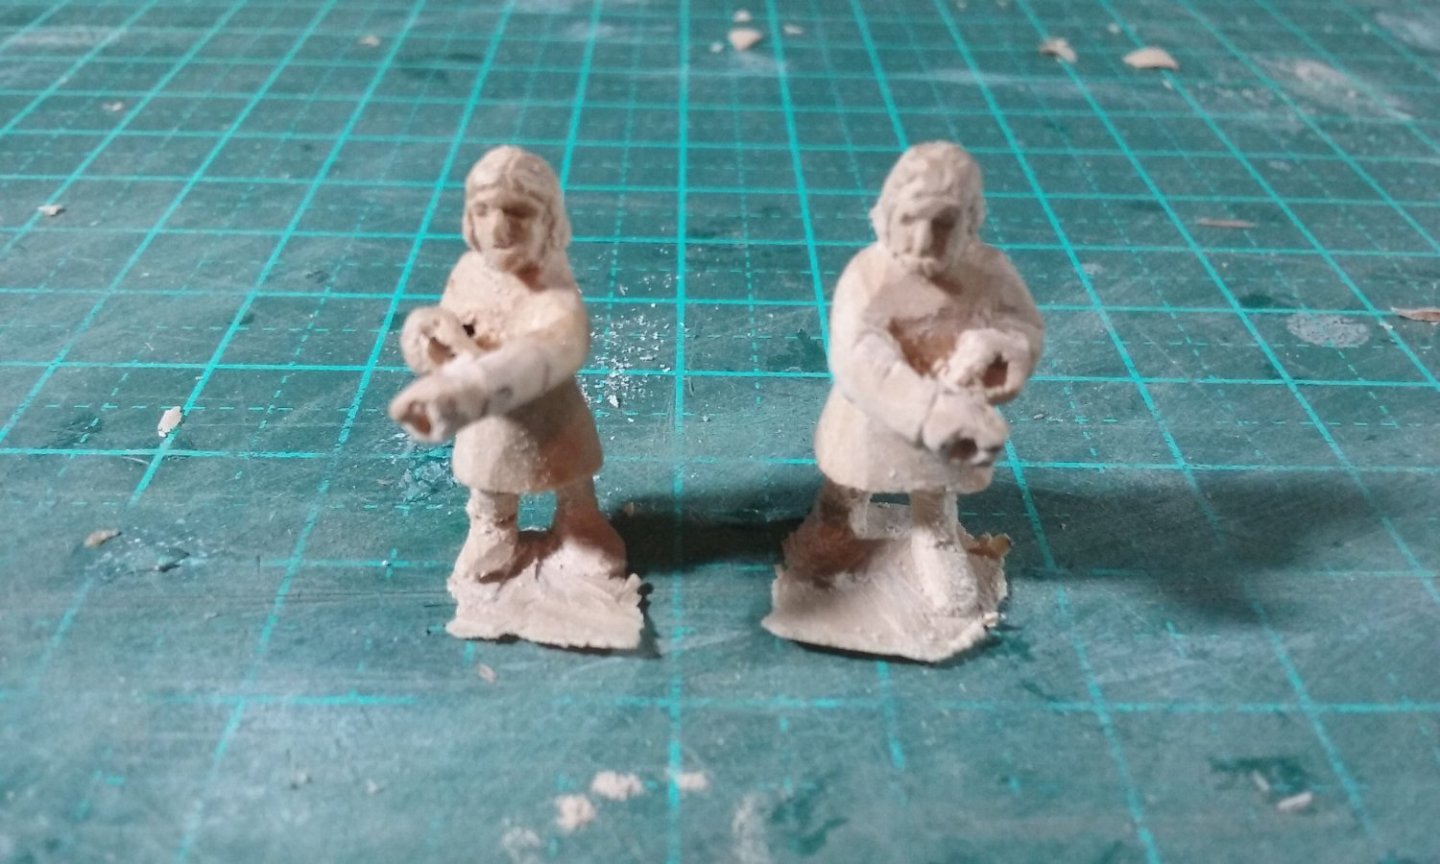
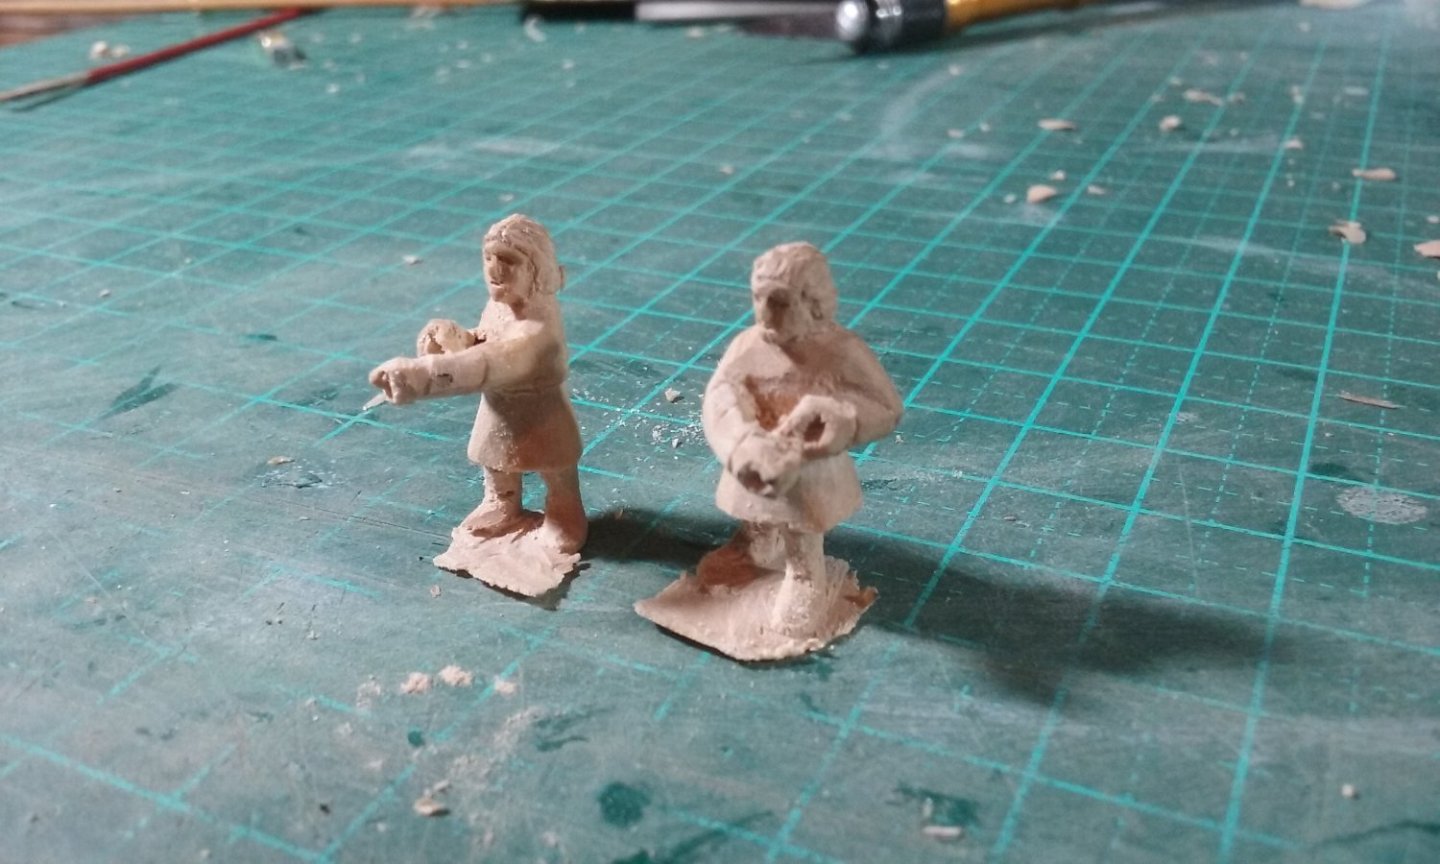
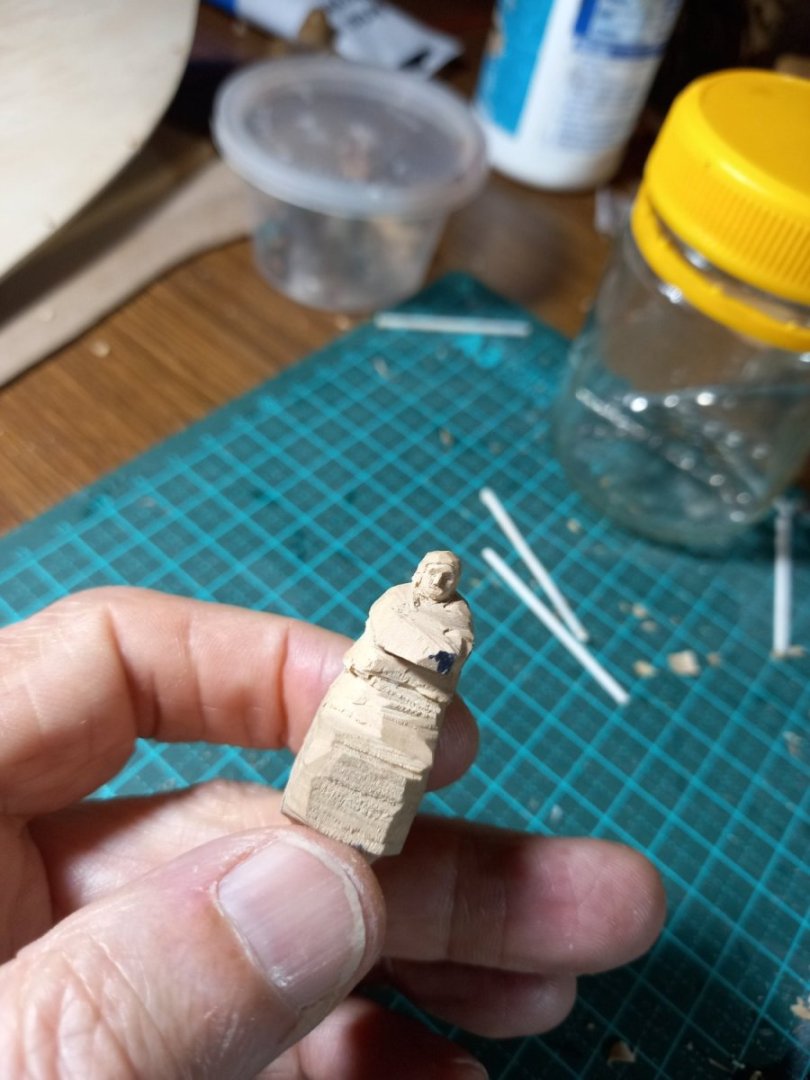
And they're done (except for thinning the legs a bit, and a bit of sanding and painting). I think the stance is wide enough. If not, too bad. I've spent so much time and effort getting them the way I want them, particularly the grip on the tiller, that this will have to do. Roughed out: And finished. Separated, and hair carved: And trimmed. I pride myself that my figures should be able to stand upright all by themselves, and usually I manage it. And two other crewmen I'd also carved (not sure if I posted them at the time) working on the rigging. I need to cut a little bit away at the base of the helmsmen's feet. At the moment they look like they're from the 70's with platform shoes. And then that's all the carving done. Steven


- 508 replies
-
- 17
-
-
-
Nice looking build. I love these spectacularly rigged yachts from back in the day. What was the cutter used for? Steven
-
That's not me, that's Liteflight. I accept no responsibility for him . . . The wide stance is well on the way . . . Here's close-ups on their faces. Steven


- 508 replies
-
- 14
-
-
-
That would make sense, Mark. And the helmsmen will have a wider stance, if only to make sure they can stand upright on the deck without having to have one of those ghastly flat stands attached to their feet . Steven
-
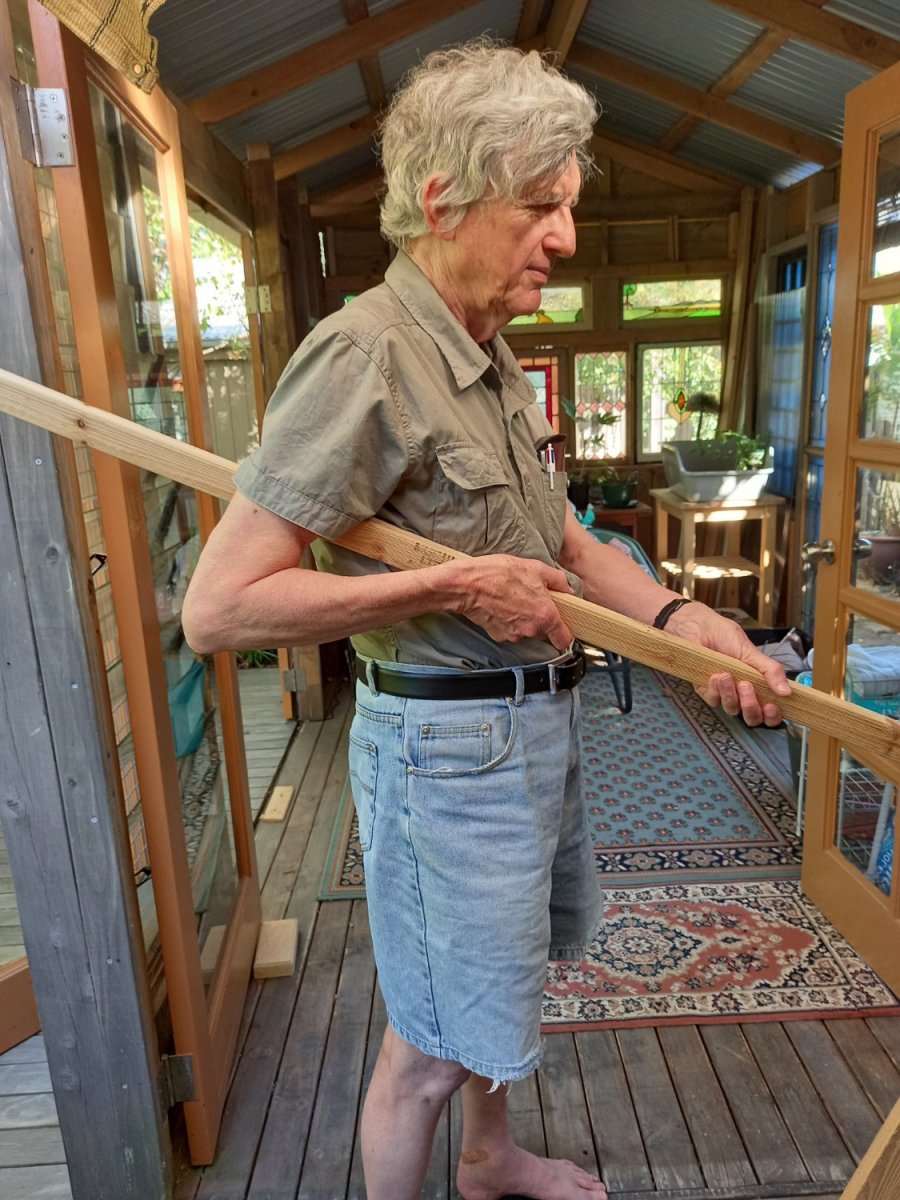
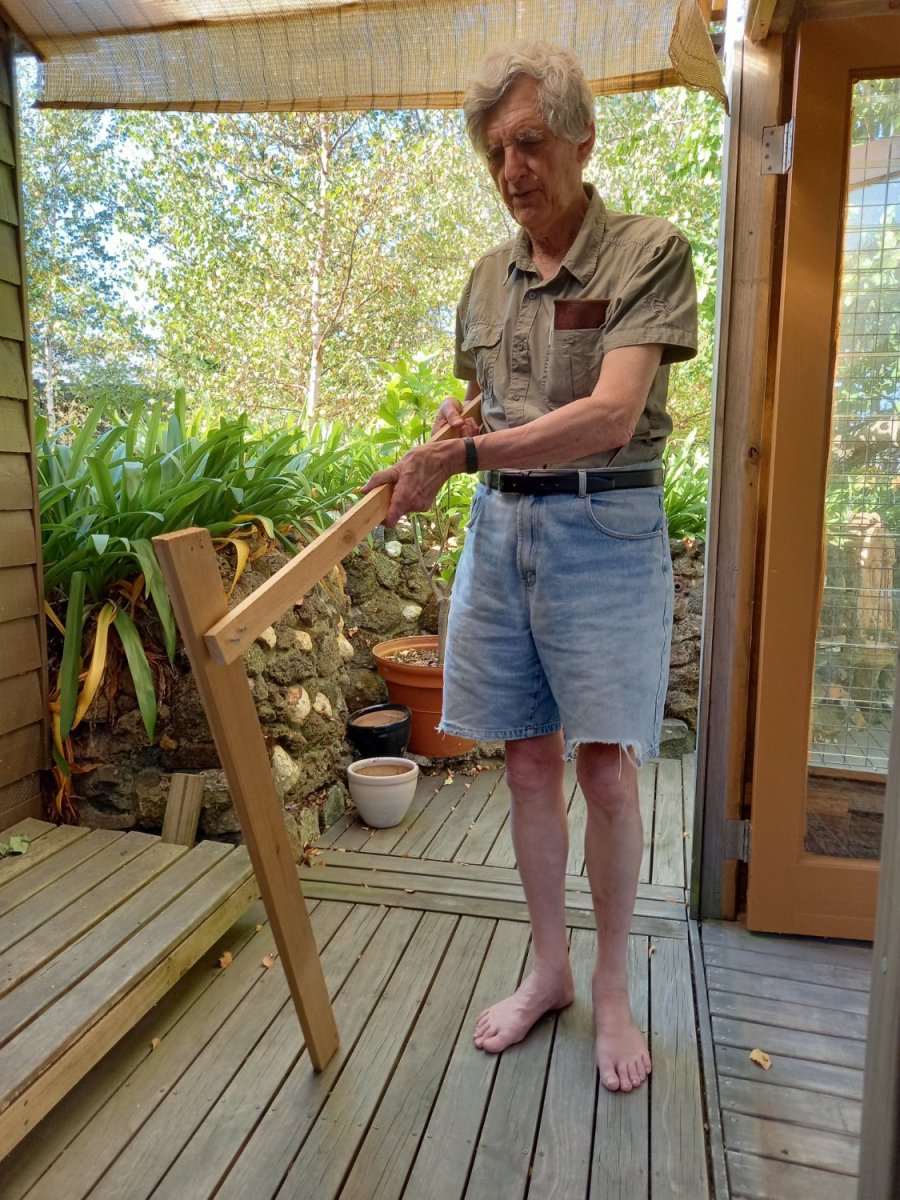
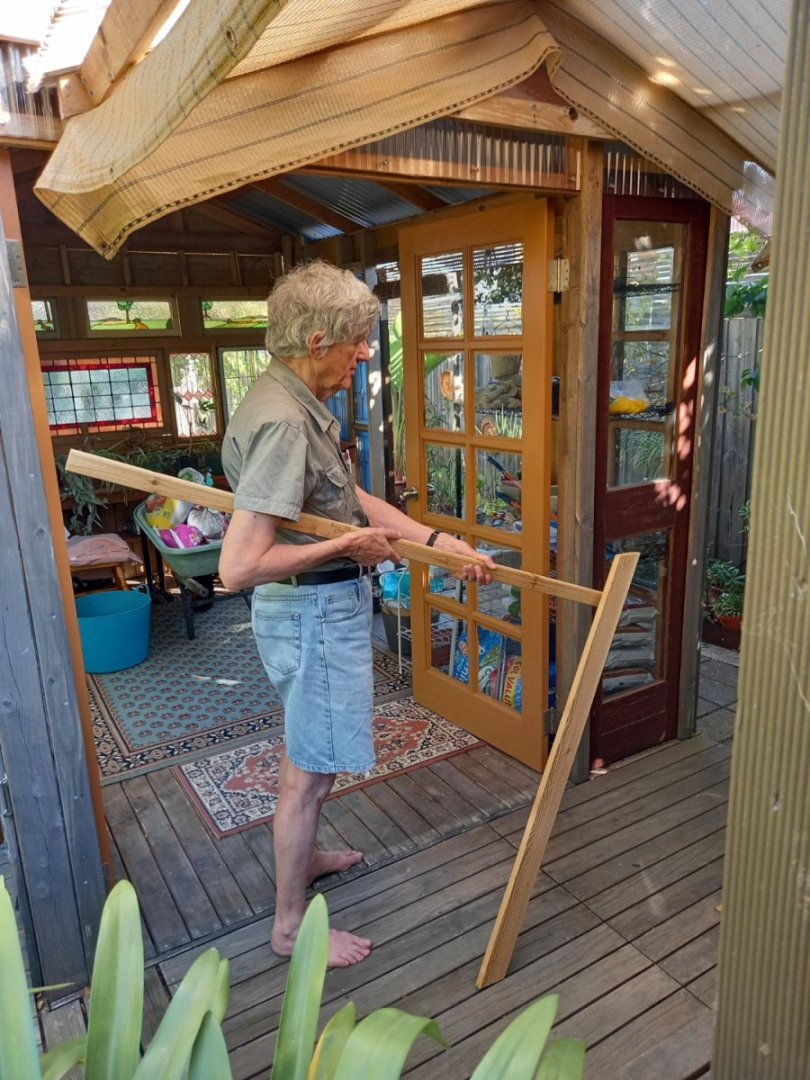
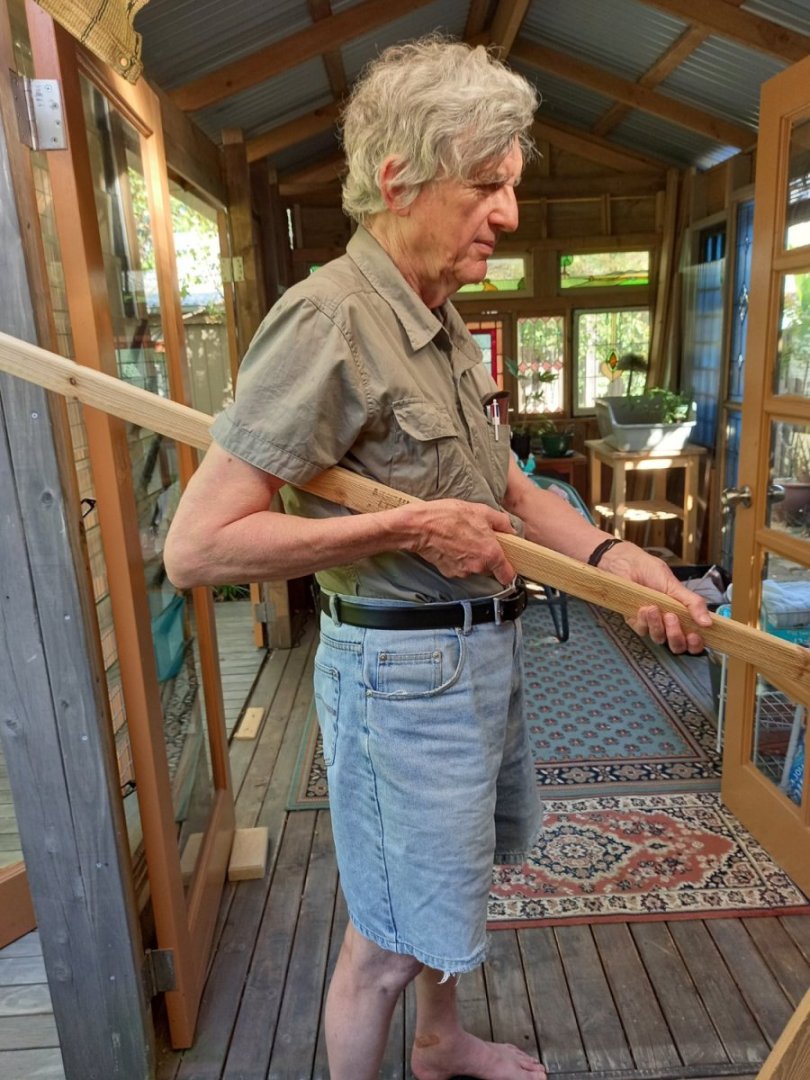
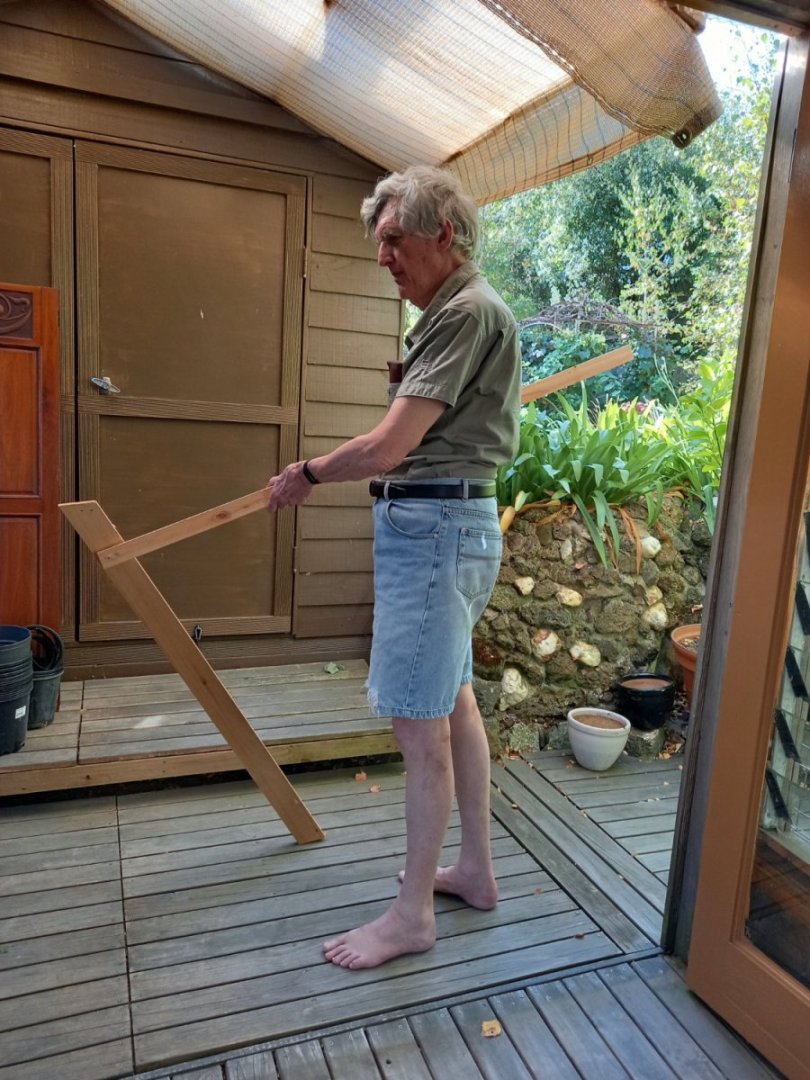
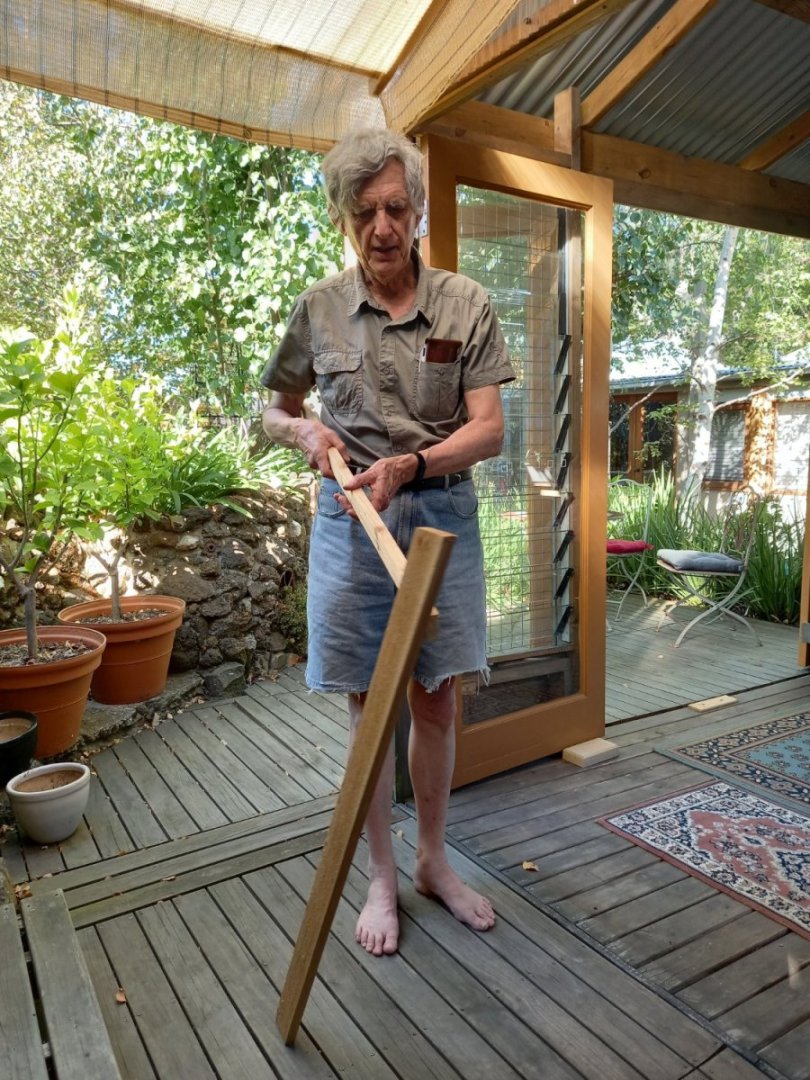
Hoo boy. This aft-facing tiller business is a pain in the neck to get my head around. I can understand how you hold a tiller crosswise or forward-facing, but aft-facing has me bamboozled. I finally made a full-size test-piece and got my lovely wife to take photos of me holding it in what I think is the most likely grip and stance for the helmsman - but who knows? Note - we're having our summer (all four days of it) in autumn. A series of 34 degree (93 F) days. Ballarat's like that. (we sometimes get snow in November, too). And I changed the tiller sockets to be slightly angled inboard from the rudder blades - otherwise the tiller would be fouled by the railing when turning it outboard (if you get what I mean). So I had to close up the existing holes with wooden plugs, and also change the shape of the rudder shafts to allow for the rudders being somewhat higher up than I'd originally thought. I hope this works! Steven


- 508 replies
-
- 11
-
-
-
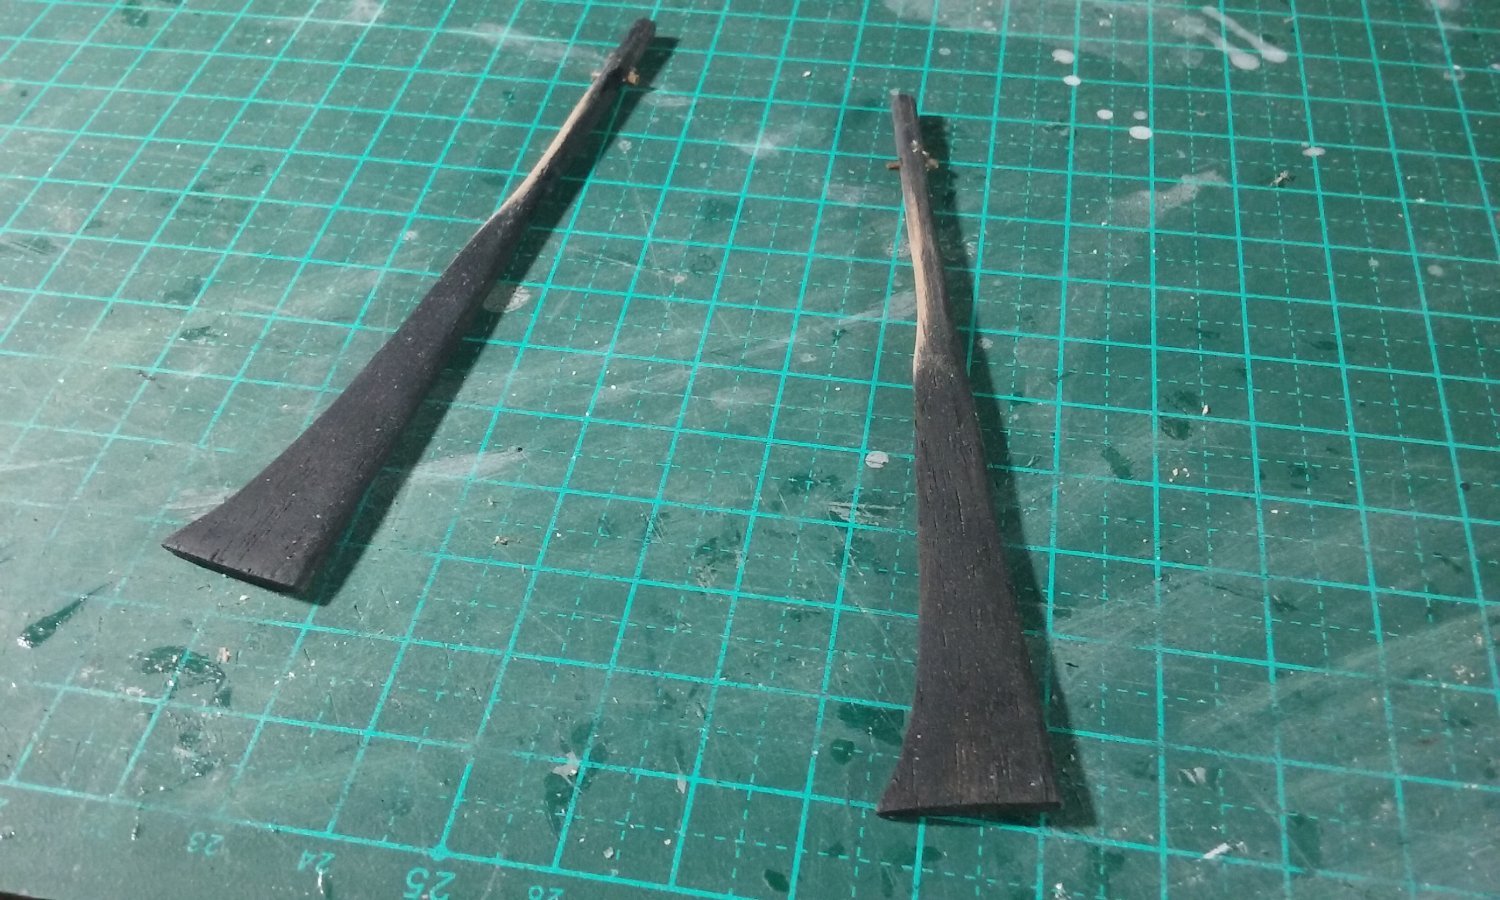
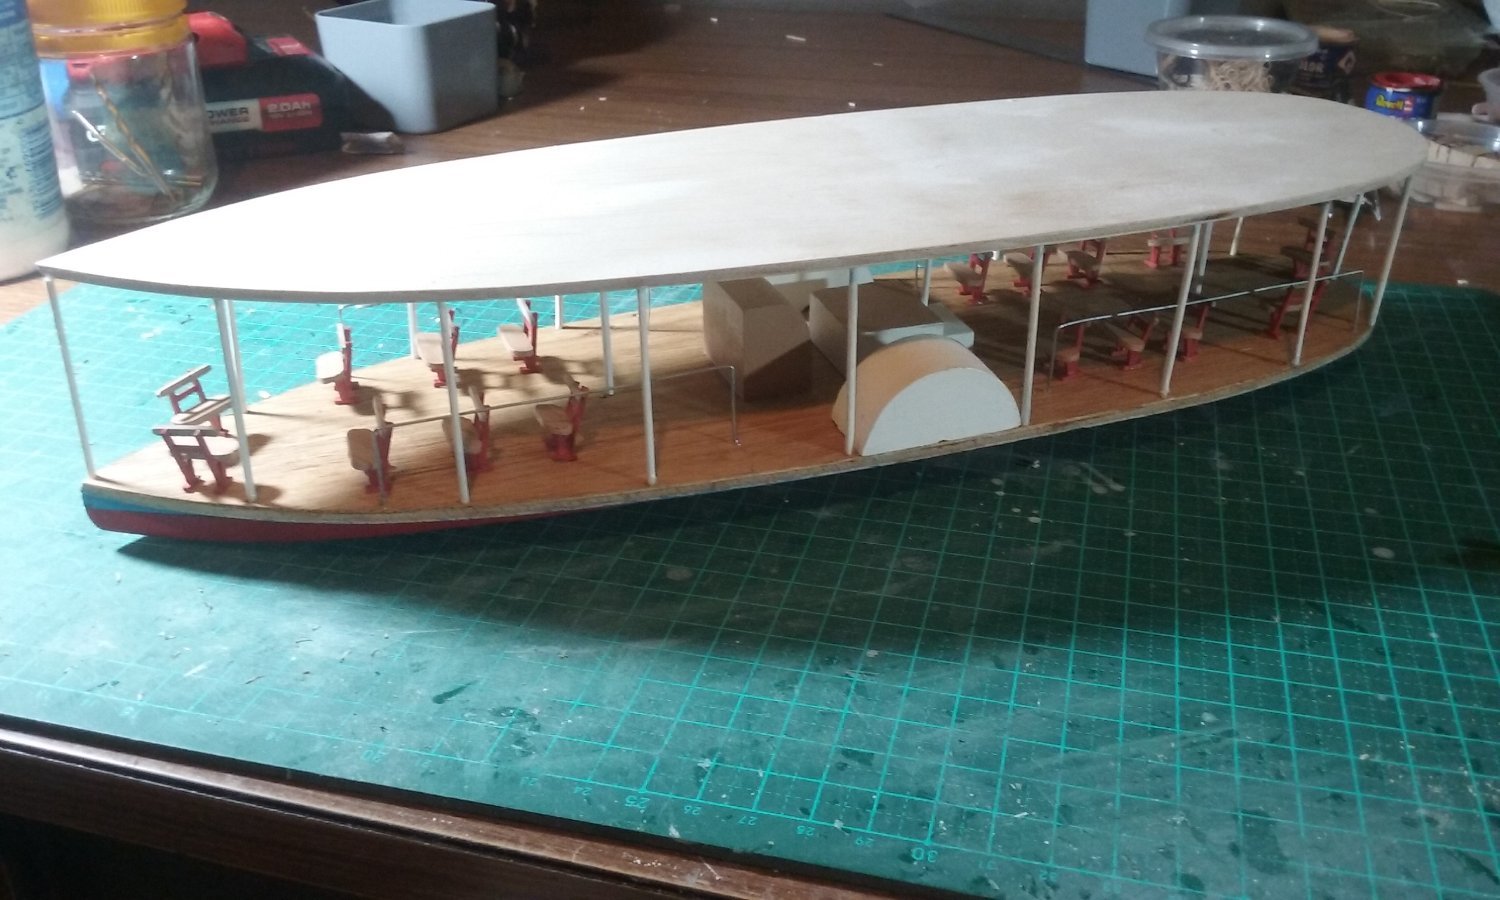
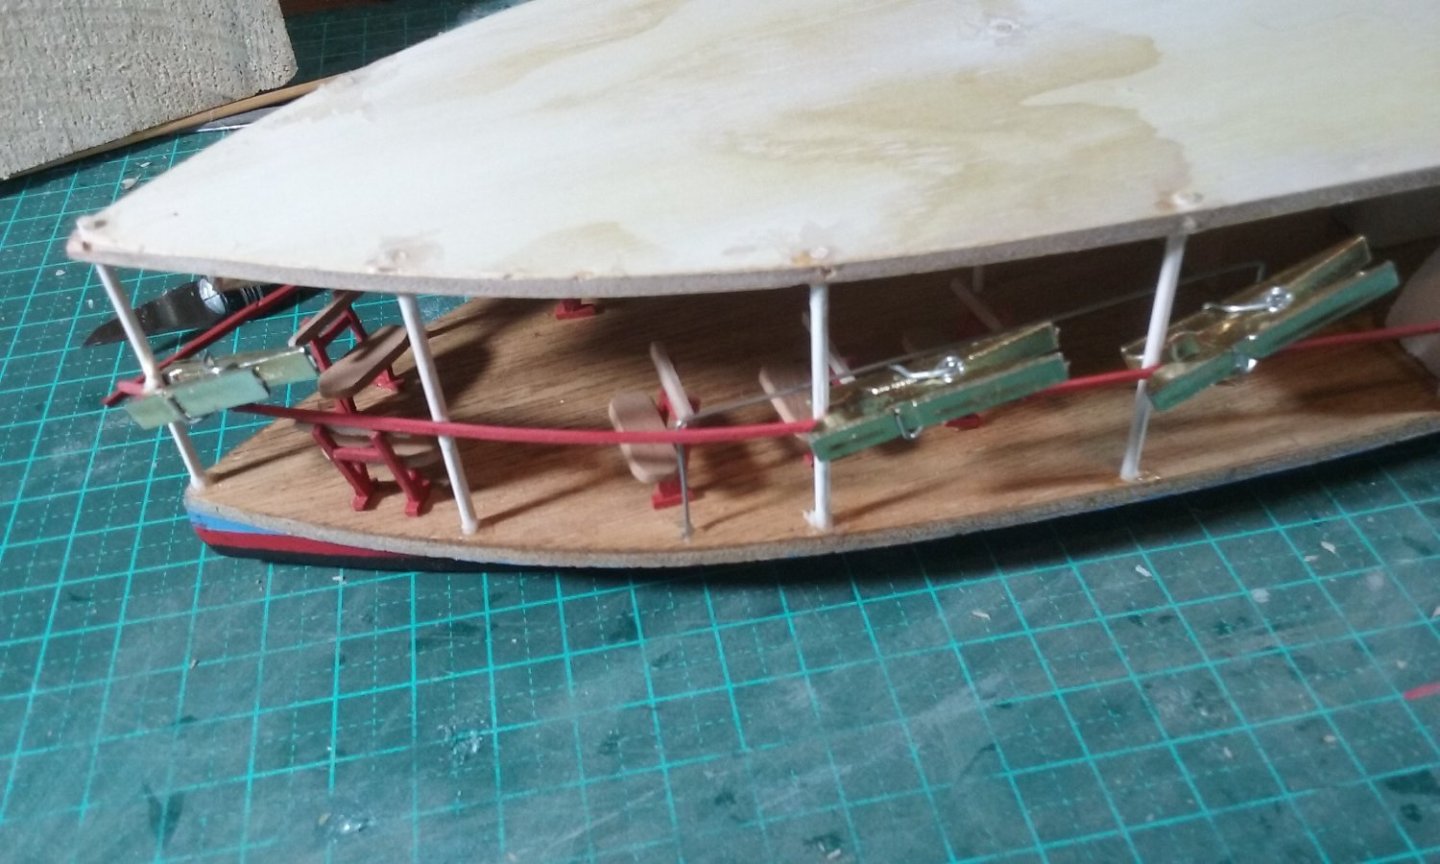
Still a fair few things to do - she needs a railing and a red and white striped awning for the roof. As I mentioned before, this is a prototype for a "good" model double the size, to see what works and what doesn't. Unfortunately one of the things that doesn't work is the uprights that support the awning/roof - they're made of bamboo toothpicks - in this version they were cut to exact length and went into "stopped" holes in the deck and roof, but due to inherent lack of precision this meant several posts didn't reach all the way from floor to roof, but hung supported at only one end. So I've removed the roof again and drilled holes that go all the way through both deck and roof, and I'll use the toothpicks full-length so they stick out the holes, and cut the ends off when the glue is dry. Steven


- 110 replies
-
- 19
-
-
-
- Paddlewheeler
- Ballarat
- (and 3 more)