Louie da fly
-
Posts
7,993 -
Joined
-
Last visited
Content Type
Profiles
Forums
Gallery
Events
Everything posted by Louie da fly
-
 I've been in the same position, but from ignorance rather than forgetfulness. You've managed to succeed despite that, so well done. There's an old air force saying - 'any landing you walk away from is a success' Steven
 -
Yep. Look at the top right of the page - you'll see a pair of speech bubbles joined together. That's how you start a PM. Type in the addressee's screen name and away you go. Steven
-
Beautiful work, Patrick. This is such a good build. My hat is off to you, sir - not just for this last bit of work, but for the whole project. Superb. Steven
-
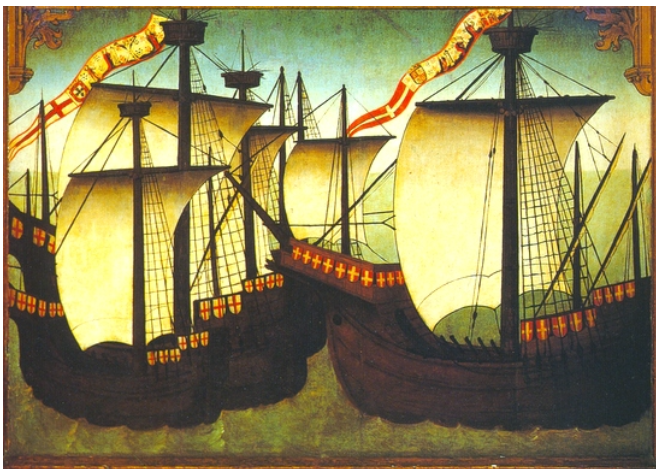
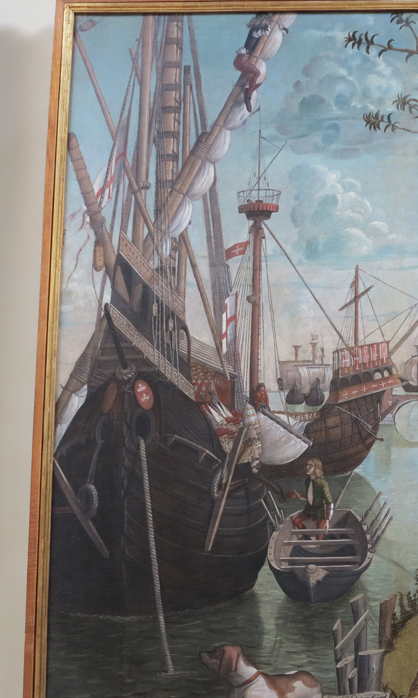
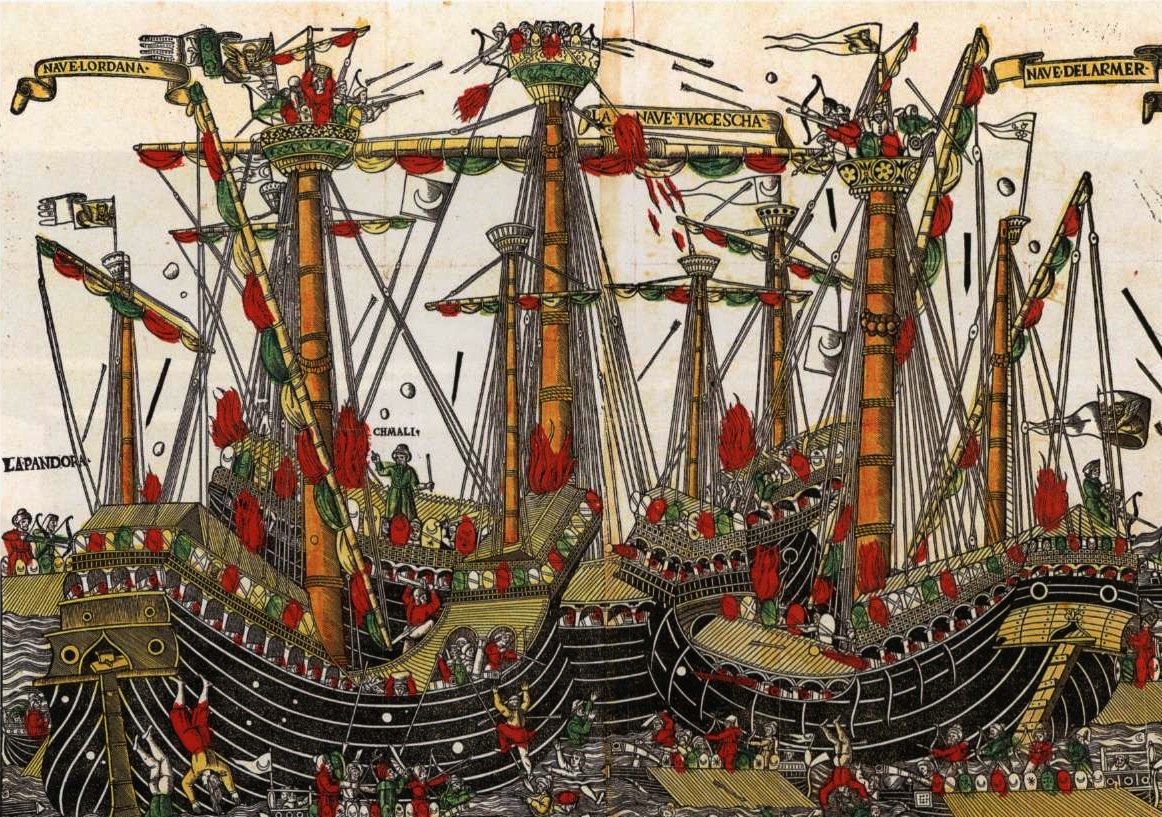
Off to a good beginning! One thing I'd recommend is that you see if you can find out how many gunports survive on the wreck and if you can extrapolate from there how many she actually would have had. I think it's pretty well accepted that Anthony Anthony exaggerated the number of guns in his picture. More guns is not necessarily better, if you want to duplicate as well as possible the way she was. But also check the Anthony Roll for the number of guns the text below the picture says Mary Rose has. Yes, McElvogue did definitely make some things up - for example, there was no boat found with the wreck, but he has drawn one. Just be aware of that and use your best judgment as to whether to believe him, and check his book for actual evidence he's based his stuff on. I'm talking from experience - I went with some of his ideas and found to my regret they were speculation rather than evidence-based. And if you don't already have it, I'd recommend R.C. Anderson's The Rigging of Ships in the Days of the Spritsail Topmast for when you get to the rigging. Yes, it relates to ships from a later date - his book starts at 1600 - but it's possible to extrapolate backwards and get a fair idea of what would have been already in use in 1545. And also refer to the two contemporary pictures that show Henry VIII's ships - the Anthony Roll and the painting The Embarkation of Henry VIII at Dover for the Field of the Cloth of Gold - for more details of rigging. For example, the latter one (despite its faults, and it does have them) shows sailors working on the yards without footropes - they were a later invention. And also other contemporary images from around the same time. See in particular my collection of 'Great Carracks' at https://au.pinterest.com/lowe1847/great-carracksnaos/ Interesting that Marsden is also thinking in terms of three decks for forecastle and aftercastle. McElvogue seems to think that's maybe taking it a bit far, but I think it's best to just use your judgment (and cardboard mock-ups) to see what you think. It's all speculation past a certain point, and your guess may be as good as anybody else's. Looking good, mate. Steven
-
Nice work, Dick. Good idea making the seats of ease visible if required. Steven
-
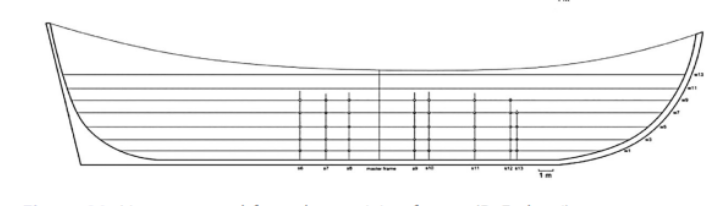
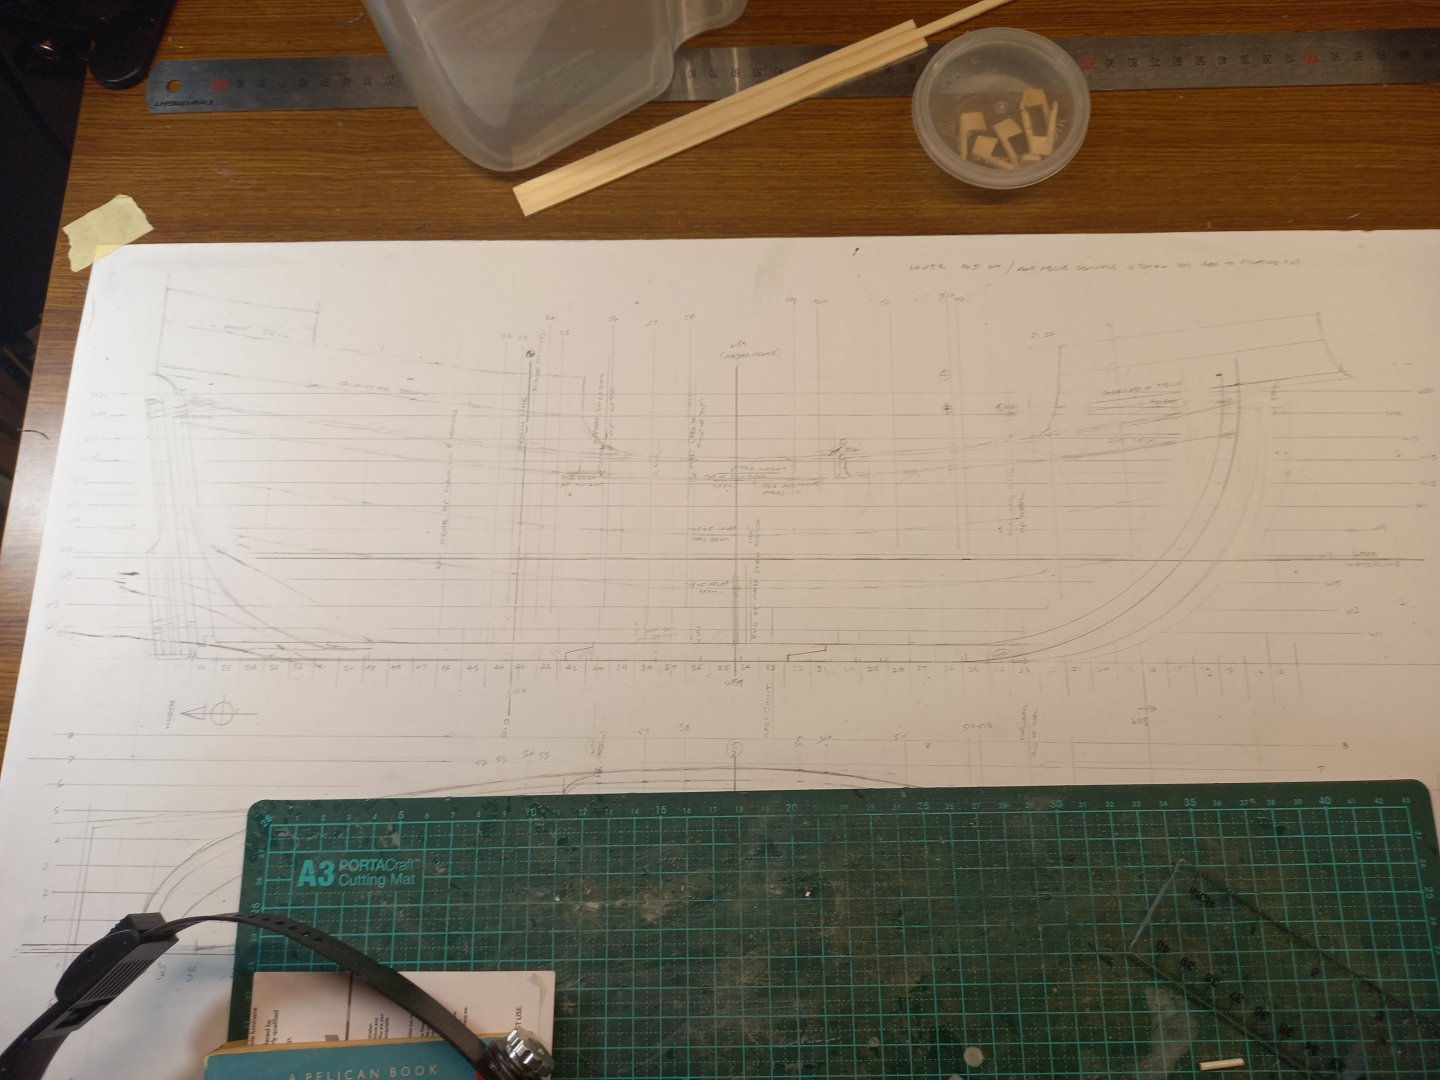
Three steps forward, two steps back. I'd seen a mention in the report linked in post #17 above, that the forward end of the keel curved upwards in the last 2.3 metres of its length, but that seemed to contradict another computation in the same paper relating to the rake of the stempost, so I ignored it. Now I discover there's an actual photo of this curved end which means I've had to redraw the front of the keel, start the curve of the stem 2.3 metres aft of where it had been, move the forecastle back by 2.3 metres, you name it. I still can't reconcile the computation of 10.25 metres for the rake of the stem - it makes it look ridiculously sharp. I'm prepared to have the stempost leaning forward somewhat - that's shown in contemporary pictures but not to this extent - though I'm prepared to acknowledge that I may have simply not understood what the author was trying to get at - here's the relevant pic from his own reconstruction (the bow is on the right) and perhaps this isn't meant to be the whole run of the curve - maybe it's meant to get more vertical as it gets higher? Those vertical lines in this pic indicate the surviving frames that they measured, but if you look at this sectional view, you can see that they don't really go very high in relation to what must have been the full height of the hull. Anyhow, I've shifted the stempost back and fiddled with the radius so as to have a stempost leaning forward to somewhere near what I think it should be, but the centre of the arc is much higher than where the author puts it. And then there's the frames. I still haven't been able to reconcile frame numbers with positions on the hull. I think their numbering system starts with floor timbers (# 1 at the forward end and and simply increasing the number value as you proceed aft?) and then keeping those numbers for the corresponding knees and futtocks they connect to - except that they started their excavation at the stern, and didn't get to the bow for several years, so how could that work? Plus they weren't always able to reconcile a particular knee or futtock to the corresponding timbers. It's all a little confusing. At least I have been able to work out where the (assumed) master frame is along the length of the keel, and also I'm pretty sure I have the position of the mainmast tied down. I think I'm going to ignore the frame numbers and just put frames in at regular intervals, making up my own numbers. On the real thing they're about 500mm (a bit over 18 inches) between centres. Which means something like 80 frames. But the frame profiles change in width really gradually. And if I follow the real vessel each frame has to be made from a floor timber, two knees, two first futtocks and two second futtocks. Part of me wants to put in all the frames, each one made from 7 pieces, another part says "nobody will ever see them - why bother?" Retro me Satanas? Oh, and they obviously didn't use the mezza luna technique of framing which I used on the San Marco ship - in which all futtocks have the same radius, they're just further away from the keel as the hull gets wider - these frames all seem to have have different futtock radii. Fun and games, kiddies. I'll think about it some more and see how I feel about it all (sigh). Steven
-
Are you making the Occre kit? If so, I've just come across a site https://occre.com/en-au/products/apostol-felipe#:~:text=The Apóstol Felipe was one,"Race for the Indies". that dates its first voyage at 1629, which would change a lot of its detail. The picture above looks more appropriate to 1629, though I think perhaps the stern galleries might have had roofs by that time. I doubt that there is any reliable information as to exactly how the original ship looked - it's more likely that the manufacturer has provided a kit of a "typical ship of this type and date". Oh, and by that date, "gold" paint was considerably more common in decorating big and important (usually royal) ships. Steven
-
As I mentioned above, the bowsprit seems to have often been somewhat offset, probably to avoid the foremast. Steven
-
Thanks for the suggestion. By the way, regarding the sub-structure for your Mary Rose forecastle, have a look at the second picture in my post above. Steven
-
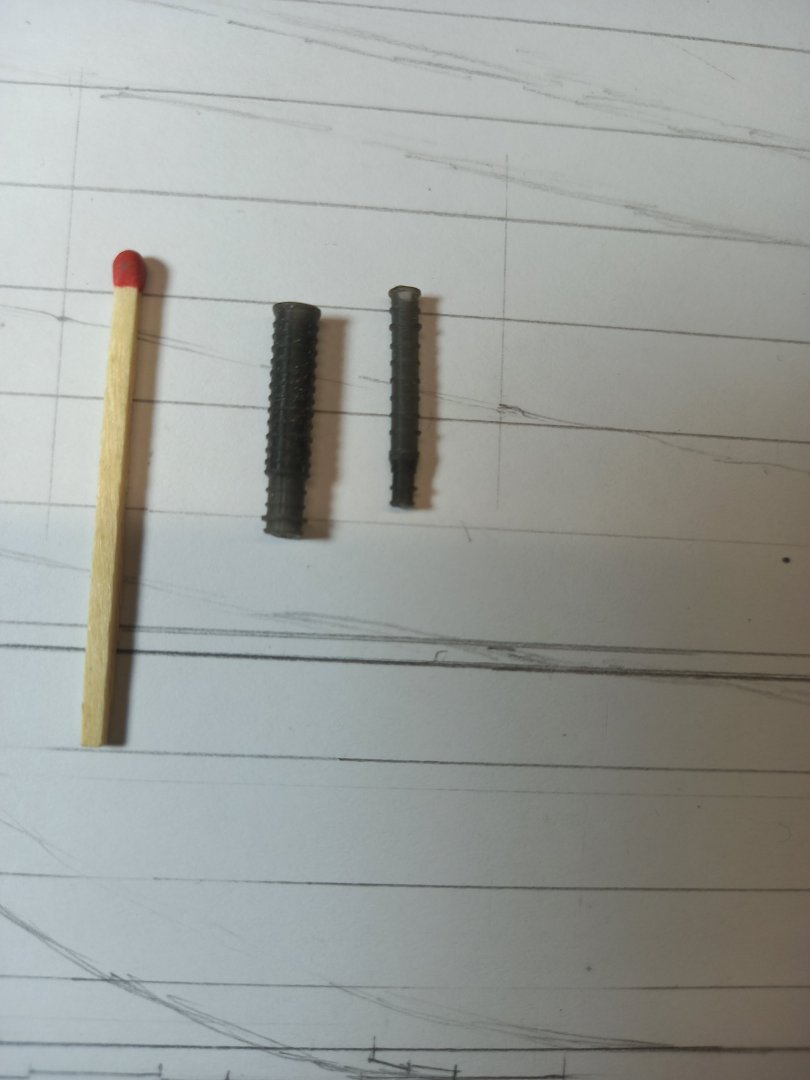
More research - this time for the width of the forecastle in relation to the rest of the hull. It narrows quite dramatically between the gunwale and the lower surface of the forecastle. Using 11 examples, I come up with an average narrowing down from full size to about 2/3 (0.667), with a maximum of 0.8 and a lower limit of 0.625. Transferring this to the drawings, I've done more on the lines and the cross-sections. Oh, there were about 12 cannons found on the Lomellina - of two sizes. Some time ago HenrytheStaffy of MSW very kindly 3D printed some for me to go on the model. He might have overdone it a bit with the numbers. But I'm not complaining Steven
-
You're doing a good job on this. Nice clean, crisp work with the planking. Steven
-
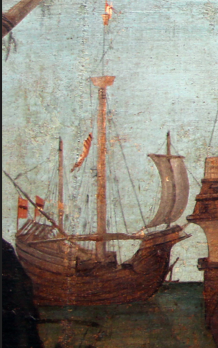
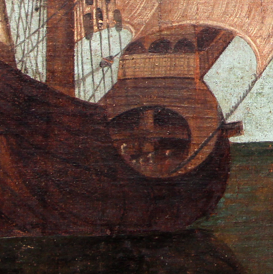
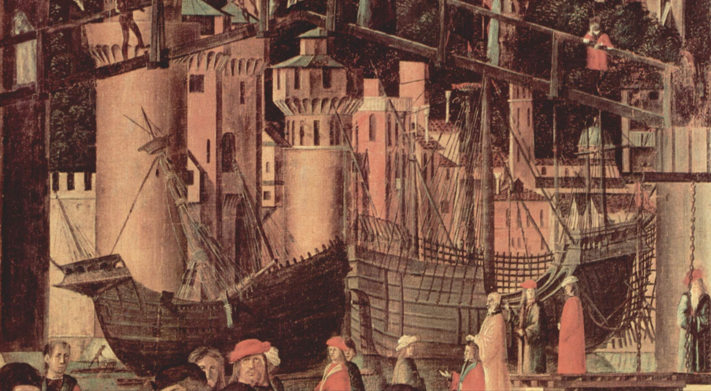
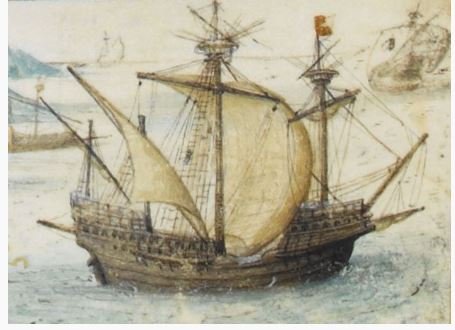
That depends on where the foremast is stepped. The Anthony Roll picture makes it look like it's right on top off the stempost. And here's a carrack (and Mary Rose was a "super-carrack") with a central beam under the forecastle. But also, quiet a few contemporary pictures of carracks show the foremast offset slightly to one side. For your consideration. Steven
-
Remains of 500 year-old shipwreck: Dated 2019
Louie da fly replied to Allegheny's topic in Nautical/Naval History
Nowadays there's a move to leaving wrecks where they are - often it preserves them better than raising them (and you don't have all the hassle of keeping them from deteriorating, apart from the expense of providing somewhere to display it, staff to look after it etc). They're still working on the preservation of the Vasa and the Mary Rose, as well as others less well known. The archaeologists record everything possible, publish the reports (usually years later) and leave it at that - and of course archaeology and preservation methods keep advancing, so who knows what they'll be doing - better - in the future? Yes, the Gribshunden was a royal vessel, but the Okänt Skepp appears to be a merchant ship. Steven -
That's right. That's what they mean by 'spiling' - planks are very far from being simple long thin rectangles. They curve, they get narrower and wider, to follow the complex 3D curves of the hull. Then there are 'stealers' (short added planks where the hull widens near the ends) and 'drop planks' where three planks become two as the hull narrows. Never have a plank come to a sharp point at the end. It would be impossible to nail it to the frame. Have a look at the planking tutorials to see how this is done. I've planked 4 models so far and I still regard myself as a newbie on planking. But practice improves your technique, and don't be afraid to pull planks off and start again if you're not satisfied. It's out of your comfort zone to start with, but bit by bit you'll get on top of it. And In the real world they didn't have a single plank run the whole length of the ship - there'd be several that made up a single 'run' of planking, joined over the top of the frames behind them (each plank overlapping half the frame) and the joins were 'offset' from one run of planks to the next so all the joins didn't line up causing weakness in the planking. Steven
-
Welcome, Nick! I'm awestruck by your model. Colours, like so many other details, are always 'educated guesswork' based on what (often sparse) information is available. Do the best you can, and you can be sure no-one will be in a position to tell you you're wrong. I'm in Oz but I was privileged to be in the UK in 1972 (or 73?) when Sunderland won the FA Cup from the 2nd Division. Very cool. Steven
-
Greetings from a clueless Patrick O'Brian fan
Louie da fly replied to Galkar's topic in New member Introductions
Greetings from another Aubrey/Maturin fan. I have the whole series and currently re-reading for the umpteenth time. I love his humour and the relationship between Stephen and Jack, and of course the maritime stuff. Have fun with the dory, and make sure you start a build log. It's a great way to get help and advice, and if there's anything you don't understand or want help with, don't be afraid to ask. You WILL make mistakes - we all do - but that's part of the learning process. As you get more experience, your mistakes just get more interesting 😁 Steven -
Welcome aboard. Do you have any ideas about what kind of ship you want to build? I'd strongly suggest you start a build log when you begin. It's the best way to get help and advice as you progress with your build. The members here are unfailingly helpful and friendly. And remember there are no stupid questions - feel free to ask anything you want to know. Steven
-
By the way, a skilled painter can 'shade' yellow paint to look quite convincingly like gold.
-
I am of the opinion that 'gold' would usually have been faked with yellow paint. And though there was a lot of 'gold' decoration on important naval ships in the 17th century I've never heard of it being used in the 16th - they seem to have used bright colours toward the end of the century but I think your kit manufacturer has had a rush of blood to the brain, and that they just made it up because they thought it would look 'cool'. I think you'd be far more correct to forget the gold. If you want to, use yellow paint, but as far as I'm aware gold has no historical justification for a model from this time. Steven
-
Ferrus, if you mean sources for mast heights, the ones I ended up using (leaving out the ones that were too far outside the average) were as follows: from Barbari's panorama of Venice c. 1500 From a Munich guide to navigation (I think) 1509 1530-1534 Carrack from Leaves from the Genealogy of the Royal Houses of Spain and Portugal - the Portuguese Genealogy From an illustration for which I only have the notation "Dubrovnki 1513" Detail from one of Carpaccio's St Ursula Legend paintings c. 1490. From an early 16th century map of Hispaniola. The "Ship of the Church, Polish 15th century. There were, as I mentioned, others which were either too much bigger or smaller than the average (from 0.67 up to 1.07) and though they may well be valid, I decided to stay within the mid-range - about 0.80 to 0.87 - as being more reliable. Steven

-
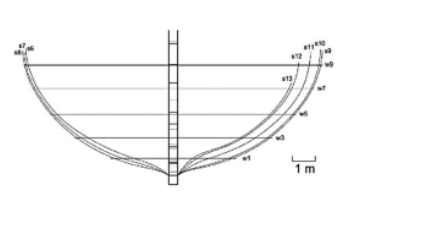
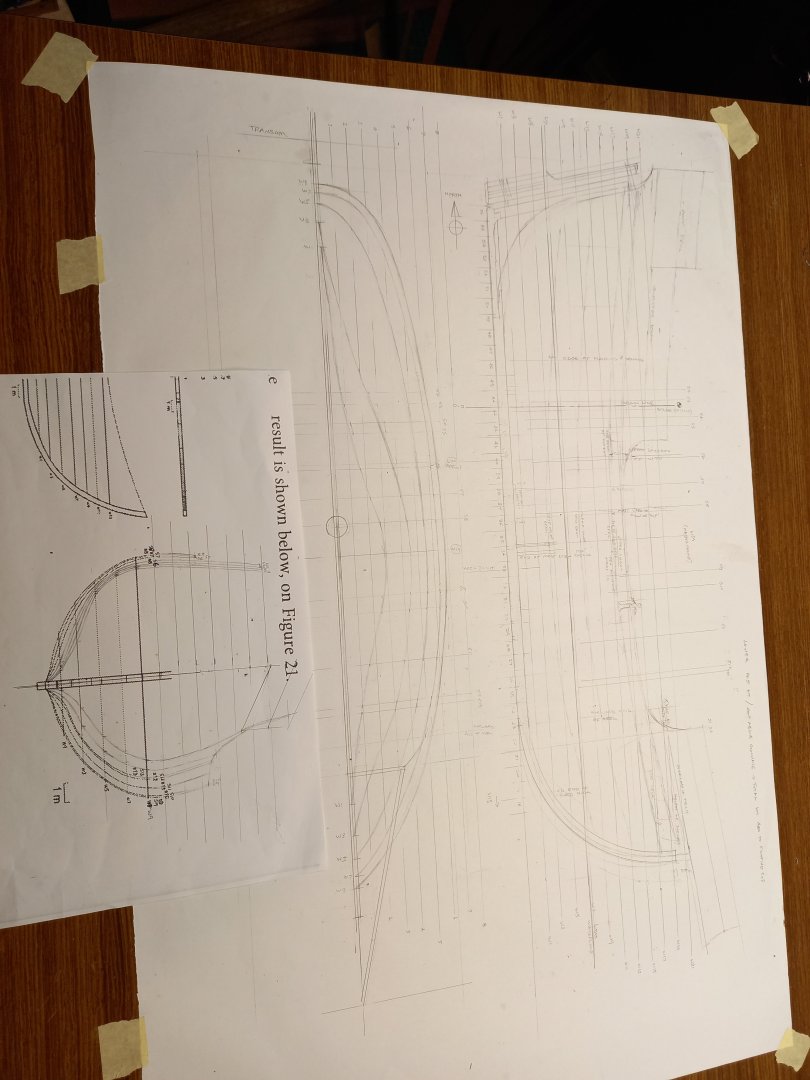
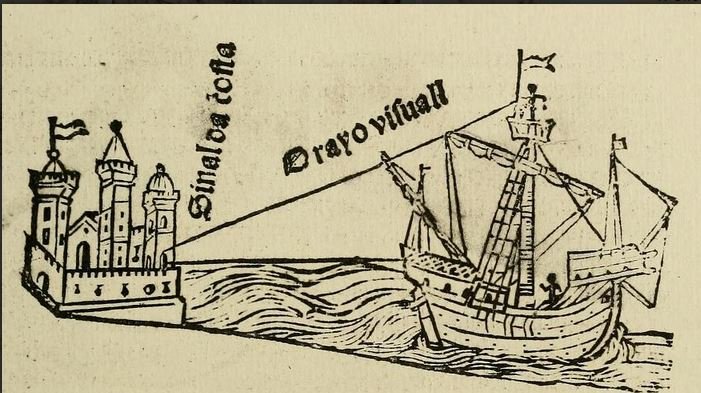
Dick, yes indeed. It seems to be very common in contemporary representations. I see it not only in Carpaccio but quite a few other renditions. Around the turn of the 16th century one starts to see a double arch instead of the single one (e.g. Battle of Zonchio), but I don't like that as much. I've been doing some more 'pictorial research' for the height of the mainmast (which was not found in the wreck). Taking into account 15 contemporary images, allowing for variations between individual ships, and even more for artistic license, and discarding figures too far outside the average, the ratio of the height if the mast above the gunwale and the overall length (forward end of stempost to after end of aftercastle) seems to be at about 0.85. With an overall length on this model of about 430mm, that works out to about 390 mm. Then if I add the distance between the gunwale and the upper surface of the keel, we get another 80mm, so mast height up to the top of the crosstrees would be about 470mm. I'm having to do some work in working out frame positions. The archaeological reports use at least 4 systems of location - first there was a grid with 1 metre squares running over the whole site. Then they numbered all the frames that had survived. Plus they had a 'zero' point on one of the planks near the aft end of the wreck that distances were measured from. And the original investigation took cross-sections at various points along the keel. As none of these seem to be referenced very well to each other, I'm busily trying to reconcile them all to a common system. The numbered frames are about 500mm apart (i.e. between the centre of one and the centre of the next adjacent), so I've got a fair idea of where each is in relation to the rest. Then the latest report has given a diagram (with a key showing how big a metre is) showing the locations along the keel of the cross-sections and of the Master Frame, which is frame No. 59 (see diagrams in post #26). So taking Frame 59 as my starting point, and the locations along the keel of the cross-sections, I can (I hope) work out which frames each of the cross-sections is closest to. And then try to work out the lines and fill in the gaps. Unfortunately, the bow and stern have not survived (see picture in my original post), so their shapes are largely a matter of educated guesswork. And the same applies to the upper works. I'm thinking very seriously about taking a page out of Woodrat's book and making a solid half-hull, and basing my frame shapes on that. I have a cunning plan to make this - we'll see how it works out. Note to admin - can I get this log moved from "Up to 1500 AD" to "1501-1750" please? If, as I believe, she was built in 1503, I've put it on the wrong section. Thanks. Steven
-
Remains of 500 year-old shipwreck: Dated 2019
Louie da fly replied to Allegheny's topic in Nautical/Naval History
I wonder when the archaeological reports will start to appear. It'd be nice to know more about this ship. Steven -
Keith, it's an Australian brand, though I'm sure there'd be equivalents elsewhere, and apparently used by automobile modellers. The one I have is SMS brand and is called "hyperchrome", and it's alcohol-based and is to be used with an airbrush, though I just used an ordinary watercolour paintbrush and it worked. The guy who put me onto it said to put down an undercoat of black matt, then another coat of black gloss before applying the chrome (which needs several coats). I didn't ask whether the undercoat was supposed to be acrylic or enamel, so I experimented - enamel is the way to go. Now you know as much about it as I do . Steven
- 110 replies
-
- 3
-

-
- Paddlewheeler
- Ballarat
- (and 3 more)
-
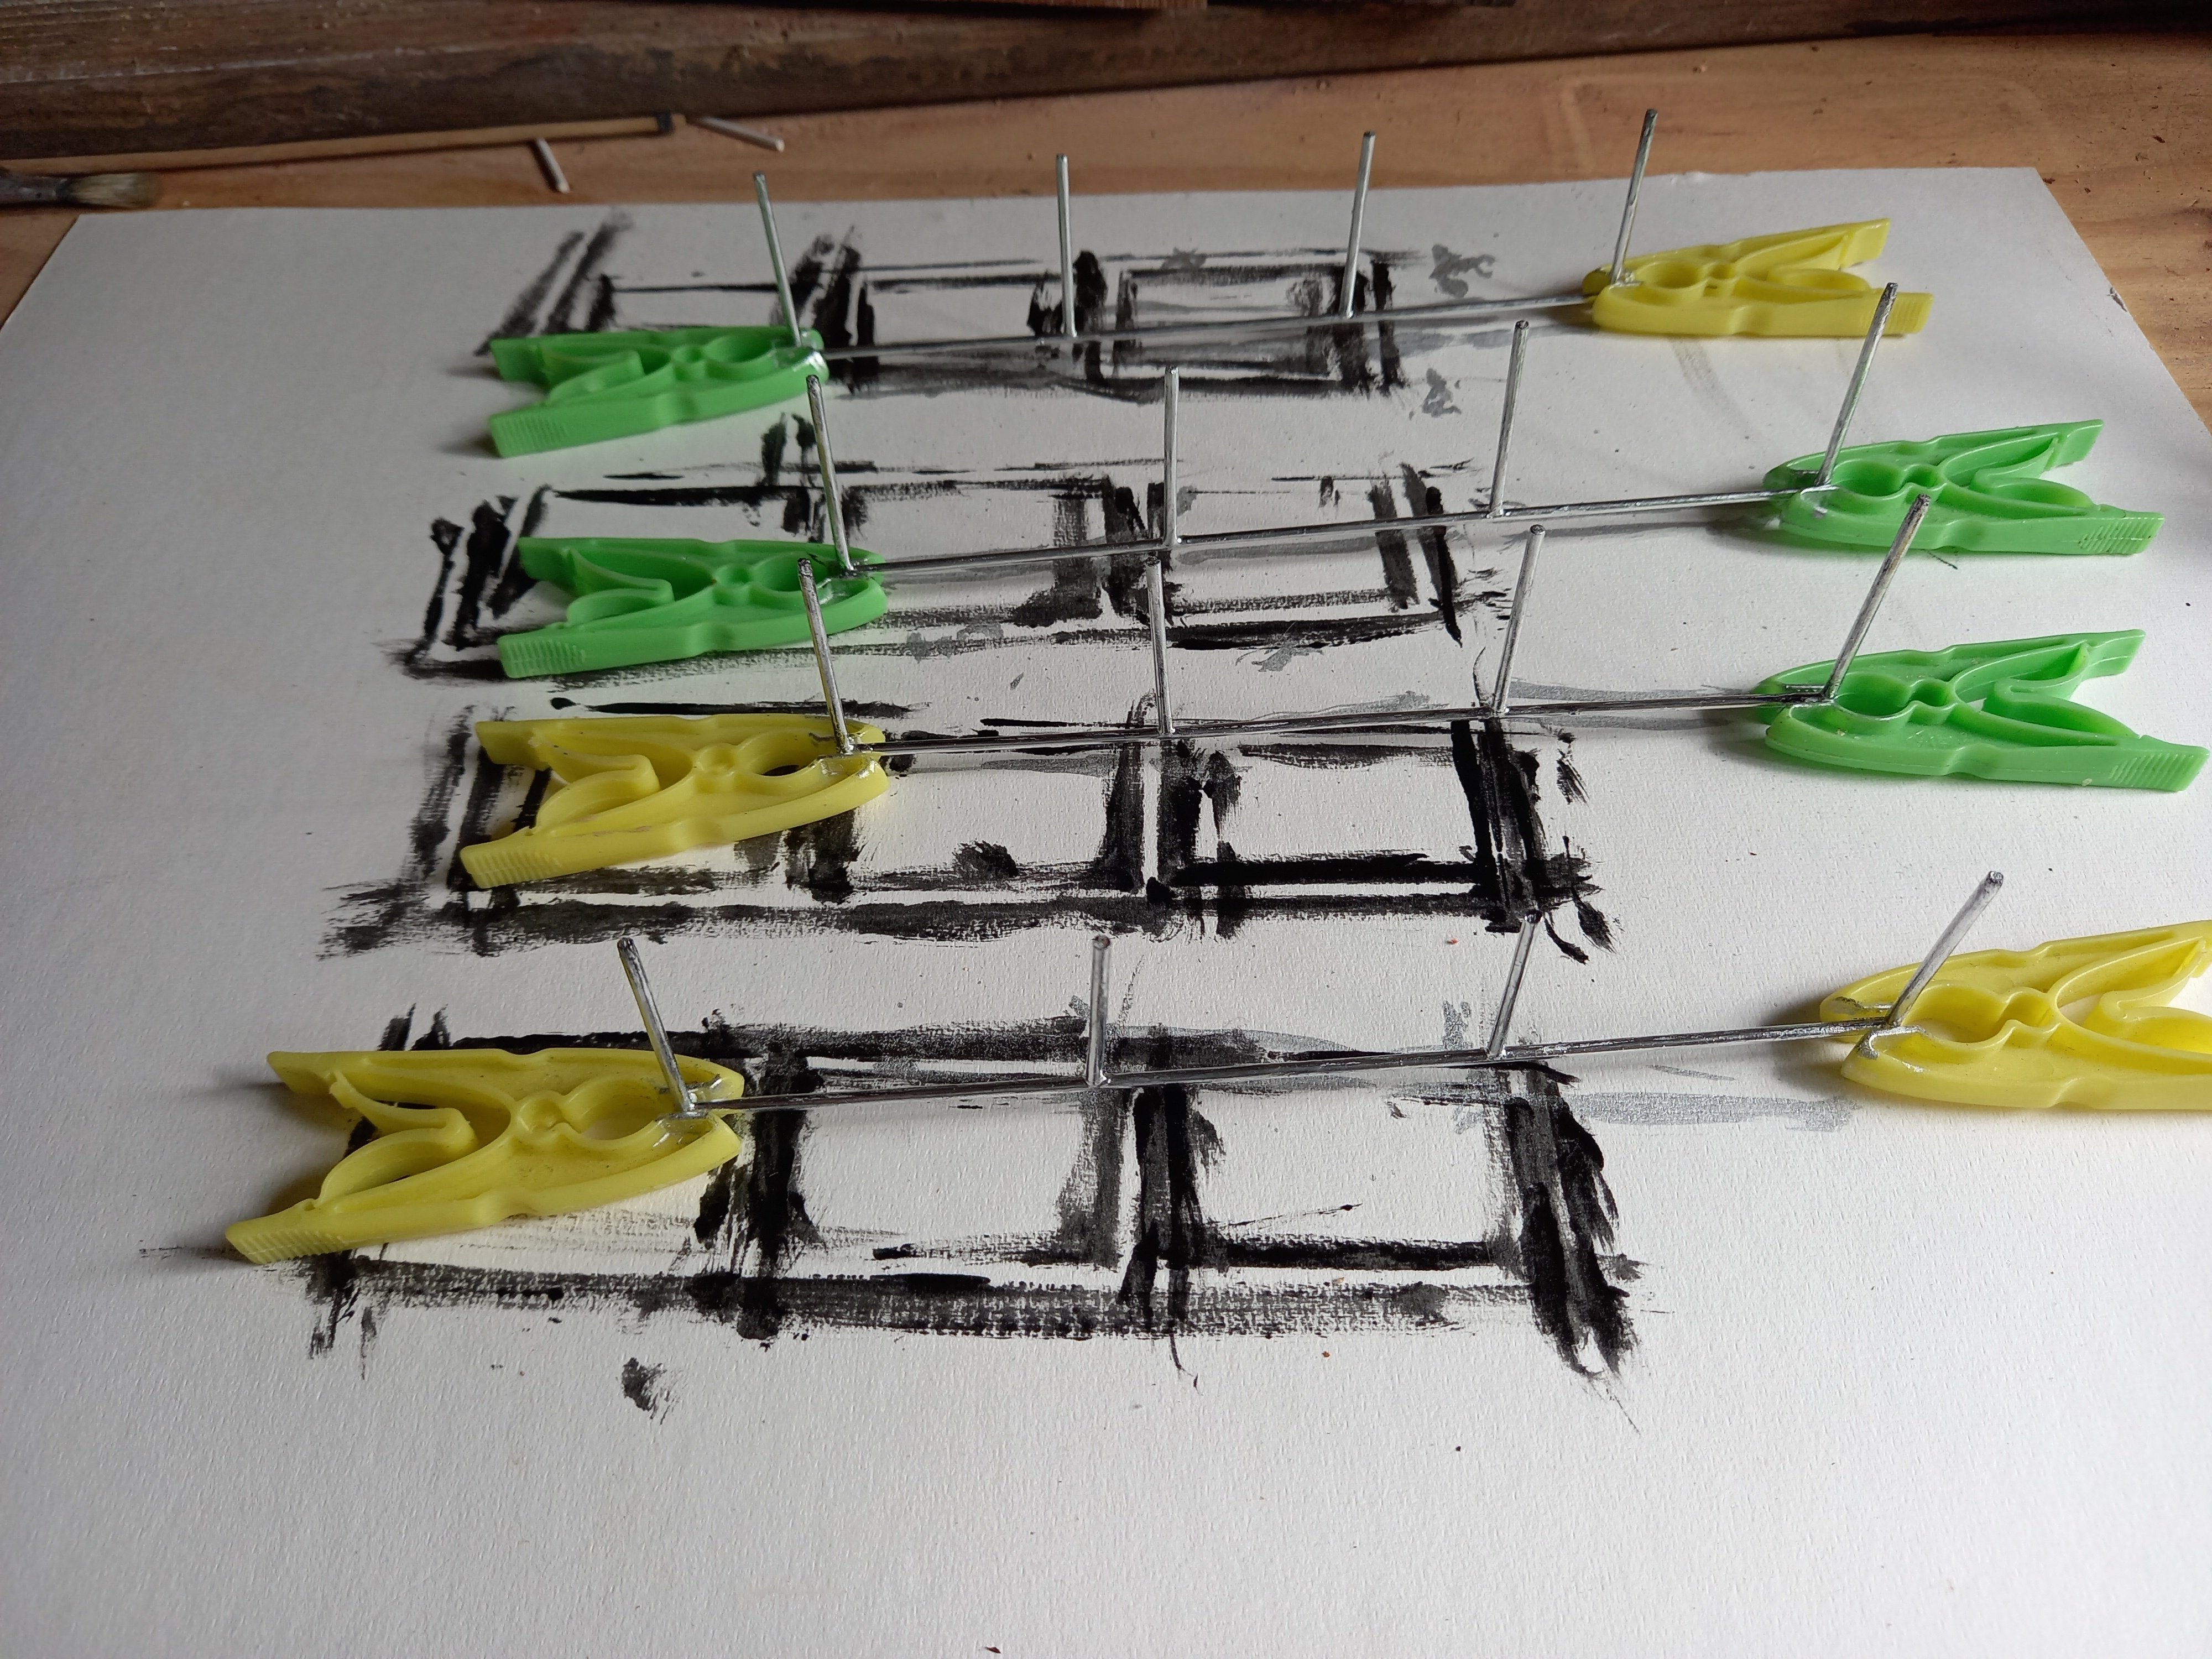
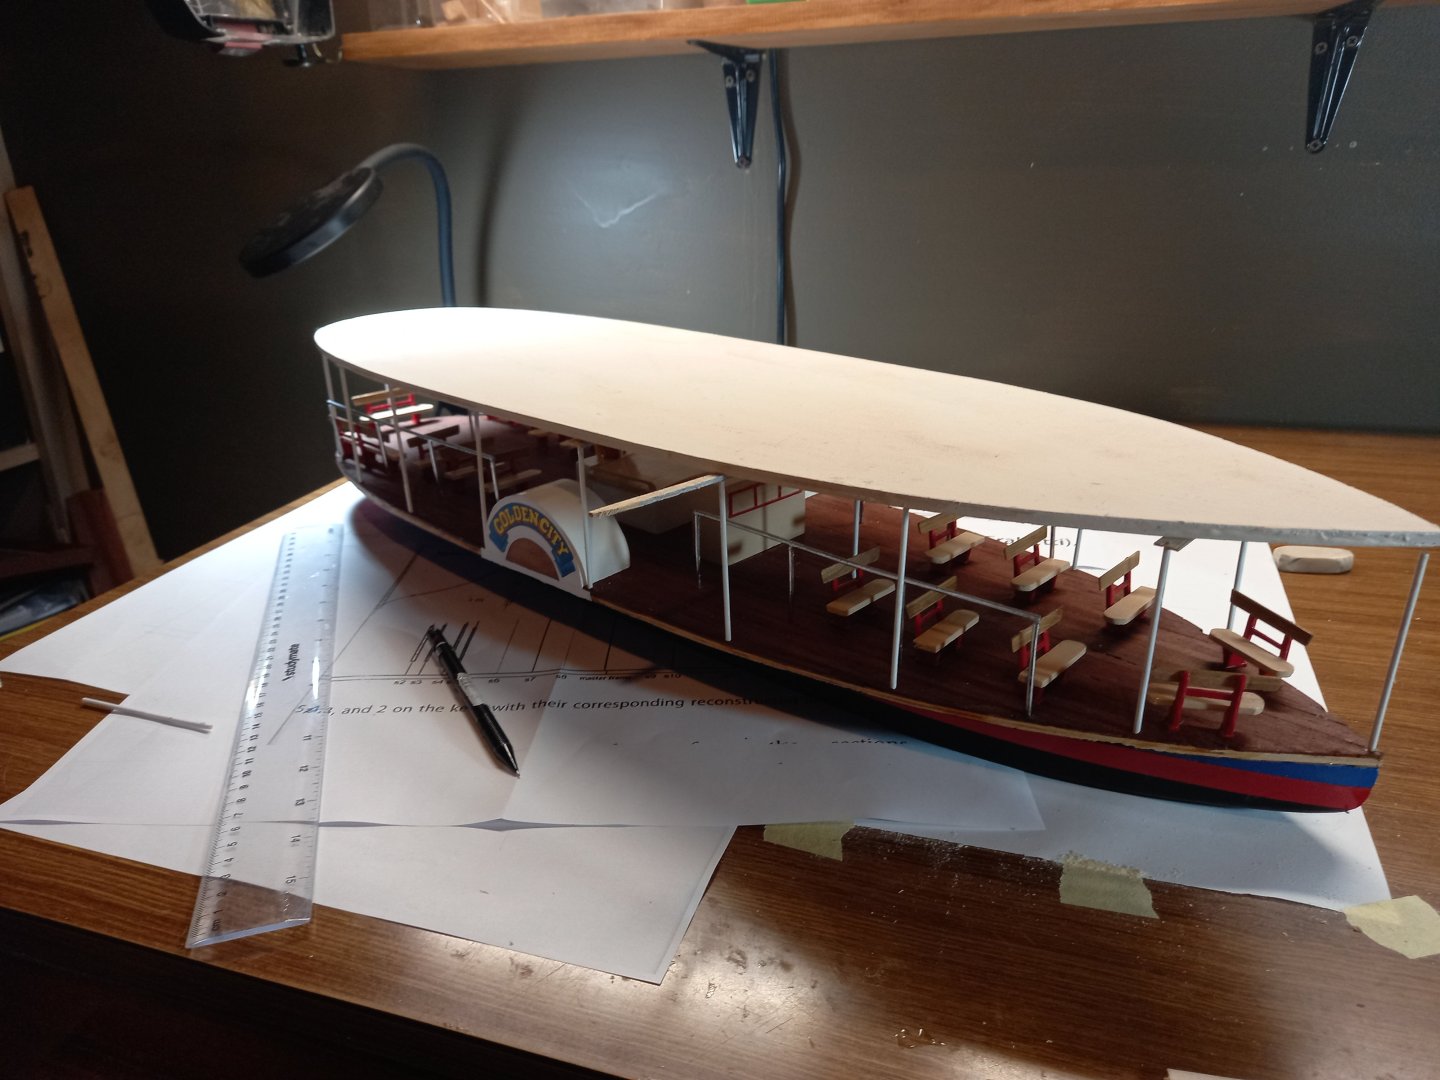
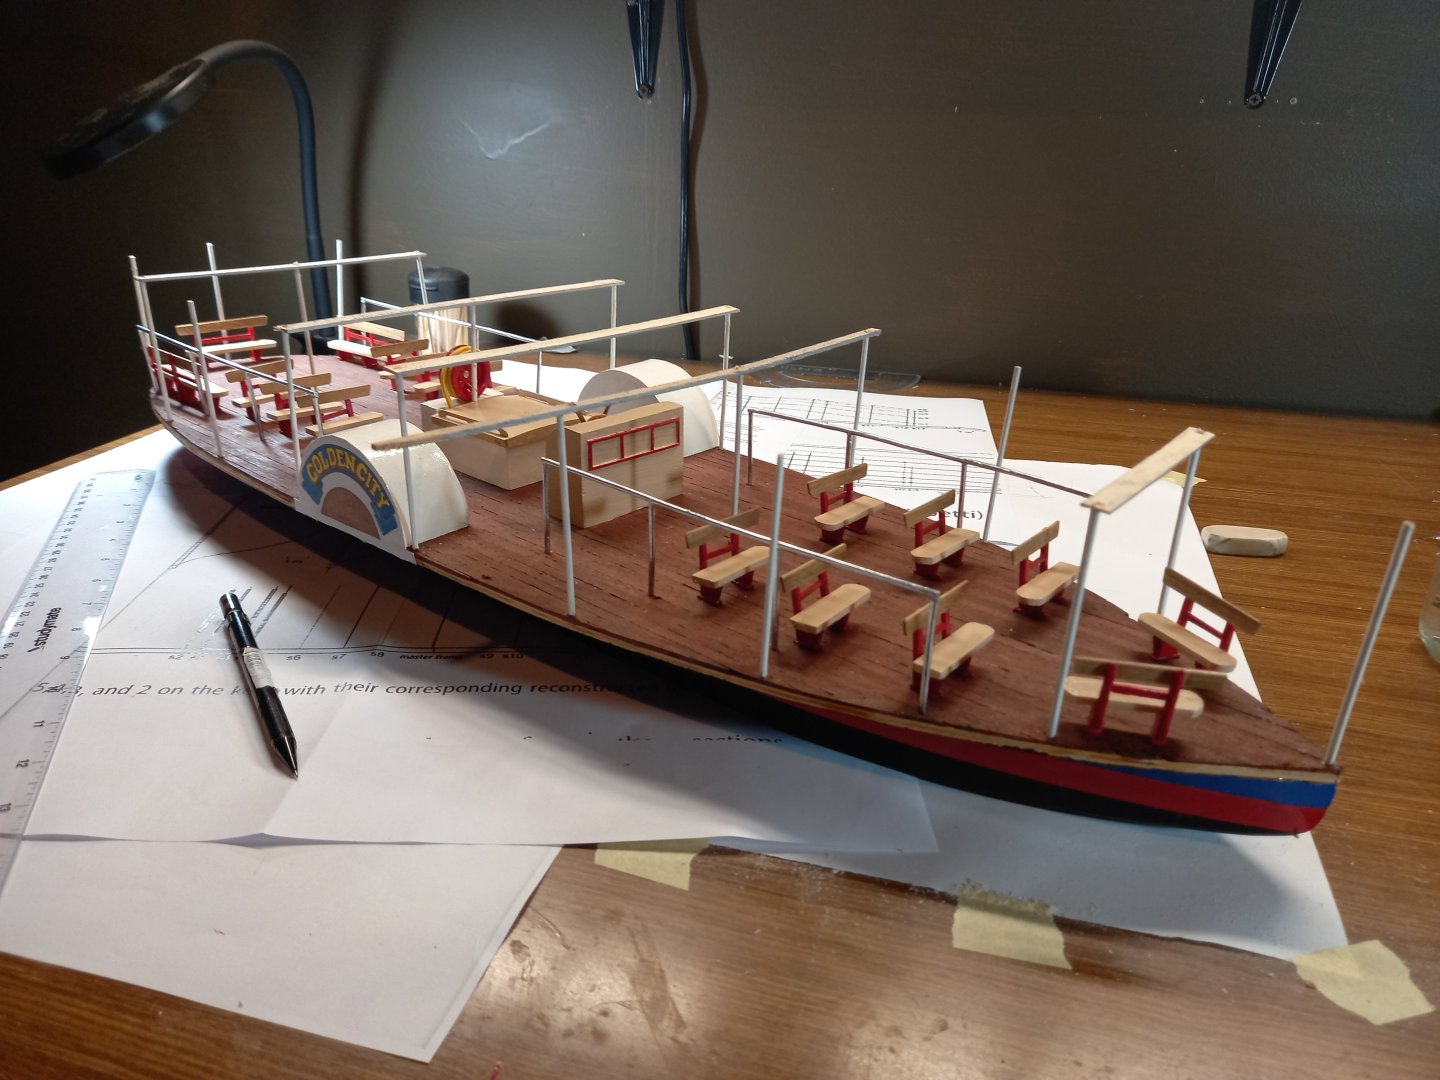
I've left this for awhile, but it's really time I got back to it. I got held up by not knowing how I could duplicate the chrome pipe of the rails that divide passengers from storage areas. Fortunately, a member of my local modelling club put me onto a paint that actually does the trick - not just like yer usual 'silver paint' look, but actual chrome. And this was on bamboo like you get in kitchen skewers, so it's quite an achievement. And I've put in the uprights that hold up the awning, and solved (I hope) the problem of the keeping the awning piece horizontal throughout, avoiding it sliding down the uprights getting all askew. I just glued the uprights, into holes in crosspieces, so the top of each upright (they're all the same length) is flush with the top of the crosspiece. Simple solution, really, and it'll be invisible when the model is complete. Still in progress. And here it is with the awning dry fitted. Steven

- 110 replies
-
- 12
-
-
- Paddlewheeler
- Ballarat
- (and 3 more)
-
Remains of 500 year-old shipwreck: Dated 2019
Louie da fly replied to Allegheny's topic in Nautical/Naval History
Rik, that first link seems to be basically the same article as in the original post. I do like the fact that there's a video. And the ship's boat is quite a find. That and some of the deck furniture (for example the pump) give some idea of the size of the vessel itself. It's now being referred to as Okänt Skepp, but that just means "unknown ship". A good enough name for me. Not much info available on-line about her even now. The Gribshunden, which I mentioned in my first post, has quite a bit more information available. Steven