-
Posts
679 -
Joined
Content Type
Profiles
Forums
Gallery
Events
Everything posted by David Lester
-
Thank you, thank you - you are all too kind. I feel like a real amateur compared to most of you, so it's really nice to read your remarks. Thanks again, David
- 91 replies
-
- Speedy
- Vanguard Models
-
(and 1 more)
Tagged with:
-
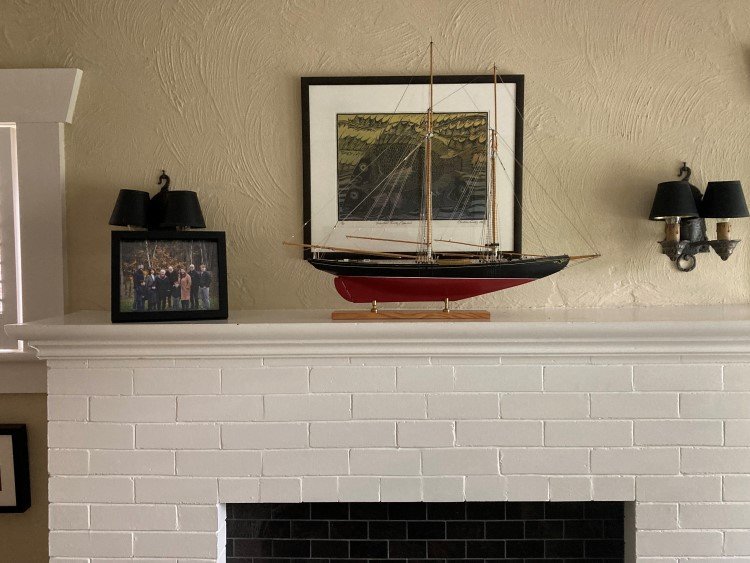
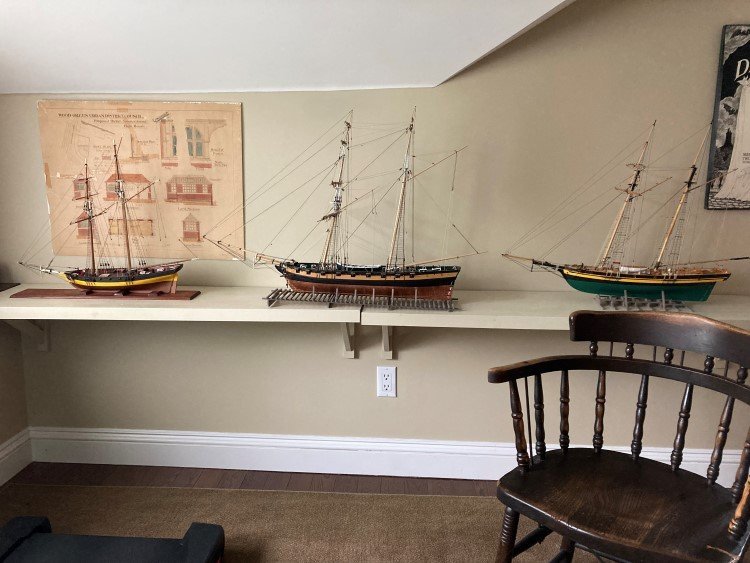
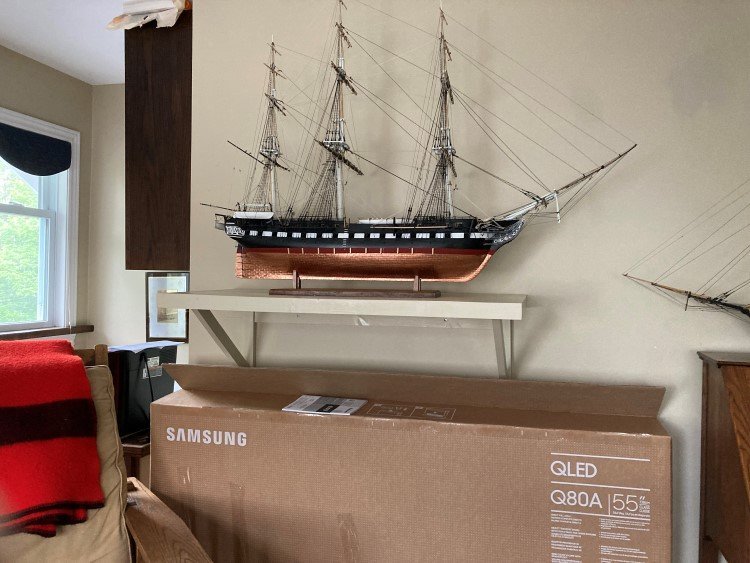
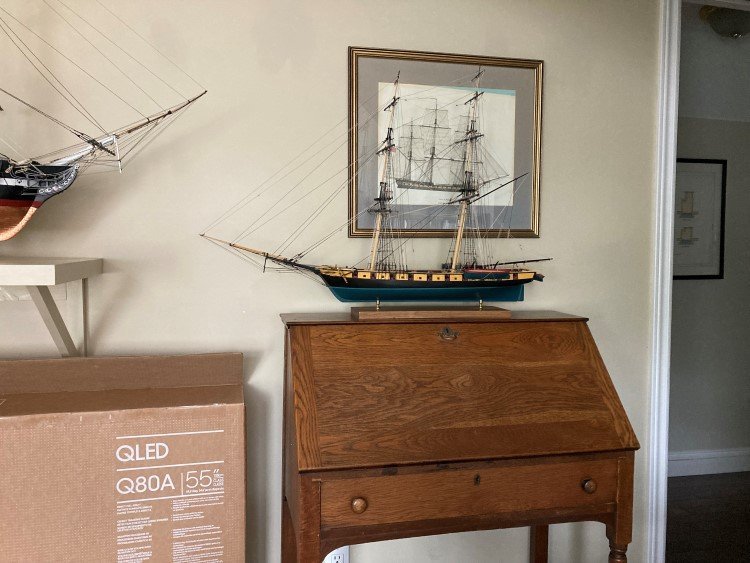
Thanks guys. A friend of mine called one of my models "a great achievement." I told him that finding places for them is the great achievement! Displaying them is no small problem. We have the Bluenose, and only the Bluenose out for public enjoyment in our living room. The rest are confined to shelves in my hibernaculum. I have been working away at farming them out. My grandson has my Rattlesnake, my daughter and son-in-law have a Bluenose, my son and daughter-in-law have my Charles Morgan and Speedy is going to my son-in-law's office. Also I donated my Armed Virginia Sloop to a silent auction fundraiser, but I still have a number of them to contend with. The Agamemnon has been weighing heavily on my mind. However I think I have a solution. Just this week, my daughter moved her law practice into a new office space and she has announced that she would like to have the Constitution there. It has always been her favourite of my collection and she says she now has a perfect place for it. It's similar in size to the Agamemnon, so it looks like a spot is about to open up for it. It's a never ending battle, but one I'm prepared to accept because I get so much enjoyment from building them. Thanks again, David
- 91 replies
-
- Speedy
- Vanguard Models
-
(and 1 more)
Tagged with:
-
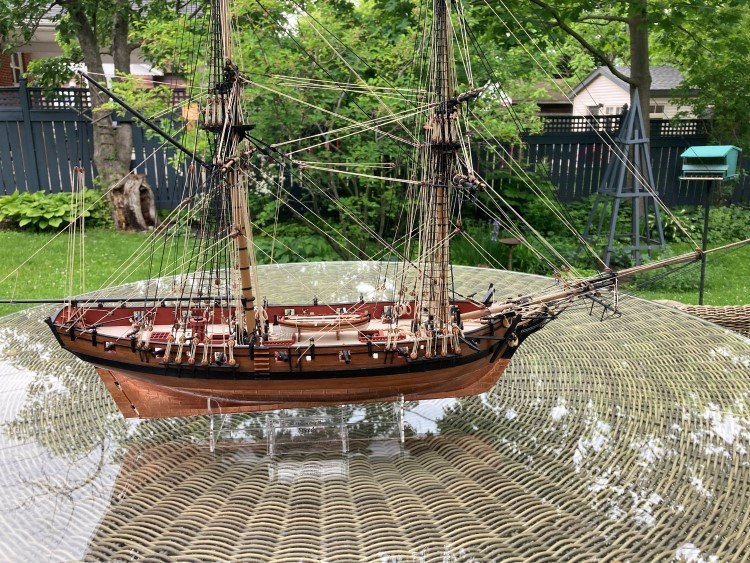
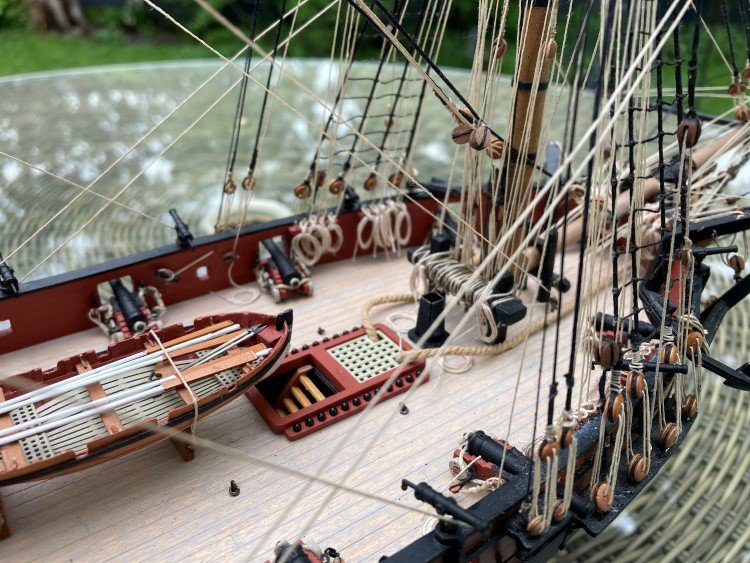
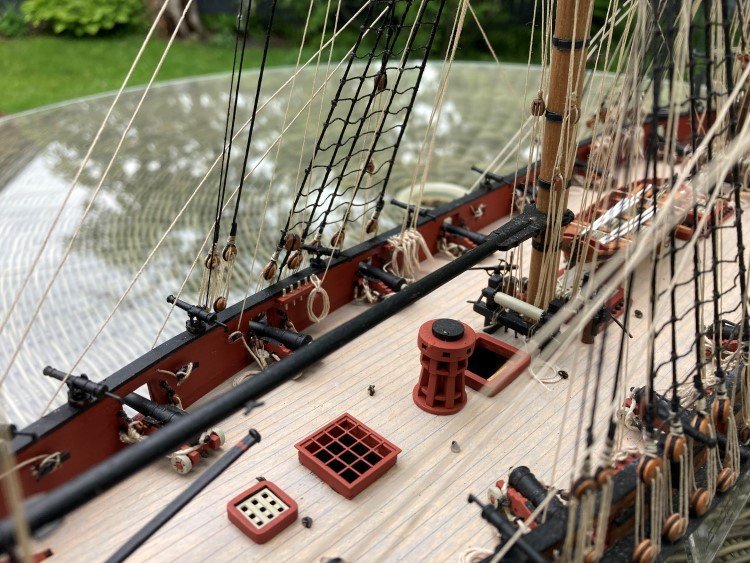
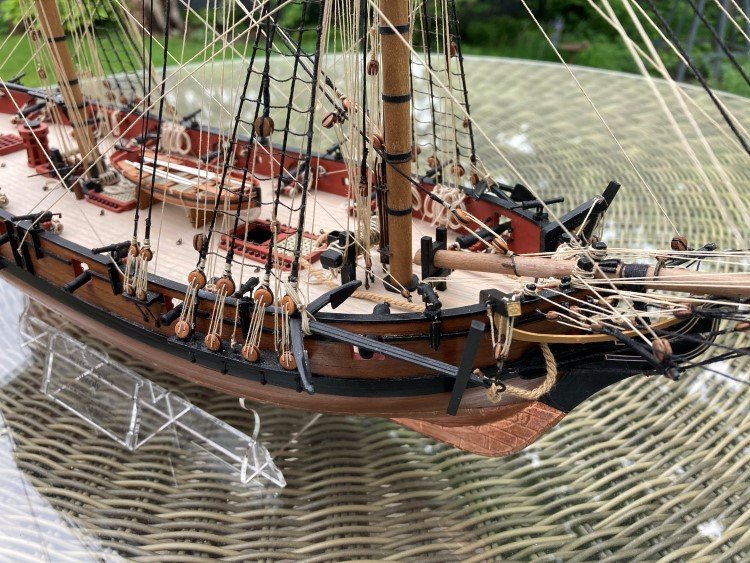
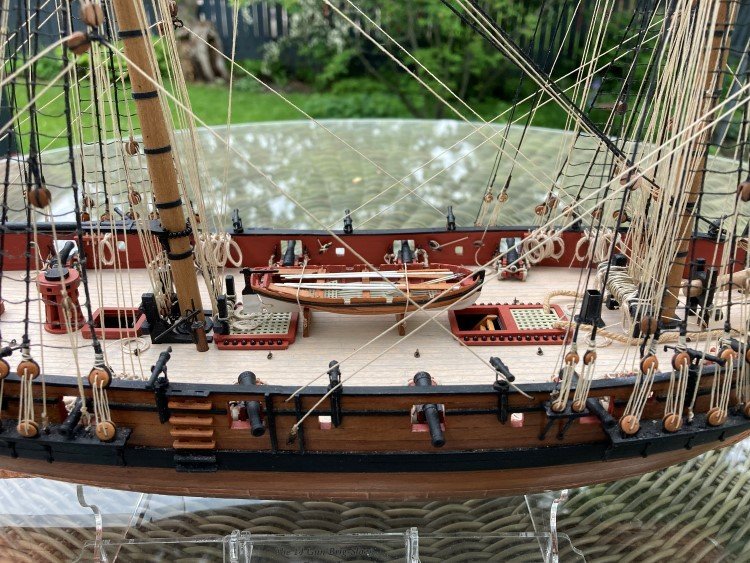
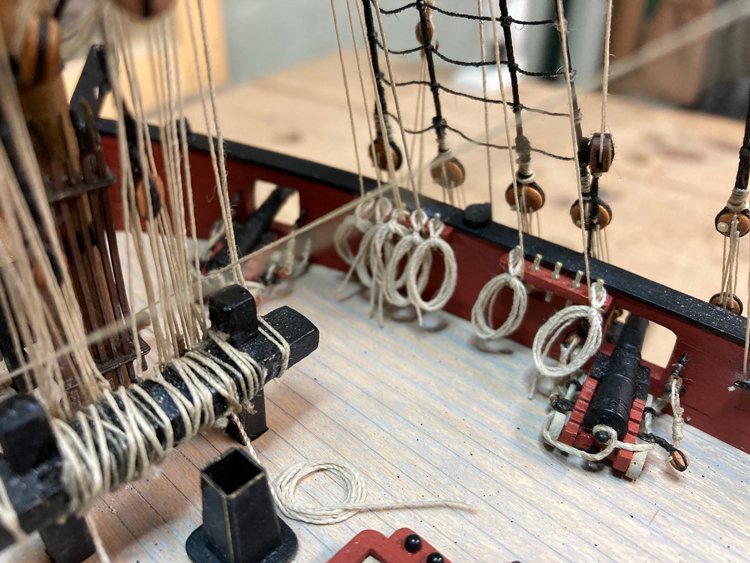
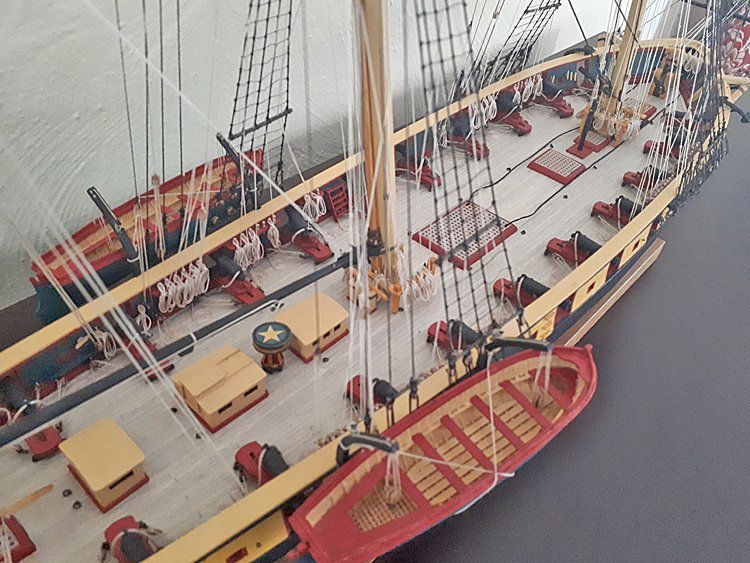
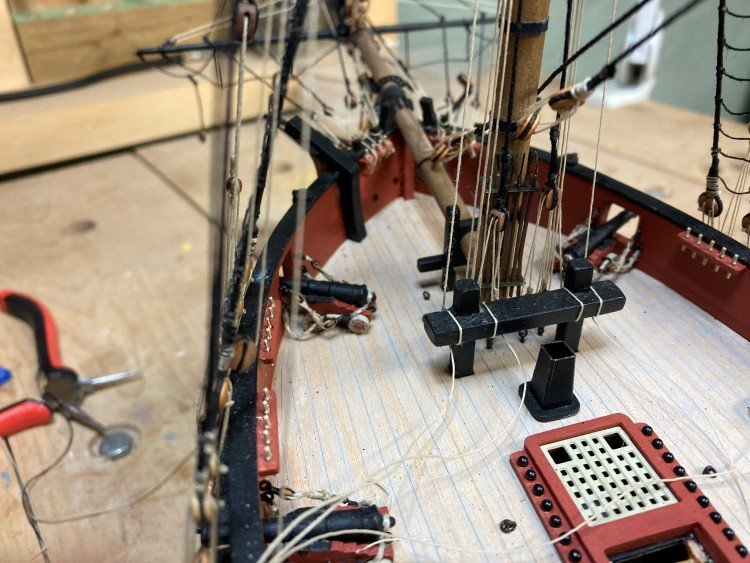
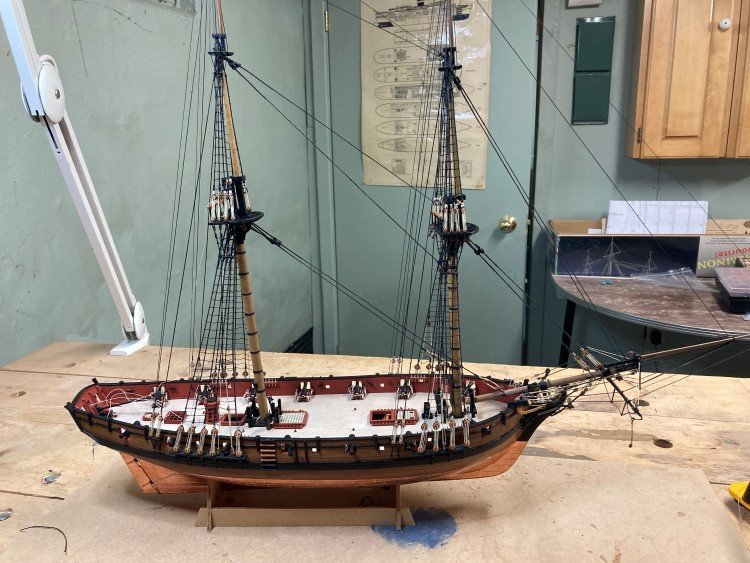
Good Morning All, Speedy is finished. The last of the braces wrapped up the rigging, then it was just a matter of adding the anchors, rope coils, boat and swivel guns. A bit of touch up with paint was the last thing to do. Now I just have to transport it safely to my son-in-law's office. This model was a pleasure from beginning to end. The only swearing was directed at myself and not at the kit, which is how I know it's a great kit. Thanks again for checking in, "likes" etc. Very much appreciated. David
- 91 replies
-
- Speedy
- Vanguard Models
-
(and 1 more)
Tagged with:
-
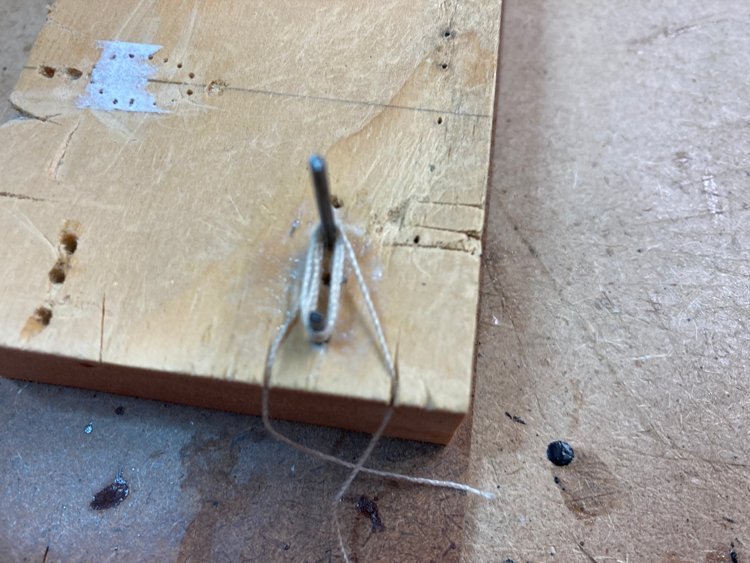
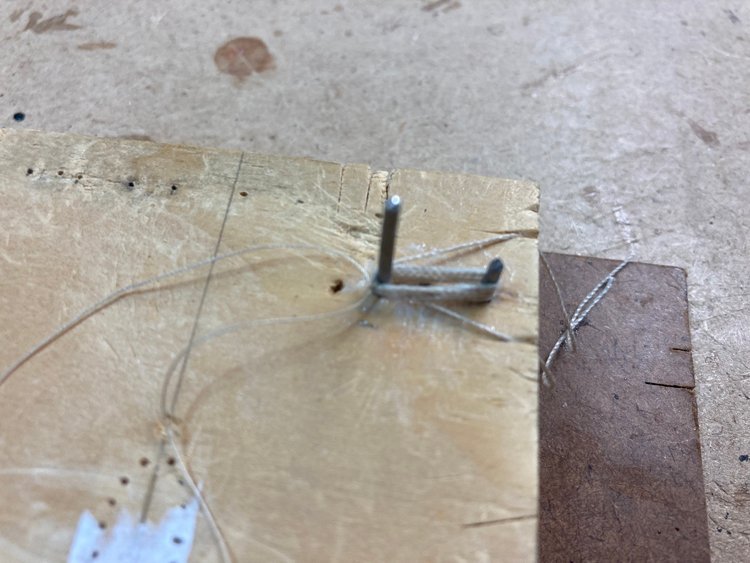
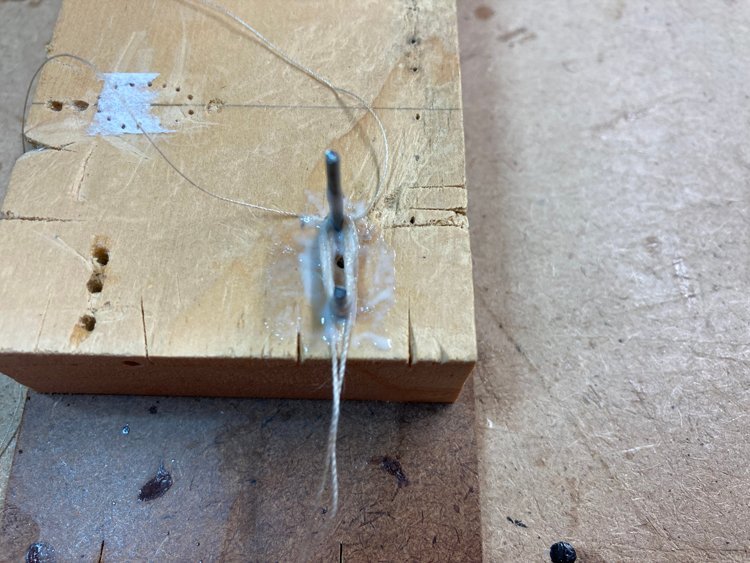
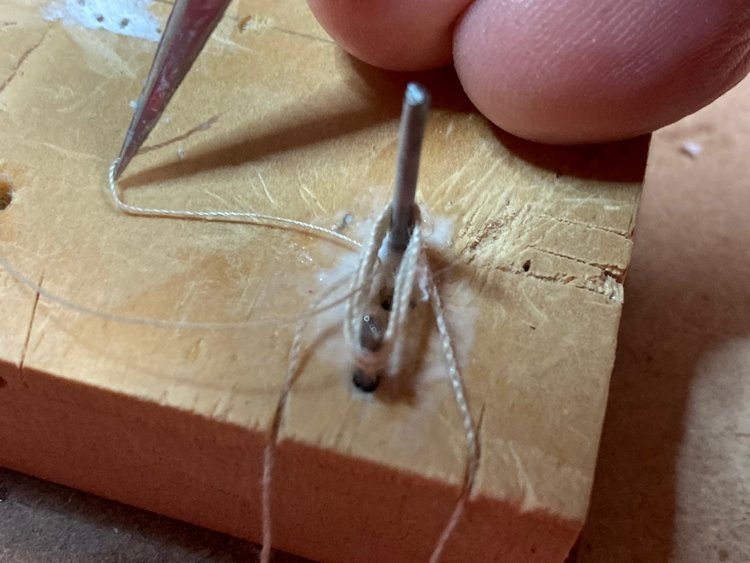
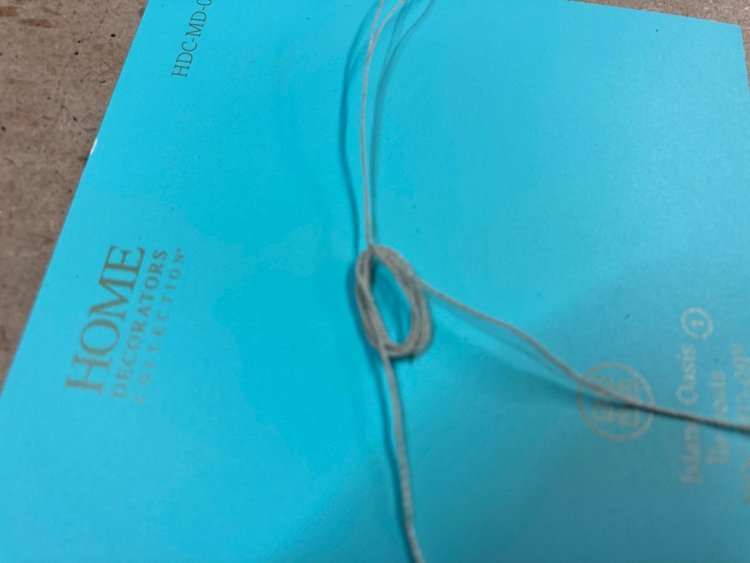
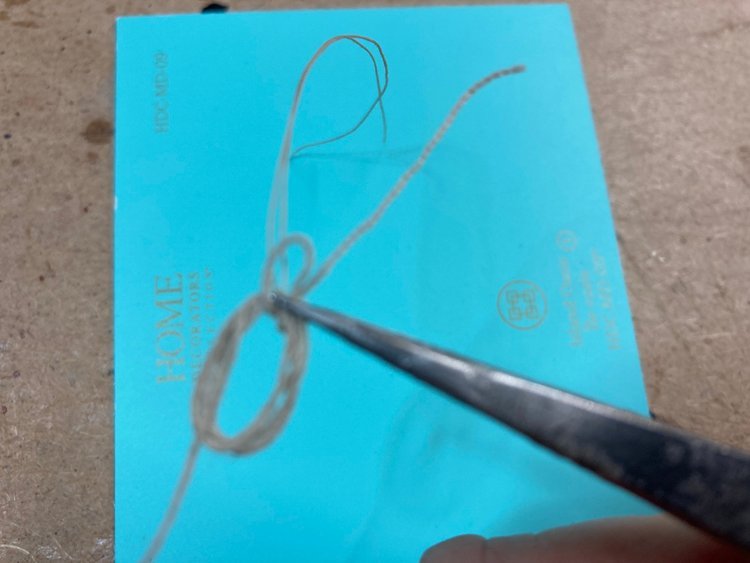
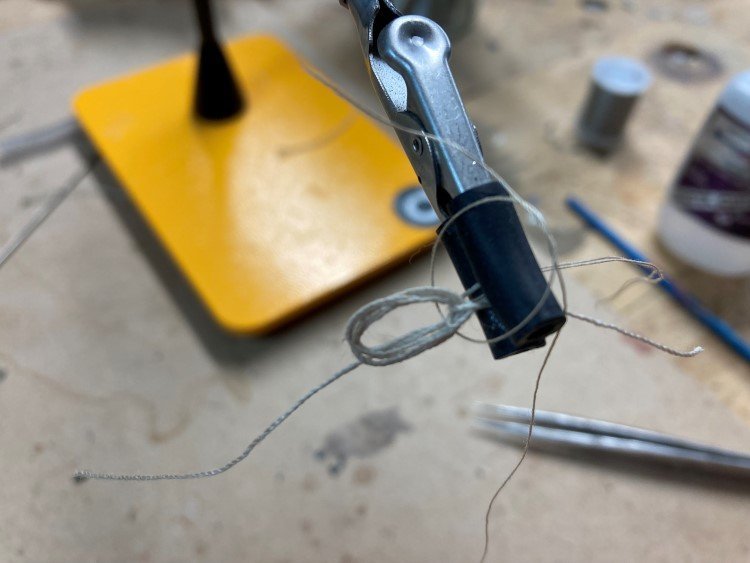
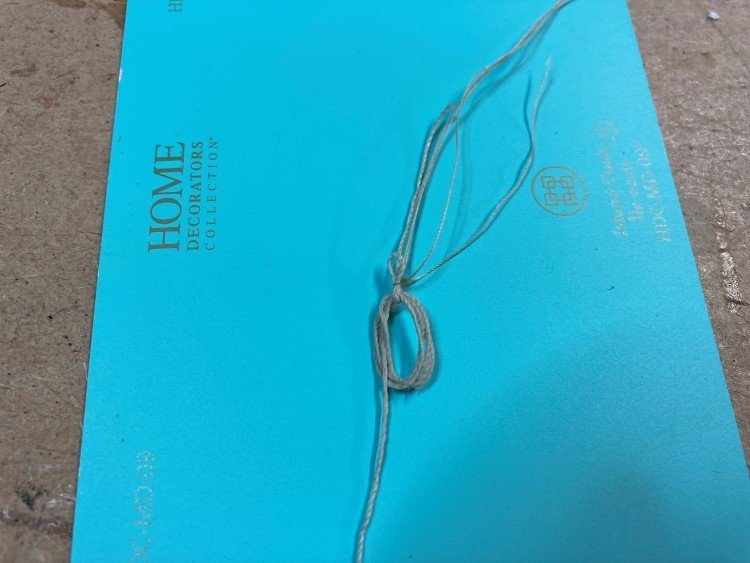
I have been working on rope coils. I have always hated doing rope coils. Not because they're fiddly and monotonous; I don't mind fiddly and I thrive on monotony. But because I am seldom happy with the result. There are many different methods shown either on the forum or on youtube which are essentially variations on the same approach and I can never make any of them work really well for me. My problem is always with the "small dab of glue" to hold the whole thing together. I can never get the loop at the top to hold unless I apply considerably more than a small dab, which always discolours the line, shows through to the front and ends up looking like a mess. Then when I use glue to attach the coil to the belaying pin it just looks like a solid row of glue running along the tops of the belaying pins. (I'm exaggerating slightly, but still I'm always disappointed with my efforts.) So here is my new variation and I think the results are better than what I have been able to do in the past. It isn't substantially different from what others do, but I solved the problem of holding the whole thing together - I started out the same as most of the other methods. I wrap the line around two nails four or five times, however I don't worry about making the loop at this point. Then I tied a knot at the top of the coil with a piece of fine thread. I slathered the whole thing with glue. I used matte finish podge, which I understand is similar to watered down white glue. When it was dry, I ended up with this - I pulled one of the long ends from the back to the front and made a loop and pulled the long end up to the top at the back, adjusting the loop to the approximate correct size. Then with the good side down, I held in the the clamp and tied another knot around the base of the loop with fine thread. This way, it's possible to add a small dab of ca clue to the knot at the back and have it hold well, without showing through to the front Then it was just a matter of trimming the threads and attaching it to the pin. I guess one could argue that there shouldn't be a knot tied around the base of the loop and the loop should not be cinched. Nevertheless I think it looks better than the heavily glued look which, despite my best efforts, I was usually ending up with previously. So for what it's worth, there's one more variation on rope coils. David
- 91 replies
-
- Speedy
- Vanguard Models
-
(and 1 more)
Tagged with:
-
Hi Dave, I can't answer your questions specifically, and personally, I don't worry about such things too much as I tend to paint my models. However, have you discovered Tom Lauria's series of youtube videos. They're all excellent, but he has one specifically on choosing and finishing wood so that it mimics the real thing, yet keeping the grain in scale for the model. He also feels that the finish is an important part of scale and that even a too thick coat of varnish can look over scale. One area where I have adapted his technique to a degree is on my decks. I like my decks to be gray, and as he shows, a good effect can be achieved by using watered down acrylic paint, rather than stain, to get the colour you want and then rubbing it with a paper towel. It gives a very nice look with a soft sheen. Even a lowly basswood deck can look ok with this technique. Here is my Niagara: That's black, white, a little brown and a little yellow mixed into a very watery mixture, then rubbed with a paper towel. I think it gives a fairly natural representation of a real deck. David Here's the link to Tom's video:
-
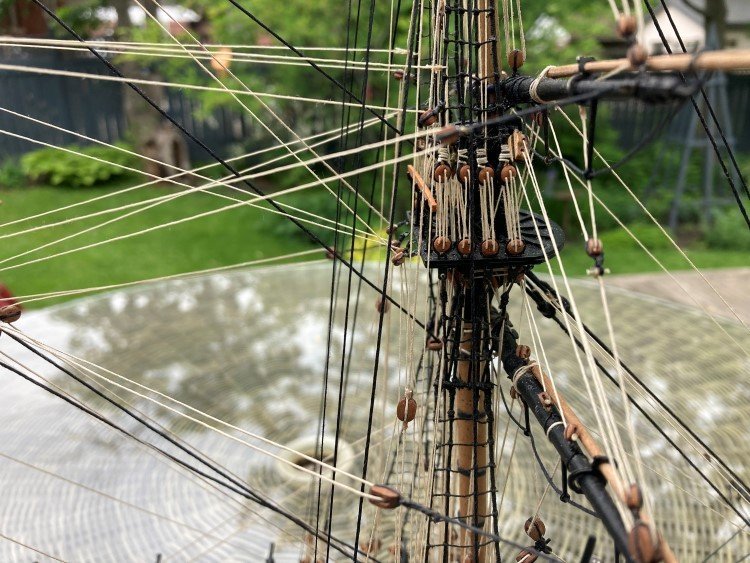
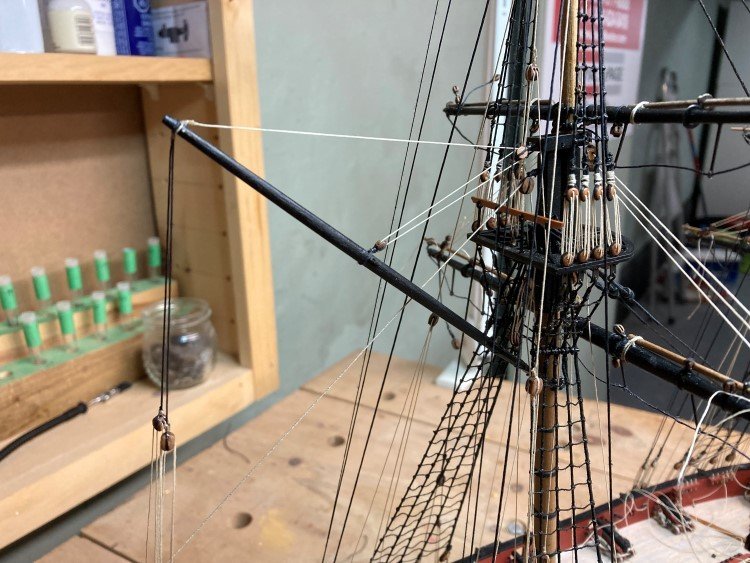
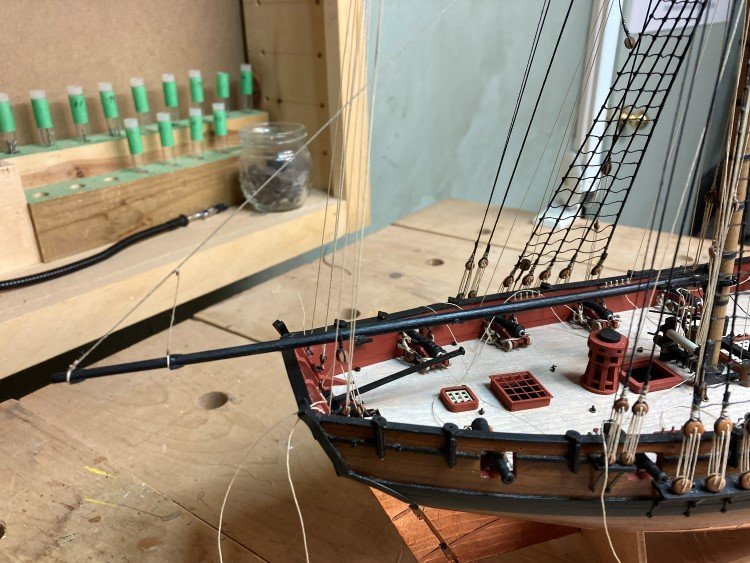
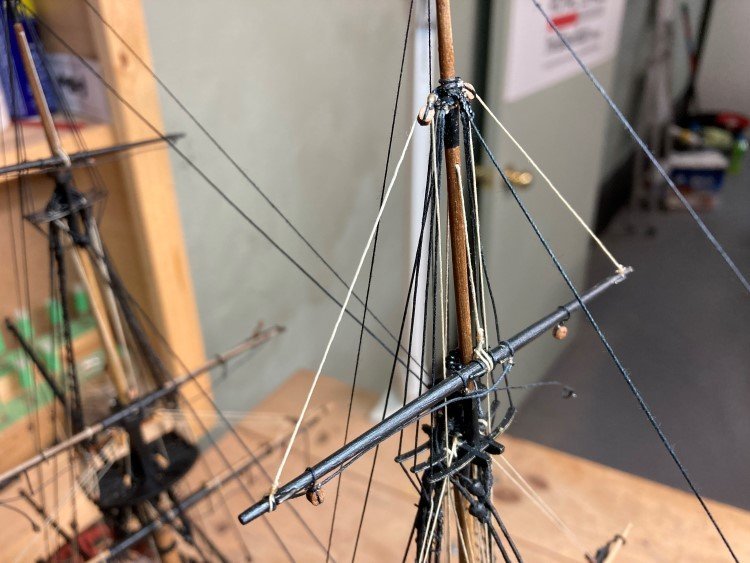
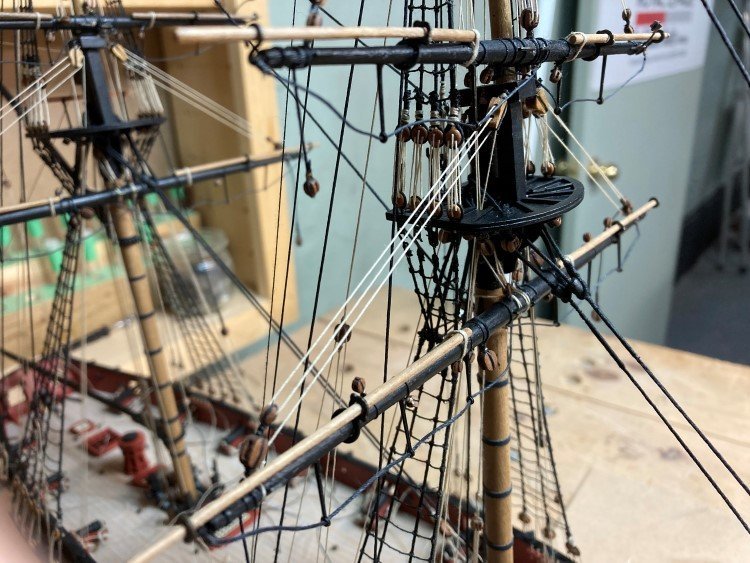
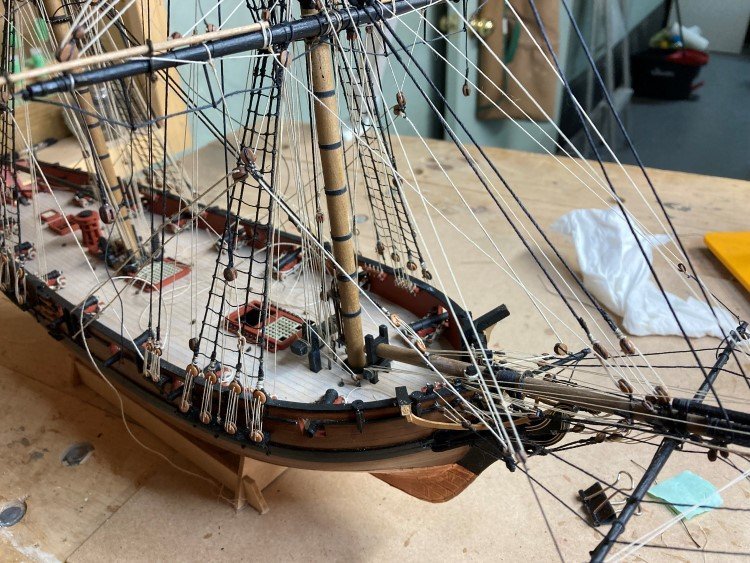
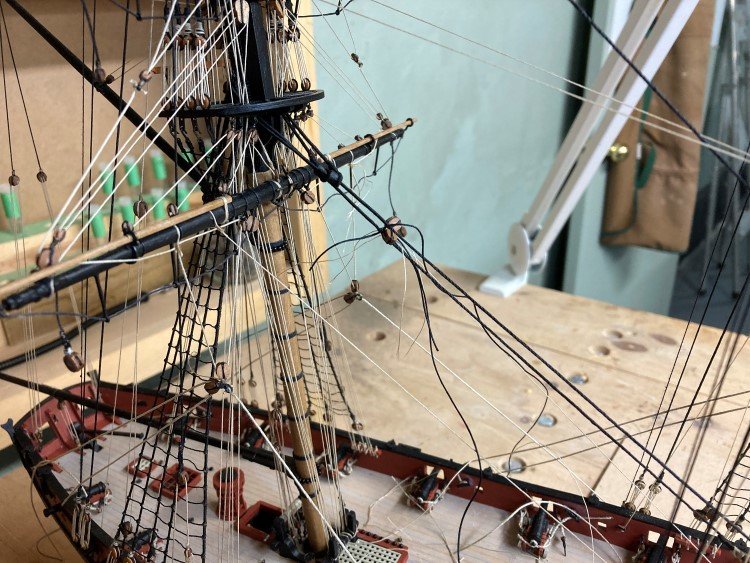
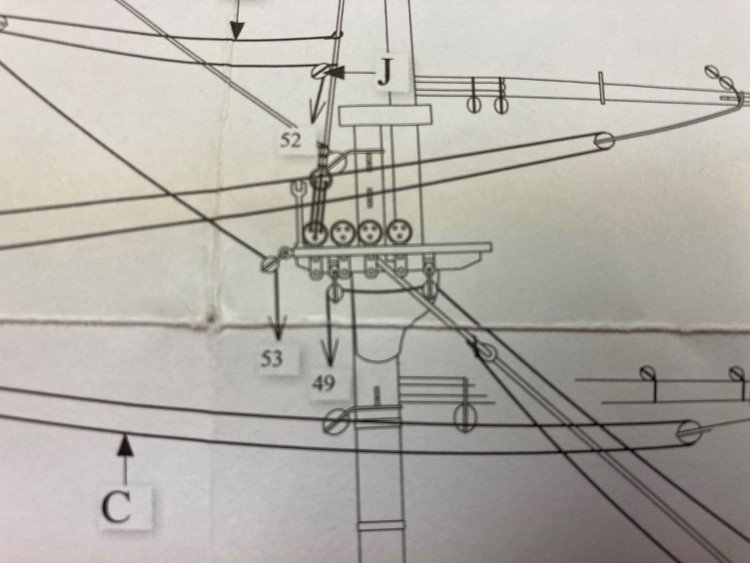
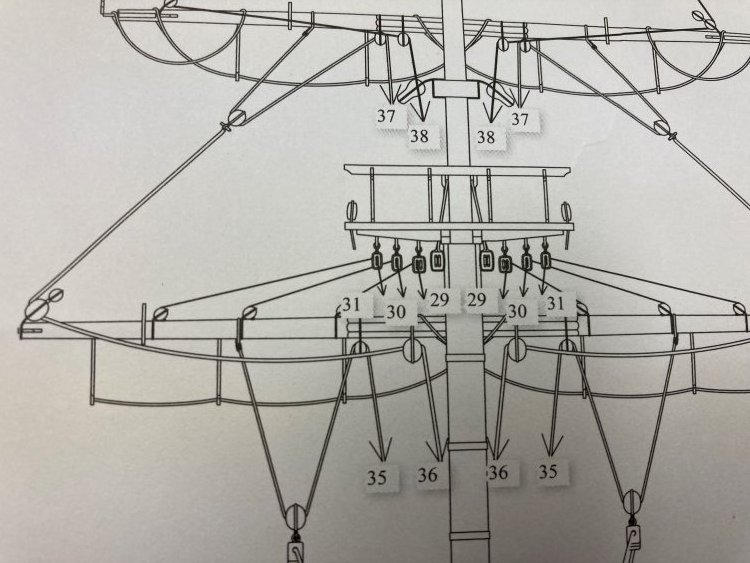
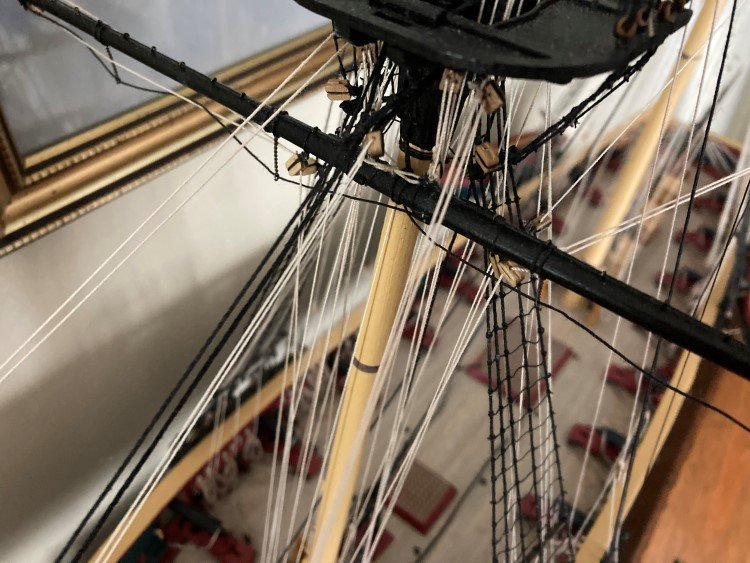
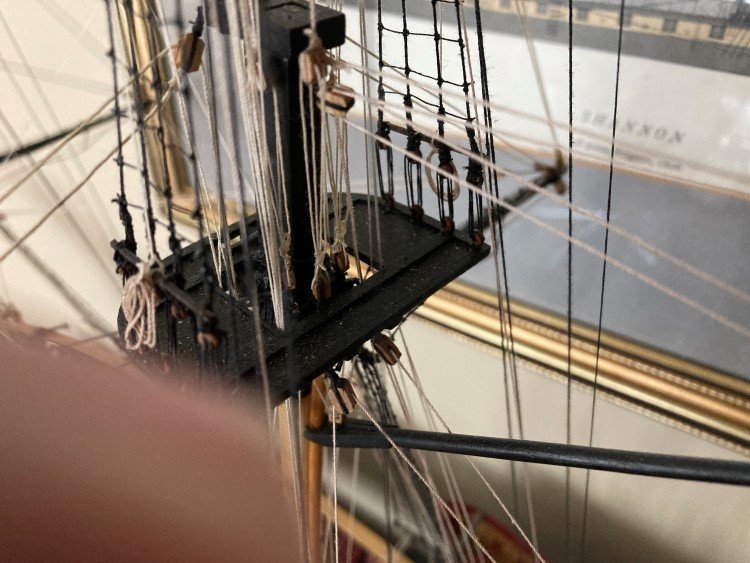
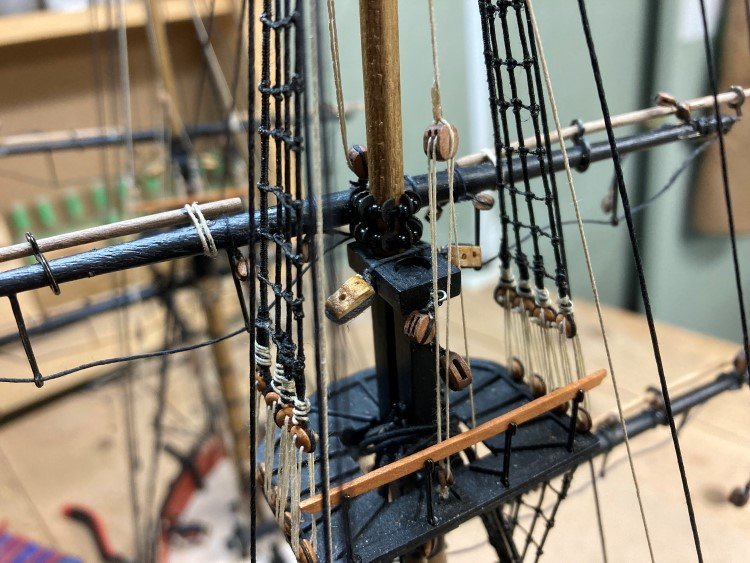
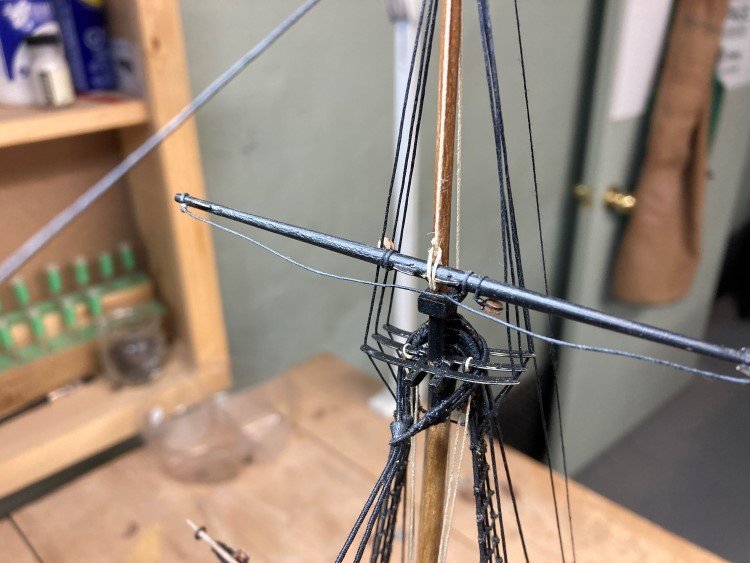
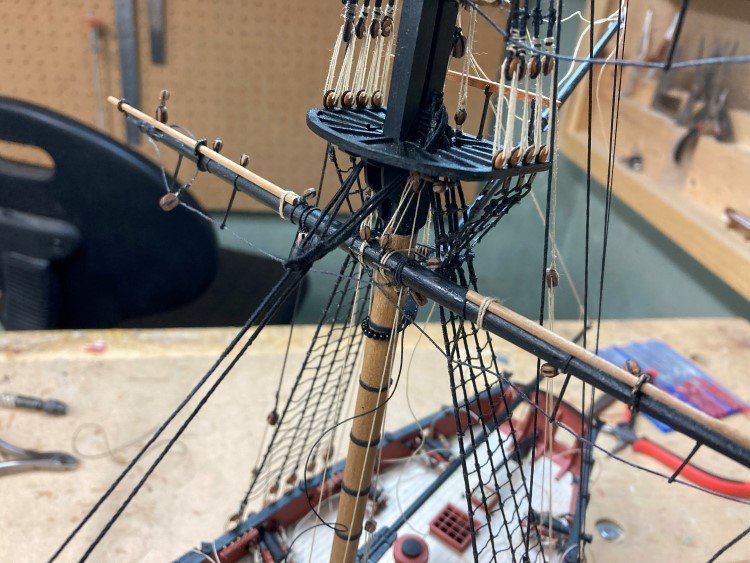
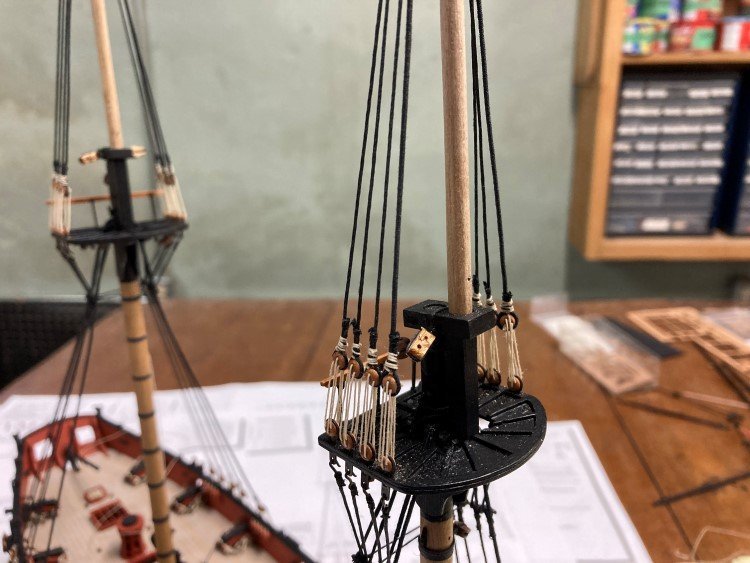
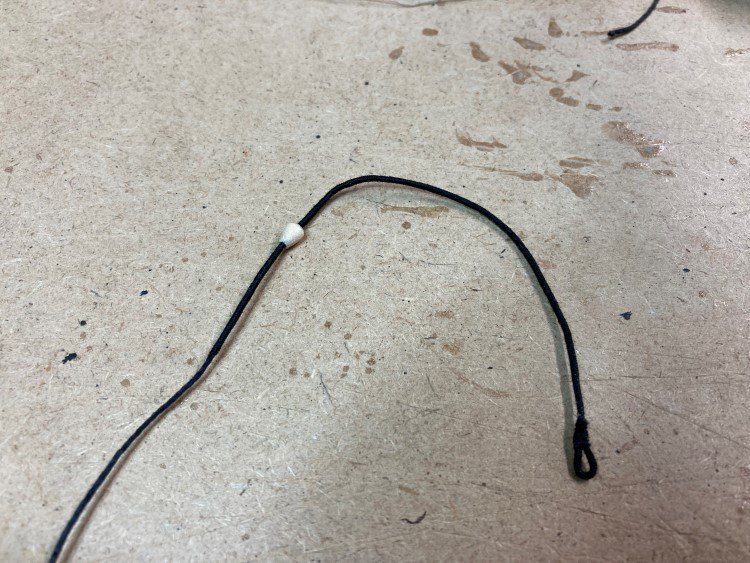
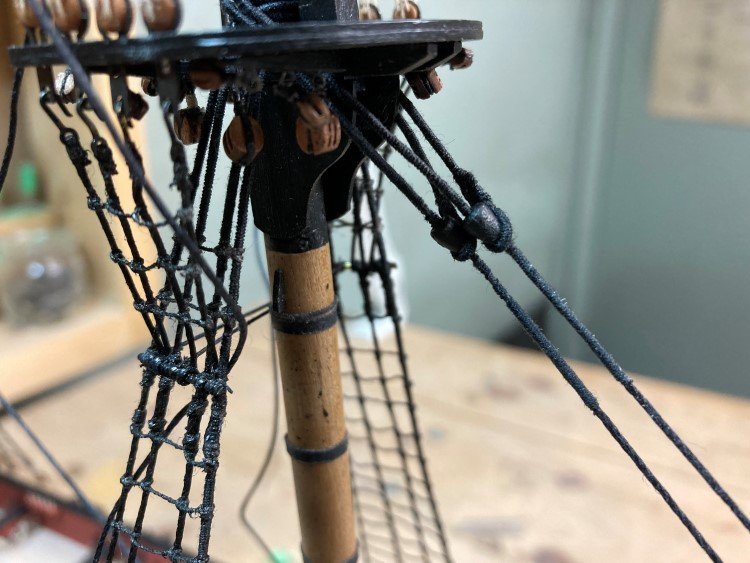
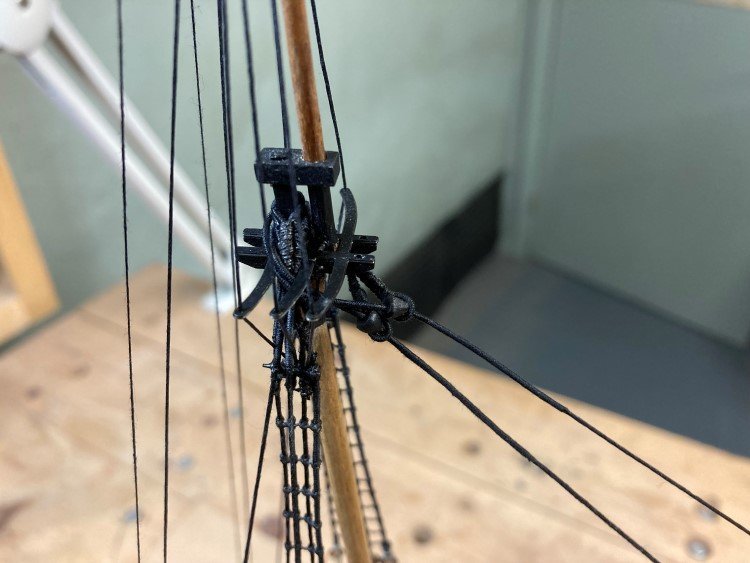
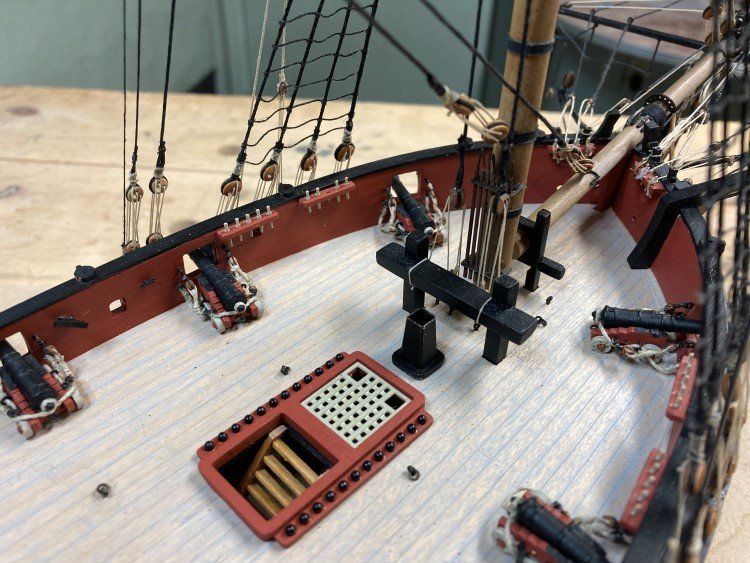
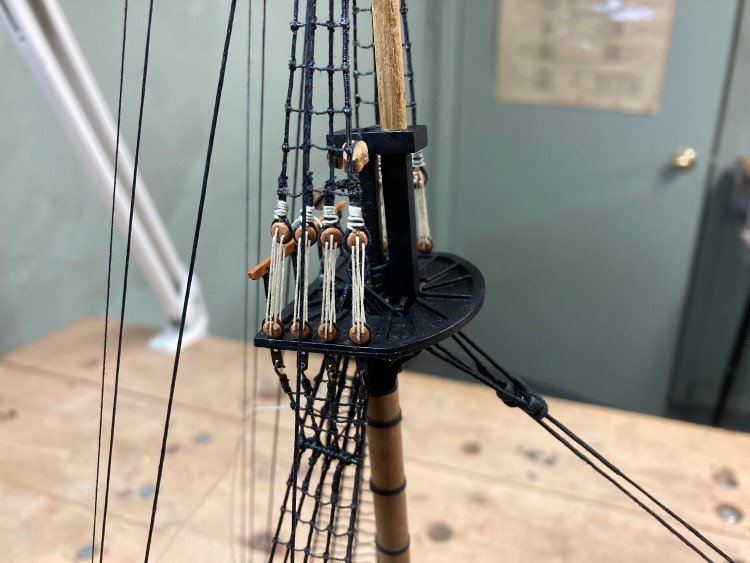
Good Morning, I'm now getting very close to the finish line for the running rigging. I've been working my way through it, step by step without any real problems (except for a couple of my own making.) The plans are excellent and it really couldn't be more straightforward. Boom and gaff - The lifts - Many times when I return to the model, I look at what I did previously and think "Were you on drugs? What were you thinking?" In this case, for reasons I don't understand I had placed the lower yard lift blocks near the aft side of the mast cap and not the fore side. So I had to fix that in situ, but otherwise smooth sailing. Clews, tacks, sheets and bow lines all added next - I'm now working on the braces. The spritsail yard braces are in place and here are the blocks attached to the main stay for the lower fore braces - I did run into a complication with the spritsail yard braces that a bit of foresight on my part would have avoided. One of the nice things about well drawn plans is that they show each component of the rigging in isolation so it's quite clear where each line originates, its path and where it terminates. However, this also makes it easy to forget that in actuality you end up with a tight concentration of lines and blocks in a very small area, such as under the mast top. In the picture below, you can see that the spritsail brace (#49) runs through two blocks underneath the mast top. They are actually double blocks which the brace shares with the clew line #29 in the second picture. I had previously attached the clew line and belayed it and as a result those two blocks no longer had much range of movement. When I went to add the brace, it was almost impossible to thread it through the second block. The area was dense with shrouds, futtock shrouds and many other lines running down. It was difficult to even find the block, let alone identify the clear path through it. I tried approaching it from the front and from the rear, but the same problem arose either way. In the end I cut the clew line, freeing the blocks and then I could manipulate them sufficiently to get both the brace line through as well as the new clew line. All I needed to have done was either not belay the clew line until after I had the brace line in place or possibly have added the brace line much earlier in the process and just let it rest there until I was ready to fully install it later. Just a minor frustration that I will take note of for the future. Other than that, the running rigging is progressing very easily (largely due to the excellent drawings) and when the braces are complete, it will be done. Then all that remains is to add rope coils, the anchors and the boat and to transport it safely to my son-in-law's office! Thanks again for comments, likes etc. David
- 91 replies
-
- Speedy
- Vanguard Models
-
(and 1 more)
Tagged with:
-
The work that's been already done on the model looks pretty good to me. It doesn't appear that you will have to undo anything, which is really nice. With respect to your questions - I'm not familiar with Billing plans, but I'm pretty sure the circled numbers are belaying points, that is, the points where rigging lines end and are tied off. In the last picture, there are some blocks also identified with circled numbers. You will probably find that the circled numbers on the blocks will correspond with circled numbers on the deck area. Someone else more familiar with Billing plans may have a better answer, but I think this is likely the case. With respect to the rudder, it's hard to tell from the photo, but it looks like there might be some tapering from about the mid point forward. I think the key is to ensure that after parts 36 and 37 are glued together that parts F856 will fit over the assembly properly. If some tapering is necessary to make F856 fit properly then that will be your answer. If they fit properly without tapering, then if it were me, I wouldn't worry about it. In the photo the aft end of the rudder doesn't appear to be tapered. I hope that's of some use to you. David
-
Tom, your CWM is looking wonderful. That white edge is a nightmare to paint. My wife almost had me committed before I was finished. Yours isn't looking too bad, but I just could not get a decent job. In the end I painted some paper white, cut it into strips and glued it on. That worked really well and it was completely undetectable what I had done. I agree with John - I think you've nailed the bulwarks colour. It's a hard colour to get just right. David
- 200 replies
-
- Whaling Bark
- Charles W Morgan
-
(and 1 more)
Tagged with:
-
That's quite interesting Allan. The shininess isn't actually an issue. It might look a bit shiny on the skein, but it doesn't look shiny on the model. I'm not advocating for its use, just raising the question as a point of interest. I tried it and thought it was fine, (by that I mean comparable to kit provided thread,) but I'm not likely to rush to use it again. I was just curious about anyone else's experience. David
-
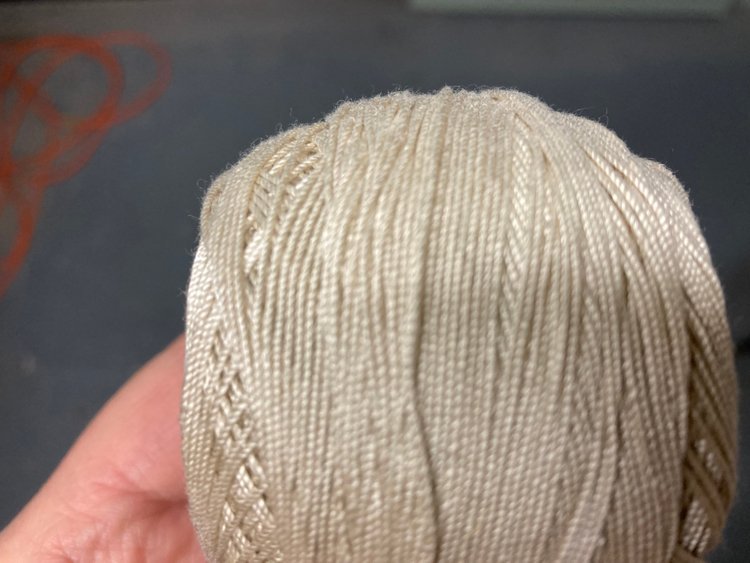
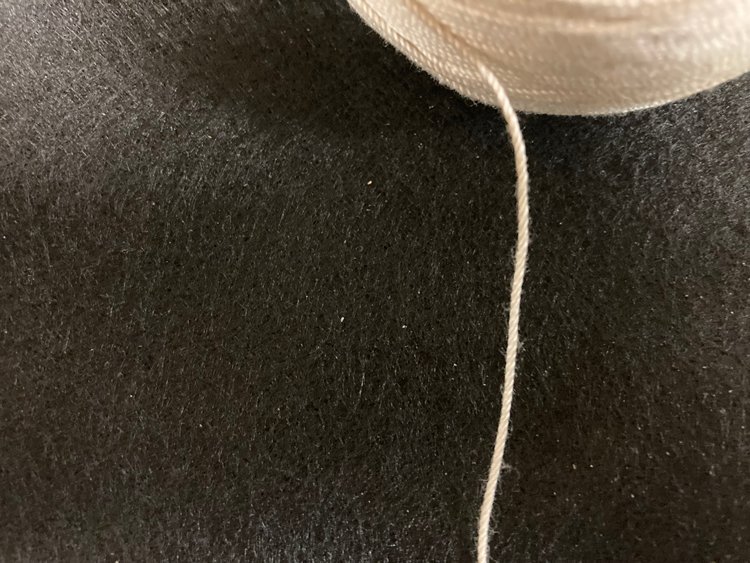
Hi guys, thanks for all the interest. I'm not talking about using it to make rope; I am talking about using it right off the spool. It's available in a wide range of sizes from size 100 which is very fine to about size 3 which is quite heavy. Here are a couple of pictures of some size 10 which is just a tiny bit larger than my regular .5mm line, which I believe is from Amati. To my eye, it looks quite a bit like rope, there's a distinct twist to it and it's only a little bit fuzzy. So, I'm not trying to advocate for it, just trying to determine if people feel it's a suitable rigging material or not. OK, I'll fess up - as an experiment, I used it for all the rigging on my Niagara, using a few different sizes. I can't just remember them all off hand, but size 10 is about .5 mm and either size 20 or 30 is about .25mm etc. I thought it was easy to work with and I'm reasonably pleased with the result. I think it looks as good as the Amati line that I've used on most of my other models. On the other hand, I didn't feel it was particularly superior either. And I'm not trying to compare it to handmade rope, which is in a category all by itself. I don't believe I'll rush back to it, but I was just curious if anyone else has experimented with it in this way. Now that I've added serving to my modest repertroire of skills, I am slowly working up the nerve to try my hand at making my own rope. David
-
Here's a question I haven't seen raised. (Maybe I've just missed it, I'm not sure.) Is there any reason not to use plain old crochet cotton as rigging line? It comes in a wide variety of sizes, enough to match any rigging size needed and it comes in a wide variety of colours - many different naturals and dark brown and black. It seems to have a nice finish and it's quite inexpensive. Does anyone use it? Are there reasons why it shouldn't be used? I'm just curious. Thanks, David
-

Seizings - what am I doing wrong?
David Lester replied to David Lester's topic in Masting, rigging and sails
Thanks for all the feedback guys. I don't feel so bad now. I now feel empowered to continue to use CA without beating myself up over it as if its use was some sort of character flaw. I'll strive to apply the glue as carefully and sparingly as I can. James - I've already started to touch up the seizings with flat black, not because of the glue, but because I've started using light coloured thread for the seizings on black line. The contrast makes it easier to get a nice even wrap. Allan - thank for the video link; that's a great explanation. Thanks again David -
The discussion of the best glue for ratlines in another thread has me thinking about my seizings. The consensus seems to be that anything other than CA glue is the way to go, but for some reason I cannot seem to get anything other than CA to actually secure my seizings. I've tried PVA, watered down PVA, podge, shellac and varnish. In every case, the seizing will always fail. After I've let the glue dry, I snip the ends of the seizing line and everything will be fine, but as soon as I snip the ends of the actual line being seized close to the seizing, it will always slip through. This is especially true if, for example, I am seizing a block to an eyebolt or hook. Just a little bit of pressure and the line around the block will slip out of the seizing and release the block. It seems that the glue is holding the seizing, but not the actual line and the seizing itself is not enough to hold the line in place. As a result, I always end up resorting to CA, trying to use as little as possible. It holds well, but goes hard and looks a bit rough. I would love to avoid CA, but I have never had success with other glues. Does anyone have any ideas of what the trick is or what I might be doing wrong?
-
Good Morning, Just a brief update this morning. I've attached all the yards - Lower yards - jeers and trusses For the trusses, I used these small cast bullseyes from Bluejacket. I'm a big fan of them and I like to keep a supply of them on hand. They come in several different sizes, but I really like the smallest ones - 1/16" inch - because they're easy to use and never look over scale. They blacken easily and just need a small amount of cleanup. (Of course when all is said and done, you can't even see them on the trusses, but at least I know they're there.) Parrels and ties on the topsail yards - Ties on the topgallant yards - There isn't really too much to explain about my methods. I just added each according to the plans. It was all pretty straightforward and free of problems. I've started working on the boom and gaff. The completion of this build is actually within sight; then I will turn my attention to Agamemnon in earnest. Thanks again for likes, comments etc. Very much appreciated. David
- 91 replies
-
- Speedy
- Vanguard Models
-
(and 1 more)
Tagged with:
-
Hi guys, thanks for all your comments. Just getting to them now, as I have been away for the week at the Habitat for Humanity Canada national conference. (I'm the local affiliate chairperson.) It felt both good and unsettling at the same time to be meeting again in a large group. Tom - I have noticed the boat you're referring too. Maybe next time. Derek - I am definitely using black ratlines next time too. Thanks again, David
- 91 replies
-
- Speedy
- Vanguard Models
-
(and 1 more)
Tagged with:
-
Dave, you can do this! You definitely need to use tweezers. I always belay the lines on the side of the ship that is away from me, reaching across the deck. I like to reach in with tweezers and wrap the line around the pin once, and only once, and secure it with as small a dab of glue as I can get away with. I always leave the line long and don't cut it off too soon because as carefully as I think I've gauged the tension, it's highly likely that at some point along the way, I'll have to pry that line loose and readjust it slightly as I work on subsequent lines. Only later do I go back and cut the lines off at the pins. I normally use cuticle nippers for most rigging tasks, but here they won't work. You need scissors that are long enough to reach in. And it takes care! It is surprisingly easy to cut the wrong line, or cut the line on the wrong side of the pin, etc. etc. I think most would agree that the best way to make the coils is separately and off the model. There is one basic way to do this, but there are many variations on it. There are examples on the forum as well as youtube. It's a matter of experimenting until you find the one that seems to work for you. (However, I must warn you, they are all frustrating.) Then add the coils to the belaying pins. I don't think I care very much for those fat belaying pins either, and like you, would be inclined to replace them with finer brass ones. It appears this would require new pin racks with smaller holes. They aren't too hard to make from scrap material. I agree with Allan, that it looks like it's still possible to do that, if you think it's worth it, or maybe you'd be just as happy working with the existing pins - they'll certainly work. You might just be suffering from something that affects me on every build - as I'm nearing the end of the building part, I can't wait to get started on the rigging, and then very soon into the rigging, I wish I was back working with the wood again. And that's when I start dreaming about the next model. Don't give up now. Your model is very good and I'm sure you'll finish the rigging as skilfully as you've done everything else. David
- 362 replies
-
- Amati
- Lady Nelson
-
(and 2 more)
Tagged with:
-
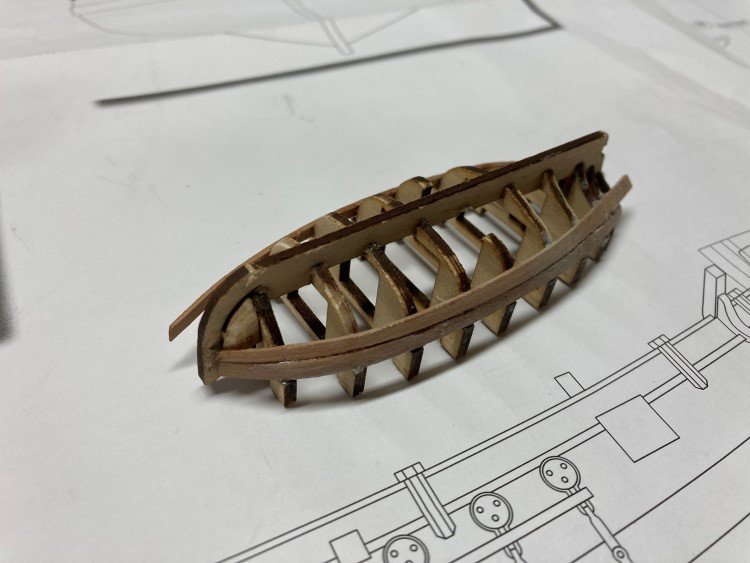
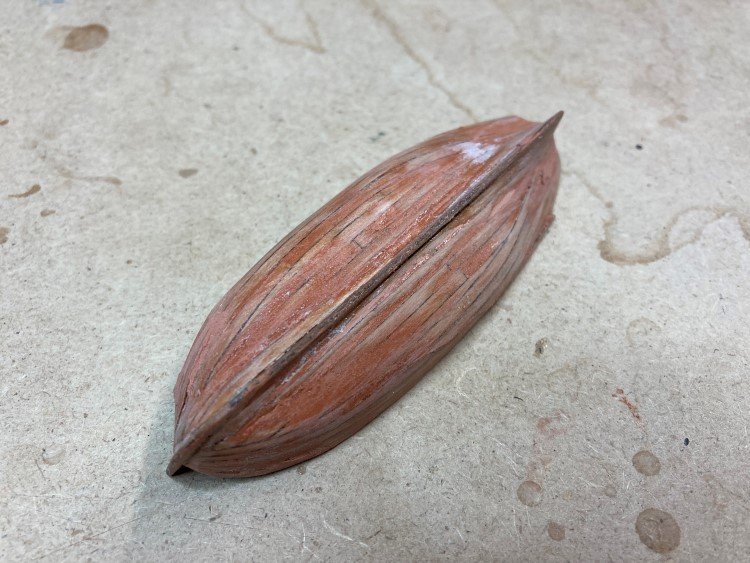
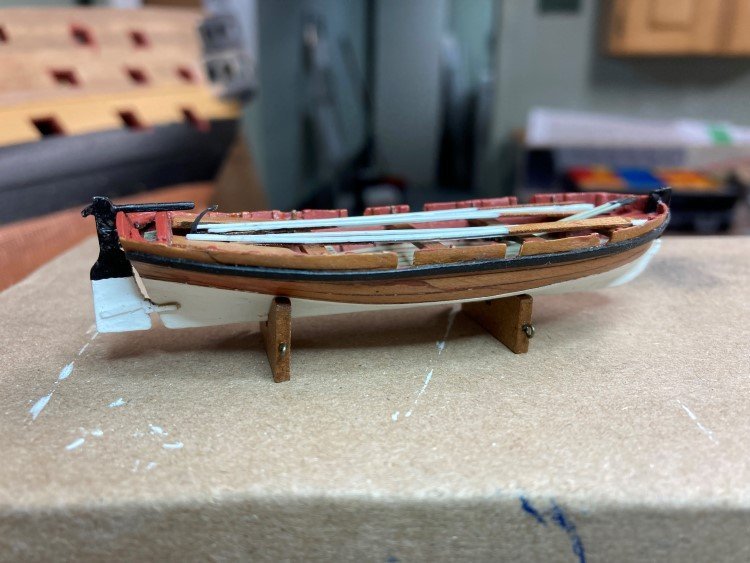
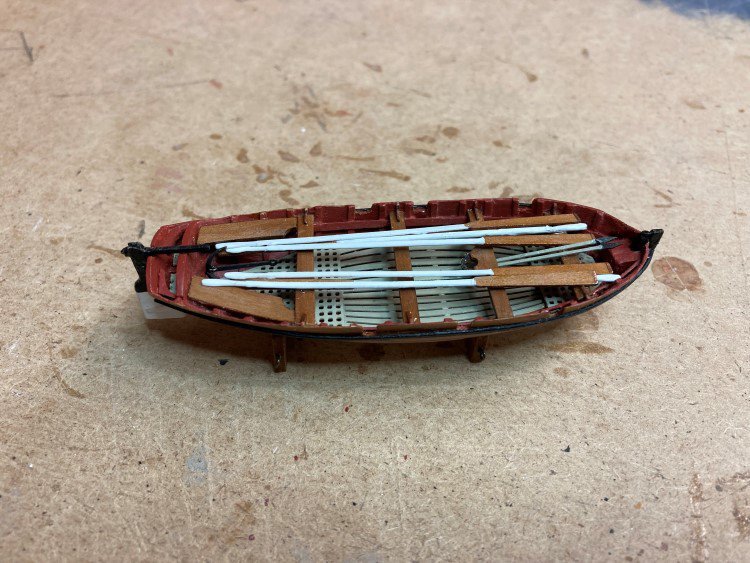
OK, the thing I like the least about any build is the (bleeped) little boats. I never have good luck with them. The Charles W. Morgan had seven of them and it was almost the end of me. Thank goodness there's only one for the Speedy, and at long last I have it finished. Initially, I messed it up so badly, that I had to order a new one. And by the way, for those of you in Canada, I discovered that Vanguard has a distributor here -The Crafty Sailor, which provides very good service. So I bought my replacement one there. Here are a few representative pictures: I've had the interior together, taken apart and back together again so many times, I've lost count and I've stripped and repainted the white paint at least three times. In any event, I think the result is now acceptable, and it will have to be, because that's as good as it's going to get. I enjoy every other aspect of a build, but for some reason these boats always have me strung out. I'm not sure why. I have four of these coming up for Agamemnon, so I think I might get them out of the way sooner rather than later, then I can relax for the rest of the build. I've also been making progress of the Speedy rigging, which will be in my next update. Again, thanks for checking in! David
- 91 replies
-
- Speedy
- Vanguard Models
-
(and 1 more)
Tagged with:
-
Hi Glenn, I think I'm with you on the ratline thing. That India ink wanted to go everywhere as I applied it. I will return to black line next time. Thanks for the comments and likes everyone. David
- 91 replies
-
- Speedy
- Vanguard Models
-
(and 1 more)
Tagged with:
-
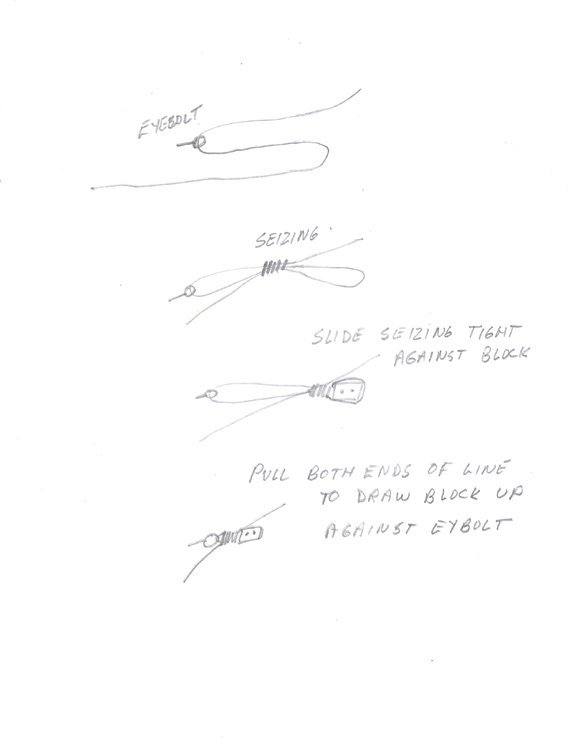
Your LN is looking great Dave. You mentioned getting blocks attached to eyebolts on the deck. Have you glued the eyebolts in yet? If not, it's easy to attach a block and eyebolt together and then glue the eyebolt and block assembly in place. If you have already glued the eyebolt in place, it's harder, but only by a little bit and will probably involve a bit longer piece of thread. Do you know about a "figure of eight" seizing? Thread the line through the eyebolt, then make a "figure of eight" and add a seizing. Place the block in the loop and slide the seizing up tight against the block. Then you can pull both ends of the line and the block will snug up against the eyebolt. If you use a fairly long piece of line, you can add the seizing well away from the deck, where it's easy to hold the line in your "helping hands" clip. This is also how I would attach a block to a yard, as you asked in an earlier post. I hope I'm understanding your question correctly and I'm sorry if this is redundant. David
- 362 replies
-
- Amati
- Lady Nelson
-
(and 2 more)
Tagged with:
-
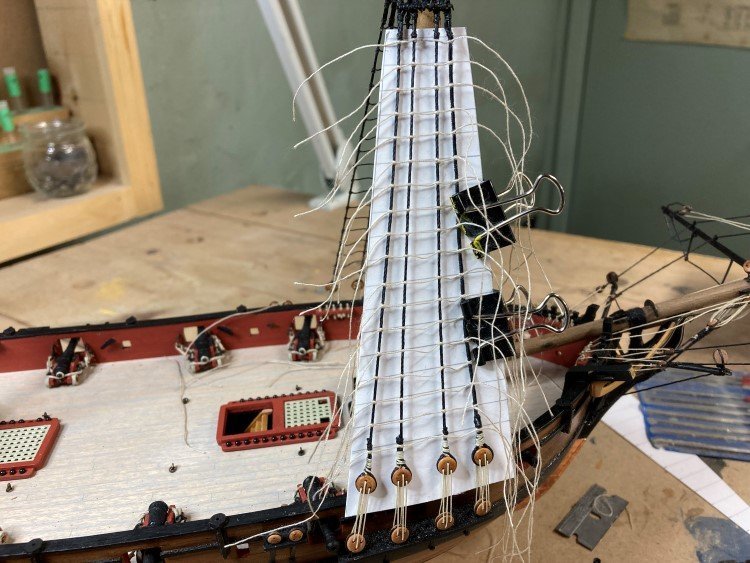
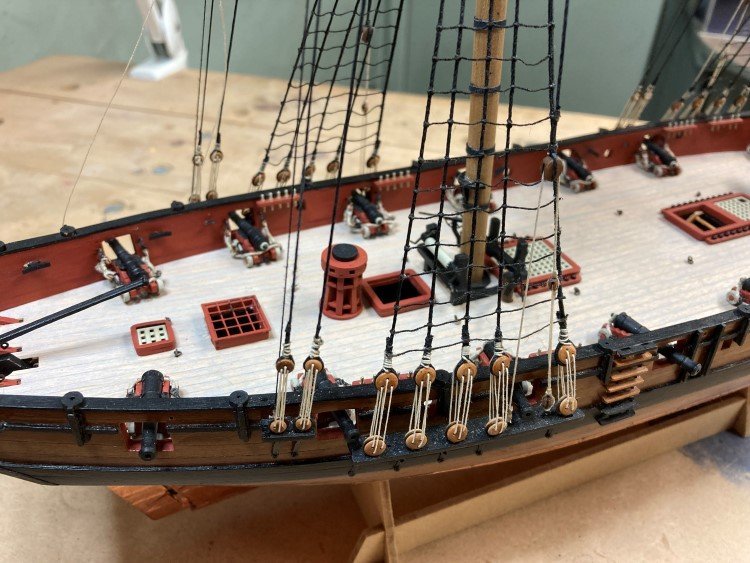
Good Morning, Time for an update. I have pretty much finished the standing rigging. I don't really have too much comment to make as it all went very routinely. Topmast shrouds in place - Ratlines - I have always used black thread in the past for the ratlines, but the instructions here called for natural thread to be stained afterwards. Does anyone know why that would be? Is natural thread inherently better for ratlines than black thread? In any case, I decided to give it a go. I used India ink to colour them. I decided to try to make my own mouses (mice?) for the forestays. I started with a 1/8" dowel and drilled about a 1mm hole into the end of it. Then I started paring the wood away with an xacto knife, sanded it smooth and then cut it off. Once I was happy enough with the tension, I glued and trimmed all the lines - So next up is the lower yards. David
- 91 replies
-
- Speedy
- Vanguard Models
-
(and 1 more)
Tagged with:
-
Dave, that mast is looking pretty good. I've never tried using a drill, perhaps I'll give it a go next time. I have always scraped my spars to shape them. I use a #22 xacto blade and draw it towards myself, turning the dowel as I go. I've also done this with square stock, but I usually use the kit supplied dowels. I've never really had a problem with them. You can remove a lot of material surprisingly fast. There is still a fair bit of sanding to do, but the scraping gets the bulk of the work done. The result is never 100% perfectly round as it would be using a lathe, but it's not hard to get very close to perfect and certainly close enough for my eye. David
-
Hi Fred, I've built quite a few models over the past few years and have enjoyed all of them, but the Morgan was my favourite. It's a really great kit and there are many photos of details available on line, which is a great resource. I hope you have as great a time with it as I did! David
- 145 replies
-
- model shipways
- charles w. morgan
-
(and 1 more)
Tagged with:
-
Thanks for likes etc. everyone. Dave - I didn't open the chainplates exactly the way Derek did. I just grabbed each one with two pairs of pliers at the base of the circle and gently pulled in opposite directions to open it a little wider; it doesn't take very much. Once the deadeye was in place, I just gently squeezed it back together just below the deadeye. It seemed to work ok. Theodosius - There's no serving line in the kit, so I just used common garden variety "sewing thread" that I buy at a local sewing store. I usually always get Gutermann, as that's the main brand they carry, but last time I was in I found some other brand (I don't recall the name), because it was available in a larger spool and I anticipated using much more of it than usual if I was serving. I don't know what weight the thread is, but it's just the usual standard sewing thread. Hope that's of some help. Thanks again, David
- 91 replies
-
- Speedy
- Vanguard Models
-
(and 1 more)
Tagged with:
About us
Modelshipworld - Advancing Ship Modeling through Research
SSL Secured
Your security is important for us so this Website is SSL-Secured
NRG Mailing Address
Nautical Research Guild
237 South Lincoln Street
Westmont IL, 60559-1917
Model Ship World ® and the MSW logo are Registered Trademarks, and belong to the Nautical Research Guild (United States Patent and Trademark Office: No. 6,929,264 & No. 6,929,274, registered Dec. 20, 2022)
Helpful Links
About the NRG
If you enjoy building ship models that are historically accurate as well as beautiful, then The Nautical Research Guild (NRG) is just right for you.
The Guild is a non-profit educational organization whose mission is to “Advance Ship Modeling Through Research”. We provide support to our members in their efforts to raise the quality of their model ships.
The Nautical Research Guild has published our world-renowned quarterly magazine, The Nautical Research Journal, since 1955. The pages of the Journal are full of articles by accomplished ship modelers who show you how they create those exquisite details on their models, and by maritime historians who show you the correct details to build. The Journal is available in both print and digital editions. Go to the NRG web site (www.thenrg.org) to download a complimentary digital copy of the Journal. The NRG also publishes plan sets, books and compilations of back issues of the Journal and the former Ships in Scale and Model Ship Builder magazines.


