
HOLIDAY DONATION DRIVE - SUPPORT MSW - DO YOUR PART TO KEEP THIS GREAT FORUM GOING! (89 donations so far out of 49,000 members - C'mon guys!)
×


David Lester
-
Posts
679 -
Joined
Content Type
Profiles
Forums
Gallery
Events
Everything posted by David Lester
-
 Hi David, By all means keep working on your Mayflower. I just checked your build log again and it's in great shape. I think you'll find it comes together quite quickly. Looking forward to following your progress. Thanks, David
- 43 replies
-
- 1
-

-
- Mayflower
- Model Shipways
- (and 1 more)
-
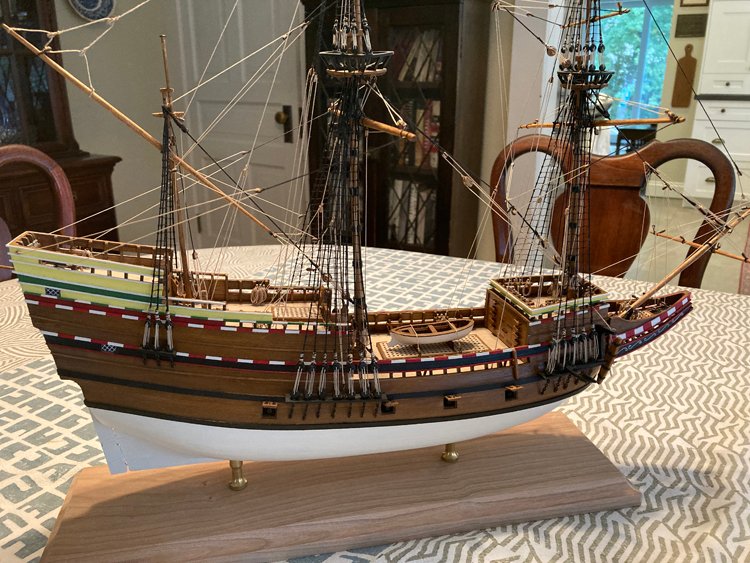
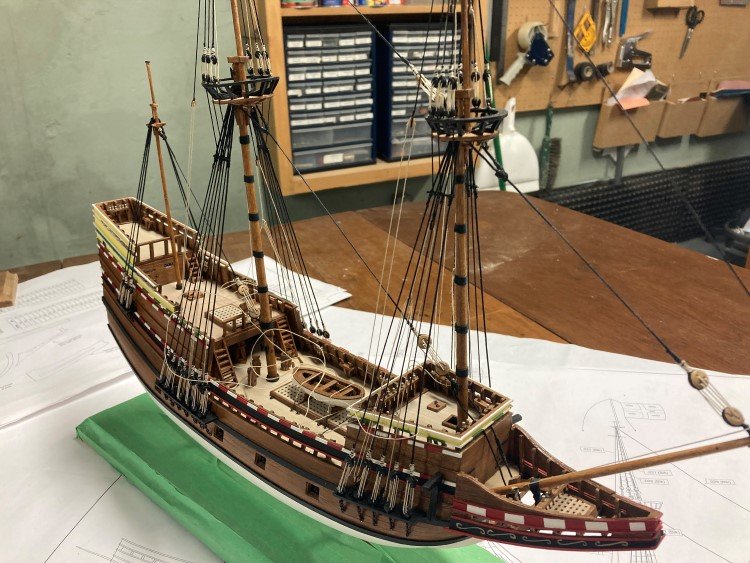
Hello All, Well, it appears that I have finished the Mayflower more quickly than I had anticipated. I'm afraid I haven't given many updates on the rigging, but really, there would be very little to be gained by anyone. This is a small model and the rigging couldn't be more straightforward. It was just a matter of working through it until suddenly it seemed to be done! So, I have a few thoughts on this model. I think I mentioned at the beginning of this build log that I was building this model on commission for someone who wants the Mayflower specifically. I don't believe I would have chosen this kit otherwise, because it's not the era or type of ship that particularly interests me, but nevertheless, it was a really enjoyable kit to build and it makes up into a very attractive and eye-catching model. I think this is a kit that deserves much more interest than it seems to attract on the forum. It has a lot going for it - it doesn't break the bank to buy it, it's not so big that it's difficult to display, it isn't too difficult and the instructions are foolproof. This would be an ideal kit for someone fairly new to the hobby; perhaps a second build for example. It was designed by Chuck Passaro and his instructions are excellent; among the best I've come across. With most Model Shipways kits, you can essentially throw the instruction book away and spend all your time deciphering the plans - especially for the rigging. In this case, it was not nearly as necessary to refer to the plans because the instructions were that complete and clear. I found this to be a fun change of pace and now with it behind me, I will return to my much bigger challenge, which has been on hold for a few months - the Agamemnon
- 43 replies
-
- 19
-
-

-

-
- Mayflower
- Model Shipways
- (and 1 more)
-
Those look beautiful, Ben. Did you glue them? If you did, I don't understand how you did it without the glue being evident. D
-
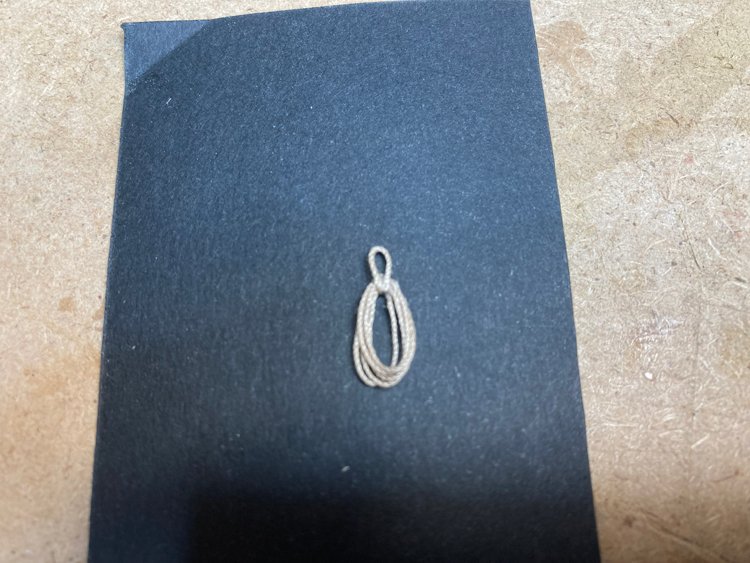
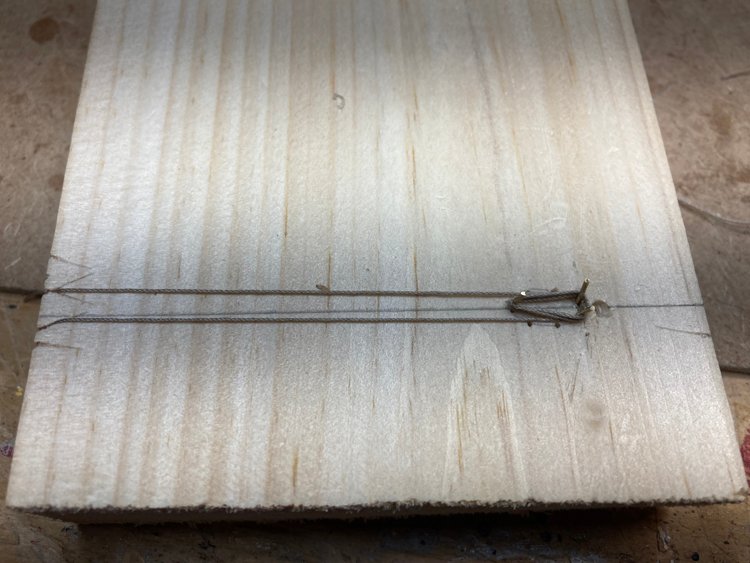
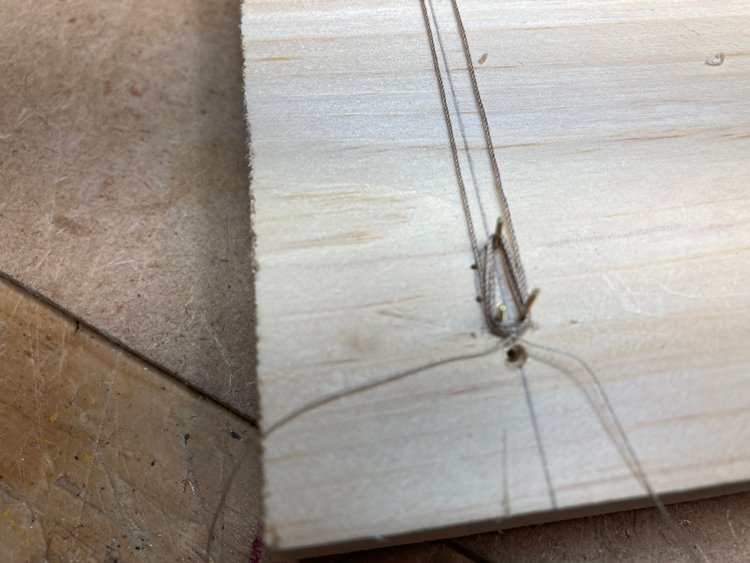
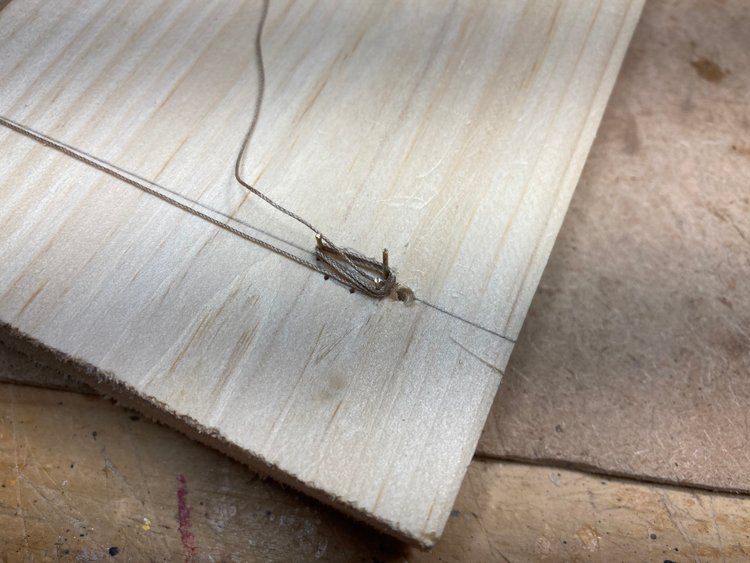
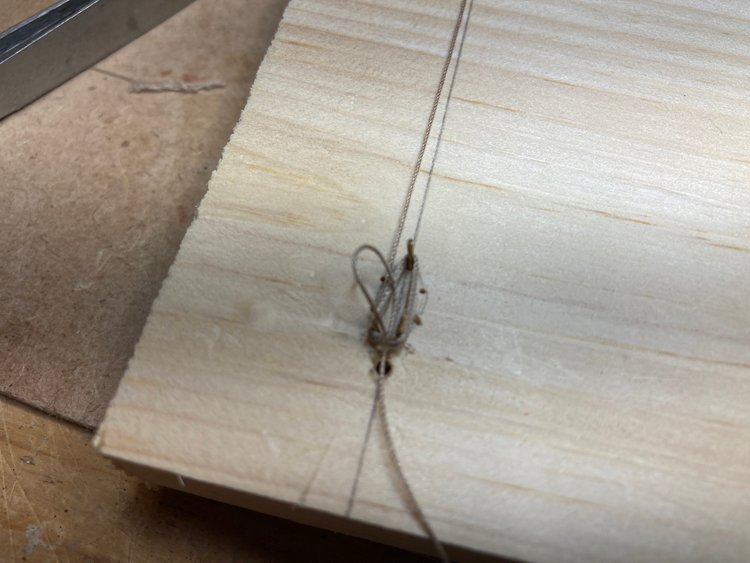
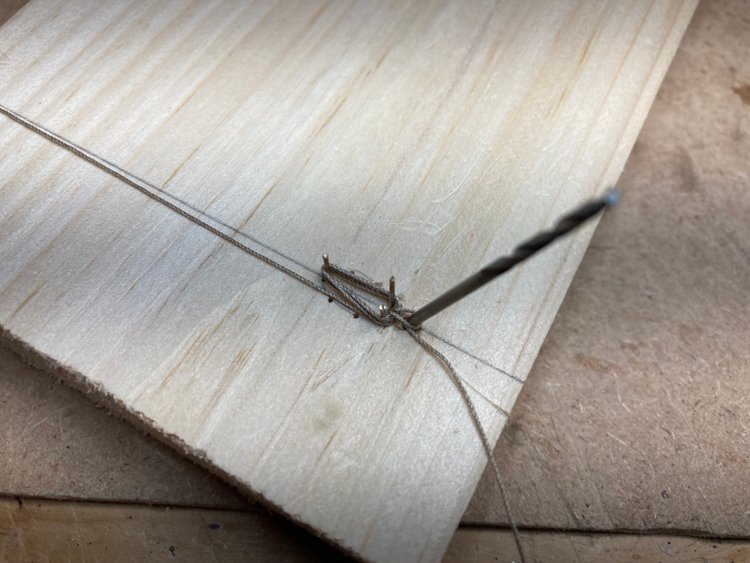
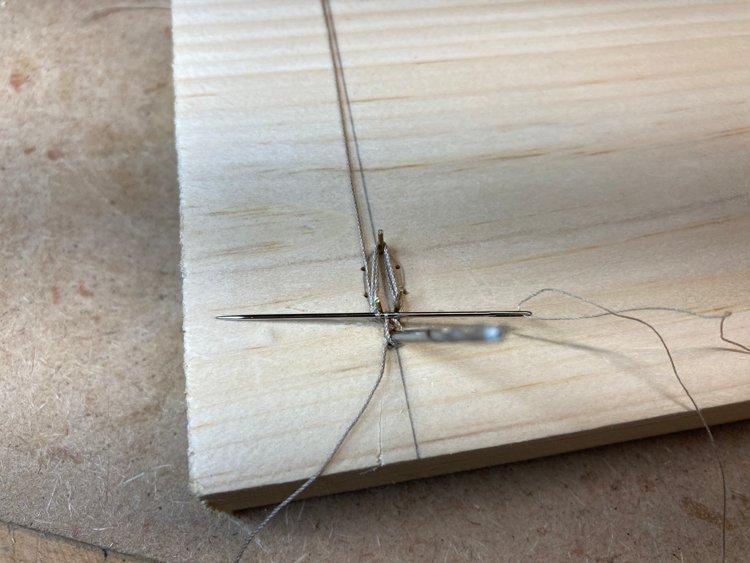
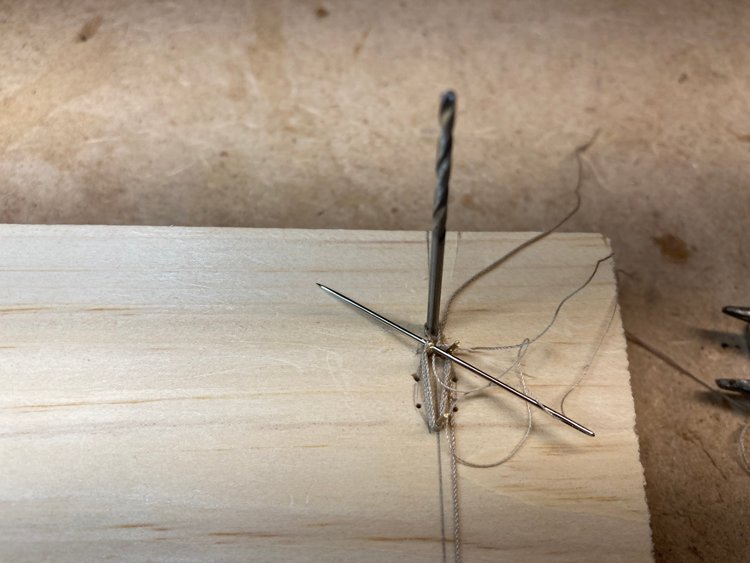
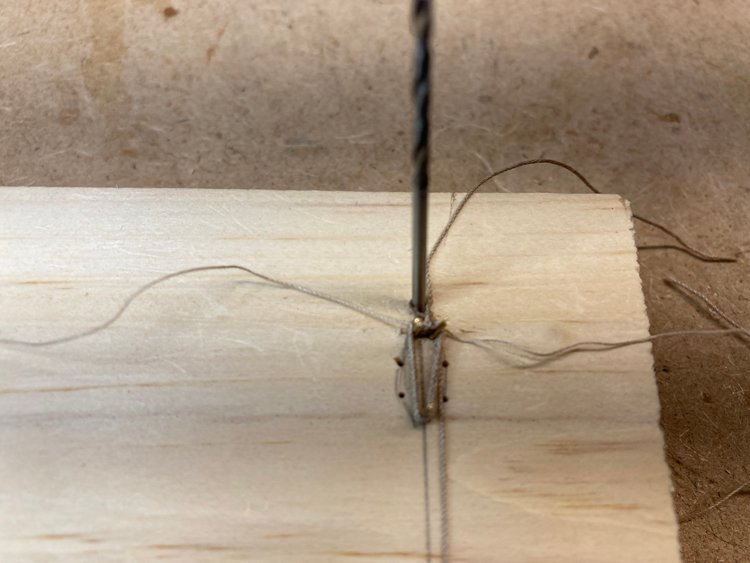
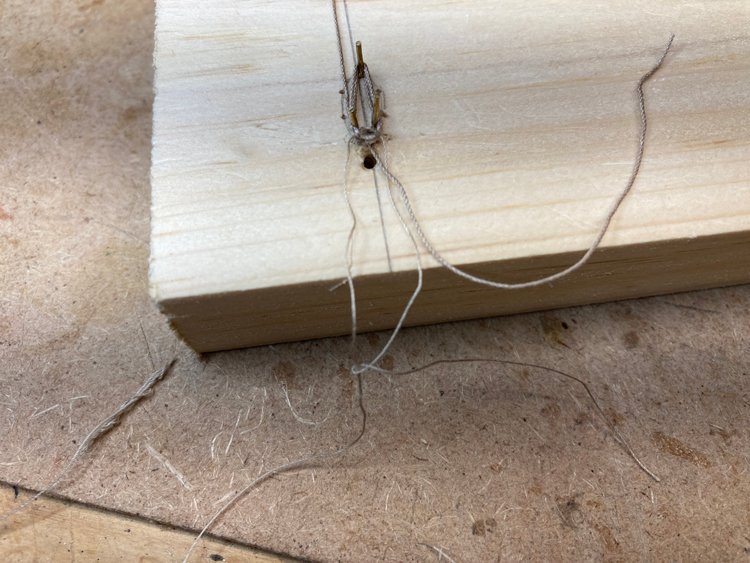
I have always struggled making rope hanks. I've tried every method I can find on this forum and on YouTube, but it always boils down to the same problem. Every method seems to work for me until that point at the end when it calls for "a small dab of glue." Well, for me diluted PVA glue never seems to hold and a small dab of CA glue never seems to hold the whole thing together either. So I end up using enough glue to hold everything together, but the result is usually the glue wicking into the line, darkening and hardening it and it generally looking terrible. The best I have ever been able to do is to try to minimize this effect, which means that at least half of the hanks I make for every model end up in the garbage and I'm only somewhat happy with the ones I do use. So here is the result of my experimenting yesterday and I think it just might be a good solution to my problem. I was trying (for the umpteenth time) the method outlined by Tom Lauria in his YouTube video. I was having the best luck with this method of any of the others I've tried, but still having the glue problem at the end, so here's how I adapted his method to try to avoid the glue problem. I wrapped the line five times around three nails - two at the top, with a narrow space between them and one at the bottom. The distance apart is the length I need excluding the loop that goes over the belaying pin; in this case 3/8". Tom outlines a perfect oval with a series of closely spaced nails, but I found it's not necessary to do that. The hank comes out more or less the same with the three nails as it does with several. Many methods only use two nails anyway, one top and bottom. However I found it necessary to have a space at the top, hence two nails at the top. Then I wrapped a length of matching sewing thread around the coils at the top and tied a knot. I'm not worrying about the loop for the belaying pin at this point. This knot around the coils ensures that they will not come apart and it's actually easy to get a small dab of CA glue on this knot without touching the main line. The glue only has to hold the knot; the thread is holding the coils. When the CA glue was set in a couple of moments, I trimmed the threads off, leaving just the knot. Then I pulled one of the long ends of the line underneath the coil at the top and up through the centre - Made a loop out of it and pulled the end back through underneath the coil at the top - And then, just like Tom Lauria did, I secured the loop with a drill bit in a previously drilled hole and pulled the loop snug against the drill bit - Here I took a length of matching sewing thread in a needle and stuck in down through the middle of the line on one side of the loop and through, at least part of, the coil below - Then I transferred the needle to the other end of the sewing thread and did the same thing on the other side of the loop - This ensures that when I tie the two ends together, the knot will be on the back of the hank - Then I just tied the sewing thread into a knot on the back side of the hank. Just like before it's easy to put a small dab of CA glue on this knot without touching the main line. When the CA glue sets, it's just a matter of trimming off all the lines - This hank cannot come apart because the coils are tied together in a bundle and the loop for the belaying pin is sewn directly to the hank. There's no glue visible on the surface and the sewing thread is completely invisible. I think this is the best hank I've ever made and the process didn't end up with the garbage men wondering "what's with all the gluey coiled thread coming out of this house?" So that's my good news for this weekend. Happy Thanksgiving to the Canadians out there! ( or should I say "Happy Hanksgiving?") David
- 8 replies
-
- 28
-
-
-
-
Good Morning, I've been working on the rigging and here is the halyard for the main yard tie. On rare occasions, I've been known to demonstrate forethought and I'm happy to report that this was one of those occasions. I threaded the lanyard through the ram's head block and the knight before I glued the knight in place! It would have been much more difficult to do after the knight was in place. Then with the line loosely in place, I glued the knight to the deck and snugged up the lanyard. I notice that as I get older, it's taking less and less to delight me! David
- 43 replies
-
- 8
-
-

-
- Mayflower
- Model Shipways
- (and 1 more)
-
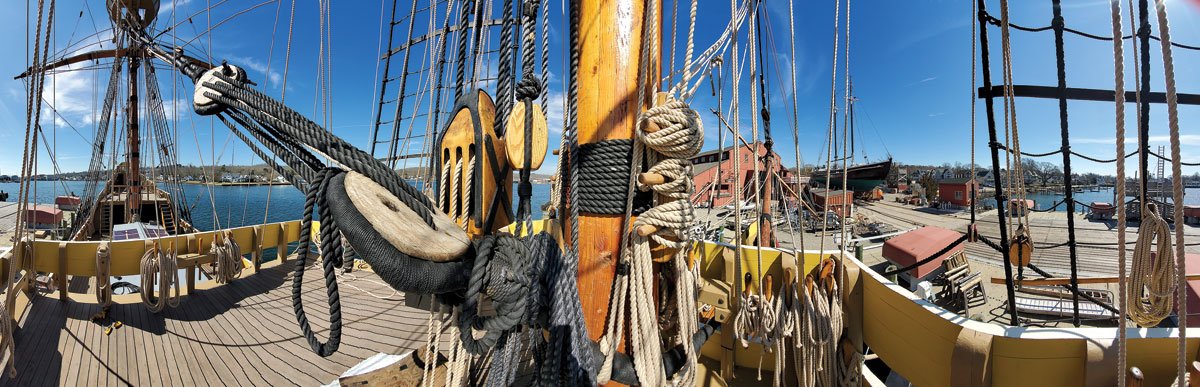
Yeah, I noticed that they're black on the Mayflower II. The colour of these lines always confuses me. For example when I visited the Constitution I noticed that those ones are black too. I may be wrong, but the rope didn't look tarred to me - it just looked like black rope. So were the originals left natural, or were they natural then tarred, and are the current ones simply black rope in an effort to simulate tarred ropes. Similarly, I have the same questions about the Mayflower. On the Victory, however, they're currently all natural. So I'm not really sure what's the "correct" way to do it. I've done them both ways on my various models, but for the Mayflower, I think I'll leave them natural. David
- 43 replies
-
- 2
-
-
- Mayflower
- Model Shipways
- (and 1 more)
-
Apparently, all of the deadeyes on the original Mayflower were elongated ones, which they appear to have used on the Mayflower II as well. It's the ones on the main and fore stays that I was referring to; they're quite a bit bigger and have five holes, like in this picture below. I didn't even contemplate making the smaller elongated ones for the shrouds from scratch. But I did experiment with the larger five-hole ones for the stays, but as I mentioned abandoned that plan. There don't seem to be many options to buy such deadeyes either. I haven't seen any of the five-hole ones anywhere. Both Cornwall Model Boats and Ages of Sail have some three-hole ones, but they're too triangular and don't look quite right for the Mayflower. Bluejacket does have elongated three-hole deadeyes, which look pretty good. I could have used them, but instead I just chose to use the kit supplied ones all around. David
- 43 replies
-
- 3
-
-
- Mayflower
- Model Shipways
- (and 1 more)
-
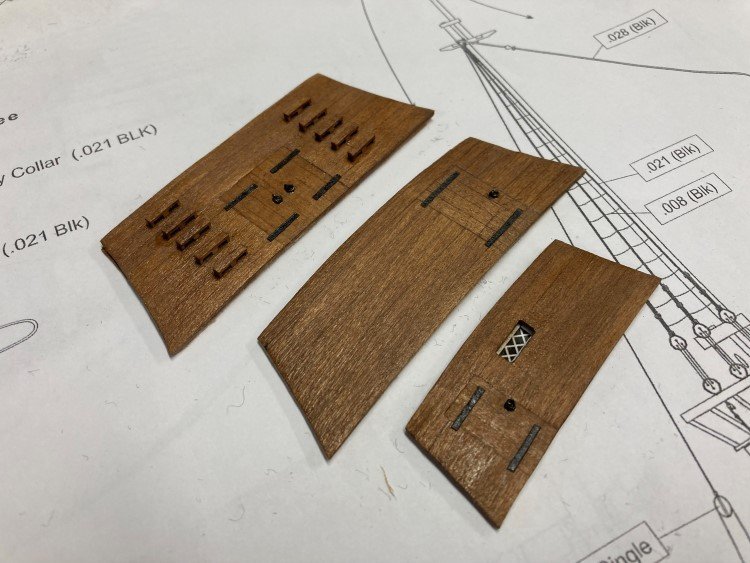
Hi All - Standing rigging is finished: For the deadeyes on the fore and main stays, the kit provides large standard three-hole deadeyes, but the instructions indicate that five-hole deadeyes with a tear drop shape would be correct and suggests making them. I tried that but had trouble getting them to look good enough. No matter what, they still looked too rough to my eye, so in the end I opted to use the less correct, but better looking standard deadeyes. I did add serving to the lines in the usual places. I wasn't completely sure it it's correct for a ship of this period, but the pictures of the Mayflower II replica appear to have it and I had the the serving machine and decided to include it. I made a mouse from wood for each of the stays. I always find them pretty easy to do. I drill a hole about 1/4" deep into the end of a small dowel and then shape the mouse on the dowel with an xacto knife and sand it smooth. Then I just cut it off the dowel. Now it's on to the ratlines: Thanks again for your comments and "likes." David
- 43 replies
-
- 8
-
-
- Mayflower
- Model Shipways
- (and 1 more)
-
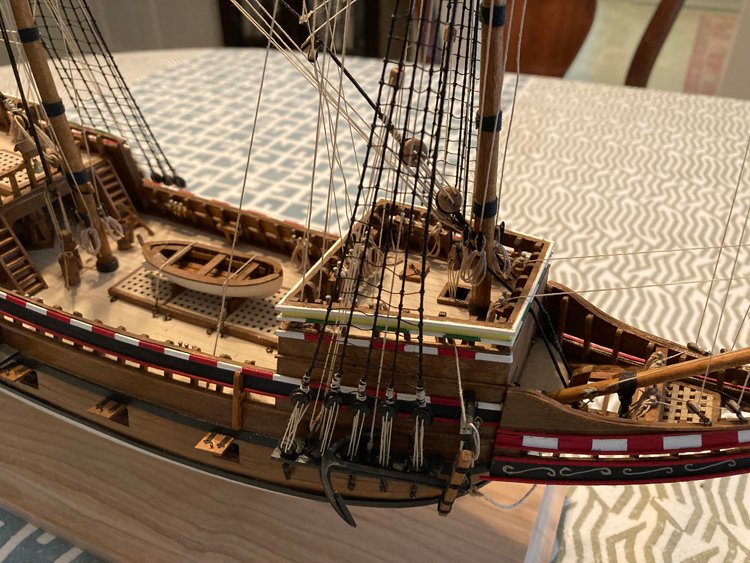
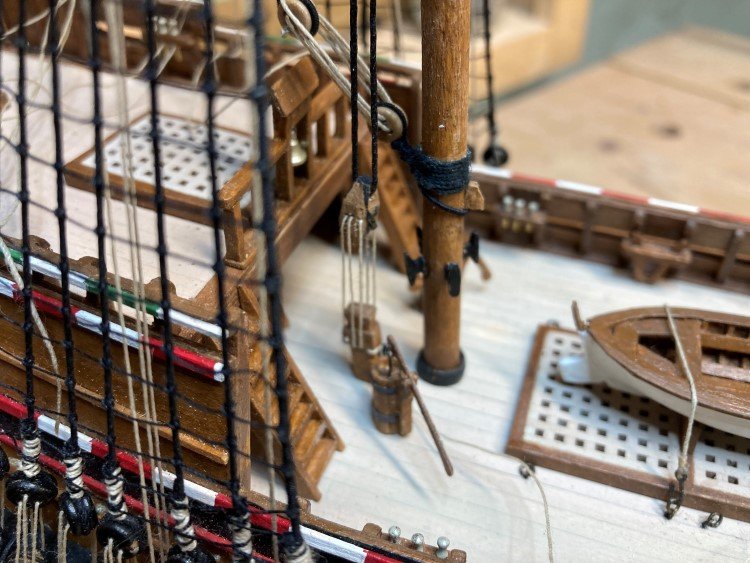
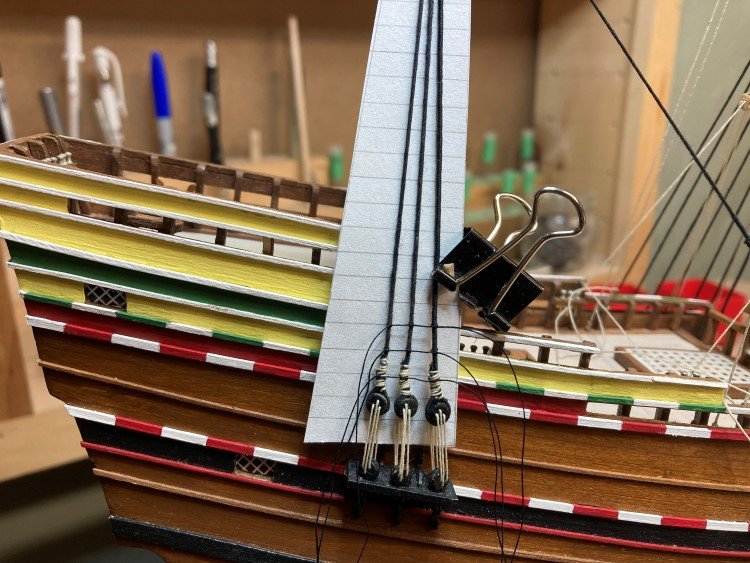
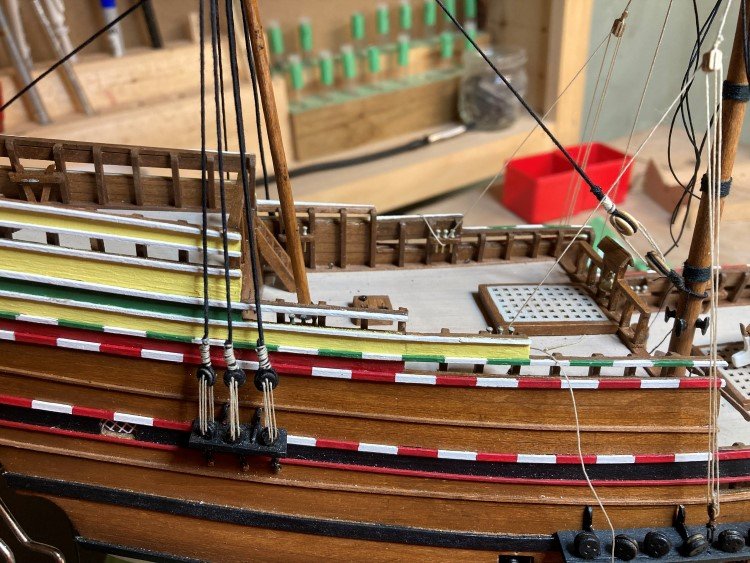
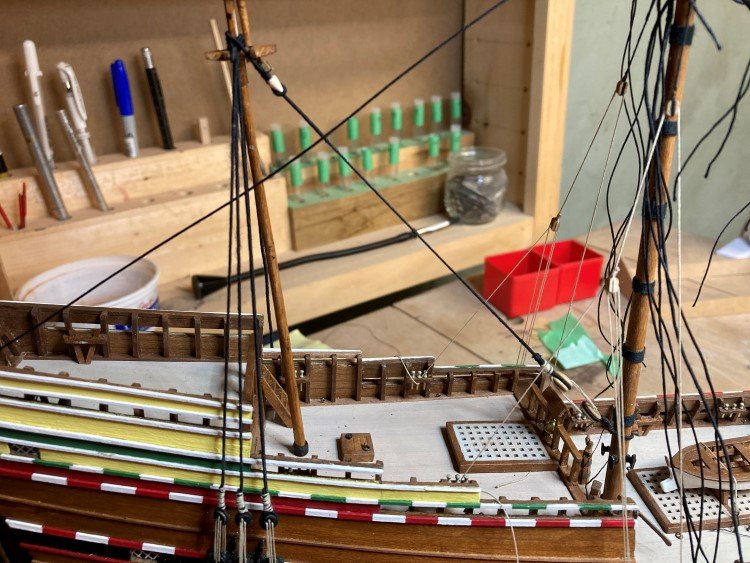
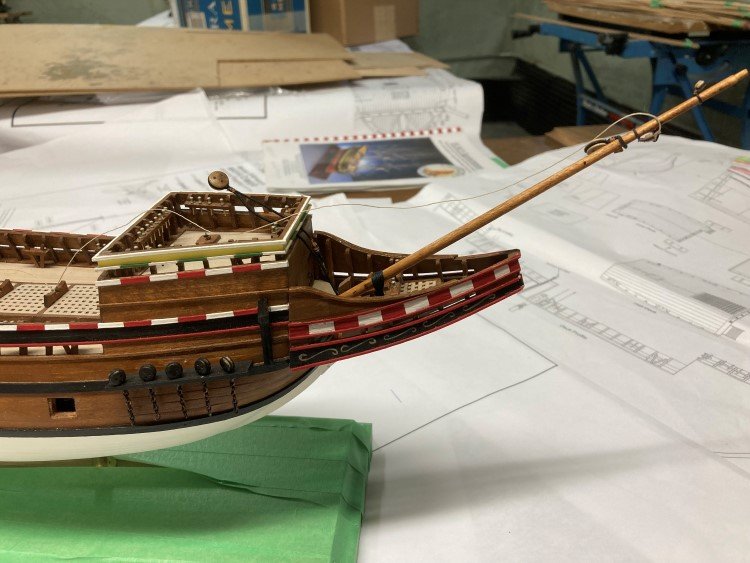
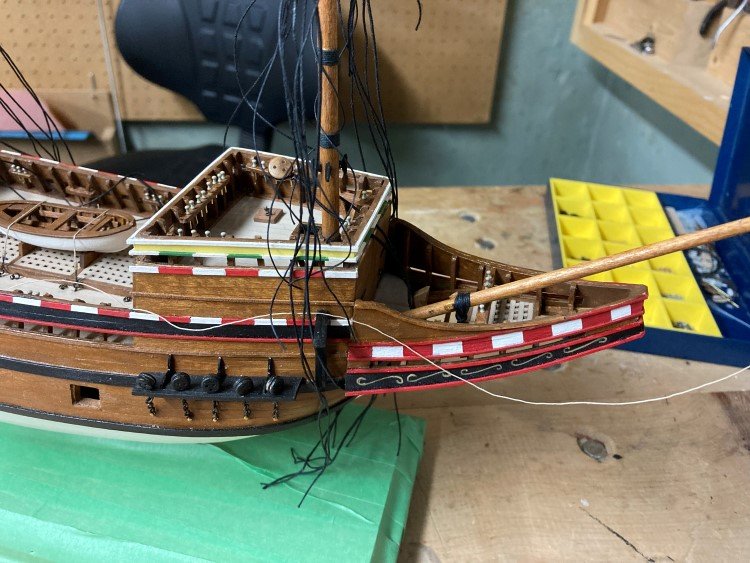
Good Morning - I'm into the rigging in earnest now. In the past I have always tended to start with the bowsprit and work my way to the stern. The instructions for this kit however suggest installing the bowsprit and then moving the the mizzen mast and working forward, so I decided to try that and see how I like it. So far, so good. The instructions suggest starting with the mizzen shrouds and then adding the mizzen stay before adding the lower main shrouds, so that's what I did. The logic makes sense - this way you can fix the stay to the main mast without the main shrouds getting in the way. One problem I did encounter however is due to how small and flexible the mizzen mast is. It isn't very robust. In order to get the slack out of the lanyard on the stay where it meets the main mast, it tended to pull the mizzen mast too far forward and, of course, there is no backstay on the mizzen mast to counteract this. I ended up undoing all the lanyards on the mizzen shrouds, securing the lanyard on the stay where I was happy with it and then redoing the shrouds, starting with the aftmost one and pulling it taut, then finally, the other two shrouds. This seemed to solve the problem and the mizzen mast is now stable and in (more or less) the right position. Moving on to the main mast, the instructions suggest first adding the tackles before doing the shrouds - The main tackles are now in place and next up are the main shrouds. I don't anticipate the same problem with the main stay as I had with the mizzen as there is back pressure on the main mast and it's considerable more robust than the mizzen. That's all for now. David
- 43 replies
-
- 12
-
-
- Mayflower
- Model Shipways
- (and 1 more)
-
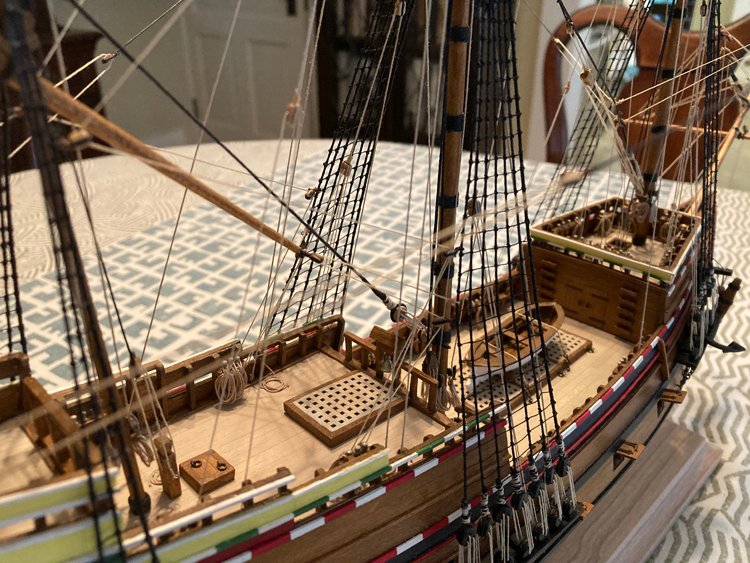
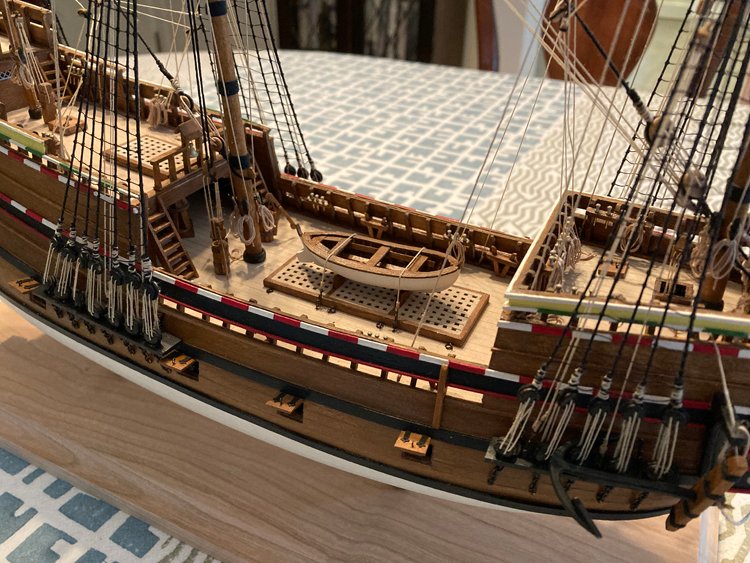
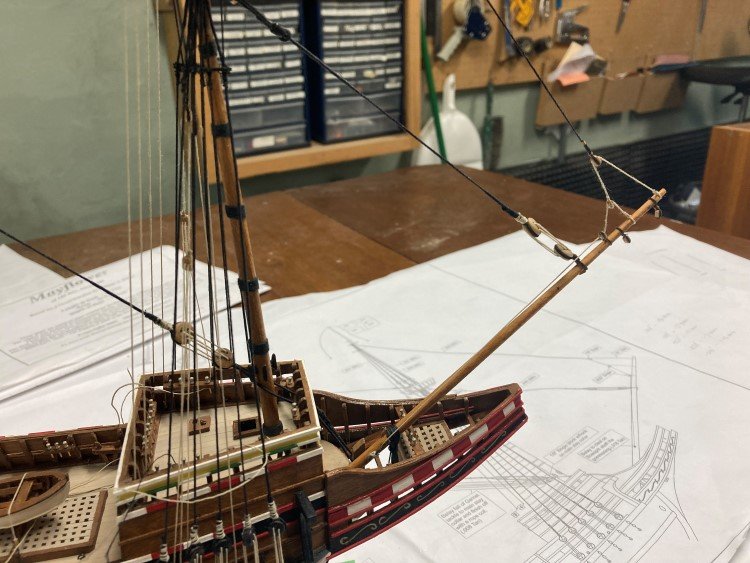
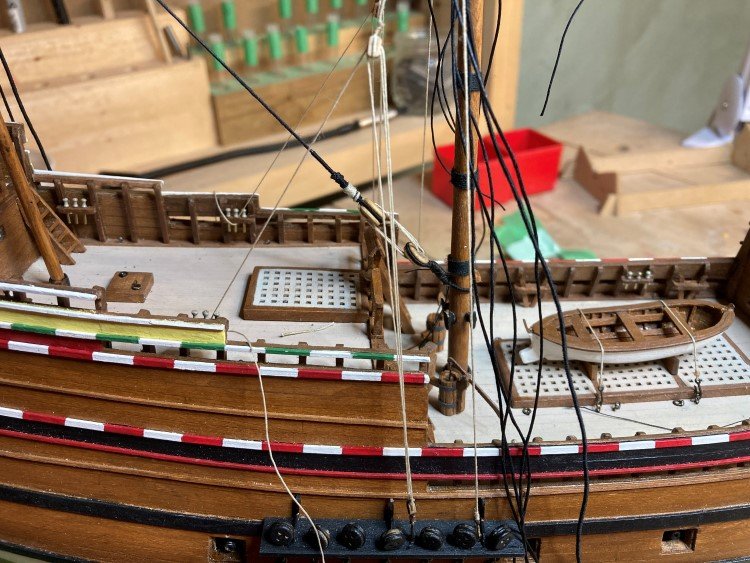
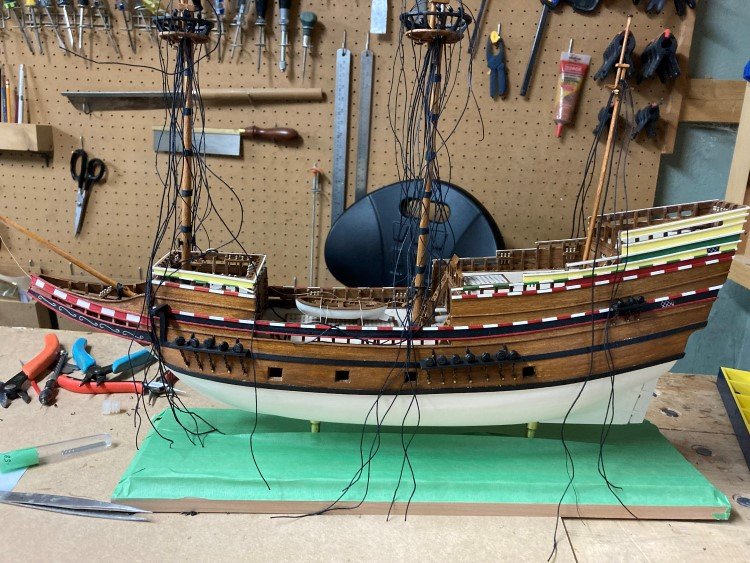
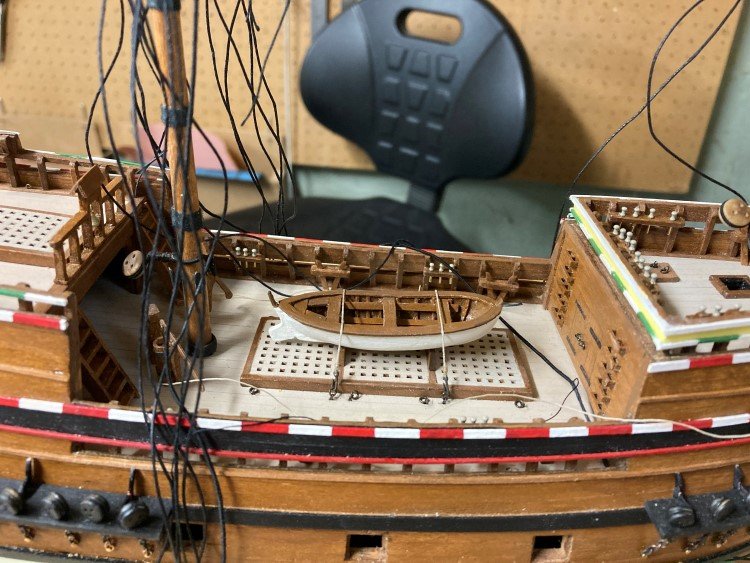
I brief update. I've added the bowsprit and the deadeye/chainplate assemblies. I've also added the boat. I don't actually take any pictures of its progress. It's built using the standard MS approach and building it proved to be as unpleasant as all of the others I have done over the years. So I have done nothing to immortalize the experience. At least there was only one of them. The Charles Morgan had seven! I don't know why I dislike building these little boats so much, but I just do. The shrouds are attached to the masts and are ready to be finished. For such a small vessel there seem to be a lot of them - five on the foremast, seven on the main mast and three on the mizzen. Thanks again for checking in, likes etc. Much appreciated. David
- 43 replies
-
- 14
-
-
- Mayflower
- Model Shipways
- (and 1 more)
-
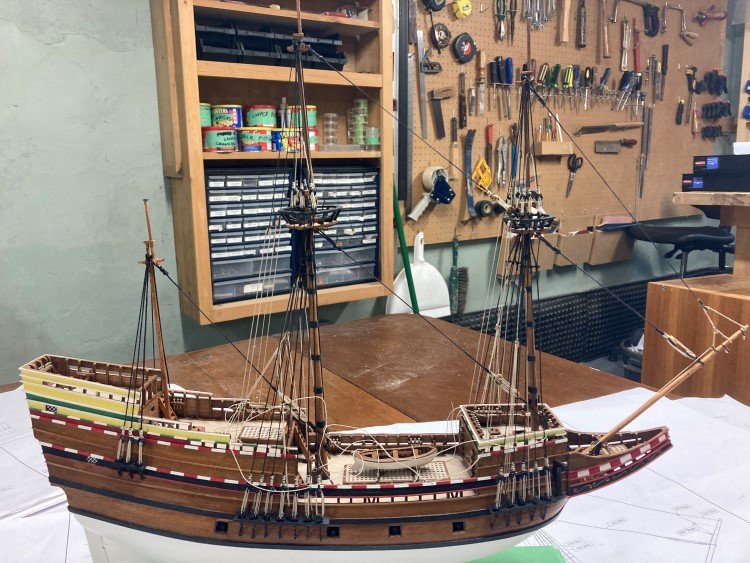
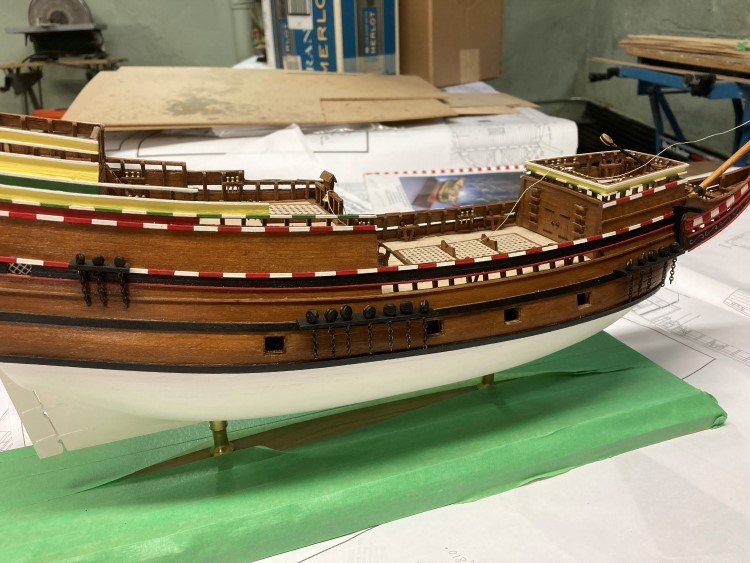
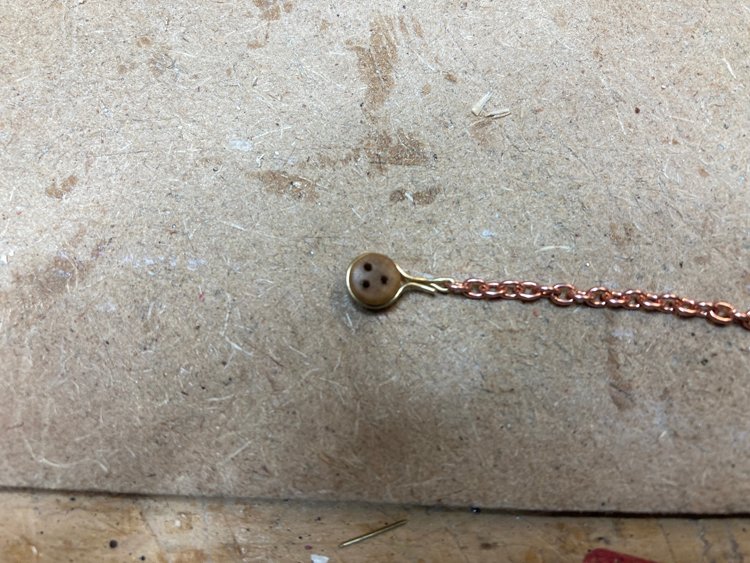
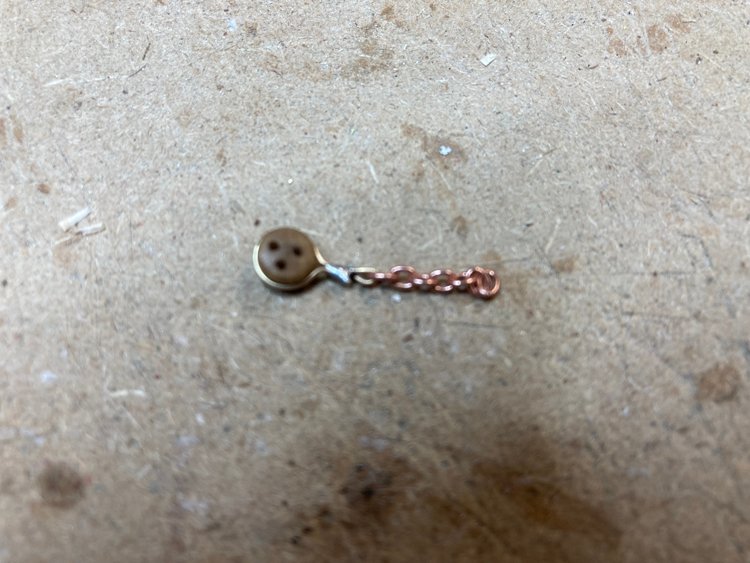
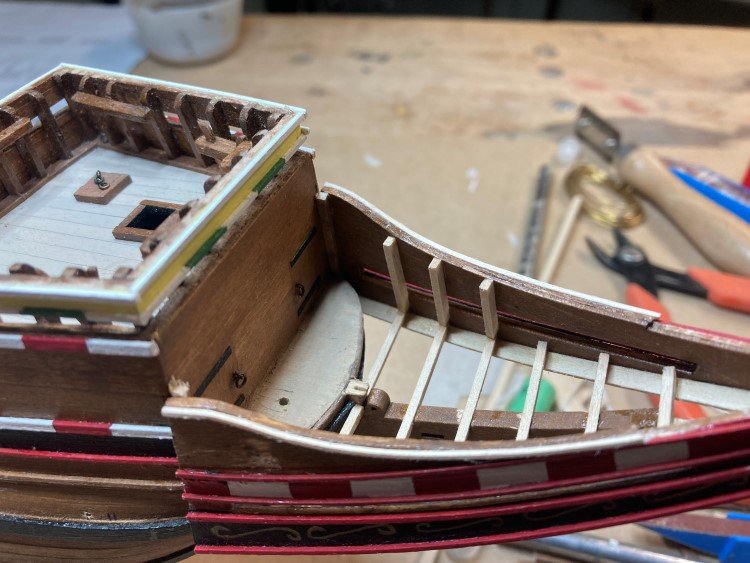
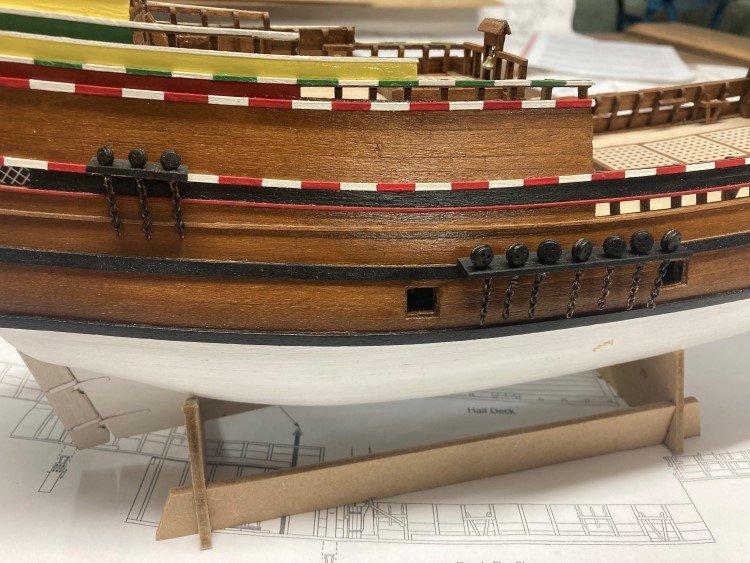
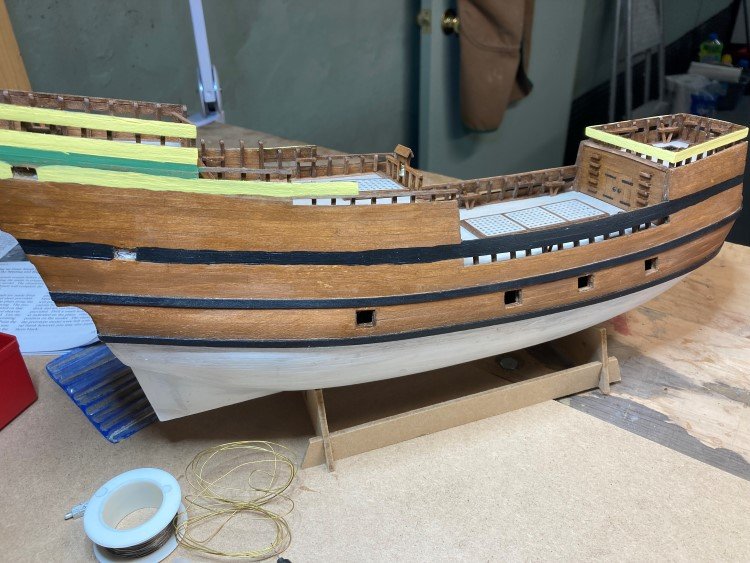
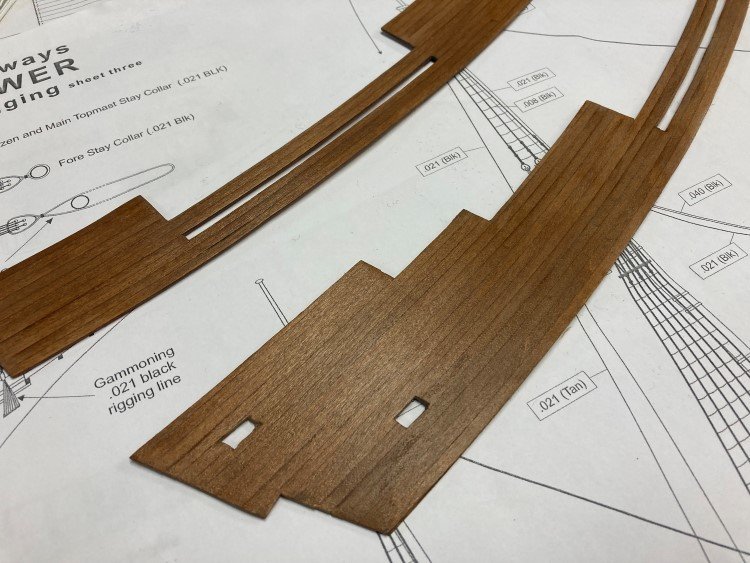
Hi All, I'm working away on the Mayflower. I've pretty much finished up the hull. I've added the moldings and completed the bow section. The bow section is a bit tricky to get started. It would have helped if I had three hands. It's one of those situations where you can't glue one piece on until another is in place and you can't glue that one in place until the other one is in place. Nevertheless once the positions of the side pieces are established and they're tentatively glued in place, it becomes easier and easier and in the end (as the manual suggests) the whole structure is surprisingly robust. I've also finished up the deadeye/chainplate assemblies and attached them to the channels. They aren't actually glued to the hull yet, just positioned there for the picture. I've used wire to help secure them to the hull. I have left the chainplates all about one or two links long and will adjust and attache them later when I establish their correct location by the angles of the shrouds. So, I now have a number of details to add to the deck, as well as some paint touch ups and then I will be ready to add the masts. Thanks for looking in. David

- 43 replies
-
- 9
-
-
-
- Mayflower
- Model Shipways
- (and 1 more)
-
If I remember right, for some reason there are two of each but you only need one of each. D
-
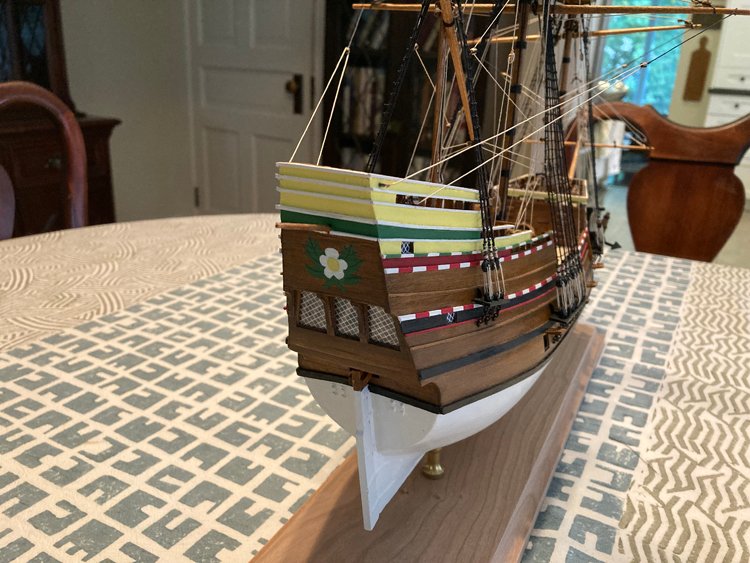
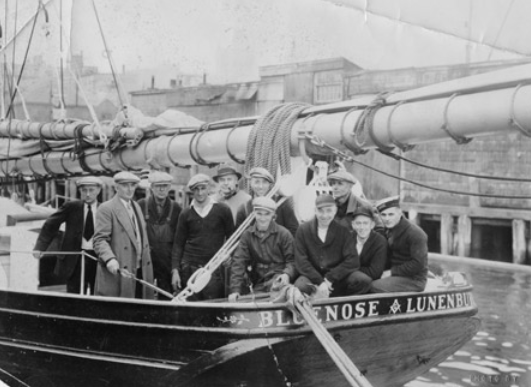
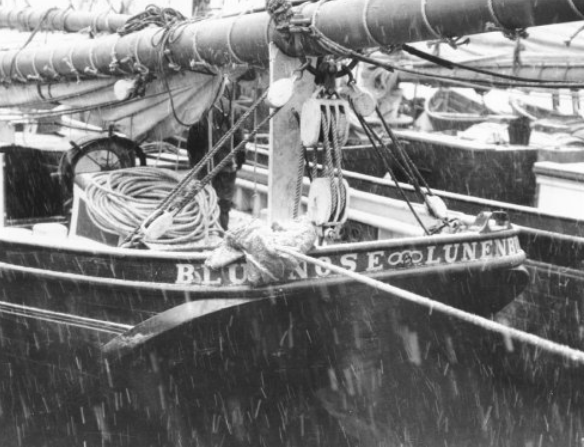
You're off to a great start and I'm sure you will enjoy building this model as much as I did. This is a fun vessel to research; there are quite a few pictures and other resources on line. Based on all the old pictures I located I would say that the Model Shipways plans are very accurate. I didn't find any major discrepancies. My favourite thing to discover were the two different versions of the stern lettering. I discovered these two different pictures: The first picture shows the Masonic emblem and the second picture shows the Odd Fellows emblem. I understand that the Masonic emblem was the original decoration and that it was changed to the Odd Fellows emblem much later. I'm looking forward to following your progress. David
-
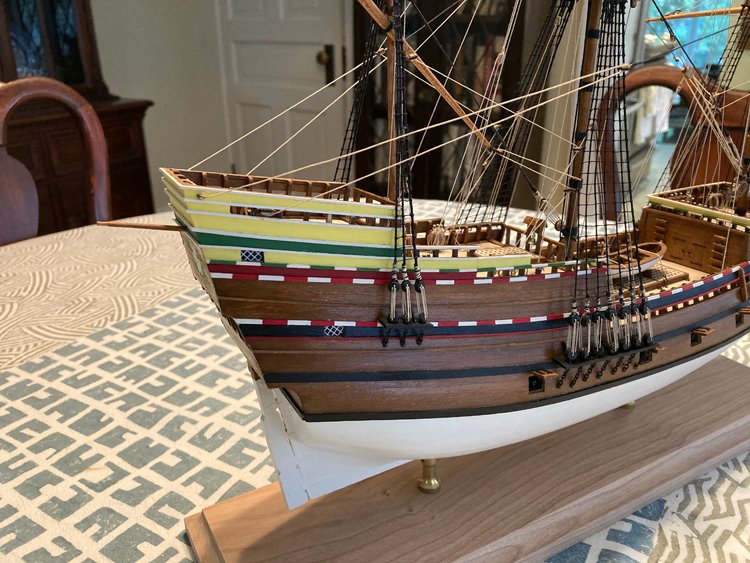
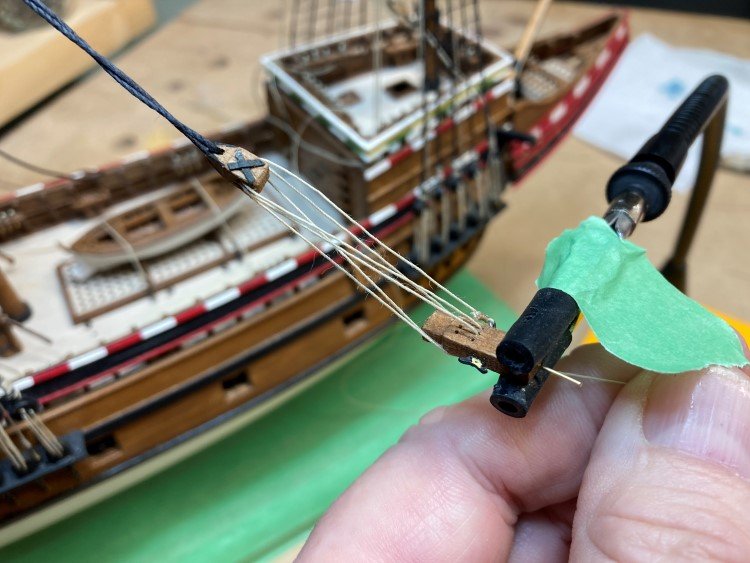
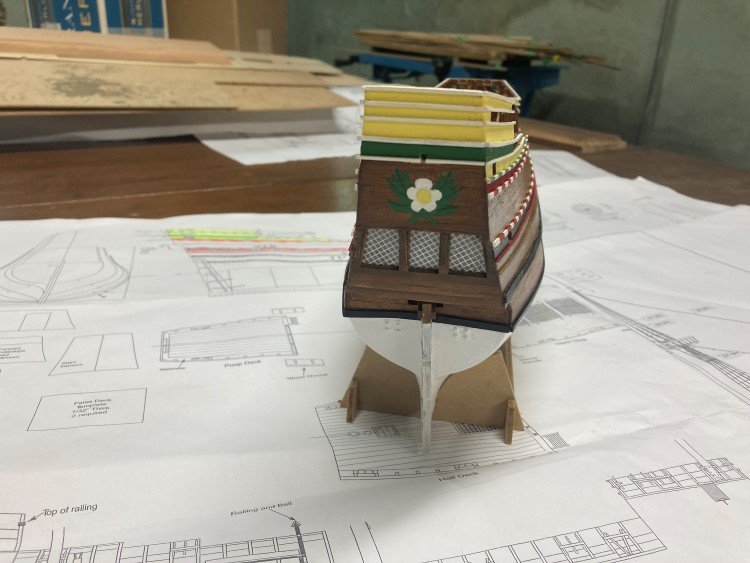
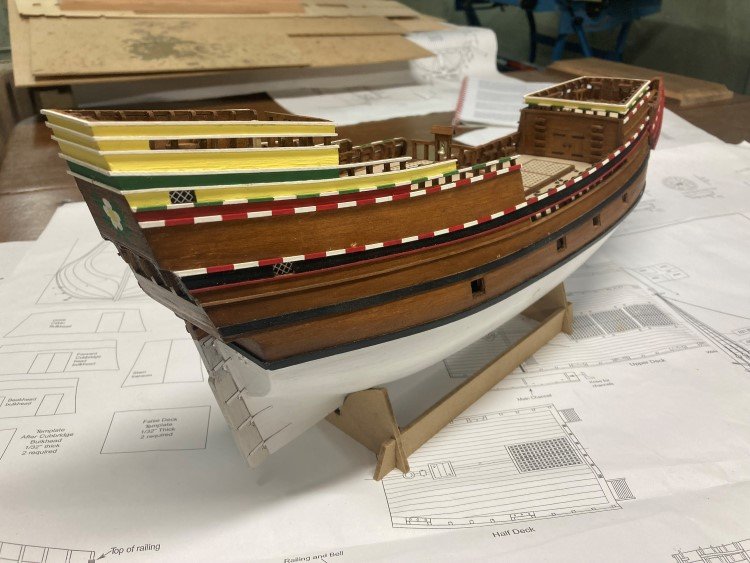
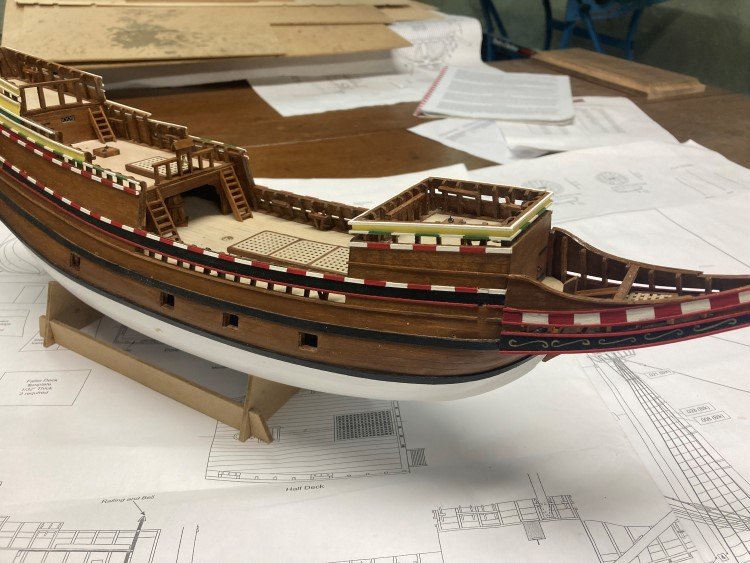
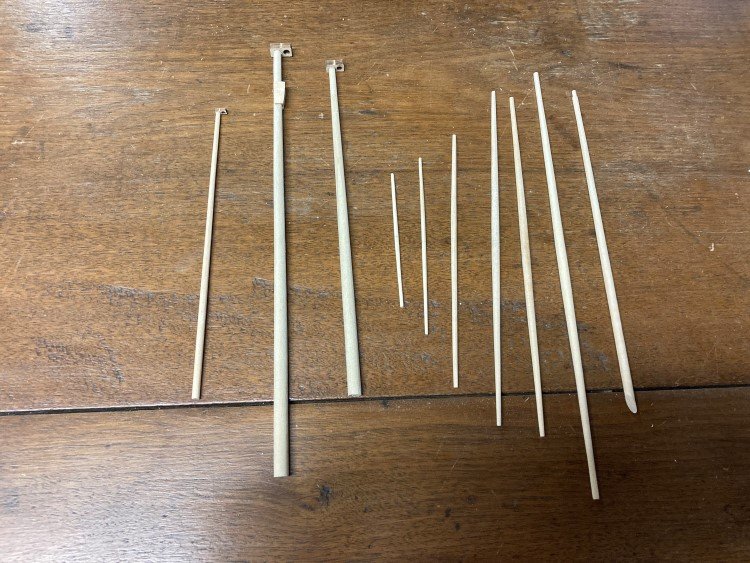
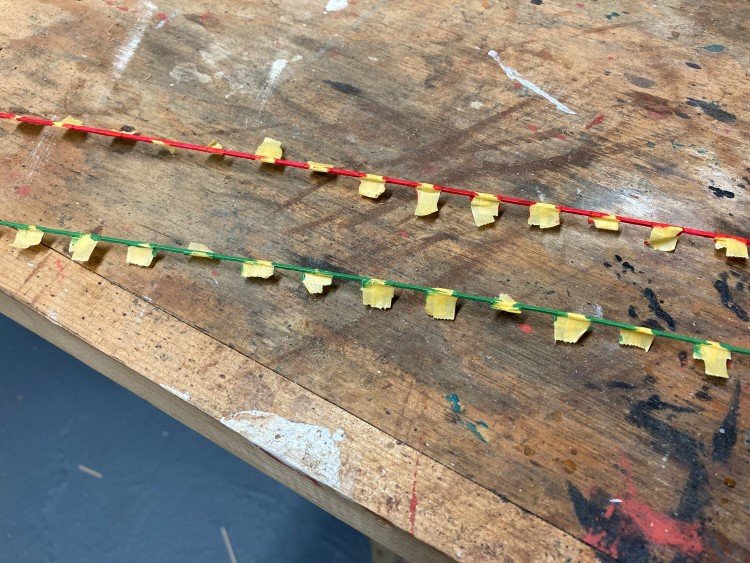
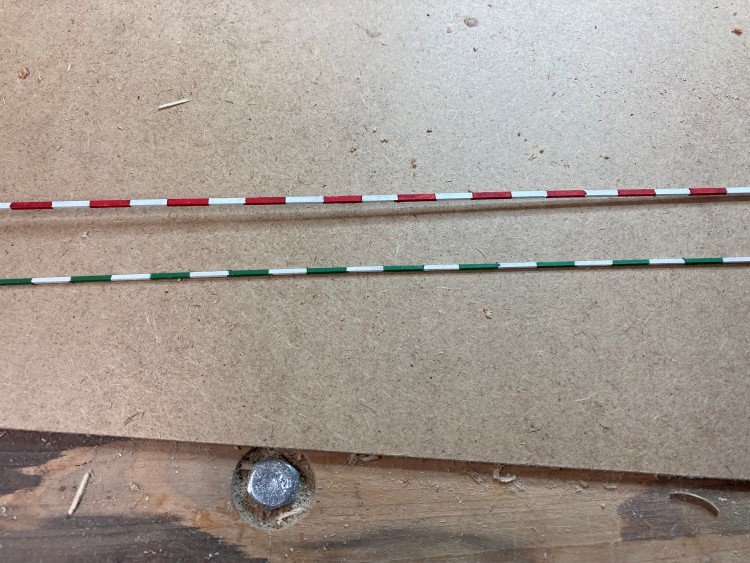
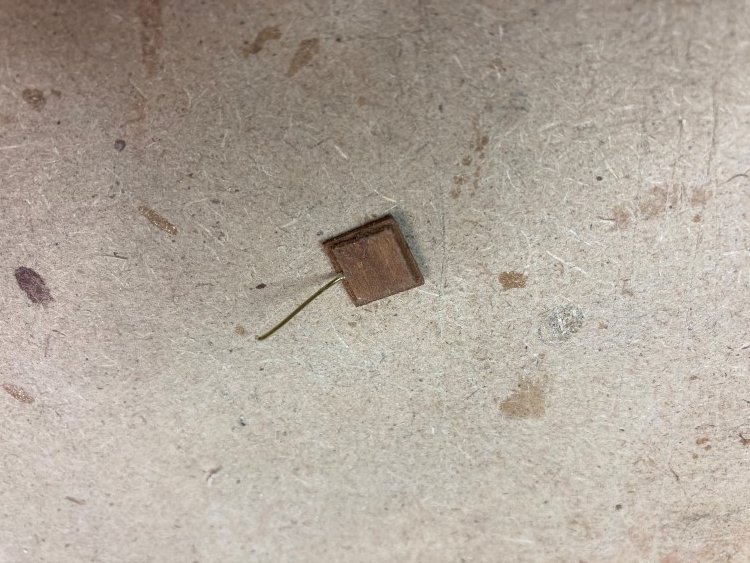
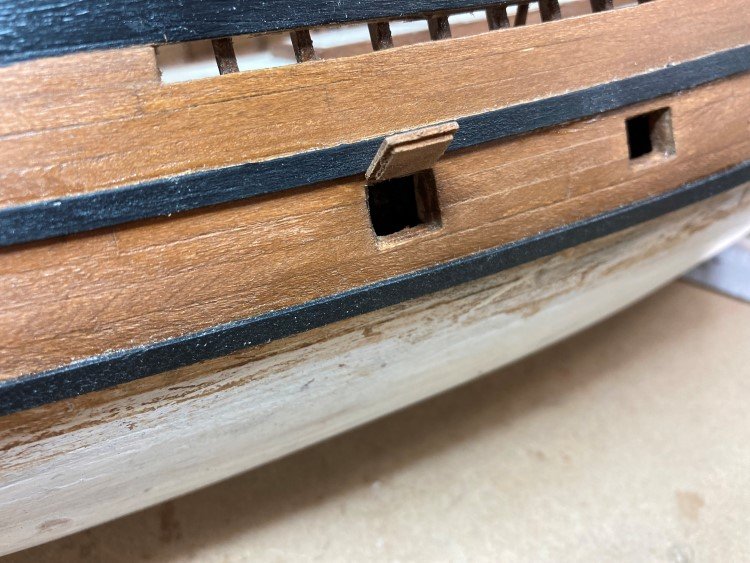
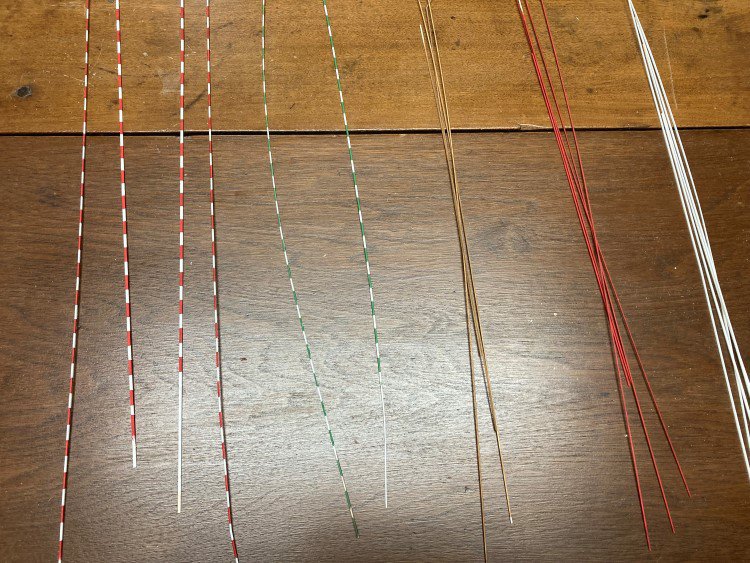
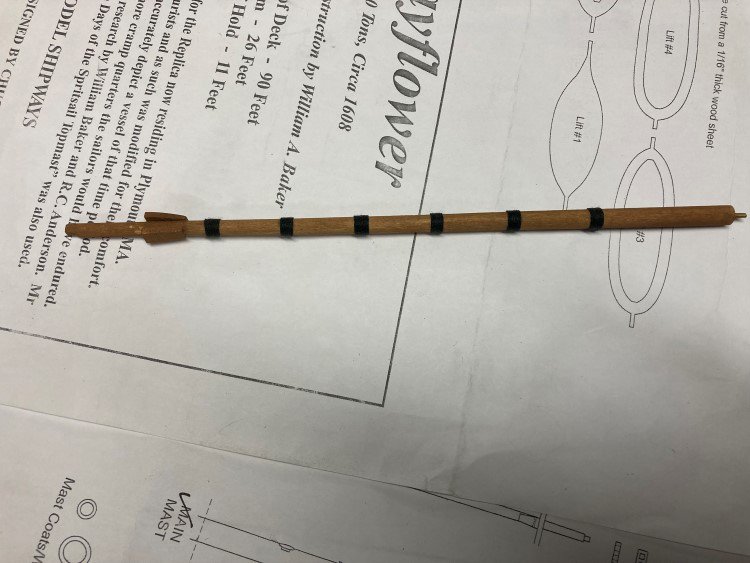
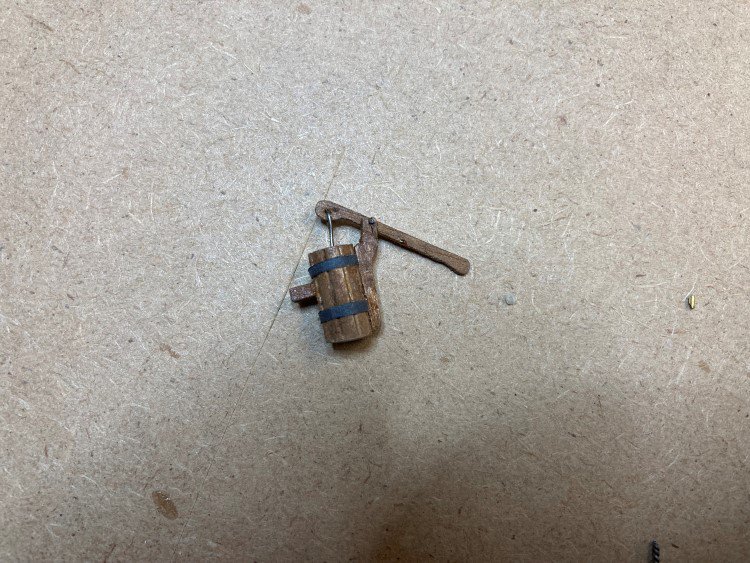
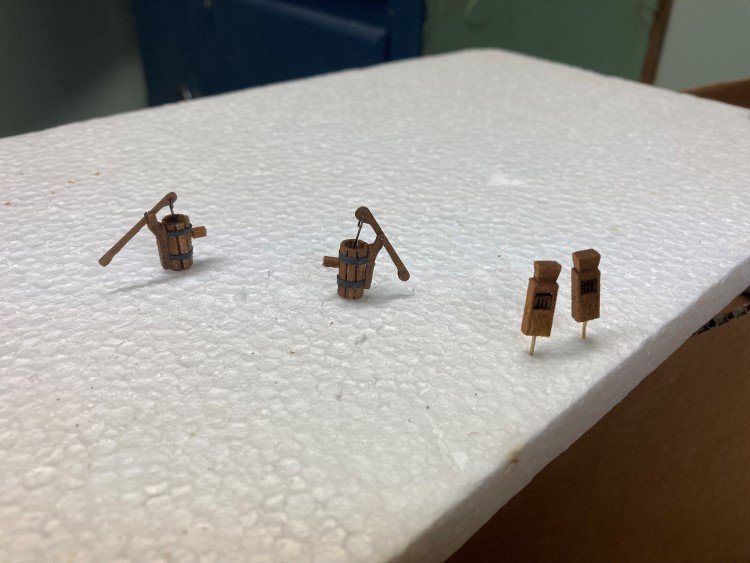
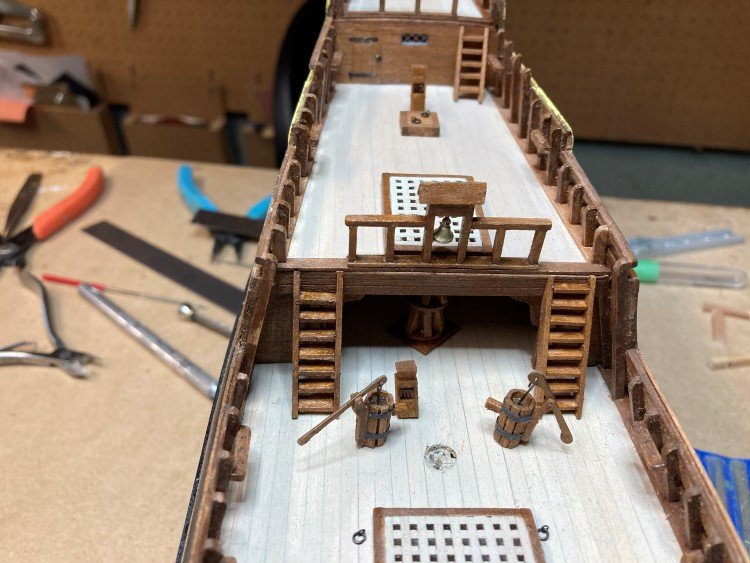
Good Morning Everyone, I've been hopping all over the place, working away at various bits and pieces. I finished planking the hull and had quite a bit of trouble getting a satisfactory finish on that basswood planking. What I have is far from perfect, but I think it will be acceptable. I'm banking on most of its flaws being hidden once all the details are added. I've attached the wales and started in on the decorative painting. I know it's looking rough at this point - I also started in on some of the spars. There aren't too many of them for this vessel and they are all pretty straightforward. In addition to the wooldings on the lower masts, the instructions call for "wood hoops" around the masts; immediately above and below the wooldings. It suggested using strips cut from a manila file folder. I tried that and a couple of other types of paper as well, but I just couldn't get them painted to blend in with the mast. They always looked too distracting, so I have opted to omit them. I'm not exactly sure what the correct method of attaching the wooldings is, but I chose to seize them to the mast, just as you would when seizing a line. It works really well and gives a very tidy result, even at the points where the line enters and exits the seizing. A small dab of glue at each point is all it takes to hold them in place - The decorative moldings proved to be more time consuming than I would have guessed. There are several different ones - natural colour, white, red, green/white and red/white. For the green/white and red/white ones, I painted them all white first, then added masking tape and painted the green and red portions. While this worked really well, it was pretty tiresome and in retrospect, I'm not sure that it wouldn't have been faster and perhaps with as good a result to have painted the red and green bits by eye and without the masking tape - I've been working on the gun port lids, although I won't add them to the hull until almost the very end. My initial though was to show them closed which you can see in one of the photos above. However, my thinking changed for a couple of reasons. I'm building this model specifically for someone and I think it likely that they will find the model to be more interesting if the gun ports are open and secondly, as the flaws in my hull finish became apparent, I decided that the gun port details would be one more thing to attract the eye and help distract from the hull finish. I don't know if there is any validity to this line of reasoning, but I'm hoping there is - I'm using a single piece of fine wire to secure each one to the hull, with a hole drilled between the two layers of the lid. the metal straps are ones I found in my stash of supplies. The one in the picture is just in place temporarily to see if it works and it seems to work just fine. I'll add some glue as well when I'm ready to actually install them. Most of the deck details are now in place - the railings, which were straightforward to build as well as the capstan, the pumps, the knights, ladders and hatches. This kit has some very poorly cast parts, including the capstan and the knights, so I made those from wood. I forgot to take a picture of the capstan before I installed it, but you can get a glimpse of it in one of the photos below. The knights have sheaves in them. You would think that it would be very easy to drill two rows of three sheave holes in straight lines and evenly spaced, wouldn't you? I don't have a drill press or mill and I'm working in basswood, so it proved to be very difficult for me to do. My oddball solution was to take a triple block from my supplies and build the knight around it. It looks a lot better than my other poor attempts. There are no pumps included in the kit at all, so these had to be scratch built. The instructions suggest taking a 3/16" dowel and flattening it so that it has eight sides. Again, without a mill, this is pretty hard to do free hand, so I opted to start with a smaller dowel, (1/8" I think it was) and apply strips to it. This also allowed me to more easily create the large depression in the top, by extending the strips above the top of the dowel. It would have been almost impossible for me to drill a large diameter hole in the top of the dowel without a drill press. The bracket holding the handle is 1/16" thick, and I found it impossible to cut a groove in it to hold a 1/32" handle, so I pawed through my supplies and found a billet of material thinner than 1/32" and I found it not too hard to cut a groove to accept this thinner material. (I sometimes wonder why I hang on to so many old billets, but it's surprising how often they come in handy.) So that's where I'm at so far. Next up is applying the moldings to the hull and painting the decorative mayflower on the stern. The kit includes a cast piece, but I don't think I'm going to use it, but rather paint the decorations directly onto the stern. This is not exactly on topic, but I thought I'd share it anyway. I tend to keep a very messy workspace and I've come to accept the fact that that will never change. However, I do find it annoying when I accumulate a number of various pieces of wood strips which I have retrieved from my storage area. Before I know it I have a variety of sizes all mixed up with my tools and I can't tell what I've got. I sometimes find myself heading back to my storage for a new 2' piece to cut a small bit off of, when I actually have plenty of small bits all mixed up with other sizes and my various tools. So, in an effort to help with this problem, I'm trying this idea. I bought some mailing tubes and cut them in half lengthwise to make troughs and then joined them together with masking tape. It's probably a bit too soon to tell how well this will really work, but so far it's promising. To the left in the picture below is my usual utter chaos. but at least I can see at a glance what wood I currently have out. Thanks again for checking it. David
- 43 replies
-
- 9
-
-
-
- Mayflower
- Model Shipways
- (and 1 more)
-
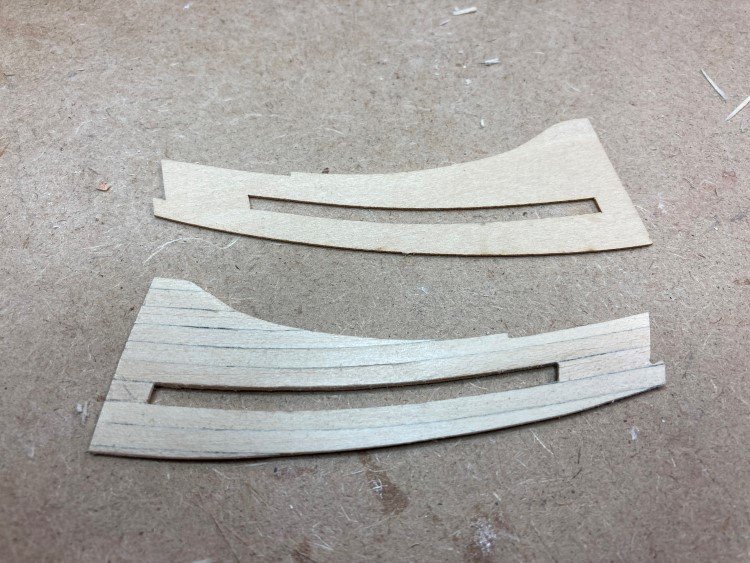
Your transom is looking good, John. I've built this kit twice now and while it's generally not a difficult build, that transom is tricky. It looks to me that you're in good shape. Once it's done, the worst is over! This is an easy and enjoyable hull to plank. One little problem that does lie ahead of you though, and which you may have already discovered from other build logs, is the provided stern rail piece - it just doesn't fit. One option is to scrap it altogether and scratch build a new one, but I ended up just cutting it into three pieces - a centre piece at the stern and two side pieces and then adding a couple of filler pieces to widen it and change its profile slightly which made it fit. This worked quite well. David
- 282 replies
-
- 2
-
-
-
- Bluenose
- Model Shipways
- (and 1 more)
-
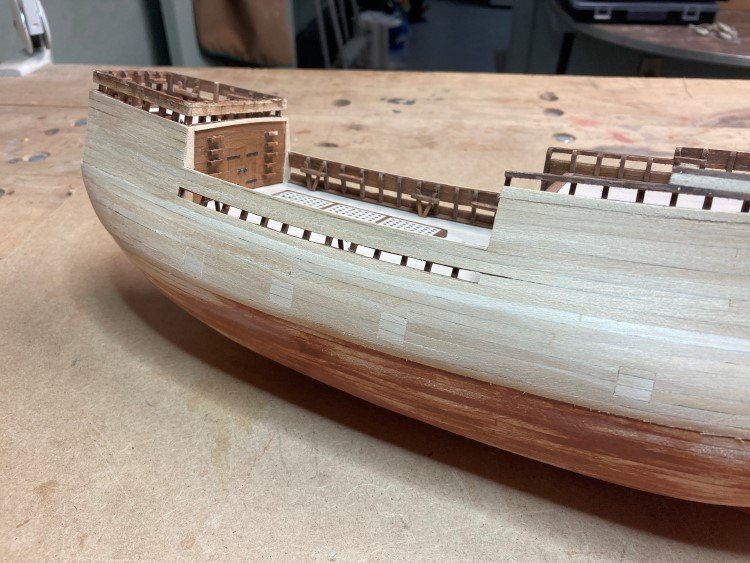
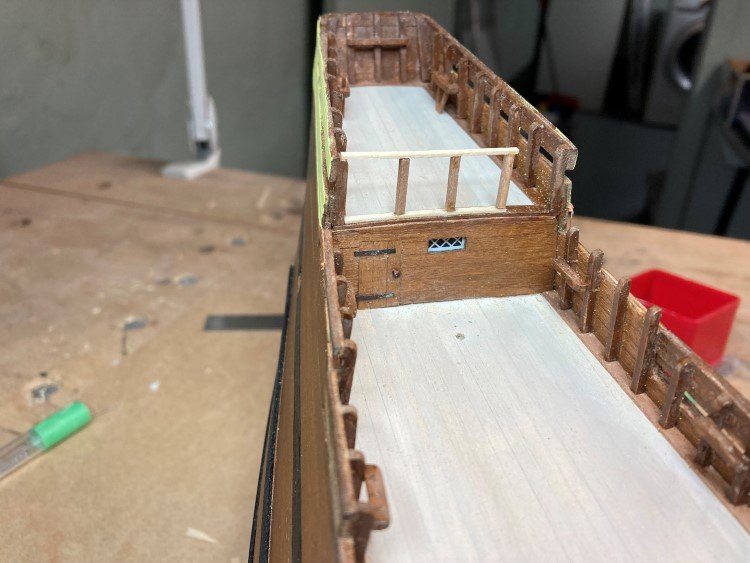
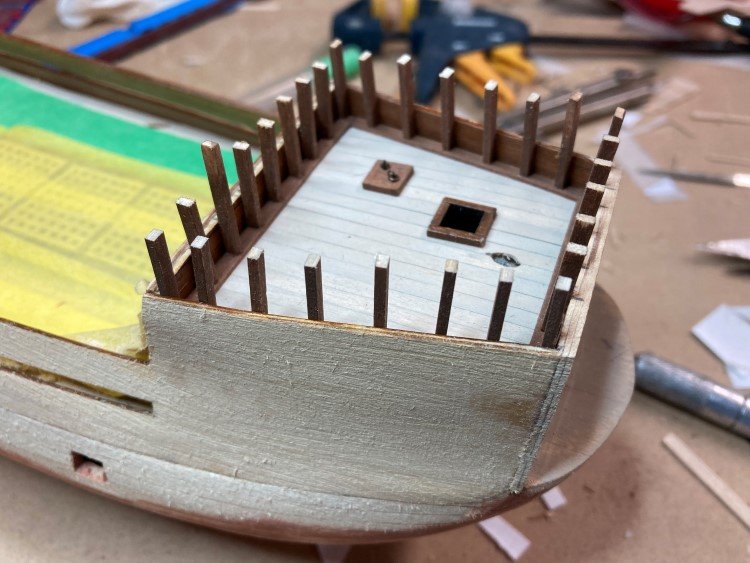
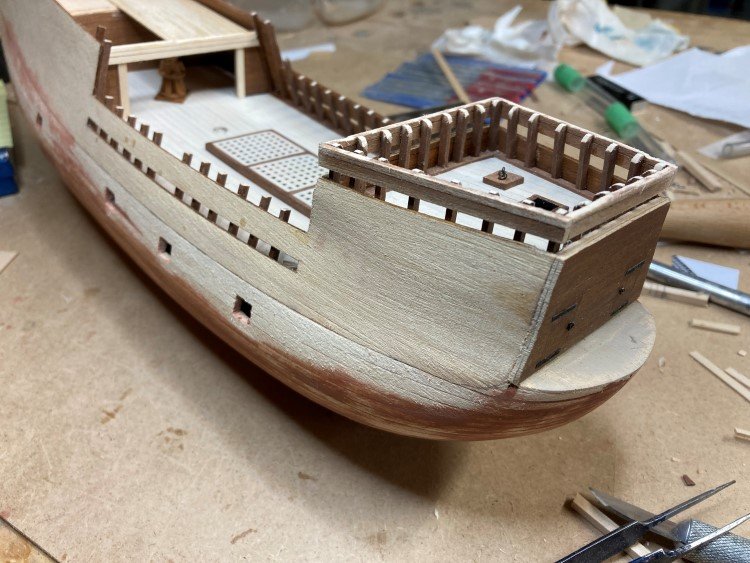
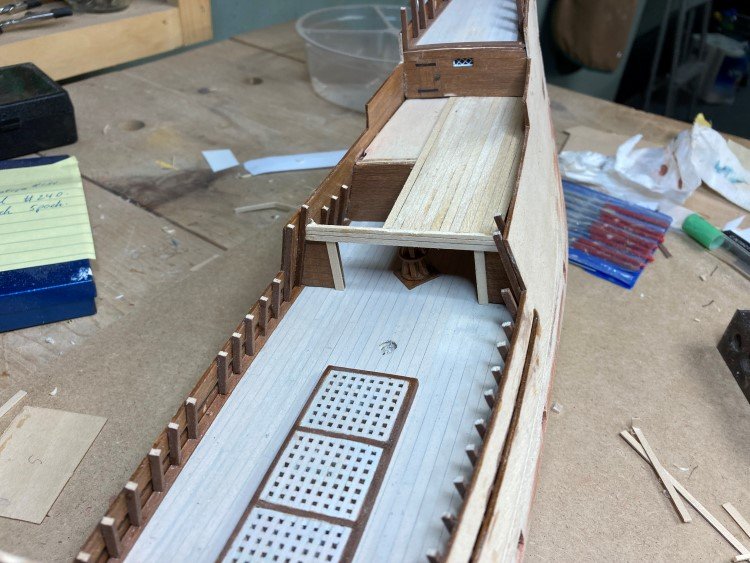
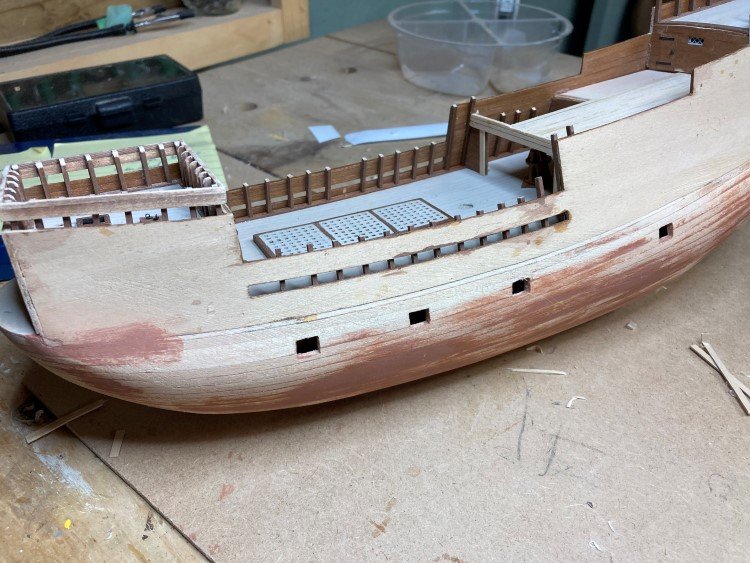
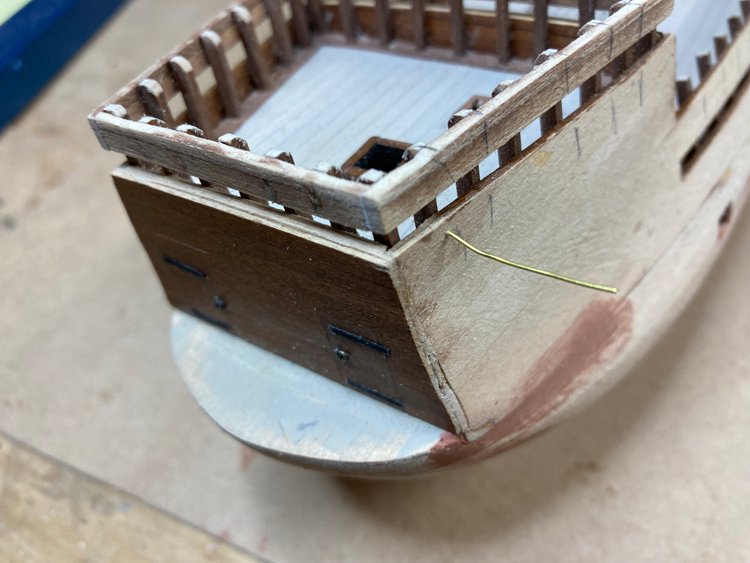
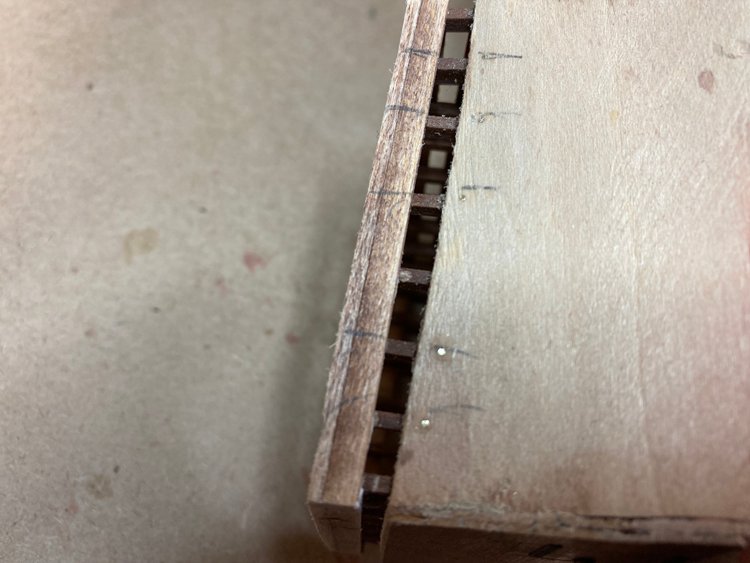
Good Morning, The next order of business for the hull was the addition of the bulwarks, which were planked on the inside prior to installation. Then the waterways and the stanchions. I decided to add the grating to the main deck at this point too - I discovered that the stanchions tend to pop off pretty easily, so I decided to add some wire to secure the ones that will support the pin rails and kevels. I'll also secure the pin rails and kevels to the stanchions with wire when I get to that point. I'll do that before moving on to the planking of the upper hull. That's all for now, many thanks for checking in. David
- 43 replies
-
- 16
-
-
- Mayflower
- Model Shipways
- (and 1 more)
-
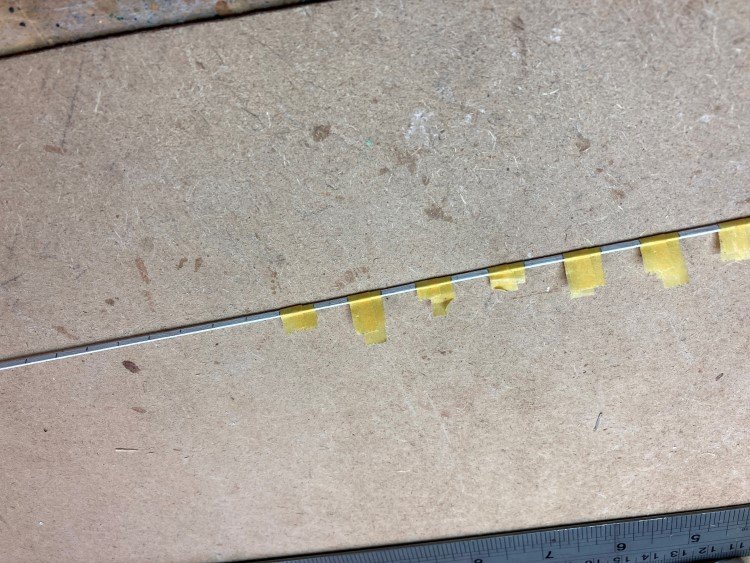
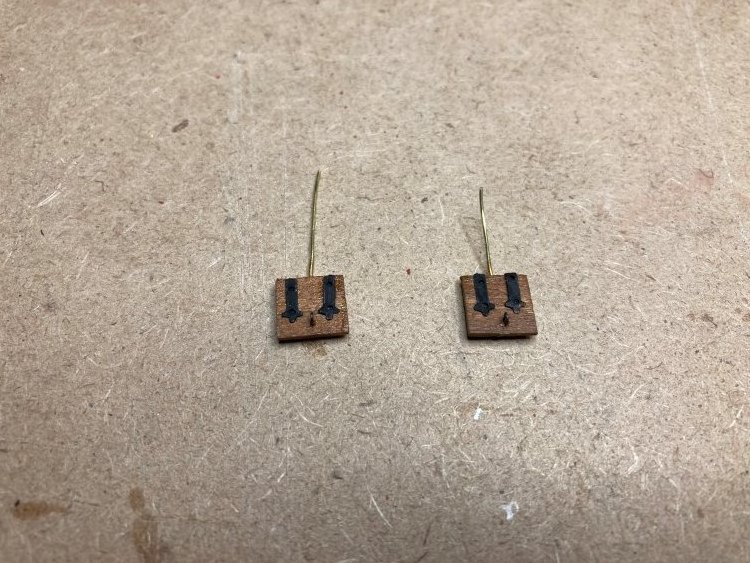
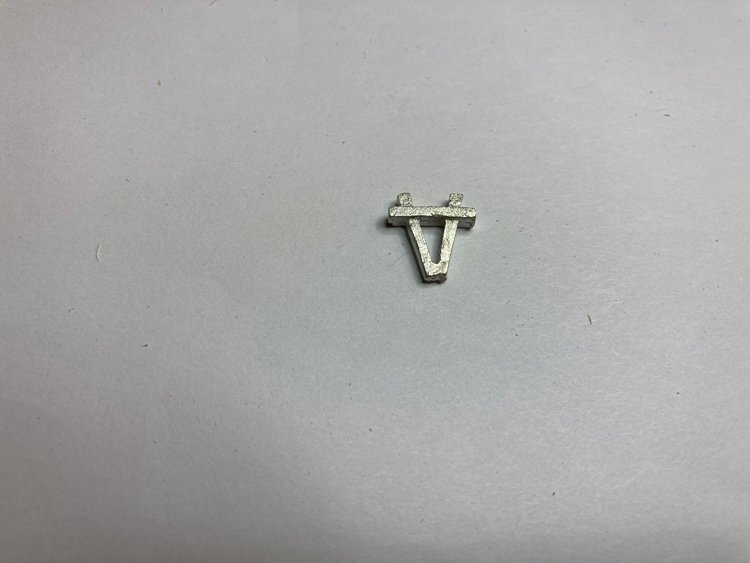
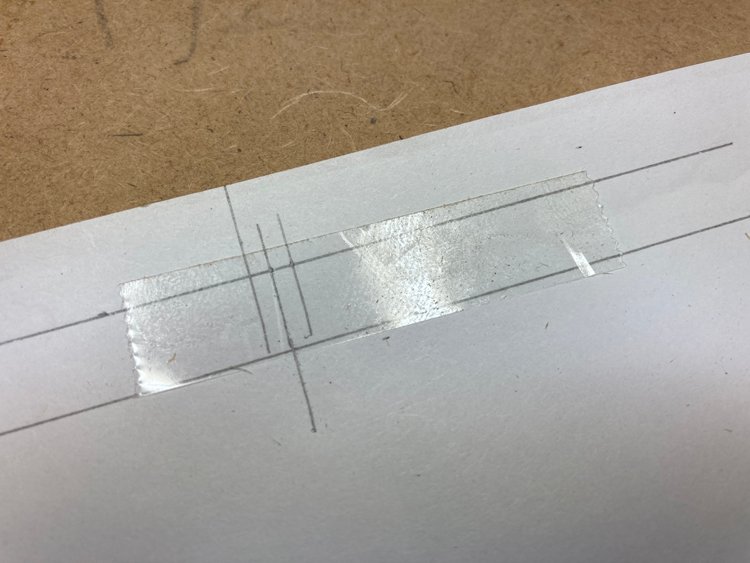
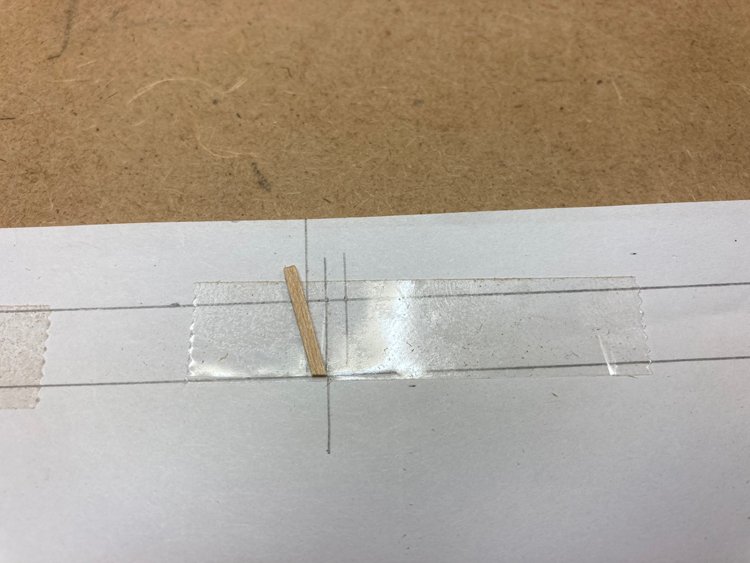
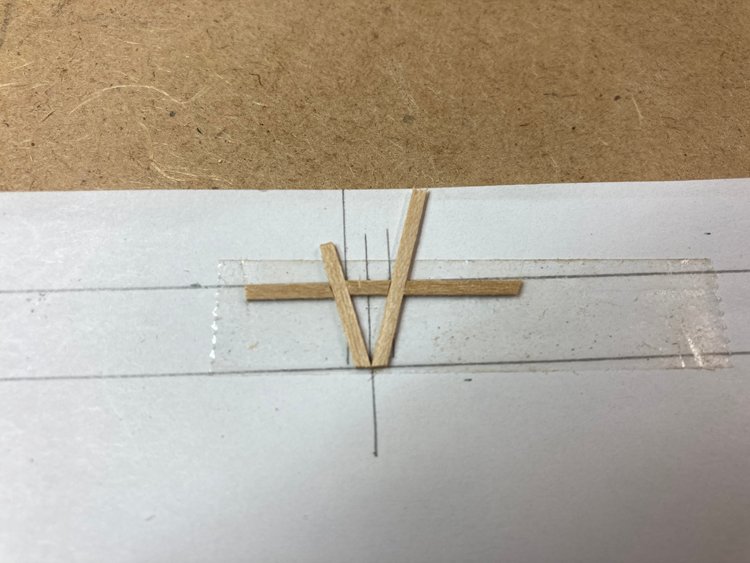
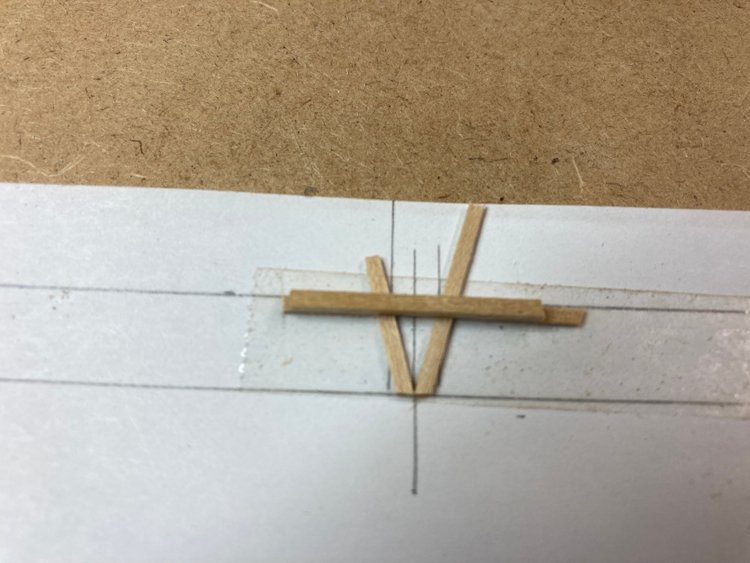
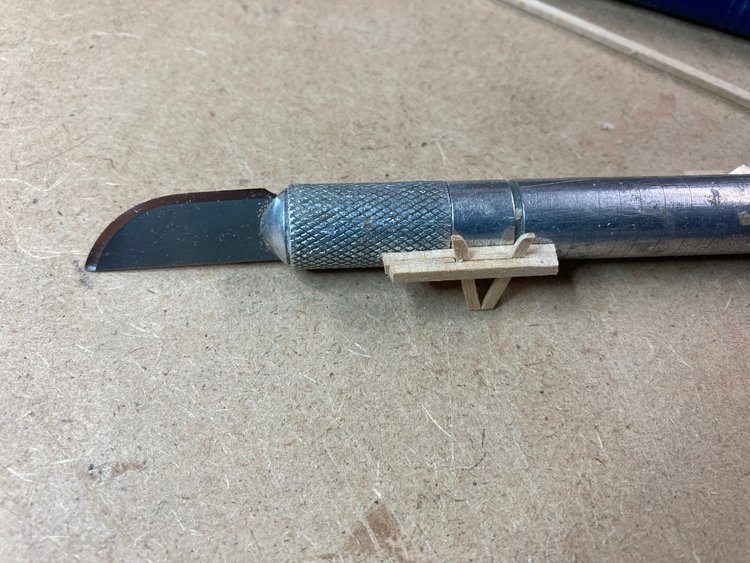
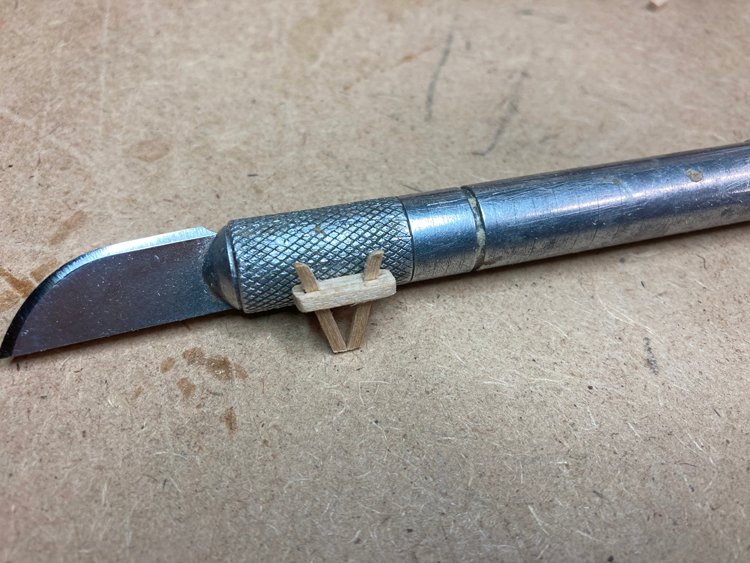
I've been working on various aspects of this build, in no particular logical order. This morning I turned my attention to the kevels. There are eight kevels on this ship and I don't really care for the cast kit-supplied ones, so I set out to make some wooden ones. Here's how I approached it. I could see that there are two ways to do this. One would be to create two holes or slots in the cross member at the right angle and then slide the uprights through. Since I don't have a mill or a drill press and I'm working with basswood, I knew that would be an exercise in frustration, so I decided to try a second method, which is to laminate the cross member on the uprights. I drew some lines establishing the dimensions on a piece of paper and covered them with double-sided tape. I placed the first upright in position and trimmed the bottom of it along the pencil line - I then added the second upright and the three pieces of the cross member. There's no glue at this point; only the tape is holding everything in place. These pieces are all 1/32" x 1/16". I then glued a piece across the cross member (1/16" x 1/16") Peeling the assembly off of the tape. It's quite rigid by this point. Then I added a second piece across the back of the cross member - After some trimming and sanding. There may be some more sanding yet to do. I'm not sure if the cross member is still a bit too thick. I think this method is going to work. Once they are all completely covered with rope coils, they should look just fine.😁 Thanks for checking in, much appreciated. David

- 43 replies
-
- 14
-
-
-
- Mayflower
- Model Shipways
- (and 1 more)
-
Glad to hear there's another MS Mayflower out there. There's currently a Billing version, but I think that's it. I'm surprised that it isn't a more popular subject. It has a very interesting story, it makes a handsome model to display and the MS version at least, (I'm not familiar with the others) is quite a nice kit. I think the crows' nests are the only real difference between what the instructions indicate and what's included. It appears that they were originally turned pieces of wood. I imagine that replacing them with the cast ones was an economic decision or perhaps one of availablity. My replacements weren't actually very hard to make, but one bit of advice I didn't mention is rather than use one piece of material for the base, use two thinner pieces laminated together with the grain going in opposite directions. One piece will tend to split, but the lamination won't. I happened to have some thin stock in my stash, but if you don't you can glue together scrap bits from the billets and still get an acceptable result. Thank you for mentioning your photos. Sometimes I like to refer to a photo if there's a detail I'm not quite clear on, and it's frustrating when it seems every aspect of the ship is photographed and on line, except the one tiny detail I'm after. If the need arises, I'll contact you and see if you have the solution in your pictures. David
- 43 replies
-
- 2
-
-
- Mayflower
- Model Shipways
- (and 1 more)
-
Hi Dave, I agree with both comments above; a piece of basswood will work just fine for the anchor stocks and I have never used a build board. I glue the bulkheads in one at a time. It's a slow process but works just fine. Then when it's down to planking and sanding, the hull seems to spend as much time on my lap as it does on the bench. I'm looking forward to following your progress. I've built the Mamoli Rattlesnake, which my grandson now has, but I'd like to build it again, this time the MS version. I have a real soft spot for this one. I credit it as the reason I got into building model ships. I've told the story on the forum before, but it was a quite a while ago now. When I was a kid my best friend's dad built model ships and I was mesmerized by them. I've forgotten the names of most of them, but what little kid could forget the name Rattlesnake. My friend still has it. This model would be about 60 years old now. I don't know if it's a kit or from scratch, but the way he handled the stern makes me think this might be a scratch build. Look at the unusual colour he used for the bulwarks. I believe the MS instructions suggest that the bulwarks should be gray. I guess that's what he was going for, but this is almost a pale blue. Also look at the flag. I don't know much (let's be honest - I know nothing) about flags, but I'm pretty sure this can only be a British ensign. My friend's dad was a real history buff and serious anglophile, so he must have opted to display the model after it was captured by the British. From what I've read, I understand that it was first re-named Cormorant by the British and then later changed the name back to Rattlesnake. Sorry, I hope I haven't hijacked your build log too seriously with this digression. David
.jpg.03ff1bf7fb7de2c1d71dbfb291f56a3a.jpg)
.jpg.ee4b19d5c2816bde004e1ab1b969d42f.jpg)
.jpg.772d205cc02d927de7edba060c000211.jpg)
-
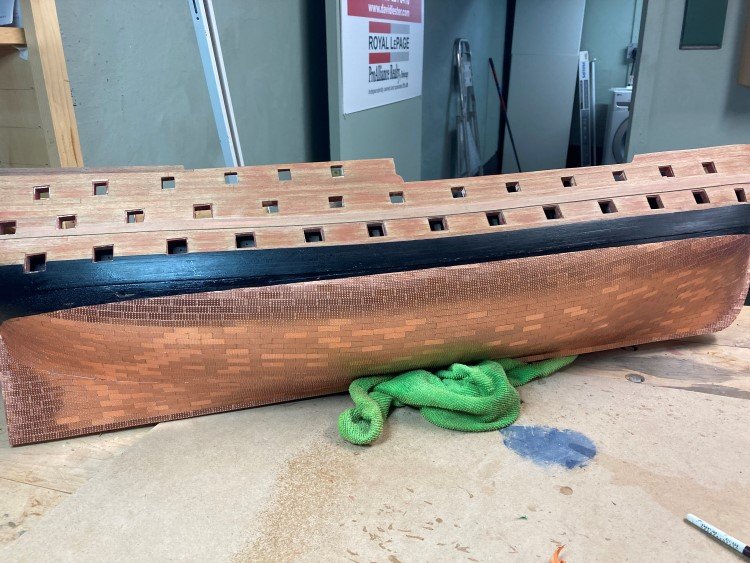
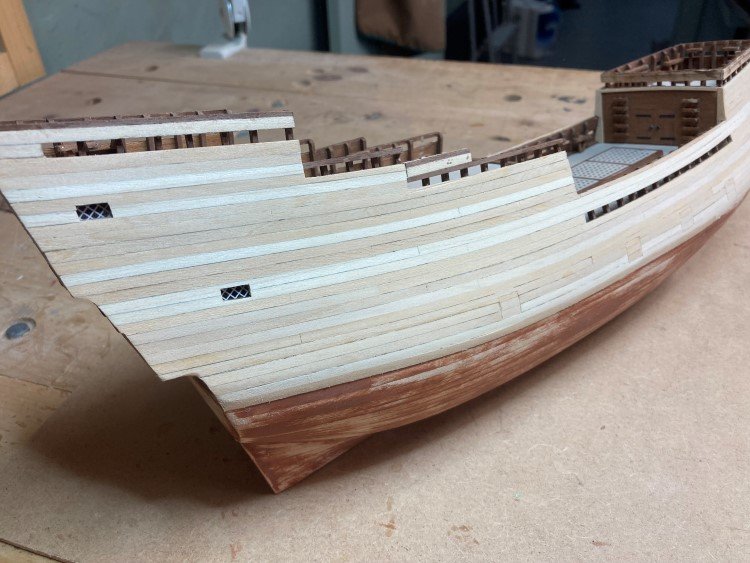
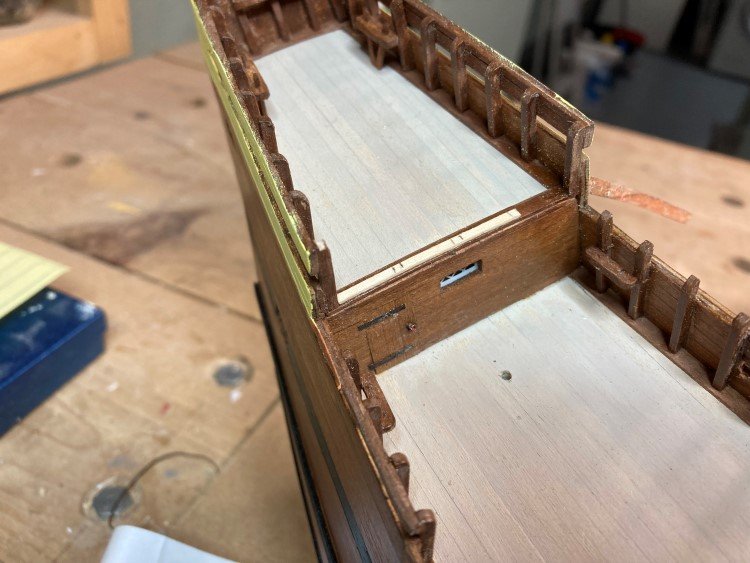
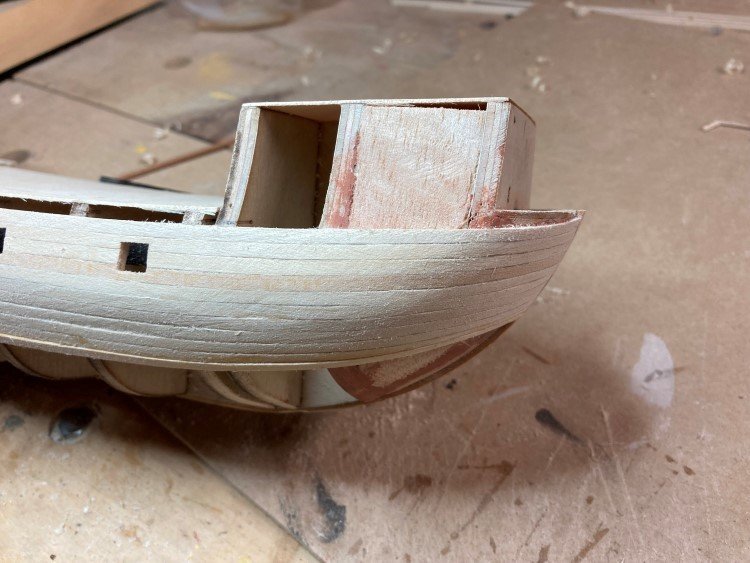
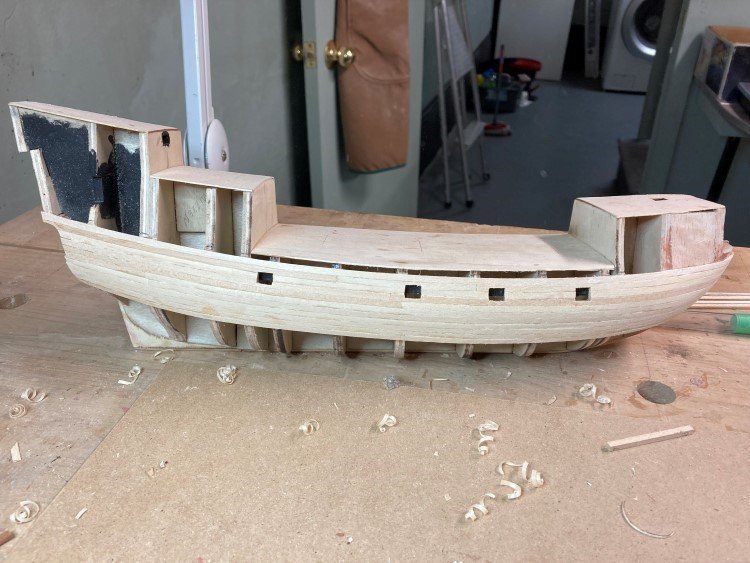
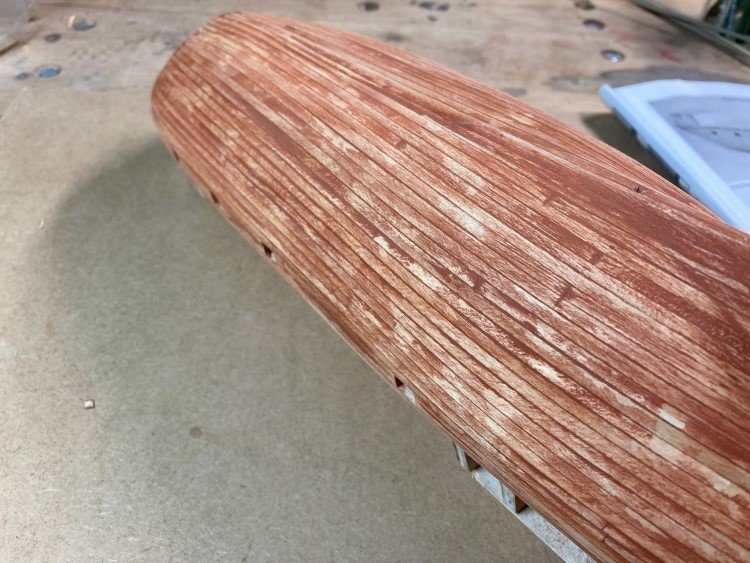
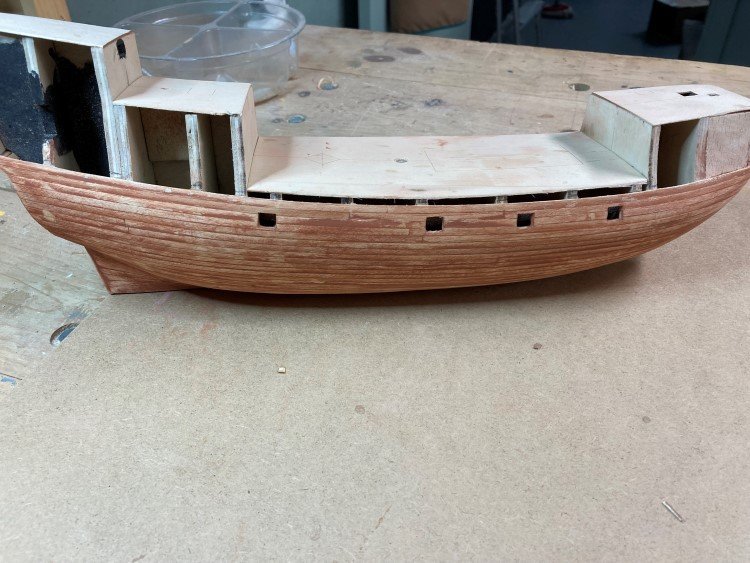
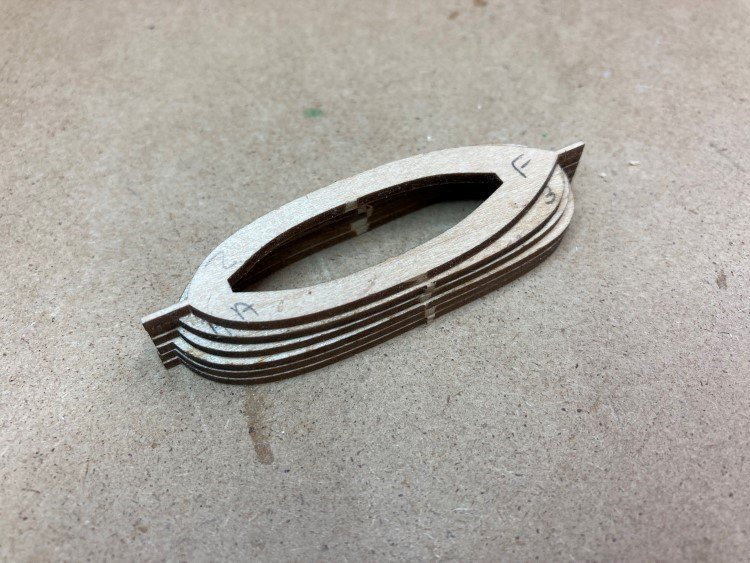
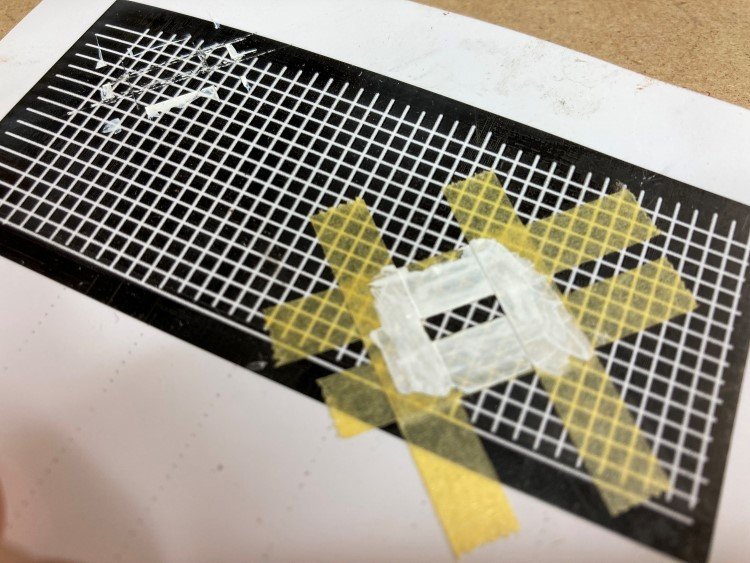
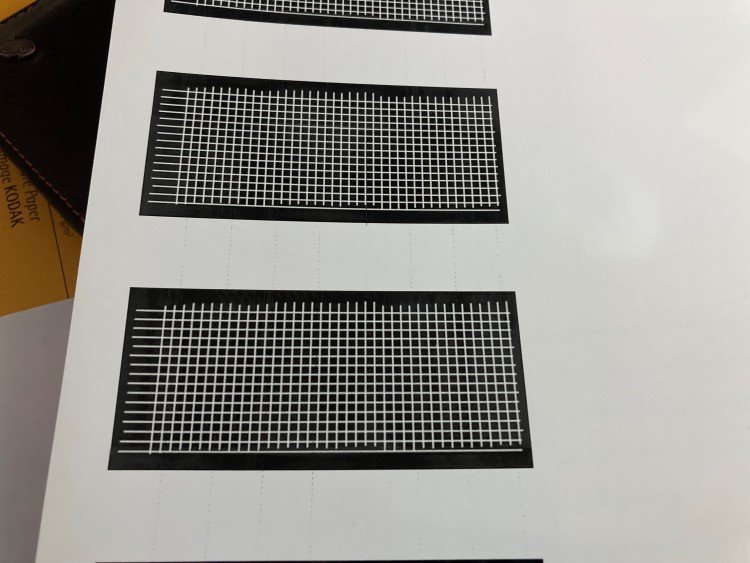
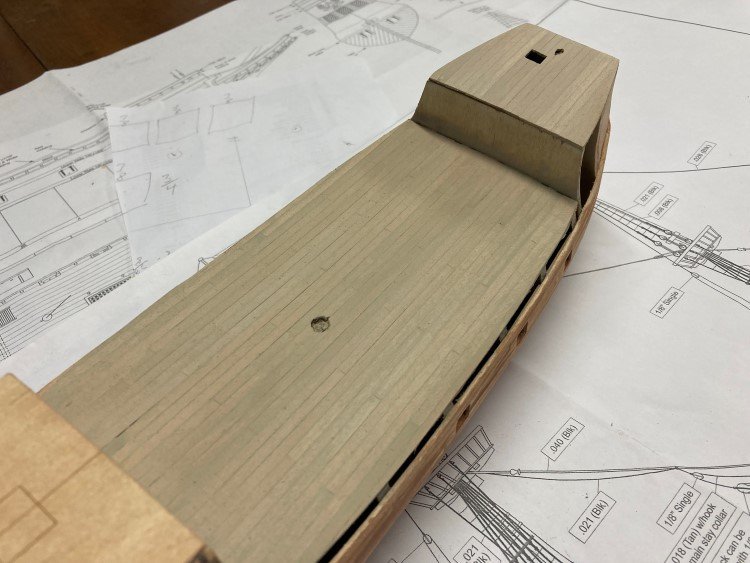
I've been working away at my Mayflower on a number of different fronts at the same time. I've finished the first layer of planking on the lower hull. Despite having a very blunt round bow, this isn't a very hard hull to plank. This kit actually includes a template to use to help "spile" the planks at the bow. I used it along with an iron and it worked like a charm. I have the lower hull sanded and filled. I happened to have some mahogany wood filler kicking around, so that's why it looks a bit odd, but it doesn't matter as it will all be covered up. I started the boat, using my usual approach of cutting it in half in order to more easily carve out the interior. I read about this technique in another build log somewhere and have used it ever since. I recommend it for this type of boat. It works really well. Once the interior's carved out, I just glue it back together. Here's how I'm doing the windows. There are a number of very small windows on the Mayflower with a diamond pattern. This detail is just far too small for me to model, so another approach is needed. The instructions with the kit indicate that there is narrow white tape provided to be placed on a piece of acetate. I received the acetate, but there certainly was no white tape included, so I needed another solution. My first thought was to get an extra fine white paint pen and draw the white lines on the acetate, but then another idea occurred to me. There is an image of the white lines on a black background in the instruction book which I photocopied, with the idea of just framing it into the window openings. The resulting image on regular paper didn't seem quite crisp enough to me, so I created a new image, using a graphics program on the computer. Then I printed in on a piece of photographic paper with a glossy finish. The result is very crisp and I think it will work just fine. To make the white frame around the window I placed some tape and painted it white. Lest you think I'm brilliant for coming up with this, let me share with you how long it took me to figure one aspect of this out. I tried making the lines on the computer diagonally, but they wouldn't come out right; they had a small "stepped" effect which ruined the look. I had pretty much abandoned the idea altogether when days later, I awoke in the night and realized I could create the lines straight and then just cut the windows out on the diagonal! Duh! This isn't a very difficult model, but there is one big challenge and that is the finish. Much of this model is shown as having a natural, rather than painted finish. This isn't too big a problem when working with nice wood, but in my experience, it can be a nightmare when working with basswood and this model is all basswood. It just never wants to take a stain evenly and I have never been happy with the results whenever I've used Minwax stain or something similar. So, I've been experimenting with paint to give a stained effect. I'm convinced this is the better way to go. I just buy inexpensive acrylic paint - Americana Decoart - and it works well. I water it down and then experiment with different applications of different viscosities. I sand in between applications and if I've applied it too thickly, I sand it off almost completely. It's just a matter of trial and error. Here I've used burnt umber, watered down with several coats applied, attempting to even out any huge differences in the boards. I then sealed it with a coat of amber shellac and gave it a light rubbing with steel wool, which knocked the sheen back. I'm happy with the result and for sure it's better than anything I could have done with stain. These bulwark pieces get planked on the inside prior to being installed on the hull. I used a similar approach for the deck, this time going for that sort of grey-taupe colour that decks often have. This time I won't seal it with shellac or poly, but use Tom Lauria's suggestion of just burnishing it with a piece of paper towel. So that's where I'm at so far. Thanks for checking in. David

- 43 replies
-
- 10
-
-
- Mayflower
- Model Shipways
- (and 1 more)
-
Congratulations Dave. Your Lady Nelson looks pretty darn nice. I'm looking forward to you next one. David
- 362 replies
-
- 2
-
-
- Amati
- Lady Nelson
- (and 2 more)
-
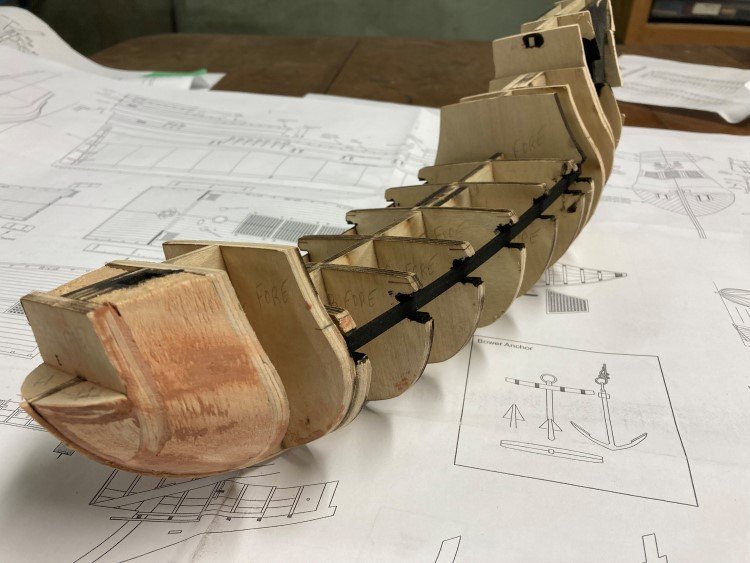
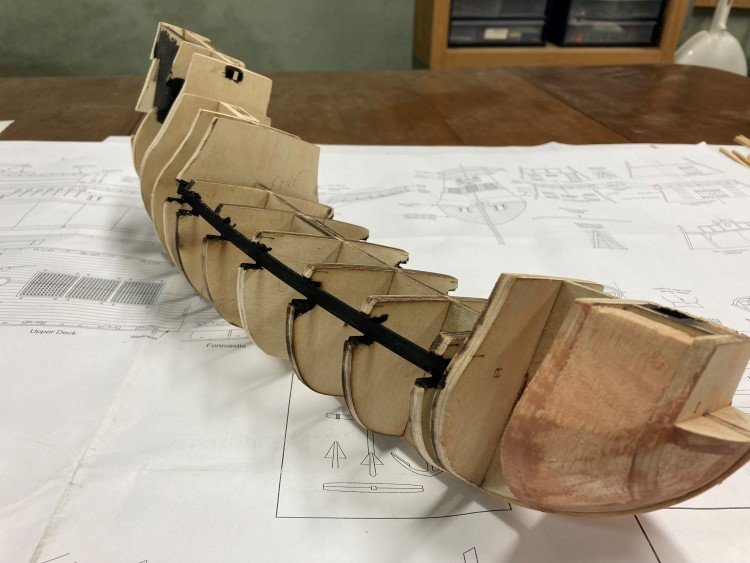
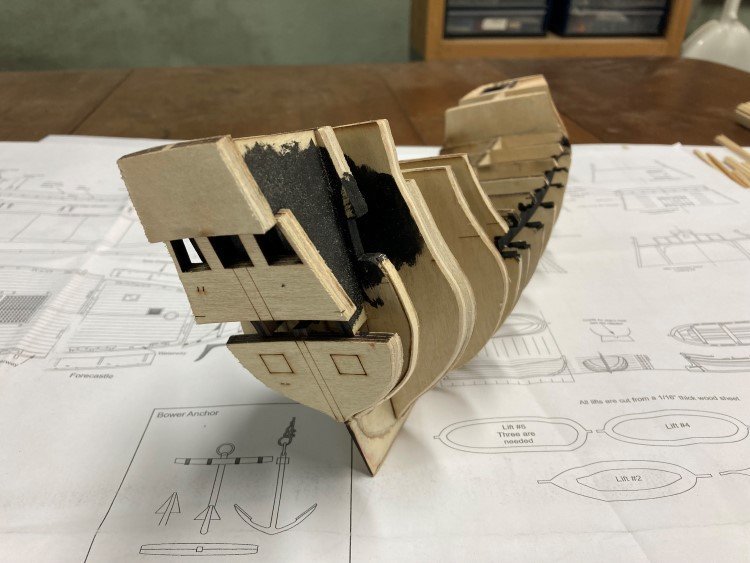
Boring little update for you - I have the bulkheads installed and faired. Everything fit together well with only very minor tweaking needed. It's a fairly blunt bow, so I added some filler blocks to help retain the profile. There's really no need for me to say anything more at this point. Very straightforward so far. Thanks, David
- 43 replies
-
- 7
-
-
- Mayflower
- Model Shipways
- (and 1 more)
-
Beautiful job!
-
I would simply make that name in Microsoft Word. I do them this way all the time. Your situation is ideal for it, because there's a frame around the area with the lettering. You should be able to find a font that's very close to what you want. You can even give the name a slight curve if you want to follow the curve of the stern. I would either create a one-celled table or use a text box and set the background colour to black. Make the cell or box quite a bit larger than you need. That way you have lots of room and margin for error when you cut it out. Centre the white lettering in the cell or box. It will take a bit of trial and error to get just the right font style and size etc. Once you've got the lettering right, print it, cut it out large enough to cover the whole stern area, glue it on and add the white frame. It should look pretty good. There may be better ways of doing it than this one, but at least this one works for me. I have never had good luck with other methods such as dry transfer lettering etc. David
-
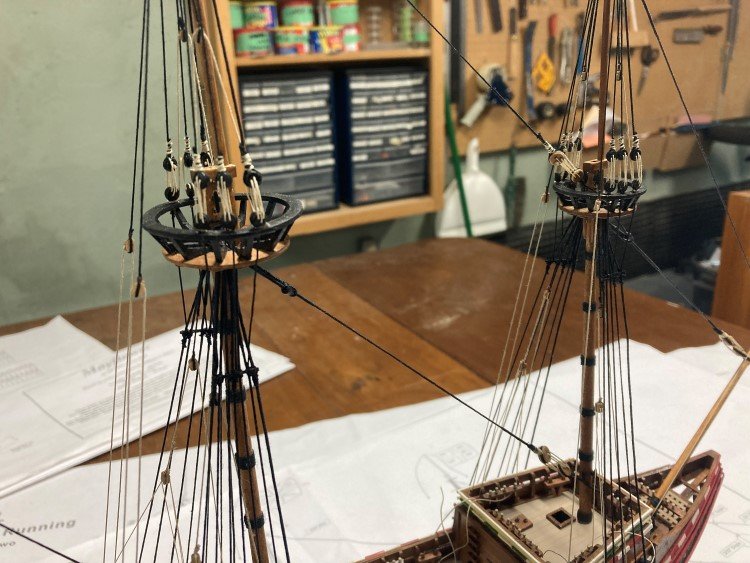
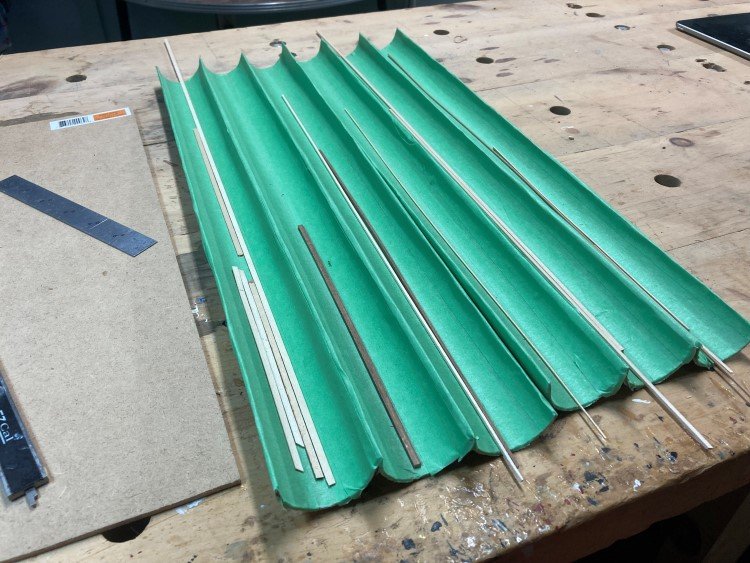
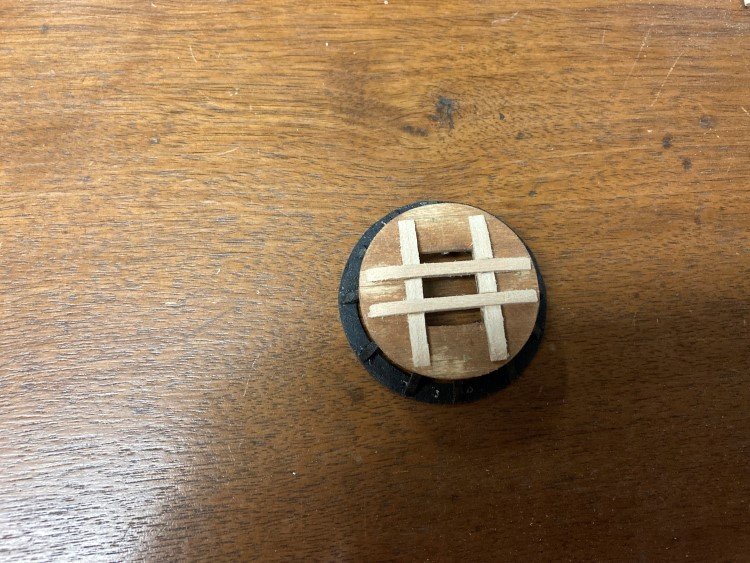
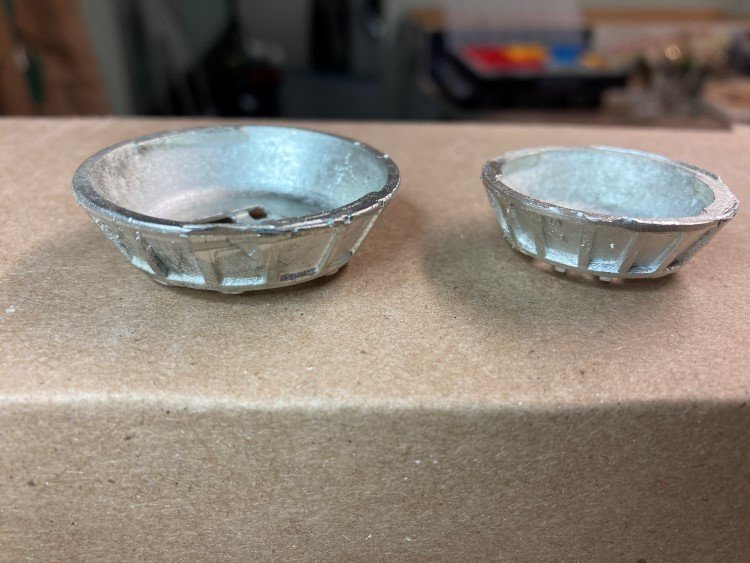
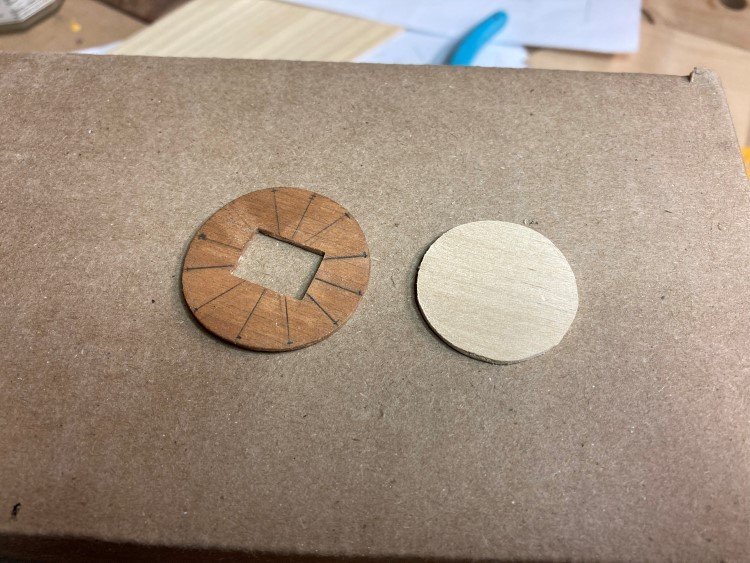
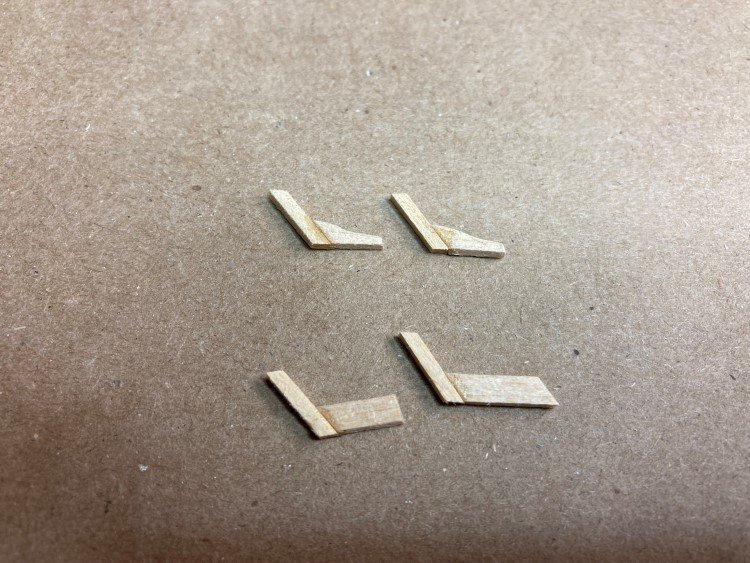
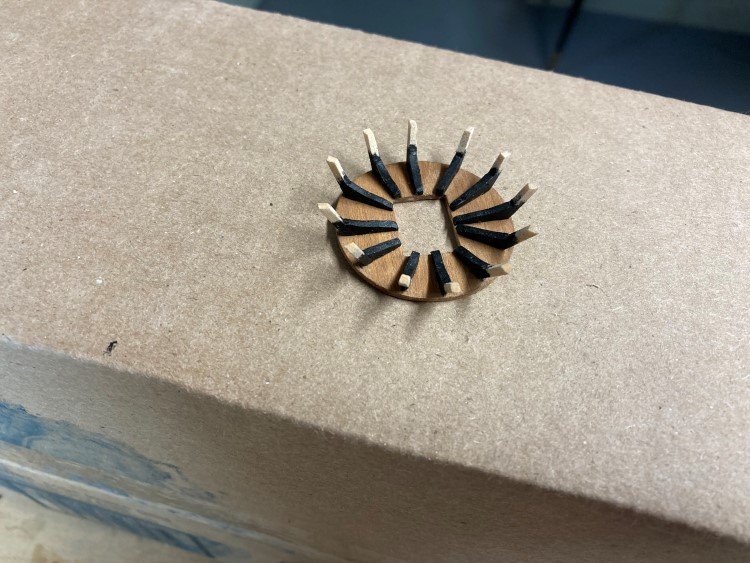
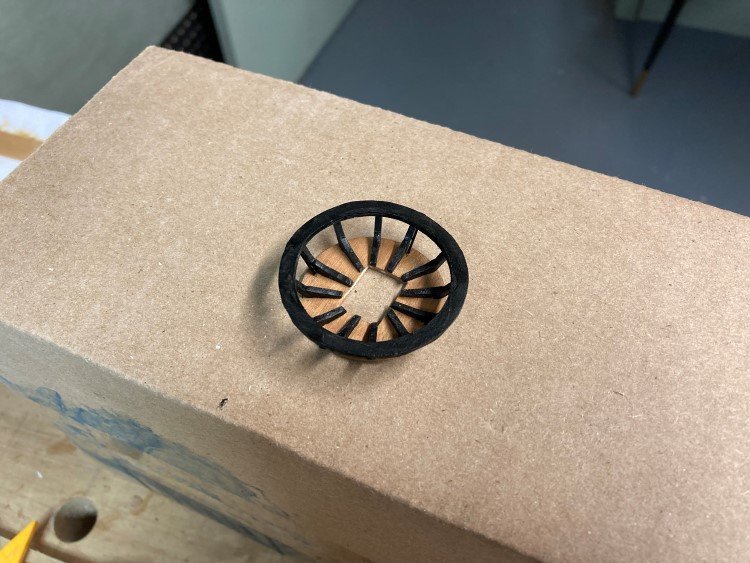
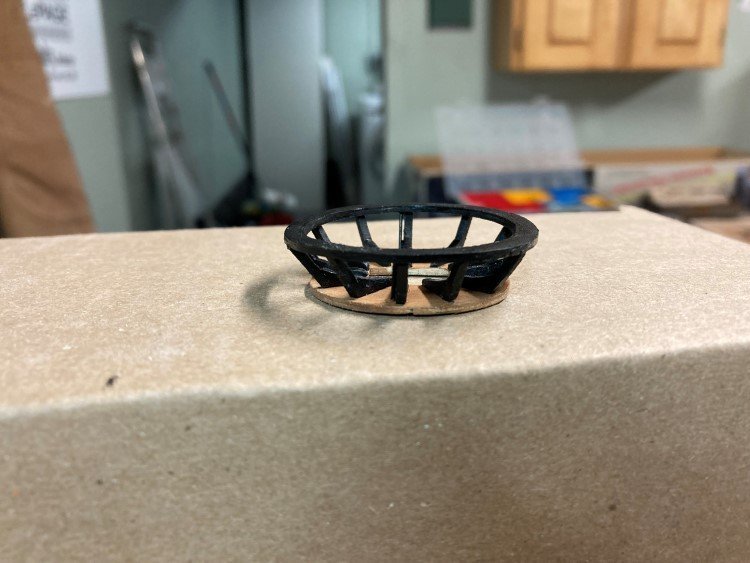
I expected to be now concentrating on my Agamemnon, but it seems the ship modelling gods had something else in store for me. I have been asked by someone to build a Mayflower for them. This is not a model that I would have chosen for myself, as I'm not particularly interested in 17th century vessels. My favourites are late 18th century. Nevertheless I'm happy enough to build it for someone else. Keeps me off the streets. There are several Mayflowers available, but I settled on the Model Shipways version, as I tend to like their kits generally and Chuck Passaro designed this one, so it seemed to me to be the best option. I don't tend to complain too much about cast metal parts. Usually I find they can be made to be acceptable with a little filing, paint etc. But I don't think I've ever seen anything as bad as these cast metal crow's nests that came with the kit. In the instructions, it shows wooden components which appear to be quite acceptable and which I assume is how the kit originally shipped. However, I was surprised by what I found which look like something my grandmother would have baked tarts in. These just won't do. Not only do they look horrendous, but I don't know how I would be able to use them. It's difficult to see in the picture, but there is almost no lip or overhang on the upper rim, yet it's necessary to mount deadeyes and futtock shrouds. I just don't see how I could do that. Also, much of this ship has a natural finish, so painting these things to blend in would be almost impossible. So rather than starting at the beginning, I decided to get this problem behind me first and I set out to design and build something that I could live with. Here is what I have come up with: I simplified them slightly. The plans show 16 brackets of about 1/32" wide. I was having quite a bit of trouble with that, so I reduced the number to 12 and made them 1/16" and I found that worked better for me and still looks ok. The crow's nests on the replica Mayflower II have closed sides, and I believe it was the idea for this model too. However, I'm going to leave them open. I experimented with closing them in and wasn't happy with the look. Also, all of the other kit versions of the Mayflower have open sides, as do many other ships of this period. There isn't a lot of glue surface on the upper ring and there's going to be a bit of tension on it, so I added four pieces of brass rod that run through to the bottom, which should give it a bit more structural integrity. You can see one of them in the picture above, but I don't think they will show up when all the bits and pieces are in place. So, now I can relax, knowing that I have that little problem solved and go back to the beginning. David
- 43 replies
-
- 14
-
-
-
- Mayflower
- Model Shipways
- (and 1 more)