
HOLIDAY DONATION DRIVE - SUPPORT MSW - DO YOUR PART TO KEEP THIS GREAT FORUM GOING!
×


David Lester
-
Posts
678 -
Joined
Content Type
Profiles
Forums
Gallery
Events
Everything posted by David Lester
-
 Looks like a good start, Tim. It sounds like you're planning to plank the hull. I don't think you'll have too much trouble with that. On a "plank on bulkhead" model, I think the hard part is getting the hull faired correctly. Although I've never done one, I imagine on a solid hull model, getting the hull shape correct will also be the hard part. I also guess that planking a well shaped solid hull will be easier than planking a POB model. (Although a little harder to remove a plank, should that need arise.) If you look at Nic's Red Jacket build, you'll see that he uses quite a bit of filler when shaping the hull, so that's clearly part of the process. Does the kit come with wood to use as planking, or are you going to get some extra to do that. David
- 142 replies
-
- 2
-

-
- alfred
- solid hull
- (and 2 more)
-
John, have you found this website: www.charleswmorganmodel.com? It's primarily a build log, but what I found most helpful was the many excellent pictures of the actual ship. They're found under the "gallery" link. David
-
HMS Victory Models - Stern Question
David Lester replied to David Lester's topic in Wood ship model kits
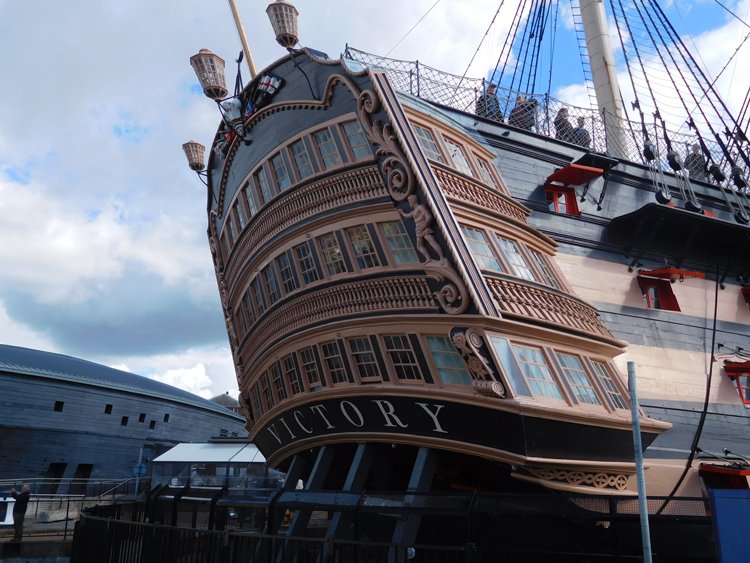
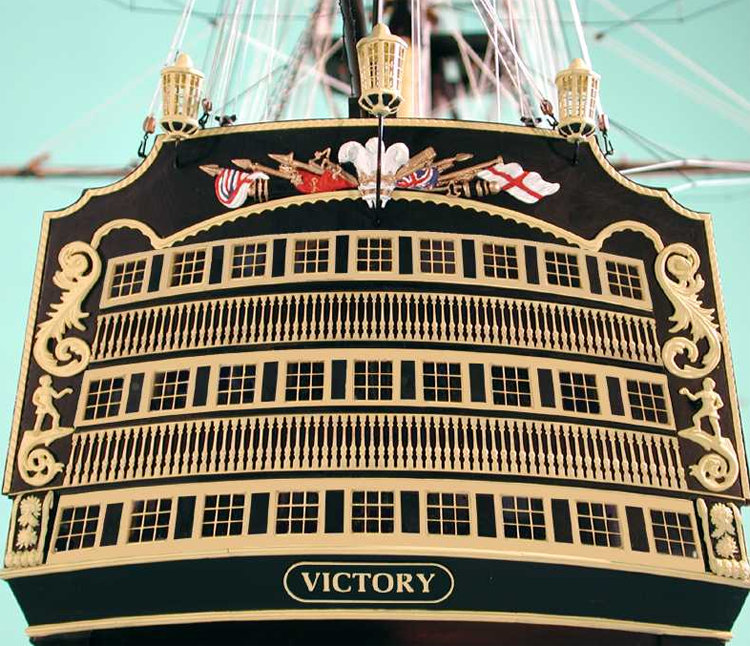
Hi Gregory, Yes, I now believe it is a question of perspective. My picture of the stern is from a low angle and isn't straight on. I think that angle distorts the appearance of the curve. Even the picture of the Billing Victory is from an angle, so the same thing occurs. The pictures of the Caldercraft are straight on. I've since gone on line trying to find pictures of the stern that are straight on. They are few and far between, but I did find one. It's from a lower angle, so it doesn't match perfectly, but it's straight on and when I superimpose it over the Caldercraft profile, the curves nevertheless line up really well. So I think that answers my question. Thank you. David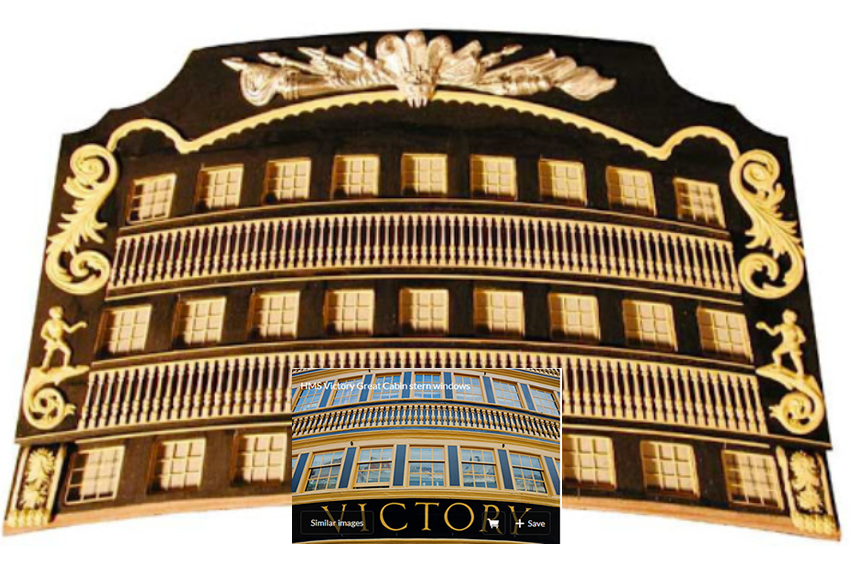
-
Your CWM is looking great. These old Marine Model kits look like they were fairly decent kits. From my (limited) knowledge of the CWM, I'd say this is a pretty accurate representation. I also think you've nailed the yellow colour of the bulwarks and other fittings perfectly. David
- 204 replies
-
- 1
-
-
- marine model company
- charles w morgan
- (and 1 more)
-
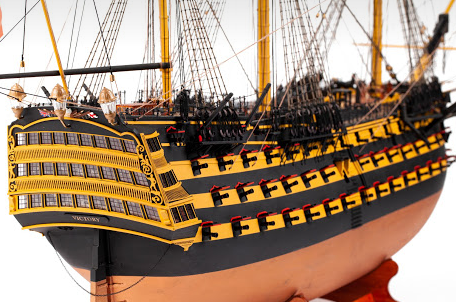
So here's a question. I'm not ready to pull the trigger just yet, but neither can I shake the idea of a Victory model in my future and I've been looking at many builds of all the different kit manufacturers and have noticed differences in the shape of the stern. On the real ship, as it currently looks, the counter area of the stern has a very pronounced curve to it, like a bell curve. However, the models don't seem to all reflect this in the same way. It looks to me that in the Caldercraft kit, this curve is flattened somewhat: And I've noticed that on the Mamoli and Panart versions, it's flattened even more. It's almost dead straight across on the Mamoli. The Billing version, however does seem to capture the steeper curve of the actual ship - Are my eyes playing tricks on me? Is is just the different angles of the pictures? Or did the stern have slightly different profiles at different times and the various models reflect those different profiles? On the Mamoli version, which is virtually straight across, I suspect it's simply a matter of inaccuracy. But I would be interested to know about the Caldercraft version, because it does look slightly different to me than the real thing, and I'm curious to know why that might be. Can anyone shed any light on this question? Many thanks, David
-
I'm looking forward to this build log. I believe it's the first Alfred on the forum, which is surprising because it's such a handsome model and interesting subject. It's on my shortlist for my next kit, but I'm a bit worried about tackling a solid hull. I'll be watching your progress with great interest. David
- 142 replies
-
- 3
-
-
- alfred
- solid hull
- (and 2 more)
-
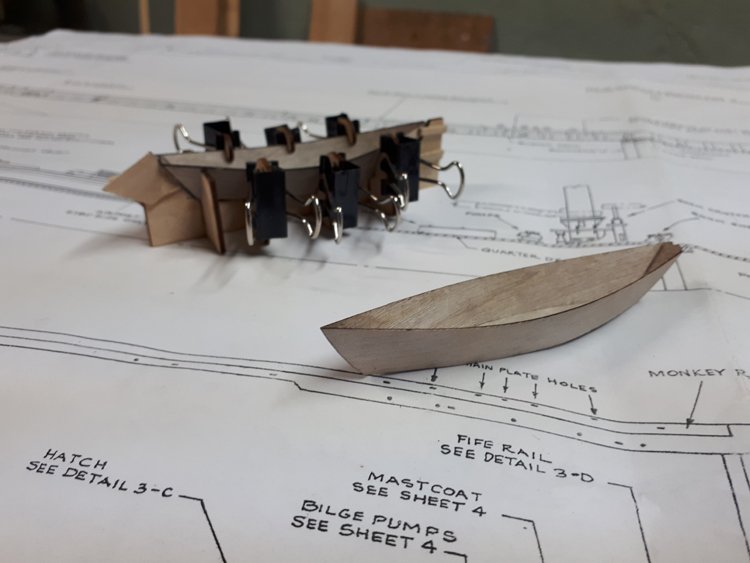
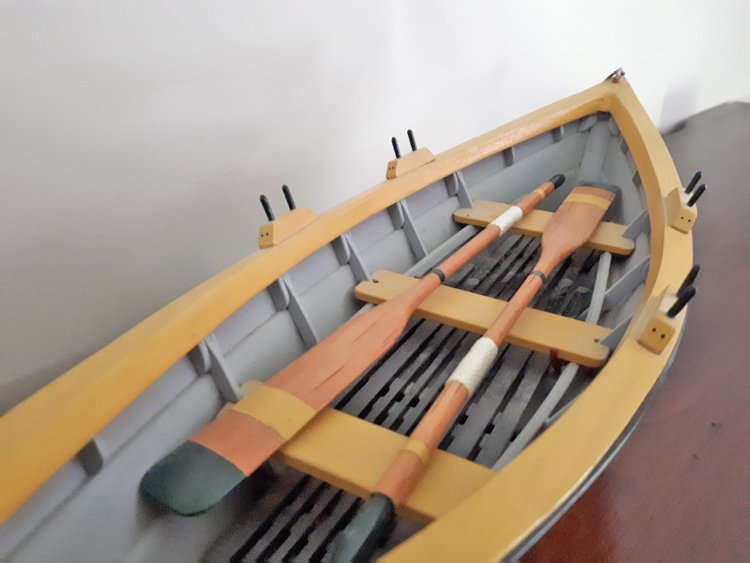
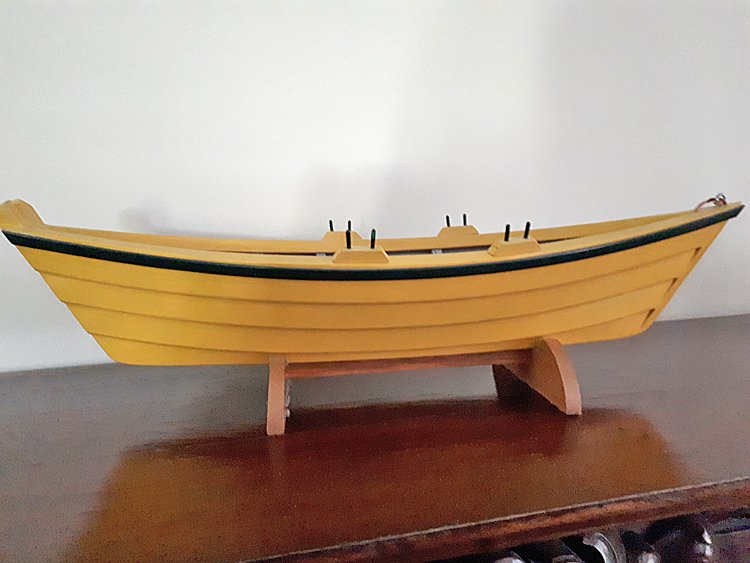
I’ve started working on the dories for my Bluenose build, and I’ll include that in my build log. In the meantime I thought I might share a bit about another dory that I have. This one is painted yellow, which I understand is referred to as “dory buff.” I’m not sure what colour the dories on the Bluenose were. There is some rare colour footage of the Bluenose, but it’s very faded and difficult to make out the colours. In that footage the dories don’t appear to be buff, but it’s hard to say. The MS plans indicate “buff” so it might be safe to assume that they could have been this colour. In any case, here’s this dory. ” It’ about 16” long and it was scratch built by someone I used to work with named Fred. This started as a little hobby for Fred, but through a friend, he soon found himself supplying them to a gift shop in Vancouver BC. He had to bring that to a fairly quick end however, because he couldn’t keep up with the demand and making them became an onus, not a pleasure. So once he gave that up, he continued to make them upon request for friends and acquaintances. There are two interesting stories about Fred’s dories – He learned from someone who had been to the gift shop in Vancouver that the owner of the shop was telling people that they were made by “an old salt from Newfoundland.” Fred found this amusing because while he conceded that he was old there was certainly nothing salty about him. He was born and raised in Brandon, Manitoba which is on the Canadian prairie, just north of the North Dakota border. I guess it wouldn’t have been as effective to say “an old salt from the prairie.” Also, Fred had a unique source for the wood he used. We worked at a funeral home which was located not too far from a major casket manufacturer. We had a great relationship with them and Fred would make the occasional trip there and bring back all the free scrap lumber he could use. And I don’t know how he did it, but he even sweet-talked them into planing it down for him to the dimensions he needed! He always used either poplar or willow. Sadly, I haven’t had this useful connection for 20 years now, nor would I have had Fred’s ability to finagle custom planing in any case. David
-
That's probably a good idea. The davits are a bit fragile and I broke more than one. However, make sure you know ahead of time exactly where they're going to go. They have to be spaced a precise distance apart to fit the length of the boats and if you're not very careful, you'll find, for example, that one needs to go exactly where one of the channels is! I cut strips of masking tape the same width as all the various components and stuck them on the hull and moved them about as necessary until I had placements that worked. If your hull is like mine there will be some minor variance from the plan in places.
-
Coming along nicely. One word of warning - there is an incredible number of items to be added along the side of the hull - davits for the boats, standards for the roof etc etc. It's a bit of a challenge fitting them all in around the deadeyes etc. Be sure of your spacing before gluing anything on. If you just move from one end to the other, there will be some error creep. There will be a need for small adjustment as you go. Don't ask me how I know this! David
- 294 replies
-
- 2
-
-
- charles w morgan
- model shipways
- (and 1 more)
-
One idea that can help is to first glue a piece of paper to the underside of the wood. Afterwords, you can either leave the paper there or scrape/sand it off. David
-
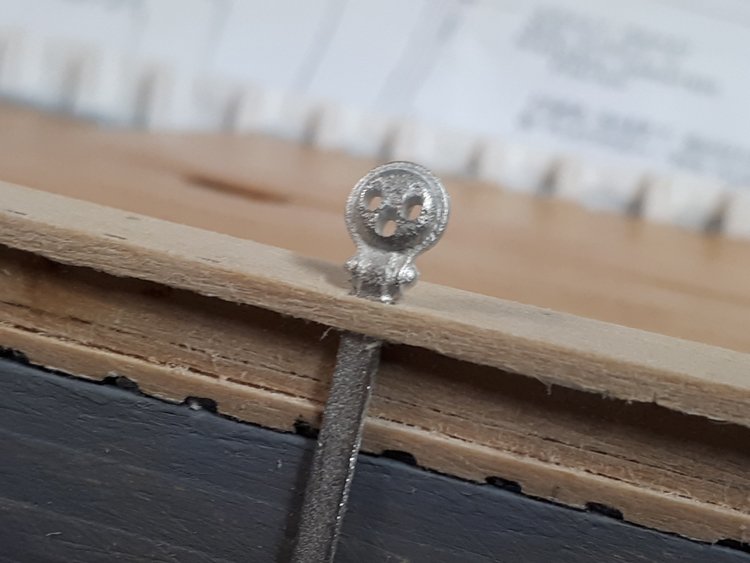
Dave, those pins look pretty good to me. I have also found it virtually impossible to make decent frames out of 1/32" material. It can be done without too much trouble with 1/16" wood and it will probably look ok, but if you thought it was too thick you could make the frame up including the pins and then sand the whole thing down on both sides, in order to keep the pins centered. I don't think you'll have any problem with ca glue doing the job. There will be no tension on them and a friction fit alone would likely hold them. Your base is looking great. David
- 389 replies
-
- 1
-
-
- bluenose
- model shipways
- (and 1 more)
-
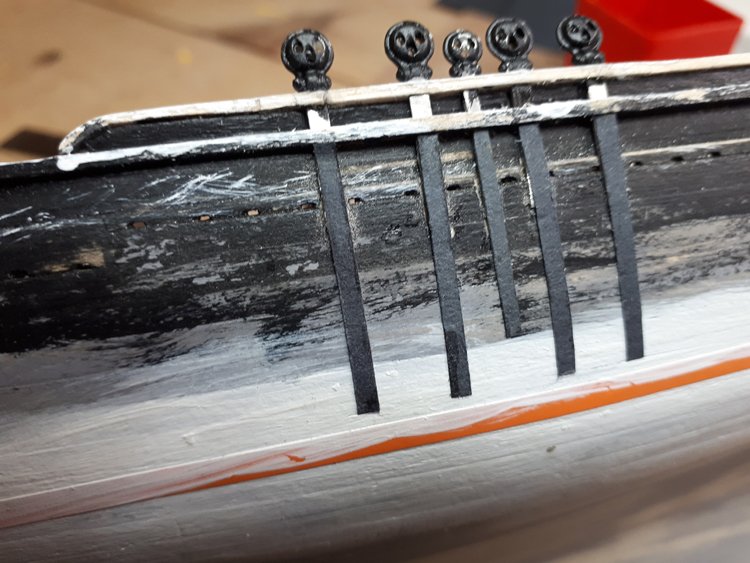
Could be. The plans don't indicate, they just show a series of vertical lines which could mean either slats or bars. One thing I'm learning here though is that it's a tricky piece to model as the overall length is only 5/8"
-
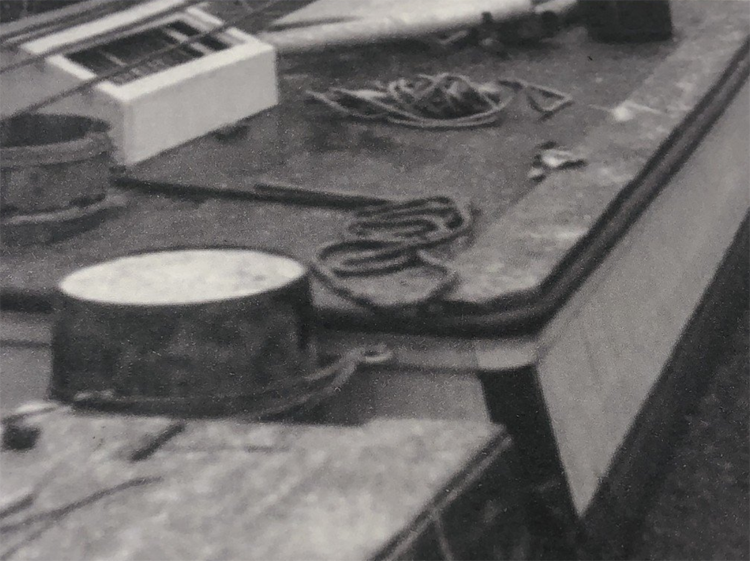
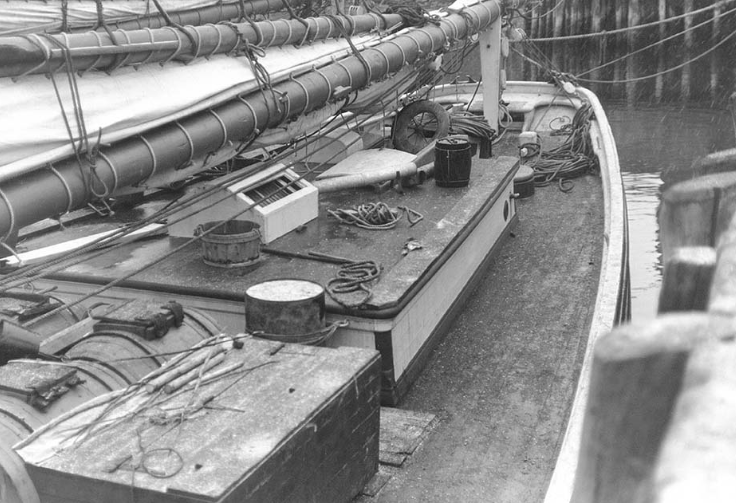
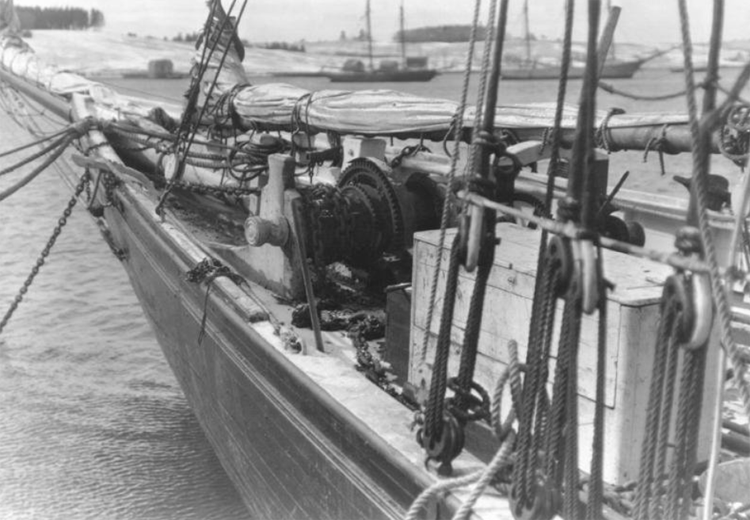
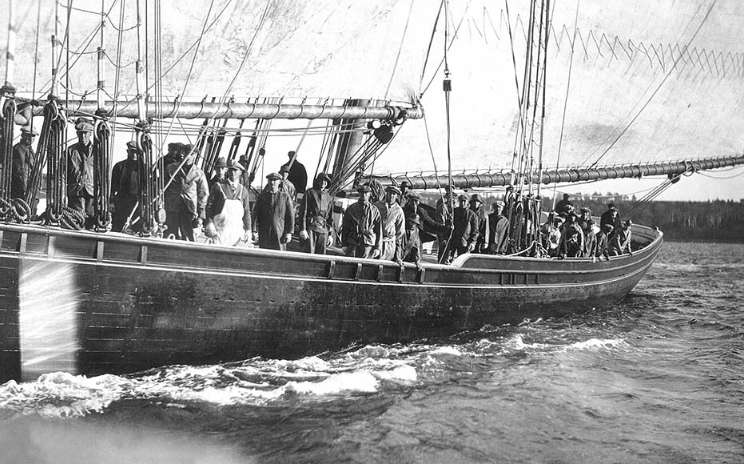
Do you have these pictures, Dave? This discussion and the fact that I'll be tackling this job myself in the near future have set me searching and I found these pictures of the Bluenose. (I think they're actually the same picture, one is just a detail of the other.) It actually differs a little from the plans. It shows the window deeply recessed. Doing something like this would offer quite a bit of scope for improvisation. You could make the window itself as a separate unit; it could be as thick as you wanted and you could easily glue strips on the underside to secure the bars as only the top surface of the window frame would be visible. Once the window unit was built, it could then be set deep within the box. Anyway, I was interested and surprised to find these. David
-
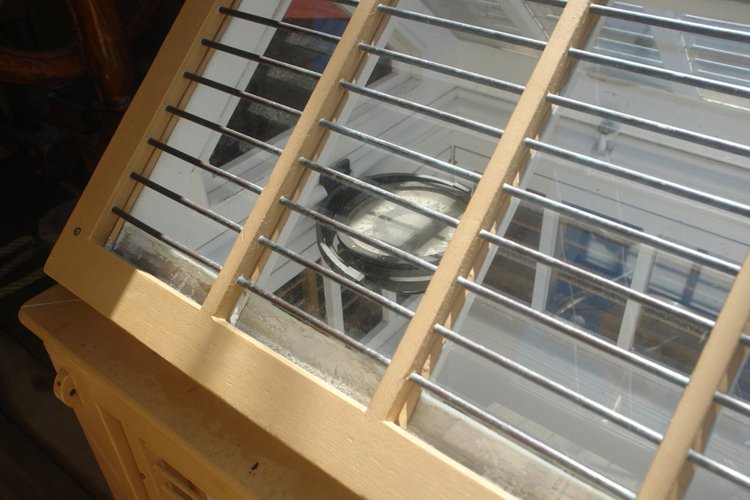
I was just trying to solve the scale problem. I had some very fine wire, but I couldn't seem to get it to pull taut enough and even if I did, it was way too easy to touch it and bend it after it was in place. Most of the other Morgan builds I had seen had used brass rod that looked far too large to my eye and in most cases they had to reduce the number of bars to only three or four, which didn't look right to me. Even using this fine line (sorry, I don't recall what size I used) I still had to reduce the number of bars by a couple, but at least the scale and overall effect is more or less intact. I know my wood frame is a little on the heavy side, but I say "so sue me, it's the best I can do." If you have small brass pins they might very well work for the Bluenose as the span is small and the pin will be long enough, that wasn't an option for the Morgan, as the spans are longer. Perhaps you could make a rough mock-up of the frame, glue the pins to the underside and see how they hold up. If it appears that they're going to stay in place, then go ahead and use the method on the actual skylight. You could also try a mock-up using rigging line and see how you like that look (I know it will stay in place with ca glue.) I'm working on the Bluenose too and haven't come to the skylight yet, but as I recall from the plans there are many bars running vertically, is that right? You're right about this skylight being front and centre and it does need to look quite decent as it will draw the eye. The skylight on the Morgan is very well hidden on the finished model, so it's quite forgiving. I'm keen to see how you end up solving the question! David
-
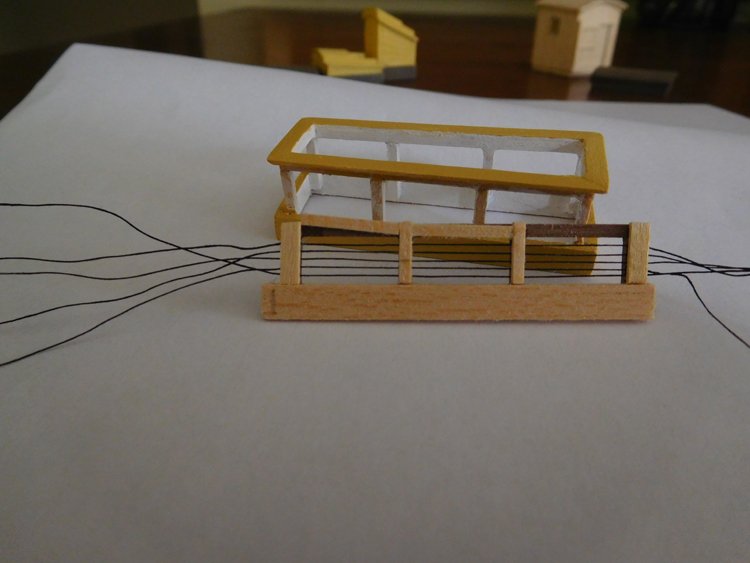
Thank you Dave; I feel better. Forgive me Bob, but on second thought, I think you came down a little too hard on me. Of course, the bars are above the glass, but there is no glass at all in my skylight, or on most models that I've seen for that matter. There has to be "frame" or wood of some kind on top of the bars, otherwise the ends of the bars are exposed, so that's why I glued the line to the underside. I guess you could argue that the wood I used is too heavy, but the real point of my post was that at this scale, I think rigging line makes an acceptable substitute for a metal bar, and is very easy to glue in place. David
-
Dumb idea, sorry for suggesting it!
-
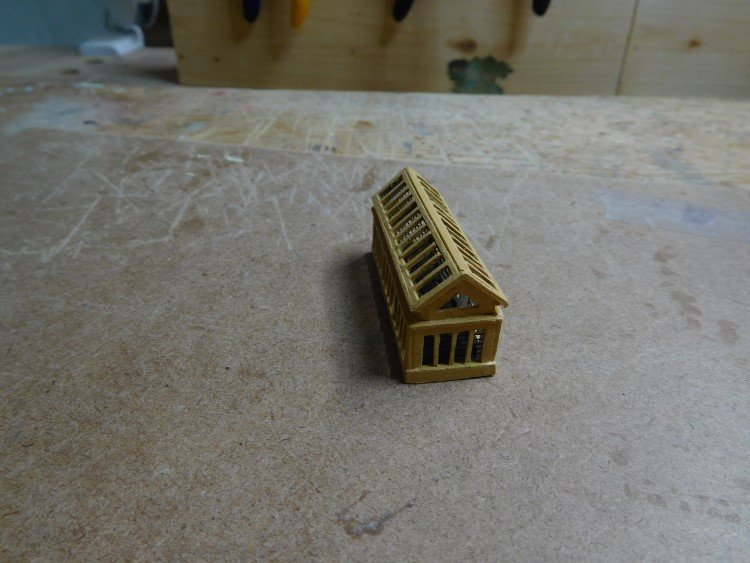
Here's what I did for the skylight on my Charles W. Morgan. I'm not sure if you would like this idea or not, but it was easy to do and I think it worked pretty well. Instead of metal, I used rigging line pulled taut. I first glued all the lines to one side of the frame using ca glue. I then pulled each one across and held it while the glue set at that end. Another way would be to string all the lines between nails on a board and then glue the frame down on top and trim the lines after the glue set. My problem for the Morgan was not having anything else that was small enough. The rigging line actually matches the size indicated in the plan which is pretty small. (I don't recall off the top of my head what that size was.) I'm not sure if that's as much of a problem on the Bluenose or not. If the metal pins you have are the right scale then you might very well prefer to use them, but the rigging line sure is easy to attach. David
-
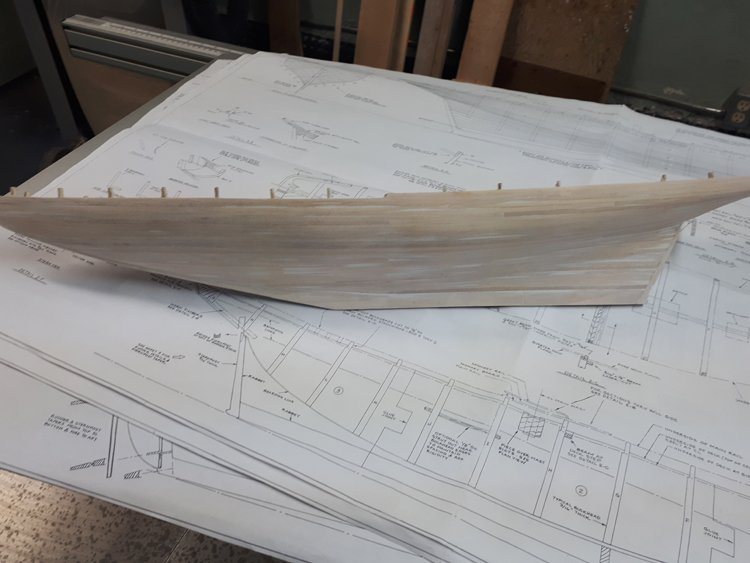
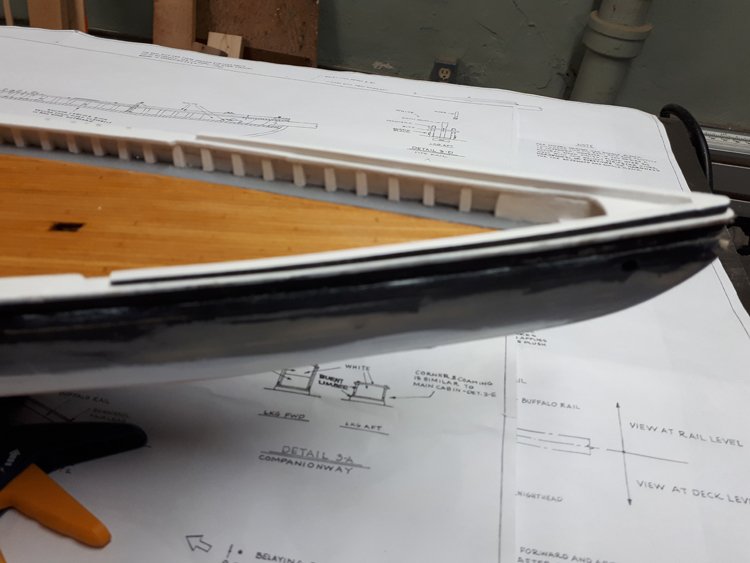
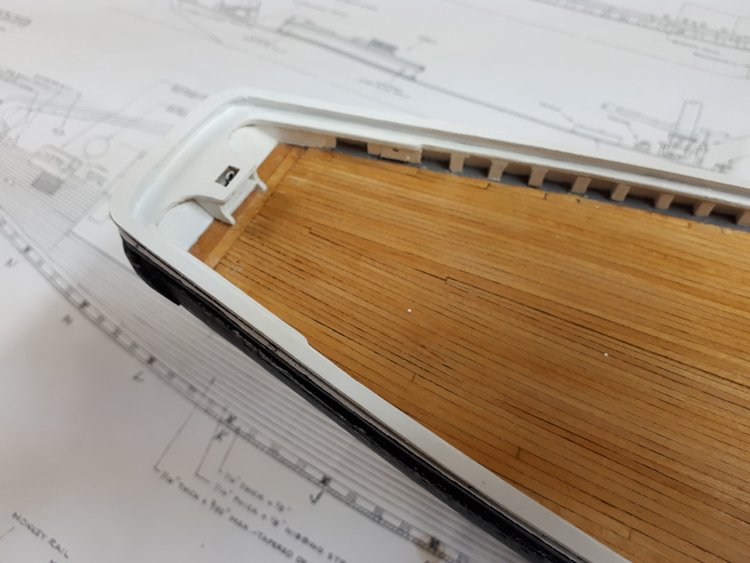
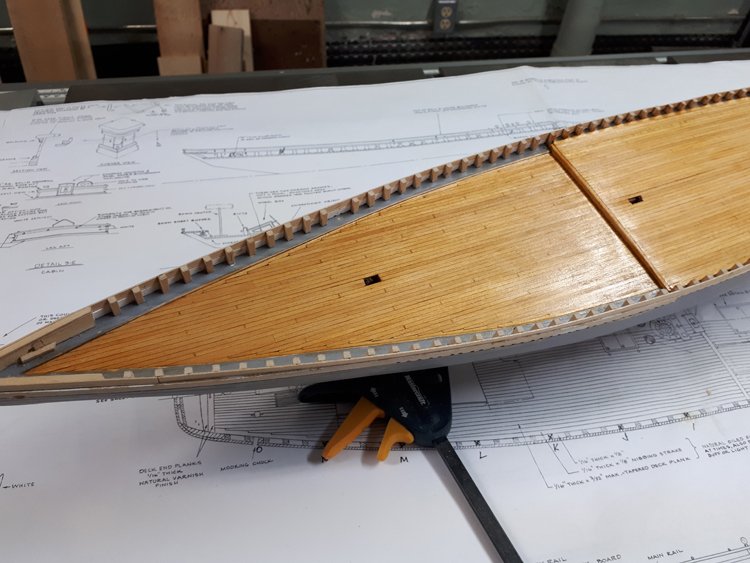
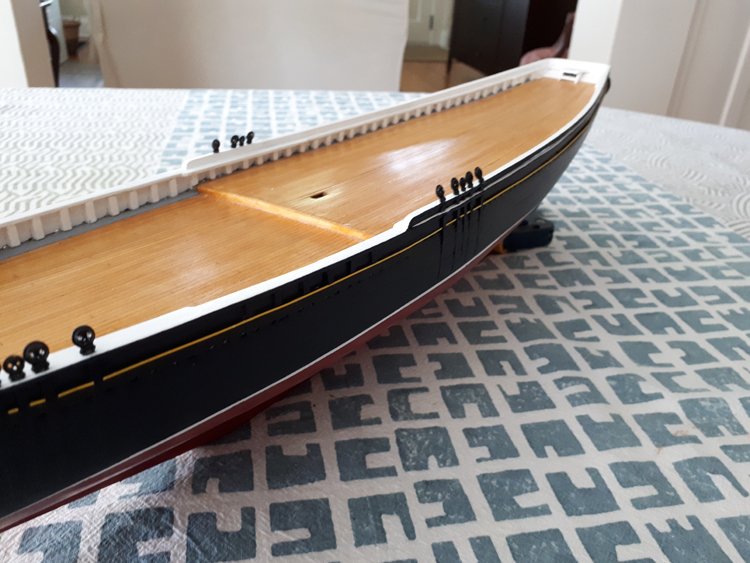
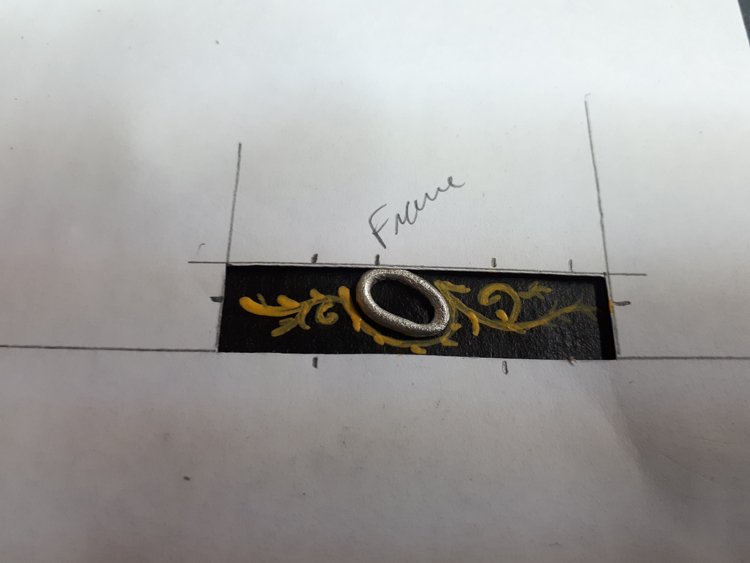
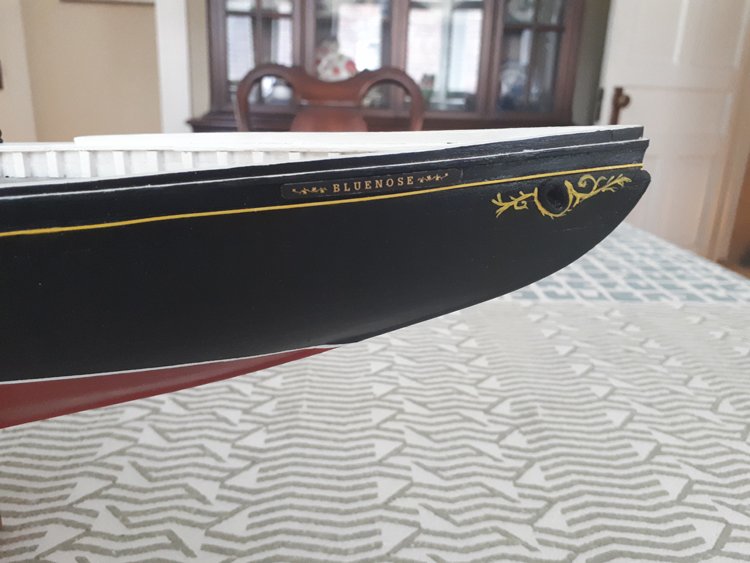
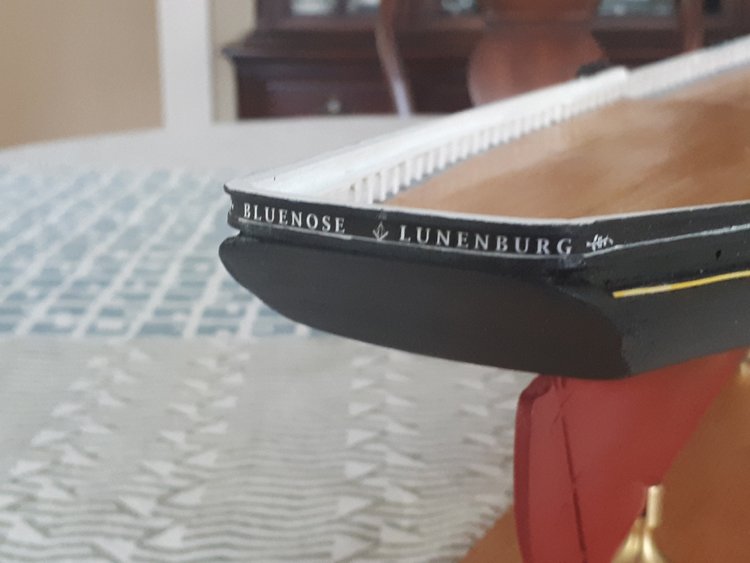
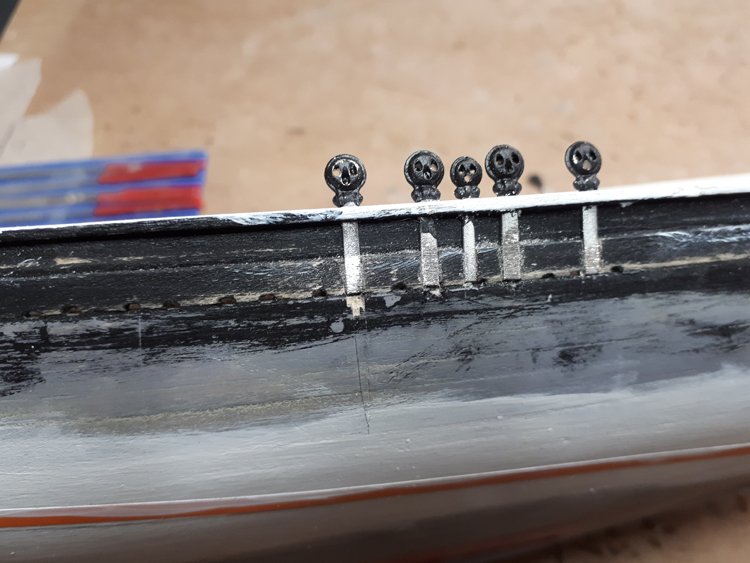
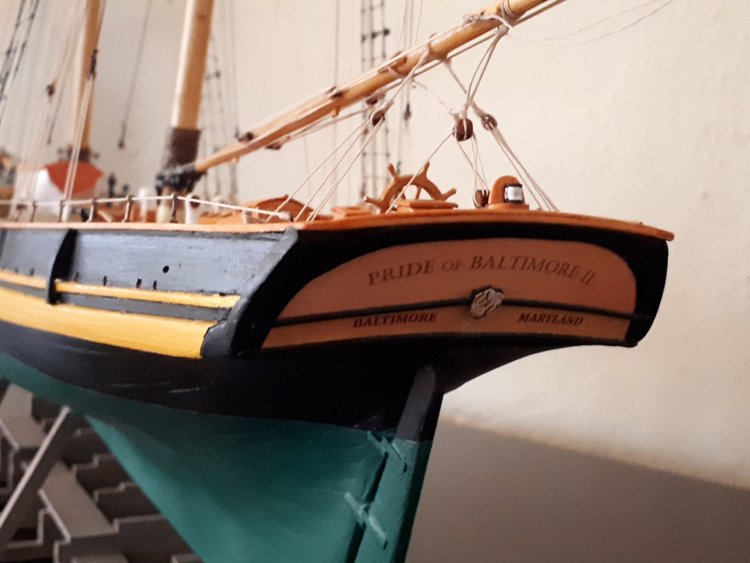
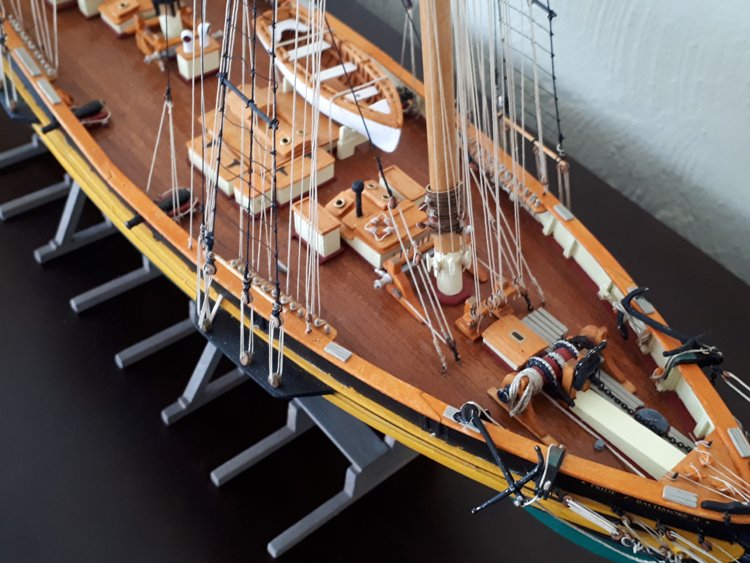
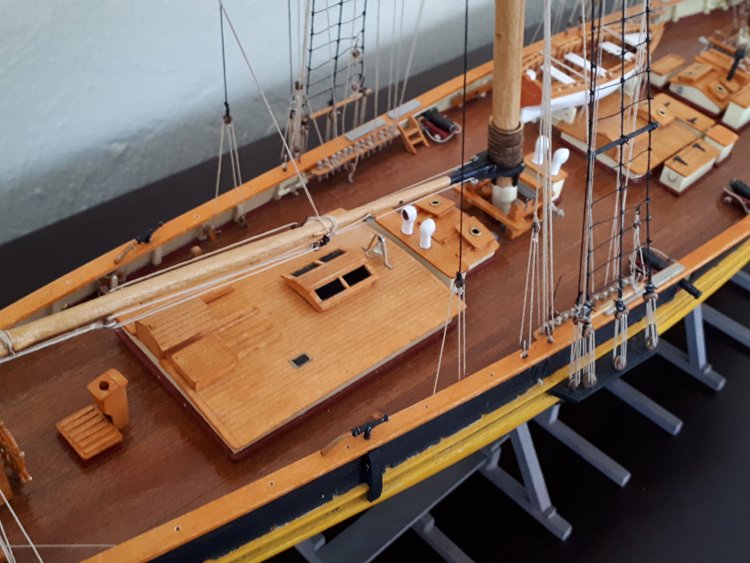
Here is the nutshell version of my Bluenose build log to date. I previously had this build log on another forum, which I have now left and want to get it up and running here. Hull, Deck and Rails: The early stages of this build are very quick and easy. It’s not a difficult hull to plank. The deck is not too challenging either. I never know how best to finish the deck. Basswood takes a stain so poorly, so this time I simply used amber shellac which seems to work well enough. I know that many builders have found that the stern section of the rail doesn’t fit property. Mine didn’t quite fit either, so it necessitated making a new stern section. I did the rest of the rail in sections. The buffalo rail at the bow is an easy detail to add. The monkey rail which wraps around the stern and half way down the main rail is a bit tricky. I laminated two thin strips to make the curved portion at the stern. Deadeyes: I had to make a decision about how to approach the deadeyes. On the real Bluenose, they are secured with a bit of hardware that sits between the deadeye and the rail (not sure what it’s called.) The options were to try to recreate it with some brass wire, which I have seen many modelers do, or omit this detail altogether or opt for these cast pieces from BlueJacket. As you can see, I opted for the cast pieces. They capture the look of the real thing and I knew that I could never recreate the effect successfully myself without it looking too big and awkward. Chainplates: According to the plans and as shown in this picture, the chainplates are flush with the hull. The integral chainplates with these deadeyes would have been long enough to use them for the fore mast, but were too short to use for the main mast. On top of that, I knew I would never be able to inlay all twenty of them skillfully enough, so I cut them off at the waist I added strips of black construction paper. When all painted, it’s a compromise that I can easily live with. I used 1/16” masking tape for the white stripe, but I wasn’t sure how I was going to do the yellow stripe. According to the plans, the stripe is actually a groove running the length of the hull and is very narrow. There is almost no space above the scuppers to fit in and I was convinced it had to be very narrow to look right. So again, I made a compromise. I actually used a piece of styrene strip, .01” x .04” I painted it yellow, then glued it on. It's not strictly speaking correct, but if gives the effect and I know I could not have achieved a neater look any other way. Decoration: I practiced painting the decorations on black paper with a template cut out to the size and shape with key reference points marked. From a normal viewing distance of let’s say 50’ 🤗 it won’t look too bad. For the stern lettering I opted for the Masonic emblem rather than the Odd Fellows emblem. It was the Masonic one that it was launched with. I outlined my detective work on this subject in a separate thread: https://modelshipworld.com/topic/24244-bluenose-and-the-masons/?tab=comments#comment-713347 So that catches everybody up. Now on to the deck details. Thanks for looking in! David

- 37 replies
-
- 11
-
-
- Finished
- model shipways
- (and 1 more)
-
2021 should be a great year to go to Lunenburg and visit the Bluenose II. It's the centenary of the launching of Bluenose. I'm sure there will be lots of extra celebration (and probably extra crowds too.)
-
Try either of these suppliers: https://www.agesofsail.com/ecommerce/fittings/hull-fittings/port-holes.html?p=1 https://www.cornwallmodelboats.co.uk/cgi-bin/ss000001.pl?page=search&SS=porthole+&PR=-1&TB=O&ACTION=Go! Your hull looks great so far. David
-
Pride of Baltimore with Bob Hunt Practicum
David Lester replied to Tony Dee's topic in Wood ship model kits
Don't sweat the planking too much. I'm a really crumby hull planker and could never produce a hull that could bear a natural finish. I rely a lot on sanding, wood filler and paint. If you're planning on painting your hull then you should be ok too. The important part is getting the hull faired properly. That's where you need to take your time. It's always tempting to get it over with as quickly as possible, but it really shouldn't be hurried. You may also have to build some bulkheads up with a thin strip. And don't worry about making a serious mistake. If you sand a bulkhead too much, you can just glue a strip on and re-shape it. Once you have the shape of the hull correct, then there shouldn't really be any problems with the planking that you can't solve by sanding and filling. If you plan on a natural finish then you need to work to a higher standard than I usually do, but if you're planning to paint it, you shouldn't have any problems. David -
Pride of Baltimore with Bob Hunt Practicum
David Lester replied to Tony Dee's topic in Wood ship model kits
Hi Tony, I just finished this model and I used the 3/16" kit supplied strips. Bob Hunt's practicums are generally not bad, but he really drops the ball with the rigging for POB. Take his rigging instructions with a grain of salt and spend a lot of time studying the plans. They're a bit hard to decipher, but everything you need to know is there. That was my experience. Best of luck and stay safe. David -
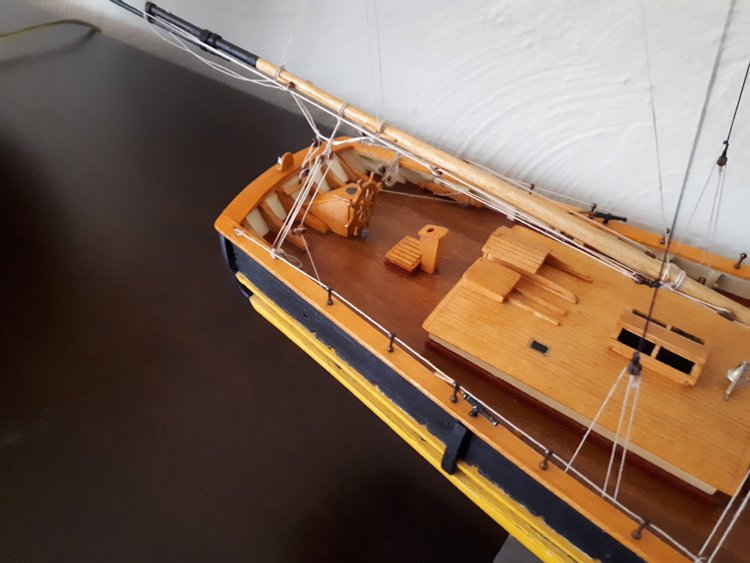
Thank you GrandpaPhil and Bob. Much appreciated. Bob - I don't have a lot of experience with woods other than basswood. I tend to be an "out of the box" builder, with only minor changes. I don't have too much trouble working with basswood, but of course you can't really scrape profiles into the edges of railings or any detailing of that sort of thing. My biggest complaint about it is how hard it is to get a decent natural finish on it. It tends to take stain poorly, with blotchy results. This isn't too big an issue for me generally as I prefer painted models rather than ones left natural, so basswood works just fine in that case. It does tend to stay a bit fuzzy no matter how much you sand it, so the secret is to get paint on it sooner rather than later, even if it still seems a bit fuzzy and sand it well between coats of paint - the fuzziness problem will go away. However, on this ship there is quite a bit of natural woodwork on the deck furnishings. This was a bit of a challenge for me to finish. My end result might be a tad too orange, but it's not very far off the real ship. I find that watered down acrylic artists' paint works better on basswood than stain. So I used a bit of orange mixed with a bit of yellow and plenty of water. I topped it with amber shellac. At least it didn't go blotchy and looks fairly natural. The deck on the real ship is quite a dark colour and I knew that finishing the basswood would be a problem no matter what I did so I opted to change the wood for the deck. I ordered .5mm strips in the appropriate width (3mm I think) and laid them over a solid thin subdeck. I got the strips from Cornwall Model Boats. They had both cherry and tanganyka in the right size. I wasn't sure which would be best and since it wasn't expensive, I ordered both. When it came it was in two unlabeled bundles and I literally couldn't tell the two apart, so I just dumped them all into one bin. They were completely indistinguishable from each other. Nevertheless it was all very nice to work with and stained beautifully. So, to answer your question about substitution of wood, I wouldn't worry about changing it for the hull planking, the basswood will work just fine. It will work just fine too for the painted parts of the deck furnishings (basically the walls and coamings of the components.) You might consider changing it for the decking, mainly because it will be hard to finish the basswood and I suppose if you wanted to, it would be a nice touch to upgrade the wood for the railing and the parts of the furnishings that have a natural finish.(basically, the roofs or tops.) The only things I upgraded other than the decking were the blocks and the rigging line. I've gotten so I really hate kit supplied blocks and the Model Shipways rigging line isn't all that nice. I've used Syren and Bluejacket blocks in the past and like both of them, but for this model I decided to try the ones from Master Korabel which I bought from Chris Watton. They are very good too. I would love to use Syren rigging line, but I tend to be a very profligate rigger and would have a fit for every inch of Syren line that I wasted. The Amati line from Cornwall Model Boats is a compromise that works well for me - it's pretty good to work with, the colour of the natural line is great and I find it to be quite affordable, even when I cut off a piece about three times as long as I actually need. You will find the instructions with this kit to be useless. In fact I almost never even refer to them. The plans however are excellent. There are six sheets and every detail is there. So far as I can tell, they are very accurate and true to the real ship. Of course they aren't much help with respect to sequence and often you have to flip among several different sheets to find everything you need for a particular aspect. If I have any complaint about them, it's the rigging sheets. There are two rigging sheets and there is a bit too much information on each one. It would be easier to decipher if it was spread out over three sheets. Nevertheless, it's all there; it just takes a bit of work to ferret it out. I chose this model for a couple of reasons - it really is a very beautiful ship, the model isn't too large, it doesn't break the bank to buy it, there are plenty of resources on-line for reference and there isn't too much rigging. (Three masted, square rigged ships just seem to daunting to me anymore.) I would certainly encourage you take on your POBPOB (plank on bulkhead Pride of Baltimore) next. I think you'll find it a great project. David
- 23 replies
-
- 3
-
-
- pride of baltimore ii
- model shipways
- (and 1 more)
-
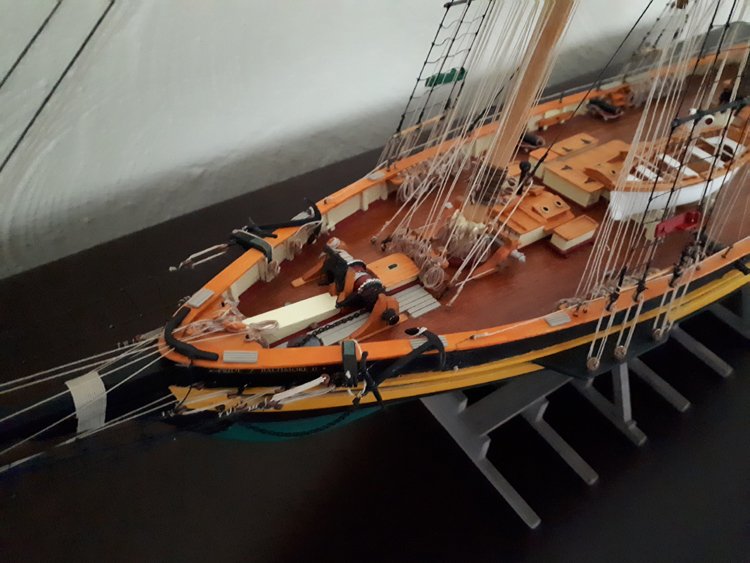
My Pride of Baltimore II is now finished. I added the rope coils, the railing and stanchions along the top as well as the running lights. I meant to mention the baggywrinkles earlier, but forgot. I tried many different ways to make them and nothing would work. In the end, I decided I'd been overthinking it and just used some pieces of wool. I found some wool the right colour and about the right size. I simply cut it into lengths and threading it onto the line and glued it. On close inspection it's obvious what it is, but from a slight distance, it certainly gives the right effect. On the real ship, the stanchions for the rail are just a dull metal colour. The ones I have were brass, so I blackened them only slightly so that they aren't quite black, but aren't bright shiny brass either. I always have trouble getting my rope coils to behave. I use Amati hemp from Cornwall Model Boats for the rigging and it's very nice line to use. However I can never get it to coil easily. The coils always want to go too round without appearing to hang. To solve the problem, I switch to crochet/tatting thread for the coils. I found one that matches really well and it's essential to use a very small size. It's Lizbeth thread, size 40, colour - medium mocha brown. This stuff is very soft and I find it much easier to use and it's virtually impossible to notice any difference. If anyone is contemplating building this model, I can highly recommend it. It's a really good kit and the plans are very accurate. There are many resources available for confirmation and I found virtually no discrepancies. Many thanks for your interest, and everyone, please stay well. David

- 23 replies
-
- 13
-
-
- pride of baltimore ii
- model shipways
- (and 1 more)
-
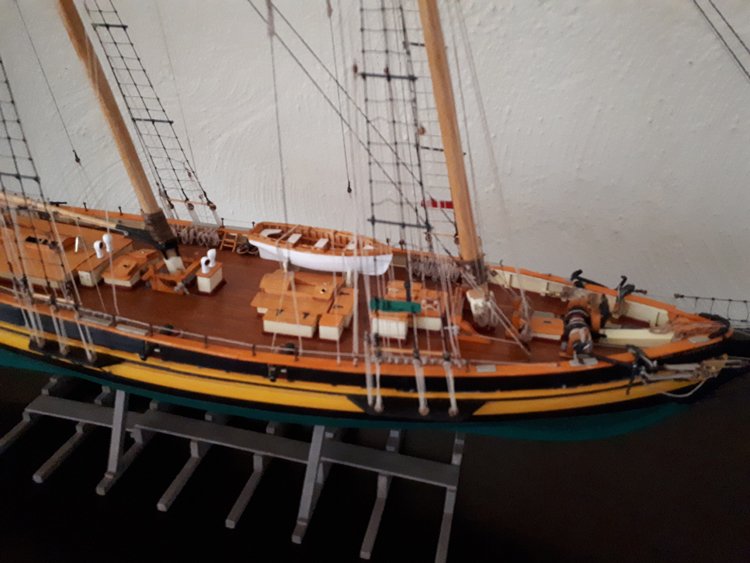
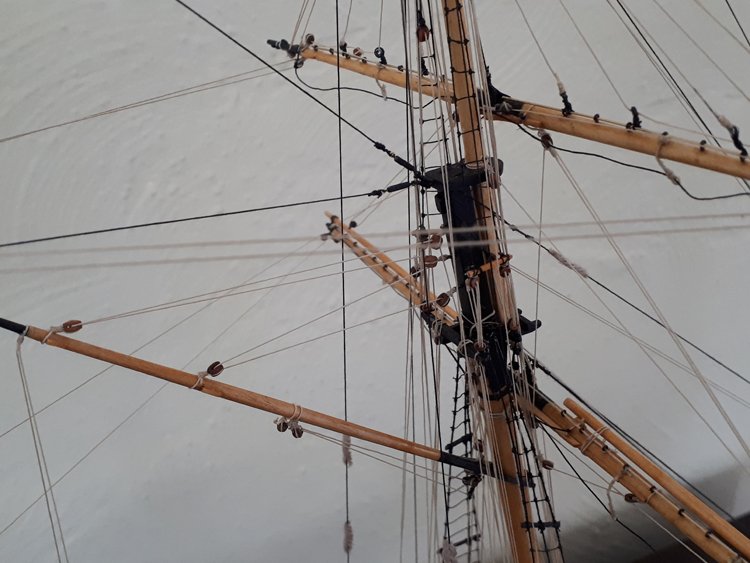
I have now essentially finished the rigging. I haven't posted during the rigging phase as it wasn't very interesting and it simply progressed in the usual way. I had one minor setback though. I had the same problem on a previous model, but failed to learn the lesson. I managed to break both the aft cross tree on the fore mast and the long spreader on the main mast. In both cases I had quite a bit of rigging already attached. I attempted to repair the breaks, but the result was pretty bad, so I had to undo the rigging and replace both broken pieces. The lesson I failed to learn is to not use the kit supplied basswood for these parts. There's a fair bit of tension on them and when I caught my finger on attached lines, it was enough to snap the parts. The basswood really isn't quite strong enough. It's much better to use some walnut or other hard wood for these parts which is what I did for the replacements. I suppose it would also work to use some very thin sheets and build up the thickness plywood style. I definitely will not forget this next time around. Three jobs left to do - add the rope coils on the belaying pins - touch up the paint in a couple of places - and add the rope railing that runs along the top rail. It's not included in the kit, but I found some really great stanchions for it at Cornwall Model Boats. I opted to omit the netting that hangs below the jibboom. I know that I simply couldn't model it in such a way that it would enhance the model, so I just left it off. This model has two turnbuckles which are placed just aft of the fore mast near the top. I've seen several methods for making them on-line, but I don't really have the metal working skills required and in most cases I think the results tend to look a bit bulky and over scale, so I made dummy ones by sanding down a dowel to a very small diameter and adding a small eyebolt at each end. I think they fit the bill ok and are scaled according to the plan. I always struggle a bit with some of the running rigging when not using sails. The plans show the model with sails and there is always a bit of tweaking involved by eliminated some of it and adapting some of it. I'm sure I haven't hit it 100% correct, but oh well. So, I'm really in the home stretch now. Thanks for your comments and likes. David

- 23 replies
-
- 7
-
-
- pride of baltimore ii
- model shipways
- (and 1 more)