
MORE HANDBOOKS ARE ON THEIR WAY! We will let you know when they get here.
×


David Lester
-
Posts
678 -
Joined
Content Type
Profiles
Forums
Gallery
Events
Everything posted by David Lester
-
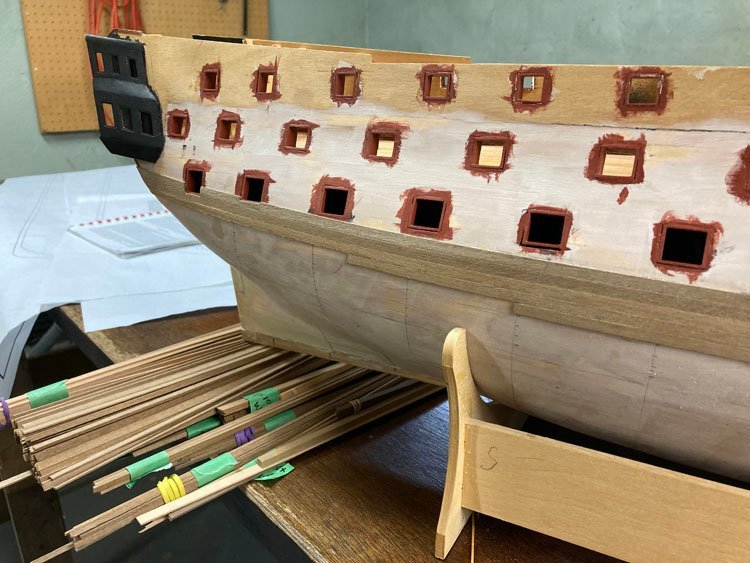
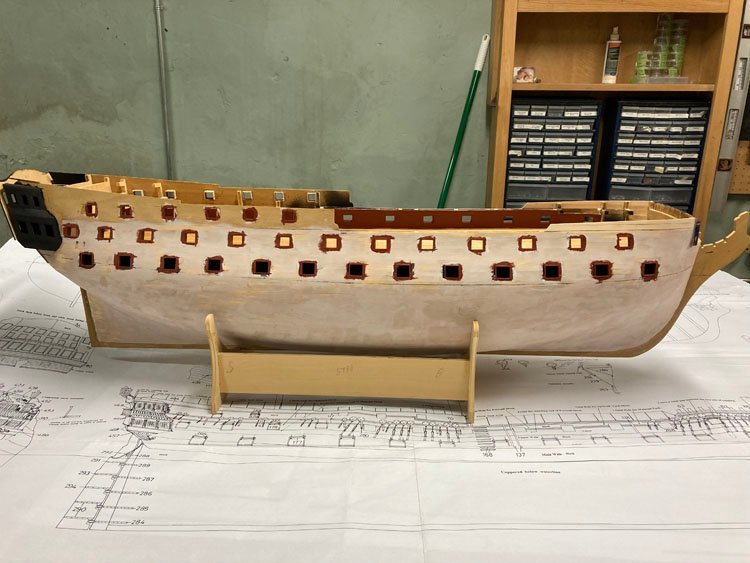
 Good Morning, I have been working away at the upper planking. This is a slow process, as the planks have to be fitted between the gun ports, allowing for a small rabbet. I made two plugs that fit into the ports and have an outer frame that accommodates the rabbet. This system seems to be working pretty well. I fit the plank against the first plug. With it cut to a rough oversized length, I then take tiny amounts off until it fits snugly against the second plug. Everything is moving along well; it's just slow going. I will need to make two more plugs for the next row of gun ports as they are a bit smaller than the lower ones. The ones at the top do not have the rabbet, so that will seem very easy. Thanks for checking in. David
.jpg.06cd474e697189282c744b868885cb84.jpg)
.jpg.838dae8c8be6dd40009a8301d12d4f78.jpg)
.jpg.1658857ab87747ee080b09345386f3ec.jpg)
.jpg.3bfd744b5121eb22228c3fe9fb1f84a2.jpg)
-
Good Morning, I have had a bit of a coppering adventure. This is the first time I've used copper plates. In the past I've only used the self-adhesive copper tape, so this turned out to be a not very successful learning experience. I did the port side first. Things started out ok, but it was looking really bad at the bow. Where the plates lay in straight rows it went smoothly but I found the transition from the hull to the stem to be very difficult to do. I finished the port side, but was not very happy with how it was looking at the bow. I decided to leave it alone and consider it to be my learning side, ie. the "bad" side that would face the wall. I have no pictures of the port side. I moved on to the starboard side and like the port side, it started out ok. But even at the outset I wasn't very pleased. The plates are easy when it's straight and even, but as soon as there's a bit of a curve, I couldn't figure out how best to handle it smoothly. At the bow things really fell apart. I redid the bow area four separate times and each time my results seemed to get worse. My terrible port side was beginning to look like the good side. I couldn't bring myself to photograph any of this, so you'll just have to take my word for it. I also seemed to have a lot of trouble getting the corners of the plates to lay flat, and of course, when I dealt with that by placing glue right at the corners, I also got it on the surface as well. I knew that wasn't too big a problem, as it will clean off, but it wasn't helping my frustration level. I was a bit surprised by my problems, as I haven't read very much, if anything, on the forum of others having such an unhappy experience. In the end, I abandoned the plates altogether. In frustration, I ripped them all off, smoothed down the hull and started over with the self-adhesive tape. Perhaps it doesn't look as good as well applied individual plates, but believe me, it looks 10 times better than my previous best efforts, so this is what it's going to be. In the past, when I've used this method, I've simulated the nail heads with a ponce wheel, but always thought the effect was a bit over scale, so this time I eliminated that step and I think the result is at least as good, if not better. I think I'm still going to have a decent looking Speedy, so I'm not disappointed in that, but I am a little disappointed with myself that I was so easily defeated. I still have the hull of the Agamemnon ahead of me. I want to use the supplied plates for that if I can. They are the same size as the ones for Speedy, however the hull is about four times as big. I'm hoping that that will give me a slightly bigger margin of error. We shall see. Thanks again for comments and likes. David
.jpg.b658fcc85ecbb8ebdfcdf4cca36028e2.jpg)
.jpg.7ada9d22fde7955158a6a5b2074efcfd.jpg)
.jpg.e2930889ebbdee0210afef41698070de.jpg)
.jpg.68c9fdf06f5b12d95389d55d773fe031.jpg)
.jpg.522fa36f434721b7f492dac2ec6ba581.jpg)
- 91 replies
-
- 10
-

-
- Speedy
- Vanguard Models
- (and 1 more)
-
1/16" x 1/2" basswood strips won't be too hard to find, they have them at MicroMark as well as at Model Expo for example. 3/64" stock can be harder to find, however I believe they have it (as well as 1/16" x 1/2") at minaturemarketplace.com which specializes in doll house supplies. Hopefully that's of some help. David
-
Thanks for the comments guys! Derek, I'm a big fan of shellac, especially orange (or amber.) On very pale wood like basswood or birch dowels it gives a really good even colour if I'm looking for a natural finish - a little richer than with just polyurethane, with none of the problems of trying to get an even colour with stain and it tones down to just the right degree of sheen. I always have a canister of compressed air handy. It's great for removing all dust and debris as I work. I don't think I have any little bits of steel wool hanging on. Thanks again, David
- 91 replies
-
- 3
-
-
- Speedy
- Vanguard Models
- (and 1 more)
-
Hello All, I've finished the upper planking and wales and everything has gone without problems. I was worried about cutting around the gun ports, and was all but certain that I'd need more than one attempt to get it right, but I was actually able to get an acceptable result on my first try. Here is the port planking done, before cutting out the gun ports and sweeps - And here is the end result with a finish applied. I debated what to do with the finish. The instructions refer to matte varnish, which I assume is intended for this planking. However, I thought I might like a little bit of sheen so I used shellac. I find that even satin polyurethane tends to be too shiny, but shellac, when rubbed down with steel wool and then burnished with a paper towel gives a very gentle sheen - I used some masking tape to mark the location of the wales. I used thick CA glue to attach it and it went on (and stayed on!) quite easily - And now, I think I'm ready to begin applying the copper plates - Speedy is proving to be a very satisfying project and I'm enjoying every minute of it. Thanks again for checking in. David
.jpg.59839ecf2bf95cb65f9f83c643f314ec.jpg)
.jpg.1a0db8fe9b674b27c4d3fc95c54c0155.jpg)
.jpg.a41f5aab2f42f3b3a655ecea997c90b0.jpg)
.jpg.b29d27c190a549099ef703223f444288.jpg)
.jpg.450e01e43356807b54fc6ef795cfb8c6.jpg)
.jpg.e323eee6c43b4aaee7866229f3ce0127.jpg)
- 91 replies
-
- 12
-
-
- Speedy
- Vanguard Models
- (and 1 more)
-
Hello All, Brief update today - I have now finished the second planking on the lower hull, both sides. Next is planking from the wales up which requires cutting around the gun ports, It will be a bit slower job, but more interesting. Thanks for looking in. David
.jpg.c9791f51a4ee1cfe3e17c9738f634508.jpg)
.jpg.f0385b3b594c0e1ea3edfa382a6f5af6.jpg)
-
Hi Glenn, I'm glad to hear your experience with both spotters and brush cleaner; it sounds like I've come across the right things. David
-
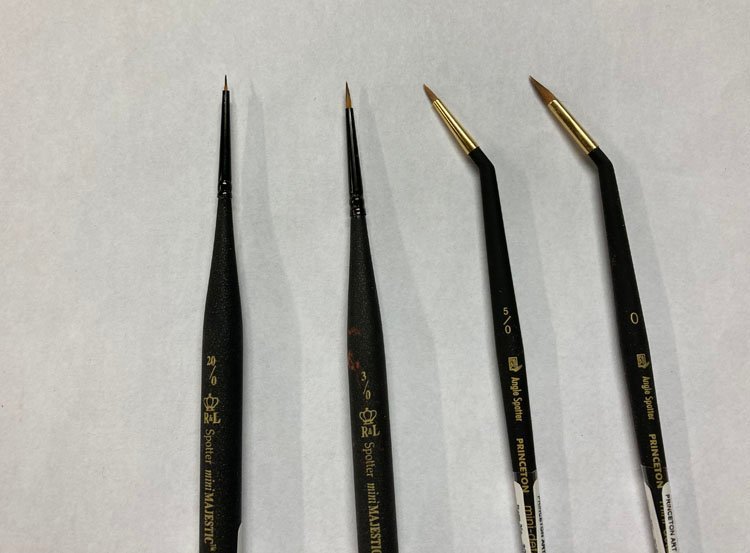
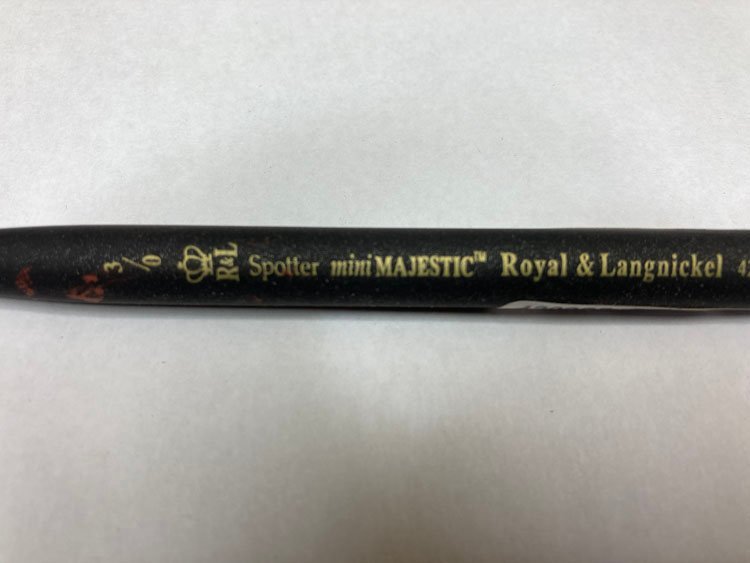
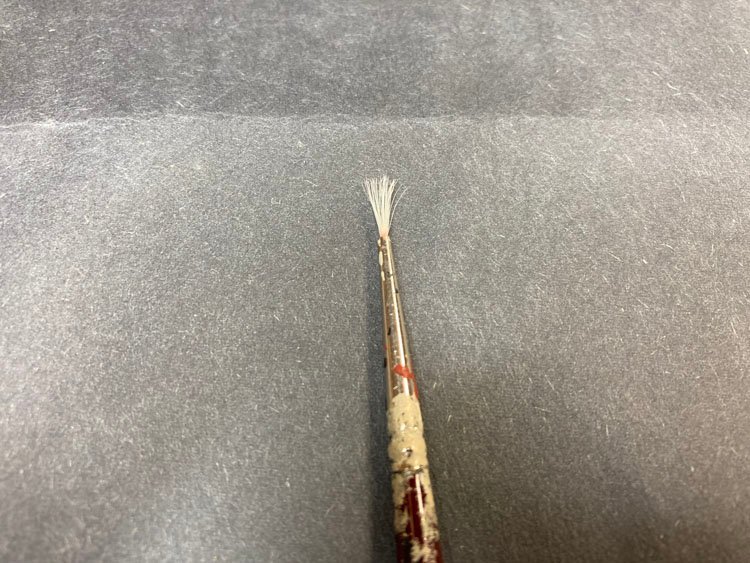
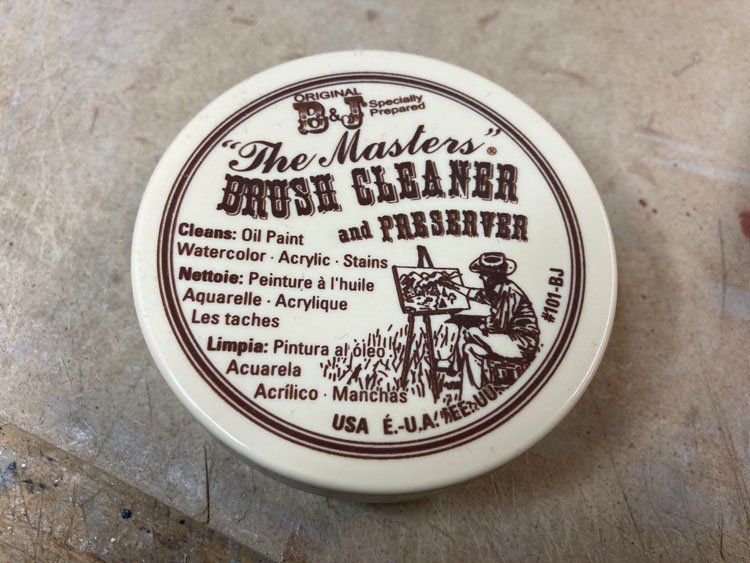
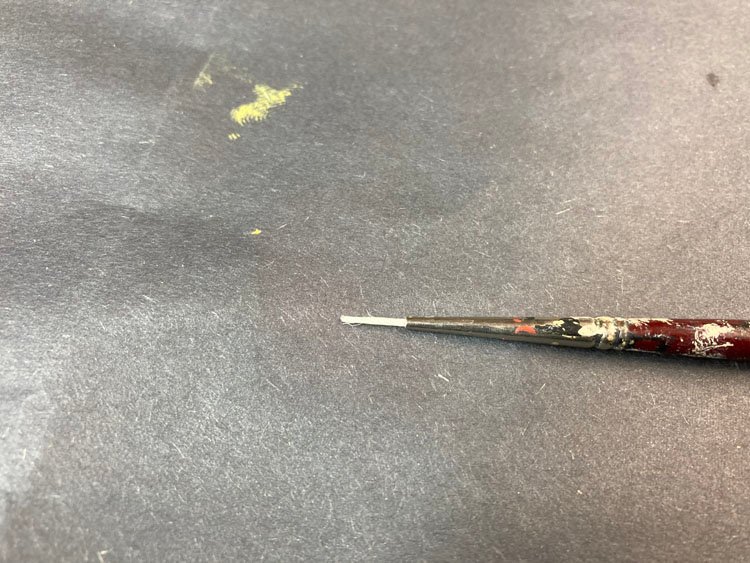
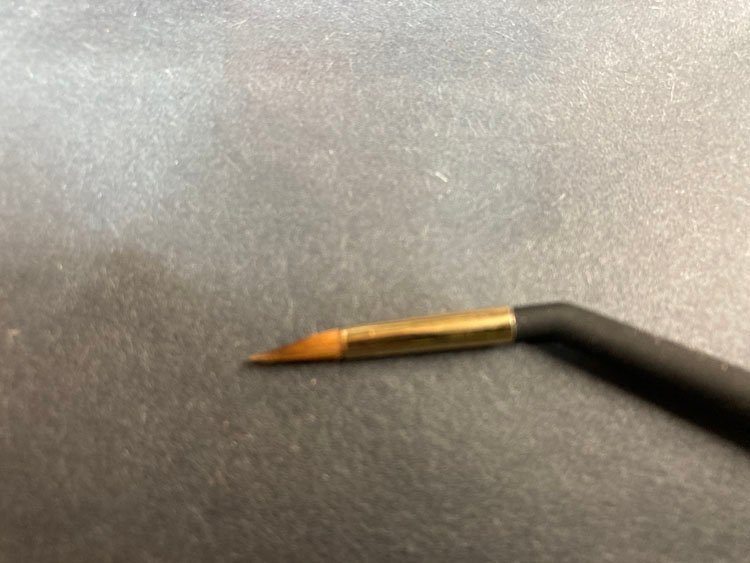
Painting my models is always one of the aspects I enjoy the most, but I have always been plagued by two persistent problems - The first is I can never seem to find the right brush for very small detail work and the second is I can never seem to maintain a brush for any length of time. I believe I have found solutions to both problems. This will no doubt be old news to many of you, especially if you're also artists or painters, but it's a revelation to me. First problem - finding a suitable small brush for detail work. It seems that when I buy even the very smallest brushes, I still can't control them easily and often they still deliver too much paint. A little research online suggested that I have been using the wrong brush. Most of these small brushes that are readily available are called "round", but what I learned is that there is another brush called a "spotter." These are also round, but they have much shorter bristles. That makes them stiffer and as a result, it increases the control considerably. I discovered that not every art supply source sells them, and surprisingly, some had not even heard of them, but I did find some and I bought four sizes (l to r - 20/0, 5/0, 3/0, 0 - very small to small.) They come in both straight and angled. I decided to try both and have been experimenting with them. So far, I prefer the straight, but I know the angled ones are going to come in handy in actual practice. (I've painted many hot water rads over the years and know how helpful an angled rad brush can be.) Second problem - cleaning and maintaining brushes. I have always found it hard to maintain my brushes. It seems no matter how careful I am, (which admittedly, is not always all that careful) they still end up looking like this in very short order. That brush started out as a beautiful fine round tip and now it's virtually useless. I discovered a product called Masters Brush Cleaner and Preserver and I think it's going to be a game changer. You clean most of the paint out of the brush in water (or solvent for oil) and then rub it into the Masters. You can rinse and repeat as necessary. When the brush is thoroughly clean, you can leave some of the "soap" on the brush which will help to maintain its shape. Here is the same brush again. The hint of red that was still at the base of the brush is now gone, and it is somewhat restored to its original shape. In truth I fear this particular brush may be too far gone to be restored completely, but leaving the coat of soap on it will cause it to retain its shape and is sure to make it still usable. If I care for my brushes this way right from the start I don't think I will have many problems with them again. For example, I have been practicing with these new brush extensively using both black and red paint and there is no trace of either near the ferule. (That's not black paint you see closer to the tip, it's just variations in the colour of the bristles) and the shape is as good as when I started. The seller calls the bristles on these brushes "synthetic sable." There are dozens of videos on Youtube demonstrating the use of Masters, which I found to be helpful. As I say, this all might be old news to many of you, but it's new to me and I believe it's going to be so helpful, that I thought I would share it. David

- 8 replies
-
- 18
-

-
-
Hi Derek, It's a real trick of the light. The deck actually has the same finish in all the picture, but for some reason it looks quite different in the last two. In reality it looks like the first couple of pictures. I applied a thin gray wash using acrylic paint and then rubbed it with steel wool. David
- 91 replies
-
- 3
-
-
- Speedy
- Vanguard Models
- (and 1 more)
-
I've spent the last little while working on the bulwarks. The first job is to remove the bulkhead extensions. This was quite easy to do; most of them just popped off - Bow and stern areas painted. I'm using Admiraly Red Ochre - Fitting the deck. It fit perfectly and didn't need any fine tuning at all - The first plank - The rest of the planking - The kit calls for the same 1x4 mm pear as is used for the hull planking, but I opted to just use some basswood I had in my stash. I'm afraid I might run out of the pear when I plank the outer hull around the gun ports. Planking above the wales and cutting around the gun ports is a really critical part of the build and it's very unforgiving. The odds of my having to do one or more "do overs" before I get an acceptable result are pretty high and I really don't want to run myself short of the pear because of that, so I can see no downside to using this basswood for the bulkwarks. As it turns out, cutting around the ports for the bulwarks went without any problems, so that bodes well for the outer planking. I hope it goes as smoothly. Drilling the holes for the guns and cleats - There are many ingenious design elements to this kit and this is certainly one of them. The places to drill are marked on the outside. They can be located perfectly and are a lot easier to drill from the outside than they are from the inside. The only caveat is to be sure not to allow any tear-out. I placed a piece of masking tape on the inside, and while it doesn't show it in the picture, I also held my finger behind the spot where the drill would emerge. (didn't hurt too much!) Sanded and ready to be painted - Finished bulwarks - And now with some trepidation, (but plenty of pear), it's on to the outer planking. Thanks, David
.jpg.2a8af2d8efb9e92c43b9af748c3d1722.jpg)
.jpg.34ef57ec1c2823f273a8336c39856803.jpg)
.jpg.5af3c193219e49fa189488d31b2d8a87.jpg)
.jpg.f71d6607873739dfb6cb0c88fe2305fa.jpg)
.jpg.1f46b0ce4634765e3d4289e160d2f926.jpg)
.jpg.e1985d1f91879c94876686a8e1106bca.jpg)
.jpg.3a53f68b4266ecd740ed7198ad974c97.jpg)
.jpg.990bce9ad831f0ce8c664cd1de4d6cd5.jpg)
.jpg.ed2009b1abc3687cbc78843c751cfd43.jpg)
.jpg.53efcdda7fa03fc63e4b10ebe16e469c.jpg)
- 91 replies
-
- 13
-
-
- Speedy
- Vanguard Models
- (and 1 more)
-
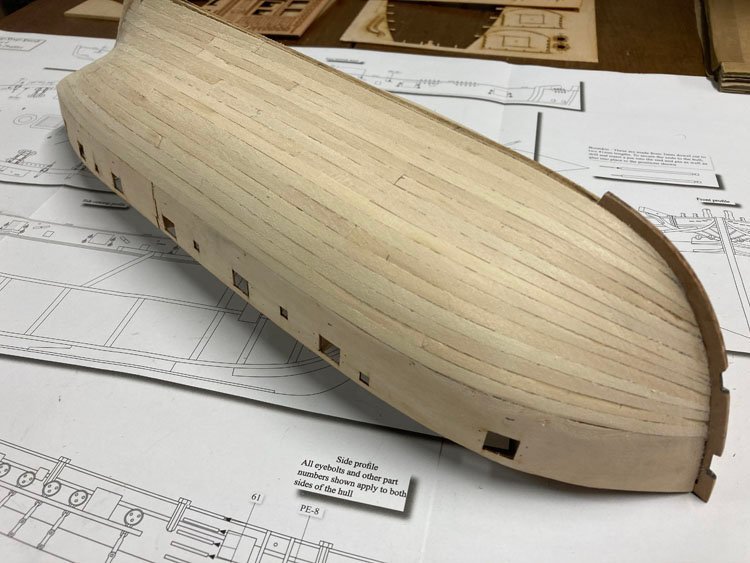
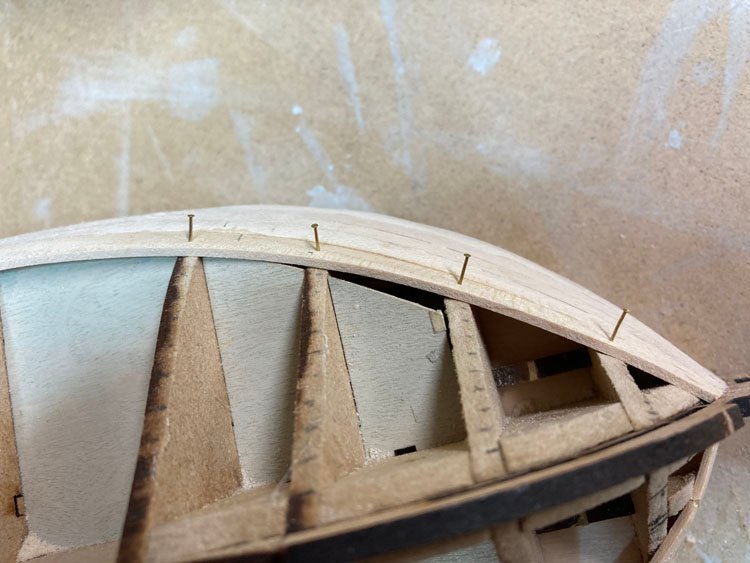
Good Morning, I've made good progress with the planking. This is not too difficult a hull to plank. I didn't soak any of the planks. I just used my new steam iron to bend the planks laterally at the bow and I also gave them a slight bend at the stern as well. With this "game changing" method they all fell into place very nicely. I had no serious problems or issues, but if I'm being totally honest, I did have to correct two small missteps. I discovered a glaring gap between two planks that I had failed to notice as I was working on them. It was just too big to fix with filler, so I had to remove a couple of planks below the gap. I brushed on acetone and was able to salvage them. I replaced them with new planks and saved these salvaged ones for a location below the water line. Also, initially I had the garboard planks located quite far down so that a portion of the keel would have been covered by them. I wasn't sure if that was right or not, but it occurred to me that the width of the the copper piece provided for the keel would indicate how much of the keel should be exposed. From that it was clear that the full depth of the keel needed to be exposed and the garboard planks were in fact too far down, so I planed and sanded them back and everything appears to line up correctly now. So now it looks like it's on to the the inner bulwarks and deck. Thanks for checking in and the likes. David
.jpg.350494a8fcb464cdeaf38100ed0a2a17.jpg)
.jpg.687e37868d49d667fa98d11f674e0832.jpg)
.jpg.e939996abb685ae336300b1c64a690ff.jpg)
- 91 replies
-
- 14
-
-
- Speedy
- Vanguard Models
- (and 1 more)
-
I've just started the second planking. I have the stern area done. So far, so good. This wood is very nice to work with. That's all for now. I'm afraid it's back to raking leaves. We are knee deep in maple leaves. However, there are still plenty more to come down which always presents a challenge. There's always a very small window between the last leaf falling and the first snow. At this point it's just a matter of volume reduction. Thanks for checking in. David
- 91 replies
-
- 7
-
-
- Speedy
- Vanguard Models
- (and 1 more)
-
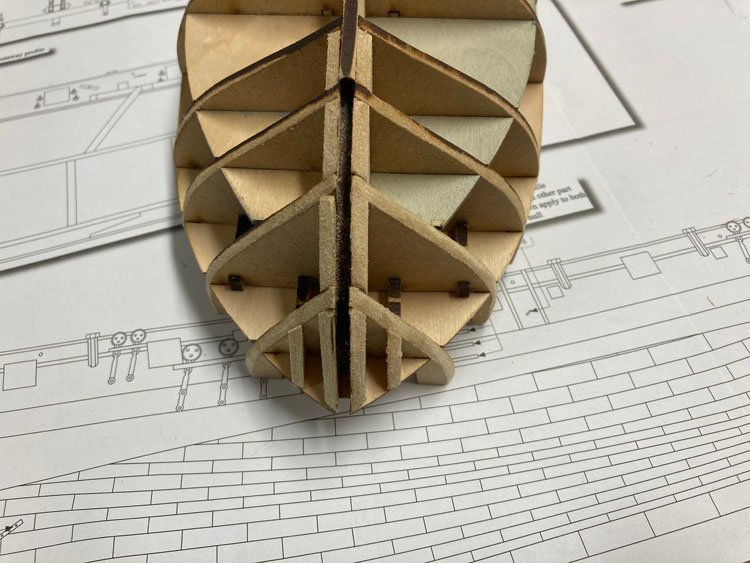
I'm working away at the second planking layer. There is a lot of ground to cover with this one! On my Speedy, I didn't bother to lay out belts for the planking. Its hull is quite small and it didn't seem essential to me. On this one however, because it's so large, I think it is necessary. I wanted to try using a planking fan this time and it works amazingly well. I like because it is a very elegant solution - it's simple, low tech and works so effectively. (And it's a lot less expensive than a set of proportional dividers.) I downloaded a template from the forum. Here is my progress so far. Thanks for looking in! David
.jpg.6c020117f95db8a3e72ddc93aaab5ac5.jpg)
.jpg.ba94d8f3877599b866218b5ec1b5126b.jpg)
.jpg.2ccceedf1ccb5c54ae8351d571e99b37.jpg)
.jpg.5c513c91930e4100a8b94e9754f03b6c.jpg)
.jpg.0cbaee1aaf79a5b6dcd705a31d4e5151.jpg)
-
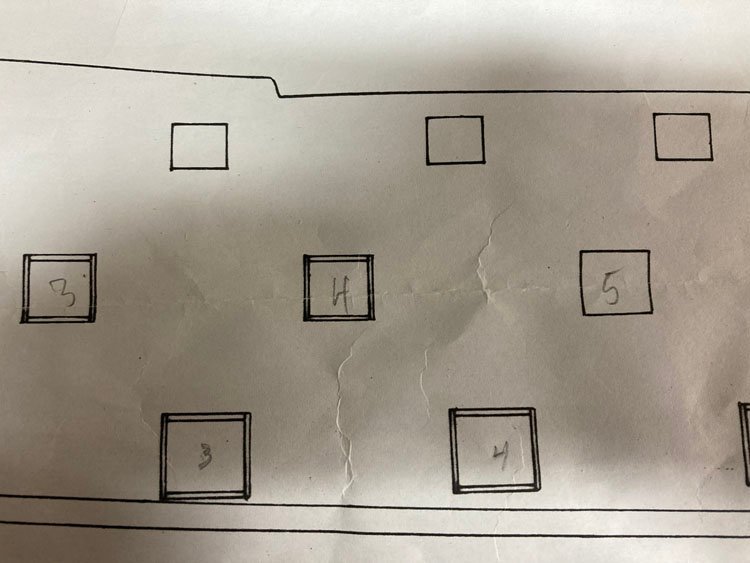
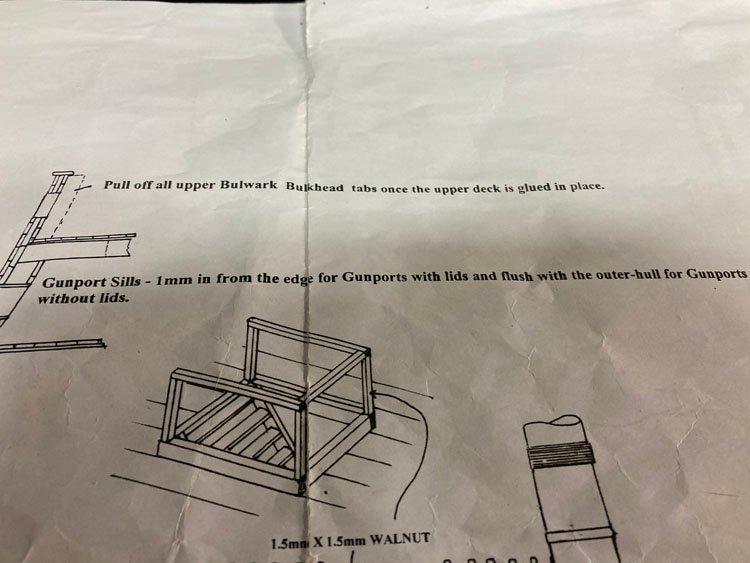
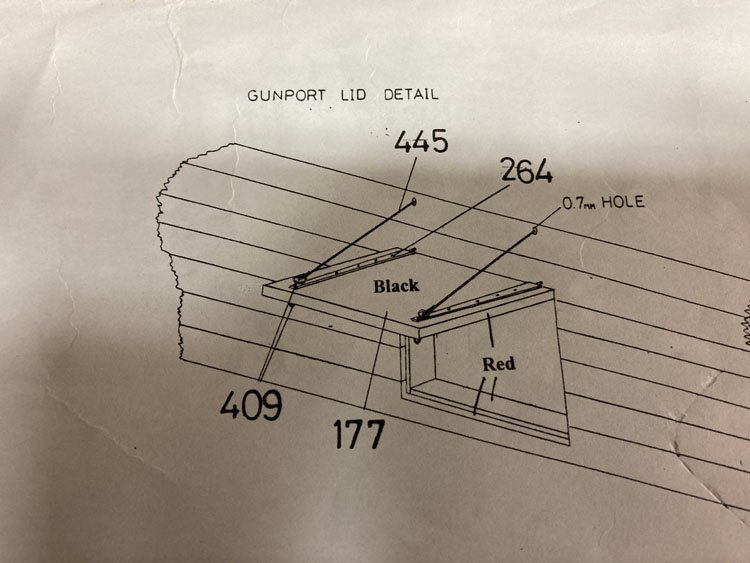
Hi Allan, I'm not sure I understand your question. I think I'm reading the plans correctly, but maybe I'm missing something. At the moment all of the gunport linings are flush with the first layer of planking. It appears to me, if I'm reading the plans correctly, that for the ports with lids, the second layer of planking should be cut shy of the edge of the linings by 1 mm or 3/64" on all four sides. This leaves a "recess" or a lip on all four sides that is the depth of the second planking and the width of the lining - both are about 1 mm or 3/64" It appears to me that the lid is simply placed against the upper lip. And, of course, for the ports that have no lids, the second layer of planking is made flush with the inner edges of the linings. Do I have this right, or am I missing something. Thanks, David
-
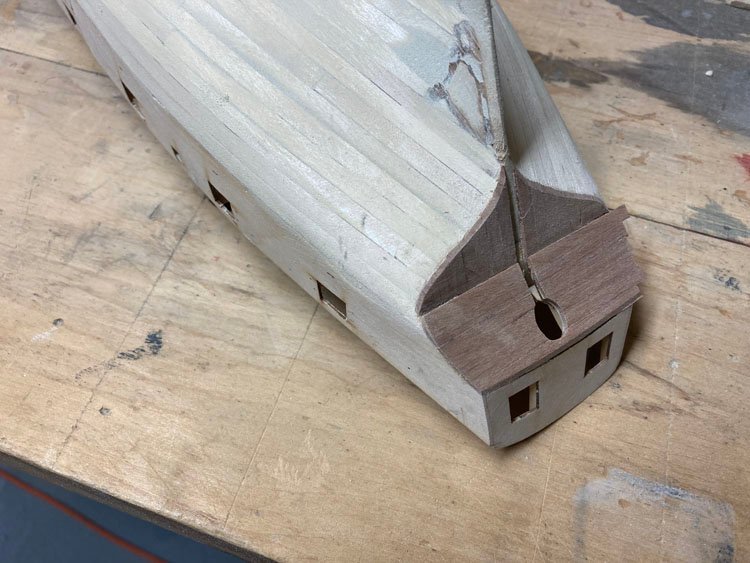
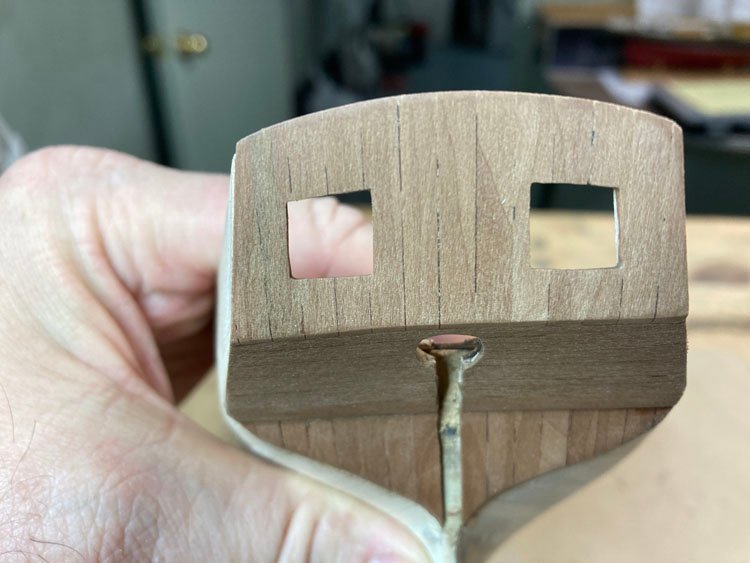
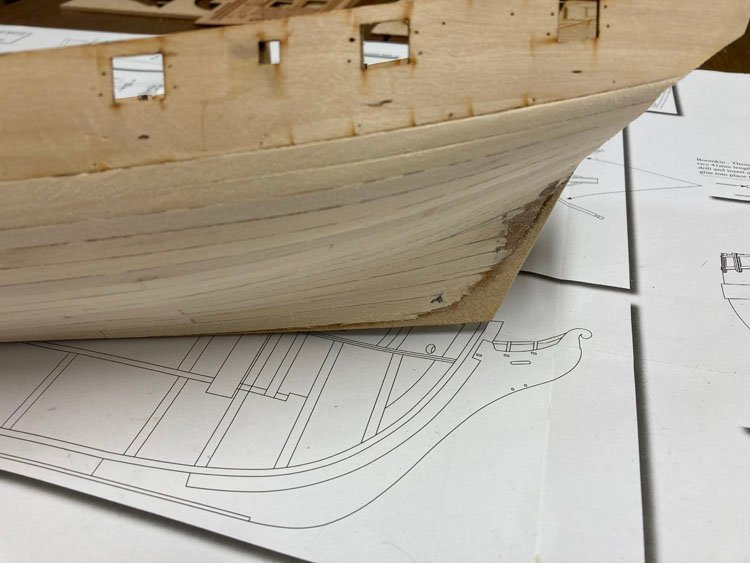
I mentioned in another post that a nearby fellow model builder asked me if I'd like to take on a partially built Agamemnon that his late father had started, but was unable to complete. I am happy to be the recipient of such a great kit. All the work that has been done on it is first rate, so it's just a matter of moving forward; nothing to be re-done. I'm really honoured that Peter Rumgay, a very skilled modeller, has entrusted me with his dad's unfinished project. I going to work on this kit simultaneously with my Speedy project. I've never worked on more than one project at a time before, and so far I'm enjoying the process. The key for me was getting properly set up and slightly changing my modus operandi. In the past, (mostly through laziness) I usually had too much stuff piled on my workbench, so it looked like a hoarder's workbench, sometimes to the point of leaving only the tiniest workspace. That just wouldn't work this time, so I have cleared it completely. Fortunately I have a lot of room in my shop so I set up two separate tables, apart from my workbench, and have one table dedicated to each kit, including plans and all parts. and just move over from the table the immediate things I need at any given time and then move them back. This makes it very easy to switch projects and keep everything organized. I should have been this organized all along. Here's the model as I received it. It would appear that the first order of business for me is the second layer of planking and I've made a start. I'm thankful for the other Agamemnon builders on the forum. I've been studying their build logs and I know I'll be turning to them again and again as I work through this very large undertaking. David

.jpg.dd9a03ceaaa4c37be311bf44597c931e.jpg)
-
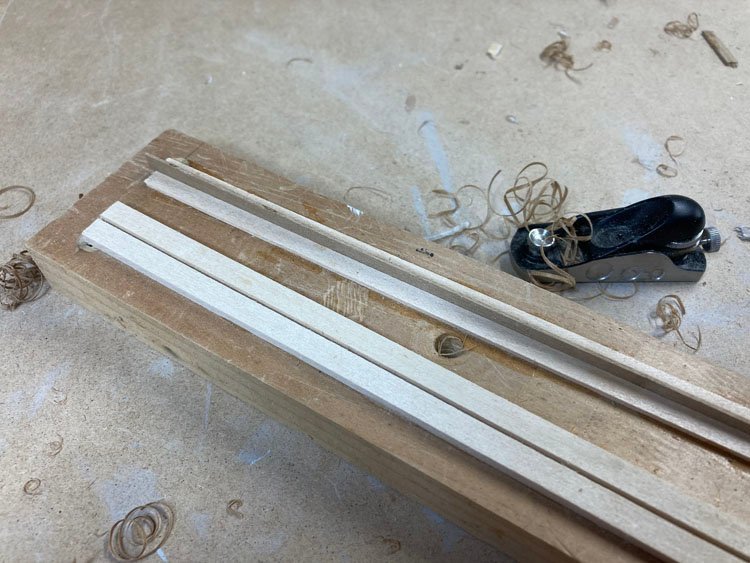
Here's the little jig I made to hold the 1mm planking. The two strips in the foreground are 1/8" high and the two behind are 1/16" high. David
- 91 replies
-
- 7
-
-
- Speedy
- Vanguard Models
- (and 1 more)
-
I have a soft spot in my heart for this kit because it was my first build and my introduction to this great hobby. I think it is one of the best introductory models there is. Pretty much everything you will encounter in larger and/or more complex models is here, just smaller and simpler. ie double planking but not too big a hull, cannons to rig, but only a few; rigging, including yards and ratlines, but not too much with only one mast, etc. etc. I used Bob Hunt's practicum for this model too, and I found it to be invaluable. Of all his practicums, this one is by far the best and should be of real help to you. With this model, along with the longboat under your belt, you will be well launched. David
-
Bob - I found that holding the plank on its edge worked just fine for the first layer of planking (1.5mm) but wasn't sure it would work as well for thinner material. I haven't started the second layer yet, but I experimented with some 1mm planking and it is in fact too wobbly. So, I've built a jig that solves the problem. I don't have a picture of it, but I'll get one tomorrow and post it. I just glued four strips onto a scrap piece of 1x2. Two of the strips are 1/8" x 1/4" and they're glued wide side down and 1mm apart. The other two are 1/16" x 1/4" and they're glued down the same way, 1mm apart. They hold the planking strip perfectly. I start with the 1/8" and then move to the 1/16" as I remove more material. Kev - your system sounds like it would work well. If you're thinking of the Speedy as your next kit, I would recommend it highly. I'm not too far along yet, but so far, it is an absolute pleasure to work on. David
- 91 replies
-
- 1
-
-
- Speedy
- Vanguard Models
- (and 1 more)
-
A little more progress on Speedy - I have finished the first layer of planking. This is not a difficult hull to plank and the whole process went smoothly. I chose not to line off the hull, creating belts. The instructions didn't indicate that this was necessary and I decided since it is a small hull, I shouldn't have any problems if I didn't do it. So I just eyeballed the amount of tapering for each plank at the bow, taking off just about half or slightly less and planning to address any issues once I got to the bottom. I worked straight down, but installed the garboard before added the final two planks above it. There really were no problems to speak of, just a matter of fitting the last plank against the garboard. I used my new little Lee Valley plane to taper the planks and I found it to be very effective and pleasant to use. (which I'm relieved to discover, since it was about the same price as a used Hyundai!) I can never seem to hold a ruler firmly in place when using a knife. This way, you just hold the plank on its edge and run the plane along it. It works really well and you have quite a bit of control. I didn't ruined a single plank this time, which is not typically the case for me with a knife and ruler. Having really only built Model Shipways kits before, I am used to drawing the bearding line and reducing the centre keel before adding the planking. This kit doesn't include that step, but rather asks you to simply apply the planking first and then sand the stern area to a very thin width afterwards. I wasn't sure how easy a task this would be to do, but it proved to be easier than I anticipated and I think I have an acceptable result. I know it looks rough in the picture, but that's only because of the the contrast in colours. It's actually very smooth where the planks feather out. I think this is the first hull I've planked where I don't need a gallon of filler (and I'm talking imperial gallons!) I will use some though, just to even out a couple of spots, but I think it will need only a minimal amount. And that's it for now. Thanks again for comments, likes etc. David
- 91 replies
-
- 11
-
-
- Speedy
- Vanguard Models
- (and 1 more)
-
Thanks Derek, I've coloured the upper deck already and I'm quite a bit happier with it than the lower deck (which was the sacrificial trial case.) The upper is more gray, less yellow. A very light sanding lets some of the wood show through and I think it's a good natural look. It will make its appearance in due course. Thanks again, David
- 91 replies
-
- 1
-
-
- Speedy
- Vanguard Models
- (and 1 more)
-
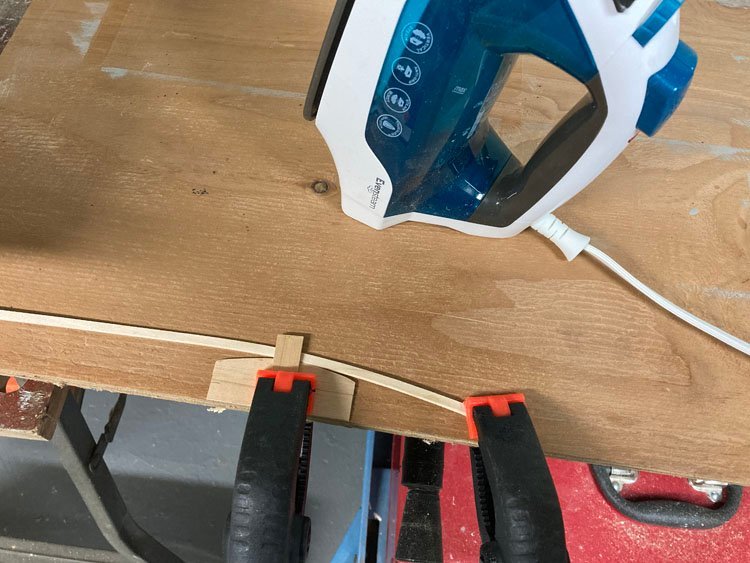
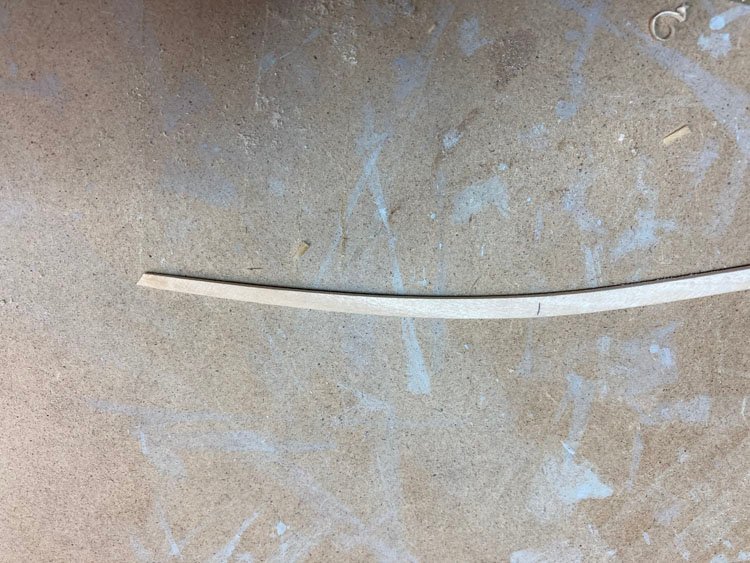
I am determined to improve my planking skills with this build, so have been trying a couple of experiments with the first layer. I tried my hand at two of Chuck's suggestions - the first was spiling and the second edge bending with an iron. The spiling works well in that it certainly solves the problem of the planks tending to "step" at the bow. However, it presents its own set of challenges and it needs some wider stock to work with. I tried one spiled plank on the port side, but no need for a picture of it - it's a bit rough and once you see it, you won't be able to "un-see" it. I don't want to ruin anyone's day. However, the iron method works really well and is pretty much foolproof. I bought a cheap iron ($21.99) and set up an ironing station. The hold-down is important, because without it, it's still possible for the plank to "buckle." With the hold-down, it works very smoothly. And here is the plank in position - I am now a convert to this method. I'm expecting it to be especially helpful for the second layer. In the past I have sometimes found the second layer more difficult and frustrating because if the plank doesn't lay perfectly flat, the glue doesn't hold and sanding results in gaps. I think this is going to improve things for me considerably. Thanks for checking in. David
- 91 replies
-
- 11
-
-
- Speedy
- Vanguard Models
- (and 1 more)
-
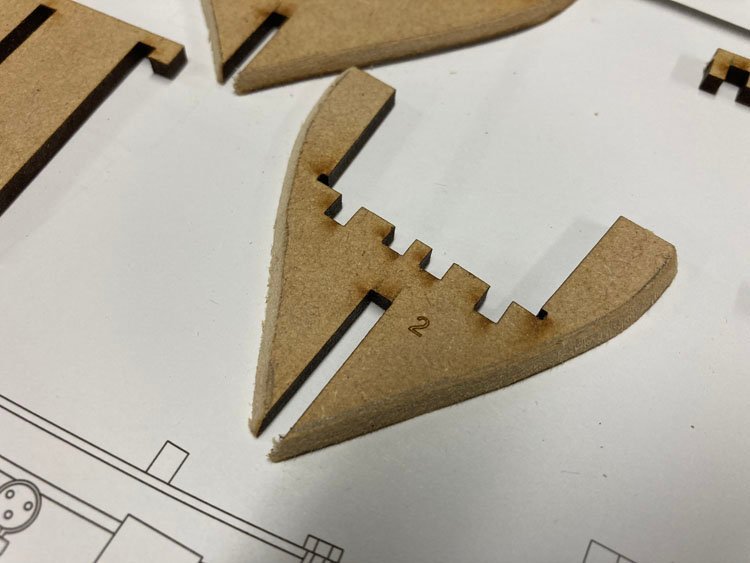
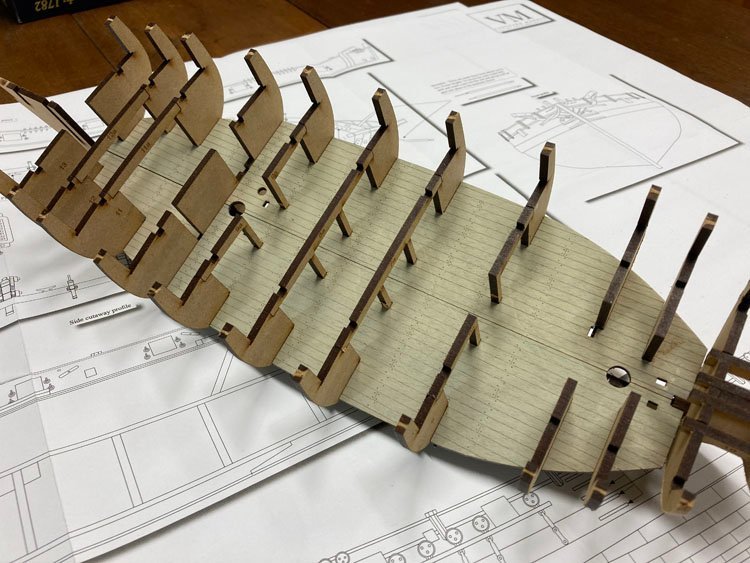
I've made a little more progress on the Speedy. It is impossible to overstate how perfectly the pieces fit together and what a pleasure they are to work with. I added the upper sub-deck which popped into place beautifully. Fairing the hull seemed a relatively easy chore. The mdf is a lot nicer to work with than plywood and with the lower deck and upper sub-deck in place, which essentially serve as guides, it was hard to go too far wrong. I did get a little over zealous on the the second to last bullkhead when I pre-sanded it before its installation. I had to fix it with a thin strip. The gunport strips were causing me a lot of anxiety, because I knew that they can be a bit tricky and I've never built a model that uses them before. However, the job wasn't too bad and again, I think it is because they are so perfectly designed and cut to fit. Like almost everyone else, I had a small bit of wrinkling with the bow sections, but nothing that can't be easily fixed with some sanding. The two sides meet up really well with the the two stern pieces. I needed a very small amount of sanding on the port side and just a tad more sanding on the starboard, side. Gunport strips installed - First strip of planking added - You can see the two spots where there was a little wrinkling and I've done some "experimental" sanding. It isn't fully sanded at this point, of course, but I just wanted to discover if it could be easily sanded out and I believe it can be. I have a new tool - a miniature block plane from Lee Valley. It's hard to tell from the picture, but this thing is small; just 2 1/2" long and 3/4" wide. I intend to use it to taper planks and to bevel their inner edges. I used it on the one plank I've installed so far and it worked very nicely; especially for beveling the edge. That's my update for now. Thanks for looking in, comments, and "likes." David
.jpg.3f5c2075be332c886a8b5447a63c39d1.jpg)
.jpg.3e3770daa34020e099f6ae15daa57e29.jpg)
.jpg.7371b8fc416b51c20954d48e09cac1cc.jpg)
.jpg.14ea75554cfb3c081b1fba9d9ae5ed53.jpg)
.jpg.69f88c03edee27d35eb710699ed7e982.jpg)
.jpg.2286940a451d9f36a943cbb6a6ef7ffd.jpg)

- 91 replies
-
- 11
-
-
- Speedy
- Vanguard Models
- (and 1 more)
-
Also, I forgot to mention in my last posting - have you found this website: suburbanshipmodeler.com? You mentioned that you want to add sails and that Bob Hunt's practicum doesn't address the sails. The guy on this website built a Bluenose with sails and gives quite good instructions. You might find it helpful. David
-
That's a very cool solution for the dories, Derek. I found them to be a royal pain to do. In the end, they were acceptable (just) but I didn't enjoy building them. These look like they will work really well and save you a great deal of frustration. David
-
Good Morning, It's been a while since I have been active in the forum, but that doesn't mean I haven't been active in my workshop. I have just finished my second Bluenose model, this one for my daughter. I didn't do a build log for it as it would be virtually identical to my first one. I ordered and receive the Speedy for my next project, but it no sooner arrived that I got a call from my near-by fellow ship modeller, Peter, who asked me if I would like to take on an Agamemnon. It had been his late father's who had started it, but been unable to finish it. Peter already had other things on his model-building plate, and since this particular type and era of vessel is not his chief area of interest, he thought it might appeal to me. He was right, however it is a pretty daunting project. The first planking is finished, the gunports are framed, the framework for the stern installed and the lower deck is planked. Everything to this point is beautifully done; I hope it isn't downhill from here. I will soon start a separate build log for this project. For the first time ever, I have two projects at once. I think I may work on them simultaneously. The idea of being able to move back and forth as the spirit moves me has some appeal. So with all that preamble over, here is my work on the Speedy so far. I have to admit that I am approaching this build log with a great deal of trepidation. There is some pretty impressive work out there and the bar has been set very high. I almost can't believe how precisely the parts have been cut - they fit together perfectly. I did a little pre-beveling on the first and last bulkheads. Notwithstanding the shiny bright finish on the deck of my Bluenose, for these naval vessels, I always prefer a grey finish. I've noticed that not too many others finish their decks that way, but I tend to like them. I wasn't sure how it would work on the etched deck of this model, but fortunately I was able to experiment on the lower deck which is almost completely unseen. I use artists' acrylic paint and make a very thin wash of gray, tempered with some yellow and/or brown. It worked quite well with this etched deck. The lines between the planks show up just the right amount. In a few spots the wash had overfilled the lines, so I ran a razor blade along them very lightly and it worked beautifully. I think I have just a bit too much yellow in my gray mix on this lower deck. For the upper deck, I'll make the colour just a bit grayer. It was great having this "practice" deck to work on. That's it for now. Thanks, David


- 91 replies
-
- 15
-
-
- Speedy
- Vanguard Models
- (and 1 more)