


Bob Blarney
-
Posts
467 -
Joined
-
Last visited
Content Type
Profiles
Forums
Gallery
Events
Everything posted by Bob Blarney
-
An alternative to a magnifying visor
Bob Blarney replied to mgdawson's topic in Modeling tools and Workshop Equipment
That will work. Another alternative is a smartphone camera mounted on a support. It can provide variable magnification, too.- 1 reply
-
- 3
-

-
A DIY thickness sander
Bob Blarney replied to Kris Avonts's topic in Modeling tools and Workshop Equipment
Well done. Here's a URL link to one that I built for thicknessing 8" x 20" wood stock for guitar tops and sides down to 2.0 to 3.0 mm thick. The adjustment mechanism isn't quite so complex. One possible advantage of my design is that the stock can be tapered across its width by adjusting the alignment of the feed ramp. If you can't access the article at the Musical Instrument Makers Forum, please let me know and I'll post a description. http://www.mimf.com/old-lib/hammond_sander_lathe.htm And here is another similar idea that I found a year or two ago, published in Popular Mechanics, July 1958, p 190. A dust collection apparatus is really essential and would not be difficult to adapt to this design. The mechanical parts are available at McMaster.com https://books.google.com/books?id=KN8DAAAAMBAJ&lpg=PA191&dq=drum thickness sander intitle%3APopular intitle%3AMechanics&pg=PA191#v=onepage&q=drum thickness sander intitle%3APopular intitle%3AMechanics&f=true -
As a first time build, I'd advise using plain old Elmer's GlueAll. Many many models have been built with it, and it's no nearly as difficult to reverse it as compared to a yellow PVA glue. There may other parts in the model where a different glue might be better (such a cyanoacrylate, i.e. superglue), but start with Elmers. Another point about using glue for building models. In many places, it would be good to squeeze a dot of glue on a notecard and apply it to the part with a plastic toothpick. This is especially so with superglues. A 1cc or 3cc syringe with a blunt needle can be very useful too, about 18 to 20ga needles, and sometimes a 16ga or a 22ga depending on the viscosity of the glue.
- 9 replies
-
- 3
-
-
- new member
- wood ship
- (and 4 more)
-
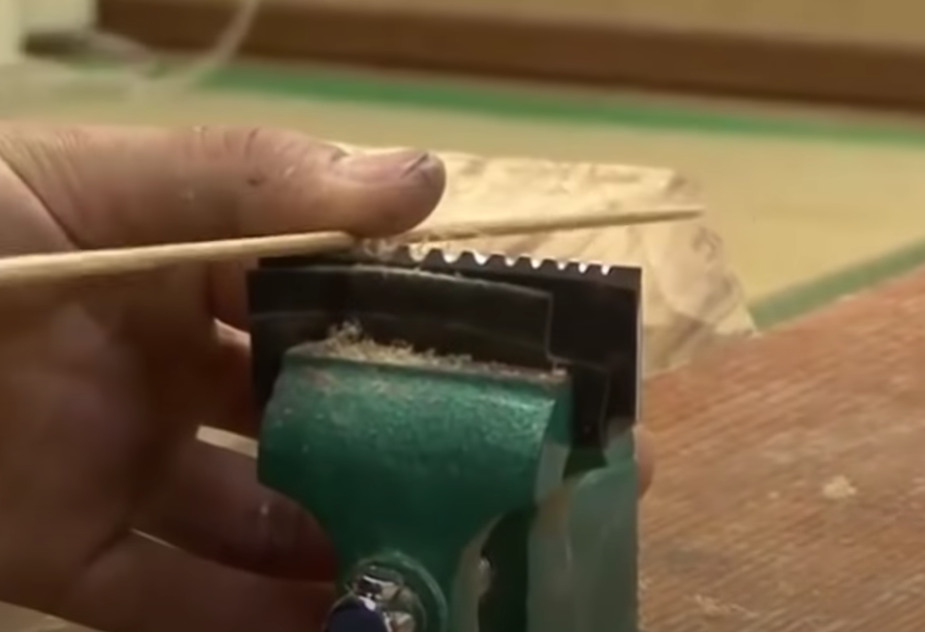
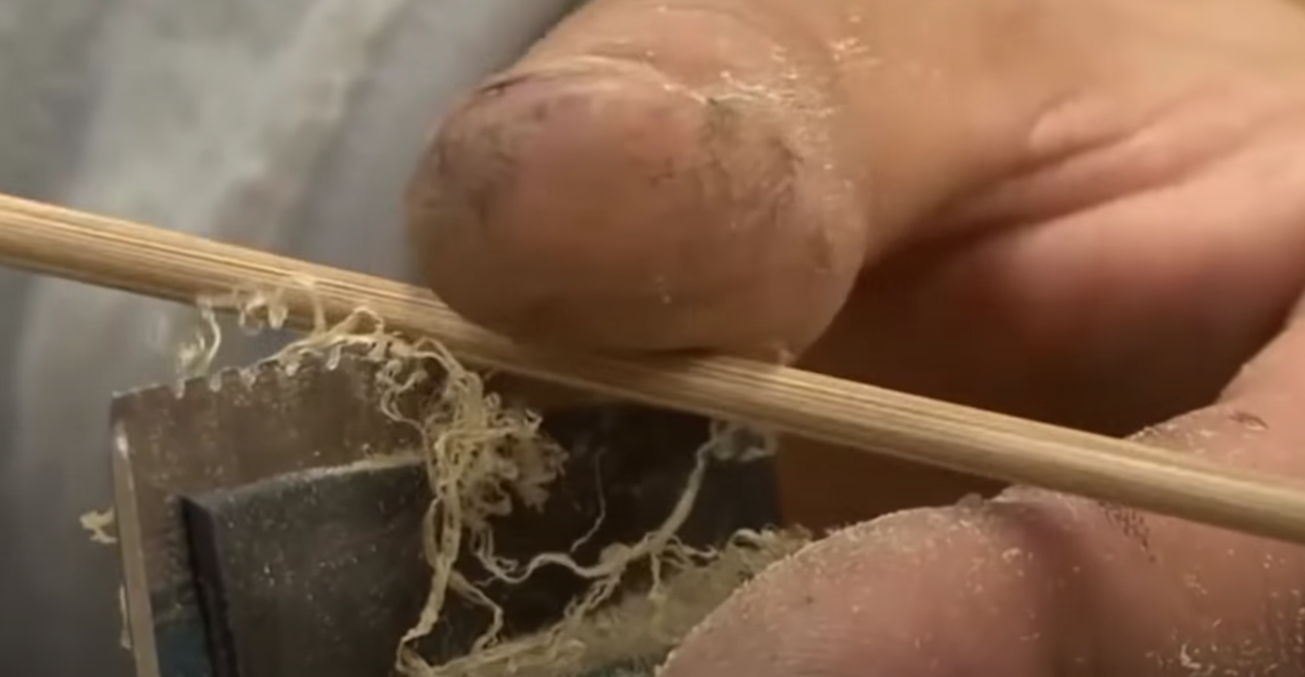
Hello, I thought you might like to see this fixture that a Japanese fishing rod maker uses to taper his bamboo stock. The bamboo rod is twirled as it's drawn over the plate.
-
A jewelers' supply is a good source for files and other small hand tools. And I find that wine corks make excellent handles. Small file tangs can be pushed in, while for larger files I drill a hole first and sometimes glue in a brass tube that accepts the tang. Finally, avoid using the same file for both wood and metal.
-
Drilling holes with crisp edges in wood
Bob Blarney replied to laps's topic in Modeling tools and Workshop Equipment
Occasionally, I have applied a wash coat of shellac to lock the surface fibers down. The shellac can be sanded off easily or wiped off with alcohol. As always, first try this on a piece of scrap of the same species. -
You might looking for Potts scissors - they are available in several degrees of angulation. Also, there are now many disposable 'keyhole' instruments designed for minimally invasive surgery that have some interesting articulations It might be difficult to procure them, however
-
Table Saw Blade Stiffener
Bob Blarney replied to Charles Green's topic in Modeling tools and Workshop Equipment
A blade stiffener is a good idea. I'm surprised that a Powermatic would need that much of a tuneup. By the way, have you ever tried a smaller blade - an 8 or 9 inch? They're less expensive and give more apparent power for cutting. My 1956 Yates American is an 8" saw that cuts 2-3/8" deep. If I use a 7-1/4"blade, there is a very significant monetary savings at the loss of only 3/8" depth of cut. That way I save my expensive high-quality blades for finer work. -
Mill Speed to Avoid Chipping
Bob Blarney replied to ChrisLBren's topic in Modeling tools and Workshop Equipment
I think you'll find that while HSS won't last as long, but it will be sharper than carbide. Down-spiral bits can be useful too. Another tip might be to do what I've done on some guitar soundboards - Put a thin 'wash' coat of shellac on the surface - it can be wiped with ethanol (denatured or drinkable) and sanded off. As always - try it on scrap material first. -
Jointer question/recommendation
Bob Blarney replied to davec's topic in Modeling tools and Workshop Equipment
I don't know why I didn't remember the Safe-T planer - a drill press accessory. An important tip about using this tool is to set the table so that it is perpendicular to the quill of the drill press (and so parallel to the disc). To do this, bend a coathanger into Z shape and mount it in the chuck. Then turn the chuck by hand and adjust the table so that the other end of the Z just scrapes the table as it rotates. It may be possible to find this at a better price. https://www.stewmac.com/luthier-tools-and-supplies/types-of-tools/planes/stewmac-safe-t-planer.html -
Jointer question/recommendation
Bob Blarney replied to davec's topic in Modeling tools and Workshop Equipment
A hand plane, a square, and a workbench -
Genesis 7.2V pistol grip rotary tool
Bob Blarney replied to grsjax's topic in Modeling tools and Workshop Equipment
The switch issues would be a dealbreakers for me. A bad switch out of the box doesn't bode well, but perhaps that's a fluke and the vendor did the right thing. So far as placement of the switch goes, a good fix would be to use a footswitch. And perhaps a sewing machine pedal could control speed as well. There is one other thing about this whole genre of tools that I don't like - the angle of the bit/cutter when grinding or cutting. It's always necessary to wear eye protection and possibly face protection because fragments are usually/often flung back at the operator. I suppose that a transparent acrylic shield could be placed on the bench to deflect particles, but that's just another thing to have around. -
one more thing - avoid 3-wheel bandsaws - most can be very cranky.
-
Perhaps you might enjoy watching this fellow rebuild a sailing yacht from the early 1900s. He uses a 36" shipsaw to cut new frames.
-
Yes, it refers to the diameter of the wheels. The actual distance from the blade to the saw's frame is less. On my ancient 1940s Milwaukee-Delta it's about 12", but with forethought that's not usually a problem. A standard 14" saw has ~6 inches depth of cut, but with an optional riser block it will cut 12" thick. The motor's power is not as important as some believe - It's a equally a matter of proper saw adjustment, a suitable blade style, and feed rate.
-
(Hmm, I have and use a 1/8" x 105" on my 14" saw occasionally. I don't find anything extraordinary about it.) If your need is beyond modeling, then I think you'll definitely need at least a 12" saw, and a 14" saw is generally considered the happy medium for home and small shop use. So far as blades are concerned, understanding the configurations of width, thickness, and tooth styles can be daunting. Generally 3-5 teeth should be engaged in the wood, with the particular tooth style suited to the nature of the material There are very good blades available at reasonable prices (~$35US for a 105" blade), but carbide-toothed blades can be extraordinarily expensive (e.g. $2US >per inch<). In the USA, two common brands that are well regarded are Woodslicer and Timberwolf, but there are also good blades from Lenox, Starrett, Olson, and others. Also, where I'm located, there are local shops that will make blades to any specification. All that said, most of the time I use a 1/4" x 6TPI or 3/8" x 4TPI with regular or hook teeth. Finally blades that are 1/2" or wider may not be suitable for 14" or smaller saws because they require much higher tension than the saw's frame can exert.
-
If there are machinery dealers in your area where you could try out several models, then I think a visit and discussion might help you to make a decision. I'm biased as the owner of 1940s-50s era American cast iron machines, but I do think that there are smaller modern machines in the 9-12" class that may be entirely suitable to your need. Some scrollsaws are quite good as well, but may be limited if their depth of cut is insufficient for the work you want to do.
-
Glue Recommendations
Bob Blarney replied to leehound's topic in Modeling tools and Workshop Equipment
I usually use ordinary Titebond, and Titebond makes a "Quick & Thick" PVA glue too. Occasionally I use a CA wood glue or polyurethane. But I still use Behlen's hot hide glue too if something might need to be disassembled, but do not use Franklin Liquid Hide Glue. -
dull number drill bits
Bob Blarney replied to BETAQDAVE's topic in Modeling tools and Workshop Equipment
this might be interesting: -
dull number drill bits
Bob Blarney replied to BETAQDAVE's topic in Modeling tools and Workshop Equipment
As mentioned directly above, cutting speed is very important. Usually I find Dremel tools to be weak, but in this case it may be the best tool available to you. If it can be fitted into mechanism similar to a drill press, then so much the better. I made such a thing using linear bearings and precision drill stock and acrylic blocks (it's really ugly but it works), and I lower it down on to the stock with my fingers to feel how it's drilling. -
Exquisite engineering and workmanship. But it may be beyond the means of many modelers. A simpler jig can be made - look up how traditional flyfishing rods are made. That jig, with a Stanley 60-1/2 or Lie-Nielsen 102 block plane can do fine work for masts too.
-
Homemade Shop Dust Masks
Bob Blarney replied to CDR_Ret's topic in Modeling tools and Workshop Equipment
we're making masks for the medical caregivers too. But now elastic is out of stock, so we're making them with long ties that can be trimmed to length. My daughter creates fabric print designs and contracts with a printer to produce a sampler proof cloth for the designs. She's now cutting up the proof samplers for masks.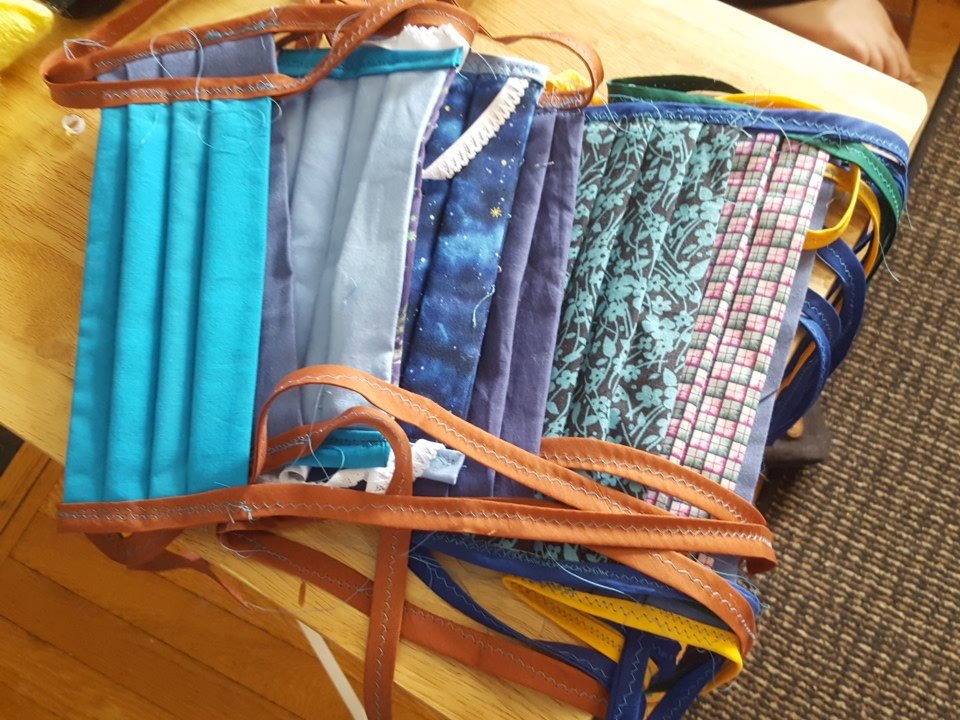

-
Resawing on a table saw has some disadvantages - it wastes (expensive) wood, and there are instances where it could be dangerous. I've resawn granadillo (a very hard rosewood) 1"Th x 11"W into 3/32" Th x 11" W veneer for guitar parts, using a riser block on my old 14" Delta Milwaukee with a 3/8" x 105" Lenox Tri-Master blade, and a high fence. But here's one technique for resawing using both a table saw and a bandsaw: 1. On the table saw, cut a 3/8" deep groove on the edges of the board 2. On the bandsaw, place a wooden table on top, drive a 6p or 8p nail just before the blade and clip it about 1/4" high. Now you can use the clipped nail to register the edge of the board and guide it through the bandsaw. There are also 'point' fences, where a board is clamped with a sharp corner just beside the teeth of the bandsaw blade. That way the board can be skewed to cut thin slices. I don't find that to be good method. But here's the safest way, which I'd do from now on: https://youtu.be/VNbq4WuJmRk
-
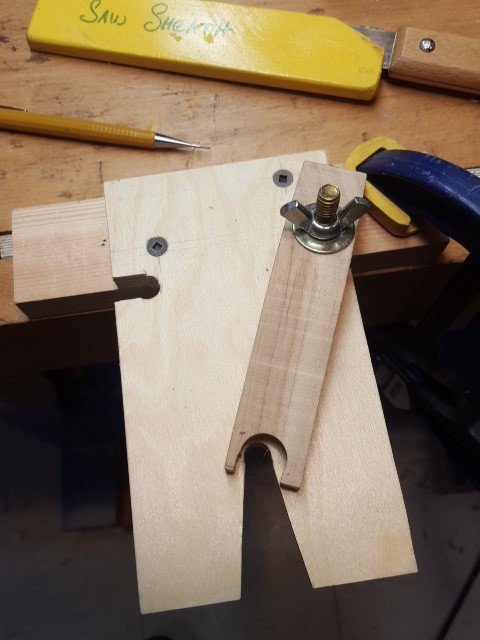
You're welcome. You could make the fixture larger and add more notches to locate additional claws. You could also use larger knobs on the toilet bolt that are easier to manipulate. The t-bolts are available in 1/4-20 or 5/16-18 sizes and different lengths.
-
Hello, modelers may find this traditional bench fixture useful. My daughter is a professional artist, and she asked me to make a birdsmouth for her bench. So I bodged this together in few minutes, and I thought she might find a hold-down claw useful while sawing and grinding out shapes. The claw is just an arched piece of hardwood that is held by a toilet bolt & wingnut, and it can be located in the notches on either side of wooden table. When it wears out from strokes of the saw blade or other tool, it's just a matter of cutting a new one.
- 3 replies
-
- 10
-