


NMBROOK
-
Posts
2,305 -
Joined
-
Last visited
Reputation Activity
-

 NMBROOK got a reaction from Bill Hime in MORDAUNT 1681 by NMBROOK - Euromodel - 1:60 - Beyond Bashed
Hi Matti
Yes she will be natural wood.I am hoping the only paint used will be to make her look old.The task is made easier by the fact the only colour is black as I don't think I will be going for the Red on the internal planking.However if I did,this would only be on the upper deck,as according to my research,Deptford where she was built had a habit of using unseasoned timber to speed up production.They didn't paint the inside walls of the hull in an attempt to let the timber breath.This didn't work and they soon had lot's of ships with rotten hulls!!!.
Yes I have plenty on and starting another log next week as well That is for me though .That will bring my log count up to four,probably some sort of record Caroline has moved on a lot this week but I will update probably at the weekend.I am working on five different things at once to combat drying times So I will take some pics when it comes together.
Kind Regards Nigel
-
 NMBROOK got a reaction from janet bode in MORDAUNT 1681 by NMBROOK - Euromodel - 1:60 - Beyond Bashed
As work is moving well on the construction of my Caroline build,preliminary work is now starting on my next'bill paying' project.This is based on the Euromodel kit,but it is my intention to push the boundaries of what can be achieved with a kit.I shall be using construction techniques for the hull that have been developed by myself,specifically for this build.The completed model shall include the following details;
1/hull planking in boxwood and ebony
2/hull planking omitted between the upper wales with false boxwood frames,this is a feature on quite a few Navy board models which I am quite fond of and an alternative from a fully framed build.
3/Full hull interior,lower gun deck upwards,with planking sections omitted on the upper decks for viewing the interior.
4/Remodelling of the stern to replicate the drawing by Van de Velde the Elder.
This project will be a 'slow burn' until Caroline is finished,but I am starting this log now to avoid missing anything as work progresses.I am trying to avoid starting another log with a planked hull
Some photos to wet your appetite
The box,rather heavy,given it's size
Mordaunt by Van de Velde the elder
Kind Regards Nigel
-
 NMBROOK reacted to fnick in MORDAUNT 1681 by NMBROOK - Euromodel - 1:60 - Beyond Bashed
Very very nice job on the deck Nigel.
Nick
-
 NMBROOK got a reaction from tarbrush in MORDAUNT 1681 by NMBROOK - Euromodel - 1:60 - Beyond Bashed
I thought it was about time for an update as the last one was several months ago .
I have fitted the waterway and quickwork to the other internal hull face and completed the planking of the deck.I am currently completing the exposed frame finishing pieces and working on the deck finish.I anticipate many coats of poly rubbed down every three coats.This gives a glass like surface as whilst I wish to see joints in the woodwork,I don't want to be able to feel them.
I feel these pictures may be a little on the red side.The pear is definitely brown with no hint of red,trouble is outdoor daylight pics are hard to come by as its dark when at home during the week and we have had some awful weather on the weekends
Kind Regards
Nigel
-
NMBROOK reacted to NAZGÛL in MORDAUNT 1681 by NMBROOK - Euromodel - 1:60 - Beyond Bashed
No worries about the colors, I know how weird the tones can get with lighting.
/Matti
-
 NMBROOK got a reaction from egkb in MORDAUNT 1681 by NMBROOK - Euromodel - 1:60 - Beyond Bashed
Thanks mate! The photos don't really do the colours justice I just wanted some pics of this stage as the next update will be too far along otherwise.
Favourite,mmm,probably not because each are different in their own way.The one that has drawn me in the most is probably Royal William,but I am deliberately holding back as I want the others to move along at a faster pace
Kind Regards
Nigel
-
 NMBROOK got a reaction from CaptainSteve in MORDAUNT 1681 by NMBROOK - Euromodel - 1:60 - Beyond Bashed
I thought it was about time for an update as the last one was several months ago .
I have fitted the waterway and quickwork to the other internal hull face and completed the planking of the deck.I am currently completing the exposed frame finishing pieces and working on the deck finish.I anticipate many coats of poly rubbed down every three coats.This gives a glass like surface as whilst I wish to see joints in the woodwork,I don't want to be able to feel them.
I feel these pictures may be a little on the red side.The pear is definitely brown with no hint of red,trouble is outdoor daylight pics are hard to come by as its dark when at home during the week and we have had some awful weather on the weekends
Kind Regards
Nigel
-
NMBROOK reacted to NAZGÛL in MORDAUNT 1681 by NMBROOK - Euromodel - 1:60 - Beyond Bashed
Fantastic result mate, this will be a superb modelt!
Of your ongoing builds, do you have any favourite?
/Matti
-
 NMBROOK got a reaction from themadchemist in MORDAUNT 1681 by NMBROOK - Euromodel - 1:60 - Beyond Bashed
I thought it was about time for an update as the last one was several months ago .
I have fitted the waterway and quickwork to the other internal hull face and completed the planking of the deck.I am currently completing the exposed frame finishing pieces and working on the deck finish.I anticipate many coats of poly rubbed down every three coats.This gives a glass like surface as whilst I wish to see joints in the woodwork,I don't want to be able to feel them.
I feel these pictures may be a little on the red side.The pear is definitely brown with no hint of red,trouble is outdoor daylight pics are hard to come by as its dark when at home during the week and we have had some awful weather on the weekends
Kind Regards
Nigel
-
 NMBROOK got a reaction from Nightquest1000 in MORDAUNT 1681 by NMBROOK - Euromodel - 1:60 - Beyond Bashed
I thought it was about time for an update as the last one was several months ago .
I have fitted the waterway and quickwork to the other internal hull face and completed the planking of the deck.I am currently completing the exposed frame finishing pieces and working on the deck finish.I anticipate many coats of poly rubbed down every three coats.This gives a glass like surface as whilst I wish to see joints in the woodwork,I don't want to be able to feel them.
I feel these pictures may be a little on the red side.The pear is definitely brown with no hint of red,trouble is outdoor daylight pics are hard to come by as its dark when at home during the week and we have had some awful weather on the weekends
Kind Regards
Nigel
-
 NMBROOK got a reaction from aliluke in MORDAUNT 1681 by NMBROOK - Euromodel - 1:60 - Beyond Bashed
I thought it was about time for an update as the last one was several months ago .
I have fitted the waterway and quickwork to the other internal hull face and completed the planking of the deck.I am currently completing the exposed frame finishing pieces and working on the deck finish.I anticipate many coats of poly rubbed down every three coats.This gives a glass like surface as whilst I wish to see joints in the woodwork,I don't want to be able to feel them.
I feel these pictures may be a little on the red side.The pear is definitely brown with no hint of red,trouble is outdoor daylight pics are hard to come by as its dark when at home during the week and we have had some awful weather on the weekends
Kind Regards
Nigel
-
 NMBROOK got a reaction from Landlubber Mike in MORDAUNT 1681 by NMBROOK - Euromodel - 1:60 - Beyond Bashed
I thought it was about time for an update as the last one was several months ago .
I have fitted the waterway and quickwork to the other internal hull face and completed the planking of the deck.I am currently completing the exposed frame finishing pieces and working on the deck finish.I anticipate many coats of poly rubbed down every three coats.This gives a glass like surface as whilst I wish to see joints in the woodwork,I don't want to be able to feel them.
I feel these pictures may be a little on the red side.The pear is definitely brown with no hint of red,trouble is outdoor daylight pics are hard to come by as its dark when at home during the week and we have had some awful weather on the weekends
Kind Regards
Nigel
-
 NMBROOK got a reaction from md1400cs in MORDAUNT 1681 by NMBROOK - Euromodel - 1:60 - Beyond Bashed
I thought it was about time for an update as the last one was several months ago .
I have fitted the waterway and quickwork to the other internal hull face and completed the planking of the deck.I am currently completing the exposed frame finishing pieces and working on the deck finish.I anticipate many coats of poly rubbed down every three coats.This gives a glass like surface as whilst I wish to see joints in the woodwork,I don't want to be able to feel them.
I feel these pictures may be a little on the red side.The pear is definitely brown with no hint of red,trouble is outdoor daylight pics are hard to come by as its dark when at home during the week and we have had some awful weather on the weekends
Kind Regards
Nigel
-
 NMBROOK got a reaction from cog in MORDAUNT 1681 by NMBROOK - Euromodel - 1:60 - Beyond Bashed
After a little absence,I have something of an update.Aside from very little time,my broadband connection is giving me grief Either lightning fast or more commonly working at a snails past.I shall contact my provider and give them what for when in the right frame of mind.
Anyway,half the deck planked,given a scrape and light sand and then a couple of coats of poly to prevent glue marks whilst working on the other side.I have moved away from shellac as firstly,I like the variation of tones and secondly it means I can use my acrylic ageing techniques should I choose.I am ,due to the pleasing appearance,considering NOT treenailing and risk spoiling the effect.
The other side of the hull is now built and shaped so my next job is to sort the upper gunport frames on this side.
Kind Regards
Nigel
-
 NMBROOK got a reaction from Dimitris71 in Sovereign Of The Seas by NMBROOK - Scale 1/84 - based on the works of Van De Velde the elder
Just a little progress,these figures are taking about six hours each on account of the small size.The faces are 2.5mm across.
Kind Regards Nigel
-
NMBROOK got a reaction from Dimitris71 in Sovereign Of The Seas by NMBROOK - Scale 1/84 - based on the works of Van De Velde the elder
I thought I would post some pics as they clearly show the stages involved in the prow ornamentation.I laminated 1.5mm pear sections on to the outside of the upper and lower rails inbetween where the uprights sit.You can see one in the first pic.The top and bottom rails were shaped and tapered leaving stubs where the uprights sit.The uprights were shaped form pears stock to fit over all three rails.The uprights will have the central carving carried out off the model and the rest will be done after fitting.This is to get the correct shape of the wrapround top and bottom.
Kind Regards Nigel
-
NMBROOK got a reaction from Dimitris71 in Sovereign Of The Seas by NMBROOK - Scale 1/84 - based on the works of Van De Velde the elder
Just a small update.Work is progressing well on the pediment carvings,but as they are only 6mmx8mm I gave up trying to take a decent picture.I have now fitted the first and the autofocus on the iphone works now the carving is fitted to the hull.I am actually up to 5 out of 6, but because I am putting two coats of varnish and then leaving 24 hours before fitting,it will be a couple of days before they are all fitted.
Kind Regards Nigel
-
NMBROOK got a reaction from Dimitris71 in Sovereign Of The Seas by NMBROOK - Scale 1/84 - based on the works of Van De Velde the elder
I first cut six pear blocks to the correct overall size of the pediments.The back face of these was bonded onto the end of some boxwood strip for handling.I set a jig up on the pillar drill(no miller yet)and cut the scallops in the front face.I then set another jig up to cut small slots on the sides to create the top cap.By doing these two operations,it should make it easier to carve them consistantly.I think the pictures are fairly self explanatory.
Kind Regards Nigel
-
NMBROOK got a reaction from Dimitris71 in Sovereign Of The Seas by NMBROOK - Scale 1/84 - based on the works of Van De Velde the elder
The next step was to increase the definition around the sides of the skull.I have drilled 0.4mm holes as a start point for the eye sockets and nasal cavity.The crutial point is the nasal cavity is central top to bottom in the skull otherwise the proportions will be incorrect.I have also started chipping away at the hairline and I am introducing some rounding to the head.The next step is the cheekbone area which is the main difference between a skull and a face
Kind Regards Nigel
-
NMBROOK got a reaction from Dimitris71 in Sovereign Of The Seas by NMBROOK - Scale 1/84 - based on the works of Van De Velde the elder
Just a pic of the completed carving.I have given it one coat of varnish for protection.It looks much darker than in real life due to lighting.
Kind Regards Nigel
-
NMBROOK reacted to Nightquest1000 in L'Artesien 1764 by Nightquest1000 - 1:48
dear all,
we do need a bit of a change every now and then, don't we?
I started on the second galley, which is sort of a double-sided open fire cooking site. No idea what the proper nautical or english term is.
I am using air-drying modelling clay for the brick work.
Tom
-
NMBROOK reacted to mikeaidanh in drill press/mill decision
Nigel,
I like your approach. As you probably know there are some heavy duty double sided tapes available these days so it may not be necessary to look beyond them for a fix and this would allow reversion to the original state if a particular job required full clearance.
Mike.
-
NMBROOK reacted to piratepete007 in HMS Royal William by KeithW - Euromodel - 1/72
Likewise Brian, I bought the Keith Julier book (Vol. 1) secondhand and devoured what KeithJ said before opening up the kit box and looking at its contents. It was then that I realized I could improve on what KeithJ did (with no disrespect intended) and it was a great starting point for my build. Now we have VinceP and KeithW (and BrianC is also very active on his great RW creation) creating marvelous works of art which just go way beyond what I had time to do (or could do) . Their works show how far you can go beyond what a kit can readily provide ... and then there are the elite builds of the Royal William such as that by Nigel Brooks. Sorry guys if I missed out somebody but there are so many and these names just come to mind.
Pete
PS Keep these works going shipmates and see how far you can stretch the envelope. Very exciting
-
 NMBROOK got a reaction from hornet in drill press/mill decision
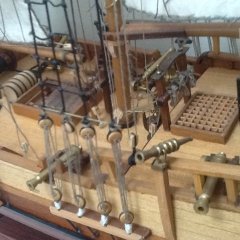
I think the easiest solution for the MF70 would be to remove the handle from the handwheel and fit it to a larger disc.Then glue the disc to the handwheel.However,having machined pieces recently that overhang the table,whilst they may be enough clearance,it would be nigh on impossible to turn a larger diameter handwheel in this instance.I struggled with the standard setup.The only other option would be to pack the workpiece up,but then you reduce the height capacity.
Kind Regards
Nigel
-
NMBROOK reacted to egkb in HM Schooner Ballahoo by egkb - FINISHED - Caldercraft - 1:64 Scale - First Proper Wood Build
Hi All, just a word to let ye all know that I haven't fallen off the Planet or anything, work/planning continues on Ballier...
Most recently I neatened the 'hole' where the rudder head pokes through the deck..
Filed out the Gun Ports properly.. they were bugging me !!
And placed an order for an Ordinance Upgrade.. this is currently the hold up as they appear to be out of stock (even though 'In Stock' was on the Web Site.. I have NO LUCK at all with Cornwall Model Boats )
Today I even attempted to Blacken my Kit guns.. weirdly it took 3 Sessions to get them dark (the mixture went very cloudy very quickly.. with little or no 'action' afterwards, so I changed out the chemicals ) reckon it will take another dipping or two to get them where I want them (I may have to use them you see, as it has been a while since my CMB order) they are a very dark grey at present.
Indecently I followed the Blackening tips from a Log on here called The Blacken-It Trials link below..
http://modelshipworld.com/index.php/topic/6977-the-blacken-it-trials/
I even test faired a piece of dowel in anticipation of hitting Balliers Masts shortly..
Will be off to Venice for a little Hollier ('Vacation' to my friends across the Pond) the week after next so will probably hold off any big shipyard work till after ..
Stay Well Folks & Catch Ya Later,
Eamonn