HOLIDAY DONATION DRIVE - SUPPORT MSW - DO YOUR PART TO KEEP THIS GREAT FORUM GOING! (Only 27 donations so far out of 49,000 members - C'mon guys!)
×


bdgiantman2
-
Posts
418 -
Joined
-
Last visited
Content Type
Profiles
Forums
Gallery
Events
Everything posted by bdgiantman2
-
 You can try also making a stub mast on a spare flat piece of wood and practice the sizing that way. Archjofo has very good pictures how he does sizing with descriptive articles as well.
- 80 replies
-
- 3
-

-
- rigging/masts
- NRG
- (and 2 more)
-
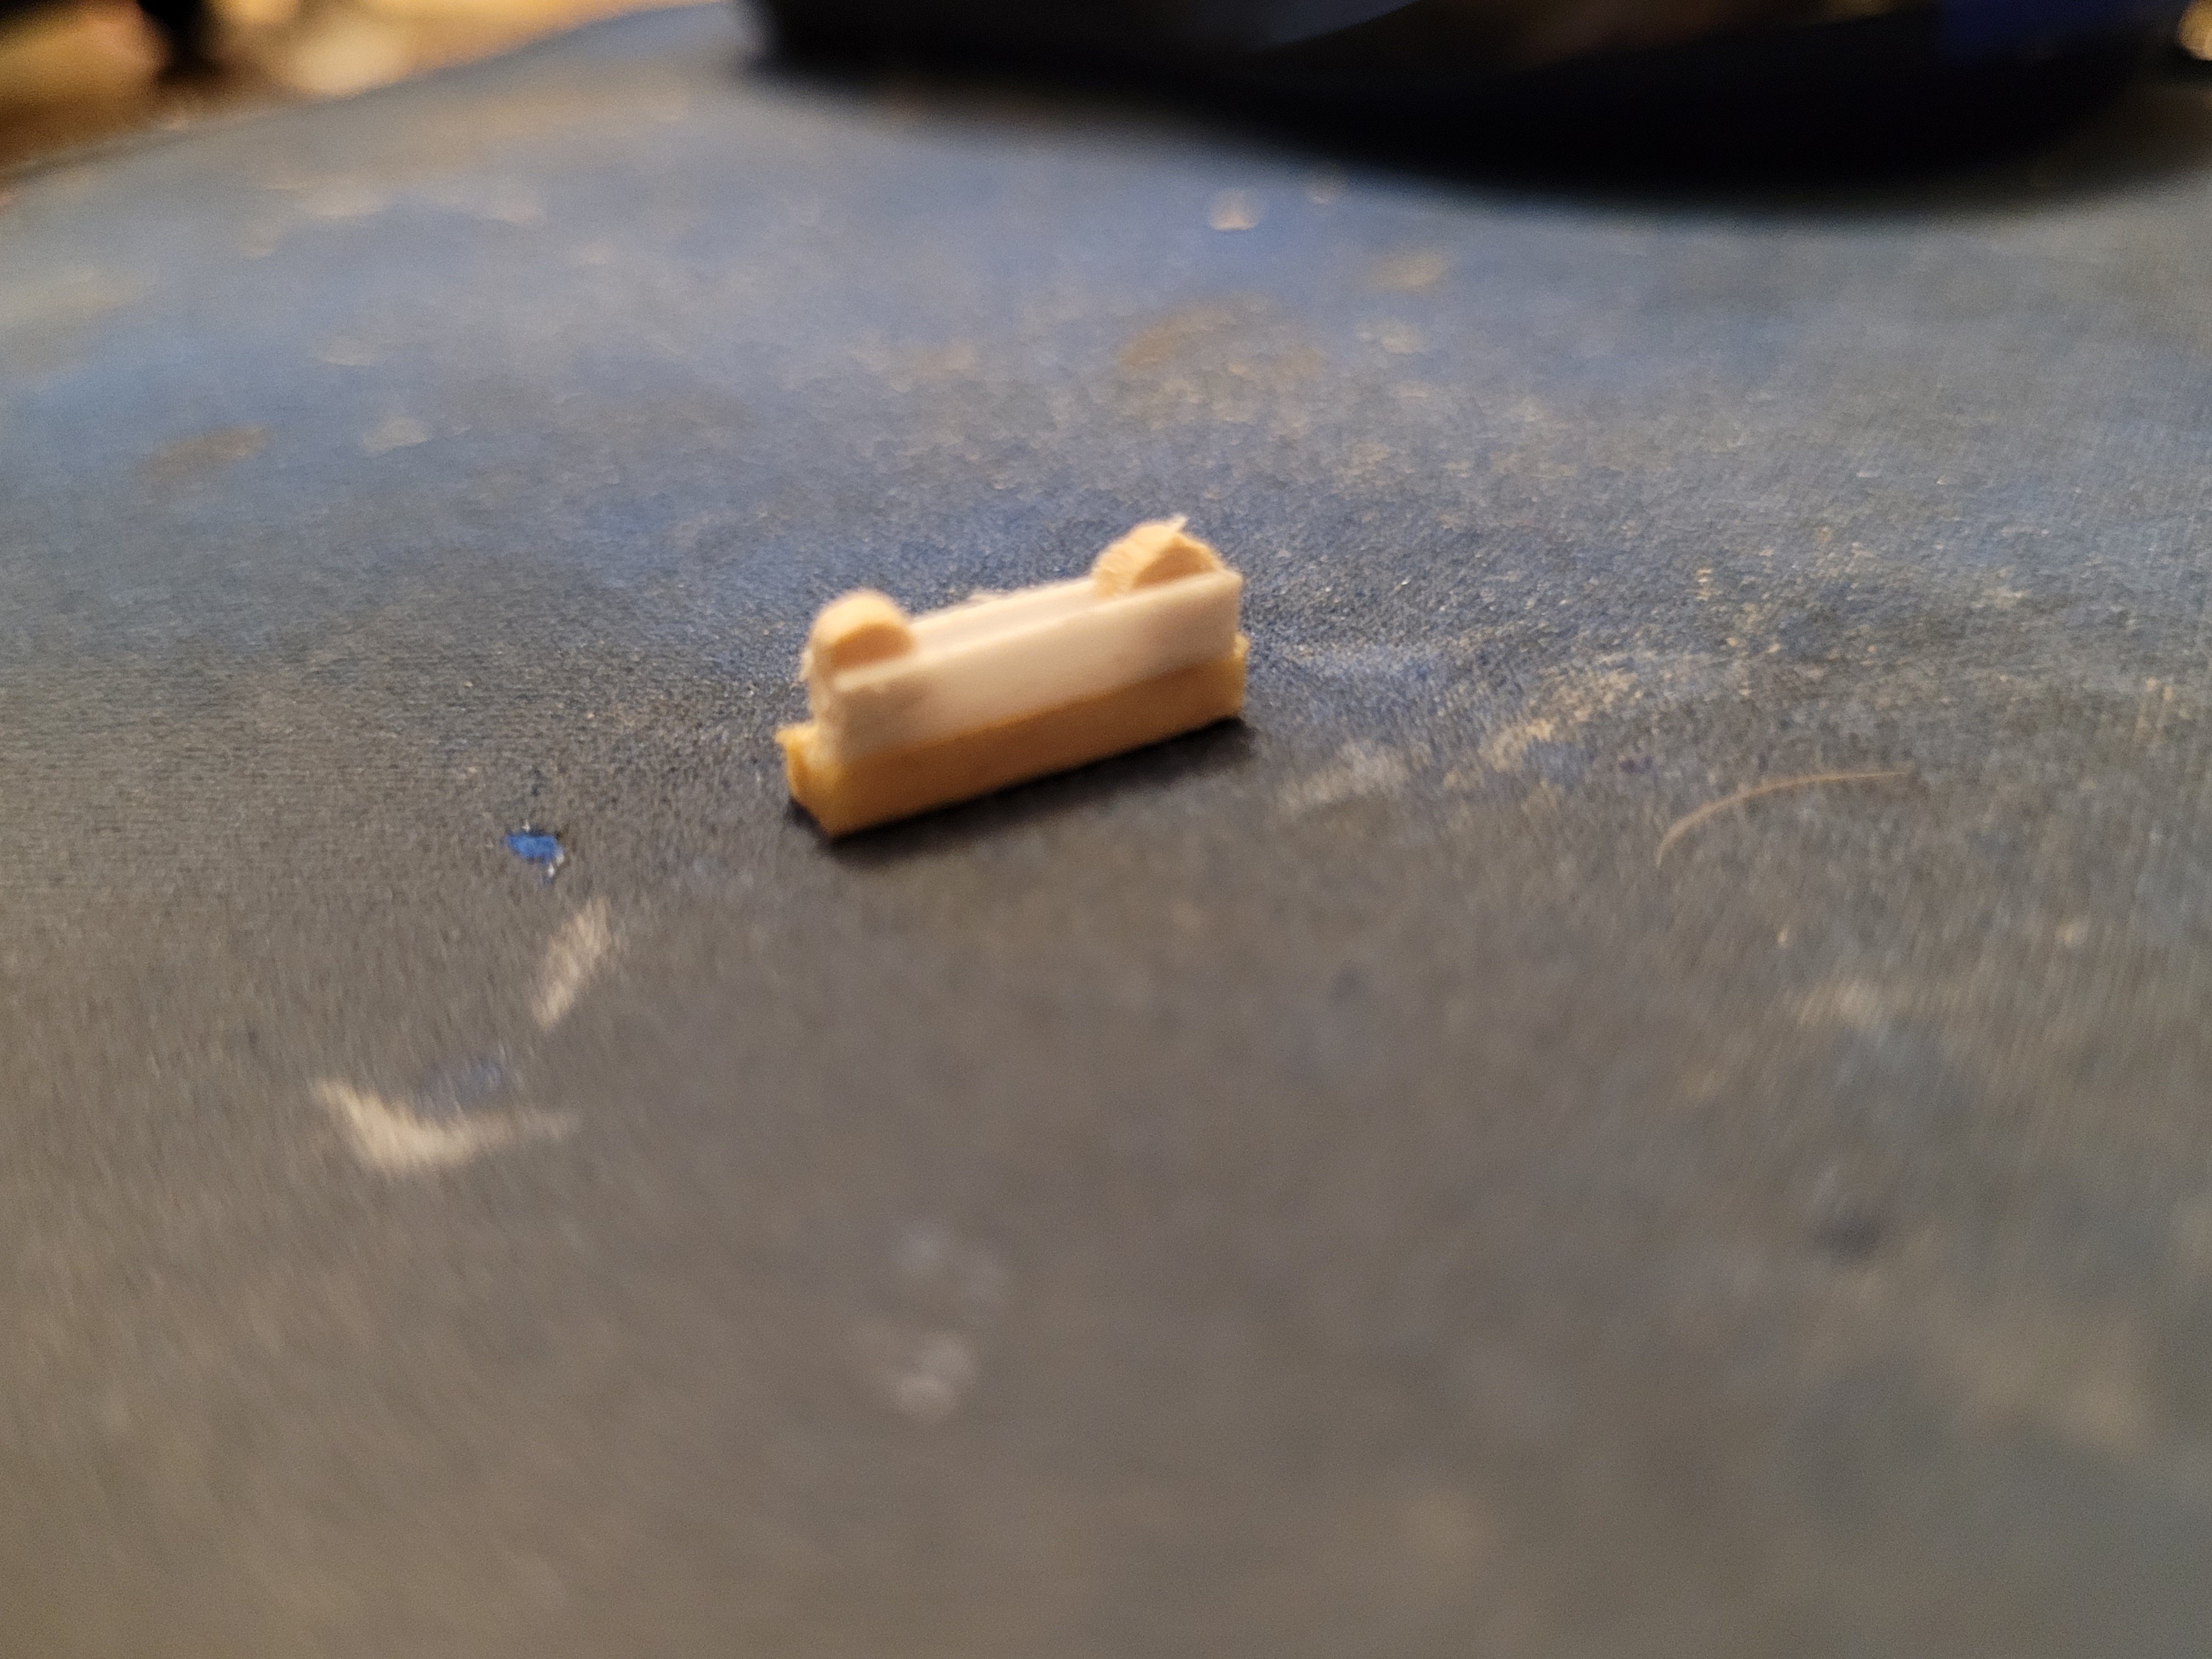
Hello friends. With my limited abilities at this time to be working on the keel and ribs like I am wanting to, I have changed my focus for the time to the favorite topic of the gun carriages. I have provided you a picture of the wheel chassis for one of the carronades. I found pieces of styrene that came molded in a square shape and filed away one of the sides. That provided me the opening for the wheels and the block of wood that I make still. Each of wheels are 1/16" wide, used a small diameter dowel I found in my workshop that proved the perfect size.

-
Gunboat Philadelphia 1776 by tmj
bdgiantman2 replied to tmj's topic in - Build logs for subjects built 1751 - 1800
I bought that Chicago Tool for Christmas two years ago, then my dad got me a similar Amazon saw for birthday last year. Mine doesn't have the blade height adjusting feature as a cheaper model, but that would come super beneficial for this hobby. Brian D -
Thank you for the reply. I could have sworn it was in your blog, but I very well could be thinking of others I follow as well that are bigger ships
-
What were the purposes of those green and red tanks near the aft of the superstructure if you know?? Great details and a finely produced ship model!! Brian D
- 68 replies
-
- 3
-
-
- Coates
- Rudderow-class
- (and 1 more)
-
Enjoying following your blog on Speedwell, she is coming along very nice. I was noticing that both tackles were singles, so because of these guns being lighter in weight and caliber they wouldn't need the one tackle connecting to the hull as a double like you demonstrated on Winnie. Is this the correct understanding?? Brian D
-
Your model of Cheerful is coming along very nicely
-
Toni, your tutorials here as well as the half-frame model have been such a pleasure to follow, you make a very good teacher on these kits and I say thank you for sharing. This desk-top model has turned out lovely
- 80 replies
-
- 7
-
-
- rigging/masts
- NRG
- (and 2 more)
-
I used to have a copy of that article from Coffins of the Brave, until the USB I had it stored on decided to cease working for me without giving any warning at all. I will have to get a new copy downloaded.
-
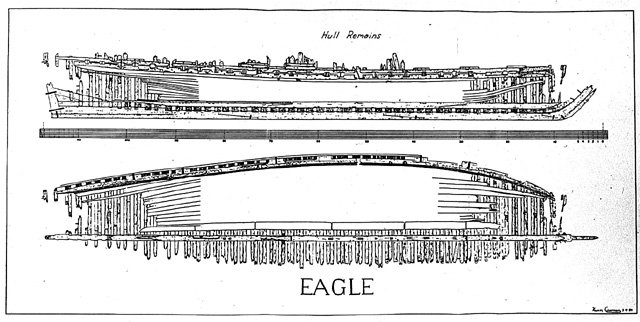
Hello Roger, thank you for the input. Some of the information I did know, others I didn't. The knees being omitted, for example, I did know about which Dr. Crisman described well in his thesis papers. I have tried studying in more depth and details the sonar pictures provided of the wreck looking at areas such as the possible hawse timbers in the bow which has either completely deteriorated or maybe buried in mud. And while it is very well documented that many construction short-cuts were taken as possible to speed up the building process, I personally can't imagine the Browns altering the standard construction especially about her bow. Many of the models I have seen of Brig Eagle show her with bow timber construction more like what you find on modern steel vessels, which I don't believe would be historically accurate which is why I am drawing her with traditional hawse timbers. If I remember correctly I do think that many clipper ships have same bow timber used real life that the models of Eagle show, but the clippers were half a century out still during 1814 war and the Browns were gone in history by then as well. It is amazing learning increasing details about this project. The population of Vergennes, VT, at the time when the ship was constructed is estimated to have been 700-800 individuals including lumberjacks and carpenters and fur hunters -- so the Brown brothers had a good supply of workers to recruit for the project. It is quite a feat that they built ships that size that fast, had to be working around the clock all hours. And despite having used a lot of unseasoned wood for the project, the ship was floating reportedly for a decade following her famous moment in history before nature did its thing and Eagle slipped under the water entirely. This tells me she may have been rebuilt with better planks after the war although the wreck doesn't provide such information that we can tell, or else there was a big enough furnace that was at the construction site must have dried the starboard side of the ship enough to keep that side intact for more than two centuries.
-
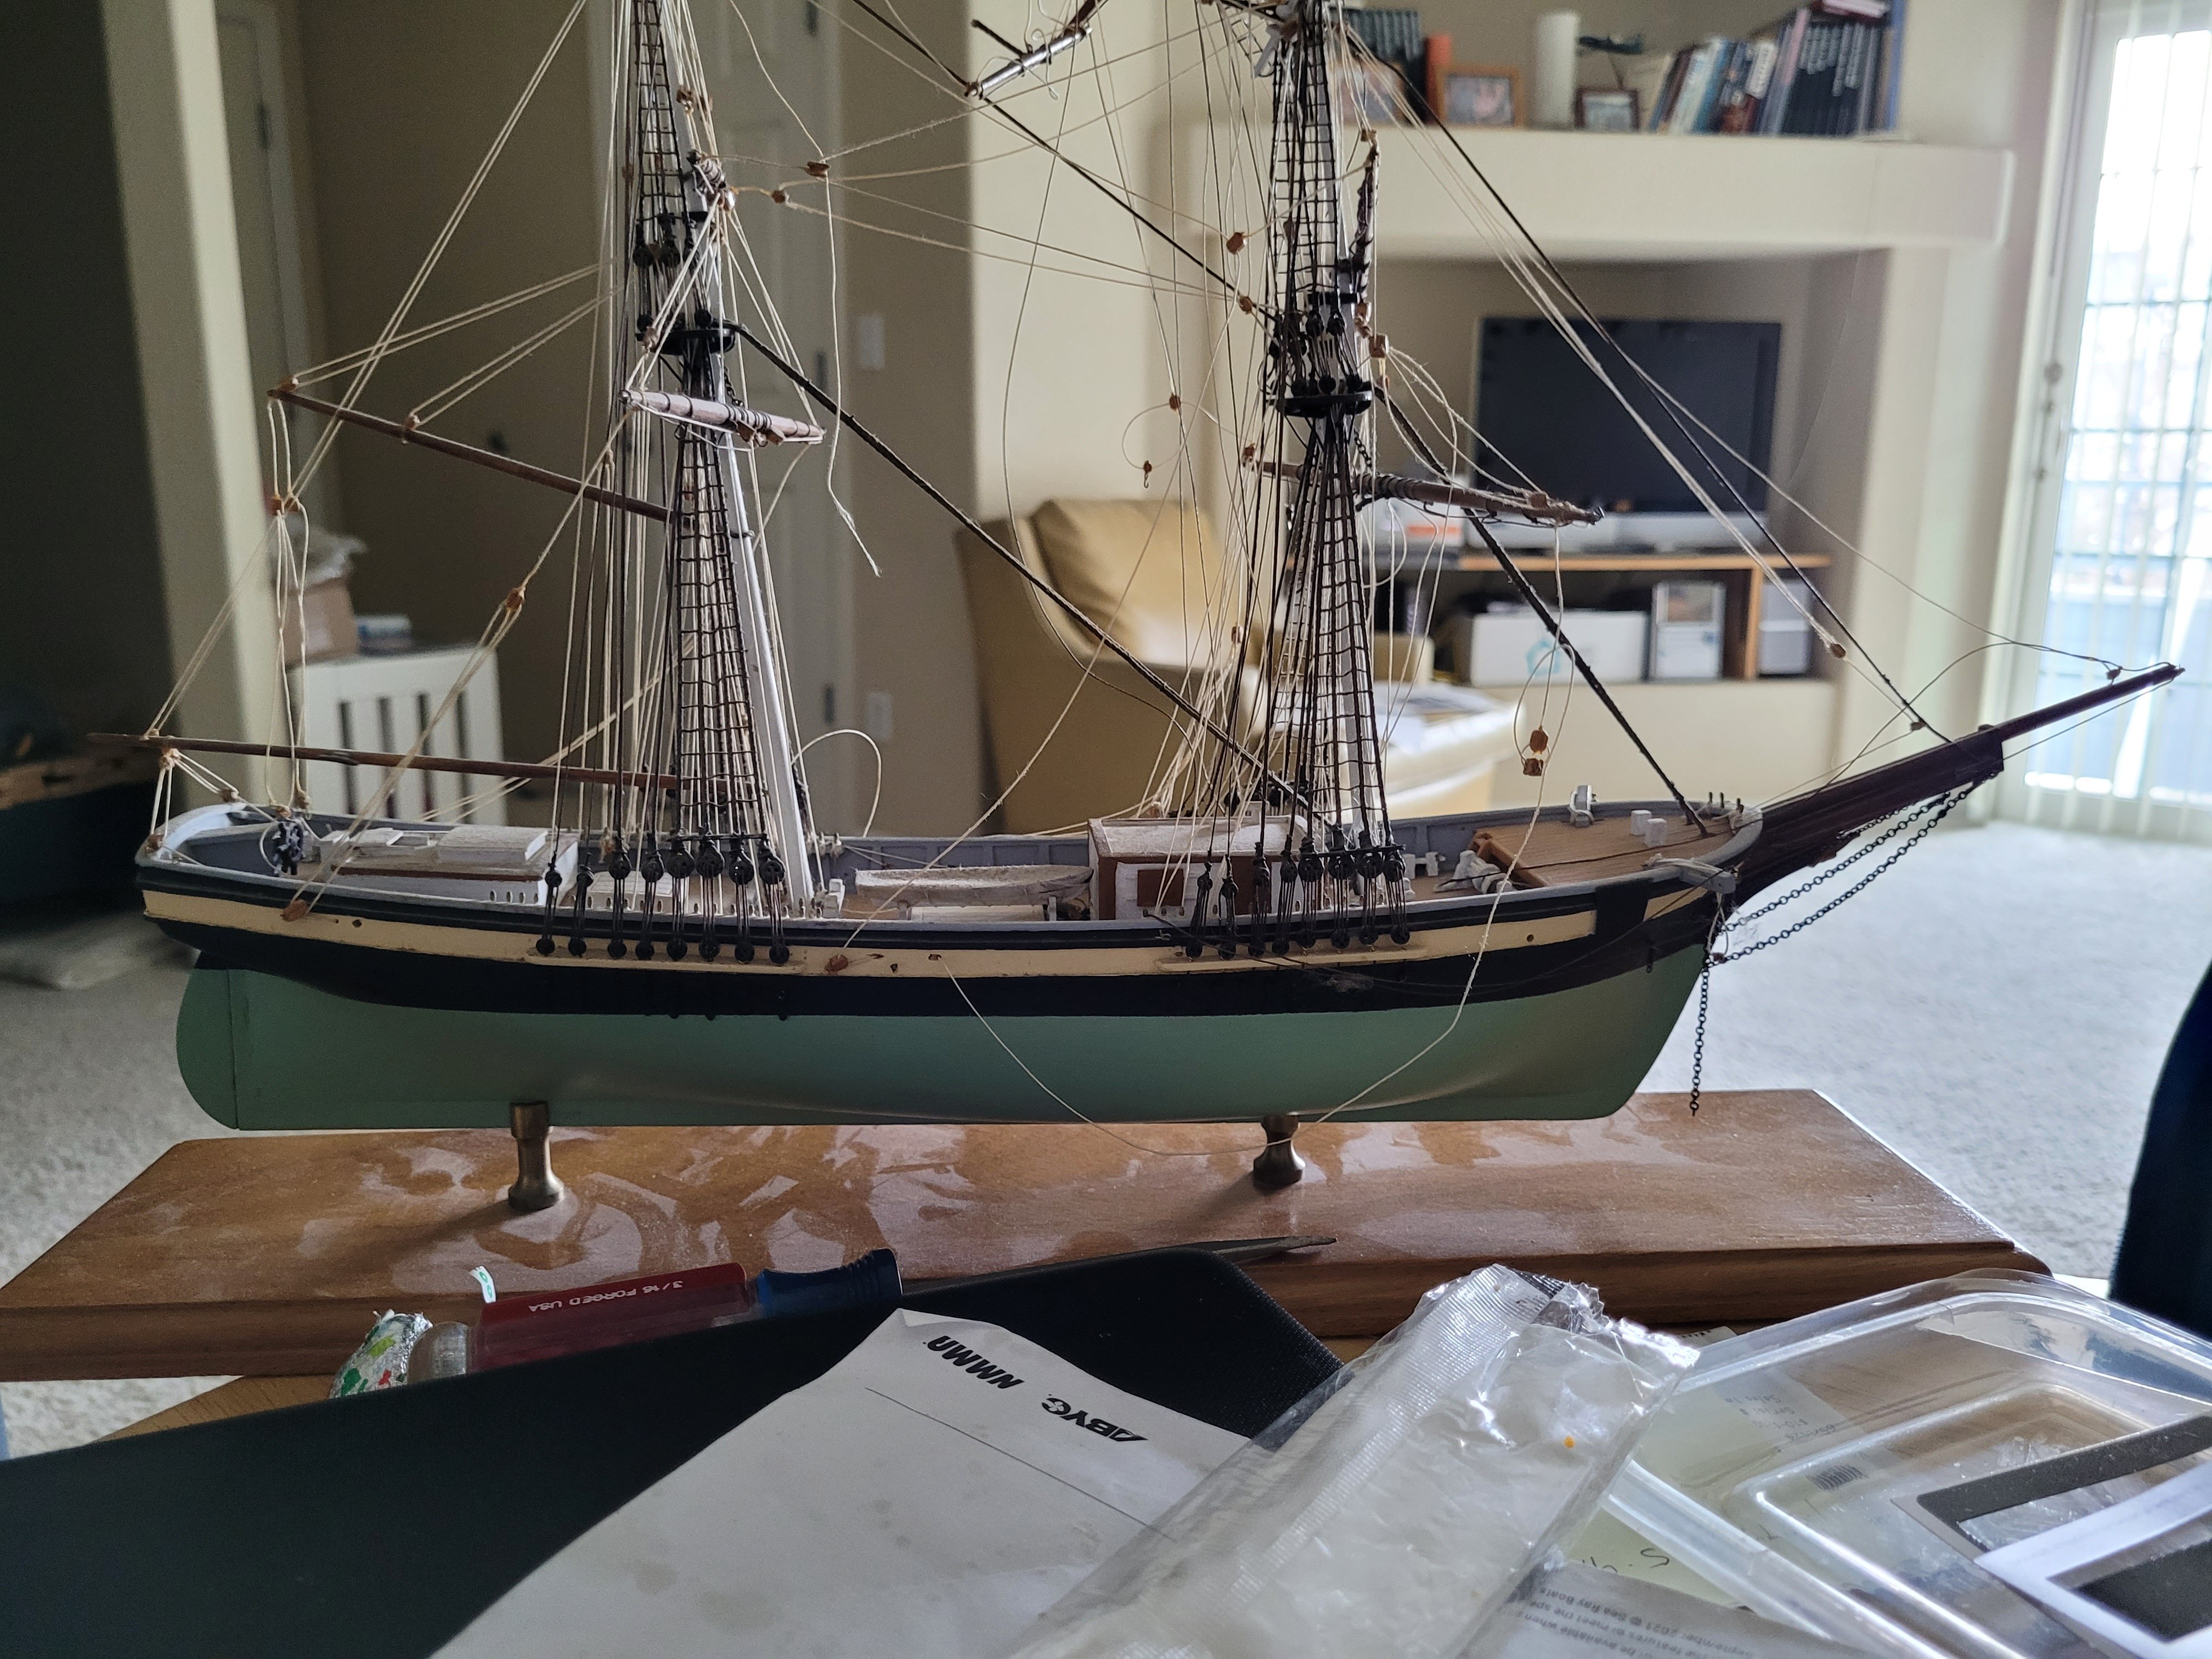
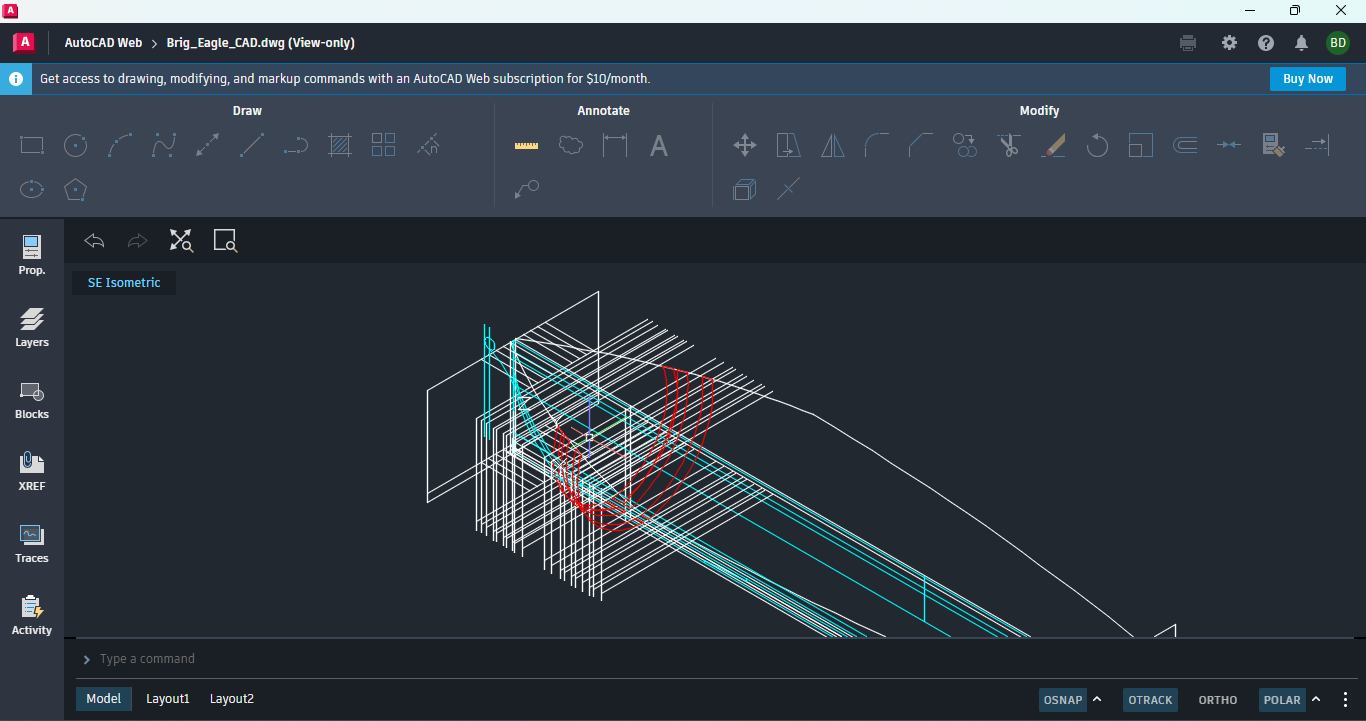
It's been a slow year in the making with progress, but here is a snippet of my attempts so far using AutoCAD doing a 3D edition of how Eagle would have looked and getting shapes of her ribs. I am open to feedback concerning this and suggestions how to proceed.
-
Amazing outcome of this ship!! I am seeing an increasing crowd for doing 3d printing and the quality has been vastly improving. How long did it take to print up all those pieces?? Looks like at least two weeks worth of printing continuously in my estimates.
-
Great demonstrating this project, Toni, your model is looking fantastic! With doing the lanyards, as well as cross seizing and others, is it easier doing these with a curved sewing needle or a straight sewing needle?
- 80 replies
-
- 3
-
-
- rigging/masts
- NRG
- (and 2 more)
-
Thank you for this information, don't know how I missed that before. So then the royal mast, on a real ship, would be 2" approximately in diameter if same size rules apply??
- 80 replies
-
- 3
-
-
- rigging/masts
- NRG
- (and 2 more)
-
Toni, I don't know if this kit will be including any of the deadeyes on the mast platforms (I've always only known them as crowsnests), but I've heard that the deadeyes get smaller in diameter as go higher up the mast. Was this typical practice as I don't know???
- 80 replies
-
- 3
-
-
- rigging/masts
- NRG
- (and 2 more)
-
The post you have drawn in blue is the sternpost. The post in red is the inner stern post. The blue sternpost you will leave thick as the keel itself. The inner sternpost does get thinned down. I have copied and provided for you images from Gaetan Bordeleau that have been a big help to me in understanding and shaping the stern and will be using for my own model. Brian D

-
I am looking forward to getting my hands on this kit after it gets released in several months, thanks for demonstrating this for all of us on here. Brian D
- 80 replies
-
- 3
-
-
- rigging/masts
- NRG
- (and 2 more)
-
I'm not sure I understand what you mean by saying "a vessel way too sharp in form." Can you clarify please and thank you??
-
I have yet to be able to find these Spillane drawings available in my research online. The only stuff I have found was a series of pictures of a higher quality model of Brig Pilgrim by William Hitchcock around 1965 (https://lannangallery.com/products/ship-model-of-brig-pilgrim-by-hitchcock). When I inquired about any plans form those folks they said they didn't have anything. Thank you for the replies.
-
Here are two pictures I took of the model. Seems could be a solid hull model but at this point I am not certain. Have not yet even attempted to unscrew the stand from the ship. The topmasts definitely will need replacing, probably fell off a tabletop and snapped. One of the deck structures shows what looks like water damage as well, didn't take a picture including this.


-
Hello from Kiowa, Colorado
bdgiantman2 replied to Doug from Kiowa's topic in New member Introductions
Welcome from another Colorado resident!! I look forward to seeing your model and the progress you are making. Wishing you success in your model building. -
Hello Randy (and Calvin), I was recently given a model of Brig Pilgrim (Boston 1825) from a coworker. This model is damaged and will be needing repairs which I am interesting in attempting to fix myself. So far I have been unable to find nor obtain any plans of this ship.
-
Interesting provision of early drawings there, Mr. Passaro as well as Greg. Looking those prints over, I am curious about that sail room. Not only does it look extremely small, but folding those sails to fit in that small room would have been heavy and cumbersome. My suspicion is that there is more of the sail room under the forecastle deck allowing the sails to fold and store more easily. Am I on the right track? Brian D
-
This ship model has been a delight to follow. I have come to like seeing those frames being visible, it would be a shame to cover them in my opinion. Those frames are so realistic and most public has no clue this is how real ships were made back then. Brian D
-
Your progress on this model is incredible, great detailing throughout this ship! Speedwell is definitely being done justice. I only hope I can make a model half as good as I progress along. Brian D