-
Posts
425 -
Joined
-
Last visited
Content Type
Profiles
Forums
Gallery
Events
Everything posted by bdgiantman2
-
Timmo, as someone who used to work in logistics with FedEx Ground, there are a number of potential reasons. The first one that comes to my mind is the possibility that the shipping label somehow came off the package (happens way more often than you may think) and having to do research to find out where your package is going to -- or there is the fact that some labels just become unreadable with the scanners being used and having to guess at some information. Another possible issue could be going through Customs. Some packages just take longer even if the shippers writes on the outside what is inside. There also are some shippers that just don't provide tracking of tracking which I know is a inconvenience to anxious recipients.
- 137 replies
-
- winchelsea
- Syren Ship Model Company
-
(and 1 more)
Tagged with:
-
Impressive model and great explaining of your processes building this ship. I am curious about one thing. I can understand the louvers and air ventilation for around the anchor ropes storage and the sail storage room, but why do they do this on the pump room as well? It has to be more than worried about a fire in the powder storage areas, as the powder rooms always seemed pretty protected.
-
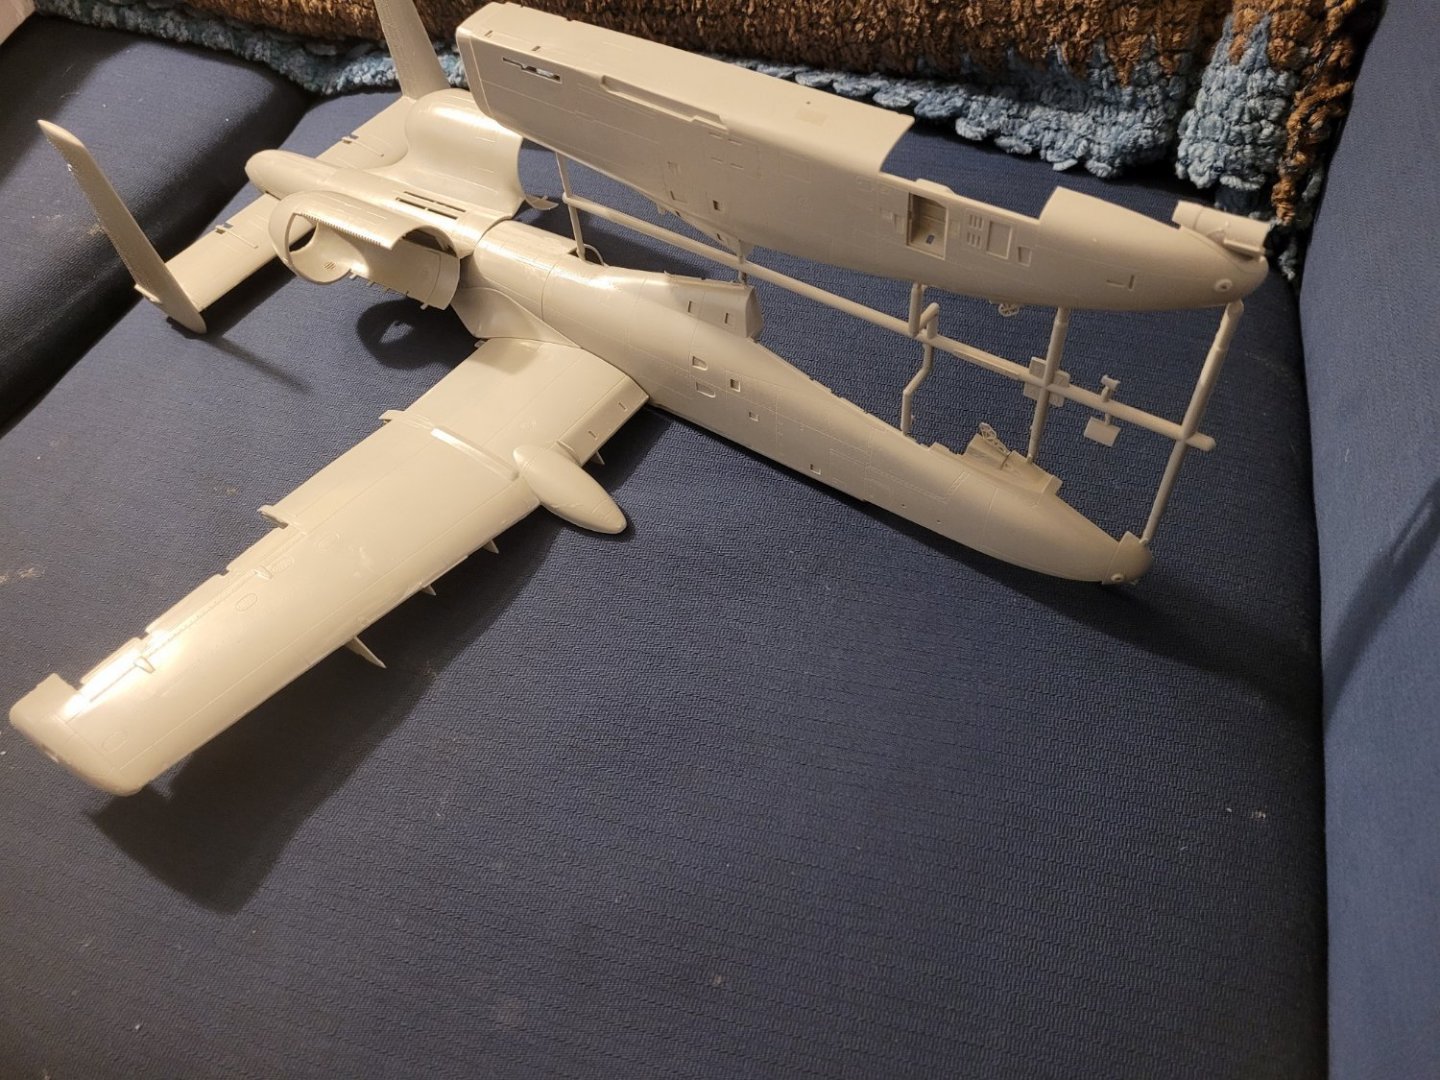
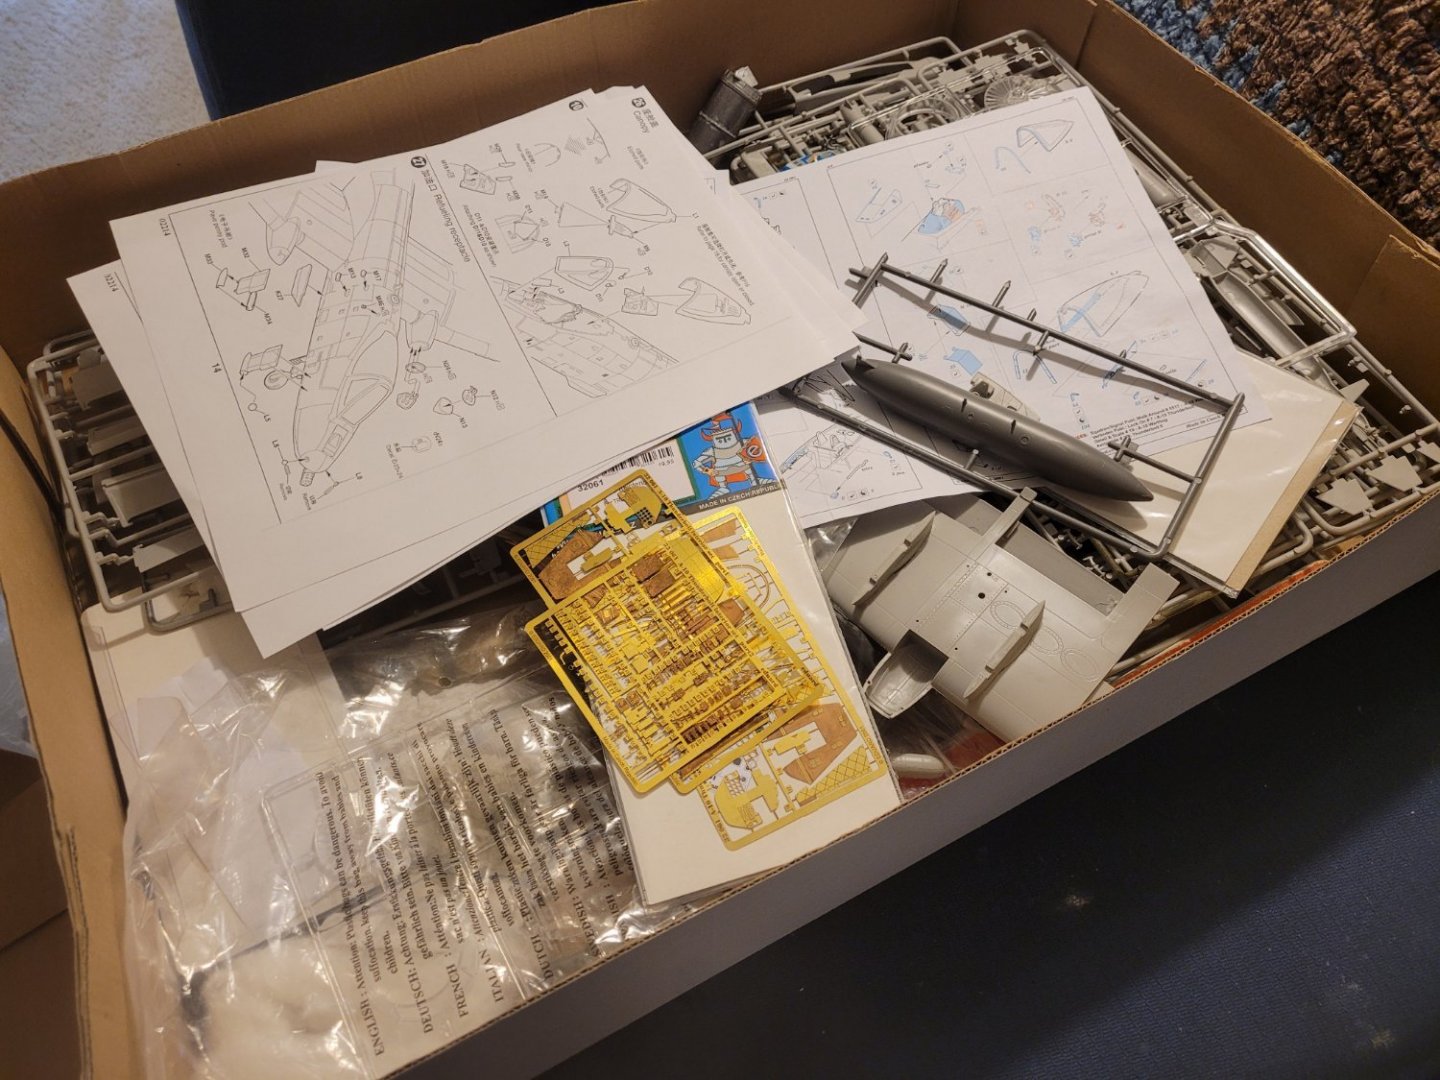
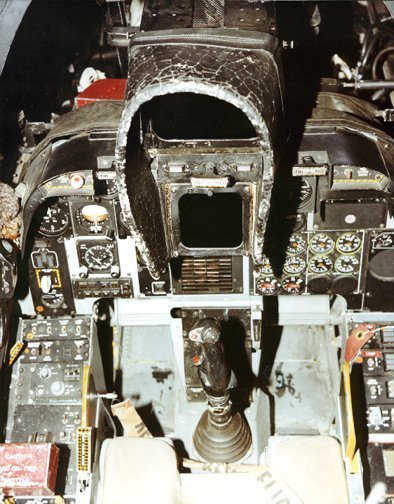
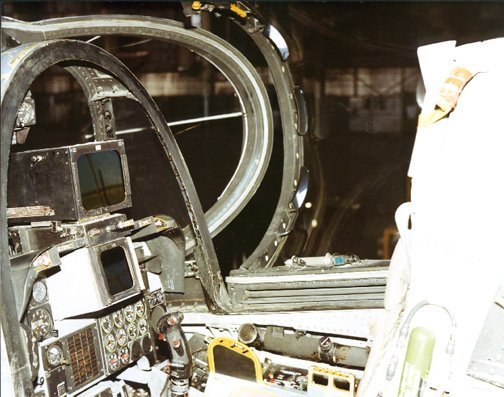
I apologize in advance that didn't start this blog sooner of this project. While I continue doing research around my work schedule as well as cutting pieces at a pace slower than evolution to make the laminate frames for Brig Eagle, I am undertaking a fighter-jet kit of interest I found online. This jet is the N/AW A-10B Warthog by Trumpeter, the experimental two-seat model that enabled the warthog to excel in night aviation attacks as well as adverse weather. This plane was launched in 1979, the same year that I was born. I have largely found in my personal opinions that the two-seat models of many American fighters are way more attractive than the single-seat usually in service in the military. Unfortunately only one model of this aircraft ever came off of the assembly line and never saw squadron service. Overall, my opinion of this kit is good quality of parts except for cockpit details considering that this kit was made in China. There are these lame decals suggested that don't even resemble the real planes cockpits at all. For a kit of this scale I have come to expect better details especially of cockpits. Thankfully, after conducting research, I was able to come across quality photo-etch brass detailing of front cockpit and will kit-bash the back-seat. Also purchasable are fuselage detail pieces as well as a kit for detailing the weapons. Included are two pictures that someone took of the back-seat of real jet when it got downgraded from test aircraft at Edwards Airforce Base to museum exhibit status. The instruction manual has good illustrations of the construction and even included a short history of real plane with some pictures. Also of interest with this kit are metal landing gears as well as two high-detail resin engines. Again, even though the real jet never saw active service in any squadrons, I plan to take artistic license and display her with a squadron. The chosen group is Eielson's Ice Hawgs stationed in Fairbanks, Alaska. Fully armed, this plane is definitely a bad-*** bird wouldn't want to mess around with. The wing, tail assembly, and engine casings are not currently glued to the fuselage, I just have them placed to show how big this kit is.
-
Thank you again for the information, Allan. I don't know why I mentioned Google in my last response, although I am certain that I did try them in the past. Also, this is what I get responding over my cellphone later at night than I ought to be. This web site is super helpful, and so many skilled ship builders.
-
I have a question involving the deck pumps. Am building a model of Brig Eagle 1814, the ship has two Elm Pumps. I can't tell from the plans if the tubes (not sure this is the correct term for them) for the pumps are vertically straight or if there is a slight tilt to them away from the keel. I see many diagrams of the chain pumps which clearly have a tilt to the tubes. I have the books by Wolfram zu Mondfeld and Bernard Frolich, but I didn't see specific answers about regular elm pumps. Thank you for your help. Brian D
-
The Sphinx is getting her teeth now! Keep up the progress on your model, she is coming along! Brian D
- 505 replies
-
- vanguard models
- Sphinx
-
(and 1 more)
Tagged with:
-
Great story, Brian! What an amazing experience, glad that you and your wife were able to reach out to those men at the museum like that and go behind the scenes. I am a little jealous, I confess -- LOL. Question for you: Looking at the pictures provided of the grapeshot, I am guessing that they are eighteen inches to two feet in length and probably 6-8 inches in diameter?? Keep up this amazing model, you are doing a very accurate job and I enjoy following this thread. Brian D.
-
You are the first builder on this project including the shot racks, they look great on your model. Did you use bearing balls for the cannon shot? You have done a great job on your Winnie model.
- 137 replies
-
- winchelsea
- Syren Ship Model Company
-
(and 1 more)
Tagged with:
-

Hello from Southern California
bdgiantman2 replied to Rodedwards's topic in New member Introductions
I used to live in San Diego, I was in East Central San Diego -- the La Mesa and El Cajon areas. An uncle lives in the Escondido area. While I was in San Diego I used to be with the San Diego Maritime Museum. the model shop was always my favorite part. The club at the San Diego Maritime Museum is good if you want to drive there, have meetings on Tuesday nights. Long Beach has a good model club if you want to drive up there also. -

Hello from Southern California
bdgiantman2 replied to Rodedwards's topic in New member Introductions
Welcome to this group, sir, and thank you for your service. Which part of Southern California are you from if I may ask? -
Is there a reason that the swivel guns have a more rustic/aged look compared to the main long guns? I can only assume the crack gun crew you have was polishing the main battery and haven't gotten to the swivel guns yet with the polish and grease.
- 1,784 replies
-
- winchelsea
- Syren Ship Model Company
-
(and 1 more)
Tagged with:
-
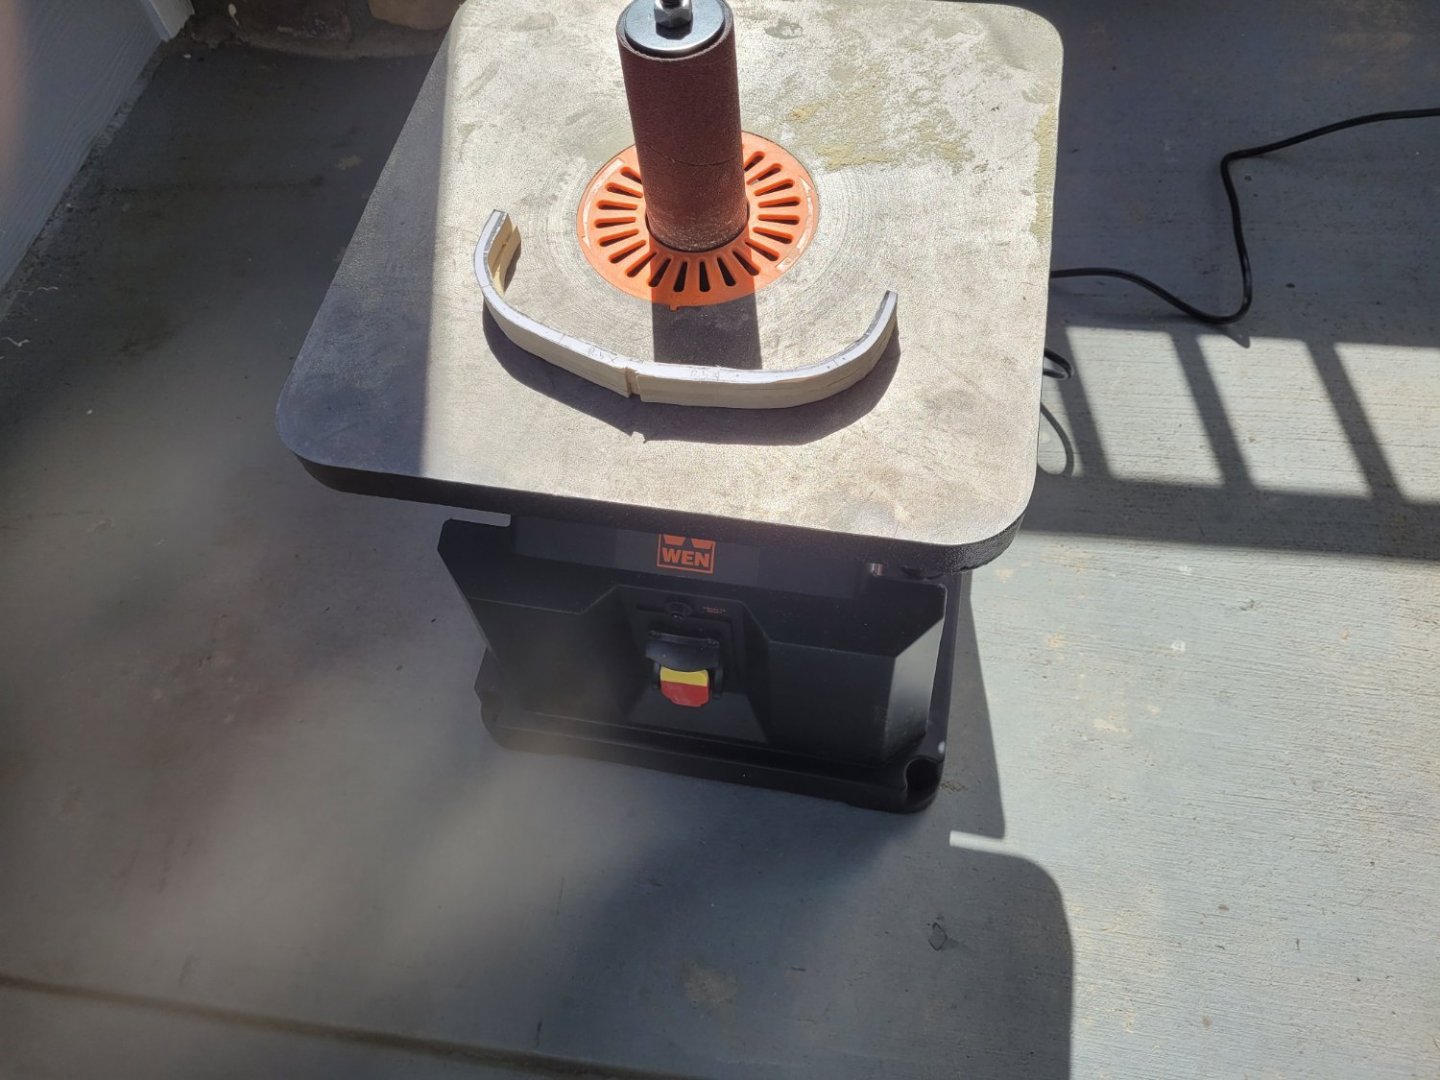
Hello Friends, and Happy Easter/Resurrection Sunday to all of you. I am finally able to post again on my blog. After a rollercoaster employment situation since the end of last year, I am back on my feet with steady income and been able to splurge a little too. I am back to the Eagle. So I have been working slower than evolution it feels on the rib sections of the Eagle. I have made the first ribs of the model, it turns out joint Frames 7-8 and not X as had originally thought it was. Placing the frame on the model I see that I need to do more trimming both inside and outside. It was the inside part giving me the most trouble. Also apparently the rib is too thick even though I am using 3/16 thick boards as drawings indicate. In trying to get the insides of the ribs better I have found two issues. First I rigged one of my Dremel units to a router tabletop and tried using it as a spindle sander. Took too little off and wasn't effective. I knew would need something bigger with more bite to it. So after researching I bought a Wen Spindle sander with an angled top. It arrived today and I eagerly tested it. This machine is a BEAST!! Made substantial progress compared to the Dremel, going to need to trim more with scroll saw first and get closer before I use the Spindle sander again -- I left too much meat on the bones. Also in the meantime I have been construction of several futtock pieces that have yet to have rest of frames glued on. And following some ideas from the Winnie projects, I have ordered some supplies from CraftySailor which should be arriving next week.
-
The galley stove turned out great, Mark. Your model of Sphinx is looking great.
- 505 replies
-
- vanguard models
- Sphinx
-
(and 1 more)
Tagged with:
-
I personally like the contrasting color of the deadeyes to the rest of the hull, I don't even see the deadeyes unless looking really close to the model. Looking great
- 1,784 replies
-
- winchelsea
- Syren Ship Model Company
-
(and 1 more)
Tagged with:
-
Brian, your image provided very accurately describes what I was trying to say in my last post to you, except you have wood panels on the outside edges of the hammock storage compared to a clothe covering on outside of hammock storage. I didn't think to have a support beam under the iron stanchions though, that would brilliantly solve the problem. Great job and go for it! Brian D.
-
From the pictures you have provided of the hammock nets, I would almost just suggest the hammock nets the sailing ships used throughout the half a century earlier. The only problem would be that I don't see a secure enough place to fasten the metal parts to on the deck being right on the edge. Would help by having tall posts for sure which would help in some ways. Guessing those posts to be 8ft to 10ft tall. The part I find interesting is how the nets are covered with strips of clothe or canvas about a foot wide using the crew as a scale. Its like they used sliced sails to make the hammock nets.
-
Awesome news that your sight has been corrected/improved. Glad to be hearing this.
- 505 replies
-
- vanguard models
- Sphinx
-
(and 1 more)
Tagged with:
-
I enjoyed following this build, the Snowberry turned out great. You did a great job mixing the wood decking and metal (plastic) decking. Congrats on completing this ship model.
- 321 replies
-
- Finished
- Flower-class
-
(and 1 more)
Tagged with:
-
Ken, great job on this model you have been building. I personally like the furled sails most, and am wanting to do this on my current build when I get to that stage way later. Looks very accurate what you have done. I am wondering though where the flag would be placed now? Most likely would be a pole in the stern somewhere it would seem to me...... Brian D
- 238 replies
-
- sloop
- providence
-
(and 1 more)
Tagged with:
About us
Modelshipworld - Advancing Ship Modeling through Research
SSL Secured
Your security is important for us so this Website is SSL-Secured
NRG Mailing Address
Nautical Research Guild
237 South Lincoln Street
Westmont IL, 60559-1917
Model Ship World ® and the MSW logo are Registered Trademarks, and belong to the Nautical Research Guild (United States Patent and Trademark Office: No. 6,929,264 & No. 6,929,274, registered Dec. 20, 2022)
Helpful Links
About the NRG
If you enjoy building ship models that are historically accurate as well as beautiful, then The Nautical Research Guild (NRG) is just right for you.
The Guild is a non-profit educational organization whose mission is to “Advance Ship Modeling Through Research”. We provide support to our members in their efforts to raise the quality of their model ships.
The Nautical Research Guild has published our world-renowned quarterly magazine, The Nautical Research Journal, since 1955. The pages of the Journal are full of articles by accomplished ship modelers who show you how they create those exquisite details on their models, and by maritime historians who show you the correct details to build. The Journal is available in both print and digital editions. Go to the NRG web site (www.thenrg.org) to download a complimentary digital copy of the Journal. The NRG also publishes plan sets, books and compilations of back issues of the Journal and the former Ships in Scale and Model Ship Builder magazines.


