


Daniel Dusek
-
Posts
174 -
Joined
-
Last visited
Content Type
Profiles
Forums
Gallery
Events
Posts posted by Daniel Dusek
-
-
Hello All,
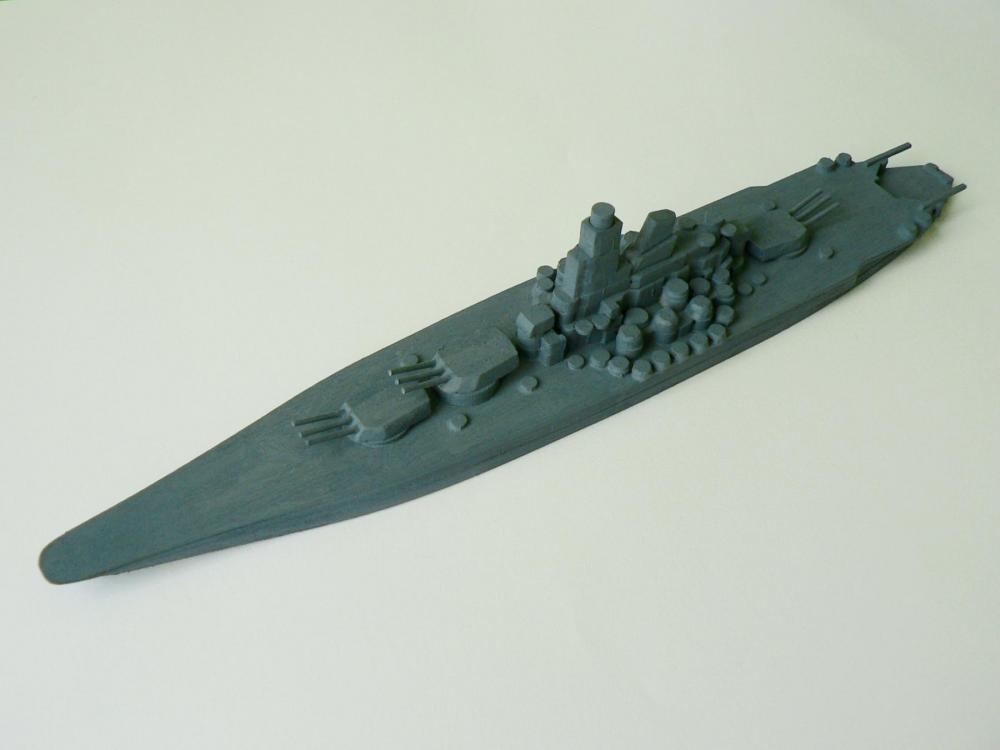
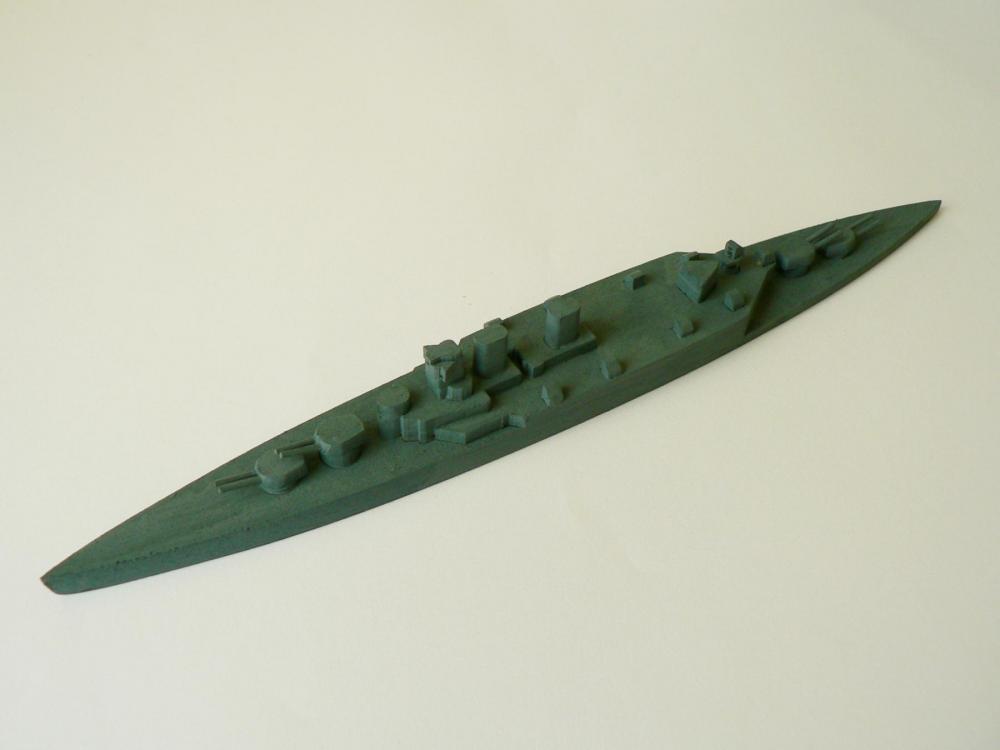
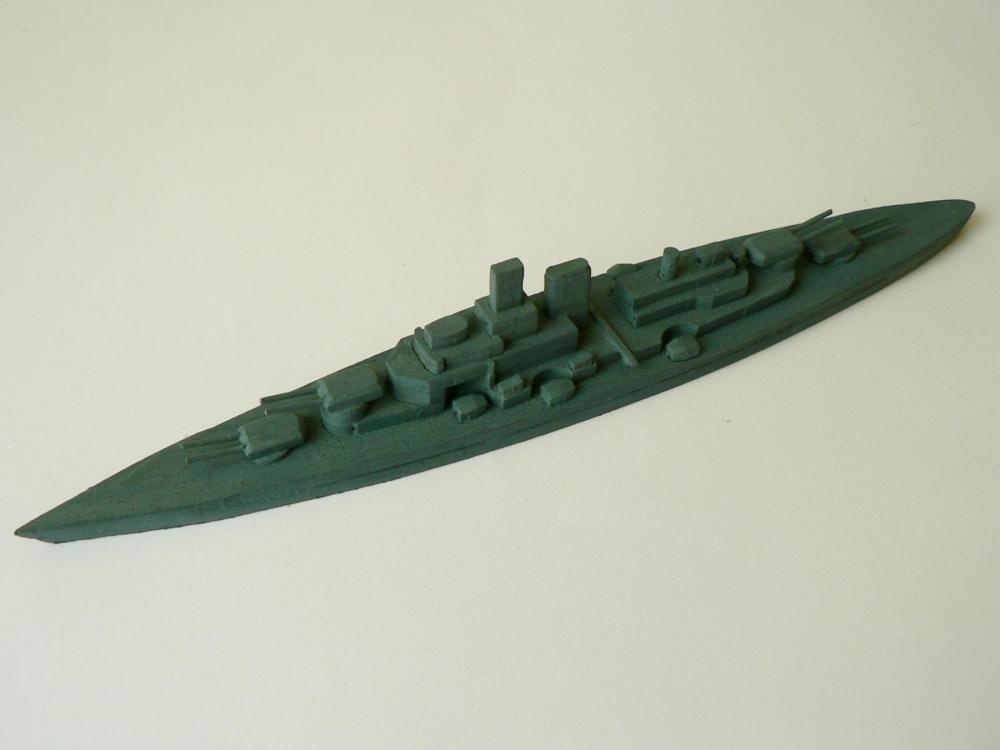
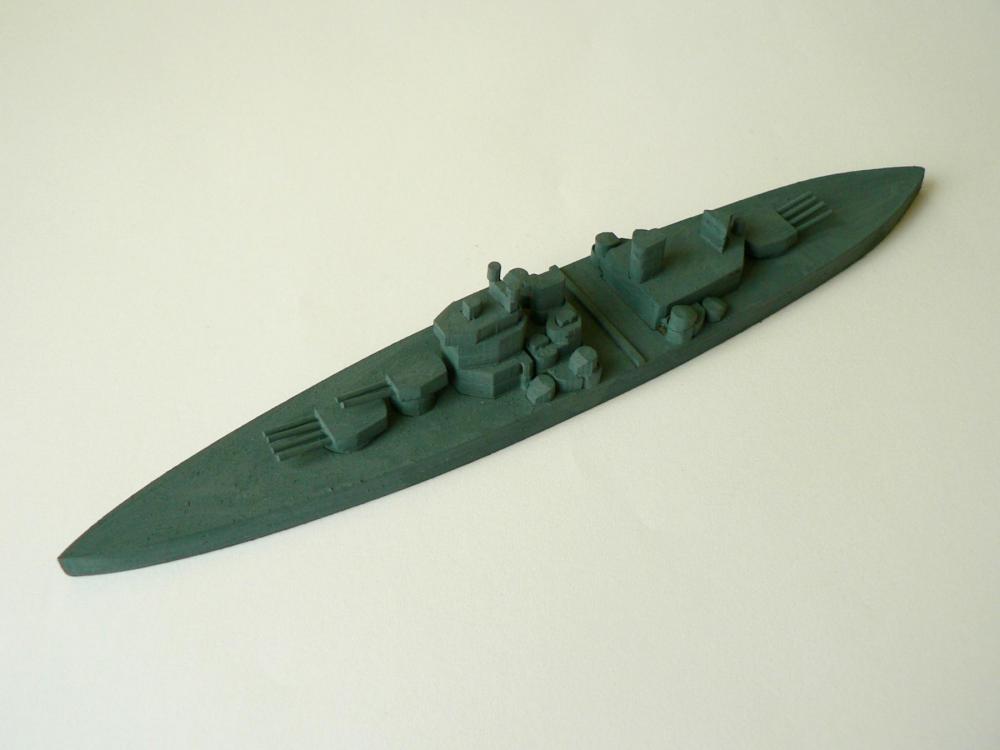
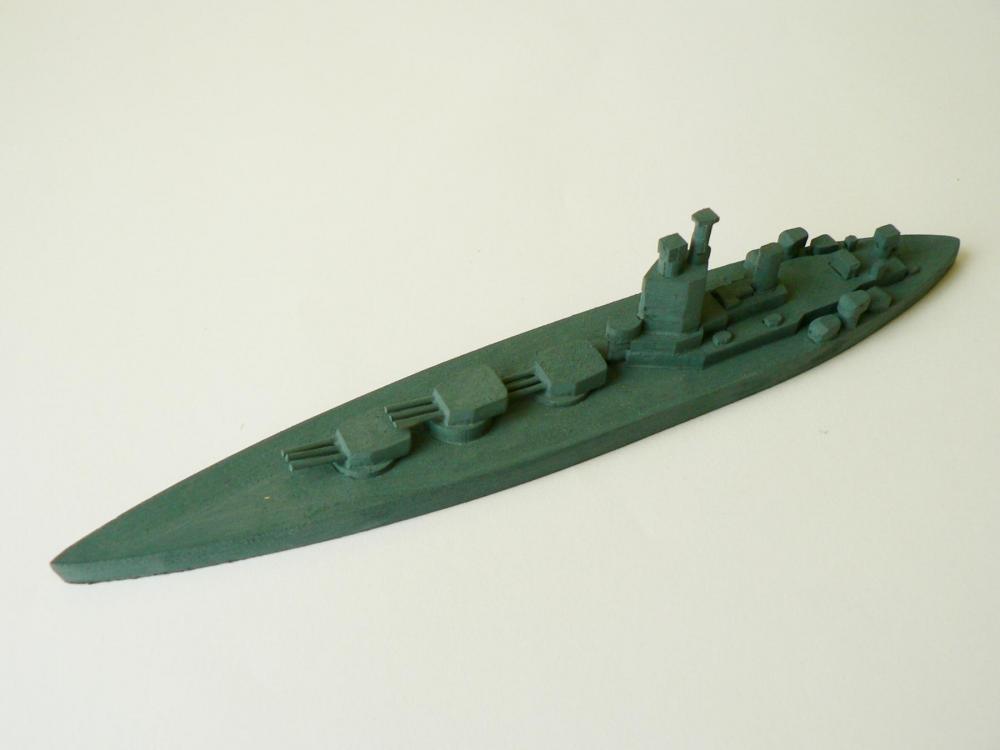
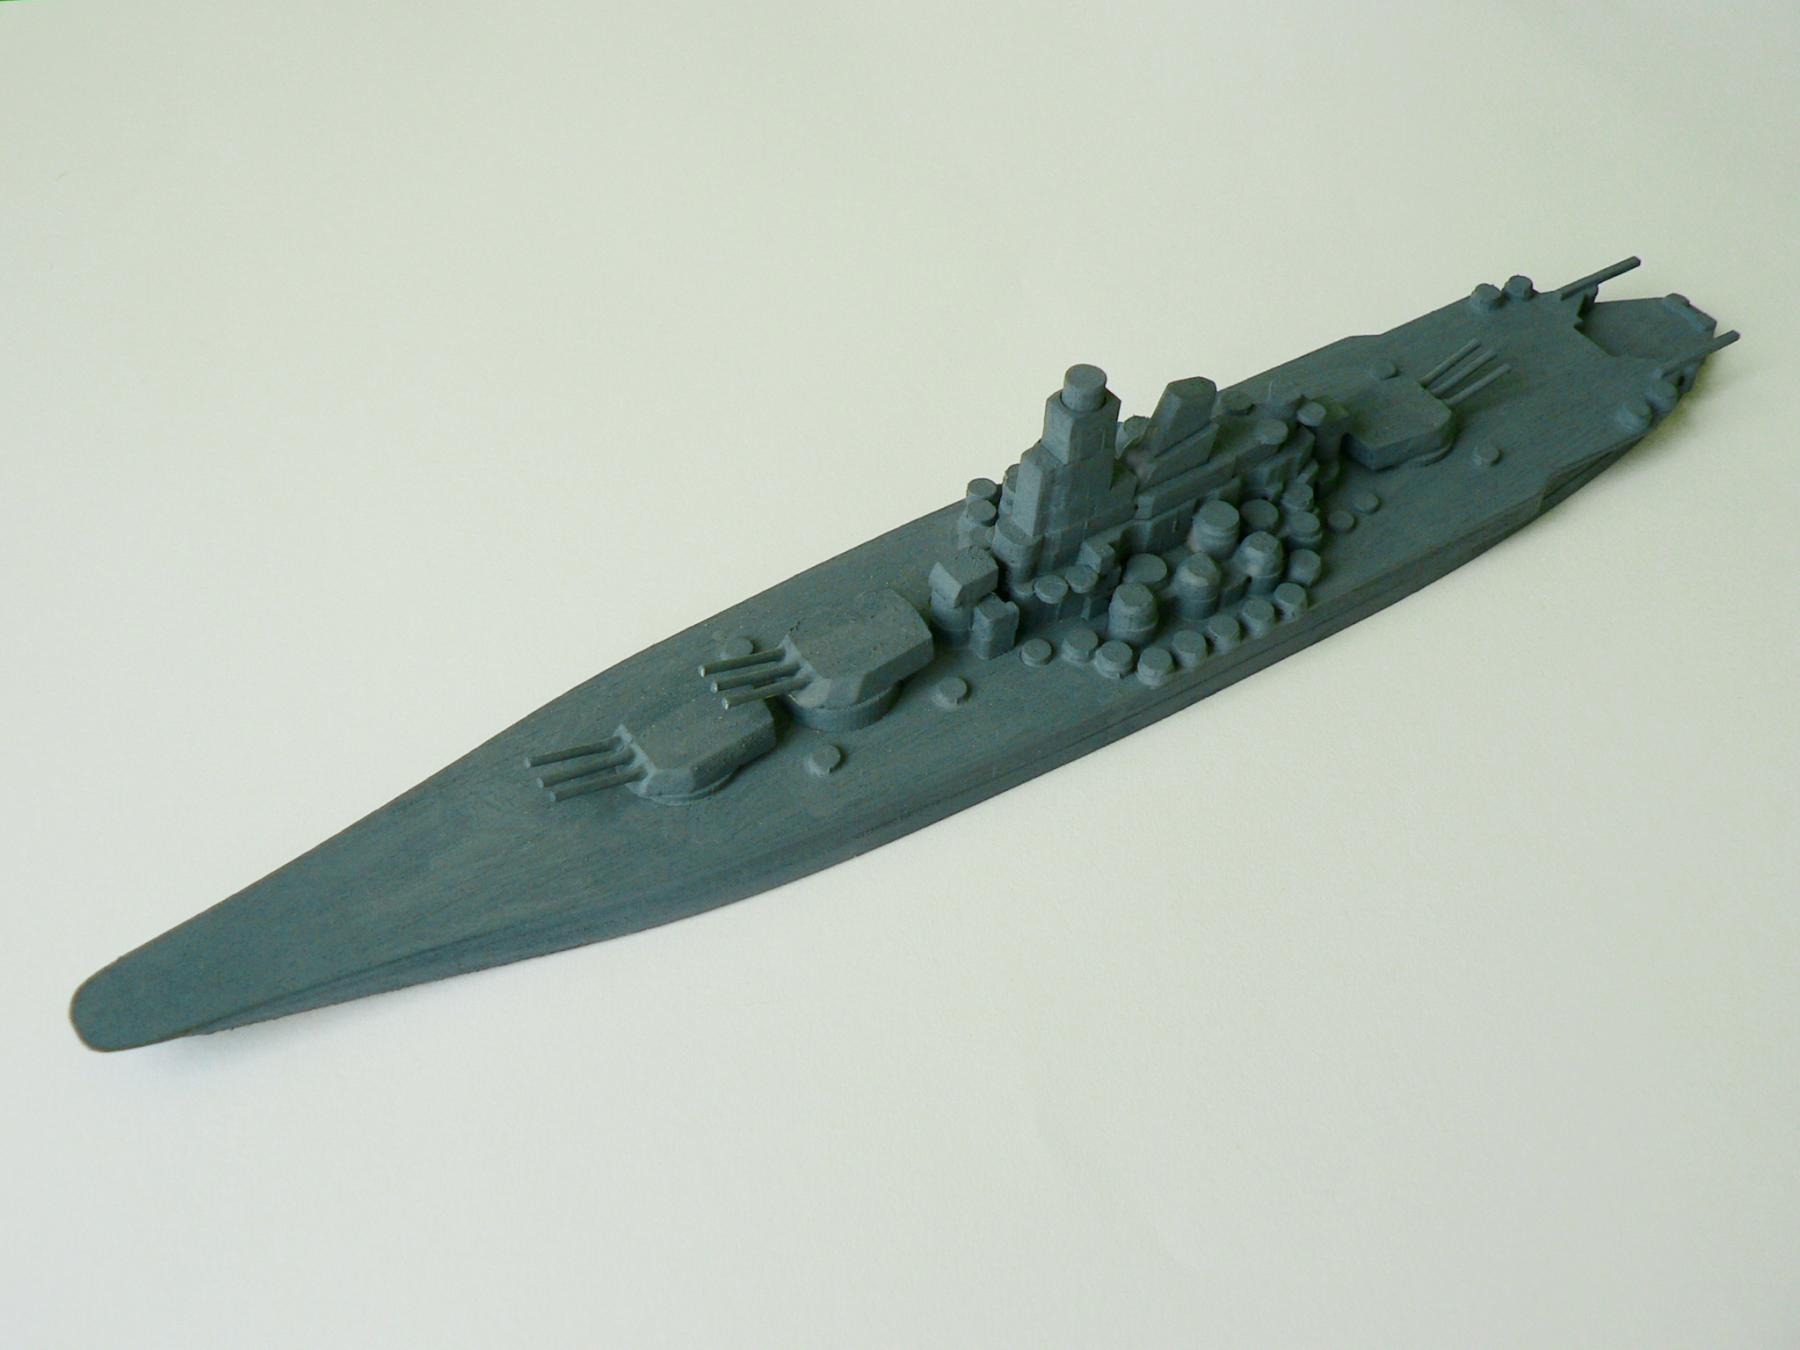
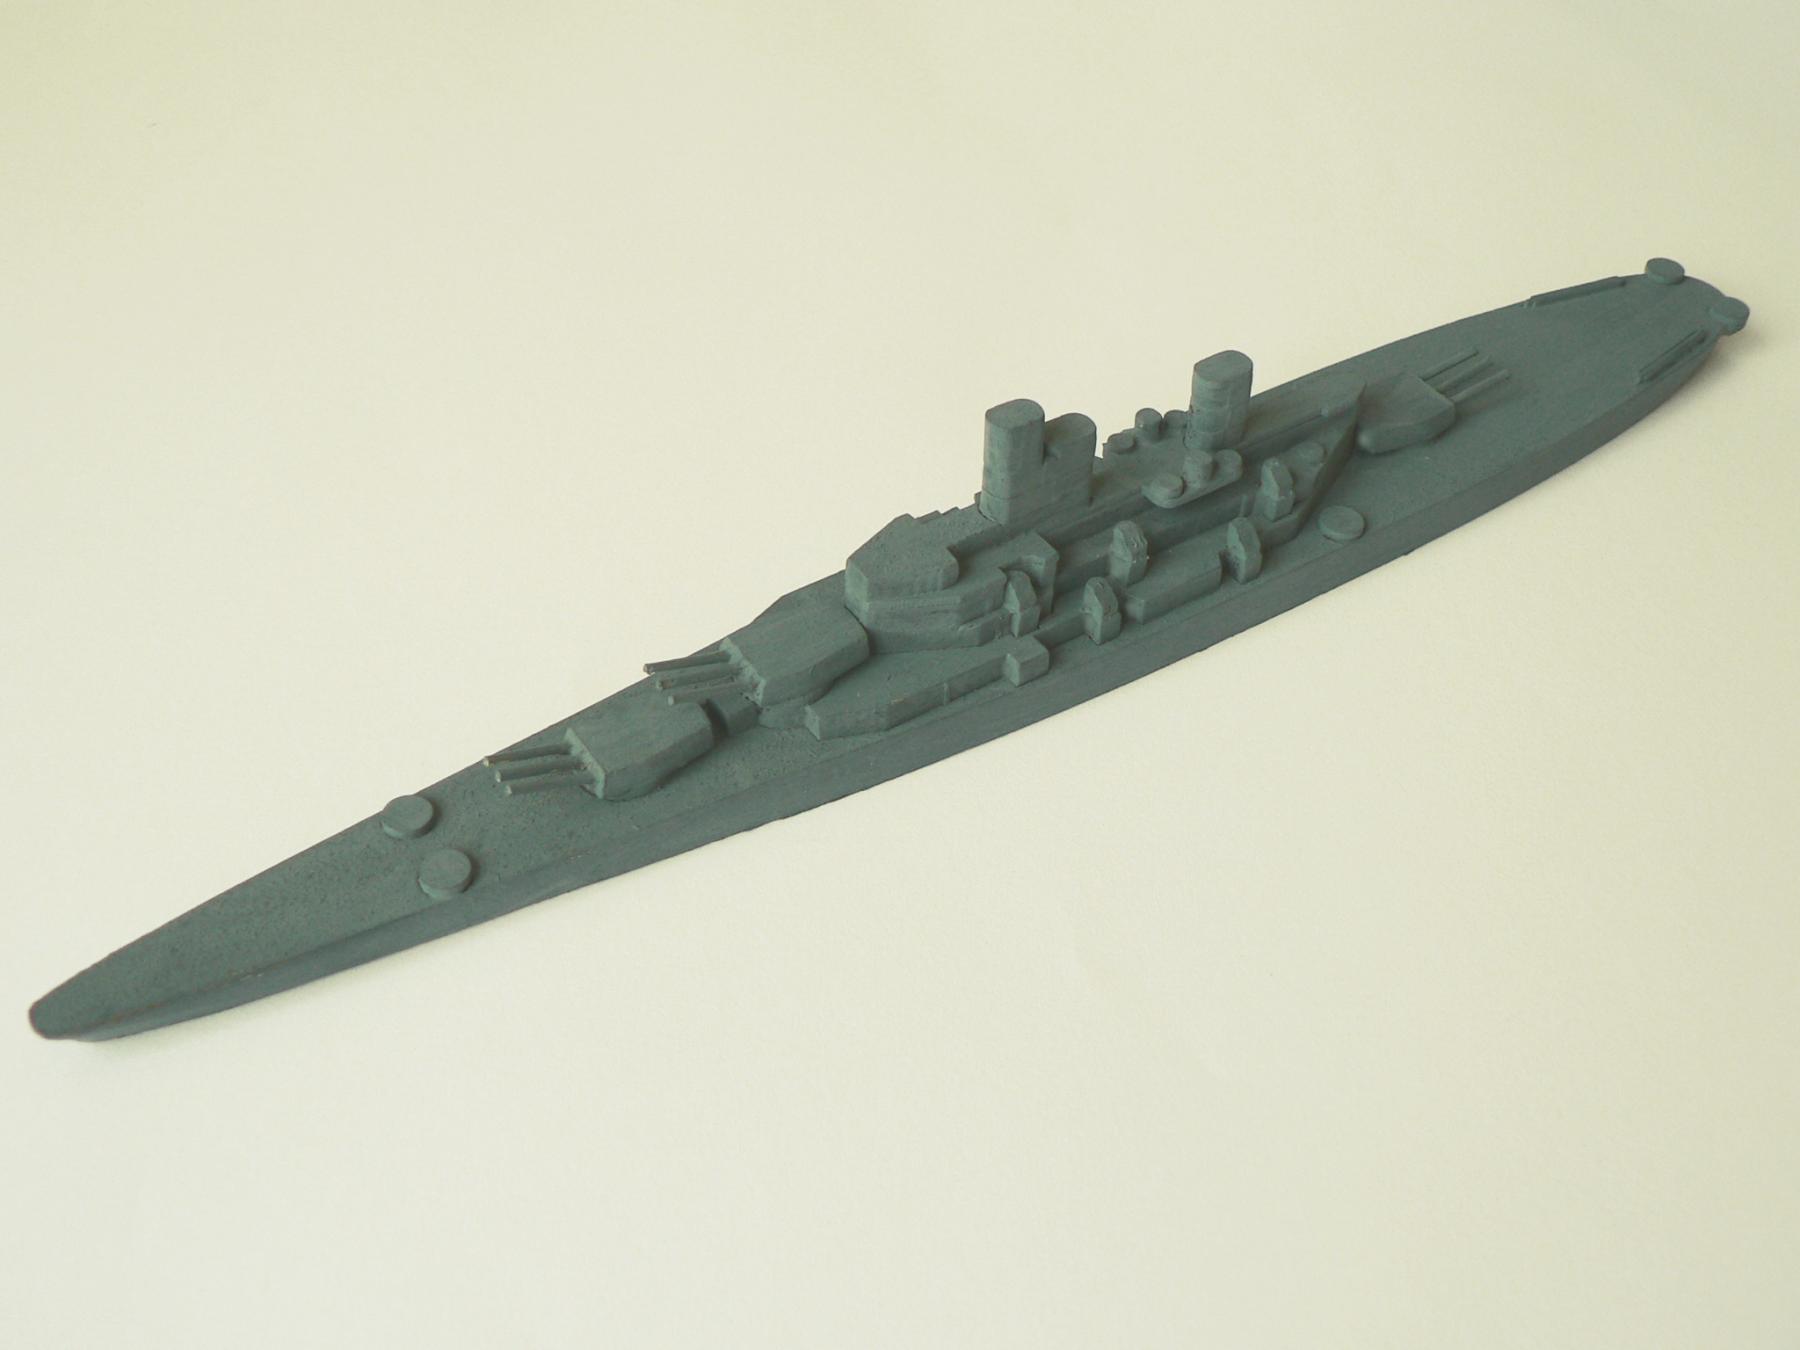
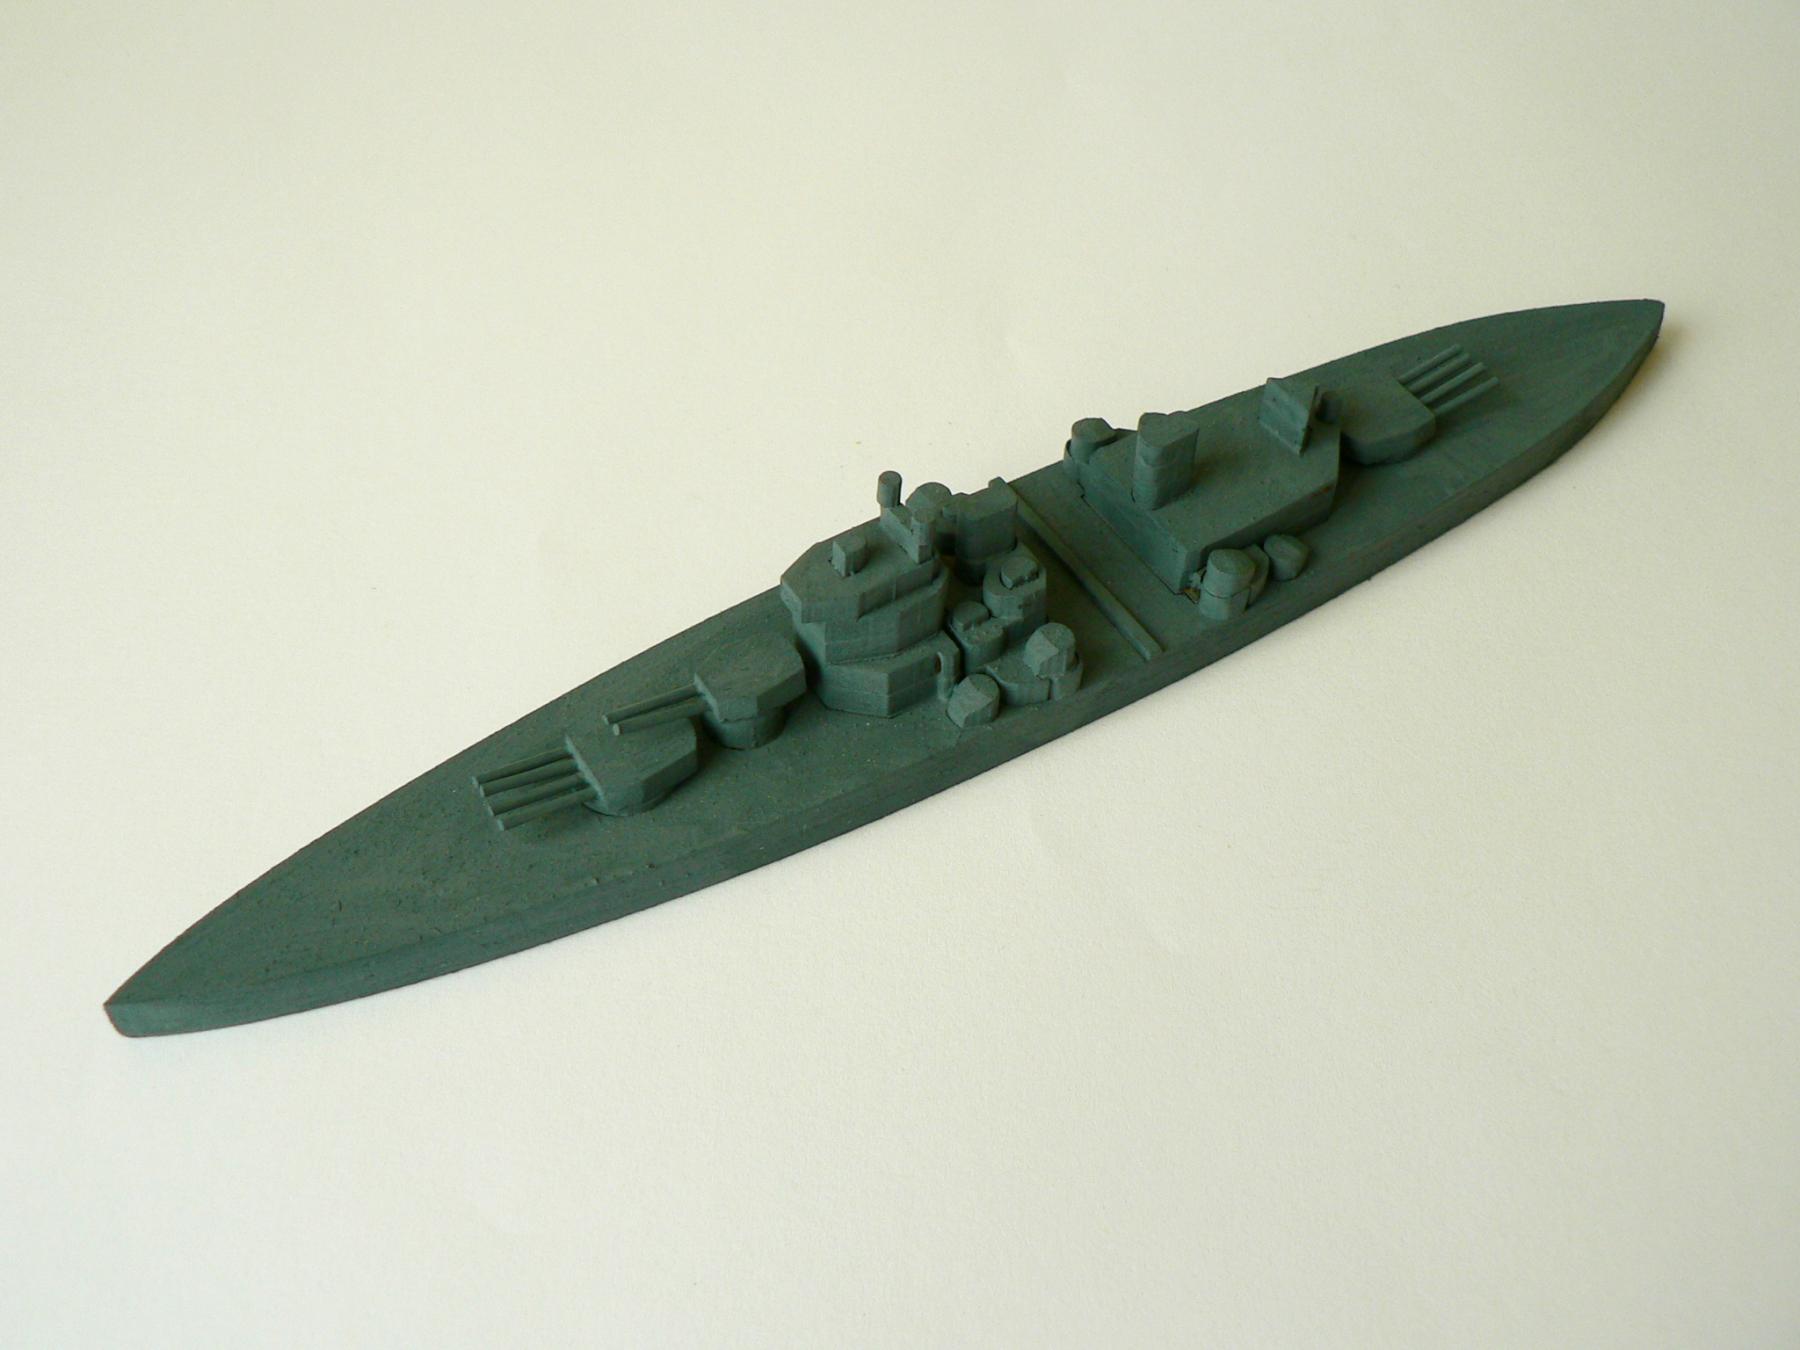
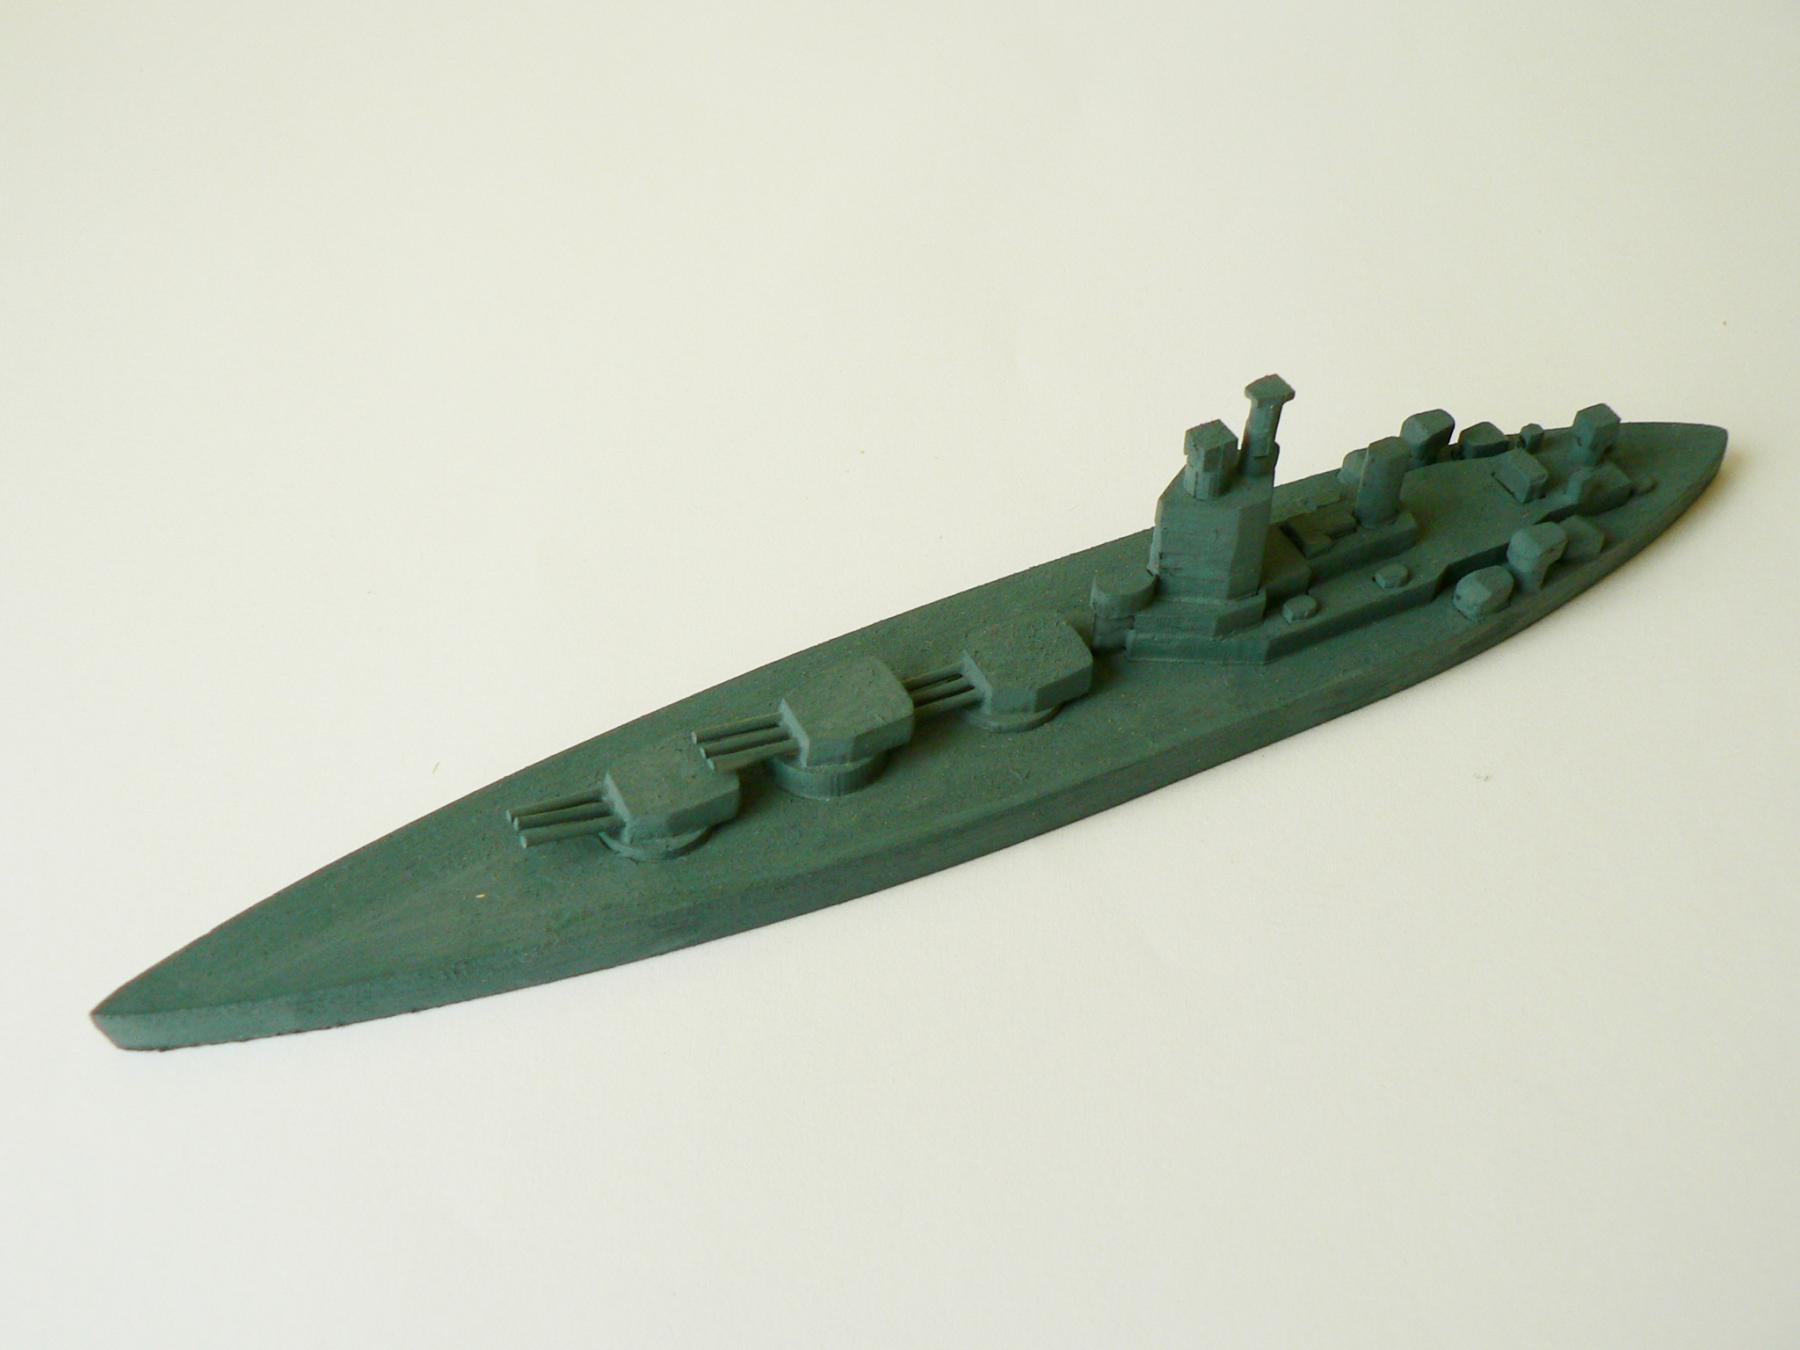
let me inform you about new products. I add into my assortment new Easy kits of WWII warships in 1/1200 scale. There are the kits for someone who want to relax from bigger projects
 . The models are very easy and fast to build.
Please visit our webpages for more info:
http://dusekshipkits.com/yamato
http://dusekshipkits.com/uss-missouri
http://dusekshipkits.com/bismarck
http://dusekshipkits.com/hms-hood
http://dusekshipkits.com/hms-prince-of-wales
http://dusekshipkits.com/hms-rodneyBest regards
Daniel Dusek

-
Hi cerberusjf, I suppose it may take about two years than the kit will be released.
Daniel
- Canute, J T Lombard and mtaylor
-
 3
3
-
-
Hello all,
Wooden churches combo kits are in the sale now. You can buy it with 30% discount. The discount is valid until May 15-2016. Please visit our special offers webpage:
http://www.dusekship.../special-offers
best regardsDaniel Dusek
-
-
Of course Nigel, it will be no problem
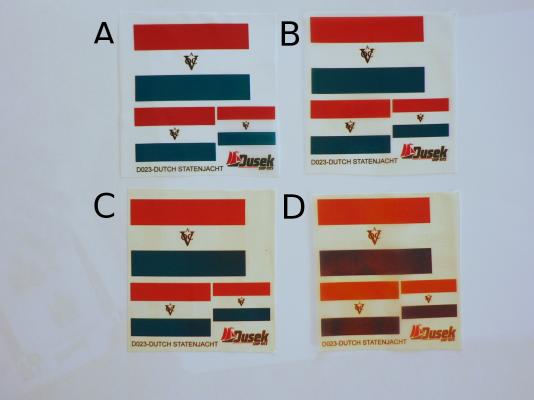
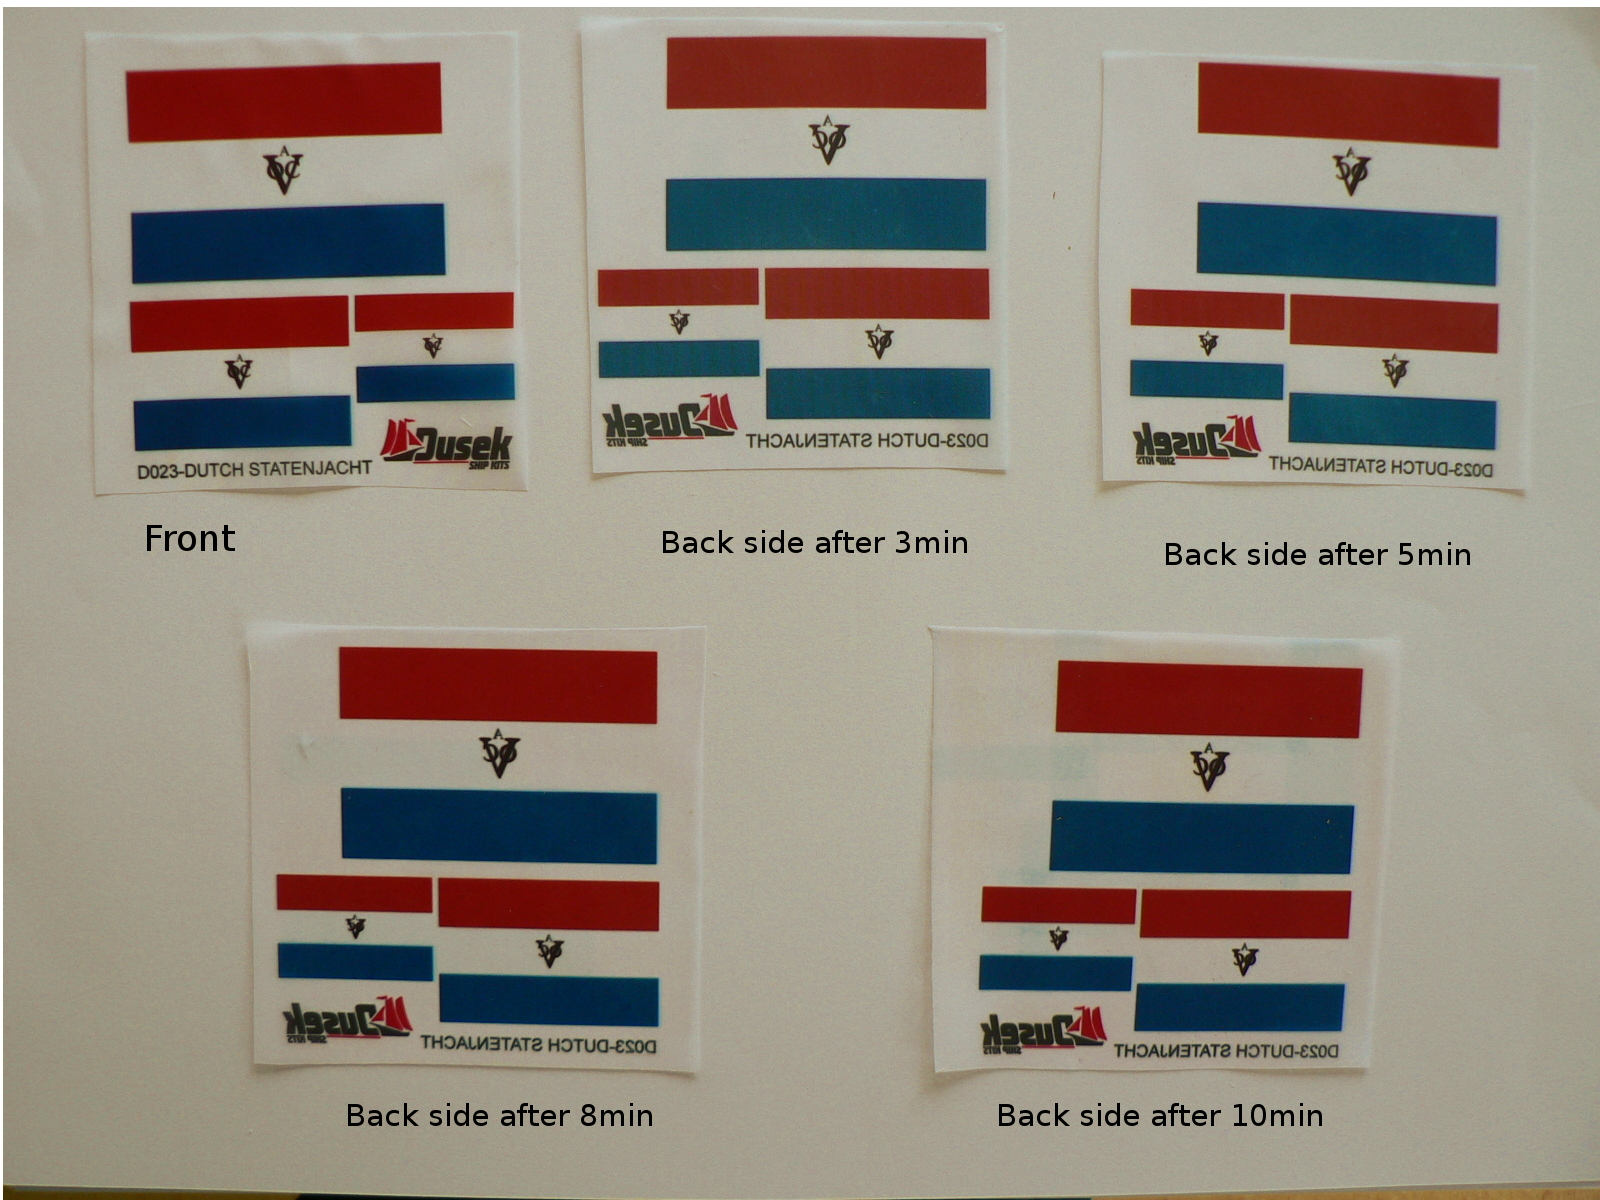
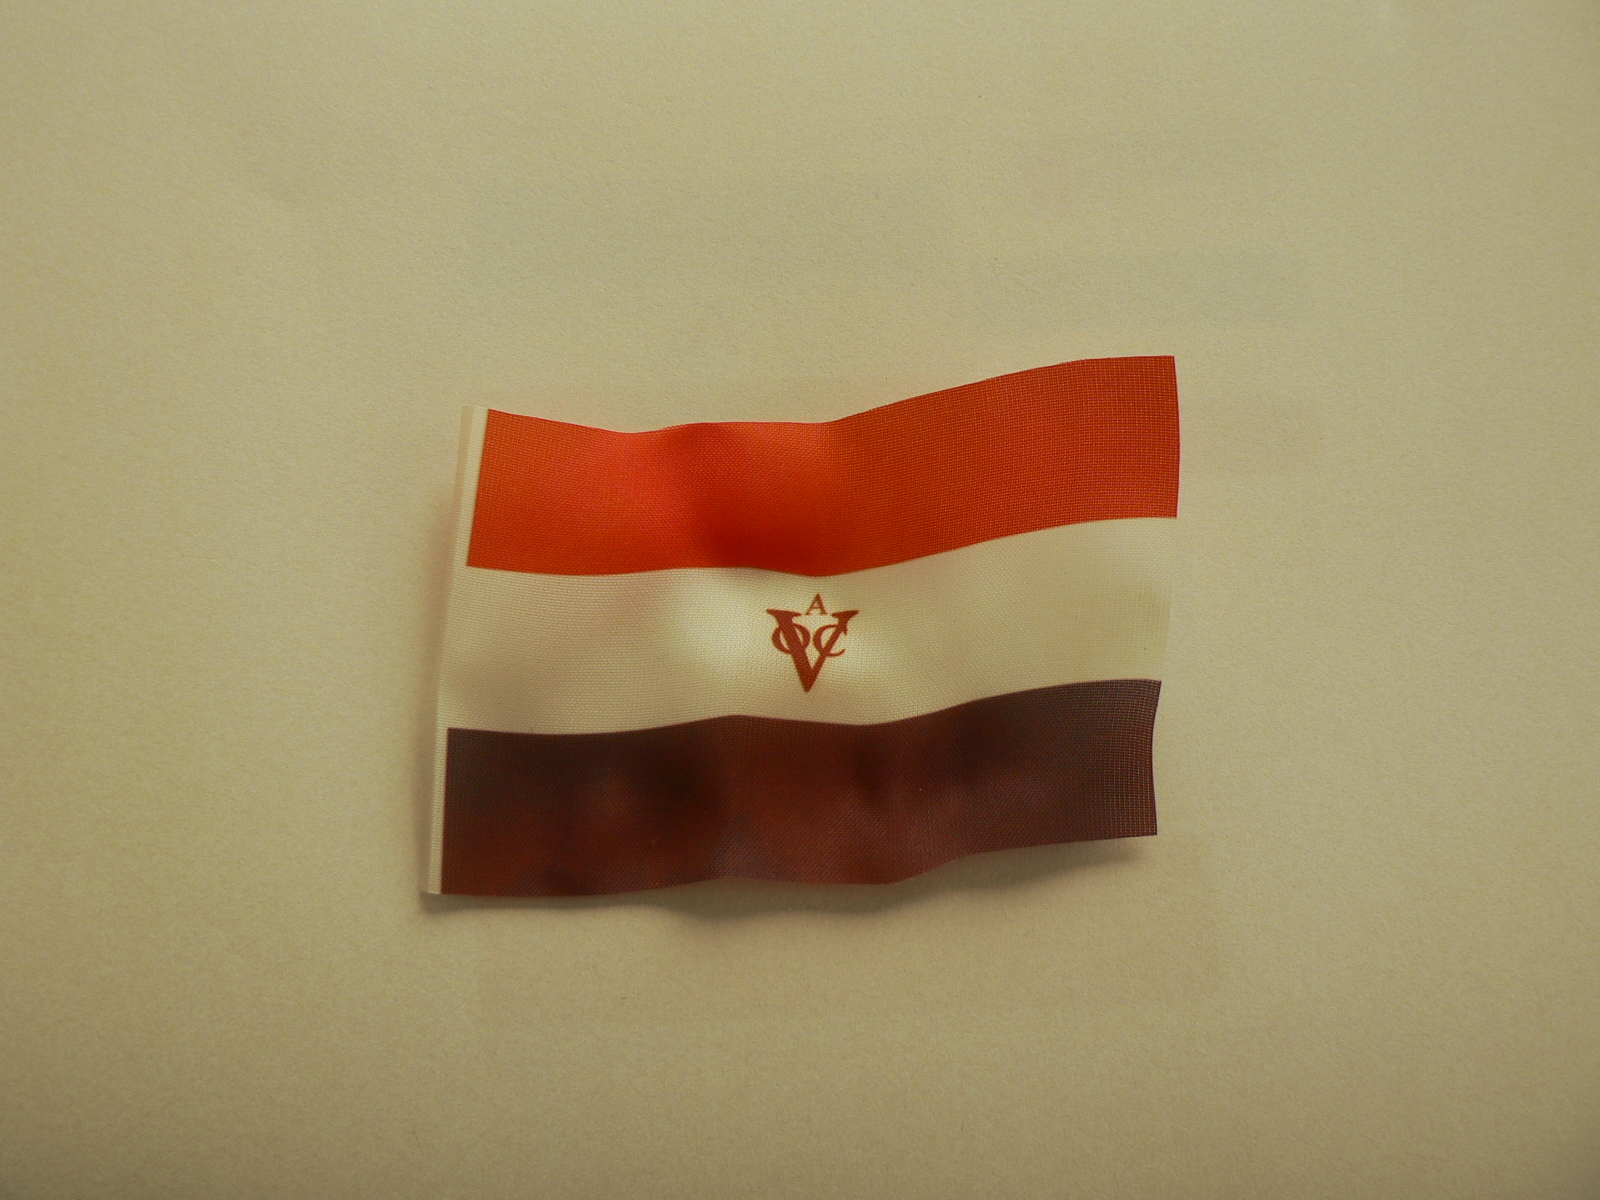
To the Don's question-below is picture with the front side and back side after different time of sublimation in thermal press. It seems to be very similar color to the front side after the 8minutes. There is only one little problem, with increasing of time the small details (like skripts on these flags) are little more smudged.
On the second picture is shown the flag after cutting from the sheet.
Best regards
Daniel


-
Thanks for all comments, so it seems the best way will be using of only decent weathering like B version.
Don-it is printed by sublimation print so it is printed only on one side , on reverse side the color is a little lighter, I will try to do some photos today to compare front and back side.
Ed-it is just the problem that the standard method is unusable because sublimation print is possible only for artificial material like polyester which is not soaked. After I print the flag I lacquer it so it could be able to cut it by scissors. The weathering is made then by thermal press (longer time in the press cause bigger effect of weathering)
Best regards
Daniel
-
Hello all,
In previous weeks I get new technology for printing cloth flags (it is polyester cloth) so I hope I will be able to replace with them the paper flags which I use now. I made some experiments with weathering. In the picture below are flags for prepared dutch Statenjacht with different level of weathering.
Opinion of which level of weathering would be the best for using in the kits would be welcome from anyone.
Best regards
Daniel Dusek
-
Thanks Dirk
Ed, I suppose that it may take about 3-4 months than the kit will be prepared (June, July I hope). I am thinking about offering the pre-sewn sails but I think they will be not available just immediately after start of production, it will need littlemore time I think
Daniel
-
-
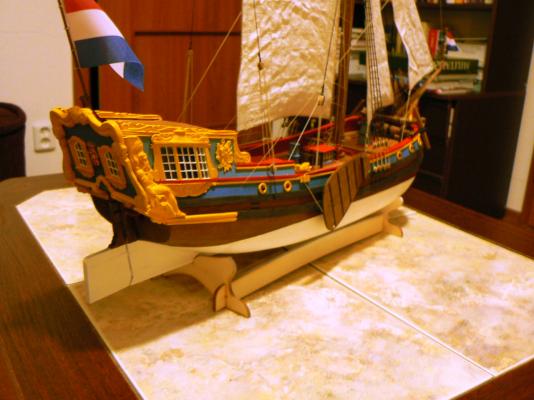
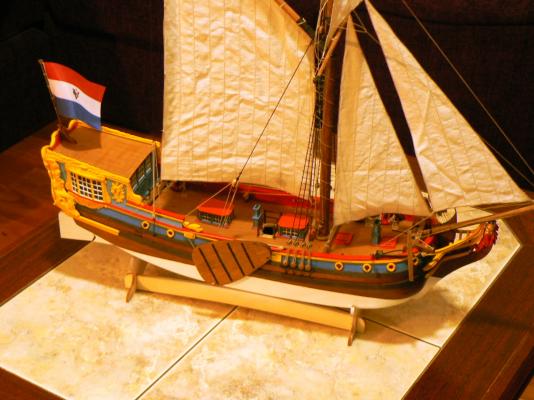
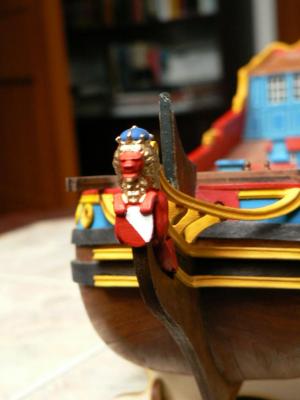
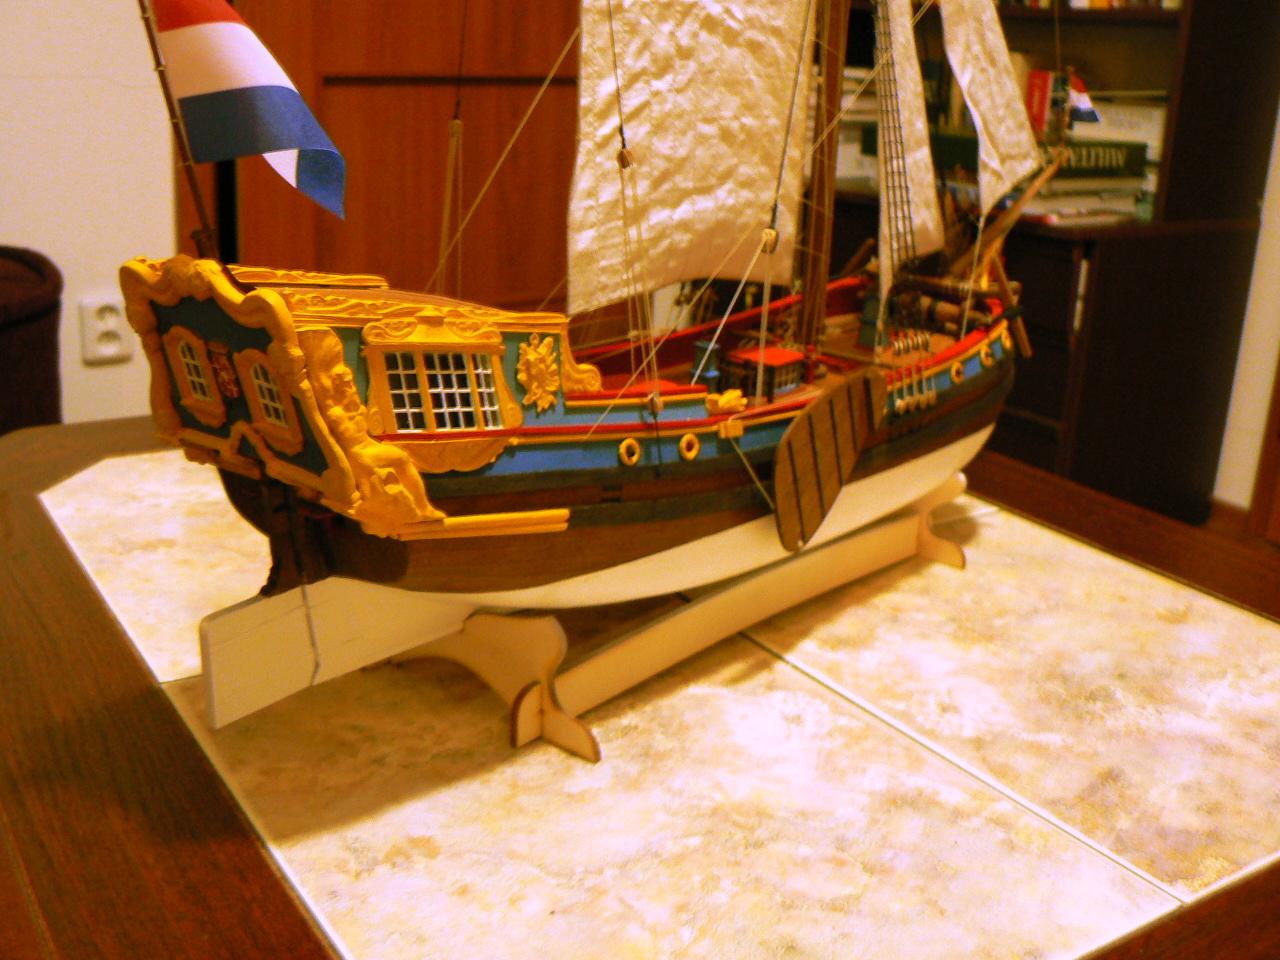
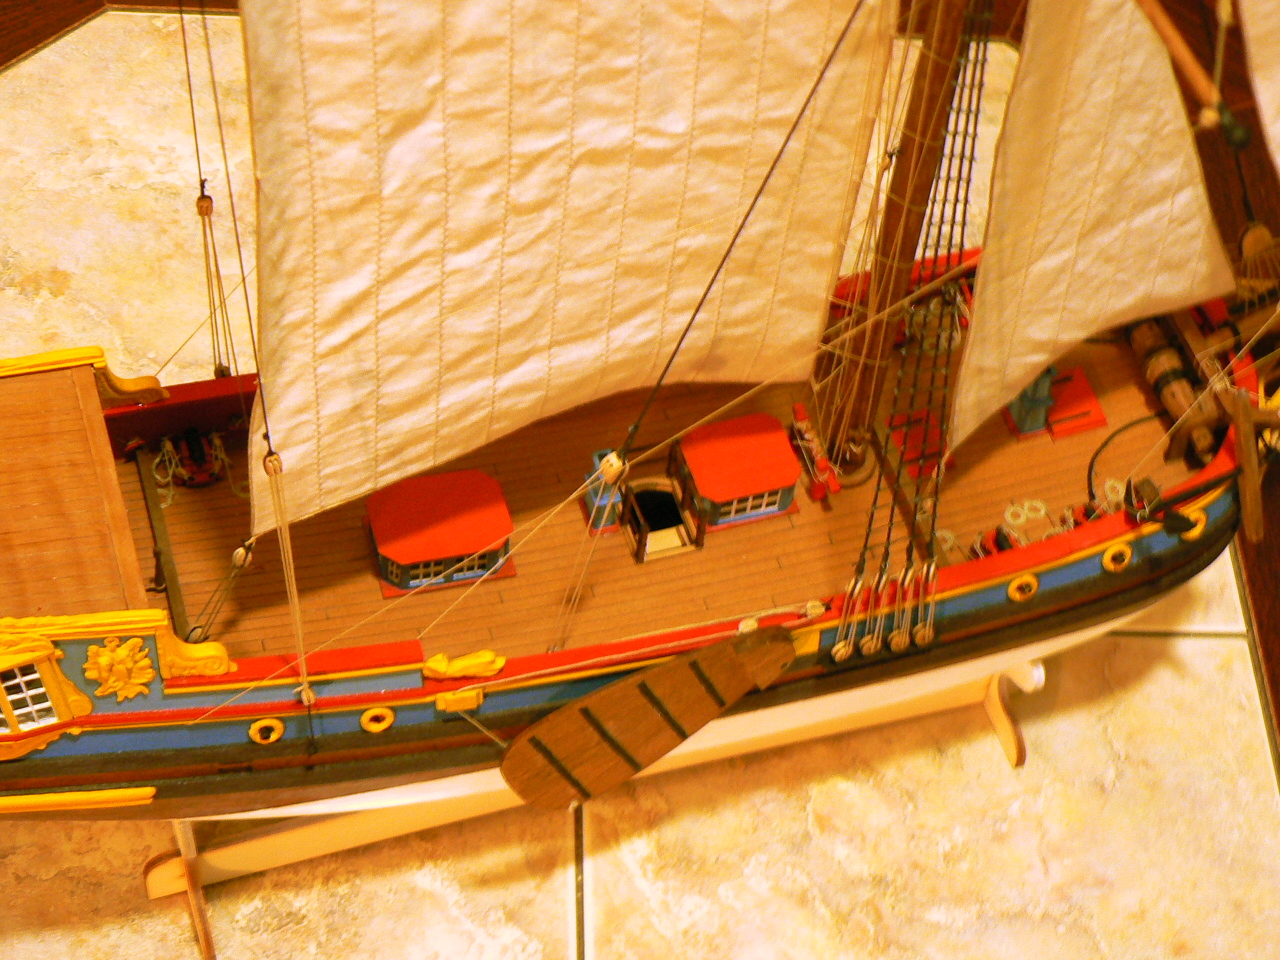
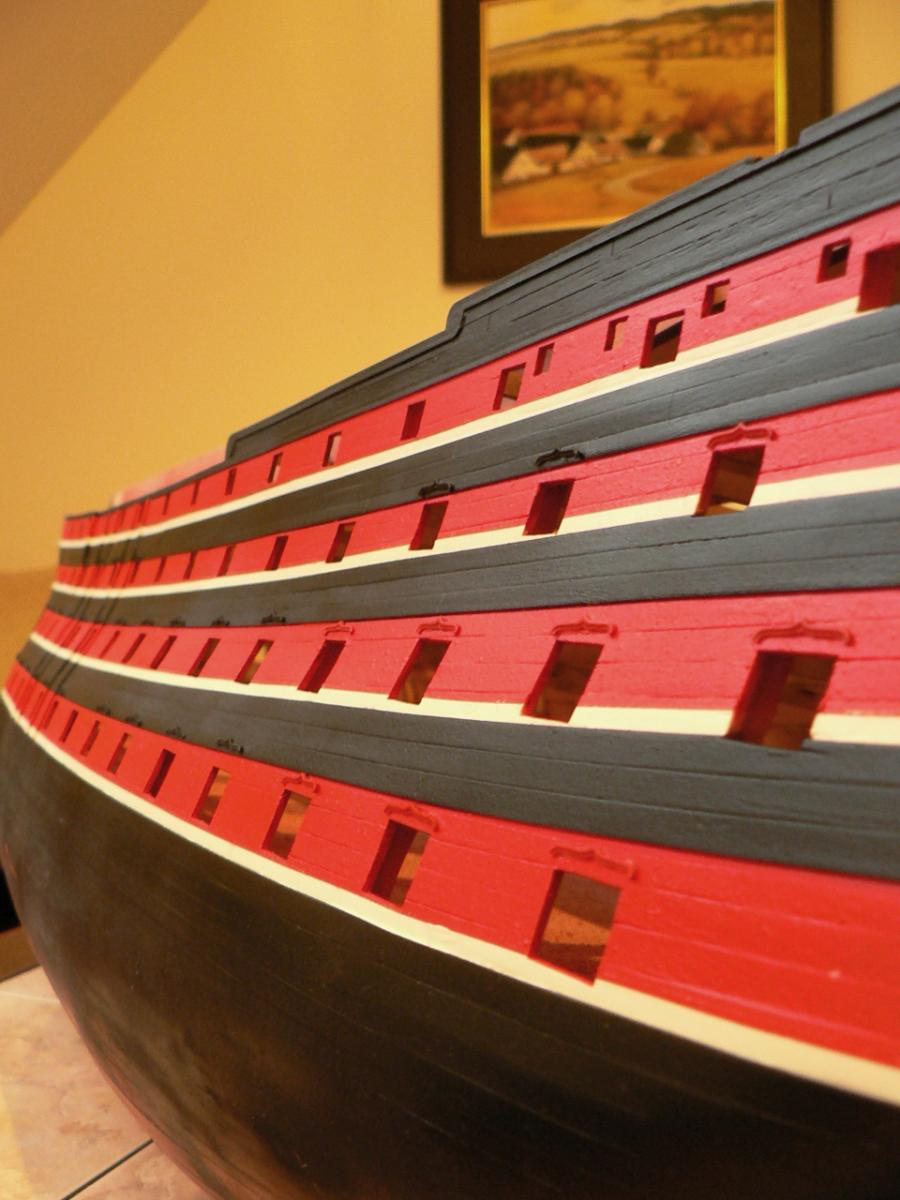
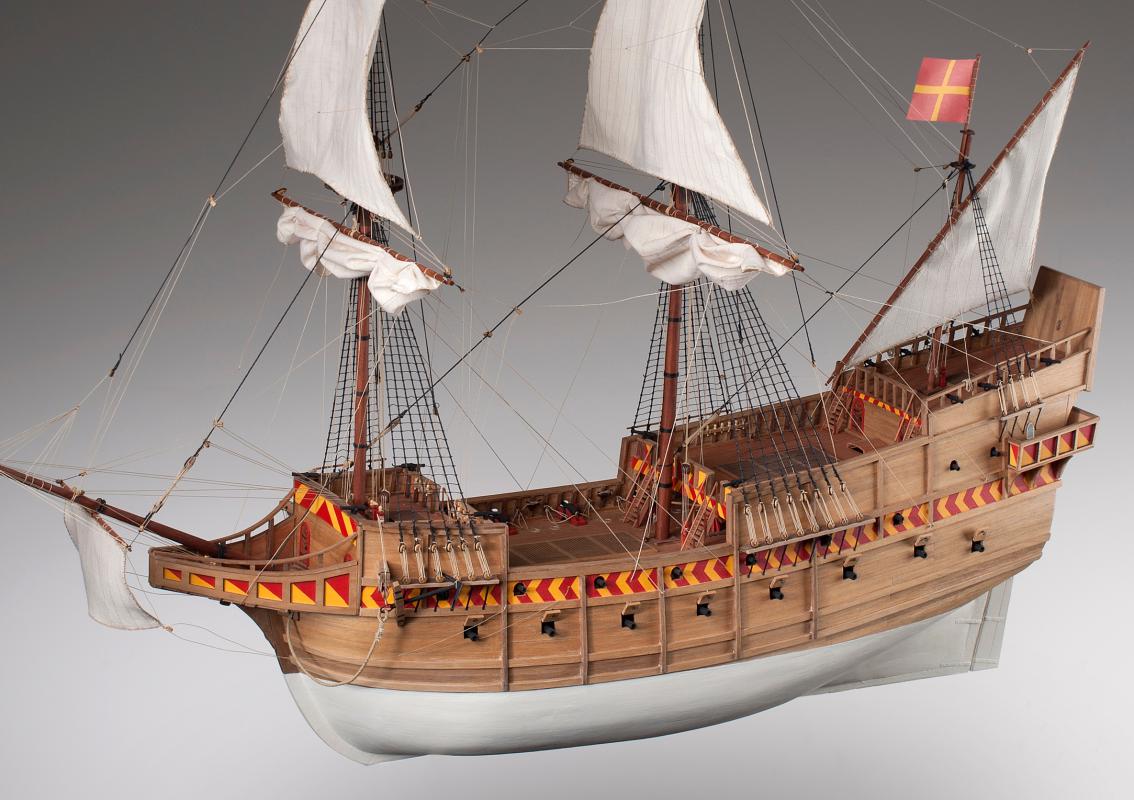
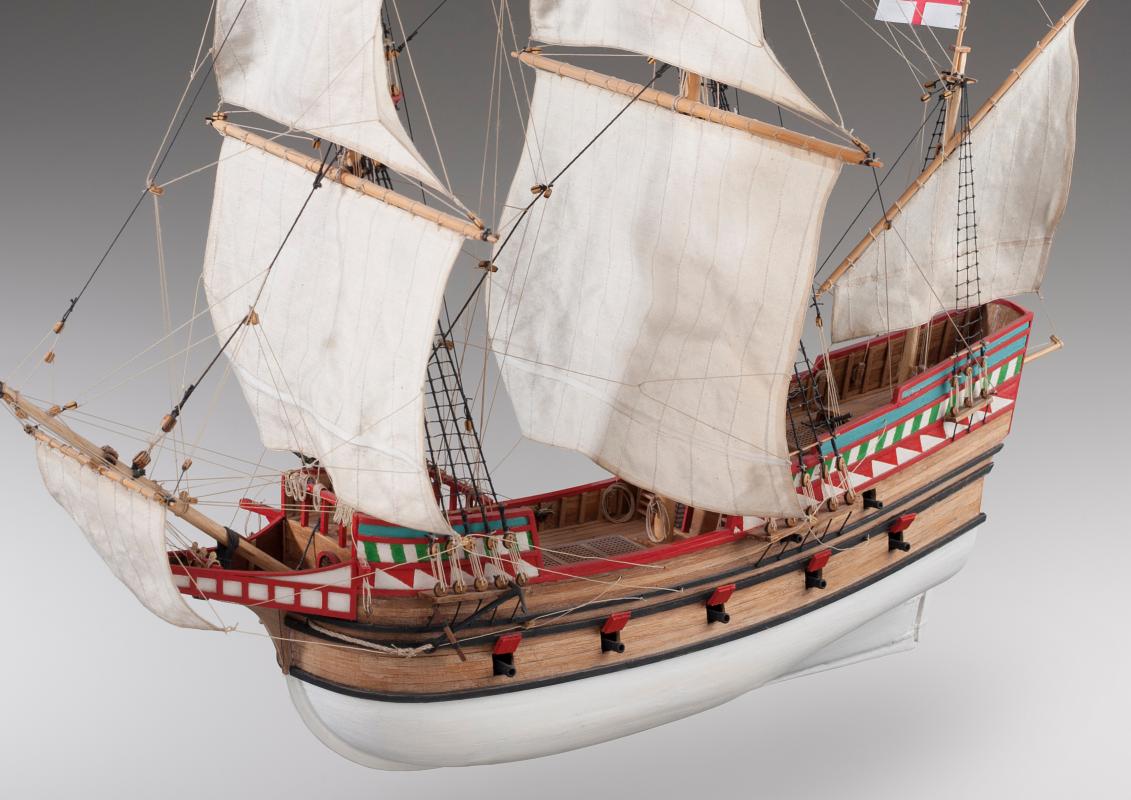
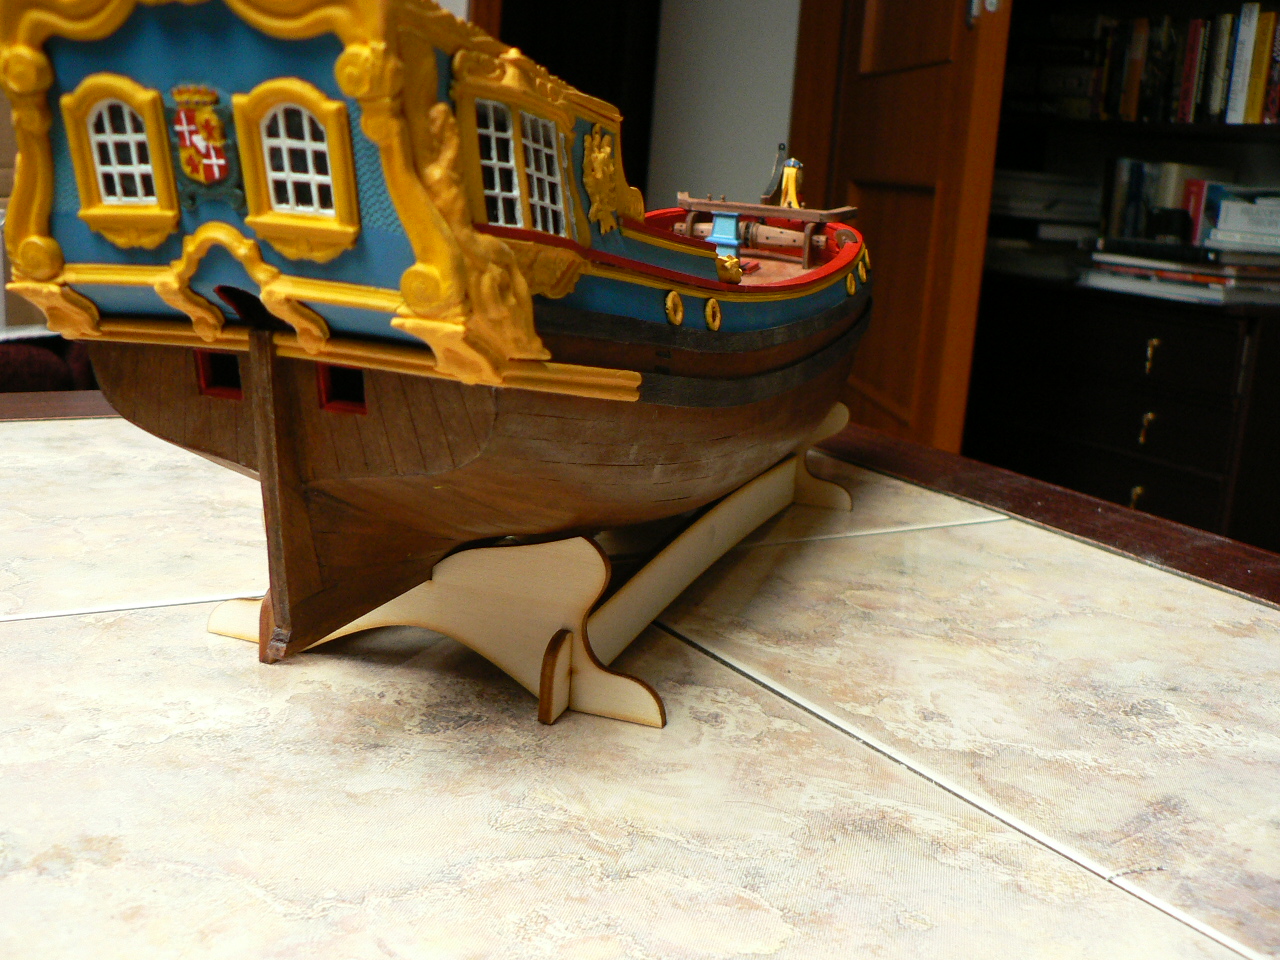
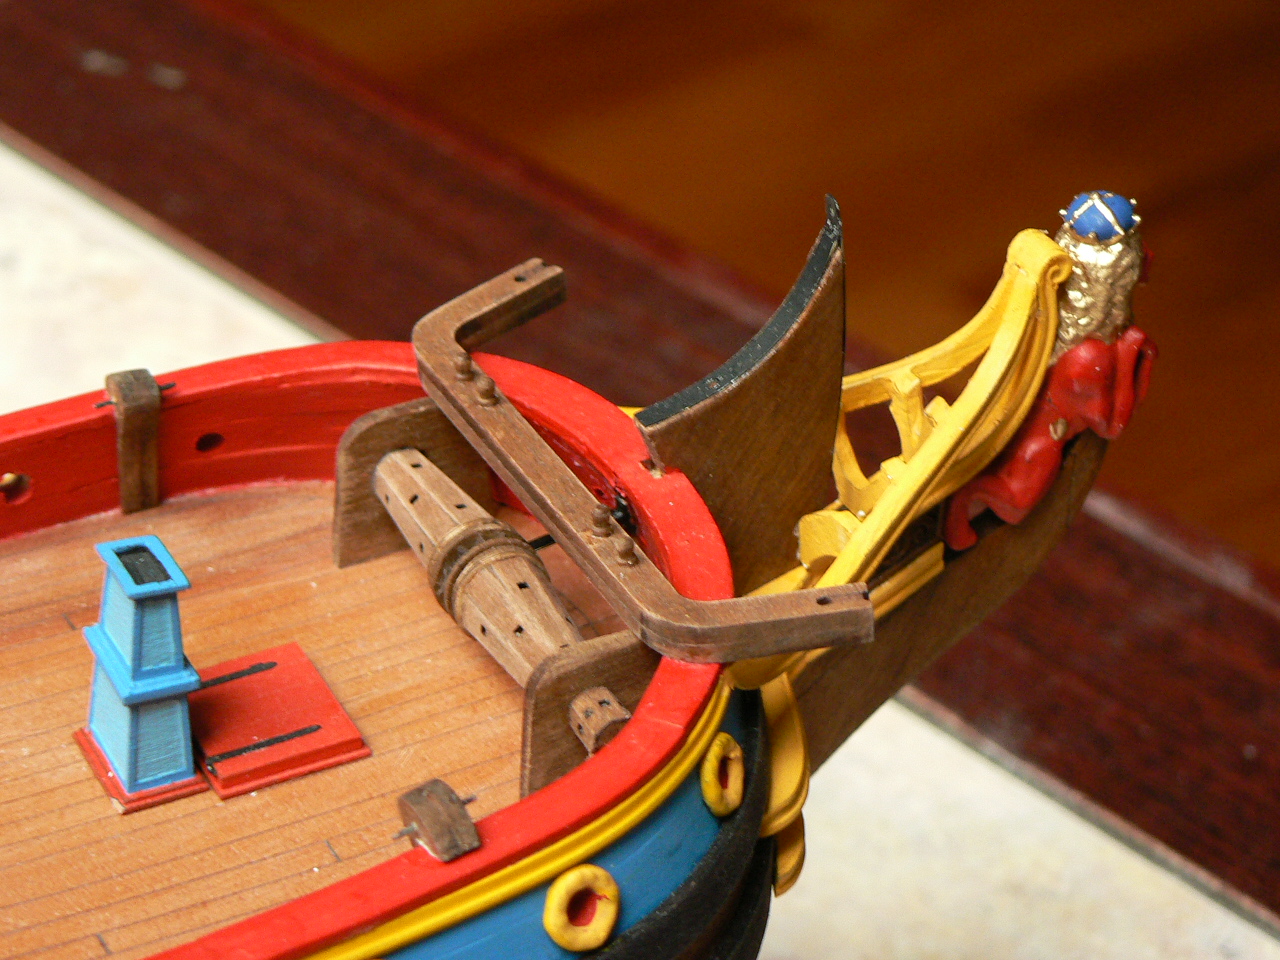
Hello All,
The prototype of Dutch Statenjacht is finished. Some photos are here.
Best regards
Daniel Dusek

- skipper1947, Bowsprit, donfarr and 12 others
-
15
-
Hi Ed,
I glue all the resin or metal parts by cyano acrylate glue.
I everytimes try to paint simple parts before I complete the bigger group. Sometimes it may hapen that the painted part glued to the another painted part is not fasten enought so sometimes it is need to glue it one time more but for me it is better then painted it just after the glueing as I am not so skillful in painting

Best regards
Daniel
-
-
Thanks Dirk
Nigel, don't worry, it will take a lot of time to prepare the kit. I suppose at least two years
Hi Anaga, thanks for the link, I will look at it. To your questions:
1) Yes I plan to do also copper plating.
2) I use Turbocad
3) I combine more sources, the basic shape is after Mr. Crespo, but some details are for example after the period plan made in USA
I also plan to use Archangel figurehead instead of standard lion.
I would be very grateful if you would give me the information about the artilery, masting, rigginng and etc.. At this moment I plan to use for artilery information from this book:
there are for example drawings and dimensions of spanish guns from about 1796, but I know that the last rebuild was made shortly before Trafalgar so I am very interested in data from your sources
Best regards
Daniel
-
-
Hi Jack,
I am not sure if I understand correct what you mean but the bow should be little higher than stern but not a lot. The good way is draw position of the planks on stem and stern and alternatively adjust it. I can make some photos of build model but I think your model look very good now and it is on good way.
Best regards
Daniel
-
-
-
Hi Sean,
I take your comments as good feed back so do not worry with the comments
. I check the printed plans and they are really little smaller (about the 2mm I measured on the A2 plan and about 1,5mm on the A1 plans). I am not sure but I think the difference is because the plans was printed with some margins. I need to find out where the problem was created (if on my side on side of my supplier). I will make during this or next week plan with corrected 1:1 details and then I will send you it.Daniel
-
Hello Sean,
I read you log, it is nice build. I would like to explain you some thinks in the kit and give you some recommendation for help to build the model as you wrote that not everythink is clear in the instructions.
1) For glueing of the veneer deck is good to use some dense white glue (I use for example Bison which I bought in DIY shop which seems to be good or it is possible to use cyanoacrylate glue but in that case there is no second chance. Using of very thin white glue lead to deformation of the venner as you wrote).
2) In the kit is packed 0,5mm rigging rope, so it is 36mm thick rope in 1/72 scale which is maybe little more than in real ancient ships was used.
3) Also the sail cloth is thick because the most modellers and me too prefer them.
4) Also the dowels 2-4mm are exact dimension which I used for prototype model.
5) I am little confused that the plans are not fit to the parts, I need to check it next week where is the problem and then I will let you know.
6) about the planking the hull- I would like to really recommend you to buy electric plank bender especially if you plan to do more wooden ship models in future. You will see that the work with electric bender is much more easy (or it is possible to use alternatively electric solder or someone use iron). But if you have not it you should put the strips into the water for more time (let them in water approximatelly for 2 hours as it is hard wood it have to absorb the water for longer time, than you can boiled them). The final radius of bending you should do in more steps. I recommend you to start planking with one strip on stern, than glue it gradually to the frames in direction from stern to bow. Then start the glueing the second strip from bow and glue it to the frames in direction from bow to stern.
Let me know please if it help you. I can prepare also some additional pictures if the instructions will be not enought clear for you.
I hope the building will follow well in future.
Daniel
-
-
Hello all,
San Martin and Golden Hind kits are in the sale now. You can buy it with 30% discount. The discount is valid until March 15-2016. Please visit our special offers webpage:
http://www.dusekship.../special-offers
best regardsDaniel Dusek

- Landlubber Mike, GuntherMT, Dubz and 7 others
-
10
-
-
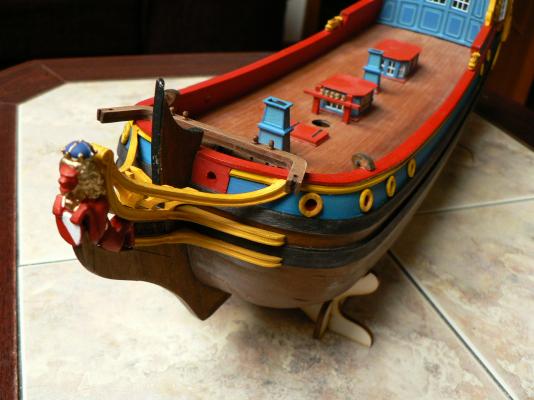
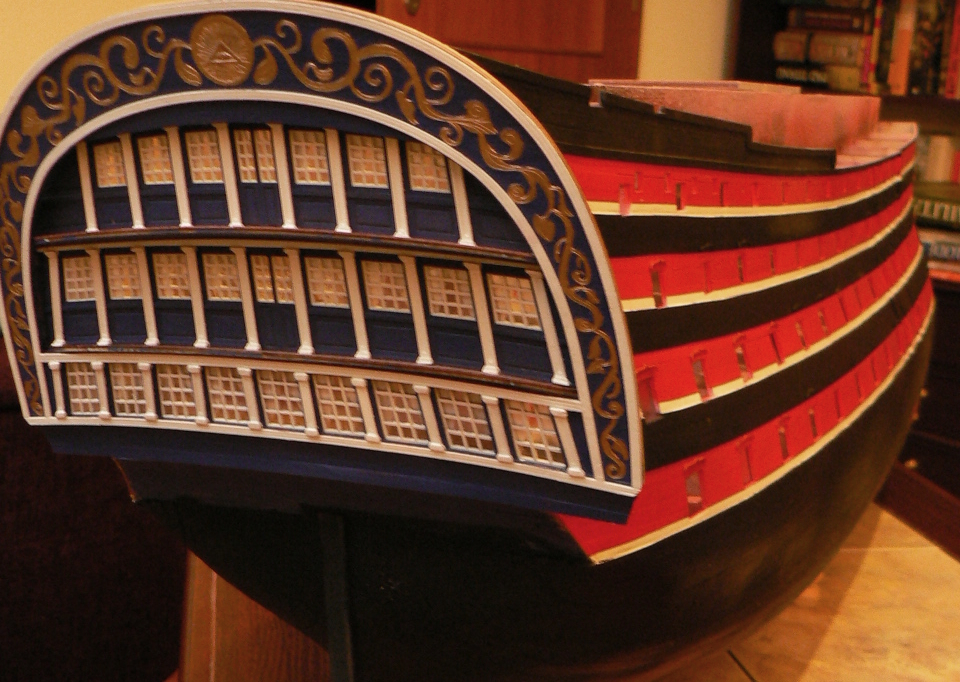
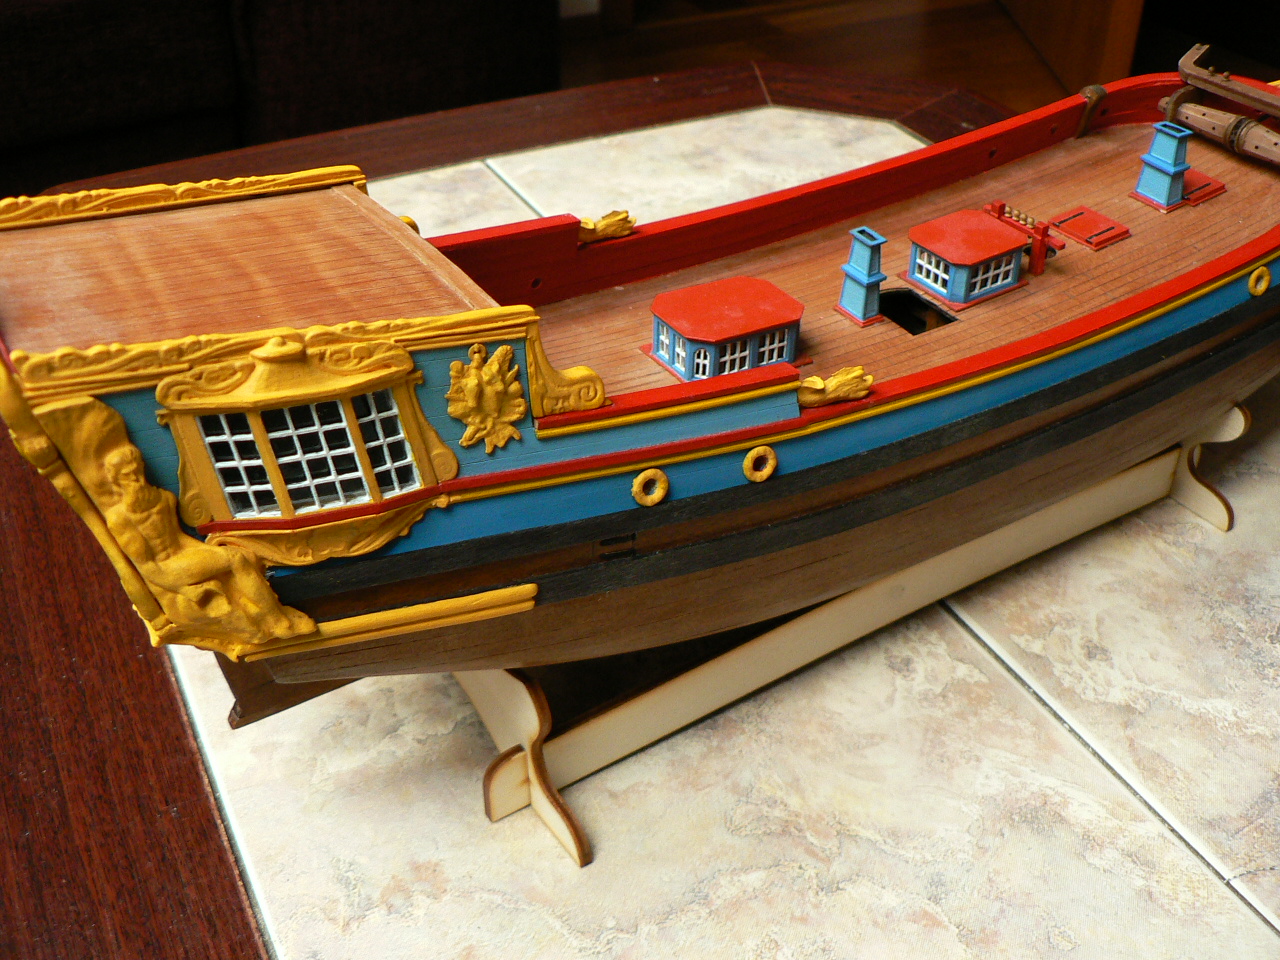
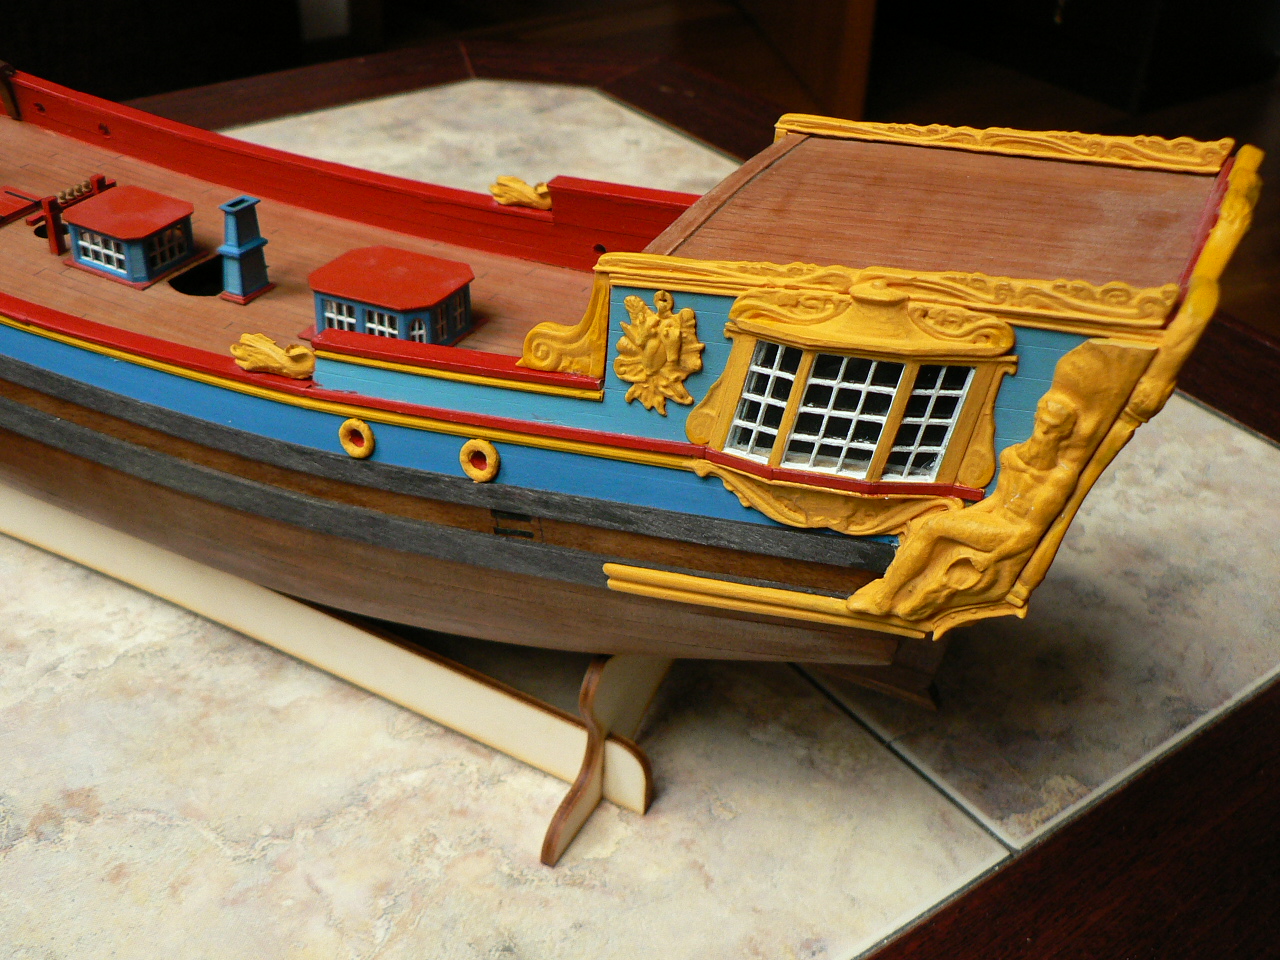
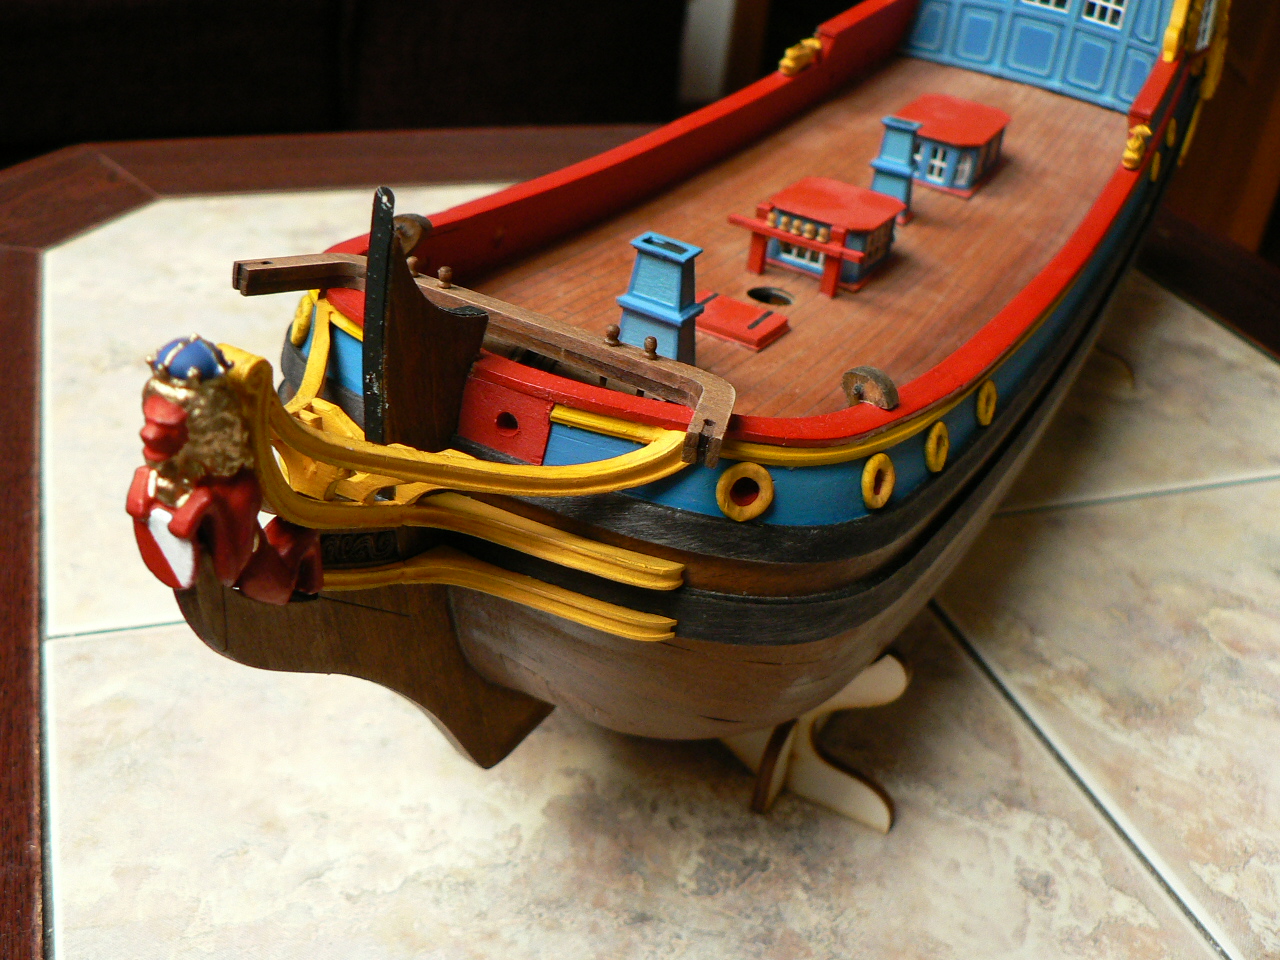
Hello all,
I made some progress on Staten Yacht prototype. All decorations are ready now. Some photos are below.
Best regards
Daniel


- AnobiumPunctatum, Kevin, Griffon and 19 others
-
22


Dusek Ship Kits-news+info
in Traders, Dealers, Buying or Selling anything? - Discuss New Products and Ship Model Goodies here as well!!
Posted
Hello all,
Greek ships combo kits are in the sale now. You can buy it with 20% discount. The discount is valid until June 15-2016. Please visit our special offers webpage:
http://www.dusekship.../special-offers