


mattsayers148
-
Posts
685 -
Joined
-
Last visited
Content Type
Profiles
Forums
Gallery
Events
Posts posted by mattsayers148
-
-
Thanks Pops, I think I just got lucky. I can't wait to see your pics.
Matt
-
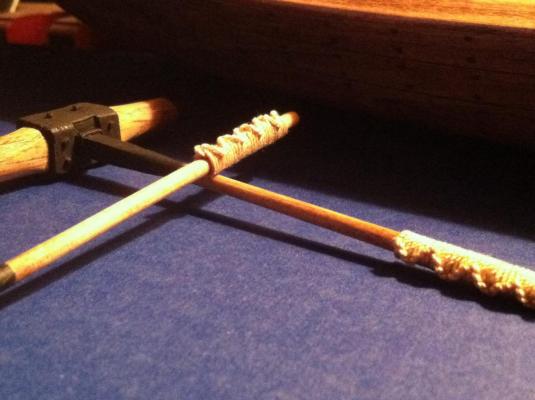
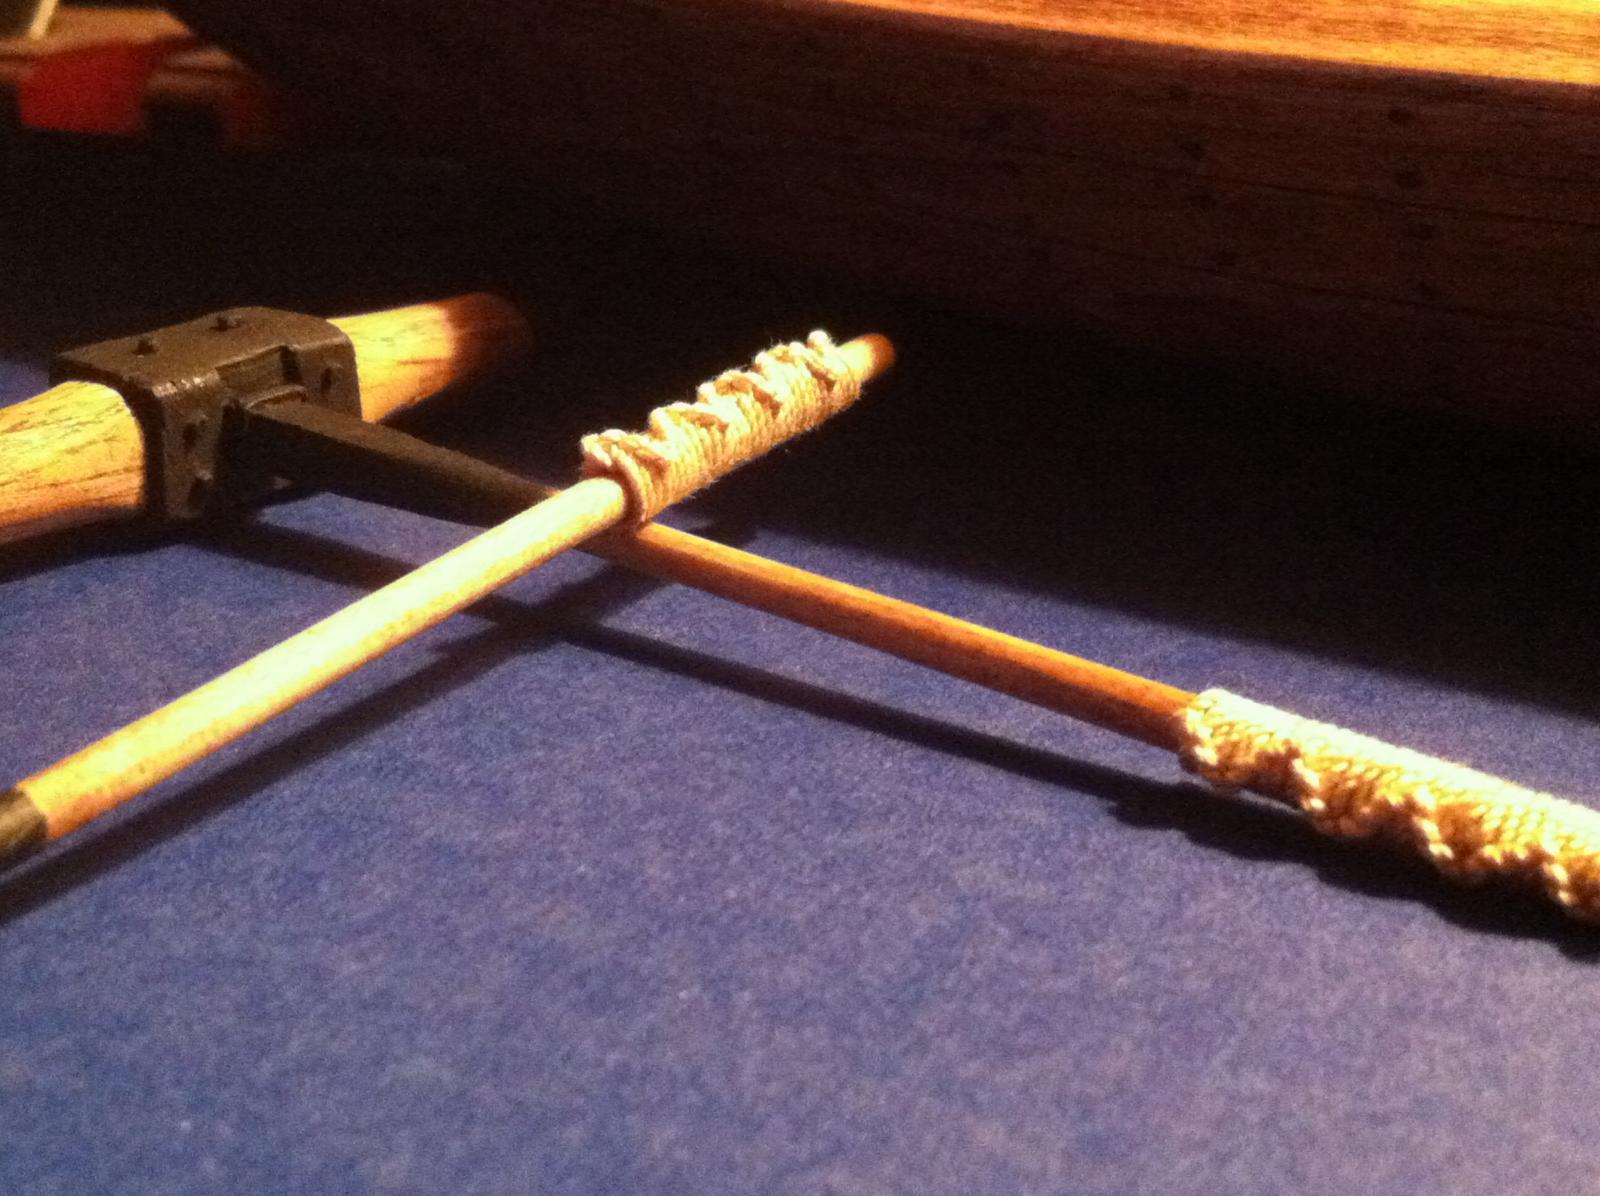
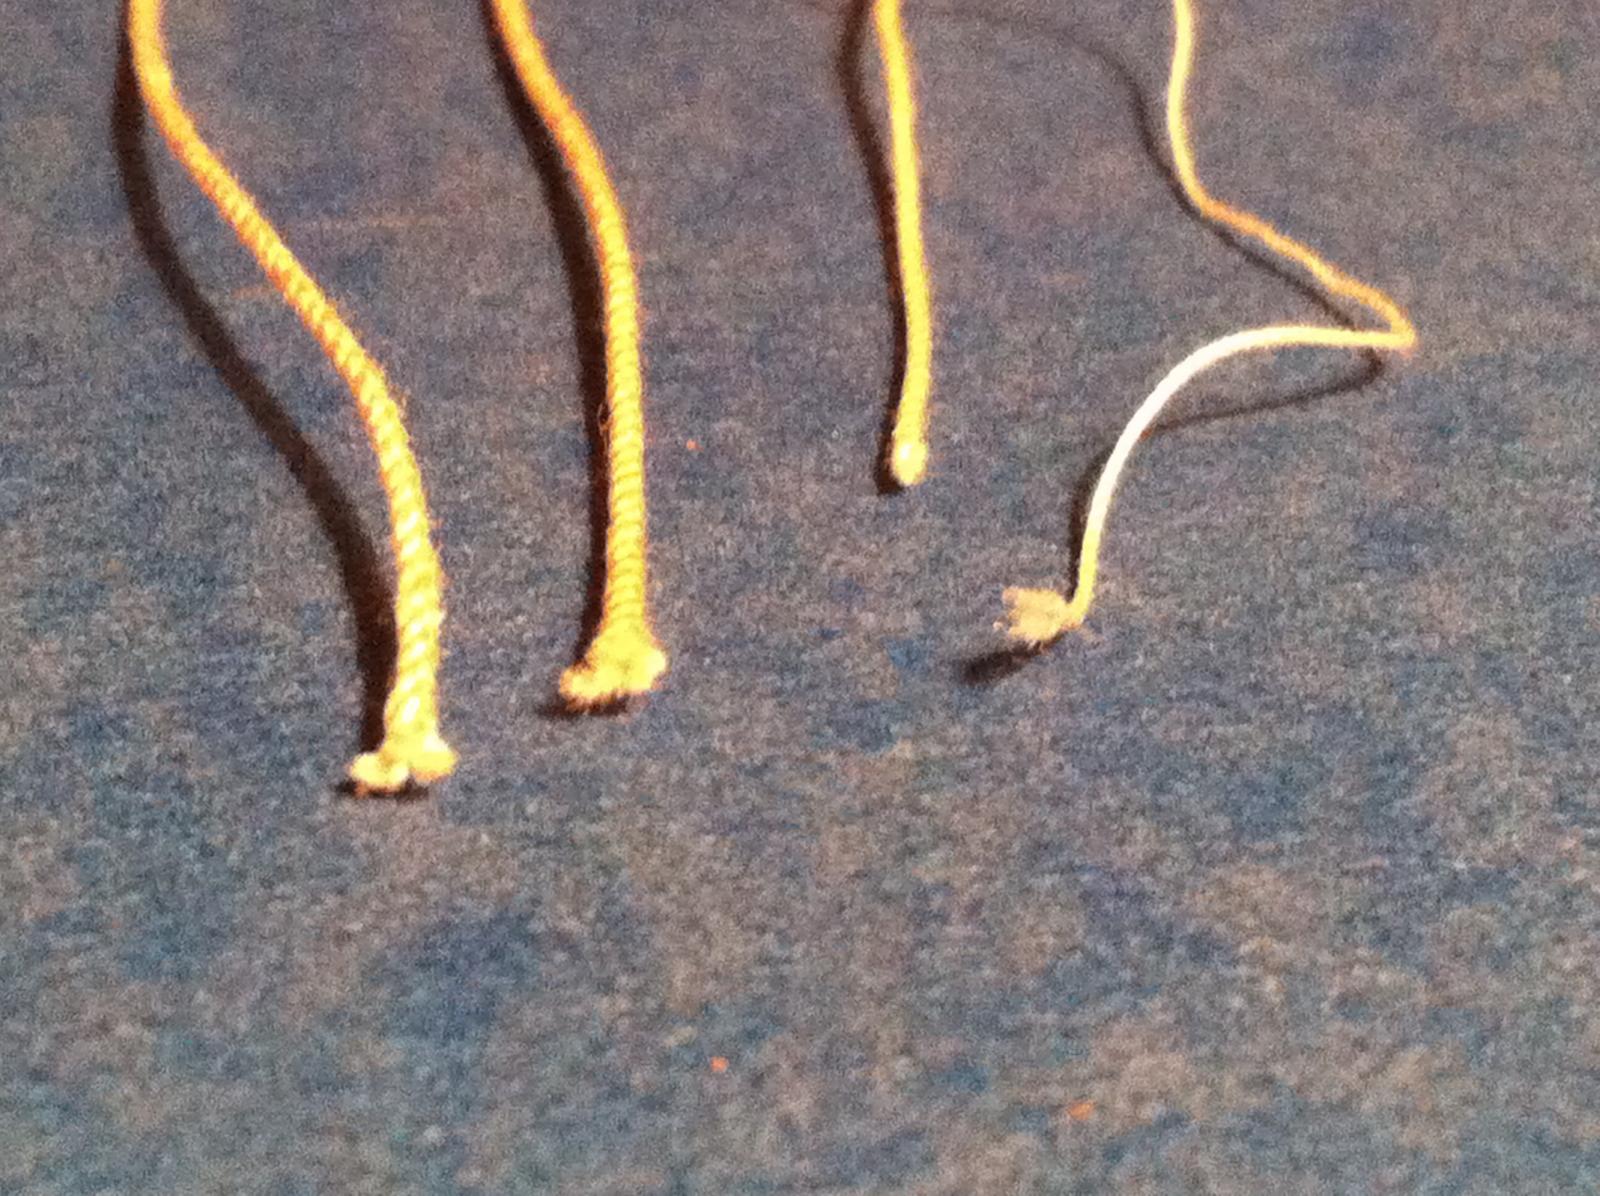
Well I did the whipping on the handspikes, not too thrilled. I change a French whip into 4 half hitches to the left then 4 to the right. I'm still surfin to find one that looks ok at this scale.
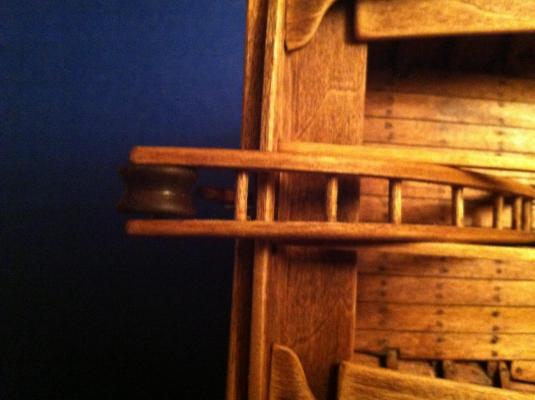
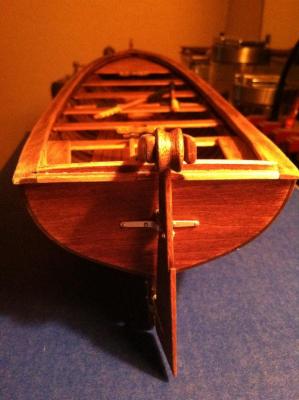
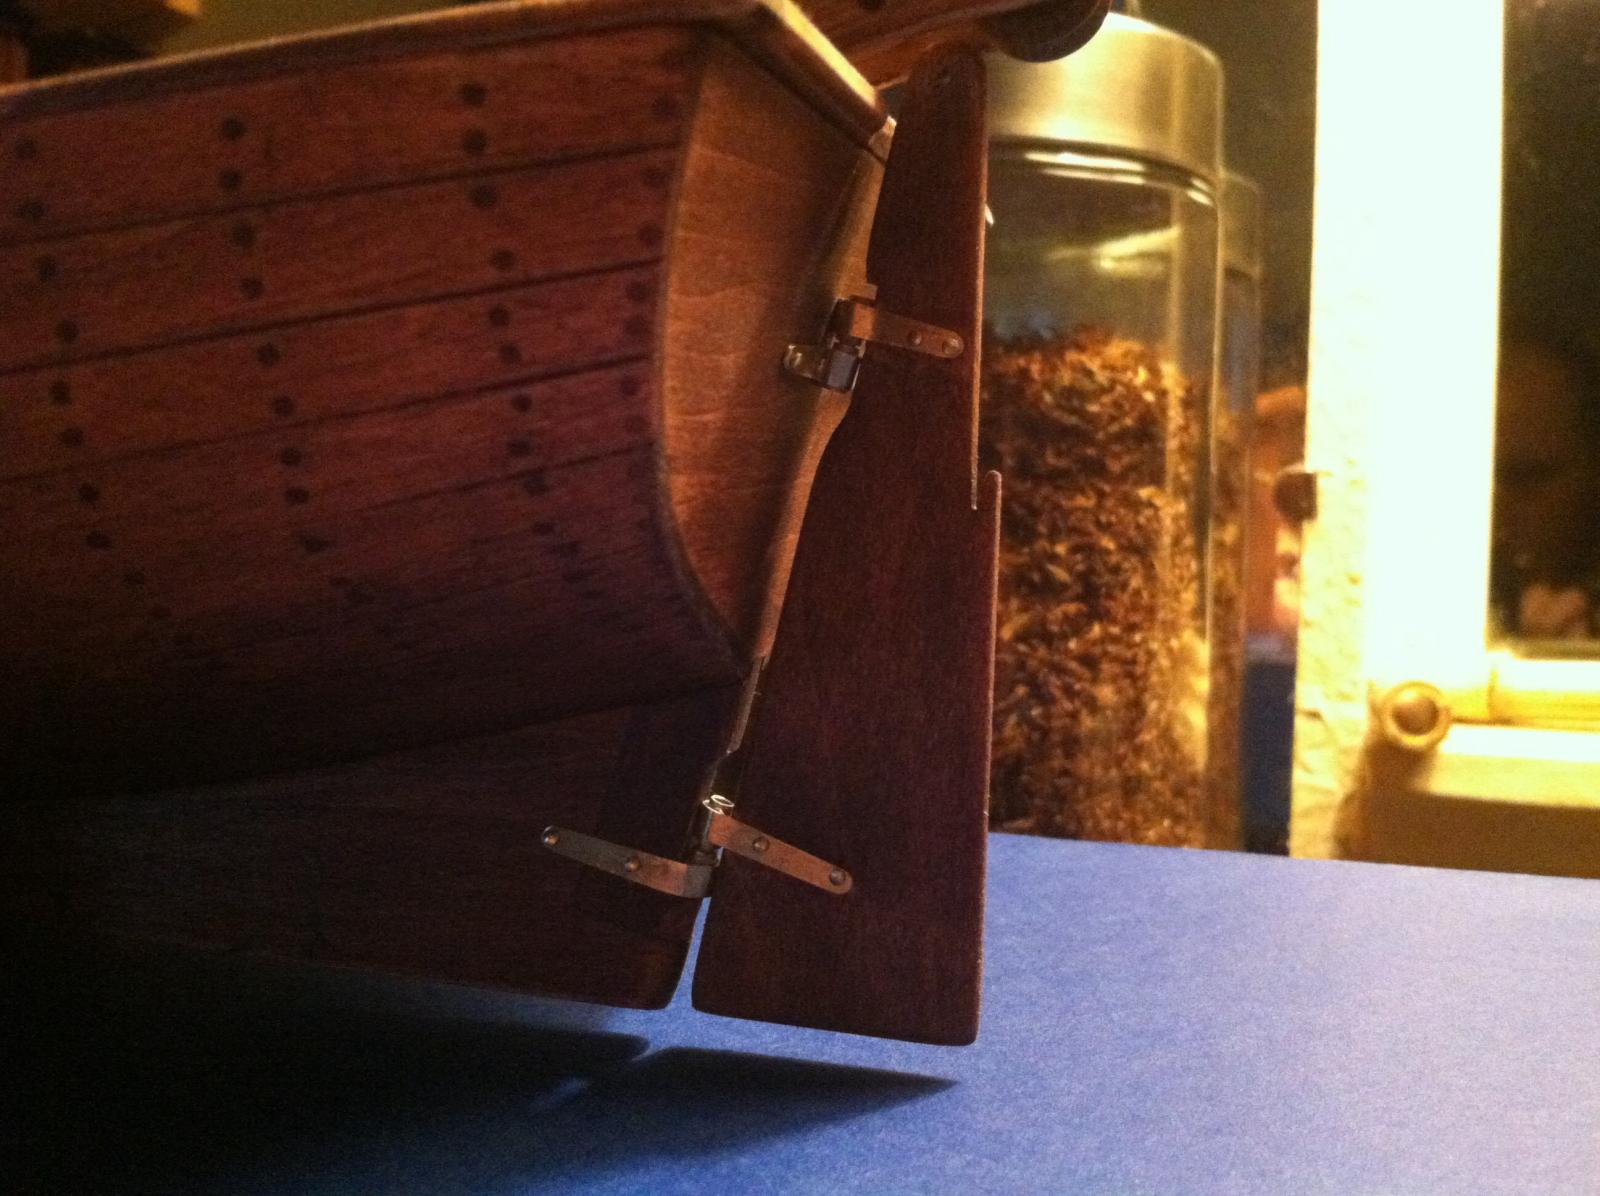
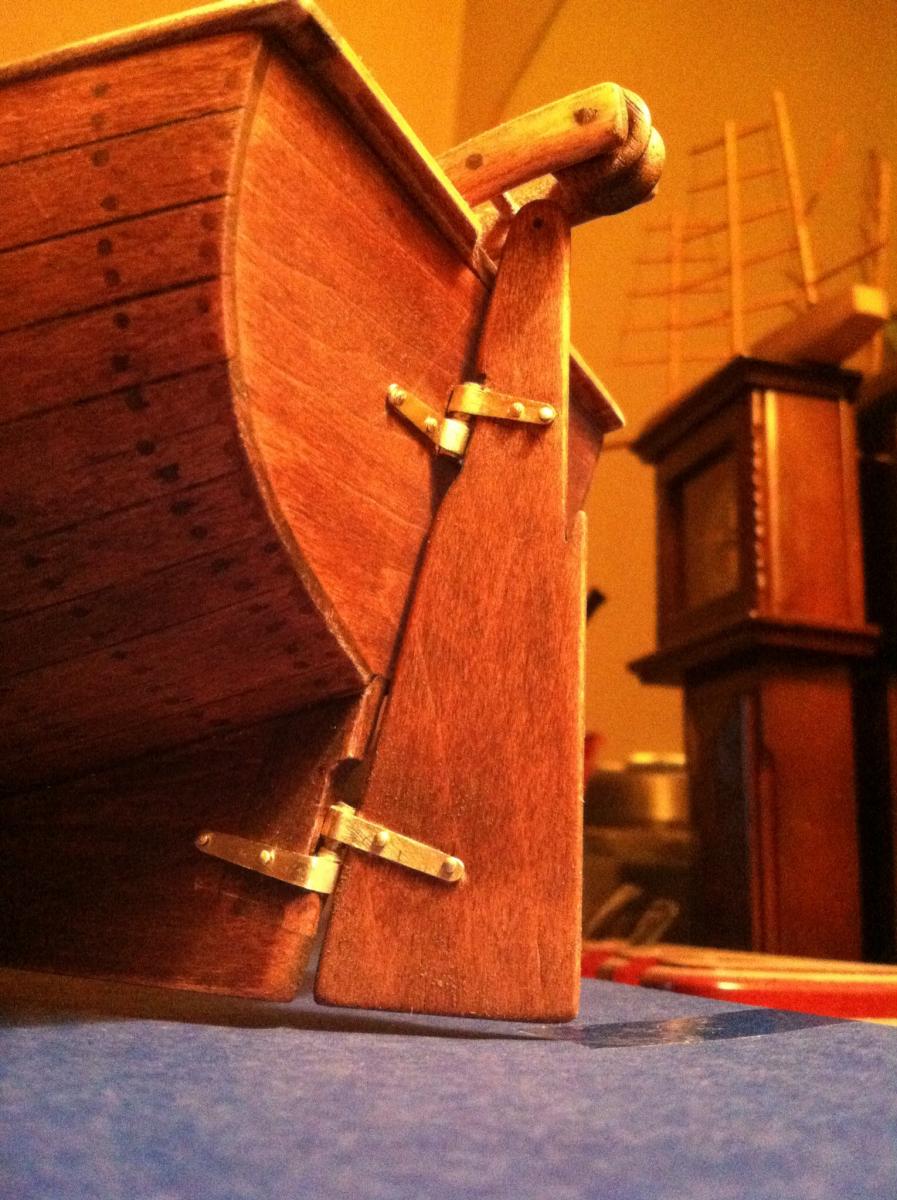
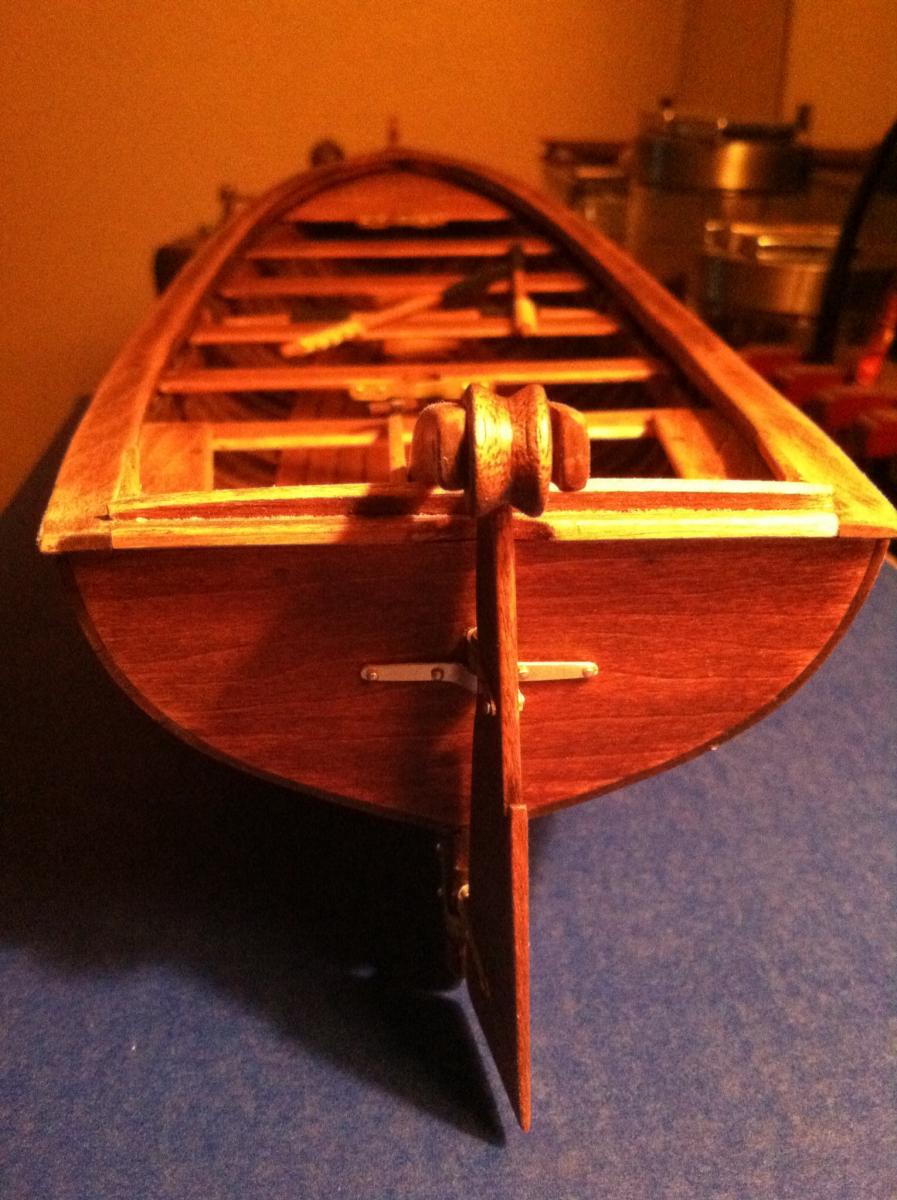
So today I shaped the rudder, made and installed pintles and gudgeons. I also finally made the stand so my rudder wouldn't get ruined. Still have to make the tiller and masts, then I go back to working on the more detailed pieces(contents of boat)
The rudder fit right in under the crane so the tiller will be off and stored onboard.
Hope everyone is having a good time during this holiday season.
Matt


-
Lookin forward to seeing how your boats comeing along. I'm sure it looks great Pops.
Matt
-
Well thanks CaptainSteve and Pops, and to All who have liked my posts.
Actually Pops, you gave me the idea of the handles going all the way through and I put the "iron" band stoppers, well, it just looked right.
I've also been looking up cord or rope whipping handles, so we'll see how they turn out. There are so many ways to do this so I'm trying to find some naval examples. I'm hoping to have this finished this eve.
Matt
The hand spikes on the plans don't seem long enough for good leverage. The old saying, "if you had a long enough stick, a man could lift the earth". Seems like the ships anchor would be pretty heavy.
- CaptainSteve, Salty Sea Dog, Canute and 1 other
-
 4
4
-
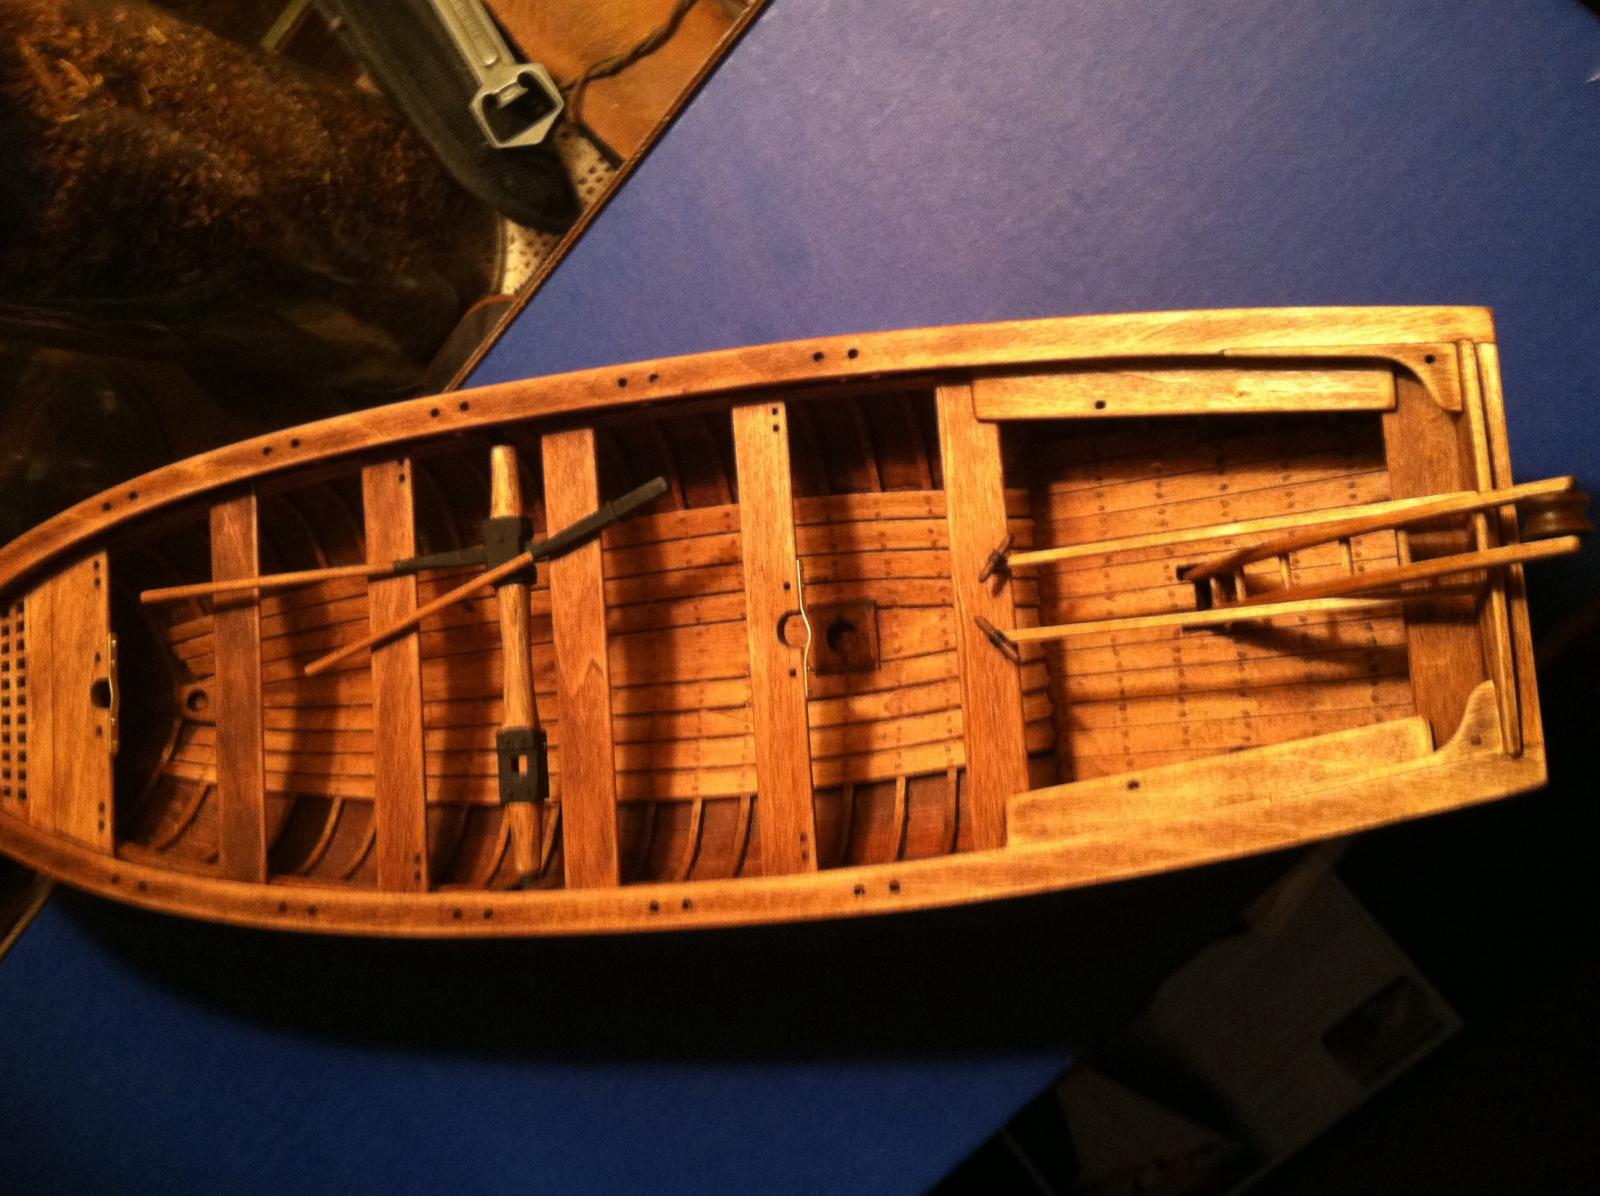
Well I finally got all the thwarts in. I had been waiting until the windlass and handles were complete to see if everything fit, and worked together. Looks a little more complete while I work on the tools.

- Canute, CaptainSteve and IgorSky
-
3
-
From what very little I've read, Bligh seems to be focused on surviving and getting home, for everyone on board. I can see if one of us got lost in the woods for weeks we'd write about the bear, or a salty, that almost got us, not the rash we got from the poison oak leaves that was used as TP. I think that's why I pay more attention to what's Not written.
The patch idea does seem to be a safer way because you could apply and take it of if you find it unsightly.
My wife almost had a heart attack when I mentioned I may age my boat by dragging it through the gravel in the yard, that idea is still in the back of my head.
Whatever you chose, I'm sure will look great.
Matt
- Nikiforos, JesseLee, CaptainSteve and 1 other
-
4
-
Yeah I had my heart skip a beat a few times during fairing, it's like prepin a car for a paint job, you'll be so glad you took your time when the planks start going on. Good luck!
If you haven't already, take the fairing past the sheer tabs, if you don't the frames can twist straight at the sheer line, which is real hard to fix later.
Matt
-
Hey CaptainSteve, I was wondering what if there was a strong enough wind gust to break, say one end of the spar, which caused a long tear in the sail? Wouldn't this cause two separate repairs, taking the skills of all to repair at sea? Could they do it, or crumble under the hopelessness settling into their minds?
Matt
- GLakie and CaptainSteve
-
2
-
Hey CaptainSteve,
I read the log book on fatefulvoyage.com I don't know if it reads any different than your copy. Let me know what you find.
Matt
-
Movin right along Ken, this is one phase that you can take some time on, it makes a huge difference when planking. Read instructions, I think it says not to fair transom and first three molds until after framing is done.
I look forward to seeing more photos, happy sanding!
Matt
-
Thanks CaptainSteve,
The day was April 30, 1789 in the Bounty log book where I read "I thought of making some improvements on my Boat on the Spot". It may have been a reorganization of supplies, what is your thoughts? I haven't read too far into the log yet, just trying to get a feel for the time. It said they also did some trading for spears, I hope I'm not reading too much into it, I'm just trying to think of what I would have taken from the island.
Oh yeah CaptainSteve, I thing Ken was trying to imitate your way of sailor talk, I think he thought his imitation was weak, not the chest:)
-
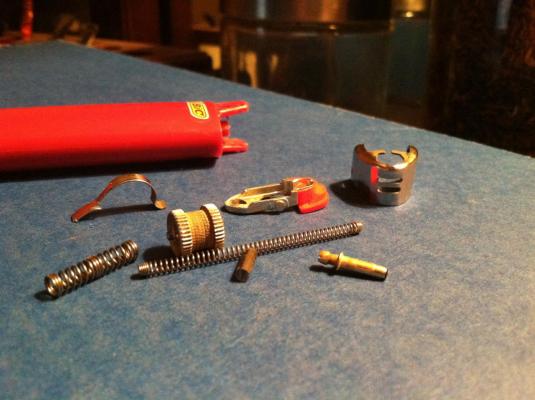
DISECTED EMPTY BIC LIGHTER / FINE CROCHET THREAD(side 3 to100/color ecru)
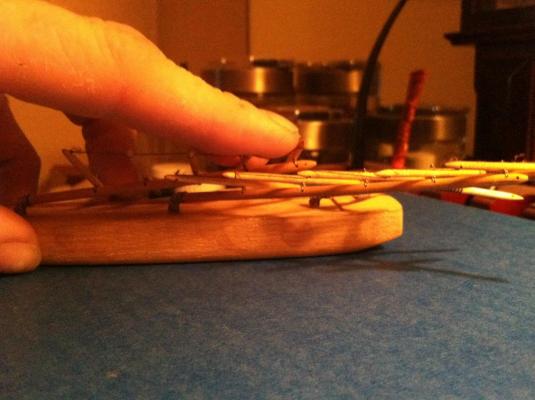
The masts on a ship in a bottle use a form hinge to "flatten" masts to fit thru bottle neck. Cut masts and place spring to rejoin masts, flatten out and incert into bottle.
The part where fuel comes out I used for belay pins(1:24)
The fine crochet(6 cord/mercerized) use for lines and sailmaking. Wax will dark thread, could be stained to your liking.
Great topic CaptainSteve, Matt.


-
Thanks Ken and Pops. I've been reading Bligh's log book to get a feel for what was on the boat. The fact that they spent a few days on an island where they obtained items for boat repairs makes the wheels turn wondering what exactly did they take?
I must read on.
Matt
-
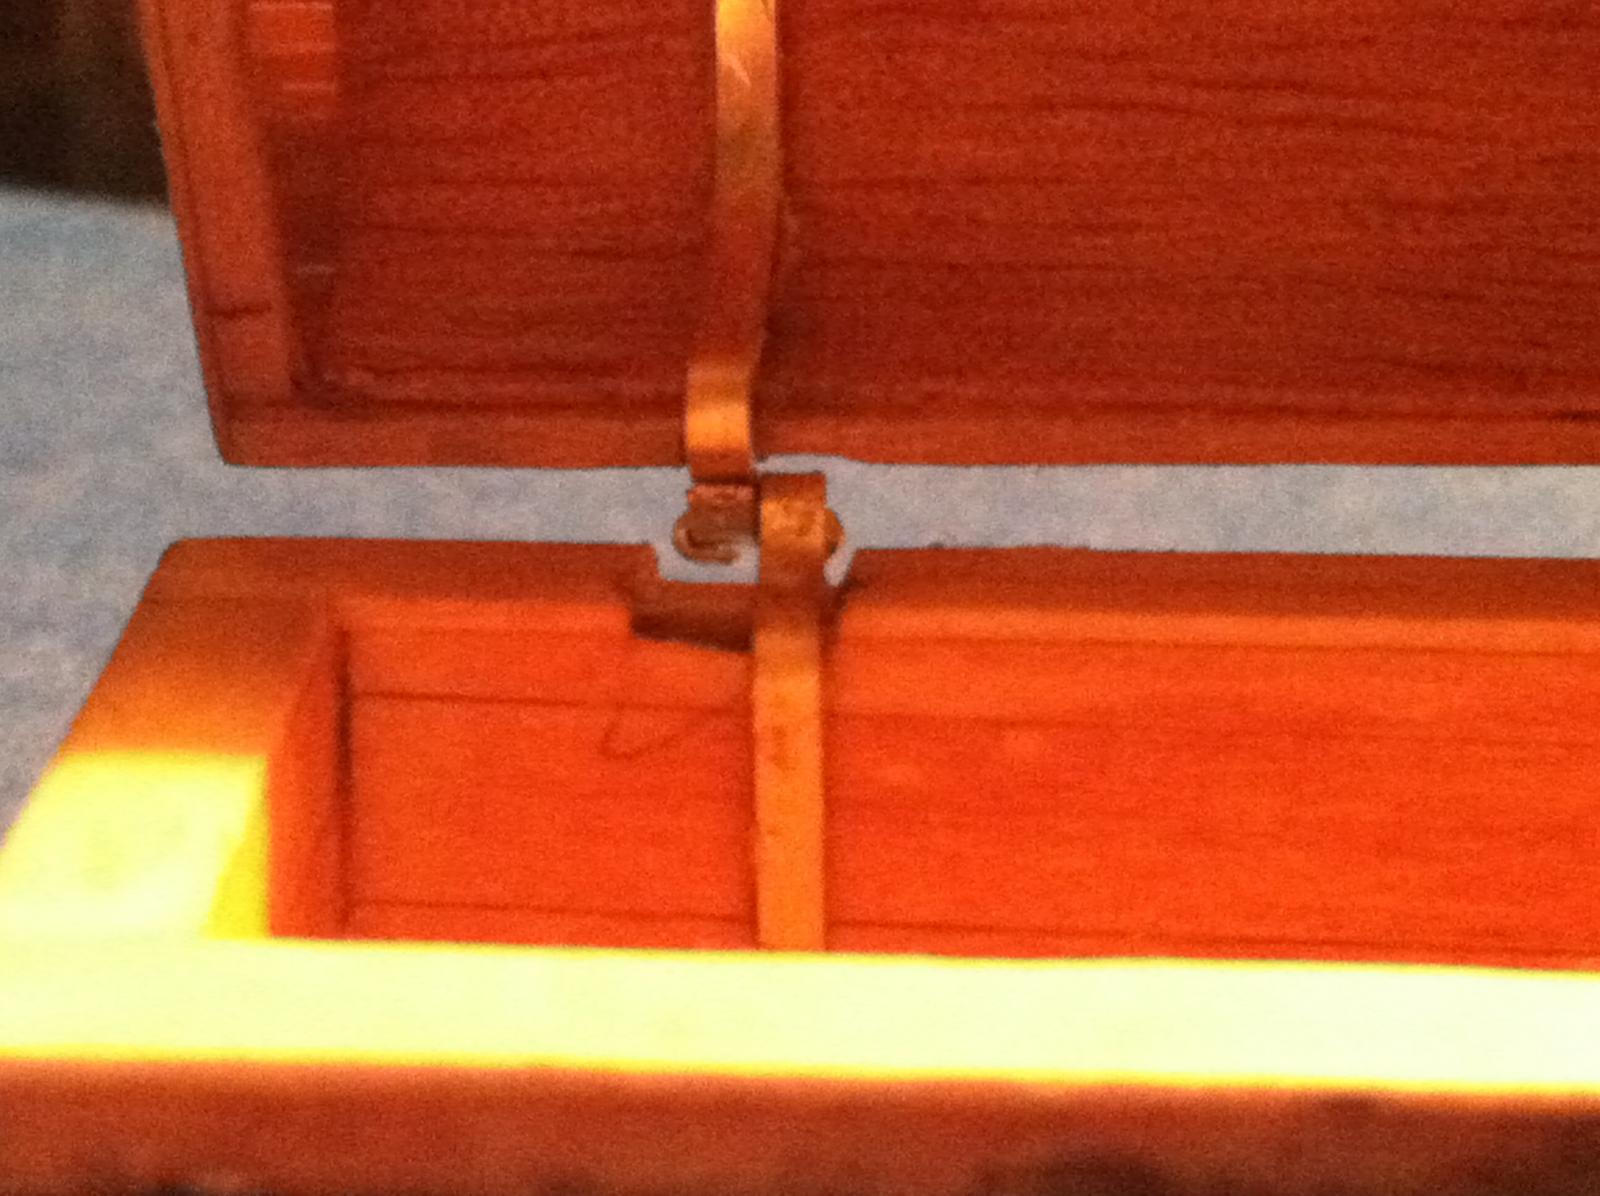
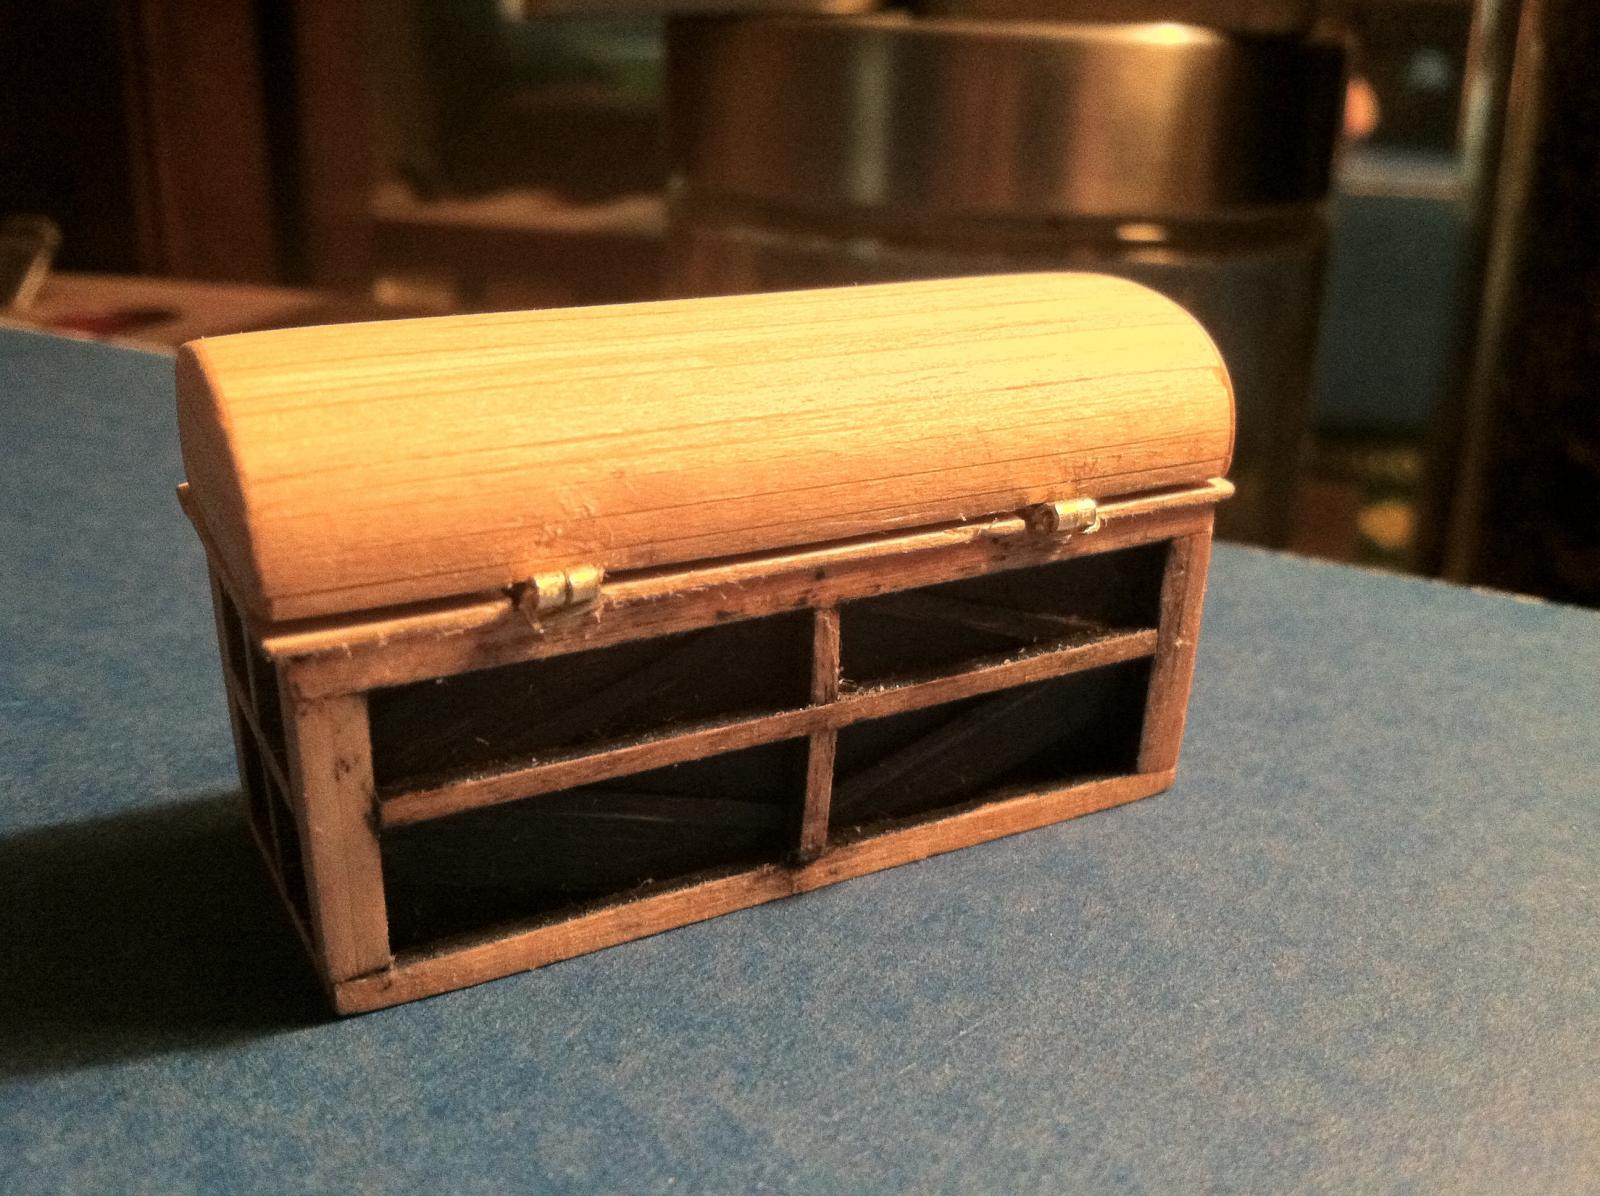
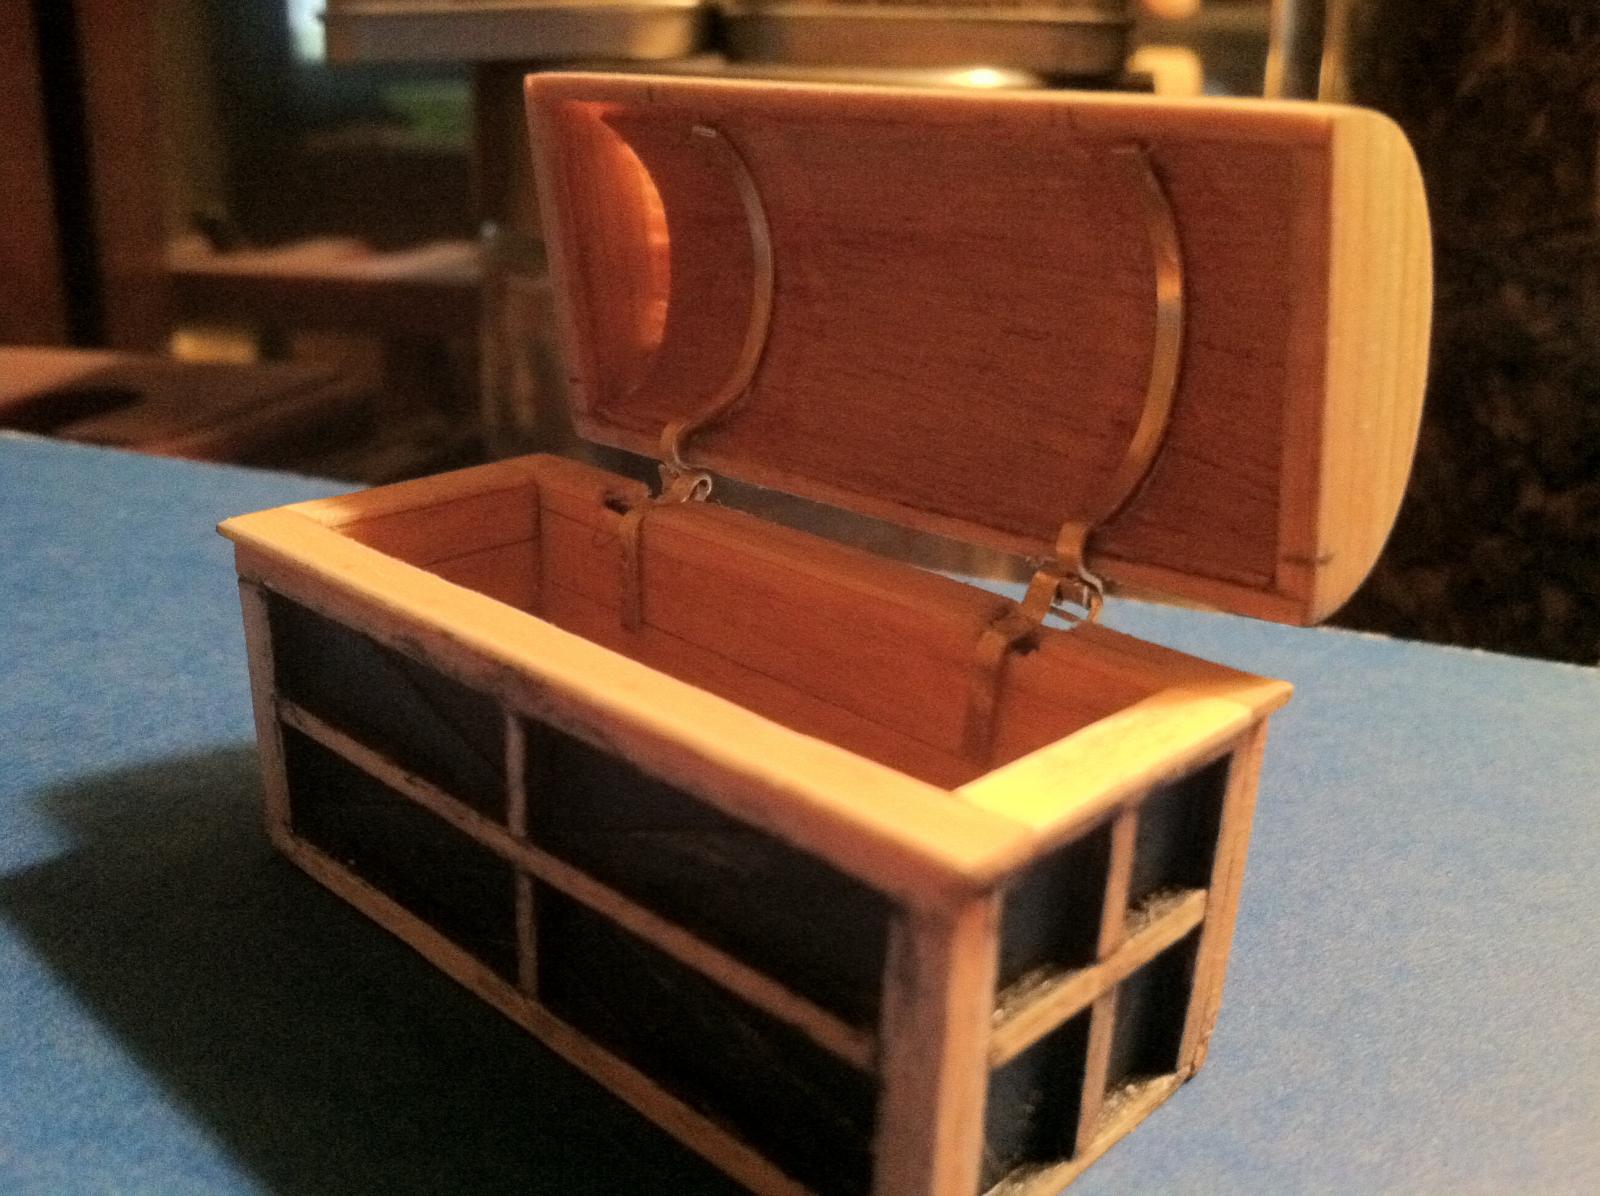
Merry Christmas everyone!
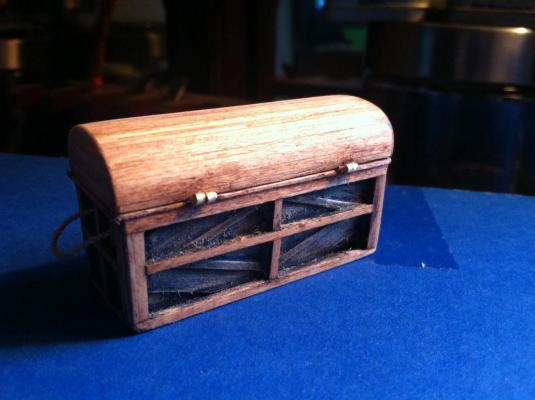
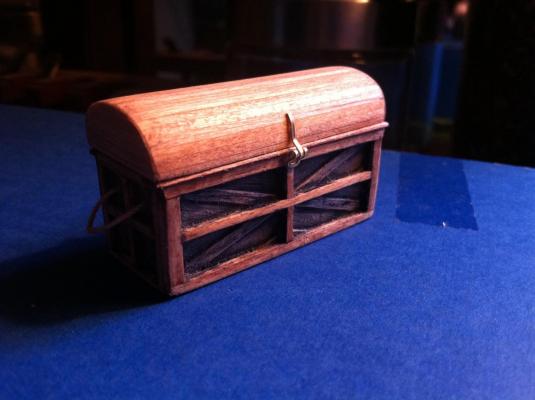
After several experiments went amuck, I finally caught the squirrel that was running around in my head and made him tell me the solution to the "working hinge challenge".
The final chest was aged and fit for public viewing. Now it's time for tools.


- CaptainSteve, IgorSky, GuntherMT and 4 others
-
7
-
Hey Jerry, looks awesome! I just got my Half Moon yesterday and excited to start it. May be awhile, now I have three more after my current build.
Have a happy and safe holiday week.
Matt
-
Hey Captain, I did the same with my sails(coffee), not as weathered as I'd like, maybe tobacco tea?
I actually thought of tying it to my bumper for a week or so, let me know how you're coming along. Your sails look great.
Matt
- CaptainSteve and mtaylor
-
2
-
Hey Ken, I added extra bracers as well. I like to work on my lap, so I added more than most so I wouldn't crush it.
Also take your time when fairing, I would start in the middle to get a feel for it since it takes very little compared to the ends.
Also I'd put a big sticky note that says "WAX!" I had tacked on the ends of the frames to the jig, when I realized I forgot to WAX between frames and jig, that would have been a nightmare.
Good luck and ask away we're all here to help.
Matt
PS: I soaked my frames a or two before I planed on the bending them.
-
Well thank you CaptainSteve you are too kind. Well I whipped this one together last night, a little rough, it still needs some fine tuning. I have a couple other idea I'm gonna try out tonite after work. And yes, it actually does work! Yeah!
Matt
- CaptainSteve, Dimitris71 and dgbot
-
3
-
Thanks Ken, I'm really enjoying this build and trying not to go too far out in left field. I'm trying to put myself on the boat back then. What do I have, what do I wish I had?
Matt
-
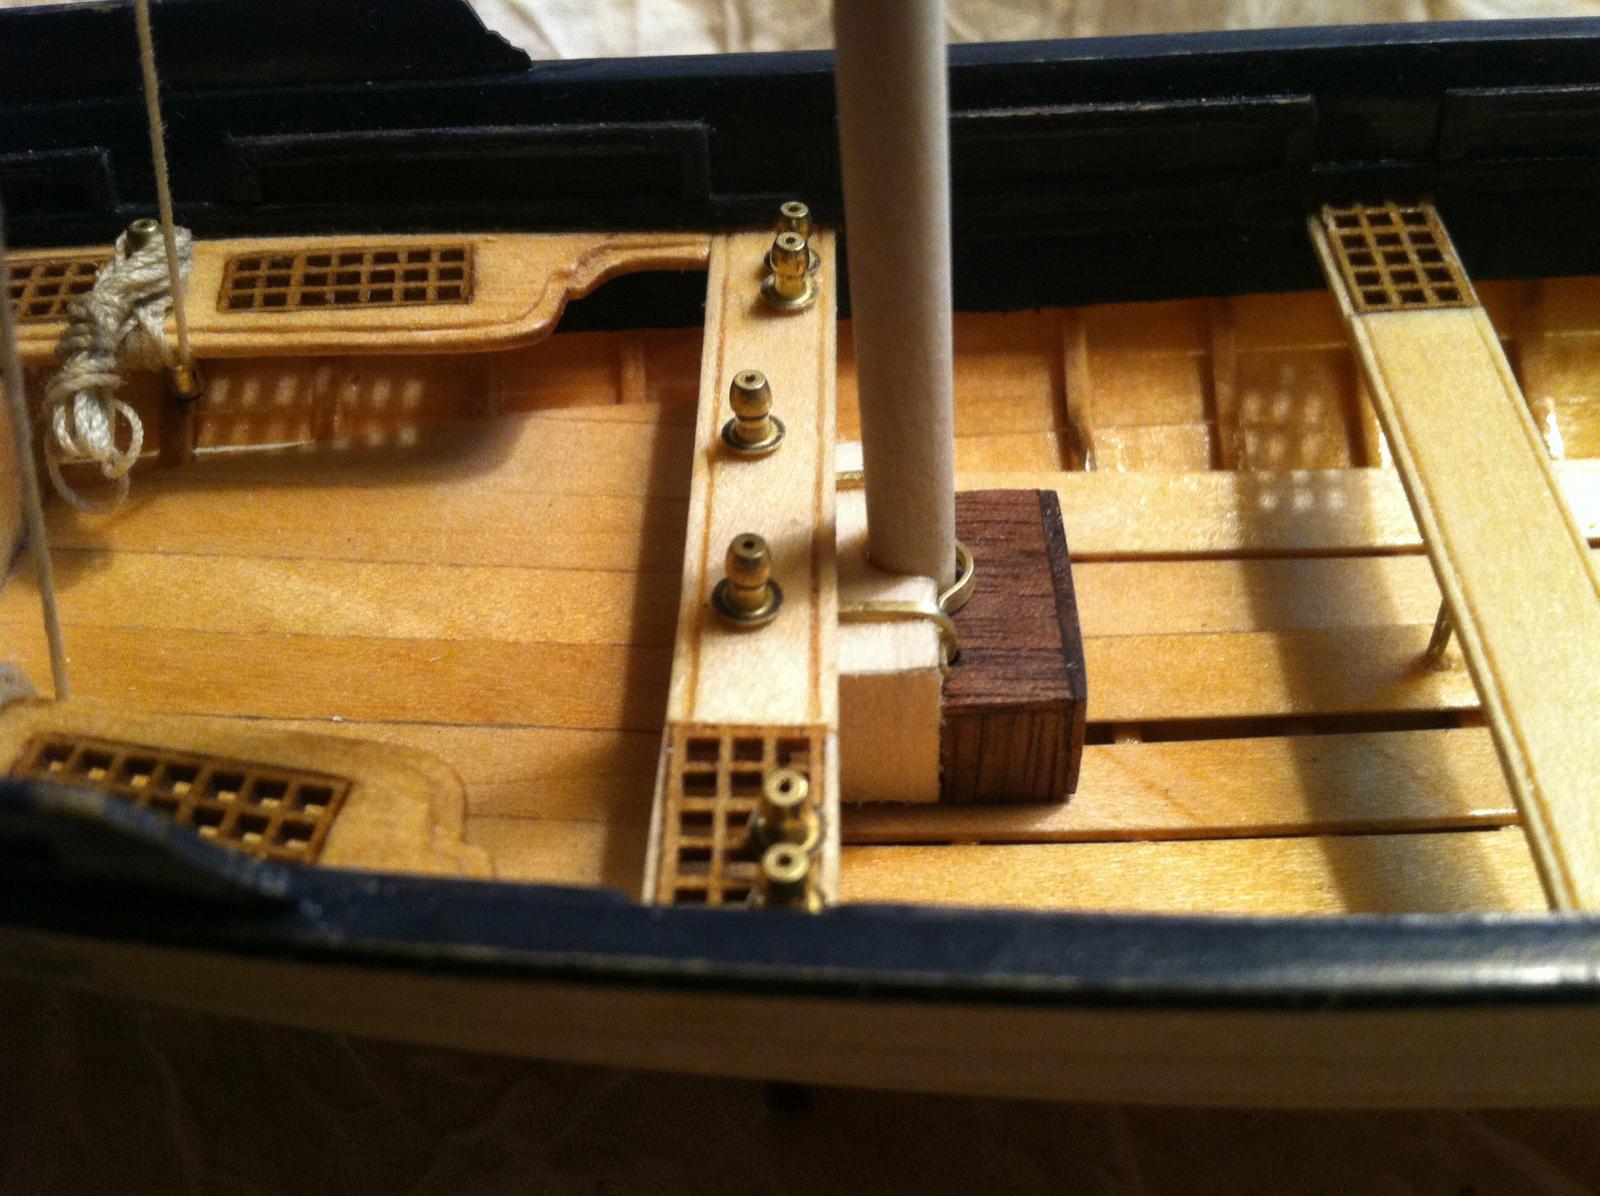
Thanks CaptainSteve, the winch and braces were made from 1/32 basswood strips laminated in a semi-circle, first with white glue then heavy dose of CA on the edges(overkill) but very strong now.
And thanks for the reminders, and I would call me OCD not master.
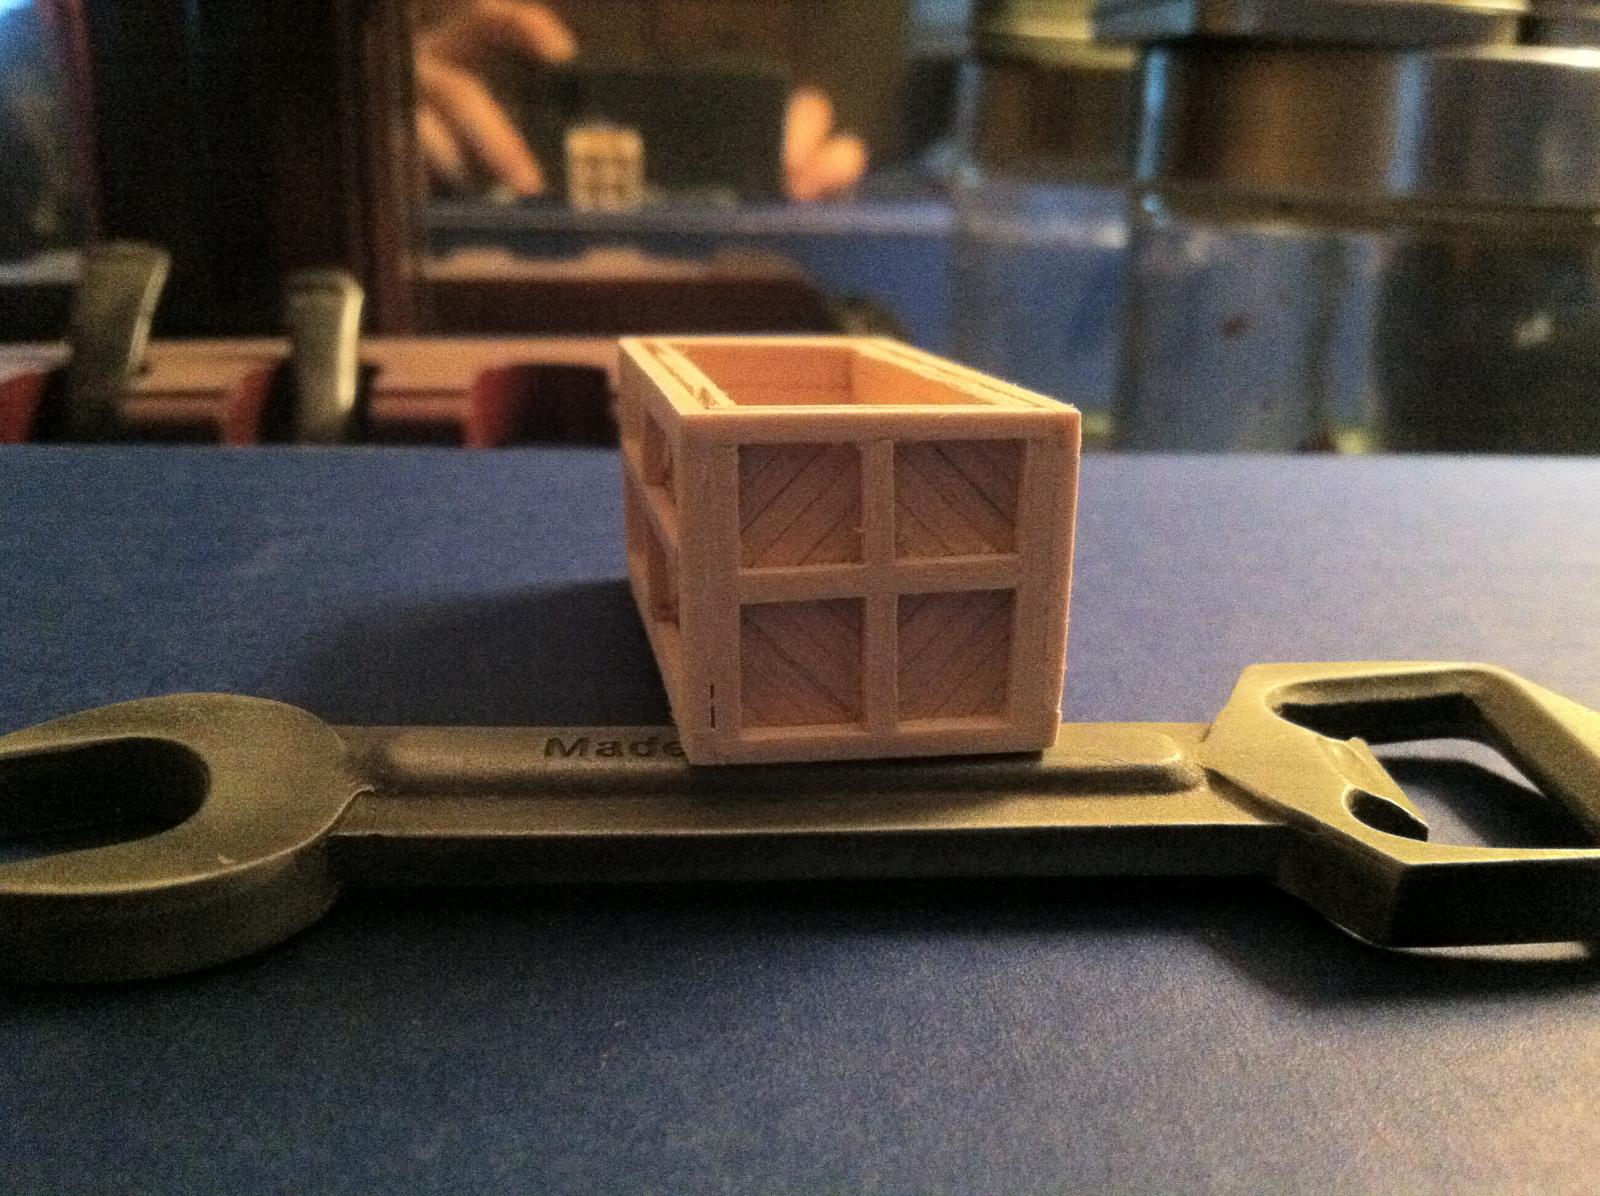
I googled 18th century travel trunk images to get a feel for how unique they were and just started fiddling, I've got more junk for this trunk.
Thanks again CaptainSteve
Matt
-
Thank you every one for all the likes.
Hey Pops, I think the biggest part of it was the size and positioning of the bolts. I took off the first two attempts before I got the size to look "correct", I ended up using 1/32 x 1/32 basswood stock and just dipped the ends in CA glue, held em in place for a couple seconds then snipped really close. Also I had to sand well(before the bolts), yet selective, keeping the sides and area around the holes square and the rest rounded. Then taped off and painted flat black. Hope that helps.
-
-
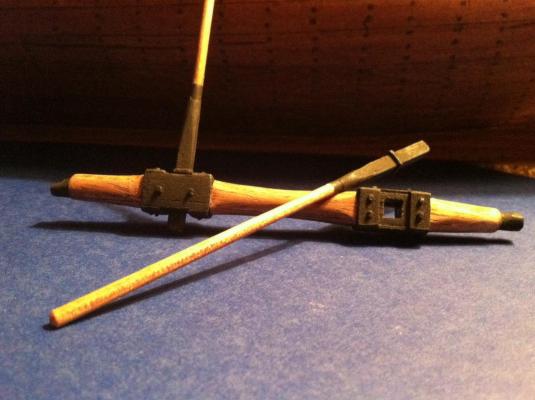
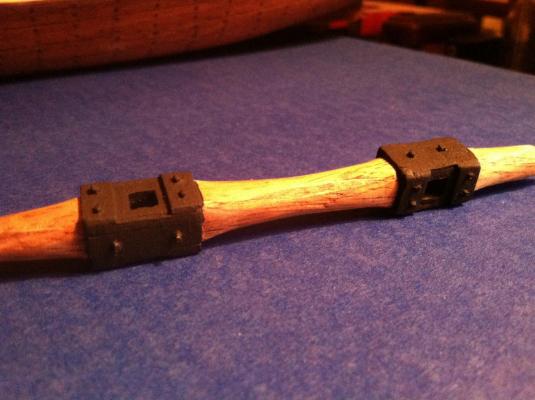
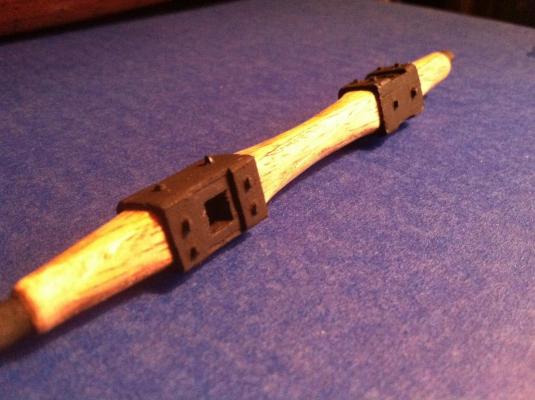
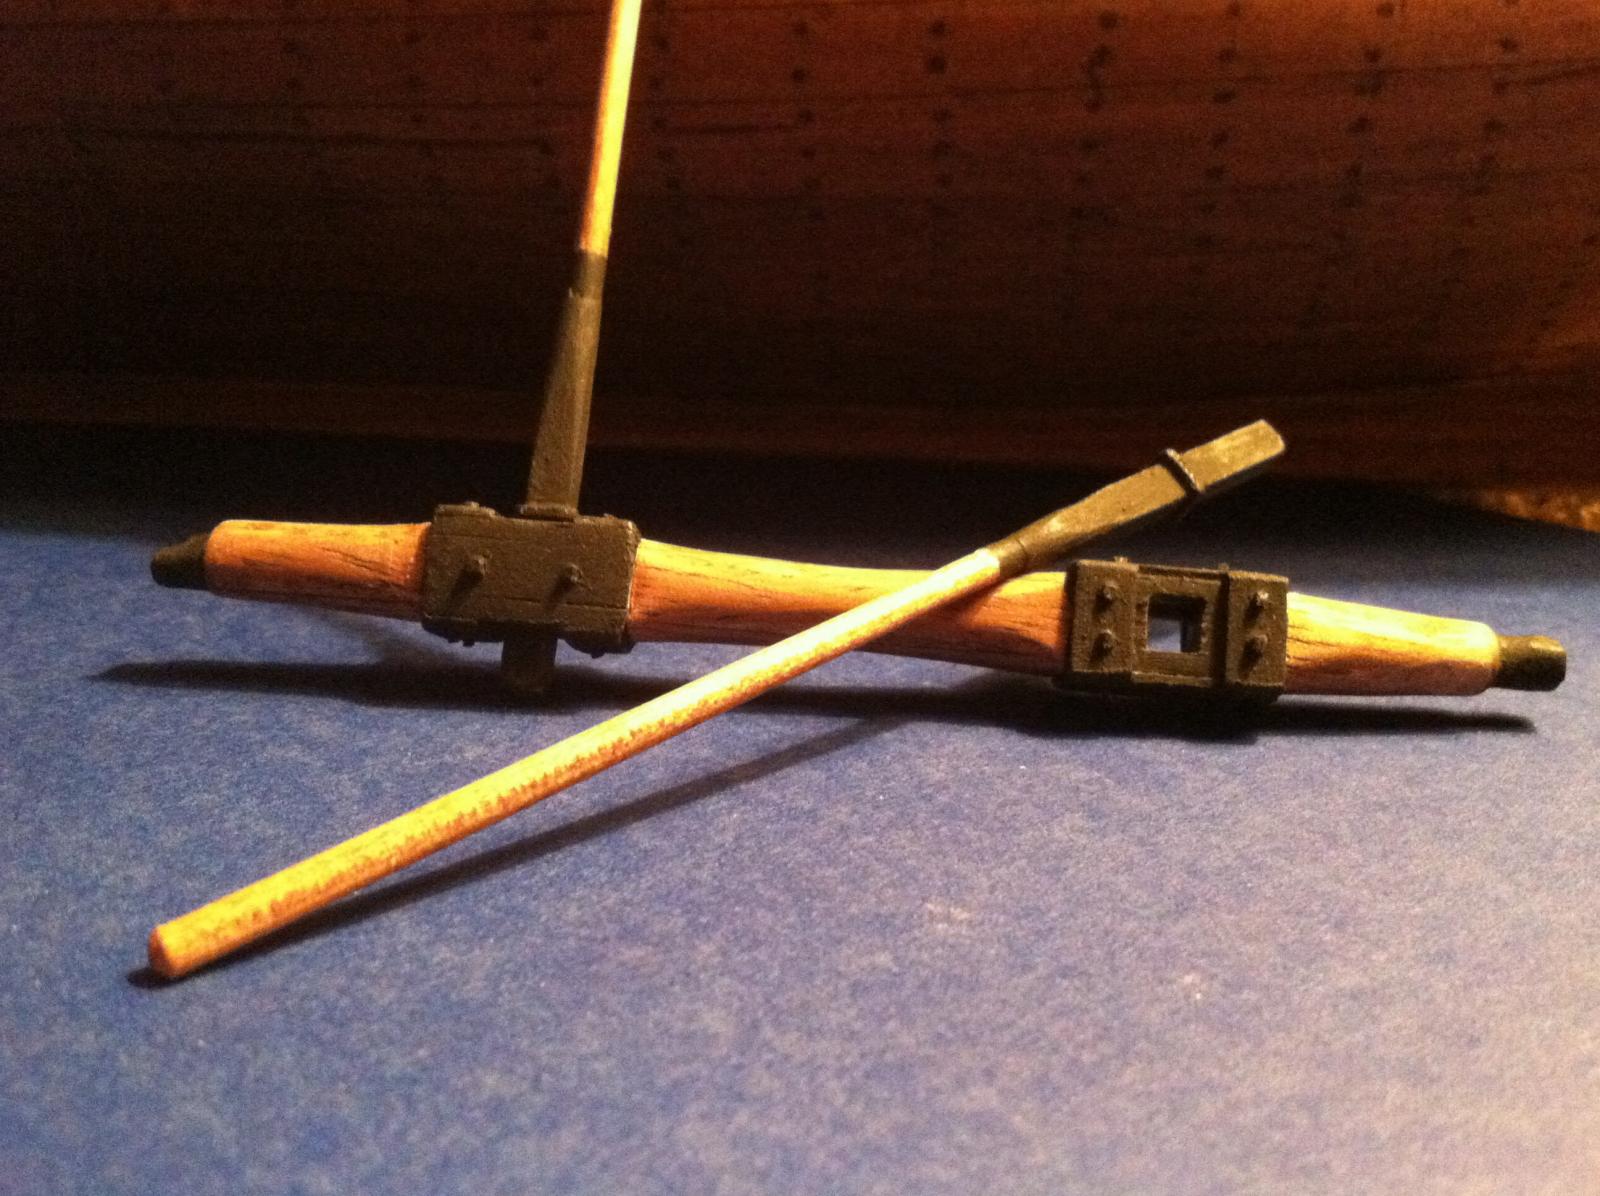
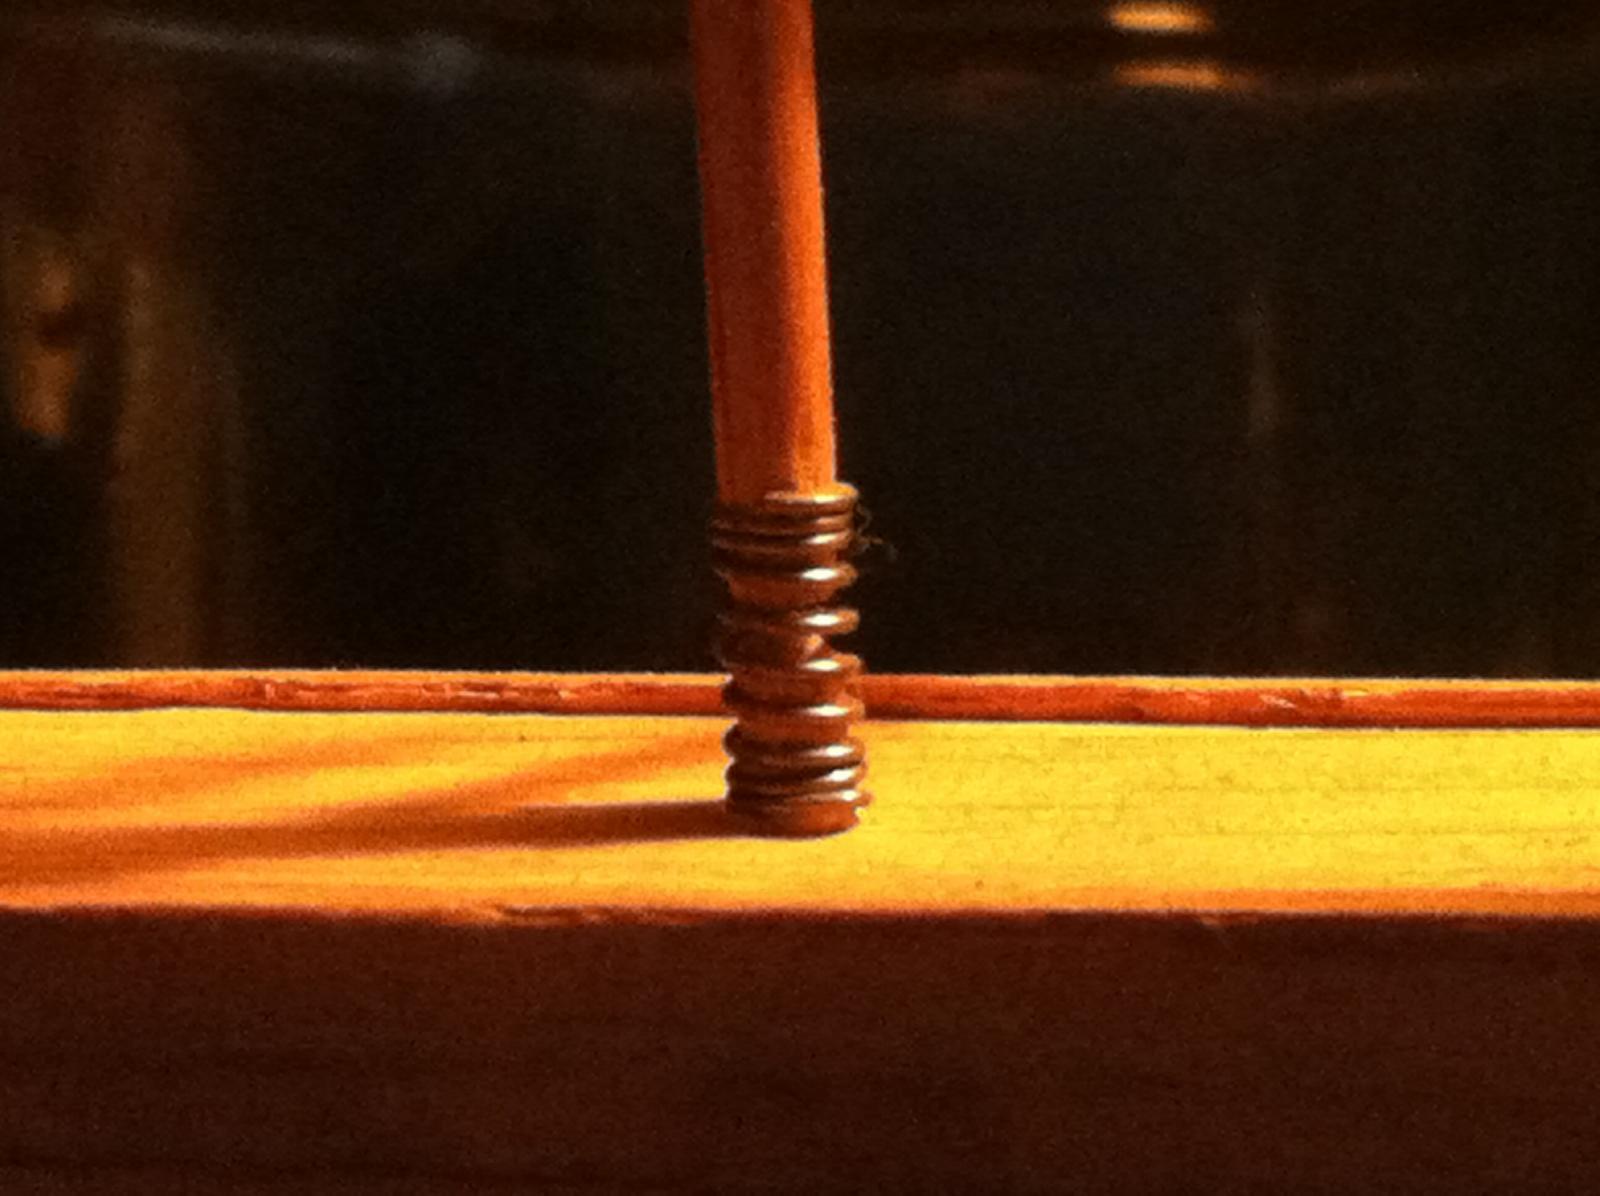
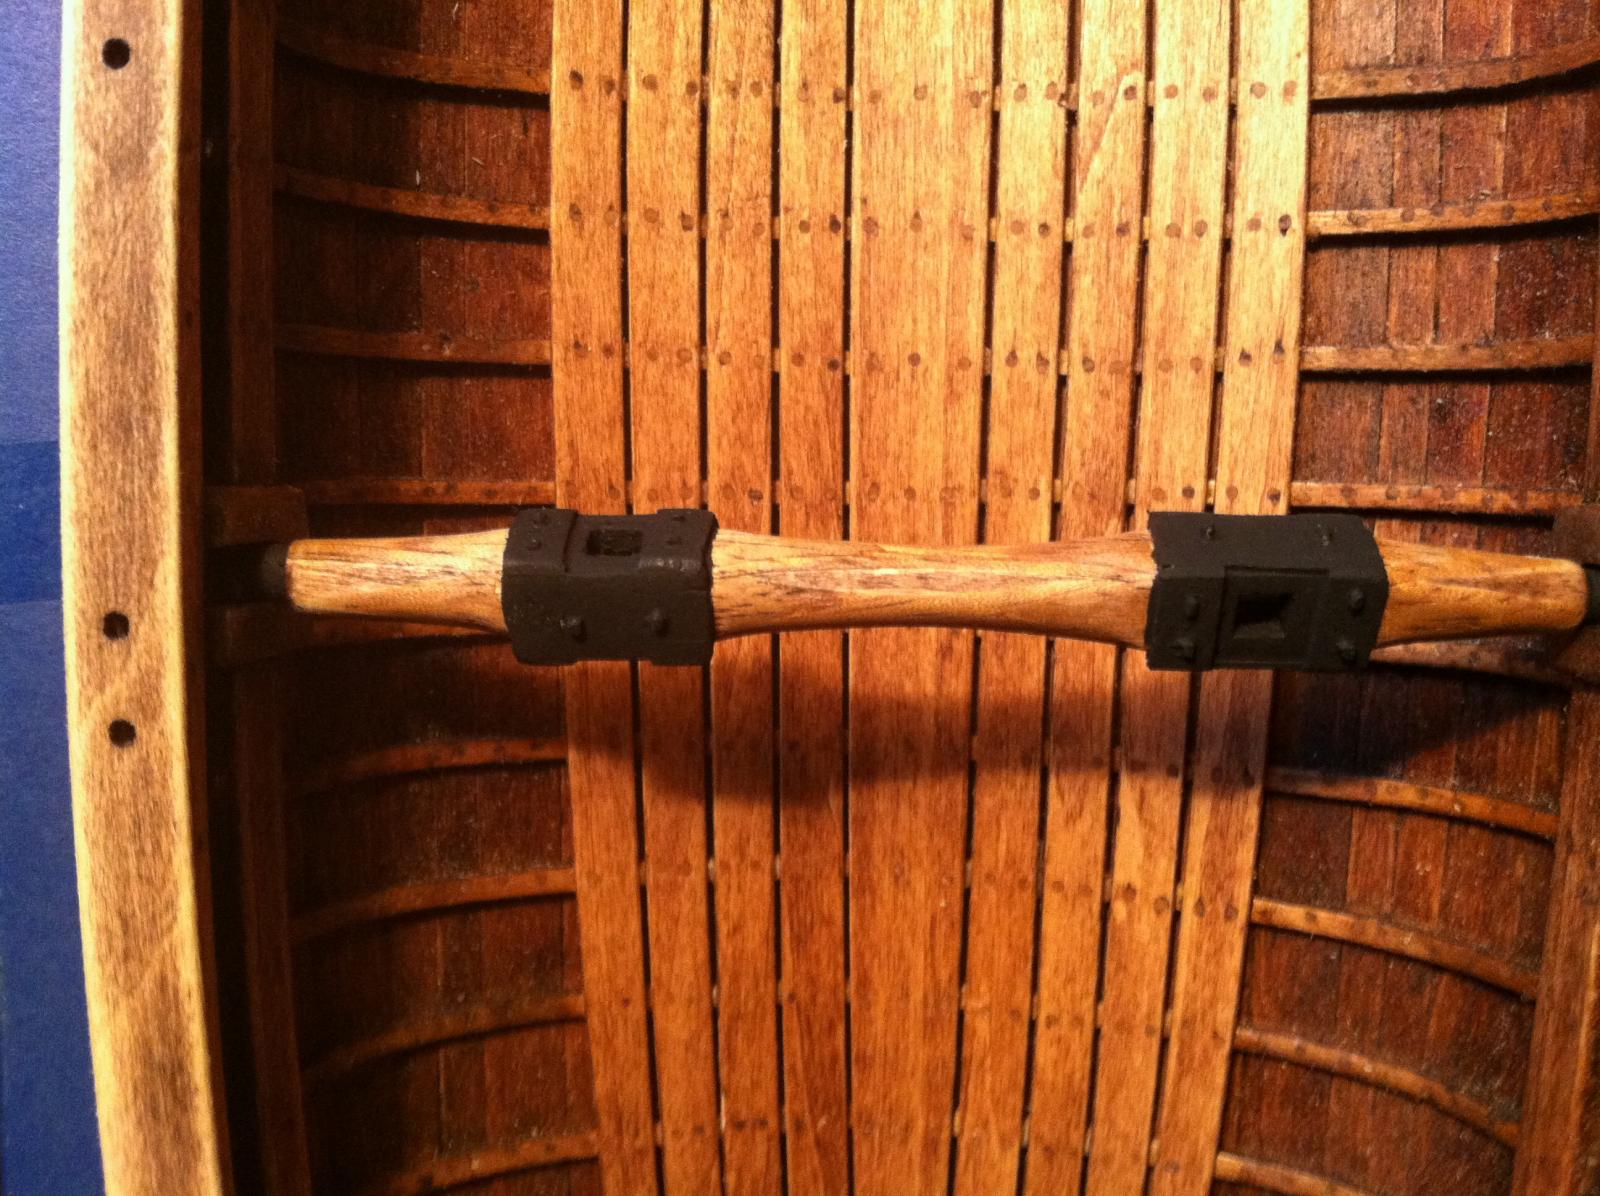
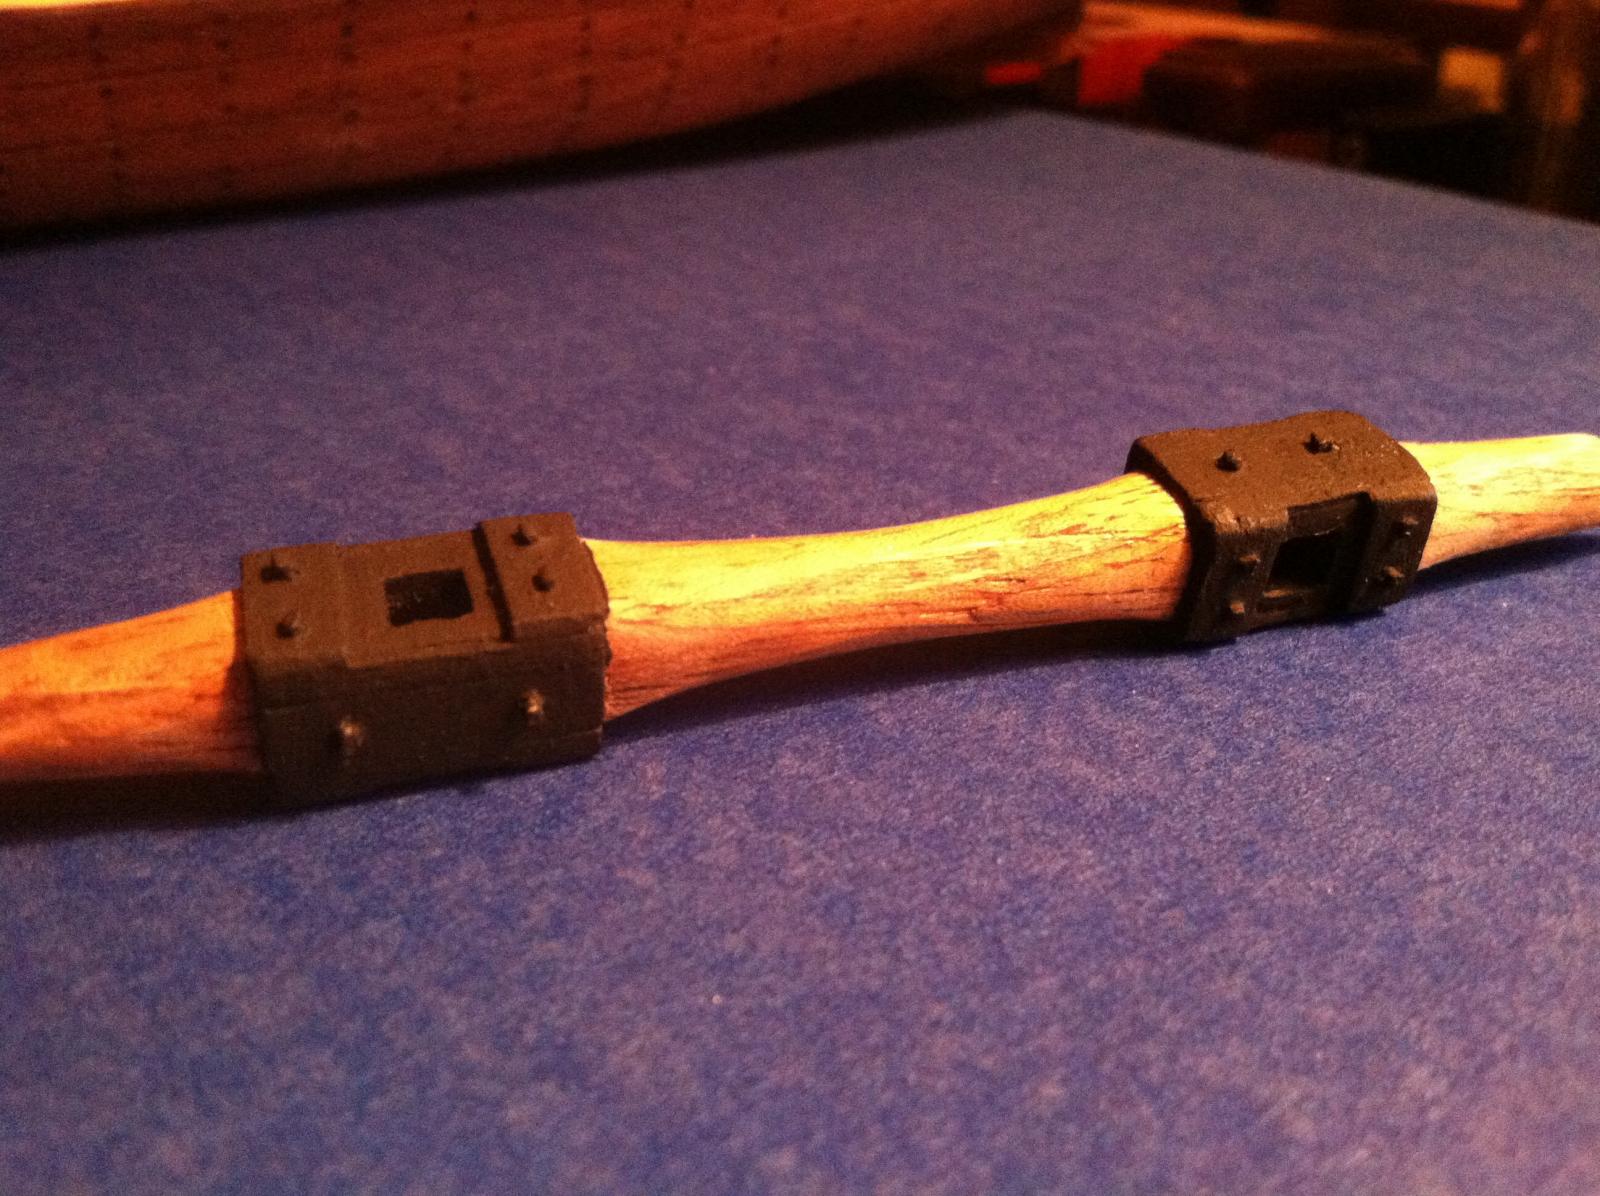
Well I came up with this addition to my windlass to make it look stronger. It seems to look ok?

-
Well I came up with this addition to my windlass to make it look stronger. It seems to look ok?


HMS Bounty Launch by mattsayers148 - FINISHED - Model Shipways - scale 1:16 - SMALL
in - Kit build logs for subjects built from 1751 - 1800
Posted
Thanks CaptainSteve and Ken. I searched for hours for knots and instructions for cord or rope whipping. I came up with this one, and only after completion did I think to search YouTube. Search "paracord" and bam, a whole slough naval examples and information about presentation naval oars that are absolutely incredible! So I still have the oars to get a little crazy with.
I was at the hobby shop Saturday and found these little grab bags of different size and shapes of brass tubing. Only three bucks! Saved a lot of time with the pintles and gudgeons!
Matt