


mattsayers148
-
Posts
685 -
Joined
-
Last visited
Content Type
Profiles
Forums
Gallery
Events
Posts posted by mattsayers148
-
-
Thanks to everyone for all the likes.
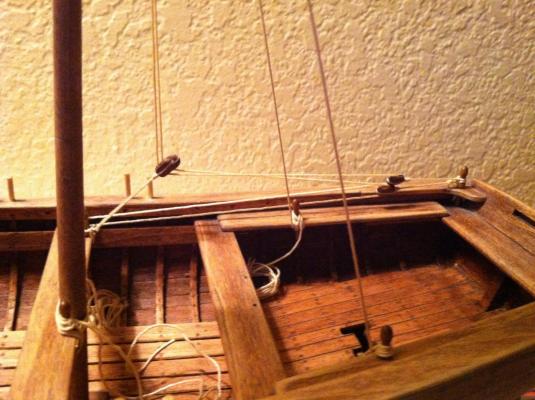
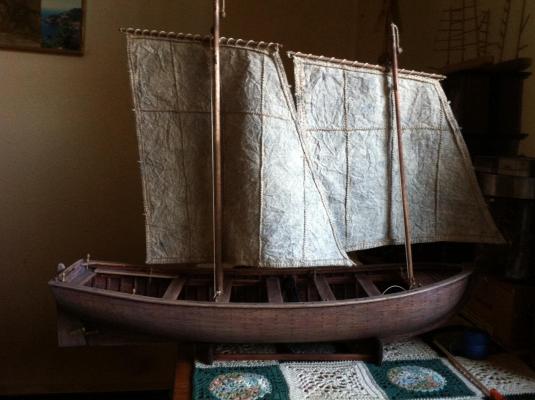
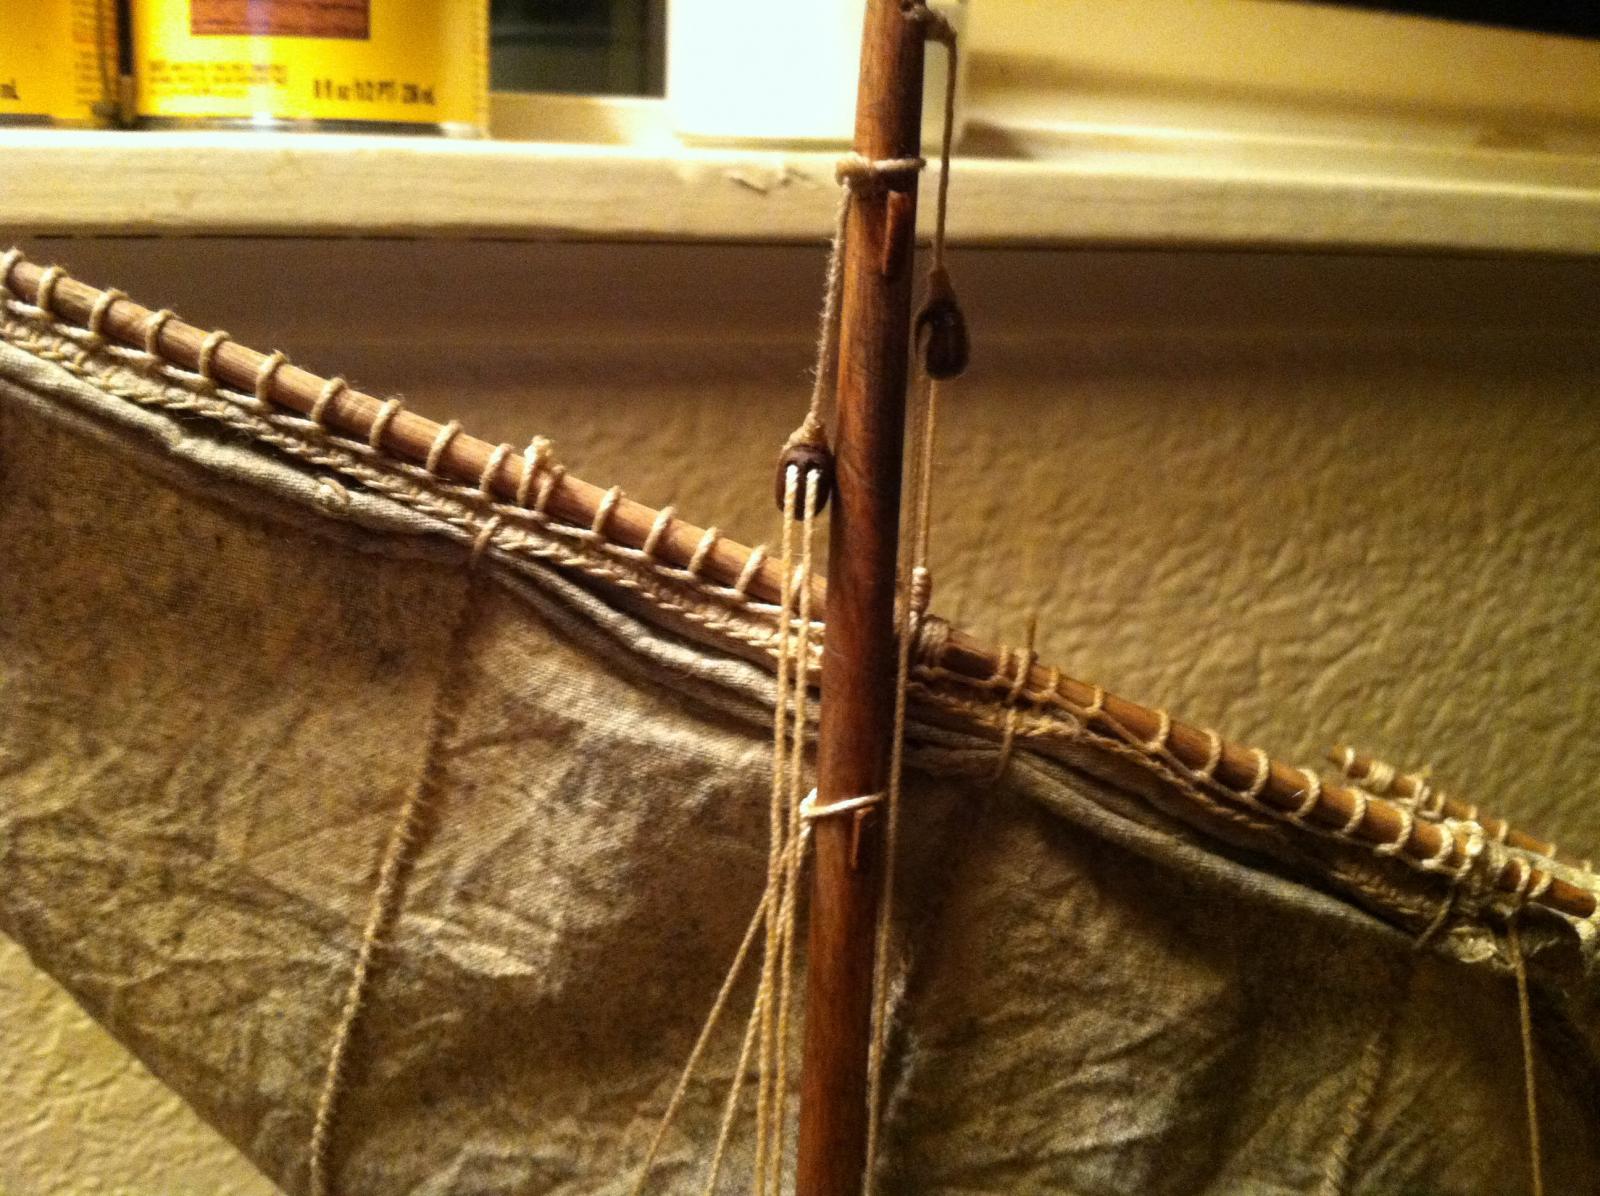
So I finished my rigging...I think. I spent too much time think, so I grabbed my rope and let the squirrels out. As seen, I went with connecting lower corners of sail to a double block on the mast.
Then I ran the lines through two sets of single blocks and back to the rear mast thwart. I may change around the pulley setup a bit, but for now I think that's it.
Matt


- Cap'n Rat Fink, GuntherMT, Keith_W and 5 others
-
 8
8
-
Hey Cathead,
Looking really nice. I don't know if you checked out the Kitbashers guide, but I put a picture if K & S 320 assorted metal pieces. You can get these packs for a couple bucks on eBay and get them in about a week. I was able to sift through the pieces and find everything for the pintles and gudgeons without making any cuts. There's an endless use for these, same with CaptainSteve's steampunk gears(also found on eBay).
Matt
-
Thanks to everyone for the likes.
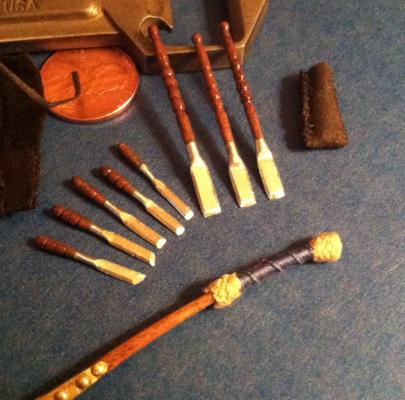
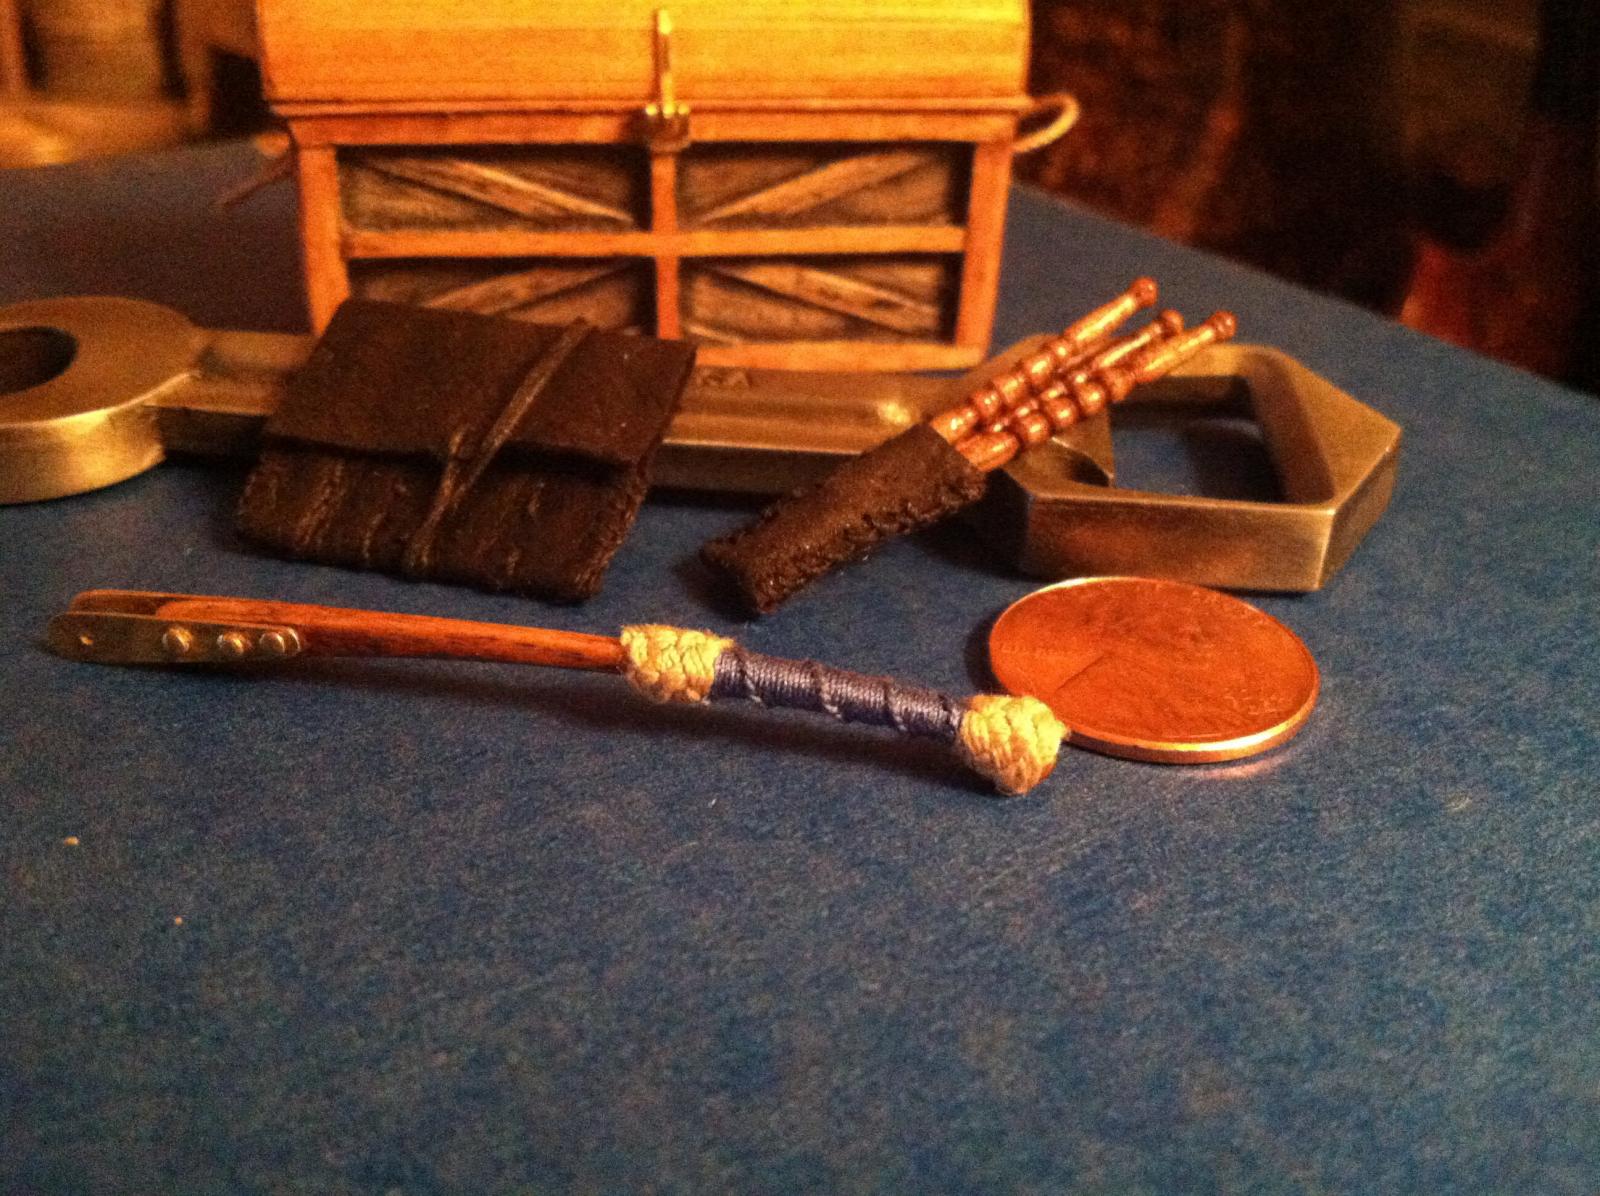
After getting my 3.25X glasses, I was able to do the turning much better. After I did the five chisels, the three large slicks I had previously made looked like crap. So I remade them and gave them their own pouch. Also, I finished whipping my tiller, and yes, that's it for the whipping.
I'm currently working on the oarlocks(rowlocks), barrels and more tools.

-
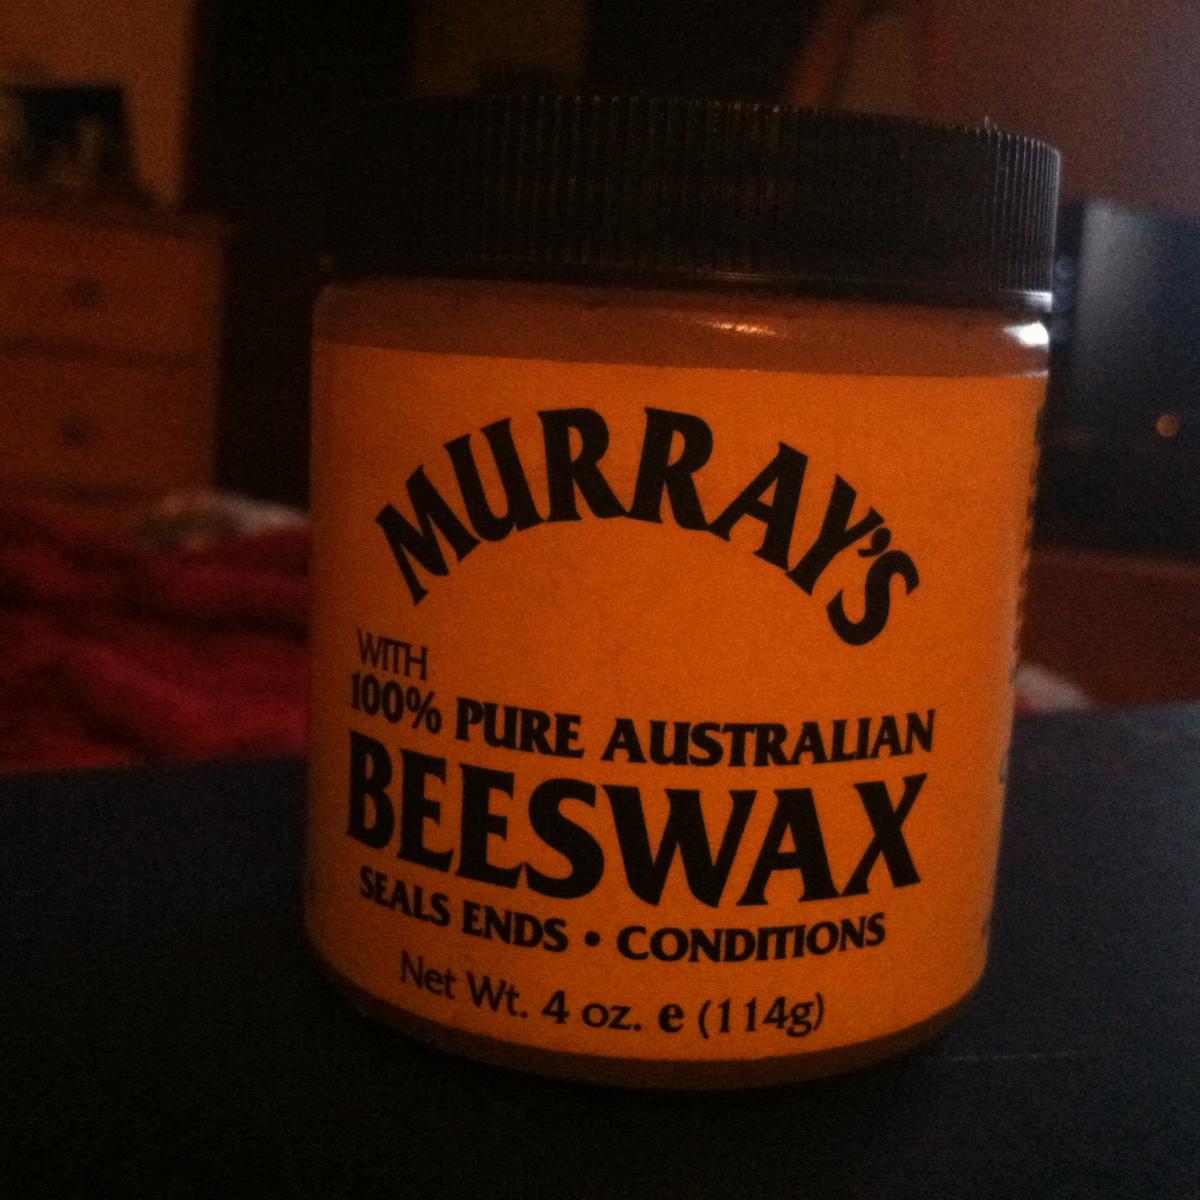
BEES WAX
Uses: everywhere
I've noticed that a lot of people weren't able to obtain just beeswax and had to improvise. As the label shows, it's from CaptainSteve backyard. If you live in a racially mixed area of town, either go to a salon or a large store in the area and look for ethnic or black hair care products. This is where beeswax can be found. You may not find this brand but there should be some brand of wax. It was only a couple bucks, but it'll go a long way.
Matt

- CaptainSteve, GLakie and hornet
-
3
-
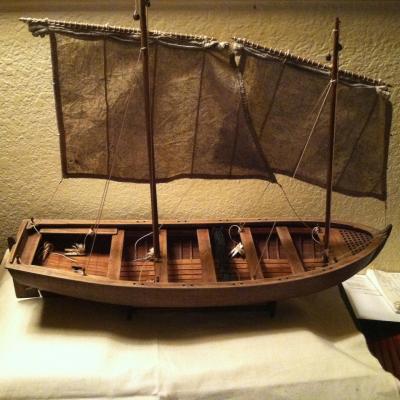
I decided to reef the sails...for now. They're high for now so I have a better view of the inside of the boat. There's something floating around in my head, just don't know what yet. At least now it's I'm my face all the time while I move on.
- Cap'n Rat Fink, GLakie, msberkman and 2 others
-
5
-
-
Hey CaptainSteve,
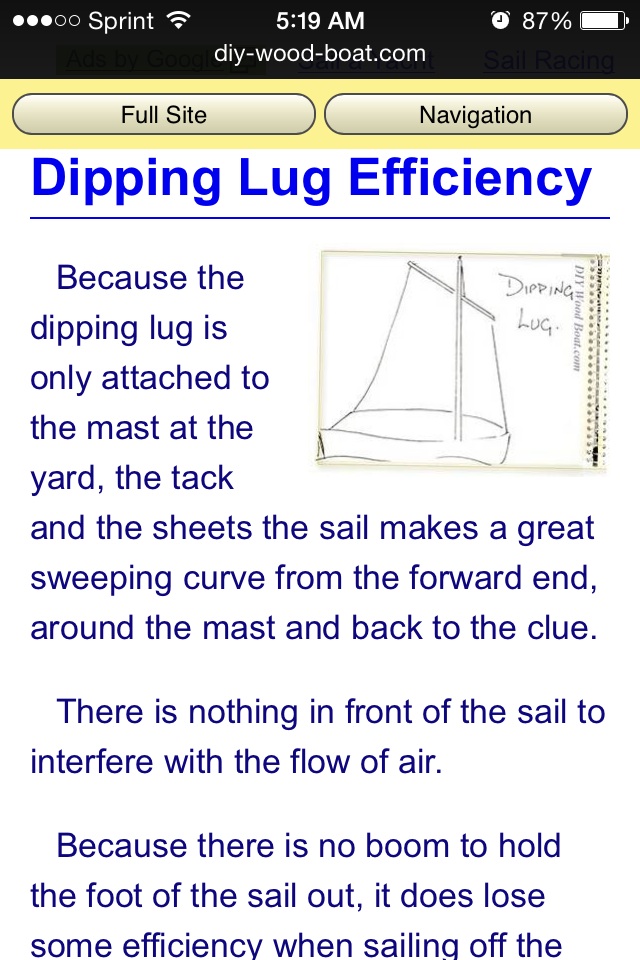
Ya know in my reading I did find something you may make. This boat was originally a difficult task to "dip" the sails to the opposite side. Later on the yard was lowered just enough to dip the peak down around the mast and lifted back up on the other side. It didn't mention exactly how this was done.
If I stop researching right NOW, the squirrels may return! Possible use your bunt line to raise up most of your sail out of the way. Maybe a double pulley set up near the mast could aide the peak down enough to make the dip much easier. This would be much faster, and safer, to do, especially in crapy weather. I gotta go let the squirrels out!
Matt
- GLakie and CaptainSteve
-
2
-
Hey CaptainSteve,
I just had to go overboard...I felt better not knowing! Oh boy oh boy, my dreams are shattered.
Matt
- GLakie and CaptainSteve
-
2
-
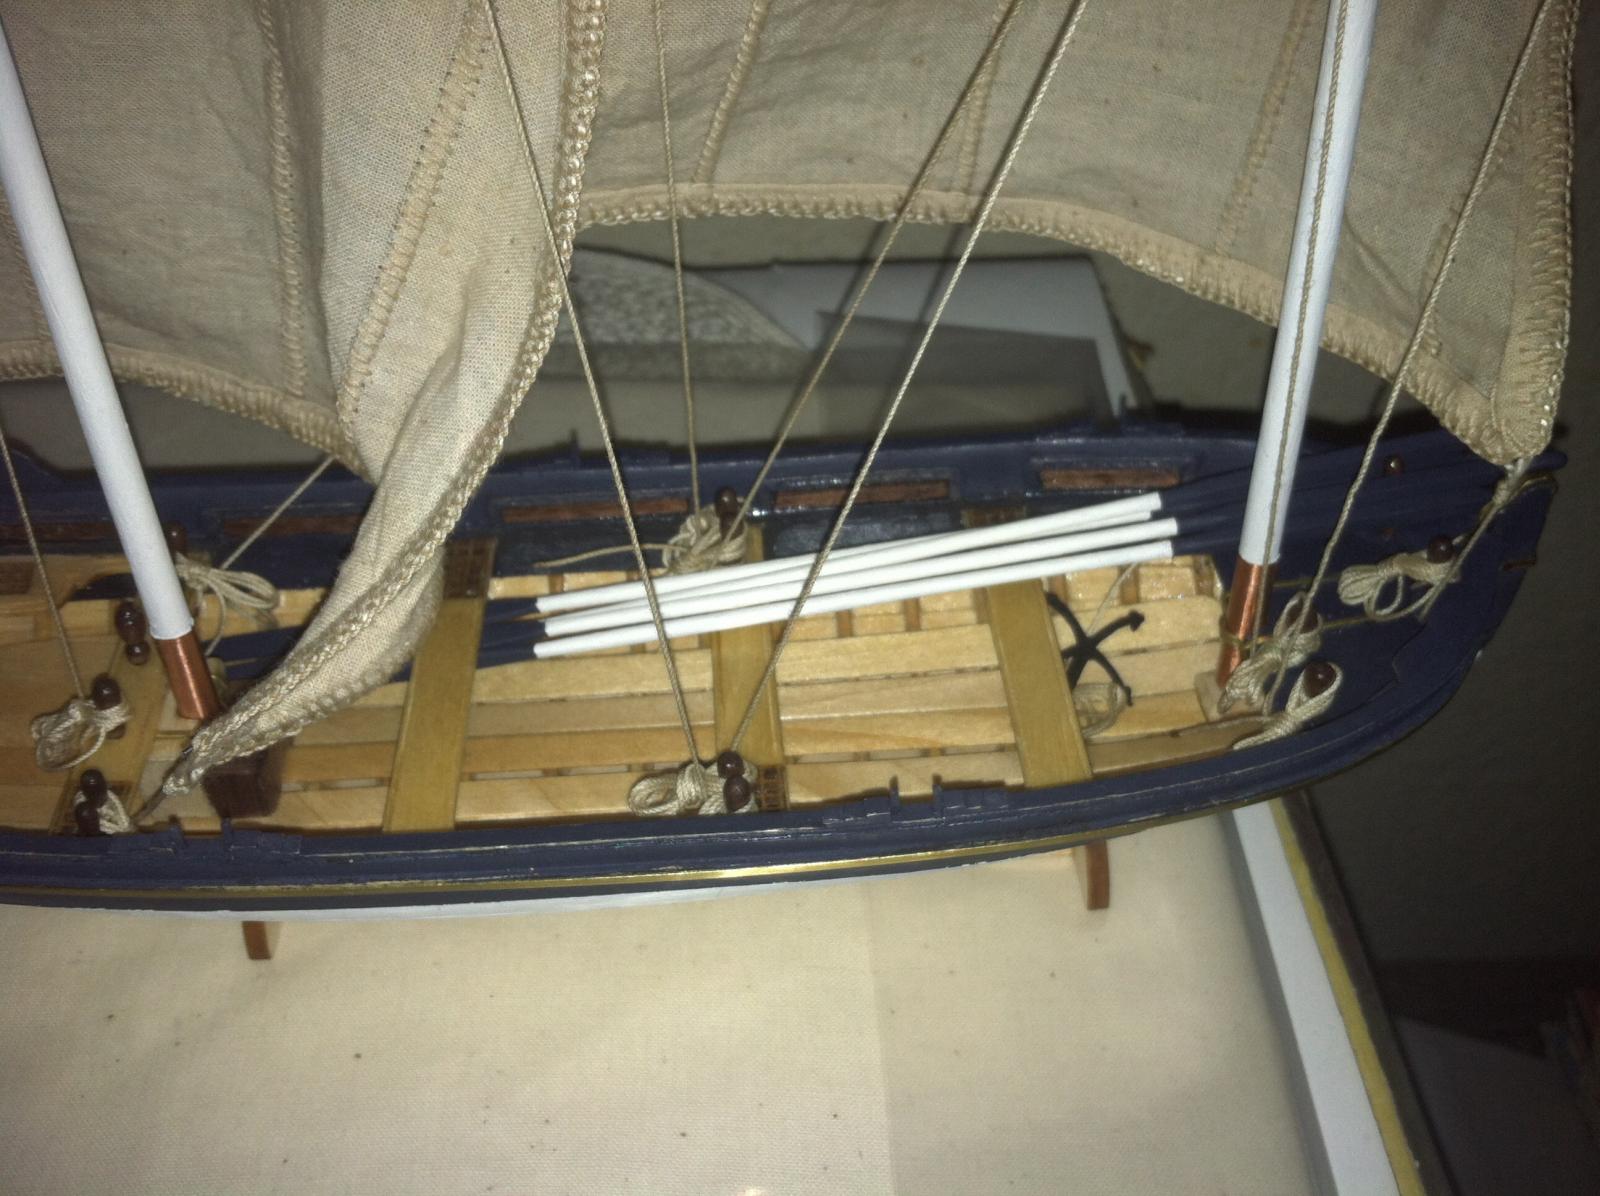
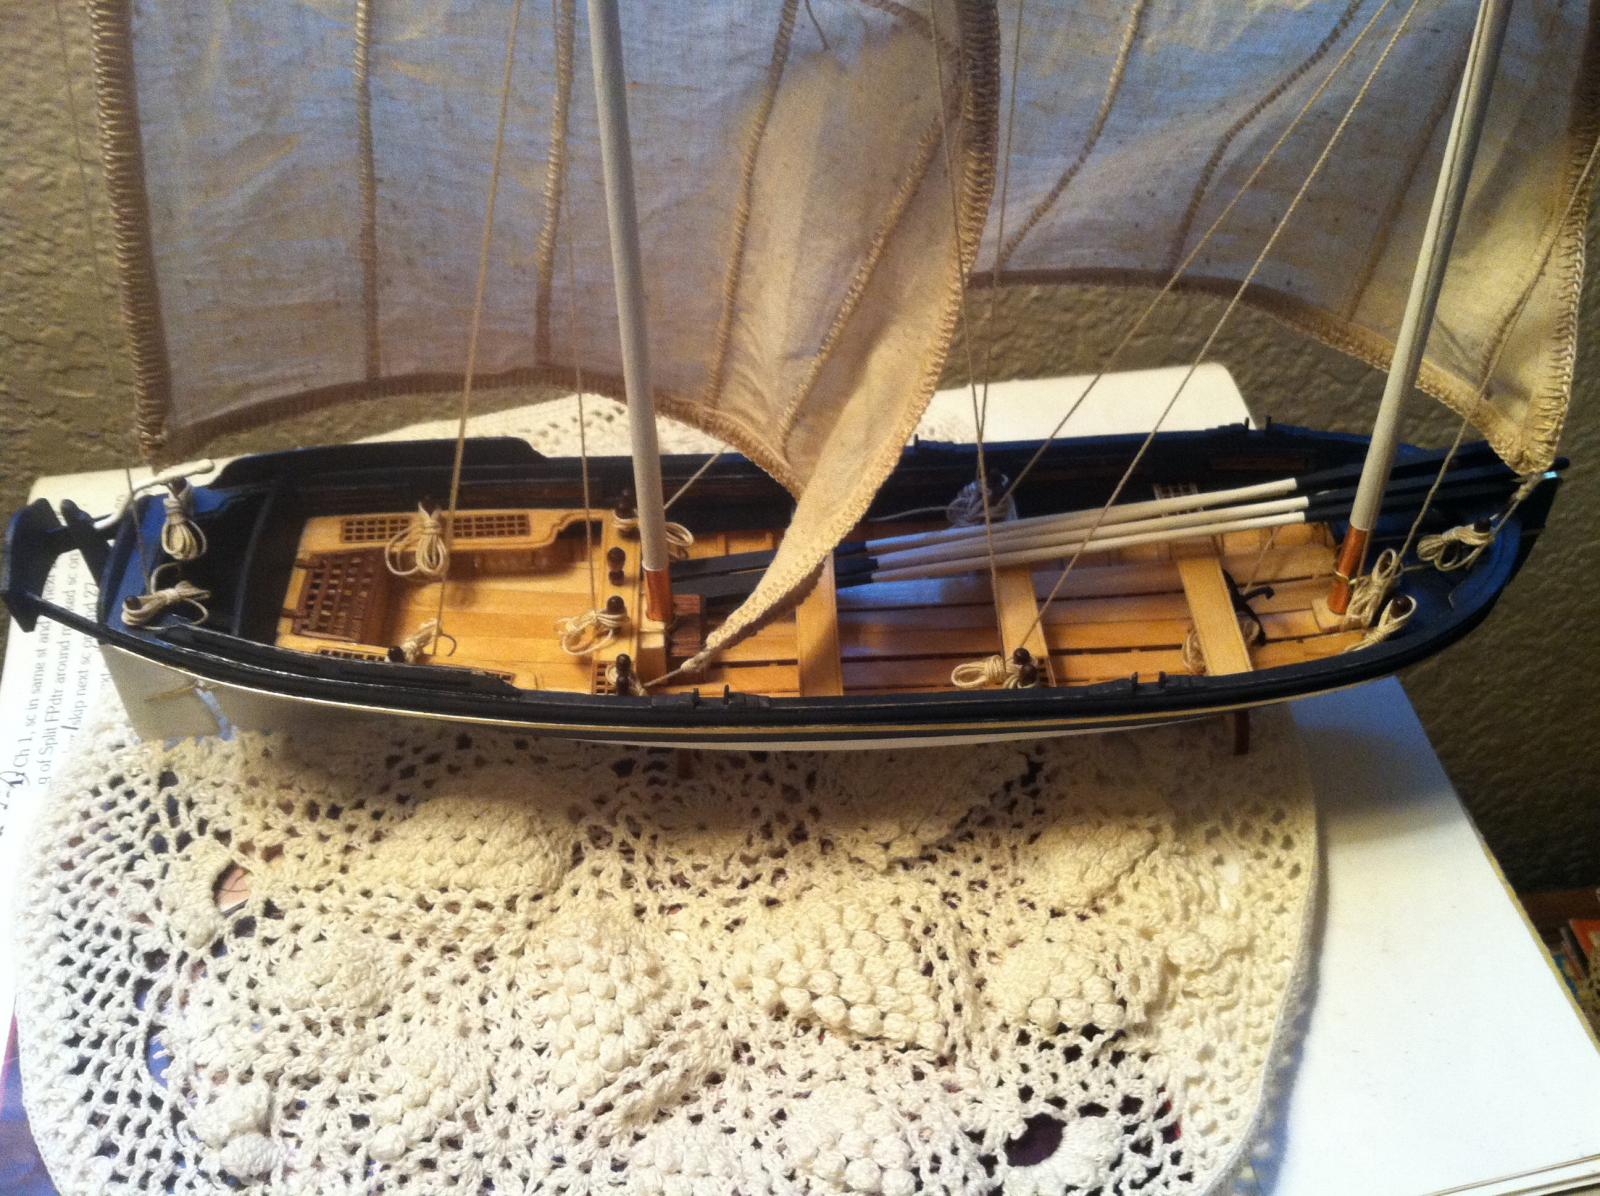
Here's my sails reattached, the "proper" way the info shows.

- Keith_W, dgbot, CaptainSteve and 2 others
-
5
-
-
Hey CaptainSteve,
I do love the grapnel and the perfectly coiled rope, a very nice touch. I got home yesterday and thoroughly filled the squirrels with knowledge. The results are on my page and somewhat disappointing.
Matt
- GLakie and CaptainSteve
-
2
-
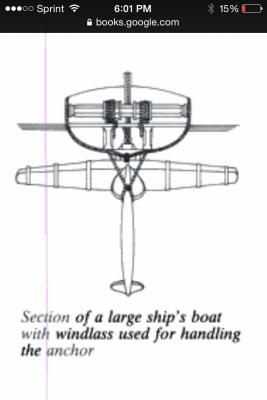
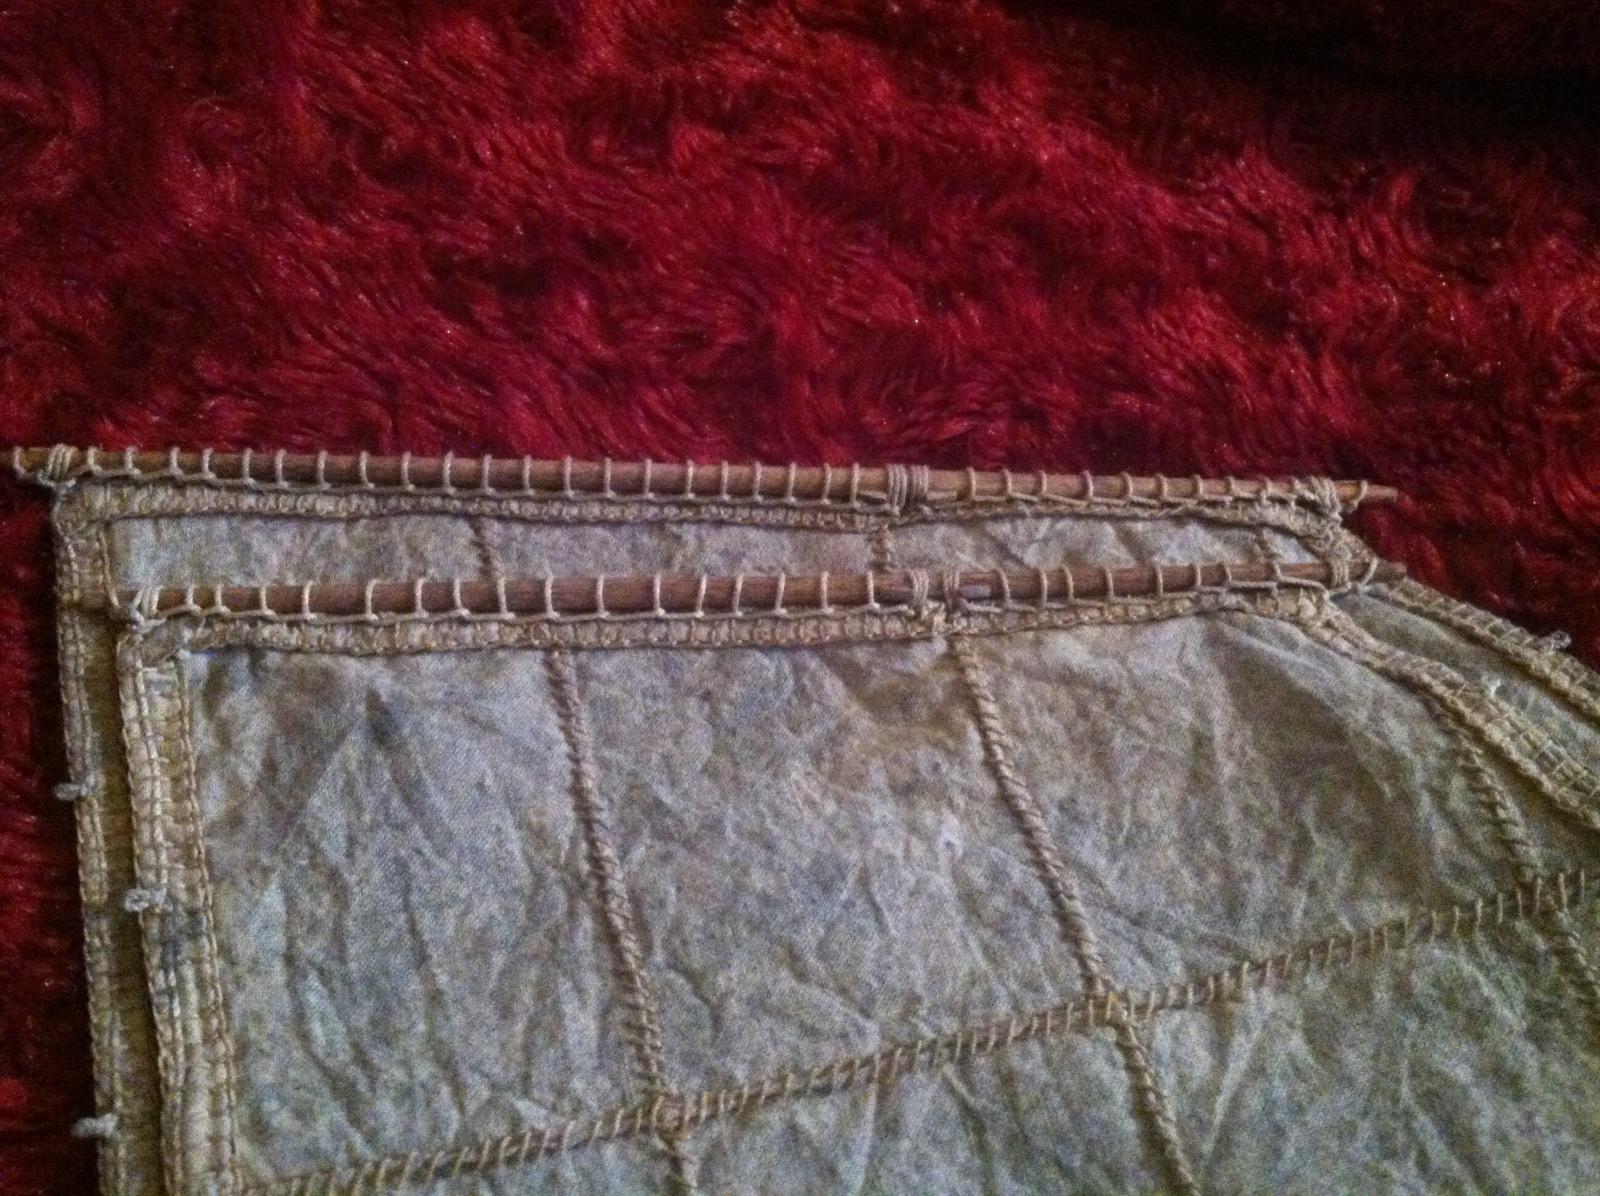
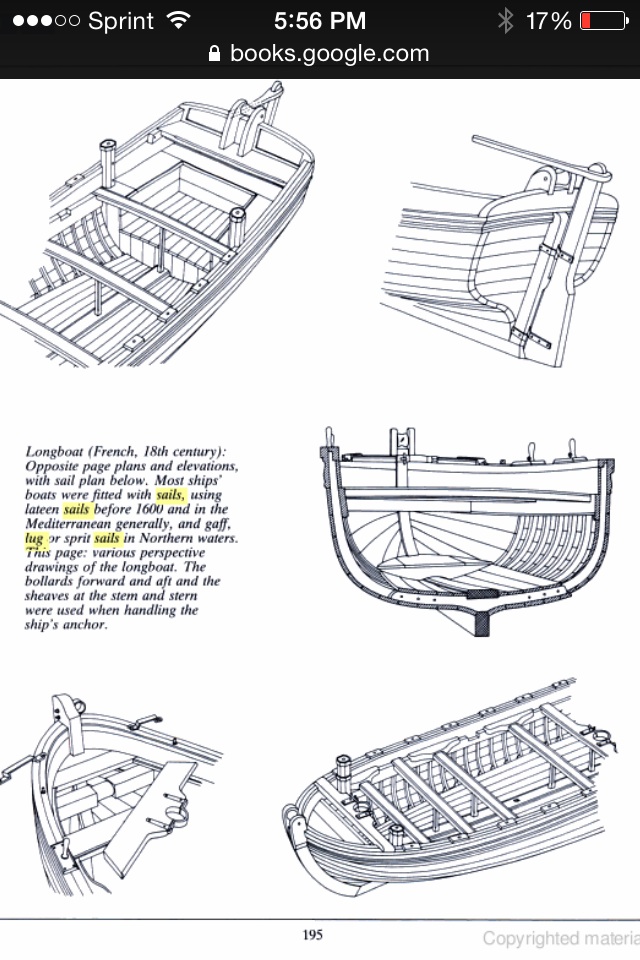
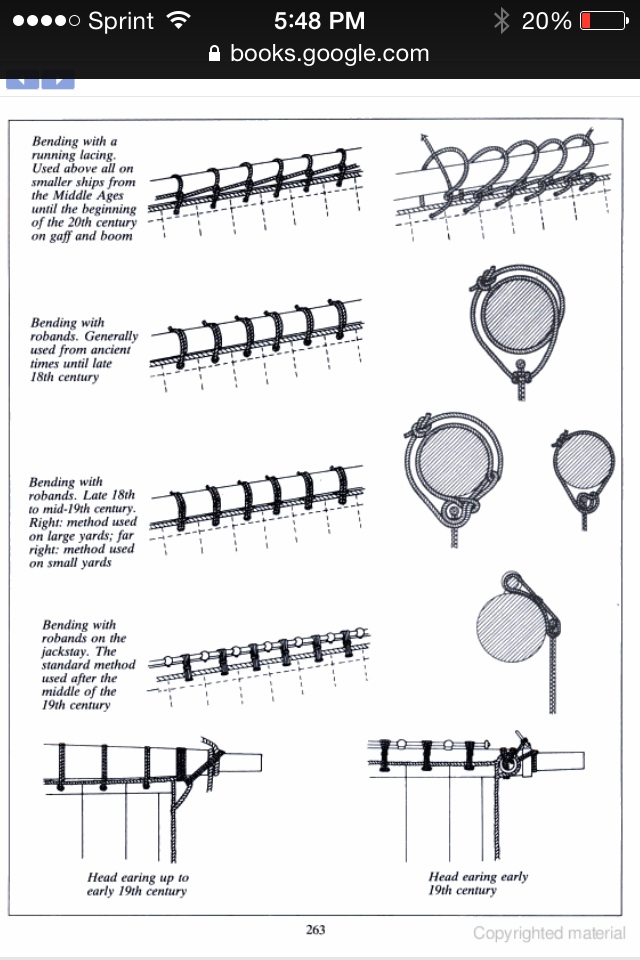
Here are a couple of pictures of what a typical ships boat looked like when set up for useing the windlass for lifting a ships anchor.
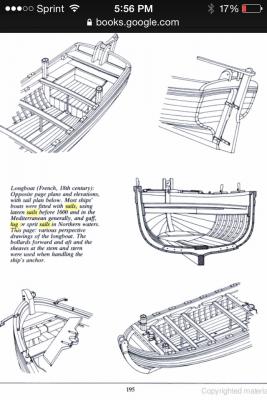
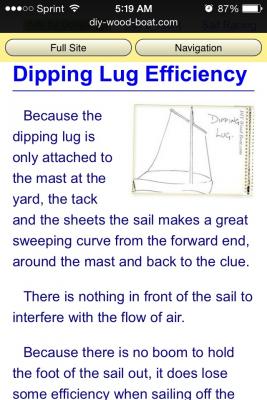
The difference between standing(tack to mast) and dipping(tack to bow) lugs. This model has dipping lug sails.

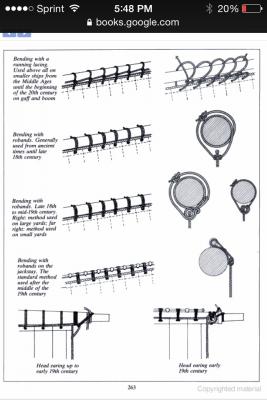
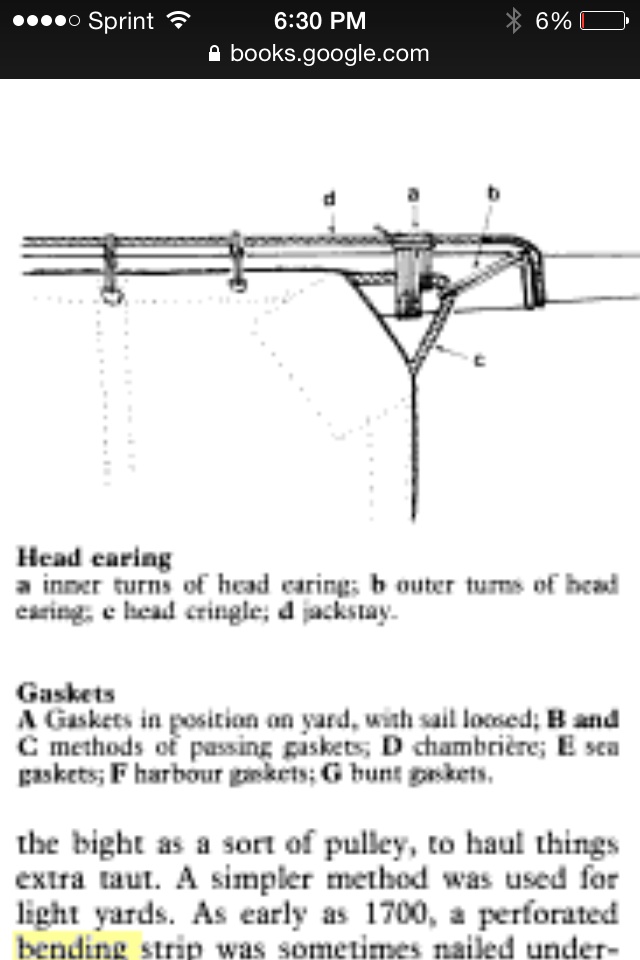
These Images show how the sail is bent to the spars. Also the head earring configuration.

The rigging for a dipping sail was extremely simplistic with only the spar attached at the mast. Often time a boat of this size would have a standing main sail and a dipping sail for the other.
So it may seem to be that both sails on this boat were dipping lug sails. It was a bit of a process to "dip" the sail from one side to the other. Because of this, in severe weather many boats would have the sails on opposite sides, both being reefed. Only one sail would be used at a time, the other lowered. This way they could quickly use either sail depending on wind direction and heading. I got nothing done on my boat so I could find every bit of info on these sails.
This info taken in consideration, it would appear that the rigging set up described on the plans are actually accurate. This is a bit of a surprise to me, kinda shot down all the rigging plans I had in my head.
- Keith_W, Canute, CaptainSteve and 3 others
-
6
-
Thanks Monkeyman,
I have to give credit to the others in this forum. If it weren't for them, and a pesky squirrel problem, I'd have one boring, bland boat(say that five times really fast). Most everything has been based on many other masters before me. I just try and follow their footsteps.
Matt
-
Hey CaptainSteve,
There's supposed to be a model ship in a museum over in Tillamook Oregon(on the Pacific coast)that my great grandfather built many, many years ago. Also my Grandpa(grandmas husband) helped build a dugout canoe when he was a child living on the Siletz Indian reservation(same coast about 100 miles south of Tillamook). That one is also displayed in a museum. I've only seen each one a couple times, but next time I need to take pictures. Maybe it's in the blood.
Matt
- GLakie and CaptainSteve
-
2
-
Hey CaptainSteve,
Haha! Yeah neither one of us drink, maybe some tea and crumpets? I have this sneaking suspicion that he spent more time in the Asian brothels than studying seamanship!
Matt
-
-
Thank you to everyone for the likes.
Hey CaptainSteve,
I agree with you on the amount of lines. I'm using my 21ft English Pinnace bash as a reference on the rigging. As with that model, I'm making everything for the sails removable. It seemed like there was a lot of lines, but all the reefing lines belay near the base of the mast.
I'm more of a visual person, that's one reason why I wanted to run three lines to see what to keep and what to get rid of. My buddy was in the Navy and told me that if the sails were in use, the rigging lines would be belayed but the ends of the lines would be placed on the deck. They would usually only be hung and wrapped if they were anchored or at port. Basically all my rigging lines were inaccurate. As for the reefing lines I read that they would all be laid on deck and tied off when they were in use.
So what I plan on doing is reef the sails and see what each example looks like. I've also seen examples of the clew and tack lines being run through a double block on the mast, essentially folding up the corner to deflate the sail.
So when I get off work today I'll make the single blocks and try all of the ideas. I'll take pics of each example and post to see what the consensus is.
Matt


- Canute, GuntherMT, CaptainSteve and 2 others
-
5
-
Here's a preliminary set up of the sails. I made 2 double blocks for each mast and I'm going to see how it all works out after I make the single blocks for the end of the spars.
- Canute, CaptainSteve, Cathead and 3 others
-
6
-
Hey CaptainSteve,
Disclaimer: Anything I say cannot be used against me in a court of law. There's a good chance I'm 100% wrong on most everything I say.
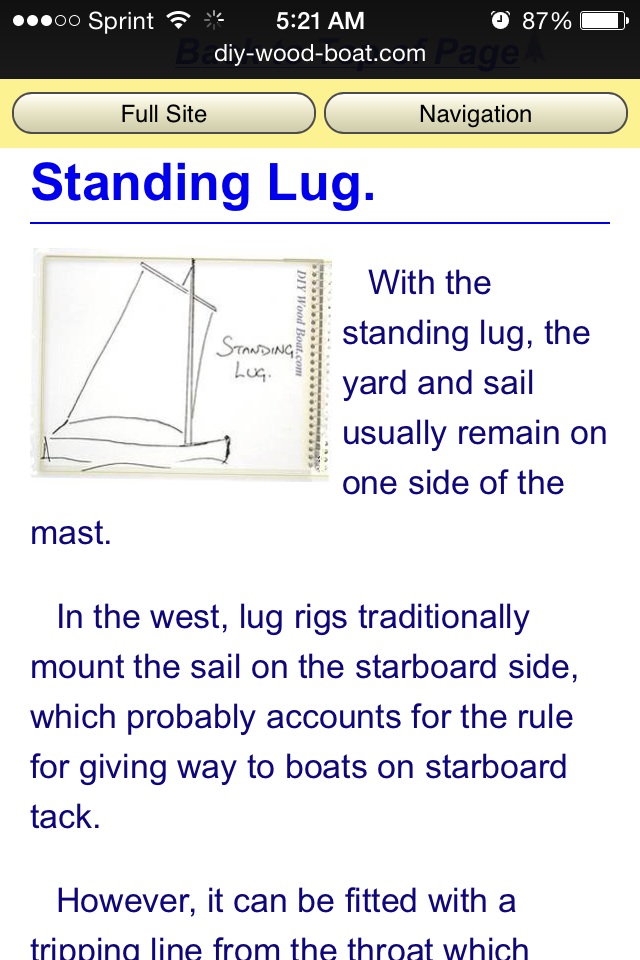
I've seen examples of the bunt line like you said. One thing I've really tried to cement is the kind of lug sail this boat would have: standing lug or dipping lug. On a standing lug the tack would be attached to or near the base of the mast where as a dipping lug the clew and tack are attached to belaying points on the boat(as the photo on this model shows).
If its a dipping lug would it be treated as a square sail would? Would lines be attached to both corners going to blocks near mast like a clew line?
I'm running on the idea that the sail would be reefed to the spar(as in rough weather). If weather got worse these lines would be pulled to "deflate" sail. Would they be pulled to the luff or leech? If clew lines were used it seems they would be pulled up to the front side of boat with both bottom corners. If a bunt line were used I'm not sure it would matter as long as the tack and clew were released. This makes me kinda lean toward three lines being used. The corners pulled first then bunt line, or all three at once? And would all three be pulled to a central position, or each to corresponding points on the spar: middle, right and left.
If all three points were pulled straight up then spar ends should have single blocks. At mast/spar junction two double blocks, one for halyard and bunt, the other for tack and clew? The shroud lines would remain taught to maintain control of spar? I'm kind leaning toward this setup. It seems logical, but may be completely wrong in which case I'd be made to walk the plank.
Matt
- GLakie and CaptainSteve
-
2
-
Thank you everyone for the likes.
Hey CaptainSteve,
Thank you, they do look like they could rip apart at any minute. Made my spars and attached to the "decaying" sails. I'm waiting to attach the reef points until get the whole rigging layout proposal drafted and sent to the squirrels for their stamp of approval.
By the way, how's your rigging going? I feel like I've exhausted my searches. I think I need to just whip out the ropes and go nuts.
A forge? Come on! Really! I may electroplate some items in gold, but the whole forge thing is just over the top...or is it? I forgot there's another legion of squirrels under this very same roof! Look out world!
Matt
- GLakie, msberkman, Salty Sea Dog and 1 other
-
4
-
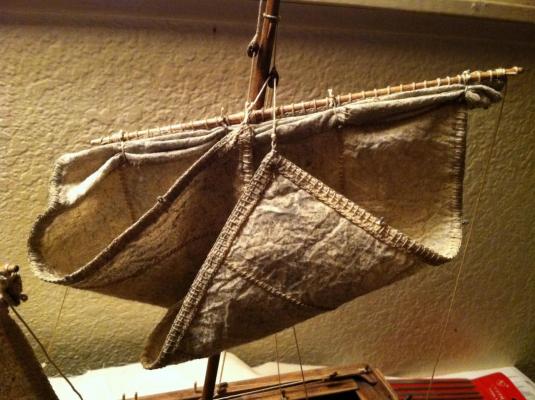
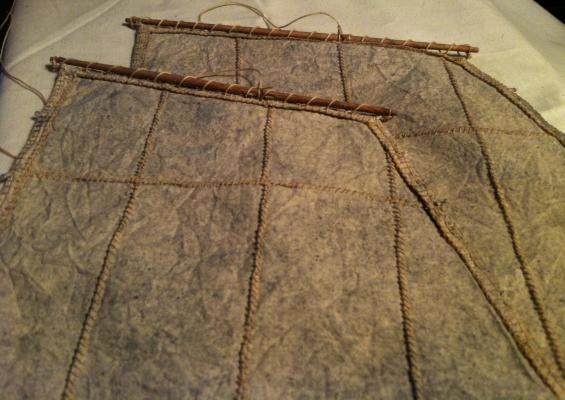
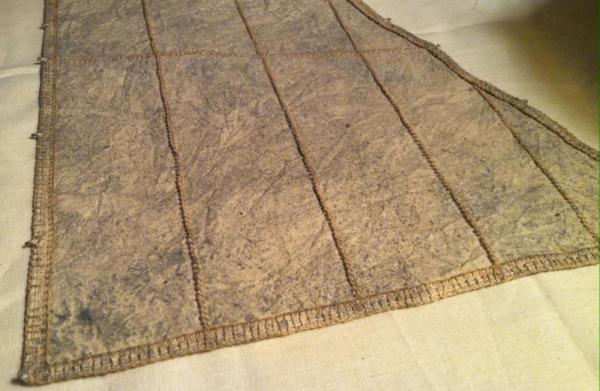
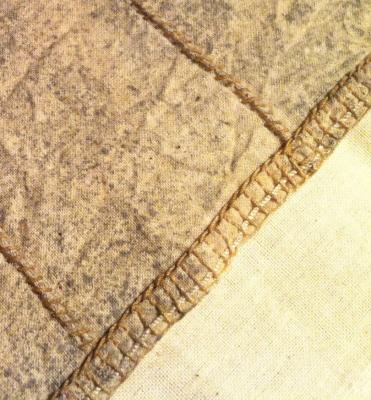
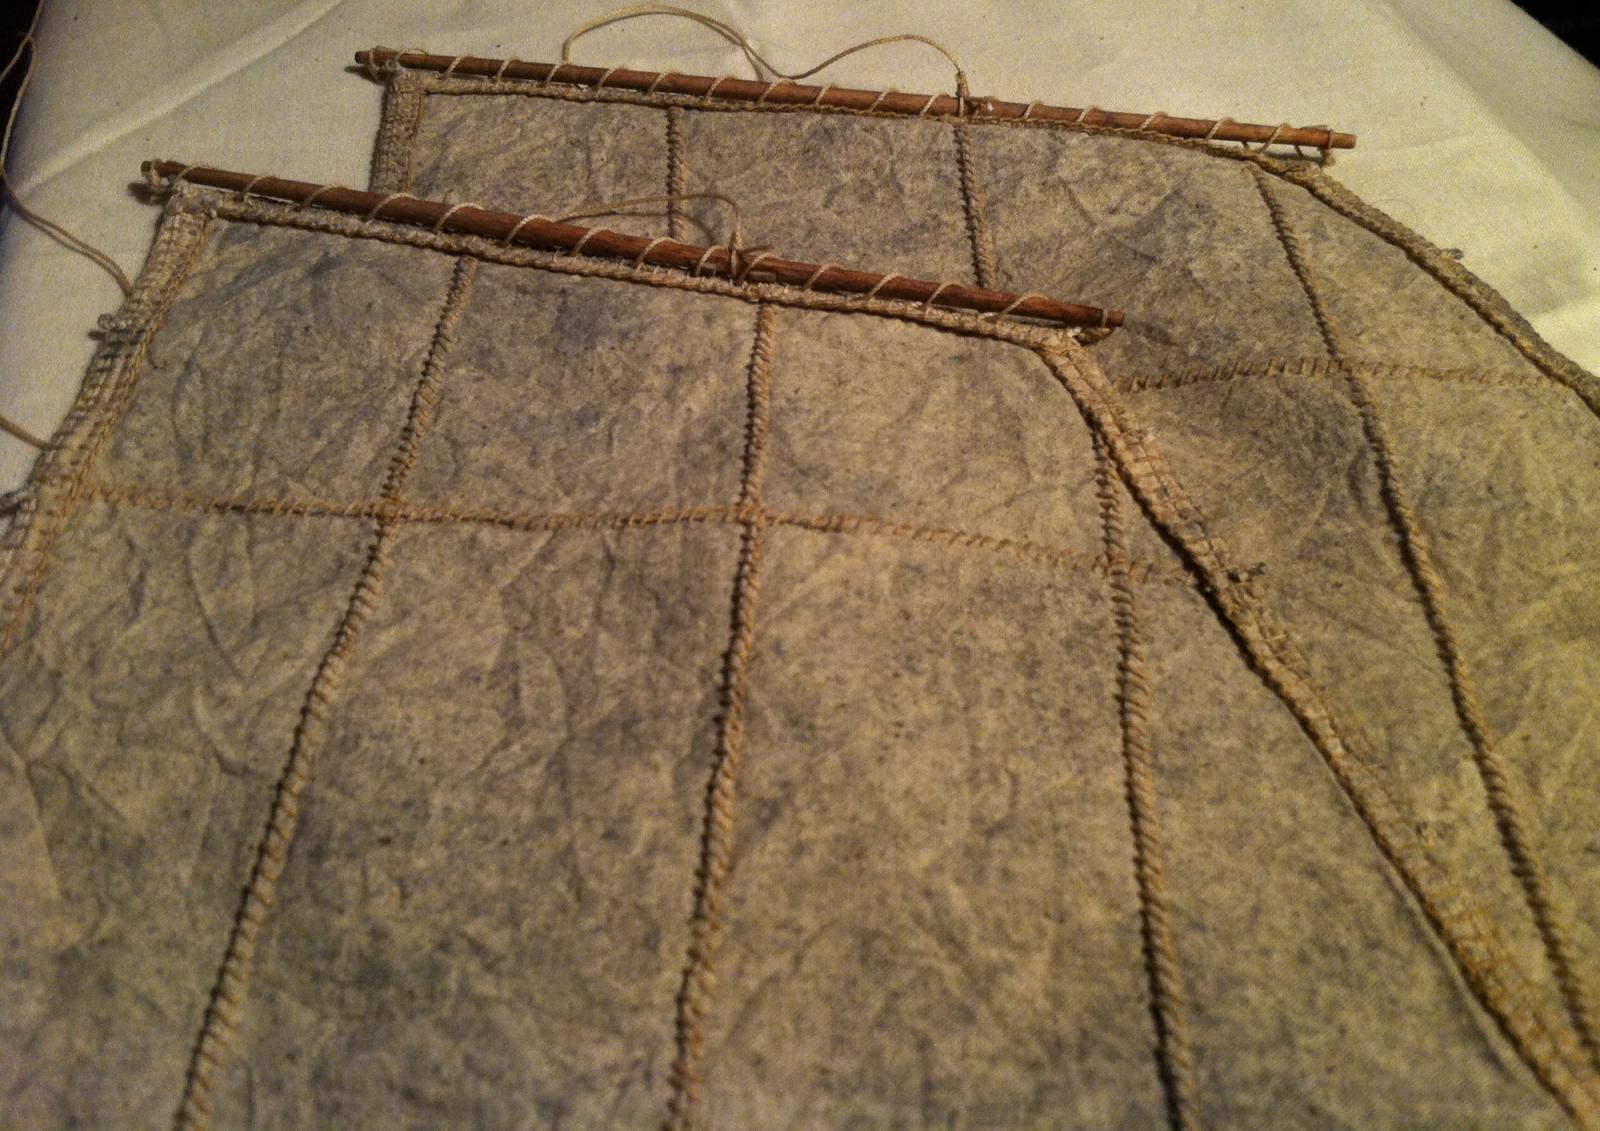
The second, and final, application of stain. I'm much happier with the sails now.
No set of chisels should go without a leather case to protect them.

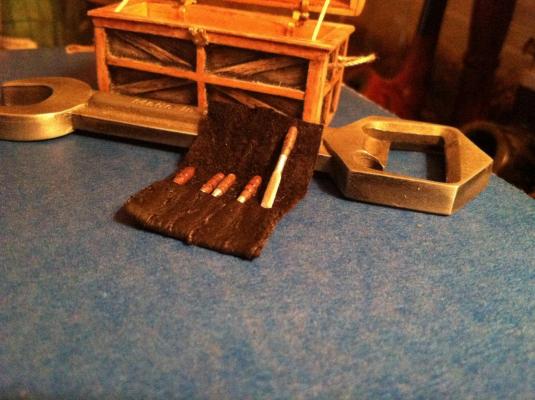
- Salty Sea Dog, Cathead, GLakie and 7 others
-
10
-
It definitely takes a lot of patients, determination and a squirrel-infused case of OCD!
- GLakie and CaptainSteve
-
2
-
Thanks George,
You know, I learned a long time ago that I'm a horrible teacher and an even worse direction giver. I really like doing anything and everything, the harder the better. I'm sure my other half would do a standup job, I just like doing it.
Matt
- CaptainSteve and GLakie
-
2
-
Thanks CaptainSteve,
What I found out was that it really only works well on dry cloth. Once it gets wet it doesn't want to accept more stain pigment. Because of this I took these pics and did another dunk.
It was a simple process. I took grey minwax and just put a few drops into hot water. When churned, the wax sticks to the side of container leaving little pigment balls floating. Then lay dry cloth onto surface and the pigment soakes in fast without much bleeding. Not really rocket science, I was just shooting for a unique look.
Not nearly as good as your poopy sails:)
Matt
- CaptainSteve, GLakie and Canute
-
3


HMS Bounty Launch by mattsayers148 - FINISHED - Model Shipways - scale 1:16 - SMALL
in - Kit build logs for subjects built from 1751 - 1800
Posted
Thanks guys, I had to stop and realize I'm a modeler, not a sailor!
Matt