KeithAug
-
Posts
3,273 -
Joined
-
Last visited
Content Type
Profiles
Forums
Gallery
Events
Everything posted by KeithAug
-
 Hello Julie I have never tried lacquer but I must give it a go some time. Although its slow I am quite enjoying the process of applying the wipe on poly. The finish is very pleasing and I can always make progress on other stuff while I am waiting. I'm watching your build with interest and wait to see how your 2nd planking options develop?
 -
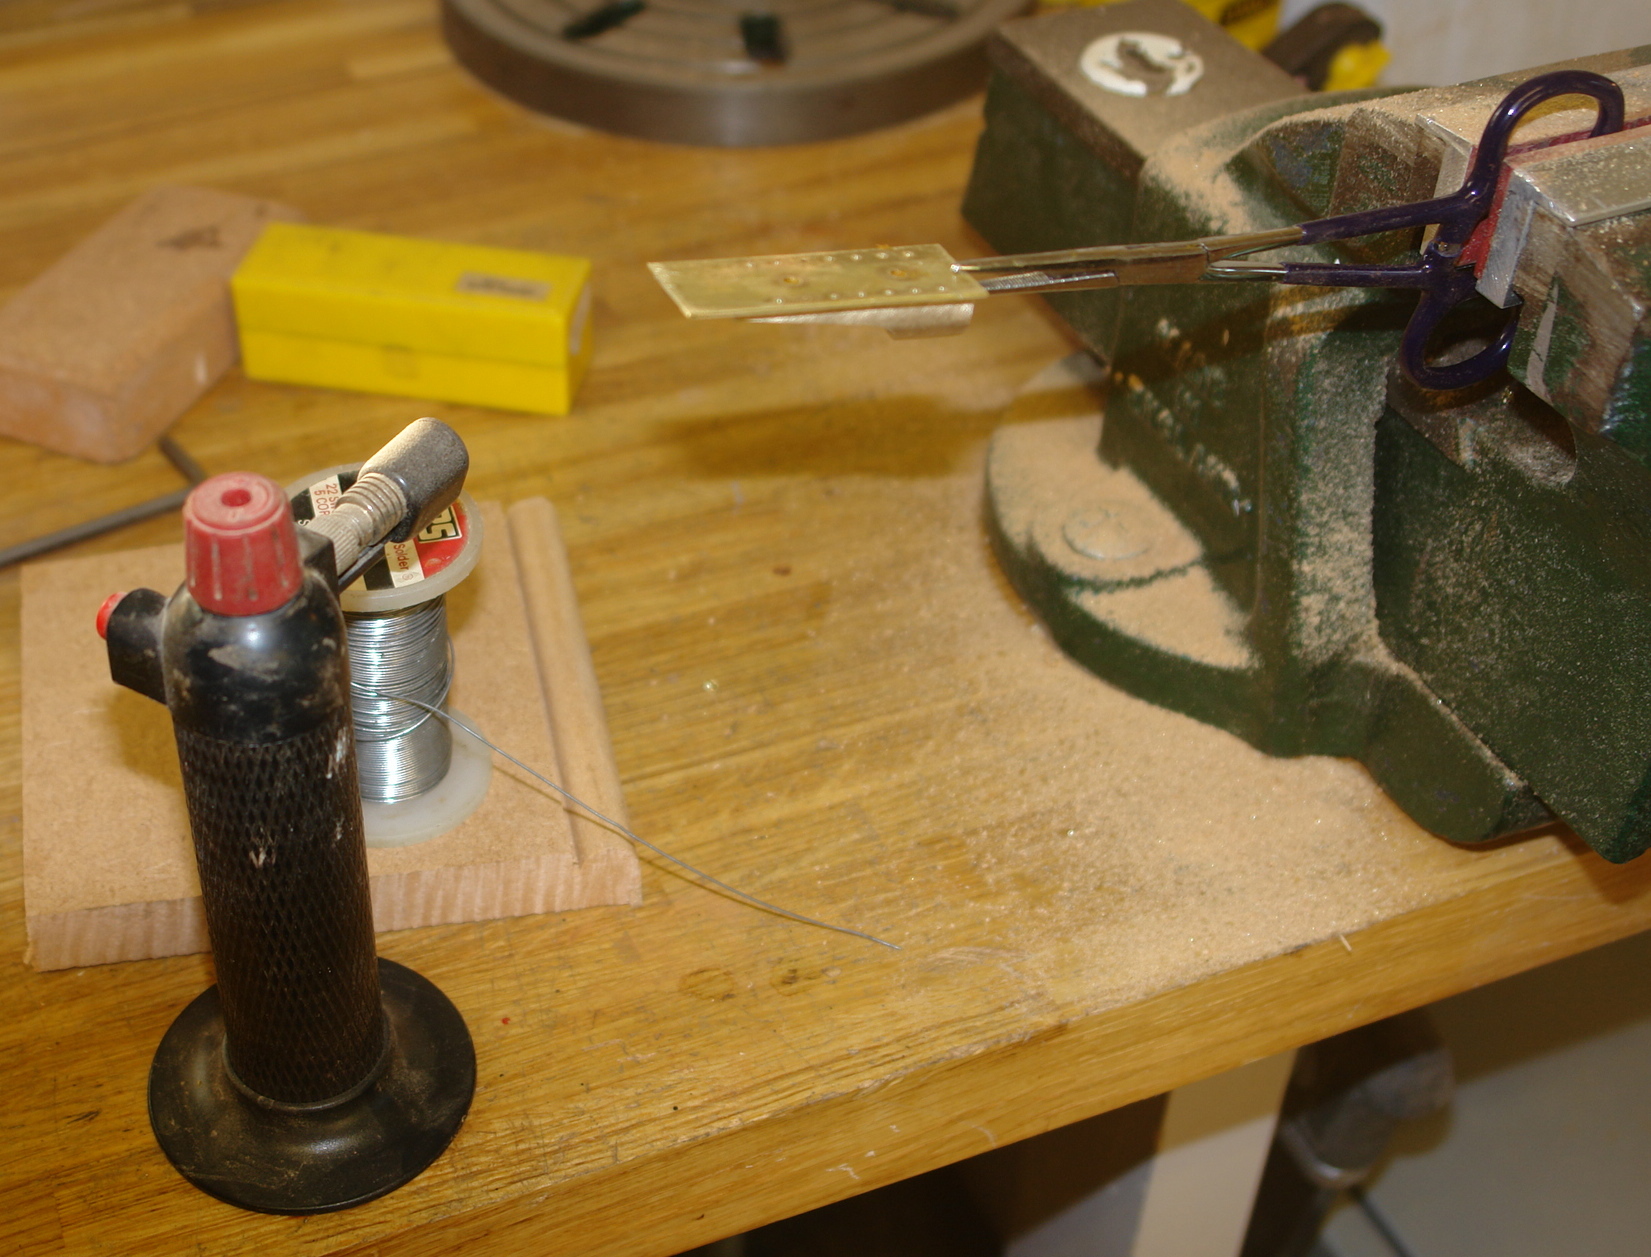
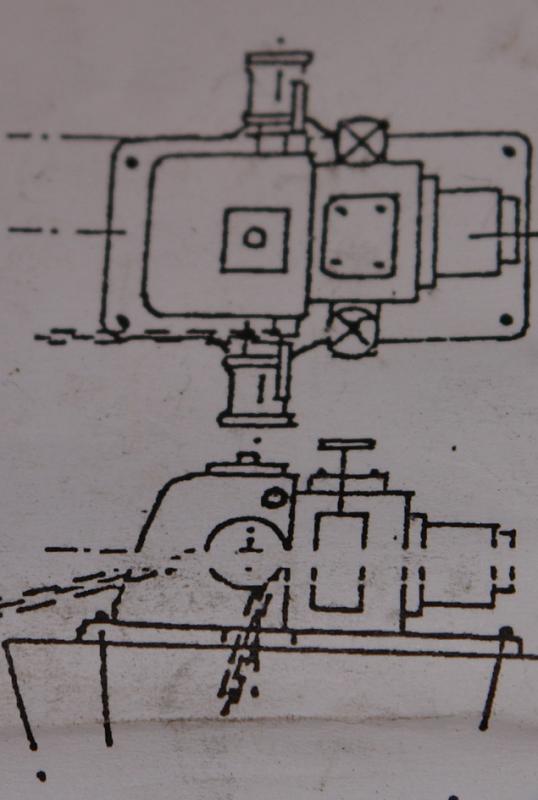
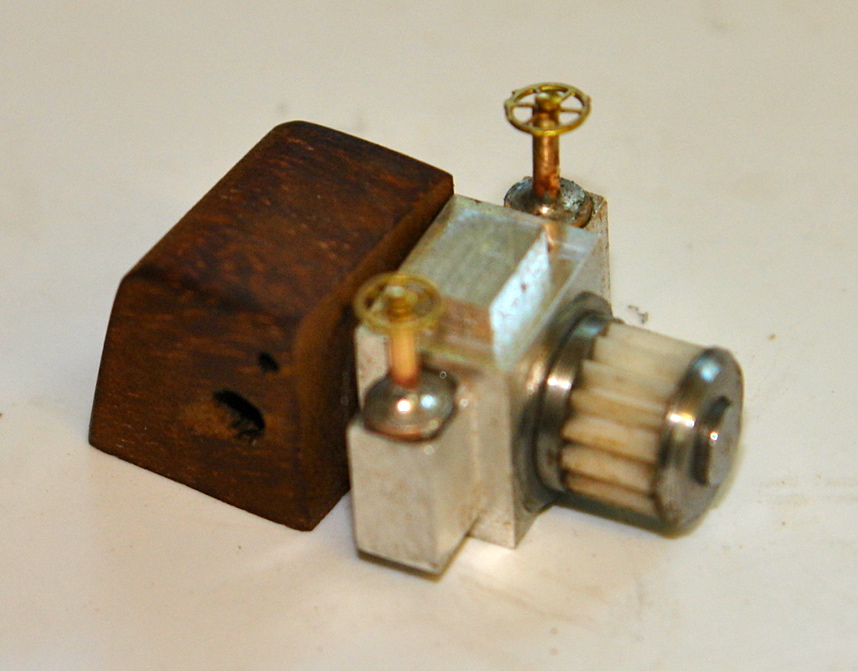
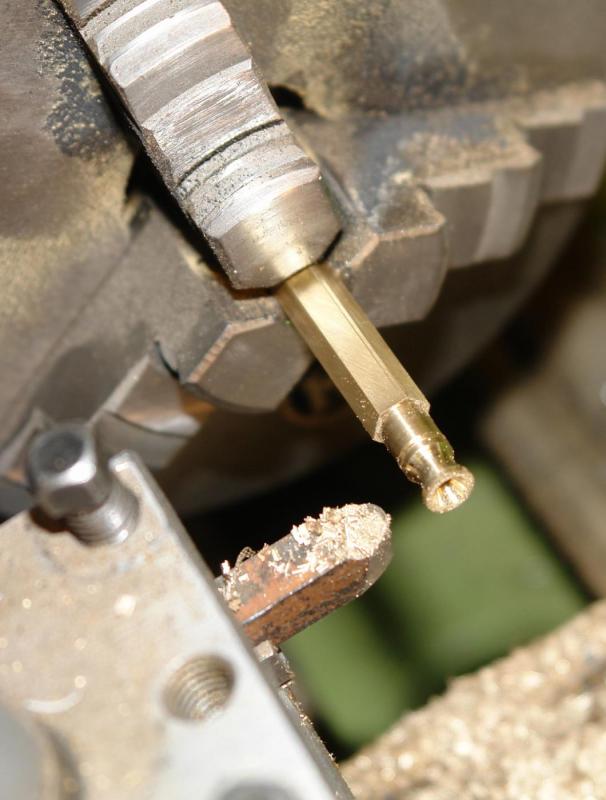
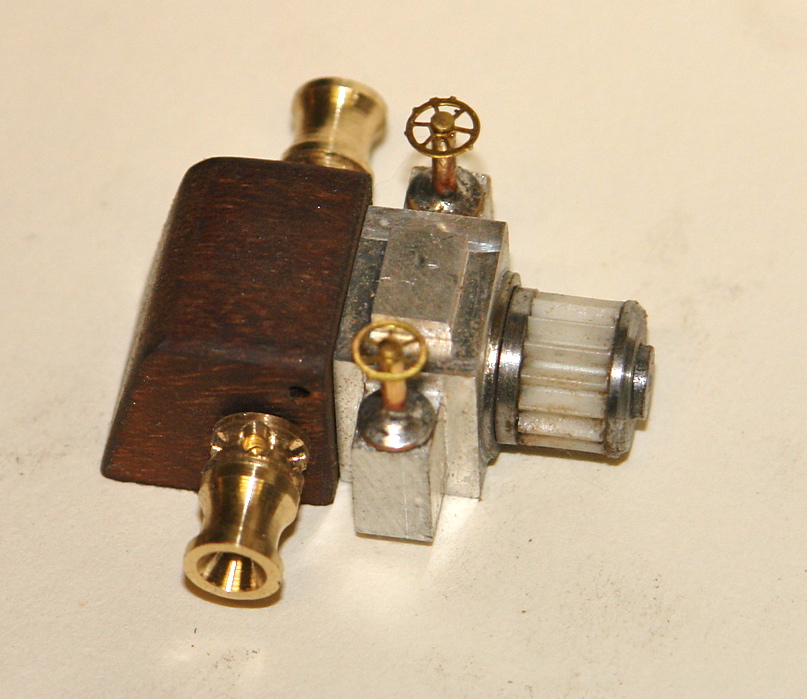
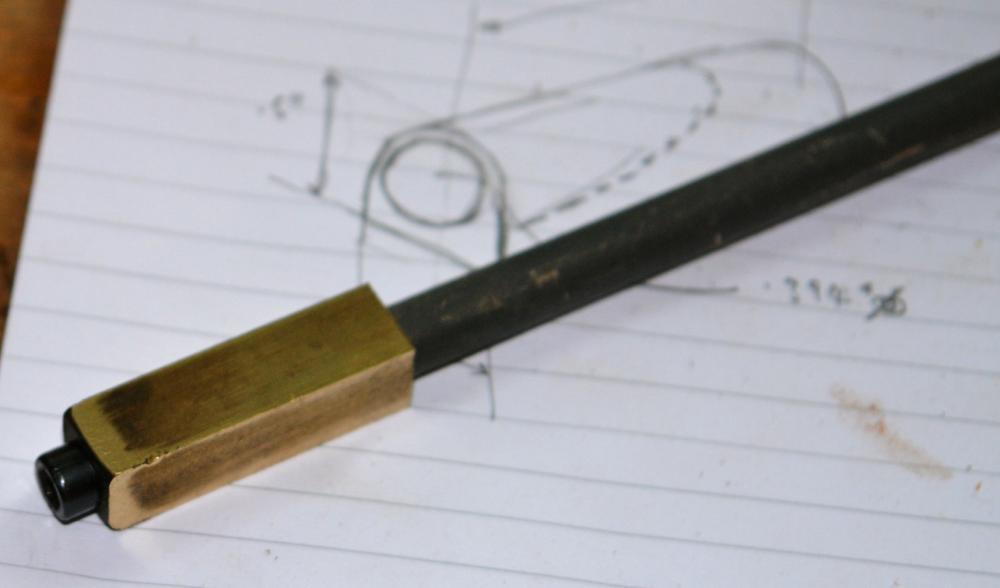
I am doing one coat of poly a day. Now on coat 4. Meanwhile I have made a bit of progress on the winch. The plan detail on the winch is basic and I also think its not very representative of the real thing. Unfortunately the internet didn't come up with much additional information so I had to resort to a bit of intuition. Because the winch is painted black I didn't have to bother much about the choice of materials so I used bits from my scrap box. One enhancement to the plan was the winch motor which now has a finned body - cut from a sprocket recovered from a dead printer. The fins do appear to be present on the original. The winch has both rope and chain drives. I made these from hex section brass bar. The chain sprocket was simulated by drilling 6 radial holes using a centre drill and then filing a groove across the holes on the lathe (while rotating). The hex bar provided the reference surfaces for equi-spacing the radial holes. The winch isn't anywhere near finished but its shaping up reasonably well.


- 882 replies
-
- 10
-

-
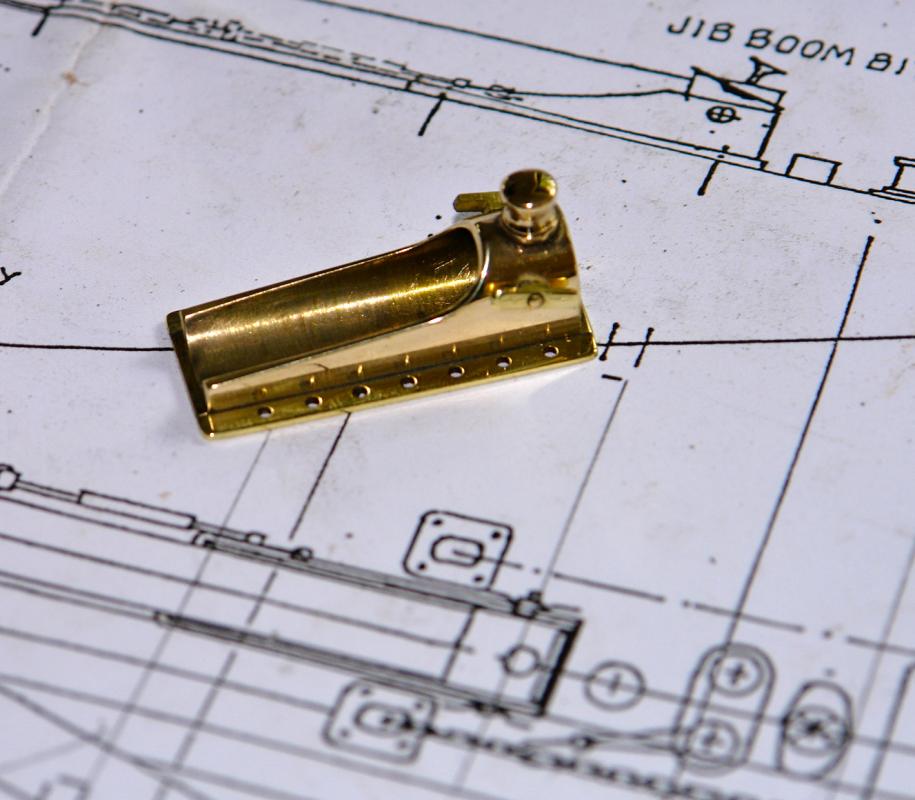
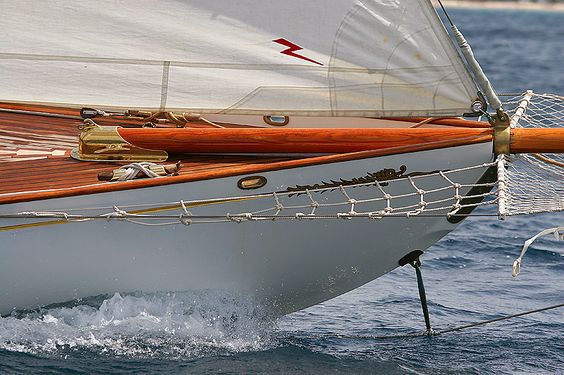
Hello Michael Fife yachts were quite traditional even in 1931. I think the use of brass for the foot reflects the traditional / quality approach that Fife took to its Yachts built for "Gentlemen". The following quote from Wikipedia is enlightening: Like the schooner Altair (1931), many of the cruisers echo his turn of the century designs such as Cicely (1902) or Susanne (1906); similarly there were few fundamental differences in his ketch designs spanning this era. Perceived by some as anachronistic, these yachts were considered by many to represent some of the greatest refinements of the auxiliary cruising yacht ever achieved.
-
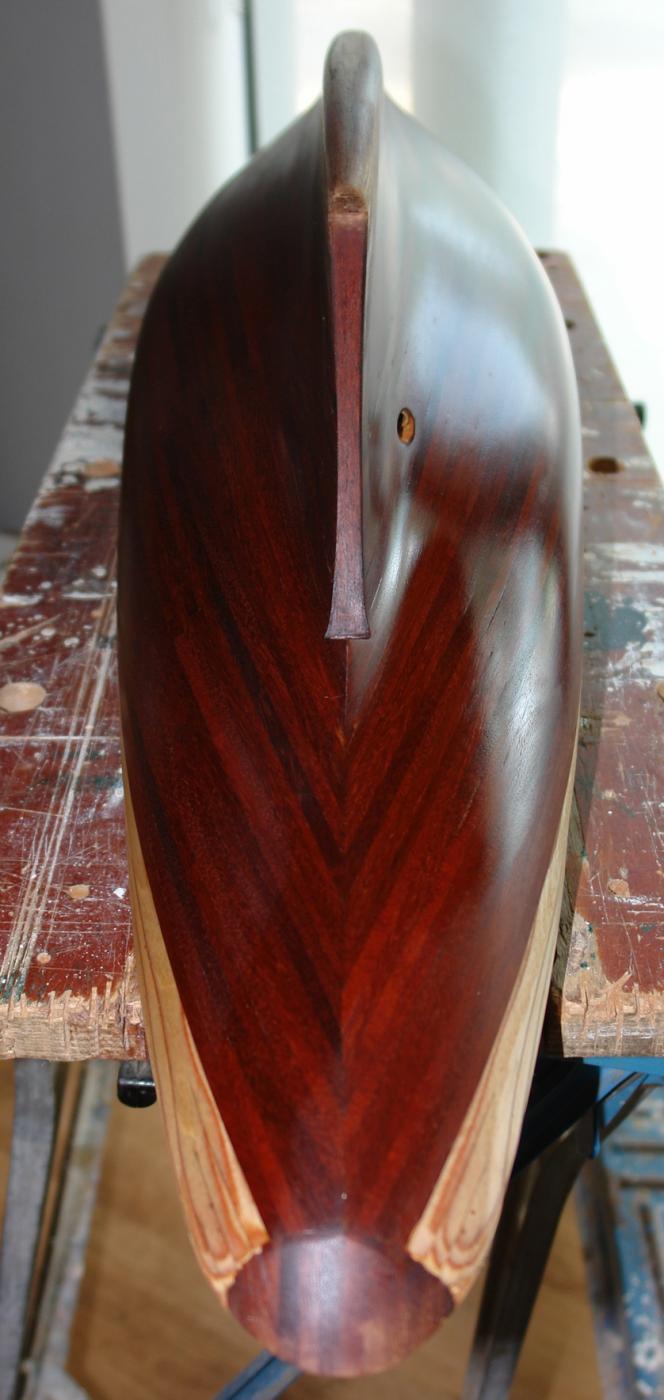
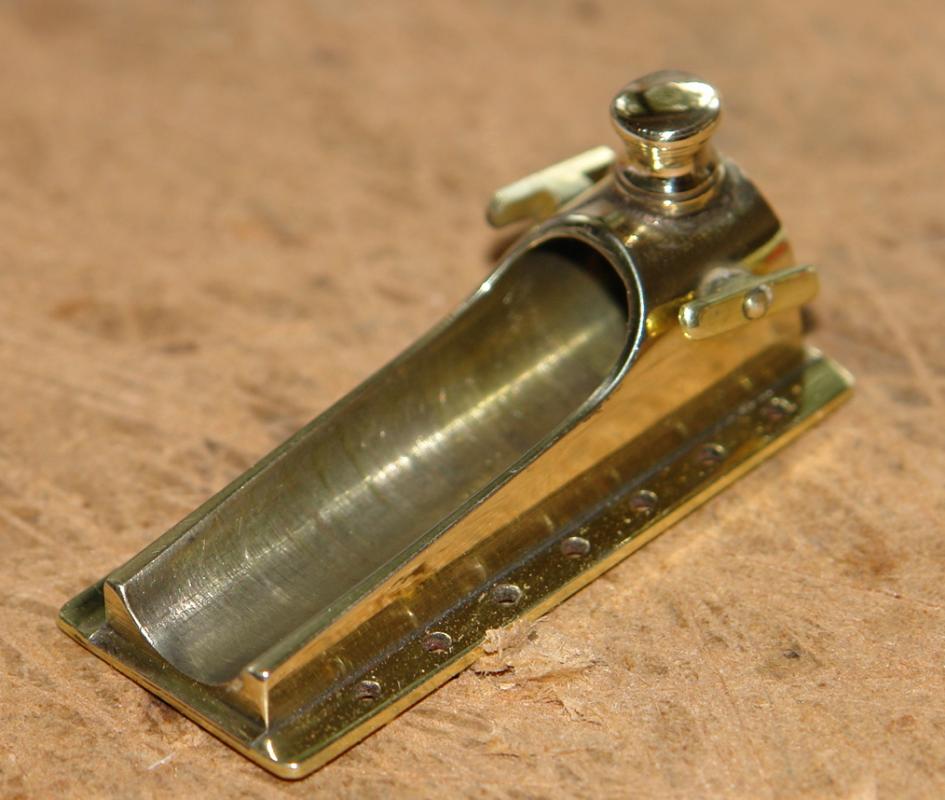
Hi Bedford I removed the machine marks with 400 grit wet and dry and then buffed the foot on the polishing wheel for about 4 minutes. The polishing wheel was primed with fine finish polishing compound. Keith
-
I am intrigued. I am now on coat 3 of the hull wipe on poly and feel I need to share an interesting observation. After sanding and wiping down the hull with white spirit I was ready to wipe on the 1st coat of satin finish poly. The first coat went on and I left it to dry. After 1 day the first coat was still slightly tacky so I left it. After 2 days it was still very slightly tacky but I decided to apply a second coat - this went on well. After another day the 2nd coat was still tacky so I left it. After a further day it was still slightly tacky but decided to apply a third coat - this went on well. After a further 8 hours the 3rd coat was perfectly dry. Throughout the workshop was at 20 deg c (68 deg f) and at 70% humidity. So in summary the first and second coats took over 48 hours "not" to dry and the third coat took 8 hour to fully dry. I have noticed similar situations in the past but never this extreme. It would be good to understand why this drying behaviour happens???????
-
Kirby / John Thank you for your positive comments. I have started work on the winch so I should have more to post in a couple of days.
-
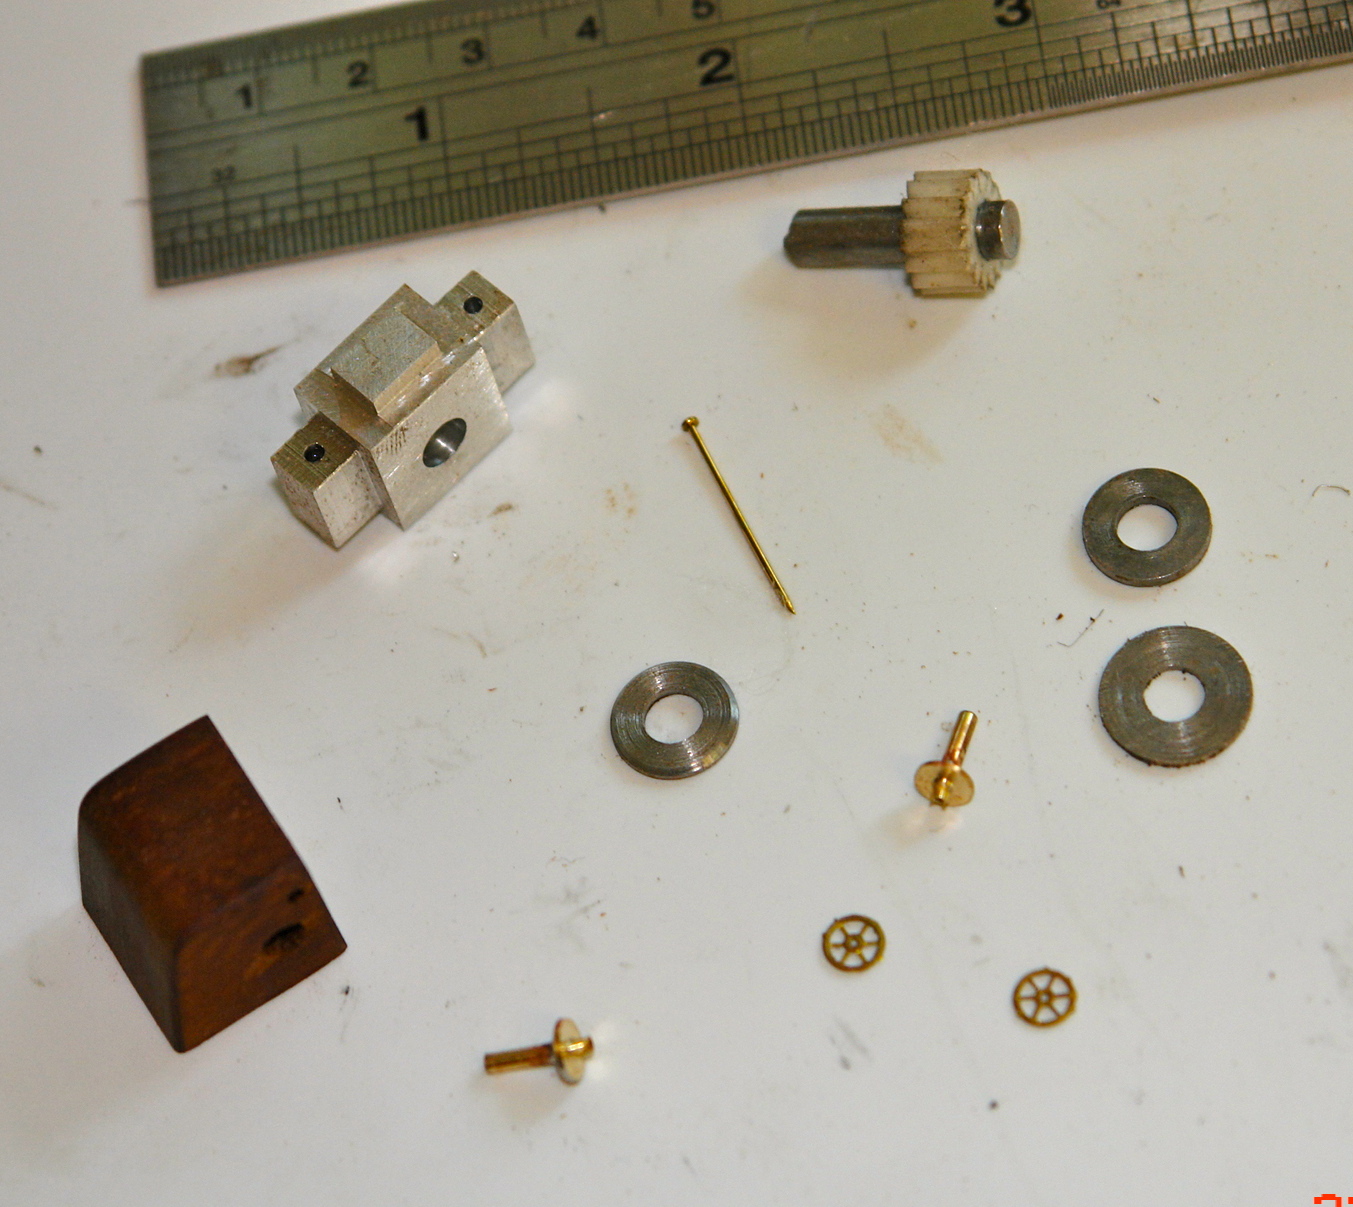
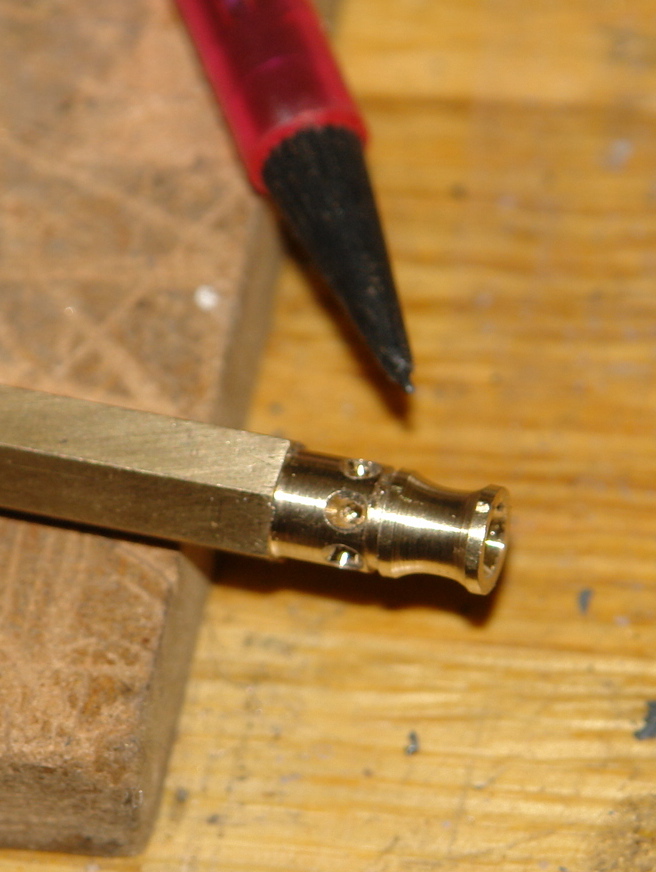
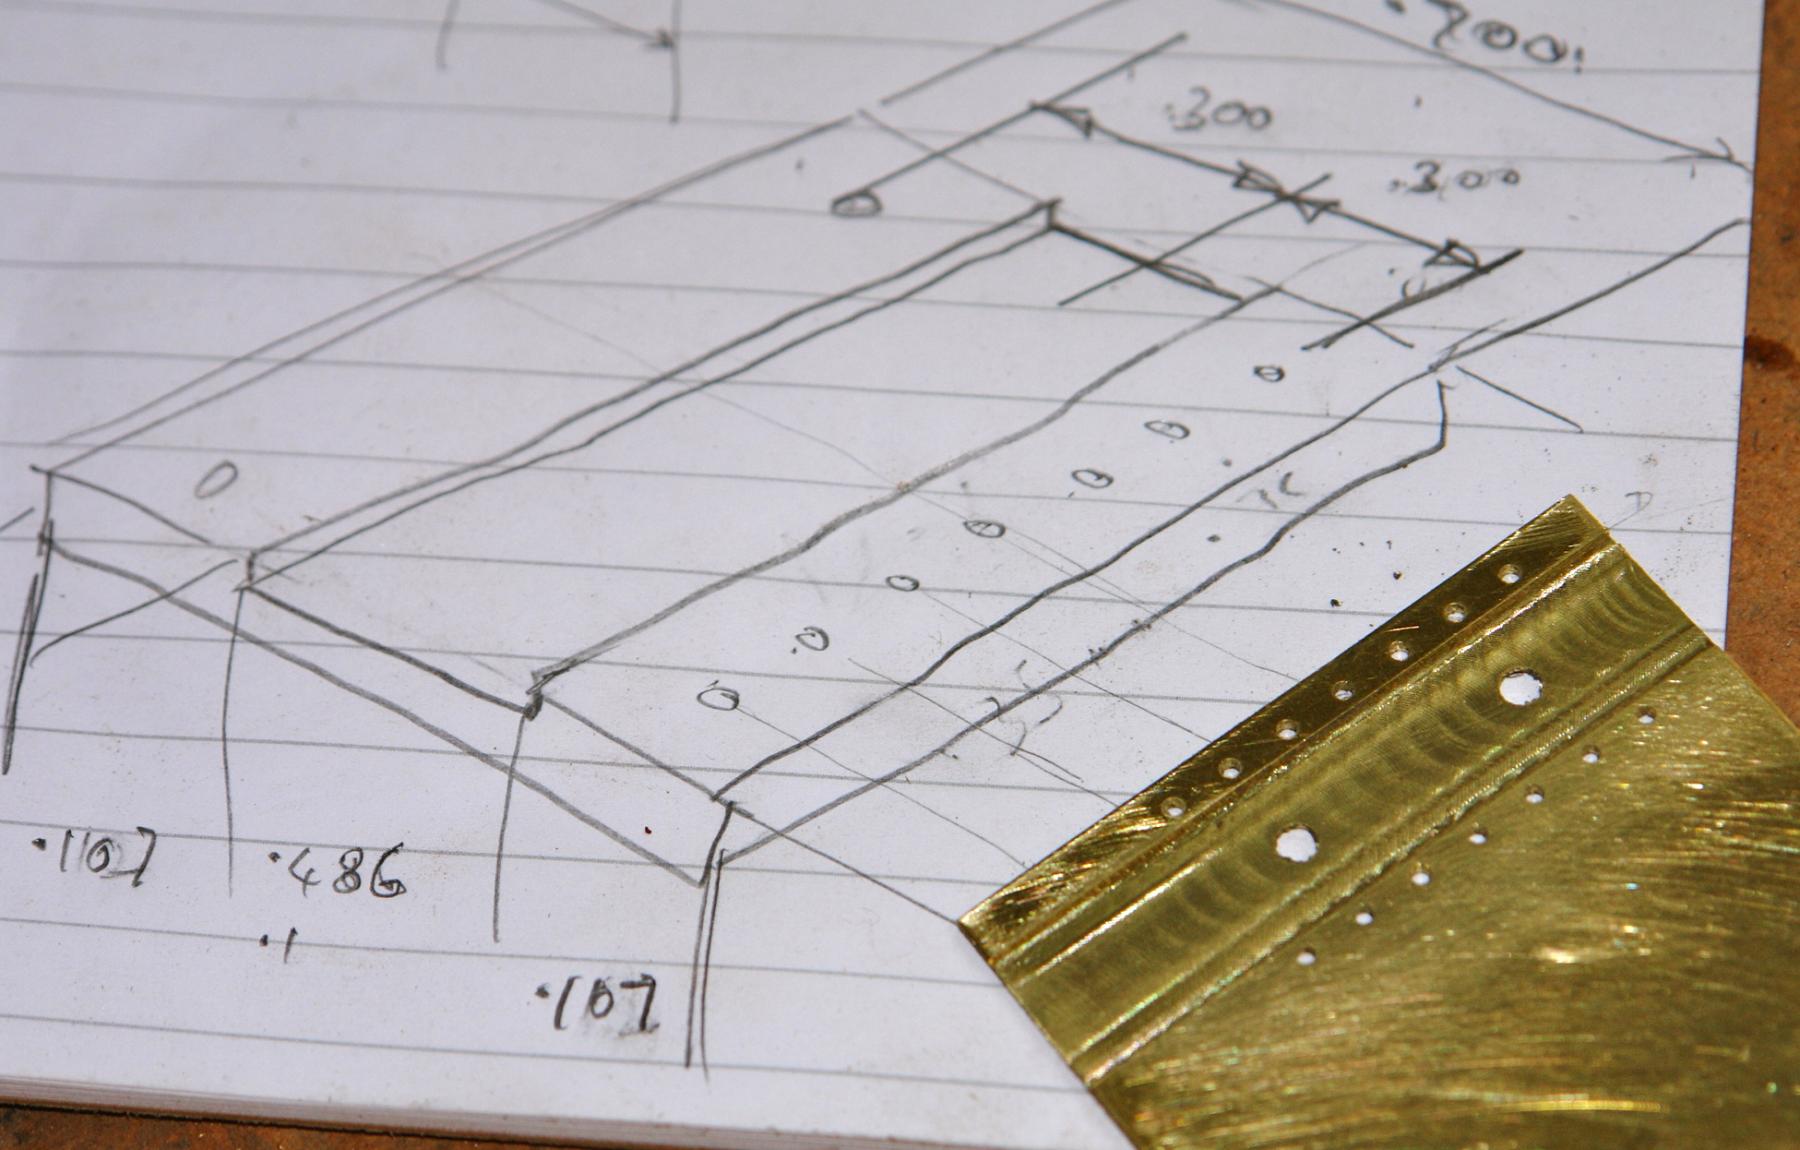
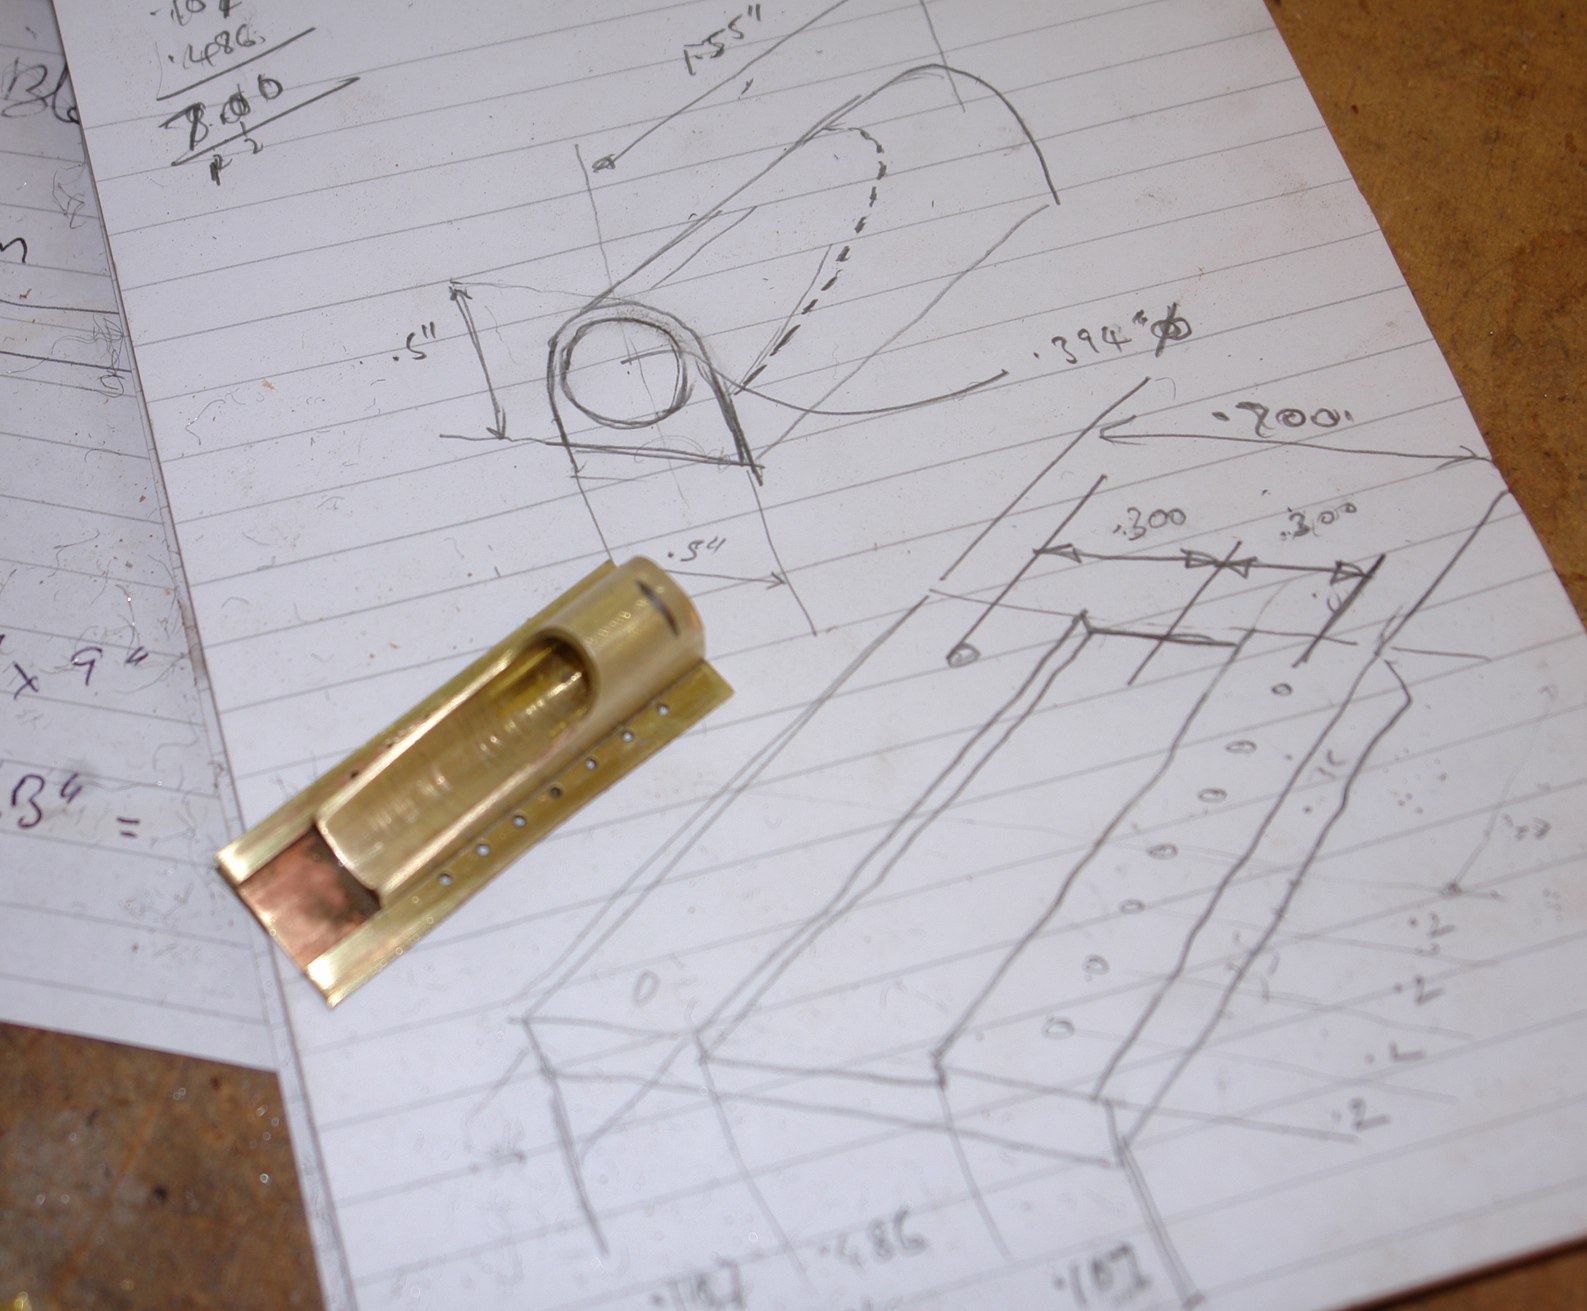
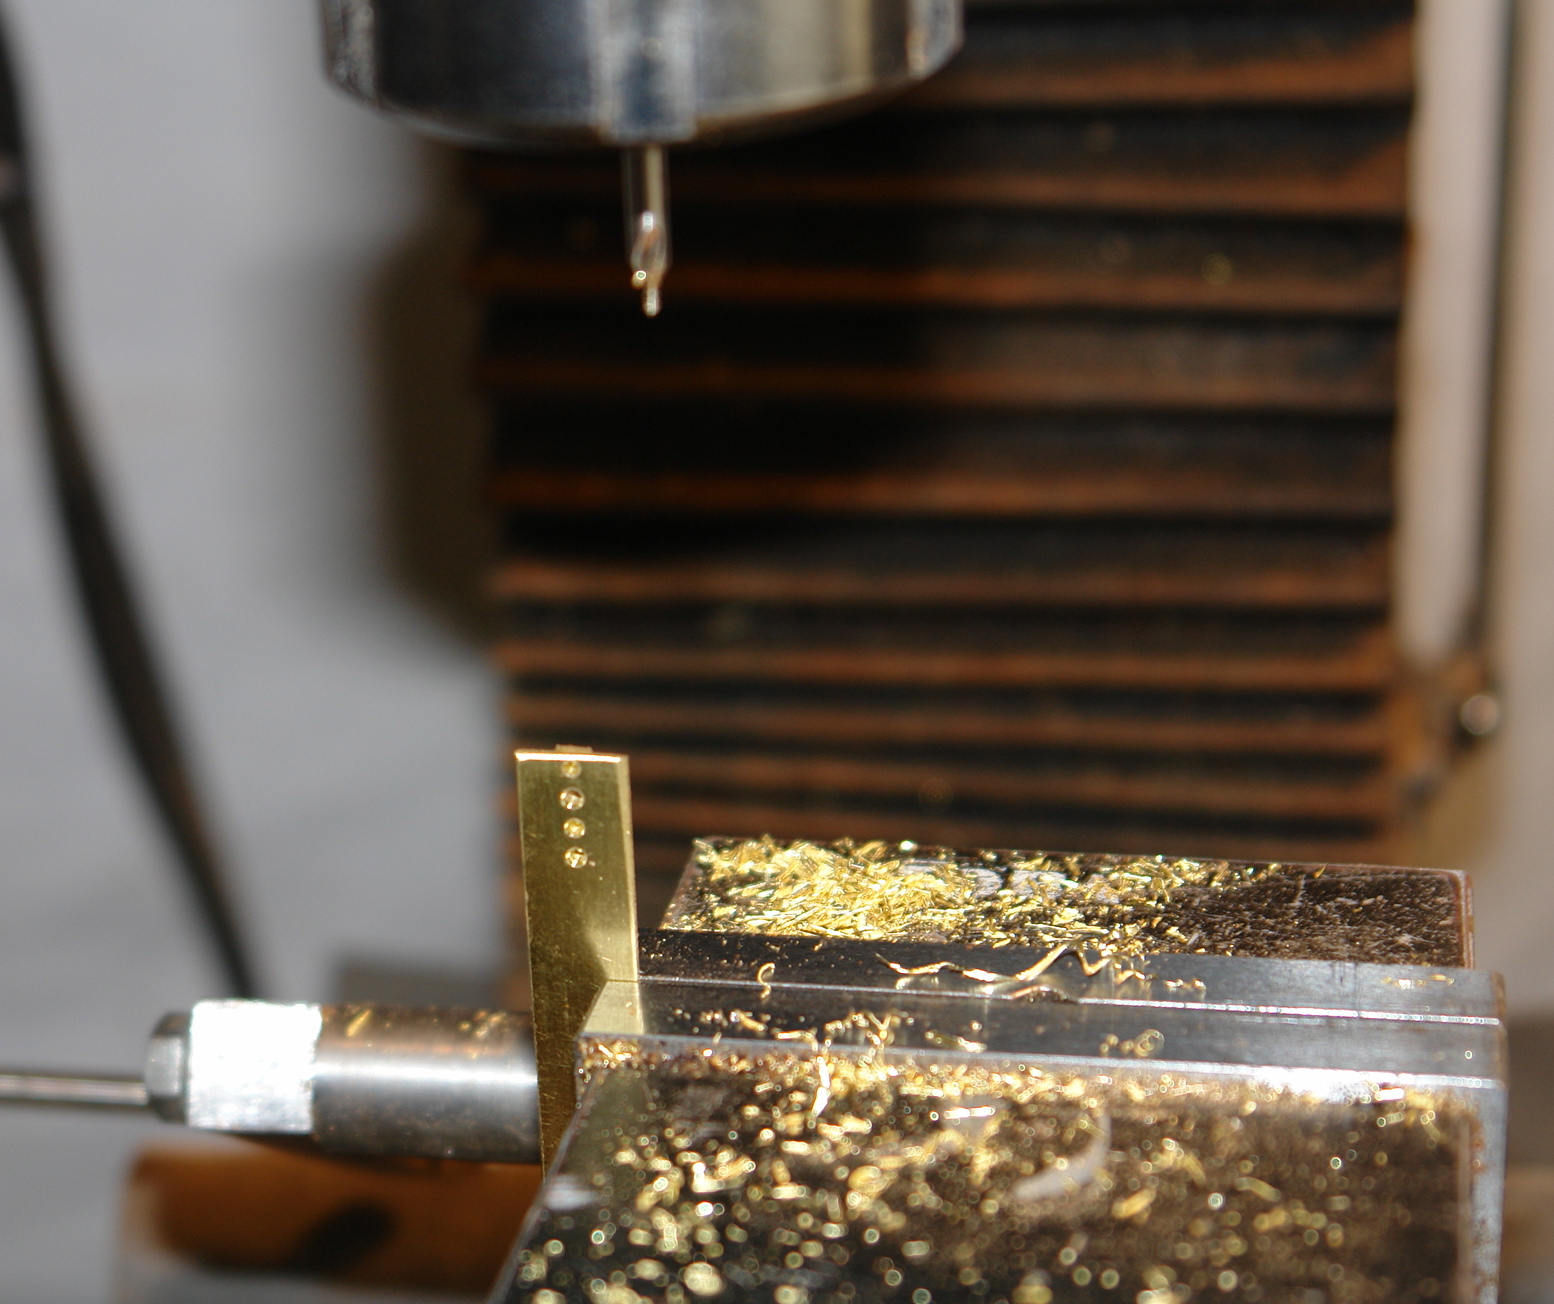
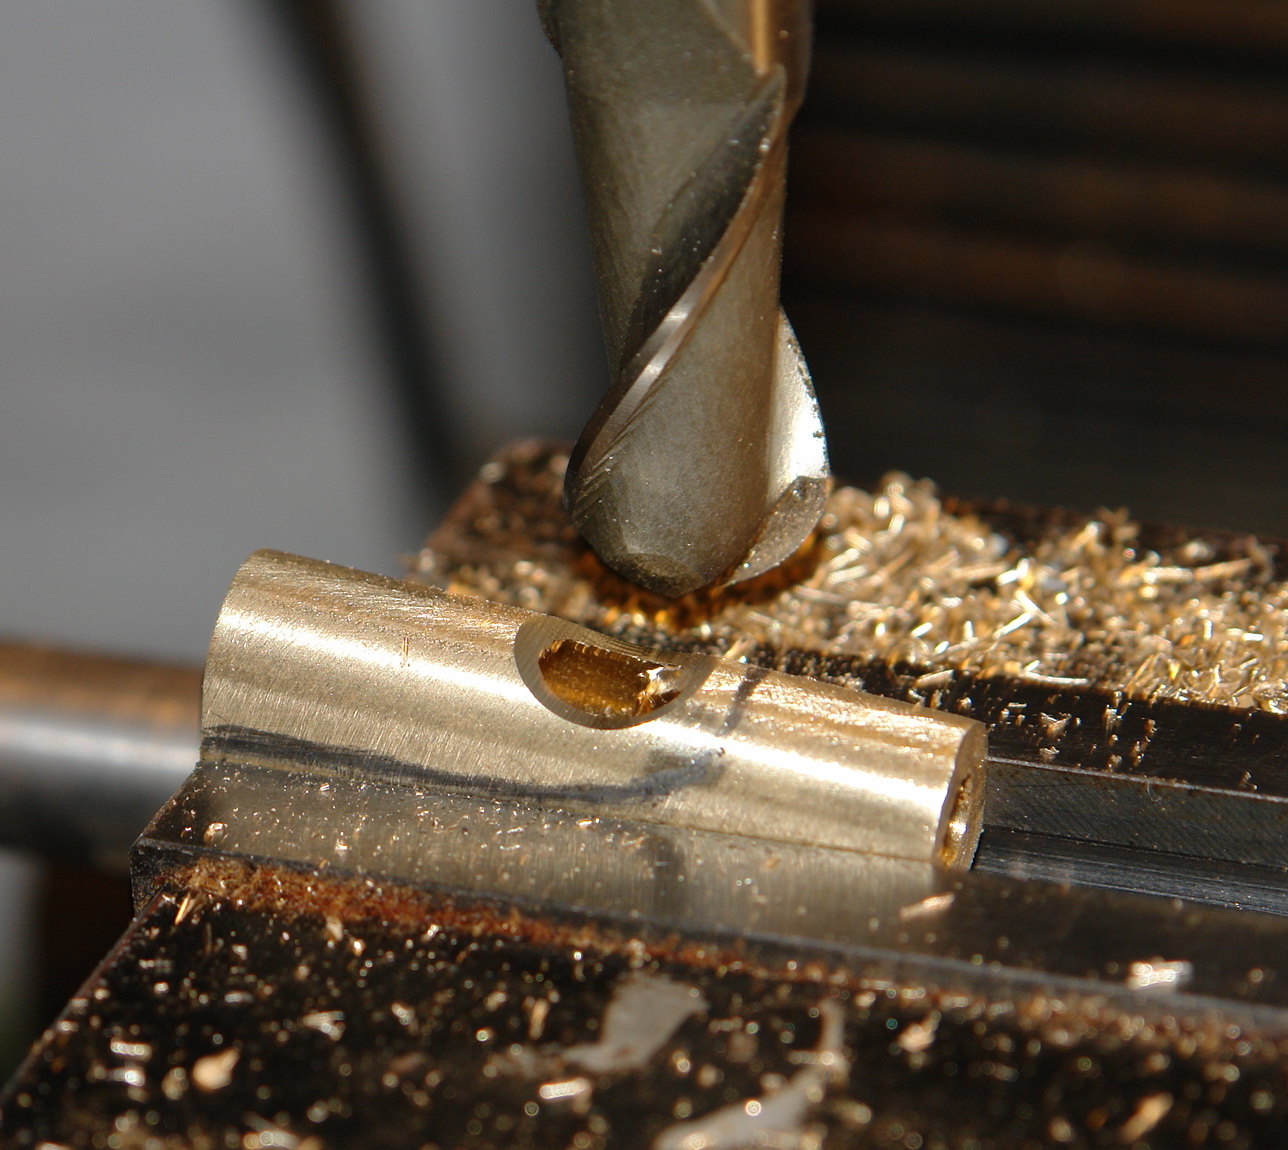
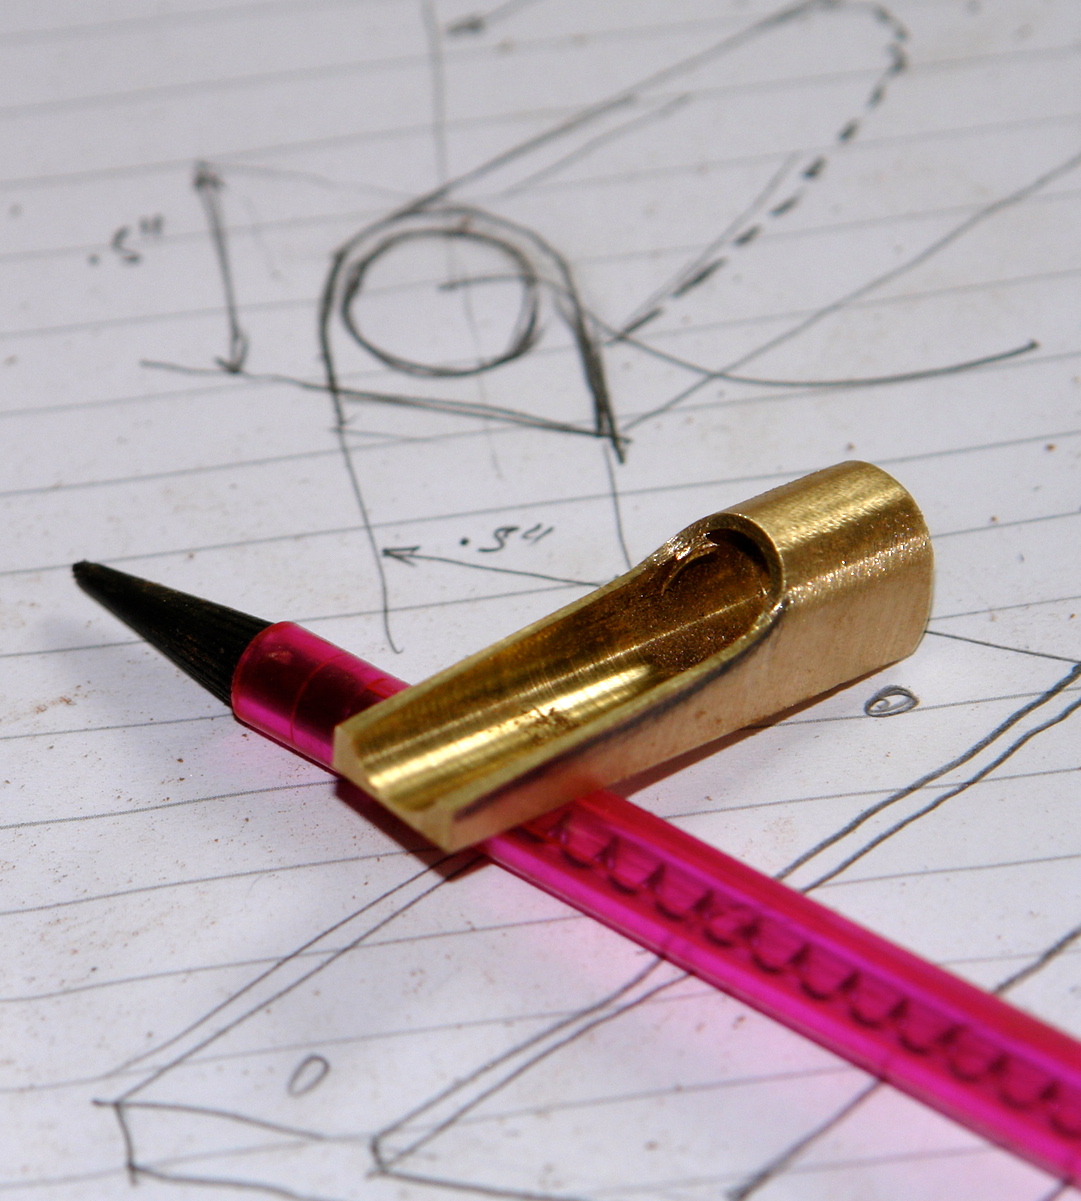
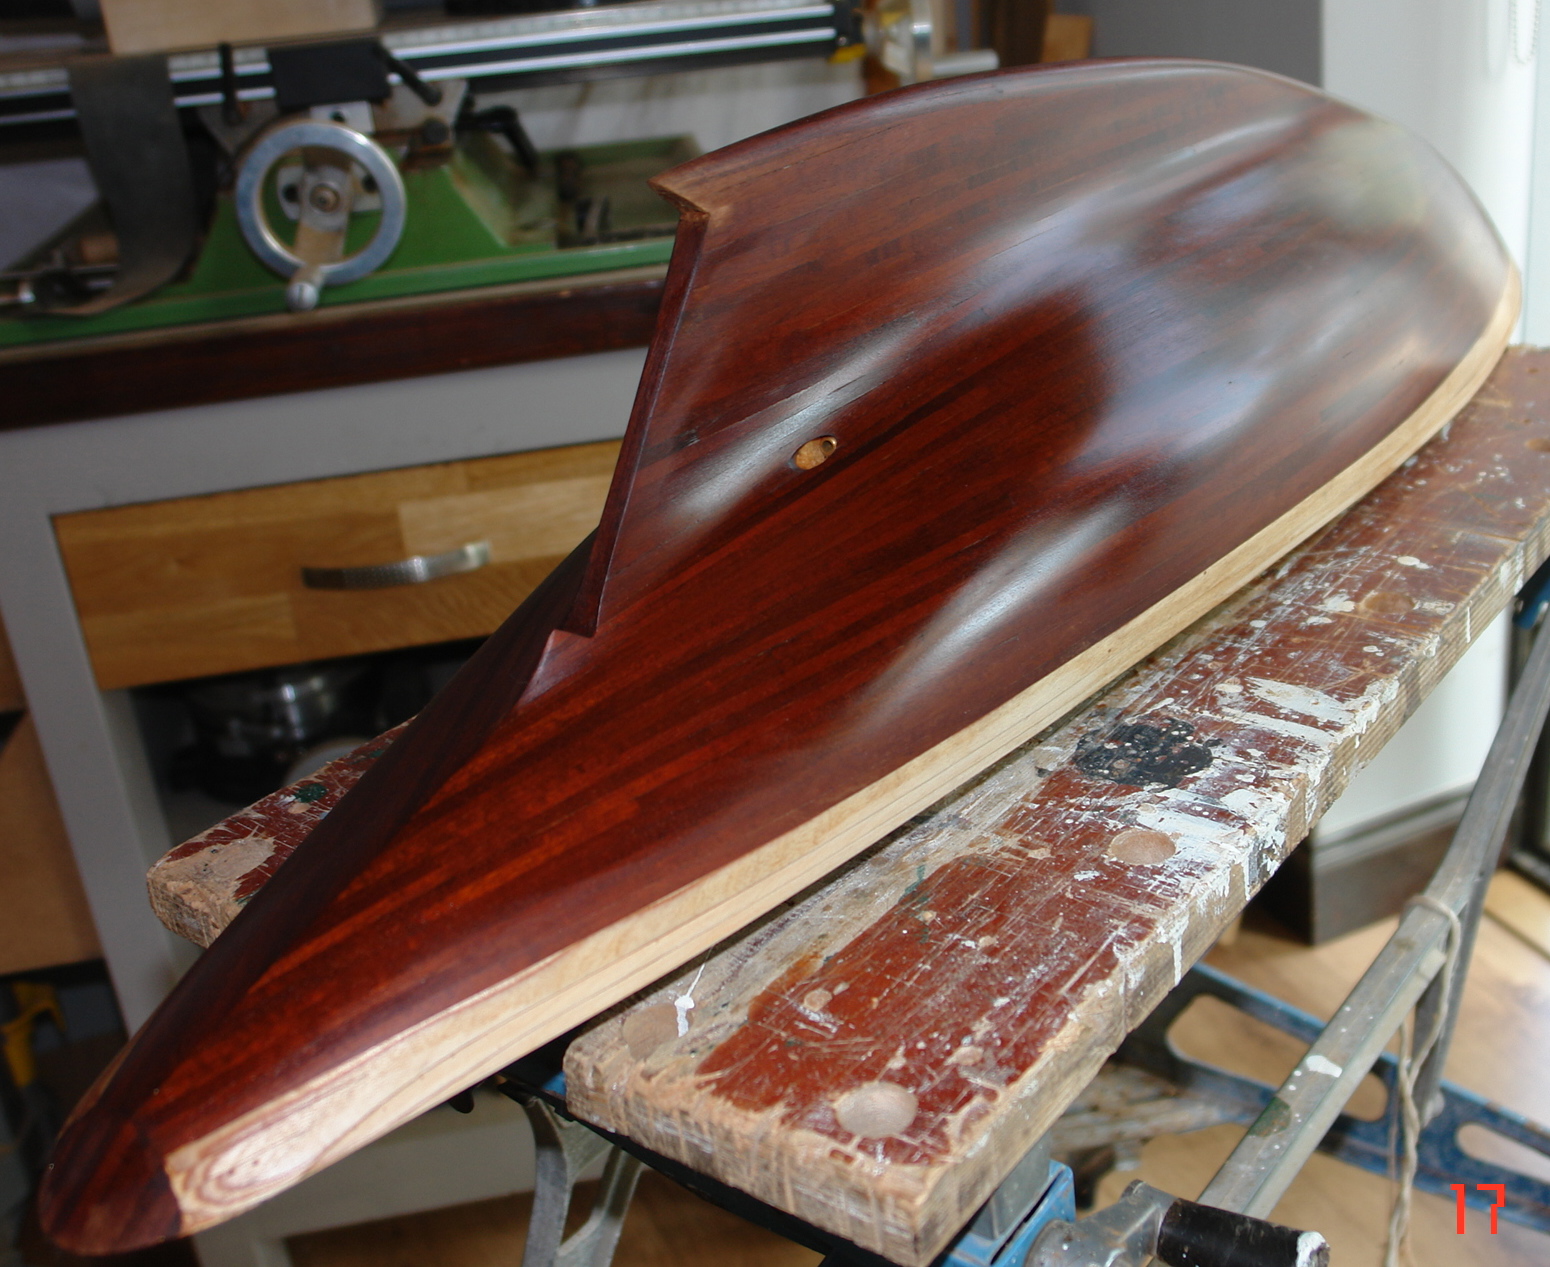
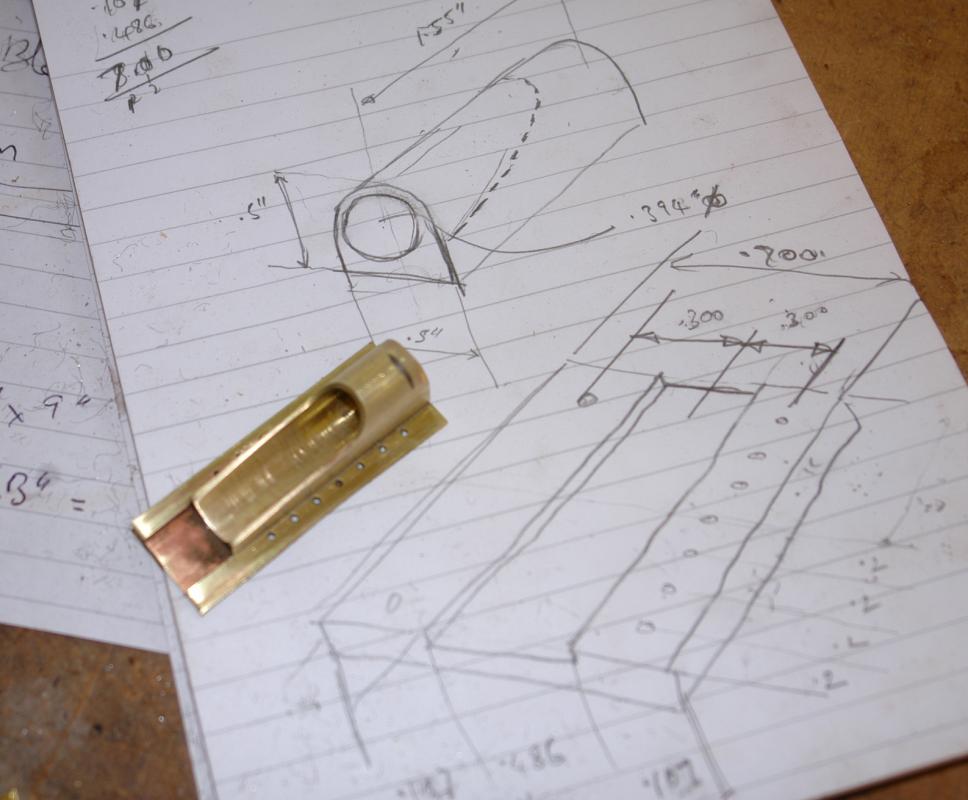
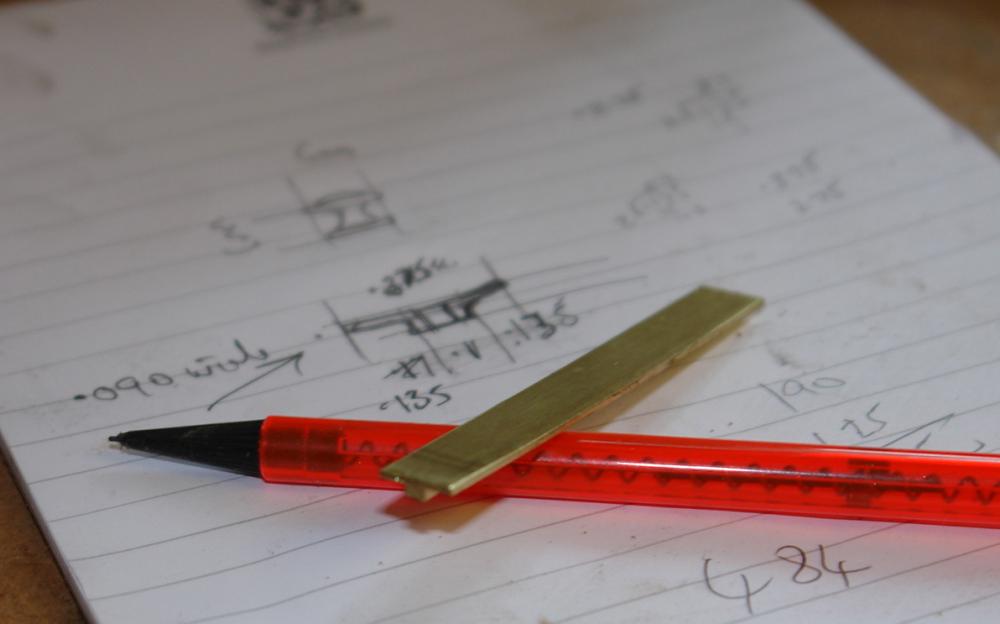
Having made the foot body I needed to mill / drill the base plate. This was made from .040 inch thick brass plate, thinned to .020inch where the body was to be attached. The 2 parts were then soldered together. Cleats have to be added to the sides of the foot and these were milled from 0.100 inch plate. The whole foot unit with cleats, etc attached was polished.


- 882 replies
-
- 15
-
-
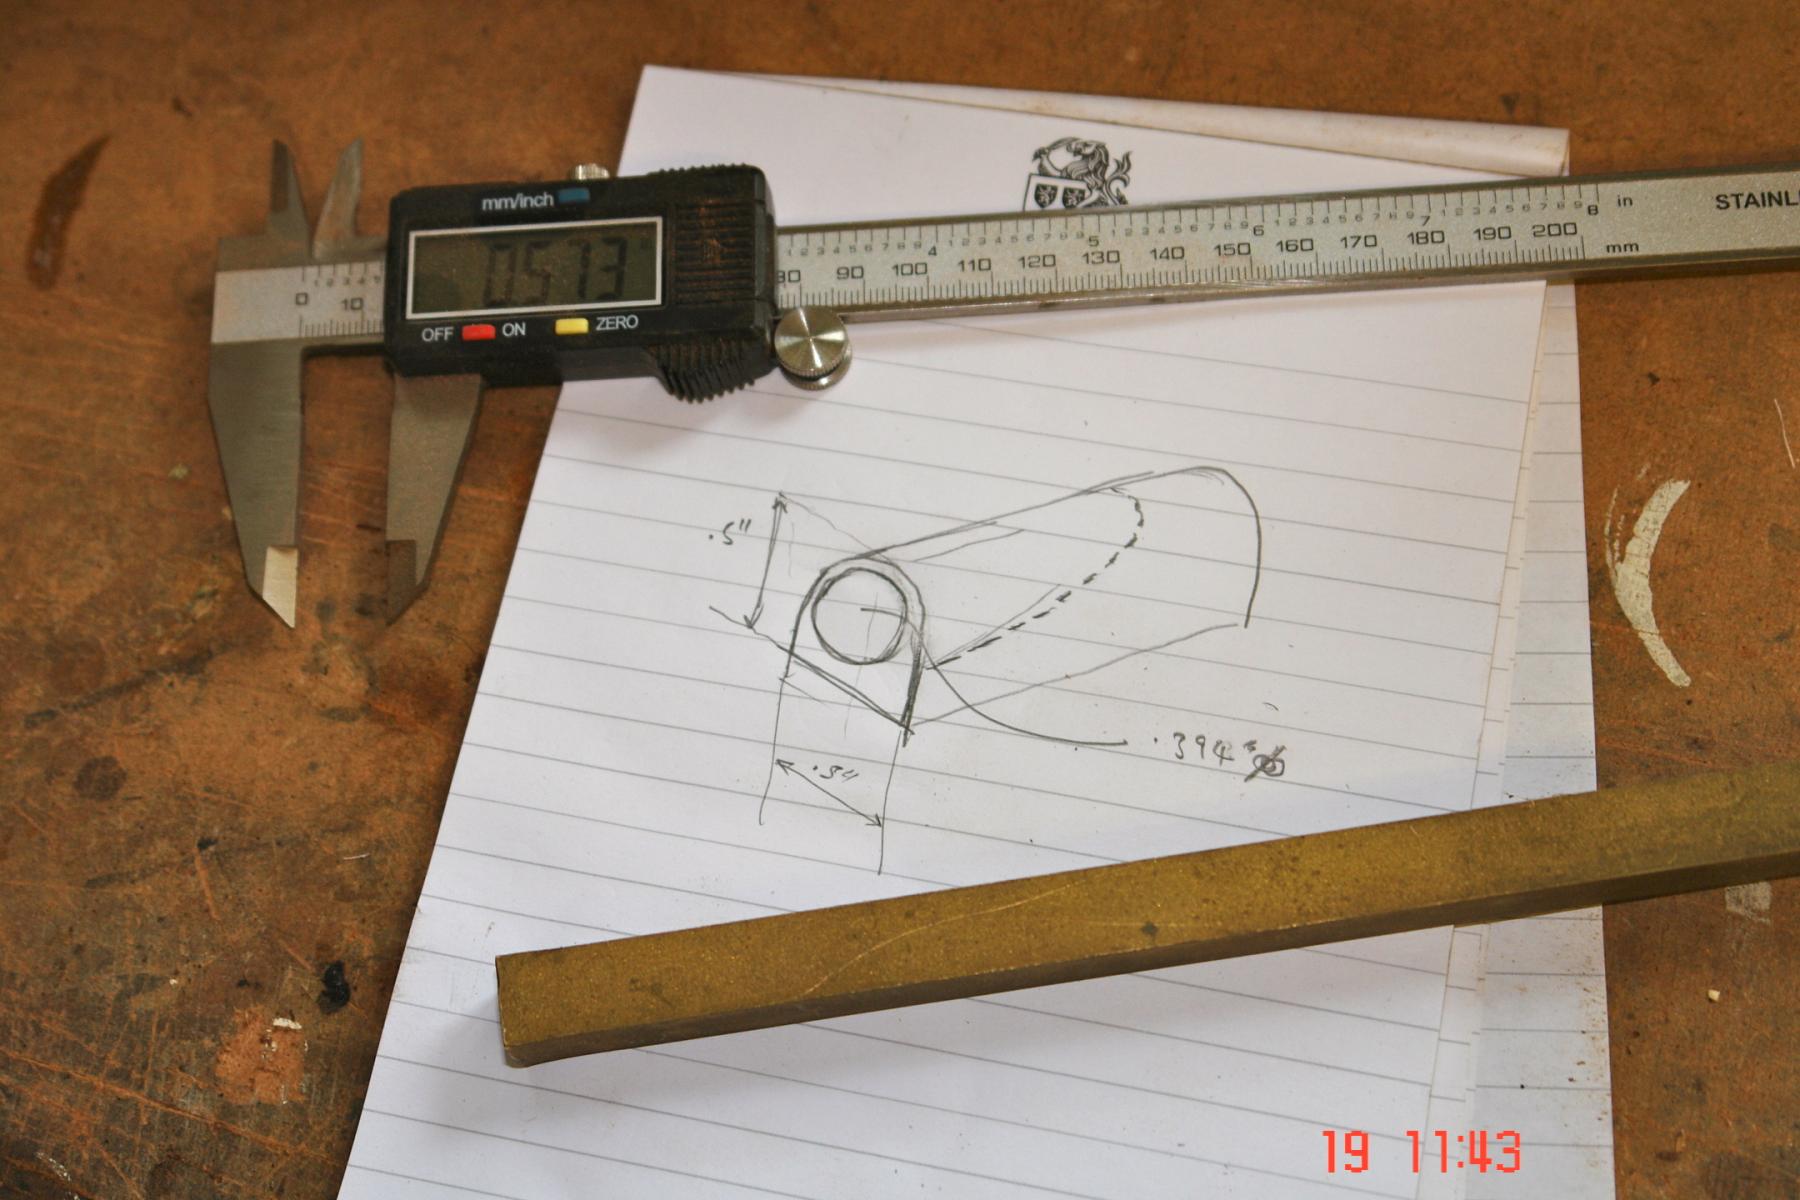
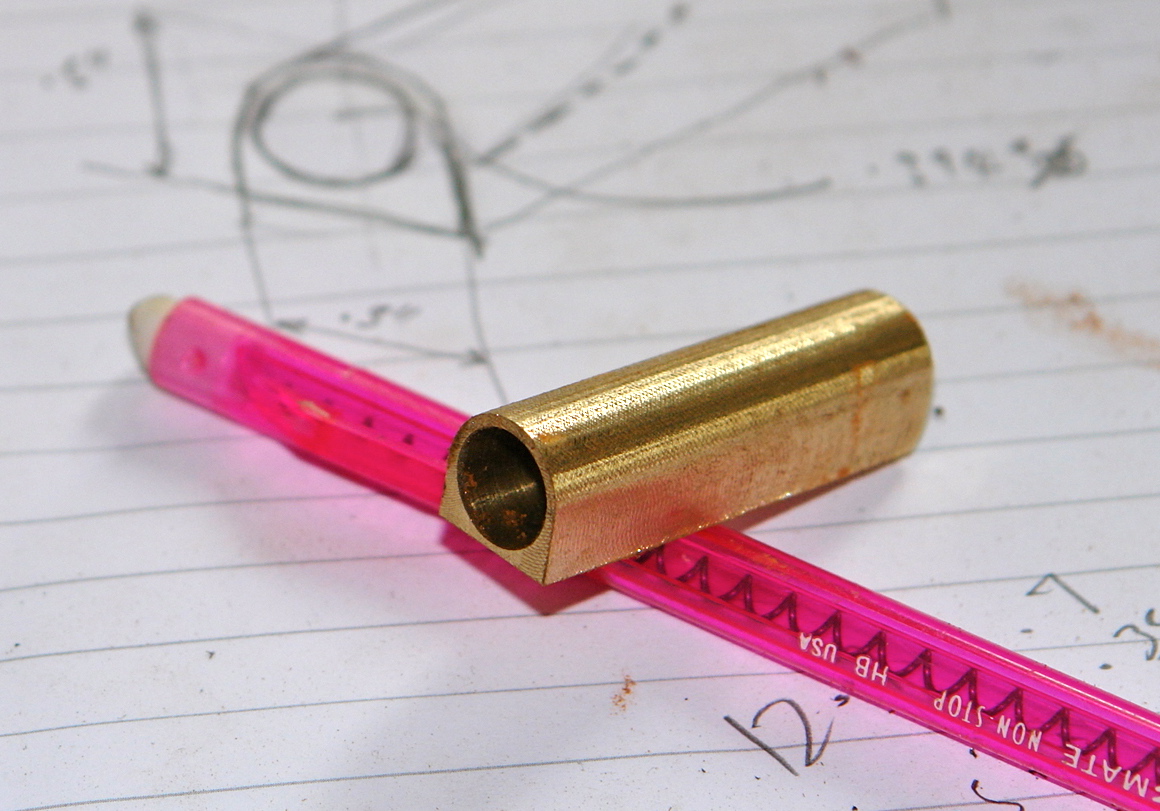
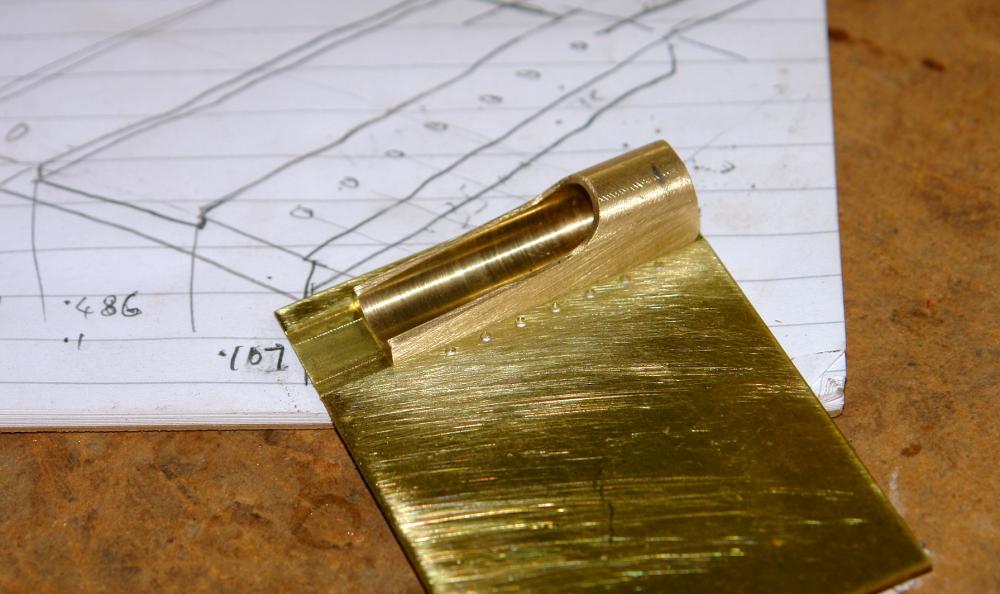
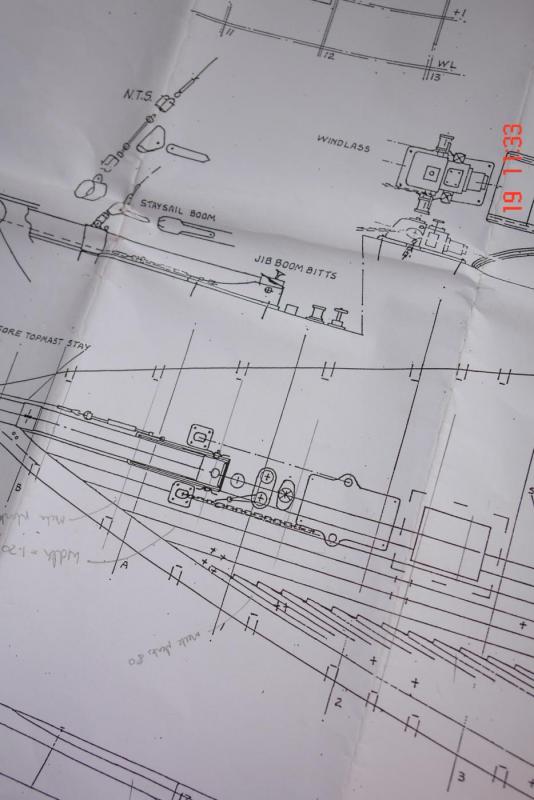
Finishing the hull is proving to be quite slow going as the poly is taking ages to dry. I needed a distraction so I thought I'd make a bit of progress on the deck fittings starting with the jib boom foot. The plans for this item were inadequate. I had a look round the internet and found another jib boom foot from a different Fairlie Yacht. This wasn't the same as on Altair but it gave some guidance. The final bit of information was gathered from a 2 second clip of a You Tube video. With this scant information I started to plan out the part. . I started the body of the foot by boring out a 1.75 long x 0.500 inch square bar which I then bolted to a round steel bar. The steel bar was mounted in the mill vice and the half round section was formed by end milling along the length of the workpiece and then rotating it few degrees before repeating the cut. Multiple passes generated the half round (effectively the curve is generated from a series of flats). The shaping of the foot was also done on the mill.


-
Hello Francis I made the deck central plank from mahogany veneer. This was from a marquetry kit that I never got round to attempting. The veneer was the same thickness as the deck planks supplied with the kit - about .030 inch (0.75mm) if memory serves me well. I cut the veneer into strips about .500 inch (12.5mm) wide. I stuck the veneer down with PVA glue while it was still parallel. I cut a piece of brass strip the same width as the deck planks and I used this as a cutting guide to notch out the centre mahogany plank - using a craft knife. I notched out the centre plank and then laid the deck plank before cutting the next notch and laying the next deck plank. Its fairly important to make sure the notches in the central plank are symmetrical.
-
Timboat This article should answer your question http://modelshipworldforum.com/resources/materials_and_tools/Modelling_Woods.pdf
-
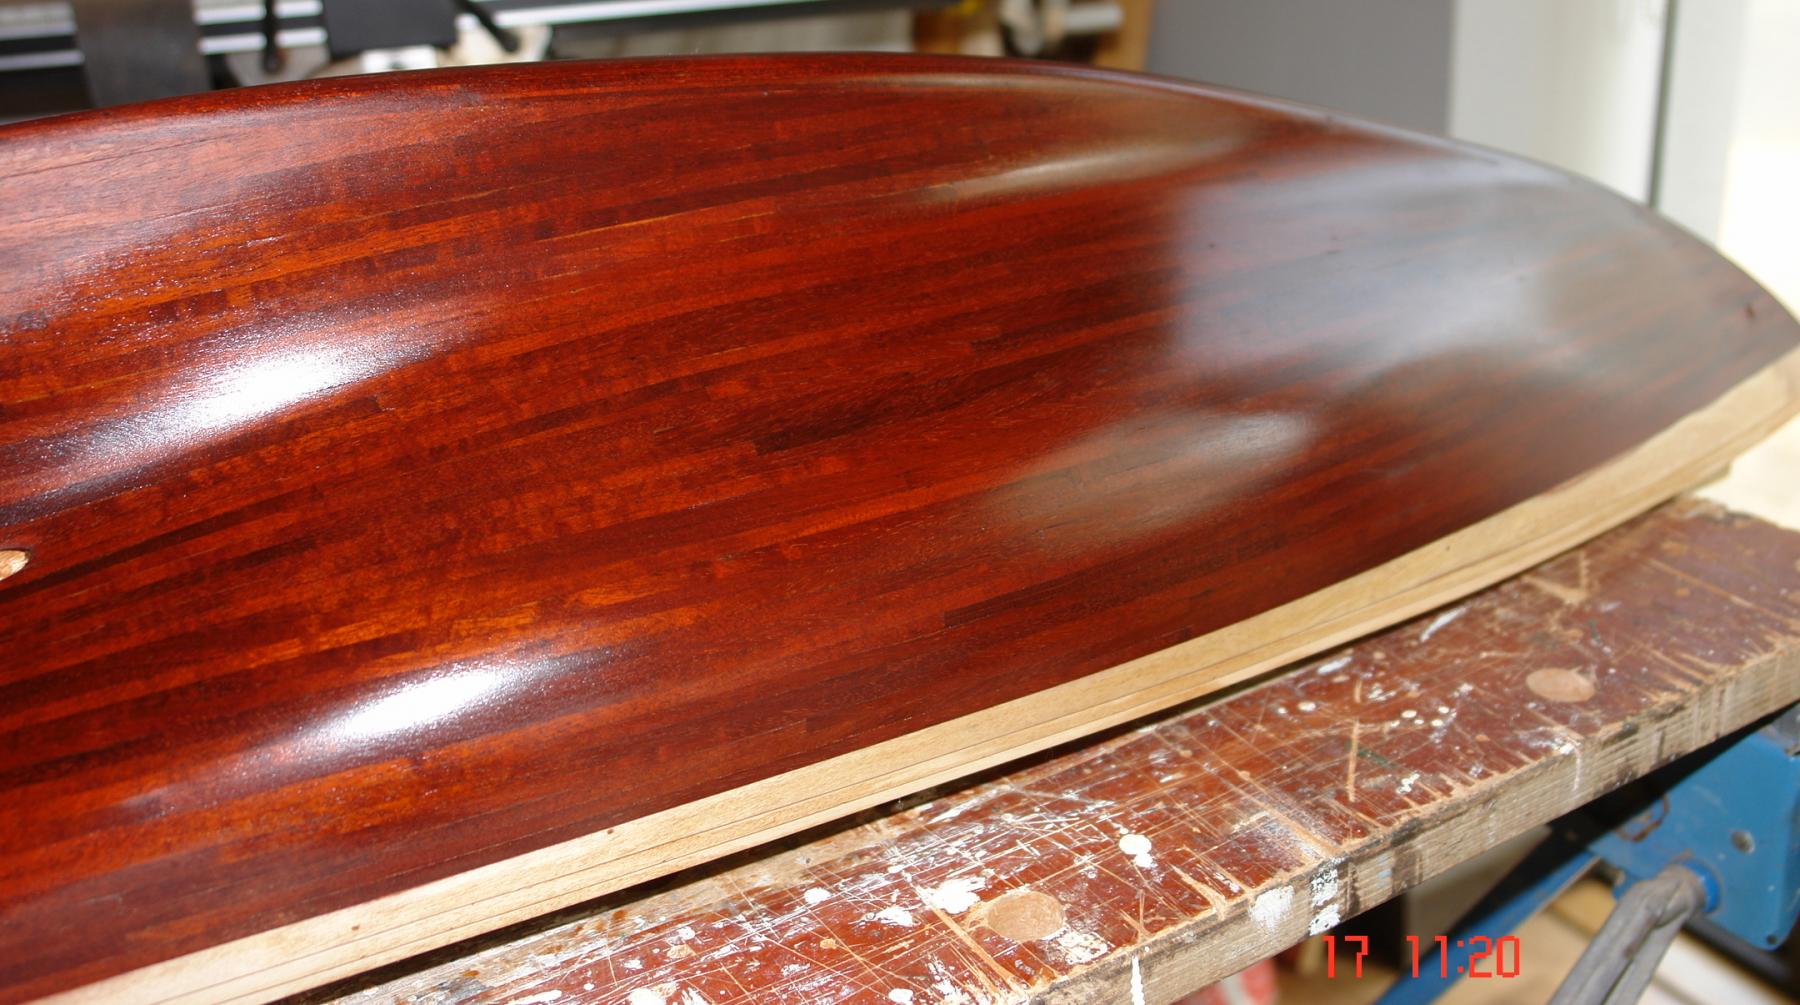
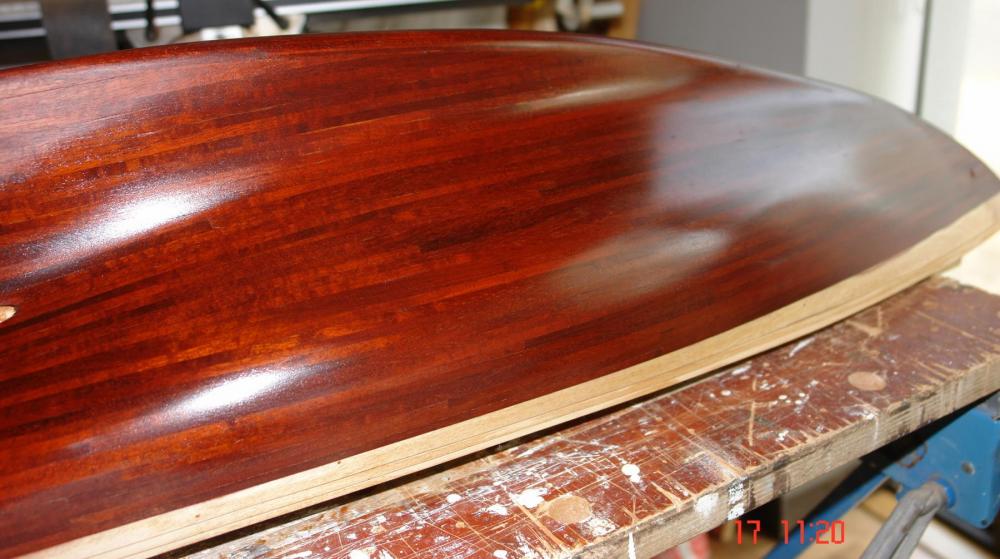
Hello John / Bedford / Tom Thanks for the feedback. Using mahogany rather than sapele has given the hull a much richer colour. The grain also looks much less course and seems to produce a much smoother sanded finish. The wood being very old (and a little brittle / hard) may may also be helping the finish. Thankfully I managed to complete the sanding without rubbing through to the 1st planking, so that is one worry out of the way. I find the variation in colour of the mahogany quite interesting given that all the planks were cut from a single large plank! The variation does emphasise the individual planks which I quite like.
-
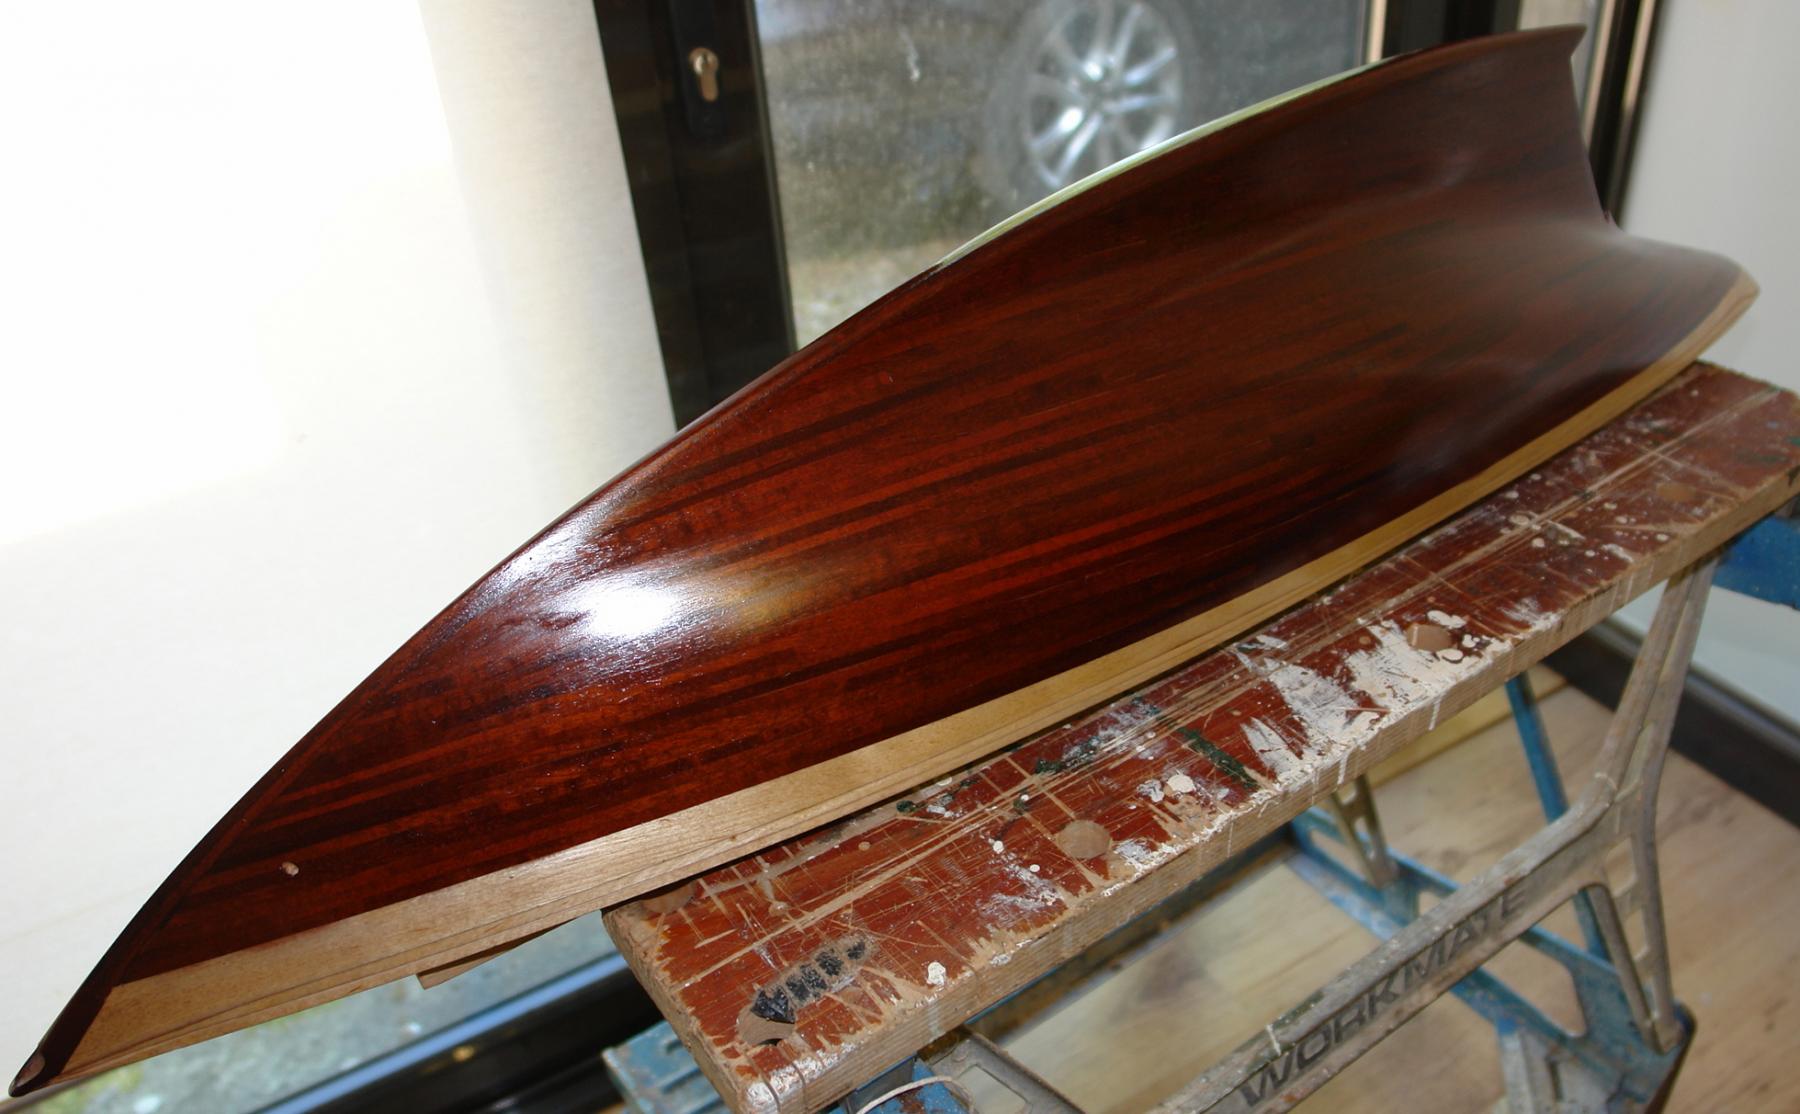
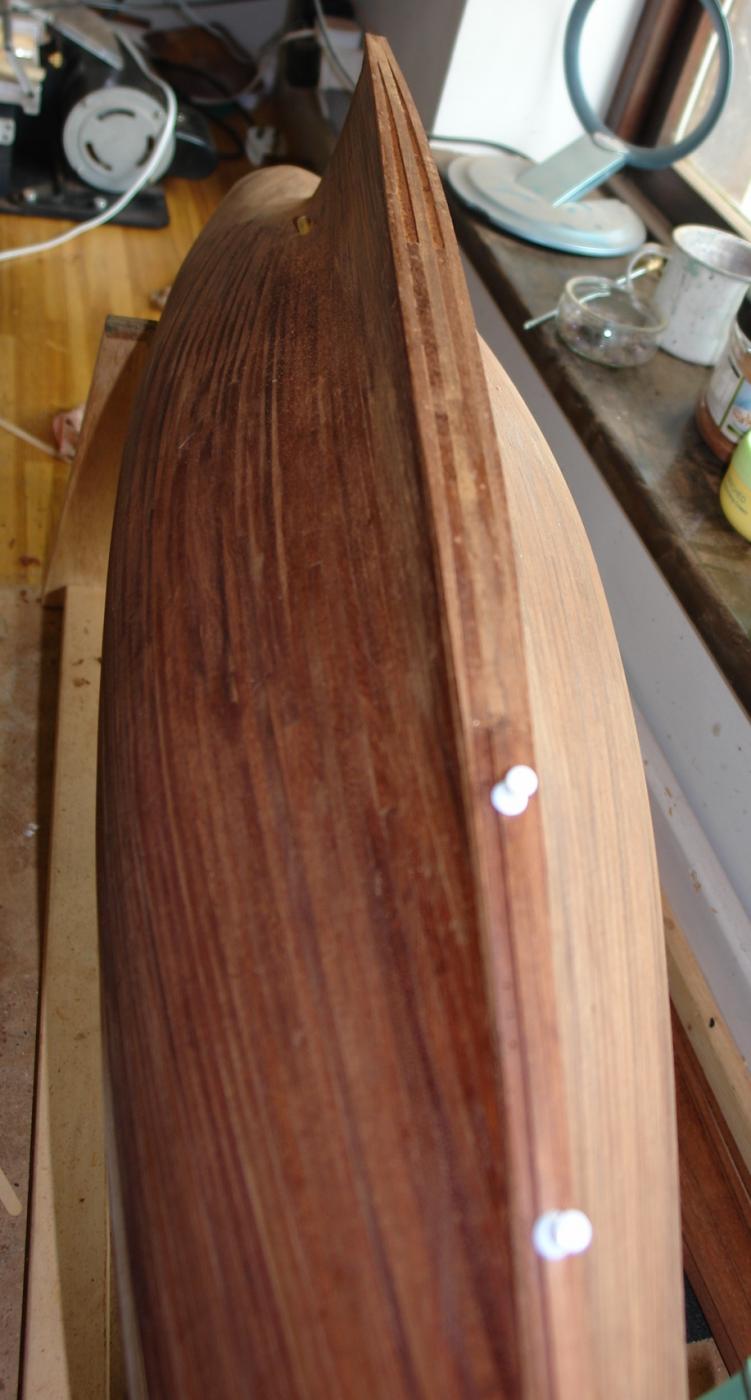
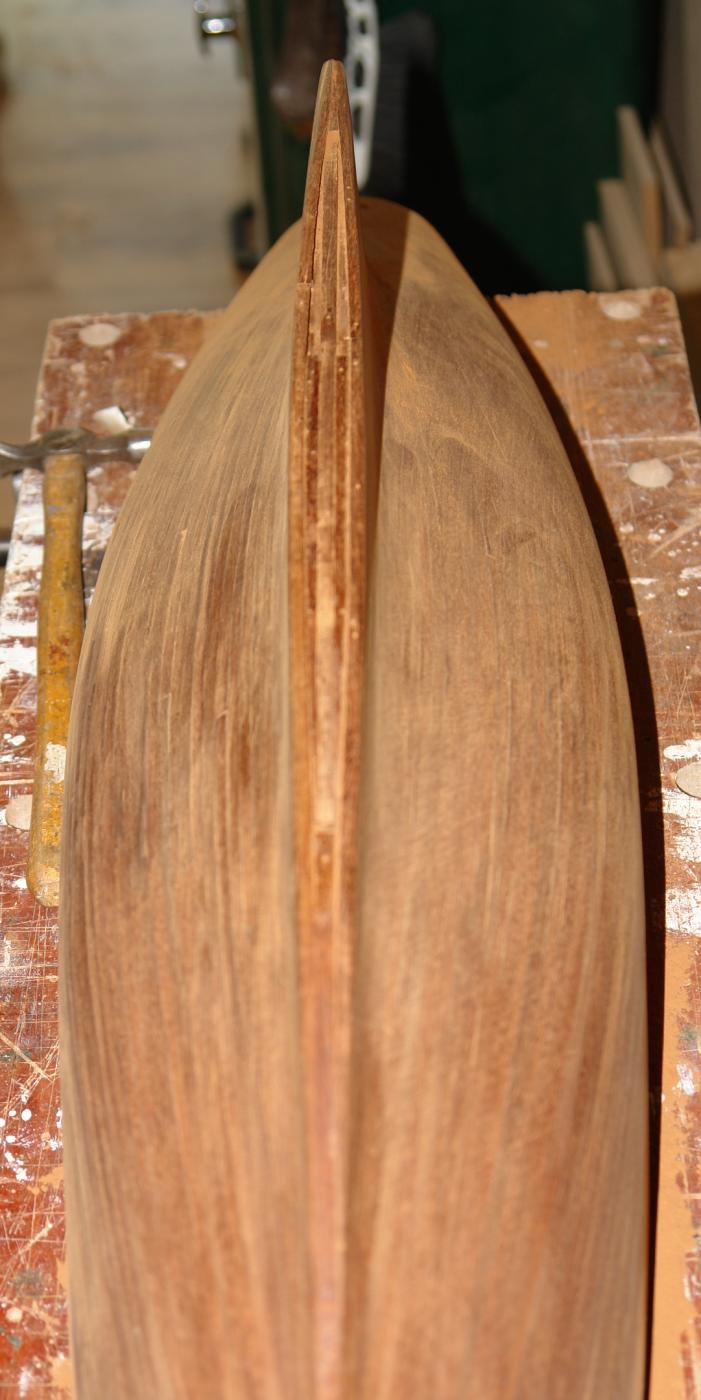
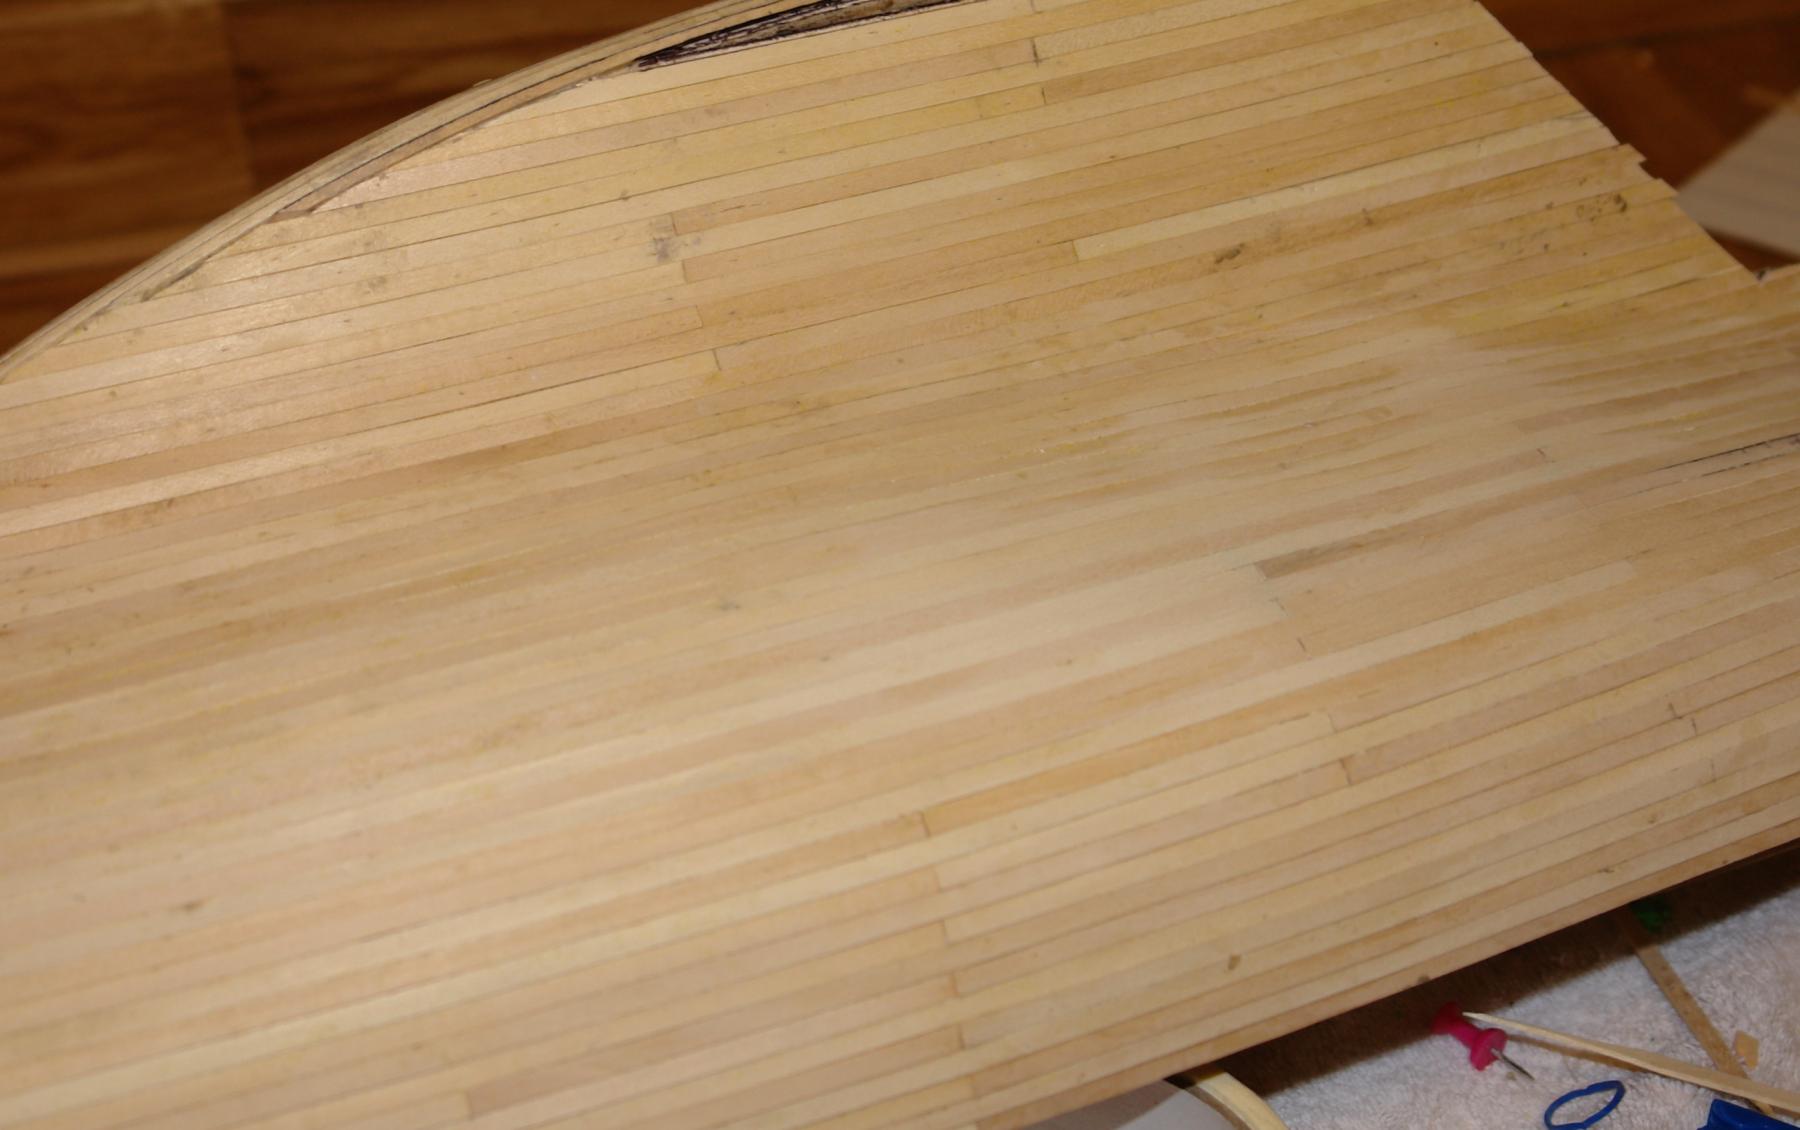
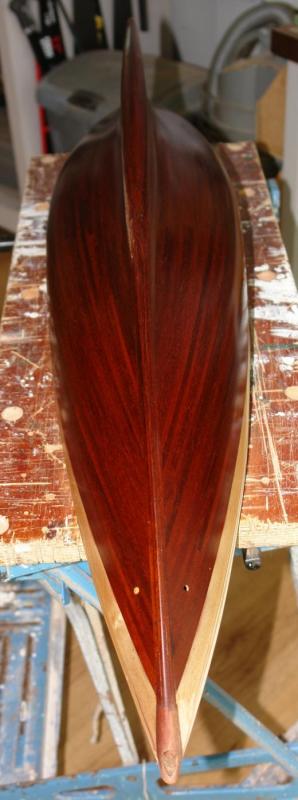
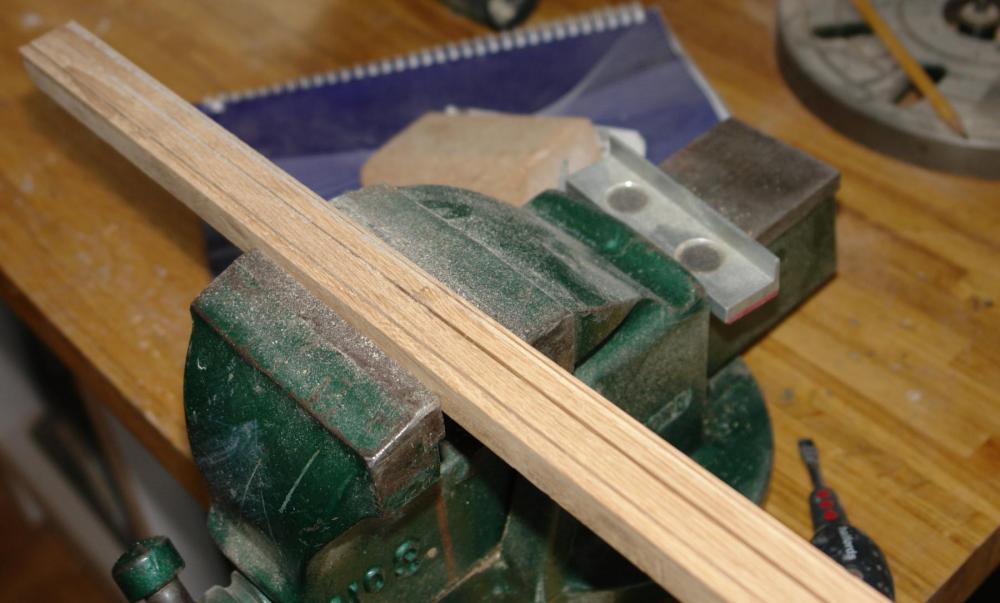
After an enforced break I have made a bit of progress. The keel was laminated from .050 inch thick planks. Quite a tedious process because the keel has quite a full form. I don't think I will repeat this process on future builds where the keel is so full. The following series of photographs illustrate the process. Holding the shape of the keel proved quite difficult and I found the best approach was to sand the planks to shape each time a layer was laid. This layer by layer approach allowed me to cut the next layer of planks to match the sanded form achieved on the previous layer. The hull was then sanded firstly with 60 grit emery followed by 120 grit and finished with wire wool. I used white spirit to raise the nap before buffing with wire wool. I did this 3 times. The photographs show the hull still wet with white spirit. Now ready for the first coat of poly (silk finish). I'm planning to thin to one part poly to one part white spirit and try wiping it on. I have not tried this before so its a bit of an experiment.


- 882 replies
-
- 13
-
-
Julie - yes I just used the full mahogany plank and laid them along the keel. They were so thin that they easily took on the shape of the keel without splitting.
-
Julie I am laminating the keel on Altair - simulating what was done on the original. I keep thinking I won't repeat the approach on future builds. Altair has a much fuller keel than Endeavour and I suspect Endeavour would be easier than Altair. That said I didn't experience any problems 2nd planking the keel on Endeavour and hence I think I would repeat this method. That said you should do what you think you would prefer - its all part of the learning experience.

- 562 replies
-
- 10
-
-
Hi Julie Much of the fun is in finding the problems and working out on how to make it better on the next build. I'd be surprised if you didn't sand through the 1st planking somewhere - its almost inevitable given the thickness of planks. As you say the balsa will save the day. Its really important to get the fairing of the 1st planking perfect. The mahogany planks are virtually a veneer and you have no scope for fixing irregulrities at that stage. When I do scratch builds I generally go for 1st planking .060 inch (1.5mm) thick and 2nd planking .040 inch (1mm thick). I find these thicknesses make the problem of sand trough unlikely.
-
Julie Re taper planks - I dint find I needed them. The planks seemed to straighten themselves up and lay quite nicely on the keel without curvature. You may remember I ruled lines on the hull to satisfy myself that I was happy with where the planks would fall. I am not quite sure I understand your question re sharp edge but I would agree that as the planks approach the hull area just above the rudder you do get a sharp edge.

-
Julie / Rob Thank you for the nice comments. I really must get back to the build and do a bit of an update.
-
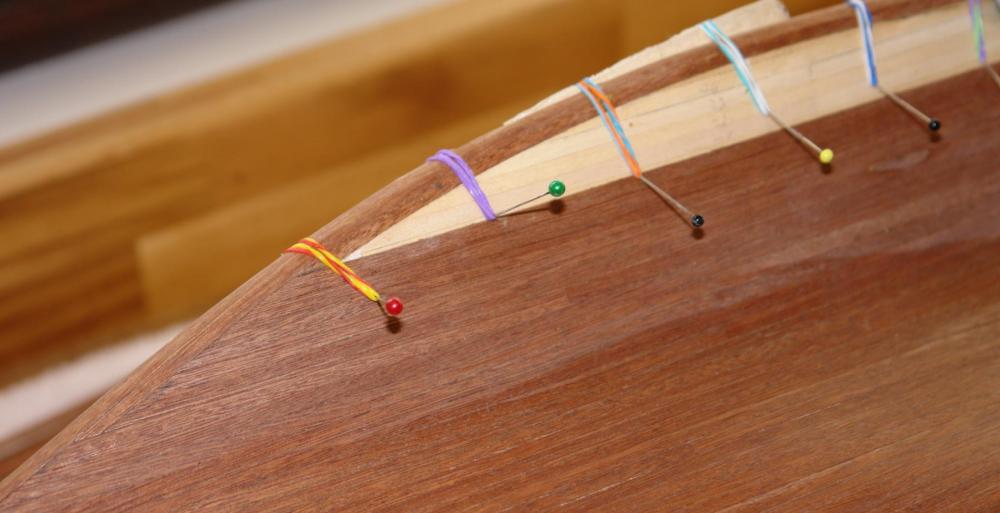
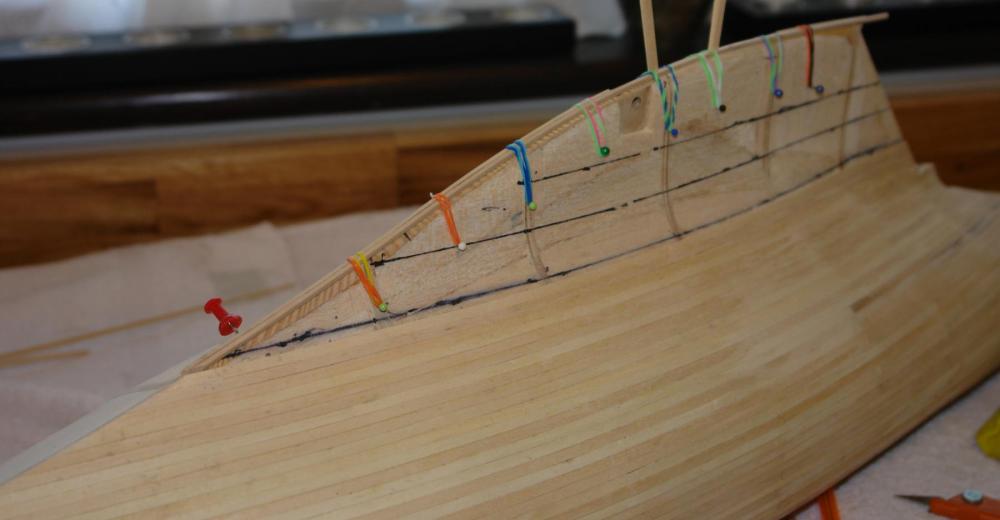
Julie - you are nearing the stage where you start to find that the planks want to bend across their thick / stiff direction as well as bending in the normal thin / flexible direction. this double bending creates the tendency to produce the clinker effect we have previously discussed. You have a choice as this situation starts to develop. You can either continue with the parallel planks as I did with Endeavour or start to shape the planks as I did with Altair. You can make your mind up as you progress. As you say it is important to make sure that you remove all glue from the last plank - particularly if you plan to leave it for a while. I tend to have a wet rag and a plank off cut handy (cut to a wedge). Once glued and pinned I immediately work along the line of pins - removing a few at a time and wiping the edge before replacing the pins and moving on to the next section. Once the whole plank edge has been cleaned I draw the off cut along the edge to remove any glue squeezed out by reinserting the pins.
-
Julie - I think its looking pretty good. I have seen much more experienced builders producing far less uniform results. Well done so far.
-
Julie - I'm please to be able to assist. There is a lot of relevant 1st and 2nd planking detail in my current build if you are interested - Altair - see below.
-
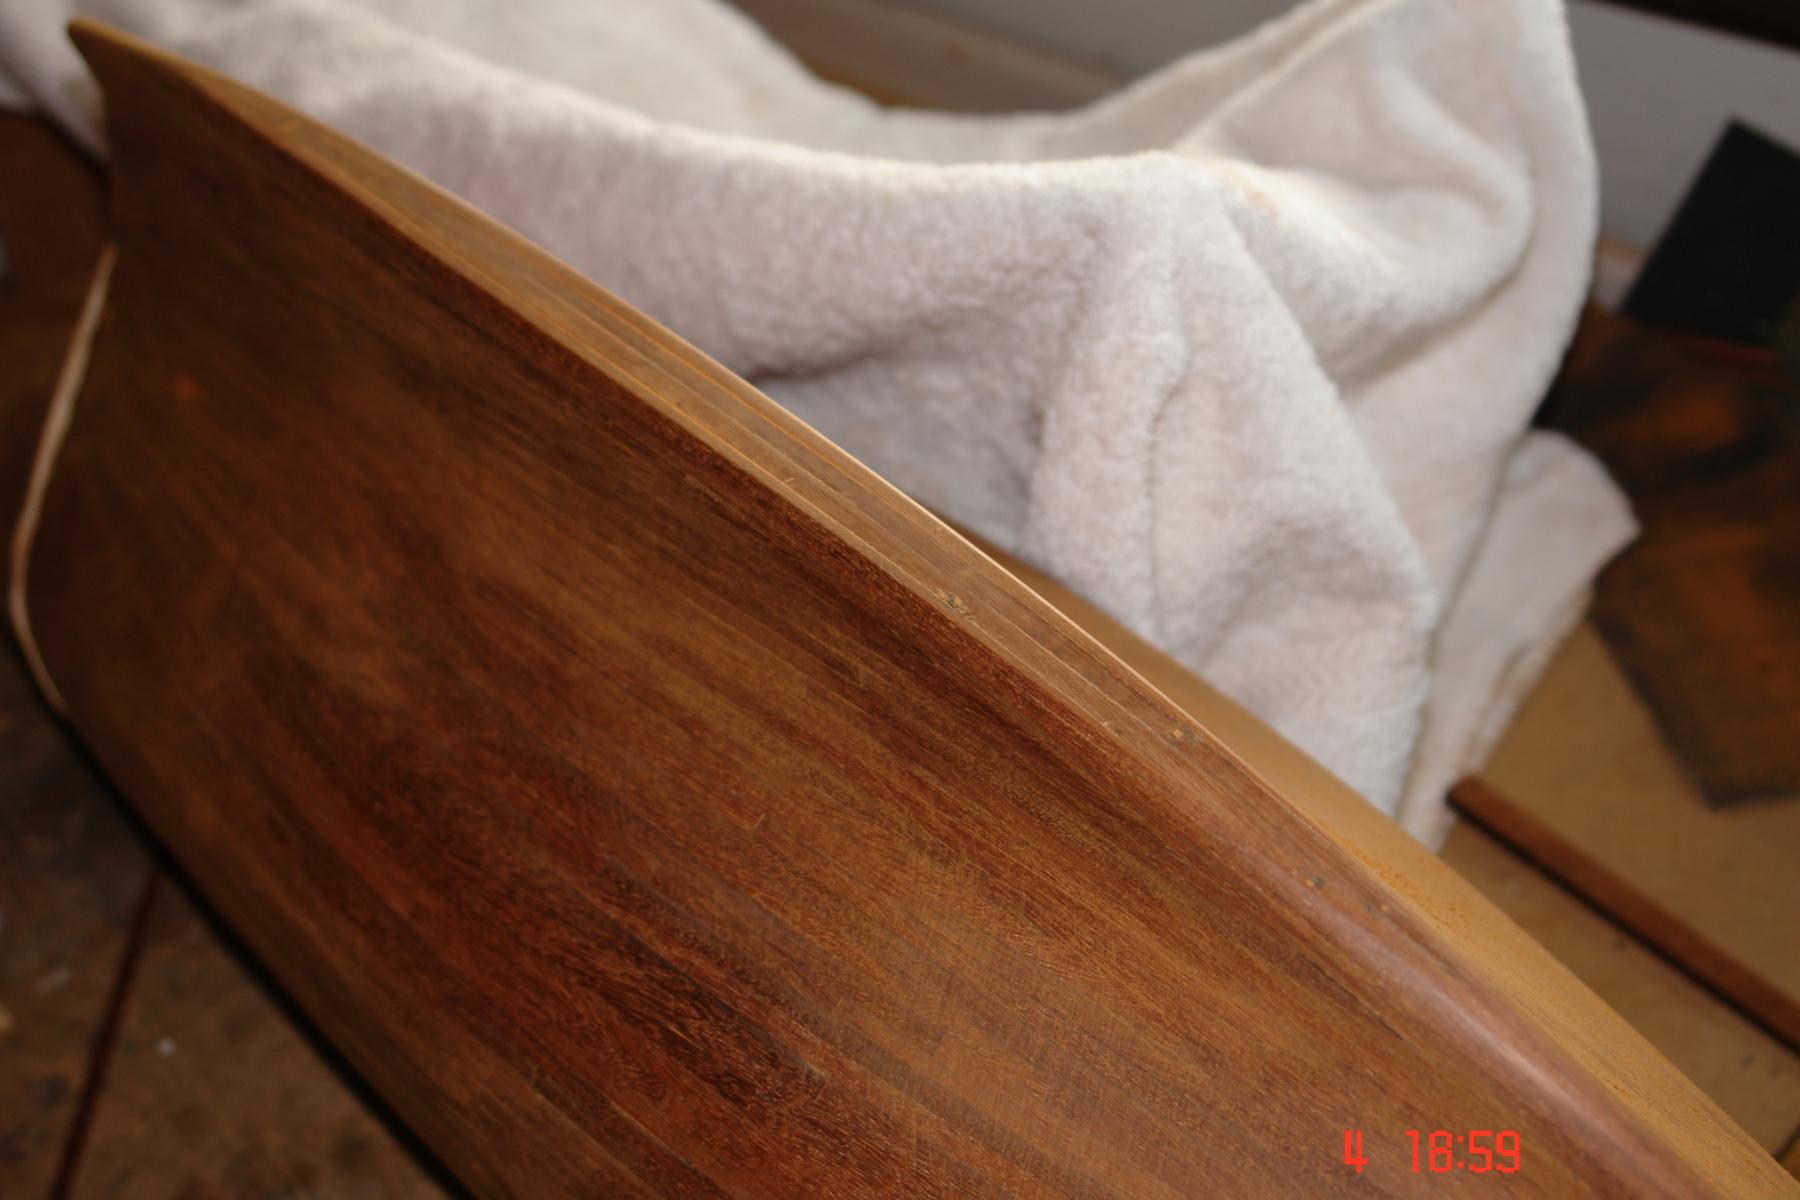
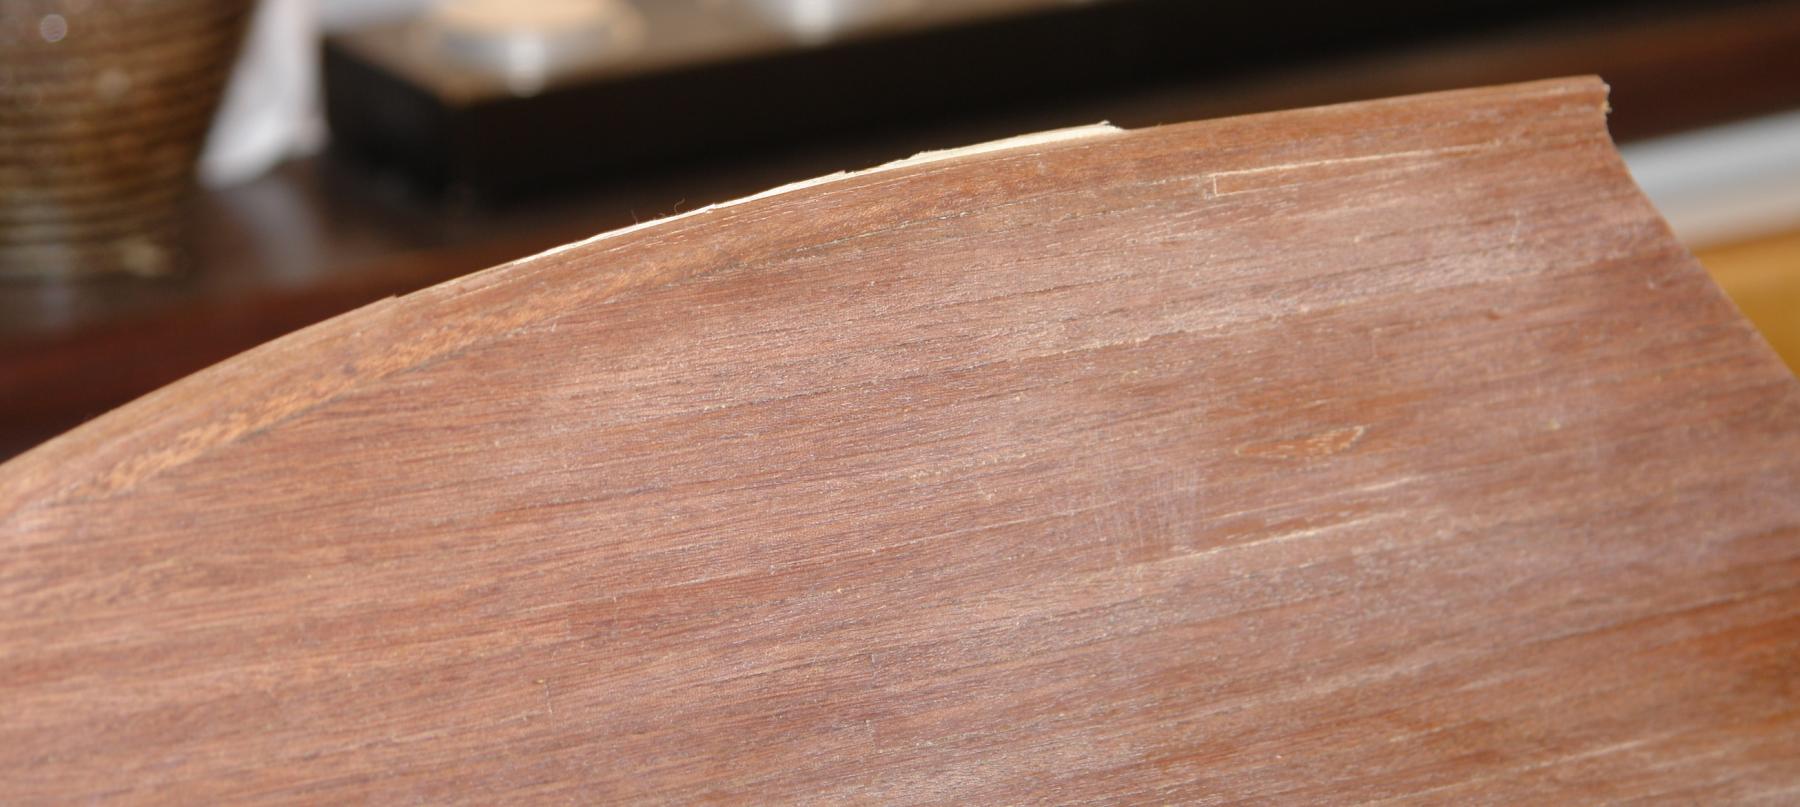
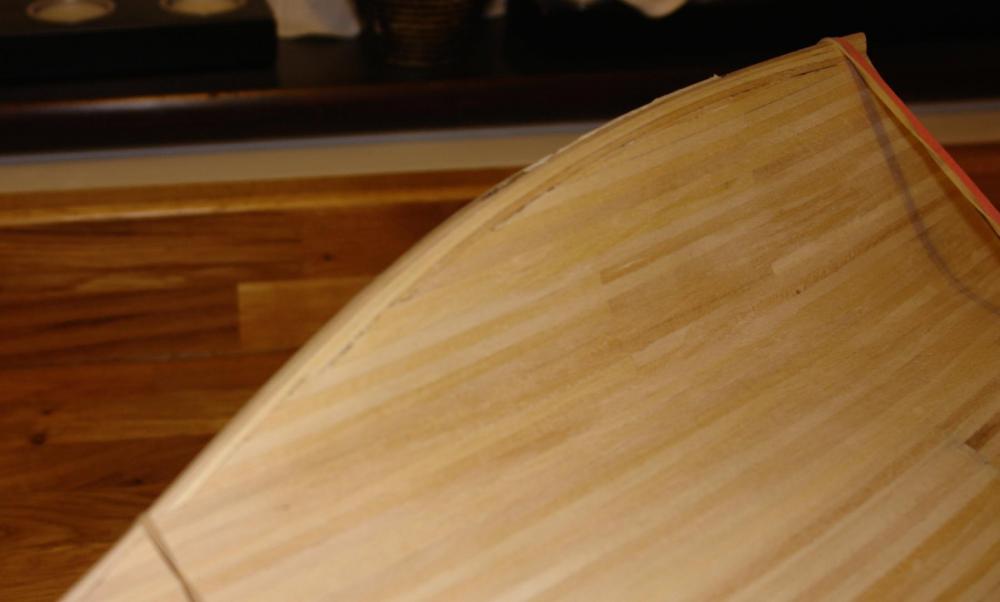
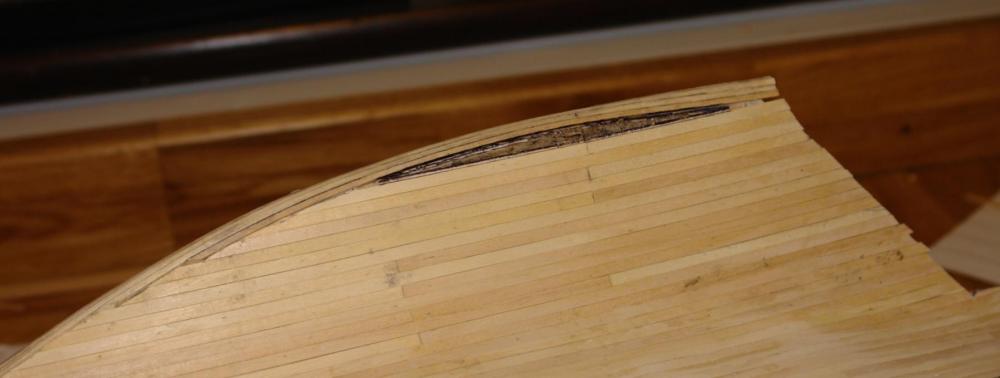
P.S. Julie looking at the back of your keel it looks quite consistent in thickness. Mine had a waist - see photo.

-
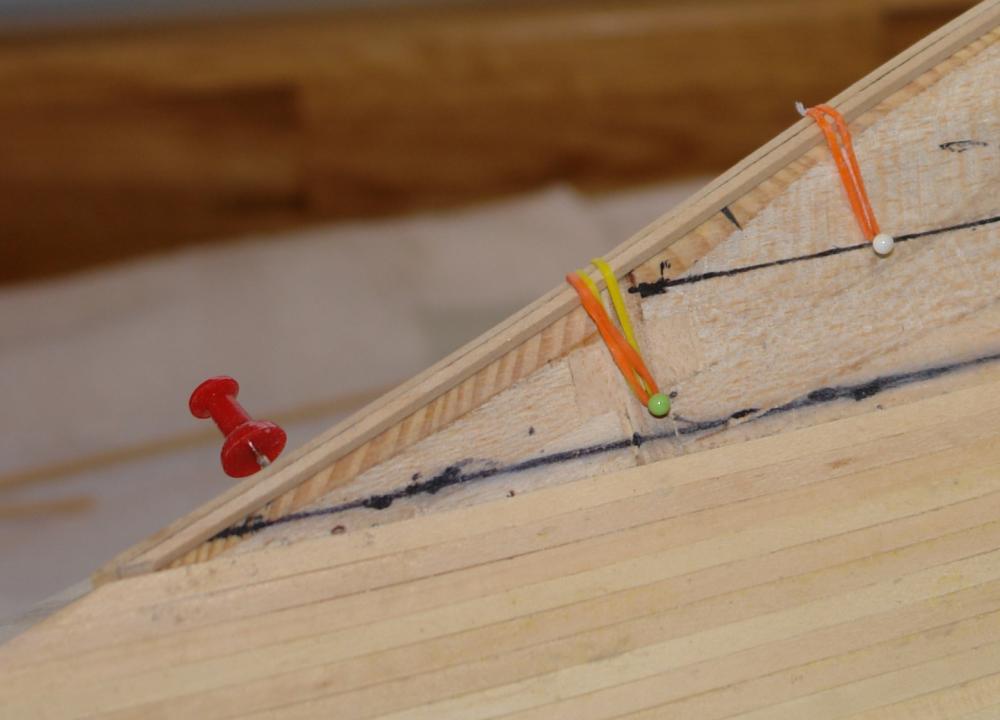
Julie - I prefer to get it right - even though it will be hidden by the second planking - but many will revert to epoxy filler and as it won't be seen it will look fine. Here is how I did it. Firstly I didn't start at the bulb. If you work up to the bulb at least you have something to but the bulb planks up to. Here is how I did it. I planked from the deck towards the keel until it started to become apparent that the bow profile needed to start transition from sharp to a rounded form. At this point I laid the first 3 bulb planks along the keel. One central, plus one either side. All the keel planks need to be shaped into a trapezoidal shape and I did this by sanding using a sanding jig that I made. This was a piece of oak with a 2mm wide 1mm deep slot cut along its length. The 2mm x 2mm keel strips were place in this slot and the protruding 1mm was shaped by sanding along its length and at an angle to the surface of the oak. If you have a violin plane this might be better than sanding. The oak plank had other slots of differing thicknesses to take other planks. I progressed with the hull planks until once again it seemed that the rounded form of the bulb needed to be fuller - I then laid the next 2 planks along the length of the bulb. I continued in this manner until the hull and the bulb planking was complete. My feeling was that my method was better than that suggested in the instructions.

-
Need Copper Plating for Amati Vanguard - HELP!
KeithAug replied to glbarlow's topic in Wood ship model kits
Glenn Cornwall Model Boats sell Amati plating - http://www.cornwallmodelboats.co.uk/acatalog/amati-copper-plates.html. But it seems to me that if you had little waste you should expect more to be supplied free of charge. -
Hello Steve - for a first model it looks impressive. One of the first things I learned was that primarily the model had to please me. So if your model isn't accurate in a few details it does not matter, unless it matters to you. Most MSW shipmates will provide praise, help, encouragement and advice without being critical, unless you specifically request it. The best advice I can give is keep building - you will find your models getting better and better. Welcome aboard.