KeithAug
-
Posts
3,986 -
Joined
-
Last visited
Content Type
Profiles
Forums
Gallery
Events
Everything posted by KeithAug
-
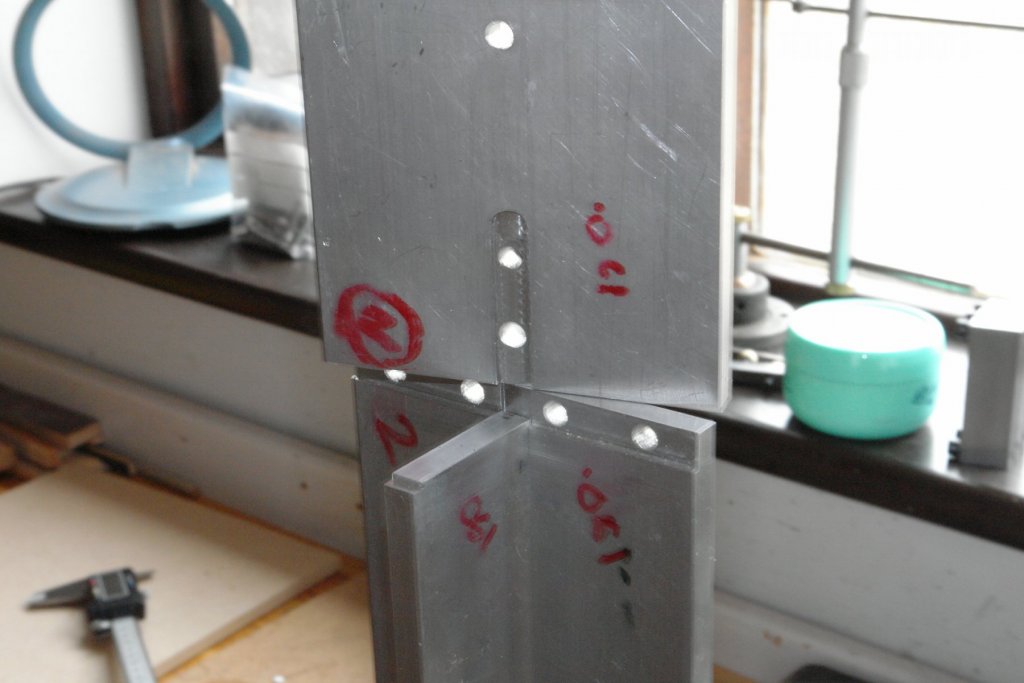
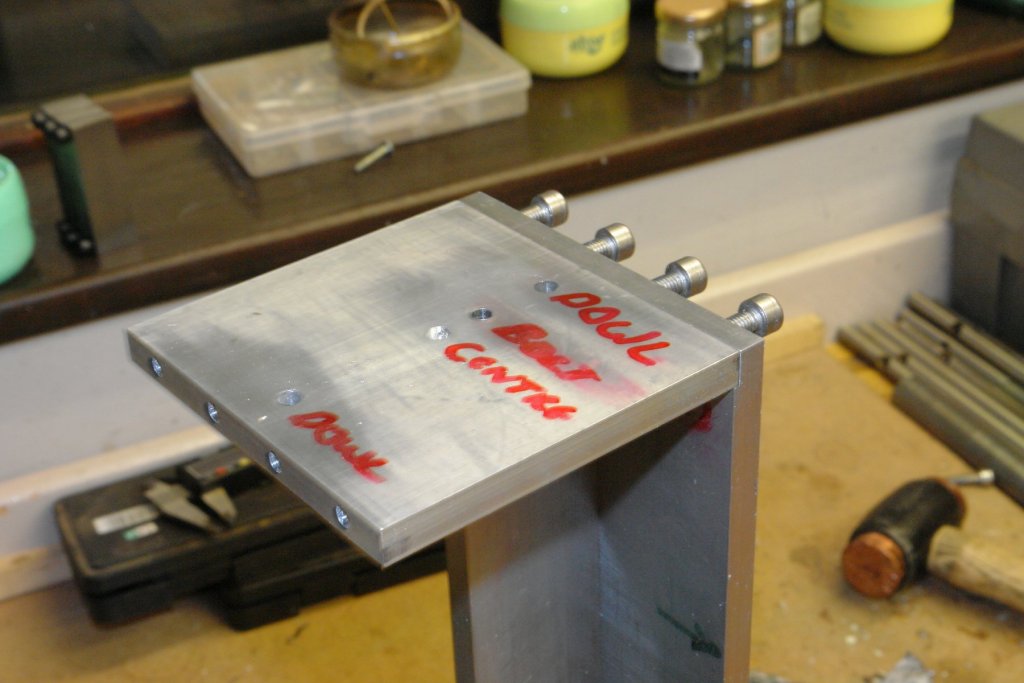
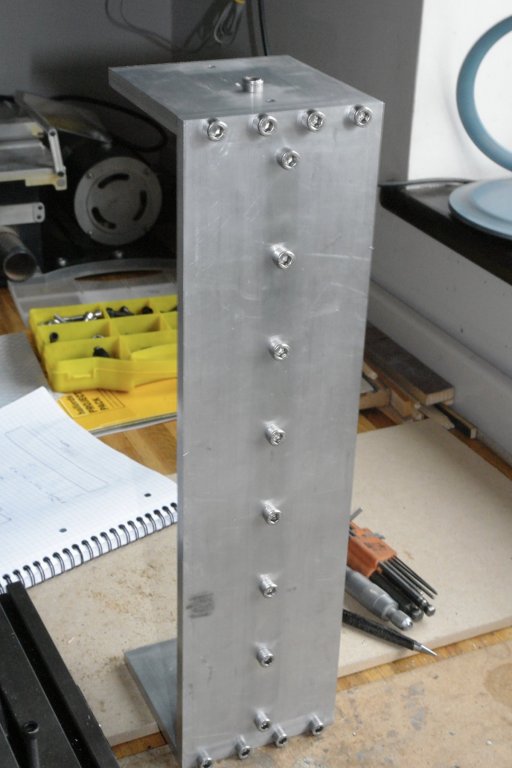
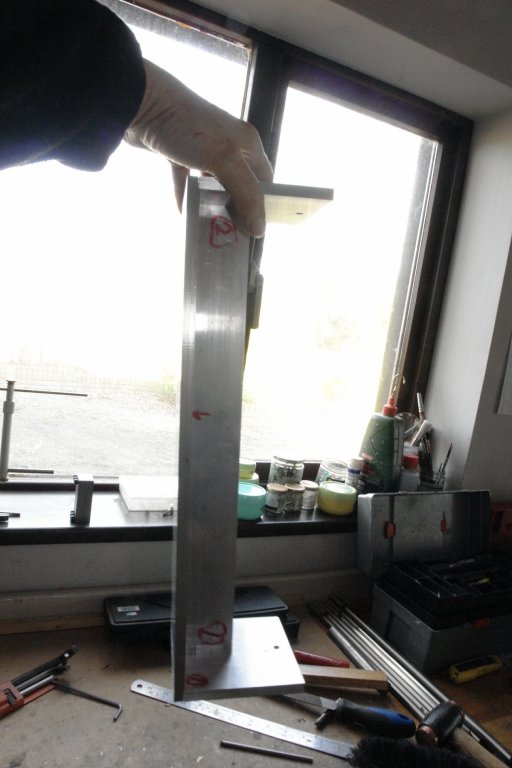
Thank You Bob. I made a bit more progress yesterday - mostly drilling and tapping. The top plates and the web needed drilling and then tapping along the edges. To hold them in position they were clamped agains the square edges of a pair of "V" blocks which in turn were clamped to the milling table. Some time later all was drilled and tapped. I mentioned earlier about making sure the axis of the column was truly at right angles to the base. To ensure this the two end plates have centre drill holes accurately machined in identical positions. These will be used to mount the entire column assembly between centres in the lathe so that the base can be skimmed square with the axis. The 4 components - end plates, web and back plate were bolted up to test fit.

-
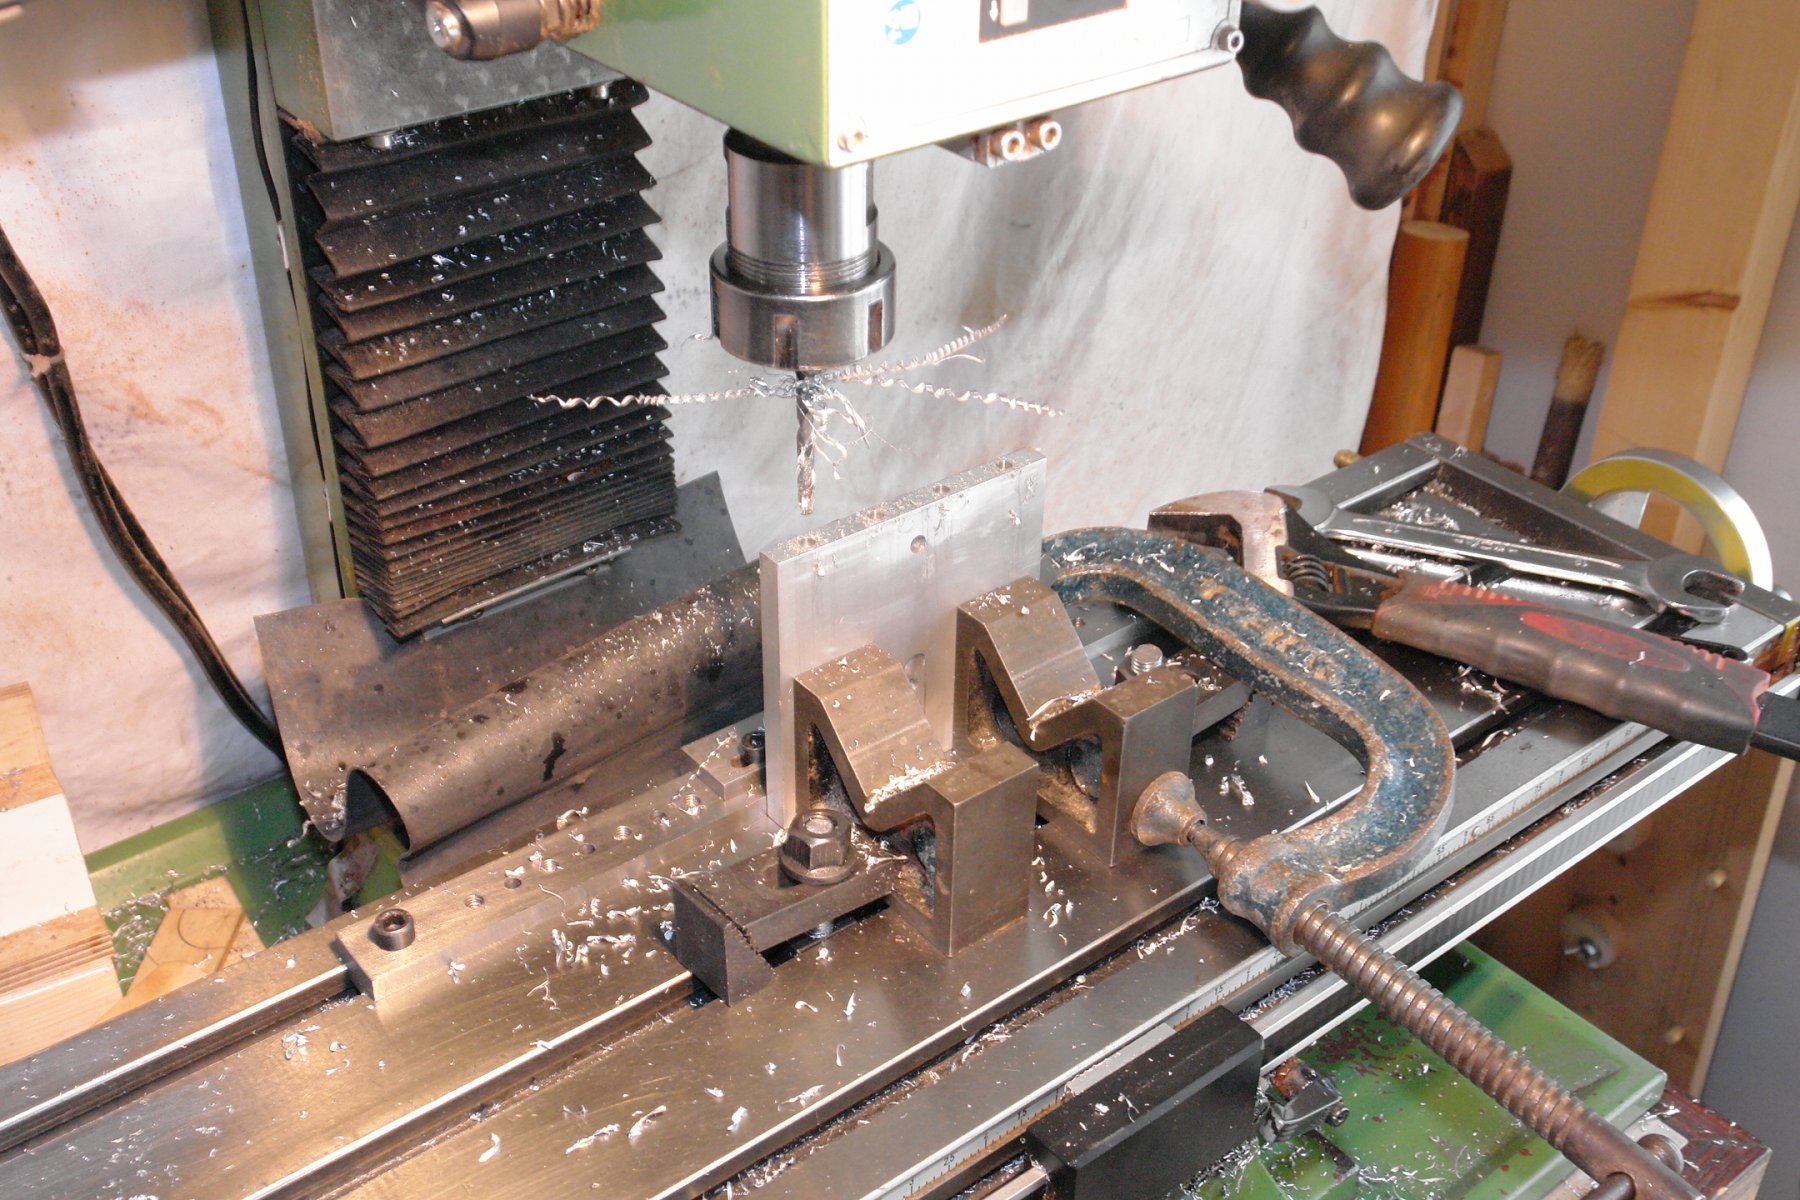
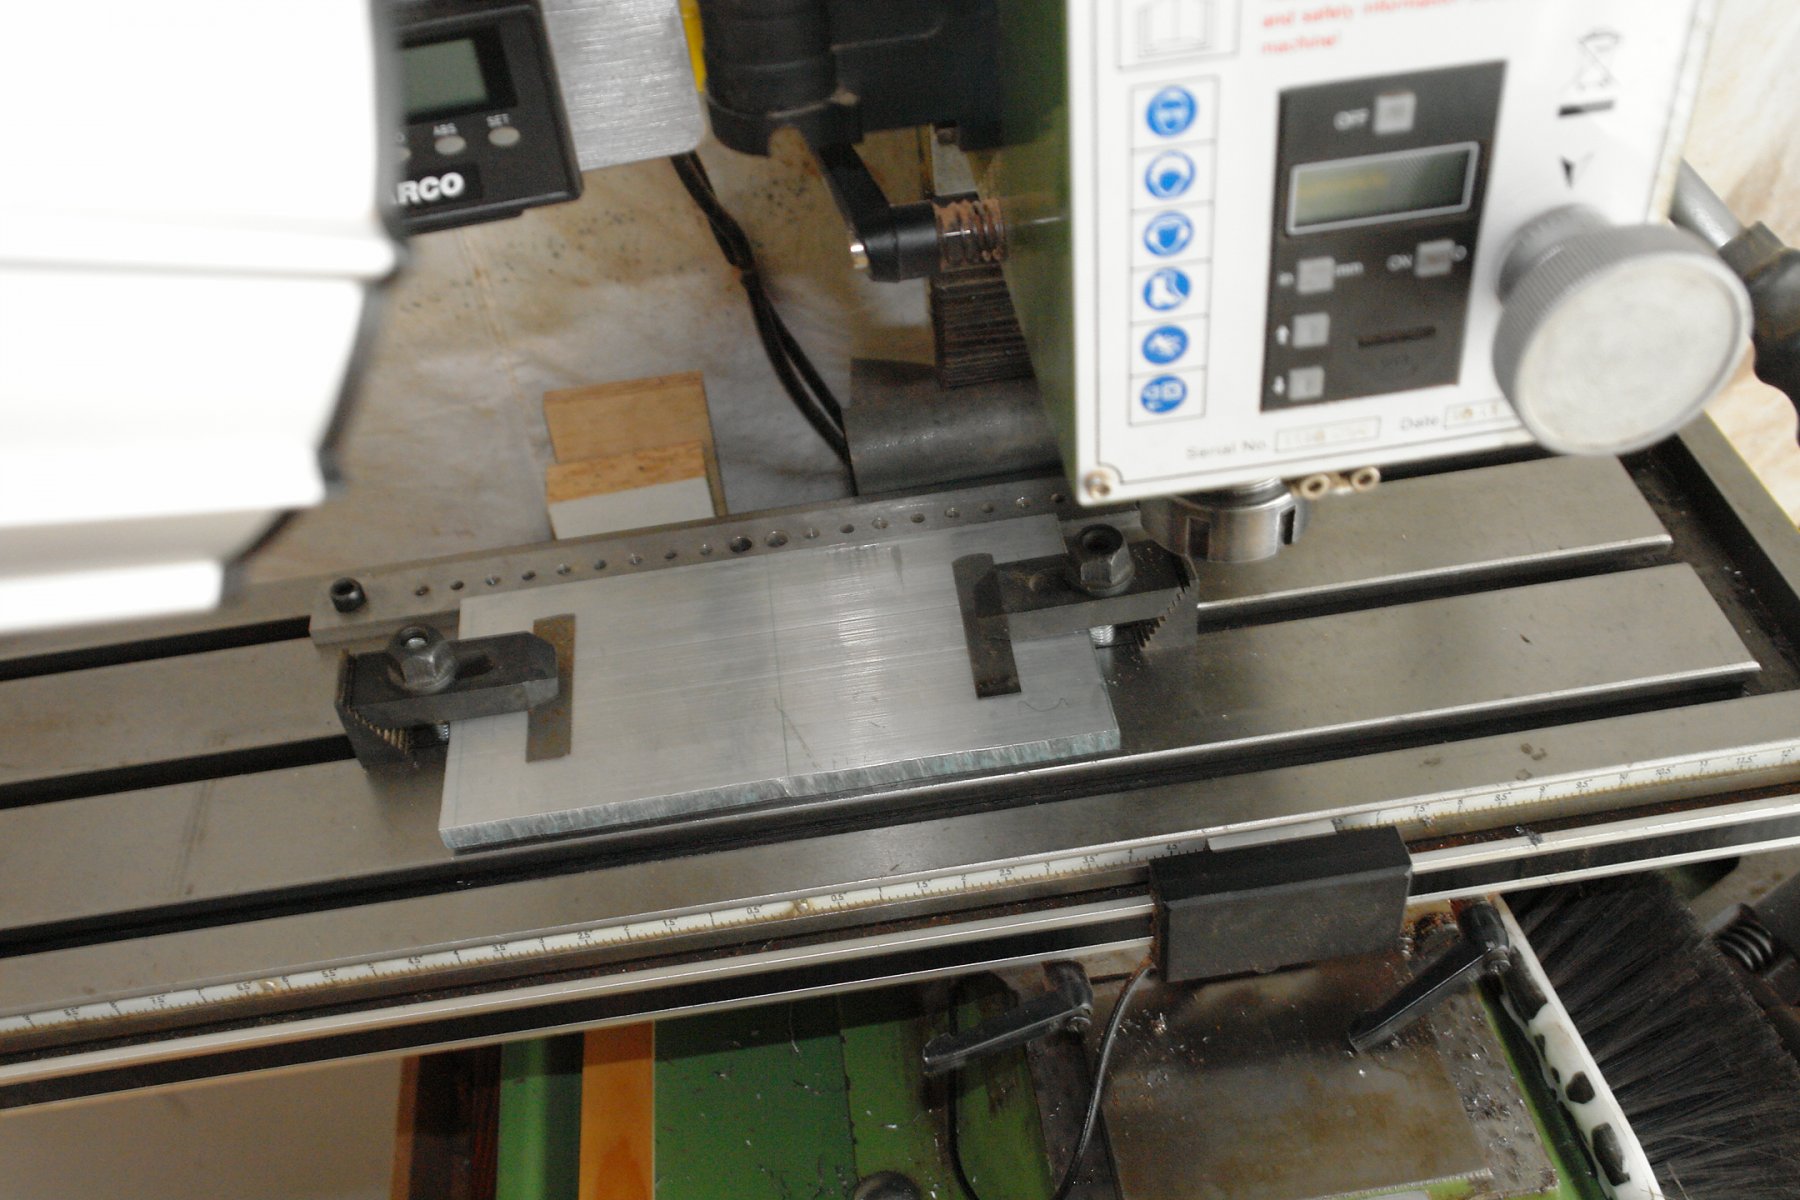
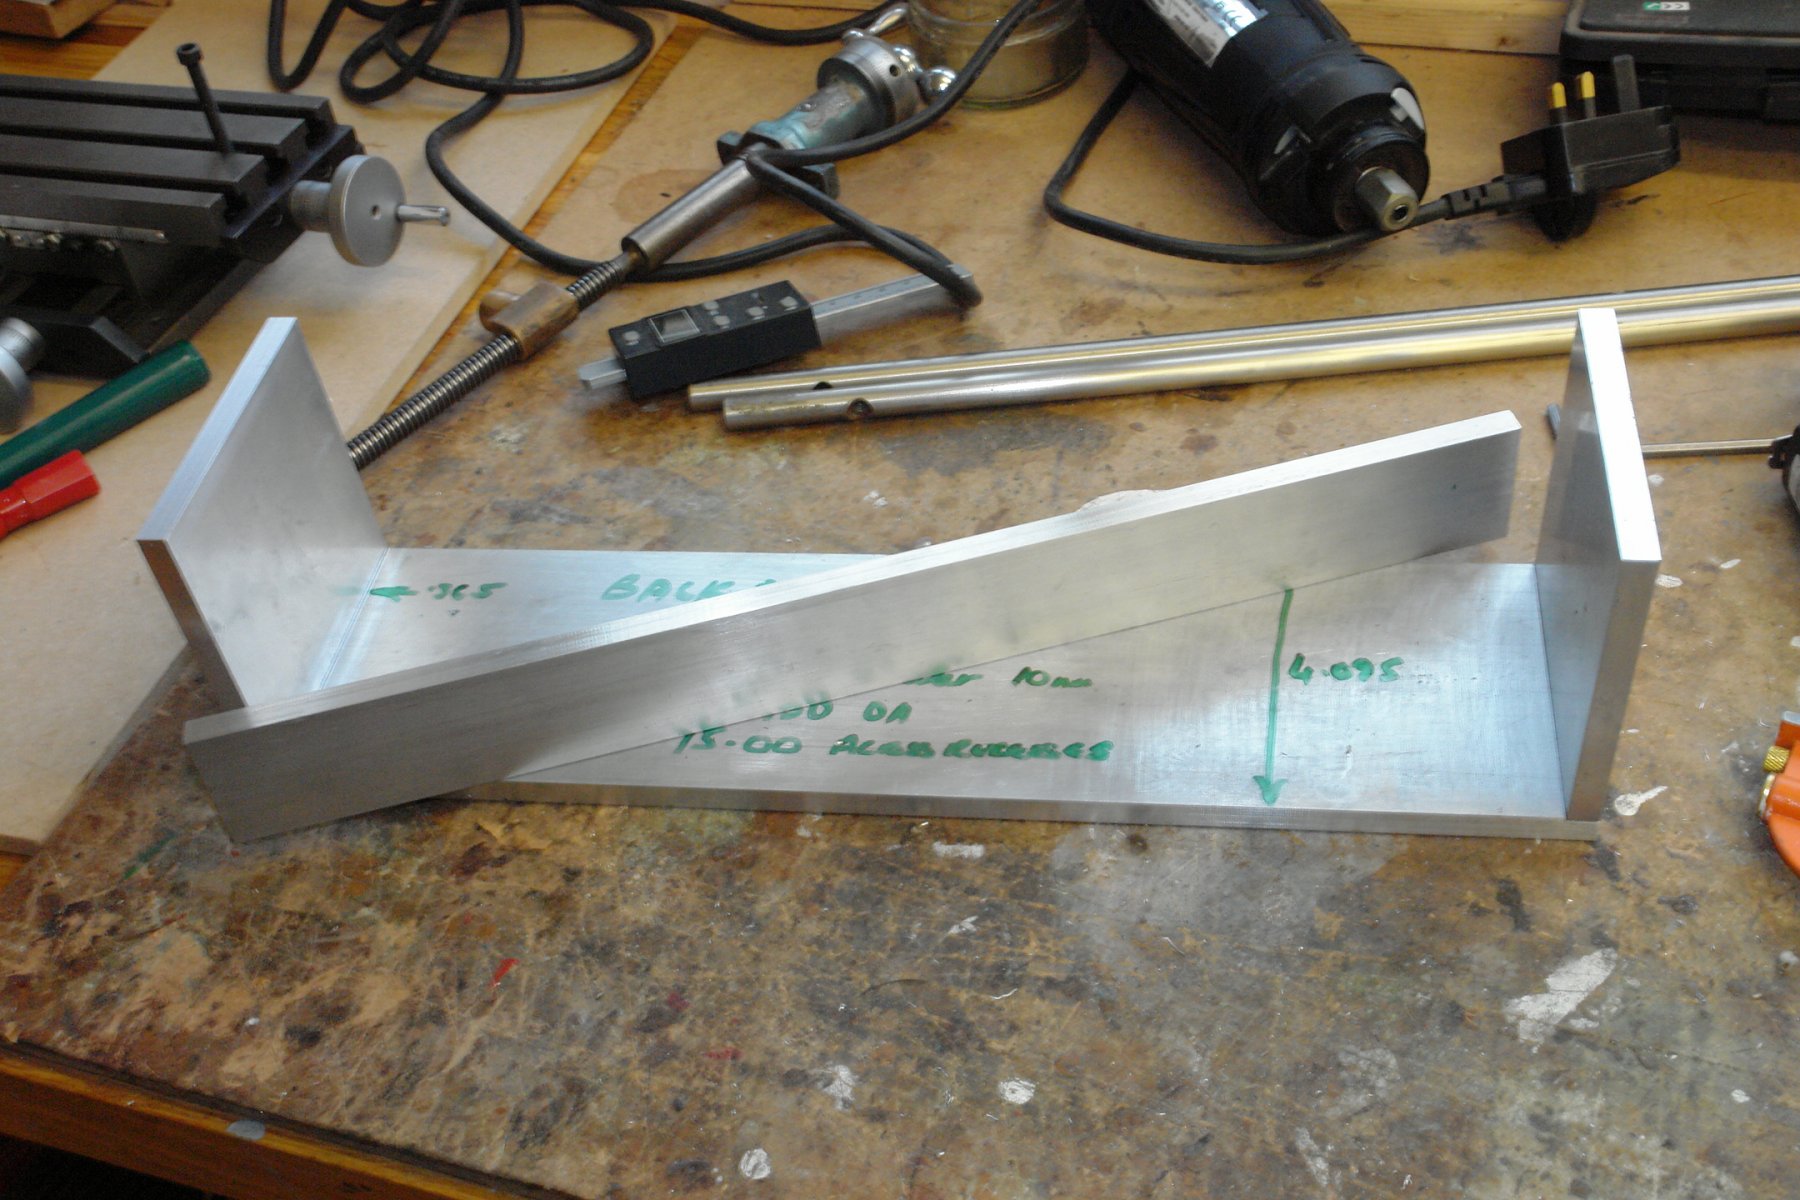
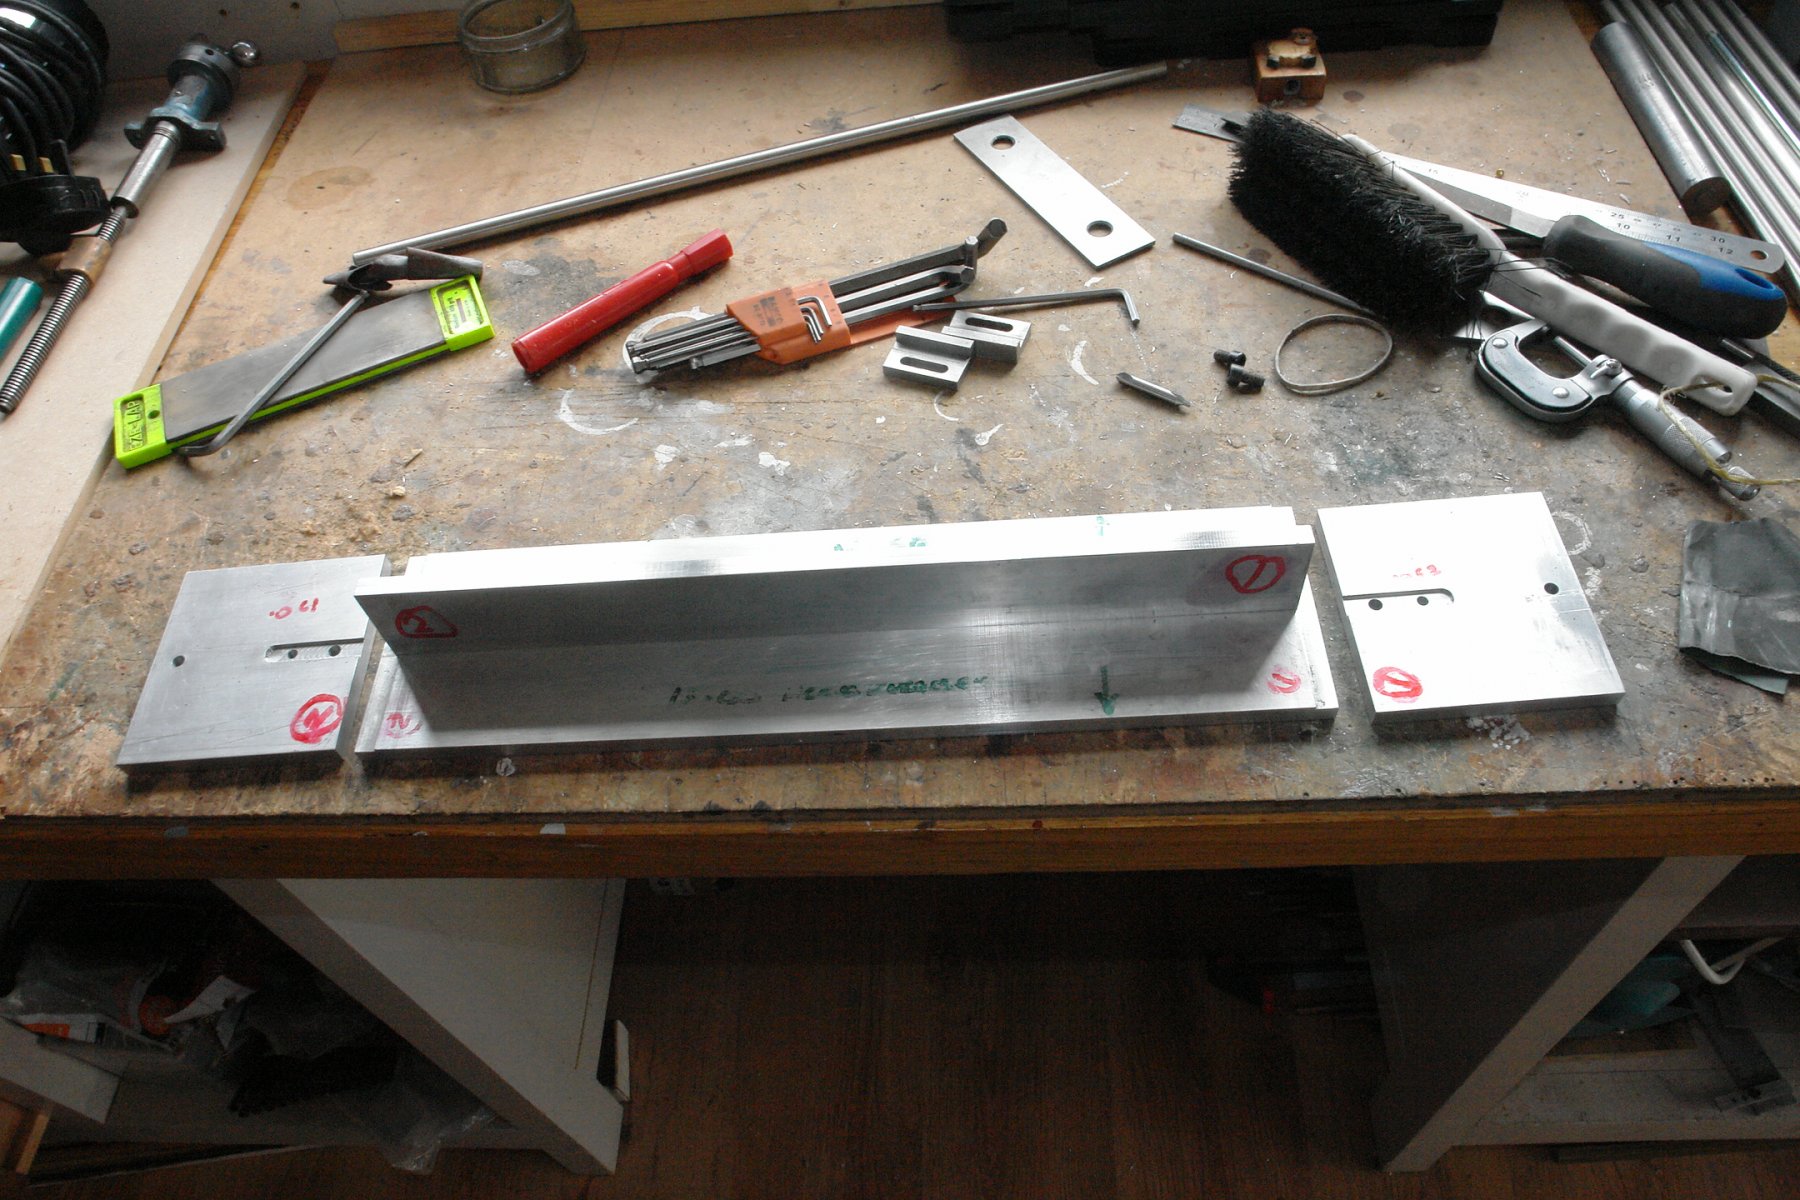
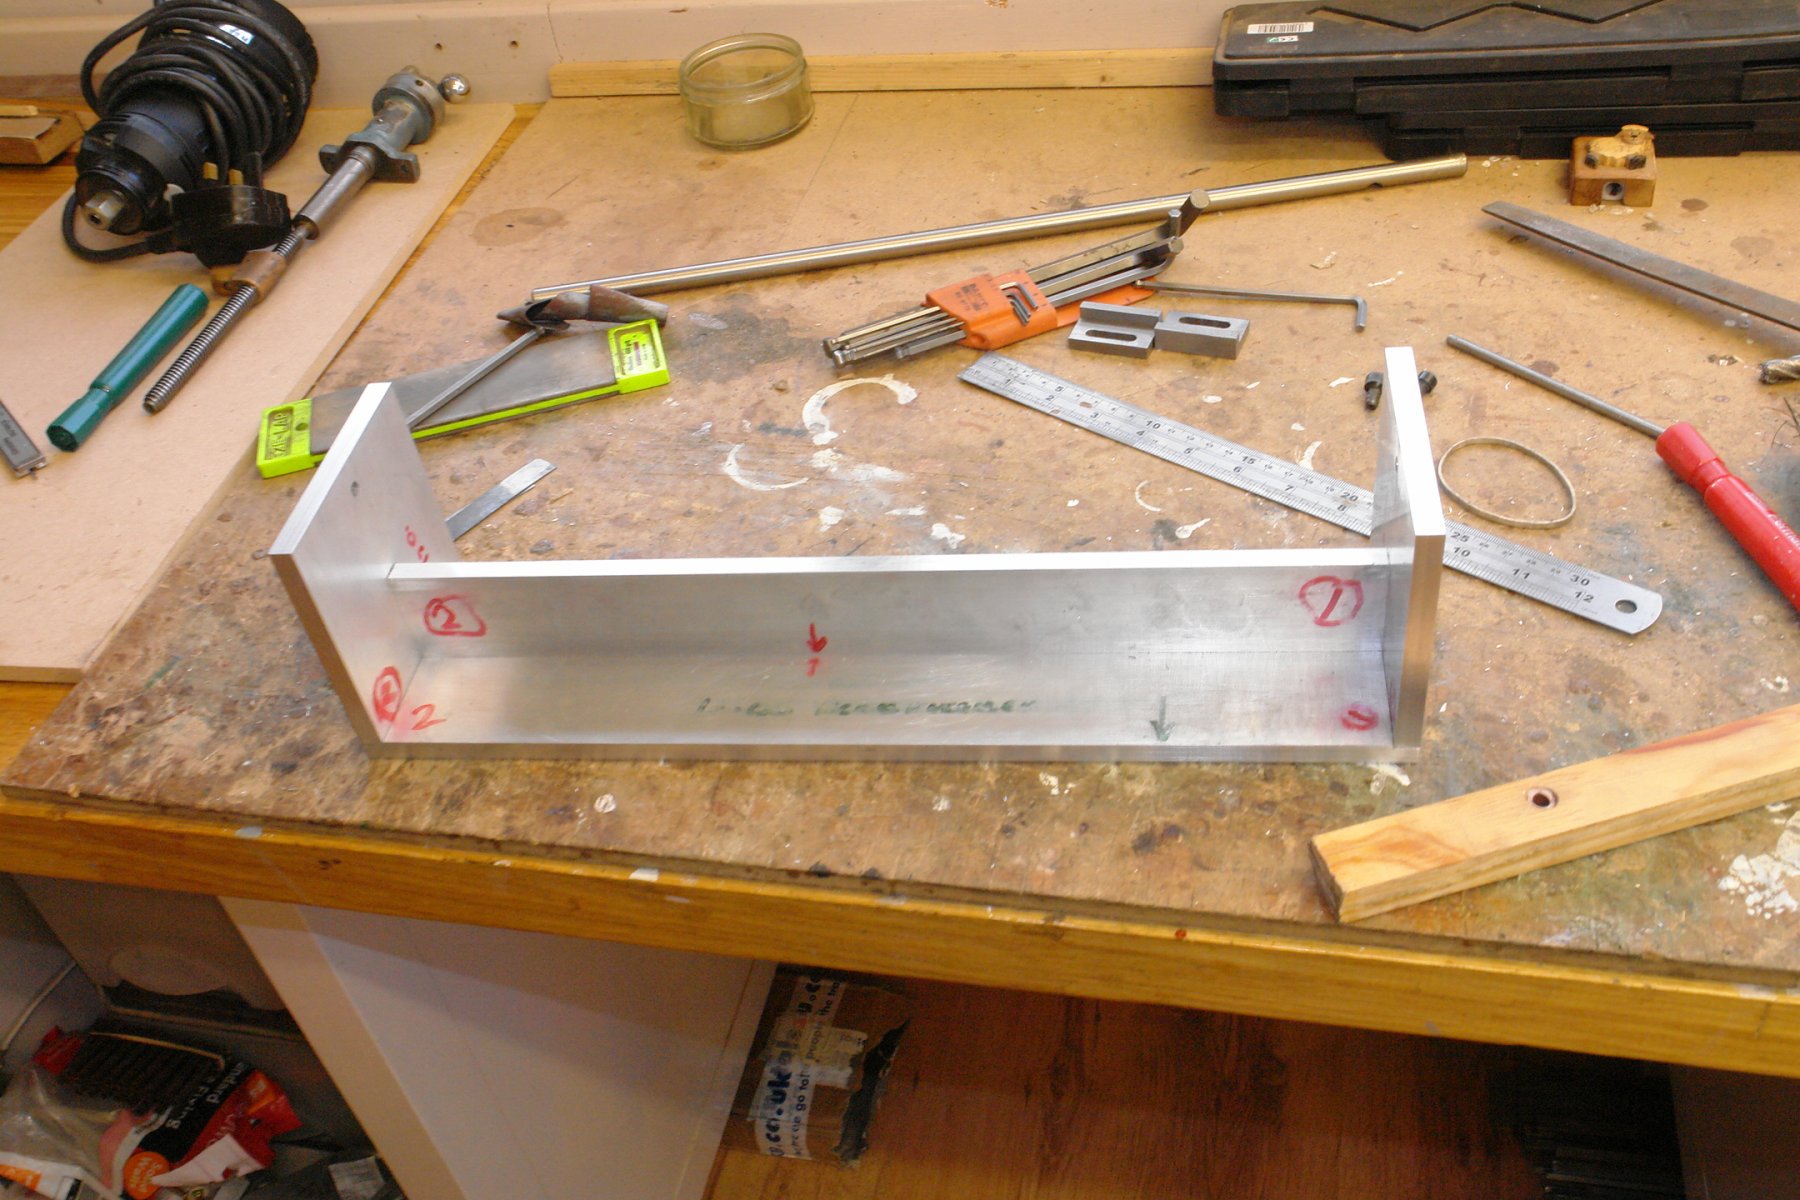
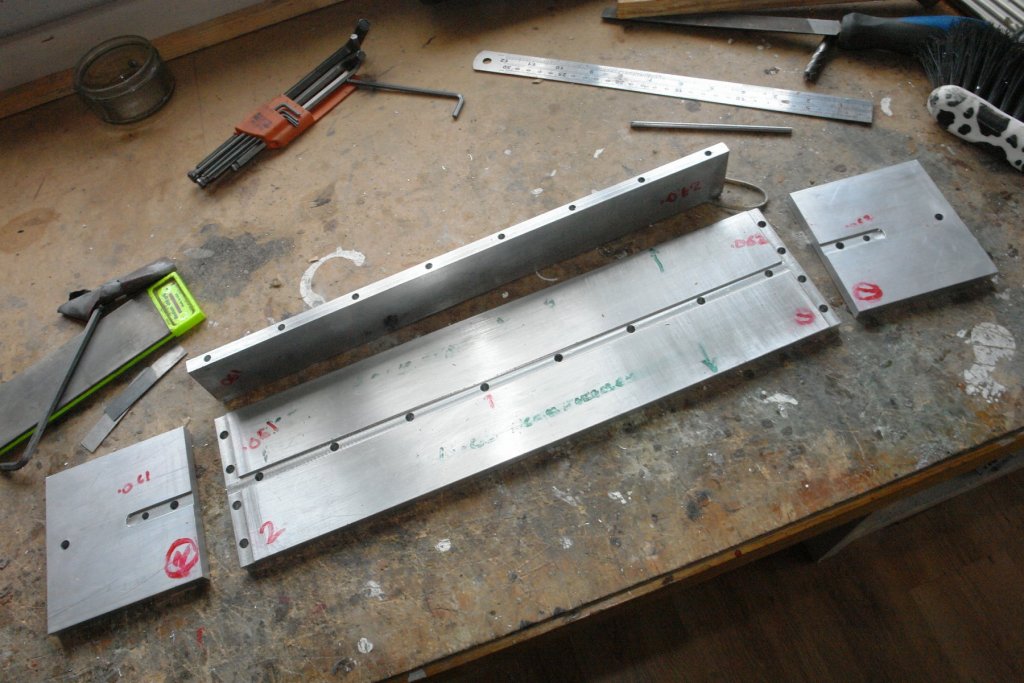
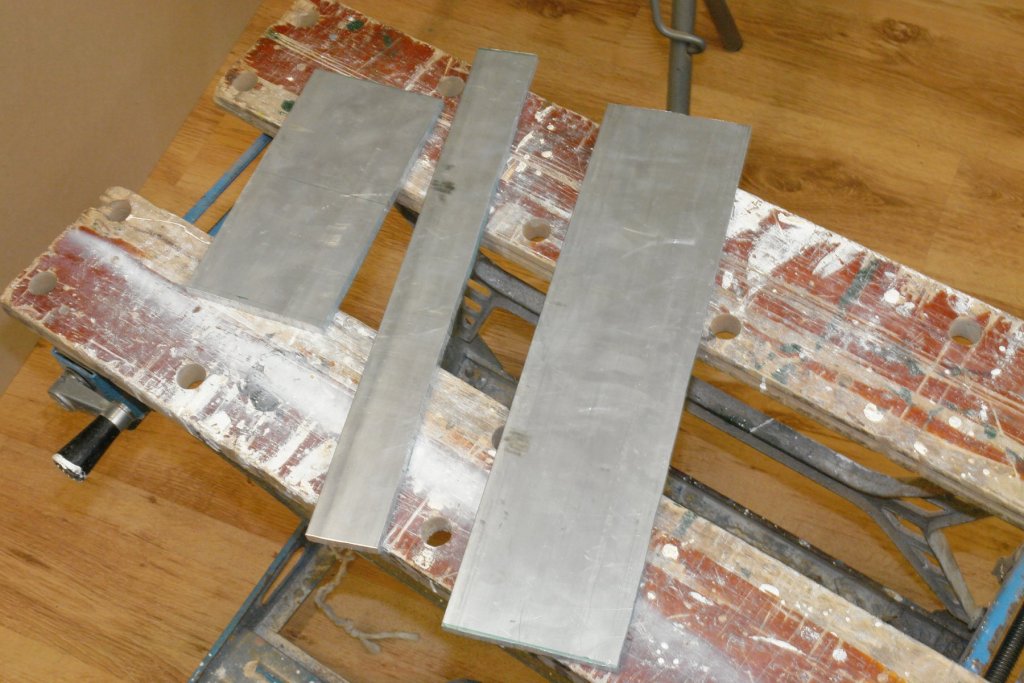
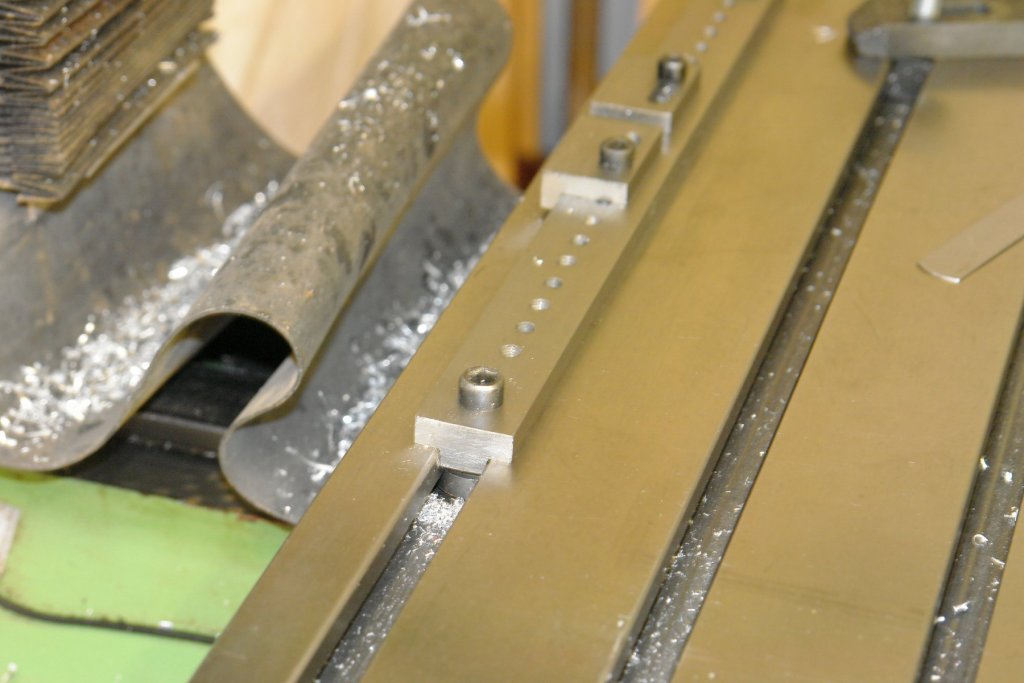
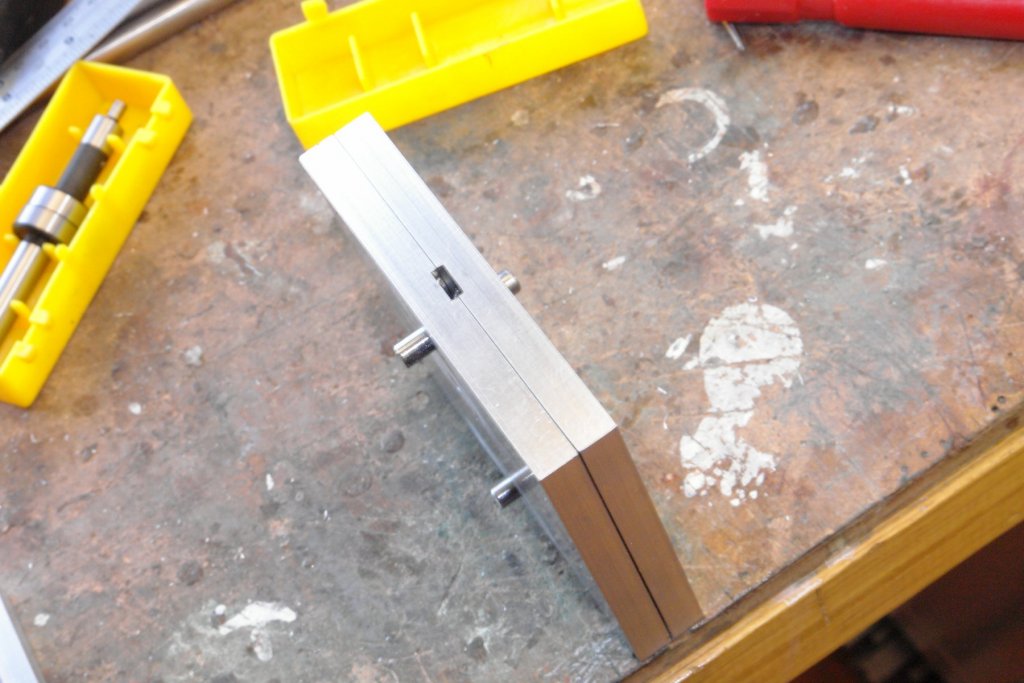
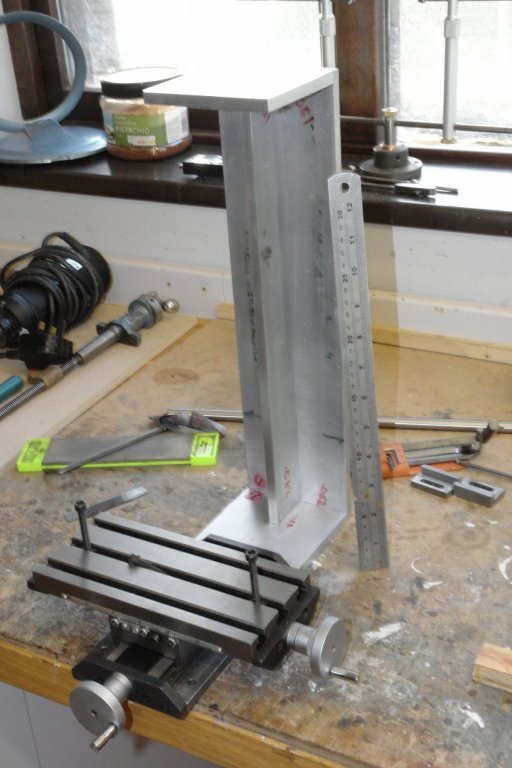
Thank you Derek, Allan, Richard and Bob. I'll keep the speed controller in mind for later in the build. I made a start on the column. Its not the most exciting component but its accuracy is critical to accuracy of the mill. Specifically the axis of the column must sit perfectly at right angles to the base (and hence the x,y table. I'll come back to this point in a future post. The first job was hacking out the 4 plates that will make up the column. Chopping through 3/8th inch plate with a hand hacksaw isn't that much fun (even in aluminium). I kept the two end plates together for initial machining hence 3 plates initially. I planned to do most of my machining off my existing milling machine bed - thus eliminating any inaccuracies introduced by holding the components in a vice. I have a side stop strip for the bed (made previously). It clamps accurately in one of the "T' slots and its side faces were machined when in the slot. Anything butted up against the stop is truly parallel to the table. All 3 plates for the top and back of the column were machined up against the stop with the front to back travel on the mill locked. This ensured all plates were exactly the same width. The ends of the plates were then faced off using the front to back travel, thus ensuring the squareness of the plates. The web was also machined parallel and square. The top plates were then separated and dowel holes and location slots machined in. The dowel holes are to facilitate later machining operations and the slots are to ensure accurate assembly. The two plates were machined in tandem on the milling table to ensure they were identical. The back plate was also slotted for location of the web and recesses were cut in the end to take the end plates. I was pleased with the accuracy of the assembly. In the following photo the plates are held together by friction while I am suspending the assembly by the top plate. I positioned the column next to the table to give an idea of the size of the mill. Next I need to drill and tap the plates so I can bolt them together.


-
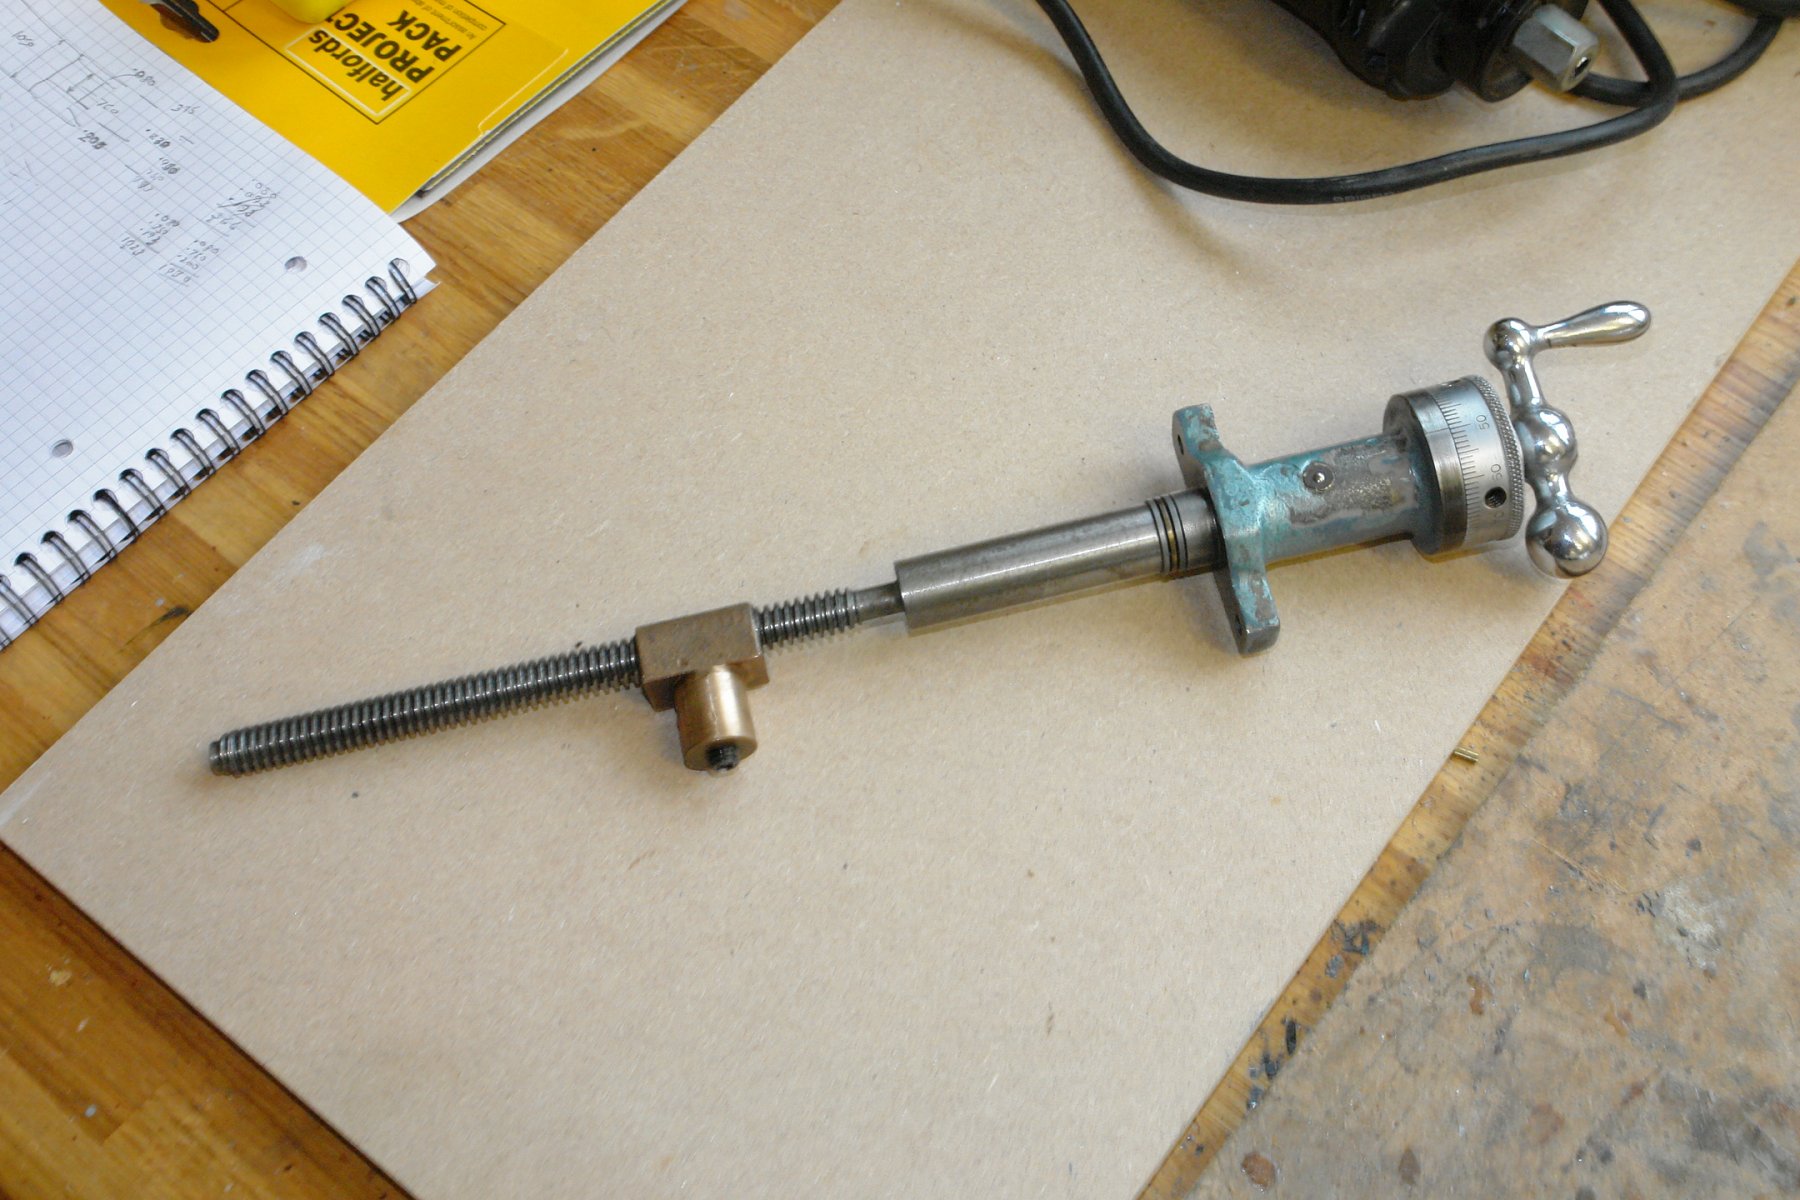
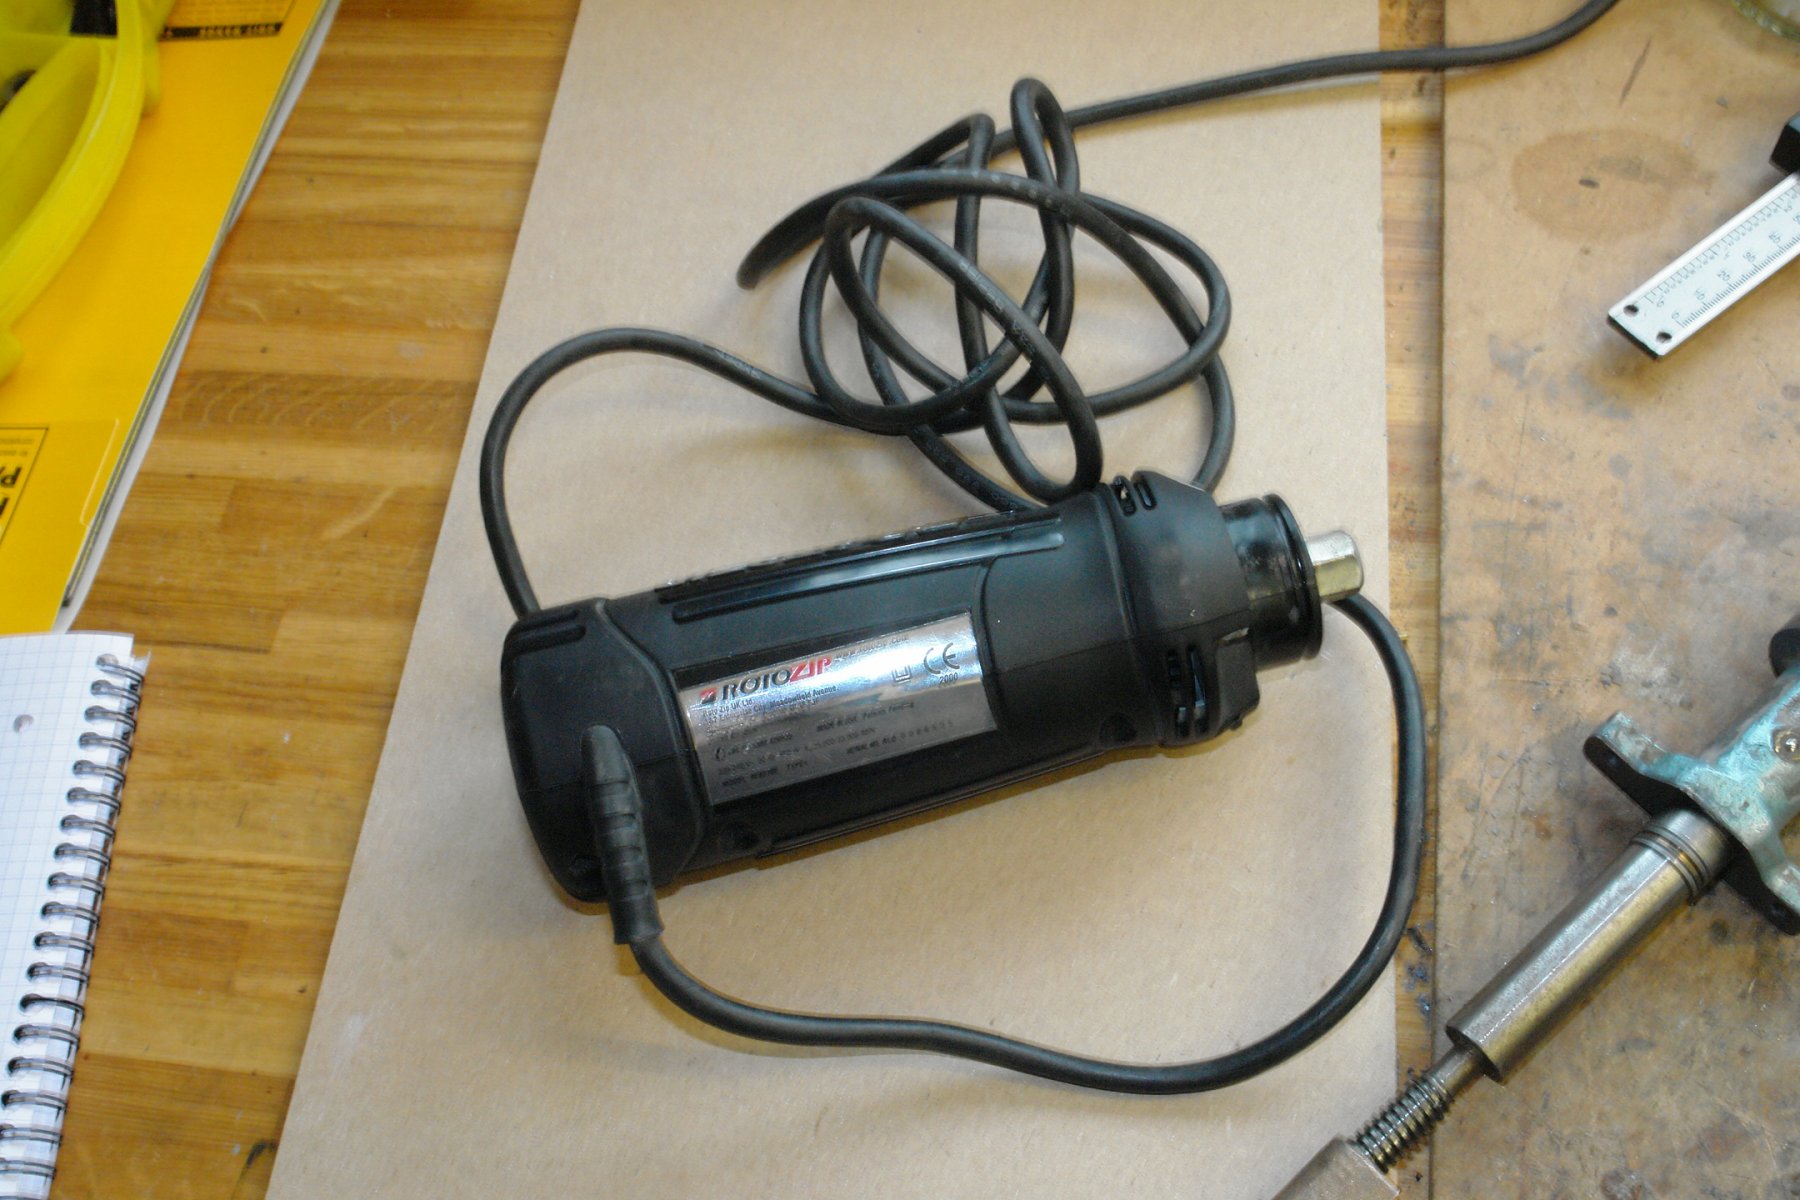
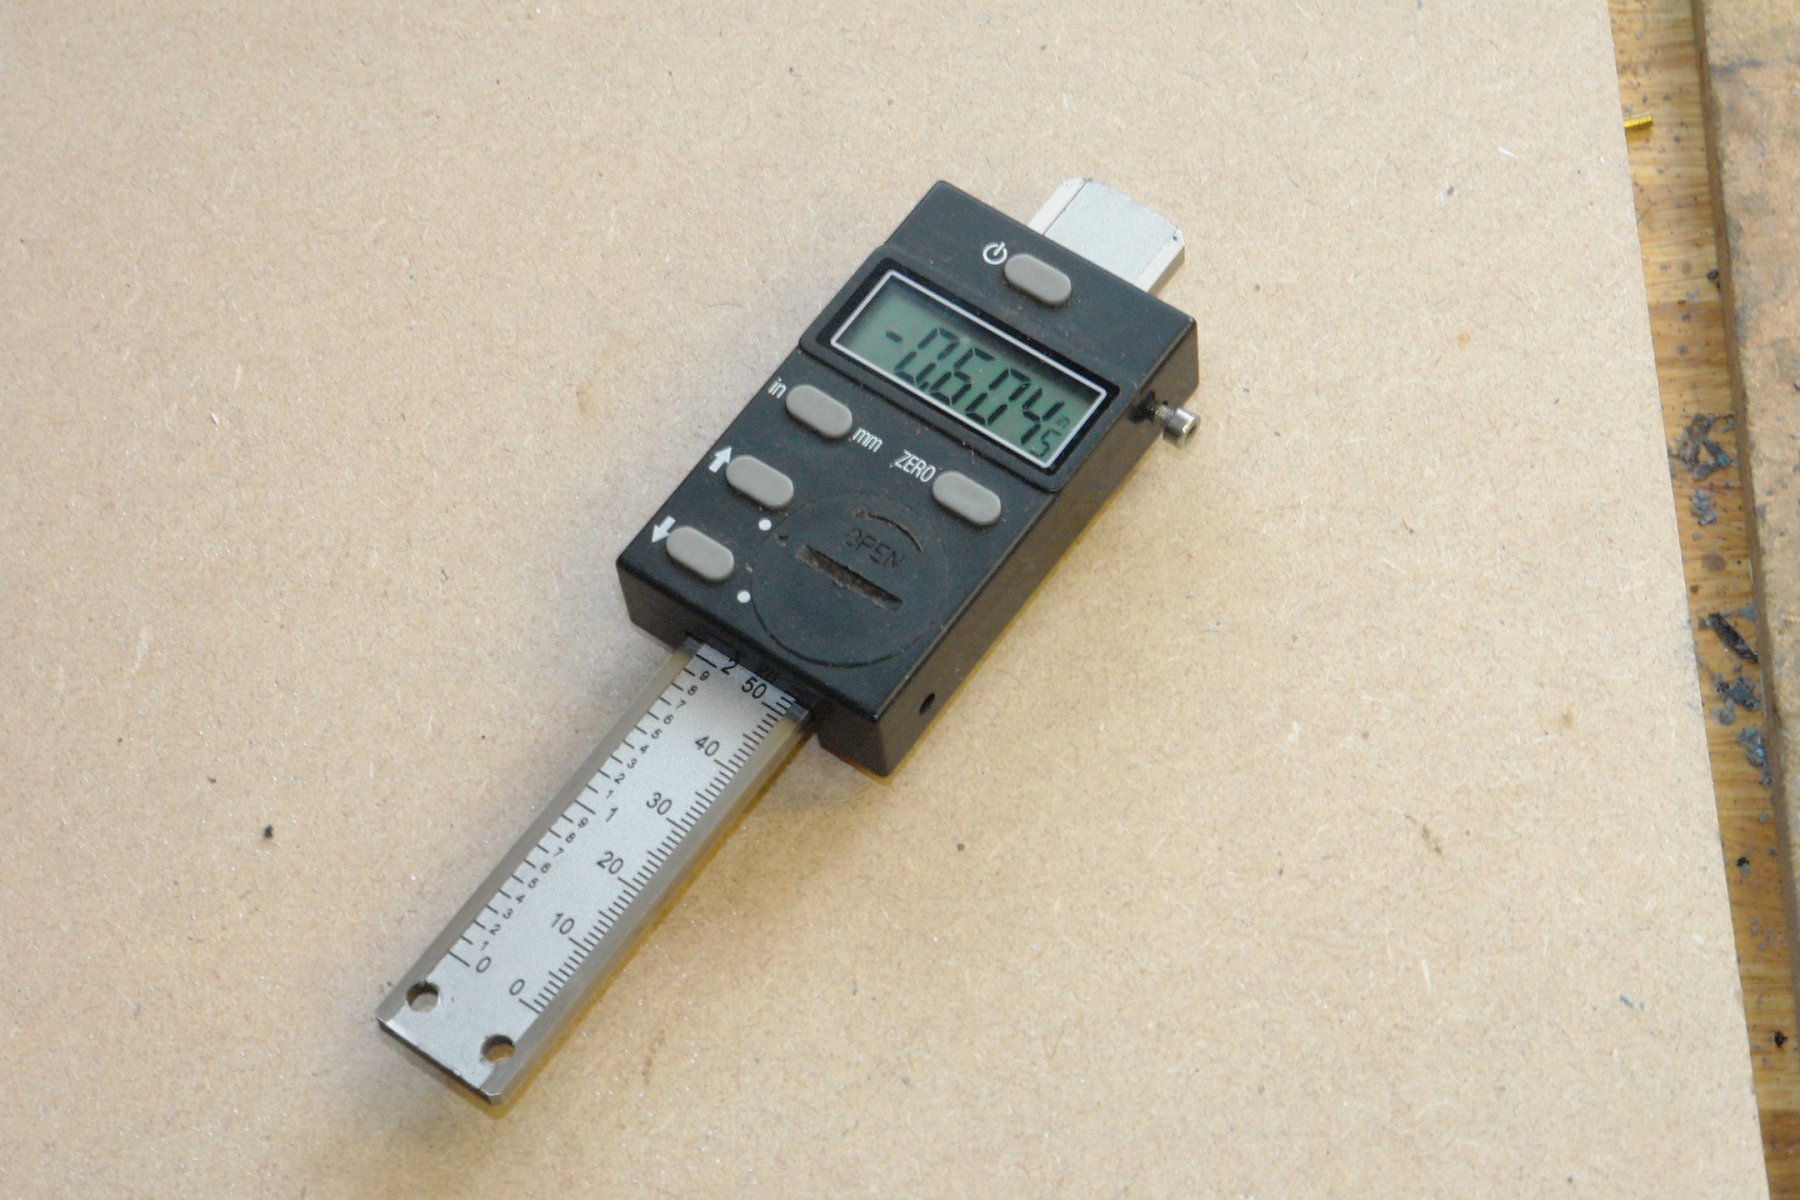
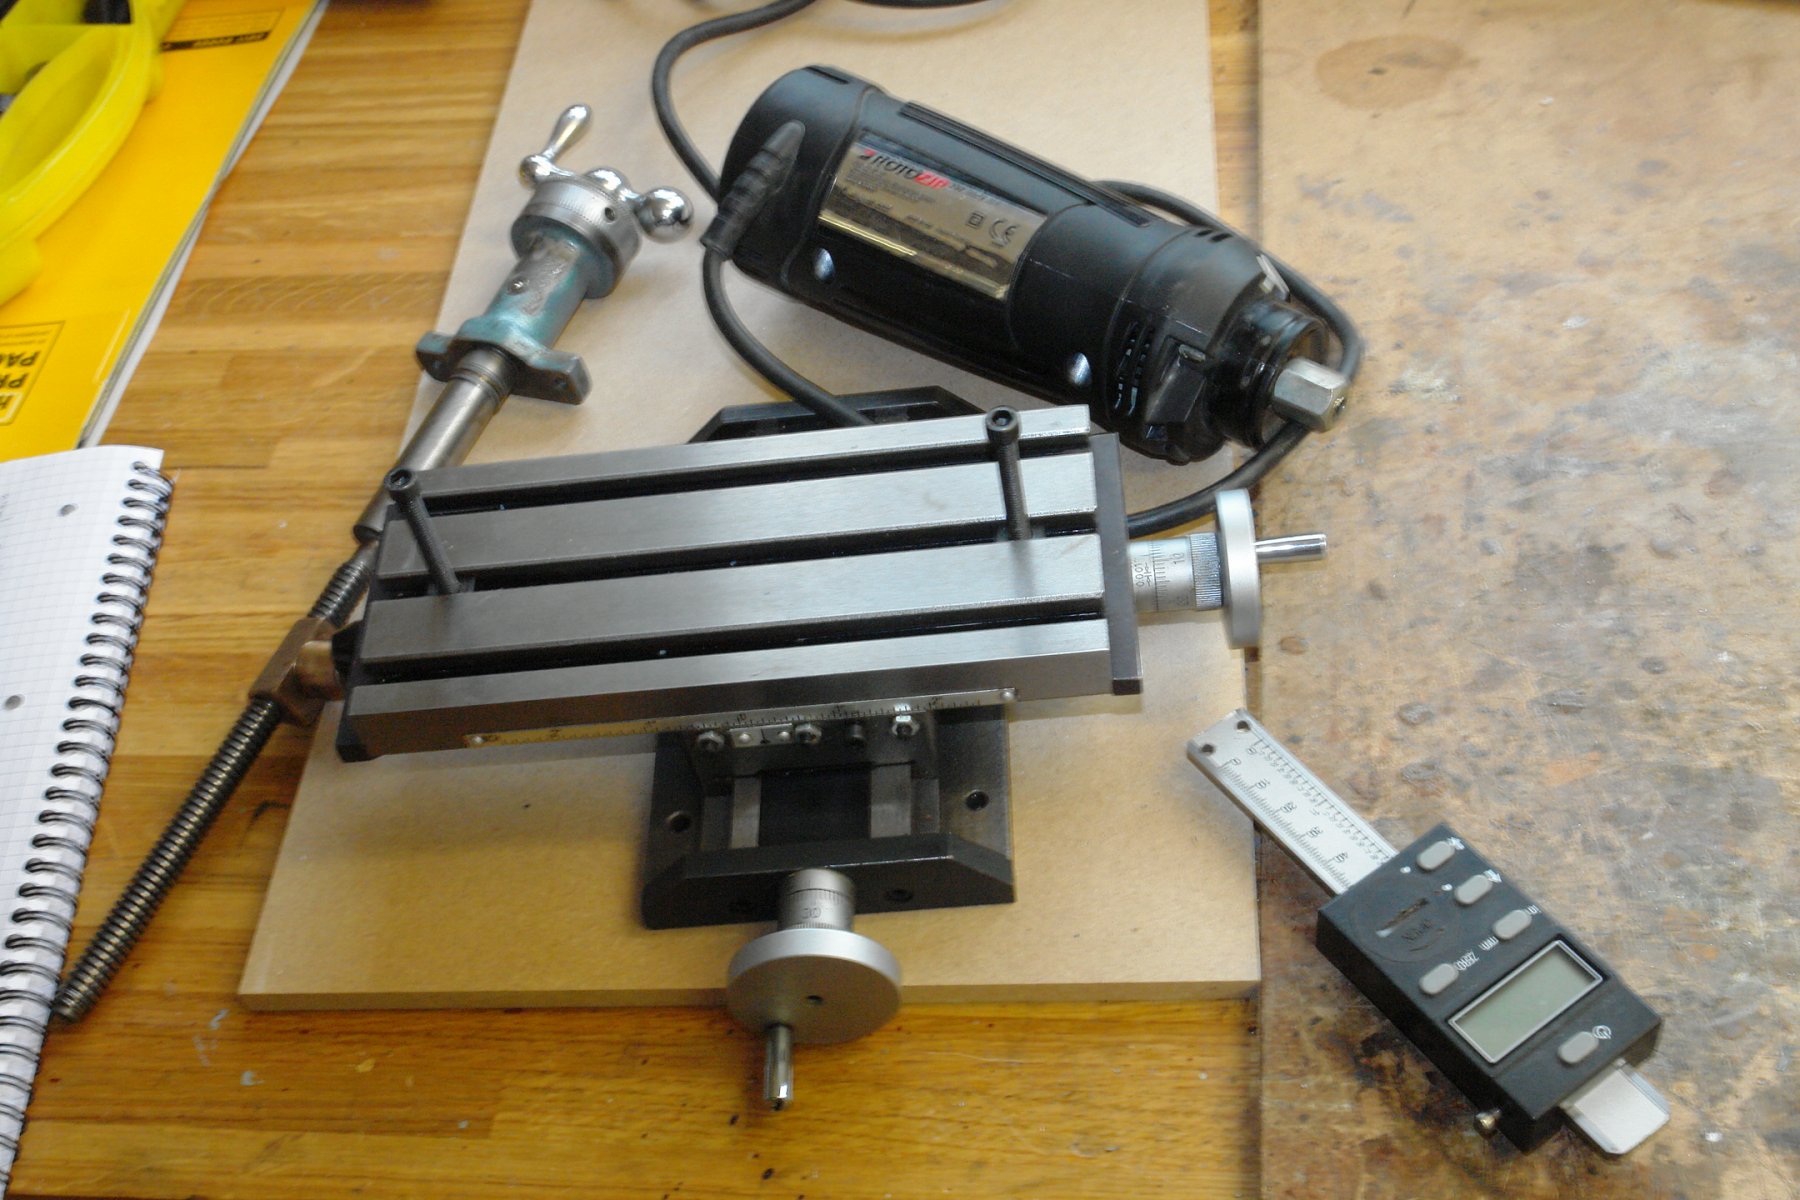
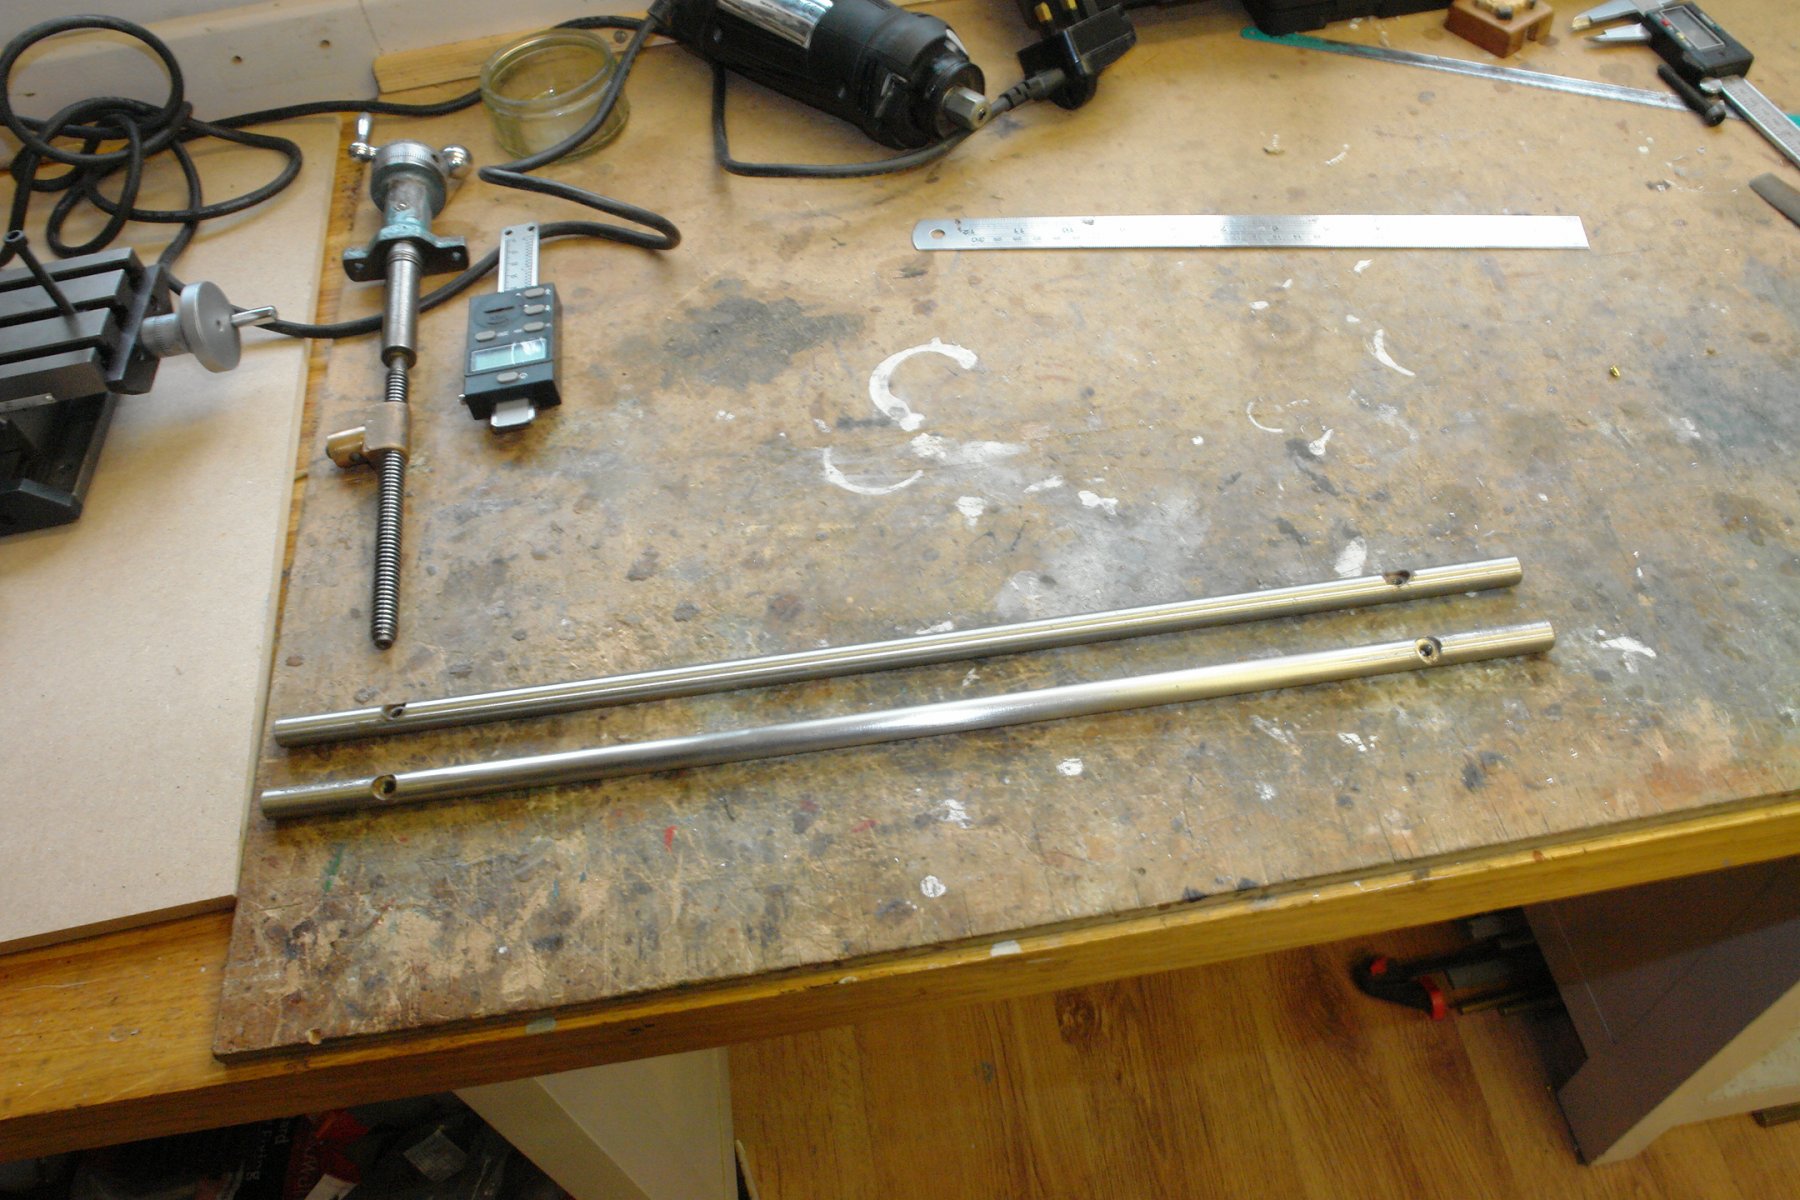
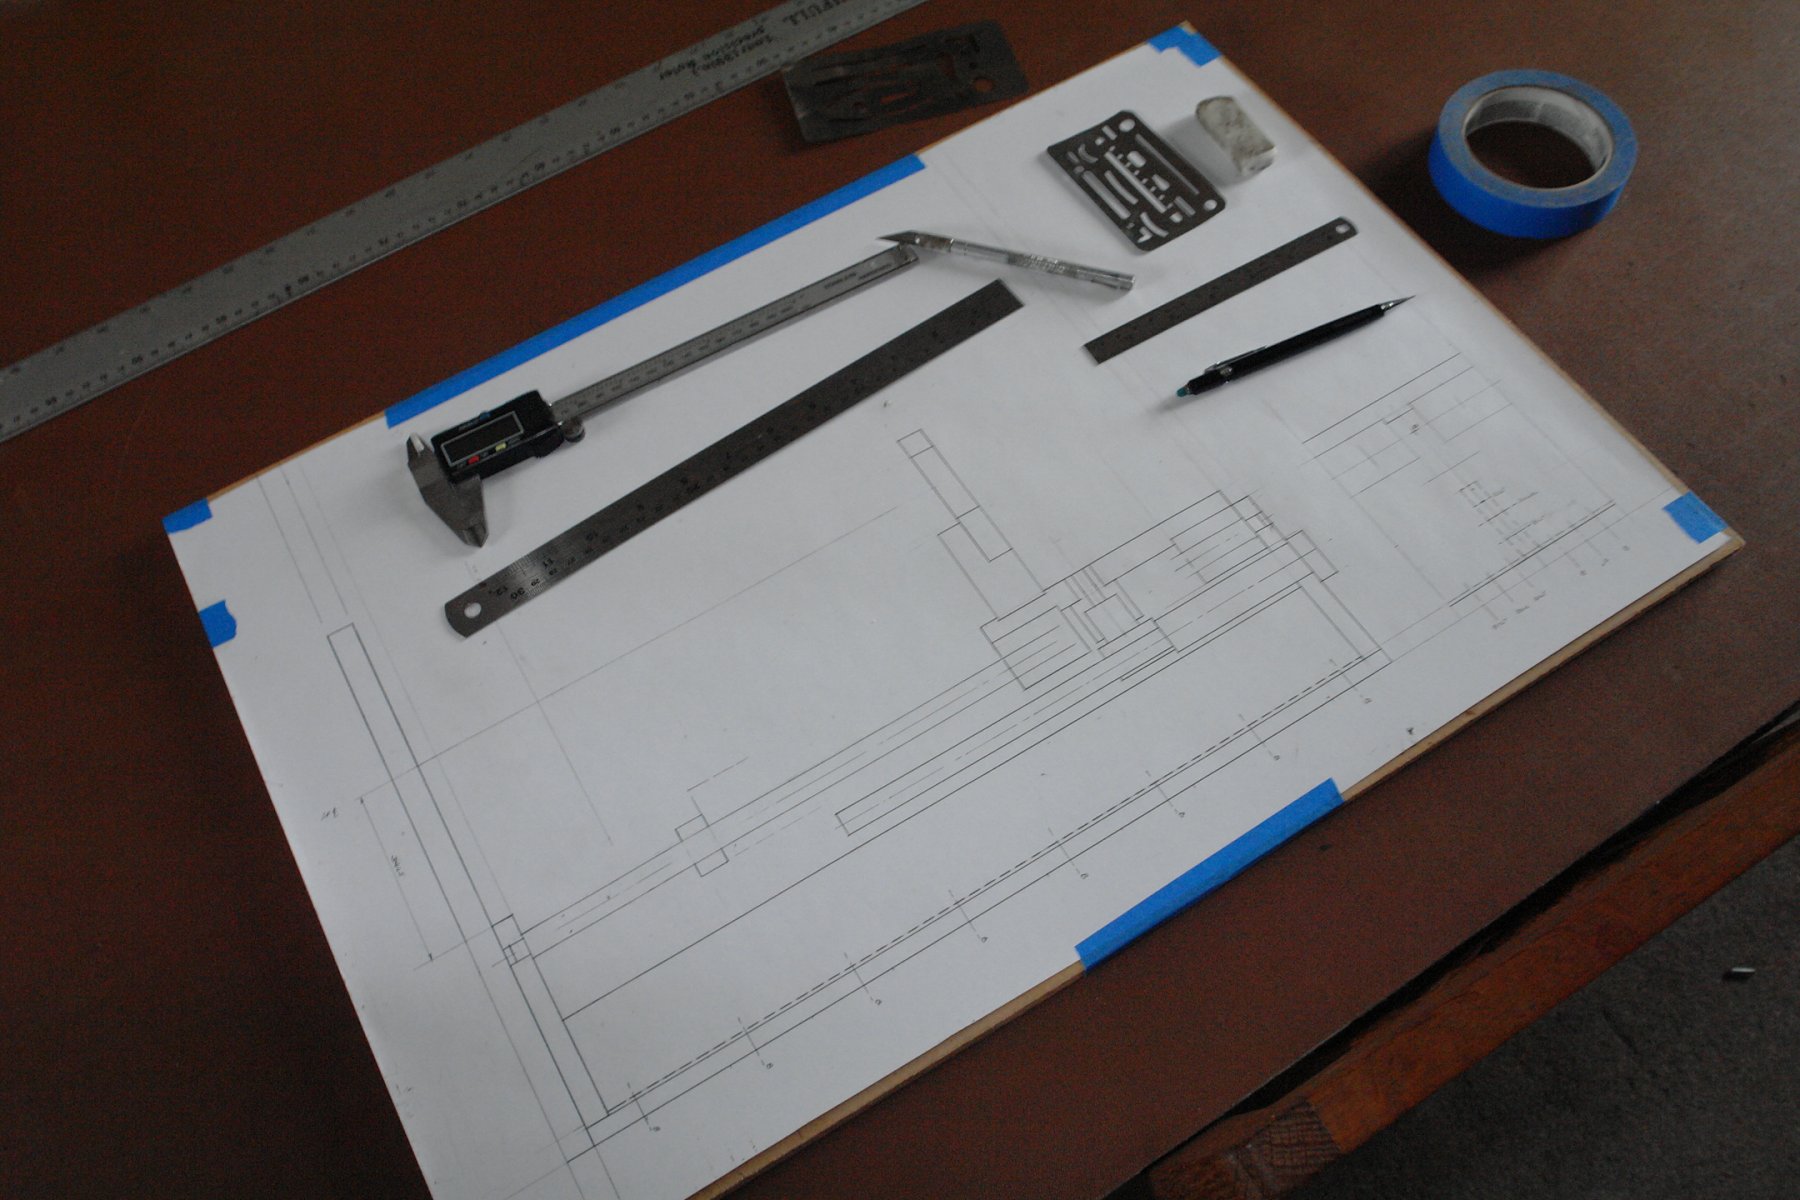
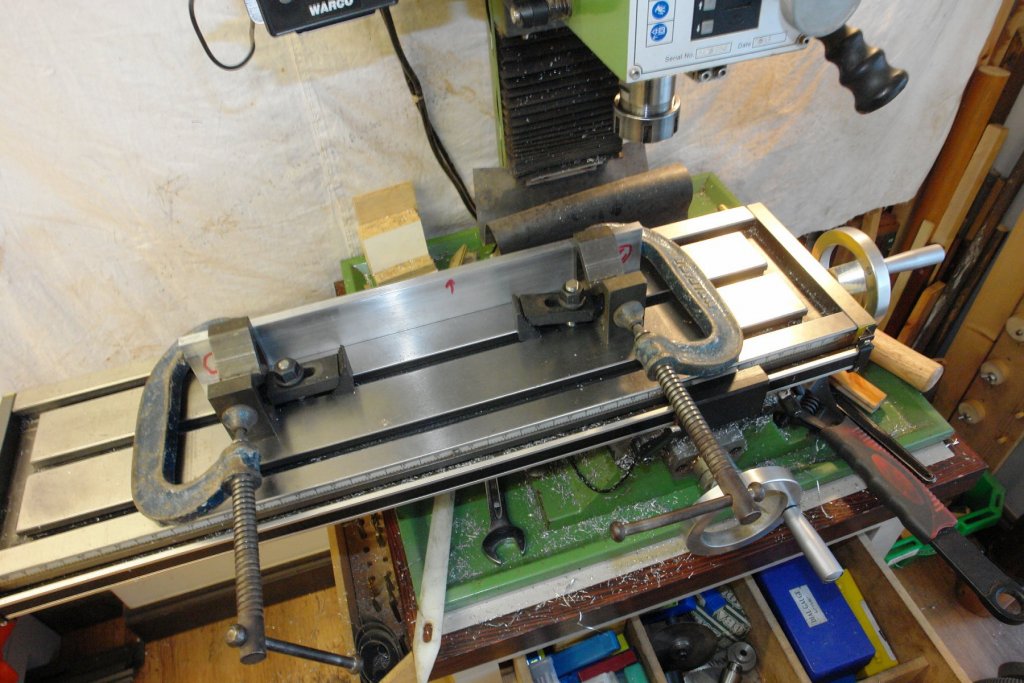
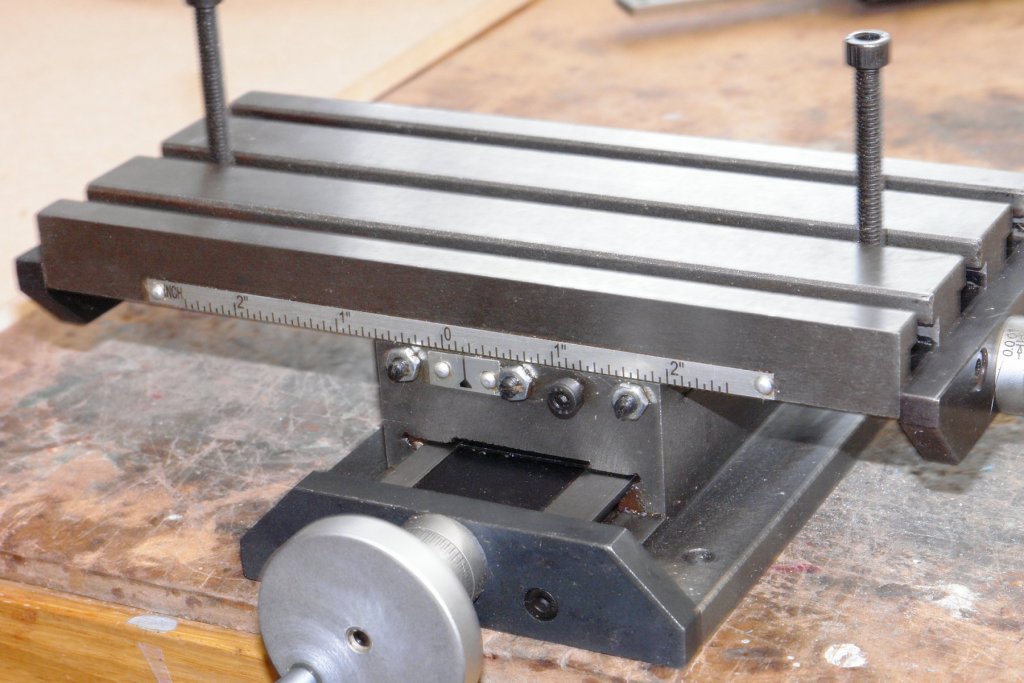
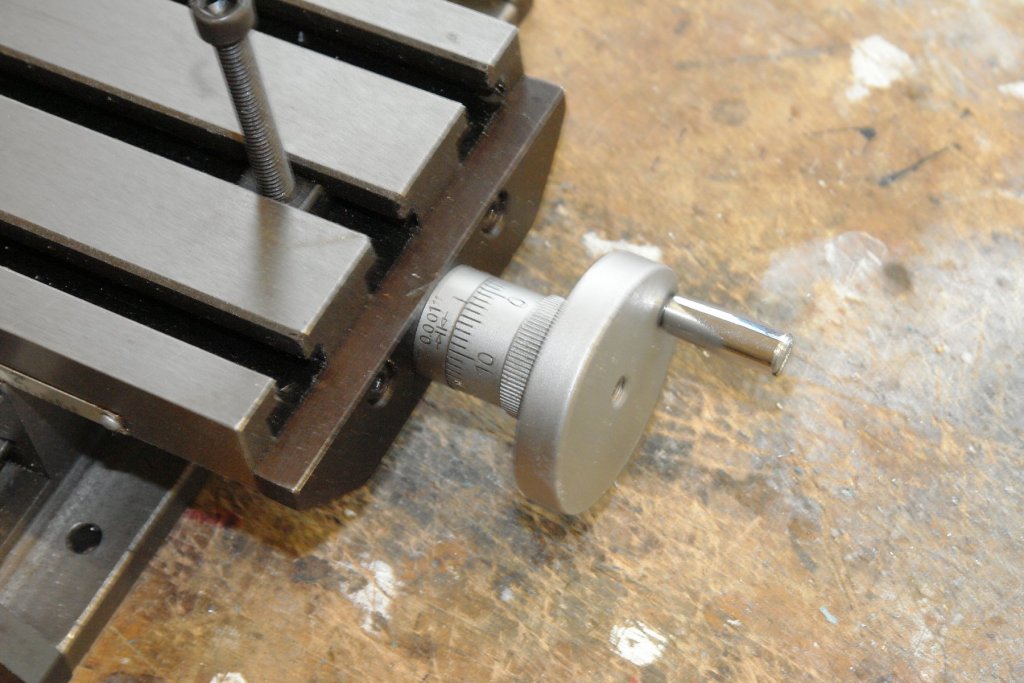
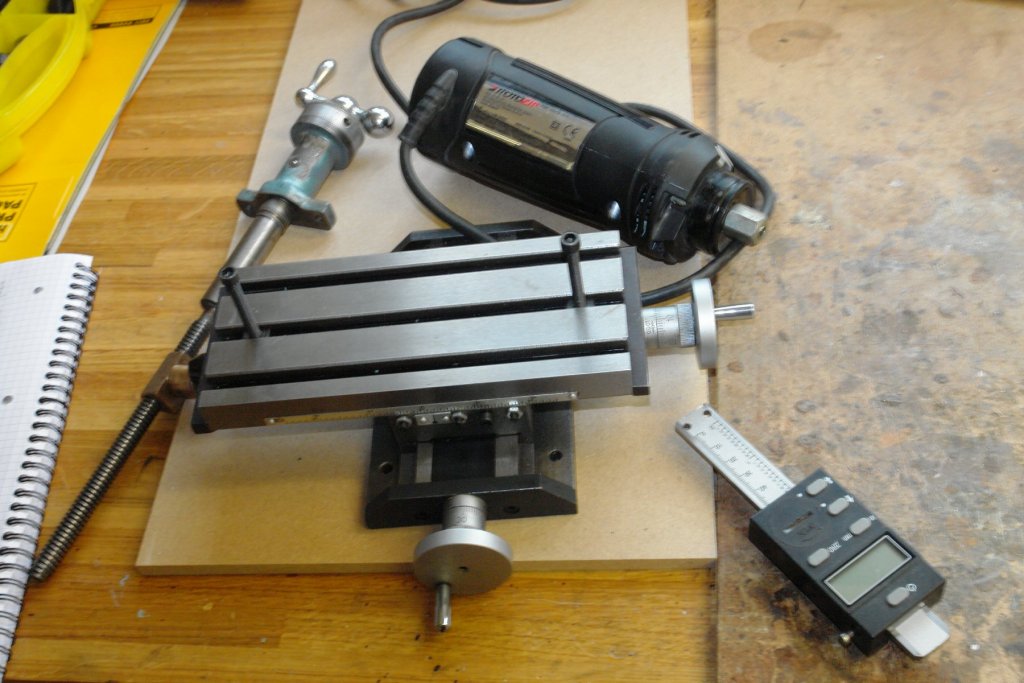
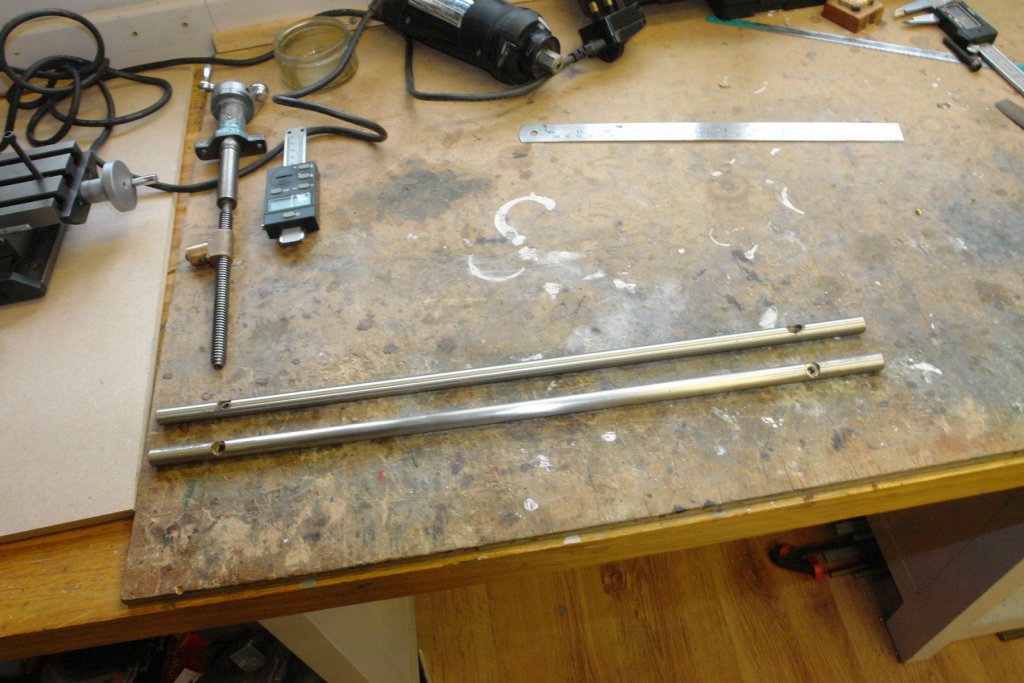
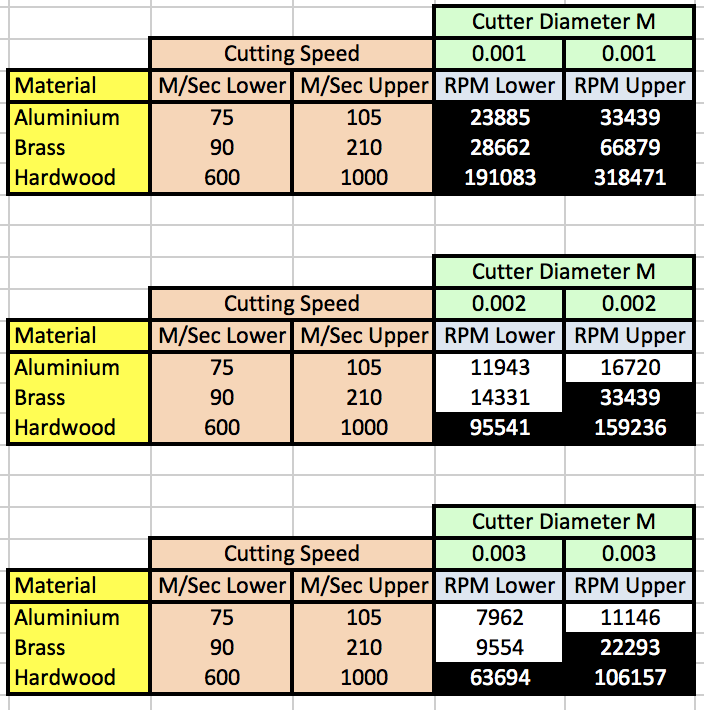
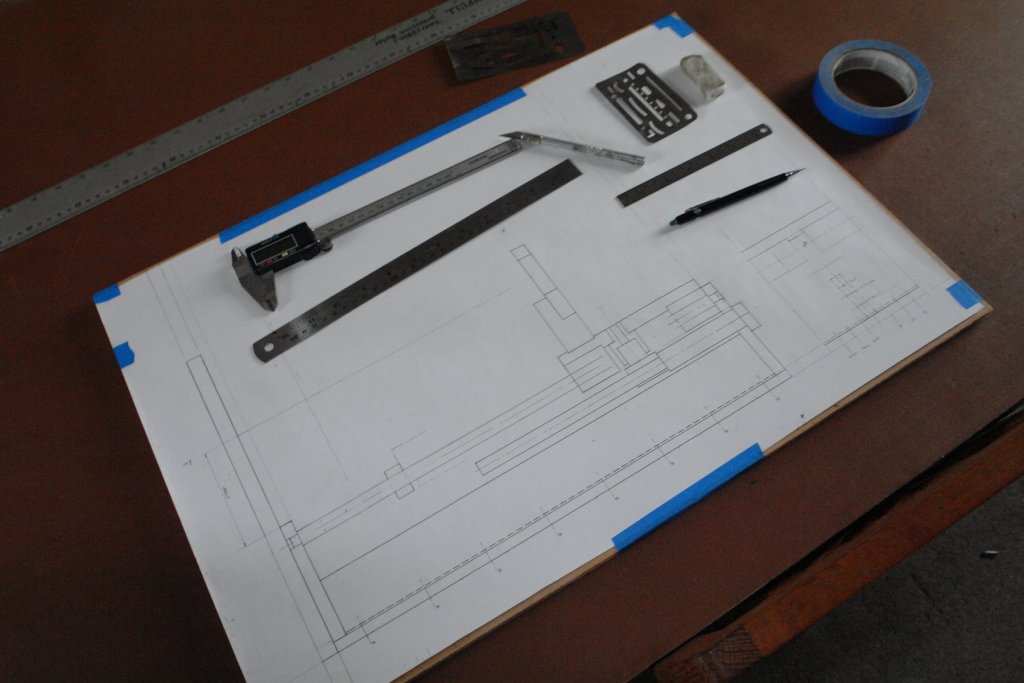
Two weeks ago I went to the local machinery suppliers open day and came away with a nice little X Y table. It came out of the redundant stock bucket and was a snip at £30. It is made of cast iron / steel (unlike many cheap fleabay products) and has gibs and locks on both axis. The hand wheels are calibrated in thousandths of an inch with one revolution giving .050 inch travel (20 TPI). The x travel is 5.250 inch and the y travel is 2.625 inch. I had been thinking about making a mini mill for a while. I find my bench mill is a bit too meaty for the smaller ship work and its maximum speed of 2400 rpm is much too slow for smaller drills and end mill cutters when working on aluminium, brass and hardwood. I did a bit of calculation on cutters of up to 3mm diameter (table below) and concluded that a spindle speed of 10,000 - 30,000 rpm wouldn't be too excessive. Having bought the table I had a hunt through my "rainy day" store and came up with the following:- Cross slide lead screw from my long retired Boxford lathe. This is nicely engineered with the screw mounted on double trust bearings and calibrated in tousandths (1 revolution = .100 inch). It will give me 6" Z axis travel. 2 speed "Rotozip" 550 Watt spiral saw body with speeds of 25000 and 33000 RPM. I have had this for 20 years during which time its had about one hours use. Its got loads of torque and nicely tight bearings. Ideally i would like to put speed control on it but as yet I'm not sure how. A digital read out, bought cheaply on a whim for £5. ( I will need 2 more). Its Ideally sized for the x axis. To make this a success I need to pay a lot of attention to the accuracy of the build but the first job was to come up with a design. I worked through a few options before coming up with the following general arrangement (drawn at full size). The column frame will be made out of .375" thick aluminium plate and the milling head will run on two pairs of linear roller bearings riding on on a pair of .473" bars that in a previous life were kitchen door handles. This should keep me off boat building for a while!


- 62 replies
-
- 18
-

-
Hello Spider. You are doing quite well really. Wife, kids and home extended one of my builds to 20 years. The kids now have homes of their own and are constantly compiling long lists of refurbishment demands. Crack on while you can, you never know what diversion is around the corner.
-
 Thank you Michael and and thank you for all th likes.
 -
Nice deck work Kevin. Its snowing in West Sussex as well - on Friday I was walking on the South Downs in warm sun and thinking spring had sprung.
-
I have to agree - it look very realistic.
-
Dan, Strongly advise against dumping the garbage over the side. Bound to attract the attention of an unwelcome wolf pack. Great figures, they add loads of interest.
- 287 replies
-
- 6
-
-
- michelangelo
- ocean liner
- (and 1 more)
-
Good to see you building again Kees. I’m pleased to hear your health continues to be good.
- 193 replies
-
- 7
-
-
- wilhelmina vii
- fishing
- (and 1 more)
-
Richard - Jim’s method work but additionally buy some of these needle threaders on eBay - they are a great help.
-
Nice work Kevin.
-
Lovely looking model. I really liked your method for making the rails.
-
Dan, I presume you didn't need the optivisor for this one?
- 287 replies
-
- 5
-
-
- michelangelo
- ocean liner
- (and 1 more)
-
ancre La Salamandre by tadheus - 1:24
KeithAug replied to tadheus's topic in - Build logs for subjects built 1751 - 1800
The mortar installation looks wonderful Pawel. Have you stained the well they sit in? -
Obviously a case of too much hooch.
-
Looks interesting Jon. I'm always terrified of starting anything new until I have finished the previous project. You are obviously better at multi tasking.
-
This should be interesting Mark. I'm looking forward to seeing how it turns out. Good luck and stay sane.
-
Hello Richard. We all started somewhere and skill comes with practice. Good luck with your first model.
-
Nicely done Kevin.