-
Posts
3,970 -
Joined
-
Last visited
Content Type
Profiles
Forums
Gallery
Events
Everything posted by KeithAug
-
Keith - She is an old lady making the most of her golden years. I hope you don't talk about the Admiral having gone to seed! Also don't tell her about the restoration costs being conditional on continuing love! I am planning to model her as freshly restored because that is how I like to imagine her - Cangarda that is!
-
Thank you Rick - some great detail there. The deck detailing around the deck houses plus much of the other stuff will prove extremely useful. The deck is remarkably uncluttered compared with that of Germainia. During the course of the build I am almost certainly going to find myself coming back to you to ask where is this or that bit. I hope you are in good health and planning to be around for a while? Some of the background reading confirms that the original panel has been retained as a museum feature. I guess the roof of the aft cabin is pretty clean. It doesn't have guard rails so obviously nothing up there requires routine access. Very nice winch detail but now I am going to have to figure out how I depict graded hoses. What do you want to do about the remaining photo's - (or have you sent them all?). It's fine by me if you just keep posting them here if you have any more to send? Once again thank you for all your help.
-
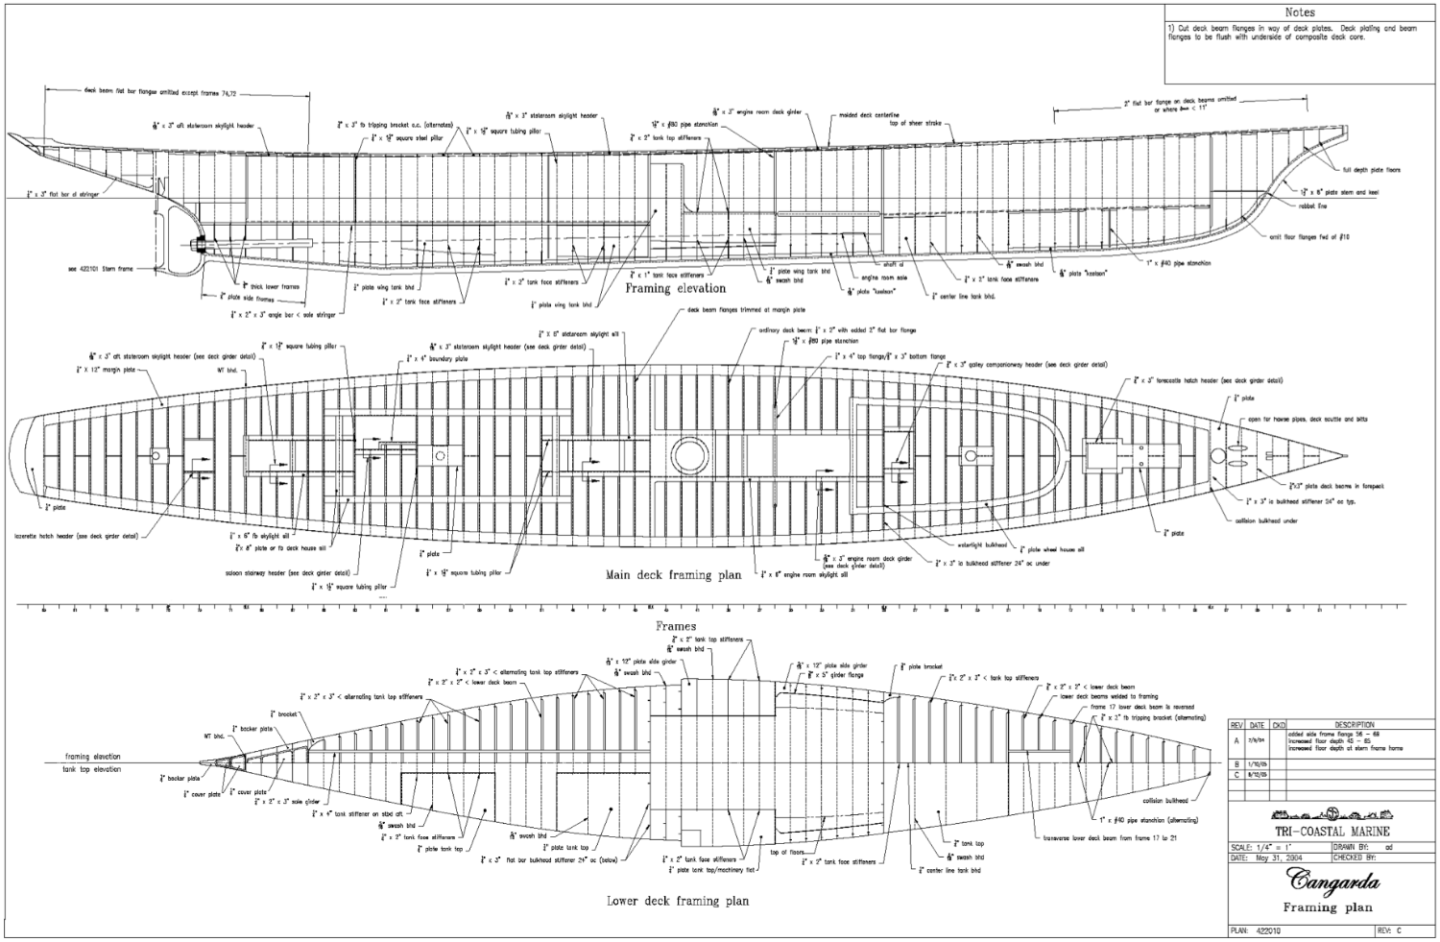
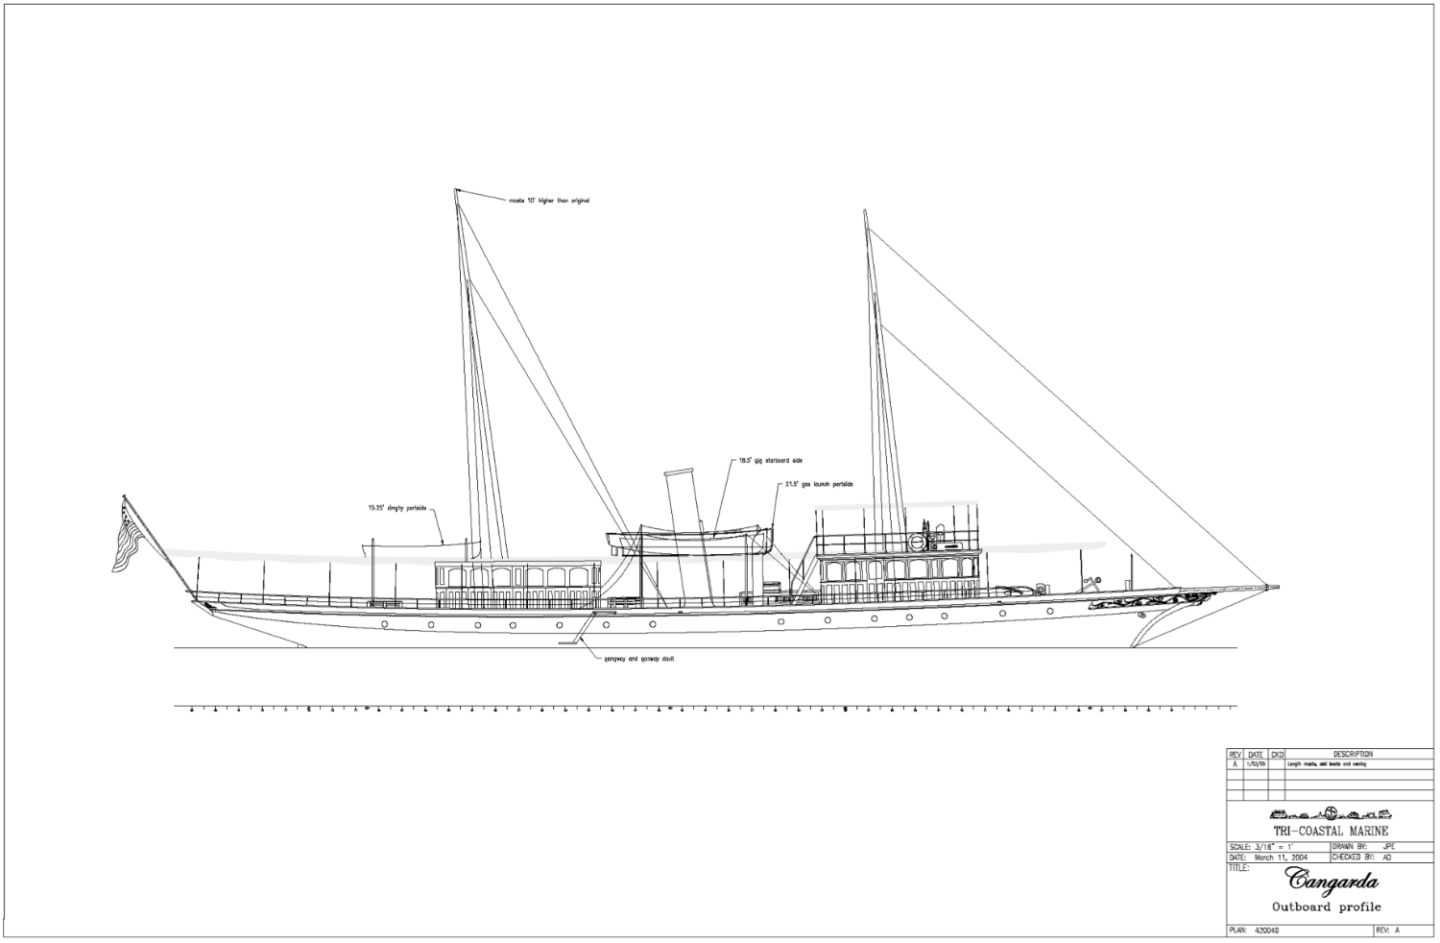
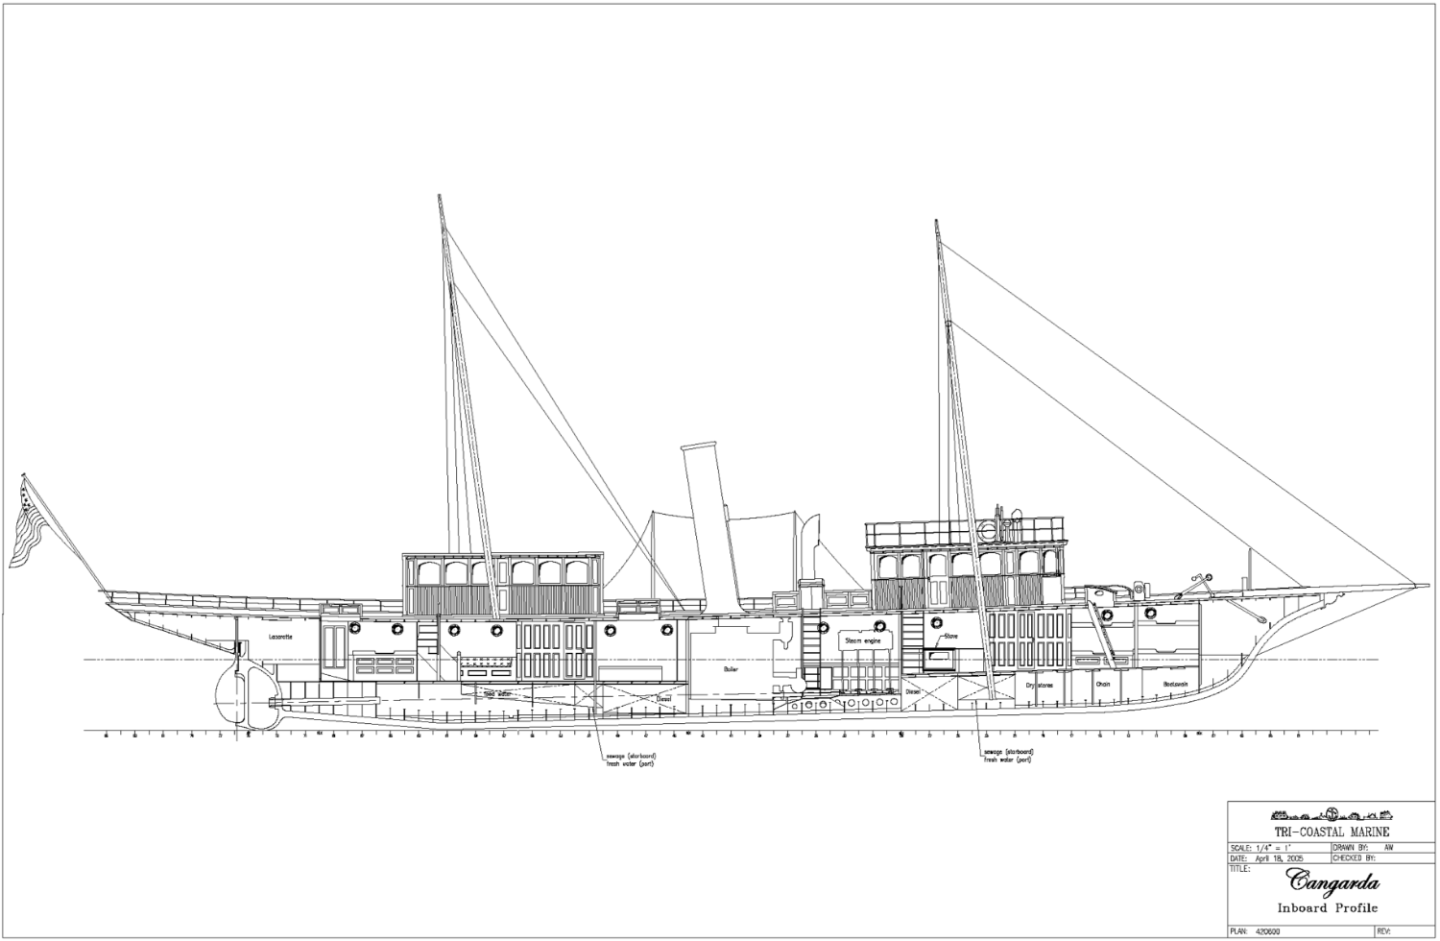
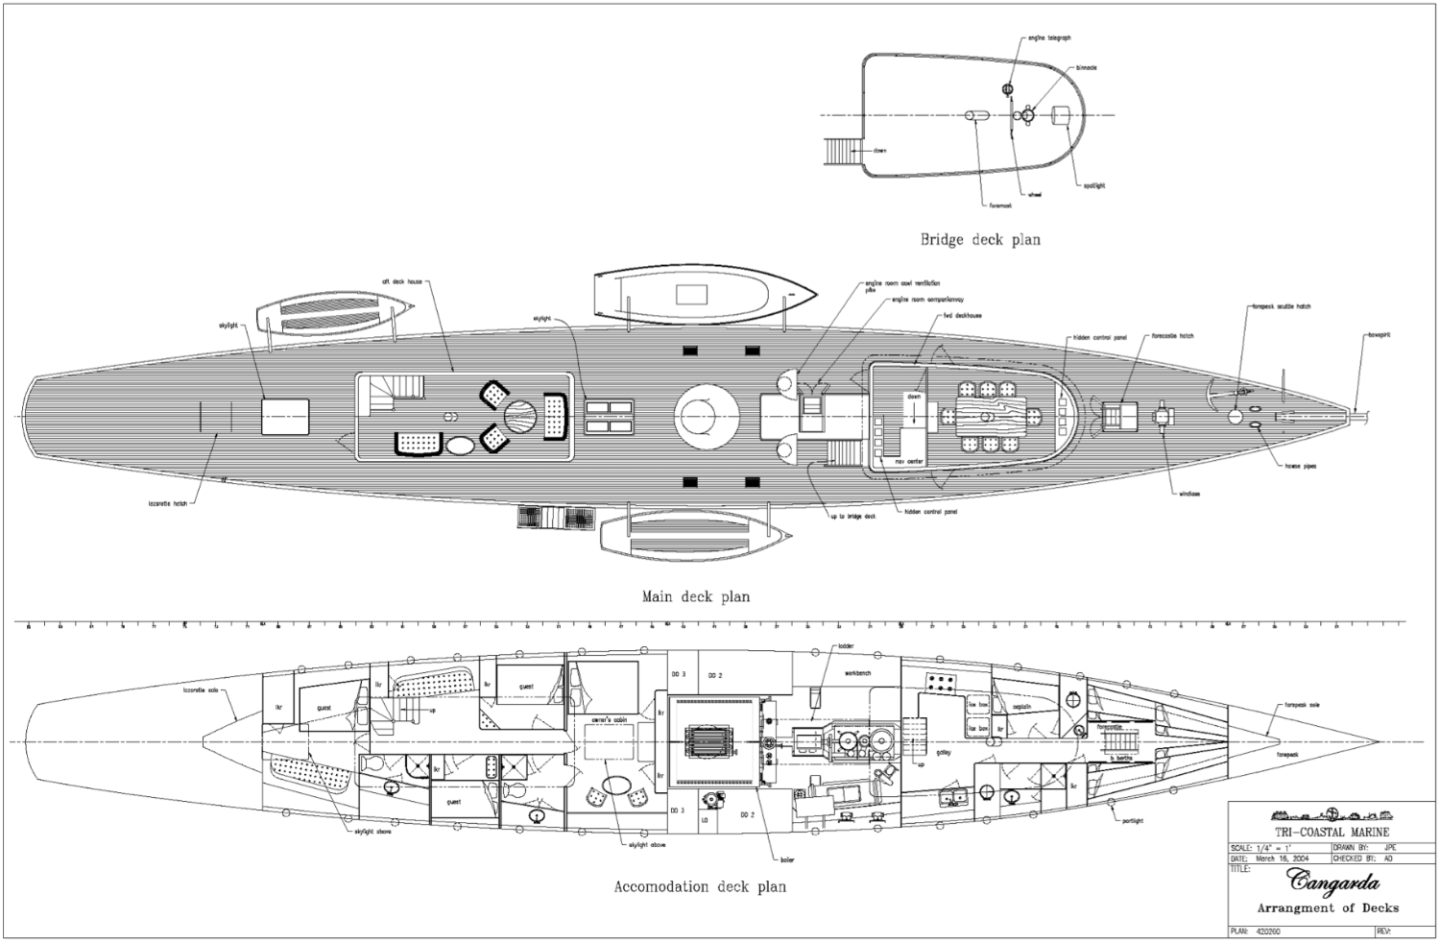
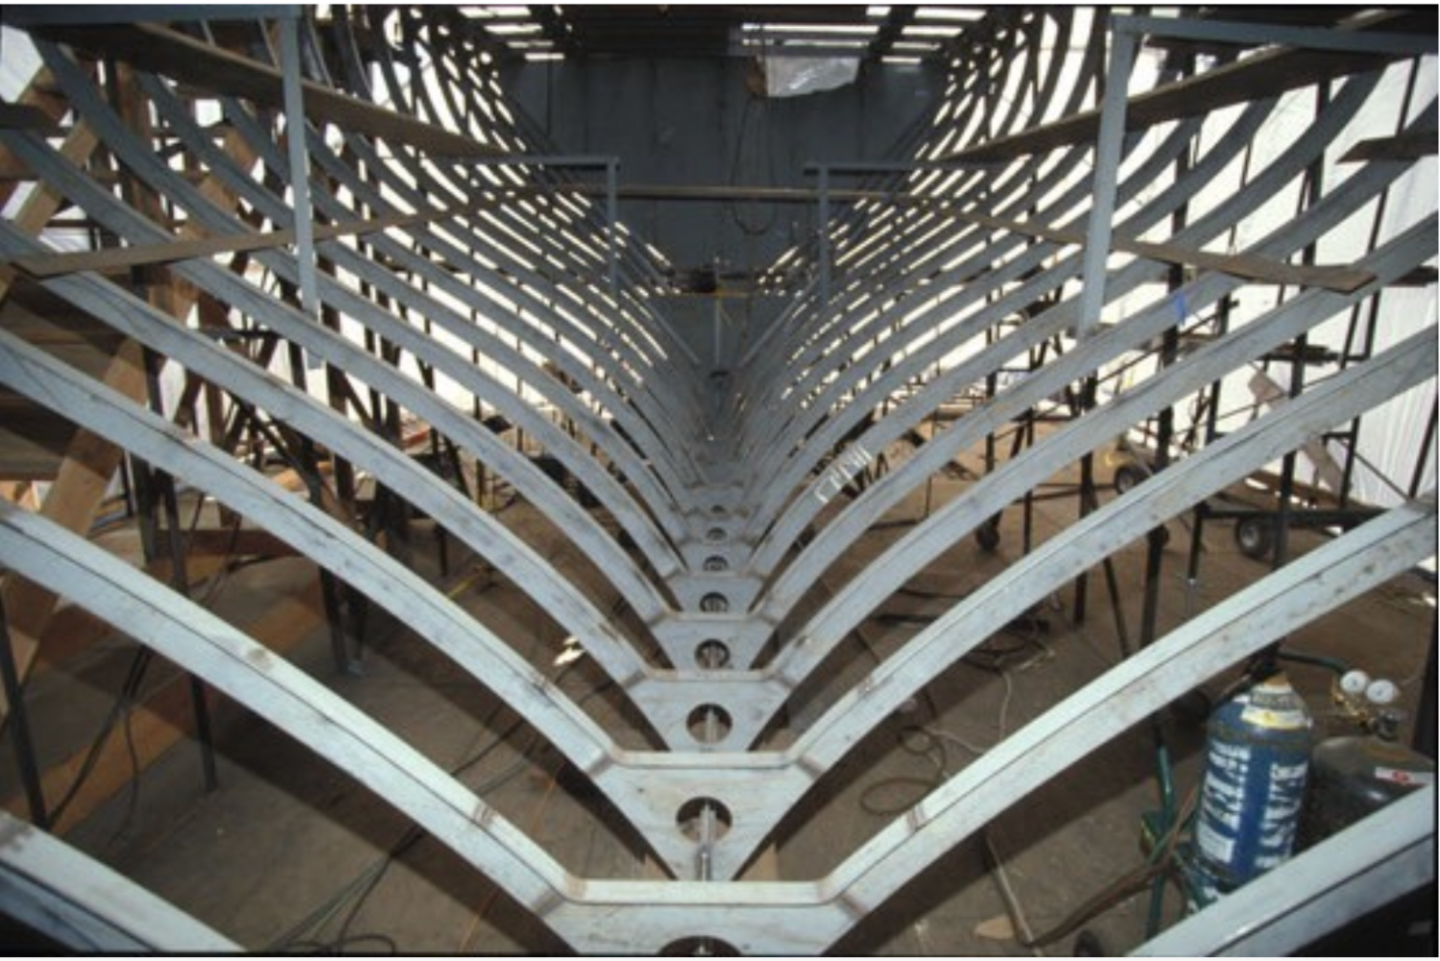
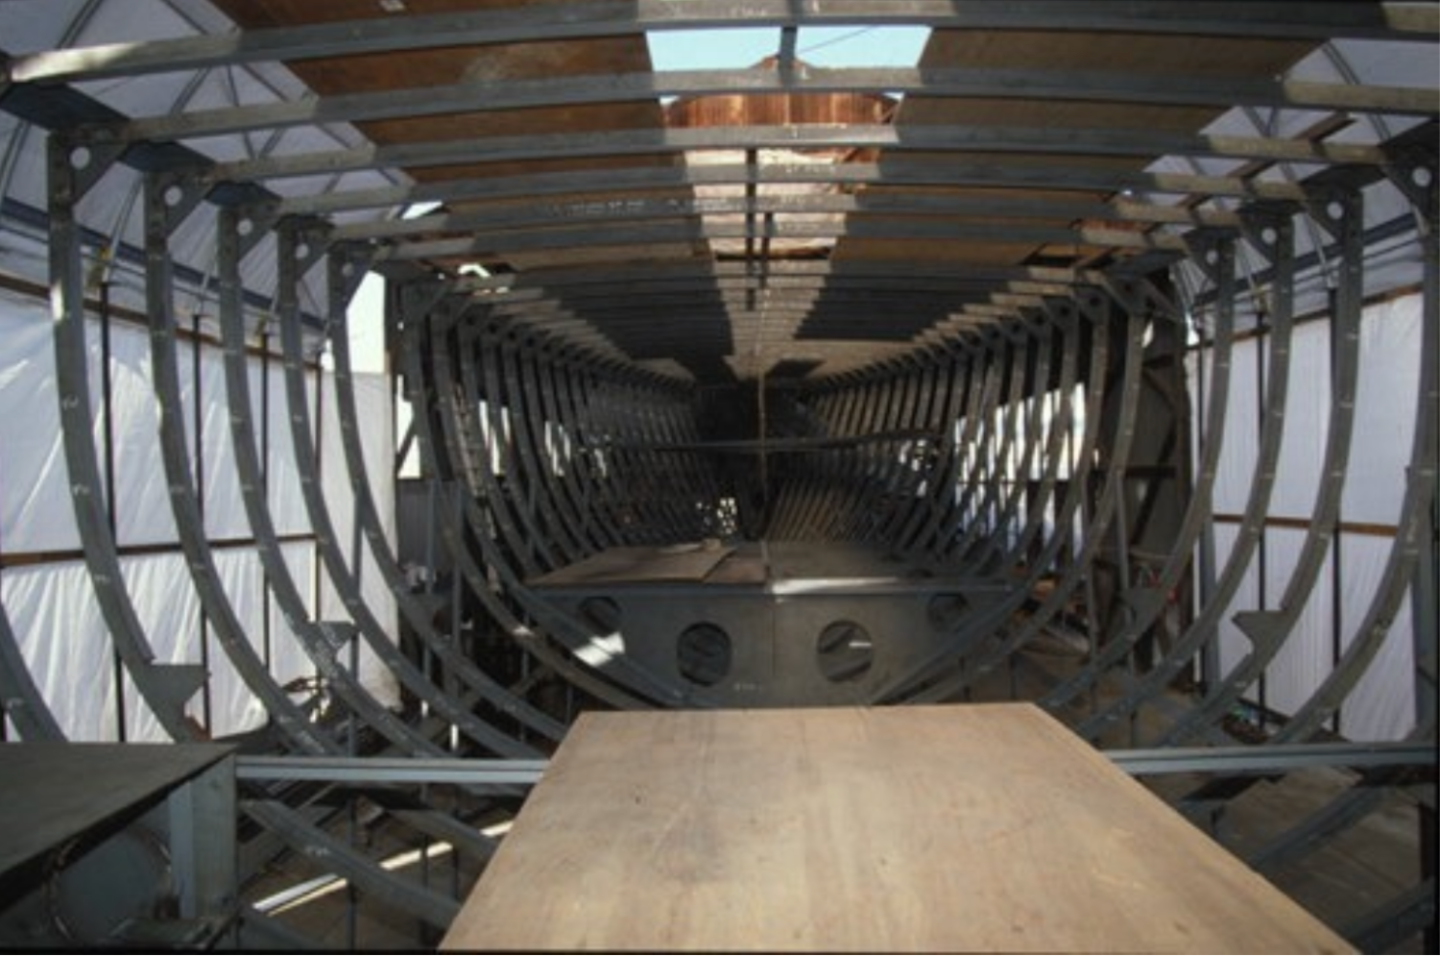
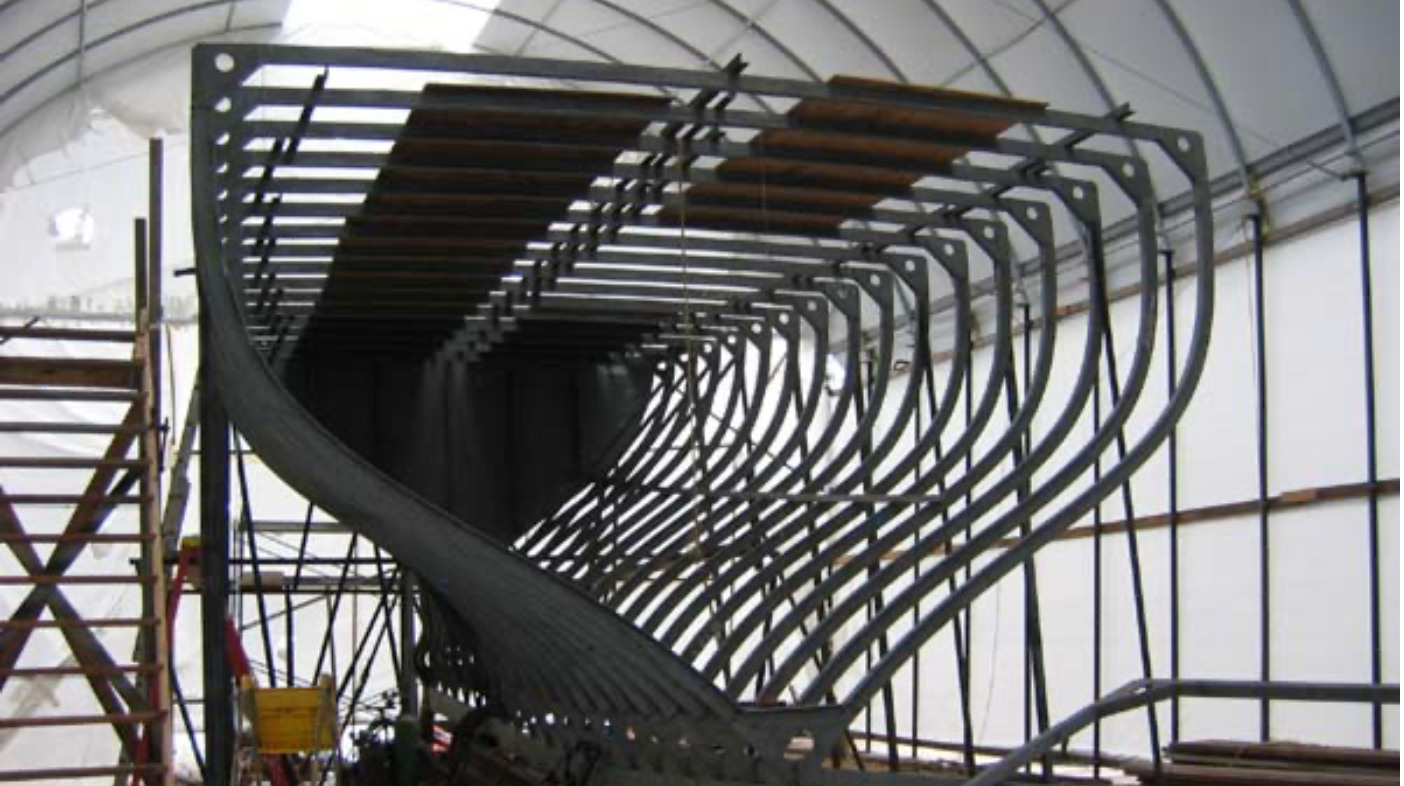
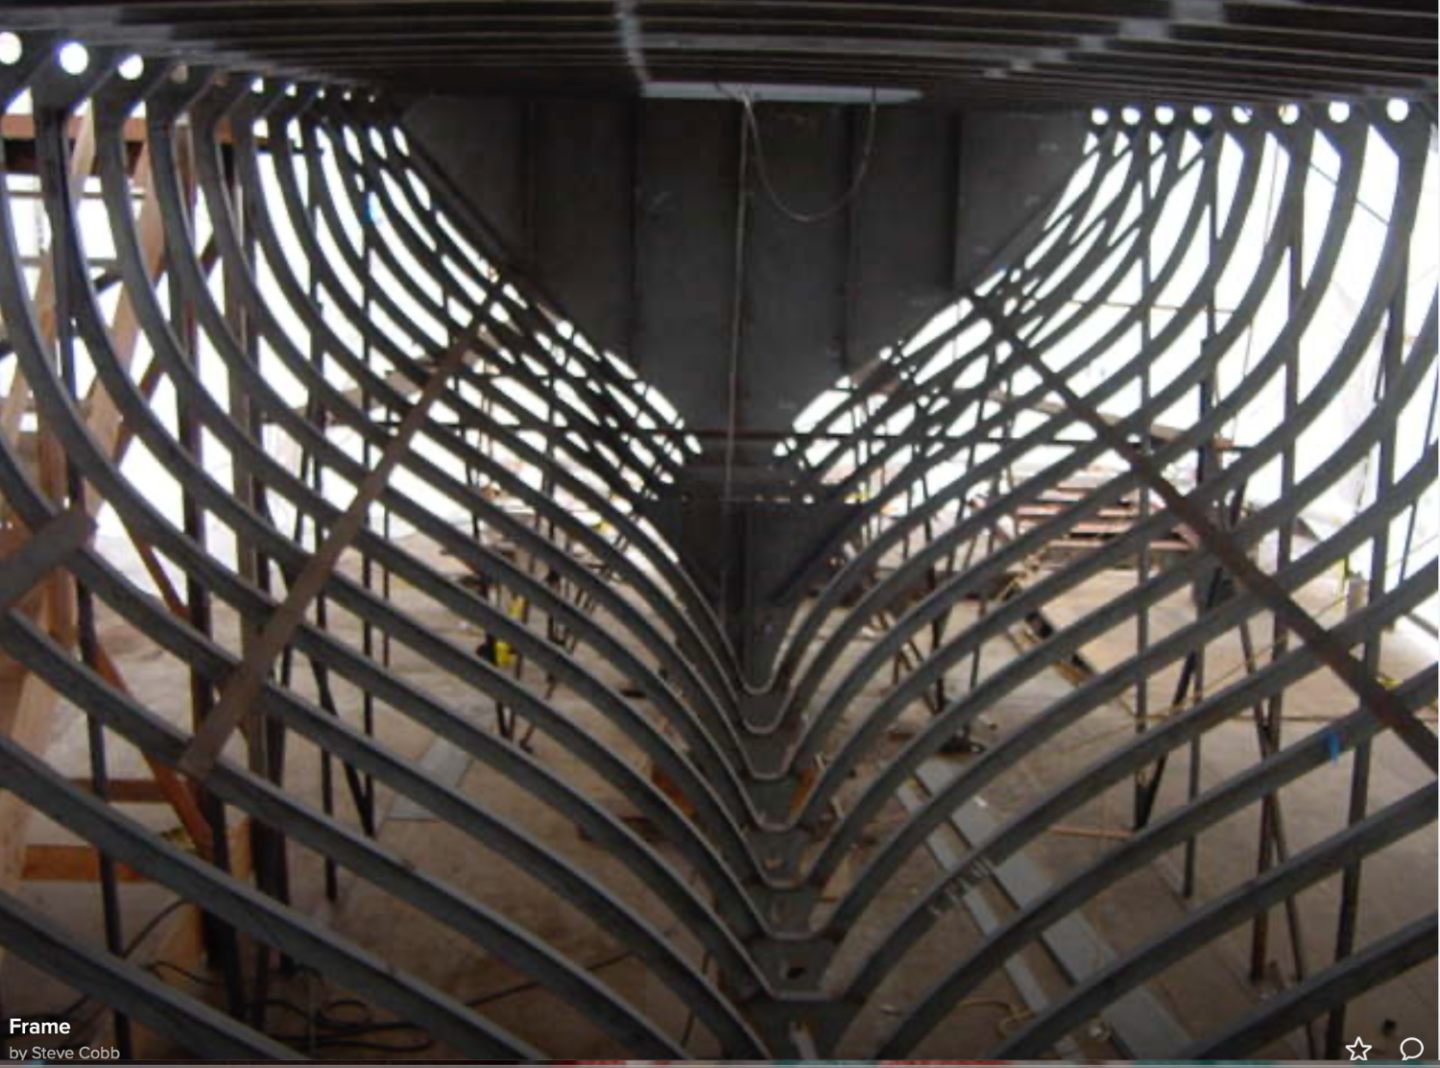
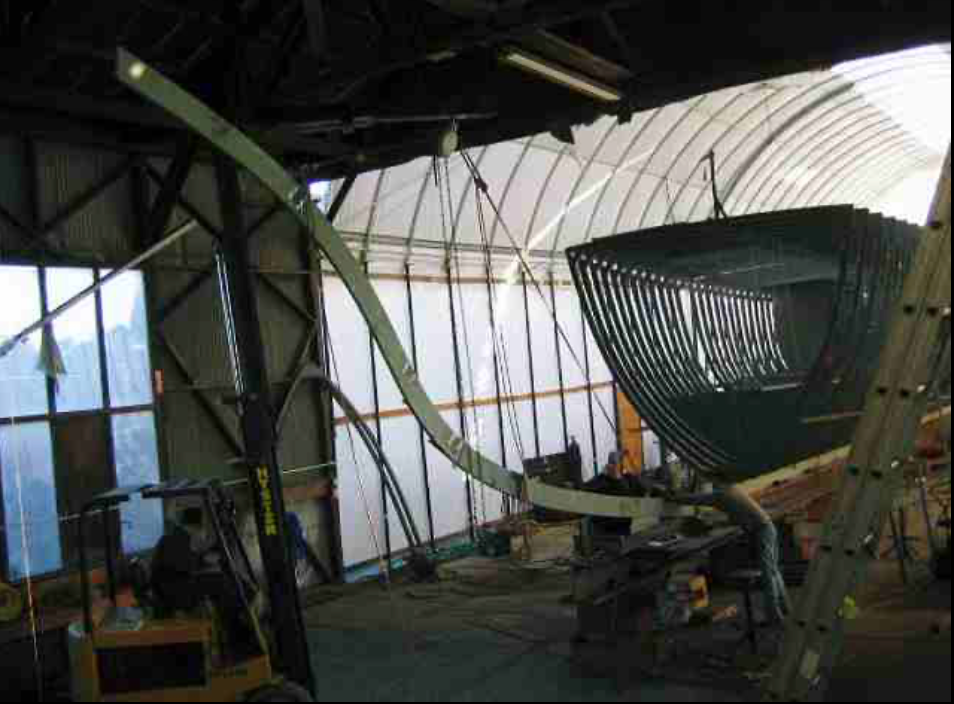
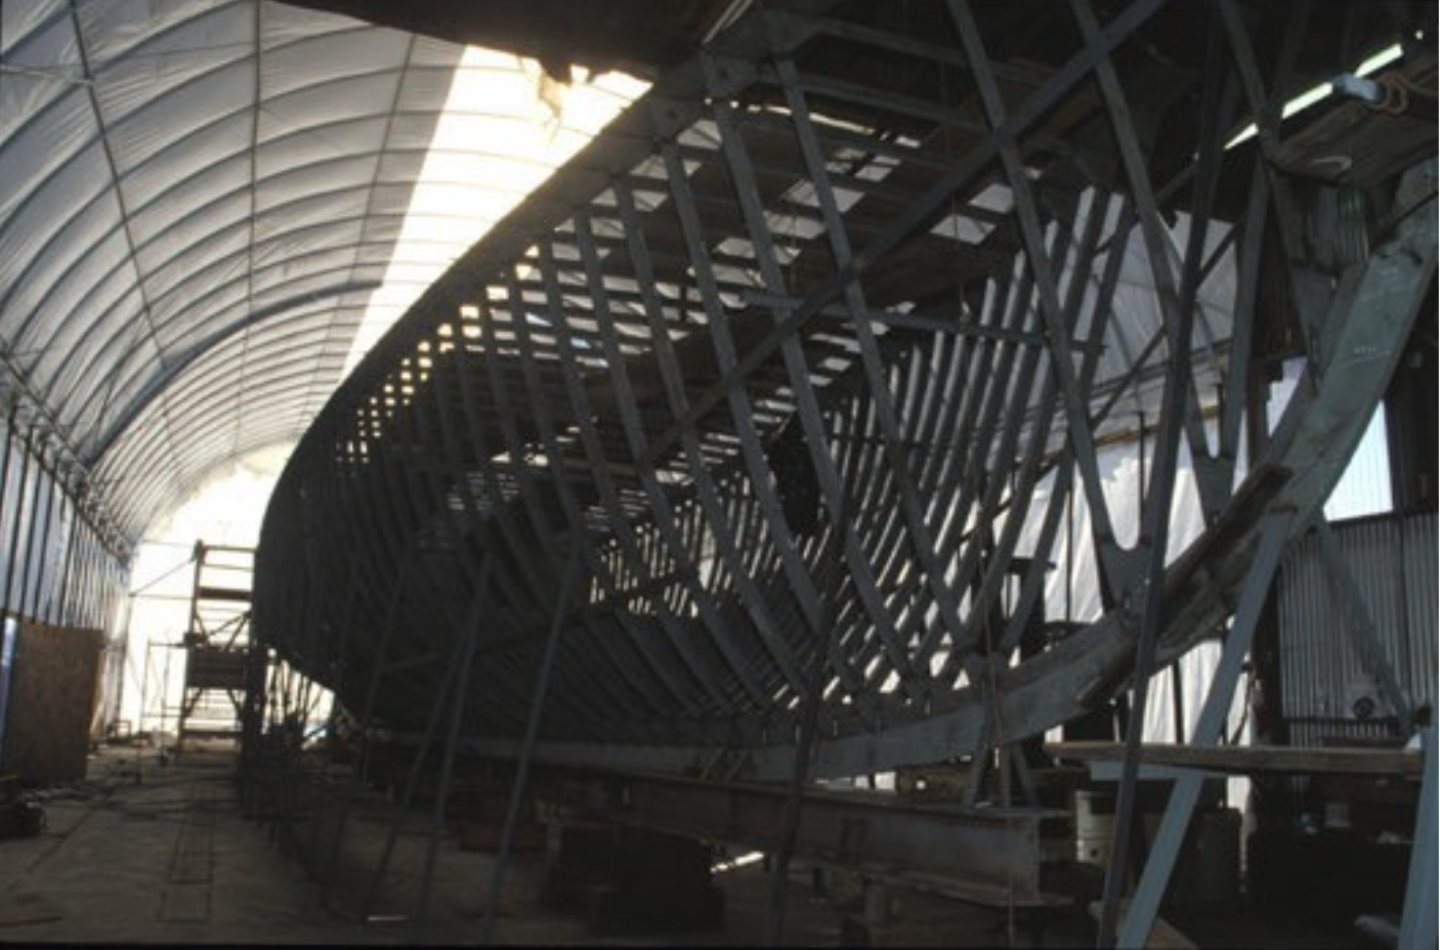
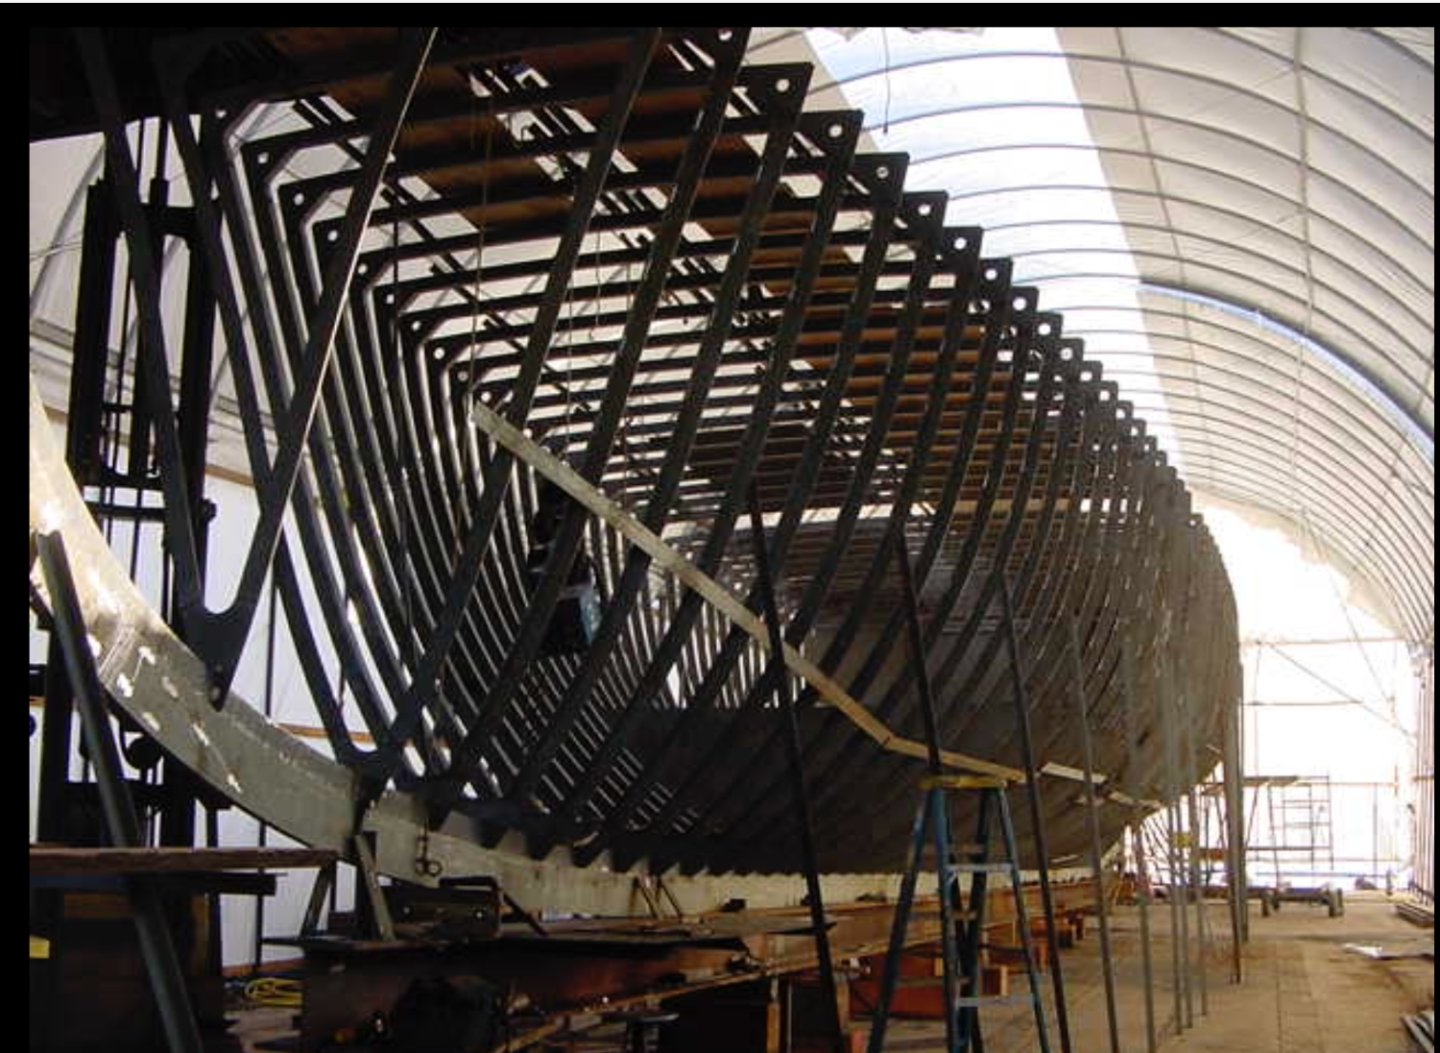
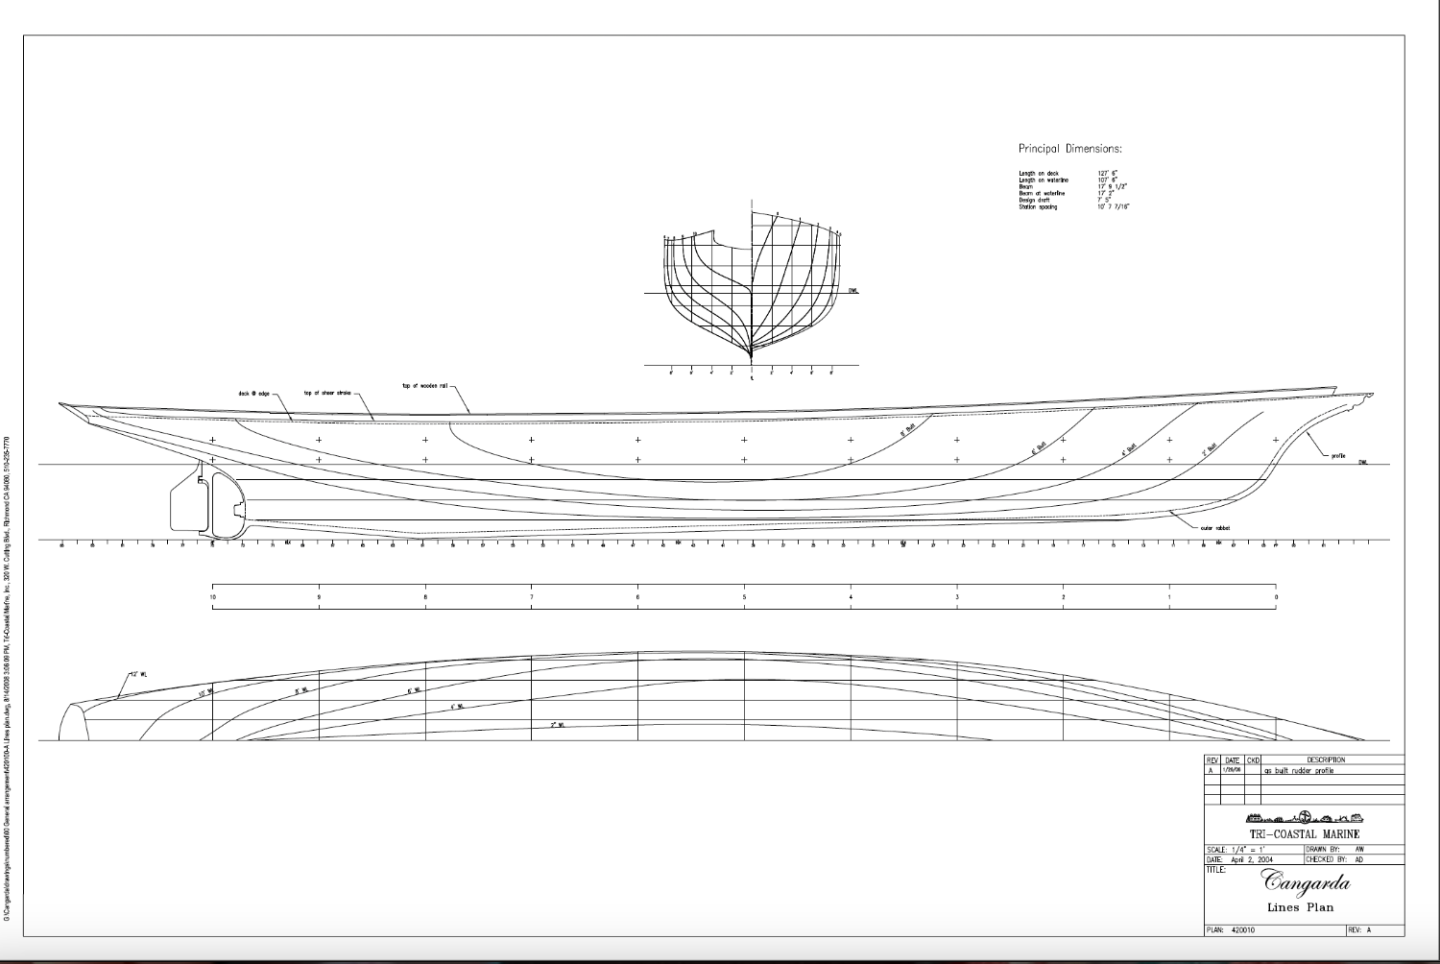
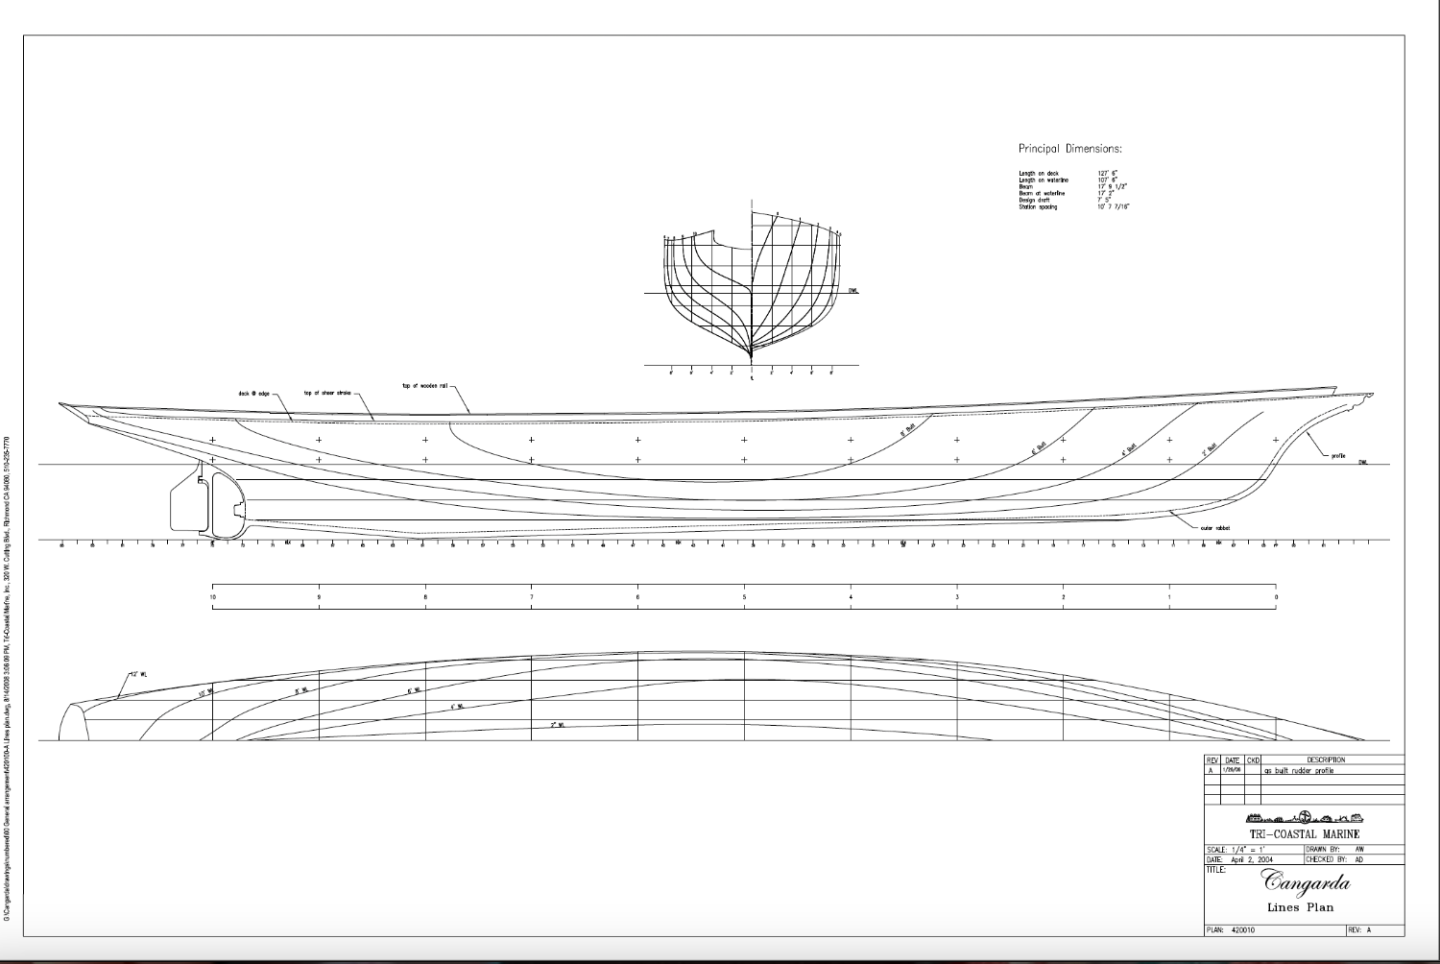
So I had better make a start but firstly a big thank you to all of you who have engaged with this project thus far. I will try to be as enthusiastic as you all seem to be. I have been collecting photographs and looking for plans of Cangarda on the net for about 8 months. It is fairly normal to find web photographs of restored classic yachts. Typically they are photographed in anchorages and photographs are also taken when they are sold or chartered. Unfortunately these photos are generally less than ideal for the typical modeller. For a start, much of the charter photography focuses on broad external overviews complemented by extensive detailed shots of the internal accommodation. The camera rarely points down at all those interesting deck fittings or up to the heavens where all that fascinating rigging resides. Shots taken at anchorage (or in transit) are also generally less than ideal. They tend to be taken from too far away to get the detail and of course deck detail is generally obscured by the viewing angle. Sometimes as in Cangarda's case photographs of the restoration are available and these can be a useful resource. So far as plans are concerned, in Cangarda's case I was somewhat fortunate. A paper to The Classic Yacht Symposium 2006 covering the early restoration of Cangarda contained 4 useful plans as follows:- These plans while containing a lot of detail were contained within a PDF document and I struggled to find a way of extracting them while keeping the detail. The images posted above are screen shots and of course when these are blown up they pixelate and produce saw tooth line edges which aren't very useful. Notably the plan information did not contain hull lines and at this stage this was the most significant obstacle to attempting a successful model build. What did give me some optimism was that I had found a lot of on line photographs of the hull fabrication. With these I had started to get a bit optimistic that I could use the available plans (above) with the general frame shapes to make a reasonable representation of the hull form. Interpreting the frames from the camera angle distorted images to generate the frame sections wasn't going to be easy but hey i was willing to give it a go. I am always a bit reluctant to put upon people and this was probably the reason that I only recently contacted Jeff Rutherford whose boatyard undertook the restoration of Cangarda. I couldn't have been more delighted with his response. Jeff confirmed that there were no lines originally and that the designer drew the profile of the bow and stern and the yard filled in the rest. The hull was then digitally scanned and the lines were retrospectively generated. Jeff put me in touch touch with Andy Davis of Tri Coastal Marine who supplied the "precious" hull lines drawing in PDF format together with a bonus reproduction of two of the plans from the 2006 paper. The lines at this stage are not sufficiently detailed for modelling having only 11 abeam sections (5.5" spacing at 1:24 scale). The hull of Cangarda is constructed on 86 frames all equally spaced at 18" full size or 3/4" at 1:24 scale. Only one of the cross sectional hull lines aligns with a frame (frame 75 at the ruder post) with all the others being set off from the frames by varying distances. I want the frames on the model to align with actual frames (I learned this lesson on Germania see note1 below) and so I need to do a lot of draughting to generate the frame drawings. I have decided that I can get away with 43 frames for modelling purposes giving a frame spacing of 1.5". I guess it is now time to get down to a few weeks of tedious draughting to generate the 43 frame drawings. Note 1 - On Germania I didnt align the frames with the actual frame positions which became a problem when cutting the port holes (which invariably sit between frames) - some of which sat half on and half off the plywood frames - making for some very tricky drilling.
-
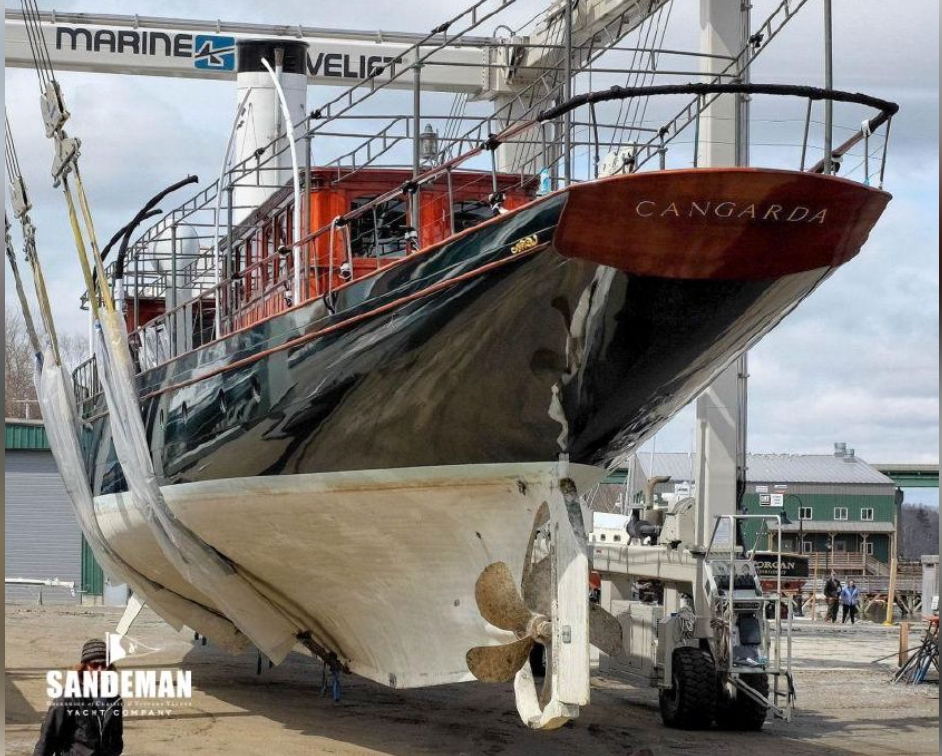
Bob, I’m modelling her as she is now with her all welded “smooth” hull. As originally built she was constructed from riveted plates as can be seen in some of her early photos. My first thoughts on painting are. Plank her hull in mahogany and overpaint above the waterline in green to match her current finish. Below the waterline leave the hull as polished mahogany. But who knows what I will be thinking in a years time☹️.
-
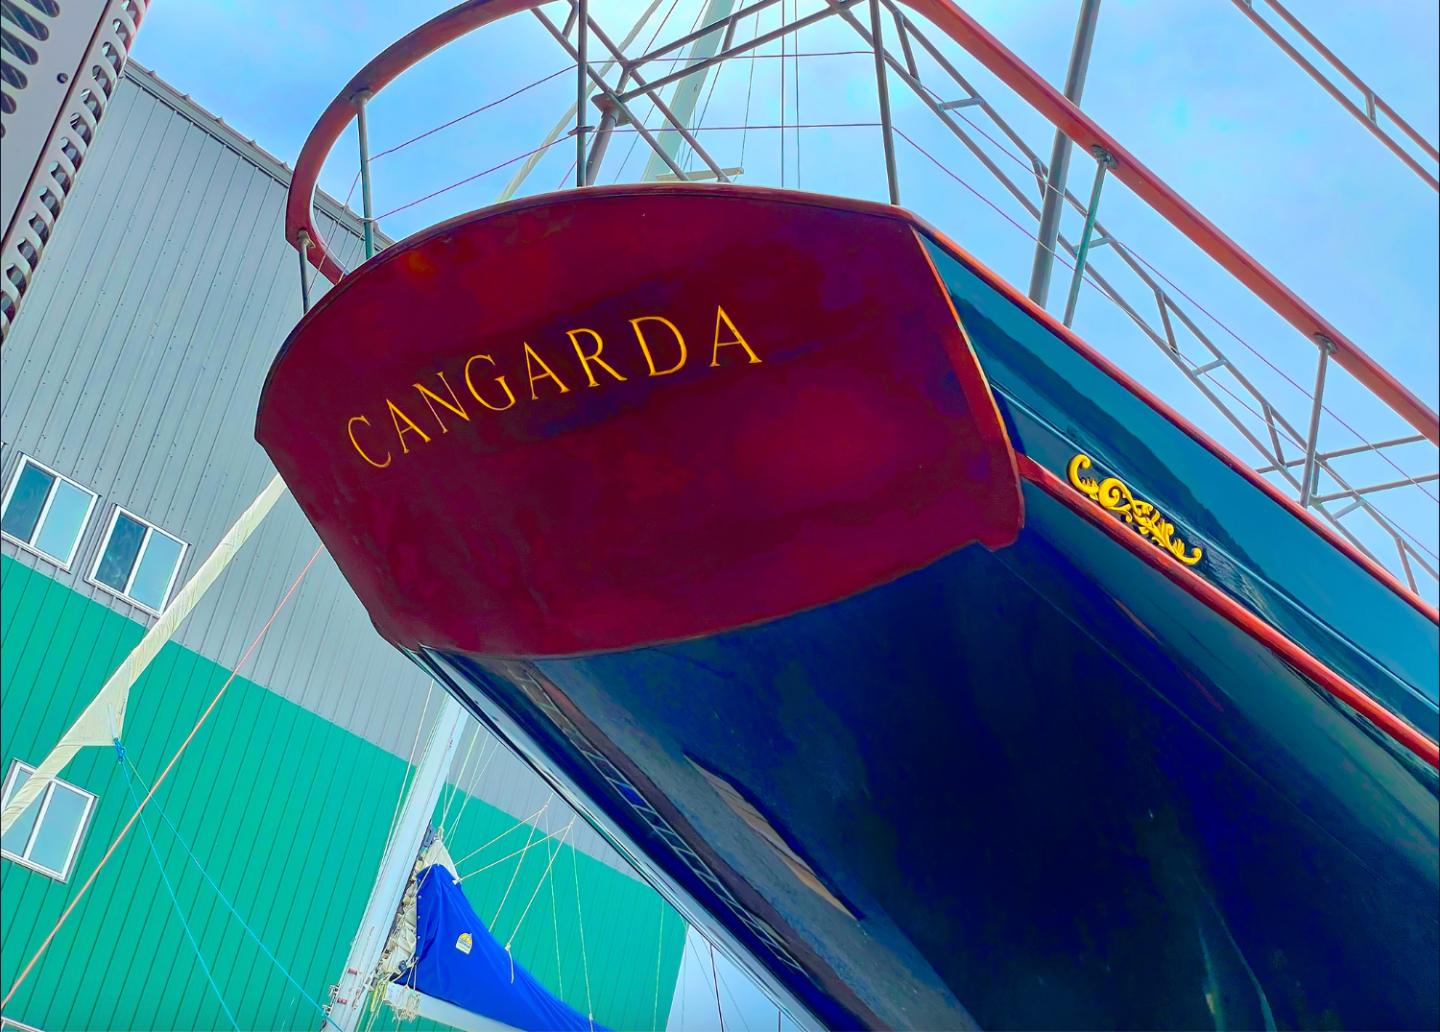
Bob, I don’t know but like you would be interested to find out. This is what I believe the rules are: The name and the hailing port must be displayed externally on the vessel, either on both sides of the hull or on the transom. The hailing port must include the place and a state, territory, or possession of the United States.
About us
Modelshipworld - Advancing Ship Modeling through Research
SSL Secured
Your security is important for us so this Website is SSL-Secured
NRG Mailing Address
Nautical Research Guild
237 South Lincoln Street
Westmont IL, 60559-1917
Model Ship World ® and the MSW logo are Registered Trademarks, and belong to the Nautical Research Guild (United States Patent and Trademark Office: No. 6,929,264 & No. 6,929,274, registered Dec. 20, 2022)
Helpful Links
About the NRG
If you enjoy building ship models that are historically accurate as well as beautiful, then The Nautical Research Guild (NRG) is just right for you.
The Guild is a non-profit educational organization whose mission is to “Advance Ship Modeling Through Research”. We provide support to our members in their efforts to raise the quality of their model ships.
The Nautical Research Guild has published our world-renowned quarterly magazine, The Nautical Research Journal, since 1955. The pages of the Journal are full of articles by accomplished ship modelers who show you how they create those exquisite details on their models, and by maritime historians who show you the correct details to build. The Journal is available in both print and digital editions. Go to the NRG web site (www.thenrg.org) to download a complimentary digital copy of the Journal. The NRG also publishes plan sets, books and compilations of back issues of the Journal and the former Ships in Scale and Model Ship Builder magazines.


