Moxis
-
Posts
314 -
Joined
-
Last visited
Content Type
Profiles
Forums
Gallery
Events
Everything posted by Moxis
-
Welcome to the forum Noramatilda! There begins to be a rather big group of ship modellers from Finland here. Concerning your question, have you tried the search function? There are other builders too who are building the Adventure. They might be able to help you: https://modelshipworld.com/search/?q=amati adventure&quick=1
-
Tervetuloa "joukkoon tummaan" Vesihiisi! Täällä meitä onkin jo muutama ennestään. Welcome onboard to the "dark pack" Vesihiisi! A couple of us (finns) are here already. By the way, I am also interested to build a model of Ilmarinen or Väinämöinen in the nearest future. It will be built from scratch in scale 1/64 which means the overall length of the model will be near 1.5 metres. At the moment I am gathering information of the ship like copies of original plans, authentic photographs, etc. If you are interested, we could join our efforts and start to build two models of her.
-
From the other side of the Gulf I also welcome you to this very friendly forum. If you need more information for your work, just ask. Or in the need of instructions for planking the hull & other things, there are many nice tutorials here too.
-
 Thanks a lot guys, I think now I have enough information to continue building. This is really the best forum for us ship model builders!
 -
Thanks Bruce. The ship was made in Finland 1830.
-
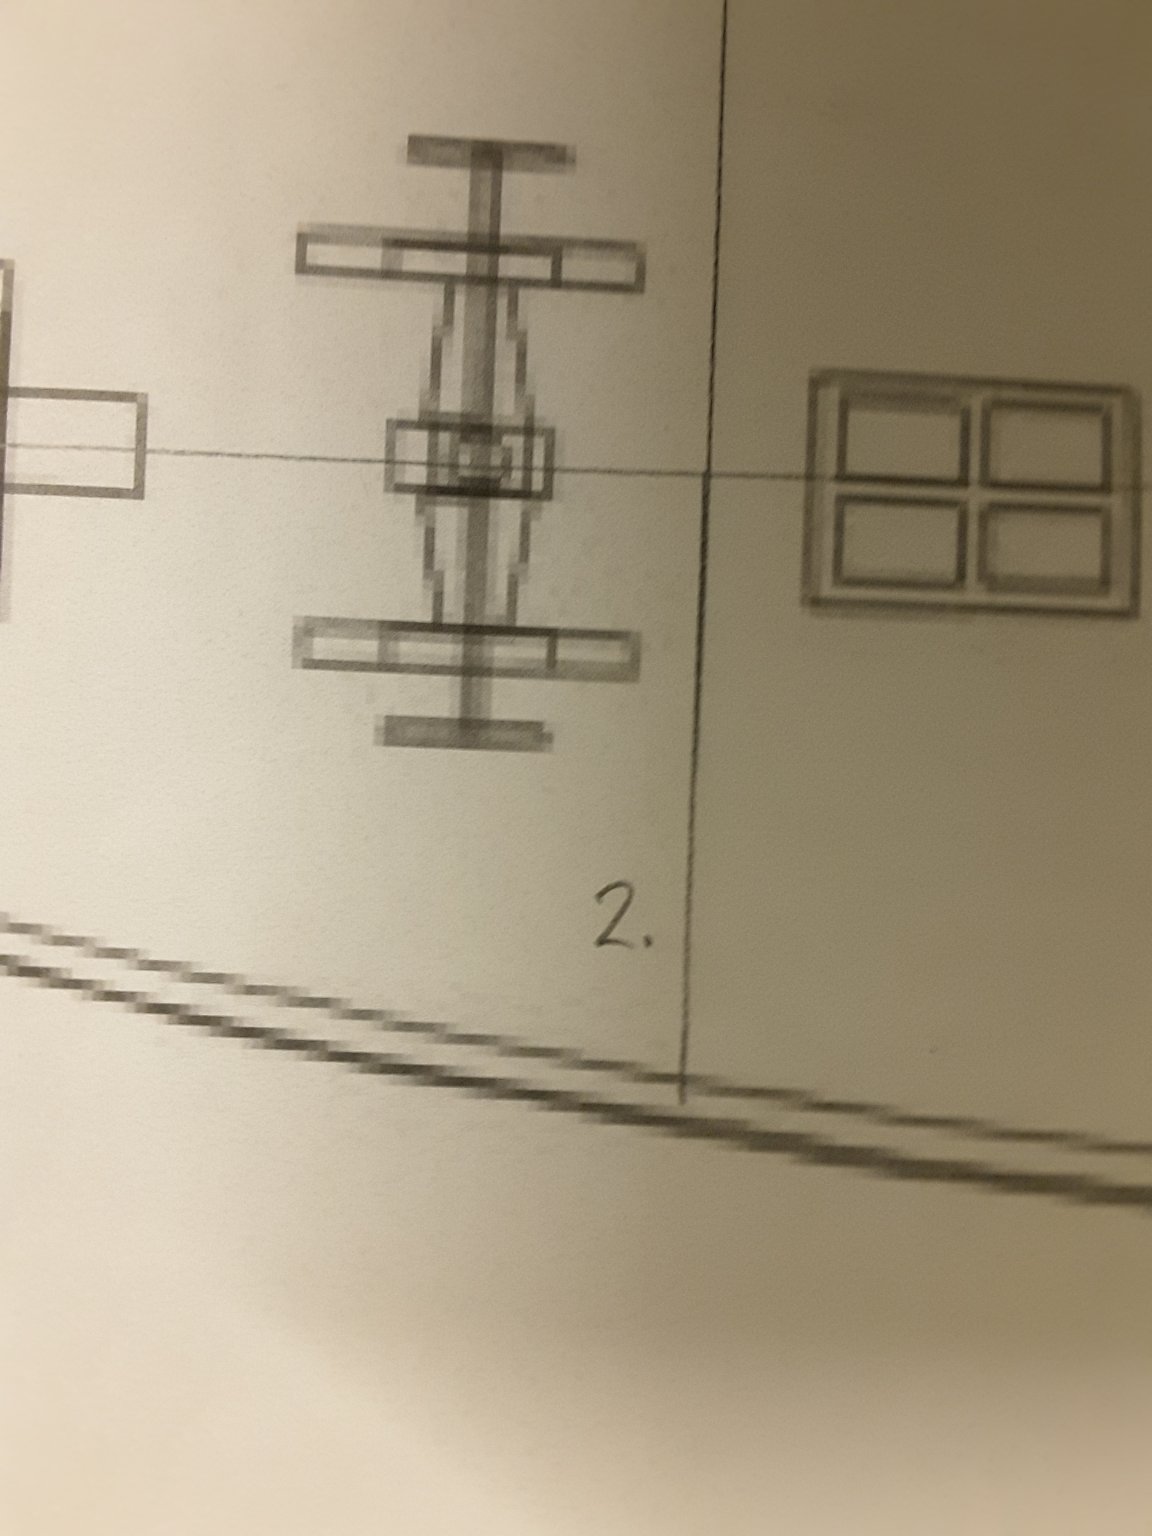
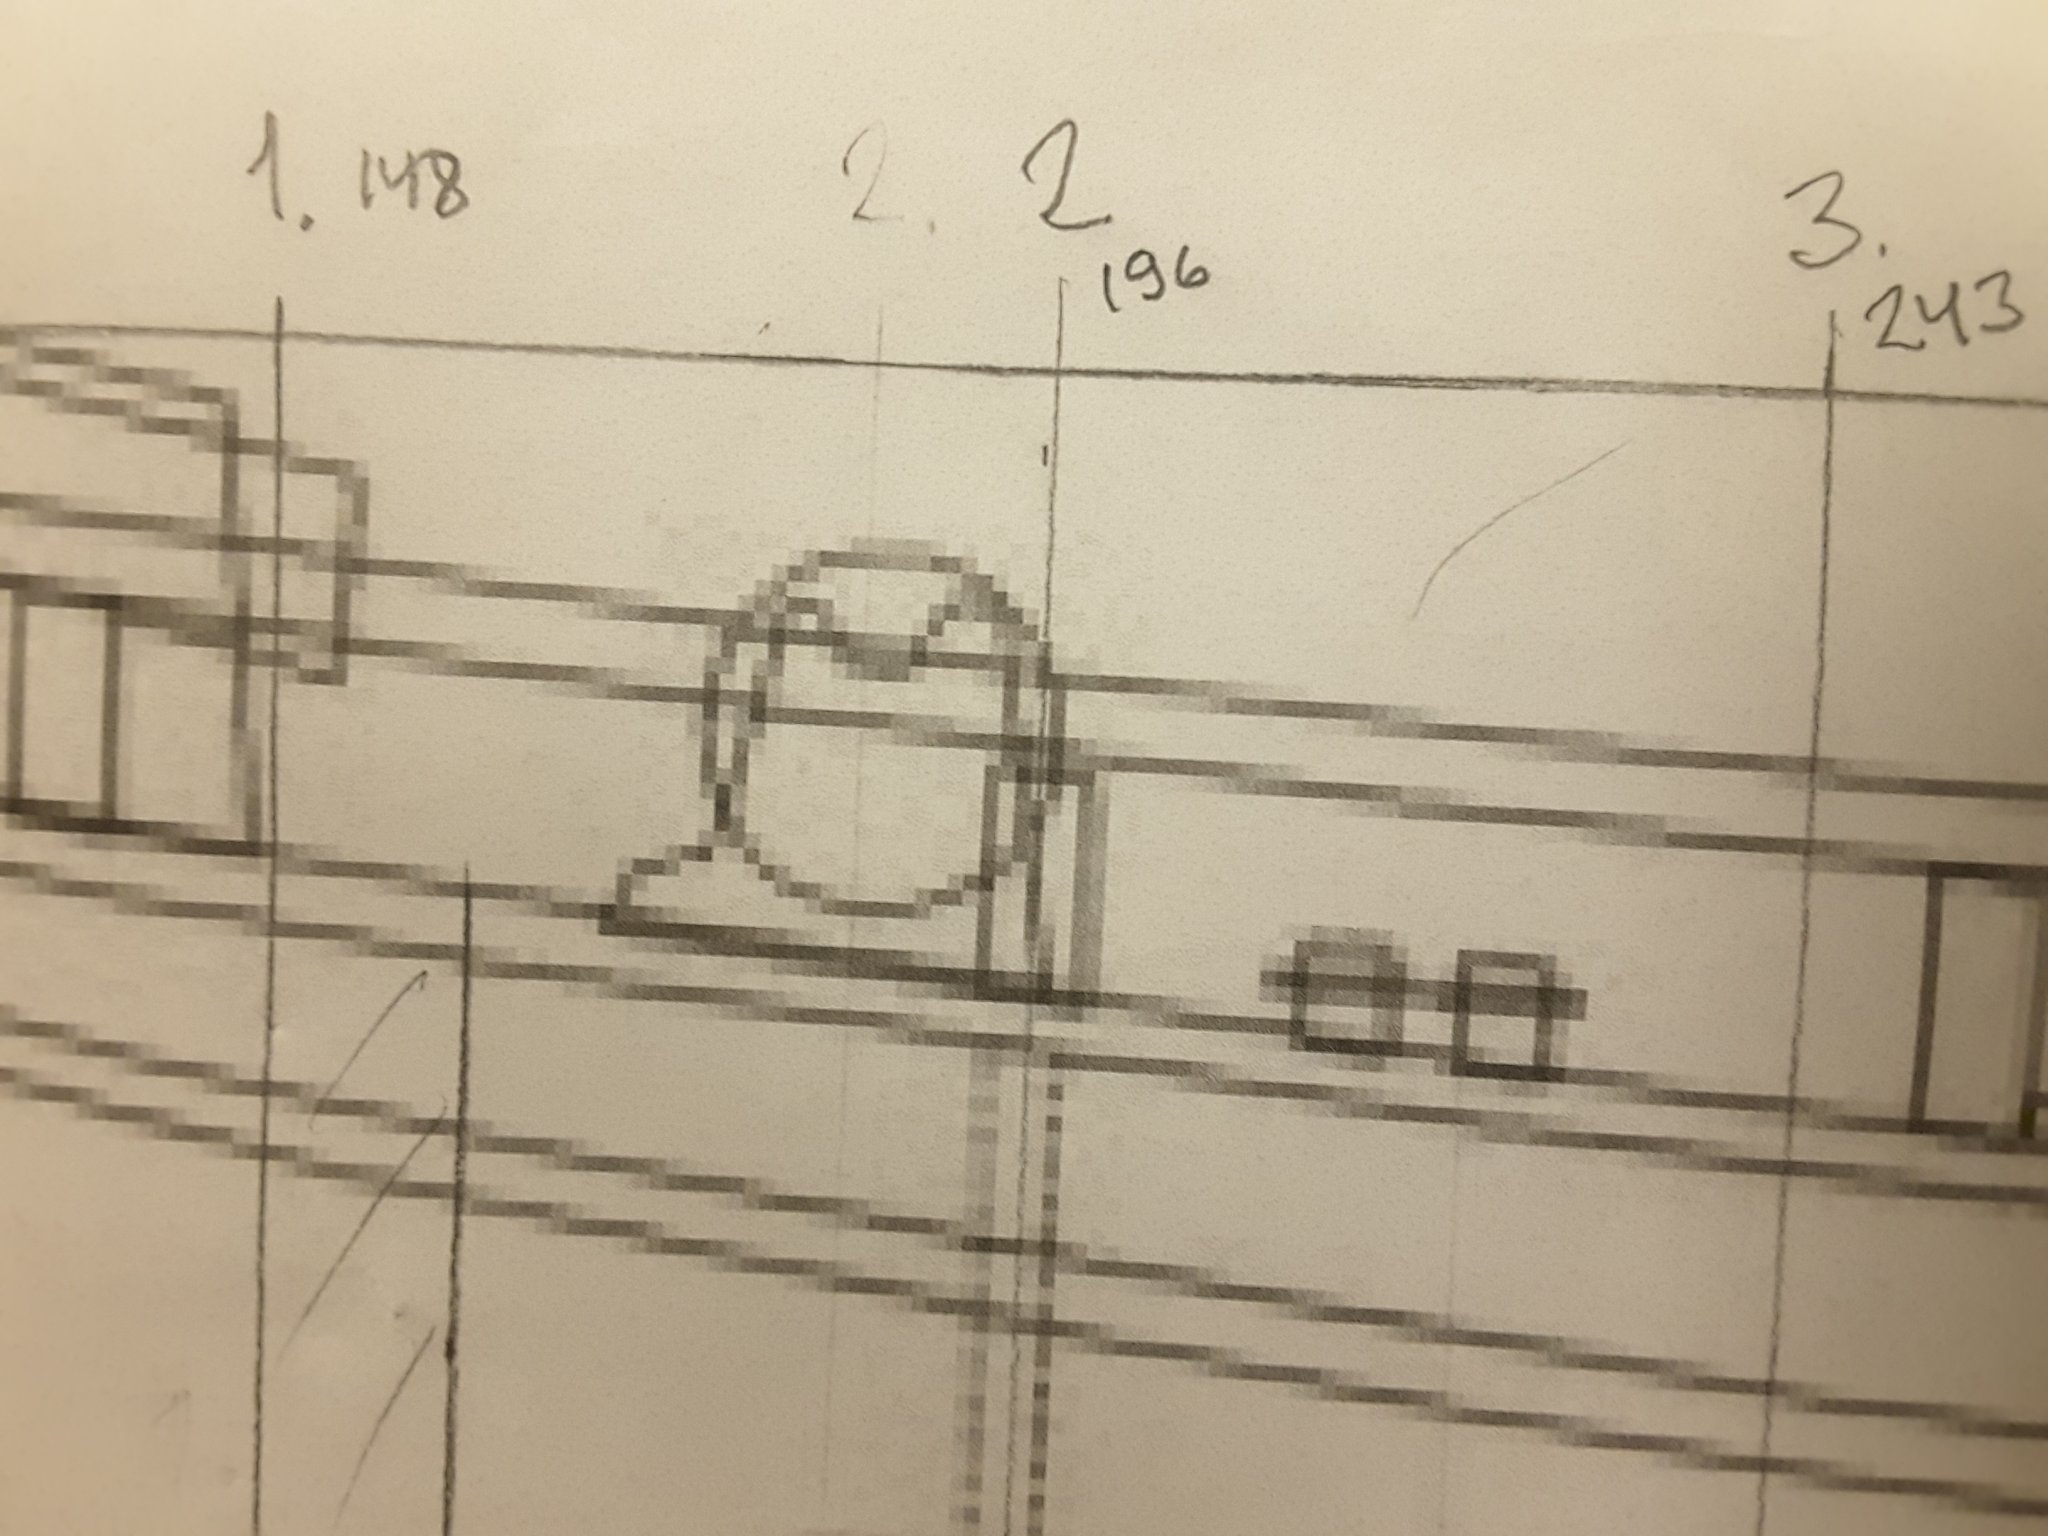
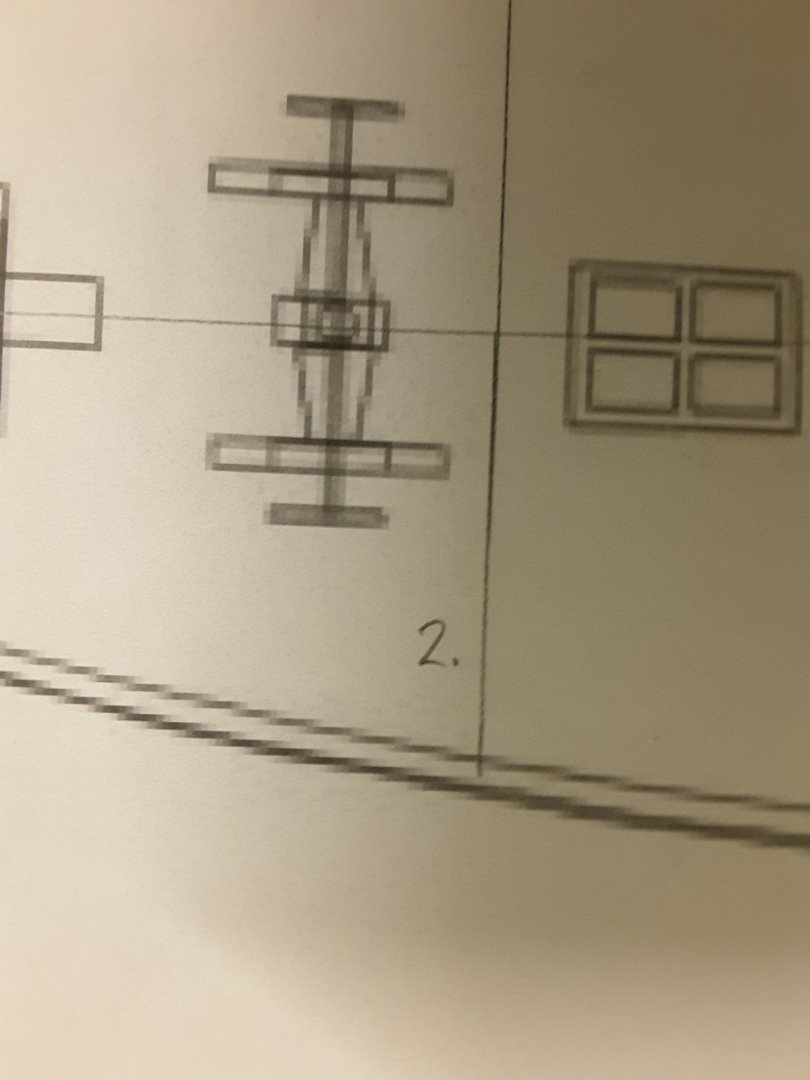
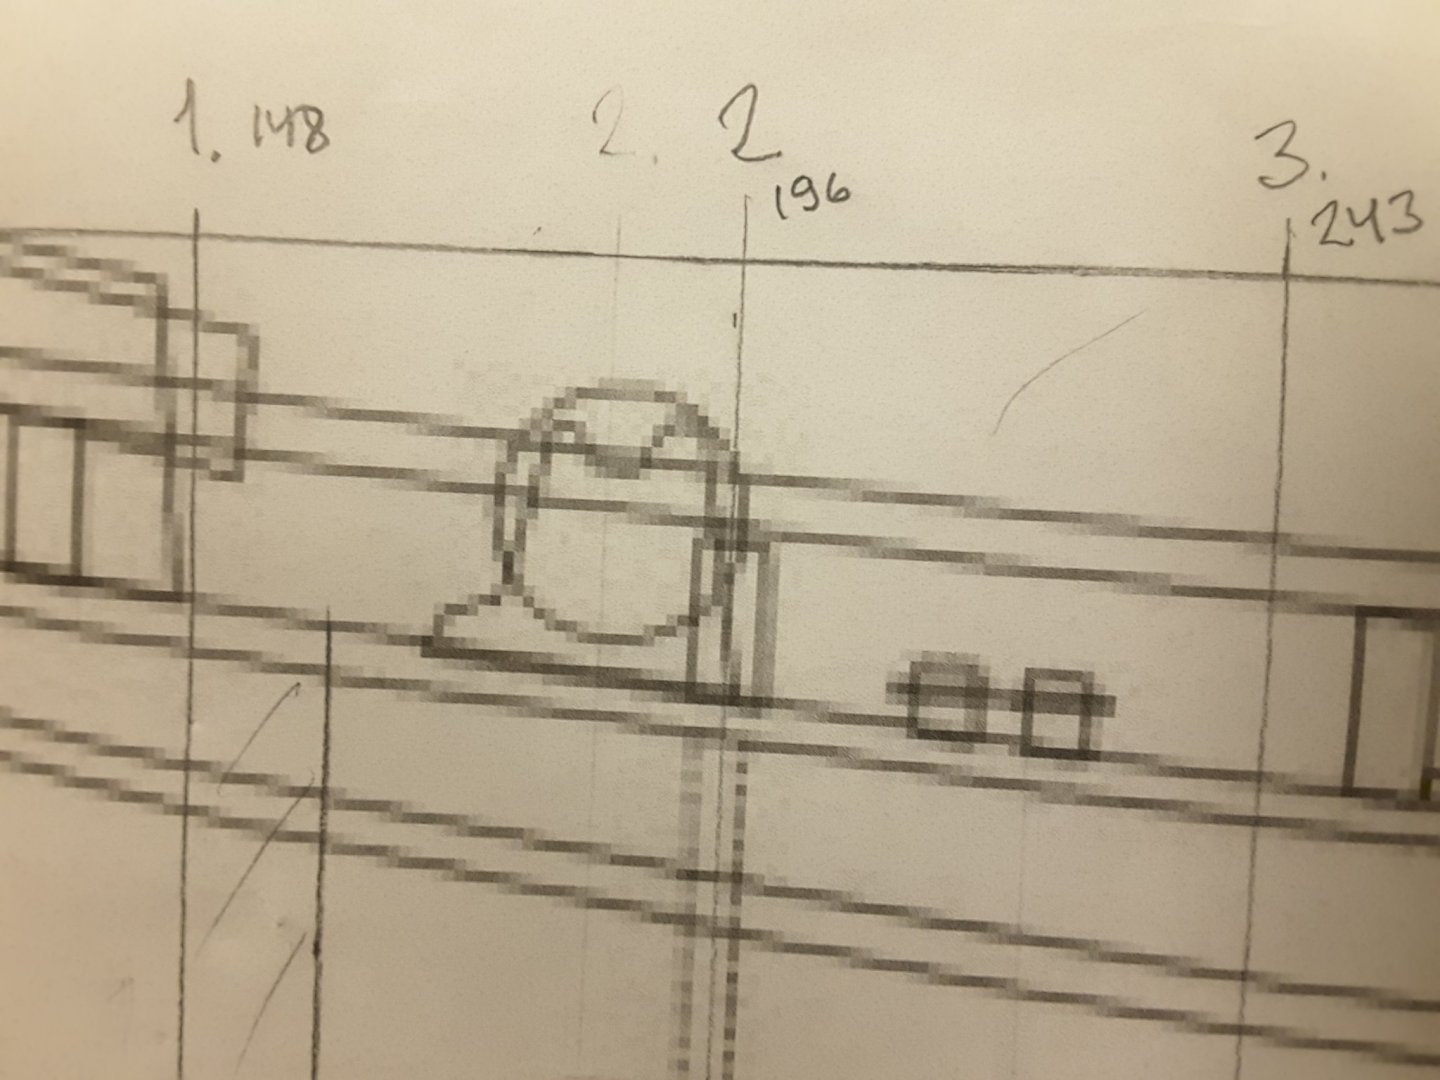
Sorry guys, but I am still waiting some more information about those simple windlasses. I tried to find something with google, but that wasn't very succesful. So if somebody of you had pictures or detailed drawings of them or could give me a link where to find them I would be very very thankful.
-
Thanks a lot for your answer Wefalck. I think you are right when saying that this rudimentary drawing is not correct for a 1830 vessel. It is included into a drawing of the complete ship which was drawn around year 2000 and concentrates more to show the lines of the ship and not her details. And because there exist no original documents of the ship any more, so nobody could say if the whole drawing is correct or not. So I think a hand operated simple windlass would be more correct in this case as you suggested. So if you have any drawings or pictures about that kind of a windlass, or a link where I could find them, I would be very thankful.
-
Hello colleagues, I wonder if anybody could help me finding better and more detailed drawing or photos of a vintage wooden windlass. I am building a model of a side wheeler from 1830 era in the scale 1/24 and have so far only an approximate drawing of her windlass, like in attached pictures. I would like to build it more accurately with more details, perhaps also a working model of it.
-
Tervetuloa palstalle Kalakukko! Hauska saada lisää suomalaisia laivamallien rakentajia tänne. Welcome onboard Kalakukko! Nice to have more Finnish ship model builders here.
-
CNC wood carving
Moxis replied to cafmodel's topic in Painting, finishing and weathering products and techniques
Beautiful carvings. Could you explain more like which 3D programs you use, what kind of 3D milling machine you have, etc. -
Hello Aviaamator, I have not followed your blog for a long time, but now I see that you have had some progress. What a wonderful ship's boat you have made, congratulations! There are a few mistakes at Ancre's plans, so don't worry. You have to use your imagination once and a while to think how to continue building. After all nobody can claim afterwards if certain details have been build right or wrong, if they are built as perfectly as you are doing. And I am very glad you have healed from your health problems, congratulations for that too!
-
Hello Mikko and welcome to very nice forum. Here are already some shipmodel builders from Finland, but there is always room for more. You are building a nice sailboat!
-
Mini Lathe recommendations?
Moxis replied to jfinan's topic in Modeling tools and Workshop Equipment
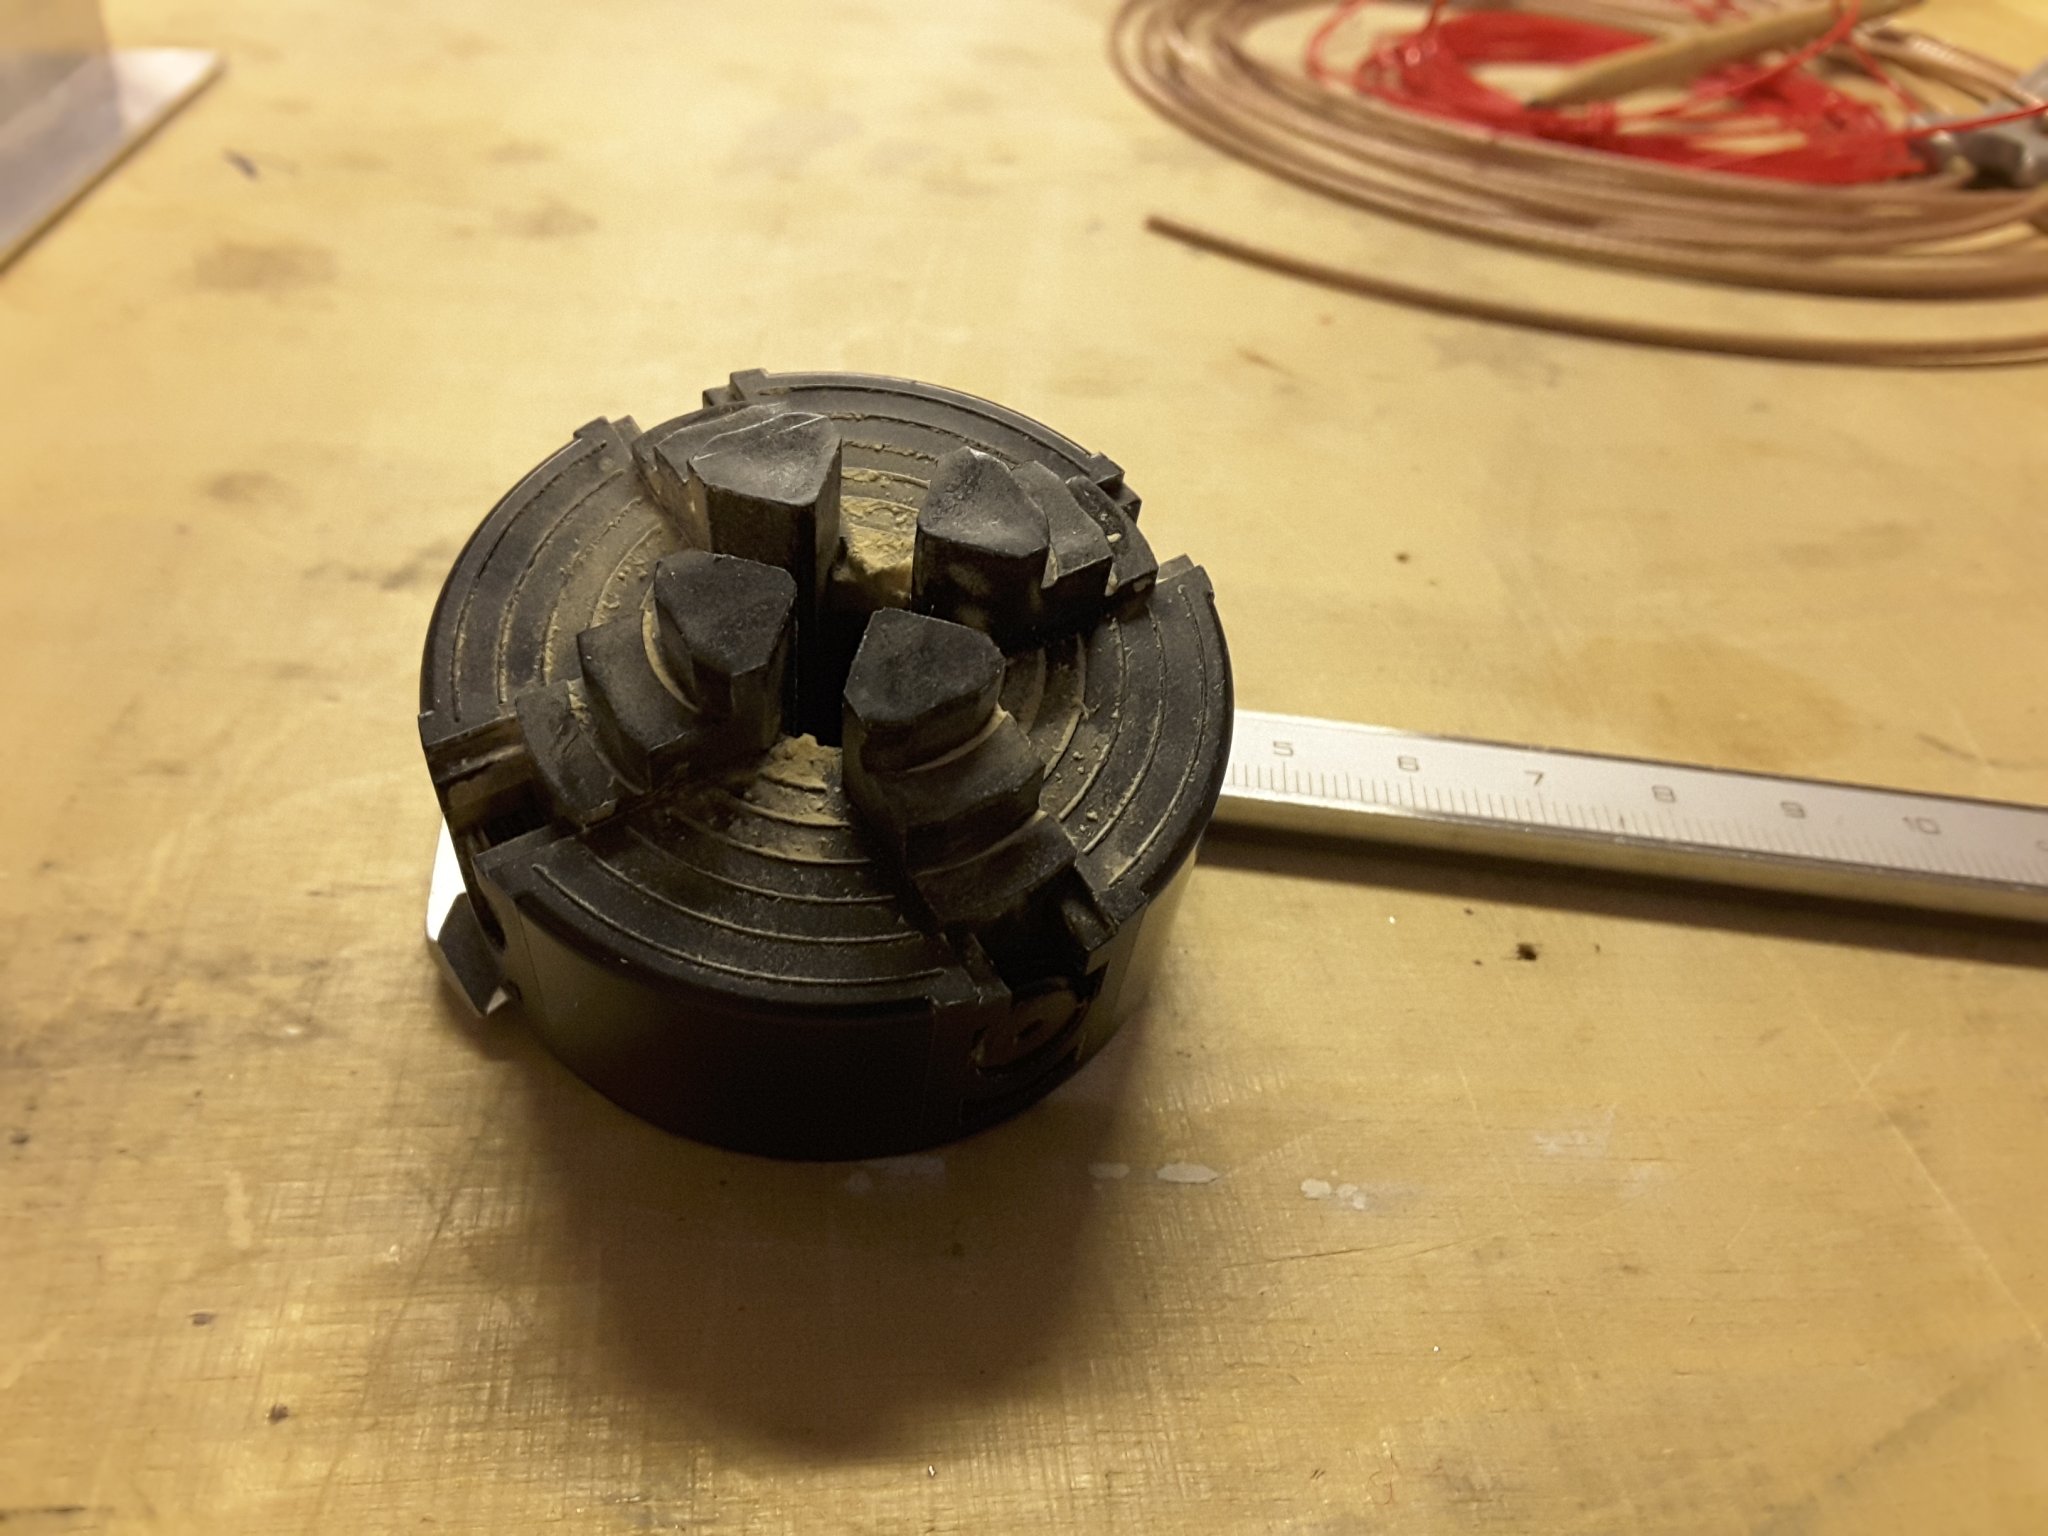
Proxxon is selling a plastic self centring 4 jaw chuck for their DB250 wood lathe. Not good for metal but quite reasonable for wood. I have used it many times to make parts of different wood species.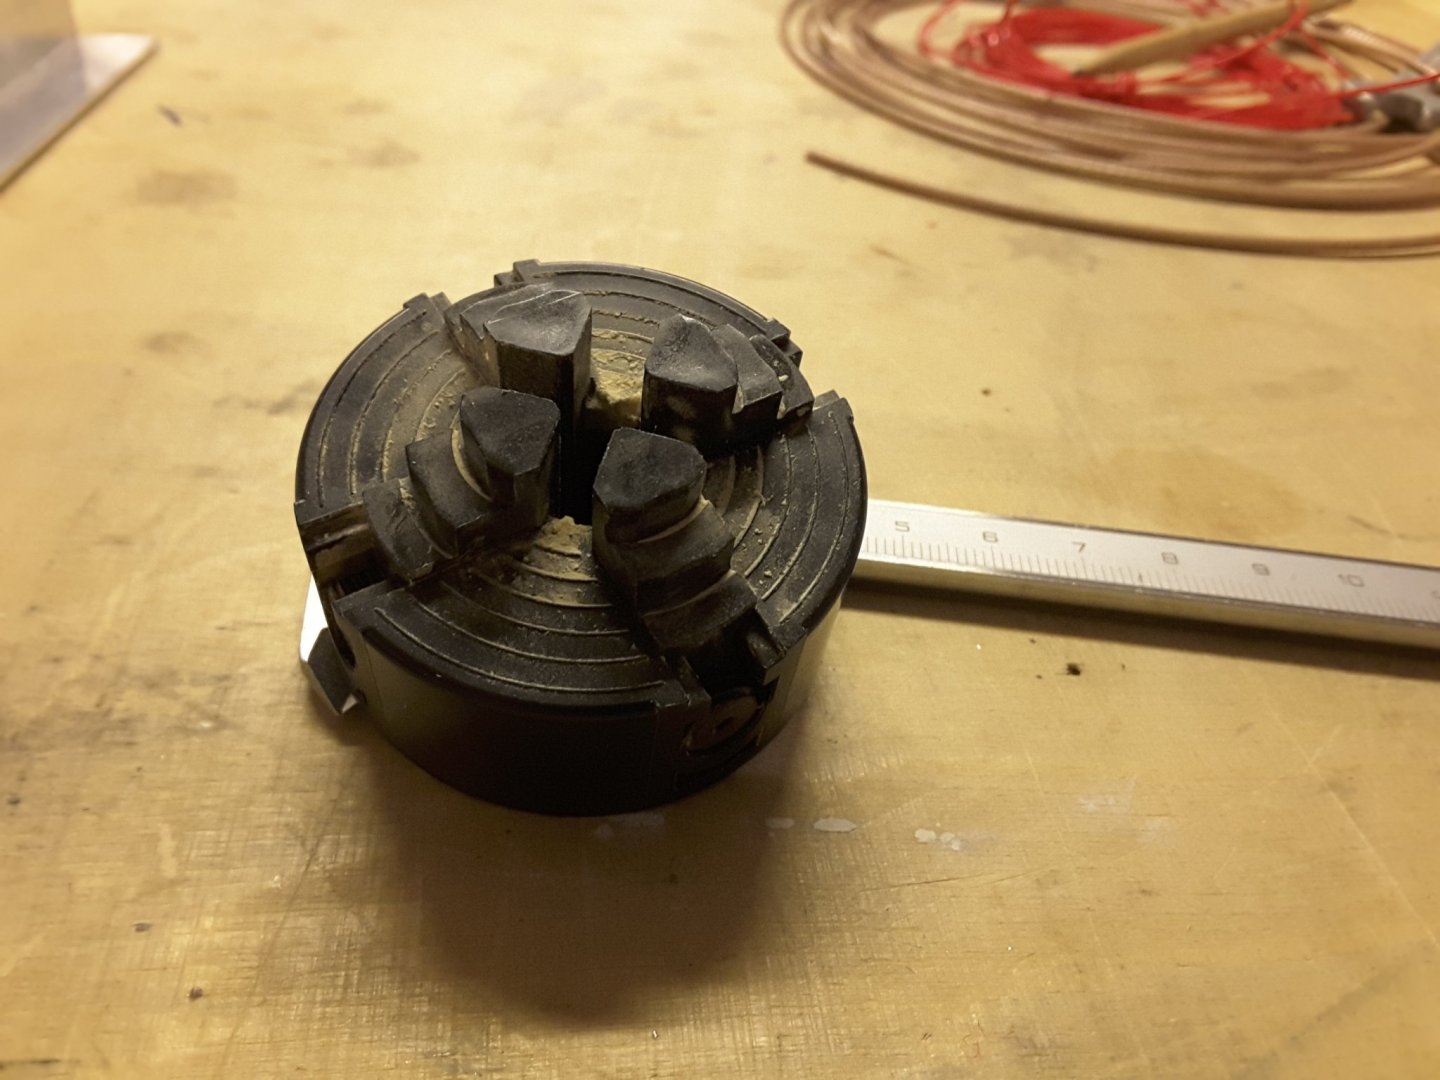
-
Which wood filler to use
Moxis replied to dkuzminov's topic in Building, Framing, Planking and plating a ships hull and deck
I have used a mixture of epoxy and microballons. It has many advantages: When cured it is very easy to sand and light. And you can make it as solid as you want, from a youghurt like into almost solid only adding more microballons into mixture. Also you can prepare the amount you need without the need of buying a full tube which always hardens when not in use. Normally it is white but it can be colored with any pigments just mixed into it. -
second plank
Moxis replied to michael101's topic in Building, Framing, Planking and plating a ships hull and deck
You could use different shades of stain to "paint" the lengths of planks to have color change if you want. -
second plank
Moxis replied to michael101's topic in Building, Framing, Planking and plating a ships hull and deck
Hello Michael, would it work if you first prepare the full length plank so that it will fit completely into the hull, tapering the ends as necessary, and after that cut it into pieces of 127 mm length and glue them into the hull? This way you have the widths of plank ends to match with each other. -
You might be interested about the jig I made to tie rope around a block:
-
Planking the hull
Moxis replied to shortgrass's topic in Building, Framing, Planking and plating a ships hull and deck
Thank you Chuck for wonderful videos about hull planking. I didn't believe it is so simple, but now I know better. However I have one question: You said you use only CA glue to fasten the planks into bulkheads. Could you inform which brand of glue you are using? Because I have tried that too with different brands, but have not found any which would stick strongly enough. In fact they are not sticking at all perhaps due to the porosity of wood. And I would love to see how you are planking the stern of the hull too, because normally there is no groove where to place the end of plank. -
1:48 boiler
Moxis replied to Bitao's topic in Discussion for a Ship's Deck Furniture, Guns, boats and other Fittings
Very nice work hyw. I understand you have made a stove and a steam boiler to supply some sort of steam engine. Are you using etched brass parts for those miniature items? -
I have also found out that the 5 minutes Araldit does not always cure completely hard. That is why I have moved to use the 60 minutes Araldite which seems to work better.
-
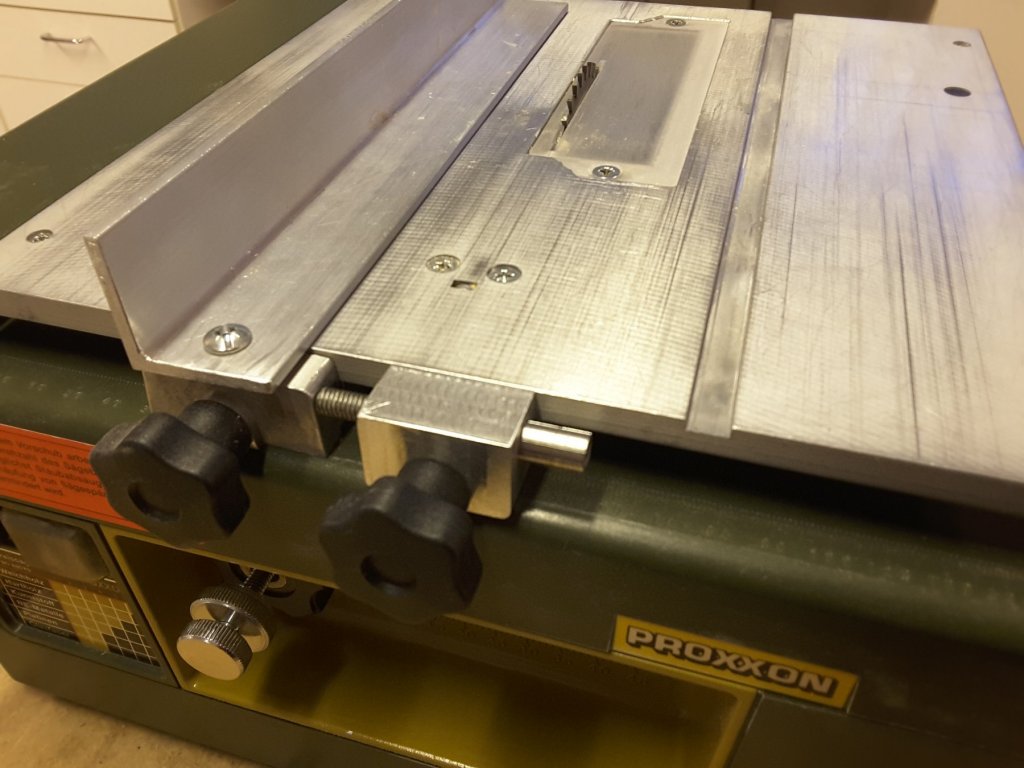
Micrometer set screw for Proxxon FKS/E table saw
Moxis replied to Moxis's topic in Modeling tools and Workshop Equipment
That's true. First I thought to use M5x0.5 thread which would have given forward movement of 0.5 mm with one revolution. But then I thought it to be an overkill for what I needed. After all they are wooden planks which we are producing. A change of air moisture or temperature would have more effect on plank dimensions. -
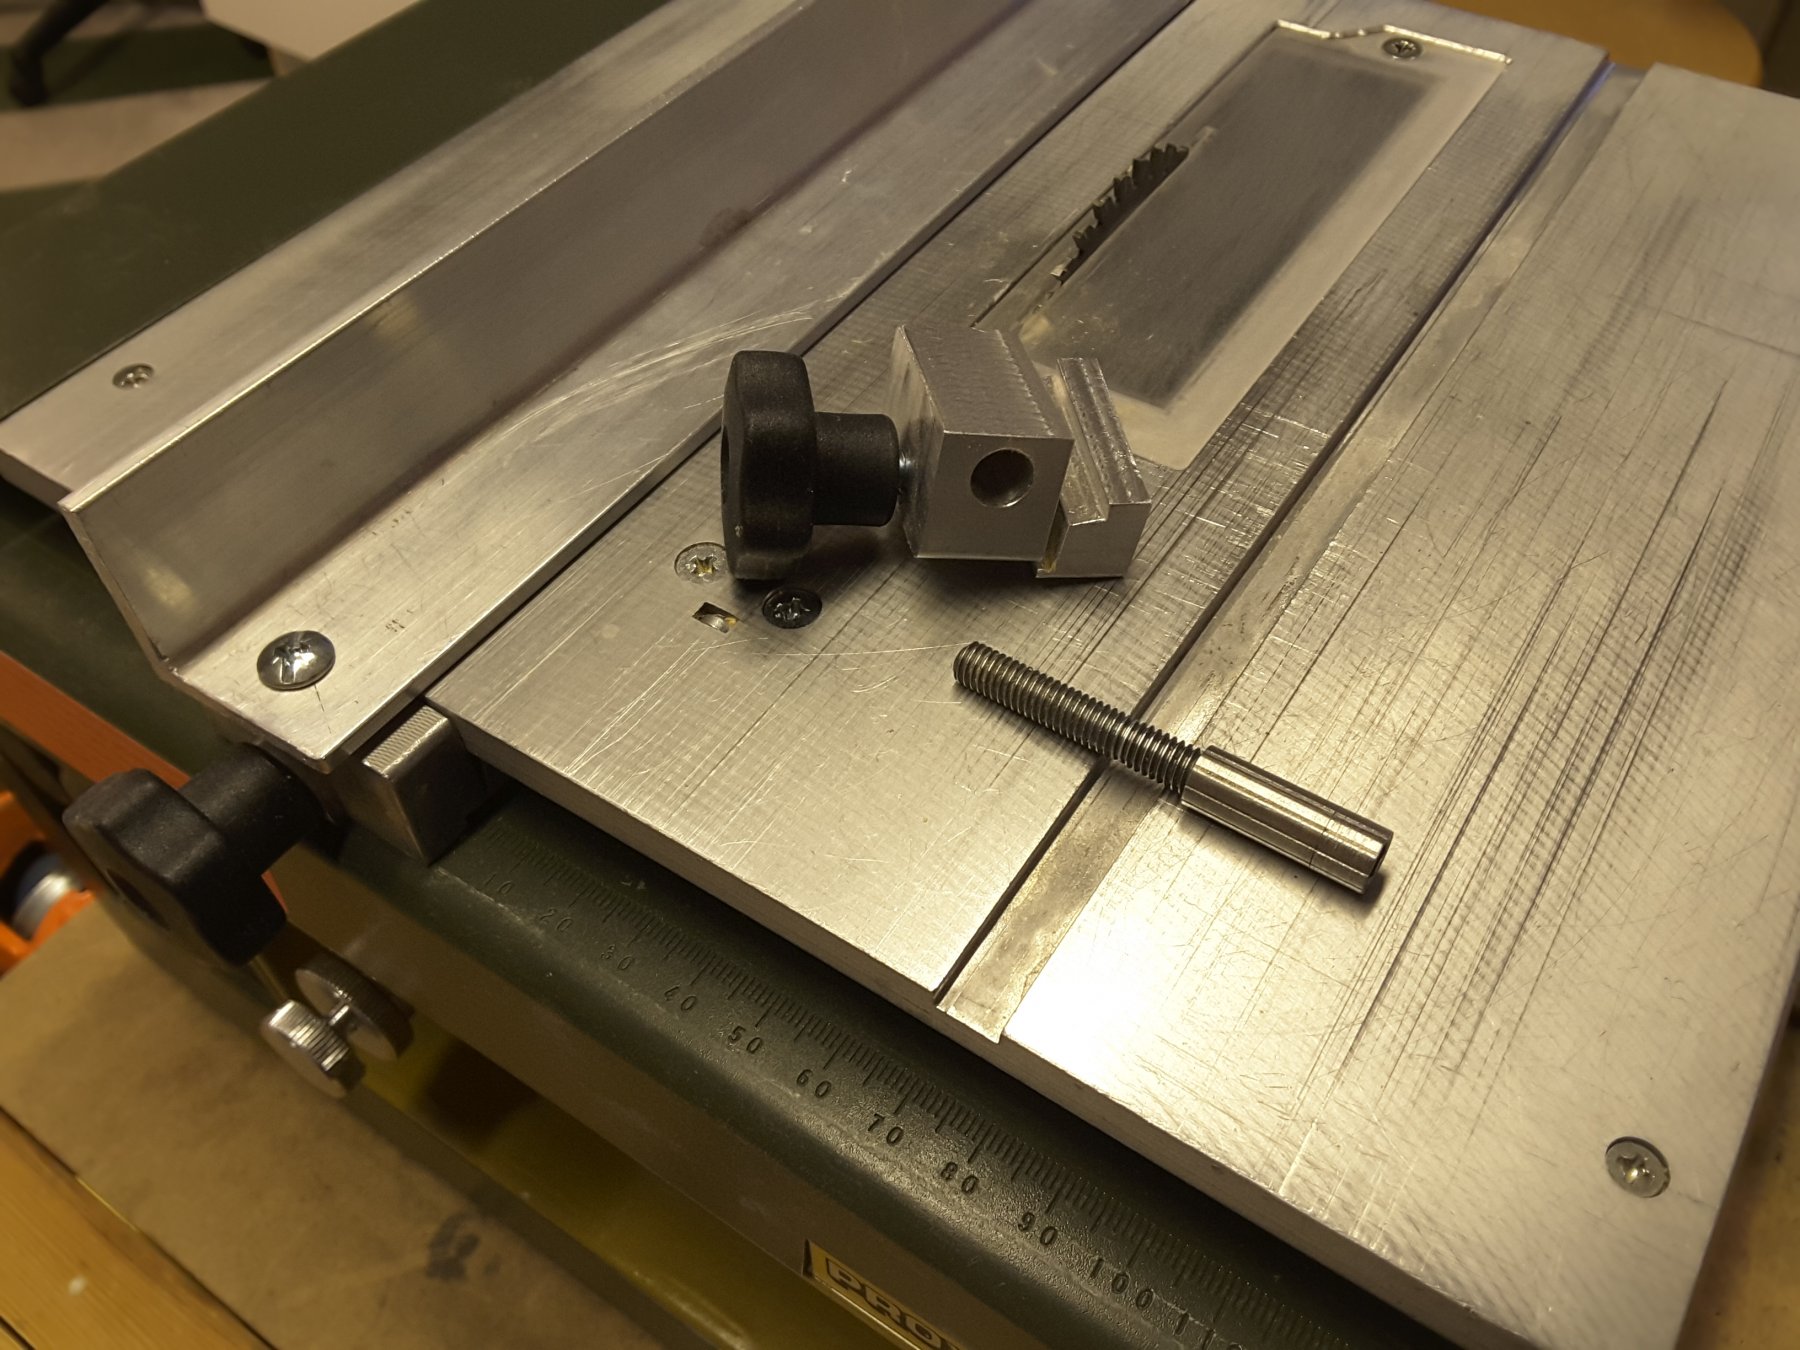
When working with my present project, I needed very accurate planks with even height. First I tried to set the fence of my Proxxon saw manually, but it is very frustrating to have it set within a few hundreds of a millimeter. So i decided to make this small gadget to simplify the setting. The only thing what was needed was to mill two pieces of aluminium, and cut threads into them for set screw and locking screw. The thread of set screw is M6x1, so that one revolution extends the screw with one millimeter. The head of the screw has 10 divisions so that one division represents 0,1 mm movement. The set screw only pushes the fence, it is not threaded into it, which makes it easy to remove the gadget after the fence is set. With this equipment i can now easily adjust the width of planks in about 0,05 mm accuracy.

-
Hello Aviaamator, at least I read your blog. Wonderful work you make there. I was watching with great interest your carving work and that video where a guy started carving. It looks that everything depends of very sharp tools. I have tried to sharpen my tools myself but never actually had them sharp enough. So first to learn how to sharpen and only then start carving. And you asked whether to paint the new model or not. I would leave it as is, without paint.
-
Generic Photoetch
Moxis replied to Richmond's topic in Discussion for a Ship's Deck Furniture, Guns, boats and other Fittings
Very nice tutorial torpedochief! I have always thought that the etch preventing film must be on both sides of the brass. So this is much easier method. But there remains one question: Where to get and what exactly is the brand of this plastic coated paper? -
Hello MHo and welcome on board. Nice to have fellow members here from Finland.