kurtvd19
-
Posts
2,997 -
Joined
-
Last visited
Content Type
Profiles
Forums
Gallery
Events
Everything posted by kurtvd19
-

Airbrush
kurtvd19 replied to Mike Dowling's topic in Painting, finishing and weathering products and techniques
Ron: The "recipe" actually calls for liquid Spic & Span (no flavor specified) - but I have a box of the powder and that's what I have used. So I would say just use your nose to pick lemon (my choice as I love the smell of lemons) or citrus. Kurt -
My Spray Booth Construction
kurtvd19 replied to thibaultron's topic in Modeling tools and Workshop Equipment
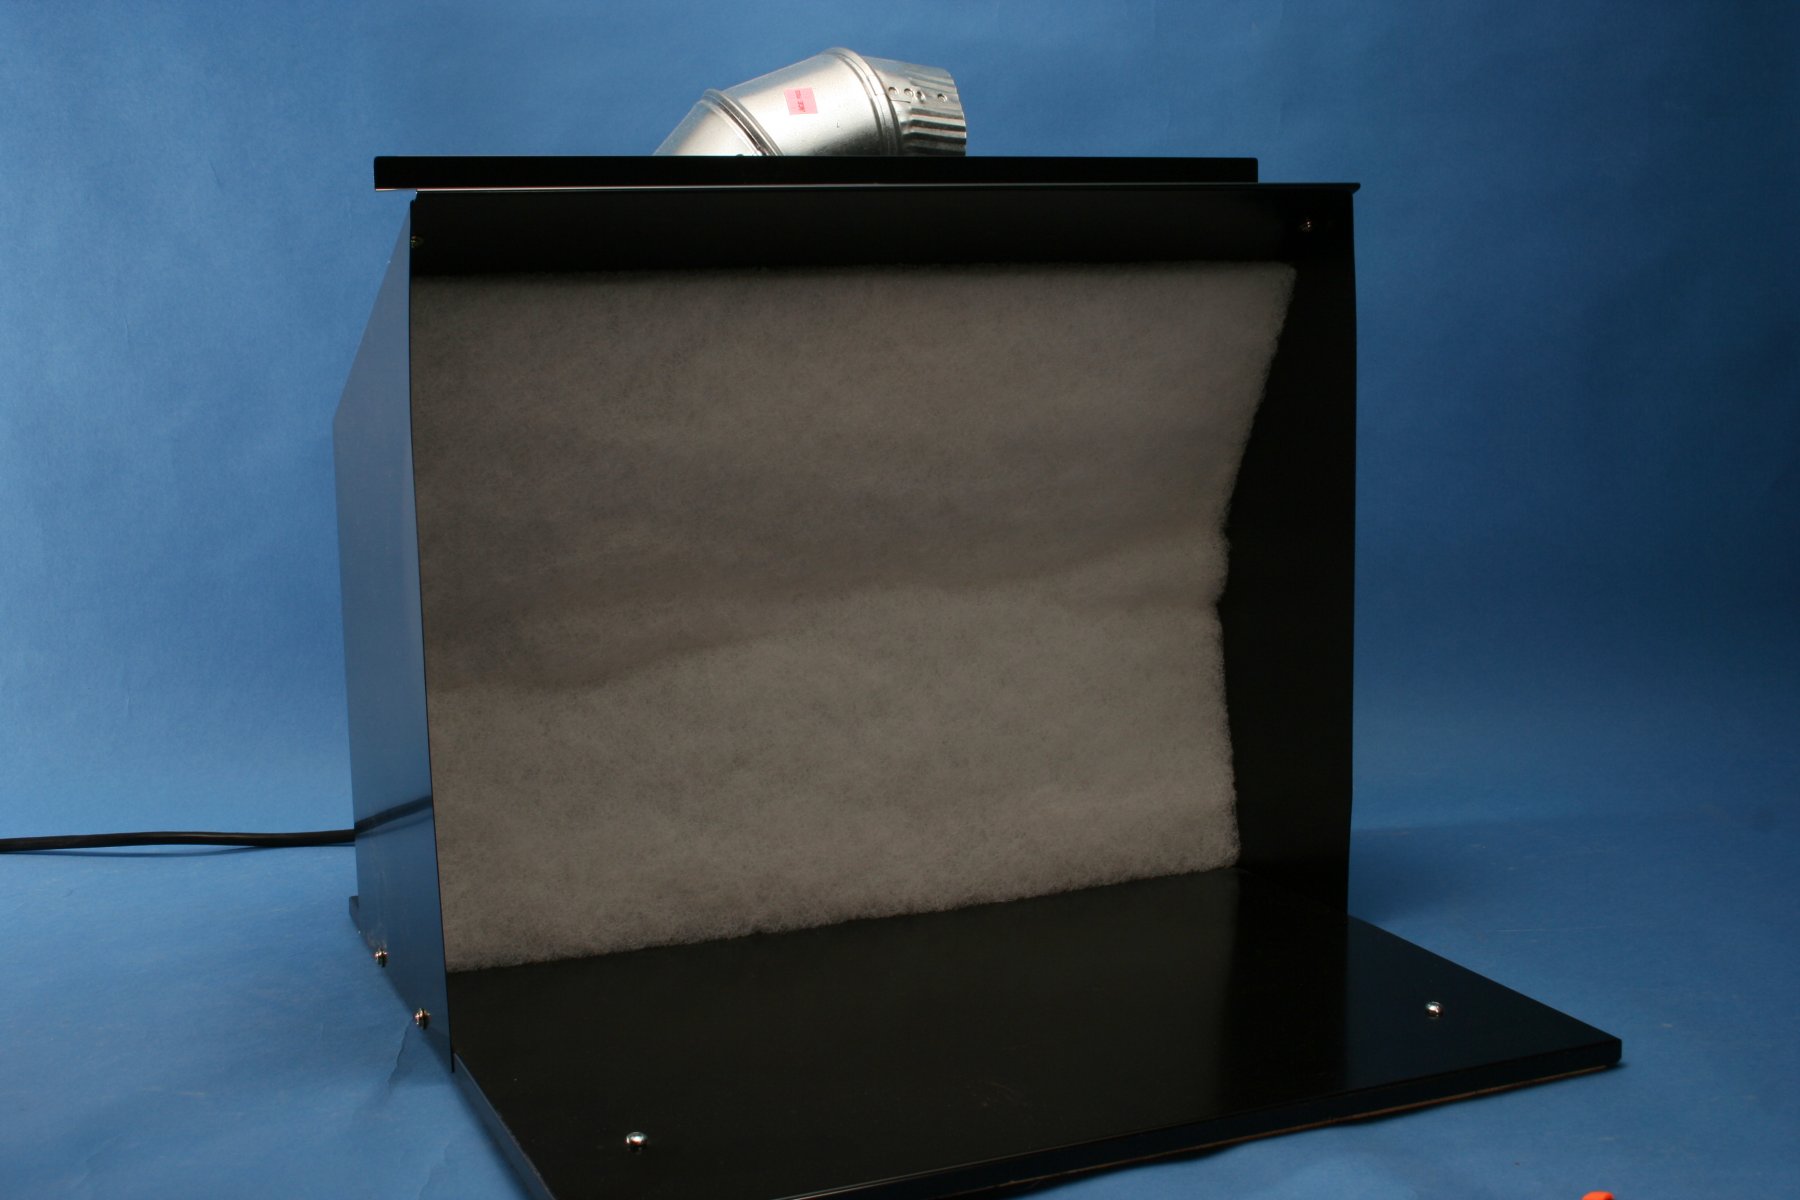
Ron: You might consider an extension of the booth's base out from the front of the box. The photo is the Badger booth before I added the light. I do all the actual spraying on the base area outside the enclosure. The filter to front of enclosure is 5" and the enclosure to outer edge of the base is 8". The airflow is higher the closer you get to the filter, so moving out from the filter will decrease the airflow so your blower might be just fine. Spray water from the brush to observe the airflow at different distances. Kurt
-
Airbrush
kurtvd19 replied to Mike Dowling's topic in Painting, finishing and weathering products and techniques
Ron: Most workshops are held in my shop when local club members - the three Chicago area cubs - meet for Saturday morning hands-on how-to's. I do Introduction to Airbrushing sessions on behalf of Badger to area clubs - mostly IPMS - but they have sent me as far as Denver. I have also done these sessions at NRG Symposiums and Conferences. Kurt -
I have used Birchwood Casey Brass Black after trying a lot of other stuff. There was a lengthy discussion here on MSW about blackening brass - a search will provide a lot of other opinions and tests. Kurt
- 296 replies
-
- 3
-

-
- chaperon
- model shipways
- (and 1 more)
-
Airbrush
kurtvd19 replied to Mike Dowling's topic in Painting, finishing and weathering products and techniques
A couple of things: - Ron's posting yesterday of the video by Ken Schlotfeldt, Pres. of Badger Airbrush, is a must view by anybody who wants to know how to use and clean an airbrush. I recommend this video to everybody before they attend the airbrush workshops I do. As Ken says in the video, what he's showing and telling works for any airbrush. - Regarding the use of lanolin in a cleaning solution, I would be very hesitant to use any sort of lubricant in the cleaning solution when my primary paint is acrylic. It might not be a problem with solvent based paints, but the slightest bit of oil will screw up acrylic paint application big time, and there will be some lanolin left behind after cleaning, to be transferred to the paint. The only lubricant needed in an airbrush is on the needle and in the trigger area. The airbrush mfg's have lubricants that will not affect the paint. Badger's goes by the name "REGDAB Needle Juice" (note - REGDAB is BADGER spelled backwards). - This is the formula for the airbrush cleaner I have used for several years. This is ingredients are what can be purchased from retail sources of what is in the airbrush cleaning solution that Badger Airbrush sells. I am sure that anything similar to Spic & Span will work. Kurt FOR 1 GALLON OF CLEANER 2 OZ. CLEAR AMMONIA 5 OZ. OF SPIC & SPAN CLEANER 1 GAL. WATER AT 120° F MIX THOROUGHLY -
There are some build logs here on Woody Joe kits - check member Clare Hess' completed kit models. Most who have seen or built the kits think they are pretty good - at least the Japanese wooden boats. Kurt
-
My Spray Booth Construction
kurtvd19 replied to thibaultron's topic in Modeling tools and Workshop Equipment
The airflow works for any spraying media - if the airflow is too strong the paint doesn't get to the object because it's drawn to the fan. I have no idea if the cooling fans would work or not. As I related before the 165 cfm unit I have sometimes is too strong when doing fine detail work and I turn the fan off. The size of the booth matters as 165 cfm might well be totally inadequate for a larger booth. I have been in automotive spray booths that made my hair stand up - but they also use a lot more pressure to the spray gun. As I seldom use over 20 psi the airflow easily disrupts the paint spray. If one routinely sprays with higher pressures I am sure a higher cfm exhaust fan would be needed so the spray doesn't escape the booth. With the work involved I wouldn't try to use cardboard. What you describe could work but if being able to fold it up is the important part why not use ply and piano hinges instead of duct tape? I once used foam core to make an overhead soft box for photography - light weight, duct tape to hold it together. Wound up remaking it with light ply when the duct tape kept coming apart - the adhesive doesn't last forever. The foam core version proved the size worked and I used the pieces as patterns for the plywood version but for the effort I would have been ahead of the game just using the plywood to start. LED lights are sure the way to go today. Ron - I think regular 3/8 plywood would work for the bigger booth. Maybe the outdoor version you used has more flexibility than regular 3/8 ply because of the thinner areas between the "planks"? The difference in weight between 3/8 and 1/2 inch is considerable. Using the corner bracing/gluing strips really beefs things up. Kurt -
My Spray Booth Construction
kurtvd19 replied to thibaultron's topic in Modeling tools and Workshop Equipment
Ron: The photo below is of the Badger Air Brush spray booth - the fan is 165 cfm. It is more than adequate for the 13" x 18" size of this unit. There are times I do not turn on the fan because the air movement draws the paint away from the object being painted. Using only acrylics, so turning it off isn't a big deal. I think you may be overpowering the spray booth with the 250 cfm unit but with the depth of your unit being so deep, moving the object out and away from the rear of the box might be the answer to too much air movement. I used 4" metal duct off the fan to go up from the fan, over to the center of the unit - past the motor - and then down. I secure a nylon stocking over the end of the metal duct to catch any over-spray that isn't caught by the filter in the unit - and some does get by. Being acrylic, the stuff that gets by the filter is dry particulate and is caught in the piece of stocking. Also, the Badger paints are virtually odorless so I have never been encouraged by the ADMIRAL to exhaust to the exterior. I like the design you are using and the plexi panes are a nice addition. Look for a 2' led type light for the top - the more light the better. I added a light to the top of the Badger unit that is just outside of the front of the box. This is OK as most of the time my work sits just outside the front of the box anyway to have access to the part being painted, but your location is the optimal location. The 165 cfm fan in the Badger unit is entirely adequate to catch the over-spray and pull it to the filter so you won't have any problems if you bring the object forward. You will probably want to get a turntable of some sort. I use the one by Tamiya and every so often I drop it into the paint remover to clean up the top turntable surface. I have a larger turntable but it's finished wood so I cover it with a piece of newspaper so it stays clean - when it's not being used in the spray booth it sits on the table where club members use it to access the snacks during meetings. Following with interest. Be sure to let us know how the unit works. Kurt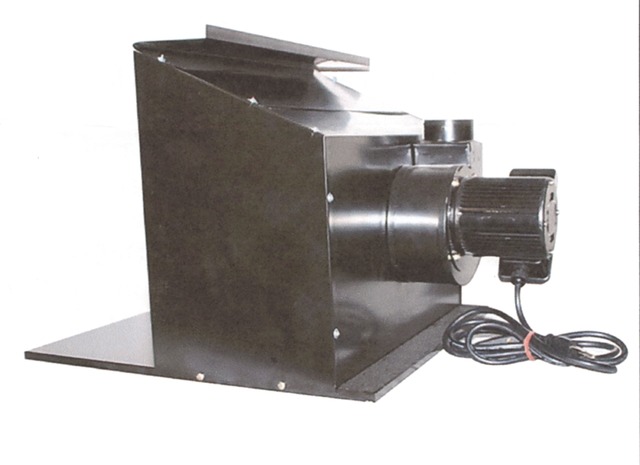
-
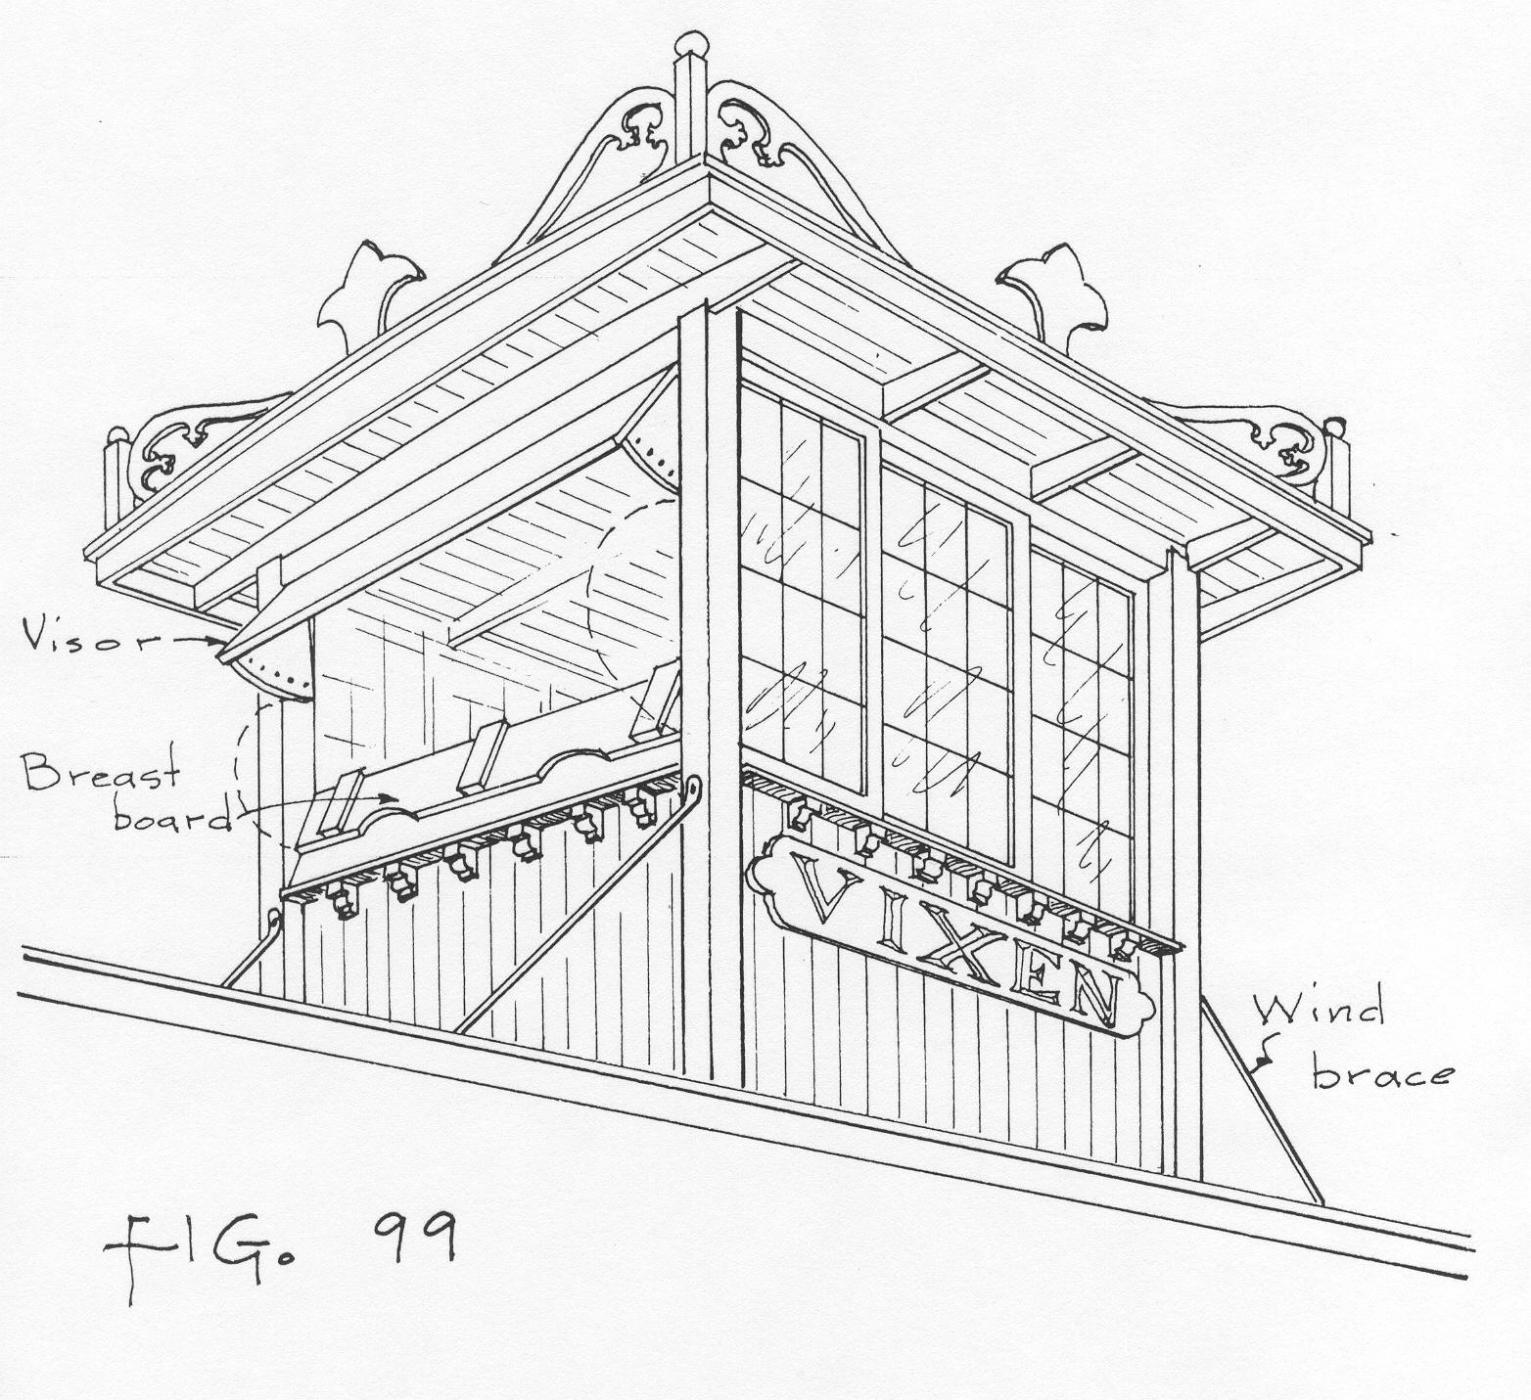
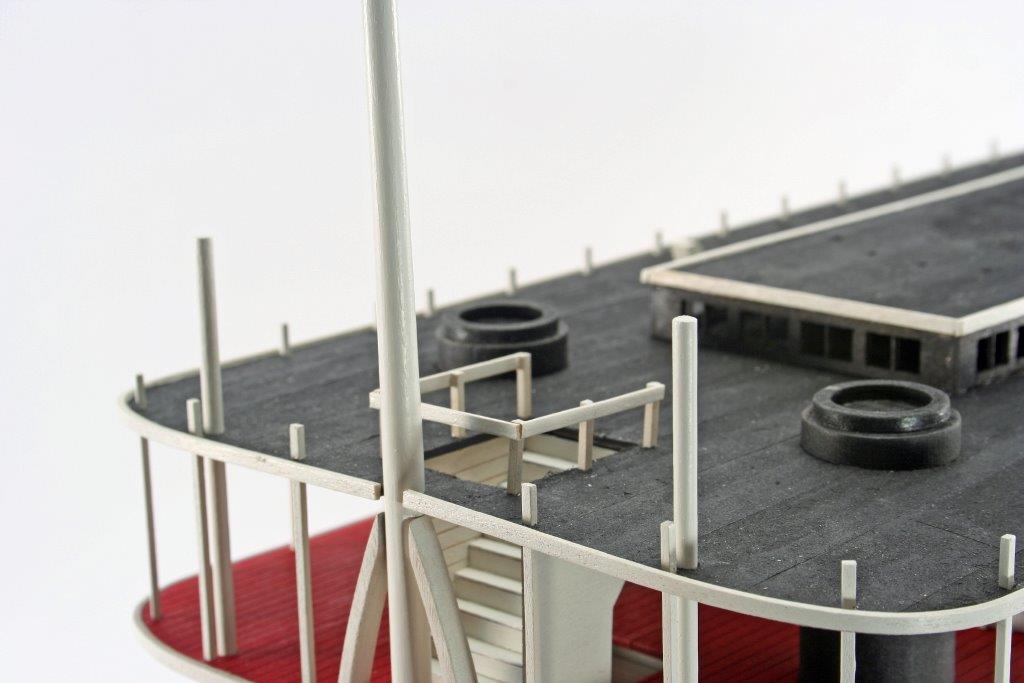
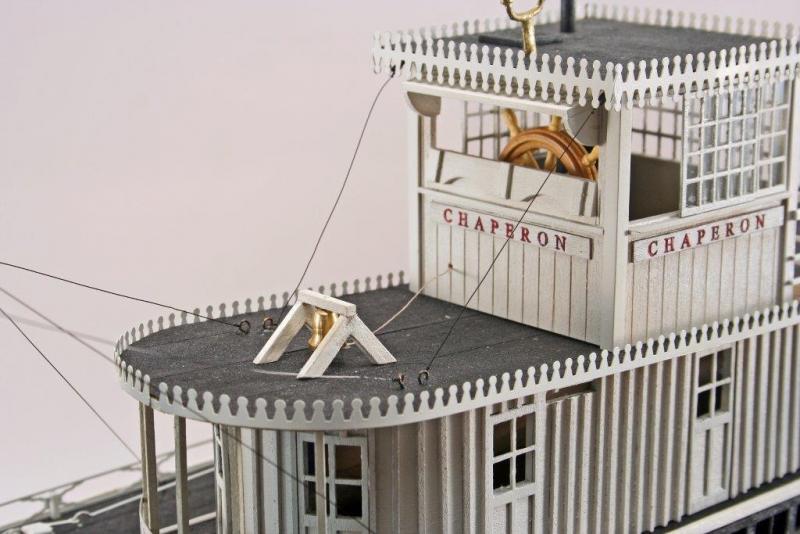
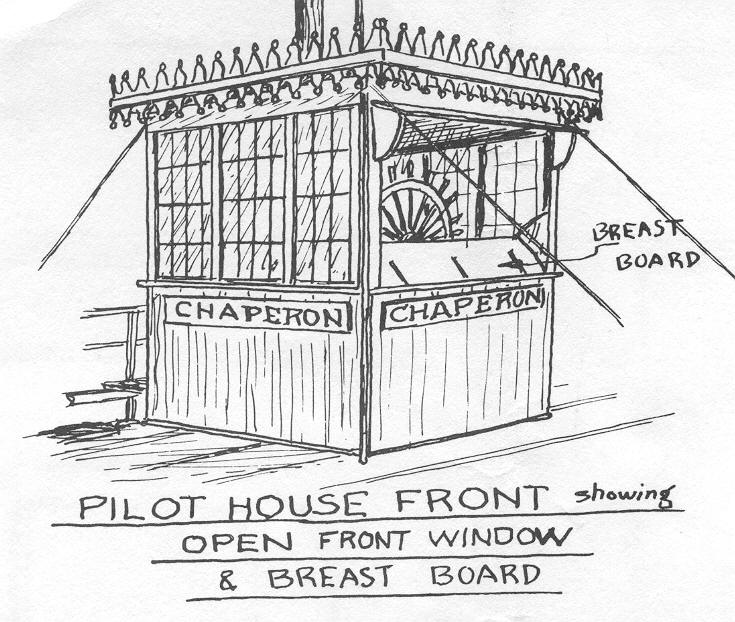
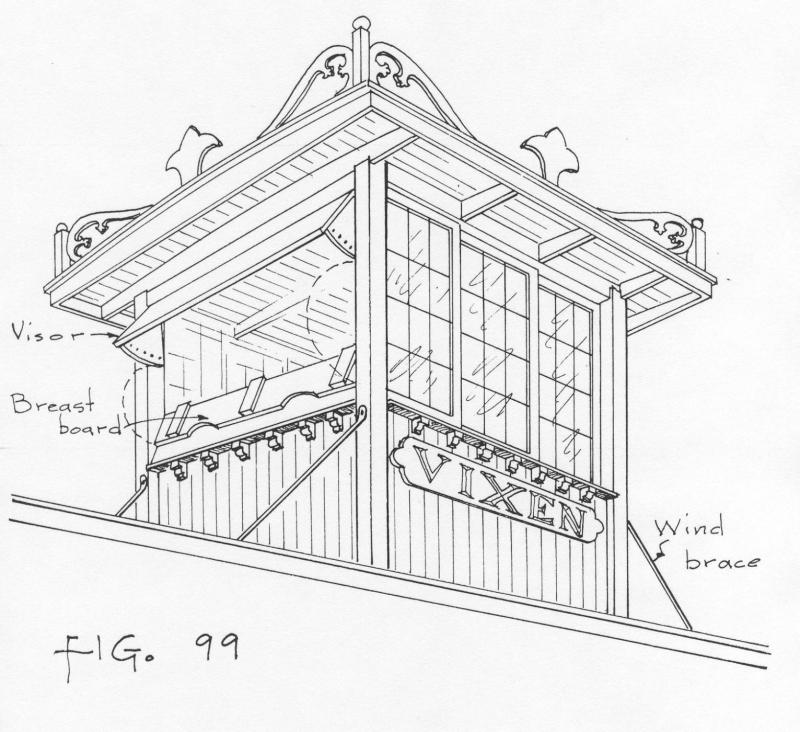
Those are the hold downs for the pilothouse. Made from brass strip with a hole in each end, the end bent down at a 45 degree angle - rigging line was taken down to the deck. The attached photos show how I did them. The photo with the rigging line on my Chaperon shows the rigging before I went back and tightened it up. Fig 9 - shows a different type of wind brace/tie down - this is from Alan Bates' Steamboat Cyclopedium The other drawing is from the old Model Shipways plans (for the solid hull kt that was never produced) Also detailed on Sheet 4 of the instructions for the current kit. Kurt
- 296 replies
-
- 7
-
-
- chaperon
- model shipways
- (and 1 more)
-
Welcome to the hobby and MSW Daniel. This is the place to learn and be part of the hobby. There is a very active club in Denver - the Rocky Mountain Shipwrights - probably the most landlocked club in the US. Having a local ship modeling club is a great tool for the beginning modeler - just like MSW. Check out our web site's listings of clubs for the info on the Denver club. A friendly bunch of guys and gals - I have attended some of their meetings and several members attend NRG Conferences regularly. http://www.thenrg.org/modeling-clubs.php Take care, Kurt
-
I used silkspan cut into scale 3 ft widths glued down with Artist's Acrylic Matt Medium. The Matt Medium was painted on with a brush and the silkspan was laid down and pressed into place. The next length was overlapped a scale 4-6 inches and continued the length of the roof. When the adjacent strip was started I overlapped the first strip by 4-6 scale inches for the entire length and at each continuing strip. I brushed a bit of the Matt Medium on the back side of each strip where it was to overlap the previous strip - didn't worry too much about any squeeze out as it looks like the tar that held the roofing material down. It was very easy to do and many have commented on the authentic appearance of the roofs. Kurt


- 296 replies
-
- 7
-
-
- chaperon
- model shipways
- (and 1 more)
-
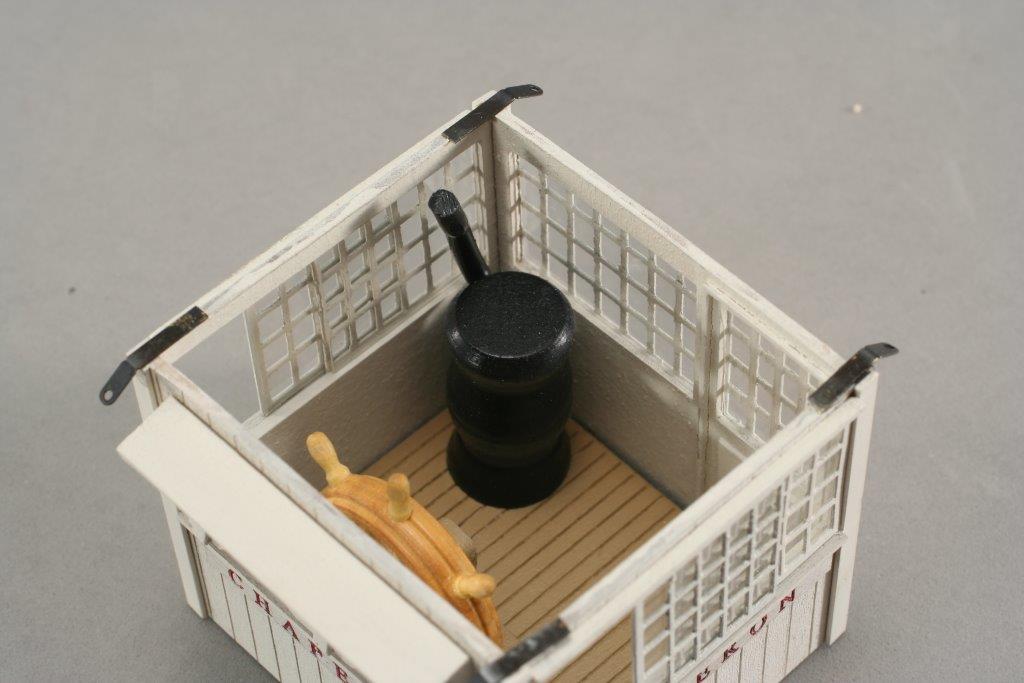
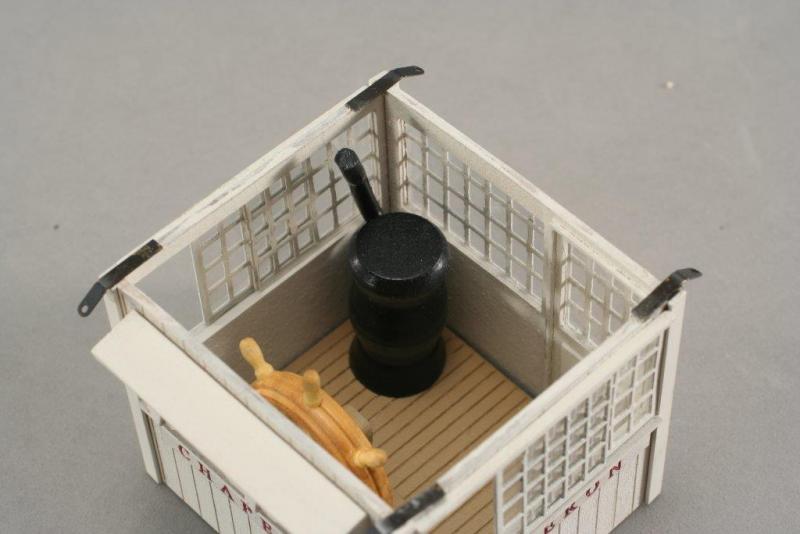
Len: The Chaperon was built in 1884 at Chambersburg, OH as the J. C. Kerr and operated on the upper Ohio River until 1892 when it was sold to Capt. R. H. Williams - the photo of the cabin area shown yesterday is for another Chaperon - built in Clinton, IA - the upper windows (skylights) shown were not on the Chaperon in question. But, the layout shown in the photo was probably close to what the Chaperon looked like in the forward area. There are a tremendous amount of photos showing interiors of steamboats and while some were quite elaborate the Chaperon wasn't one to have lavish ornamentation and furnishings. Kurt
- 296 replies
-
- 5
-
-
- chaperon
- model shipways
- (and 1 more)
-
Steamboats and other rivercraft - general discussion
kurtvd19 replied to Cathead's topic in Nautical/Naval History
The Klondike steamer in Whitehorse was featured in a short article in the NRG's Secretary's Newsletter in the Winter 2016 issue. Our Secretary lives in Whitehorse so it was easy for him to photograph it. Kurt- 281 replies
-
- 1
-
-
- Steamboats
- riverboats
- (and 3 more)
-
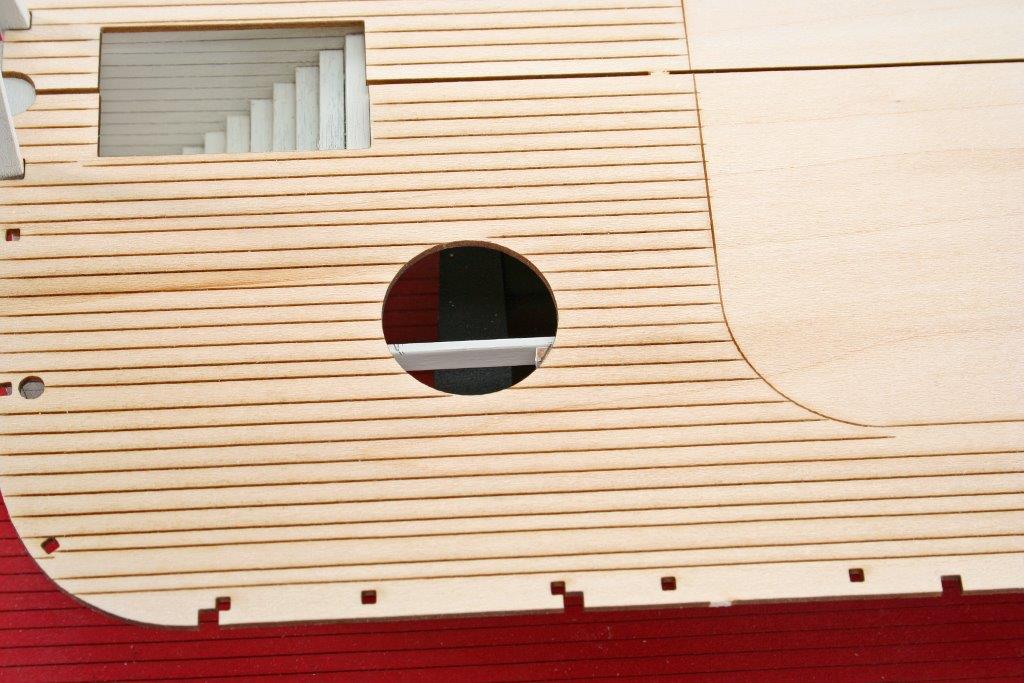
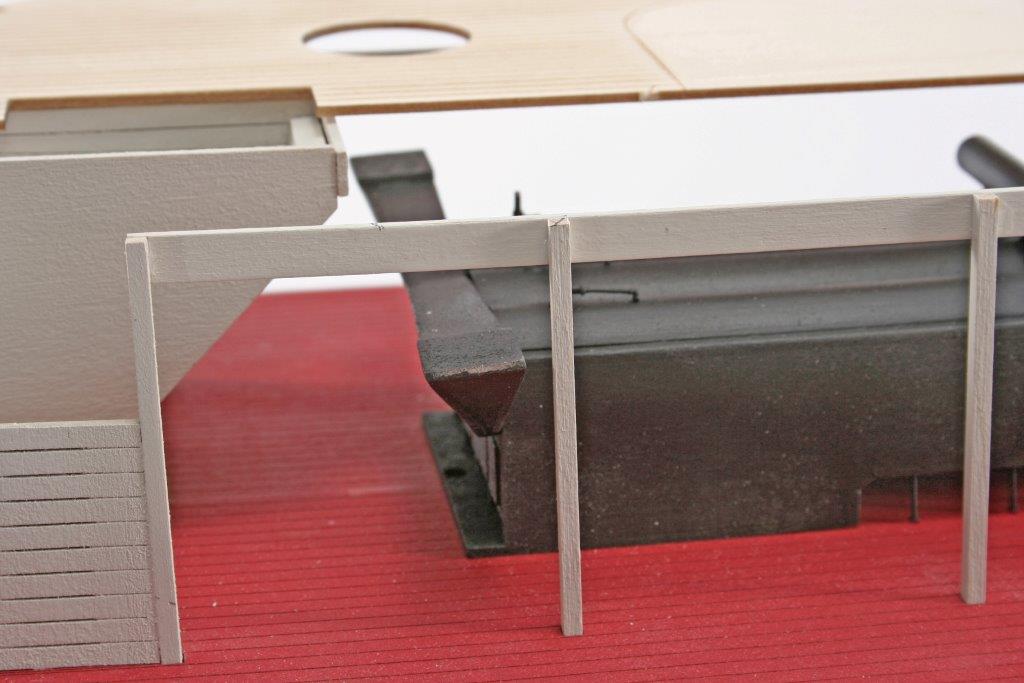
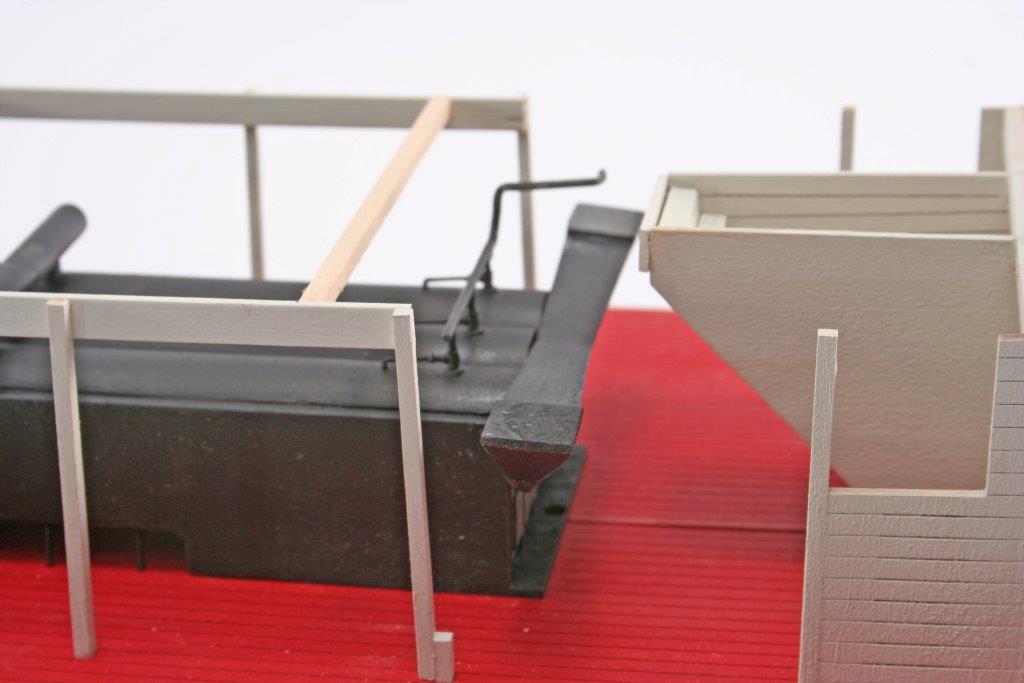
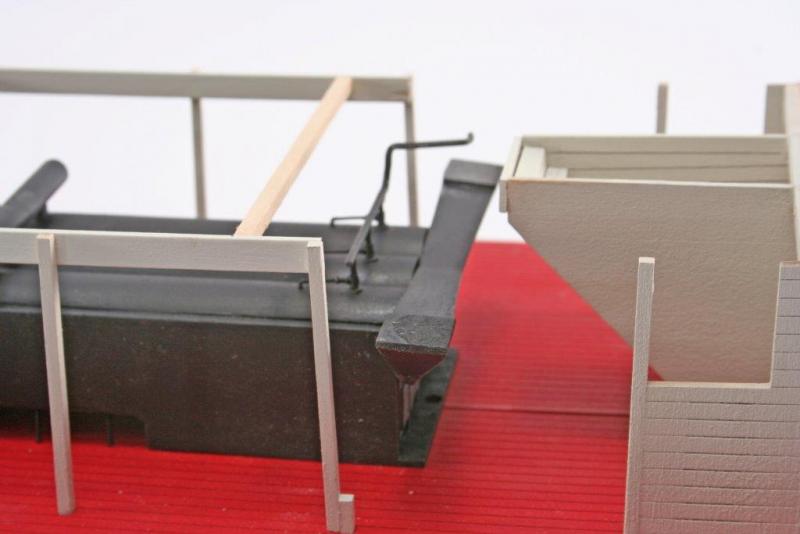
I explained it in the magazine article - copied below; Parts 39A P/S (Port/Starboard) are to be installed at this point. These parts are supports for the boiler deck and they match the shear of the decks so their orientation is important. Also, these parts need to be cut shorter than they come out of the laser cut sheet as they interfere with the smoke stacks unless they are cut short at the forward end. See Photo #26 that shows part 39A on the port side installed as the part comes from the kit. Photo #27 shows part 39A on the port side interfering with the smoke stack passing through the hole in the boiler deck. Part 39A must be cut short as shown in Photo #28. I discovered the interference when I first laid the boiler deck onto the model to check the fit of the boiler deck and the parts were painted and glued in place. Photo #12 in the instruction manual does show the correct shortening and assembly of parts 39A but the instruction do not call this out. The fix was easy to do once I figured out what was needed. I spoke with Bob Crane, the kit designer, and the instructions for this assembly will be corrected in the next printing. The 3 photos accompanied the text. The middle photo shows the deck piece moved towards the centerline of the boat. Kurt


- 296 replies
-
- 4
-
-
- chaperon
- model shipways
- (and 1 more)
-
Here is what I did. The plans were updated after I contacted the kit designer to show the problem - have no idea of how many sets were initially printed but eventually the correction will show up in kits sold. Kurt
- 296 replies
-
- 5
-
-
- chaperon
- model shipways
- (and 1 more)
-
Cathead is right on going with white. Whitewash was cheap and plentiful and helped with vision in cabins with small windows. By far the most common colors on riverboats were white and red due to the cost and availability of other colors in that era. Some boats had brown or green decks, but few had anything other than white on the walls. Kurt
- 296 replies
-
- 5
-
-
- chaperon
- model shipways
- (and 1 more)
-
Ken: Great work as usual. A very attractive model. Great news about Scale Hardware! I buy a lot from them and was very unhappy when the doors closed. Glad it was bought up and I can get parts again. Kurt
- 162 replies
-
- 8
-
-
- dirty dozen
- fishing
- (and 2 more)
-
I like it as is. I think it will look great when installed - the limited visibility of the boiler when installed will make the weathering look very realistic. Kurt
- 296 replies
-
- 6
-
-
- chaperon
- model shipways
- (and 1 more)
-
Len: The box is the insulating part that covers the individual boilers. I would leave it as is and add details to the assembly if you want to upgrade. Kurt
- 296 replies
-
- 5
-
-
- chaperon
- model shipways
- (and 1 more)
-
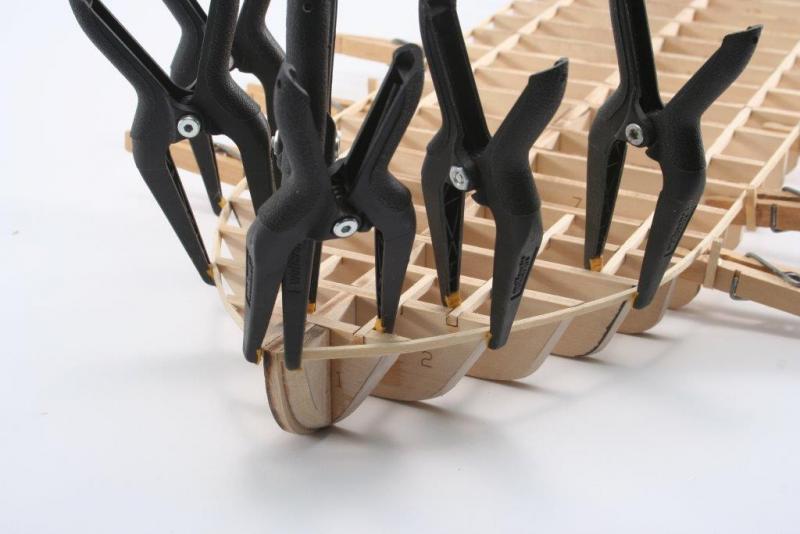
Len: To the right side of the attached photo of the hull of my Chaperon during assembly you can see a simple home-made planking clamp made from a common clothes pin. This type of clamp does no provide a lot of force, but it you soak the plank for a few minutes and clamp it in place to dry then when it's dry glue in place the use of a lot of force is not needed. Kurt
- 296 replies
-
- 6
-
-
- chaperon
- model shipways
- (and 1 more)
-
ofencer - We have established a policy acceptable here - please don't muddy the waters with what is done elsewhere. Please read the policy and posts that were linked in my earlier post. Kurt
-
Ken: For a discussion on Copyright, the following link will take you to a much discussed topic - http://modelshipworld.com/index.php/topic/12628-copyright-beware/?hl=copyright The official policy regarding Copyright on this site is posted on the last page of the link above. You are perfectly able to do anything on your own for your model w/o worry about copyright - it's only when posting the drawings or selling the drawings that you run the risk of violating the law (or our rules here). The link above should clear this up for you. Building the model and posting on MSW is encouraged. You mention selling copies later - that would certainly depend on your work not infringing the copyright of others - but also follow the rules here on MSW about selling. It is entirely feasible for you to do up CAD plans and sell them w/o violating copyright - depending on how you go about the project, what you add to the work, etc. There is all sorts of information regarding copyright on the internet. My suggestion would be for you to do some research into copyright and then decide on how you proceed with your project. If you have any specific questions you can send me a PM. Kurt
-
Sternwheeler "Zulu"
kurtvd19 replied to Kishmul's topic in CAD and 3D Modelling/Drafting Plans with Software
It's another riverboat log - I am on board. The ZULU was a cover on an old Model Boats - the R/C magazine from GB - and a how to. I have it in my files and will be digging it out. If this is the same ZULU, it had two wheels at the stern that could be reversed independently for very responsive steering. I have a set of R/C sidewheels I intended to use on a model of this boat - but I think I am done with R/C - but as a static model I am very interested in this build. Kurt -
Poochie: Midwest has a list of tools needed to build the kit in the instructions for their Lobster Smack. There are additional or replacement tools that will make it easier to build but the minimum are listed right in the instructions. Kurt