kurtvd19
-
Posts
3,048 -
Joined
-
Last visited
Content Type
Profiles
Forums
Gallery
Events
Everything posted by kurtvd19
-

Please help! What to buy.
kurtvd19 replied to semorebutts's topic in Metal Work, Soldering and Metal Fittings
I was going to suggest watching Paul Budzik's video as it is very good and accurate. You might need heat sinks between joints as Paul describes. Do not use a torch - the photo etch will not stand up to the heat. I watched a guy destroy several pieces before switching to a small pencil point iron. If you have access to a resistance soldering unit with a rheostat to turn it way down it will work also. Kurt -
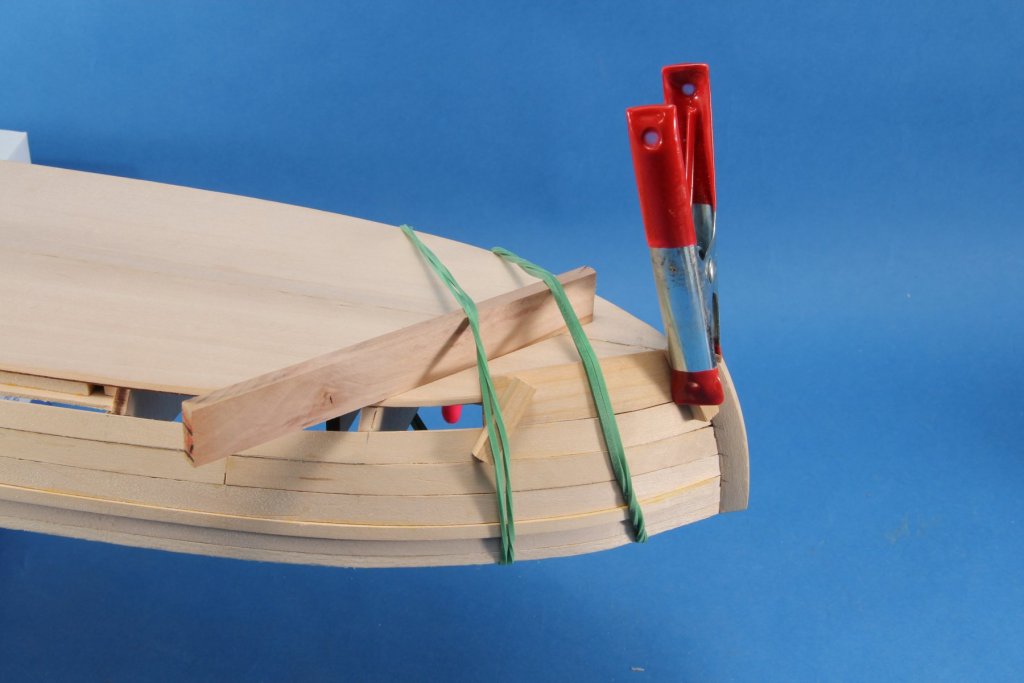
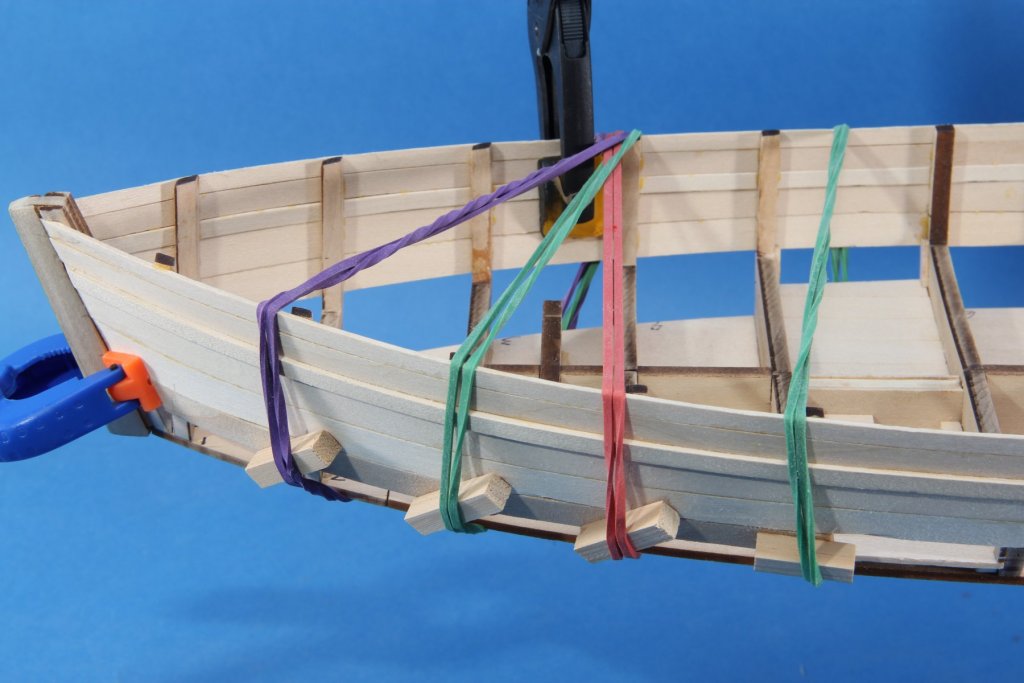
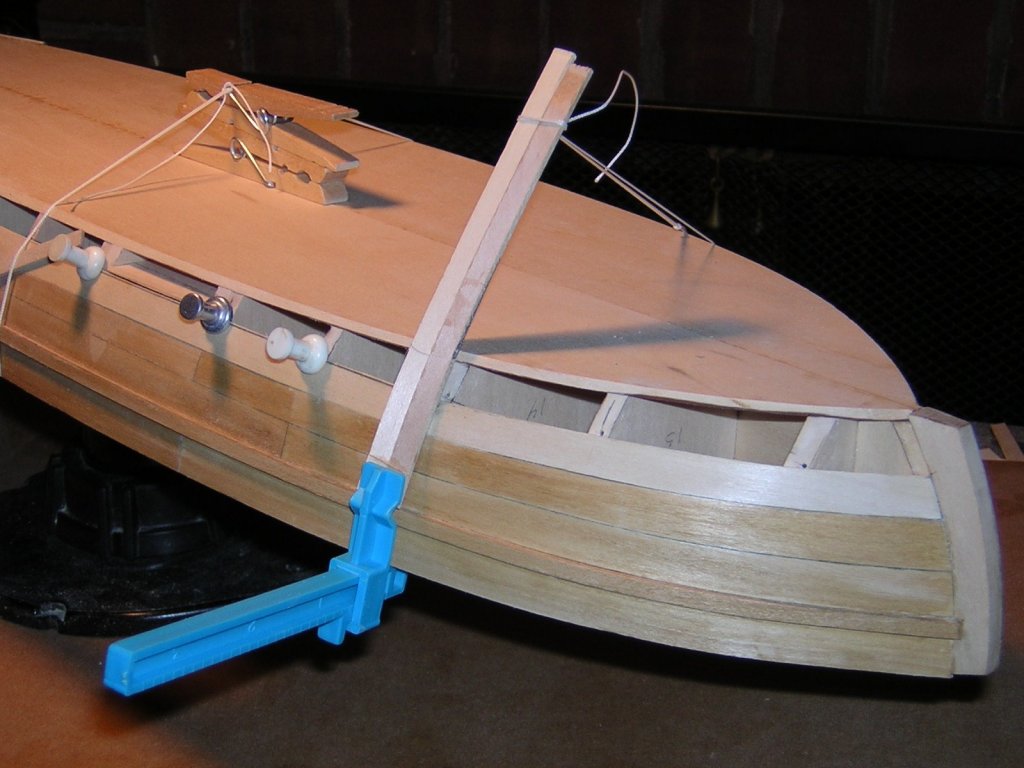
Tiger The photos attached show how I clamped some planks in place using rubber bands and some scrap to hold the pressure where it was needed. I used this method to hold the whetted planks in place while they dried in place and then again when they were glued in place. The third photo was from my late friend Joel Sanborn (a NRG and MSW member who's greatly missed) showing how he held planks in place while building the same model - the Gunboat Philadelphia kit by MS. Maybe these will be useful to you. Kurt
-
Vossey: Go to the link below where Eric has a bunch of photos from the Museum and general info on the Arabia. I will post photos here IF I get there - sometimes the best laid plans..... Kurt
- 599 replies
-
- 4
-

-
- sidewheeler
- arabia
- (and 4 more)
-
Eric: I'm on board. The Arabia is a fascinating story. I'm planning a spring trip to KC to see the museum again - last saw it the year they opened. Kurt
- 599 replies
-
- 4
-
-
- sidewheeler
- arabia
- (and 4 more)
-
The $11 price was a special sale. Need to check back their occasionally as I am sure they repeat sales. Kurt
-
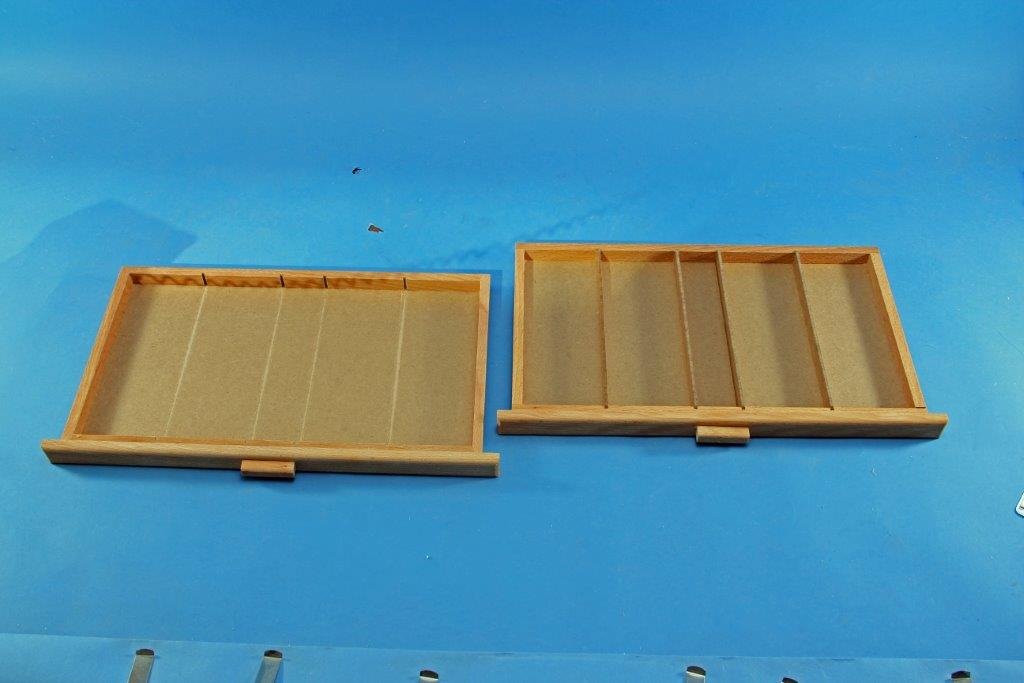
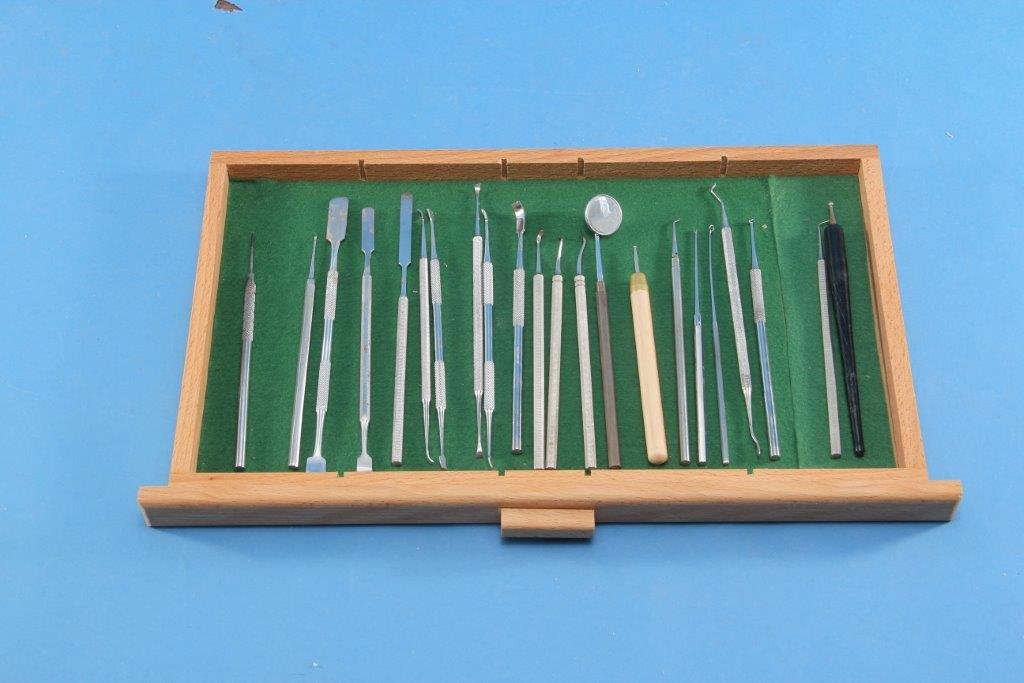
I got 2 sets for myself and another 2 for a buddy. I decided that I needed to line the drawers with felt as the wood just seemed to be an unfinished storage system - not knocking the quality or anything I just like my tools store neatly. So I went to the local Hobby Lobby with my 40% discount coupon (never go there w/o the coupon) and got some self-adhesive felt sheets. The first photo shows the drawer on the right as it comes with the 4 dividers in place. They are securely glued in place but only along their bottom edge and were easily loosened up with a few taps from a jewelers brass hammer and removed and set aside. The felt was trimmed to size and adhered to the drawer bottoms. With the thin felt the dividers still fit in place w/o interfering with the drawer closing. I set all of the dividers aside for now as I don't think I will be using many of them if any. Glad I got these - thanks for the heads up they are well worth the $$. Kurt
-
Metal work resourcnes
kurtvd19 replied to Kurt Johnson's topic in Metal Work, Soldering and Metal Fittings
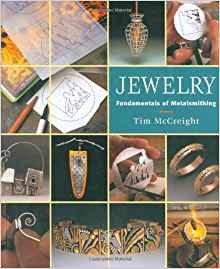
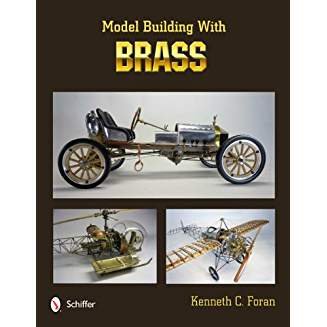
Three books that I have in my shop - they stay in the shop not in my library - is #1 The Complete Metalsmith by Tim McCreight. It's inexpensive and comes as a paperback or a spiral binding which I recommend as it can lay flat on the bench for reference. It's not a machinist's book but a general how to work with metals book - all the essential information is there to guide even a first time metal worker. The second is Ken Foran's book that Bill mentioned earlier. I can't say enough about this book other than if you work with brass or want to - Get It. Ken's a contributor here - you might PM him and see if he's got some autographed copies for sale. The third is another by Tim McCreight - Jewelry Fundamental of Metalsmithing. This book goes beyond his other book with refined techniques that are used in making jewelry and fine metal work that one can adapt to work on models. This is a "nice to have" book whereas I think the other two are "must have" books. Amazon links - https://www.amazon.com/Complete-Metalsmith-Illustrated-Handbook/dp/0871922401/ref=sr_1_1?ie=UTF8&qid=1508595894&sr=8-1&keywords=the+complete+metalsmith+by+tim+mccreight https://www.amazon.com/Jewelry-Fundamentals-Metalsmithing-Crafts/dp/1880140292/ref=sr_1_1?ie=UTF8&qid=1508595973&sr=8-1&keywords=jewelry+fundamentals+of+metalsmithing https://www.amazon.com/s/ref=nb_sb_noss?url=search-alias%3Dstripbooks&field-keywords=model+building+with+brass
-
Toni: I have nylon jawed pliers for this kind of work on a blackened or plated part. You can wrap some tape on a regular set for a temporary soft jaw pliers. Kurt
-
Steamboats and other rivercraft - general discussion
kurtvd19 replied to Cathead's topic in Nautical/Naval History
Eric: You nailed it. Kurt- 281 replies
-
- 4
-
-
- Steamboats
- riverboats
- (and 3 more)
-
review BlueJacket Shipcrafters Lobster Boat: A Review
kurtvd19 replied to Cathead's topic in REVIEWS: Model kits
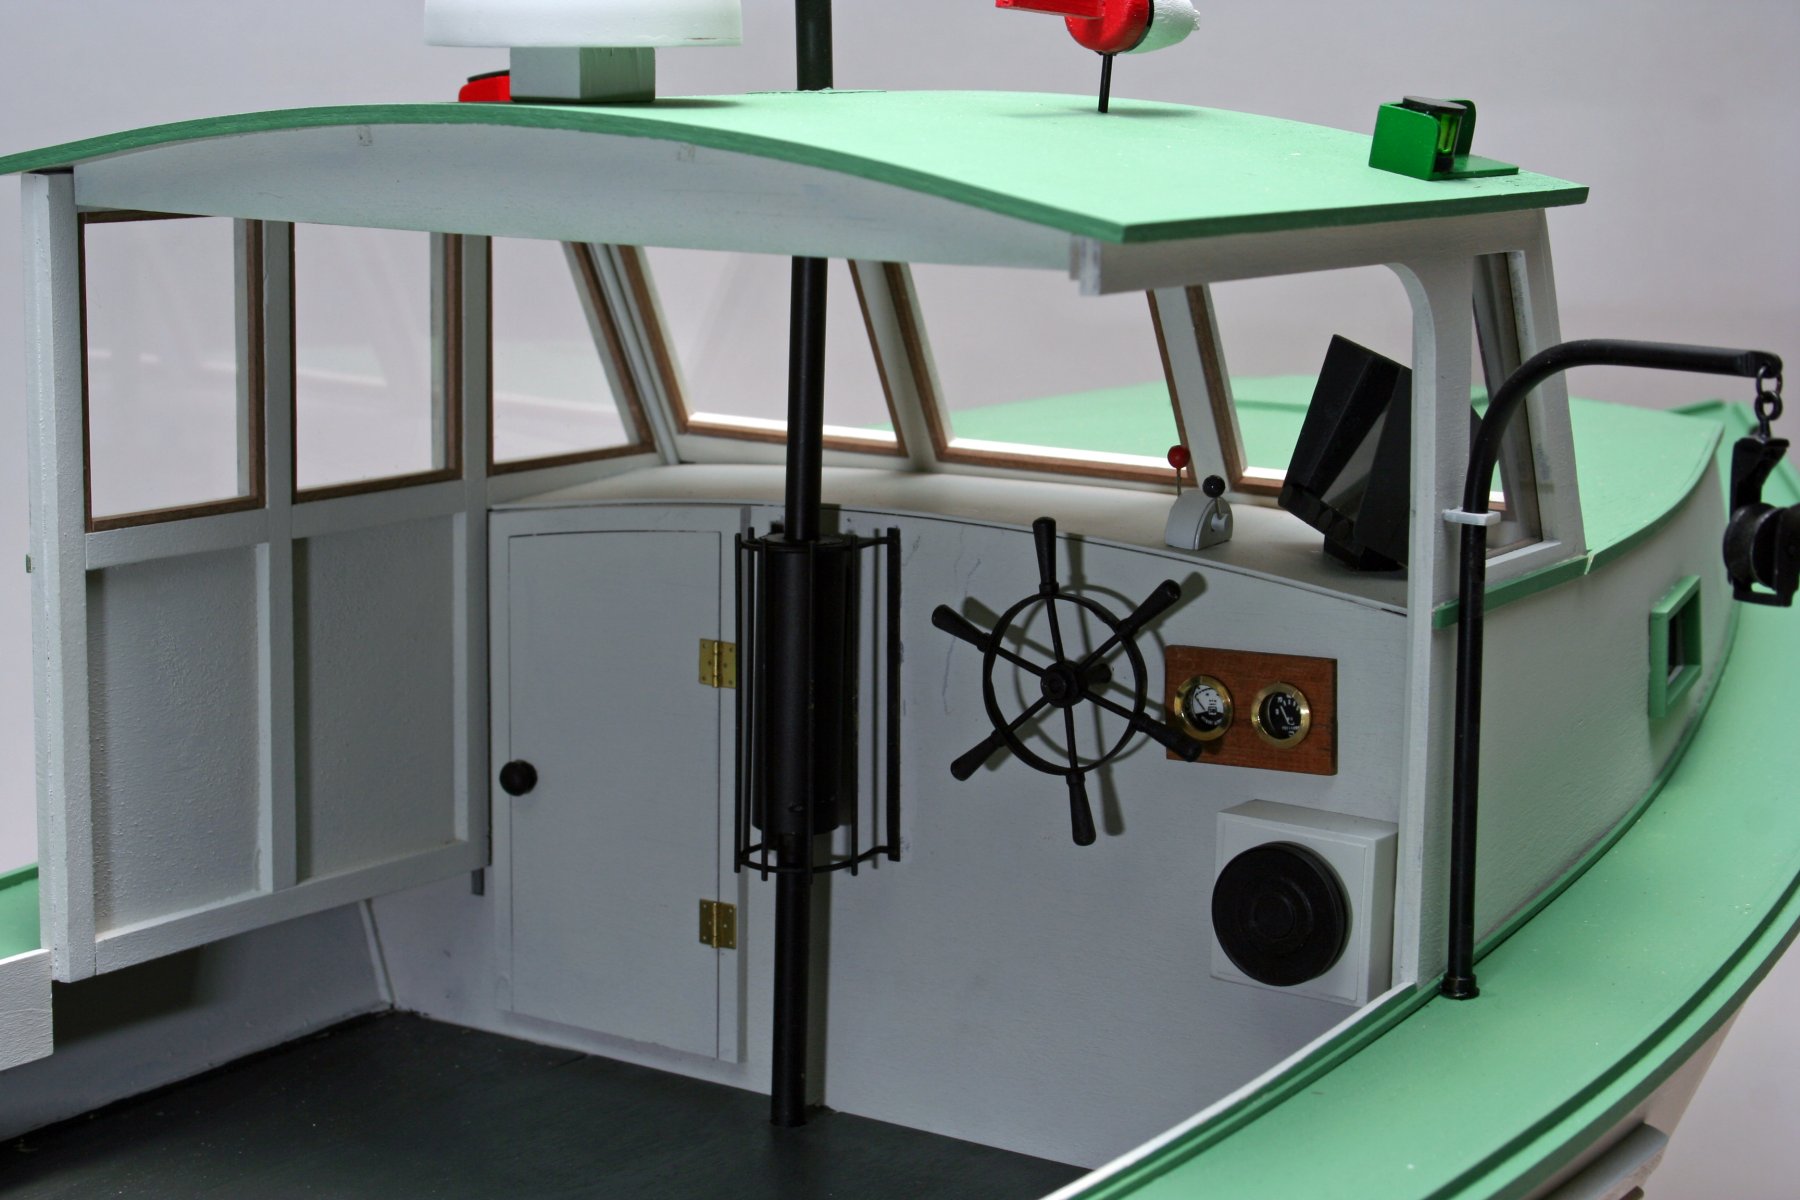
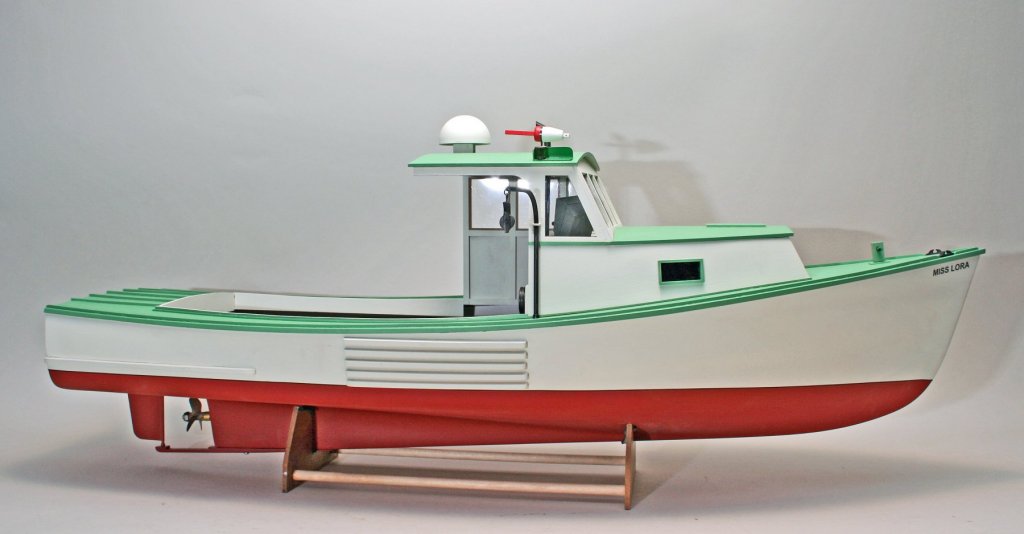
Eric: A very nice build. I like the colors too. I built the Bluejacket Lobster boat with the fiberglass hull and the instructions and plans appear to have been much better with the kit I did as it's a newer kit and the instructions in their more recent offerings just keep getting better. I considered the same green color you used but used a lighter green. I attached two photos of my build. I agree with the paint issue - I switched to acrylics many years ago. When I opened the old Floquil paints my wife would immediately start to complain about the smell. For peace I started to investigate acrylics and have not used any solvent based paints other than rattle can primers (occasionally) and then out doors. Since Badger introduced their Stynylrez primers I use them indoors. In fact Mary will often be in the shop at the same time I am airbrushing with the Badger paints and doesn't mind the very slight odor. It's great being able to paint w/o a respirator - though I do use a spray booth - for the particulate issue not harmful fumes. What's next on the building board? Kurt
-
I love it - and the price but I can't find it on their web page. Spent 20 minutes w/o success - can you provide a link to the catalog page? Searched under tool drawers, drawers, storage drawers - w/o success as well as scrolling all over their various categories. Thanks, Kurt
-
Split Brass Ring Frustrations
kurtvd19 replied to David Lester's topic in Masting, rigging and sails
Henry: Good point and 100% correct. However, they are not always properly aligned or closed before being opened and that's why I have the pliers. Kurt -
Split Brass Ring Frustrations
kurtvd19 replied to David Lester's topic in Masting, rigging and sails
Soldering is a good cure but you need to get the two ends aligned so there is no visible gap between the ends before soldering. There are special loop closer pliers that squeeze the rings together w/o the tendency of common pliers to make them oval rather than round. The pliers have a curved shape cut into the jaws that hold the ring upright so the ring ends can be squeezed together. No need for an expensive pair as their use is light. Any jewelers supply has them and many places selling beading supplies too. The photo is from the Fire Mountain Gems catalog - I have a pair from this supplier. Kurt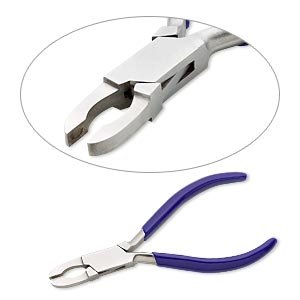
-
Steamboats and other rivercraft - general discussion
kurtvd19 replied to Cathead's topic in Nautical/Naval History
There is an article linked below from the Institute of Nautical Archaeology (INA) an organization member of the NRG, about a hull survey done in Fairbanks, Alaska of the Steamboat Nenana a museum boat in Pioneer Park. This might be of interest to the followers of this forum topic. There will be an expanded article in the next issue of the INA Quarterly and I will link it when available. Kurt https://nauticalarch.org/first-look-at-a-rare-northern-steamboat/- 281 replies
-
- 6
-
-
- Steamboats
- riverboats
- (and 3 more)
-
Byrnes table saw questions
kurtvd19 replied to alde's topic in Modeling tools and Workshop Equipment
I agree 100% with Keith. Kurt -
Eric: I went over the Bertrand info too with the same results. Also checked info on the the Arabia and the original data on the Heroine - but as Glenn Greico explained several times in his build log Kevin Crissman was routinely digging up facts as Glenn built the model. I also checked Glenn's build log and there is no evidence that he simulated caulking anyplace on the model and his models contain all the known details. I will be surprised if any info comes back showing that caulking was used. Kurt
-
Chris: As far as I know it was just paint as many hulls were white. I think white might have been used more than black actually. I have never actually read anything about hulls or decks being caulked. All sources I have read say the hulls were fitted with smooth tight joints between the planks as well as the decks. Decks did have camber for water run off - which would only be rain as riverboats were not likely to get their decks wet otherwise in the protected rivers. You have my curiosity aroused and I will be contacting some nautical archaeologists about this issue of caulking. Kurt
-
Chris: Riverboats were painted. A lot of white paint was used for the superstructure and hulls but many hulls were black. The hull is hardly visible on most riverboats so this isn't very important - pick what you want. Decks were commonly red, brown and some green. The roofs were covered with tar paper so they were grayish black to black - the older the grayer. There are some great riverboat builds here - do a search for "Chaperon by Blighty" "Chaperon by Ron Grove" "City of Monroe by cborgm" "Steamboats and other river craft - a general discussion" andChaperon Sternwheeler Steamer 1894 by Mike Dowling These build logs will show you colors used and discussions about colors. Kurt
-
Please welcome and thank "Navarino Models" for becoming a new sponsor of MSW. Navarino Models produce model kits of ancient and traditional Greek ships as well as commercial vessels. Visit their web site and check them out. I am happy they contacted us to become a sponsor. www.navarinomodels.com
-
Chuck: Testor's also makes the decal papers. I have used the Testor's product with great success. The only problem is that printers do not print white but as it doesn't appear that you are using white it's not a problem. The print your own decal papers must be sealed after being printed with an ink jet printer or the inks will lift when wetted to apply. Testor's (and others) sell the clear coat in a rattle can. As with all decals they need to be applied over a smooth surface and dull or matt paints need to have some clear gloss applied first then the decal applied and then overcoated with dull coat or matt coat to match the model's surface. The clear overcoat also hides the edge of the decal film - as thin as it is w/o the overcoat you can see it. http://www.testors.com/product-catalog/testors-brands/testors/tools/decals/ Kurt
- 269 replies
-
- 2
-
-
- Queen Anne Barge
- Syren Ship Model Company
- (and 1 more)
-
Byrnes table saw questions
kurtvd19 replied to alde's topic in Modeling tools and Workshop Equipment
Al: Check the blade for flatness using a piece of plate glass or something that is truly flat. If it's not flat get rid of it. If the blade is burned the metal's no good but if it's just "burned on" resins from the wood it can be cleaned up - if it's still flat. The clamp I used for the strip jig is an old aluminum X-Acto clamp. The portion that fits into the groove on the saw had to be narrowed, but a carbide tipped blade on the Byrnes saw did the job w/o any damage to the blade. Let us know how your next try comes along. Kurt -
Byrnes table saw questions
kurtvd19 replied to alde's topic in Modeling tools and Workshop Equipment
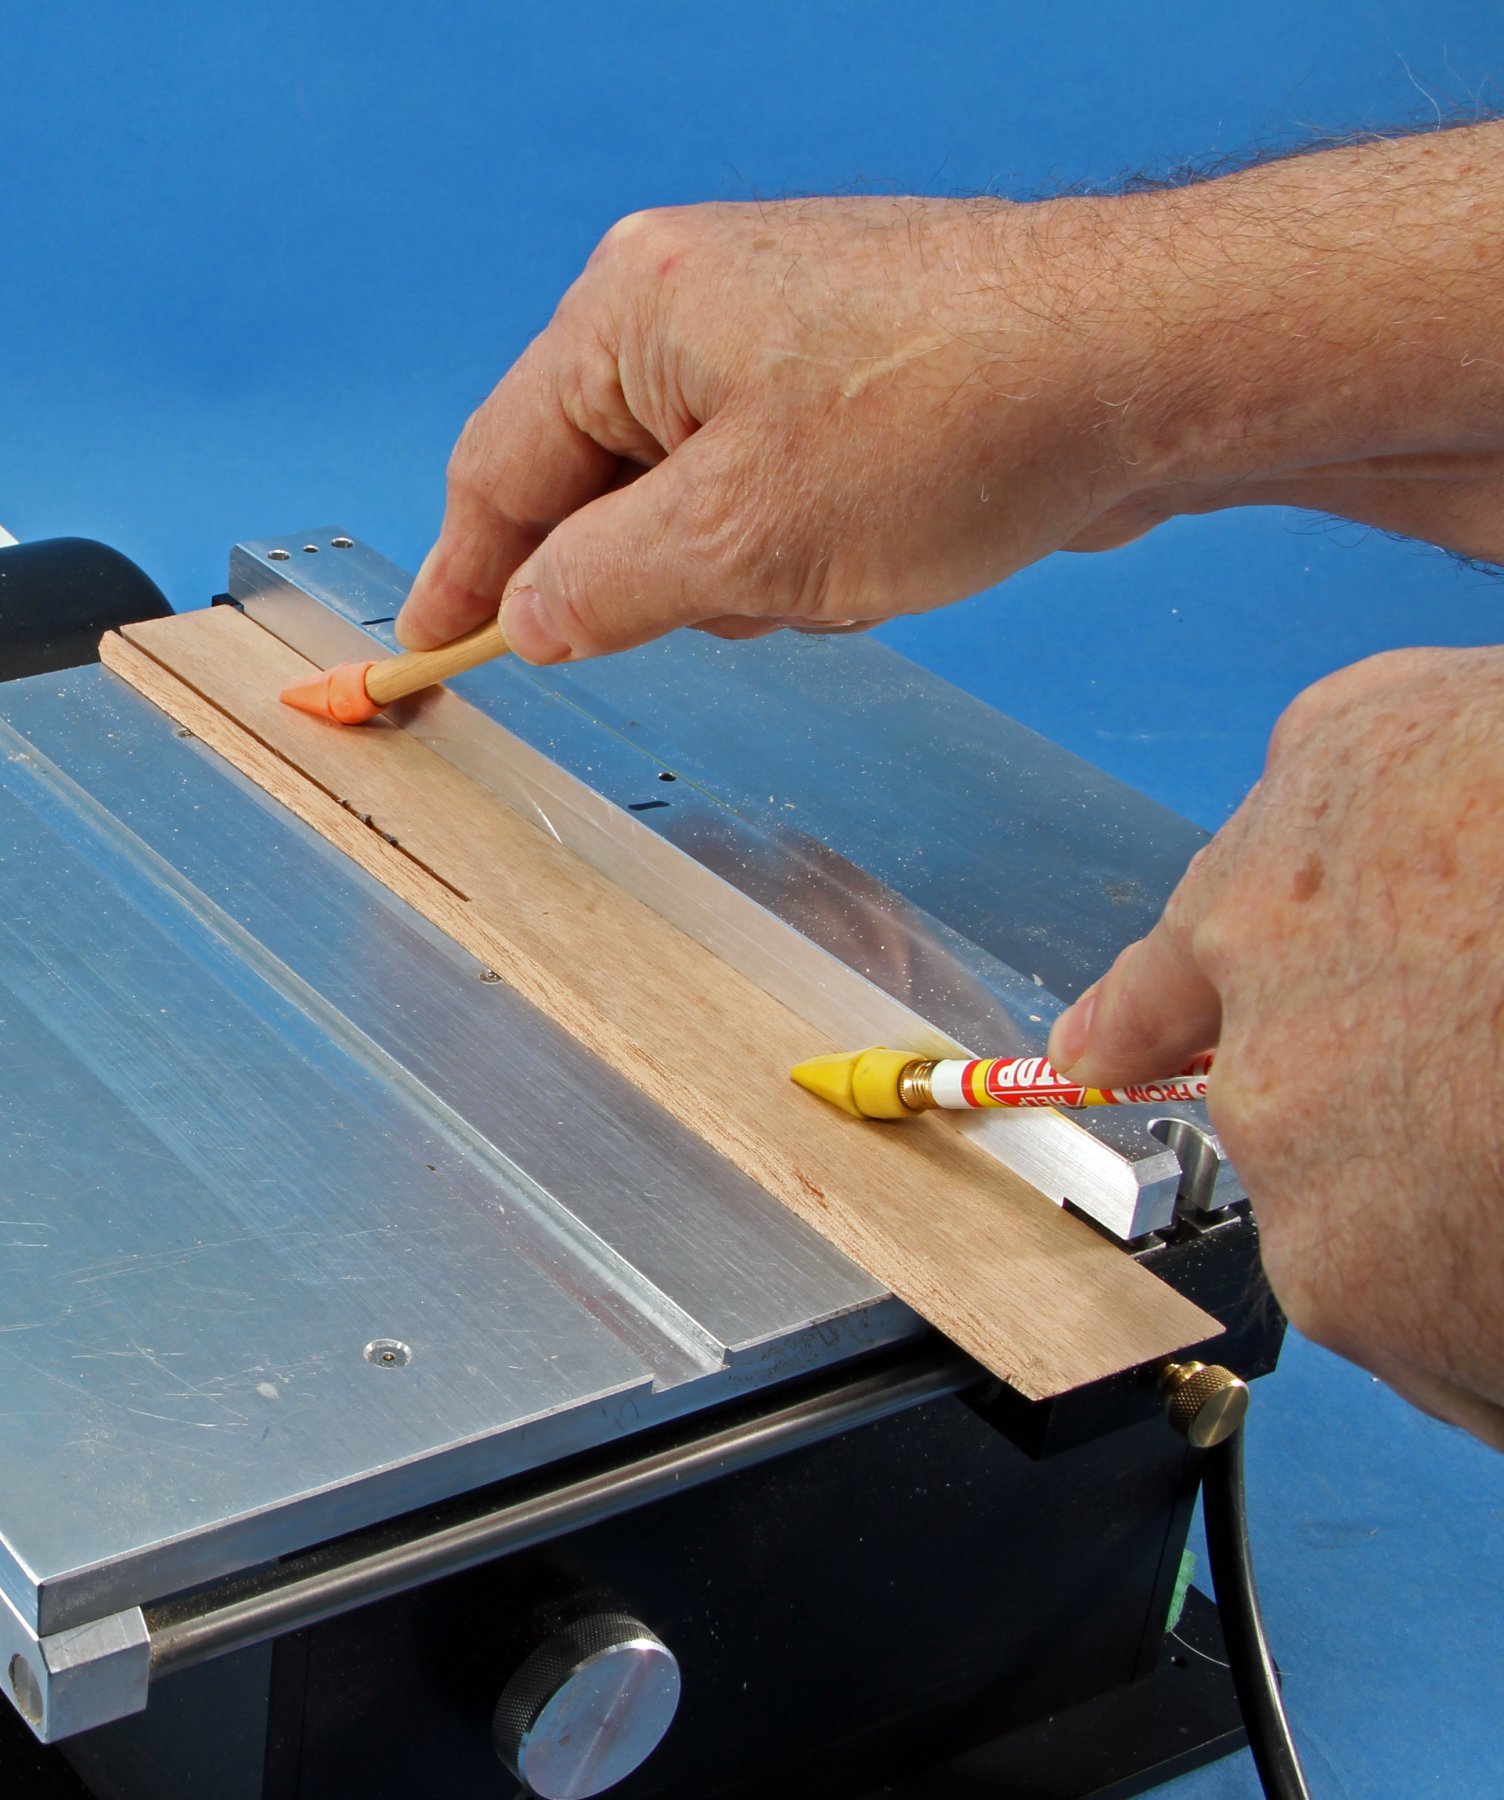
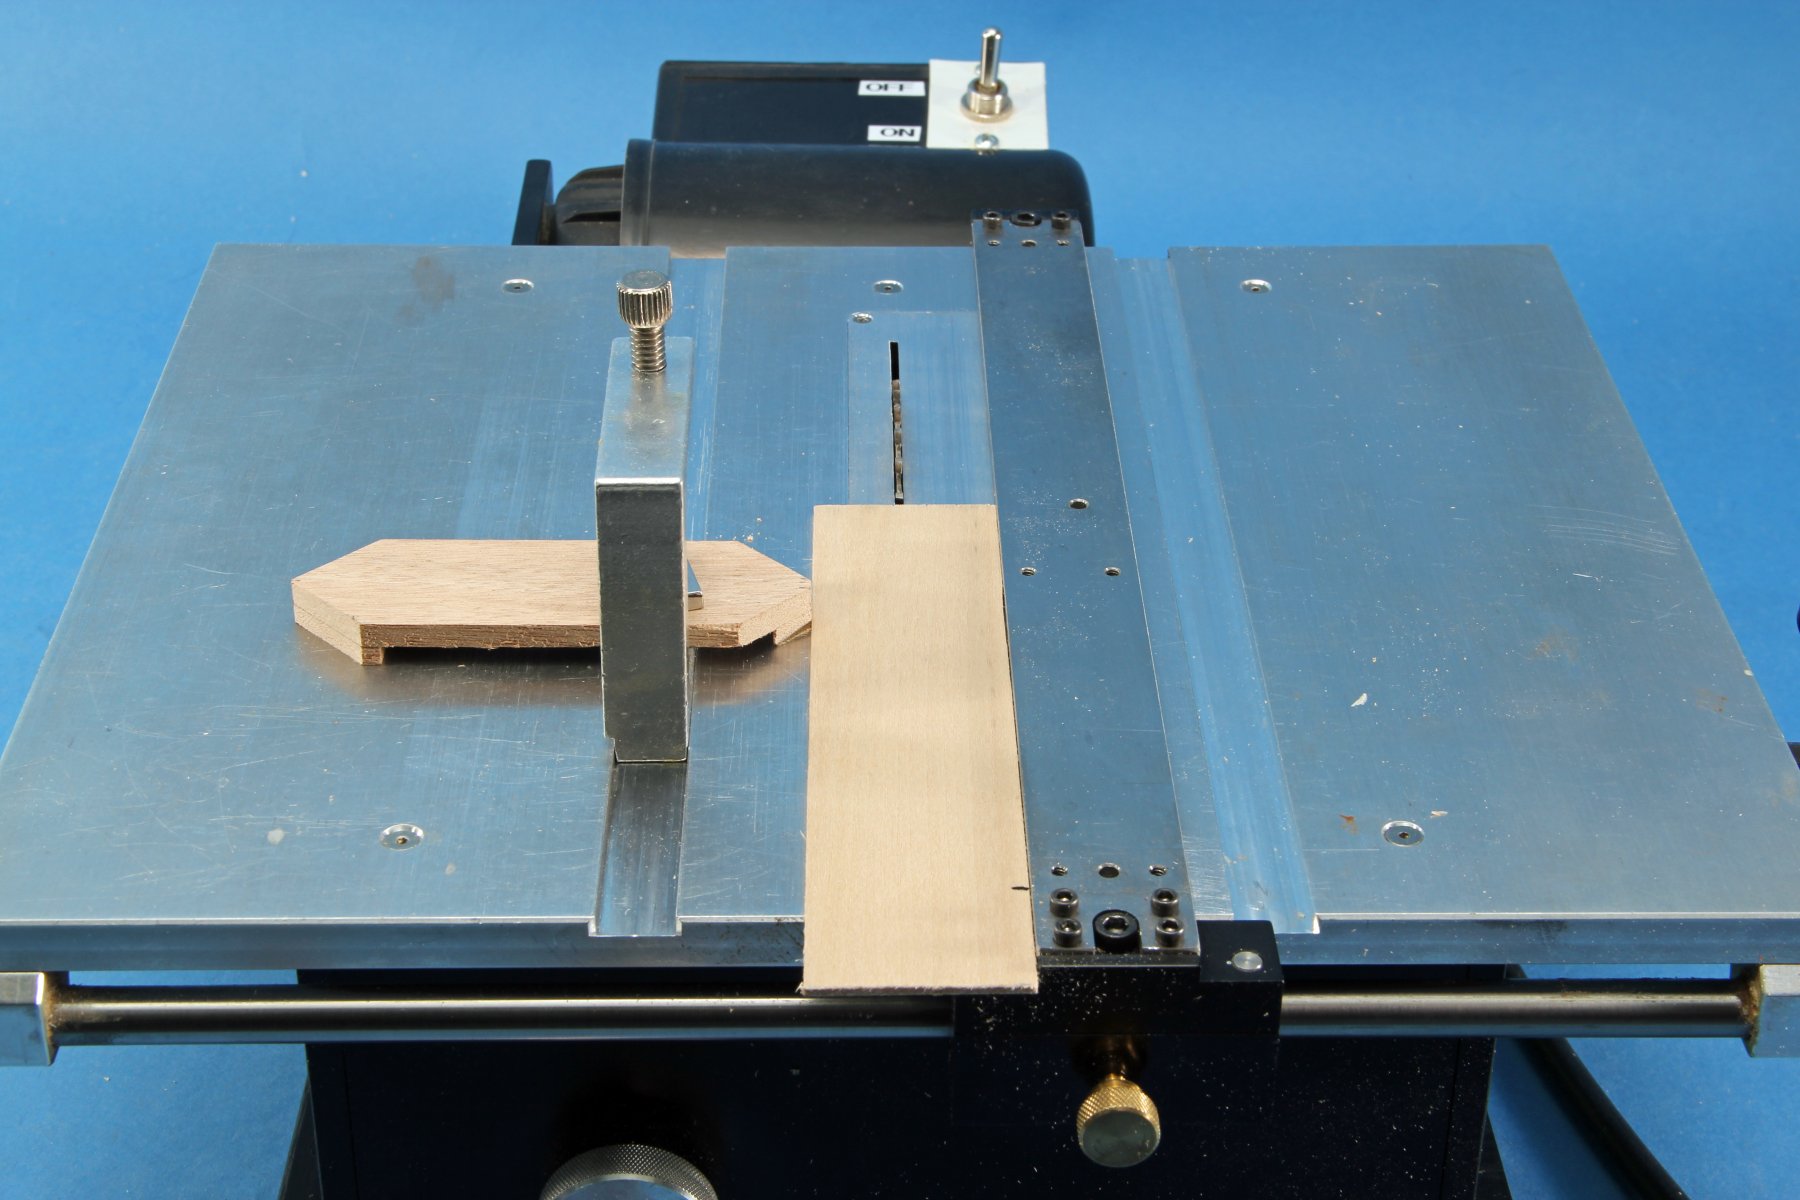
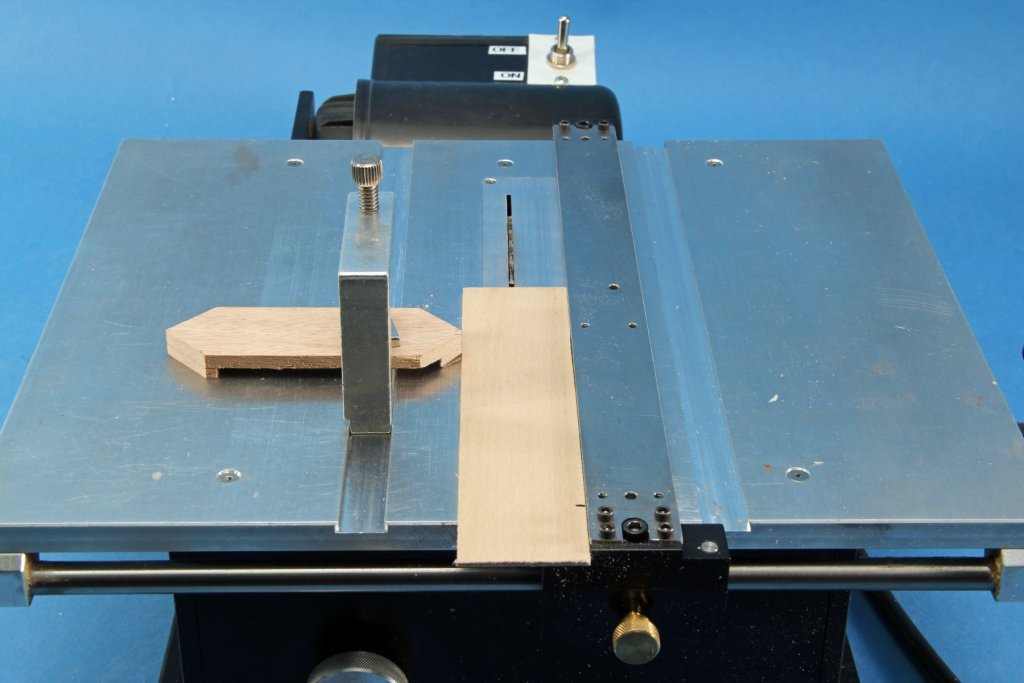
Al: You didn't mention the blade being used - if you are using a fine slitting blade it's probably heating up, warping and causing the binding. However with you being right handed use the fence on the right side of the blade. A thin slitting blade with many teeth has a tendency to heat up because the blade doesn't have any set to the teeth and the sawdust isn't ejected like with a true wood cutting blade. Follow the attached photo and you will not have binding (except from a hot, warped blade). Using the fence as shown makes it safer too as the cut off piece also falls away from the blade. If "trapped" between the blade and fence the off-cut can be sent back at the operator by the blade's rotation. If you are cutting a bunch of strips of the same width use a set up like in the 2nd photo - it assures each strip is the same width in a safer manner. The guide on the left must be well forward of the blade - it's just used to set the width of the cut - the wood is guided just as shown in the first photo. Hope this helps. Kurt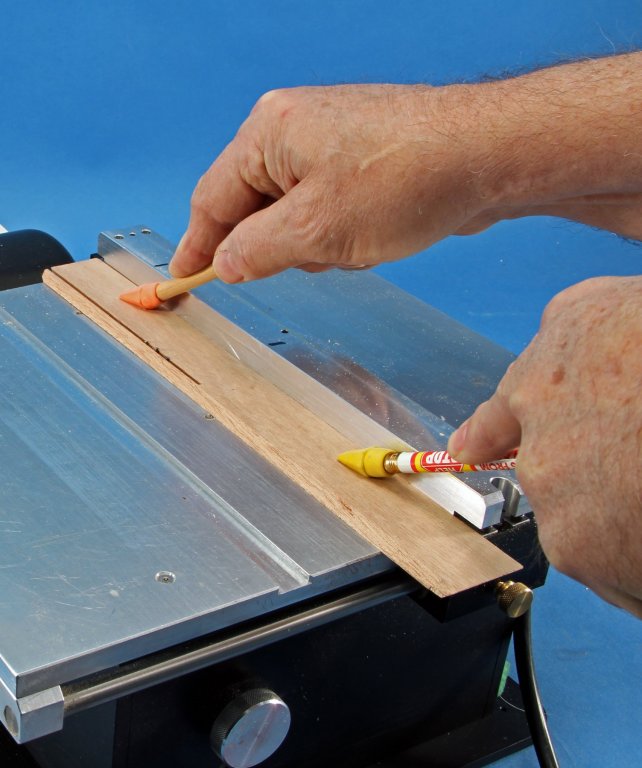
-
Elijah: You need to make sure that the joints do not touch the wood. If they do, capillary action can smear glue to any contacting surface. The professional jigs have a gap in the corners where each plane of the jig meets another. A 1/8" wide x 1/8" deep rabbit on each piece of the jig before you assembled it would do the job. If it's just screwed together no problem - unscrew, make the rabbit cuts and reassemble. Otherwise you will need to secure something to the jig pieces to provide a space at each intersection of the wood pieces. You need to keep it square so cover the entire wood surface except for the gap at the joints. If you can disassemble it but can't make the rabbit cuts, bring it to my shop and we can get it done. Kurt
- 701 replies
-
- 2
-
-
- phantom
- model shipways
- (and 1 more)
-
Chris: Theyhave all periods. US supplier would be Walthers as per Jack's link. Sorry, don't know of anybody down under. Kurt