


kurtvd19
-
Posts
3,043 -
Joined
-
Last visited
Content Type
Profiles
Forums
Gallery
Events
Everything posted by kurtvd19
-
 If you can get at all the joints the emery paper works fine. I use heated Sparex in a small croc pot to clean the parts before and after soldering. Either way, clean the residue off and then wipe with alcohol. Don't touch the joint area with your bare hands and use a good flux - I like to use a paste flux - as the bits of solder stick to it better than the liquids. Heat the joint until the solder flows and then back the heat off immediately. The joint should be good. I have used a Smith Little Torch for several years and it does a great job as the heat can be varied by the size tip used. I have started to use a resistance soldering unit in the last year and like it a lot. You can certainly use one of the larger soldering irons with the Stay-Brite but the pencil types probably will not heat the metal enough. Remember to heat the metal, not the solder. The solder will melt and flow to the heat. If able heat the back side of the joint with the solder on the face and the solder will flow into the joint. Kurt
- 250 replies
-
- 6
-

-
- willie l bennett
- model shipways
- (and 1 more)
-
Actual silver soldering isn't needed. Try Stay-Brite a silver bearing solder that melts at a much lower temp than silver solder but higher than soft solder. It can be blackened unlike soft solder and is plenty strong enough for the job. Parts need to be clean and adjacent joints need to be protected from getting too hot - heat sinks or clay as a heat sink around the previous joint do the job. Kurt
- 250 replies
-
- 5
-
-
- willie l bennett
- model shipways
- (and 1 more)
-
Can i live without a BYRNES TABLE SAW
kurtvd19 replied to shihawk's topic in Modeling tools and Workshop Equipment
David is referring to a method of removing every other tooth on the slitting blade and then filing an angle on the face of each remaining tooth with alternating angles from one tooth to the next. Only on the face of the tooth and no set to the teeth. This was developed by Lloyd Warner of Warner Woods West - and former NRG Chairman - who did this for all his saw blades that he uses to gang cut strips on a custom made saw with multiple blades. The advantage is no binding because the blades don't heat up from the sawdust not being able to be carried away in the cutting process. Bob Filipowski with Lloyd's permission developed a great Power Point presentation that he has shown at a NRG Conference as well as at local club meetings. I will check to see if this was written up in the NRG Shop Notes 2 book. Kurt -
Can i live without a BYRNES TABLE SAW
kurtvd19 replied to shihawk's topic in Modeling tools and Workshop Equipment
Julie Mo - I used my Byrnes saw to do all of the wood trim in my 2nd floor addition. Cut the 3/4" Oak like it was butter. Best part of using it was that it was easy to carry from room to room rather than walking back and forth to my 12" trim saw that kicks up way too much sawdust. Kurt -
Mike: It's looking great. The battens sure are a job but they add a lot to the finished project. Glad you got the bends done OK. Kurt
- 225 replies
-
- 2
-
-
- chaperon
- model shipways
- (and 1 more)
-
Sjors: You hit on the solution for those who dislike rigging. I did so many repair and restorations that I said 'no more (extensive) rigging" and now I tell the guys that my latest tug boat had a lot of rigging - TWO flag halyards! Kurt
- 701 replies
-
- 7
-
-
- phantom
- model shipways
- (and 1 more)
-
Mick: At last night's meeting of the local Nautical Research & Model Ship Society of Chicago I showed your build log photos of the pink ivory "tiles" to the group and Marc gave a short presentation about the wood's properties - from a botanists perspective - it's availability - and cost! WOW really expensive here! Your photos really looked great projected onto the screen - seen much larger than life size. The group thought the finished hearth was magnificent and that the pink ivory was the perfect choice for the tiles. Take care, Kurt
- 504 replies
-
- 5
-
-
- washington
- galley
- (and 1 more)
-
Mick: I too love the hearth tiles. The little "C" clamps are beautiful. Kurt
- 504 replies
-
- 5
-
-
- washington
- galley
- (and 1 more)
-
Airbrush
kurtvd19 replied to Mike Dowling's topic in Painting, finishing and weathering products and techniques
Wacko: Or do you prefer WackoWolf? I wish I knew your name. The 350 is by far the easiest airbrush to clean up after it was left dirty. Simply unscrew the fluid cap and the needle from the body of the brush as these should be the only parts that have any paint in them. You can soak them in any solvent for a couple of hours and the dried paint should soften up so you can clean it out. There is a seal in the fluid cap that can be soaked for anything short of a full day w/o any adverse effects but as long as you are careful of the orifice in the fluid cap and the point on the needle you can't hardly hurt this workhorse. I got my first airbrush for Christmas in 1960 - a 350 and it's still going though in my Grandson's hands now. I have some newer 350's that I use for instructing and I always have to give them a thorough cleaning when the class is over. I just disassemble the cap and needle, drop them into some cleaner and rinse them off after an hour. Only part I have ever had to replace on a 350 is the fluid cap when somebody screwed it down too tight onto the needle and flared out the orifice quite nicely - but not if you ever want to use it for spraying again. For some reason they never do the same thing with any of the other brushes - probably because they look so much more delicate while the 350 looks like it's indestructible. Happy airbrushing, Kurt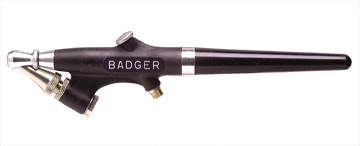
-
Thanks Toni. Looking at the handle more carefully I will stick with the aluminum scalpel handle I have been using as it allows the entire length of the cutting edge of the blade to be used. Kurt
-
Can you show us a photo with one of the scalpel blades they call spear? Looks great but I am concerned about how much of the blade is exposed - doesn't lok like enough would be exposed. Thanks, Kurt
-
Mike: The kit designer said that the fix would be added to the instructions but I have not seen the revised instructions. Maybe they did it in house rather than sending it back to the designer who's explanation would have probably been clearer - just guessing though. Kurt
- 225 replies
-
- 3
-
-
- chaperon
- model shipways
- (and 1 more)
-
Mike: It's looking good. The lettering turned out real nice - I told you it could be done! Kurt
- 225 replies
-
- 3
-
-
- chaperon
- model shipways
- (and 1 more)
-
Mick: Thanks. I am sure it's nicer to work with than ivory! I will as Marcus Botanicus to enlighten the group at our next club meeting about this wood. Take care, Kurt
- 504 replies
-
- 5
-
-
- washington
- galley
- (and 1 more)
-
Mick: Looking real good. I like the tiles and agree that something had to keep them in place. They look great - please explain the pink ivory - I have never heard of it. As you said "painting with wood" I am assuming it's some sort of wood rather than actual Ivory (which is nasty stuff - I did a small Ivory Chinese Junk once - the smell when cutting the ivory was horrendous). Kurt
- 504 replies
-
- 4
-
-
- washington
- galley
- (and 1 more)
-
Adam: This is great news - another Galley Washington build log. I will be watching with anticipation. There should be more build logs of this project by now with plan set #68 having been mailed out on Friday. You will be one of the pioneers. Take care, Kurt
-
Mike: It looks real good. Your skill with the airbrush will improve the more you practice. I think you will like how you can apply paint yet still see the underlying wood grain for when that type of appearance is wanted. Take care, Kurt
- 225 replies
-
- 3
-
-
- chaperon
- model shipways
- (and 1 more)
-
Mick: Yes, we have a couple in the works. Next one out will be aimed at first time scratch builders but interesting enough for more advanced modelers too. Can't let the cat out of the bag yet, but I think this next one will be very popular. Kurt
- 504 replies
-
- 5
-
-
- washington
- galley
- (and 1 more)
-
Mick: Beautiful work. I think your build may be inspiring others as I just shipped out plan set #68. Sure wish some others would start build logs too. Keep up the good work, I truly enjoy your posts. Kurt
- 504 replies
-
- 4
-
-
- washington
- galley
- (and 1 more)
-
whats an easier build for a first kit
kurtvd19 replied to rdestefano01's topic in Wood ship model kits
Chuck: The NRG dinners are NOT formal - that went out the window many years ago - and I am known (famously and infamously!) for wearing Hawaiian shirts to them. Kurt -
Elijah: I announced at the meeting last night (the Nautical Research and Model Ship Society of Chicago - where Elijha's a member) that it was your birthday and the group in attendance asked me to relay their birthday wishes to you. So, Happy Birthday, slightly belated from the group. Being on vacation you missed Doc Brackett's presentation on his 12" = 1'0" kayak build - a very good presentation that showed some things that modelers can use in our builds. Take care, Kurt
- 701 replies
-
- 4
-
-
- phantom
- model shipways
- (and 1 more)
-
Airbrush
kurtvd19 replied to Mike Dowling's topic in Painting, finishing and weathering products and techniques
Daddyrabbit: I am in complete agreement with what you posted today. And you are correct that we would rather not have anybody suggesting purchasing illegally copied products. Your points are legitimate and the facts that you explained today and I agree that a cheap brush can have its place. The brushes I was referring to as illegal copies have been copied in total, including the patented air regulators and/or other key (and patented) pieces. And except for the quality of how they are actually made and assembled, are identical looking - but they sure don't perform the same. Some are so blatant in their copying they even put the company name and model of the legitimate brush on the copied brush. The only thing I would point out to a beginner is that some of these things are pure garbage and what you purchased from Harbor Freight might not be what somebody can buy there next week. What the guy buys next week might be an exact (illegal) copy and one that will never work right and an expert couldn't throw paint with it and the new guys gets discouraged and thinks he's the problem and gives up. Or it could just be a poorly designed and manufactured brush that looks just like a name brand - and the new guy can't tell the difference in the quality. For an inexperienced modeler I would recommend that a low end brush from a name brand will rarely be defective and will give the beginner a better chance at being successful. It's extremely rare for these to ever have a problem out of the box. Every Badger unit is tested before it leaves the factory and I am pretty sure that so are the Iwata & Pasche brushes. I will confirm about the Iwata tomorrow night when I see one of my counterparts from Iwata at our local IPMS chapter meeting. No need to introduce a problem other than the modeler's inexperience into the equation. I once went around and around with a modeler who attended one of my seminars who was having all sorts of problems. He told me he got one of the units I suggested and explained the problem. I walked him through the proper adjustment, he tried it again and called back with another issue. This went on and on and took up a lot of his time trying to get it to work. I asked him who he bought it from and as I was going to suggest that he might have the rare defective brush right out of the box and to return it to the store or to take it to Badger who would fix it while he waited (he was local and could drive there in 30 minutes). He told me where he got it and I knew immediately that it wasn't actually a Badger unit - but it said Badger on the side, etc. He took it back to the point of purchase and demanded his money back, got it and bought a name brand brush. He was ready to call it quits with trying to airbrush. Our IPMS chapter meetings are interesting when somebody asks a question about airbrushing. If it's about a Badger I answer the question. If it's about an Iwata, Steve answers the question. If it's about airbrushes in general or what's the best airbrush - both Steve and I answer in turn - if needed. It can sometimes get rather humorous as we both have identical starts to our reply about the best airbrush - "There is no best airbrush. The best airbrush for you isn't necessarily the best for the other guy and anybody's best airbrush is the one that feels right to them." We then ask what they want to paint and make suggestions from there. Take care, Kurt -
Airbrush
kurtvd19 replied to Mike Dowling's topic in Painting, finishing and weathering products and techniques
Mike: Practice on something other than the Chaperon! It's not too difficult to use an airbrush, but you really need to practice on some scrap stock. Some old newspaper sprayed using just some water will teach you a bit about control and adjusting the brush for optimum spraying. The adjustments will be different between water and paint, but still will teach you control..The use some paint on similar (scrap) product before tackling the actual model parts. The wood that surrounded the kit/deck pieces is the same exact wood and can be used for testing. Good luck. Kurt -
Thanks to Greg for the donation. Thanks to Jim for the rework. And thanks to Pete for the purchase - you will love it. Kurt