kurtvd19
-
Posts
3,048 -
Joined
-
Last visited
Content Type
Profiles
Forums
Gallery
Events
Everything posted by kurtvd19
-
 Dave: I just went to the download and it worked fine. You might have tried while it was being fixed but it worked fine from here at 1:40 PM. Kurt
 -
An error was found on page 23 of the monograph and it has been corrected in the file that is downloadable from the NRG web site as of 3-30-18 at about 11:30 AM CST. In the chart on page 23, the dimensions for the BASE PLATE should be 1/2" x 2" x 3 1/4". The error was the 3 1/4" dimension was shown as 2 1/4". If you printed out the monograph earlier than this morning you may want to reprint page 23. If you downloaded it you may want to delete the copy and download the file again. Sorry for the inconvenience. Kurt
-
Dave: Don't be intimidated about showing. Models are judged on the merits of the model's workmanship and in Novice, Intermediate and advanced classes. Anybody entering for the first time is eligible to be in the Novice category. The Novice and Intermediate classes get a handicap (that is calculated after the model is judged) and models are not judged against other models until they win a gold award when they are eligible for a best of category (miniature, best novice, best Great Lakes, etc.) and it's the points that are compared - the judges don't go back into the contest room to look at one model vs another (except in rare instances of ties). Looking forward to meeting you. Kurt
-
Dave: No, there is not a bill of materials as such. Bill, the author felt it was critical that scratch-builders know/learn how to develop a bill of materials. At the start of each section of the monograph there is a bill of materials for that section - listed by sizes of material but not by lengths. The following text does give the lengths needed in that section so adding up the lengths is all that is needed. All of the materials are common stock sizes no special milling required as the project was designed so that the builder w/o access to power tools could still do the project - while accomplished builders can use any woods they have access to. I am sure that someone who has purchased the plans will do up a list and they may share it here. BTW, your plans were mailed yesterday by Priority Mail. Are you by any chance coming to Manitowoc in May? Kurt
-
Each of the Shop Note books are a bit over 200 pages. The binding allows it to lay flat if you are using it for reference at the bench. Each book contains Shop Notes that have been published in the Journal. The original SN has content from the start of the Journal up to 1980. SN 2 content is from Journals published from 1981 - 2005. I will let others give their opinions on the usefulness of these books - all I will say is I have both in my shop and find them very useful. Kurt
-
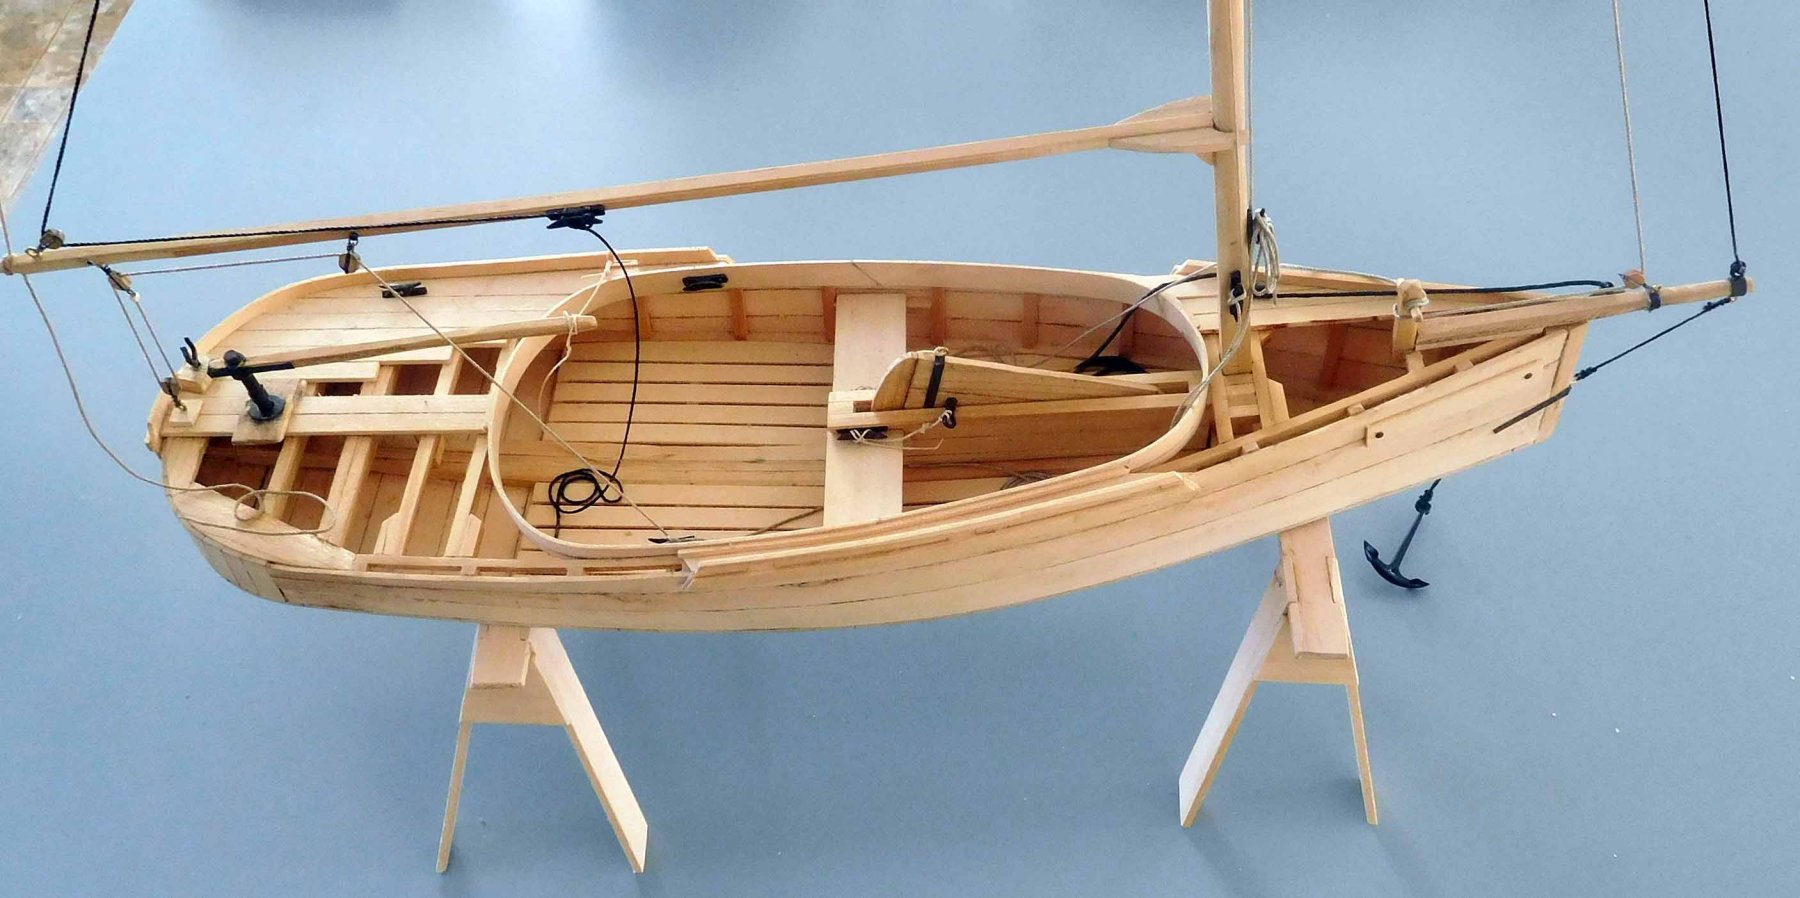
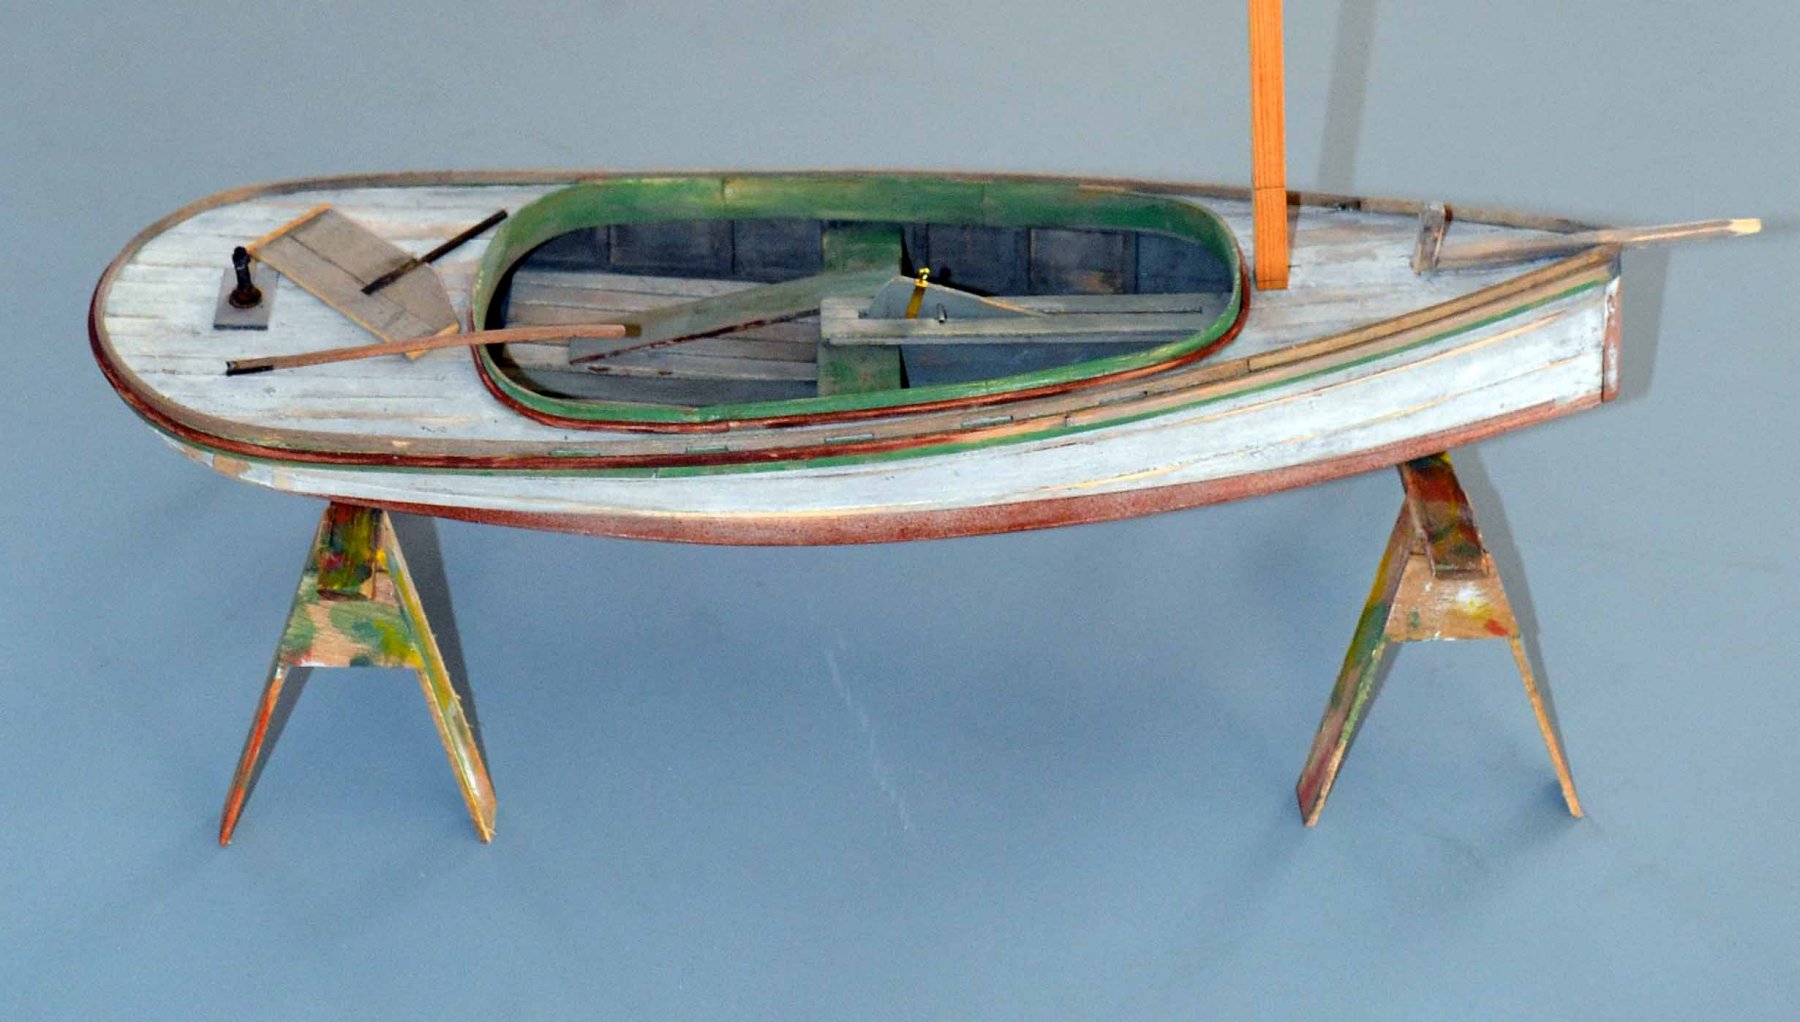
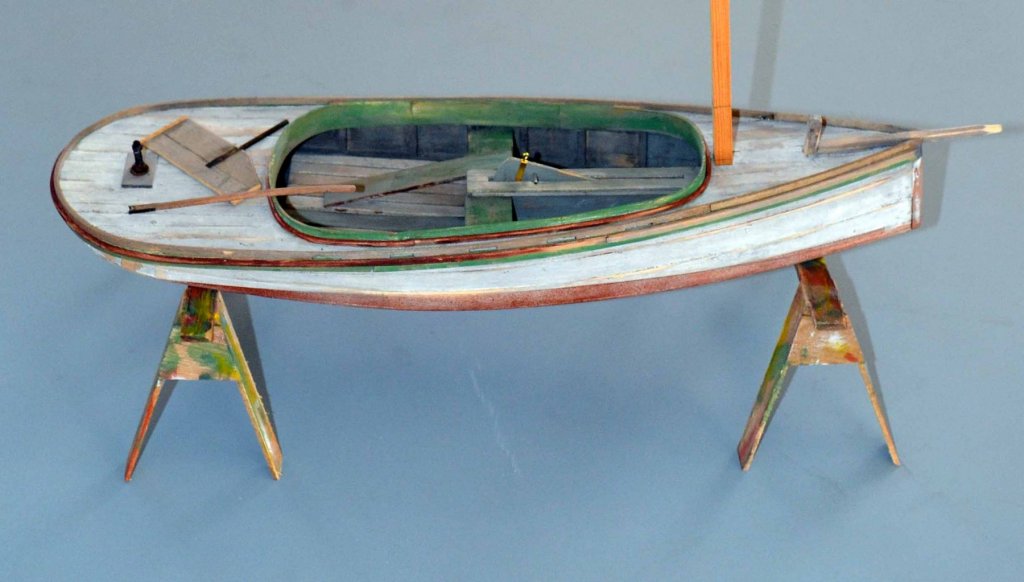
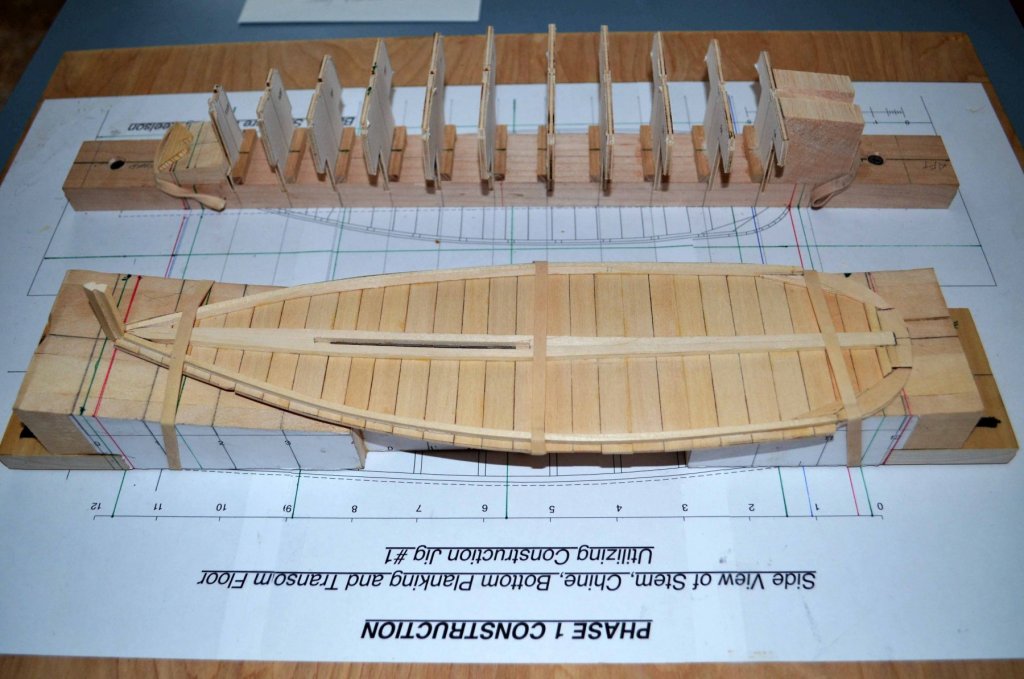
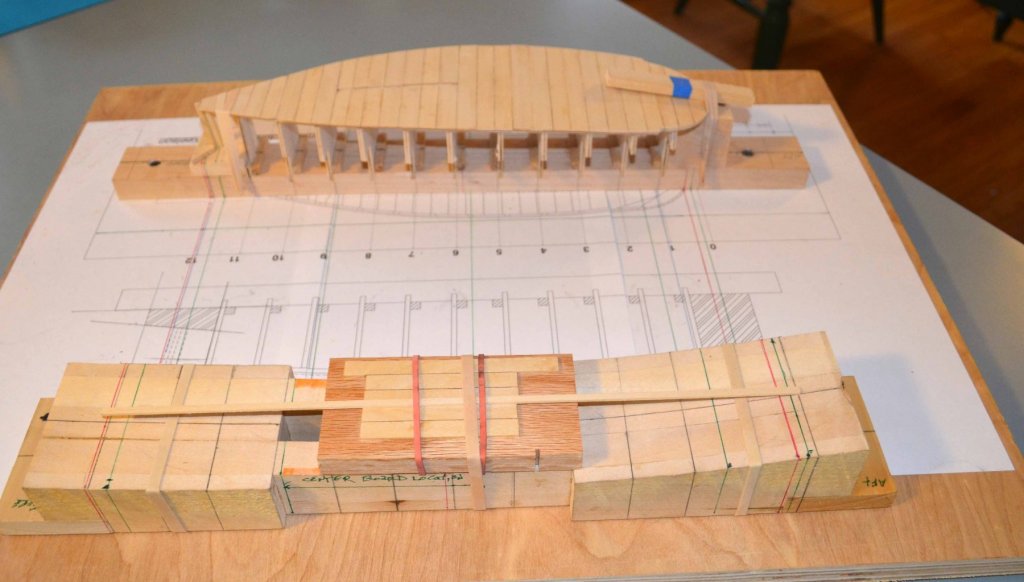
THE GENERIC EAST COAST OYSTER SHARPIE – LATE 19TH CENTURY The plans and monograph are now available to build a late 19th century, Generic East Coast Oyster Sharpie. The eleven sheets of CAD plans and the 277-page, step-by-step monograph are designed as an introduction to scratch building a small workboat in a miniature version of a full-size board for board build. This project was created primarily for modelers of intermediate level of skill or experience with special instructions for those with limited access to power tools. This project will also appeal to all workboat fans and those wanting a change from long-term projects. The project was designed and written for the NRG by William “Bill” Strachan with the plans done by Al Saubermann, both members of the NRG and the CT Marine Model Society. Bill Strachan is a retired Enrolled Agent and an avid miniaturist. Early in the 1980’s he was the Comptroller for an architectural firm and had the opportunity to build all their architectural models. In the 1990’s he joined the SW FL Shipmodeler’s Guild. He served the Guild as Bosun and Newsletter Editor. Retirement meant moving to CT, and he became Secretary and Newsletter editor for the CT Marine Model Society he also served as Vice President of CMMS until last fall. Bill and his wife Sue live in Wolcott, CT. Al Saubermann is a retired physician whose career in academic medicine spanned 45 years. He's been building model ships for over 35 years including scratch building for the last 10. He recently completed a board model of the USS Peacock (1813) built from the original plans conserved in the National Archives. He currently serves as Secretary for the Connecticut Marine Model Society. Al and his wife Olga live in Deep River Connecticut. Plans from Mystic Seaport and the Mariners’ Museum and books by Howard Chapelle and others are the reference sources for this 3/4” = 1’0” scale model, and presents three options to choose from to complete your model. The 277 page, monograph contains 441 color photographs and diagrams to guide the builder. Referenced and quoted sources are footnoted for the modeler and a bibliography is provided. The monograph is provided as a free download from the NRG web site. Ordering information is on the NRG web site. The plans are shipped rolled in a sturdy box. The monograph is also available on a USB flash drive for an additional charge.

- 14 replies
-
- 19
-

-
Wooden Mallet for Chisels
kurtvd19 replied to ChrisLBren's topic in Modeling tools and Workshop Equipment
Not unless you are working at a large scale - Like 1:1. A mallet helps when making deeper and wider cuts than on almost any model - unnecessary for the fine work we do on models. Kurt -
Noted riverboat modeler Glenn Hensley - 1919-2018 – passed away recently and was buried with full military honors on February 16 at Jefferson Barracks, MO. Glenn was a WWII Combat Photographer in the China-Burma-India Theater of Operations. Several of Glenn’s riverboat models are exhibited at the University of Missouri-St. Louis' Mercantile Library. His models also reside in the Smithsonian Institution and Mystic Seaport Museum. It was reported by the St. Louis Admirals R/C Model Boat Club Commodore Jane Benefield, that Glenn was laid to rest down by the river under the shade of trees. Glenn had been a member of the St. Louis Admirals R/C Model Boat Club for many years but had not been active for several years. I had the opportunity to get to know Glenn back in the 80's and to see his models prior to their going into the Mercantile Library and after they were moved there into very nice settings. If you are in St. Louis and interested in riverboats the Mercantile Library has many models as well as extensive research materials on just about everything you might want to know about riverboats. Kurt
-
I agree with Eric about hulls always being painted. I have also seen black hulls but white was certainly the most common. Kurt
- 599 replies
-
- 4
-
-
- sidewheeler
- arabia
- (and 4 more)
-
Somebody once said this about making money as a model builder "You can make a small fortune as a model builder. However, you must first start with a large fortune". Whatever you charge make sure you have a contract and that you get a substantial deposit - a minimum of 1/3 of the final figure - before you start anything. The deposit has to cover all your expenses and some profit just in case the buyer drops dead or declares bankruptcy. Kurt
-
Airbrush question
kurtvd19 replied to Antonio Vasquez's topic in Painting, finishing and weathering products and techniques
The nice thing about over spray from acrylics is that it is dry before it settles onto anything and is just dust to sweep up or brush up. The air pressure, nozzle pattern, how close to the subject the brush is held all contribute to over spray - if any. I use a spray booth but before I used it the table top was dusted off w/o any falling to the floor. I use the spray booth more for the lighting than over spray collection. All of my comments apply to acrylics - solvent based paints should only be sprayed in a proper spray boot with electrical components suitable for combustible environments. Kurt -
Eric: I know I have more than this one photo showing construction of riverboats but I came across this one tonight looking for something else. Note the planking and the under deck supports. Kurt

- 599 replies
-
- 7
-
-
- sidewheeler
- arabia
- (and 4 more)
-
Dee Dee: Thanks for the offer, but I have a bunch of these. In fact I have just about decided to use them because after spending almost a full day machining 4 from brass I just am not happy that they look any better than this style. I am just about convinced that the angle of the horns isn't going to be missed in the model. I know that this isn't the first small sloop to be modeled and this style had to be used on those models as nobody sells anything much different. Thanks again for the offer and thanks to all who have pitched in. Kurt
-
Ryan: Right here on MSW we have the Triton Plans in the Work Group Projects that you can build a cross section model from or a full model - separated into two projects. Downloadable plans for the frames and keel pieces are accessible in the cross section area that will work for what you want to do. Access to the plans is only $5.00. You can see work others have done but the plans access section is only unlocked to you after paying the small fee. Once you have paid the fee this area is open to you so you can download all or part of the plans as needed - perpetual access. Kurt
-
Airbrush question
kurtvd19 replied to Antonio Vasquez's topic in Painting, finishing and weathering products and techniques
Over-spray is minimal. I use acrylics and the over-spray is dry before it falls onto the table top. A bit of newspaper catches it easily. Another advantage of acrylics is little to no odor. Solvent based paints are a different story and a spray booth like Hornet suggested is appropriate. Just be sure it's a properly designed unit with the fan being rated for use in a combustible environment. Kurt -
Roger: Thanks for pointing the article out for Ken. That's why I keep the annual index from the first SNL each year. I put each index into a 3 ring binder as well as on the HD of my desktop. Yet, I sometimes do just as you said - search the covers of the collection. Interesting thing about the restoration job. Only shortly after the boat was finished and delivered to the museum here in IL they somehow severely damaged the hull structurally when moving it on or off the trailer for it's first major showing and it's no longer on exhibit. the last I heard. It's about 10 miles from my place and have never been able to go see it - planned to give it a look but they took it out of public view before I got the chance. Kurt
-
Ken: It's a two-part article. Started in Vol 54.1 and concluded in Vol 54.2. I can provide a pdf copy of the article. We sell back articles in the NRG store for $2.50 each - downloaded as pdf's - but this one isn't posted yet. Contact the NRG office about payment & I will get it sent to you. Kurt
-
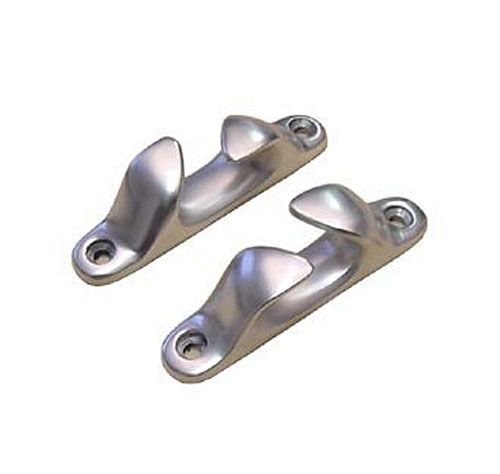
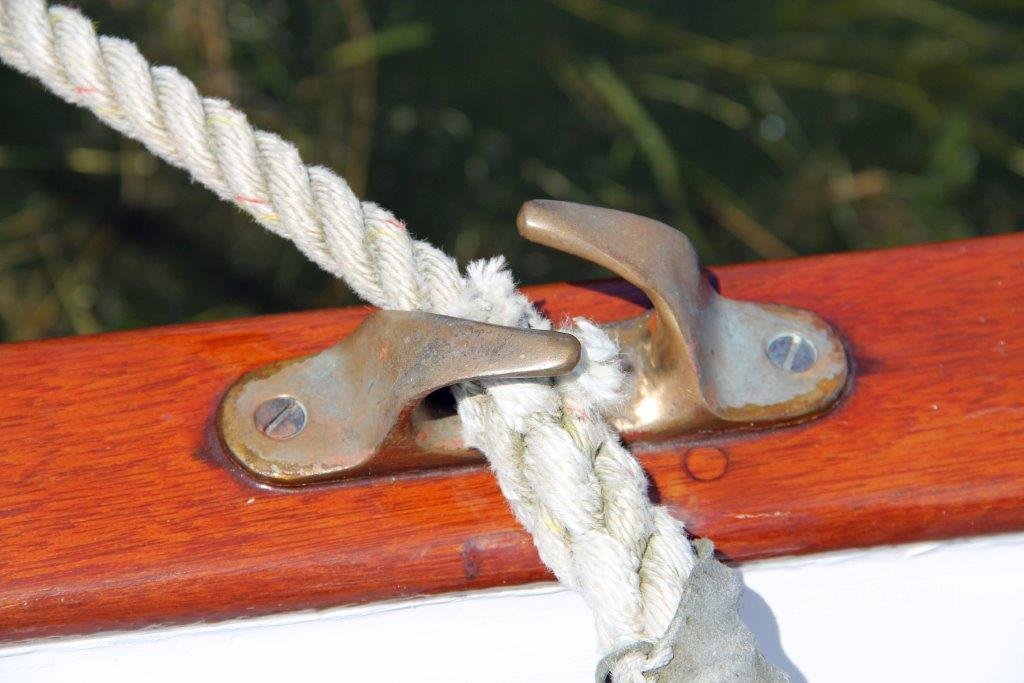
The Panama Fairlead is not the fitting needed - wish it was. It's almost square when viewed from the side and the part I need is very low profile from the side - full size they are only 5 1/2" long by about 1 1/2" to 2" high. Two full sized Panama Fairlead's would sink the 26' sloop I am modeling. I will be making up a master, then a mold and then cast, polish and plate the parts for the model. Thanks to all who have commented and provided help.
-
Nic: Yeah, I did too. Looks like it's time to make a master and then cast them. I thought about bending/twisting them like you did and adding a bit of low temp solder to the ends and filing to get a master but I think starting from scratch will work better. Kurt
-
Found a full size fairlead that's close. Looks like it's time to search through 40+ drawers of parts all in old manila 2" envelopes - I am sure I saw something close to this.
-
Thanks Jim. I think the panama fairlead that AOS has is for a Panama Canal rated ship - it has a almost square profile while this chock is much lower profile. I have thought that I will have to cut and modify a closed chock and make a mold to cast copies. I have an inquiry in with the boats owner who's commissioned the model - I sketched and measured the fitting but I can't read my writing (unusual as I normally have very good lettering - but went cursive standing on a ladder in the boat shed). Thanks.
-
I need to identify this fitting from a 26 ft sloop. It's some sort of chock or fairlead. The next question is does anybody make one of these fittings so I don't have to scratch a master and cast them? Need some about 3/8" to 1/2" long. I checked Bluejacket and Model Expo and some model yacht suppliers. No go. Any help would be appreciated - even if they were made by a defunct mfg as I inherited a load of old fittings from AJ Fisher, Baucher (sp), etc. - drawers full...if they made some I will search through the stuff I have. Thanks, Kurt
-
Welcome to Sherline as a new Sponsor of MSW. They have set up a special landing page for ship modelers. Thanks Sherline for your support. Kurt
-
The first build log - tune in tomorrow? Kurt
- 47 replies
-
- 1
-
-
- queen anne barge
- Syren Ship Model Company
- (and 1 more)
-
Welcome Master Korabel. Welcome to the NRG/MSW family of modelers. Kurt