HOLIDAY DONATION DRIVE - SUPPORT MSW - DO YOUR PART TO KEEP THIS GREAT FORUM GOING! (Only 13 donations so far - C'mon guys!)
×


Jeff-E
-
Posts
699 -
Joined
-
Last visited
Content Type
Profiles
Forums
Gallery
Events
Everything posted by Jeff-E
-
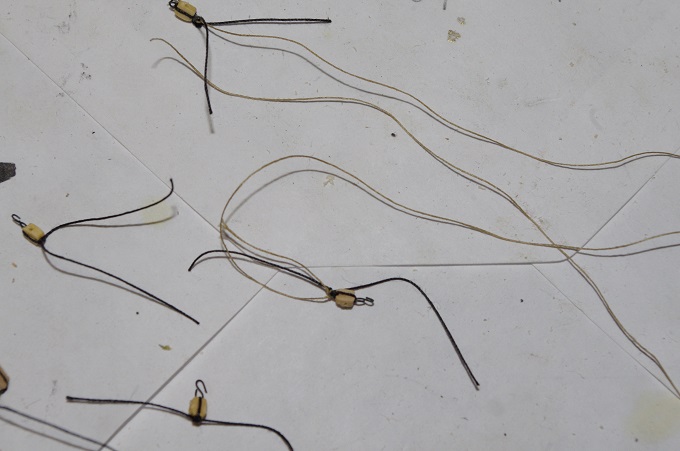
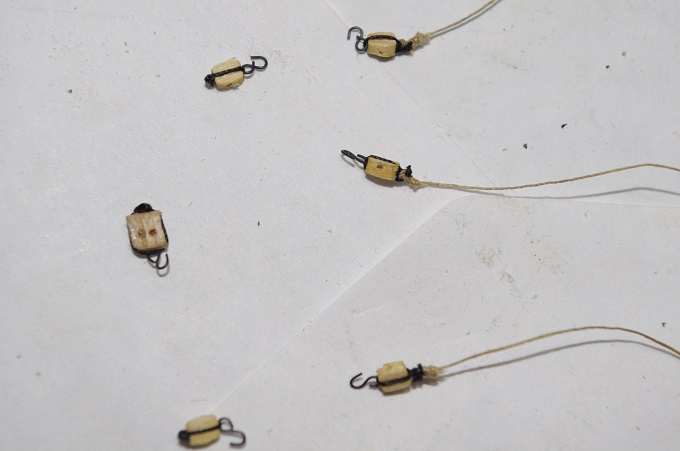
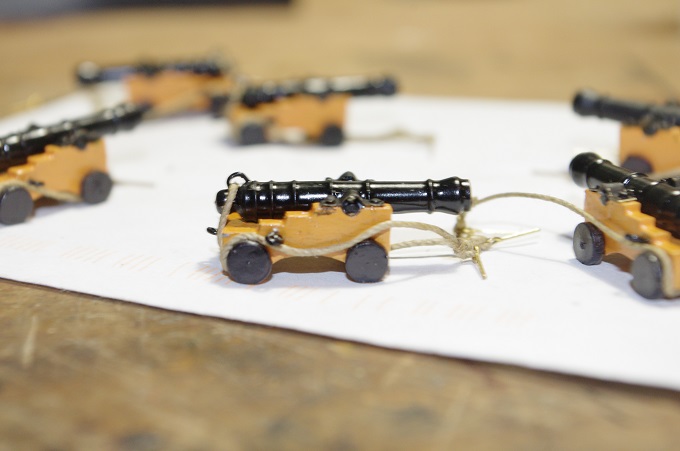
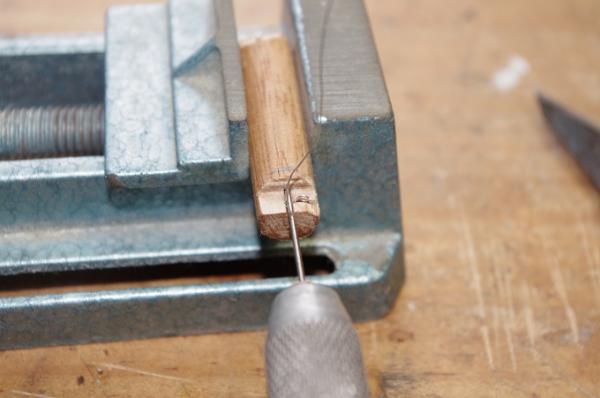
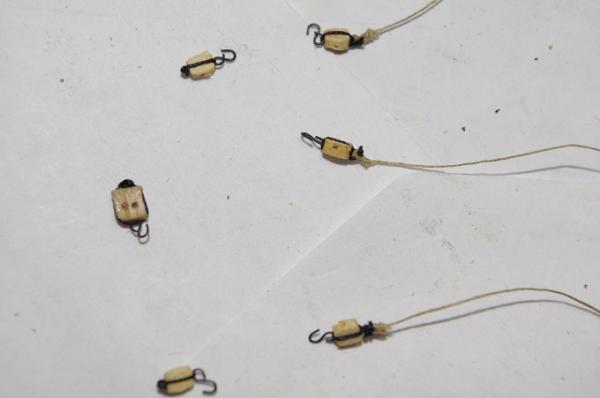
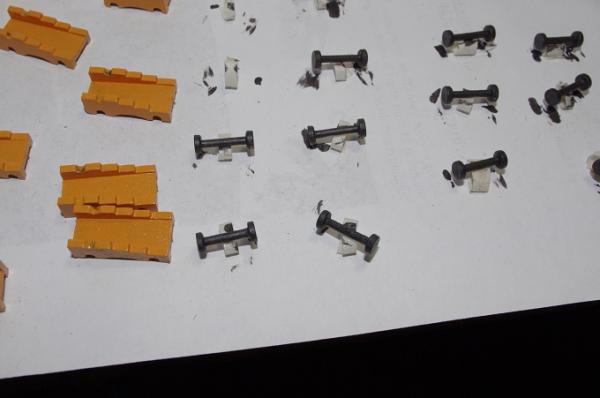
The next step was to make up the tackle for the guns. The blocks used for the guns are 3mm 2hole blocks and 3mm single hole blocks for the guns on the Lower and Middle Gun Decks and 2mm single hole blocks for the upper gun deck. For the train tackle on the Upper gun deck I did use 3mm 2 hole blocks filed down to 2mm none these blocks are not supplied in the kit. I made up a hook for each block out of 0.25mm wire using a very convenient jig which I found in 'wooden tips and tricks ad making jigs' forum on this site by G.T.M. and I thank him very much for posting his idea, he made his out of a piece of brass rod , I made mine out of a piece of 8mm dowel as I did not have any brass rod but it still worked really well and produced a consistent size hook. The first three photos sow the jig and the resulting hook. The next two photos show the hooks tied to the blocks and the last photo shows a jig I made up to reeve the blocks so I would just have to hook them to the cannons on the model and adjust the tension


-
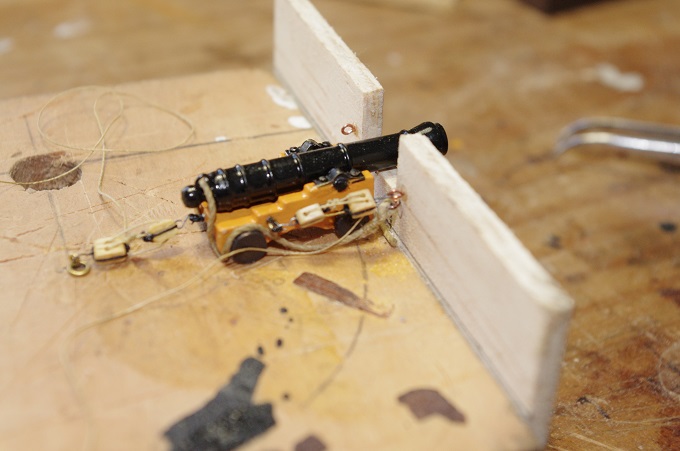
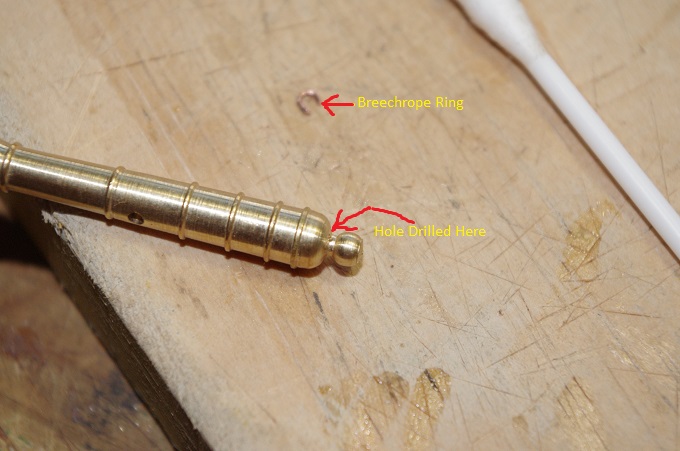
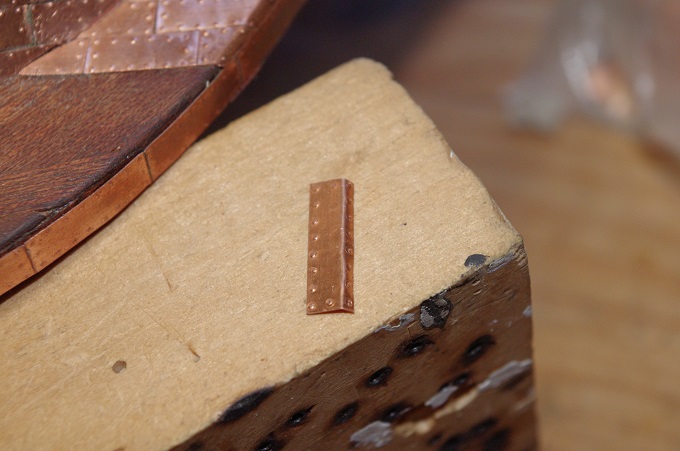
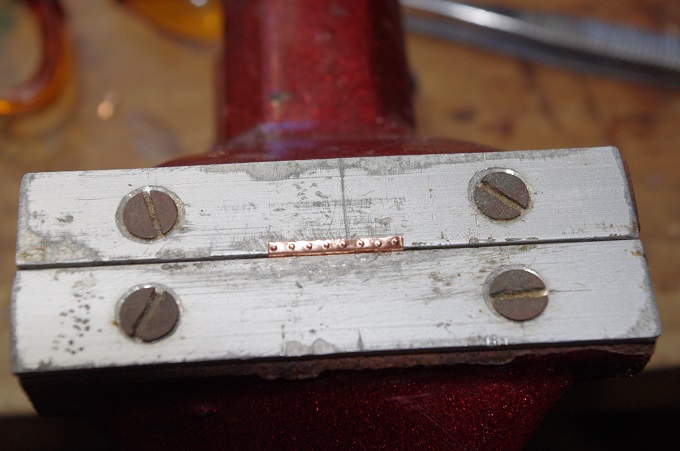
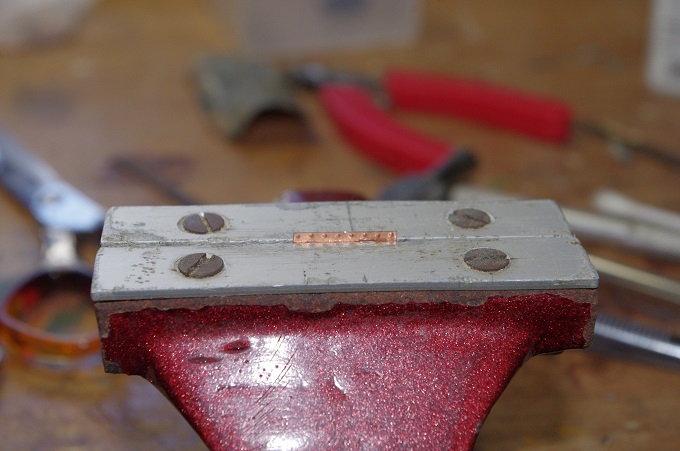
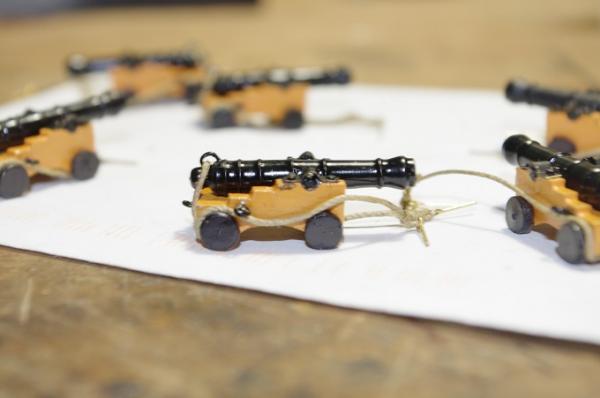
Hi All, Next came the barrels, as they are not supplied with rings for the breech ropes I had to make them, I used the opened eyes of a 2mm copper eyebolt. A 0.5mm hole was drilled into the back of the barrel in front of the pommelion and the end of the eyebolt was epoxied into it. The barrels were then painted and fitted to the carriages. The last photo shows the breech rope fitted to the gun

-
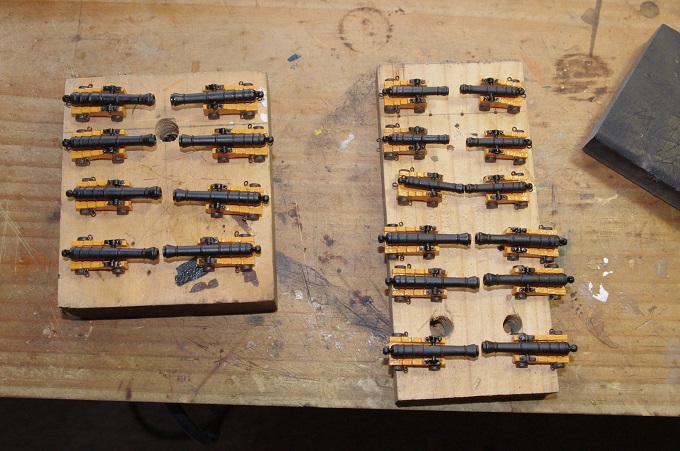
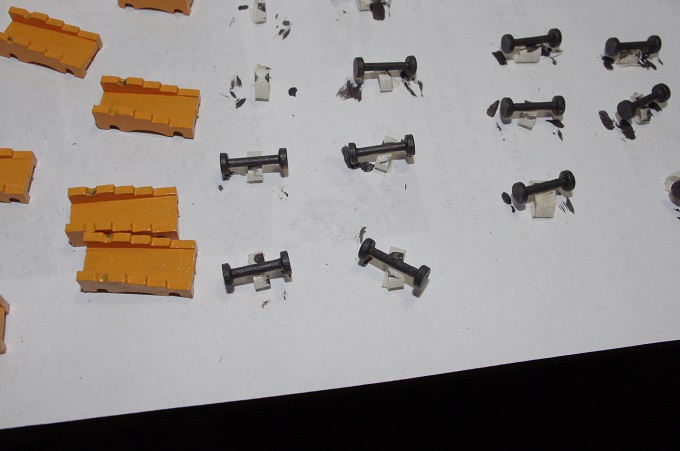
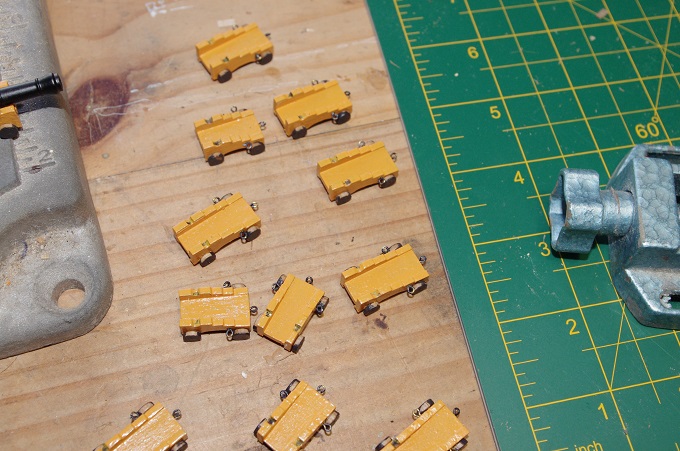
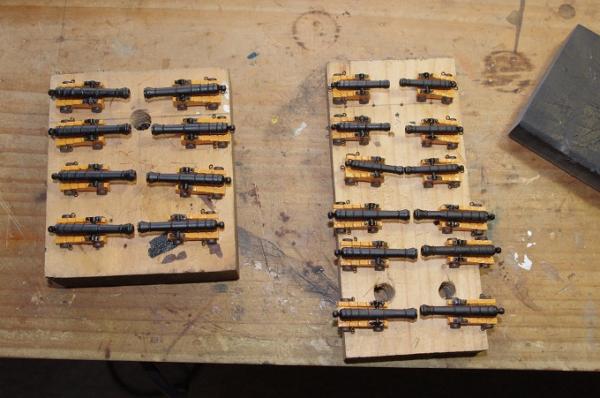
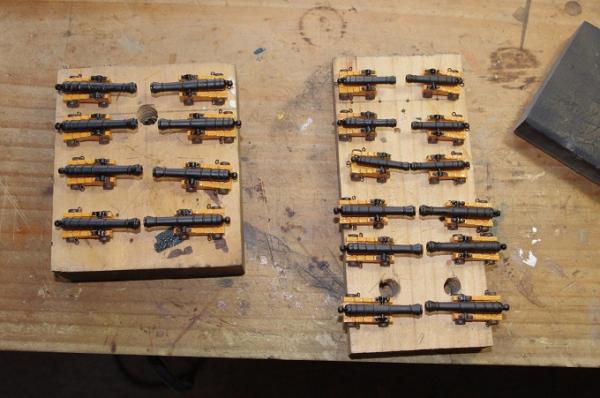
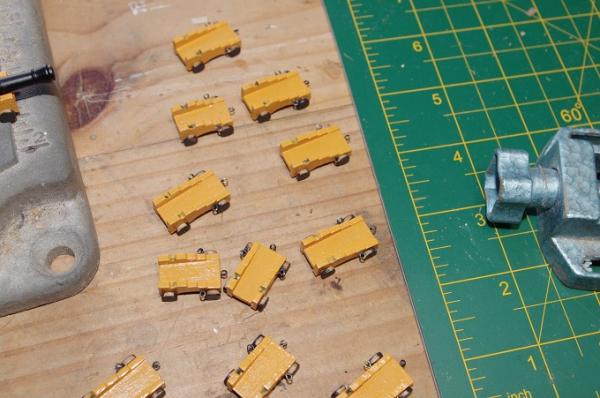
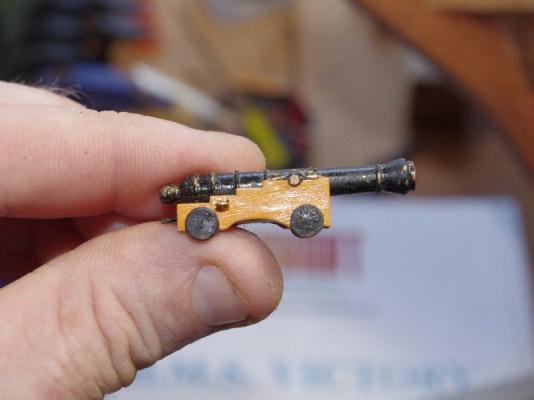
Hi All, After the roundhouses where fitted the beak head deck was left while I went back to complete the lower gun deck. the only thing left to be fitted to this deck was the cannons and I had left these off as I was afraid of breaking them off as they will stick out of the gunports. I decided to make up all the cannon carriages and mount the barrels to them in one go. The carriages were assembled for three laser cut parts each and then painted. One thing to note is the lower deck of the carriage is a wedge shape and the wide part goes to the rear. The wheels are supplied as one piece and these where stuck down to a piece of paper and spray painted. The wheels were glued to the carriages taking care to fix the wider wheels to the rear, as the difference is slight I did manage to glue the wider wheels to the front a couple of times but caught the mistake in time to rectify it After they were dry holes were drilled and eyebolts fitted for the gun tackle

-
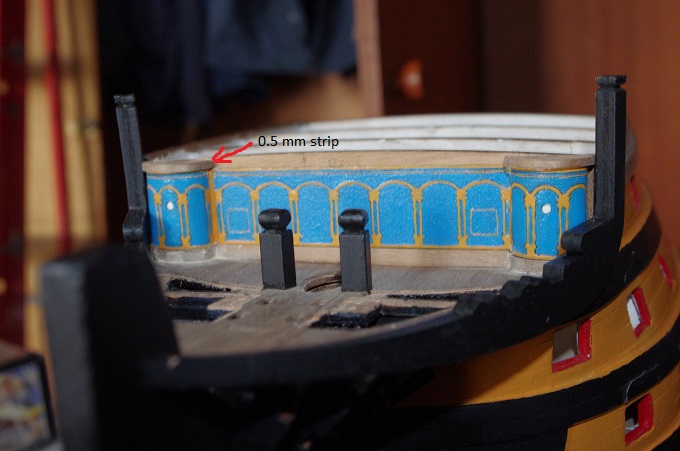
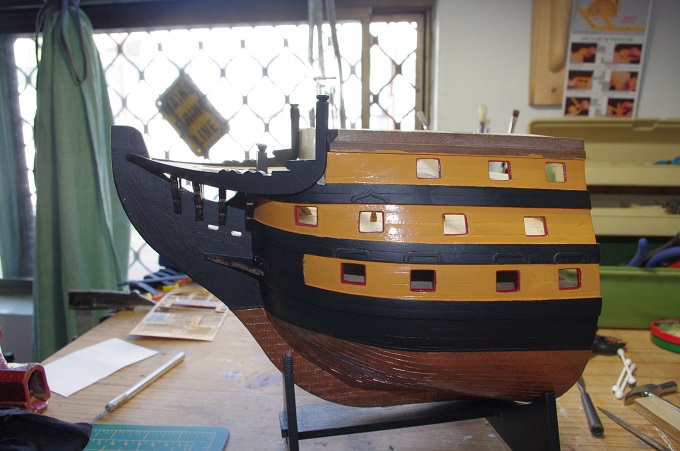
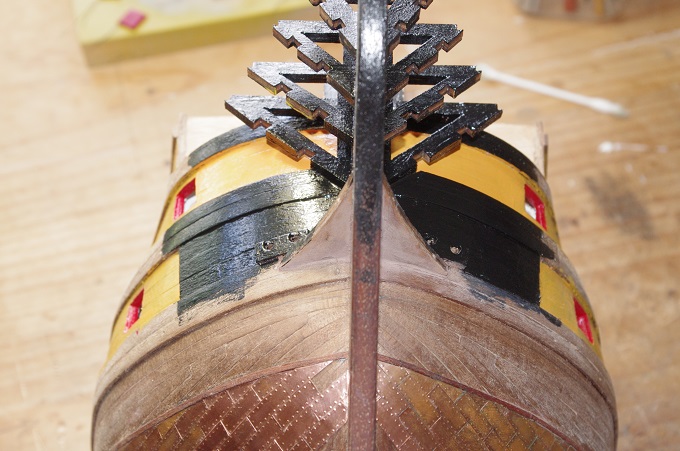
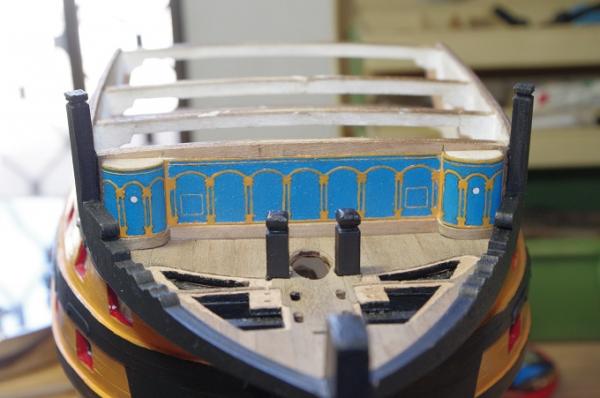
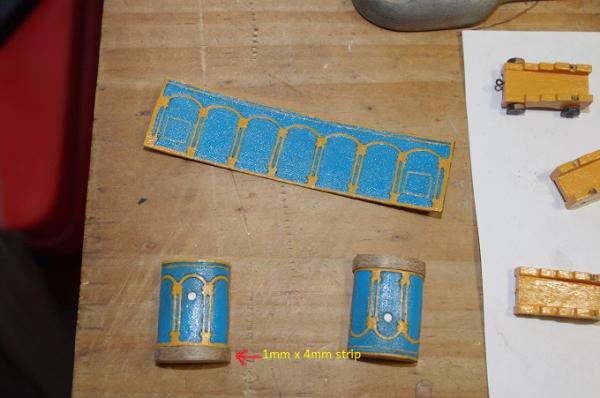
The roundhouses and the facia were then glued into place and another piece of 1mmX 4mm strip was glued below the facia between the roundhouses. In the second photo you will notice the supplied part that is supposed to go on top of the roundhouses. I did not use this part I cut the ends off and glued them on top of the roundhouses and glued a piece of 1mm X1mm strip between them and glued some 0.5mm strip around the edge of the ply parts. Then gave all the bare timber a coat of paint


-
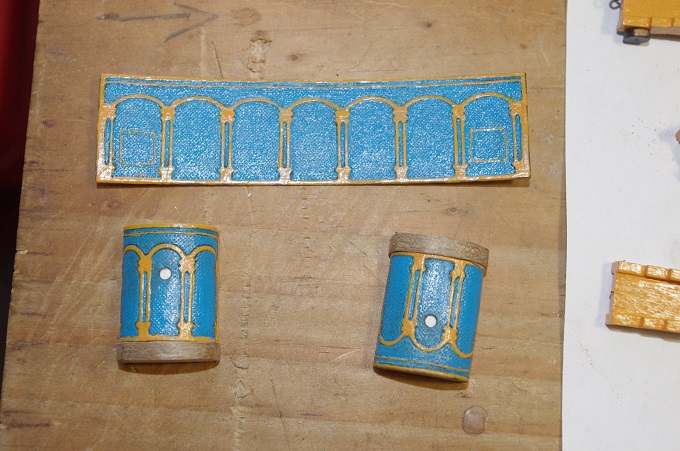
Hi All, The stage was to build the roundhouses on the beak head deck these were made from 2 half round pieces of dowel and 0.5mm ply etching which was bent around the dowel and glued. The ply was coloured gold and black so it had to be painted. I used the mantua yellow ochre and Tamiya sky blue, which I think is a pretty nice combination. When the ply was fixed to the dowel with the top edge aligned with an edge of the dowel a 4mm gap was left at the other end this was filled with a 1mm X 4mm plank

-
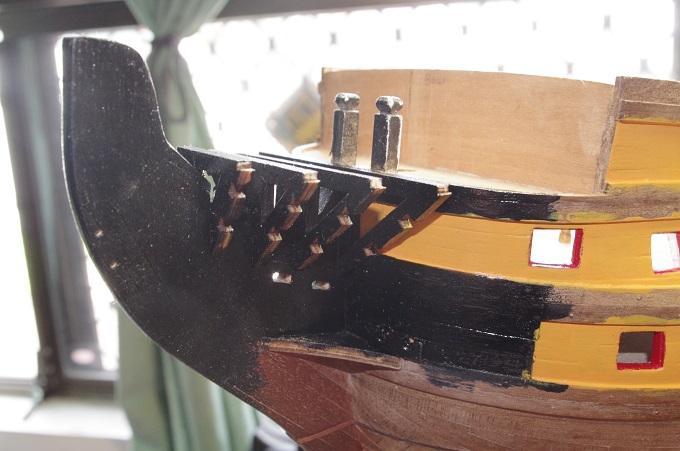
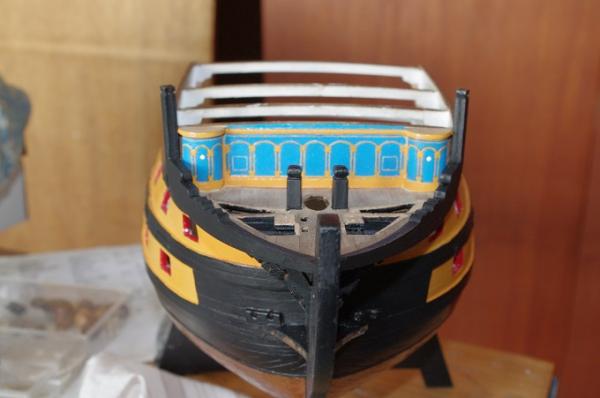
Hi Slog and Antony, Thank you both for your kind words Welcome back to this log Captain Slog Antony, I think with your skills you could build this model from scratch Once the head rails were dry they were painted as the next lot of photos show. I forgot to mention in the previous post that the drip mouldings over the gun ports were fitted the supplied parts were shaped brass strip which was epoxied onto the hull and then primed and painted black


-
The next lot of photos show the Head Rails being fitted. they where fitted one at a time and allowed to dry for 24 hours That's all for now I will post some more soon


-
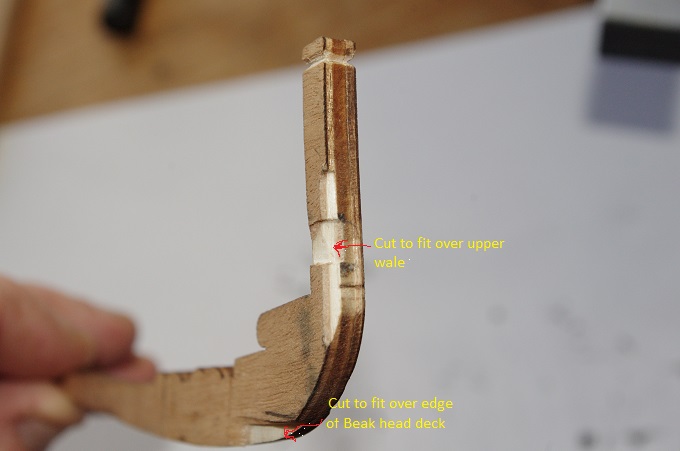
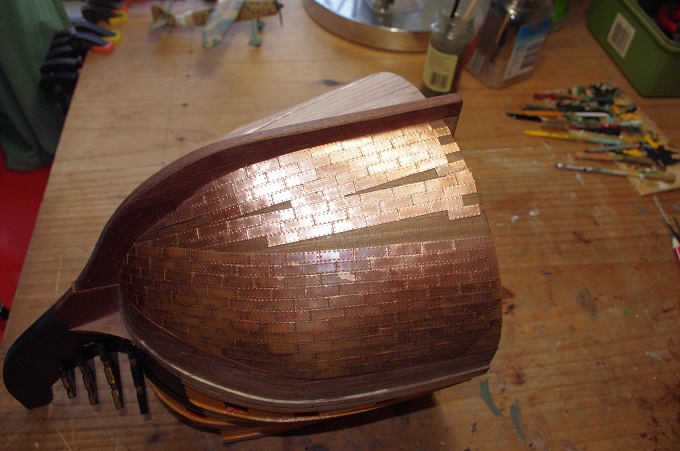
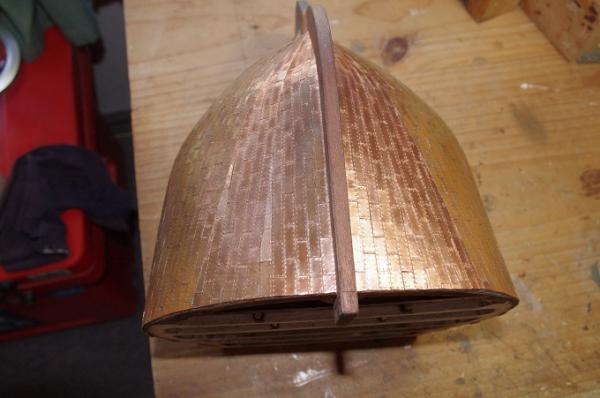
Hi All, The last post shows the completion of the coppering it was a fairly straight forward process except for the fact that it was quite time consuming but I am quite pleased with the result So on with the next stage of the build, and from here on I hope to keep it in sequence . The main rails for the beak head deck are laser cut from 5mm plywood and although it looks like the deck has straight edges there is a slight curve that theses pieces have to be bent to follow, unfortunately I don't have any photos of the jig I made to bend these parts but I can briefly describe how I did it. Firstly I placed the head rails in tub of hot water to soak for about 30 minutes then I traced a template of the deck on paper and transferred this onto a piece of 10mm plywood and hammered nails along one side of the line. When the parts had finished soaking I placed them against the row of nails and hammered in another row of nails to hold the part in place along the line. The parts where left to dry overnight. Once they had dried into shape they hade to notched out to fit over the top wale and the aft end of the deck as seen I the following pictures


-
Hi Kester, Thank you for your kind words. It worked quite well and I was happy with the result. The next pic shows how I shaped the plates to the curve of the keel, I stuck a piece of masking tape where the plate was going to go and trace the outline in pencil and then transferred this to the plate and cut around the outline this gave me rough profile of the shape this was then cleaned up with a file and fitted in place The next pic shows the coppering of the starboard side of the keel completed Sorry about the flash reflecting off the plates. I thought I had some more pictures of this stage but I can't find them they may have been lost when my old computer crashed
-
As I had planked the keel and stem post the plates where not wide enough to cover the edge of the keel so I had to lay the plates in the centre of the keel and then bend a plate on either side of the edge to cover it I found it easier to pre bend the plates and adjust each one as needed before gluing them on The first three photos show how I bent the plates Which no matter what I try I can not get them in the order I want them sorry


-
And they didn't come out in order the first Photo was supposed to be last
-
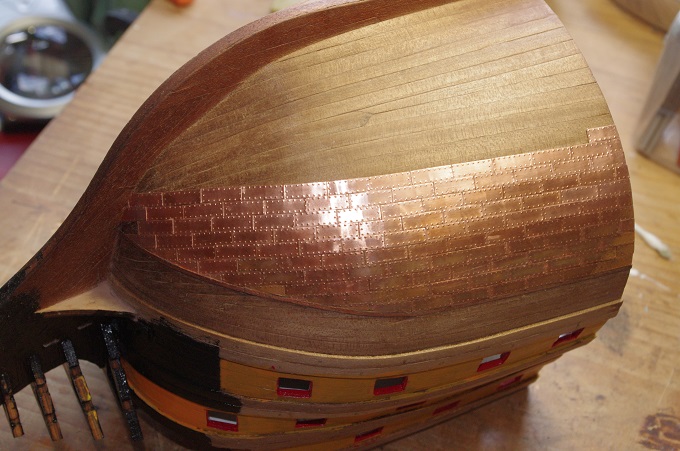
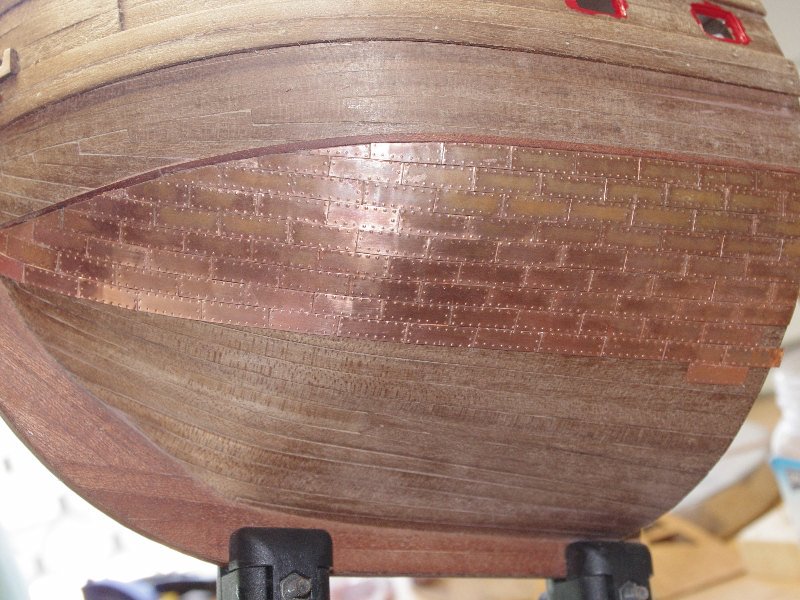
Hi All The copper plating was now continued from the keel up the last line of plates laid. The next two photos show the starboard side almost complete and the start of the plates along the keel on the port side. This process was fairly straight forward the hardest part being cutting the triangular shapes to fill the gaps. The last Photo, hopefully if they come out in order, shows the coppering on the hull completed the next stage is to copper plate the keel and stem post

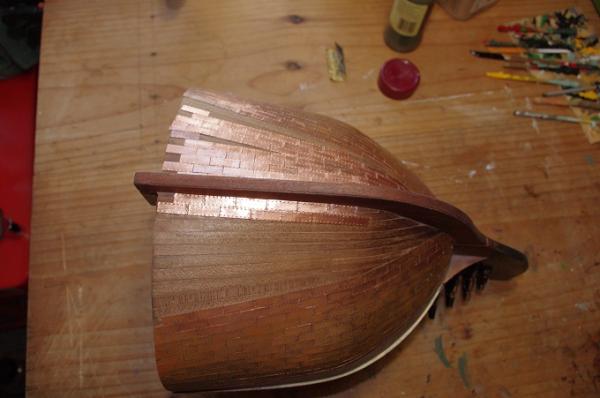
-
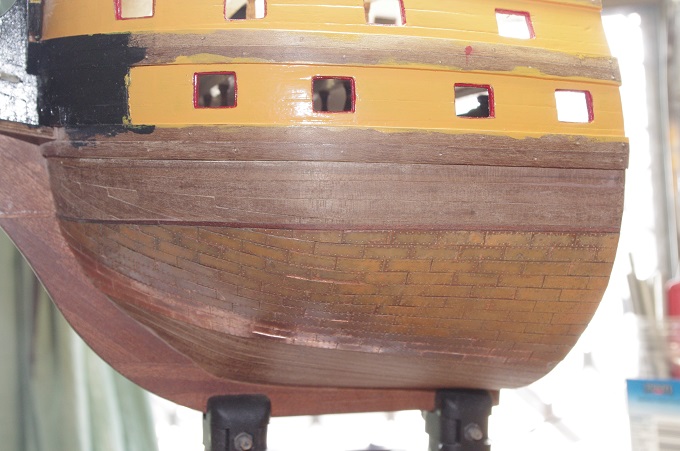
Just a quick note I was sorting through my photos and realised that I have posted the fitting of the beak head deck out of sequence with how I constructed the model, the deck was not fitted until after the copper plating was completed.
-
Here is another shot of the beak head deck fitted and some photos of the copper plates. The first photo of the copper plating shows the plates finished to the gore line. The next line of plates will come form the keel up to this line


-
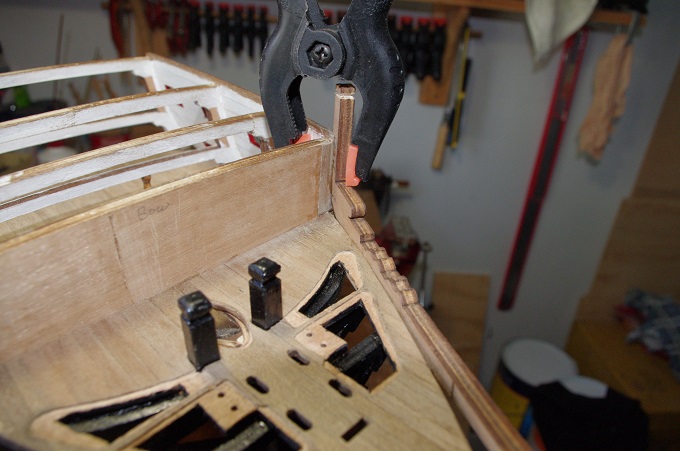
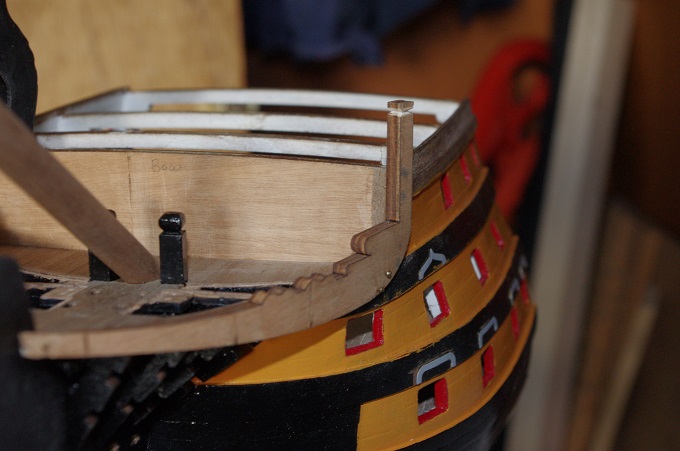
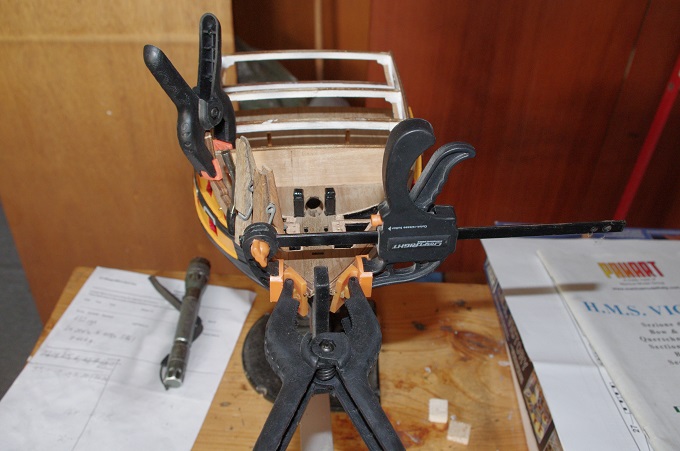
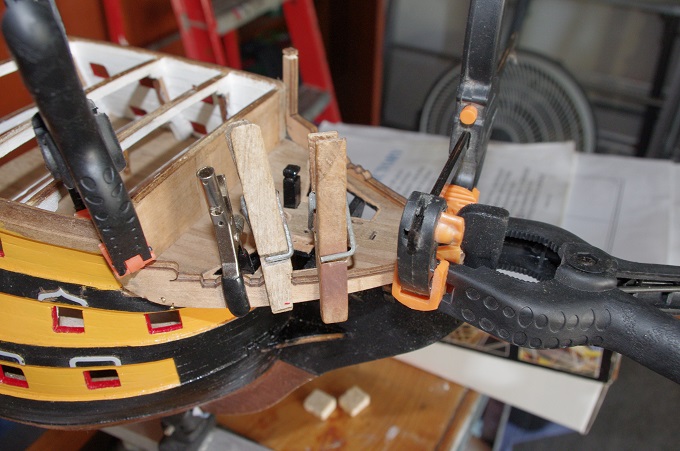
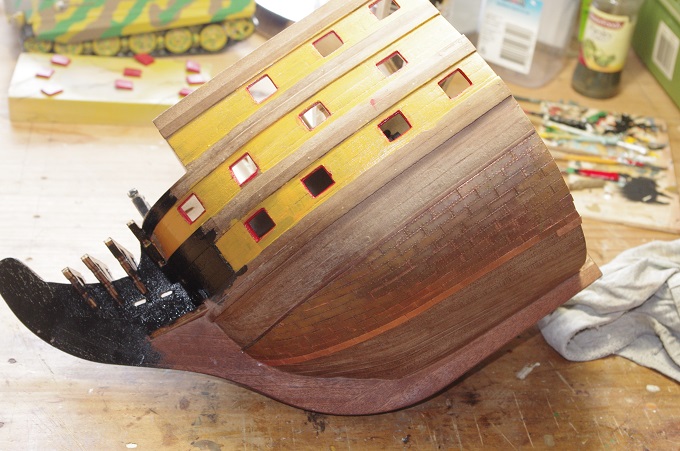
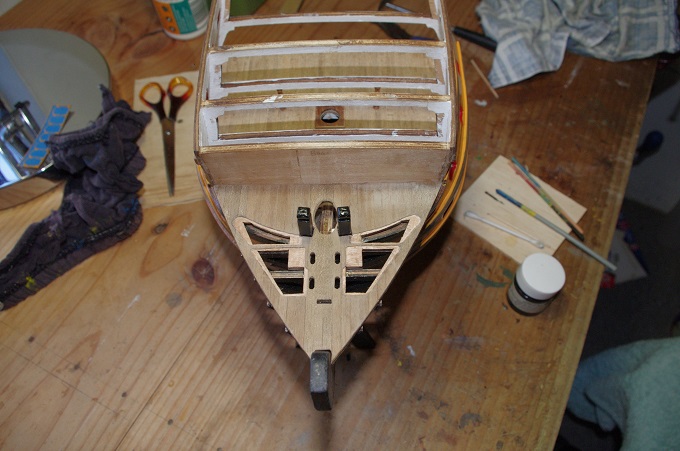
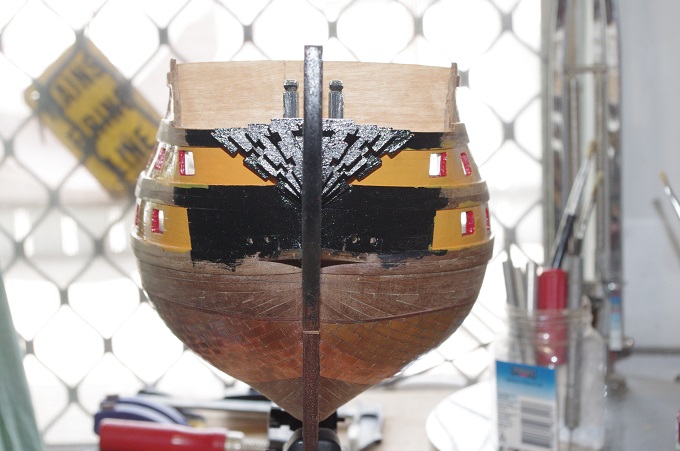
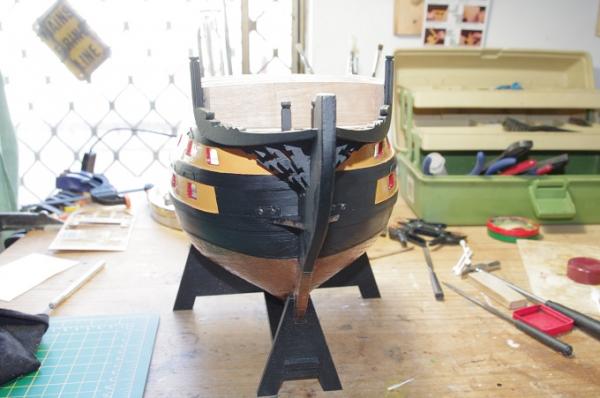
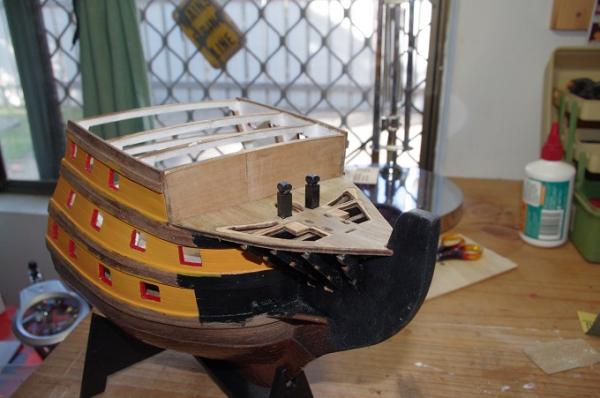
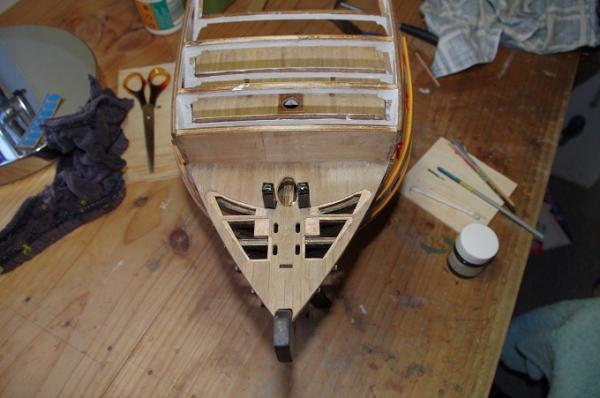
Hi All, After completing all that could be done to the beak head deck off the model, including painting the underside black in between the frames, it was fitted to the model.
-
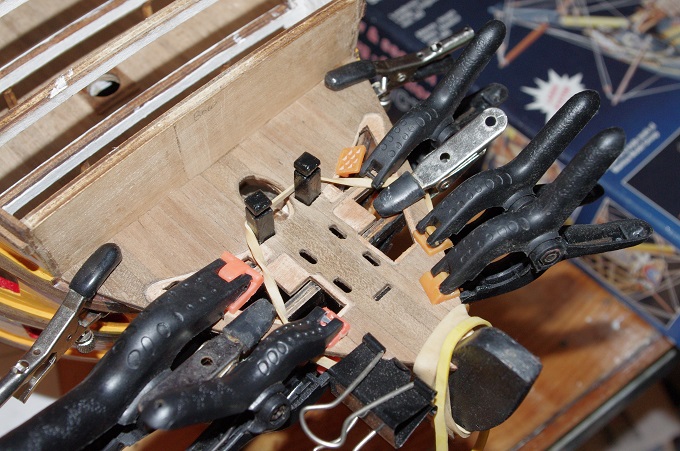
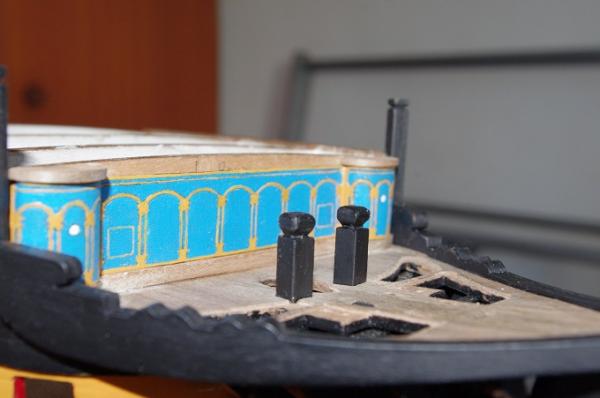
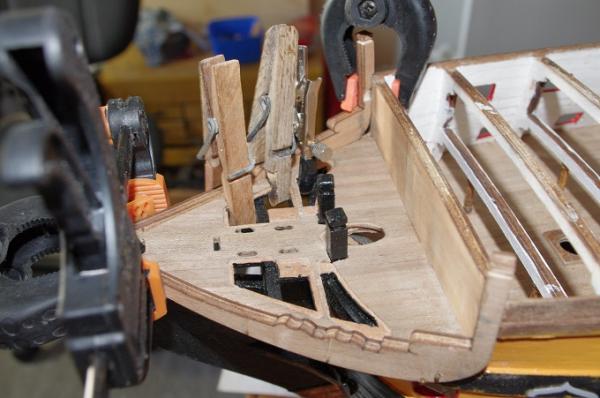
The next two pictures sow the cut out deck and the gratings fitted. Note they are only dry fitted and will not be glued until the bowsprit gammoning is done.

-
I have been away too long I'm having trouble loading the pictures in the order I want them if I remember right the pictures used to appear in the order you upload them but now they will jump into different positions and I cant work out how to load pictures into the middle of a post that is to add text before and after the picture. I have had a look at Dan Vad's "how to add pictures to your post ' but the edit button to start the process is gone Any help greatly appreciated
-
Hi Nils and Anthony, Welcome back to this log and thankyou for your kind comments
-
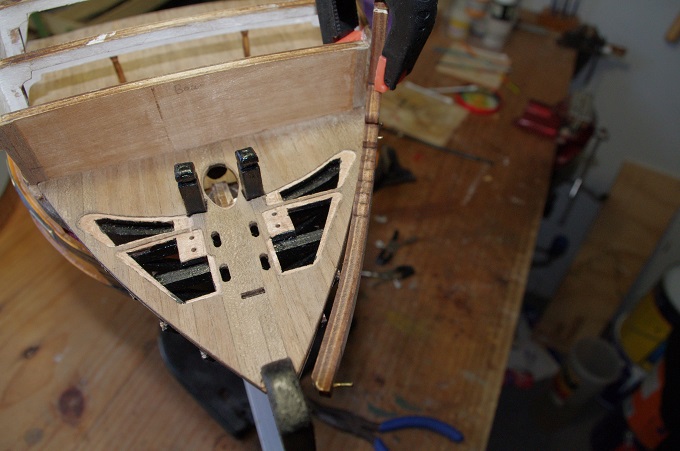
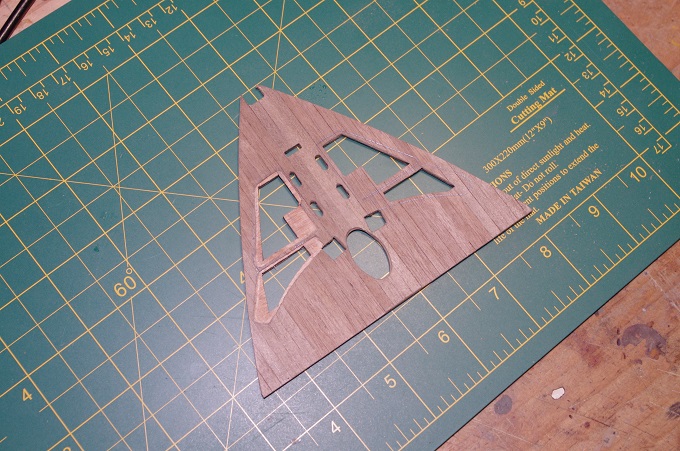
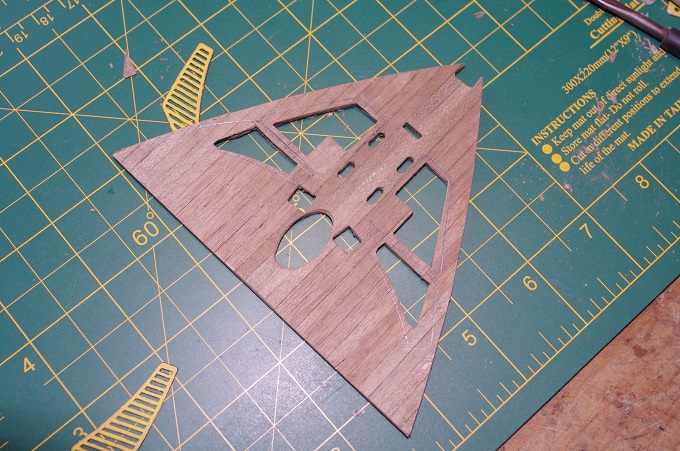
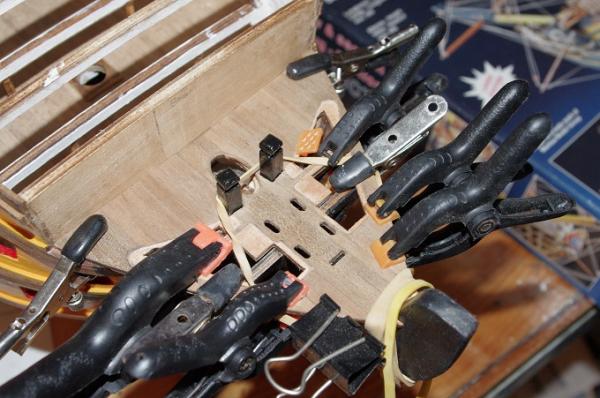
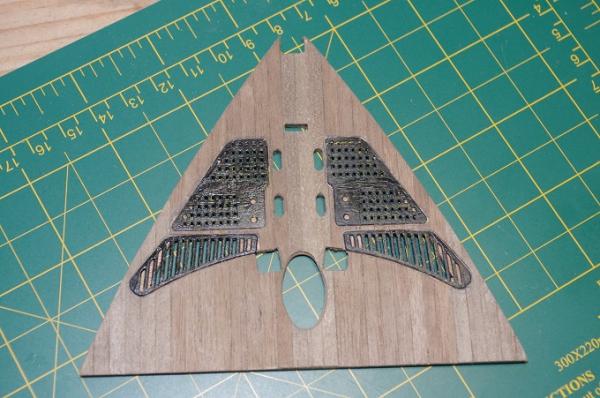
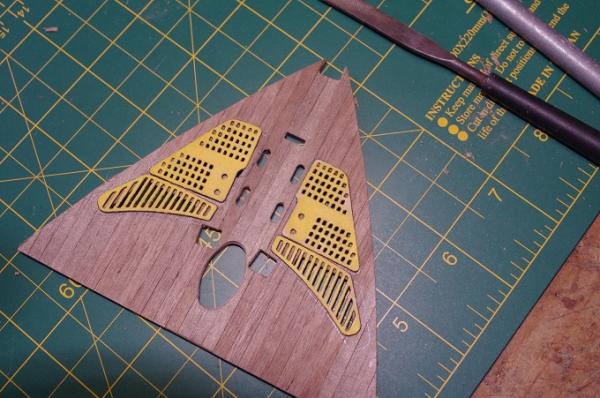
Hi All, The next step was to plank the beak head deck, this was done off the model so both sides could be planked and the underside pained before it was fitted. The gratings supplied for this deck are etched on a 0.5mm ply sheet, see the first photo below. To allow the gratings to sit flush I marked where they would fit on the deck and then carefully cut away the deck planks to fit them.

-
Hi Kester, Thank you for looking in again I am looking forward to restarting this log
-
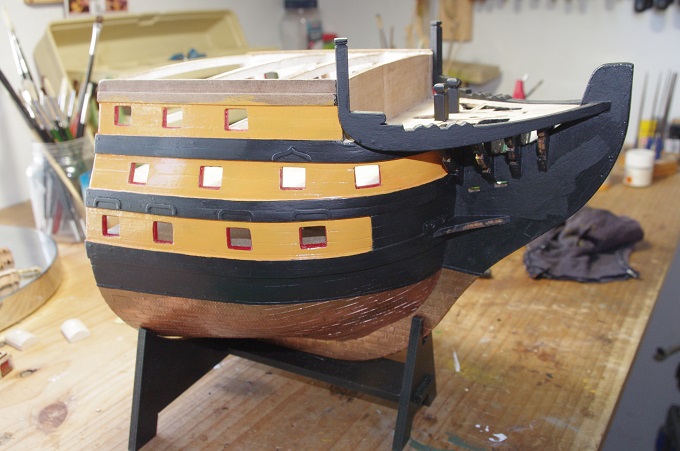
Hi All, It has been a long time since I last posted on this site, I think around 18 months. I had a break from modelling and some personal issues to deal with plus my computer decided to up and die which involved a lot of mucking around to retrieve the data on the old hard drive. I now have an external hard drive that I save everything too. I have managed to do some work on the model in the last 12 months and I have taken heaps of photos of the work completed. I will endeavour to add a few pictures each day on the work I have completed until you catch up to where I am currently with the build. So here goes The first photos are of the painted Beak head frames and the upper ochre bands. The colour I ended up choosing for the bands in between the wales was yellow ochre made by Mantua and supplied by Modellers Shipyard, I know some of you will think it is a bit dark but I think it contrasts really well with the black I will post some more pictures soon. Please be patient as I have a new image resizer that I'm still getting used to


-
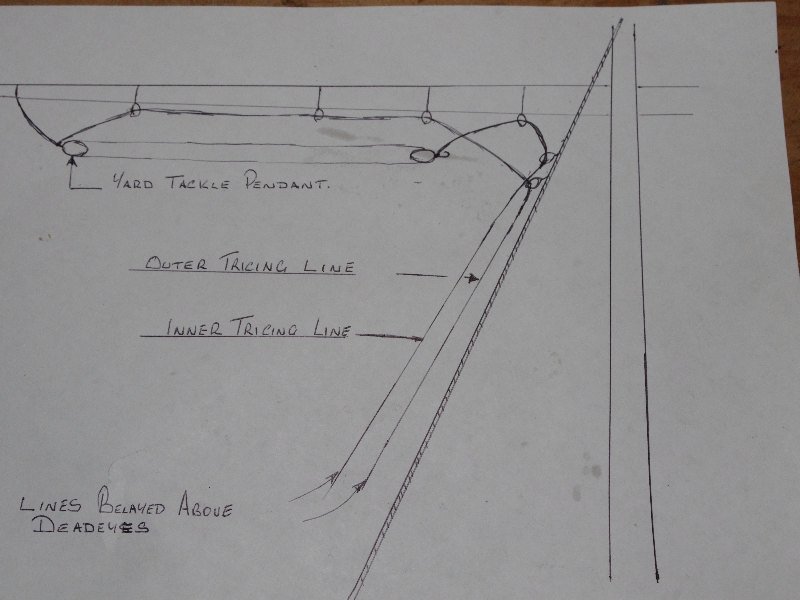
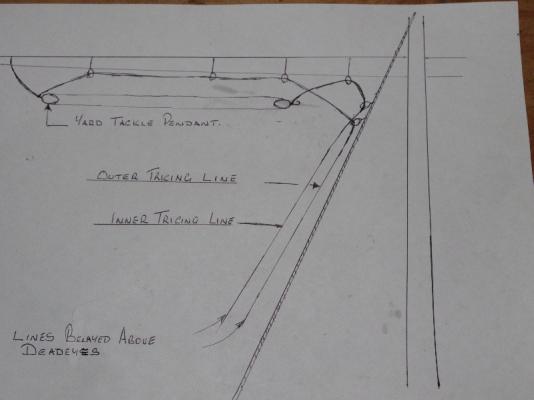
Hi Grant, Excellent work on making your long tackle blocks, a great technique and thank you for sharing it. To your query on tricing the yard tackle pendants I have read lonridges version and also looked at Mckay's book, the only two refeerences I have of this shiip and betwwen the two of them I have come up with a theroy, proably wrong, on how the pendant was triced up. Longridge says that when the pendants were not in use the tackles were triced up under the yard. In McKays rigging schedule he lists the inner tricing line as having Two 8" single blocks as part of it's makeup and the outer tricing line having four 7" single blocks as part of it's makeup. Putting both of these pieces of information together I came up with the following interpretation of how it might have been rigged The two lines would then belay at the points indicated in Longridges belaying plan I hope this helps and thank you for raising this interesting topic I have learn't a lot fom it so far
-
Hi Dragzz, Antony and Kester, Thank you all for your kind words and swift replies Dragzz - Are your gunports pre cut or do you have to cut them out in your kit after you have planked the hull Antony - Thank you, I will take my time doing the coppering. I will keep it in mind that they have it stock. Kester - I agree with you and I will give the yellow ochre a go and see how it looks
-
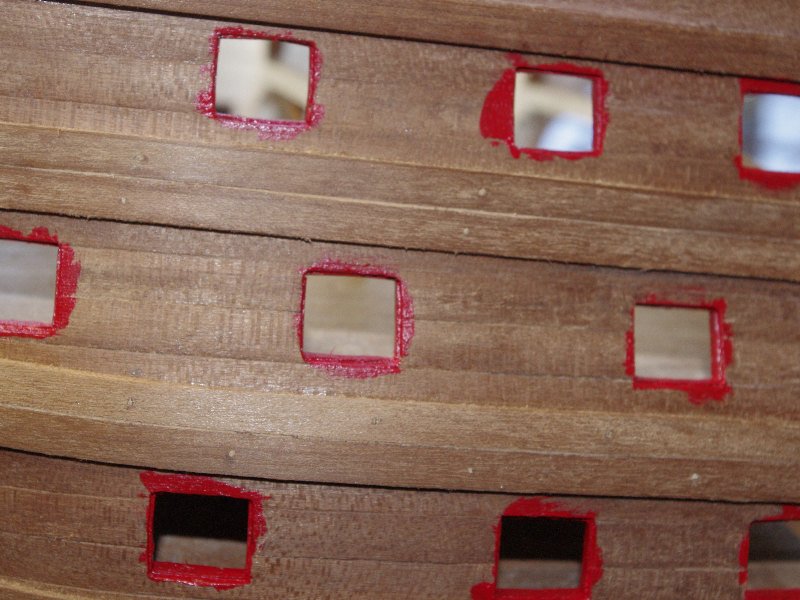
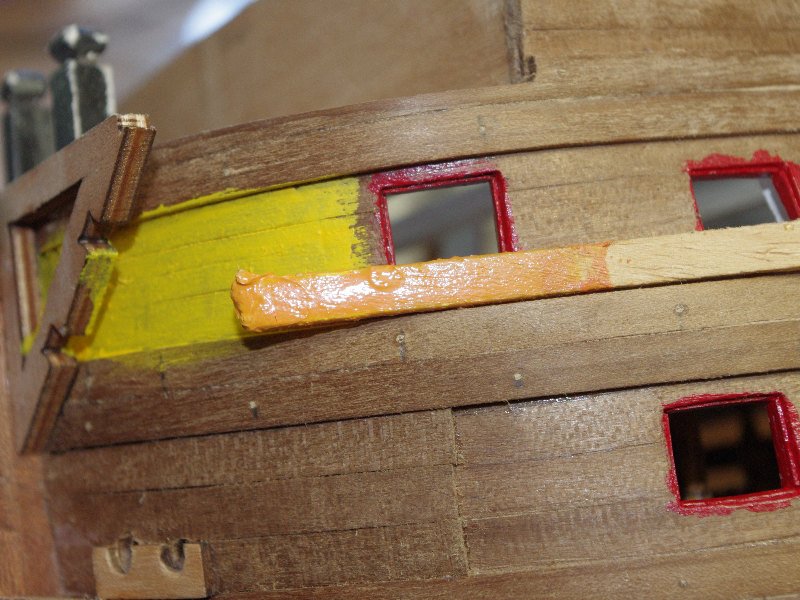
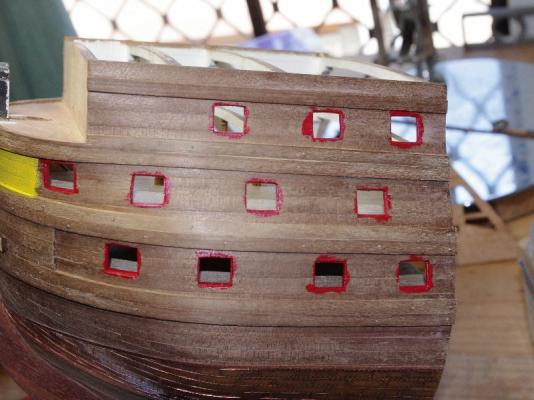
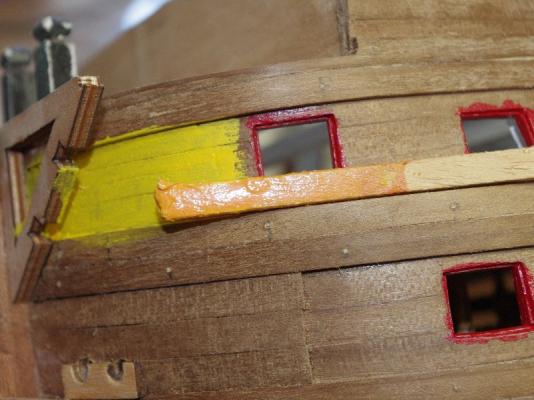
Hi All, I have made a bit more progress today. I have coppered a few more strakes on the port side only 2 to go till I reach my gore line on that side. I also came across a better method of making the plates fit when you come to cutting the angles where they meet the stem or the battern. It is in one of Keith Julier's books and he says to lay the plates but as they reach a point where they need to be cut , cut a full plate to fit the angle and the fill the gap behind it with a half or three quarter plate. It saves trying to cut very small triangular shapes some of which on my hull are only 2 or 3mm long and trying to trim them to make them fit neatly. I did skim through this article but did not quite understand what he meant but I do now and although I will plate the starbord side to match the port side I will be using this method from here on in. I have also fitted the last 2 beakhead deck frames and started to paint the area behind them and the gunports A note to anyone else building model if you do intend to paint it paint the space between the middle and upper wale at the bow BEFORE fittng the beakhead deck frames as this area is a bit hard to access after they are fitted. I should heed my own advice, I said in my last update that these areas will be difficult to get at A couple of pic's of the gunports, this is only the first coat Last of all I would like to ask your opinion of the colour for in between the wales.The first pic shows the colour as it is at the moment, this is Tamiya flat yellow, I think it is a bit bright. I am thinking of using yellow ochre, I think it is by Mantua, which is on the stick in the second pic. It is the same colour as I painted the test gun carriges I would order some yellow ochre from Caldercraft or Admiralty paints but the only supplier I know of in Australia, Minature Steam, is out of stock


-
Hi Dragzz, Thankyou for your kind words . The plates were supplied with the kit