HOLIDAY DONATION DRIVE - SUPPORT MSW - DO YOUR PART TO KEEP THIS GREAT FORUM GOING! (Only 13 donations so far - C'mon guys!)
×


Jeff-E
-
Posts
699 -
Joined
-
Last visited
Content Type
Profiles
Forums
Gallery
Events
Everything posted by Jeff-E
-
Hi Keith, Excellent work on the treenails and the flooring they look great. Glad to hear you had a happy and festive New Years,
-
Hi Kimberly, Glad to see you back at work on your model and looking forward to seeing some pictures Very sorry to hear about you and your sisters misfortunes and I hope all is well now
-
Hi Vivian, She is looking really great, nice neat work on the anchors and their rigging and I think your cannons turned out OK. You will soon be onto the real fun part, the rigging. By the way have your wooden deadeyes turned up yet? Keep up the good work and the pics coming
- 188 replies
-
- 1
-

-
- latin caravel
- artesania latina
- (and 1 more)
-
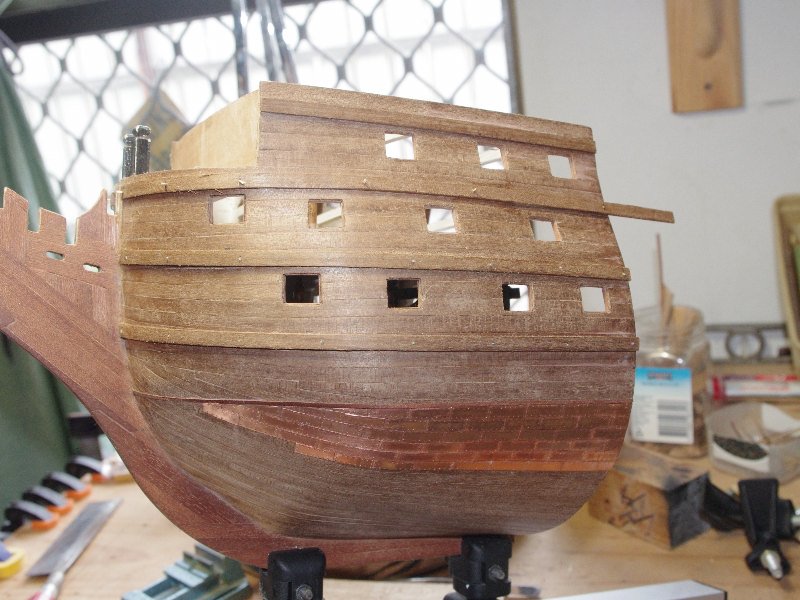
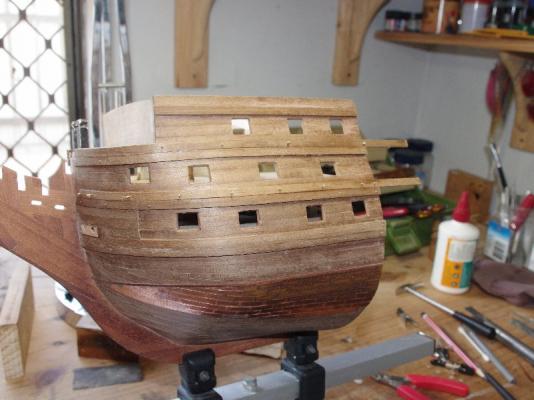
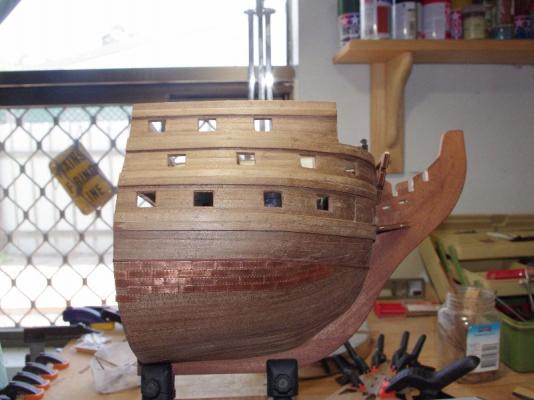
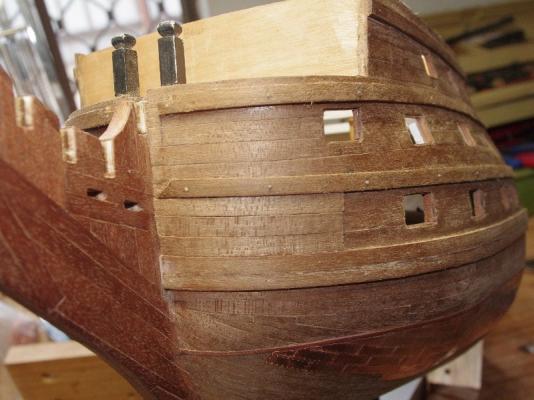
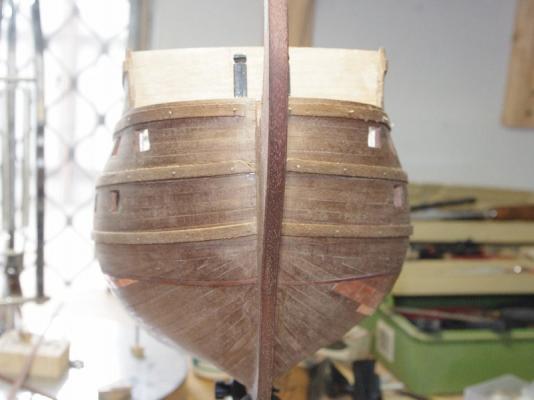
Hi Glenn, Grant, Slog and Mobbsie, Happy New year to all of you and your familys and thank you all for your kind words. Grant - I'm going OK with the coppering now that I have an easy way of cutting the plates but is does become a bit fiddly sometimes when there are very small triangular patrs to shape and fit. So I take a bit of a break from it to work on other parts of the bow Slog - I am very happy with how the wales turned out and I think they will look better when painted Mobbsie - I am 8 strakes down on the port side and 5 down on the starboard and I will be doing 12 on each side before coming up from the keel, so there is a bit to go . As I said to Grant above it does get a bit fiddly so I have been doing other things on the build to have a bit of a break from it, I hope to make a good run at it over the next few days so we'll see how go. After a bit of painting there's not much more I can do on the upper half as I need to turn the hull upside down to finish coppering the bottom
-
Hi Daryl, You have made a great start to your build and I must say a very nice fix on the warped frames. Did you consider coantacting the manufacturer or supplier to replace the faulty parts? I have seen from other builds on this forum that Occre are not to bad at customer service but can be a bit slow However looks like you are off to a great start and that you have a good plan on how to build the section I will follow with interest
-
Hi Ollie, Glad to hear you had a nice holiday in a very beatiful part of the country and it looks you had quite a nice haul with your metal detector. I have been to that museum many years ago, back in '95 and it was a great display back then they had a couple of very good detailed models of the Endeavour on display then along with the relics from the ship that you have shown. A great little town
- 803 replies
-
- 2
-
-
- colonial cutter
- modellers shipyard
- (and 1 more)
-
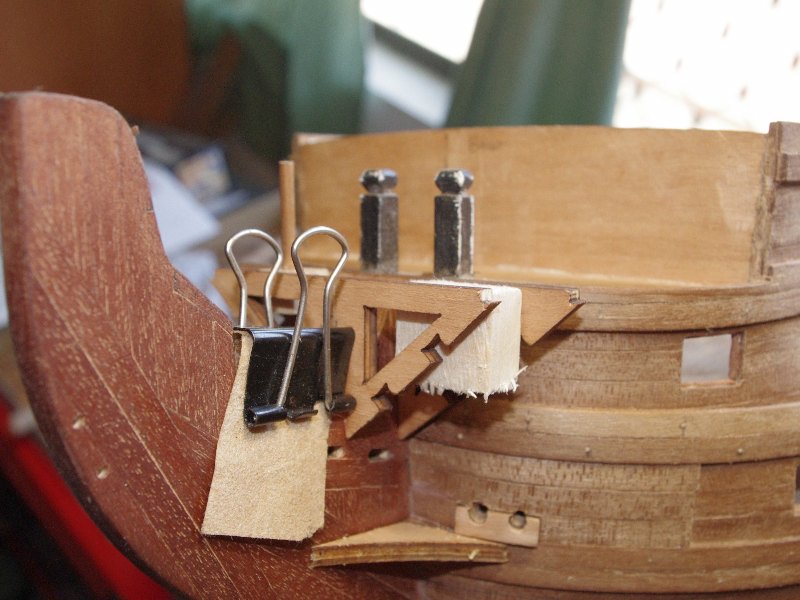
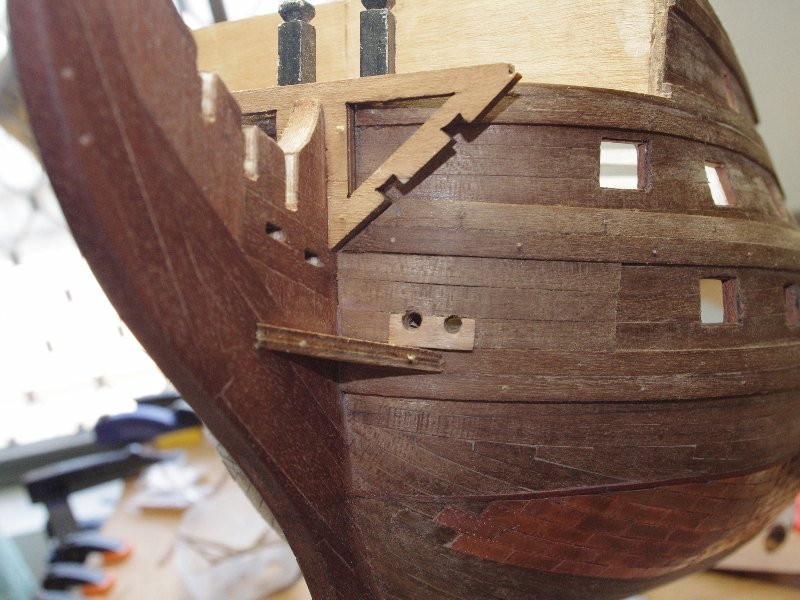
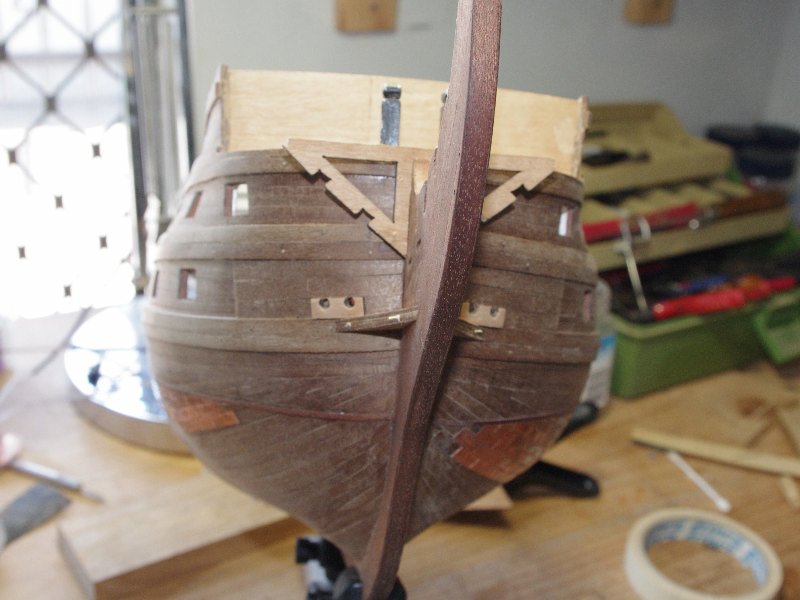
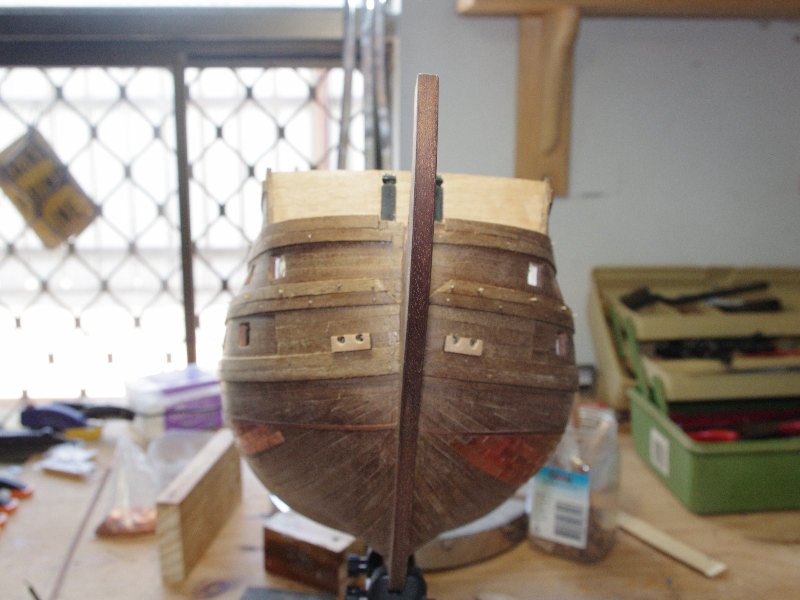
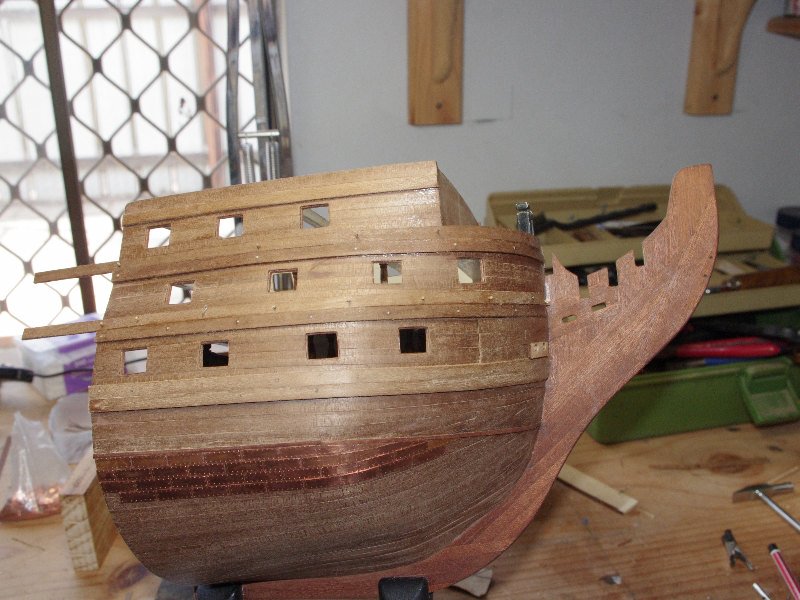
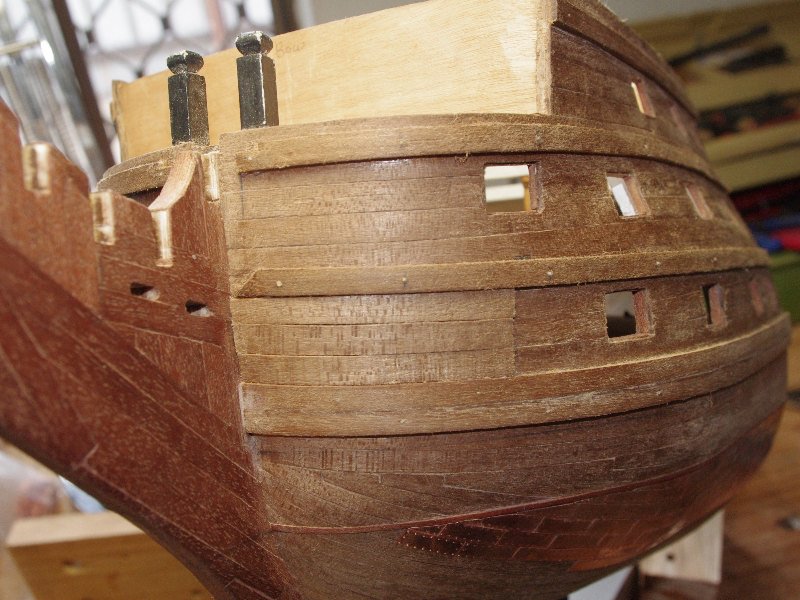
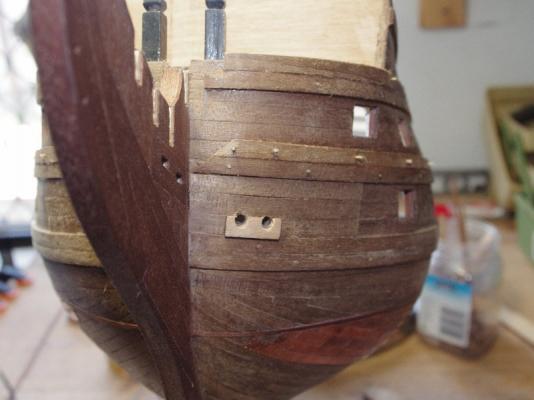
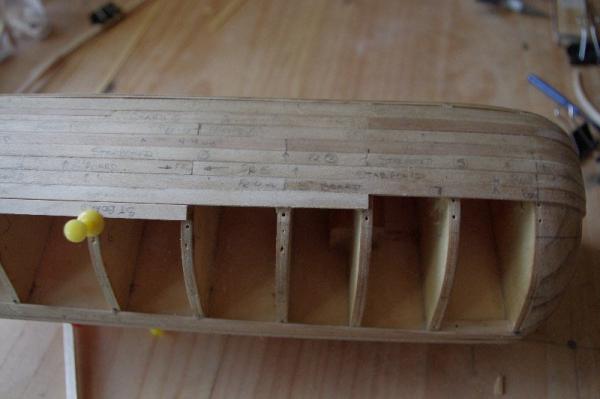
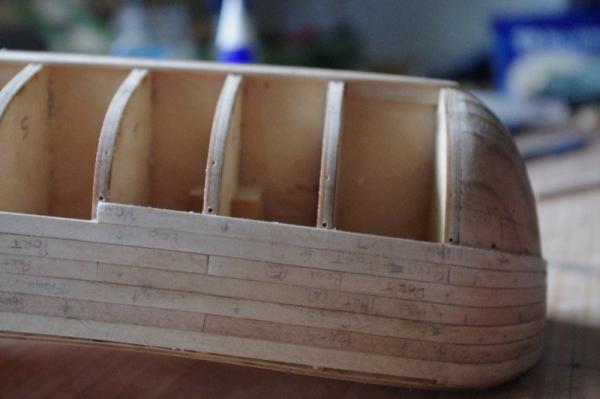
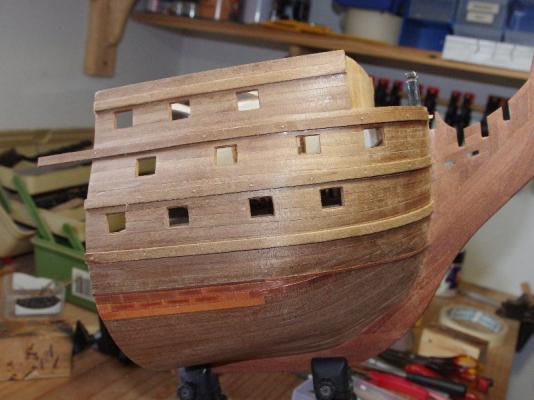
Hi All, I have made some more progress over the last couple of days. The wales are complete and I am quite happy with how they turned out I was a bit worried about getting the lines to look right. I have also drilled the hawse holes and fitted the stem supports which lie under the hawse hole blocks, these supports were laser cut ply and did not fit against the hull properly where the stem meets the bow planks so I glued some scrap 1.5 x 5mm strips to them and then filed them down to fit the shape of the hull The first two frames for the beakhead deck have also been fitted After the other two are fitted I will be some filling and sanding of the bow area where these parts have been fitted an then painting the area before fitting the beakhead deck as some areas will be hard to get to once it is fitted.


-
Hi Slog, Great work, your bowsprit is looking good all nice and square
-
Hi Glenn, Sorry to hear about the problem with your bulheads and I am glad to hear that Jokita have been very helpful in assisting you. A good thing that you noticed it now and not much later in the build. Best of luck with it and I hope to see your build up and running again soon
-
Hi Dragzz, Looking good, your lower deck planking came out well.
-
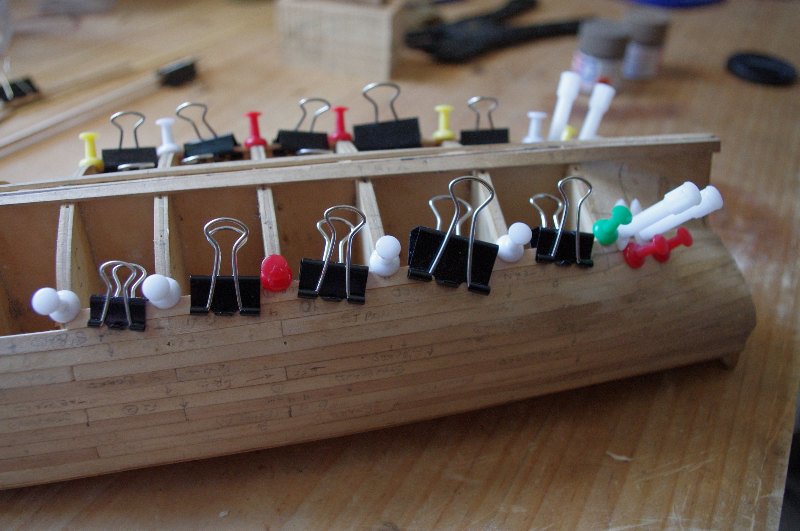
Hi Al, That is exactly what Arjan is saying the pin is pushed intothe frame adjacent to the plank and then removed once the glue has dried . You also may be able to use small paper clamps to hold the the plank even with the one above it.This method won't leave any holes in your finished planking I would also suggest that you predrill the holes in the frame so that the pins don't splt them as you push them in. The pins used in the following pics are plastic map pins May I also suggest that you use short plank lengths, maybe 200mm long, instead of the full length as I think it will be easier to obtain a smooth run of planks and you don,t have to worry about trying to line up and glue down a full length of plank in one go. If you do decide to use this metod make sure you stagger the pattern and ensure the ends finish covering half a frame width so the next part of that plank has some frame to glue to, as Arjan says it does not have to be 'histrocally accurate' but it may make the job easier This is only a suggestion and if you feel more comfortable with using the full length planks then thats fine it is your build. I do agree also with Arjan that a good building board is essential and this, along with the decks will hold the keel straight I hope this helps

- 265 replies
-
- 1
-
-
- finished
- artesania latina
- (and 1 more)
-
Hi Glenn, And were off !! Looks like you have made a good start all nice square
-
Thank you Richard, I am getting there slowly
-
Hi Grant, Sorry to hear about your virus and I hope you are feeling better soon. It always seems to be the way that we fall ill on our holidays. I have just being going over your quandery of the belaying point for the fore tackle pendant and I think you are right that the lower single block hooks to an eye on the fore channel and I think you are a right in saying that it should belay to a deadeye or eyebolt on the fore channel but Longridge goes on to explain that when it wasn't in use it was triced up by the inner and outer trice lines which maybe suggests that it wasn't a critical line to the operation of the yard and maybe this is why it was belayed on the inside timber head when it was used. Just my opinion I hope I have not confused the matter further
-
Hi Vivian, Very nice improvisation with your rudder hinges they look very good and they work. Are you going to paint them black? Your anchor machinery thing is called a 'windlass' in our silly english Your deck fittings look good also very neat. With your cannon could you add a small strip of timber to the bottom of each side of of your gun carrige to cover the legs that are now exposed and then add some new legs to lift them up to the right height ? It may make the carriges a bit bigger but it would be an easy fix :)Just a suggestion. I hope your deadeyes turn up soon
-
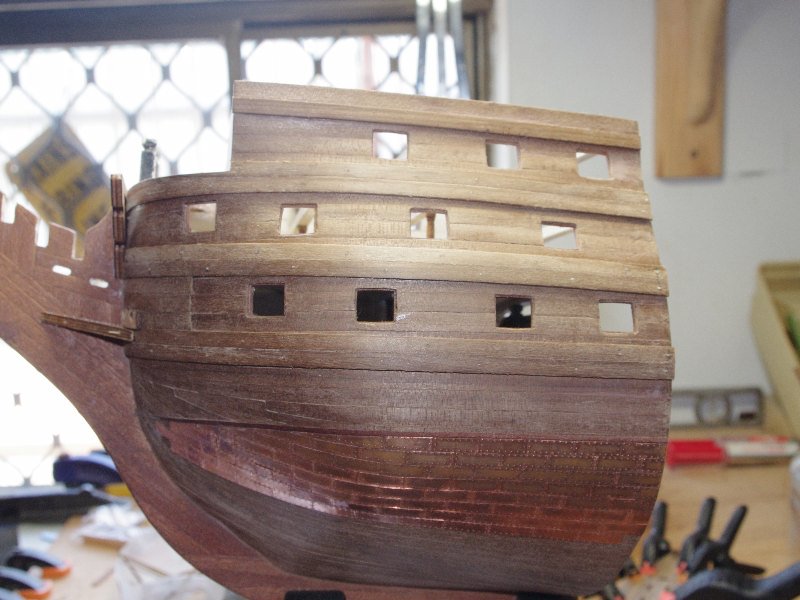
Hi All, Some more progess, the lower and middle wales are fitted and the timbers at the bow for the hawse ropes to go through are also fitted between the lower and middle wales. I cannot find, in any of my books, what these timbers are called if they do have a name and I imagine they do, so any help would be appreciated. They are most noteable in the last pic The gaps betwween the middle and upper wale at the stem is to facilitate the fitting of the first frame which supports the beakhead deck . The port side middle wale is fitted I just took these photos beforehand. It is clamped and pinned in positon so you can't realy see much of it


-
Hi Grant, Glenn and Ron, Thank you all for your kind comments. Ron - The instructions can be a bit vague and sometimes out of step, I use them as a guide only and after studying them decide how I am going to proceed with the build. I hope your mistake is an easy fix and if you have any questions please ask as you will get a lot of help from builders on this forum. I look forward to seeing your log posted
-
Hi Keith, Very nice planking, you are doing a great job with it. The stealer has blended in well with the rest of the hull and is hardly noticeable. It should look really nice treenailed looking forward to seeing it
-
Hi Kester and Antony, Thankyou both for your kind words. Kester - Yes I am quite pleased with how the plates are running so far. I hope yopu get back to your build soon. Anotny - Yes it really is rather handy and can be adapted for manking all different sizes
-
Hi Vivian, Your deck fittings look fantastic I especially like how the cannons turned out well done they look 15th century. Are you going to tie them to their carriges? Your hull looks very nice waxed
-
Hi Dragzz,, Sorry to hear about your warped planks the replacement ones look good but they do appear to be a bit wide. How wide are they? An 11 inch wide plank at your scale would be about 3mm
-
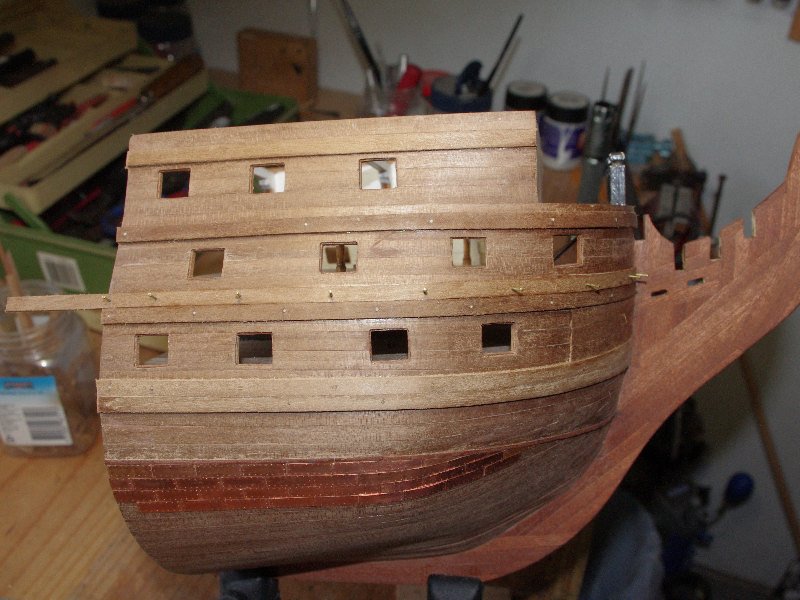
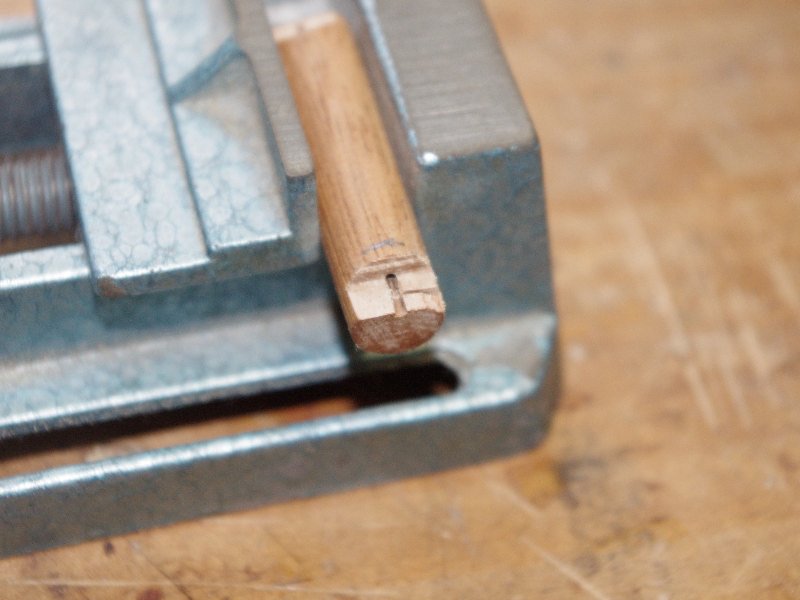
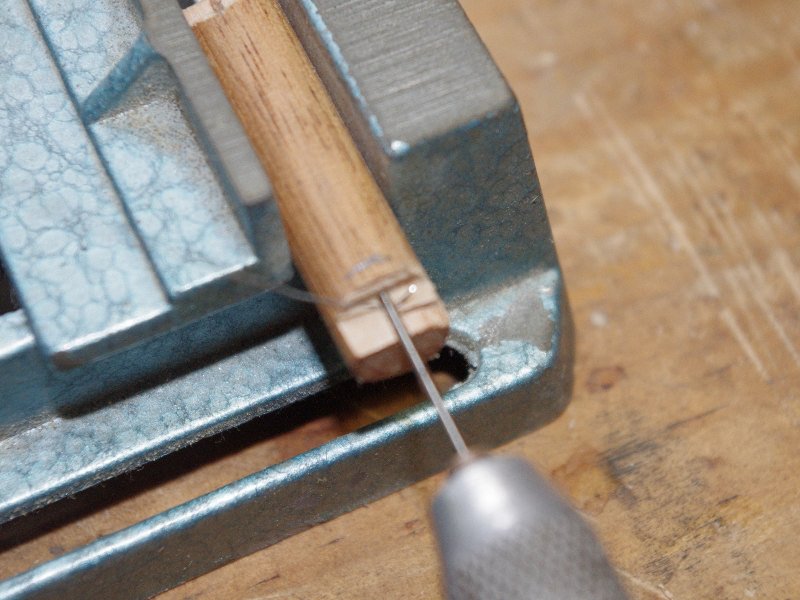
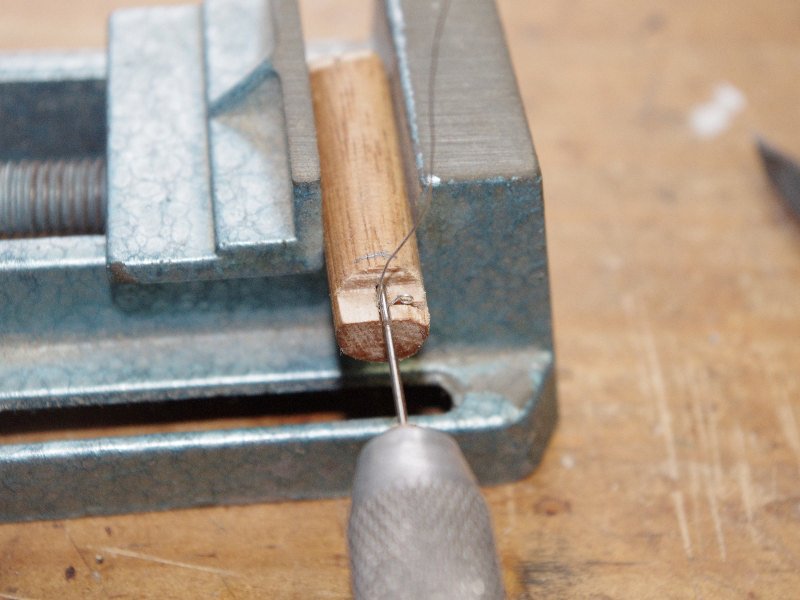
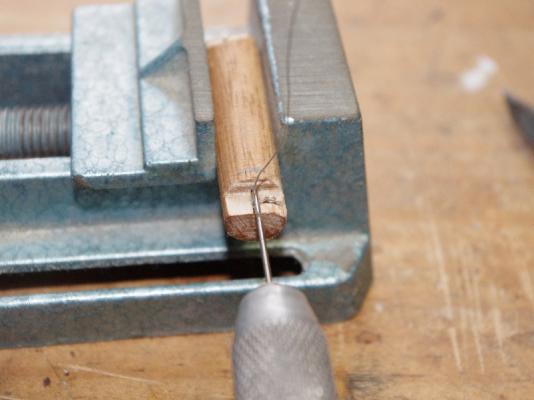
Hi All, A little more progress, all the lower strakes of each wale is now fitted and I have started to make the second strake for each of the three lower wales these should be fairly straight forward to fit as they just lay on top of the strake below. I have also done some more copper plating on both sides. While browsing the forum the other night I came across a jig by GTM in the 'wooden tips and tricks and making jigs' section for making eye pins as I had been thinking about how I was going to make some very small hooks for my cannon rigging I thought it was a great idea and that maybe I could use it for making hooks for the tackle on my cannons. So I made the jig up out of a piece of dowel, he used brass rod which will be much more durable, but I don't have any on hand and it works a treat. Thankyou very much GTM I can make a hook out of 0.3mm wire 2mm long in about 2 minutes. I will give a brief description how I made mine but for a full description go to the page mentioned above, first I dilled a 0.85mm in the end of the dowel close to the edge about 12mm deep, then I filed a flat on the dowel about 4mm in from the end until half of the previosly drilled hole was exposed a slot was then cut on one side of the hole so that the eye of the hook can be inserted into it so it will stay in line with the bite of the hook. To use the jig I inserted a 0.75mm drill bit backwards in my pin vice and lay the wire onto the jig and push the drill bit into the hole, trapping the wire in the half hole, then it just a matter of bringing the tag end of the wire over to meet the main piece and you have a eye formed. Remove from the jig and then lay the eye into the slot insert the drill bit into the hole again and bend the wire around until you form a hook, remove it from the jig and trim up The finished product As I have about 100 of these to make I would like to thank GTM for his time saving and brilliant Idea. Sorry if some of the pics are a bit blury but the light was a bit dull even with the flash


-
Hi Slog, Excellent work with the lantern support looks fantastic. Glad to see you back at work on her.
-
Hi Al, A warm welcome to this forum A very nice model of the Bounty and it looks like you are off to a good start with it, I will follow your build with interest as I have this kit on my shelf to do maybe after the Victory bow is finished
- 265 replies
-
- 1
-
-
- finished
- artesania latina
- (and 1 more)