HOLIDAY DONATION DRIVE - SUPPORT MSW - DO YOUR PART TO KEEP THIS GREAT FORUM GOING! (Only 20 donations so far - C'mon guys!)
×


Tallshiptragic
-
Posts
551 -
Joined
-
Last visited
Content Type
Profiles
Forums
Gallery
Events
Everything posted by Tallshiptragic
-
 Yeah a lot of models I've seen the builders have adjusted the slope to be less and the quarter galleries look more horizontal. I guess in a way to ease their own minds. This isn't right though as from the contemporary sketches they follow the sheer line. It's amazing what you can walk and work on though haha sailing on both Duyfken and Batavia which have sloping decks following the sheer surprisingly didn't hinder much at all.
- 322 replies
-
- 2
-

-
- sergal
- sovereign of the seas
- (and 5 more)
-
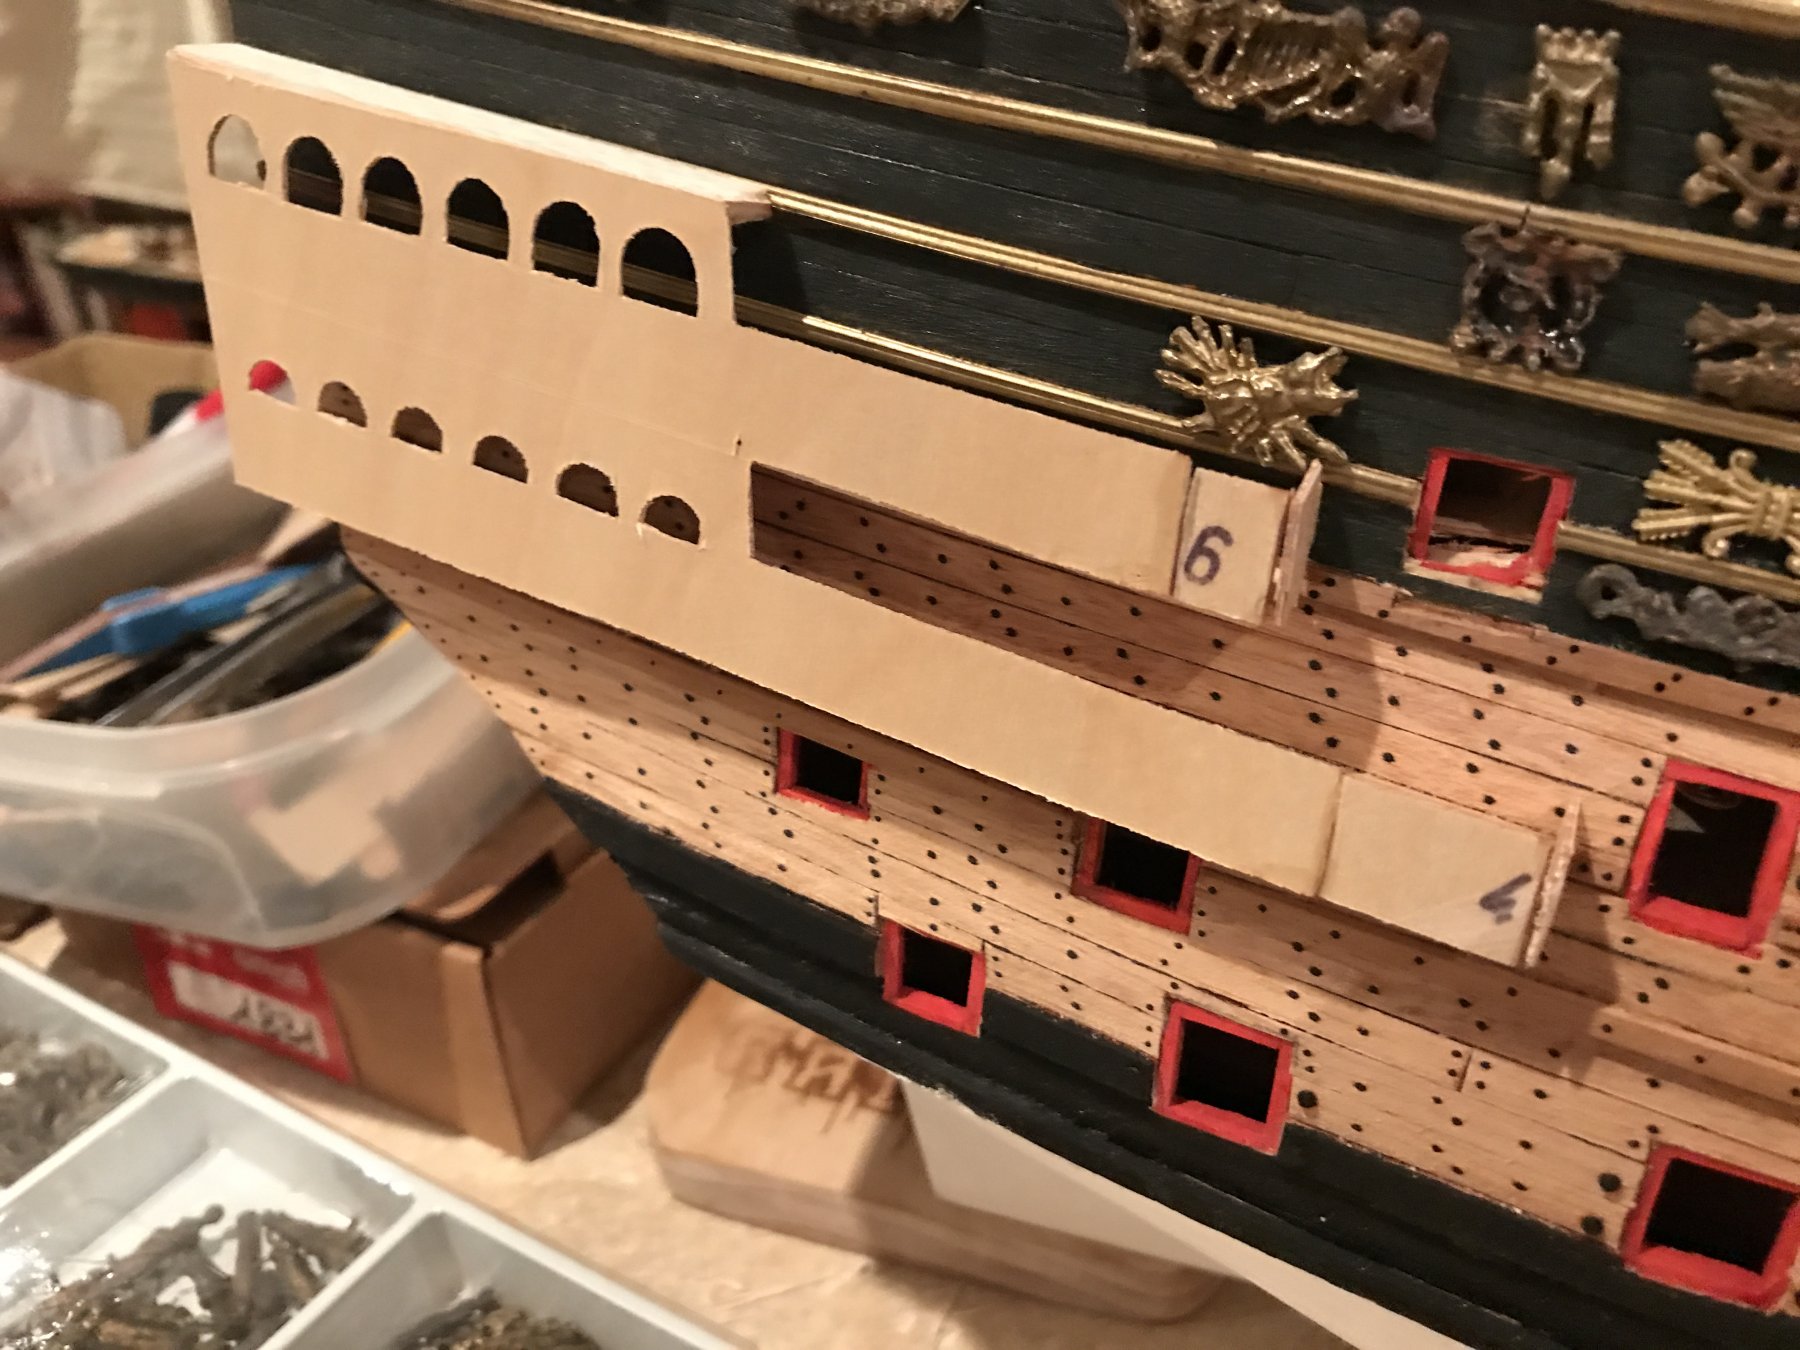
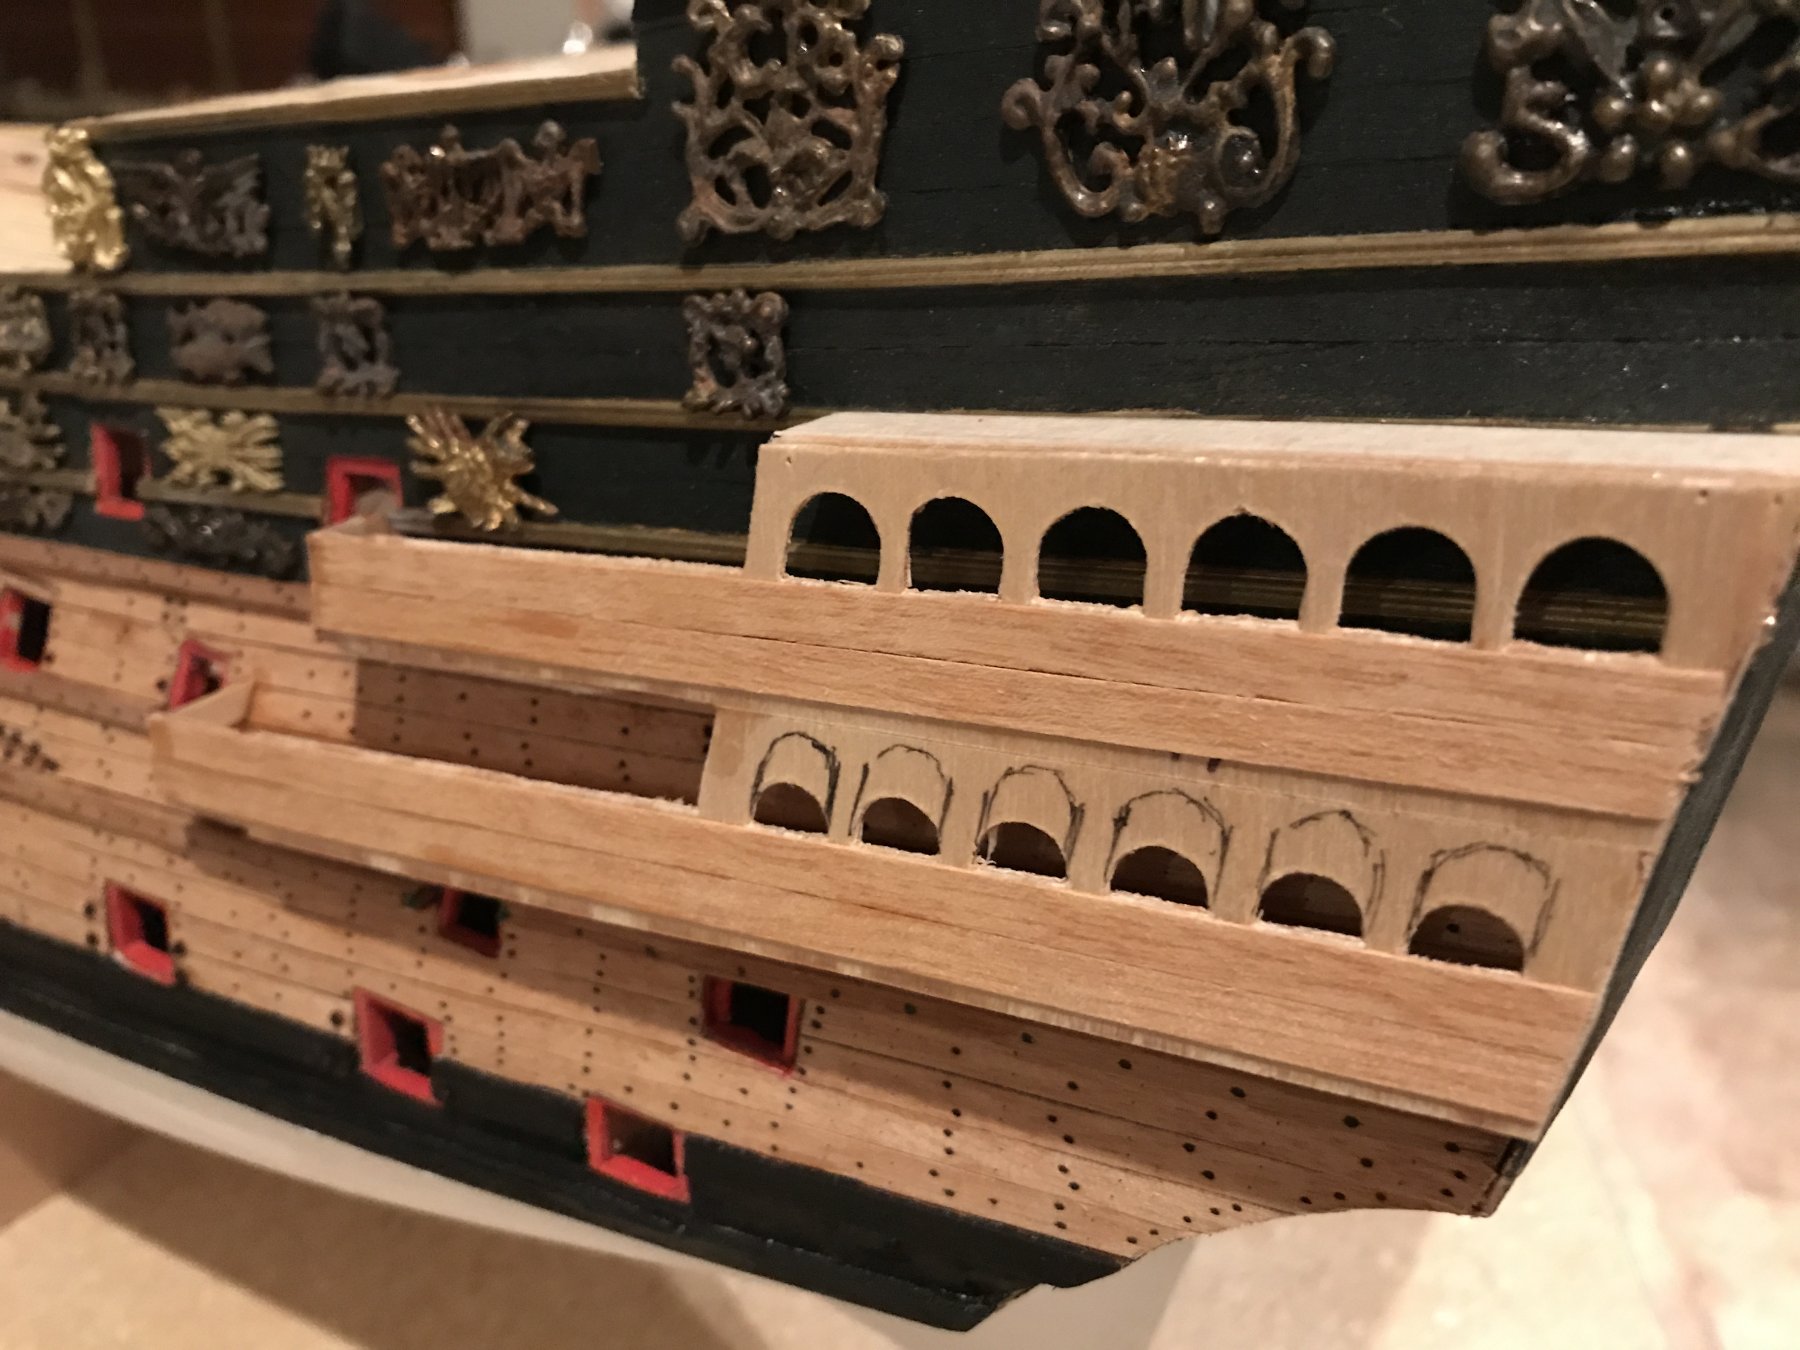
Done a little more tonight. Began the build up of the lower part of the quarter galleries. Still a little rough as I figure out if the incline of the lower planks are correct. Again not working from plans makes it a little harder but at the same time, gives me a lot of artistic freedom.


- 322 replies
-
- 5
-
-
- sergal
- sovereign of the seas
- (and 5 more)
-
Thanks EJ, she's a joy to build and I do prefer the modifications I've made to her. Well worth the extra effort I don't think I've looked at the kit plans or limited instructions since I put the frames and keel together hahaha It would be great to have a Mary Rose and Revenge along with a Royal William and Victory side by side to see the development of the large British warships.
- 322 replies
-
- 3
-
-
- sergal
- sovereign of the seas
- (and 5 more)
-
I also think from looking at her now, you can see how close her design was to that of the galleons of the previous century.
- 322 replies
-
- 3
-
-
- sergal
- sovereign of the seas
- (and 5 more)
-
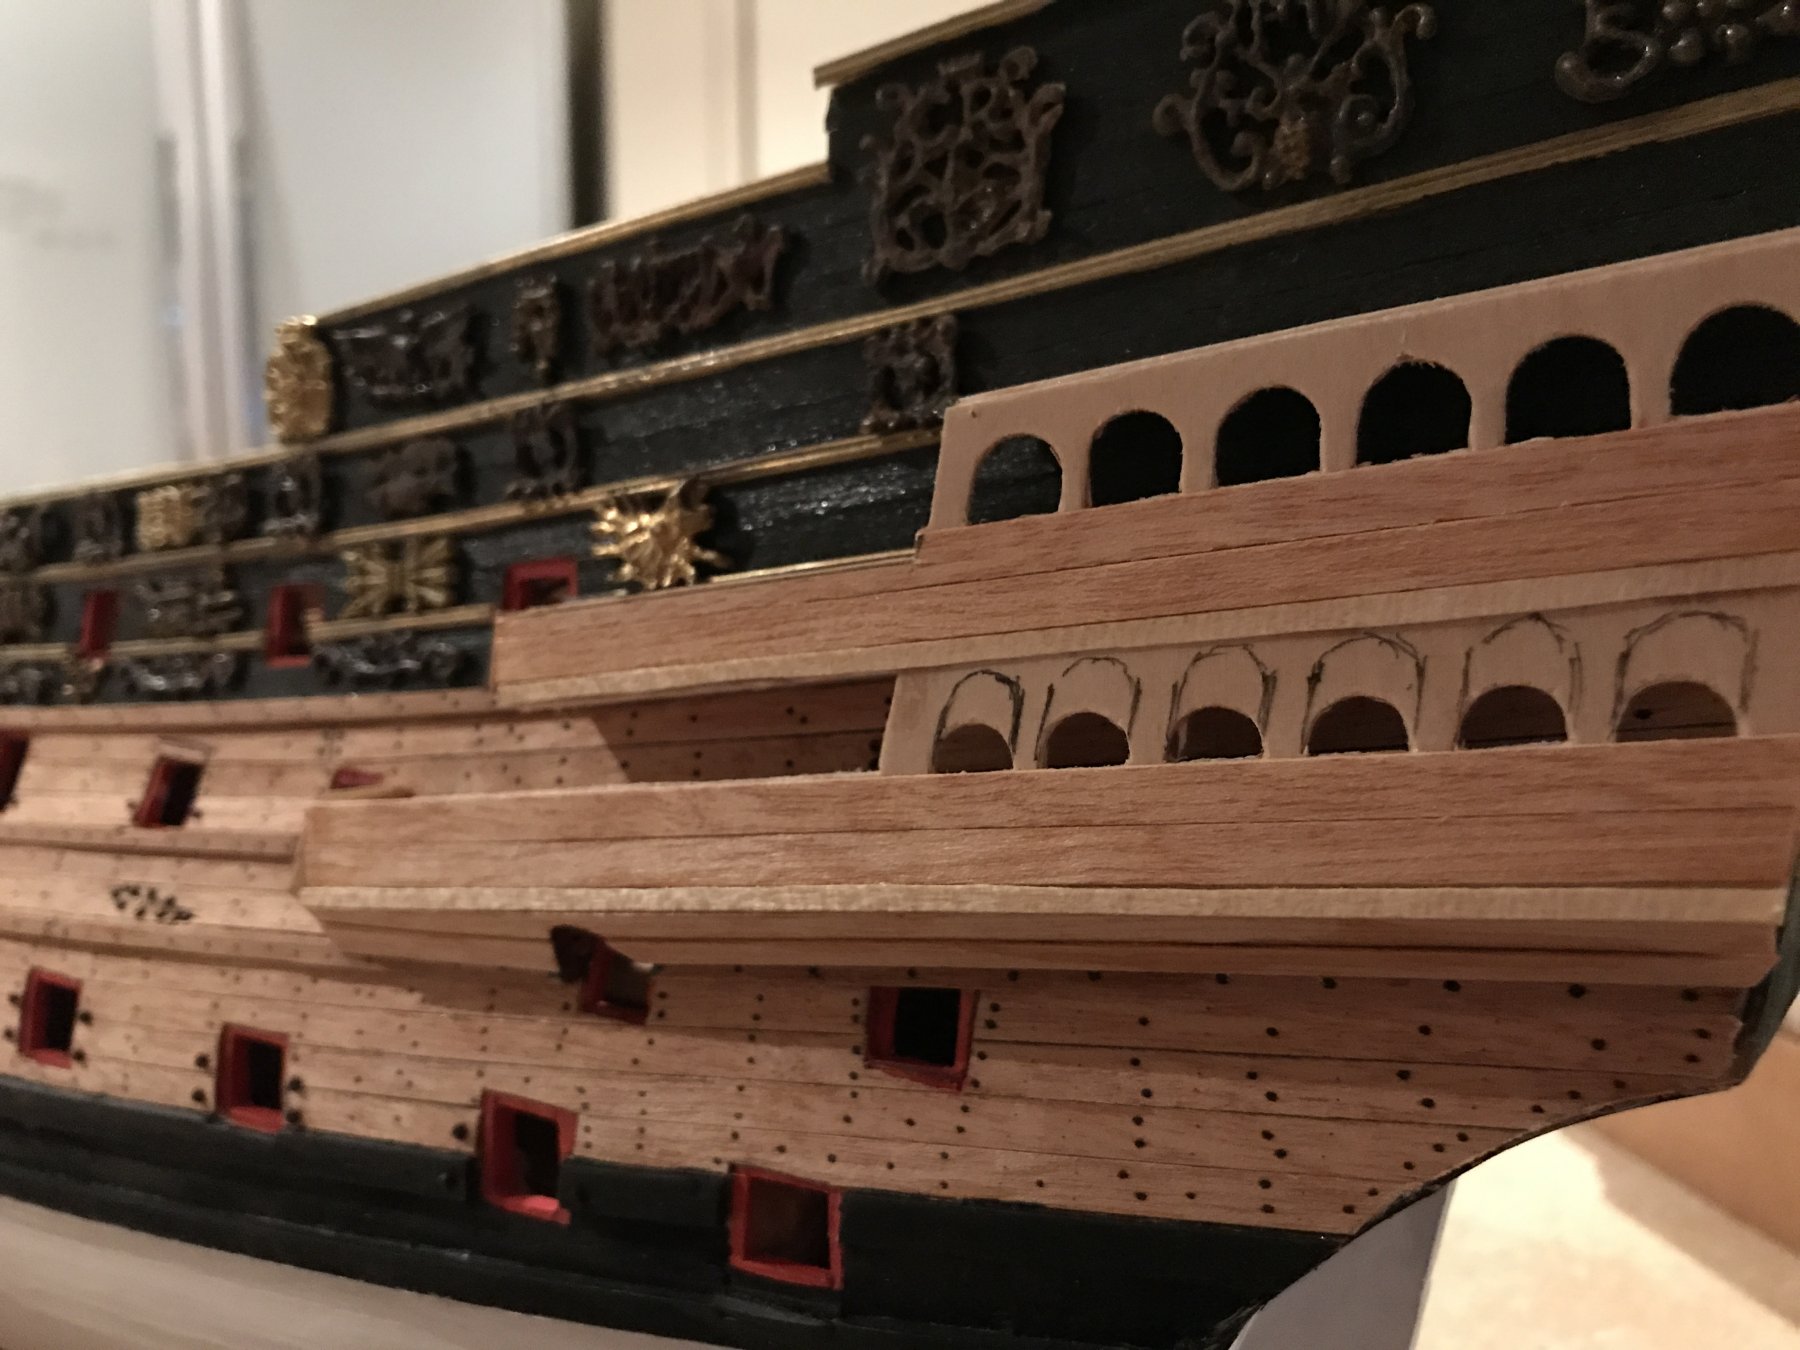
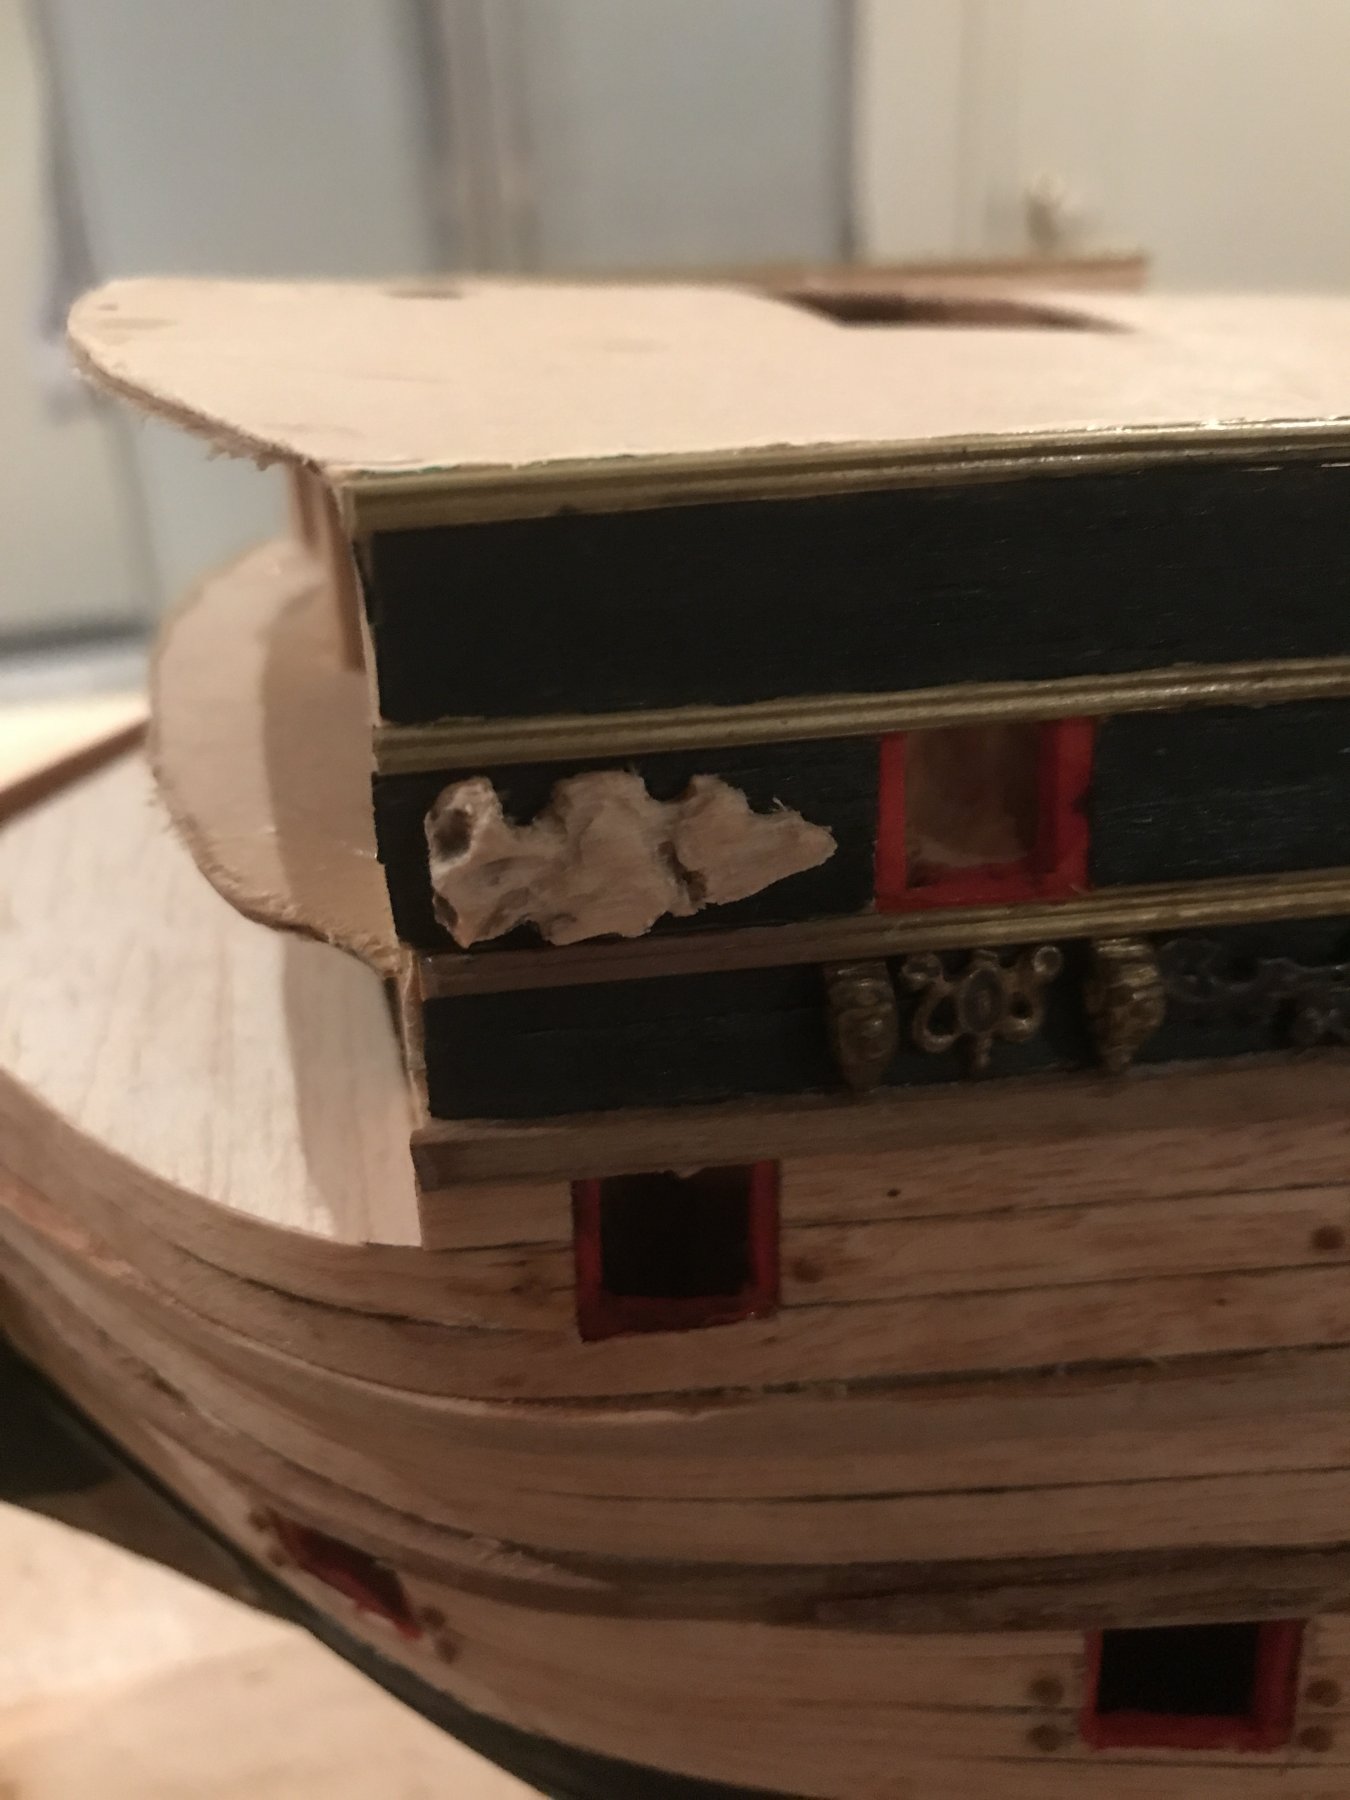
Again more building, this time the quarter galleries the forward deck extensions have had to be extended and the lower row of dead lights (windows) need to be larger to match those of the level above... I don't understand why sergal had these half the size of the others? Also ive yet to do, but the underside will be built up with an incline again to match the sketch I'm using as my base. She's coming along now and now really resembles the Sovereign! 😁


- 322 replies
-
- 6
-
-
- sergal
- sovereign of the seas
- (and 5 more)
-
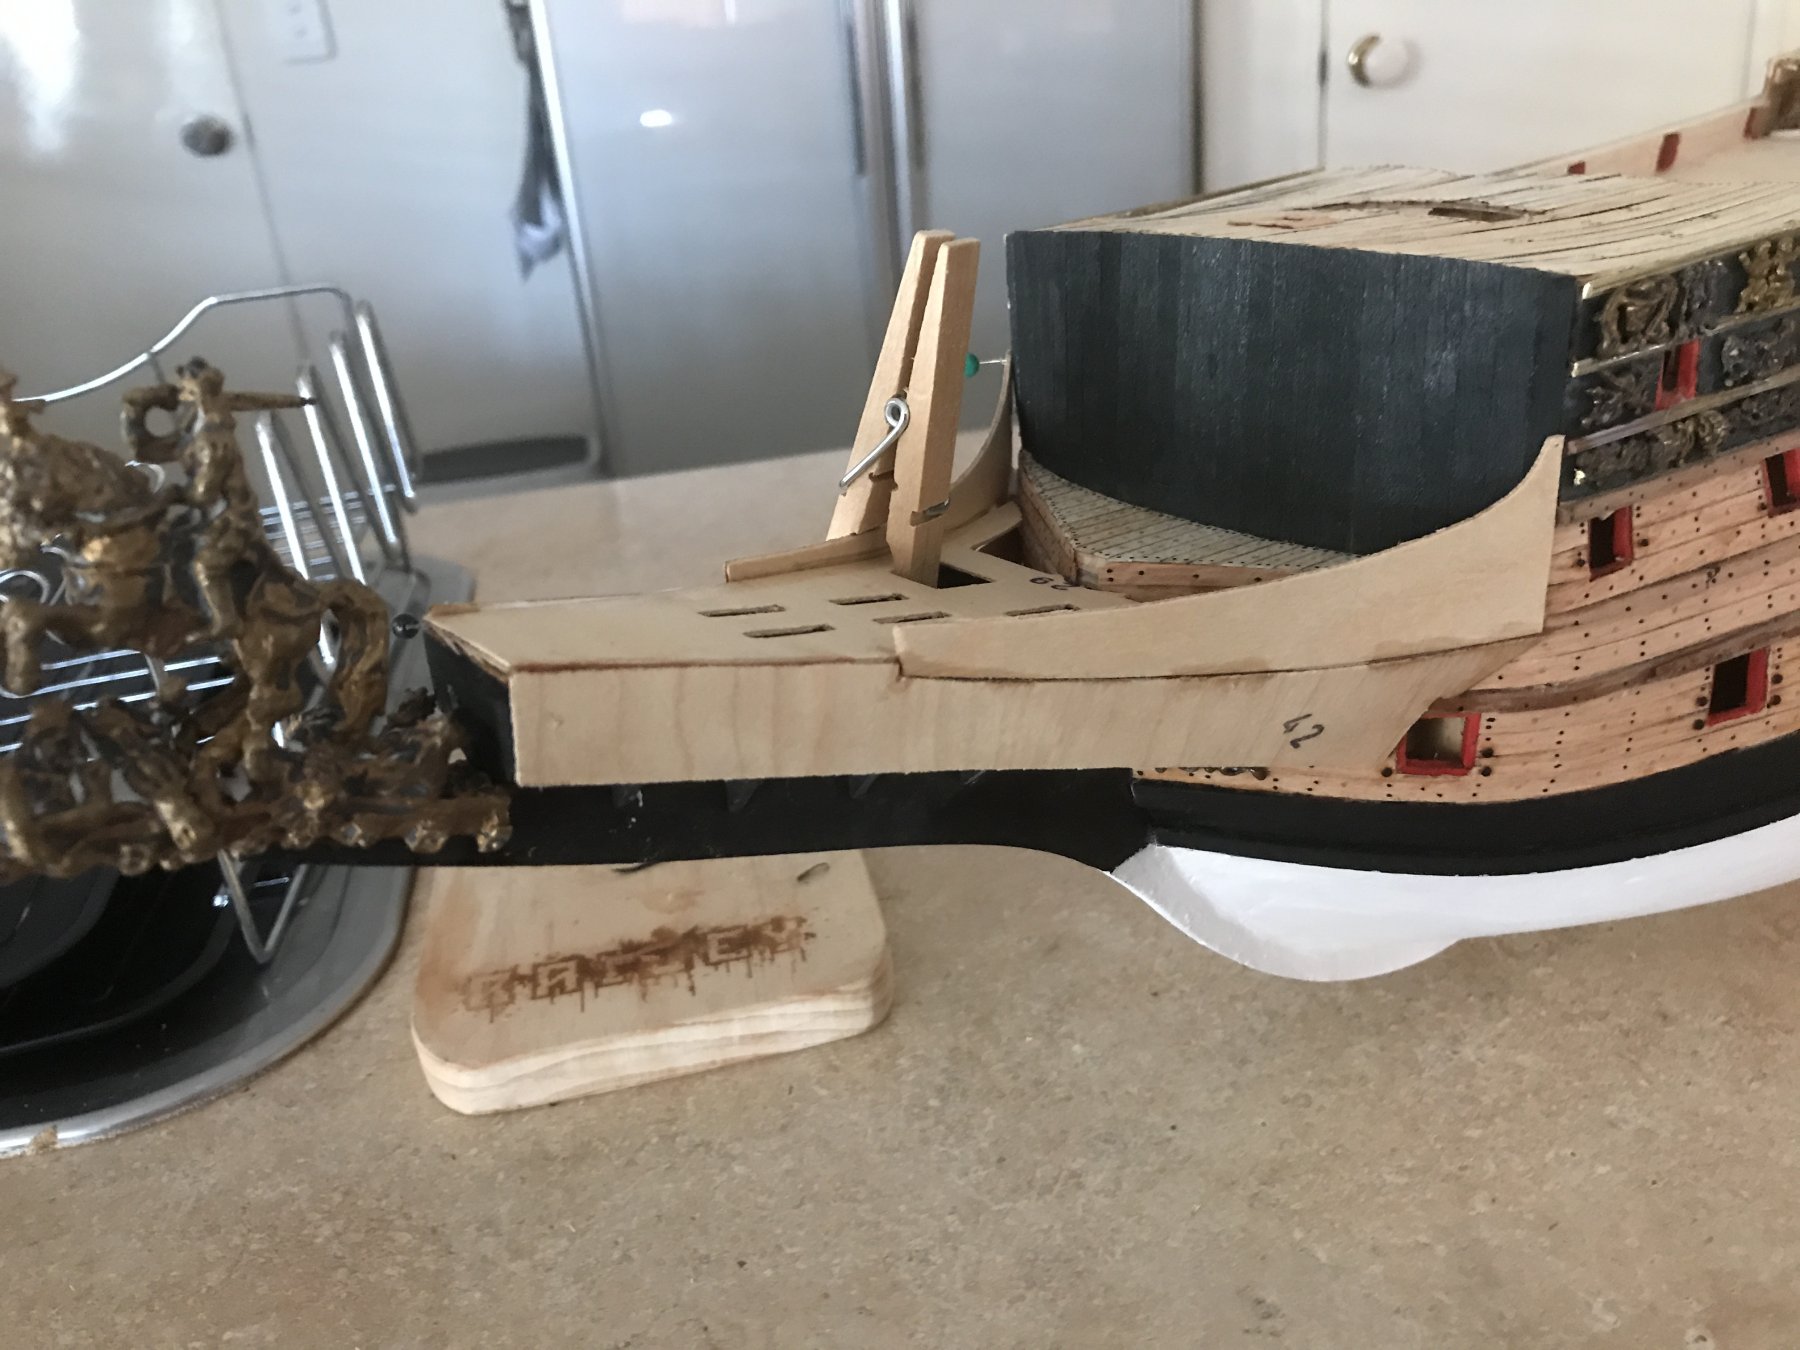
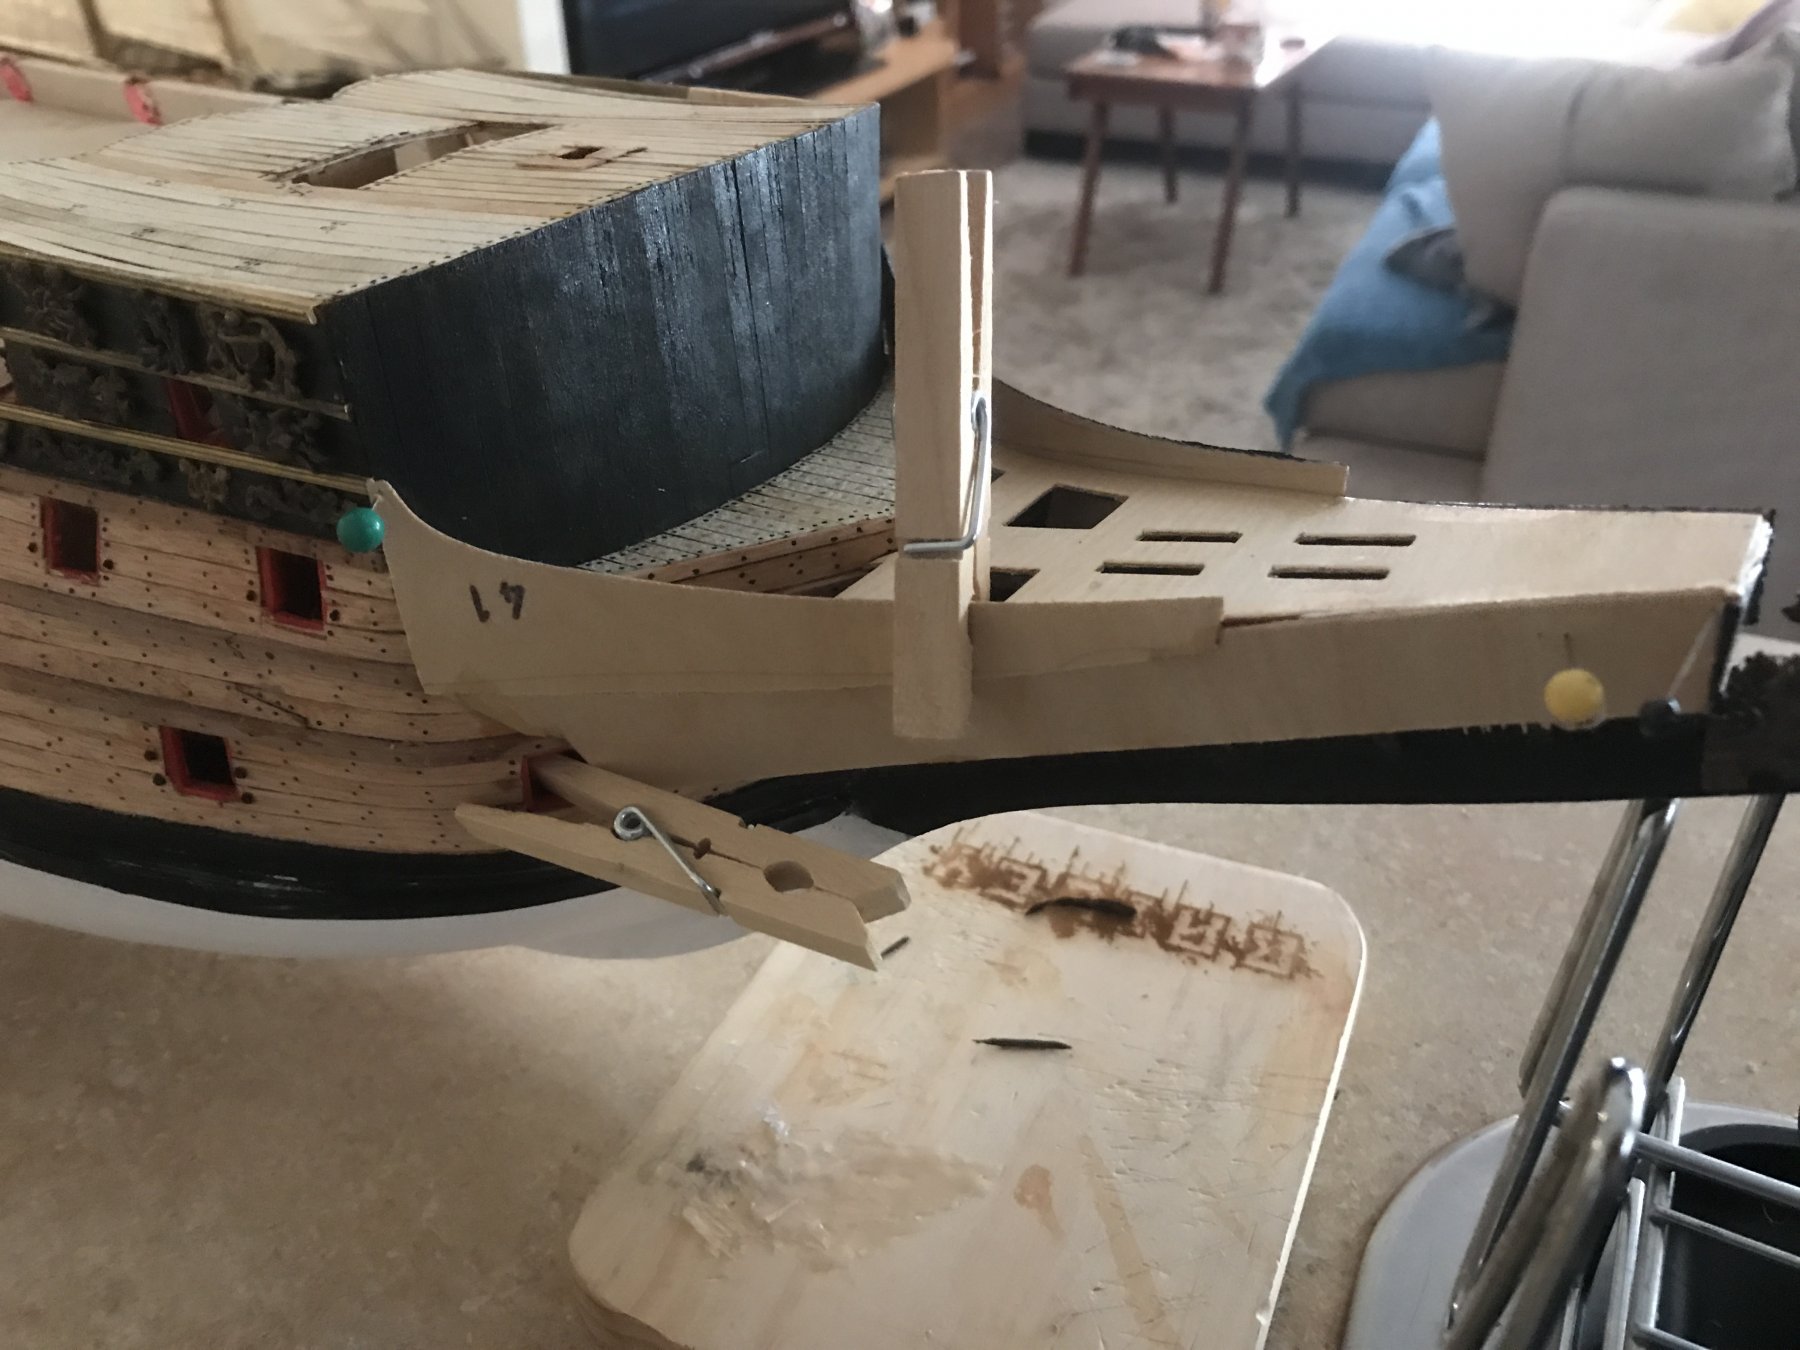
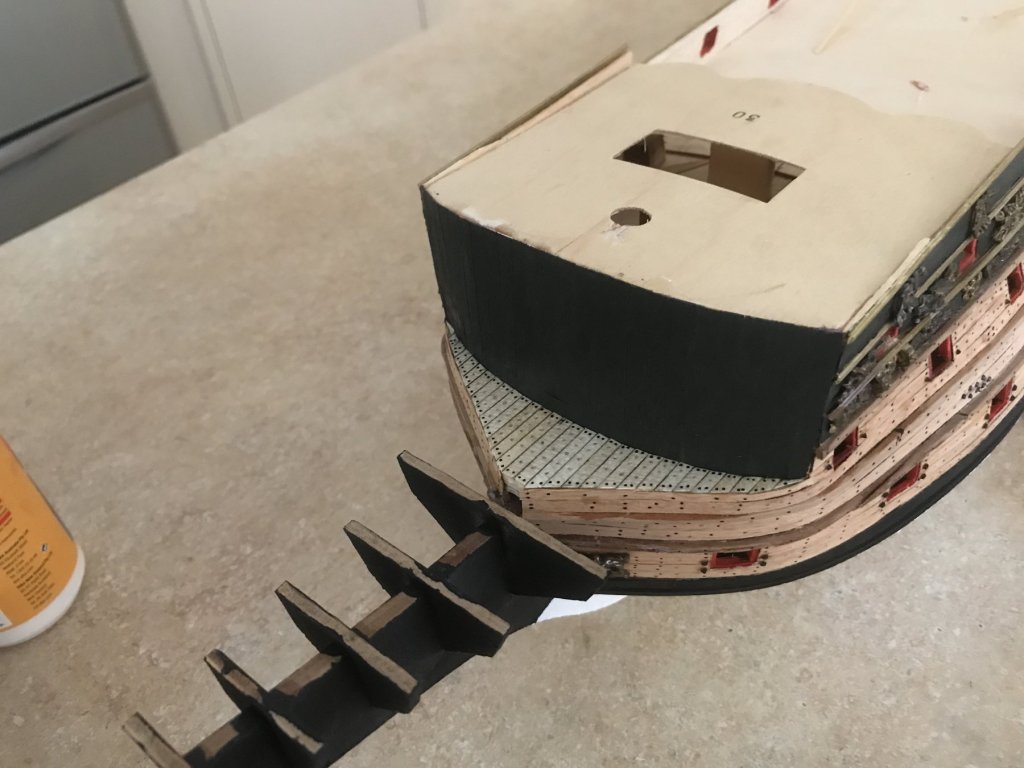
Decided to build up the beakhead bulwarks. The false deck I've used only as a guide at this stage as it's not fixed in place just to guide the shape of the sides. The bulwarks are made of two pieces per side providing a reasonably similar shape to that of the Van de Velde sketch. The upper piece I used unchanged and fit perfectly even with my modified wale positions, the lower piece had to be trimmed to fit but overall not by much so was happy to not have to cut completely new pieces. You will also also see now how I've raised my forepeak (small deck in front of the f'cstle bulkhead). This matches more to the ship building methods of the time and not one continuous deck into the beakhead as sergal suggested.


- 322 replies
-
- 4
-
-
- sergal
- sovereign of the seas
- (and 5 more)
-
Half deck now also planked. Not yet treenailed.

- 322 replies
-
- 5
-
-
- sergal
- sovereign of the seas
- (and 5 more)
-
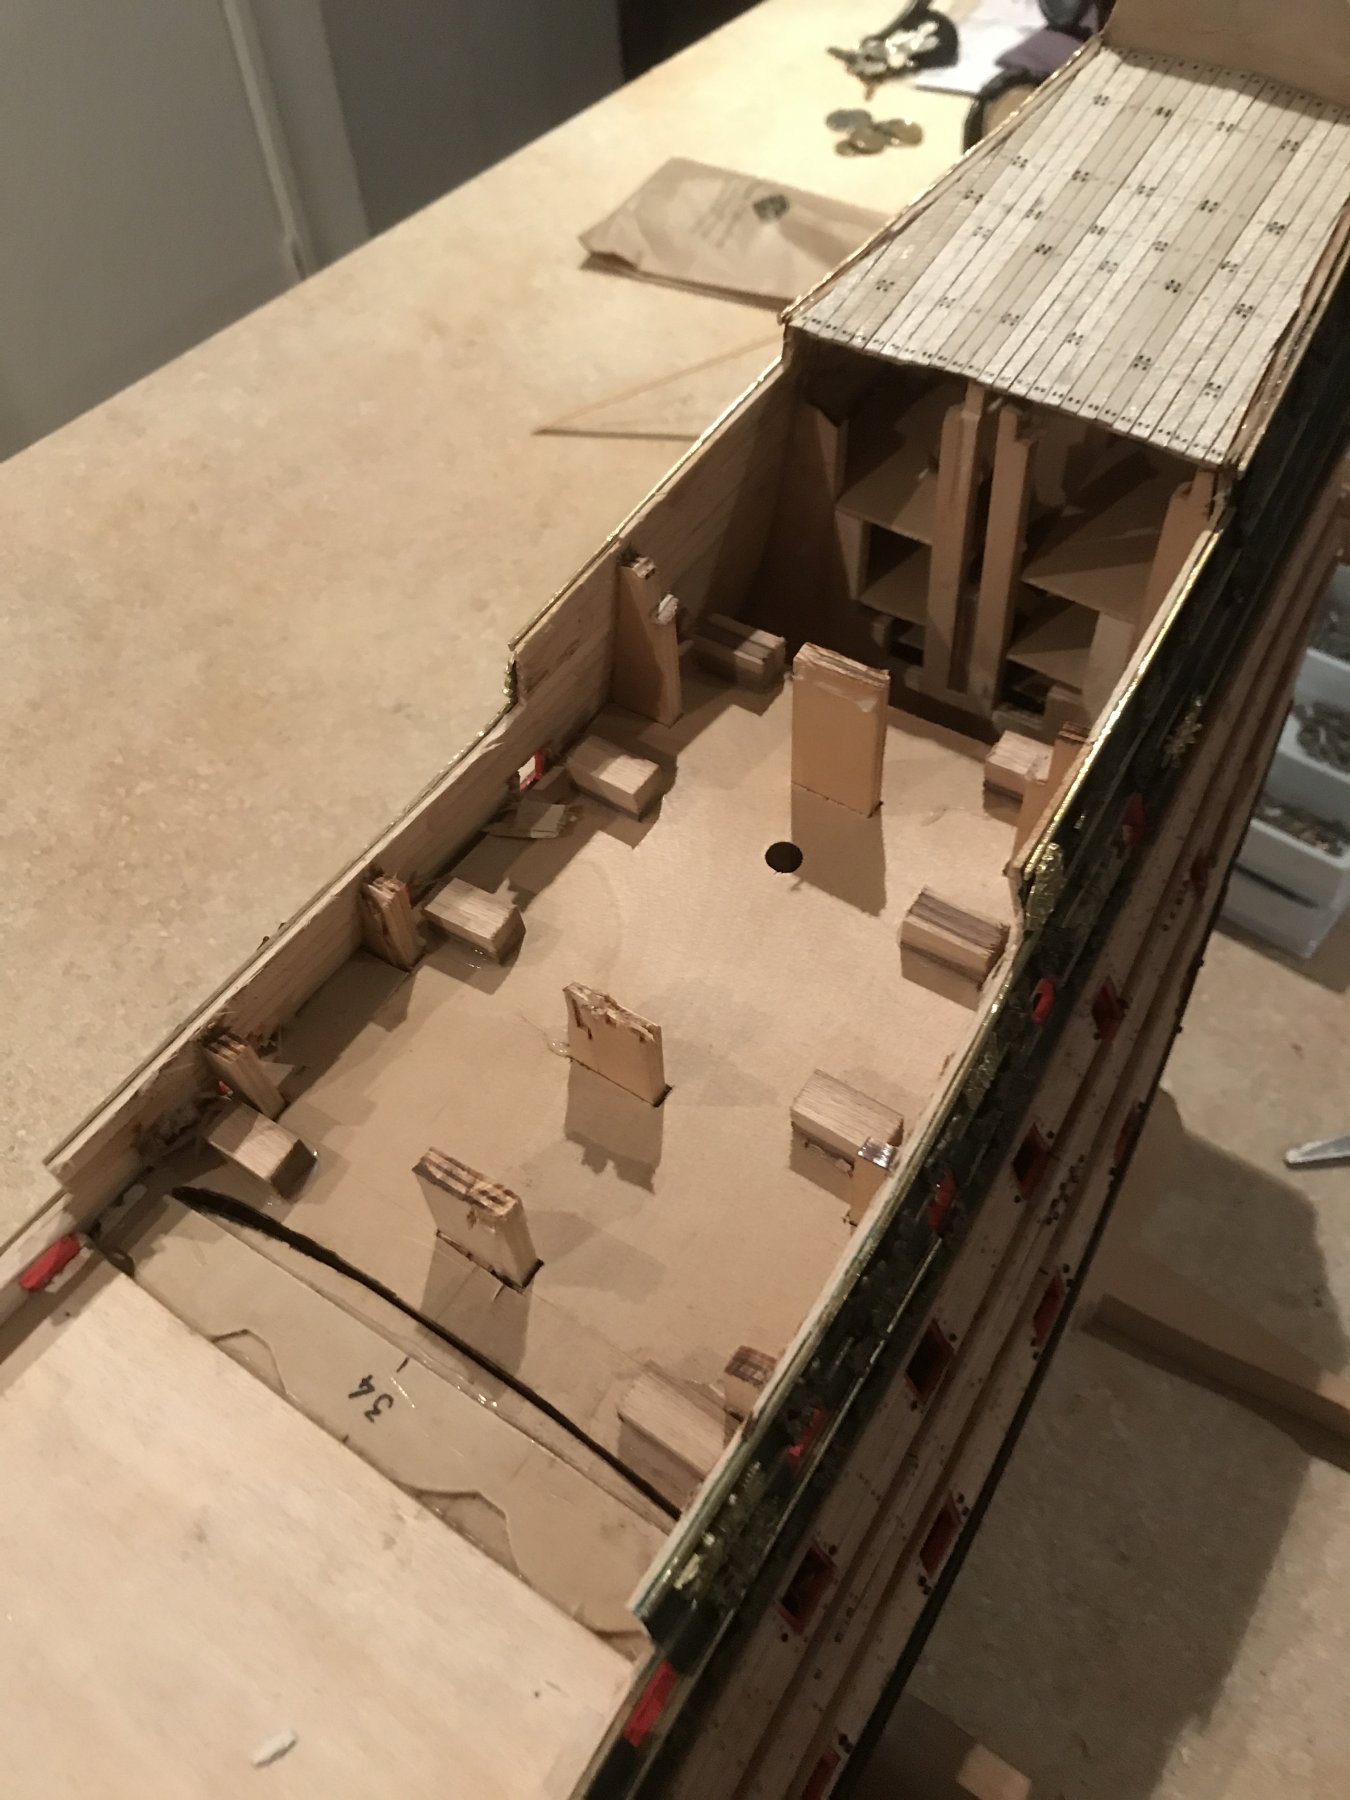
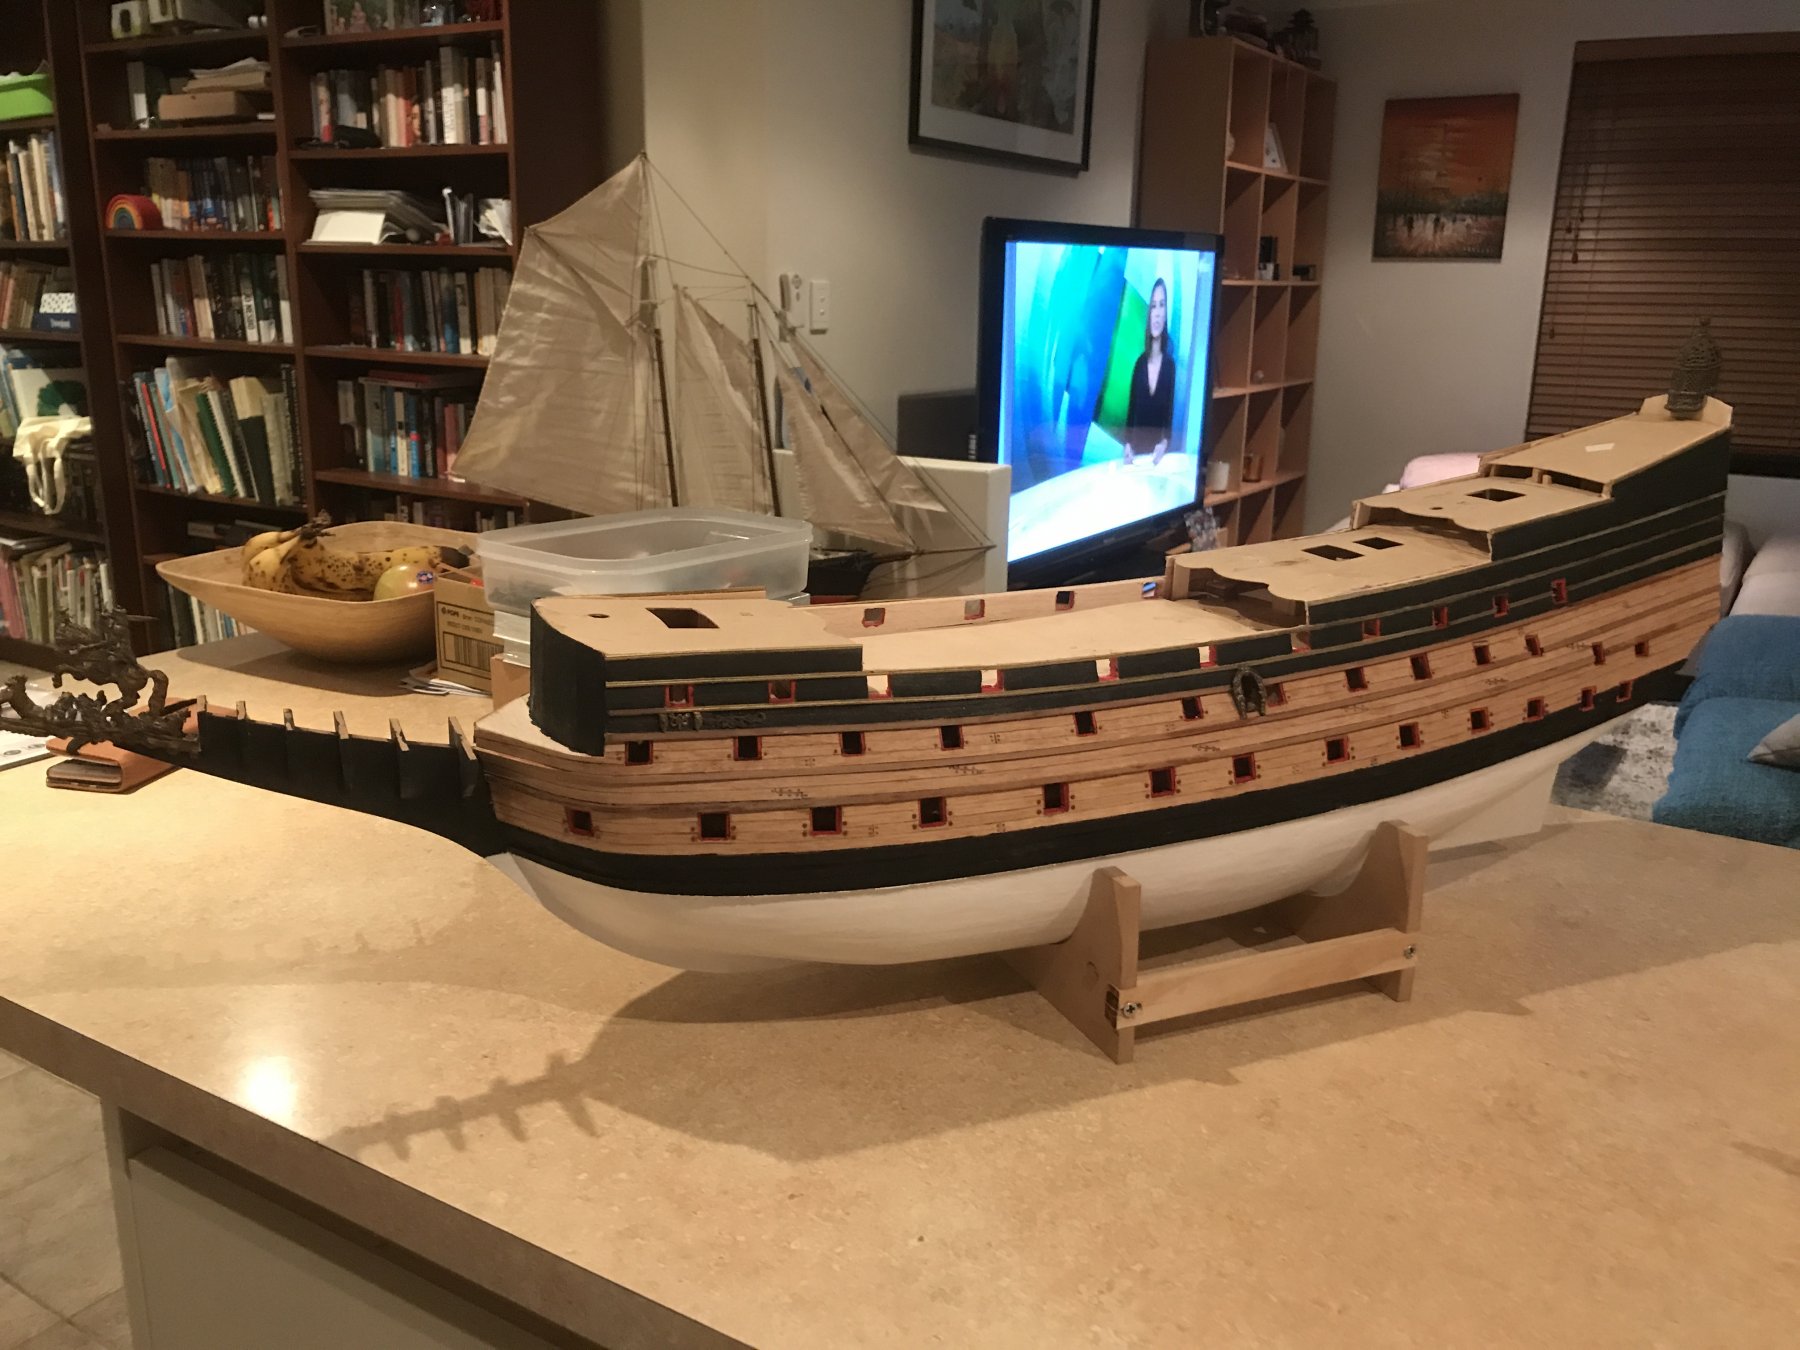
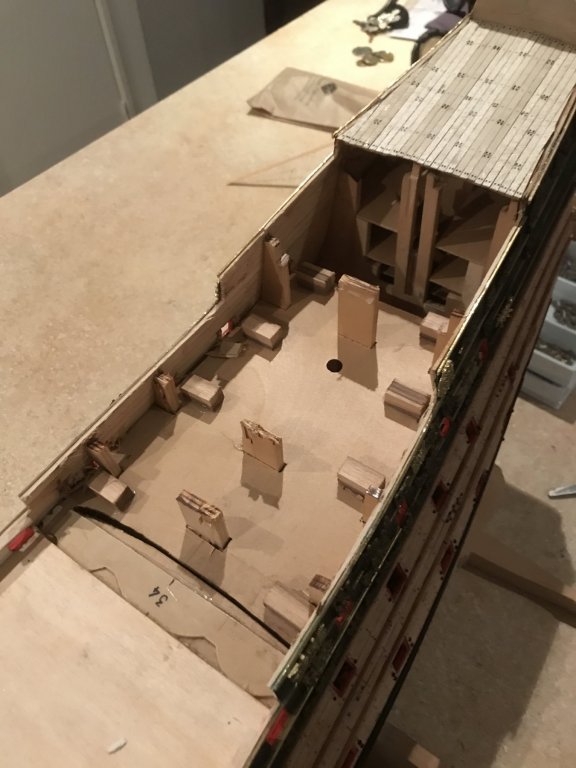
Merci Messi i thought id better mention a few other changes to the kit. The f'cstle deck slants downwards toward the rear according to sergal. This is incorrect and is in fact an almost level deck so this deck was raised at the rear to suit. The half deck, quarter deck and poop deck also slant though upwards following the take of the ship. Again to match Van de Velde sketches this has been changed. There mention in Sephtons book of straightening her decks in the 1640's while also reducing the height of her bulwarks to improve sea keeping qualities which is what you see on the Van de Velde sketch. So the half deck and quarter deck have been lowered aft producing more of a slight incline- basically level. Only the poop deck has retained the rearward incline. Another reason for doing this is on the Van de Velde sketch the bulkhead at the start of the poop deck which leads to the roundhouse (officers quarters below the poop deck) show a door and windows. If I built these as per sergal suggests, these windows would not be possible and a door would be far to tall to fit. So so those three decks were removed, the framing adjusted and the decks reinstalled in there new a modified locations. I had contemplated building her after her major refit of 1659/60 at one point which would have required a complete restructure of all her upper stern decks as well as a new head but decided to leave it in favor of the Van de Velde sketch believed to be from either 1651 or as she was entering dry dock in 1659 for her major rebuild.
- 322 replies
-
- 4
-
-
- sergal
- sovereign of the seas
- (and 5 more)
-
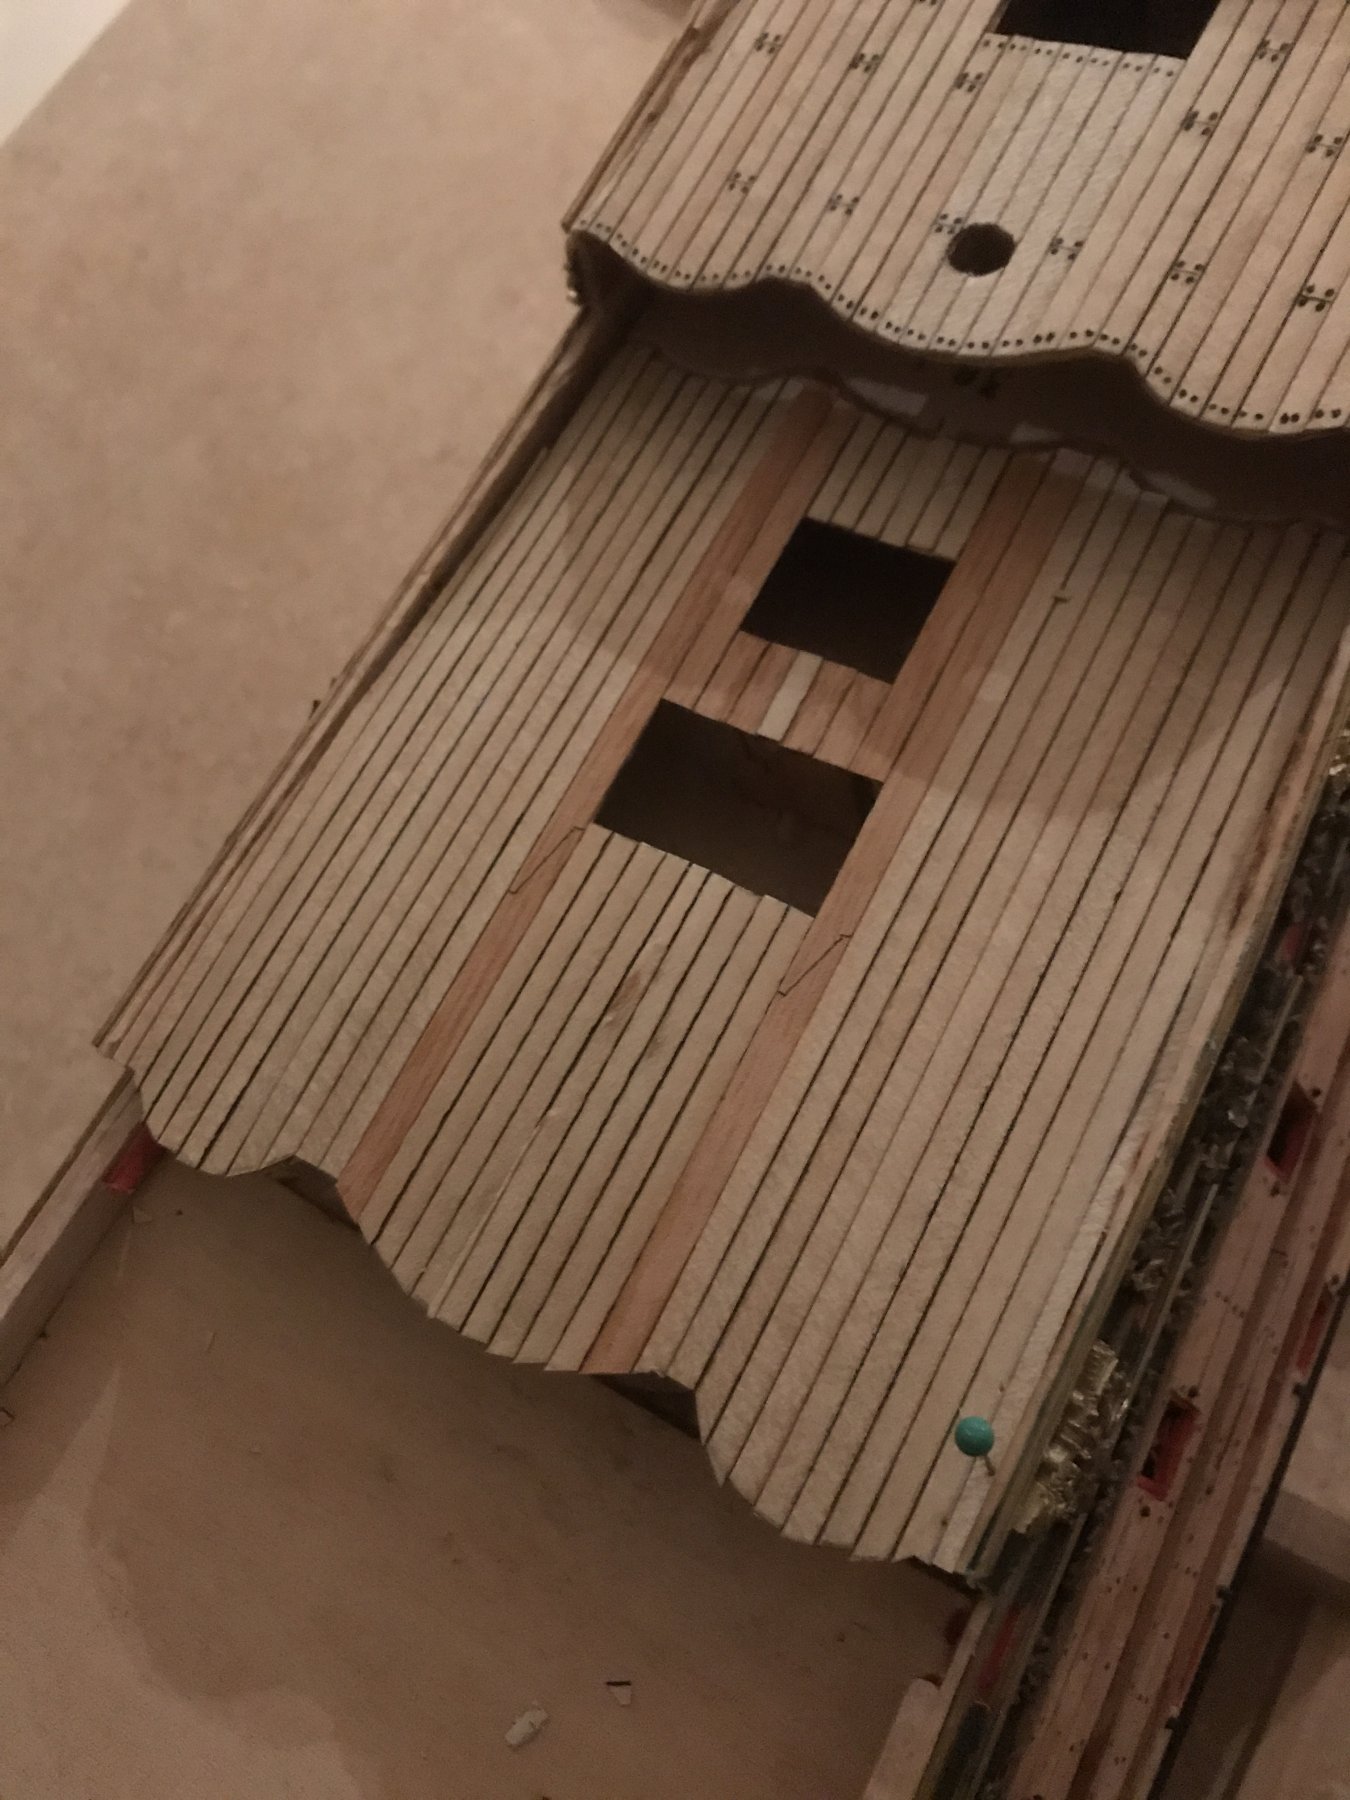
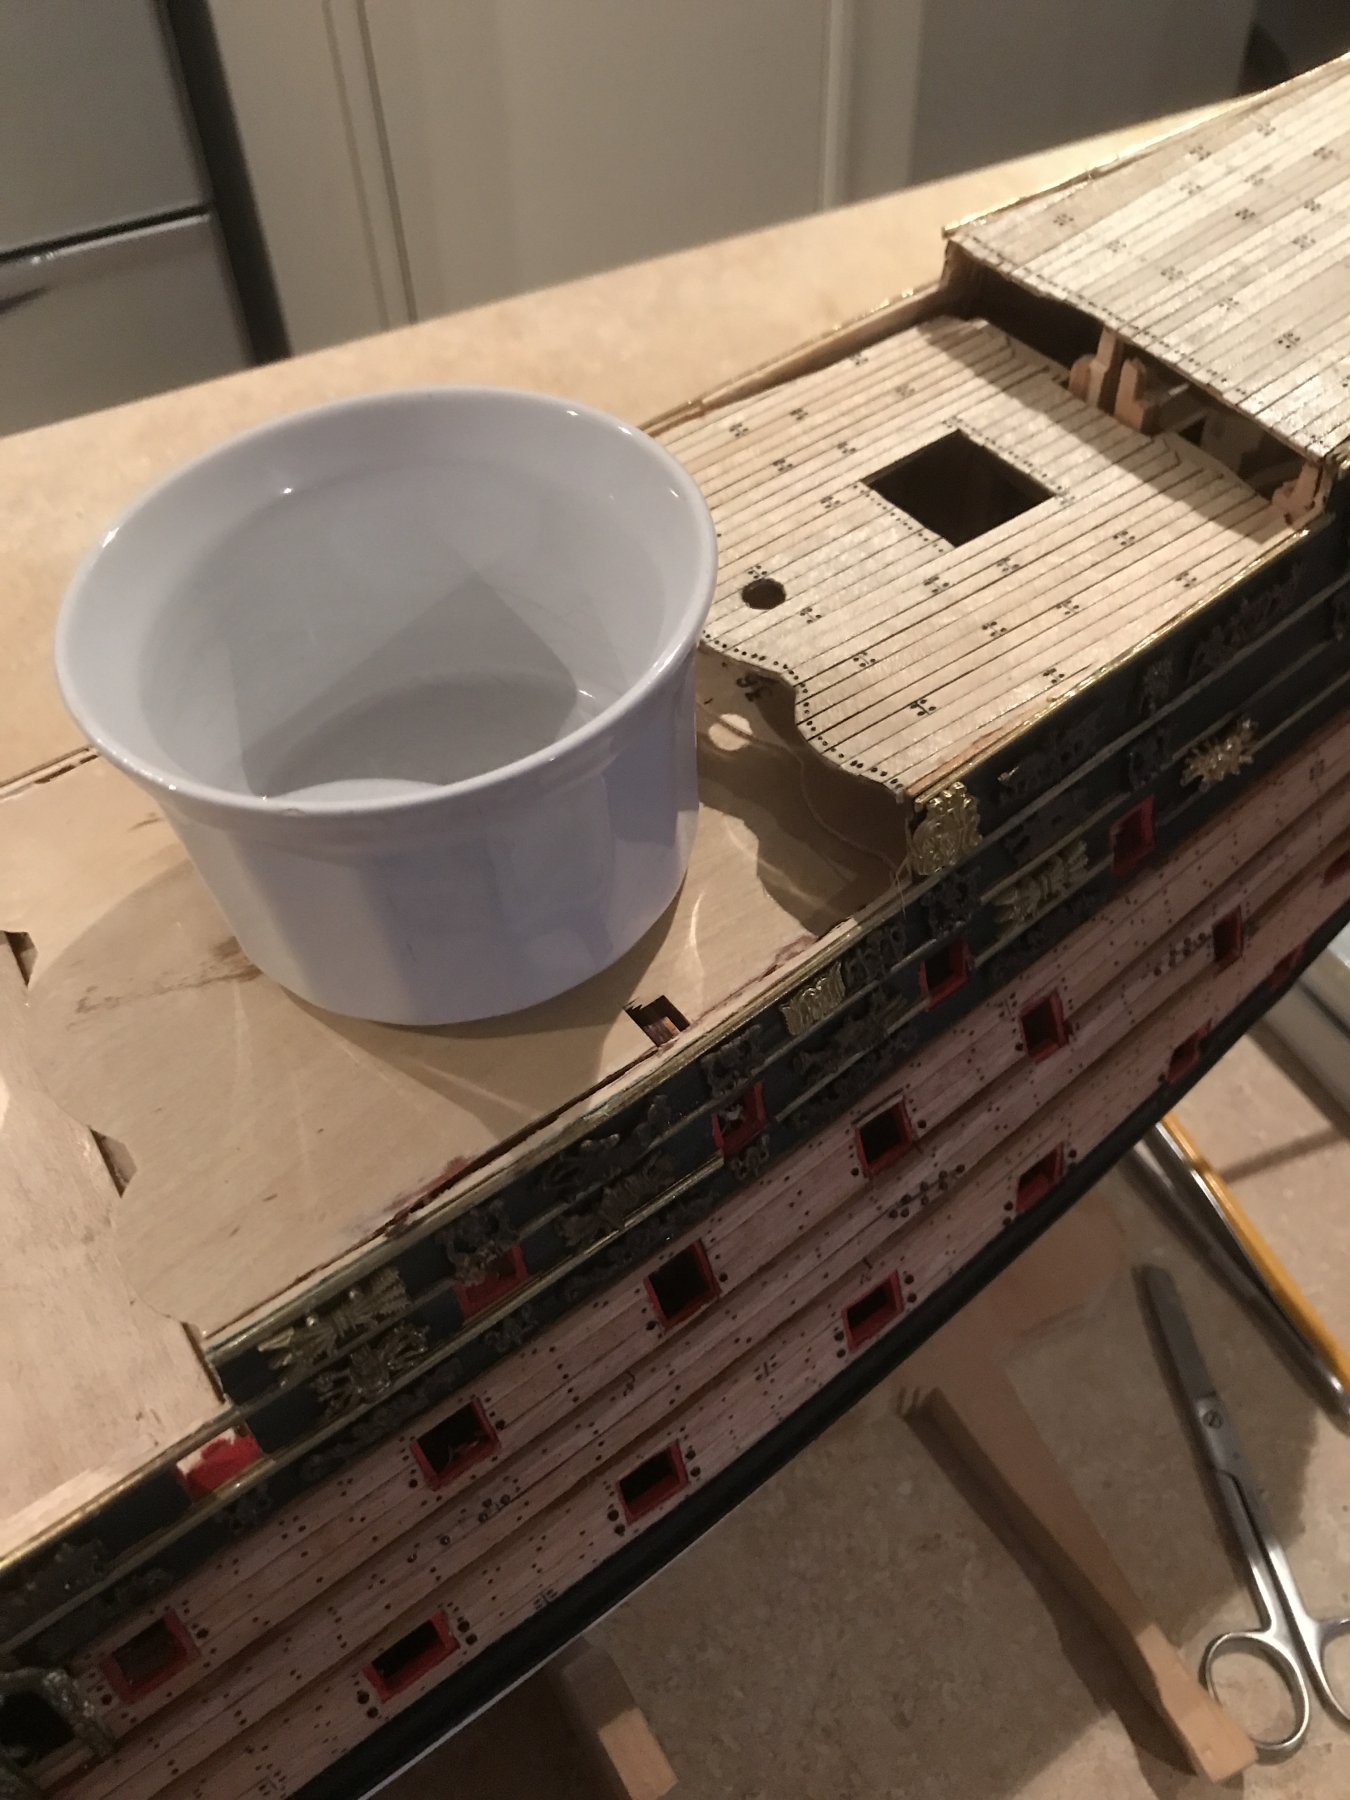
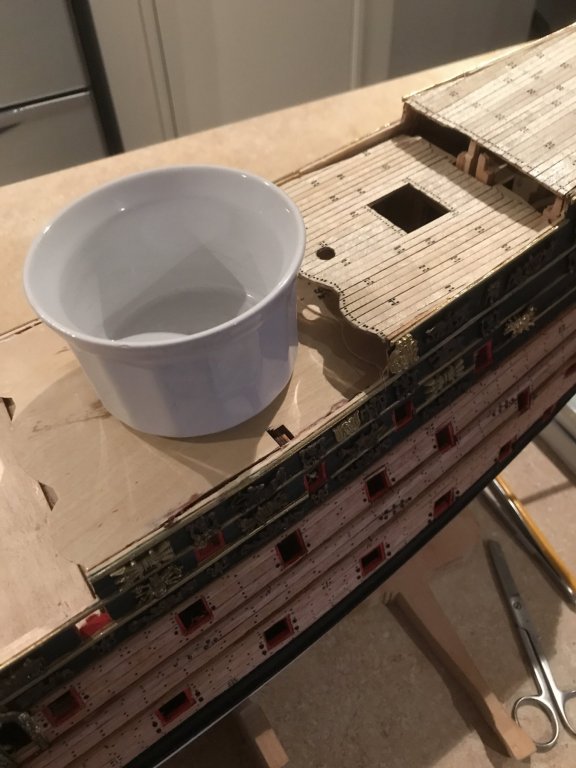
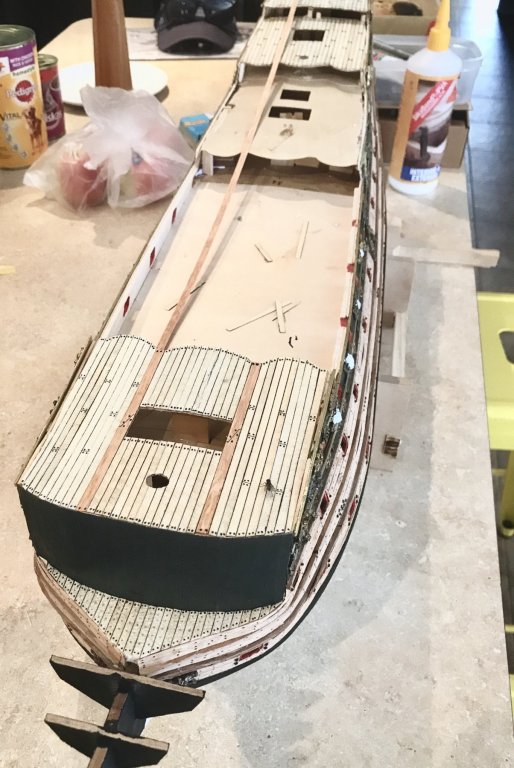
For a change of pace from the decorations I've started some deck planking. Fore peak, f'cstle, quarter deck and poop deck are planked. The half deck and waist to go. I've imitated the caulking with black marker like the hull and the treenails with the ebony filler for the tarred ones. Once sanded down should come up nicely. What a difference the planked decks make!
- 322 replies
-
- 6
-
-
- sergal
- sovereign of the seas
- (and 5 more)
-
I like the faded look best also Sjors, will be applying a wash to mine to dumb down the gold punch as it were.
-
Thanks ulises, this is the first time I've used the ebony filler but am quite pleased with the results and just like the Vasa the tree nails aren't in a perfect row.
- 322 replies
-
- 2
-
-
- sergal
- sovereign of the seas
- (and 5 more)
-
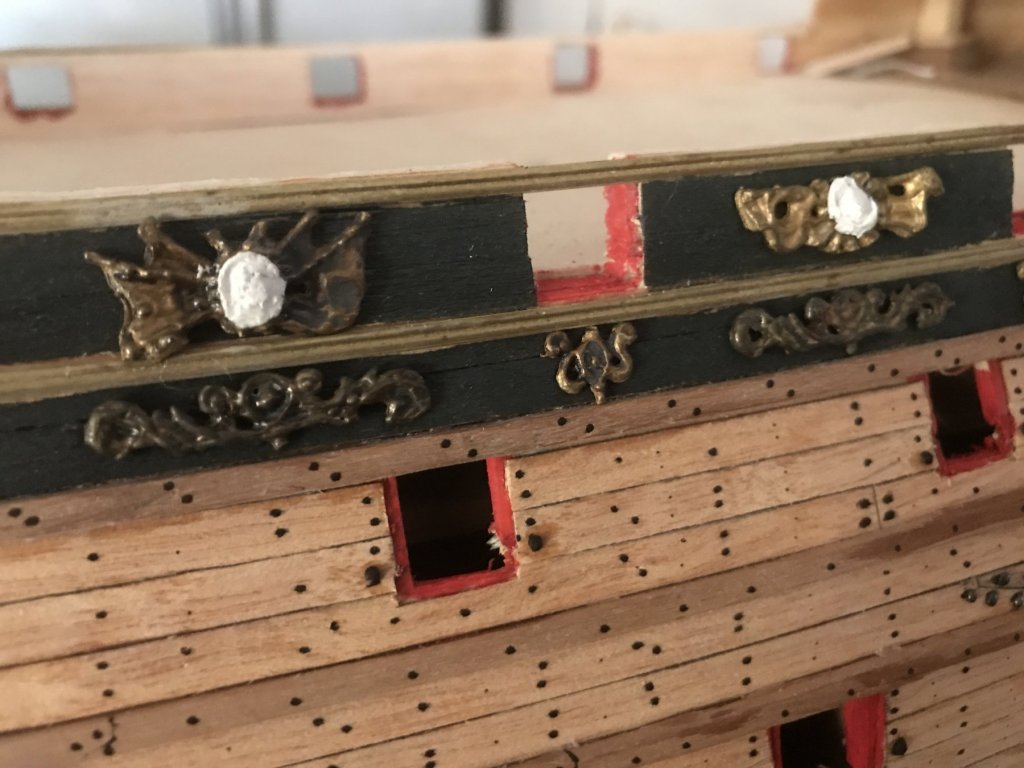
Using modeling clay (air dries without shrinking) to modify some of the kit carvings to match that of Van de Velde.
- 322 replies
-
- 8
-
-
- sergal
- sovereign of the seas
- (and 5 more)
-
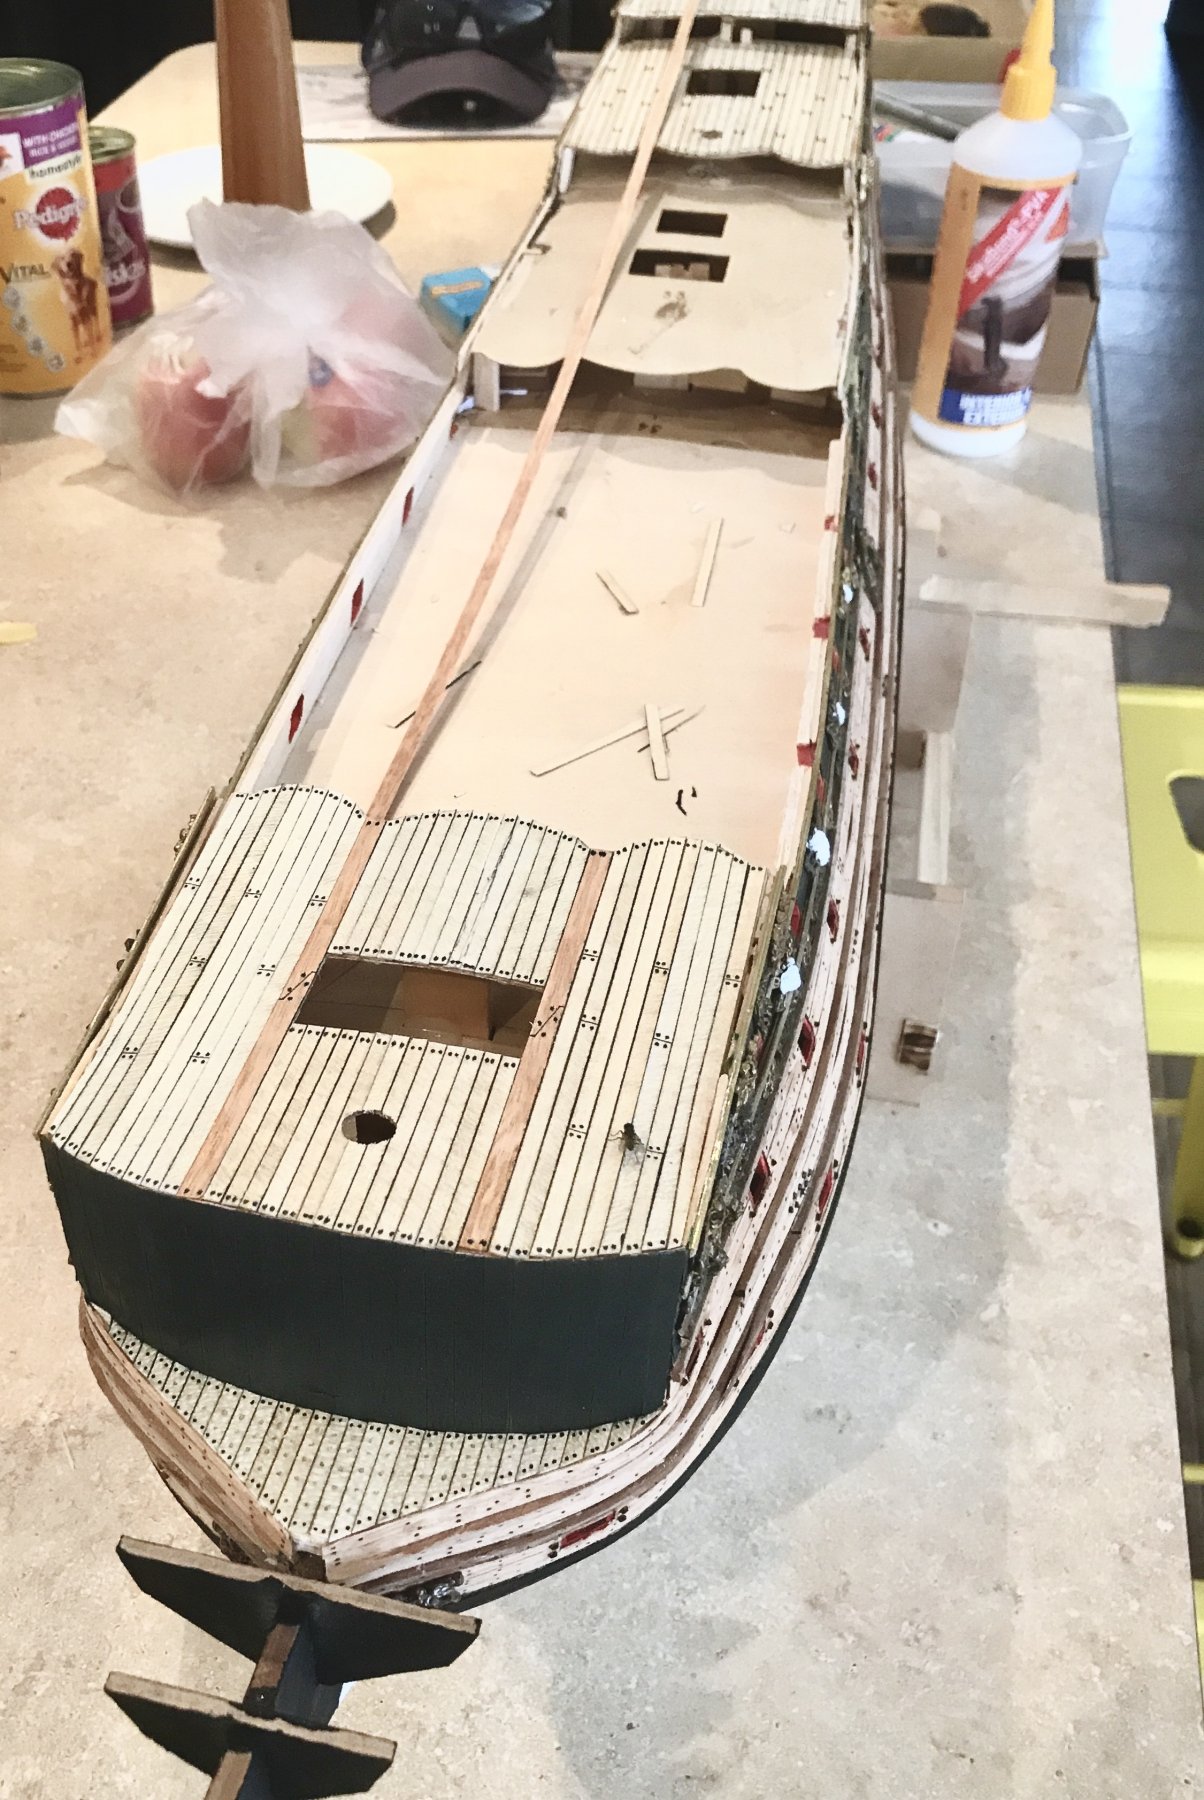
Continuation of the hull. Have also planked the forepeak. The kit suggests that this forepeak runs continuously onto the beak head, but I've separated them and raised the level of the deck to match the Van de Velde sketch and other vessels practice at the time.

- 322 replies
-
- 8
-
-
- sergal
- sovereign of the seas
- (and 5 more)
-
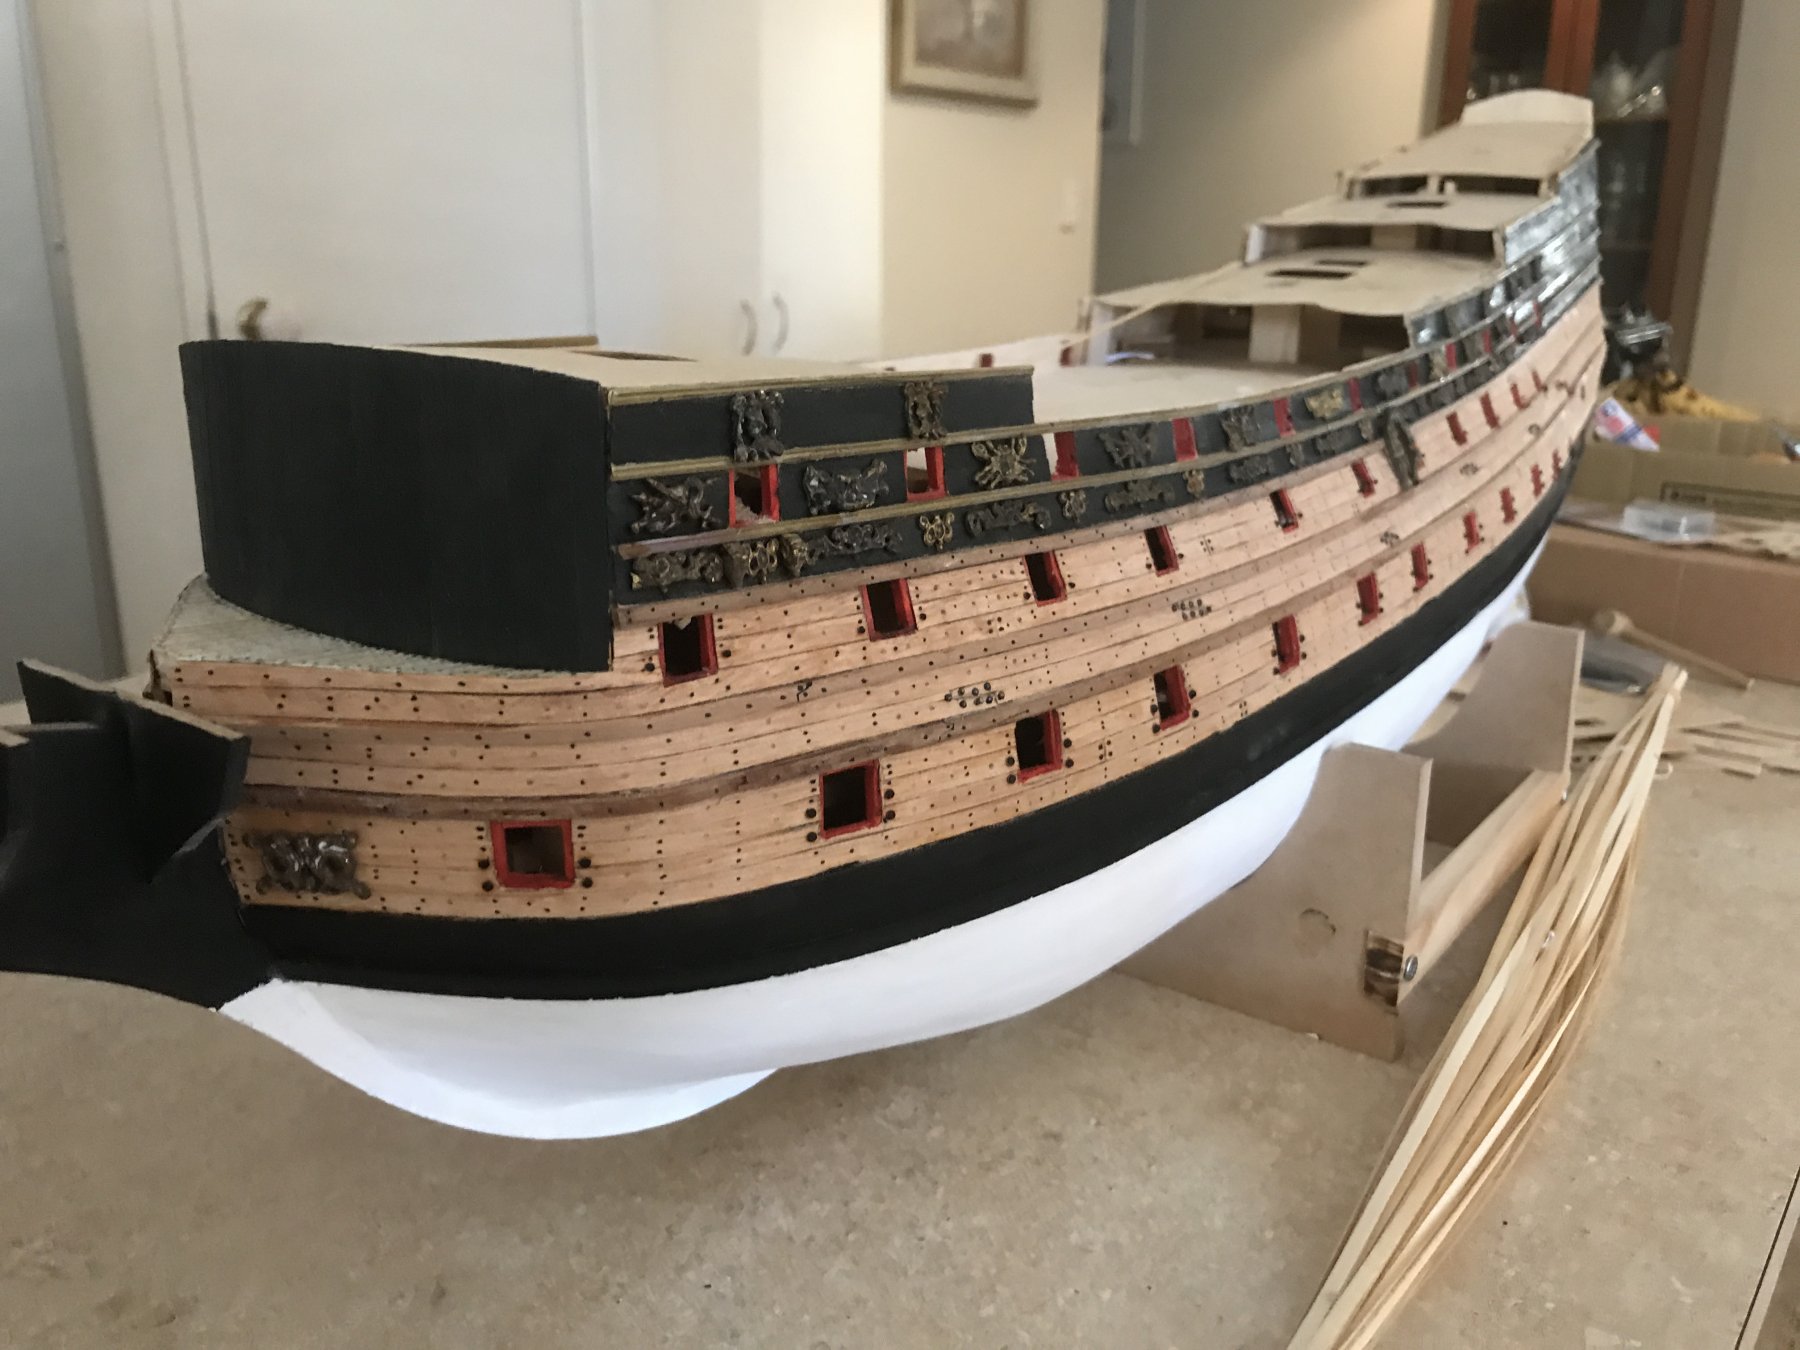
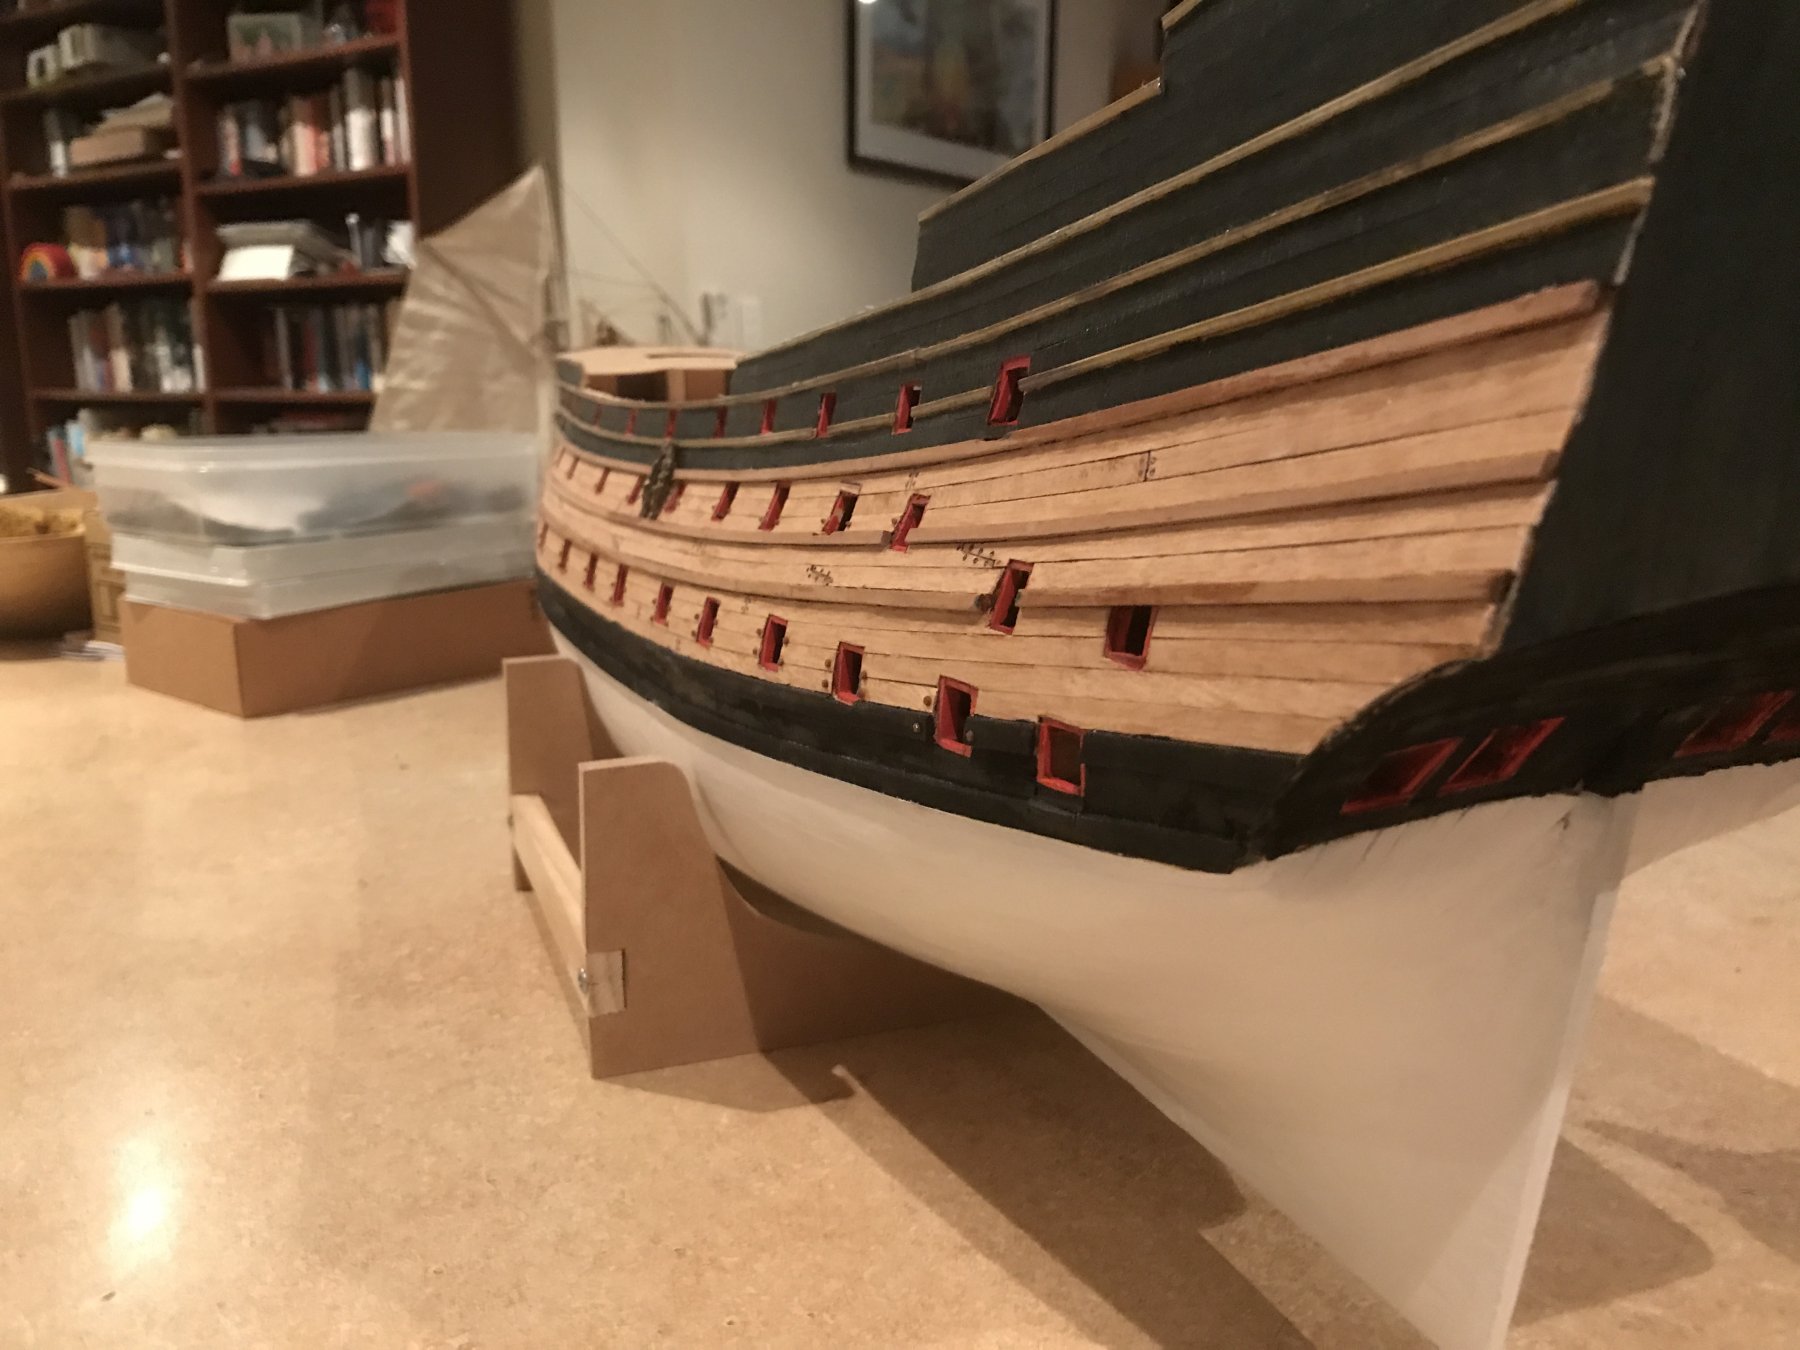
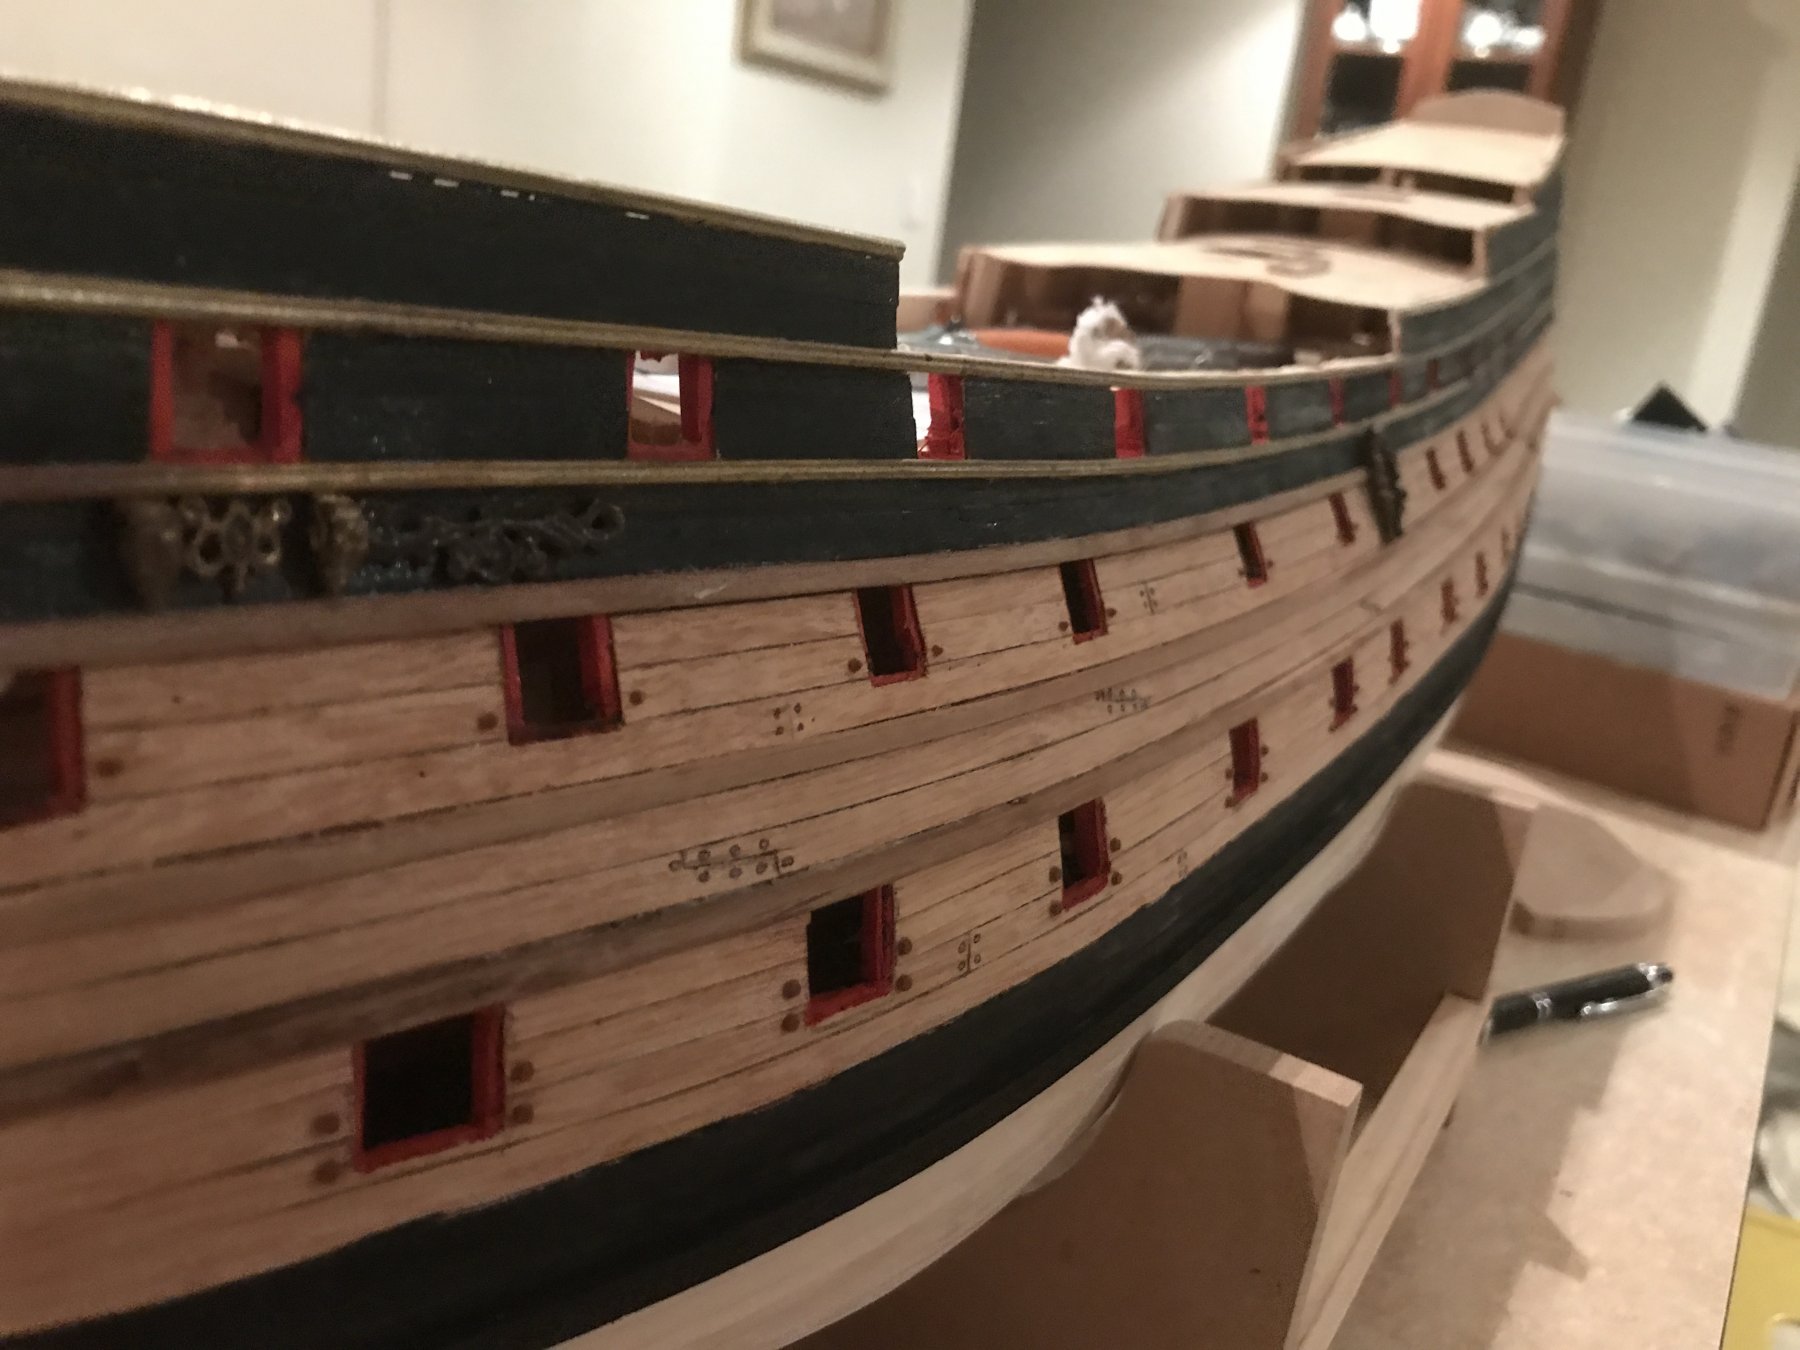
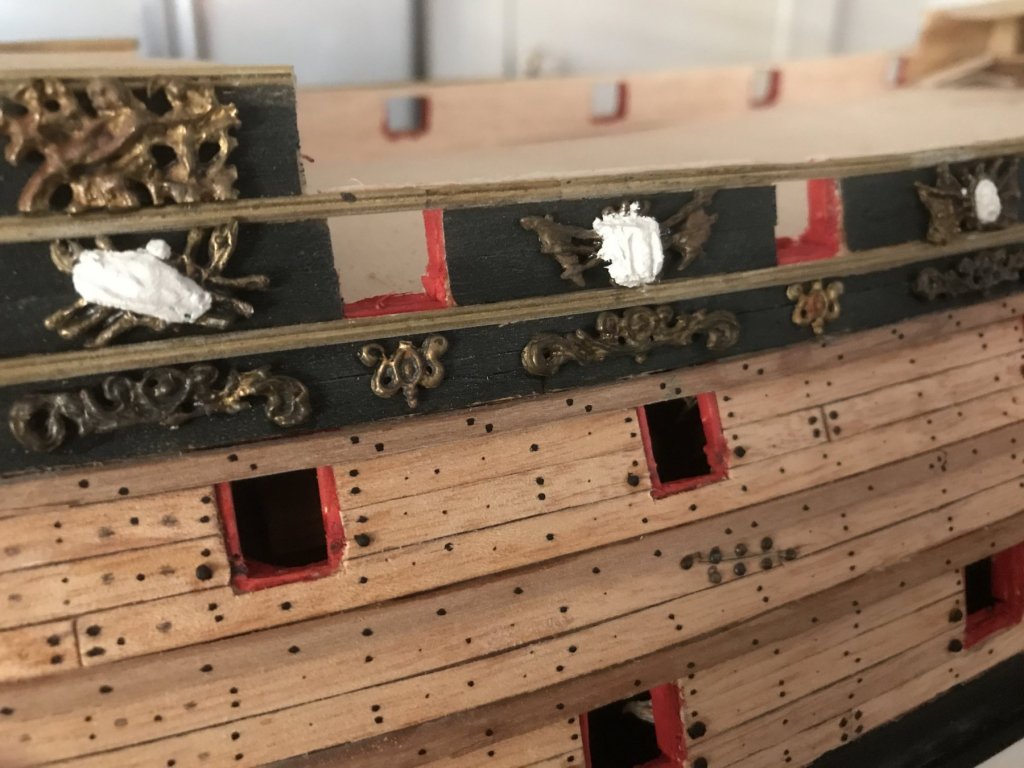
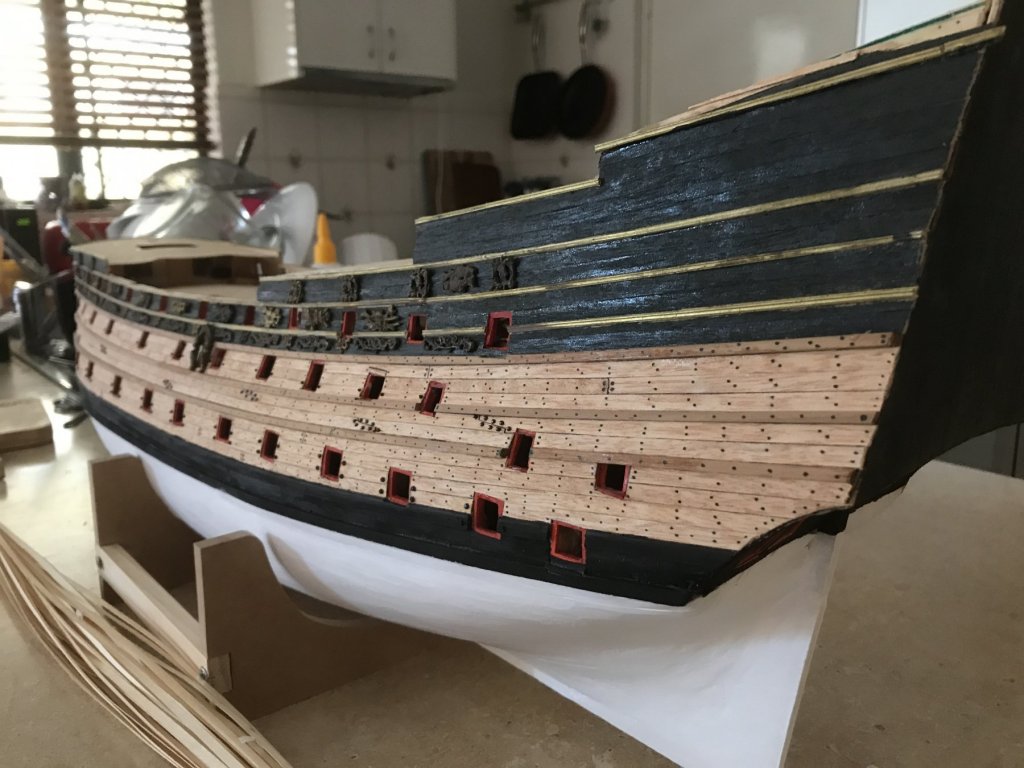
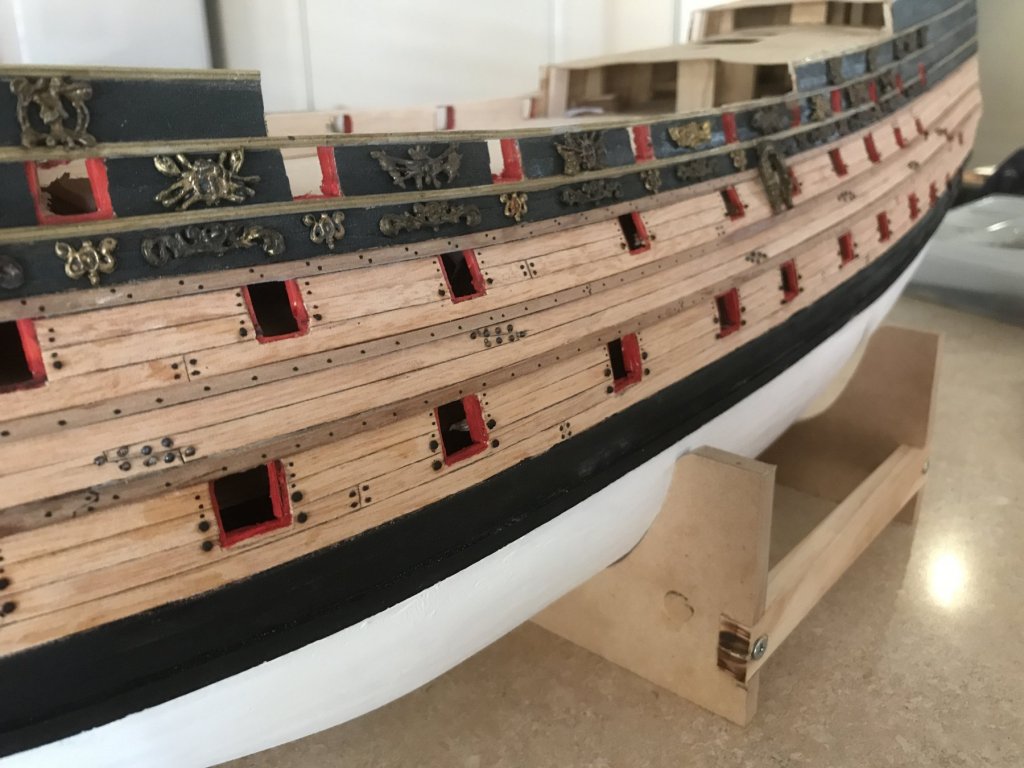
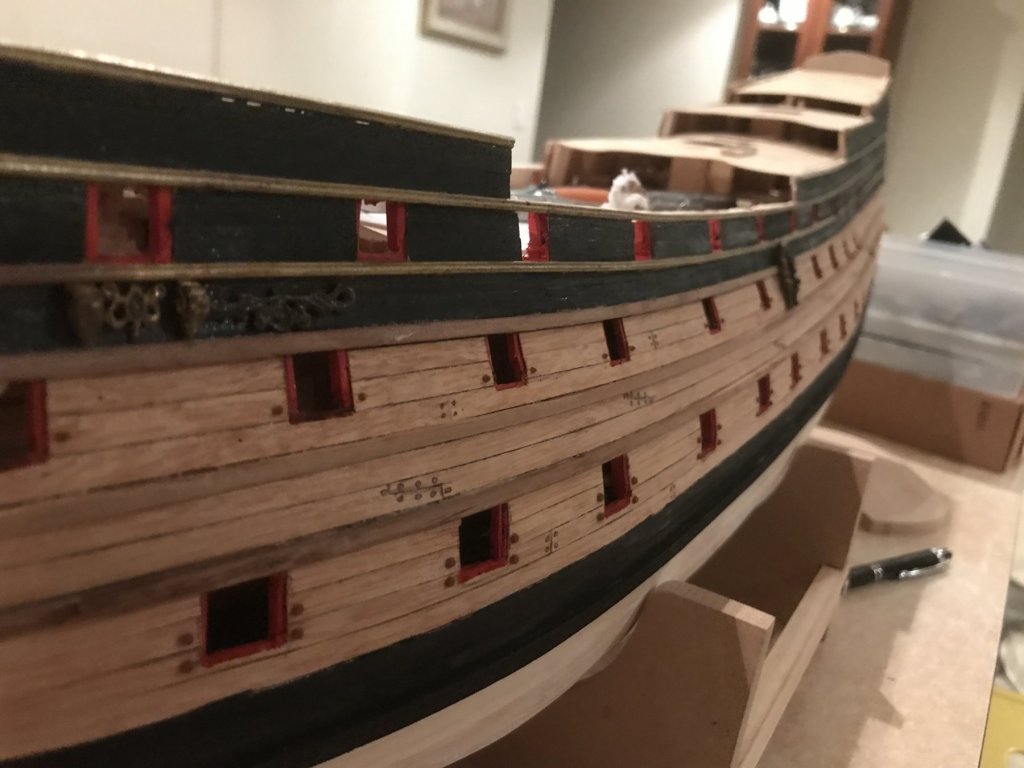
Thanks Scott, the flat black I've used for the lower wales are almost too black so will need to give it a wash to tone it down to my liking but overall I'm happy with her appearance. The white I'll have to adjust as I painted the white right up to the wale astern and therefore the bows also to match the Serb on the Ley painting, however on the Van de Velde sketch after re checking the white is clearly only up to the waterline so I'll mark out the waterline over the lower wales which will be over painted white and the white on the stern and bows will be covered in black to give the natural straight waterline. Thanks BV, I have considered that also but displaying one side as you mentioned and the other just full hull - similar to the Greenwich model of the Endeavour, without the cutaway hull obviously haha. I should make a decision soon as the more I build on her topsides the more fragile and susceptible she will be to damage. Back to the model, more 'iron bolts' added using the forementioned mode train nail heads for the larger bolts and drilled holes with black ebony wood filler for the smaller diameter bolts. So far both hull sides are at the same level of completion with the obvious bolt locations placed but I'm deciding whether to continue and add more bolts and then the treenails. I'm using the 1/10 Vasa model from the Vadamuseet and the Batavia replica as a guide for these and again happy so far. You'll also notice some more carvings added using a mixture of the sergal fittings which are actually upon closer study reasonably accurate.
- 322 replies
-
- 7
-
-
- sergal
- sovereign of the seas
- (and 5 more)
-
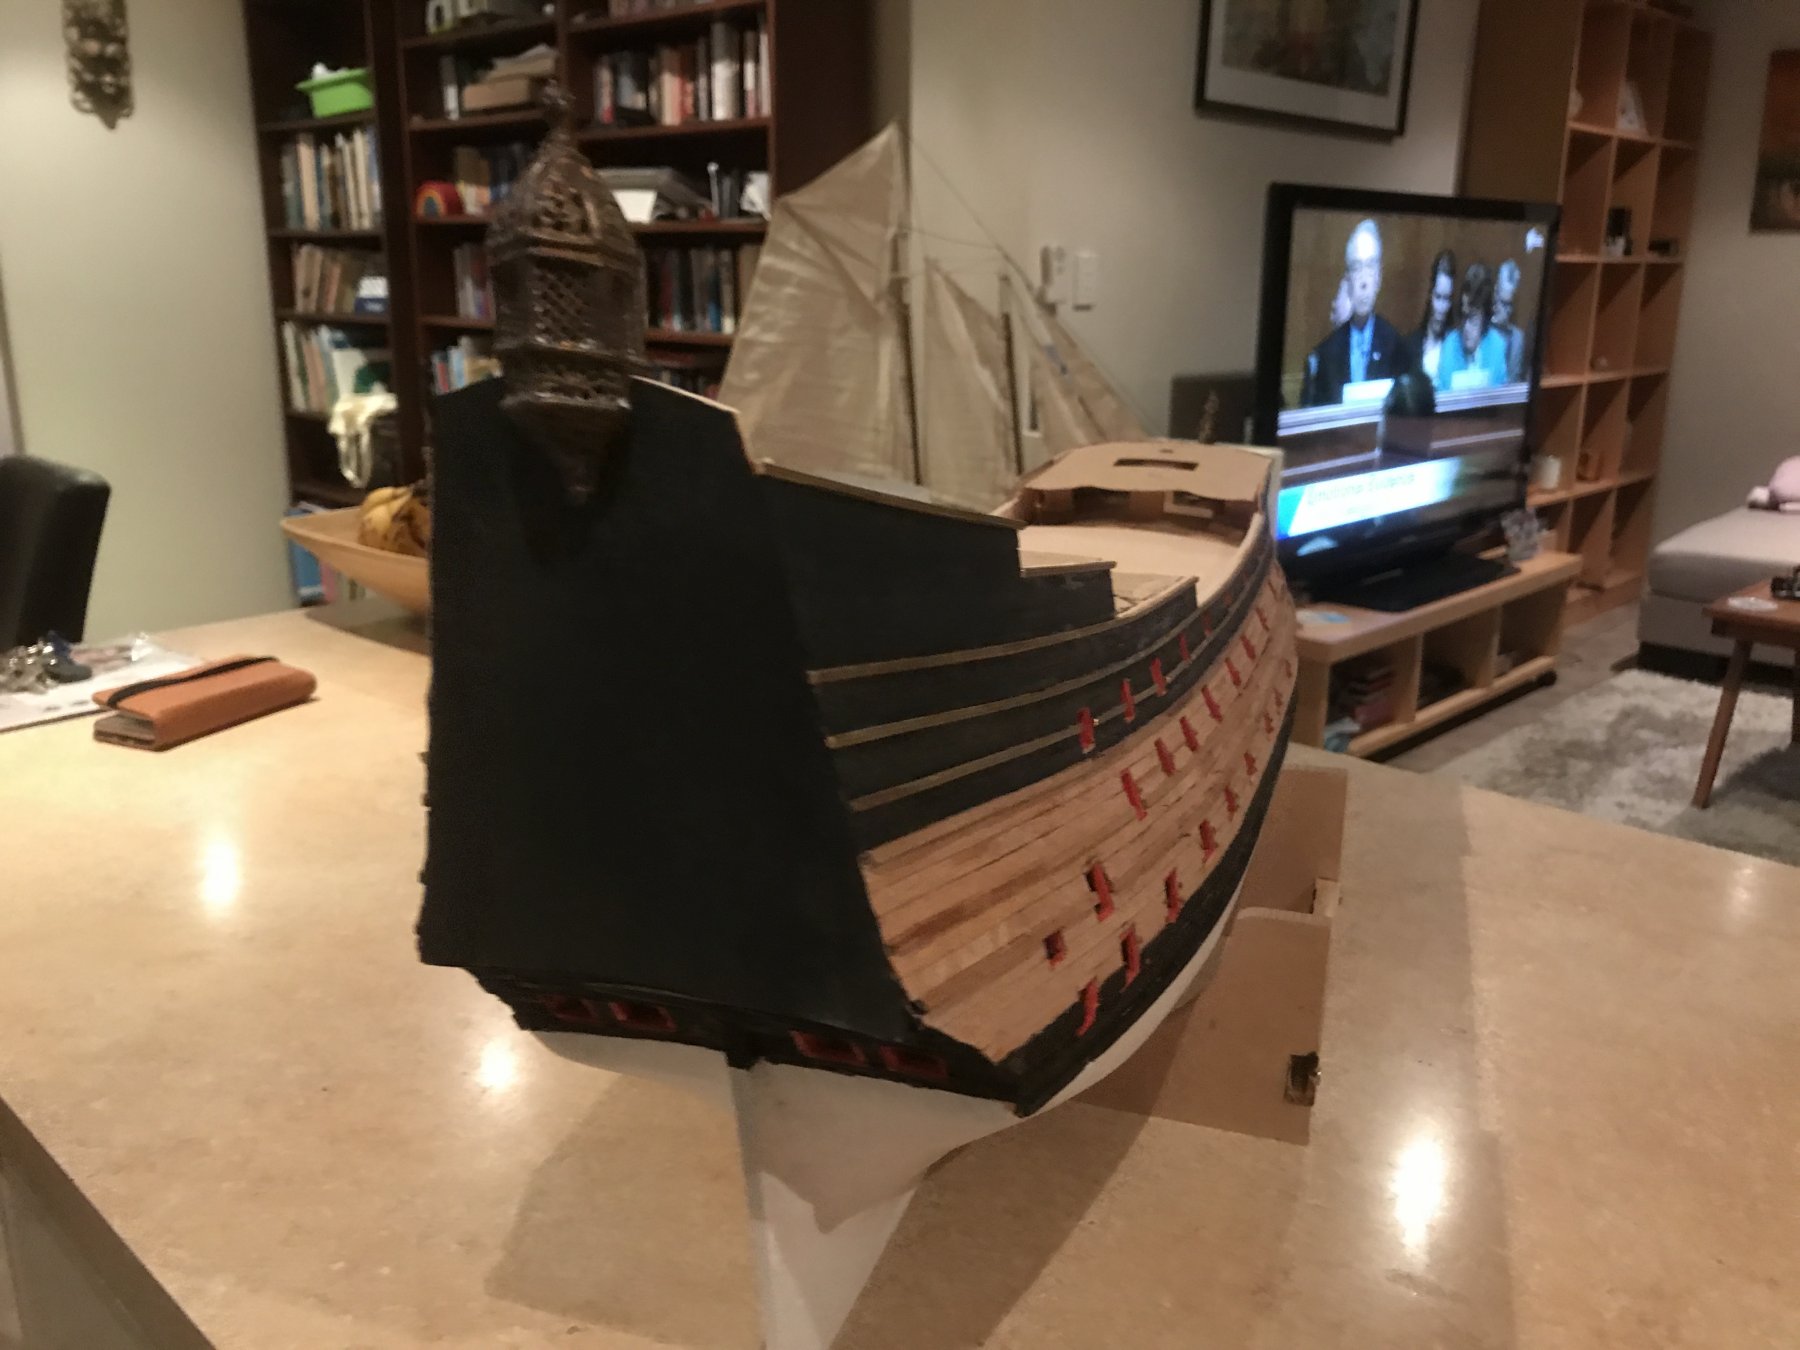
As she sits tonight the figurehead and great lantern isn't fixed, just wanted to see how she looks haha


- 322 replies
-
- 8
-
-
- sergal
- sovereign of the seas
- (and 5 more)
-
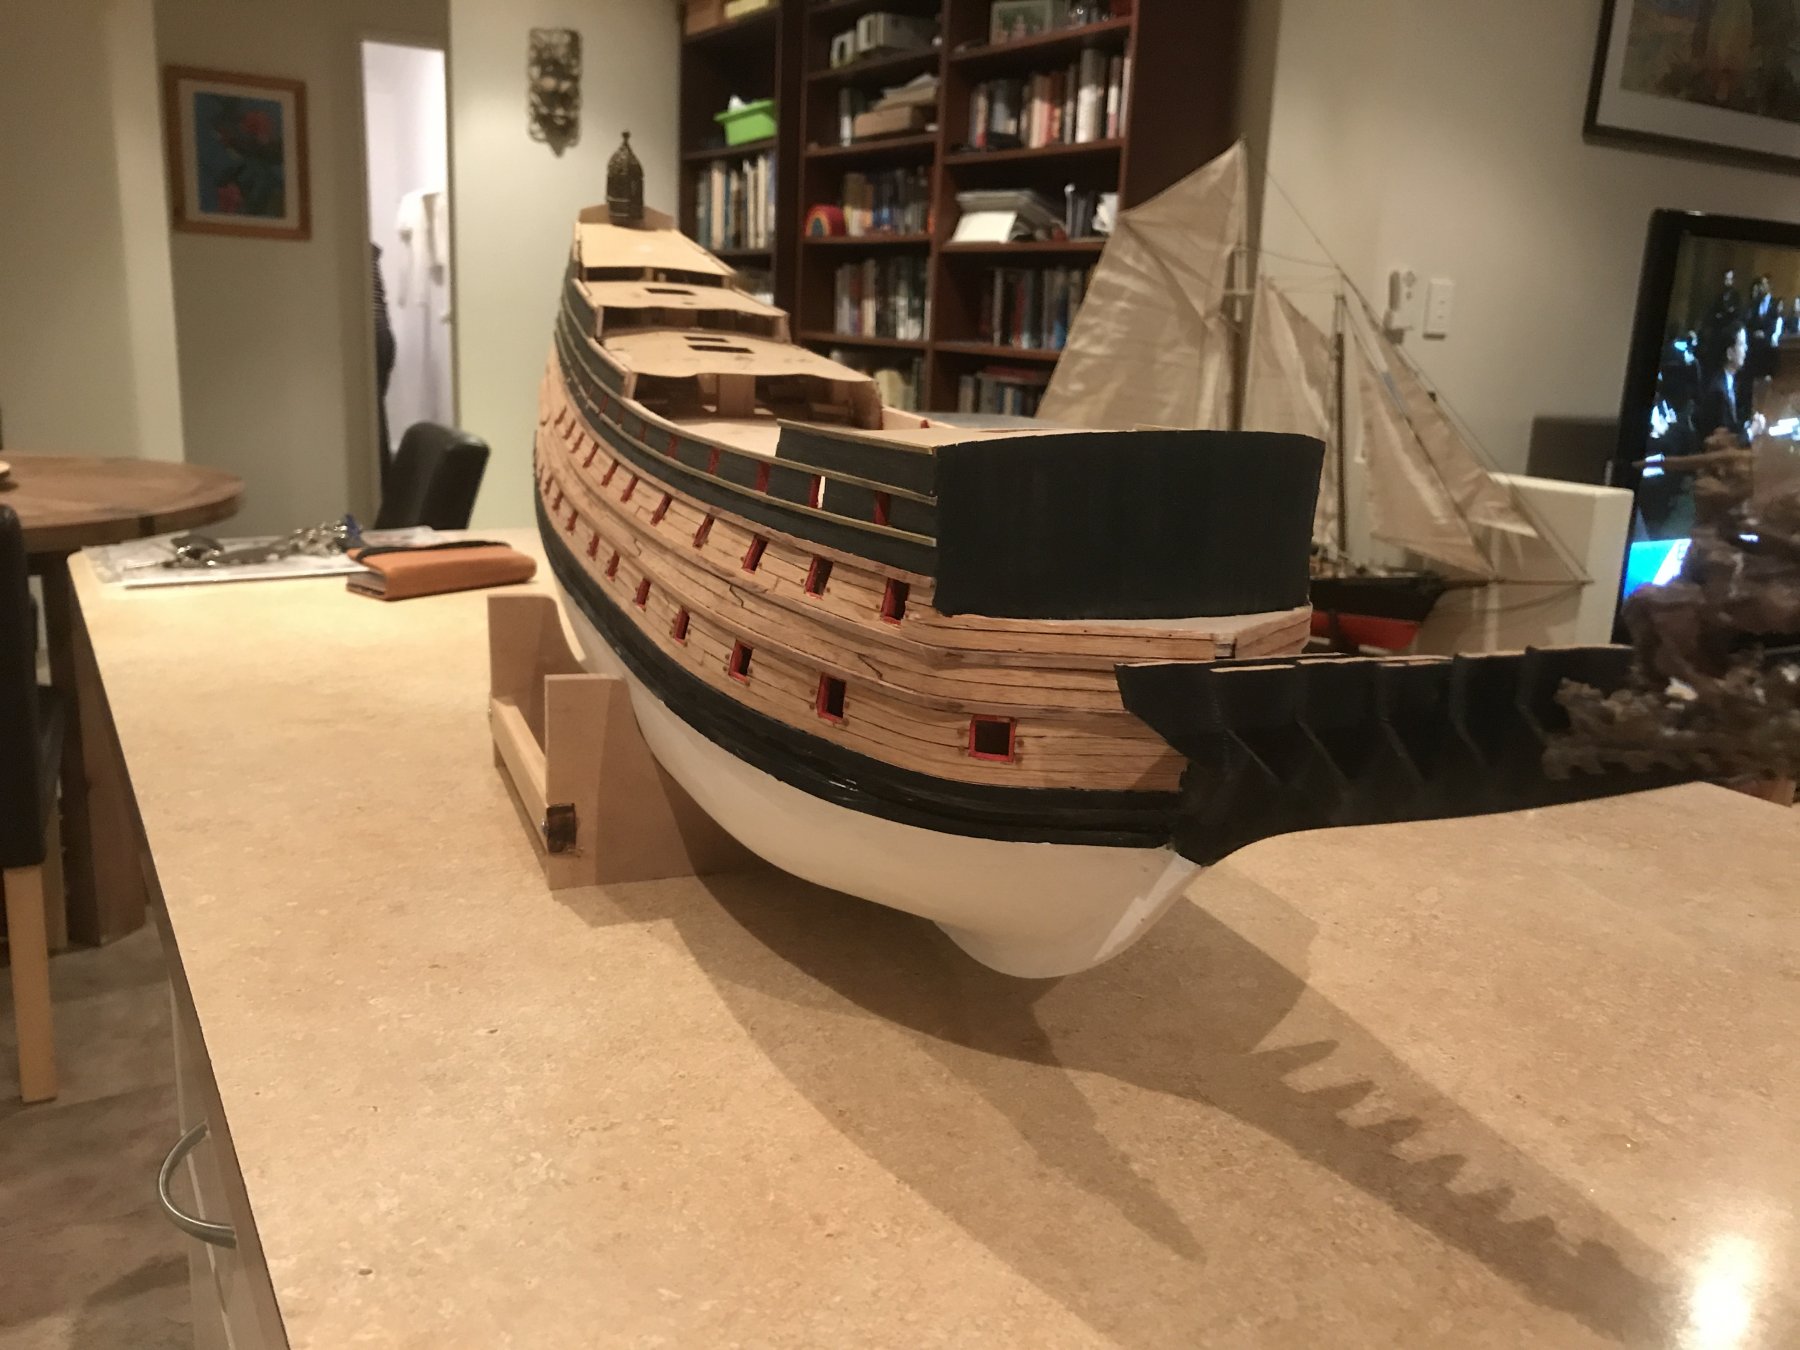
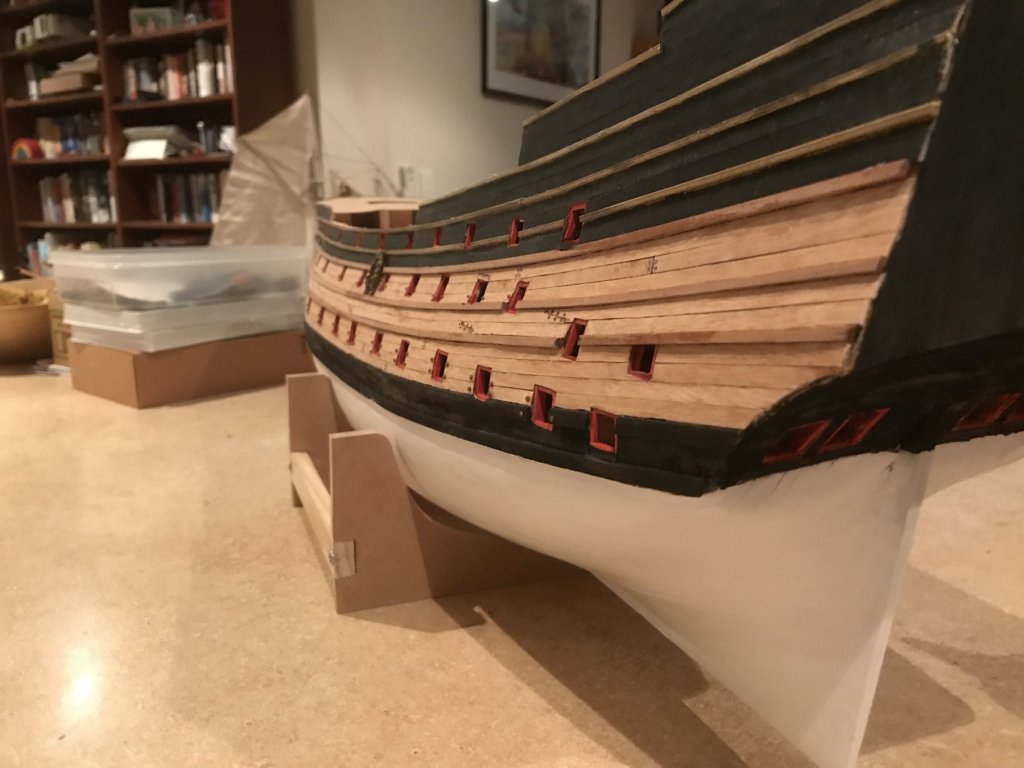
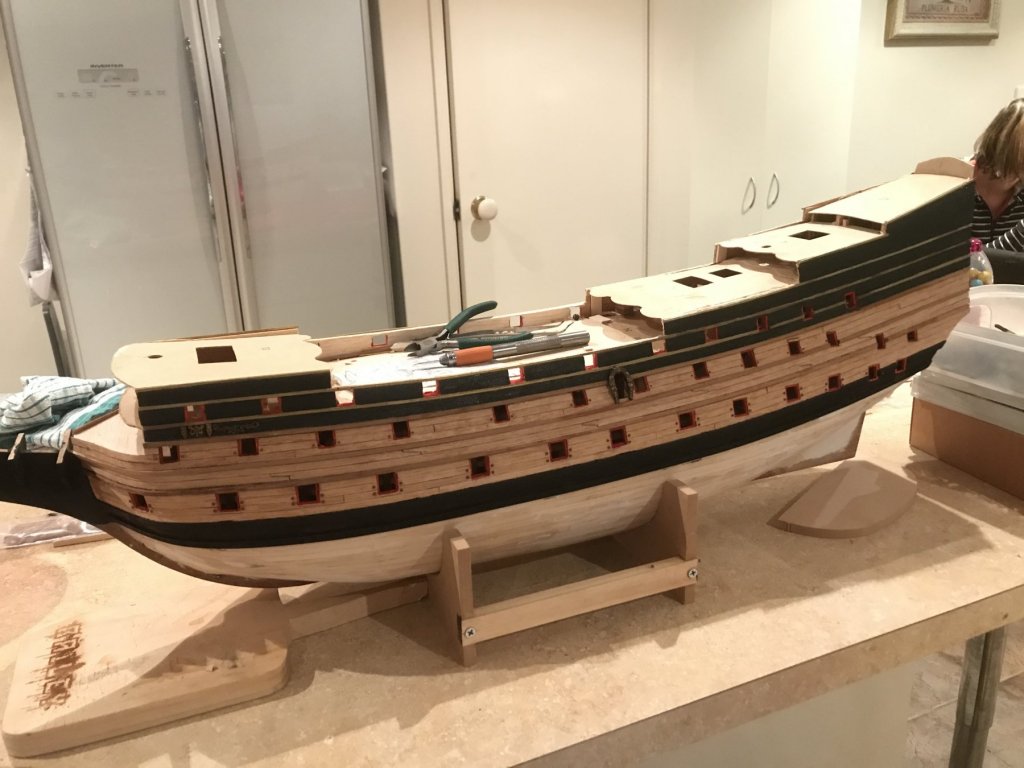
Before I got too carried away, thought I should finish the lower hull. Still yet to decide completely whether to display her as a diorama or full hull.. The transom still requires a sand before painting. I've also started to cut away at the side of the transom for the footing of the carving that will be fixed to the arch of the transom.
- 322 replies
-
- 7
-
-
- sergal
- sovereign of the seas
- (and 5 more)
-
Thanks BV, it's an interesting colour choice with a nice contrast. It's one very interesting ship and model to build even with the extra required effort to correct the sergal kit. However I'm having a blast
- 322 replies
-
- 2
-
-
- sergal
- sovereign of the seas
- (and 5 more)
-
The start of a very long process of carving....

- 322 replies
-
- 9
-
-
- sergal
- sovereign of the seas
- (and 5 more)
-
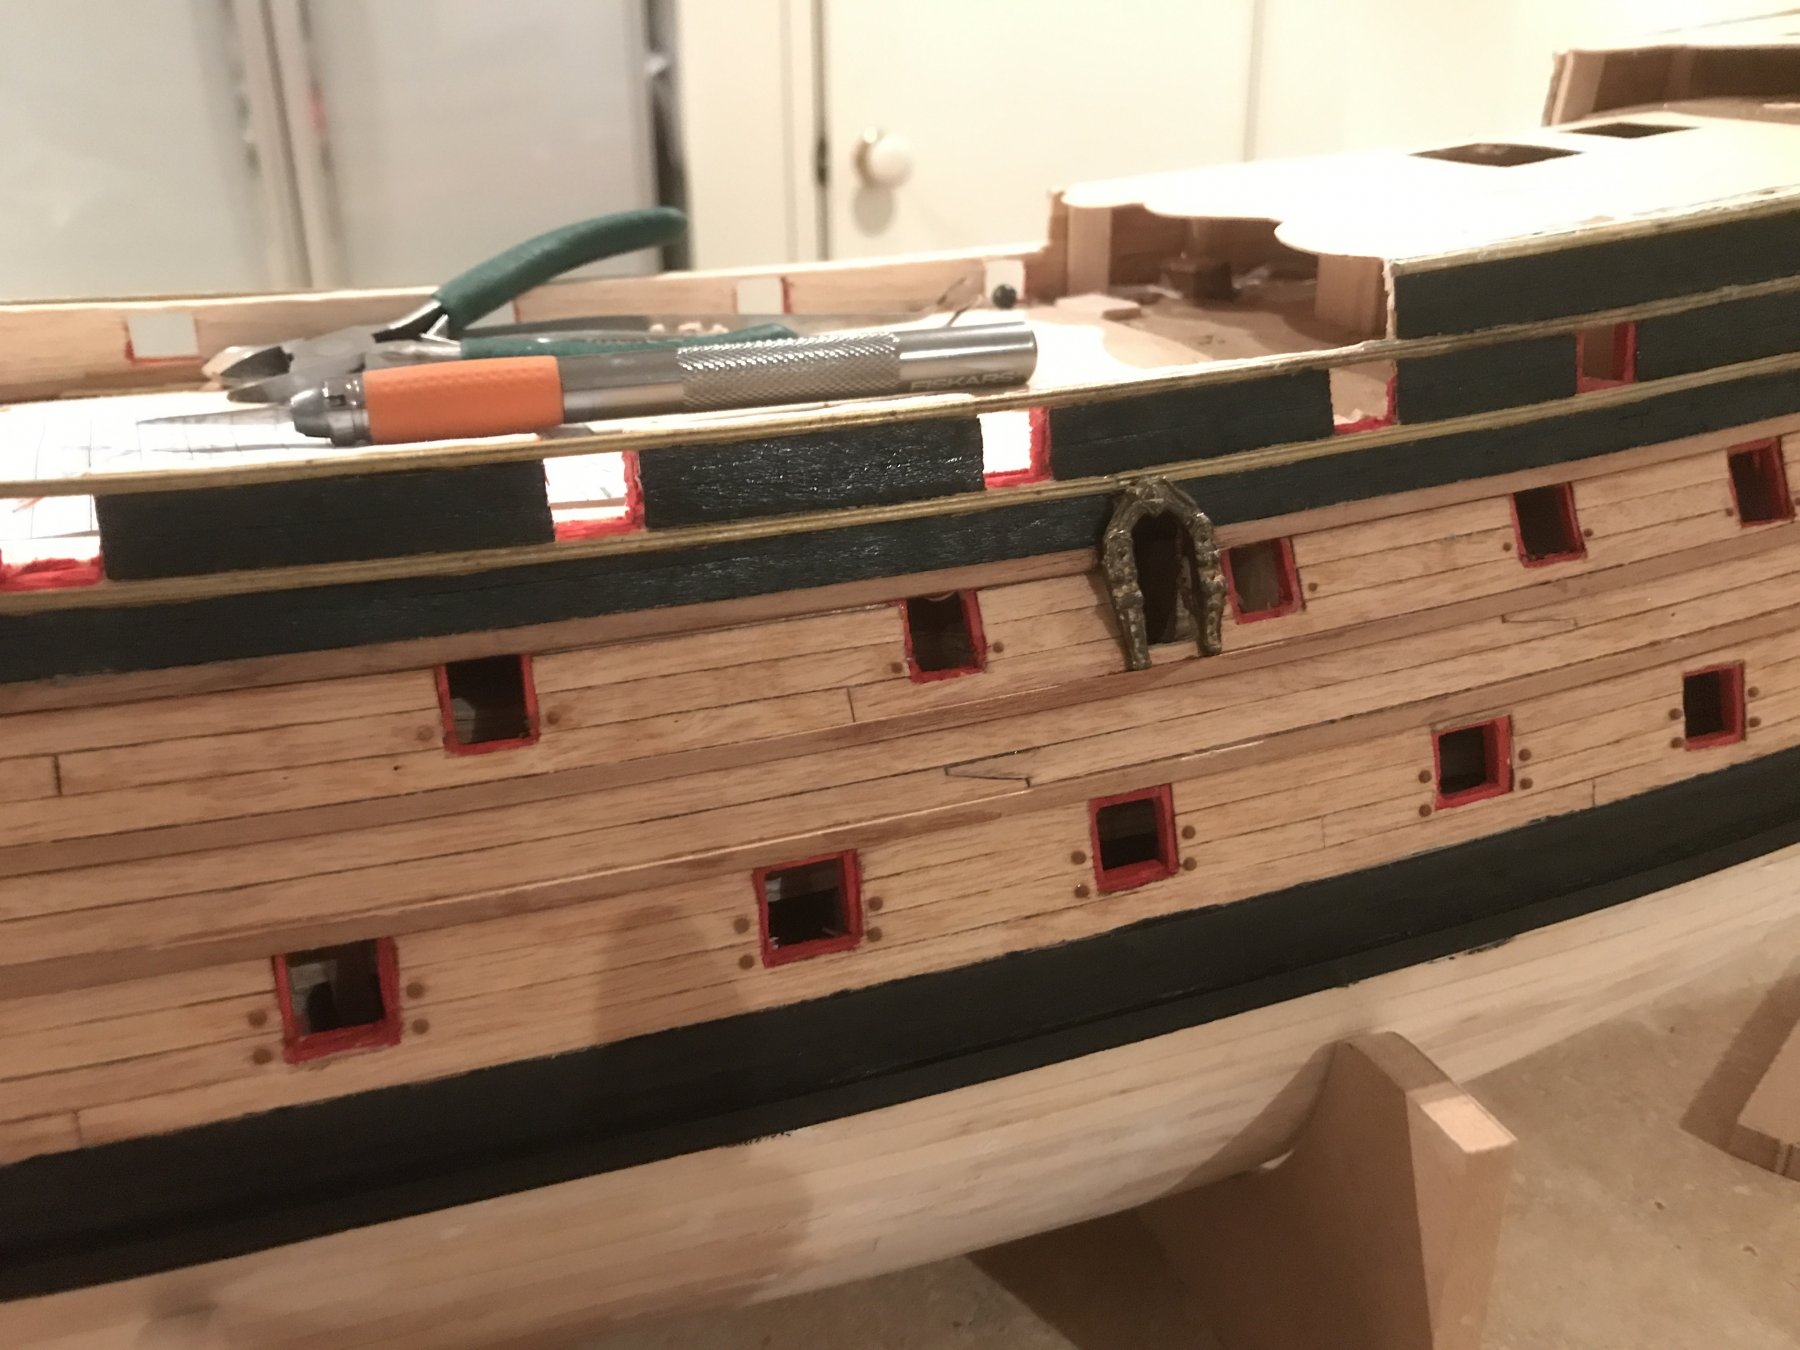
Have started fixing bolts to the hull. Initial bolts represent the gun rigging eyelets from the inside of the hull. These are plastic bolt heads used in model train building and come in all sorts of sizes and types, again found these while building my modern ships. Also playing around some of the brass fittings from the sergal kit - what is suitable and what should be replaced. Some of the carved filigree carvings that would need to be replaced is so small I think I'll have to sculpt rather than carve to keep them fine enough. I wish these were painted on like the later vessels of the 17th century! I'd find that much easier to do.
- 322 replies
-
- 9
-
-
- sergal
- sovereign of the seas
- (and 5 more)
-
For those I would suggest fixing the rope to the stay and once threaded through the block weight the running end down and apply a drop of glue at the block. This will keep the line taught - let it dry before fixing the running end to the stay. This should keep the tension in the lines, this is how I do my lines which need to remain taught without putting too much pressure on the stay and pulling it out of whack.
- 608 replies
-
- 7
-
-
- la couronne
- corel
- (and 1 more)
-
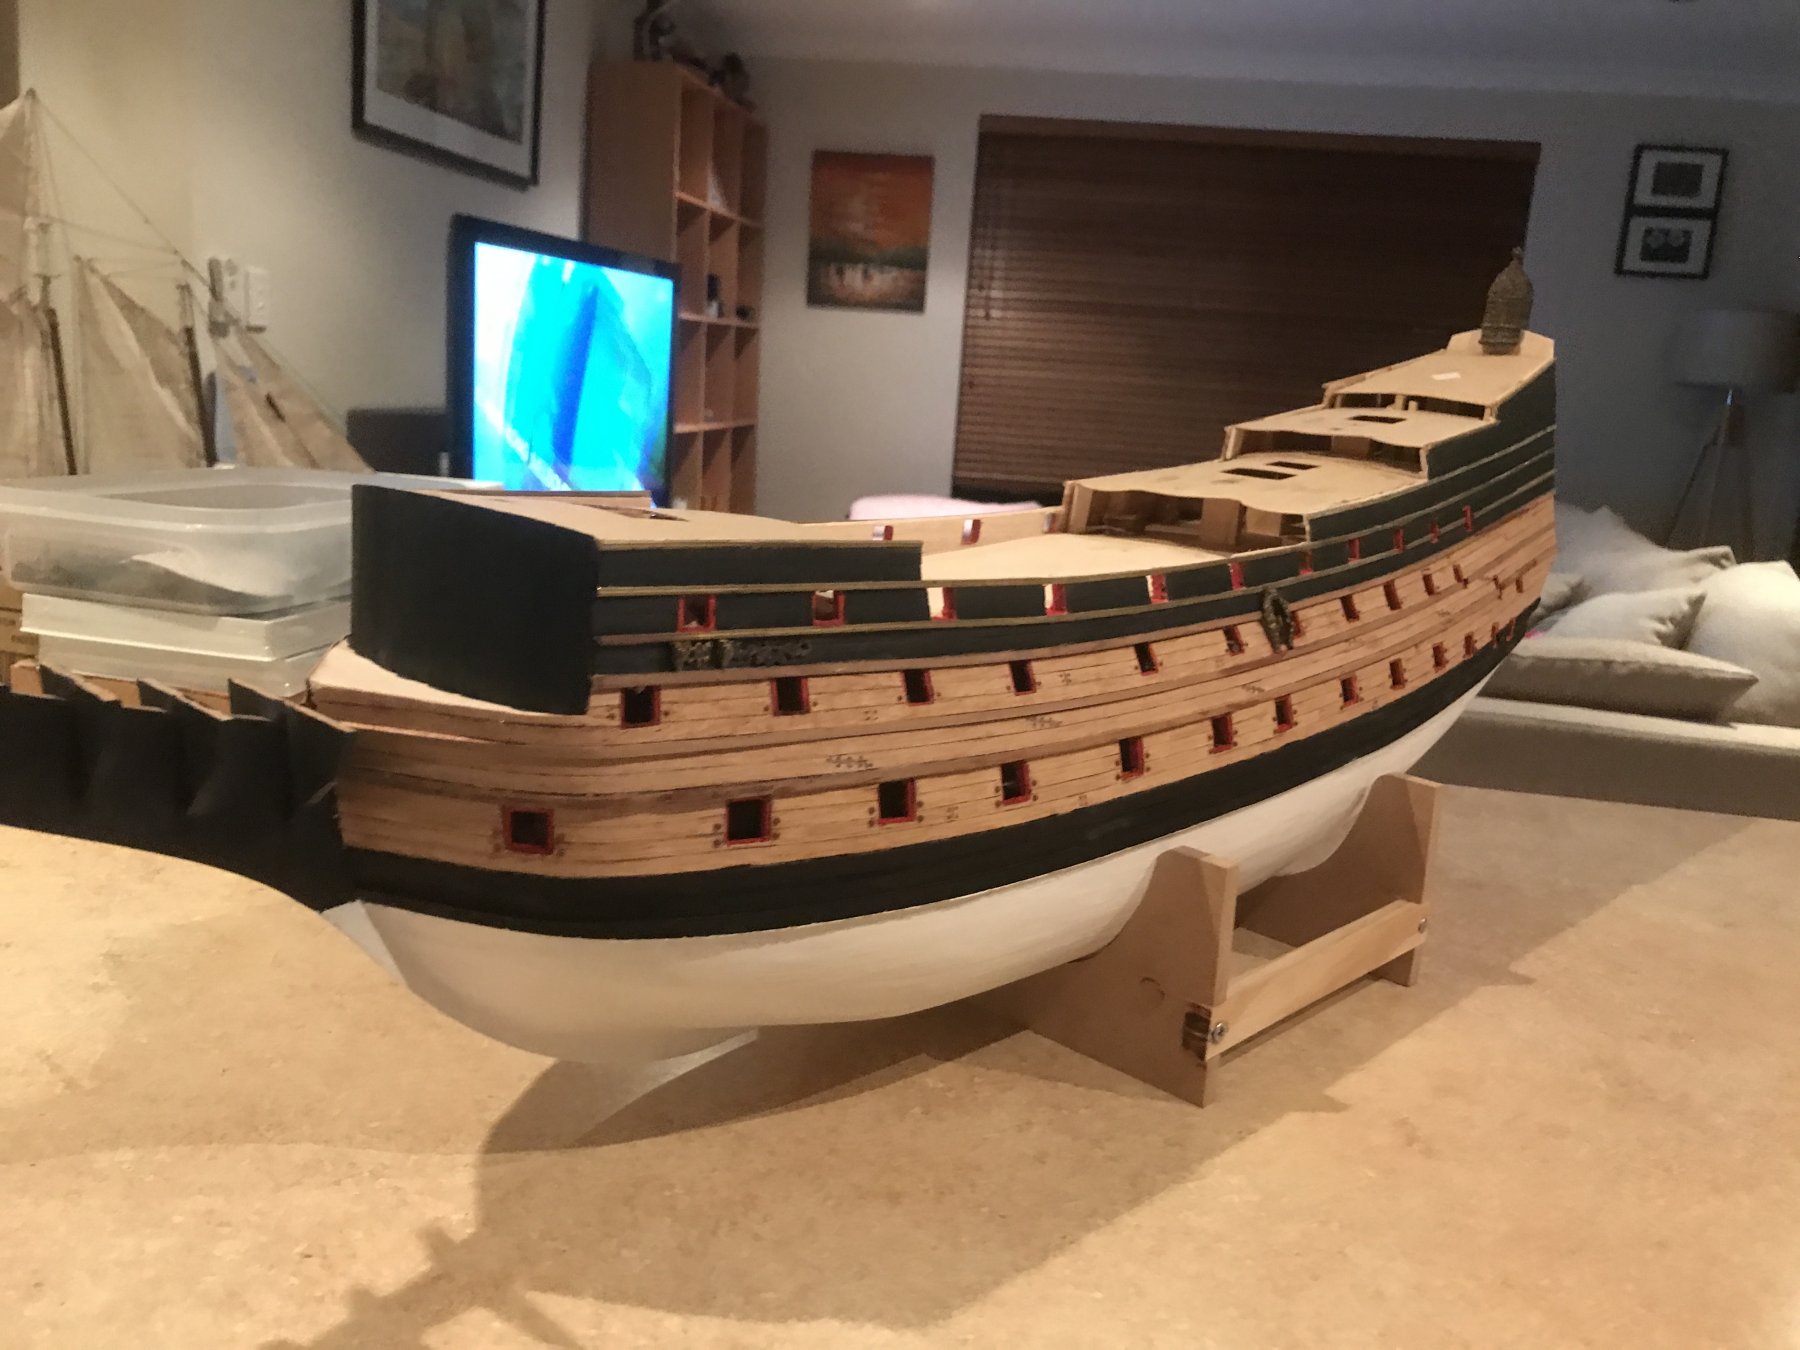
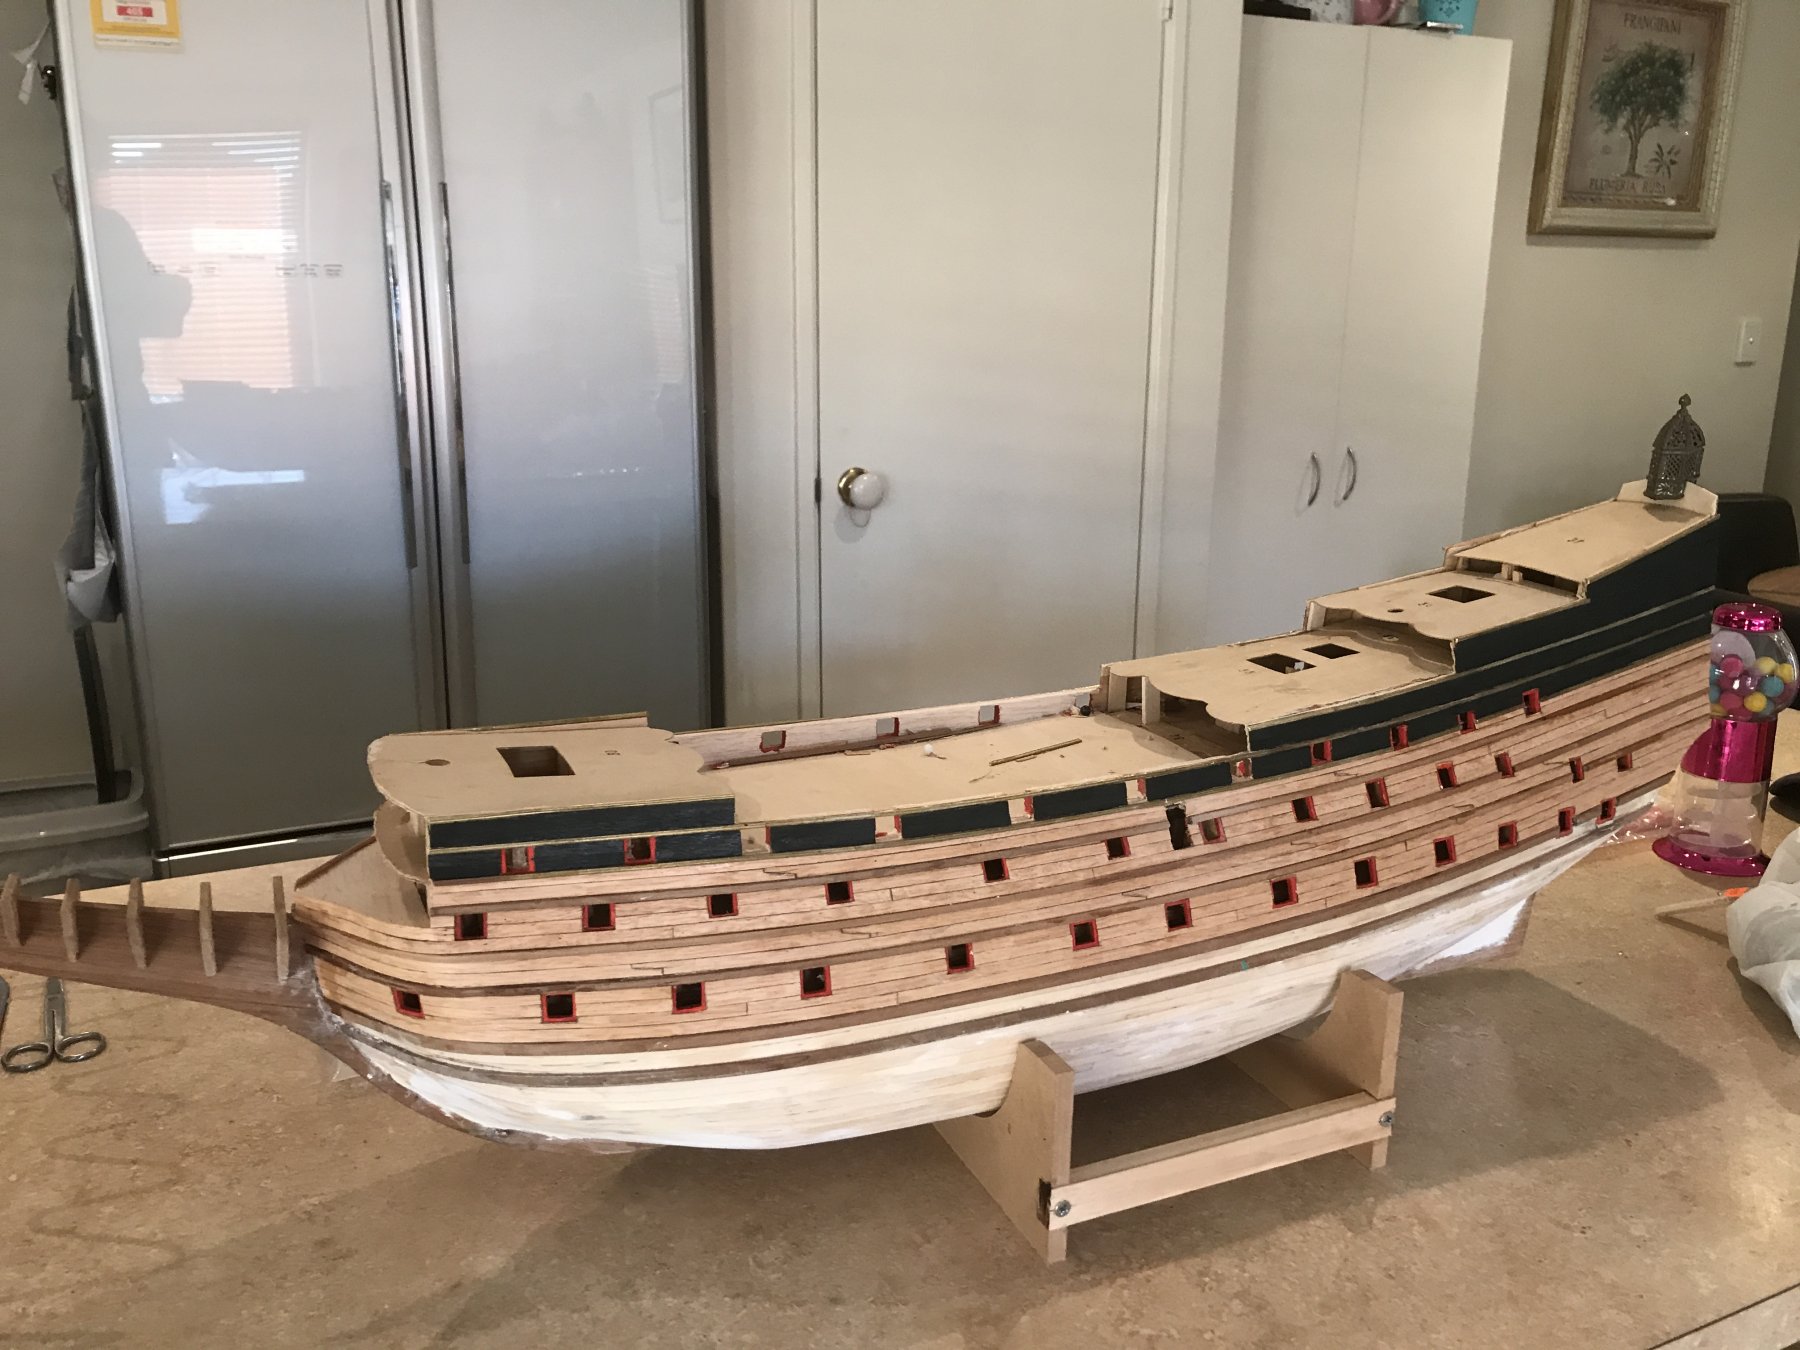
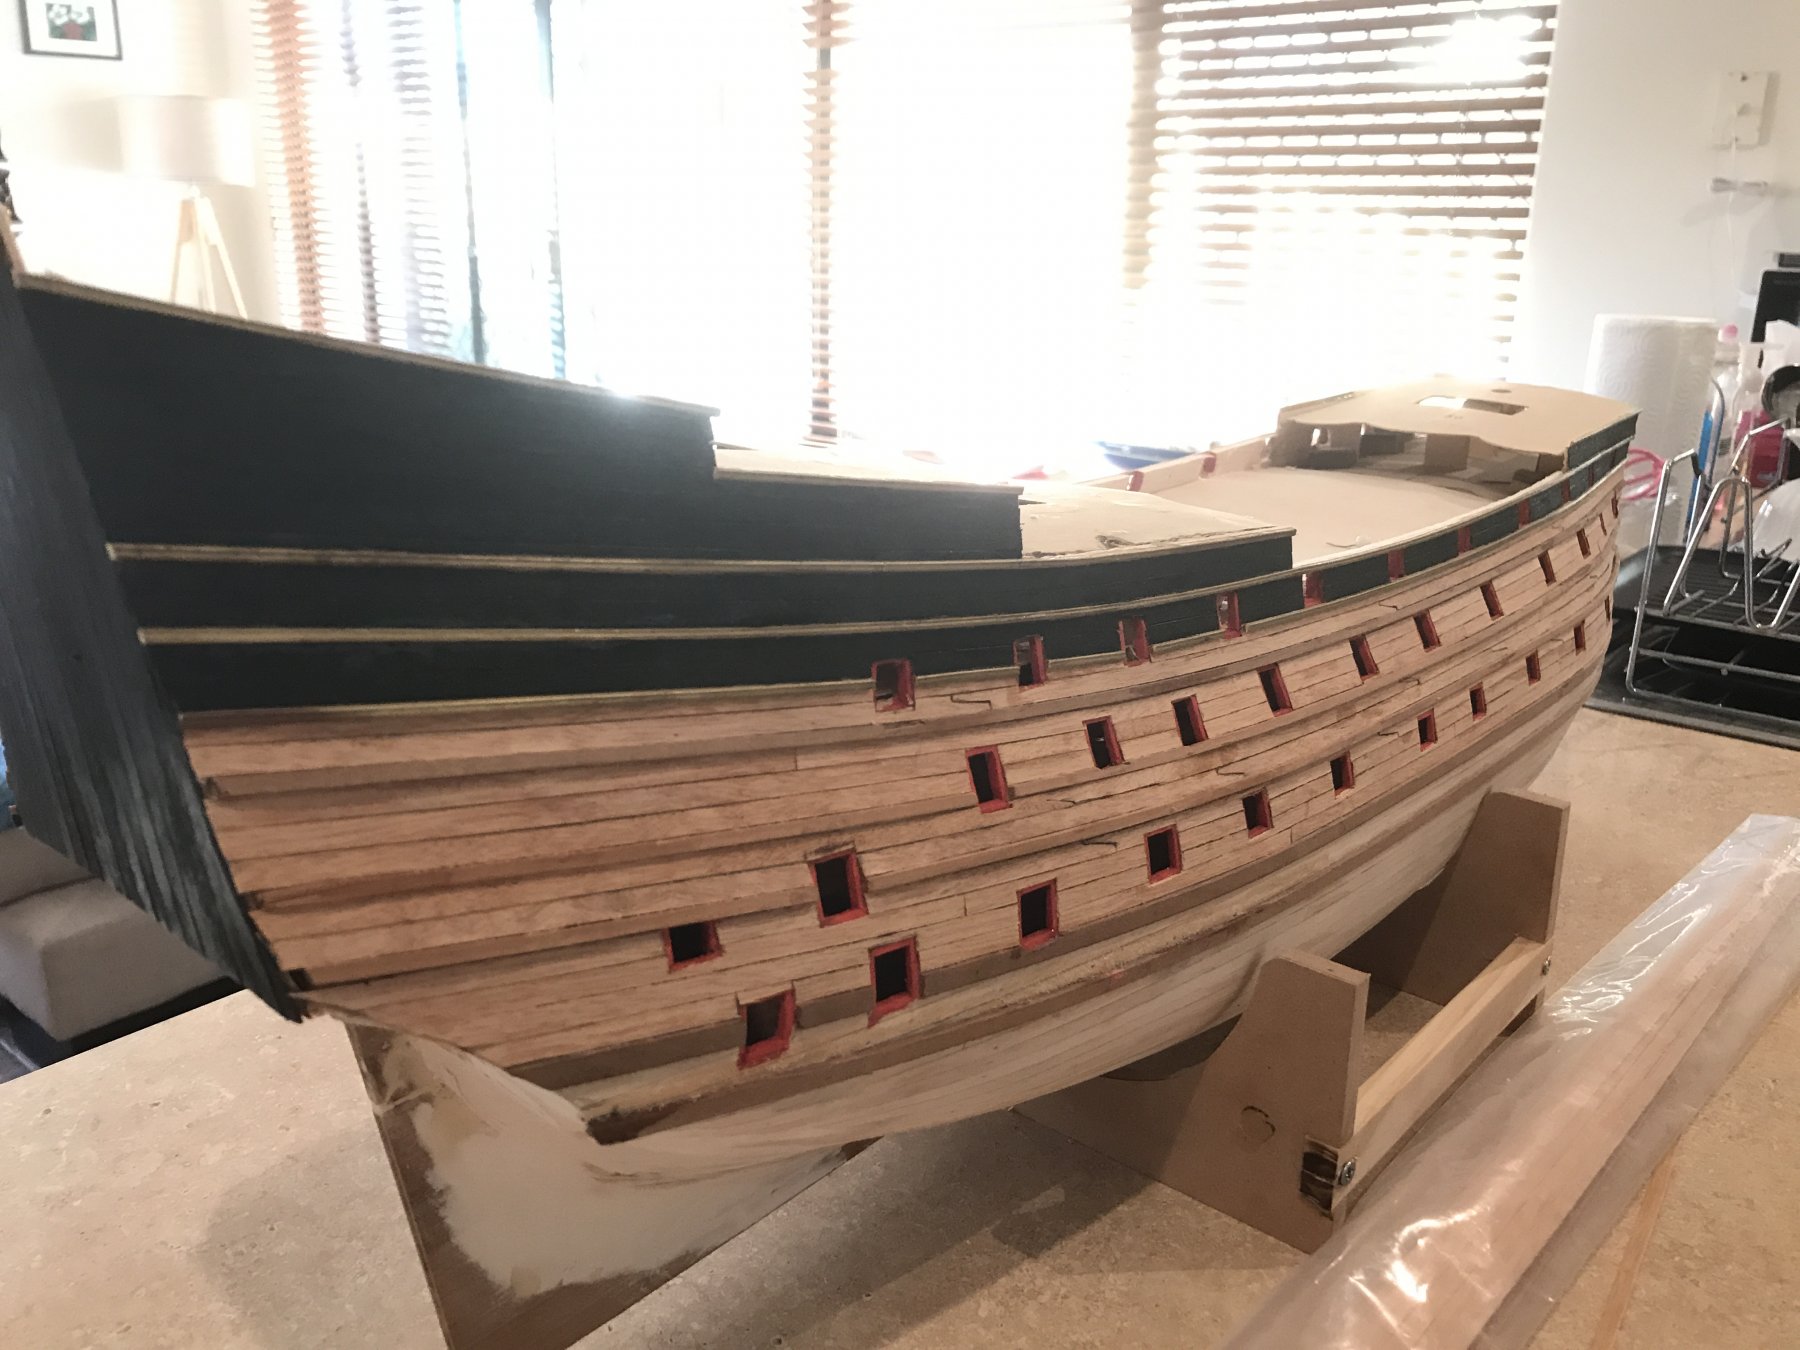
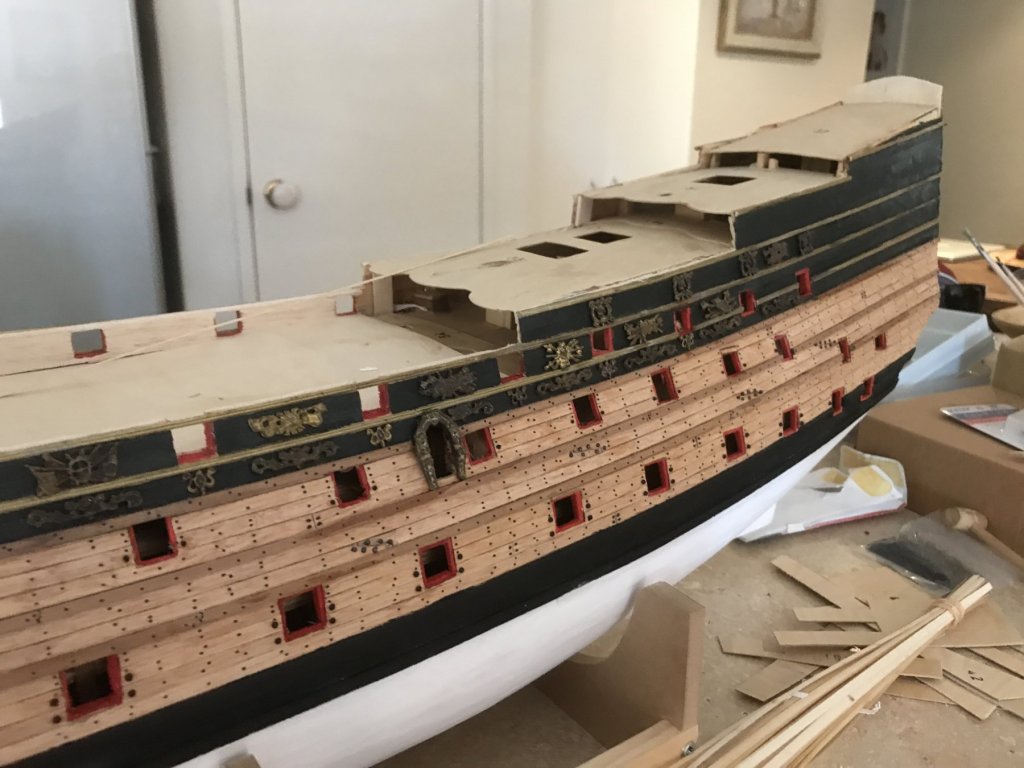
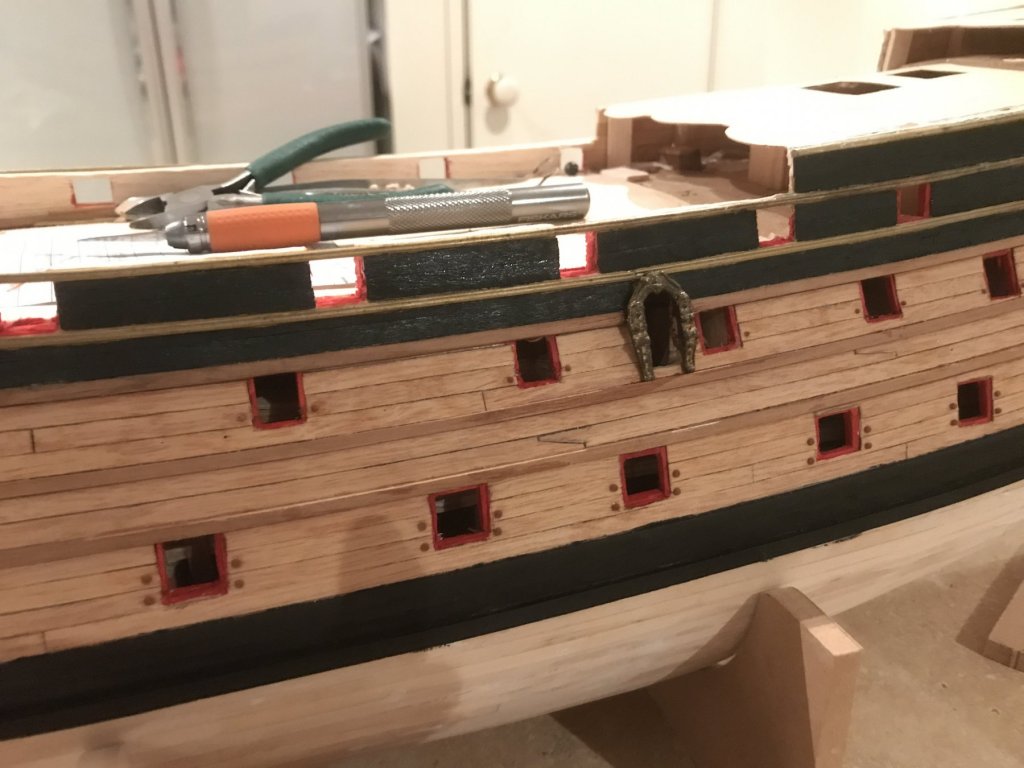
Just a touch of colour The colour I've used is actually closer to midnight blue rather than just flat black paint. This is to tone the colour down a little otherwise I think it'll be too much. The lower wales I will however paint flat black. King Charles wanted no colour on the Sovereign apart from black on the hull sides above the upper wales as a backdrop to the gilded carvings. A little unfortunate as I think she would have looked amazing with those carvings painted to reflect reality as in the Dutch ships and that of the Vasa. I've seen a build on here where the whole hull is painted black saying it matches what King Charles wanted and that of the ley portrait however as mentioned the quote from King Charles was the black only above the upper wales. The dark hull of the ley portrait would be the black transom which I agree with and the dark tarred hull as most ships of this period would appear a darker brown colour as the more and more layers of tar where added to the hull sides. I will stain my hull a darker colour which is another reason I changed my hull planks to stop making the hull too dark after staining. An an interesting difference which I haven't seen in any paintings is the part works Sovereign models showing a dark red band of colour between the two lower wales... if anyone has build or is building the part works kit - do they give a reason to this colour?


- 322 replies
-
- 10
-
-
- sergal
- sovereign of the seas
- (and 5 more)
-
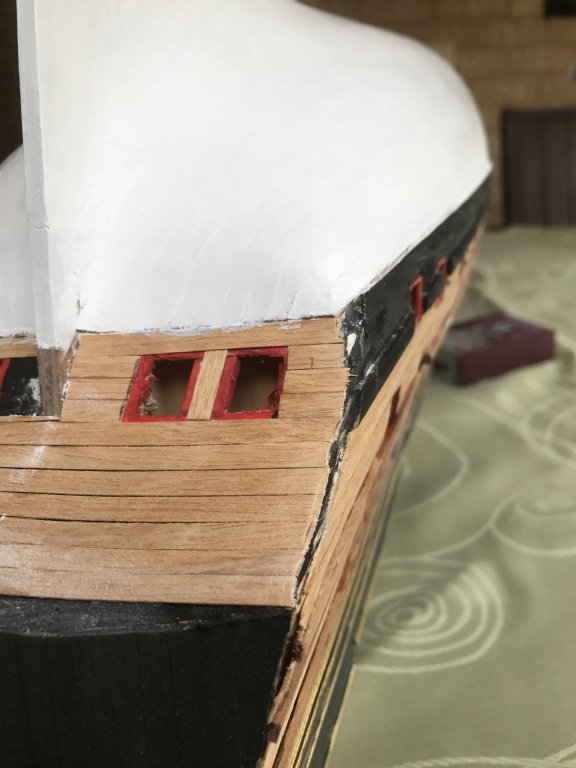
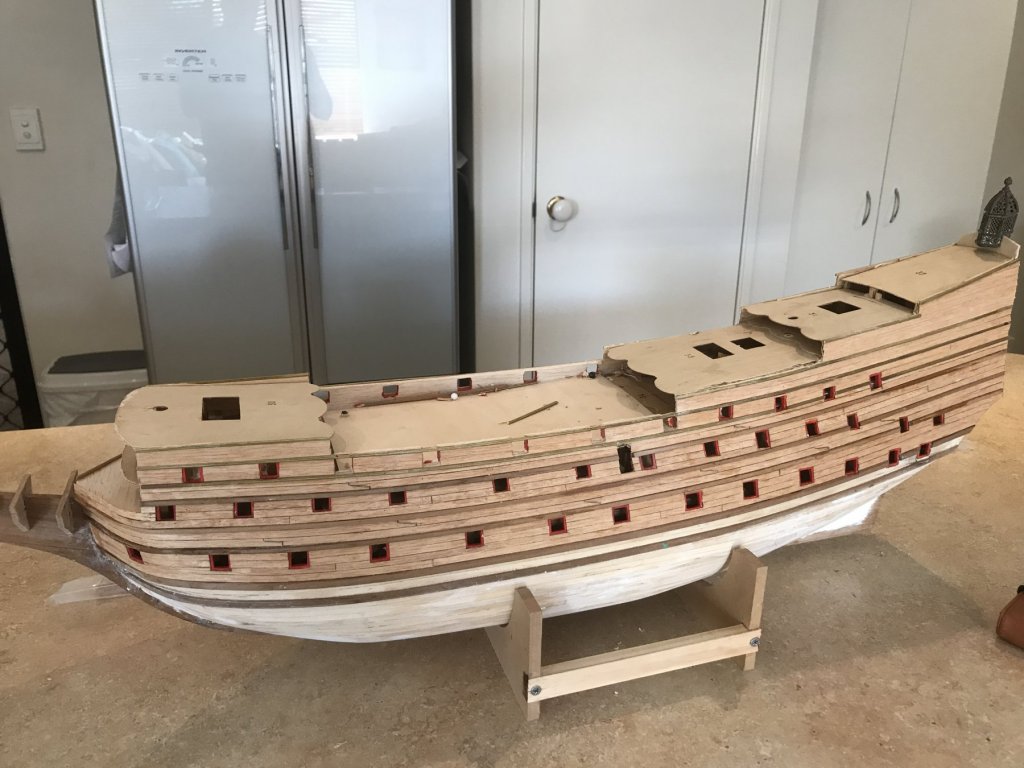
Port side second planking complete, now to clean up the gun ports to the correct size, ill then have to plank the transom but still yet to cut the four lower ports which will need to be done first.
- 322 replies
-
- 6
-
-
- sergal
- sovereign of the seas
- (and 5 more)