HOLIDAY DONATION DRIVE - SUPPORT MSW - DO YOUR PART TO KEEP THIS GREAT FORUM GOING! (Only 24 donations so far out of 49,000 members - C'mon guys!)
×


ken3335
-
Posts
314 -
Joined
-
Last visited
Content Type
Profiles
Forums
Gallery
Events
Everything posted by ken3335
-
 Hi Steve, I must say that I'm very impressed with your Bounty build. You've taken a pretty ordinary kit and raised it to a to quite something else, full of character. It's been a pleasure reading your log and I'll certainly follow it to it's launch with interest. Ken
- 291 replies
-
- 3
-

-
- bounty
- billing boats
- (and 1 more)
-
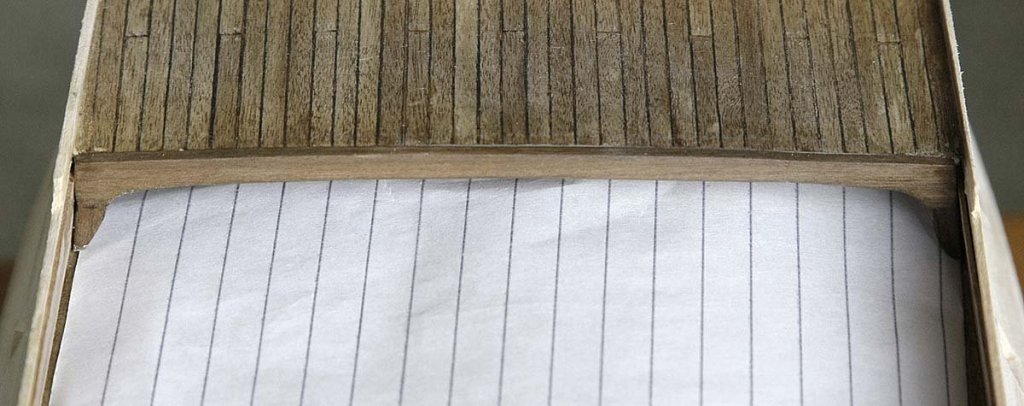
Hello Everyone, It seems that there has been a problem for some with viewing my last post so I'll re-submit it. Some may see two versions of the same post so at least you know the reason. You'll be pleased to know that after that hiccup I'm back on track. The big question, was it worth the extra work involved? The answer is an emphatic yes, worth every minute spent on doing it and I think that when you look at the pictures you'll agree with me. I got some Tanganyika for the planking as this is what I normally get in kits and I'm familiar with it. I used an electric sander and took the planks back as much as I could with it rather than rip them off and leave a rough surface. I used a soft pencil on the edge instead of a marker pen which gave excellent results, I tree nailed in the same way using filler and finished the surface as I had done on my earlier attempt. I am so pleased, this is my best planking yet and one that I'm quite proud of, it looks even better in real life due to the matt varnish. The colour is truest on the first picture. The last picture is the before and after. Don't you wish life itself was like this, you screw up but you can put it all behind you and start again! Ken

-
Hi, Because you're all showing interest here's another picture. This is the tall ship Statraad Lewmkuhf. I took it when it made a visit to Liverpool, I shot it in black and white to give it more period character. Loads more like this. Ken

-
Hi Pete, Thanks for that. I got the block from EBay, I think that it cost about £1, it came from China, for its price it's good quality and fits well, very handy piece of kit. I think I just entered Proxxon and it came up in the listing. Ken
-
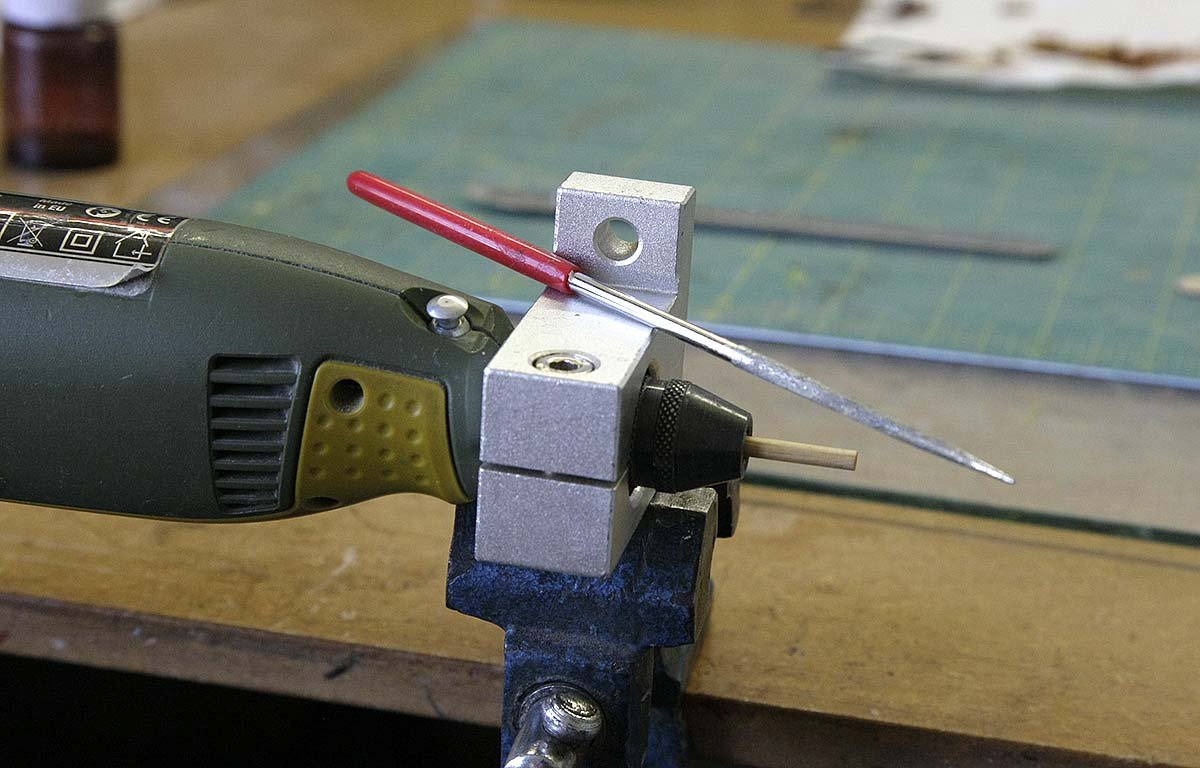
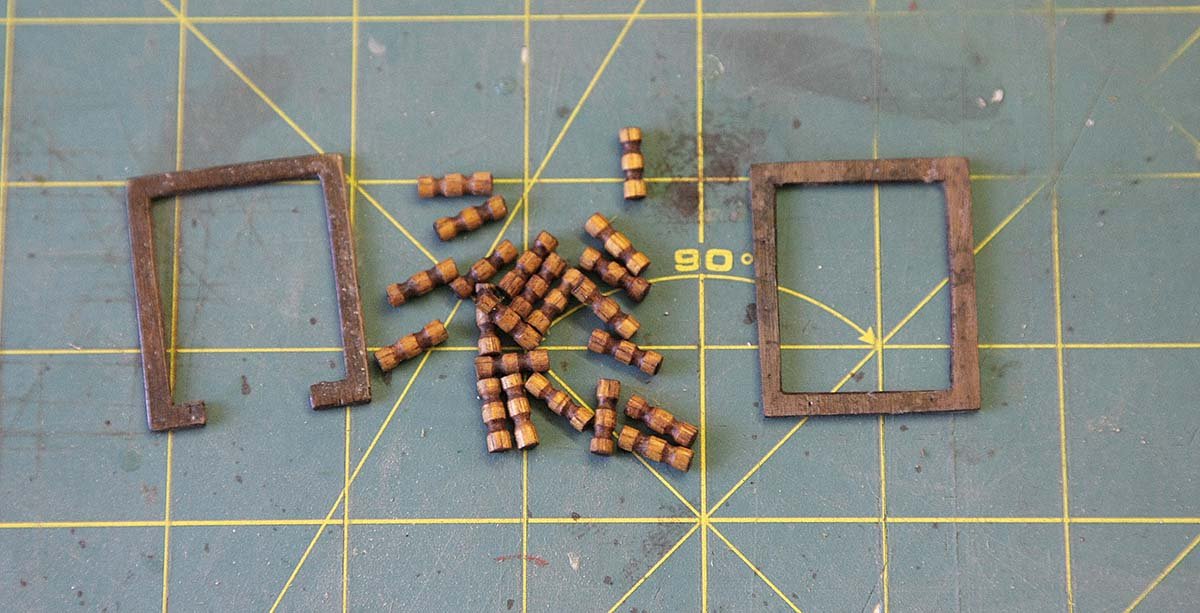
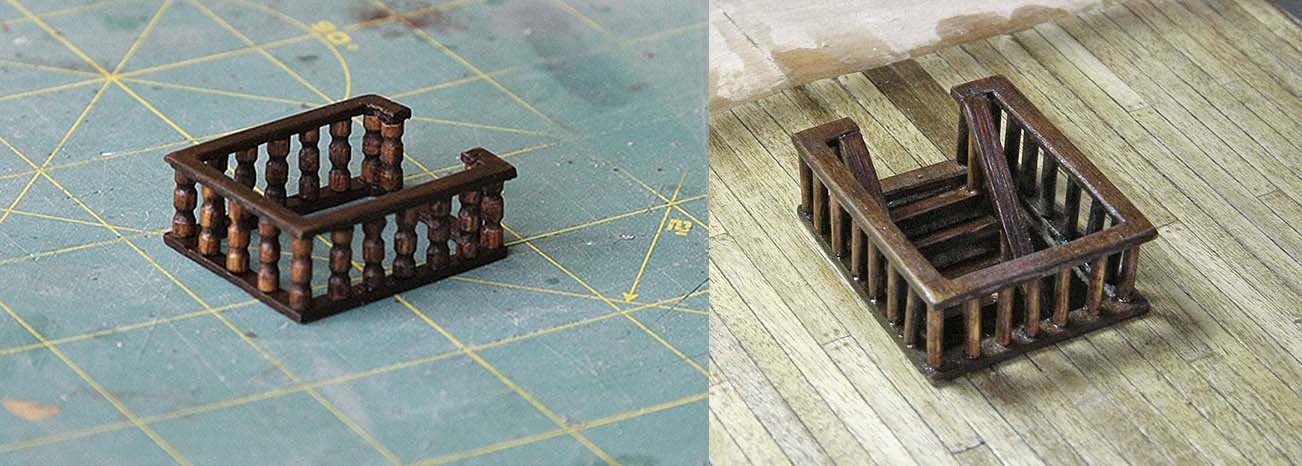
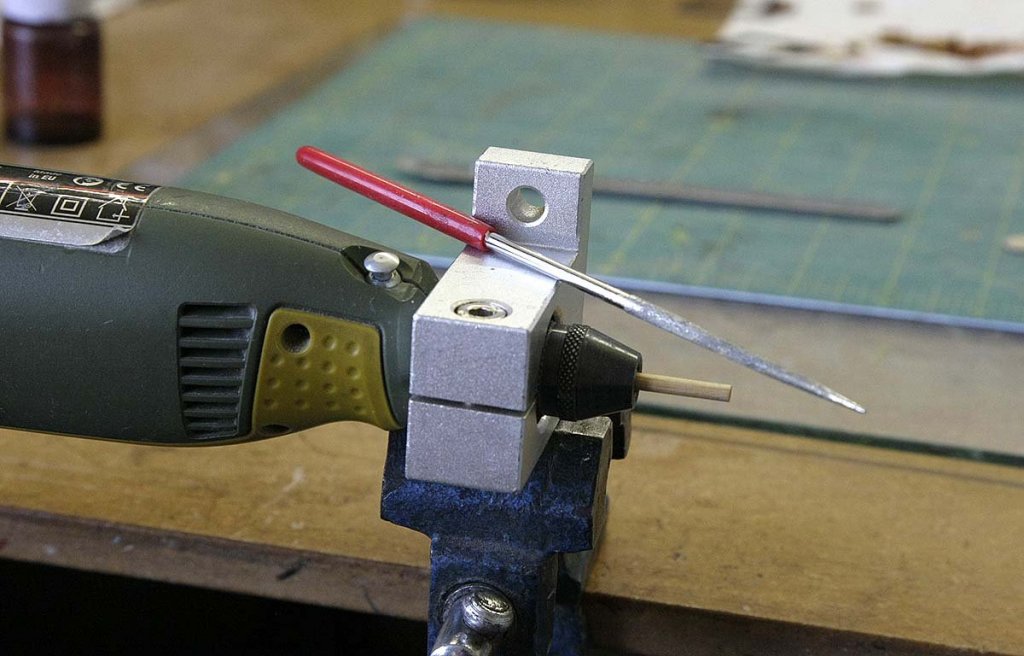
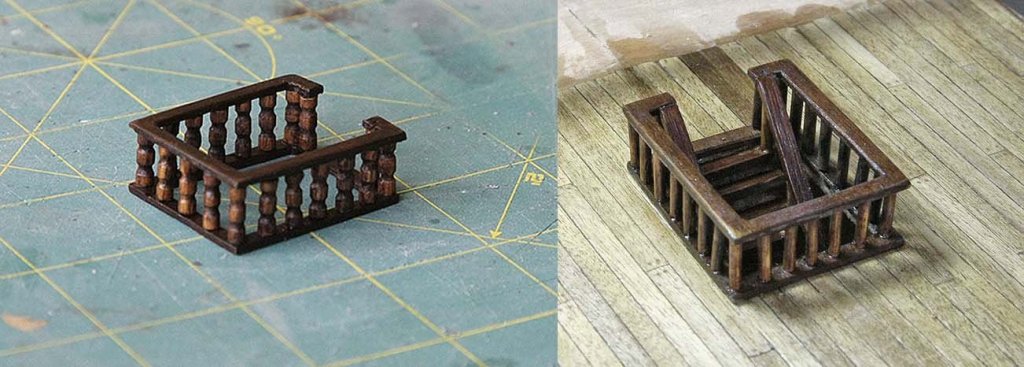
Hello Everyone, Just a small update. As the deck was striped bare and the staircase rails removed I took the opportunity to try and improve them. I was pleased with the first ones but as the build develops I increasingly want things to be the very best that I can make them so even though they won't be seen I'm glad of this second chance at them. I used the original rails but tried to make them look better by using columns instead of straight dowels for the uprights. I used 3mm dowel, I marked what the size would be and mounted my drill in a clamp. I used a round needle file as the dowel spun to put two grooves into each, when cut to the marked length they looked quite good and I think you'll agree that the finished rail is much improved. Ken

-
Hi Vince, Thanks very much for your thoughts on this. I wasn't really bothered about the different shades of planks, the picture doesn't show the true muddy nature of the planks and that very out of scale caulking which dominates your perspective, both of the decks looked like they belonged to completely different ships. As I said I'm quite glad that I had another chance. What happened was that the bleaching hadn't penetrated deep enough so that when I sanded I was getting the dark brown coming through, the more I sanded the worse it got. I've certainly learned to think about what I'm doing more carefully, pencil next time. Ken
-
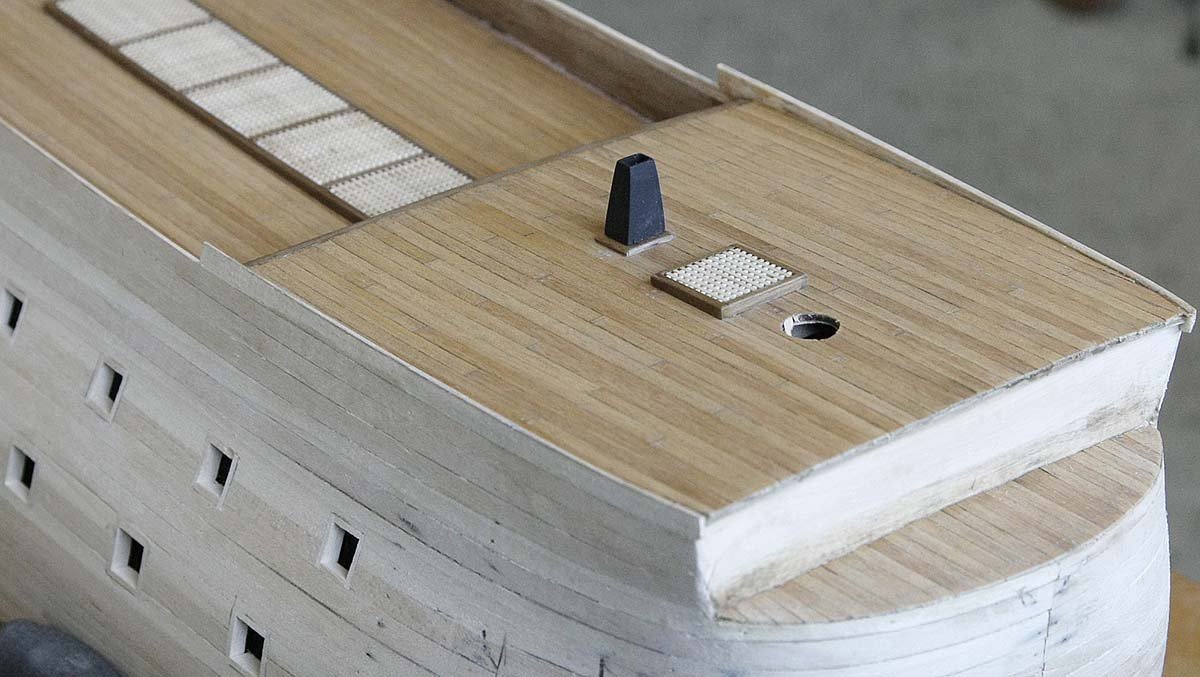
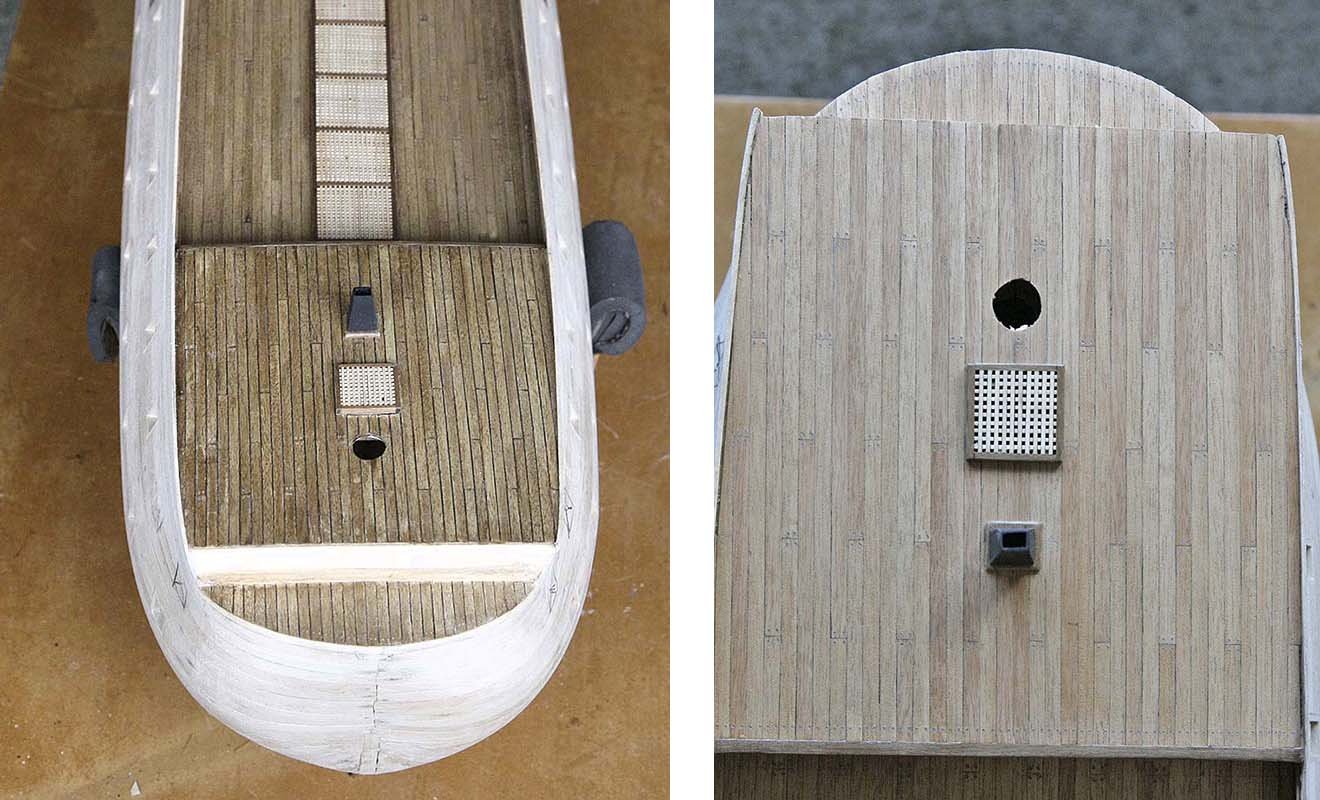
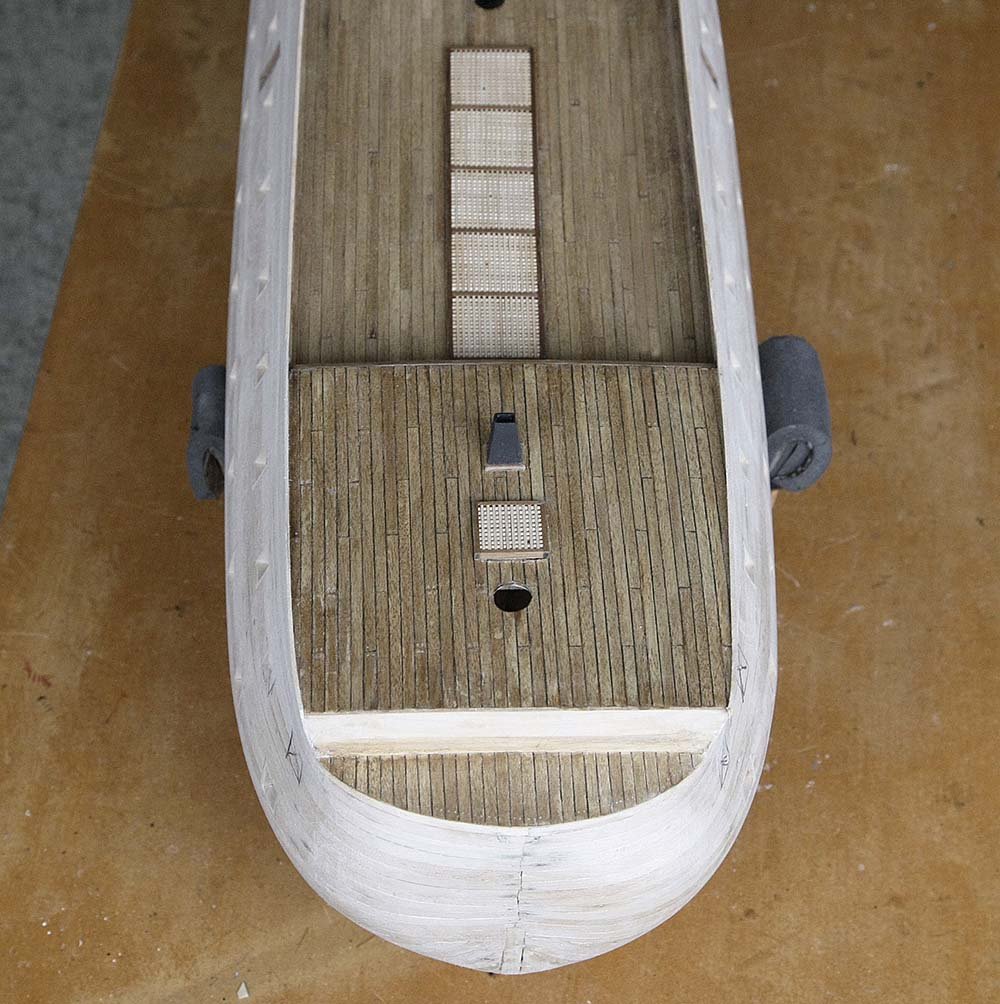
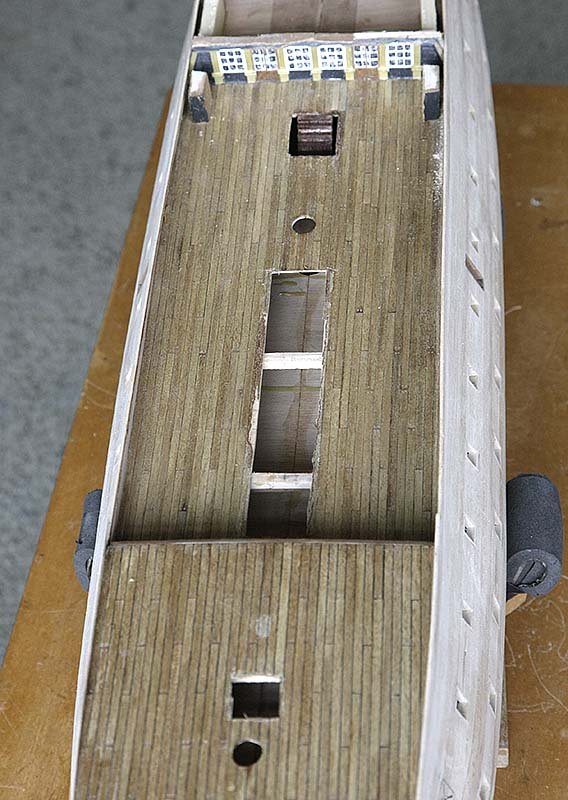
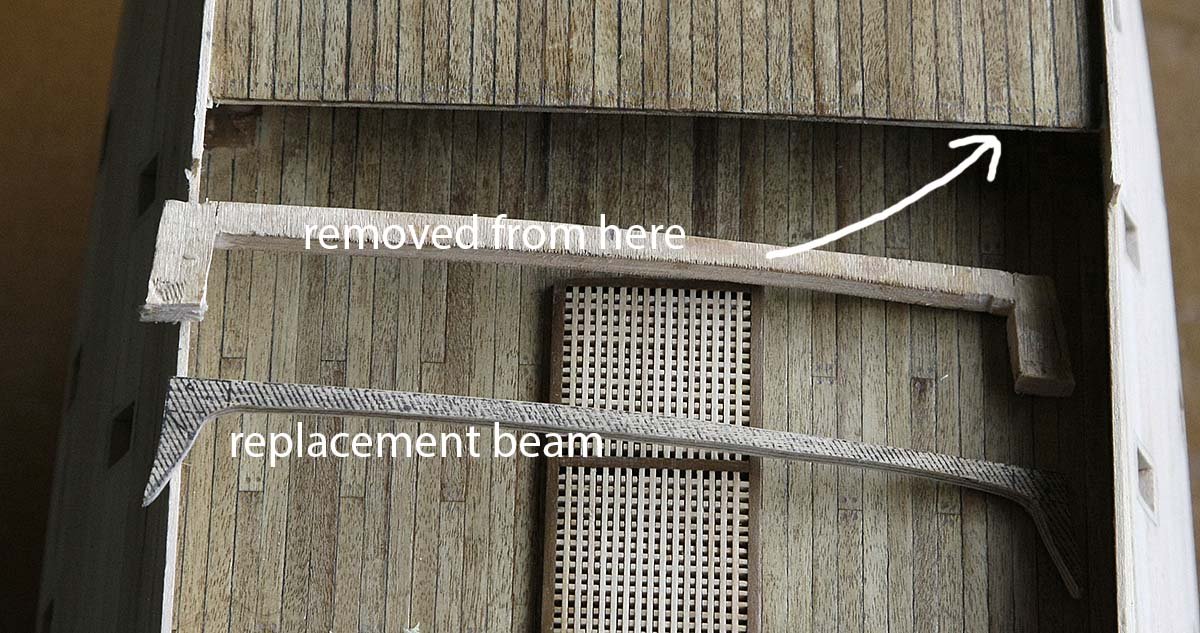
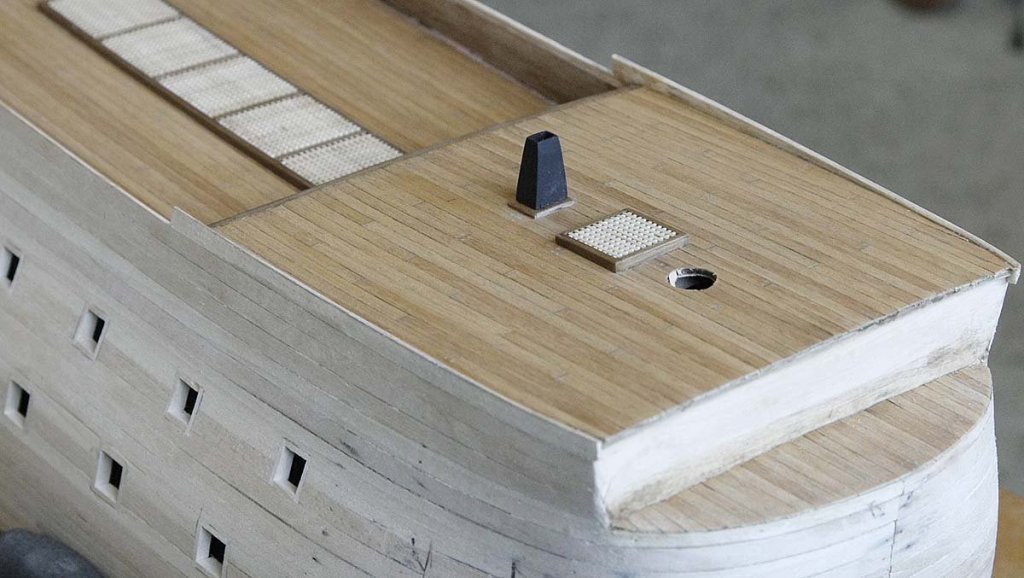
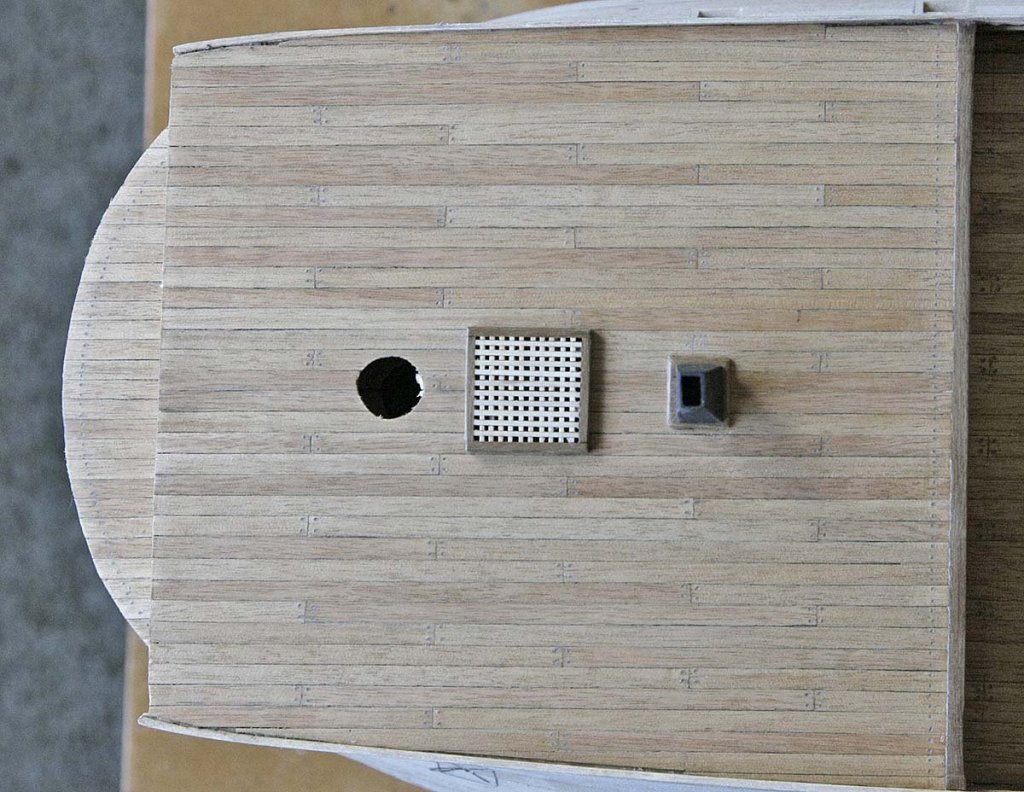
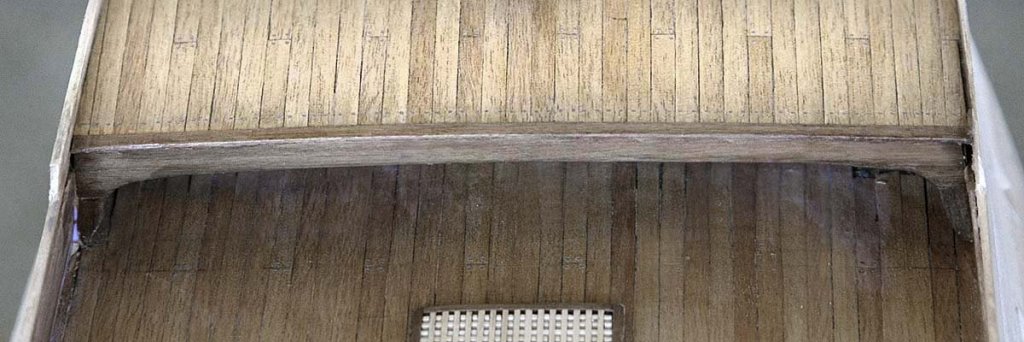
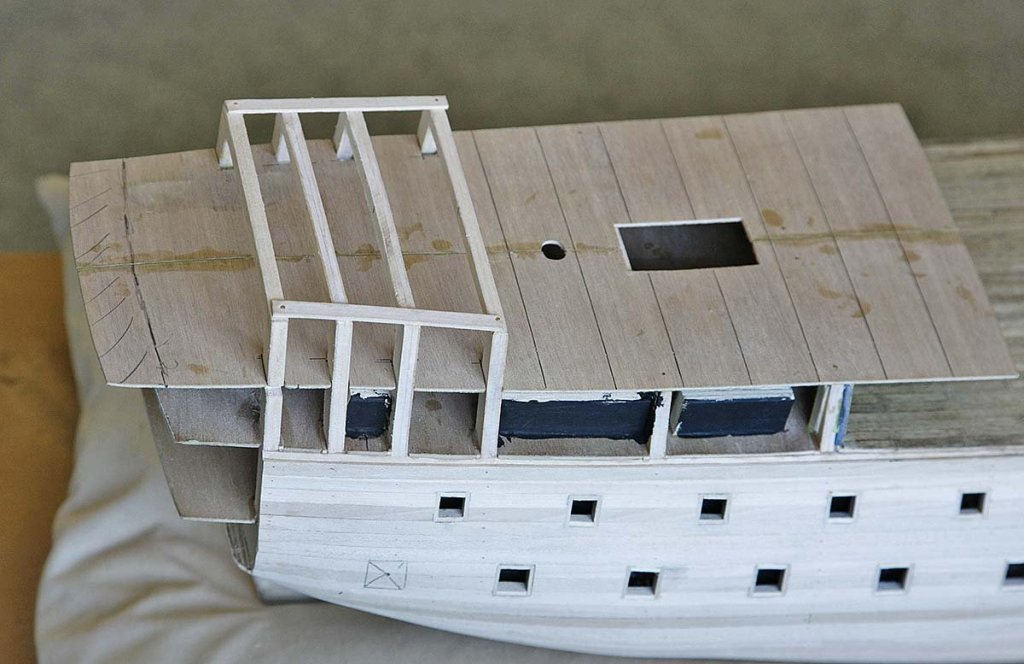
Hello Everyone, A bit of a disaster yesterday. My fault, down to inexperience and lack of forward thought, hopefully I'll learn from it. All was going great with the build since my last update so here's the lead into it. I cut out and lined the side entrances, I installed the dummy gun carriages for the main deck just as I'd done with the lower decks. I fitted the forecastle deck and the quarter deck, the latter was about an inch too long and needed cutting down but I thought that it was better than it being too short. I then continued the first planking upwards for four more planks which took it to a little above what was needed, I can cut it back to size later. There was now a long section of unsupported planking between the forecastle and quarter deck especially as one of the bulkheads now needed to be cut away so I lined the inner with 1mm walnut planks, it was then quite strong. I had in preparation made a saw cut most of the way through the bulkhead to be removed so it was quite easy to take out. I have Vince to thank for this as he showed it quite clearly in his log. I then made up the deck beam that went at the rear of the quarterdeck planking. I made it up from 3mm ply faced with 2mm walnut strip. I sanded it to shape leaving a rebate that when in place the deck planks would butt up against it. I made up the grating for the forecastle and a chimney for the stove, ( sorry no stove ). I was delighted at the progress so far but it was about to go very pear shaped on me. When I bleached the walnut for the main deck planks I didn't do all the planks in one go, only enough for that deck, I did the others much later, big mistake. They looked as if they had taken on a slightly different shade than previous but as I was going to dye them light oak once they were on I thought nothing of it. To compound this the marker pen that I'd used had dried out so I bought another but from a different manufacturer, second mistake. I cut the planks to length and edged them with the new marker, this marker seemed a little more moist than the first, it leached into the wood more than the original but I never noticed. When I'd finished the planking, including the small deck at the bow I tree nailed them, stained them but when I put on the varnish these small differences became much amplified. To my dismay the deck looked darker with a more uneven colour and the black caulking showed up far too strongly and way out of proportion, I was not a happy bunny. I went to bed and tried to pretend it hadn't happened and it would all be okay in the morning, it was too awful to think about, it looked bad, I couldn't leave it like that. If the boat fairies didn't visit it overnight and fix it I would have to strip and re-plank both decks as I now don't think that I can replicate the main deck planks. This morning it looked just as bad, as with the windows, if I left the decks the way that they were I would on seeing them every day regret it. I'll take it on the chin and learn from it. I have now striped the decks, cut away part of the quarter deck to give me access even removing the stairs, I'll clean everything up, get some wood and start the decks again. Now that I'm committed to the task I feel quite good about it as I'm telling myself this is your chance to make it even better. Ken


-
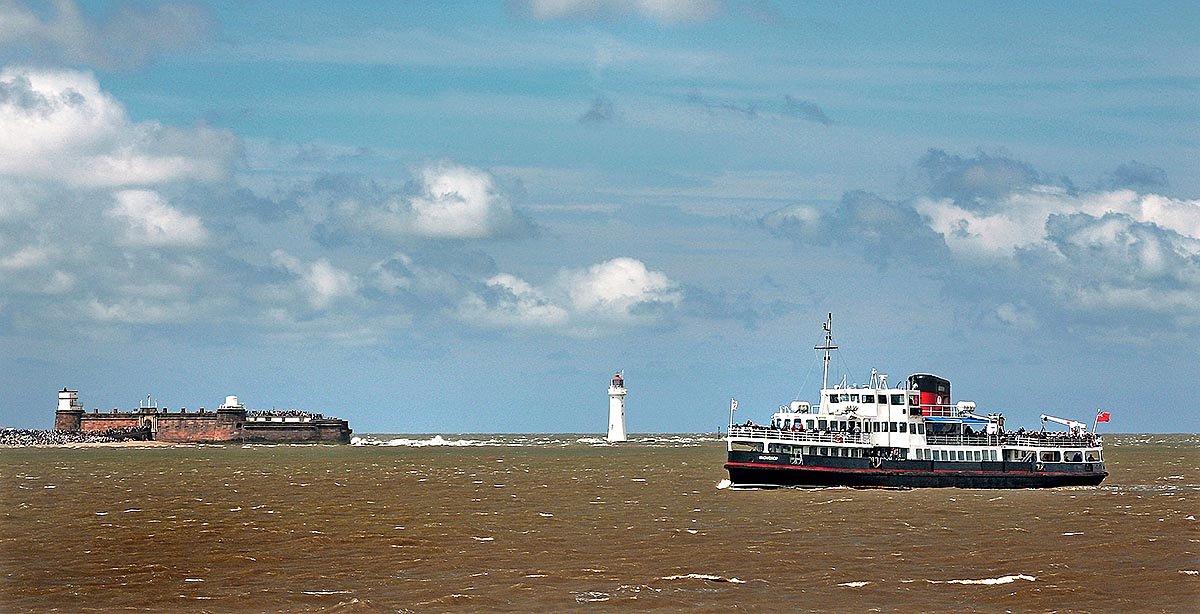
Hello. I think that it's time for another picture, I hope that you like this one. You may have heard of the Mersey Ferry, made famous by the 1960s song from Jerry and the Pacemakers, "Ferry Across The Mersey." This is the ferry boat Tulip sailing across the Mersey from Liverpool to the Wirral peninsular, just over a mile away. In the background is the New Brighton lighthouse and the old Fort Perch Rock, both built in the early 1800s. Ken

-
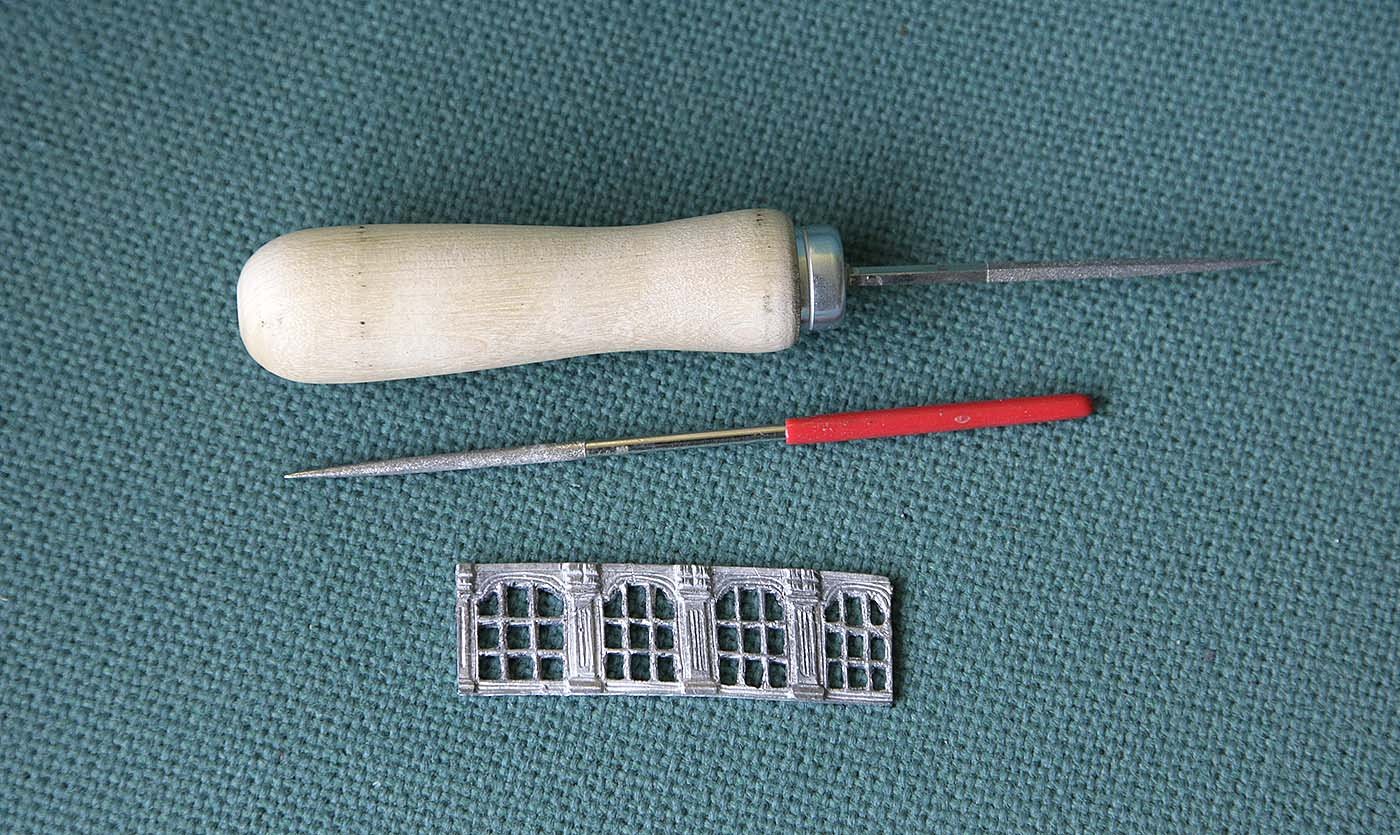
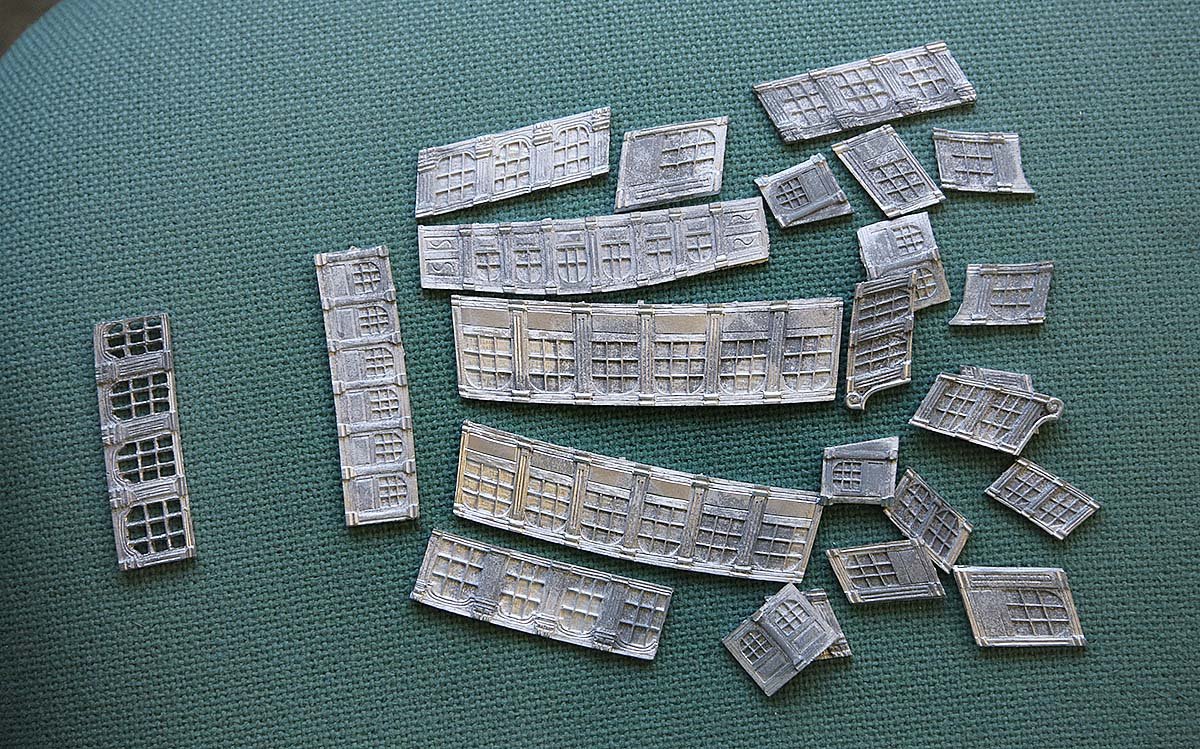
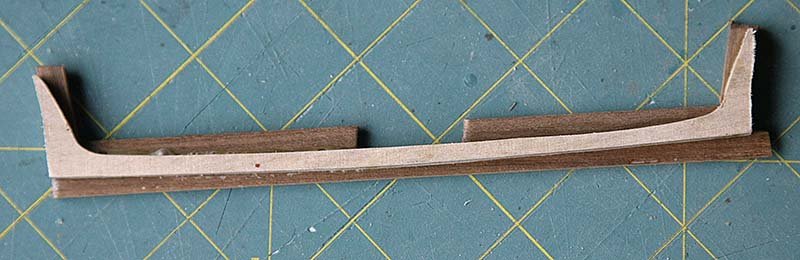
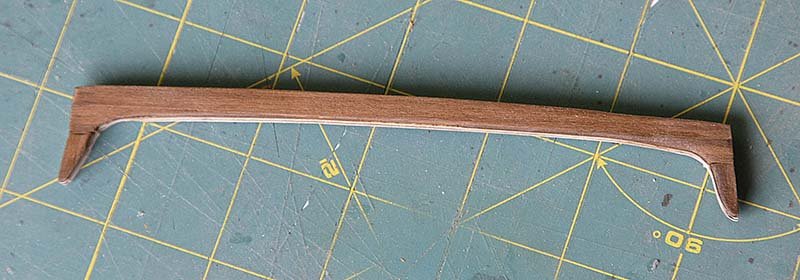
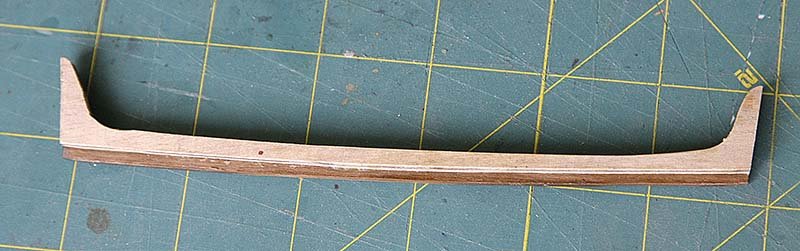
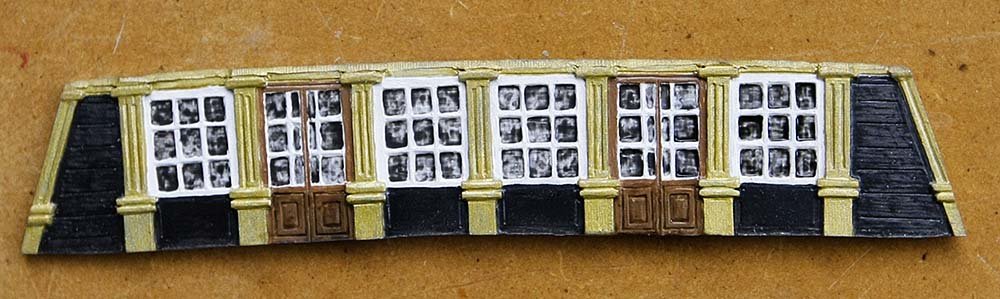
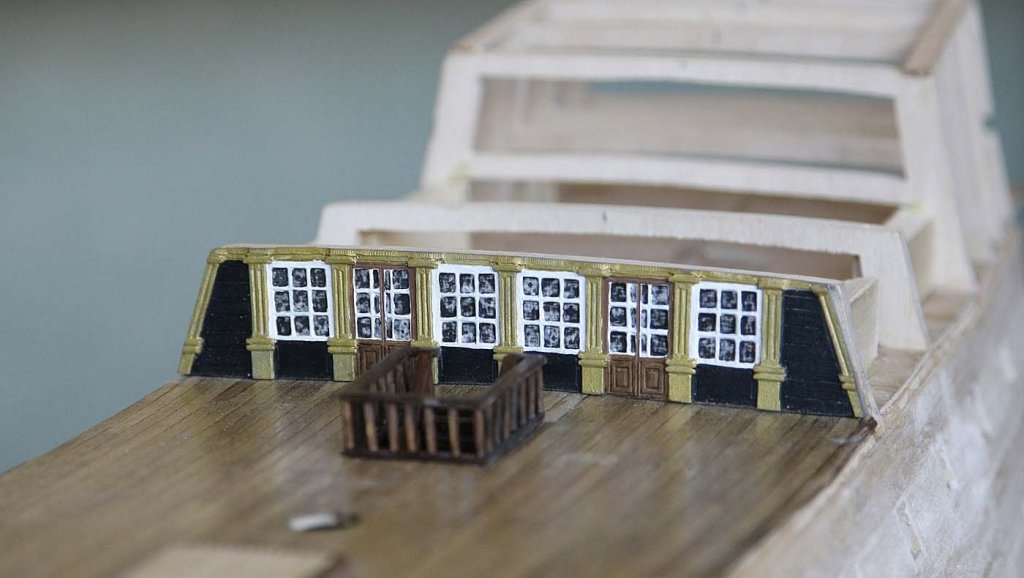
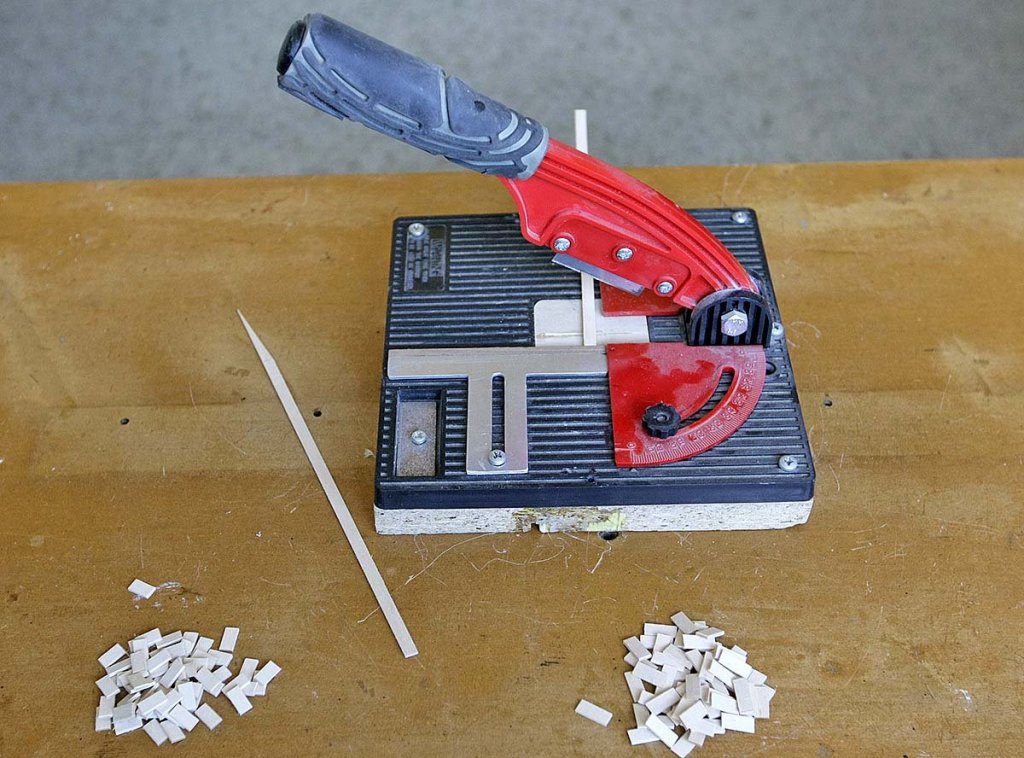
Hello Everyone. The saga continues, but now I'm beginning to realize what I'm letting myself in for. Next on the list was the cast facia under the quarter deck. I could play around with this as when it's in place it wouldn't be seen. The castings were real meaty items with plenty of depth and a fair amount of detail, better in my opinion than the thin but crisp photo etch, there is more character in them. That is except for the window framing, I couldn't initially see a way of making these windows look good but I set out to see what I could do. First I cleaned the casting up, primed then painted the frames white. I then dripped a black wash into the glazed area, this found its level in the castings leaving the white frames untouched which meant that I didn't have the almost impossible task of painting the frames neatly. I then painted the remaining facia. When the black wash dried it did so in a blotchy way and on the model looked like a normal window reflection, better I think than a solid colour. BUT!!!! I couldn't stop thinking that with a bit of effort I could do better. I'd seen the results that others have achieved by opening the glazed areas up. I knew that if I didn't try I would find myself in a couple of years kicking myself knowing in my heart that I should have done it but by then it would be too late, every time I looked at the model I would feel regret. I selected another casting and started. I drilled a pilot hole, fitted a large handle to my needle file so that I could hold it and began filling. It wasn't a very difficult task but it took a long time, the four pane panel shown took me one and a half hours and it was so mind numbing it felt much longer, but it could be done. I've decided to set aside half an hour each day of my building time to the task, I shan't look forward to it but bit by bit they will get done. I feel like someone has given me a can of red paint and a brush and told me to paint the Golden Gate Bridge and I don't like painting. This was defiantly not in my brief. I can see Pete smiling, he warned me that this would happen as I progressed but I doubted him. In the picture when the pile on the left is bigger than the pile in the right I'll be happier. Ken


-
Hi Anton, Looking very nice, and those scarf joints add a touch of class which lifts it above just an ok planked hull, well done. Ken
- 322 replies
-
- 4
-
-
- sergal
- sovereign of the seas
- (and 5 more)
-
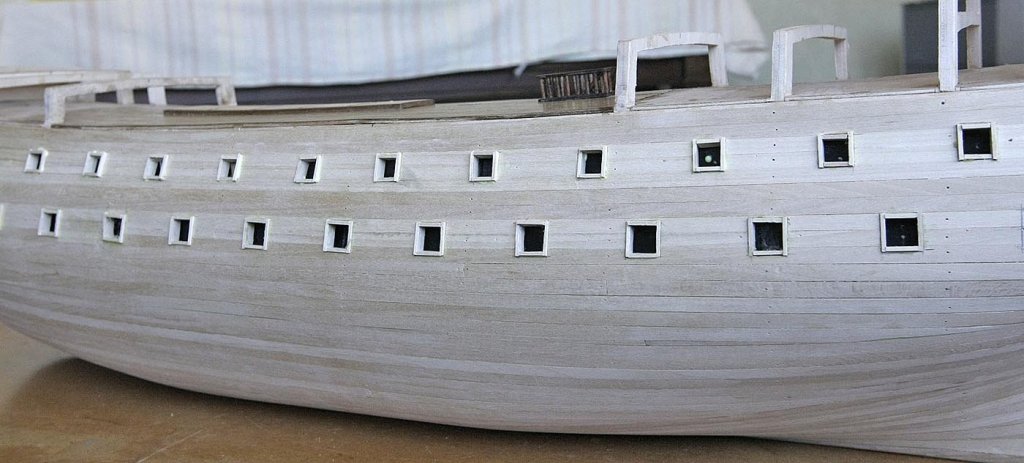
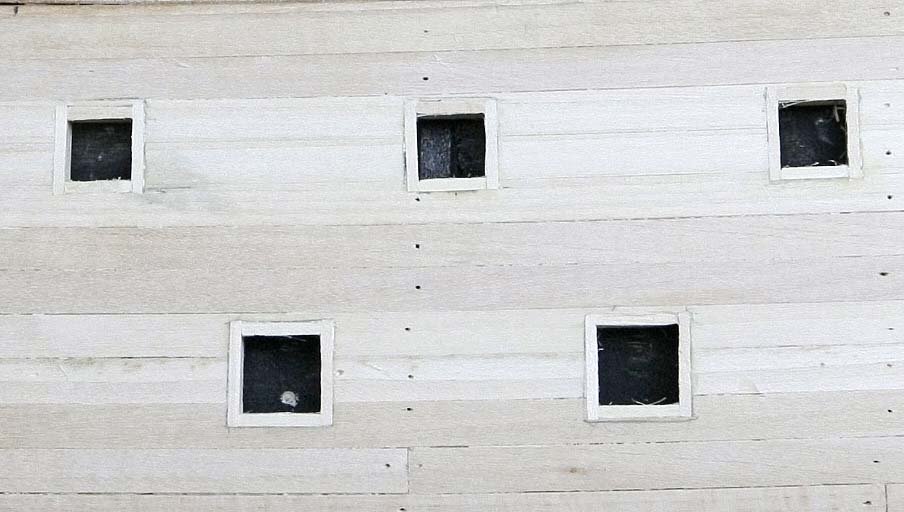
Hello All, Again thanks for your likes and some very kind comments on my build. Yesterday the weather was quite bad, wind and rain, so I had a good spell of building time. The result of this was the completion of the port linings and a few trial things which I'll report on later. For the linings I used the off cuts from the first planking strips. I cut the linings using my very useful guillotine to get them uniform. I fitted them, they were a good tight fit and after a good drying time I trimmed and sanded them, all went well and I'm pleased with the result. When I fix the second planking I will leave the appropriate gap around the ports. Ken
-
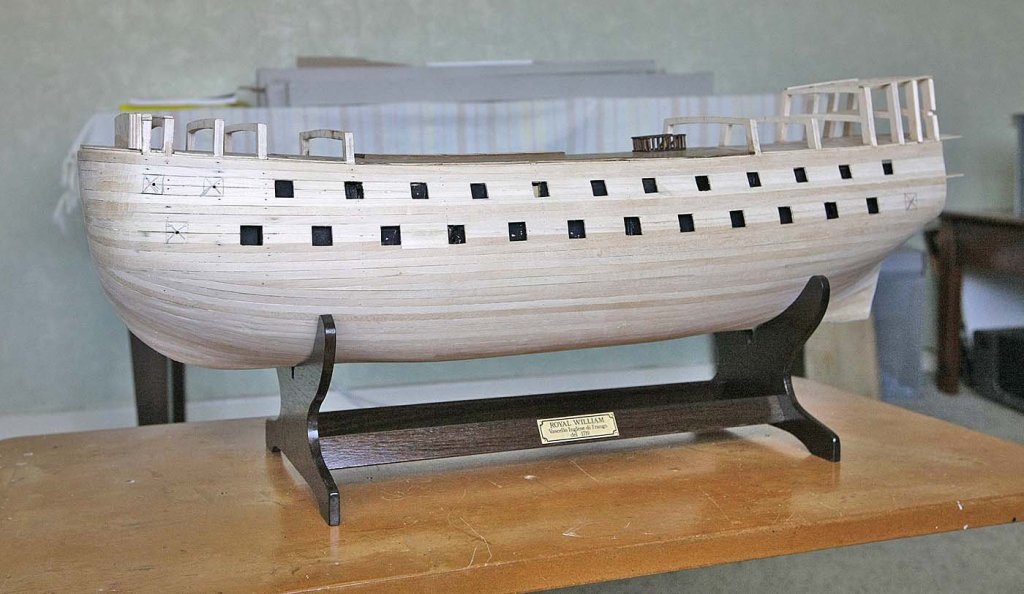
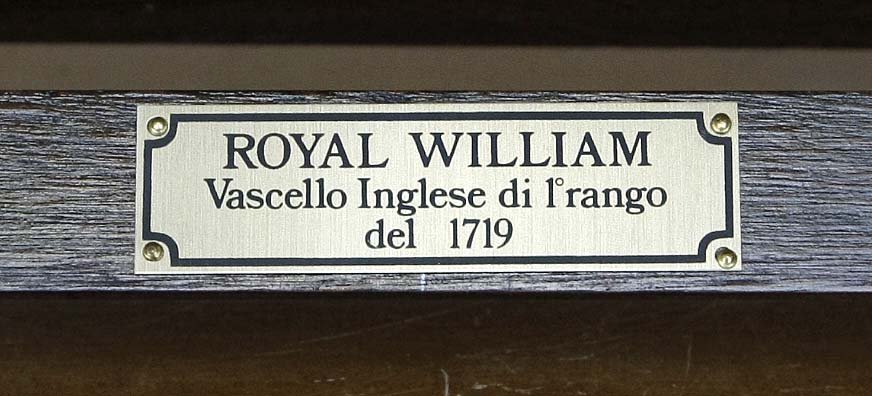
Hello Everyone. Thanks for your likes and comments regards the photo. The idea seems to have gone down well so I'll take it on board. I think that with the build I'll be with this group for some time so I must keep you all entertained so that during slack times you won't drift away. Not a great deal to report today, just the stand. Euromodel provided in the kit quite a good substantial stand, it's made from 7mm mahogany and includes a nice nameplate. I assembled it, sanded, dark stained it, sealed it and put on two coats of poly. I think it looks good and suits the model. Ken
-
Hello Everyone, Once again thanks for your likes, as you must know it does motivate you. Here's a post that has nothing to do with modelling but may be of interest to some of you. I live near the coast on a small picturesque peninsular, it is an area with a great maritime heritage. The Confederate ship Alabama and many more were built here. I often go walking along the coast and take with me my camera to shoot I hope, interesting maritime themed pictures of the Mersey estuary, the old docks and the varied shipping. I thought that if there is an interest here I'll show the occasional picture in my log when my build doesn't have much progress to show. It's just a thought as many of you are scattered around the world and don't know what is current on English waters, anyway let me know your thoughts. Here's my first, a shot of a cargo ship leaving Liverpool during a storm, enjoy. Ken

- 424 replies
-
- 15
-
-
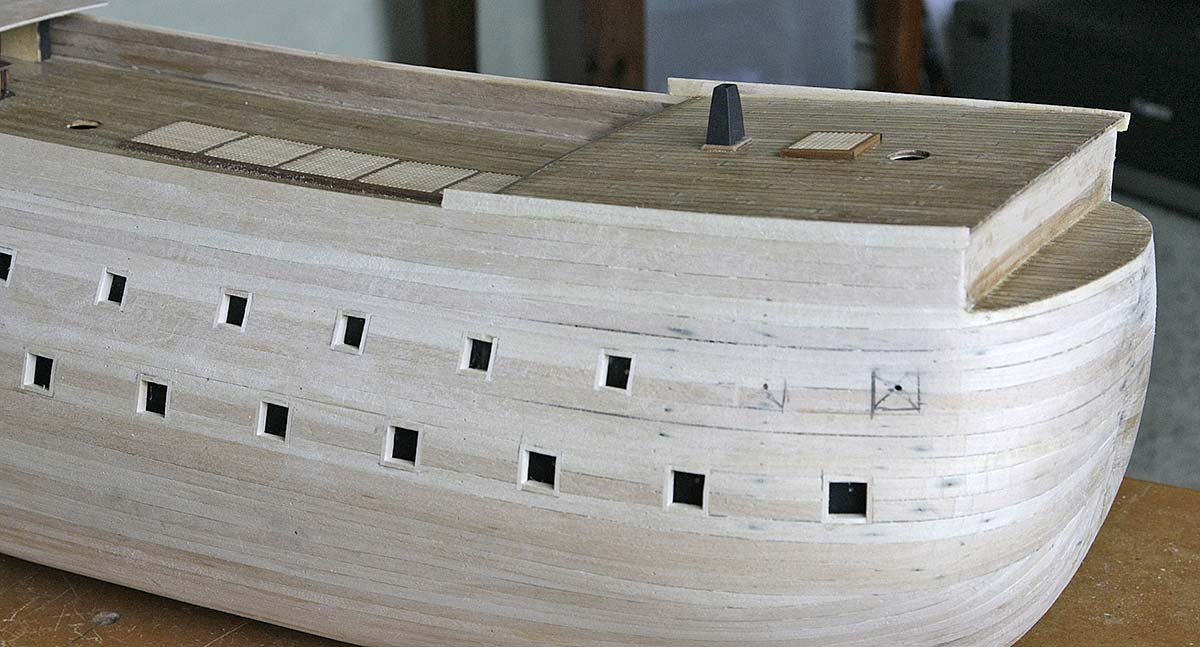
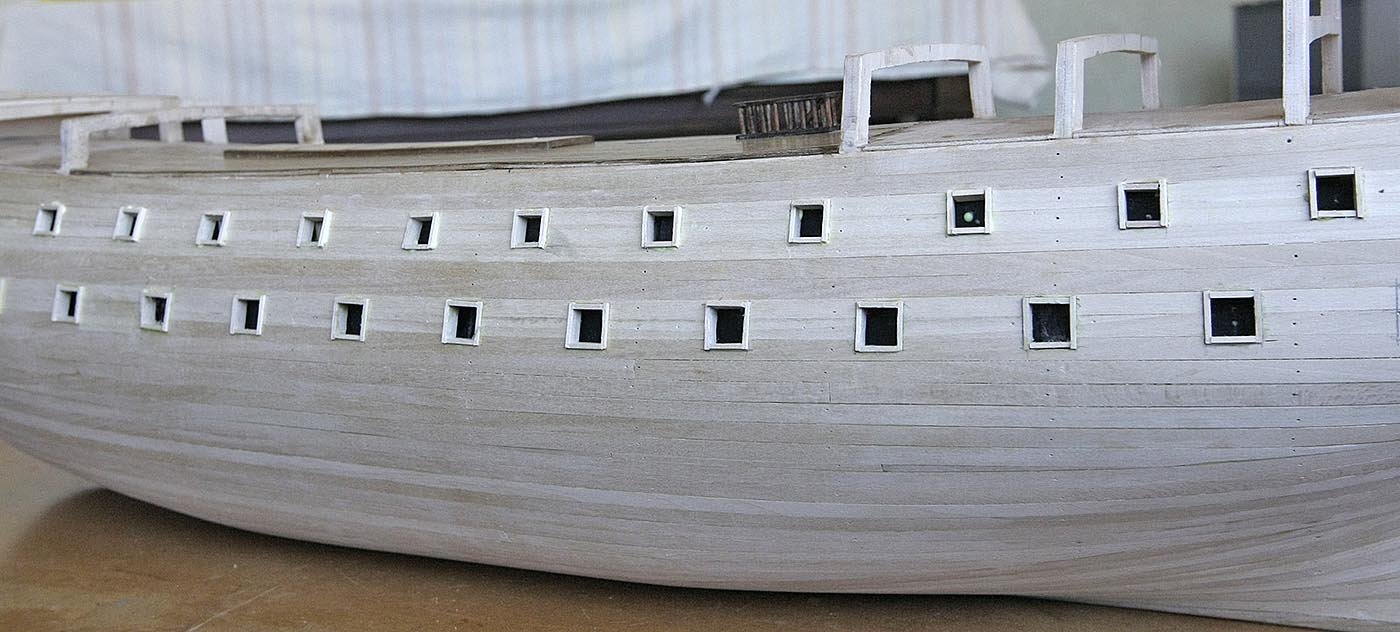
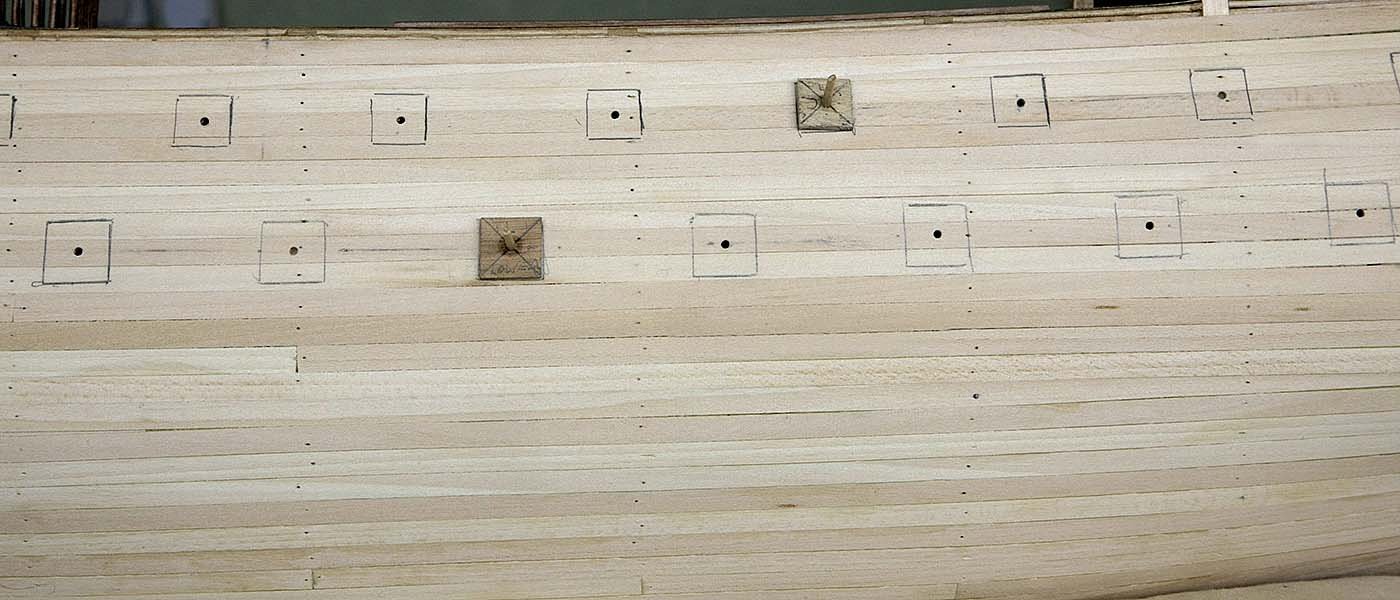
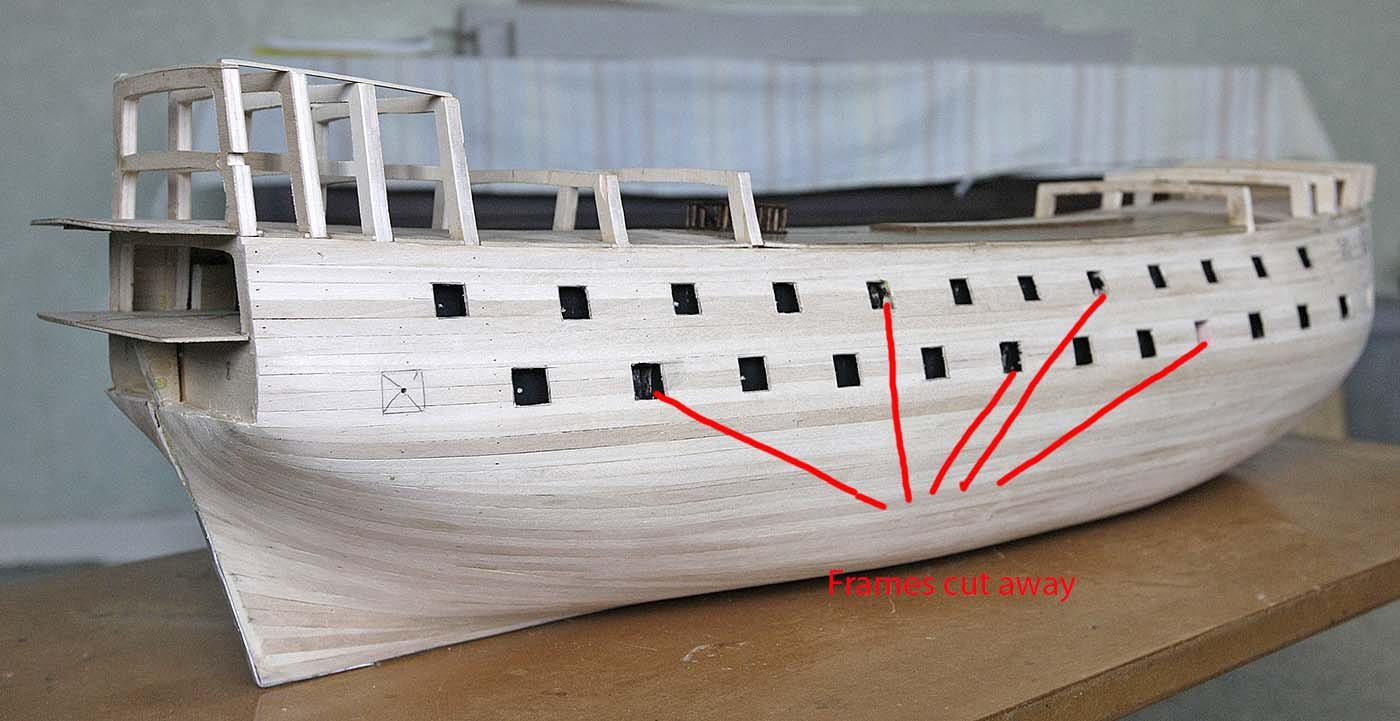
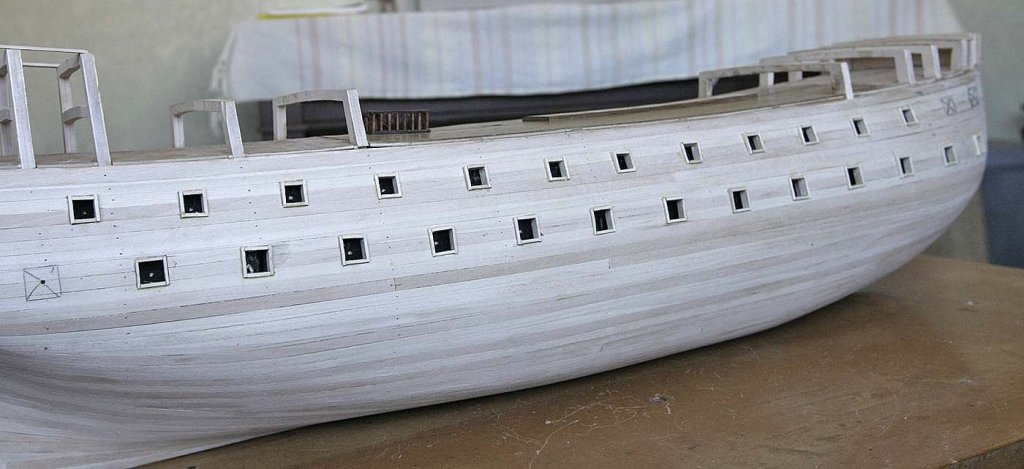
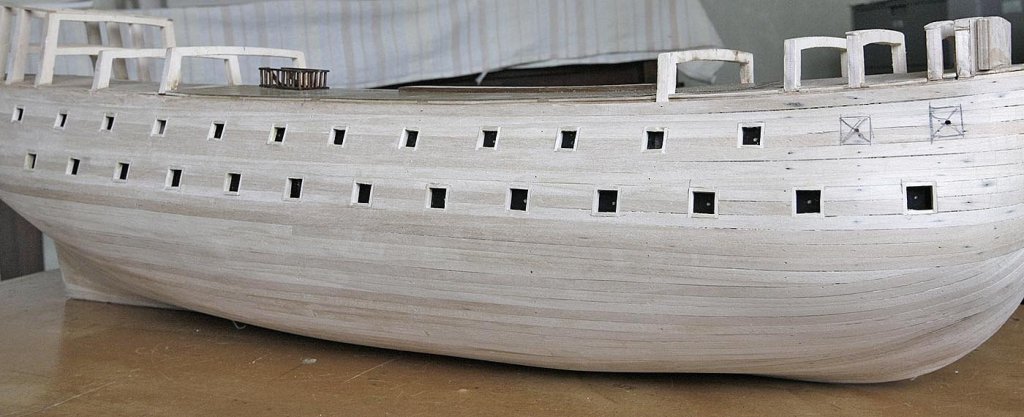
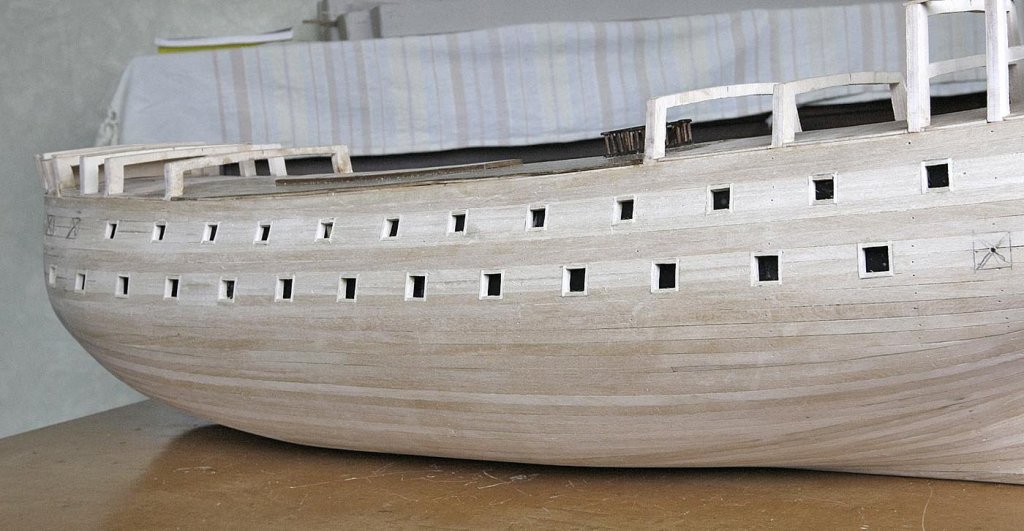
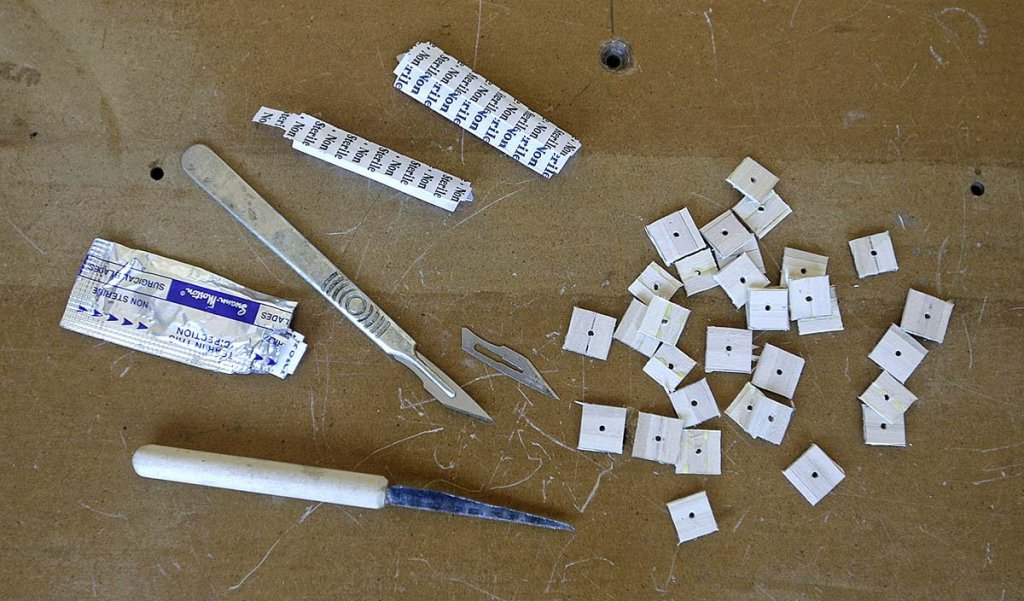
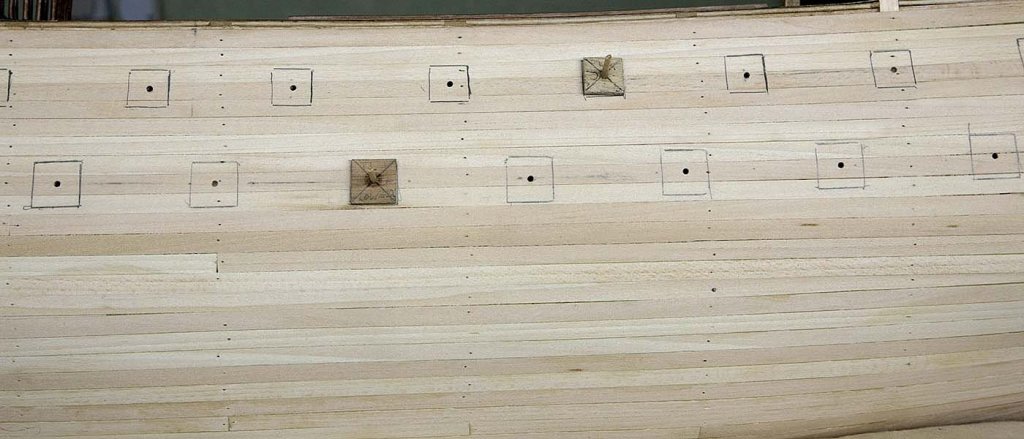
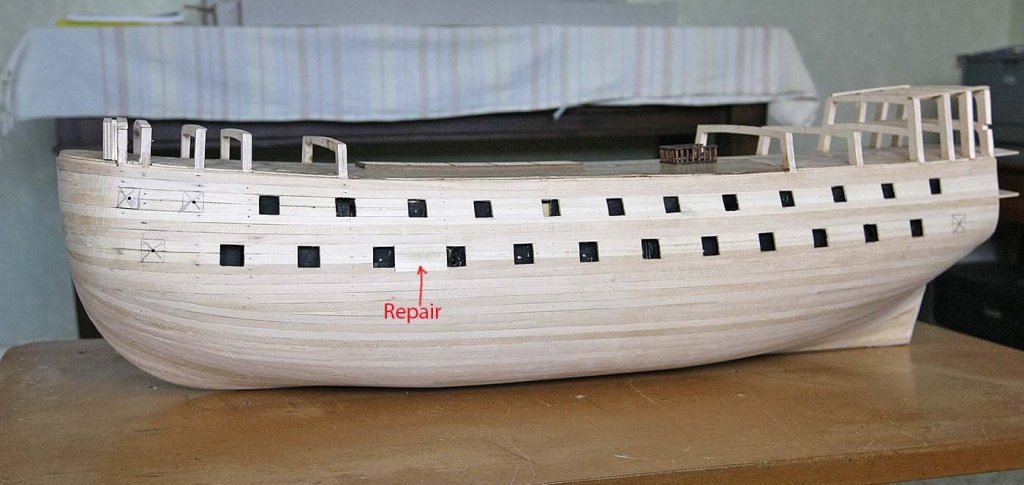
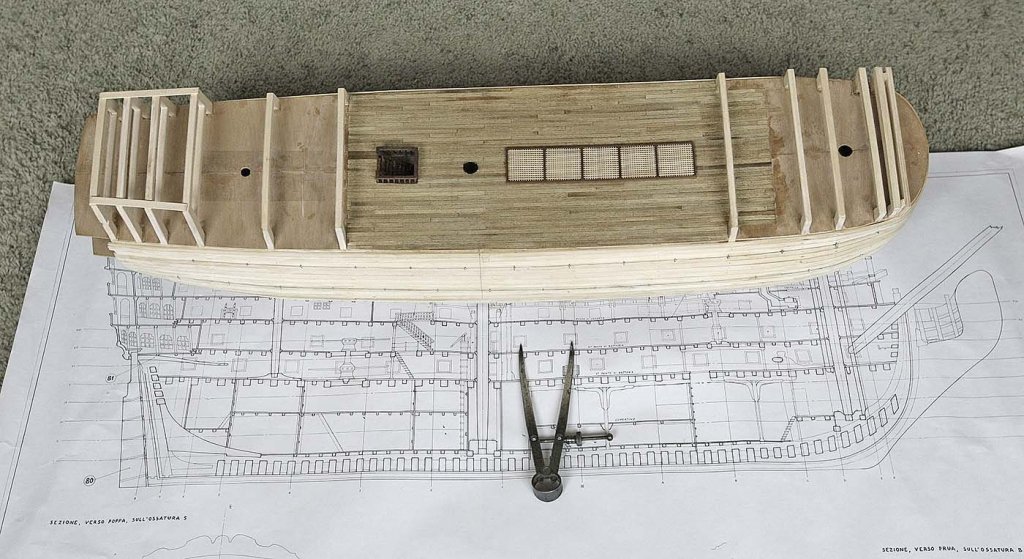
Hello Everyone, Still more progress, Here's the next episode. But first, Thanks for that reply, I'll copy that for my entry. It was now time to tackle the gun ports. To mark them out I made the appropriate size plugs and using the guide holes drew in the port positions. Before committing to cutting I checked, re-checked then checked again. For cutting I used a scalpel, I find them much sharper than a Xacto knife and give a perfect cut with ease. I didn't drill any pilot holes, I find that with a fresh blade it isn't necessary. Cutting the 1.5mm planks is just one pass with the grain and four passes across the grain and the plug comes away cleanly, no need for sanding to size. You can see in the pictures how cleanly the plugs came away intact. I used a fresh blade for each side. At first I was going to leave the ports which coincided with the frames as closed ones but as things were going so well I decided to cut away the frames and have a continuous line of open ports. Rather than just hack away I made a small saw from a junior hacksaw blade, I had thinned the blade quite a bit so as it had no strength and would bend so I fixed it into the dowel handle so that it would cut on the pull stroke, this is also shown in the picture. The whole procedure went very well and I was surprised at how quickly it was done, I had one clumsy moment when I put my thumb through some unsupported planks, thus needing a small repair. Next will be lining them. Ken

-
Hi, A question, Does the entry port have recesses and linings like the gun ports? Ken
-
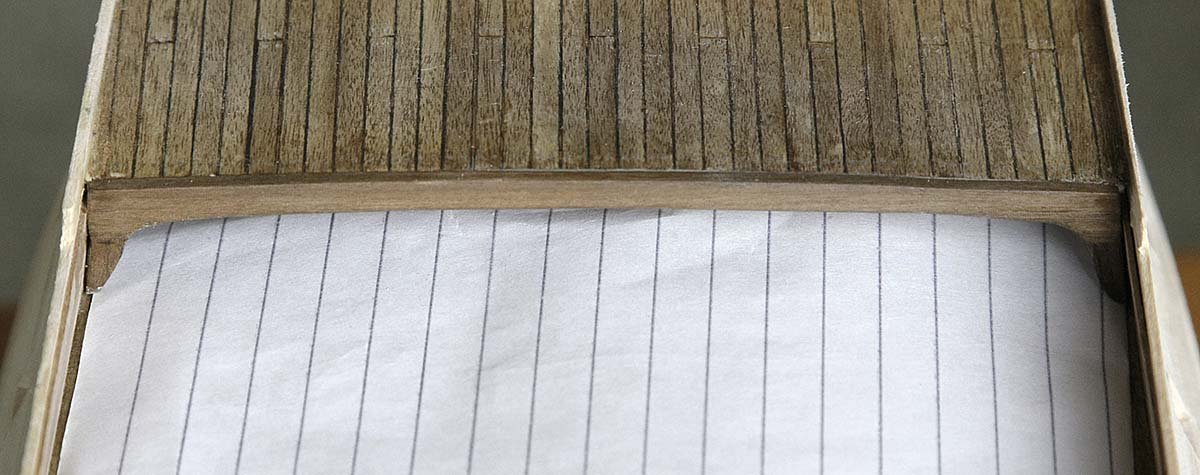
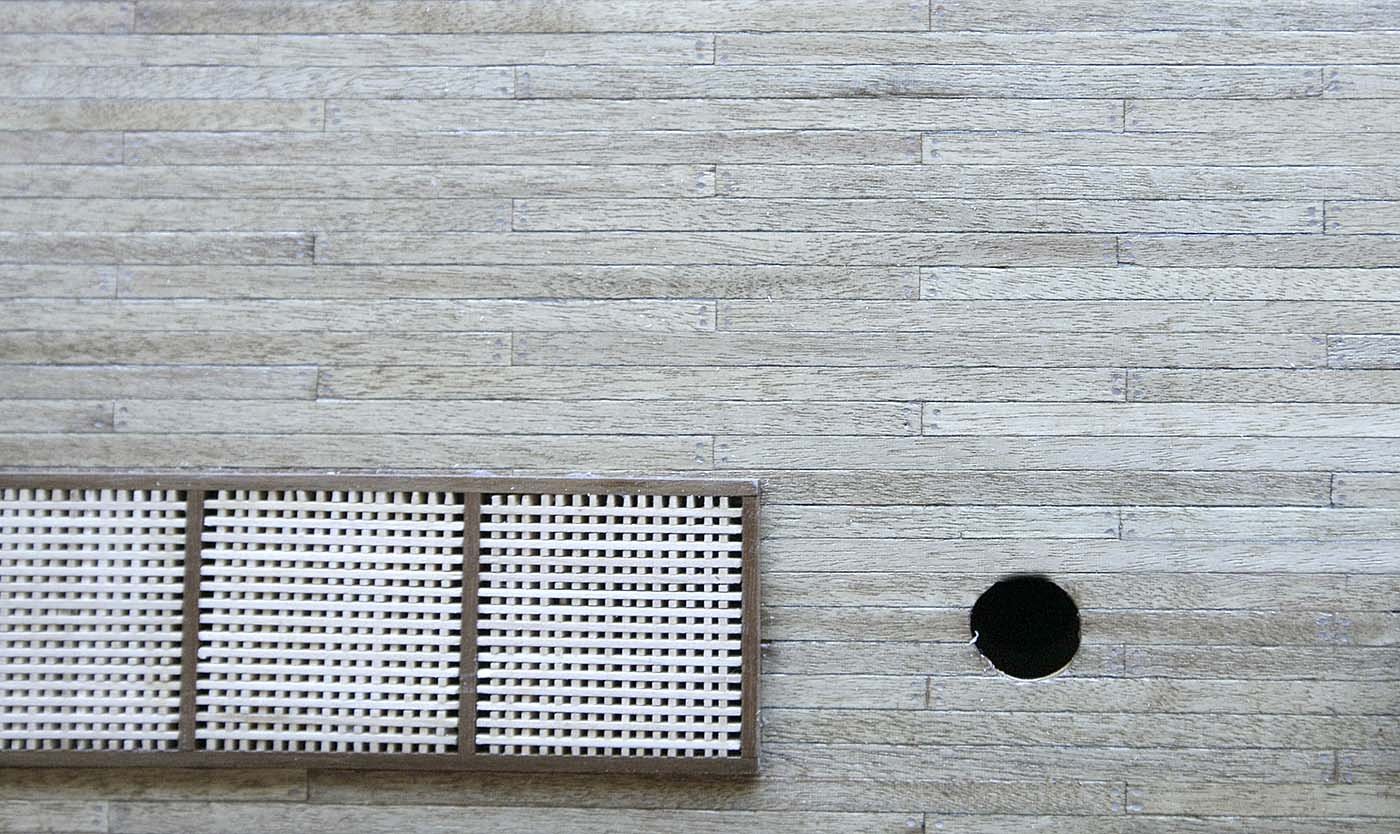
Hi Pete, No I'll take it off before I plank, I left it on just to photograph, but I think that I'll leave it there until the last minute just to protect that area from knocks. I'll use this reply to show a picture of the improved tree nailing filler colour, you may recall that I drilled out the previous filler as it was so close to the deck colour that it couldn't be seen, I've put in a different shade and I'm now happy with how it looks, I also replaced a few of the planks as they were a different shade and stood out. I hadn't started this build with the intention of being this particular but with other builders looking on it makes you want to raise your game, who knows where it will lead. Ken
-
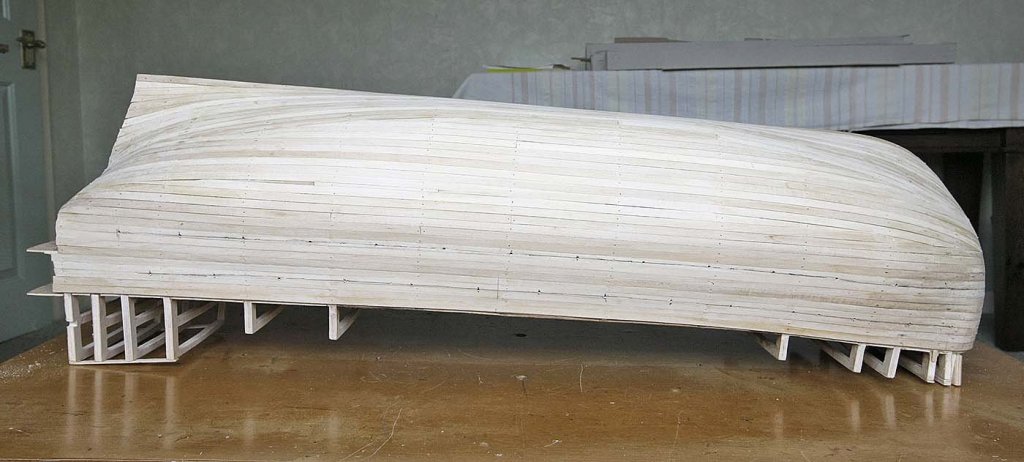
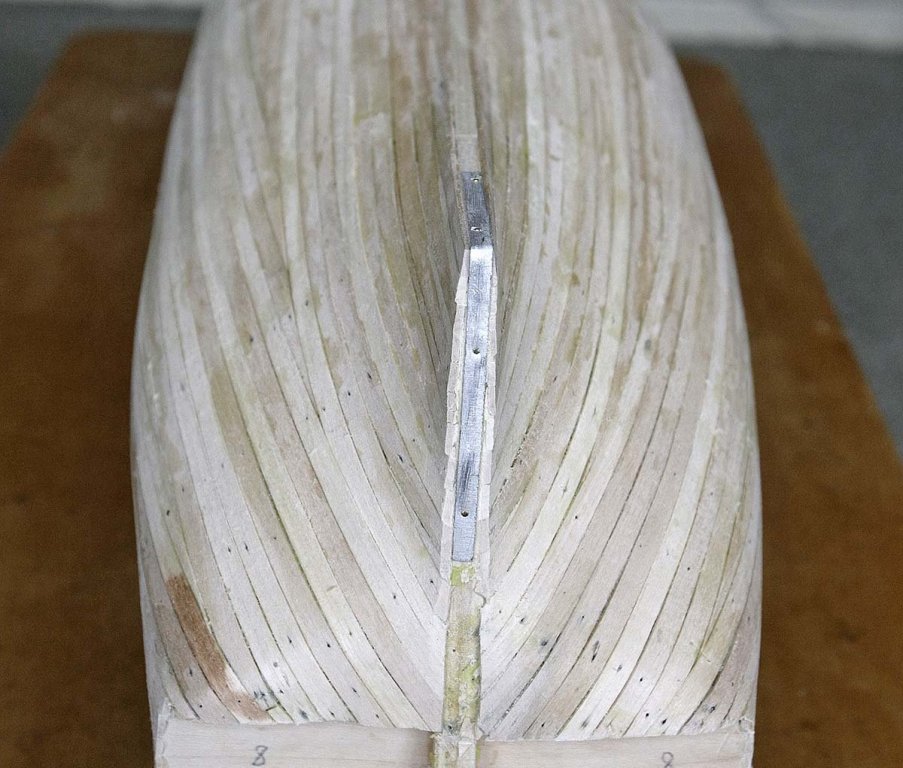
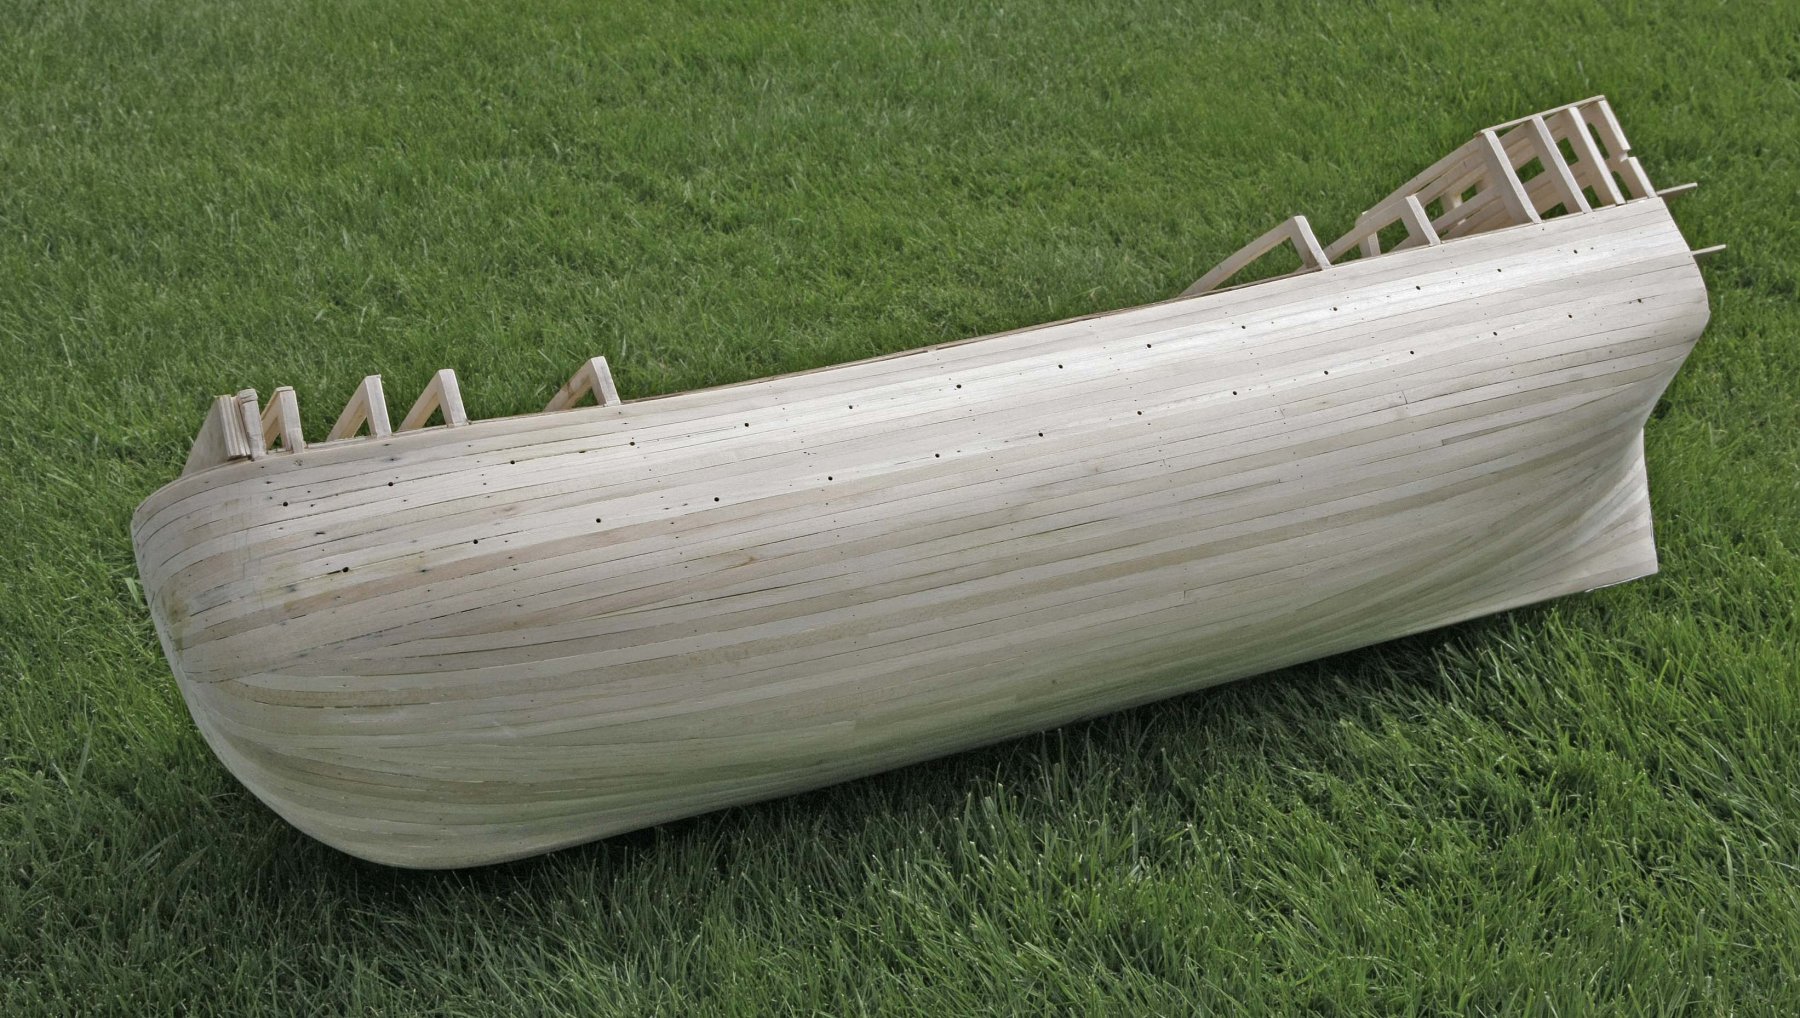
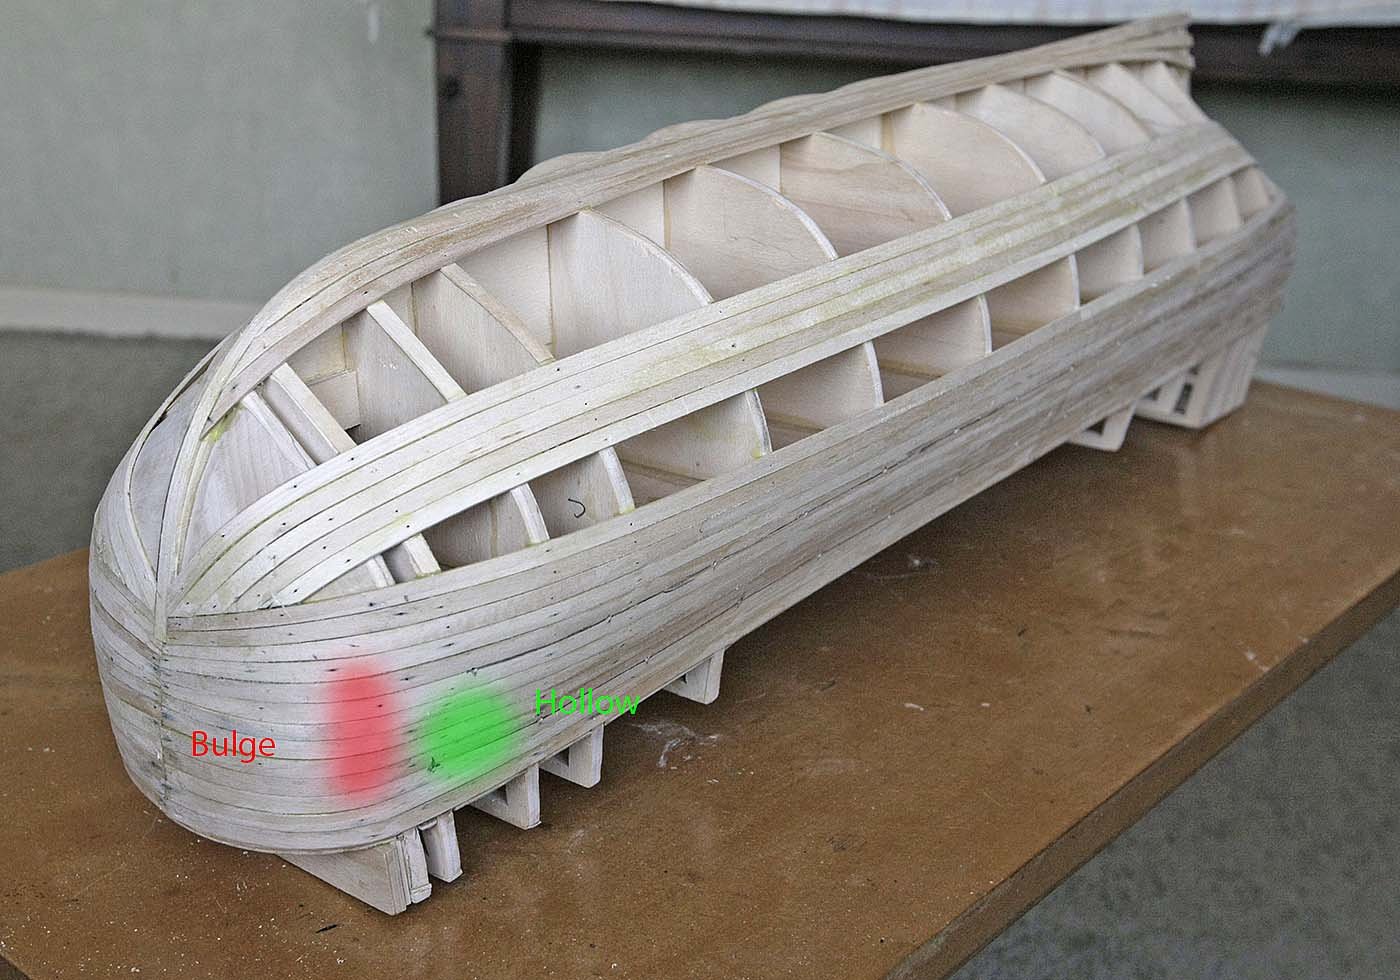
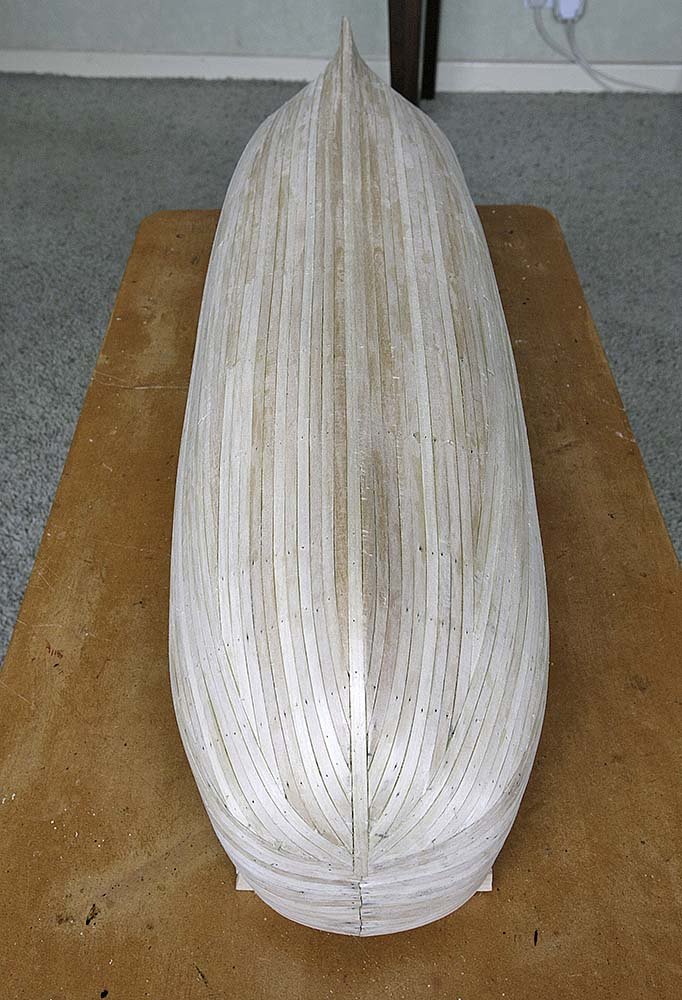
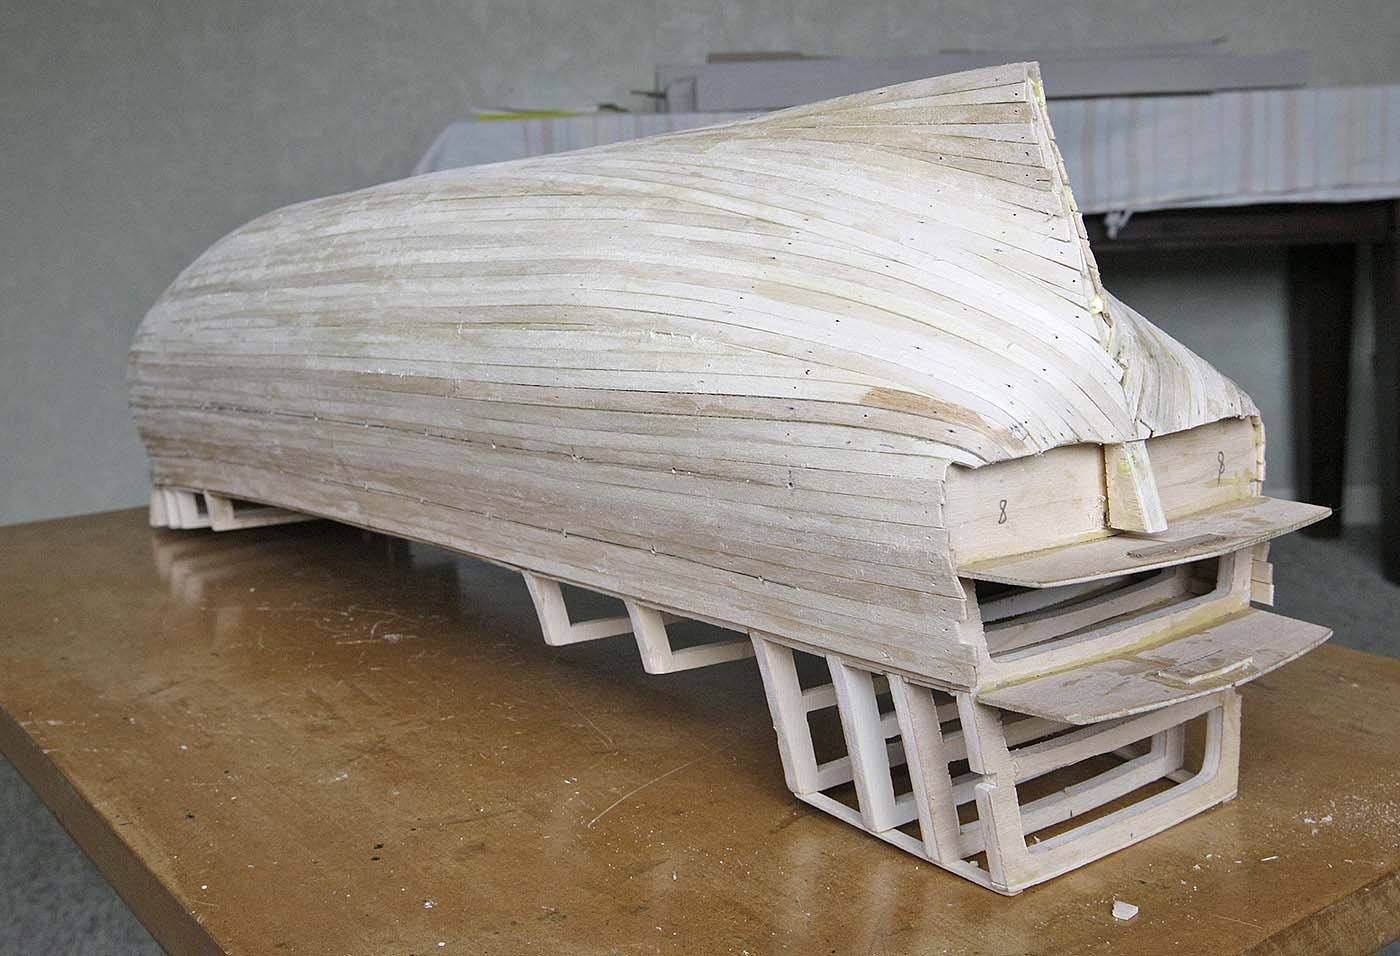
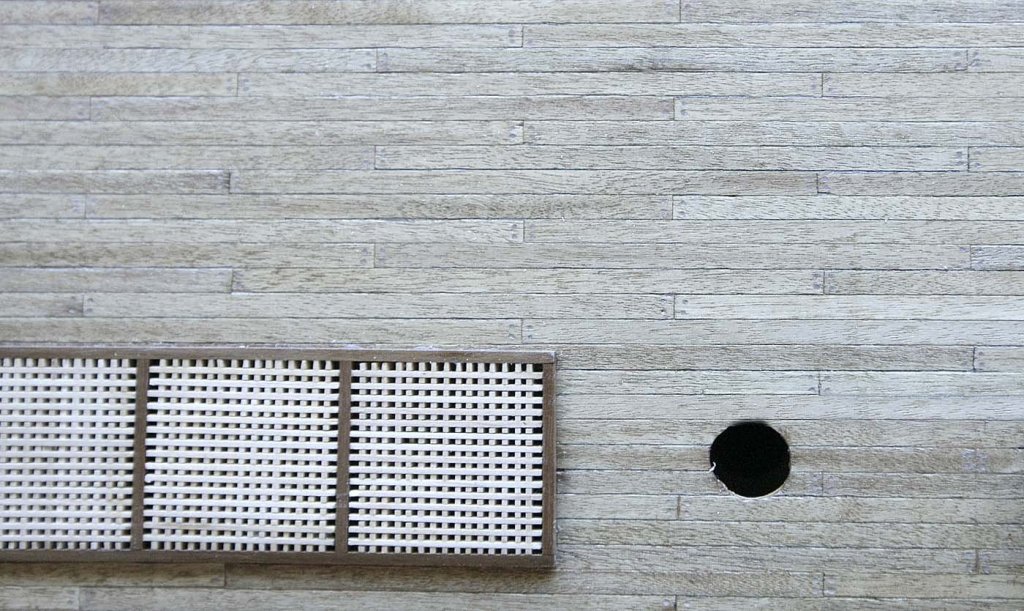
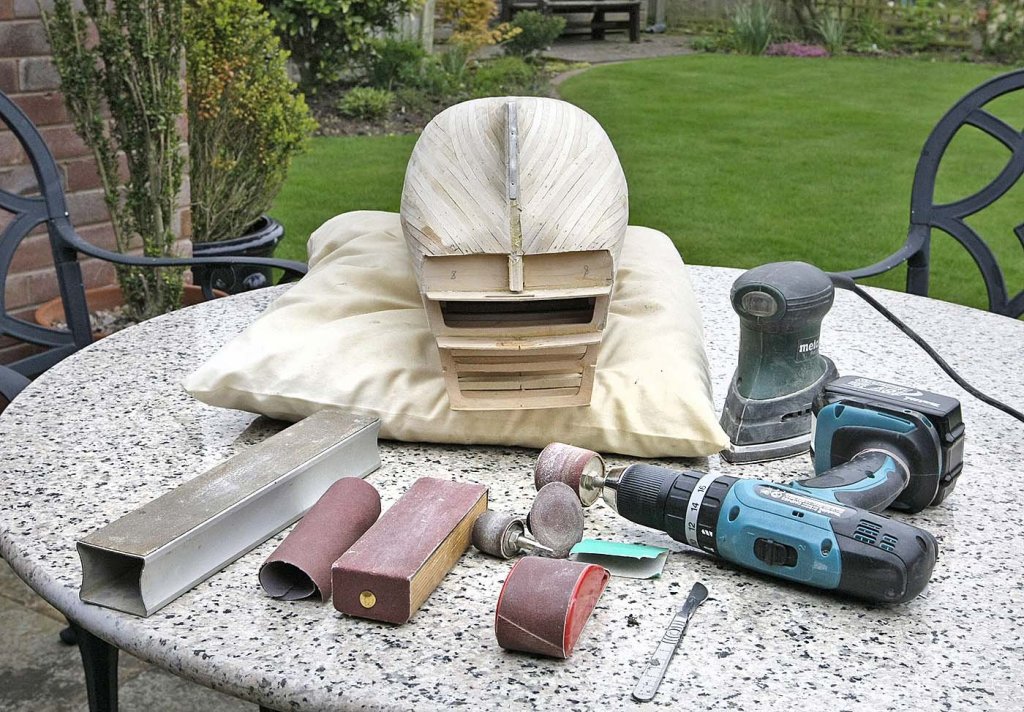
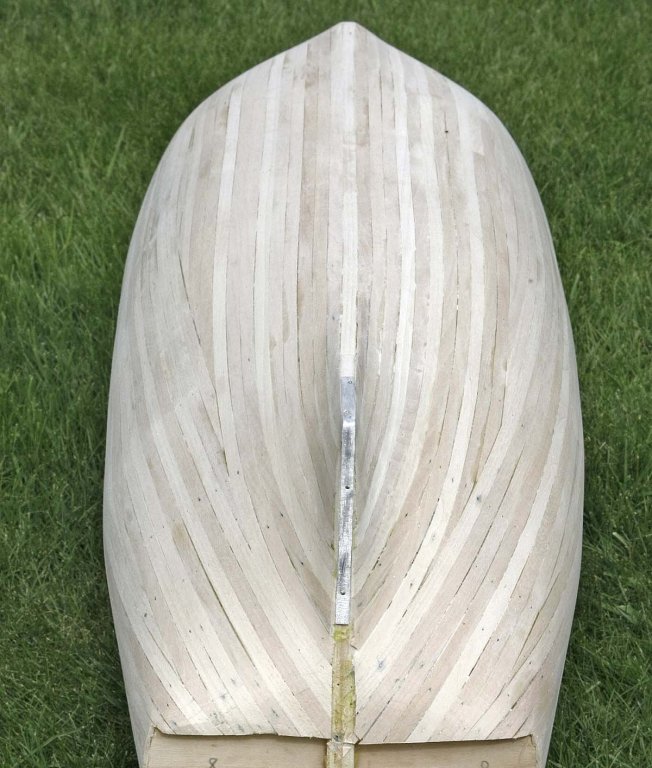
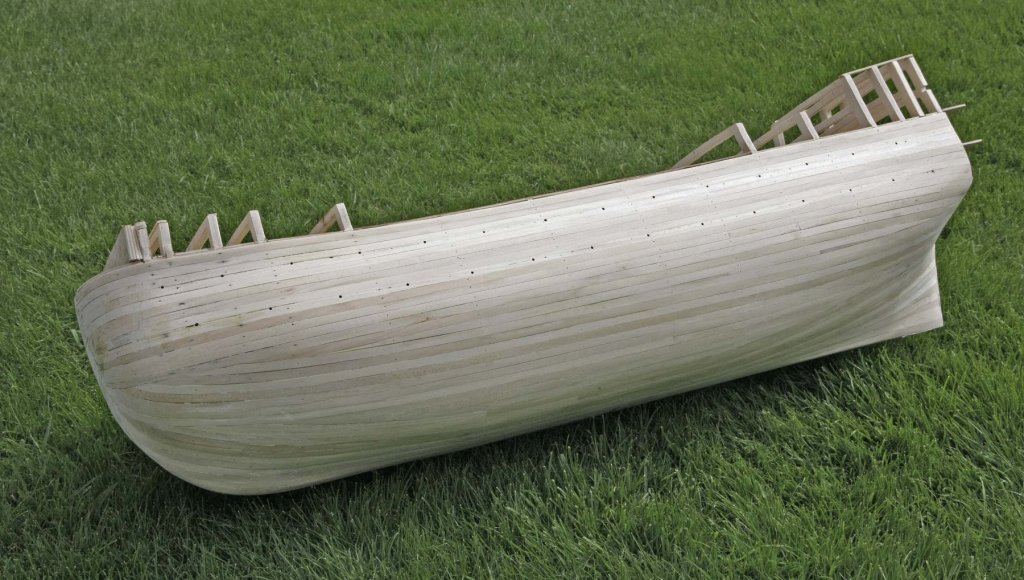
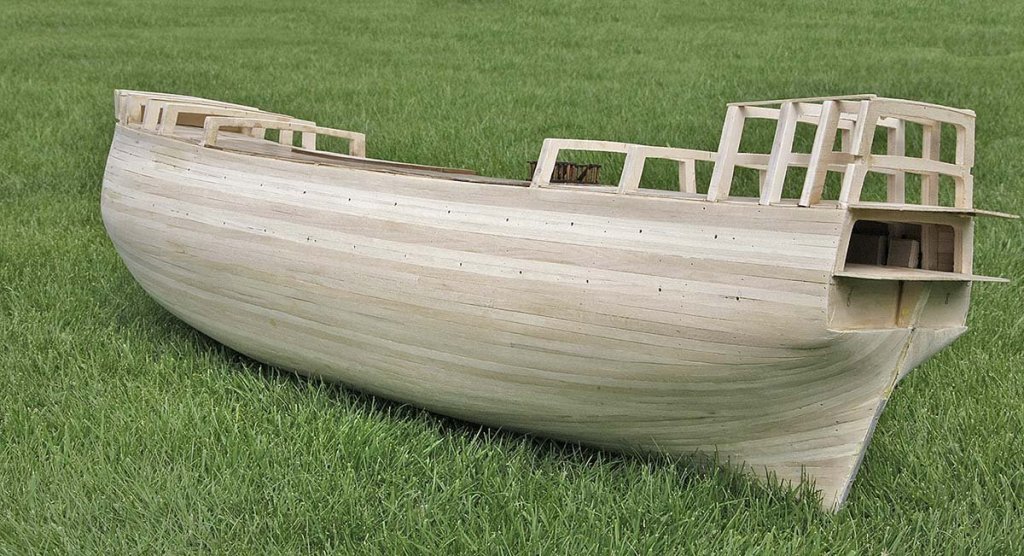
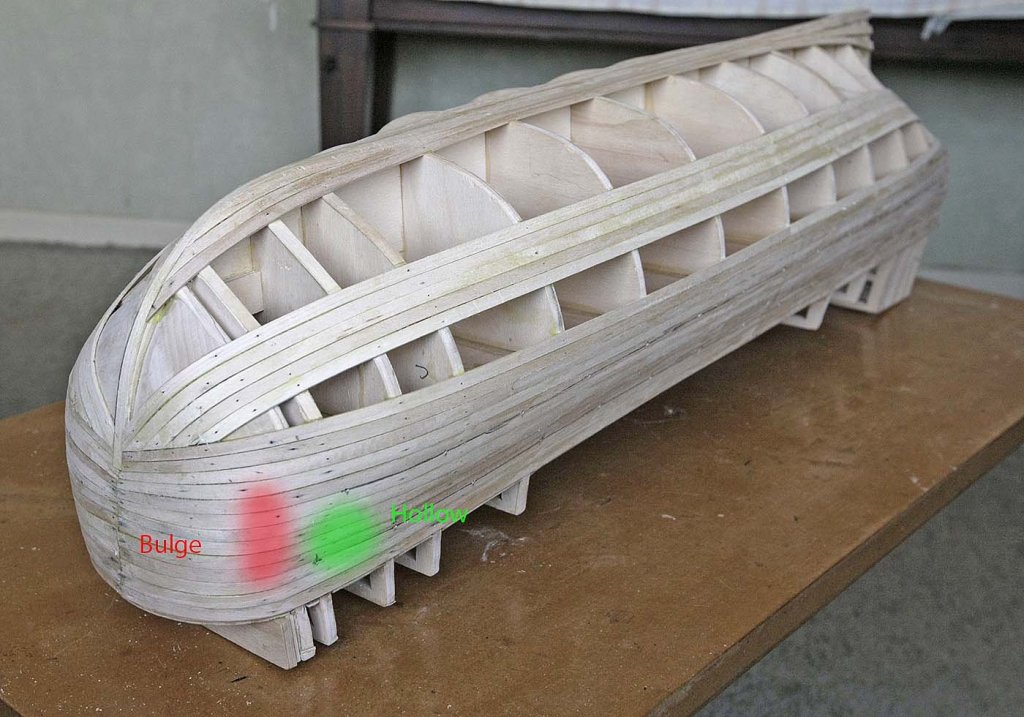
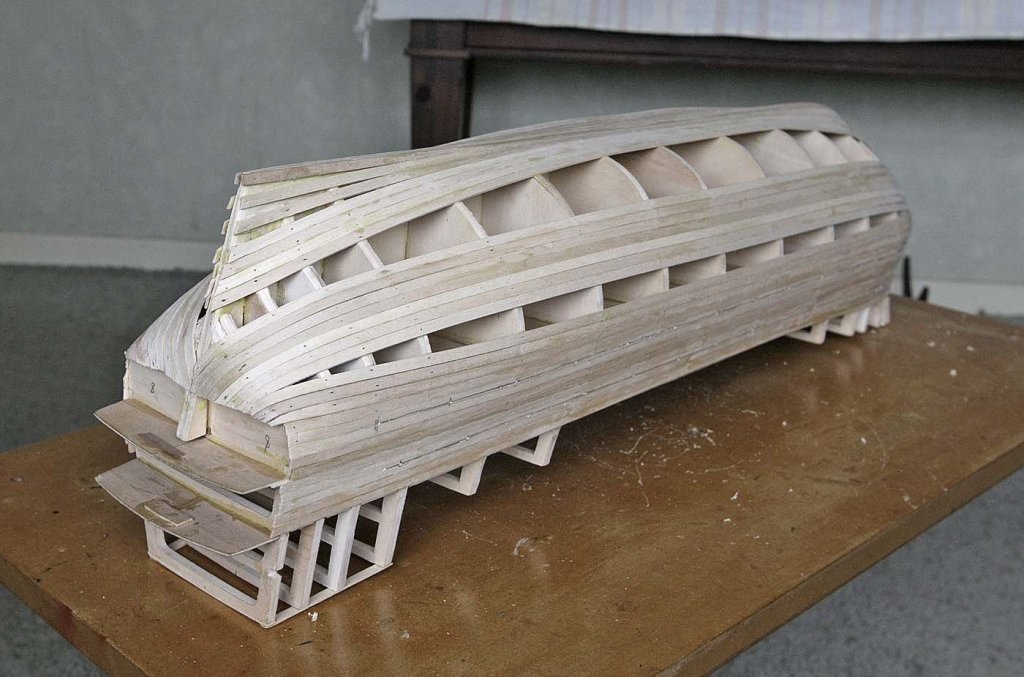
Hi, Another update. I'm still in the first honeymoon period of the build, I'm still excited about building this kit and at the moment I don't seem to be able to tear myself away from it so it's moving on apace. The sun came out today and I was able to go into my garden and get some serious sanding done. The high spot at the bow needed sanding back almost to the bow blocks but once done the hollow that I'd noticed disappeared and that area nicely flowed forming the correct shape of the hull. Nothing more of note just a lot of elbow grease saw the whole hull take on a very pleasing form, no high spots or hollows and I'm delighted to say not a drop of filler anywhere, success. Nothing more to report so I'll just put up the pictures. Oh yes the metal strip worked a treat, I'd strongly recommend using it as it made finishing that area easy. The photos were taken outside this time. Here in the UK it's early spring and it's nice to see my lawn greening up and looking lush but I'll have to put the model down and get cutting it. Ken
-
Hi Chris, Thanks for liking my build so far and for taking the time to comment. I haven't decided yet about painting the lower hull, I probably will because I like the finished look. I hope followers won't be too disappointed when I say historical accuracy is not my intention. I mentioned in my introduction my goals for this build, I do hope though that I will end up with a clean, neat well finished and good looking model that I will be proud of. I will add as much detail as I'm able. I do have a problem though, you may notice in one of my pictures that I have lost part of my hand, I have a reduced sense of touch and poor dexterity. I started my first kit for movement and control therapy, it was either that or knitting! I found that I enjoyed the building and just continued for the pleasure of it. For me this is going to be a most challenging project as it is and to add another level of difficulty would I think take away some of the enjoyment. I did see Chuck's video though and will bear his planking principles in mind. Ken
-
Hi, Sorry to hear about the pictures, I'll try and post the missing ones here, let me know if it works. Ken


-
Hi Sjors, I'll also be following this build. How do you manage two builds of this magnitude at the same time? Best of luck with it. Ken
-
Hi, I like what you'r doing so far. He who dies with the most toys, WINS. Ken
-
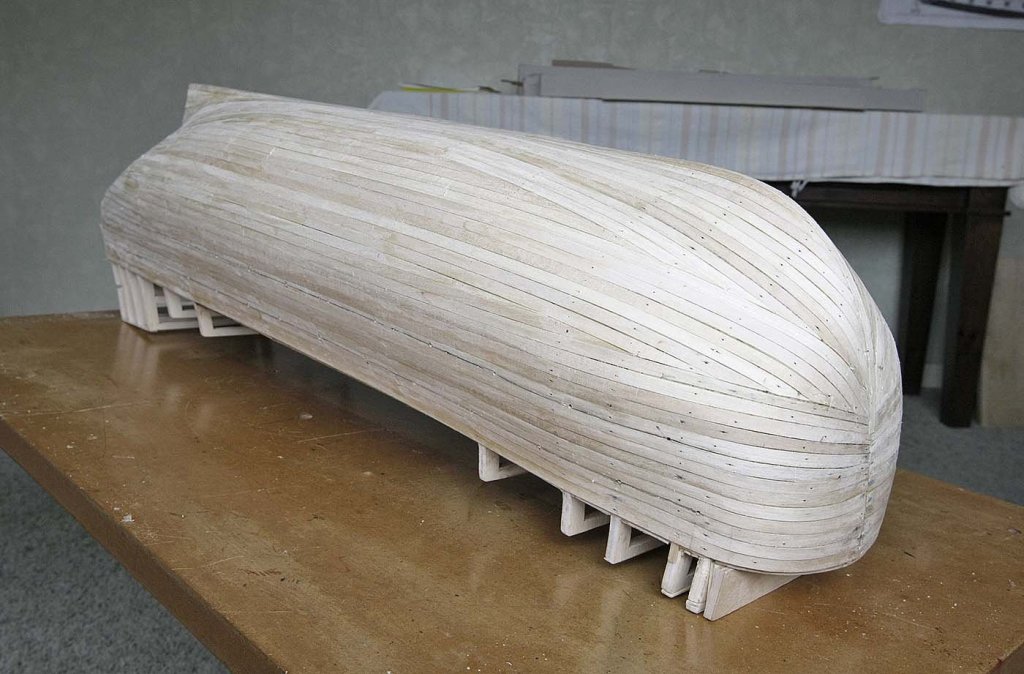
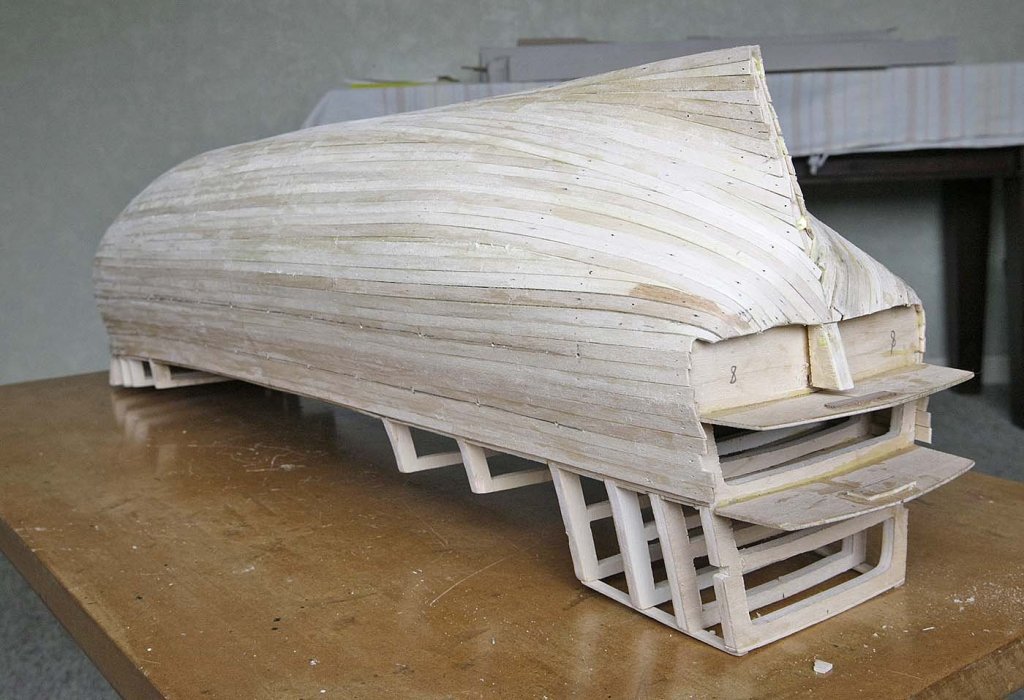
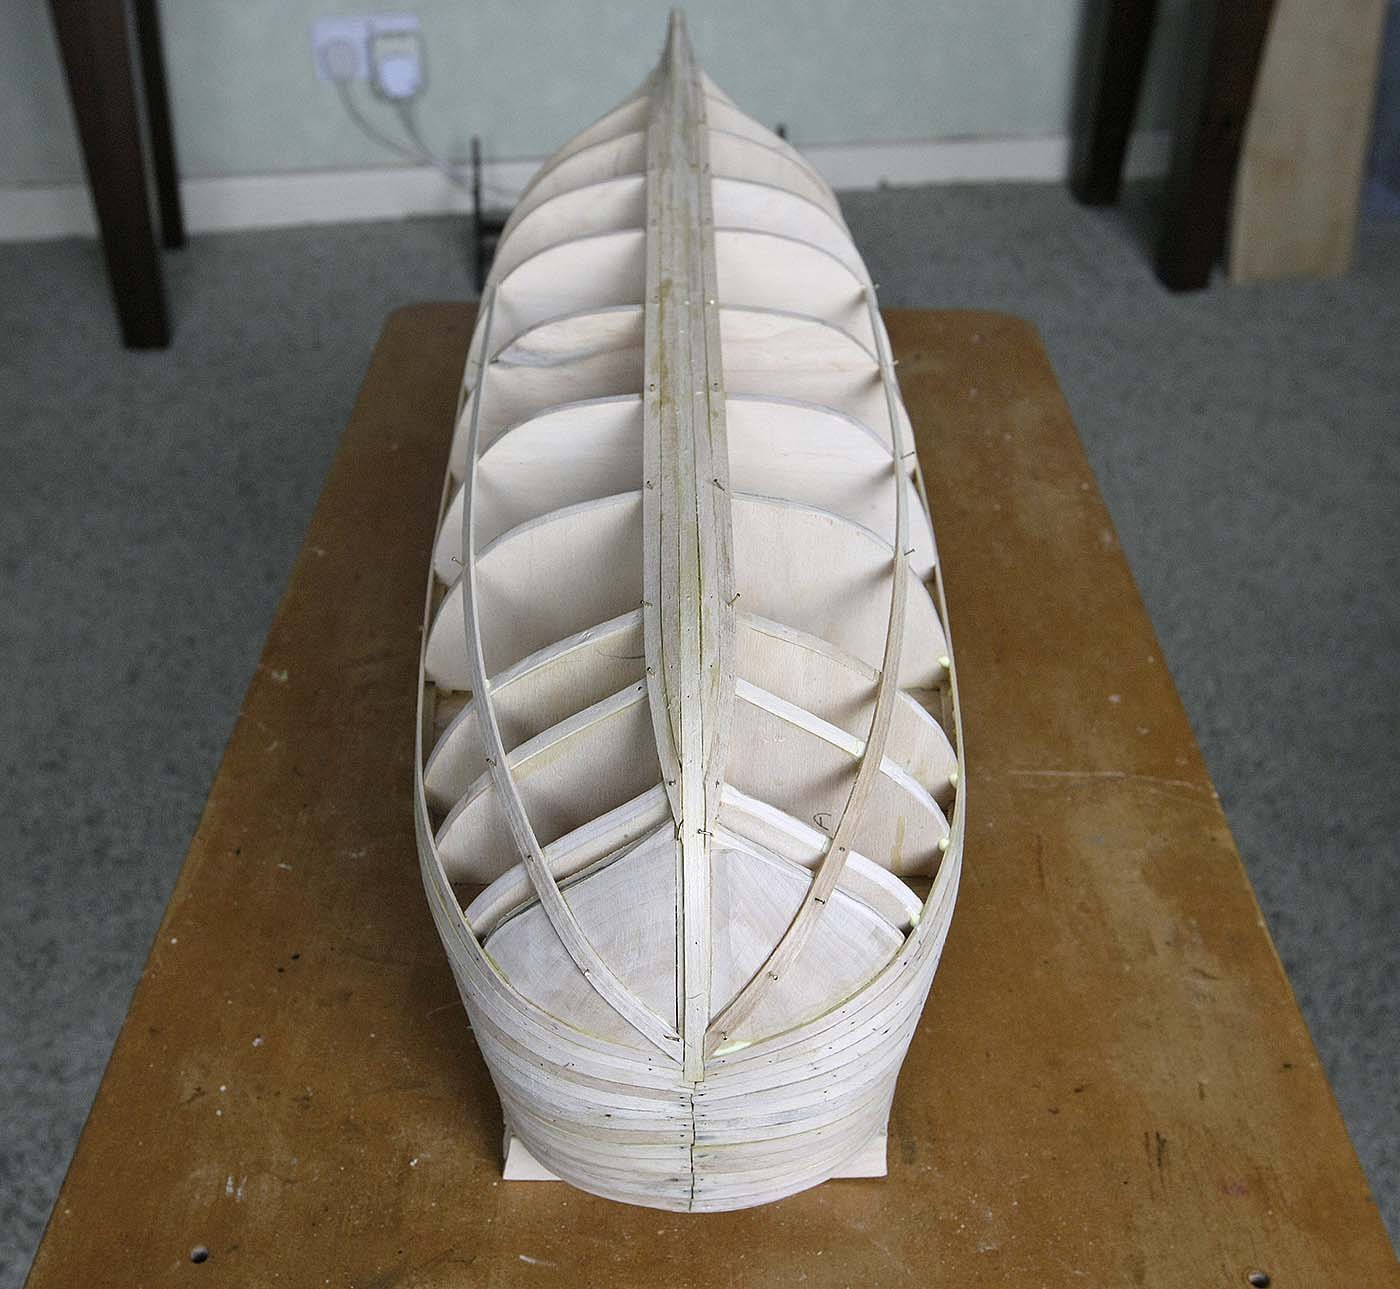
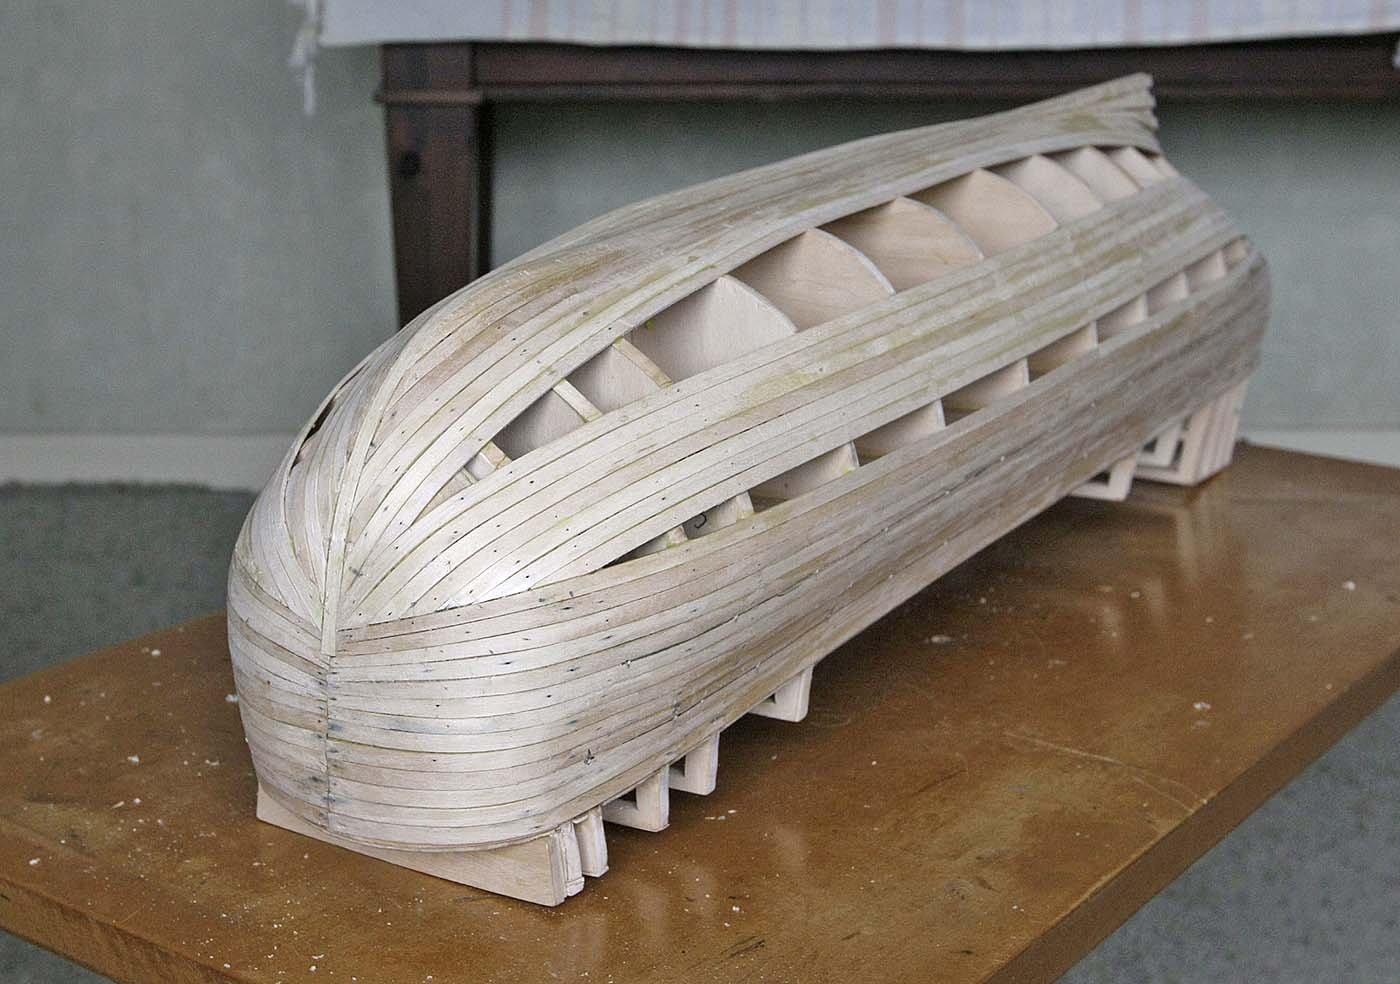
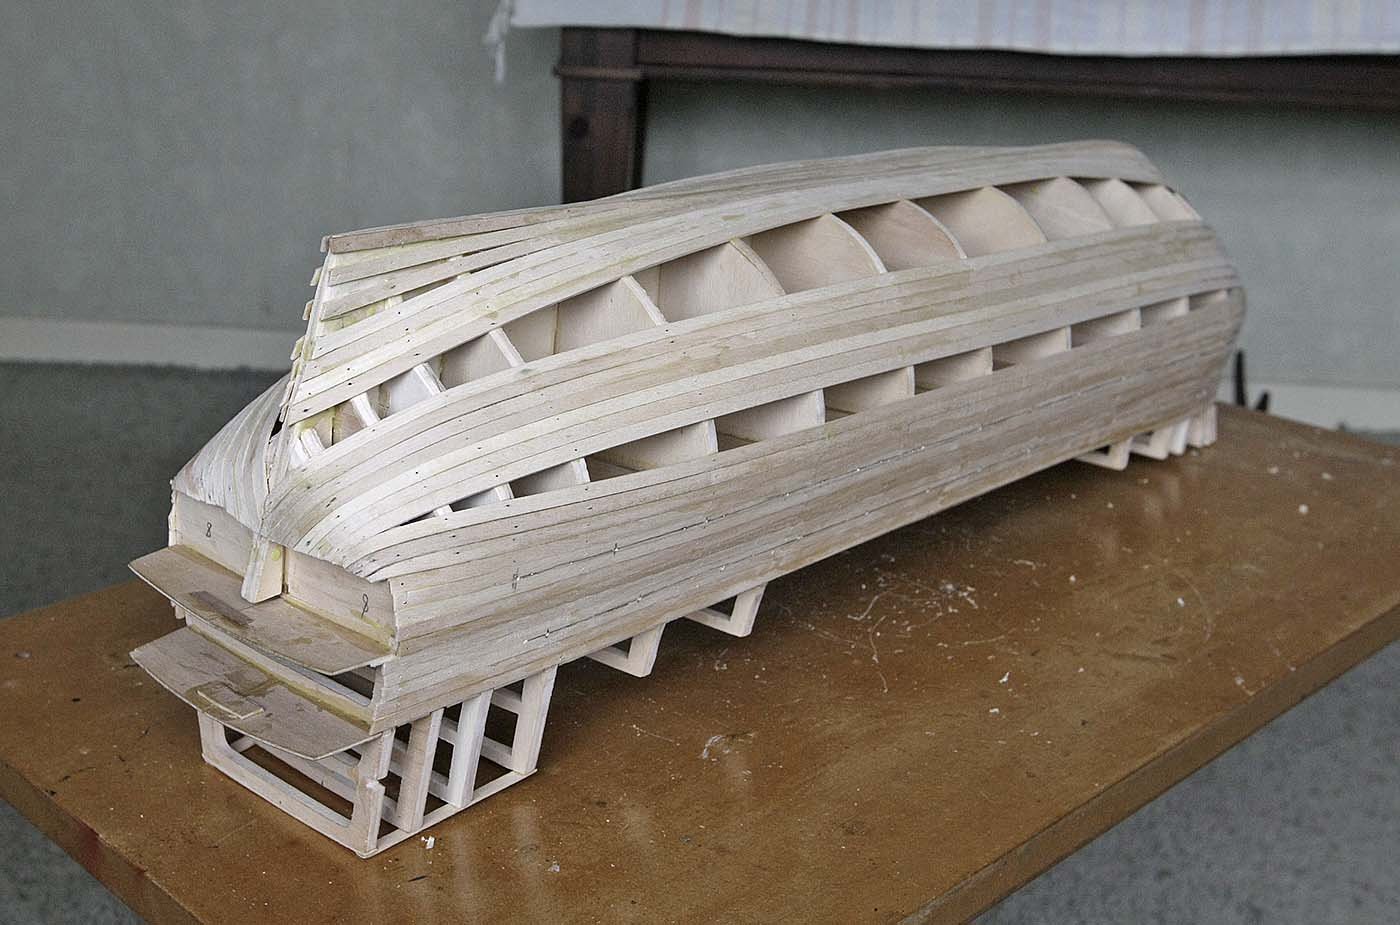
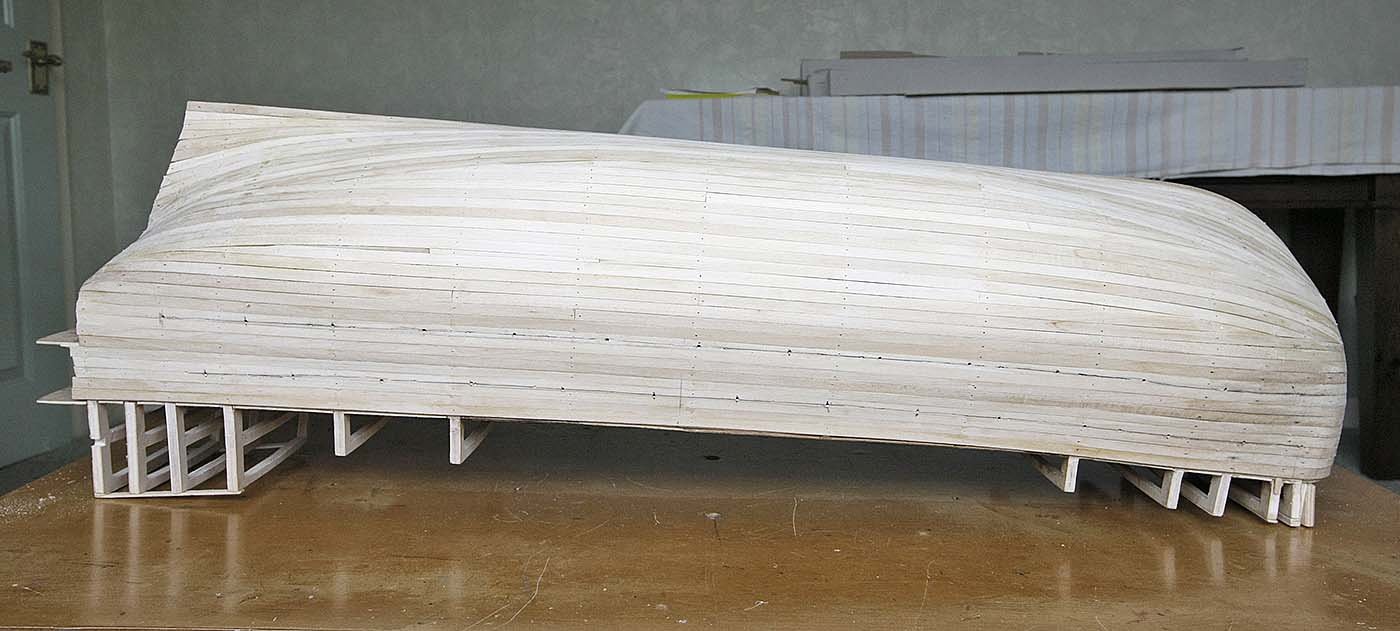
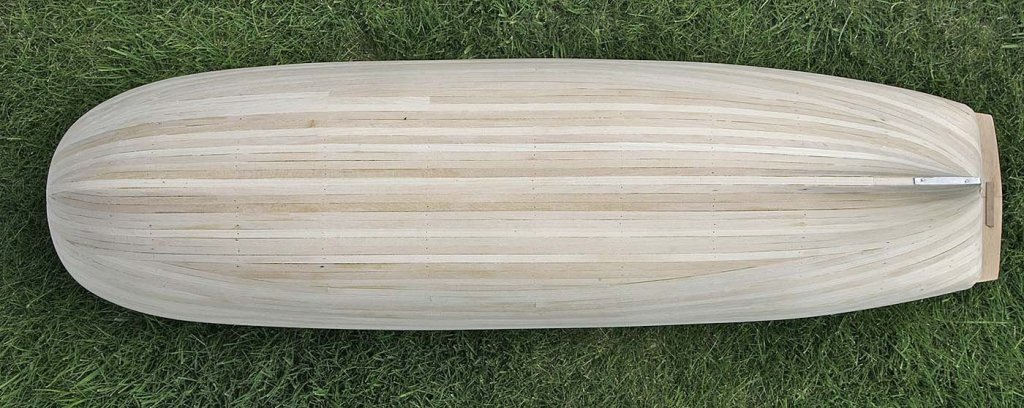
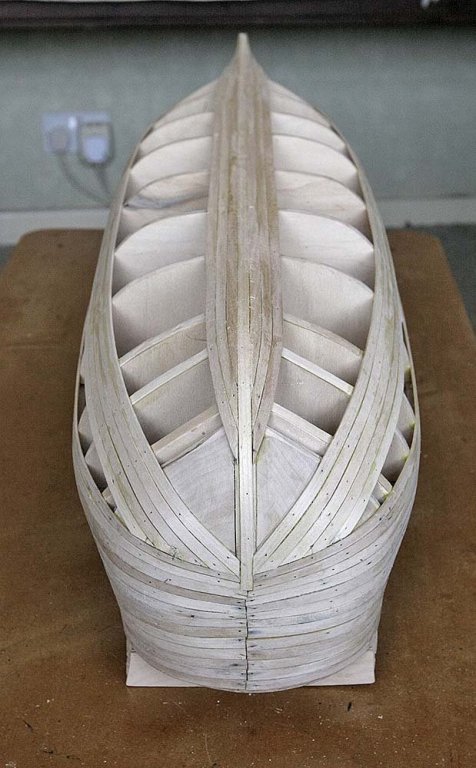
Hello, Thanks for your likes and comments. Again happily making good progress, Here's my update. I've completed the first planking, it's a great feeling seeing that last bit of plank slot into place, closure. Not much to say, I just continued in the same way until it was finished. I've looked at the planking and I'm pretty sure that after sanding I will achieve my goal of no filler for the first time. The stern and the rear part of the keel need to be sanded down from there original 10mm to 5mm to allow the second planking to butt up flush with the stern post. I hoped that I'd done this initially but I had been much to timid and quite a bit more sanding was needed. To get it down to 5mm evenly and without going too far I made a metal 5mm strip and attached it to the area needing reducing, this will be a good guide for me and give me confidence to take as much off as needed without going too far. The pictures show the hull just having been completed but not yet sanded, Next will be the big sand, but that will be when it stops raining as I'll have to do it outside. Ken