DONATION DRIVE - SUPPORT MSW - DO YOUR PART TO KEEP THIS GREAT FORUM GOING!
×


Chuck
-
Posts
9,691 -
Joined
-
Last visited
Content Type
Profiles
Forums
Gallery
Events
Everything posted by Chuck
-
 Really looking good Matt. You are making steady progress.😁
 -
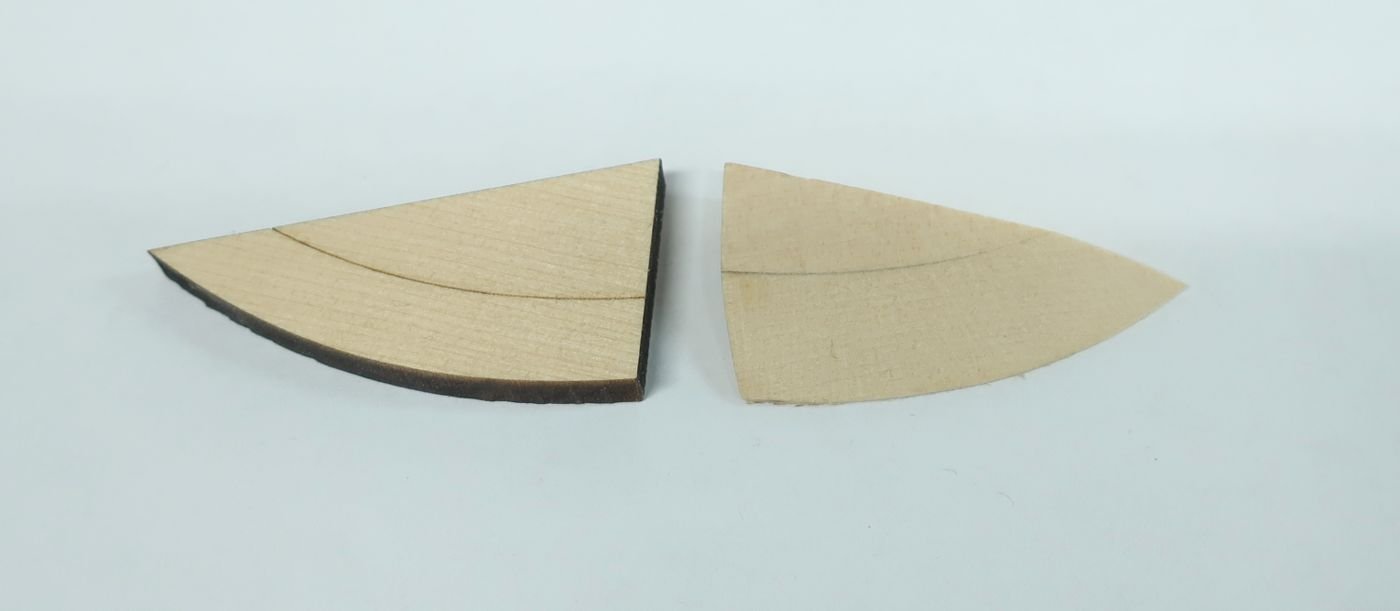
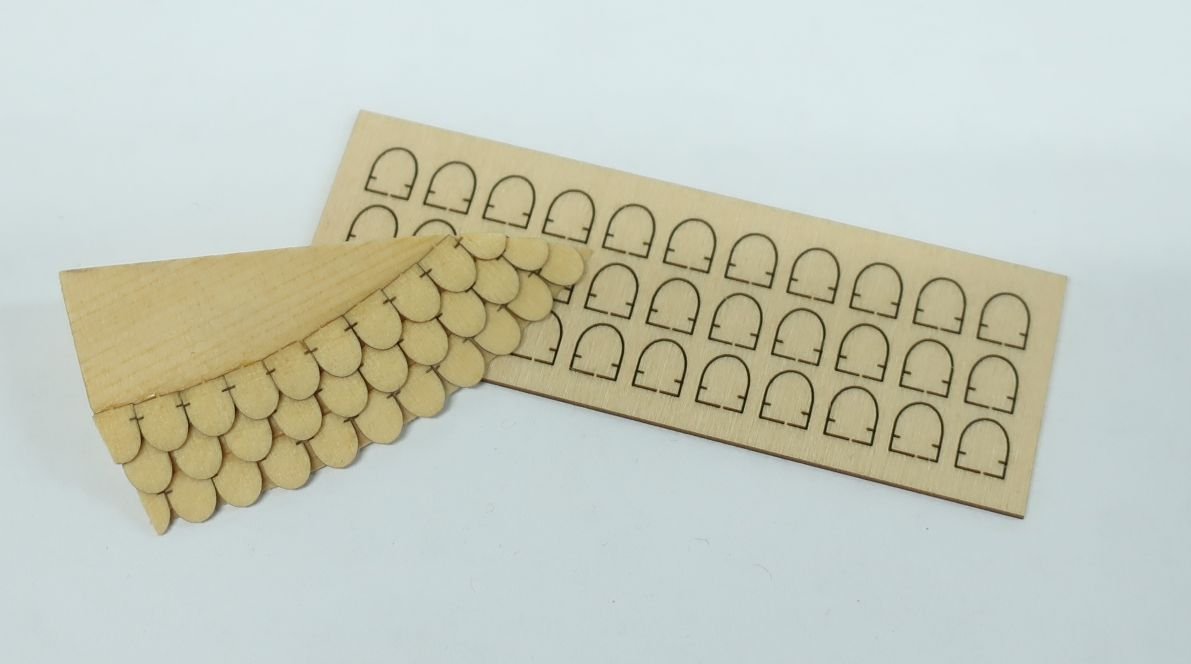
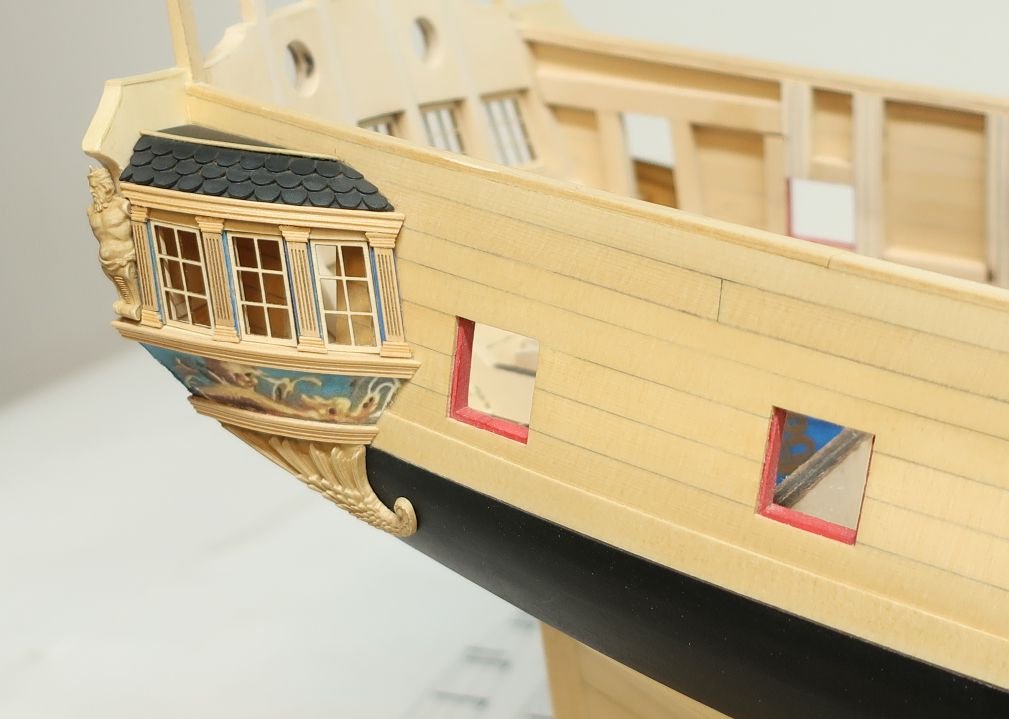
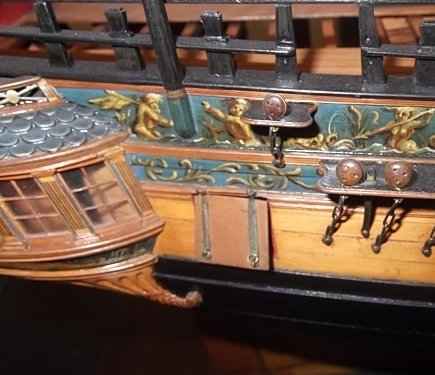
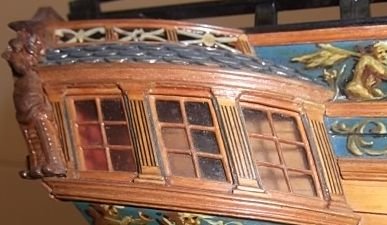
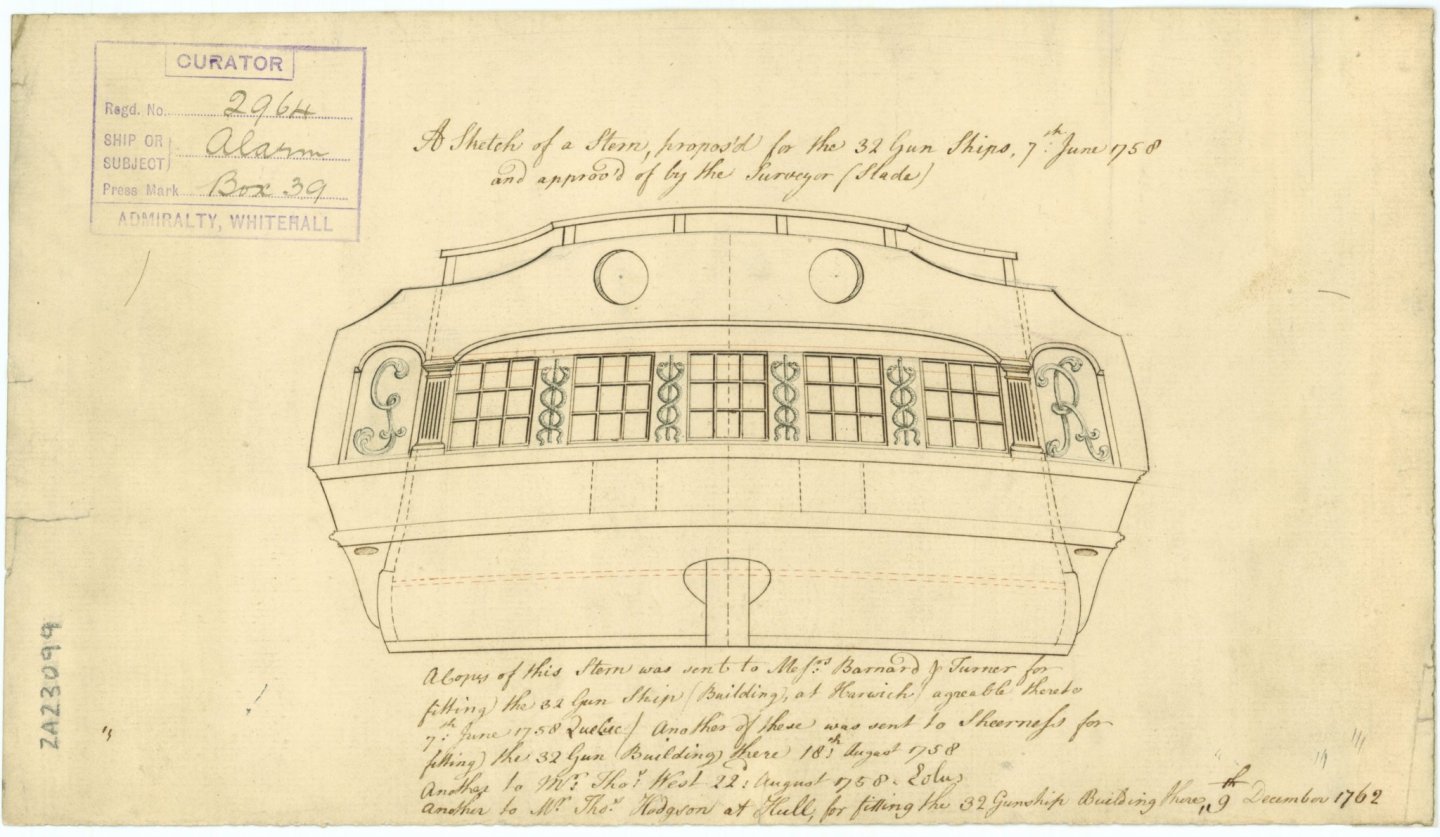
Yes I agree, I dont think that would work or even look good. I just spray it with some fixative and it looks good to me. If you wanted to, you could always use it as a paint by numbers sort of thing and just paint on top of the printed frieze. But I think the printout looks better than anything I have seen short of just painting it from scratch. I did finish the roof today... The roof is laser cut and 1/4" thick. It has a laser etched reference line to show you where to bevel it to the "sloped" shape needed. Then I used some laser cut shingles and added them to the roof. Three rows as is typical. After each row starting with the bottom, I sanded the shingles very thin....paper thin almost. The tops were sanded flush with the roof to accept the next row. Then I repeated it....until completed. There are marks on each shingle to help you position the second and third rows. Then the roof and tiles was painted black. But the tiles are more of a dark slate gray. So I weathered them a bit so it wasnt a stark black. Then I added a thin molding on top as you can see. This is also laser cut but it also needs to be sanded thinner. 1/32" is too thick. I sanded it to about 1/64" thick. At this stage I still havent glued the shingled roof in position. So resist the urge. Before finishing up this quarter gallery I want to now start on the one on the port side. Once that is completed up to this stage I will finish the both of them. The fancy rail along the roof still needs to be added. But that is better done after the friezes are glued to the sides of the hull. So I have to finish those up first. And finally some inspiration and reference which you can compare to my interpretation. Although I used the draft to correct any differences with the contemporary model. Chuck
- 1,784 replies
-
- 46
-

-
- winchelsea
- Syren Ship Model Company
- (and 1 more)
-
Yes that would be fine.
-
Very nice...its looking good Doug!! One thing however...the stern post shouldnt be added at this time. That is glued on after the planking is completed. Planking will be much more difficult with it in the way.
-
That looks really good. Well done indeed!!! Chuck
- 99 replies
-
- 1
-
-
- winchelsea
- Syren Ship Model Company
- (and 1 more)
-
Math isnt my thing....I will leave it to one of the other guys to give you that percentage!!! Keep in mind none of the stuff will fit that is offered as a laser cut package and also the carvings. You will need to build it all at that scale. Chuck
- 1,784 replies
-
- 1
-
-
- winchelsea
- Syren Ship Model Company
- (and 1 more)
-
Yes there would be but they are seldom shown on ship models. You could of course add one. But its a bit "kitchen sink" for my tastes.
- 1,784 replies
-
- 8
-
-
- winchelsea
- Syren Ship Model Company
- (and 1 more)
-
Yes that was all straightened out, thanks. The tissue paper didnt work. I used plain paper and it worked well. The friezes you see are glued on permanently now. More to add soon.

- 1,784 replies
-
- 16
-
-
- winchelsea
- Syren Ship Model Company
- (and 1 more)
-
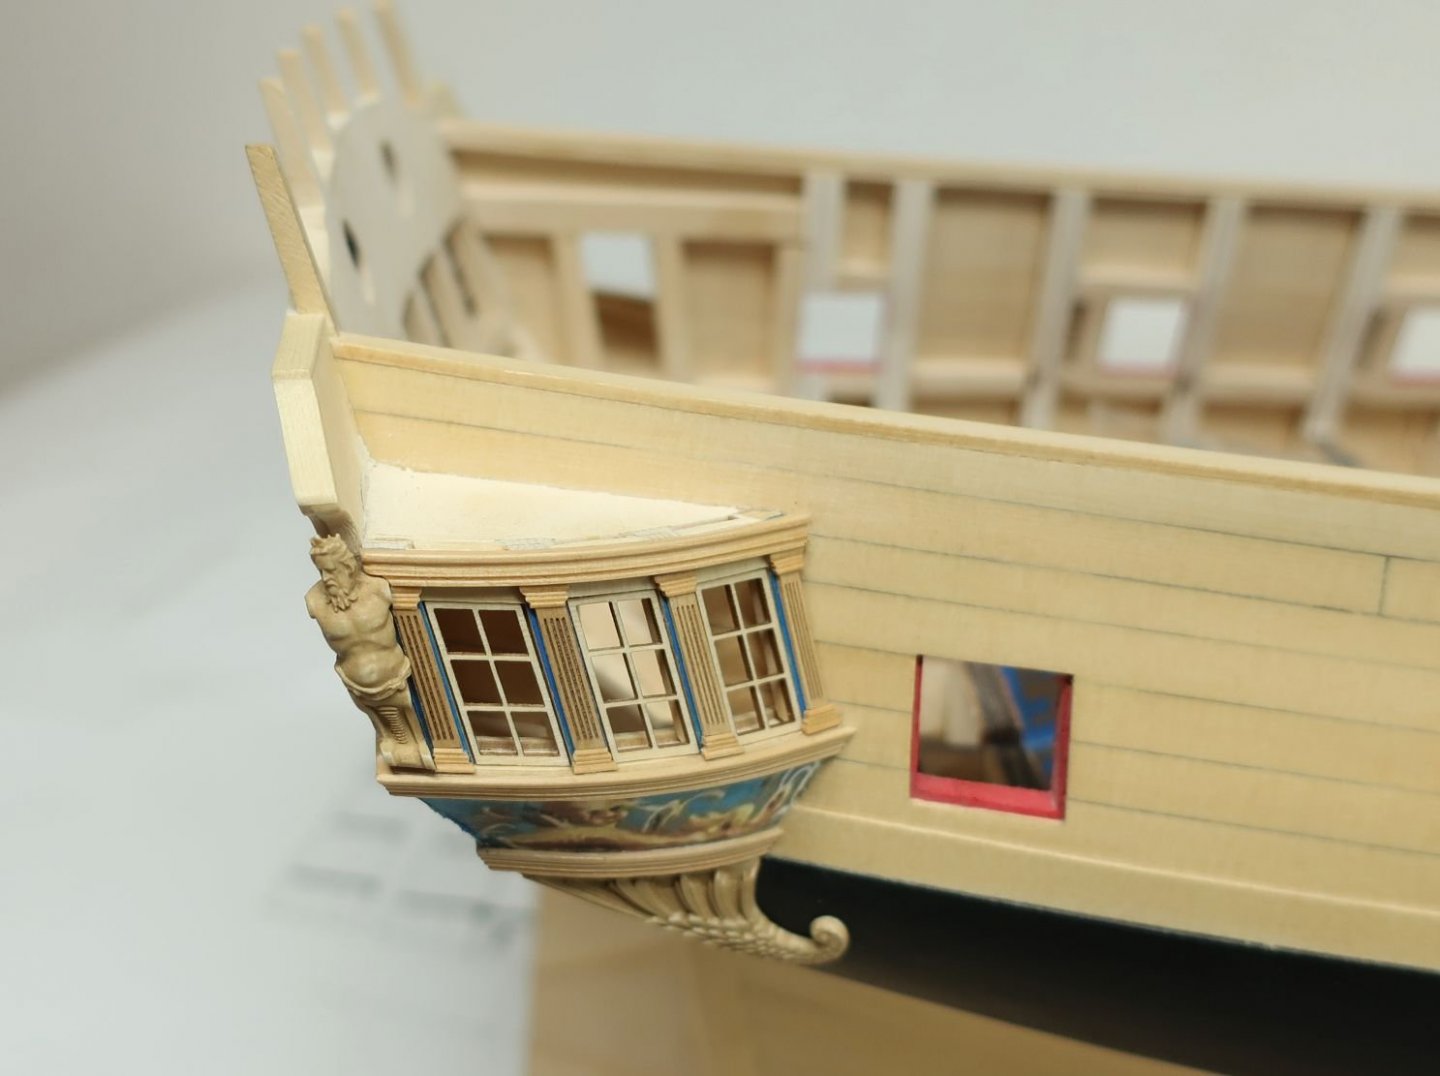
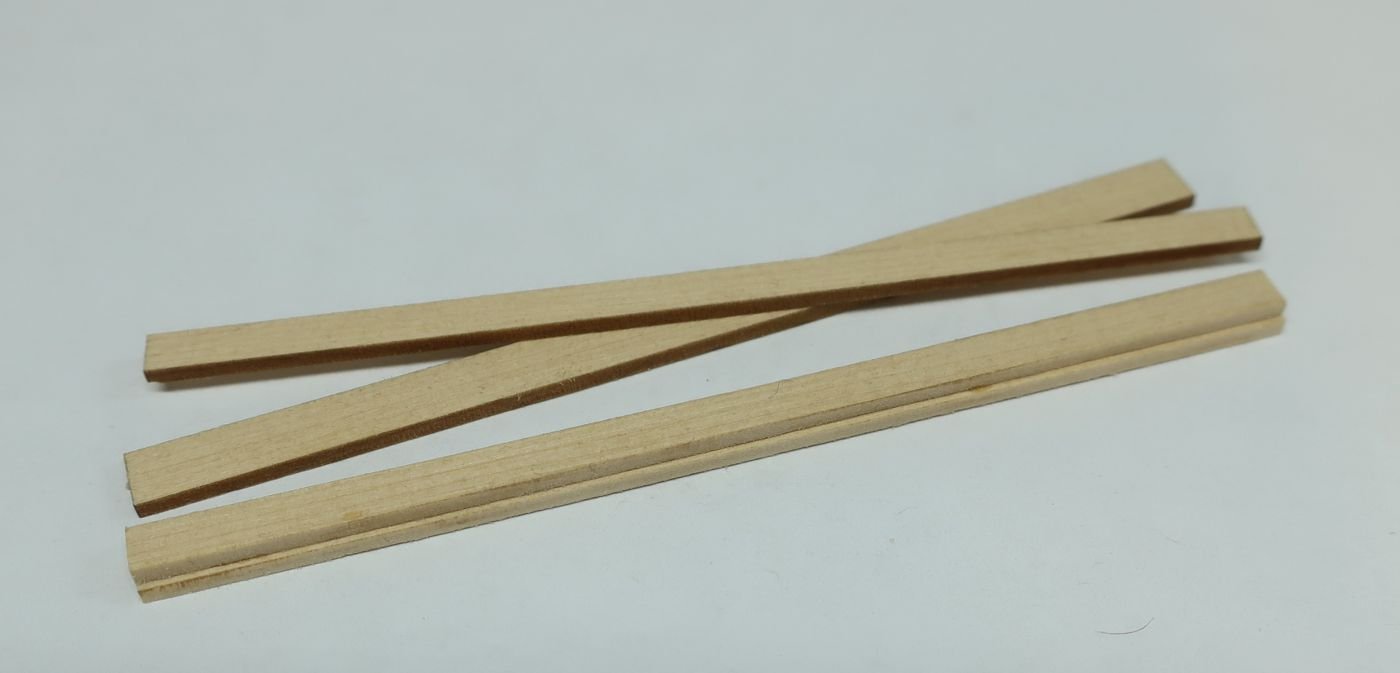
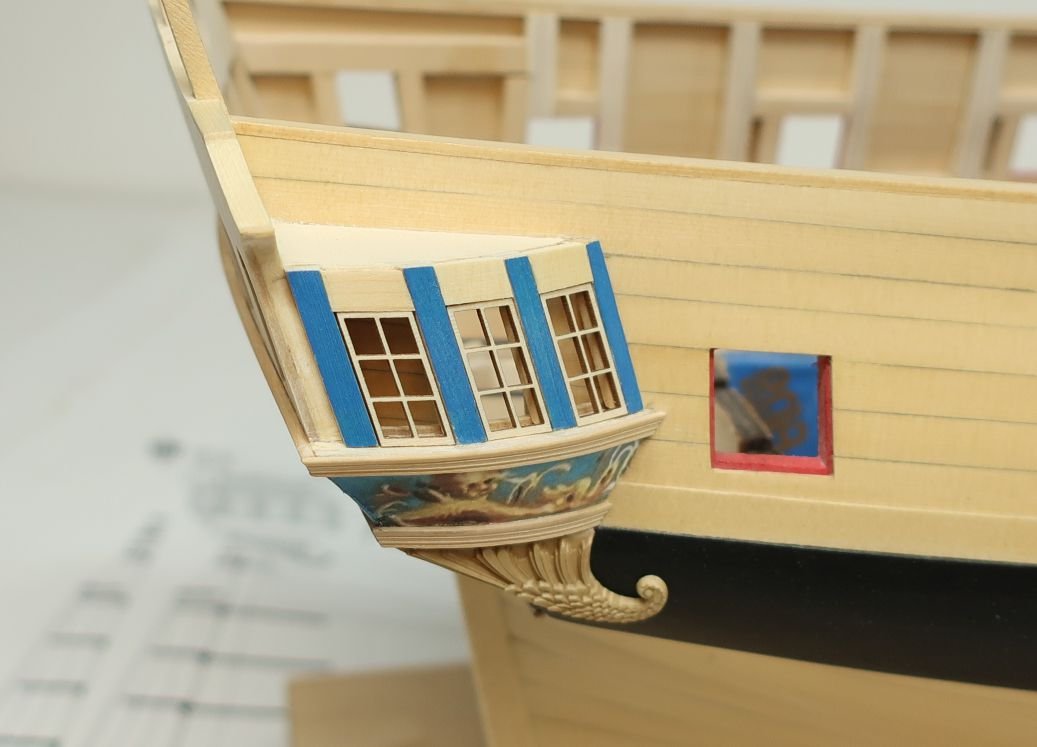
Thank You!!! I added the columns to the QGalleries. The top and bottom of the columns were done using a scraped strip of boxwood. Basically you scrape the strip like you would make a molding. Then cut off tiny pieces that become the top and bottom of each column. You still must file the sape on each side to finish it off. This was a 3/32" x 3/64" boxwood strip. Then the fluted column was added between these two pieces to complete each column. These are laser cut from .025" thick boxwood. They have laser etched flutes. Note how just a small strip of blue remains on each side of the columns. I will start working on the other side so now so I complete the galleries at the same time. Then I will put the shingled roof on each qgallery.
- 1,784 replies
-
- 30
-
-
- winchelsea
- Syren Ship Model Company
- (and 1 more)
-
I hope so. I actually have three resin sets of figures right now. Jack is almost ready with his so you can order them. The friezes will be available to download. But you guys still have a long way to go!!!! Theres a lot planking ahead you guys. Dont rush through that....this stuff will be ready when you are ready. 😃
- 1,784 replies
-
- 6
-
-
- winchelsea
- Syren Ship Model Company
- (and 1 more)
-
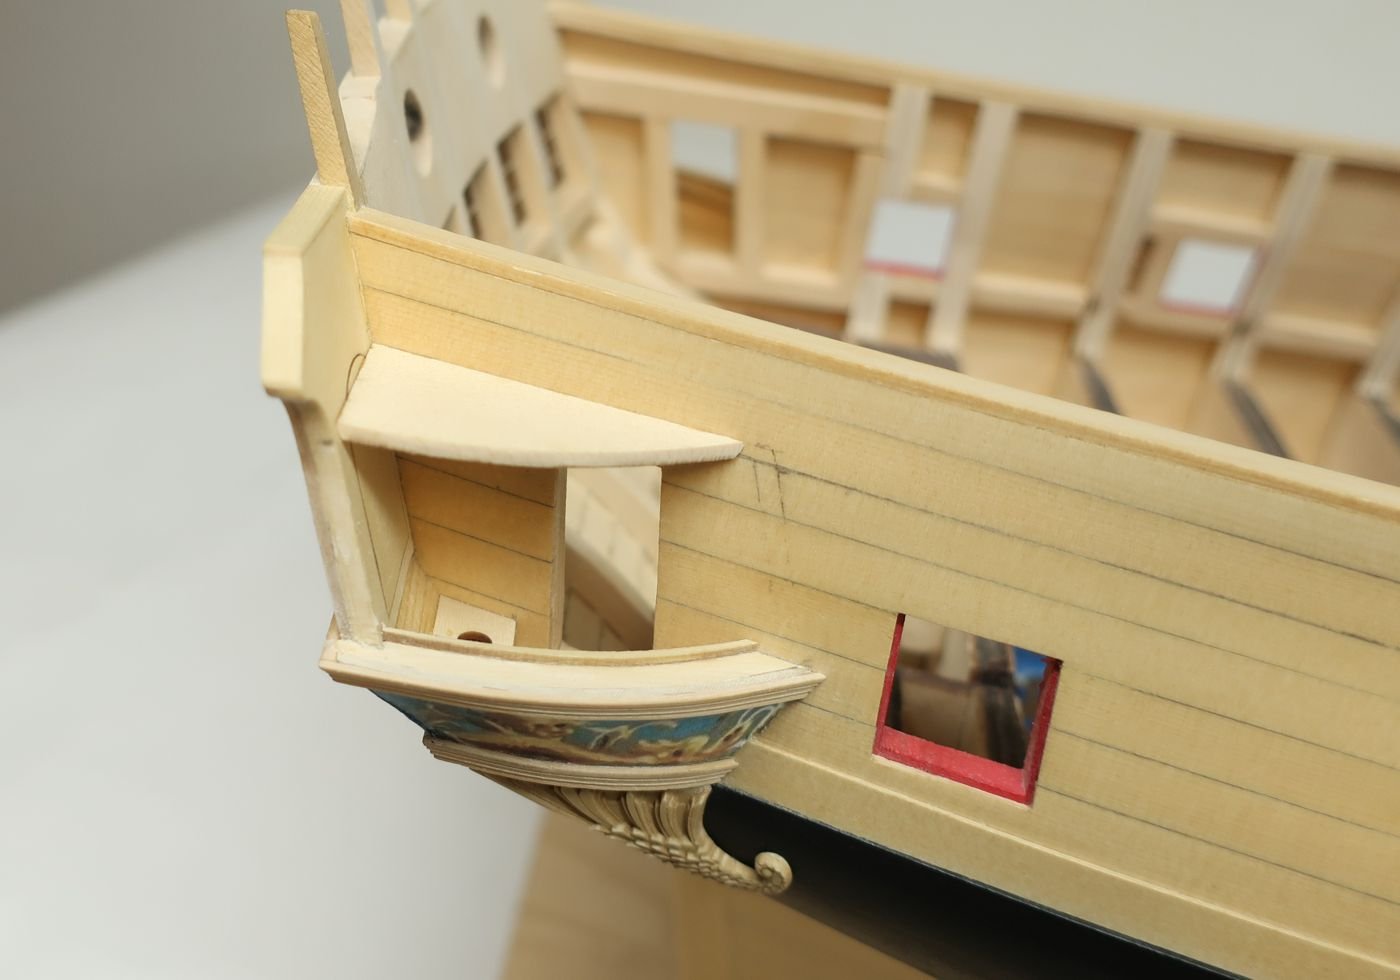
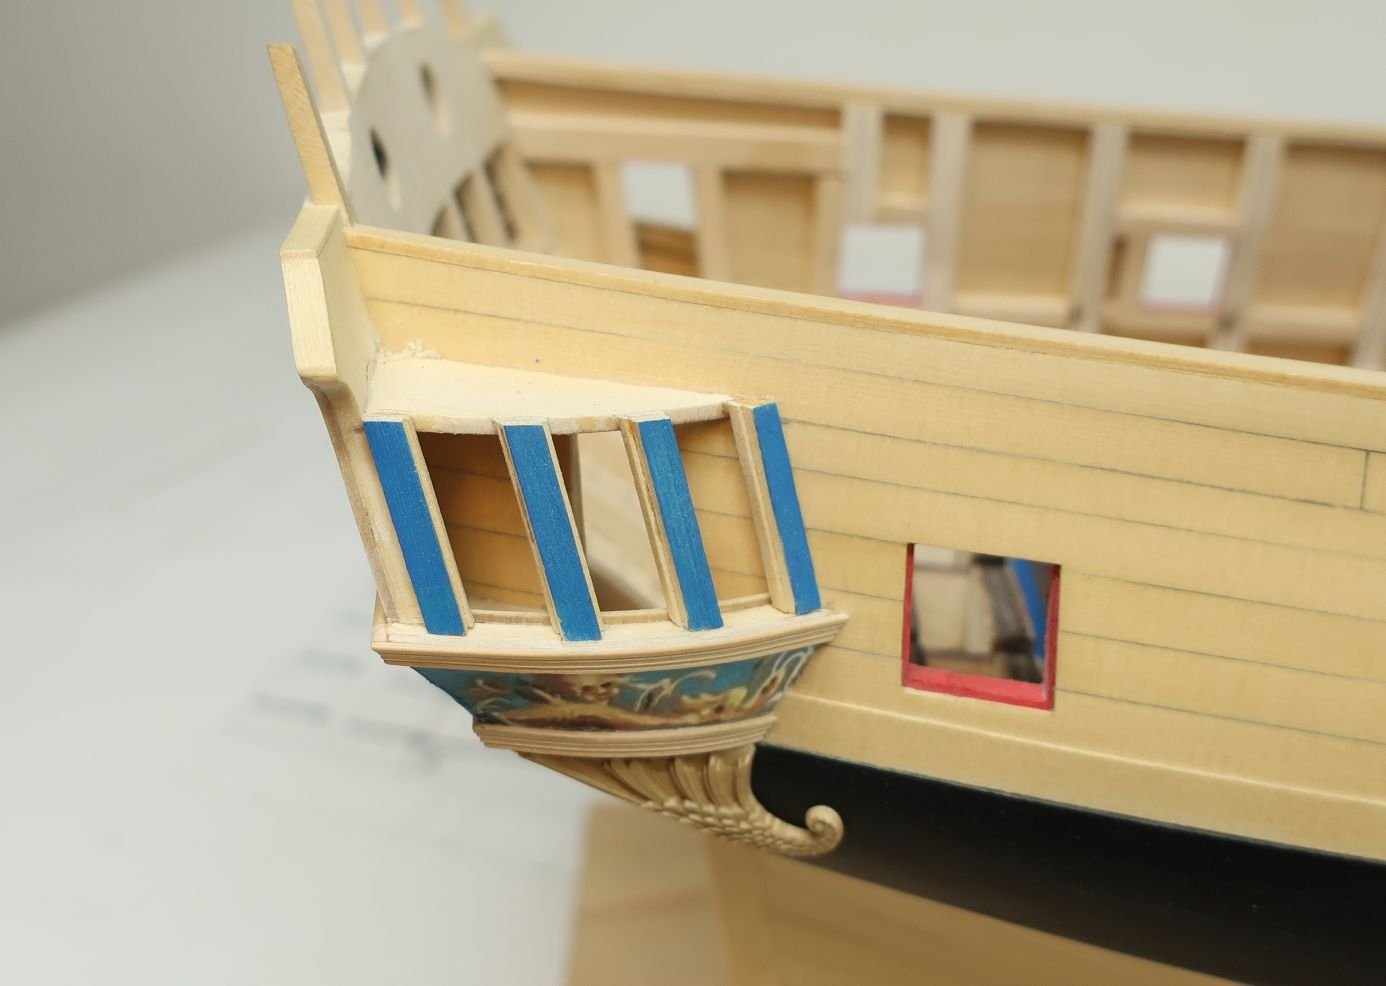
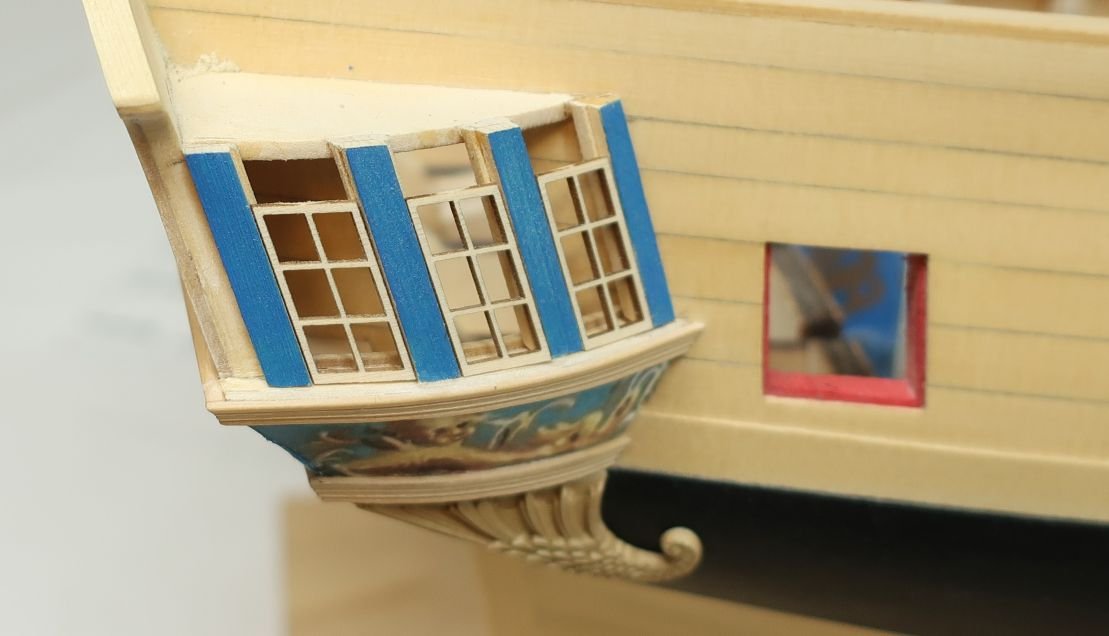
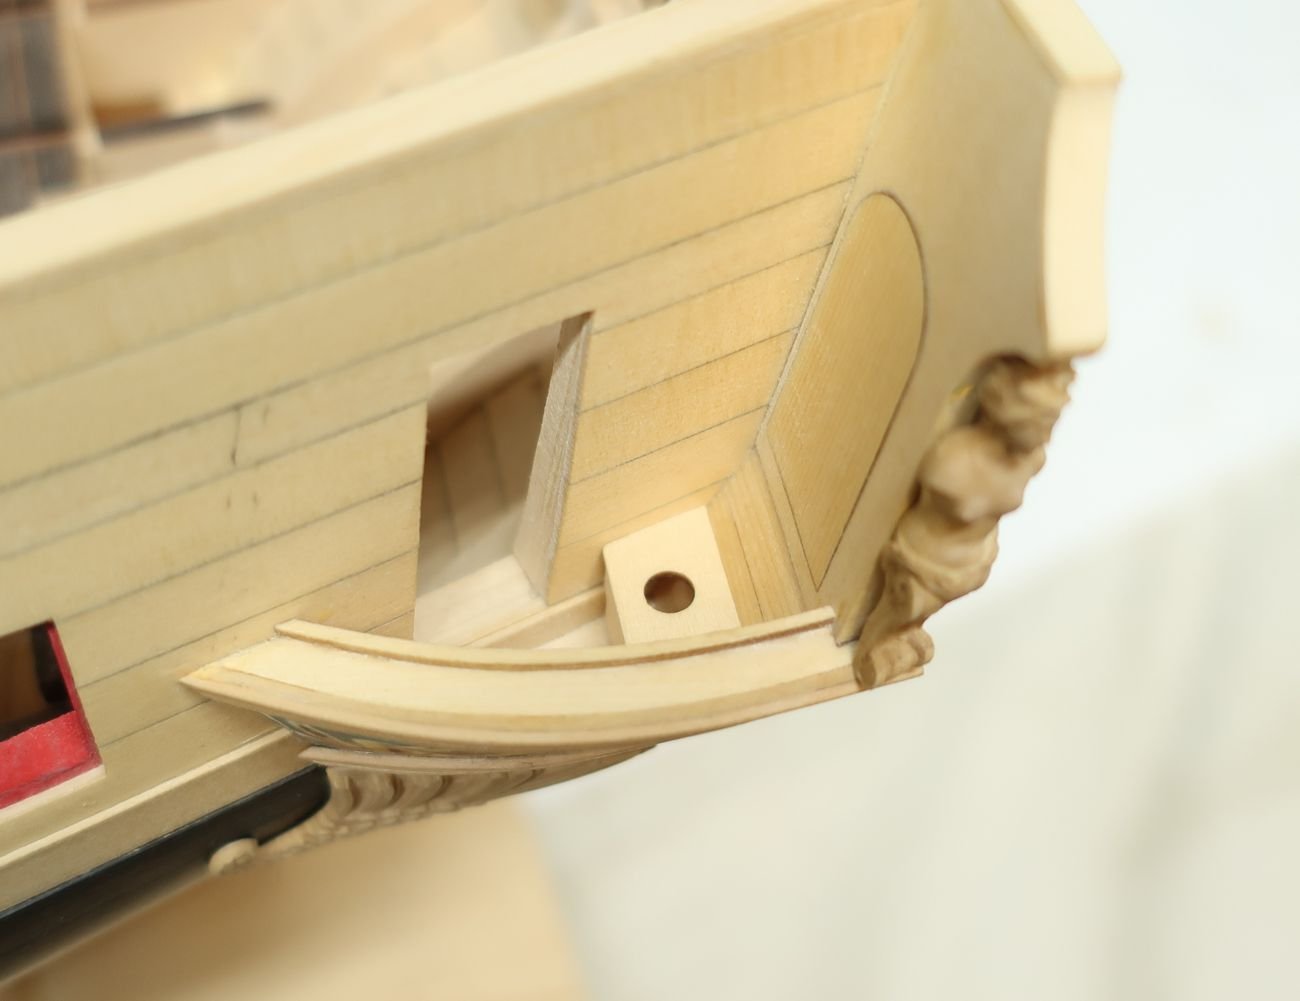
To close up the Qgalleries, I started by adding the top. This is laser cut (1/16" thick) It is important to create the same angle as the bottom. This was marked with the paper template earlier. You can see my tick marks in pencil. Getting this angle correct is crucial just like the bottom of the Qgalleries. Otherwise your windows wont fit well. The aft edge needs to be beveled to sit flush against the transom. Next we need to put in the uprights between each window. These are two layers of 3/64" thick laser cut strips. One layer is slightly wider than the top layer. This forms a rabbet on both sides when glued together as shown below. You will need four of these on each side. Clean the laser char off each layer before you glue them together. You should also paint the top face of these blue before you start shaping them. Yes you will need to touch these up later but this helps. I am using cerulean blue acrylic paint. It is a pretty good match to the friezes. You can see these four pieces glued into position below. One note.....the two outside pieces dont have a rabbet on the outside edges. They were sanded away. The rabbet is used to catch the windows when they are inserted later. In fact, how do you know where these should go so they are spaced the proper distance apart. Use the laser cut windows as a guide. I started by gluing the two outside pieces on first. Then I positioned a window temporarily so I knew where the next one went. Do this carefully so all your windows fit. Its good to do a dry fit first. Use rubber cement to temporary hold the uprights in position. Another important note....the forward upright has a very drastic bevel on its forward edge so it fits snug against the planking. I also left each upright a bit longer and once glued in place, I sanded them flush with the top. It should look like this when you are done...but the windows are NOT glued in at this point. Dont do that yet.... You will also notice that these uprights stand proud of the transom edge....that is OK and by design. It should stand proud by one layer or 3/64" along the transom. Then we had to insert the top above each window. There are two layer remember? But you seriously only need to put the outside layer on. Its OK to leave a gap because the roof (with its shingles) will cover those gaps. I used 7/32" wide x 3/64" thick strips. This is wider than you will need. But after getting the angles correct and they are glued in position, you can sand the tops down flush like the uprights. Lastly....we need to add the fancy molding along the top edge of the Qgallery. It is scraped like the others and is also 1/8" wide and 3/64" thick. You will need to bend this to get it to lay against the surface properly. I also had to file out the aft edge of the molding so the figure would fit. I used a sharp miniature chisel actually after the molding was glued into position. I think you can see what I did so the shoulder of the figure would fit. To finish it up I will have to add the fancy fluted columns in between the windows next...but I ran out of steam and will do that during the week. 😊


- 1,784 replies
-
- 36
-
-
- winchelsea
- Syren Ship Model Company
- (and 1 more)
-
Thank you so much, that is very kind of you to say.
- 1,784 replies
-
- 1
-
-
- winchelsea
- Syren Ship Model Company
- (and 1 more)
-
Just a small update...I have put the seats in the galleries. This means I can start closing them up next. The seats are made of two laser cut pieces that are 1/32" thick. The front panel and the top. You still need to bevel and tweak the edges for the best fit.
- 1,784 replies
-
- 25
-
-
- winchelsea
- Syren Ship Model Company
- (and 1 more)
-
Why would i do that? They used them.
- 1,784 replies
-
- 5
-
-
- winchelsea
- Syren Ship Model Company
- (and 1 more)
-
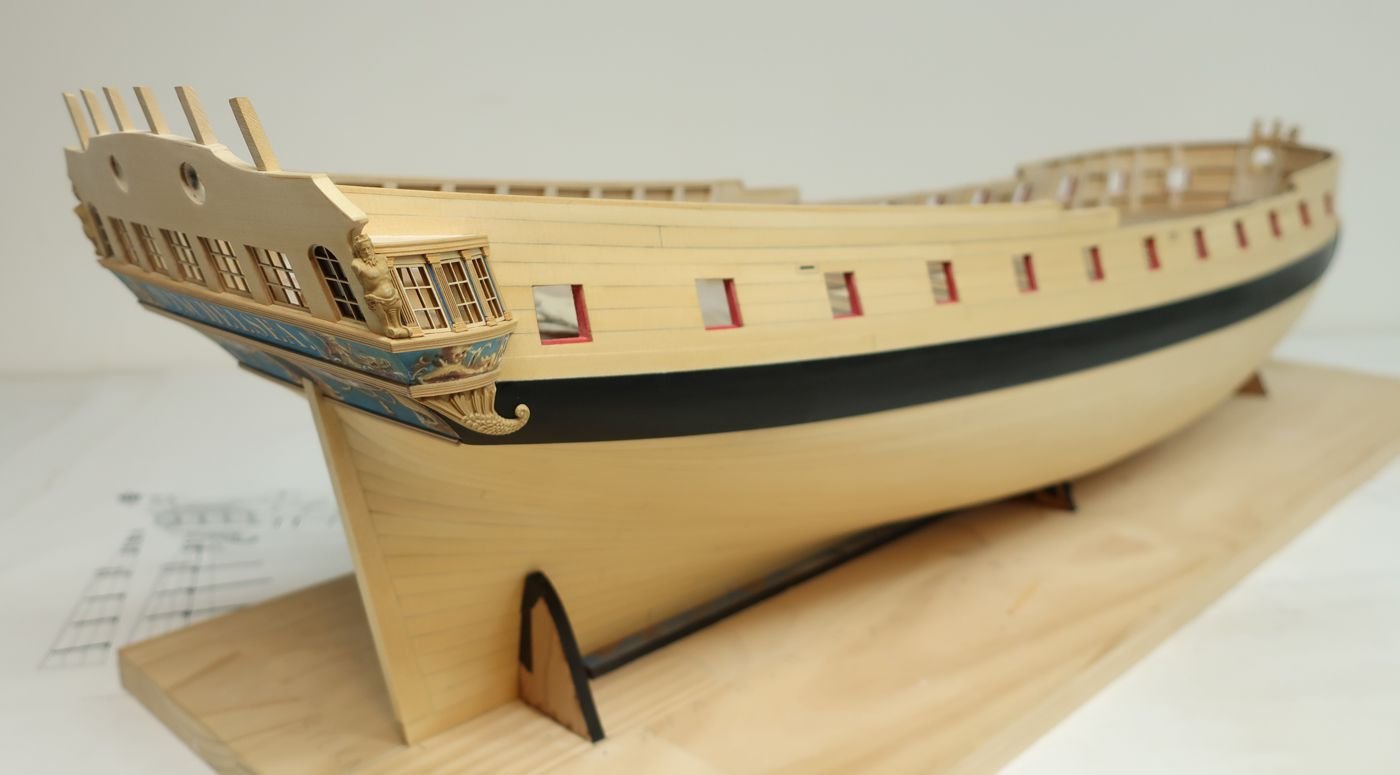
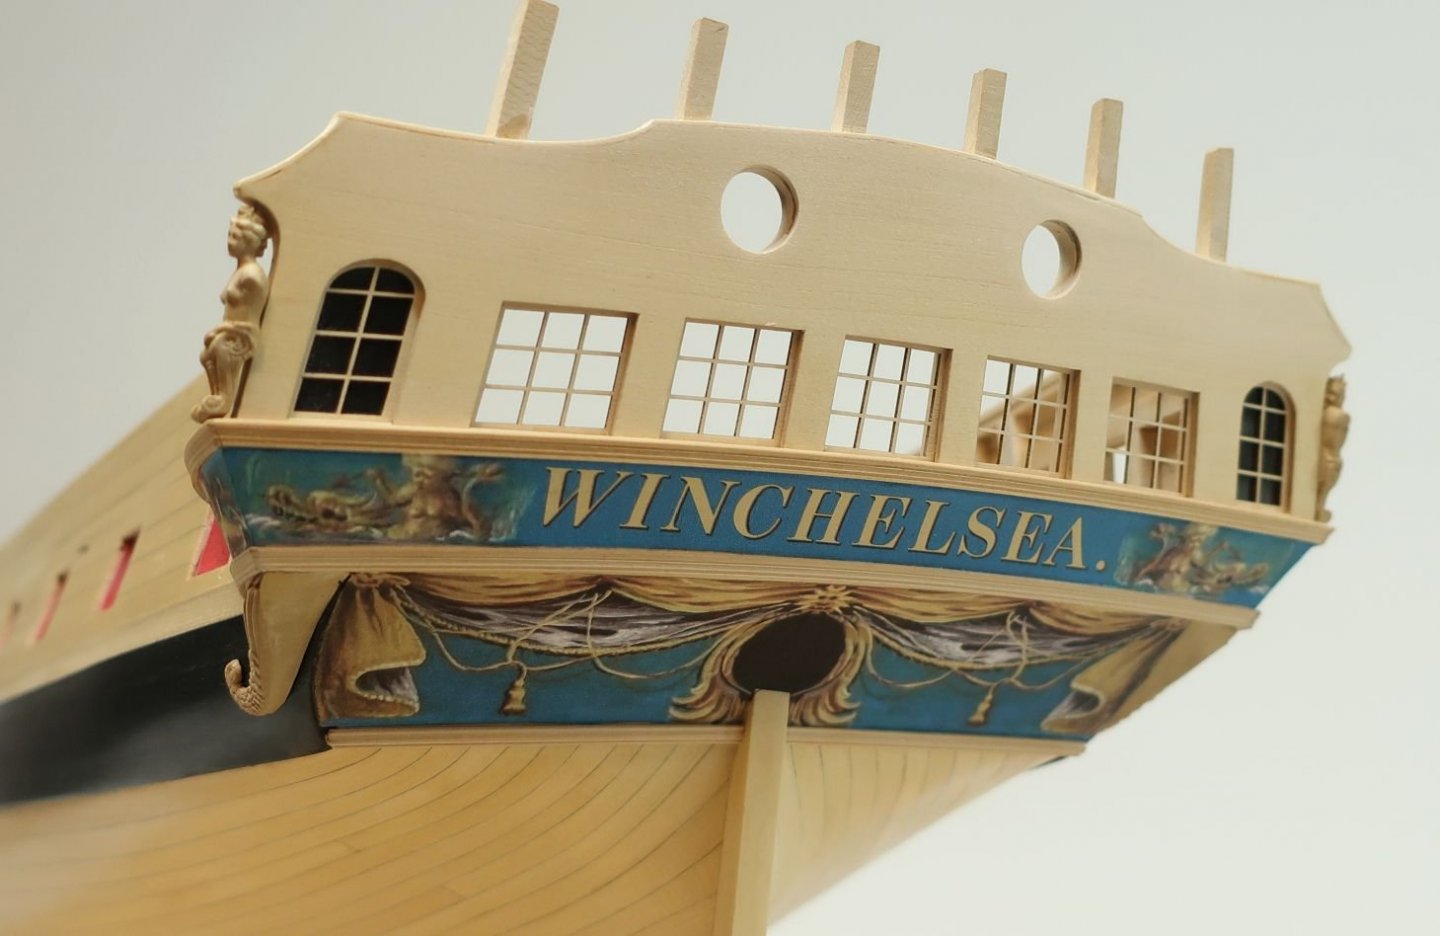
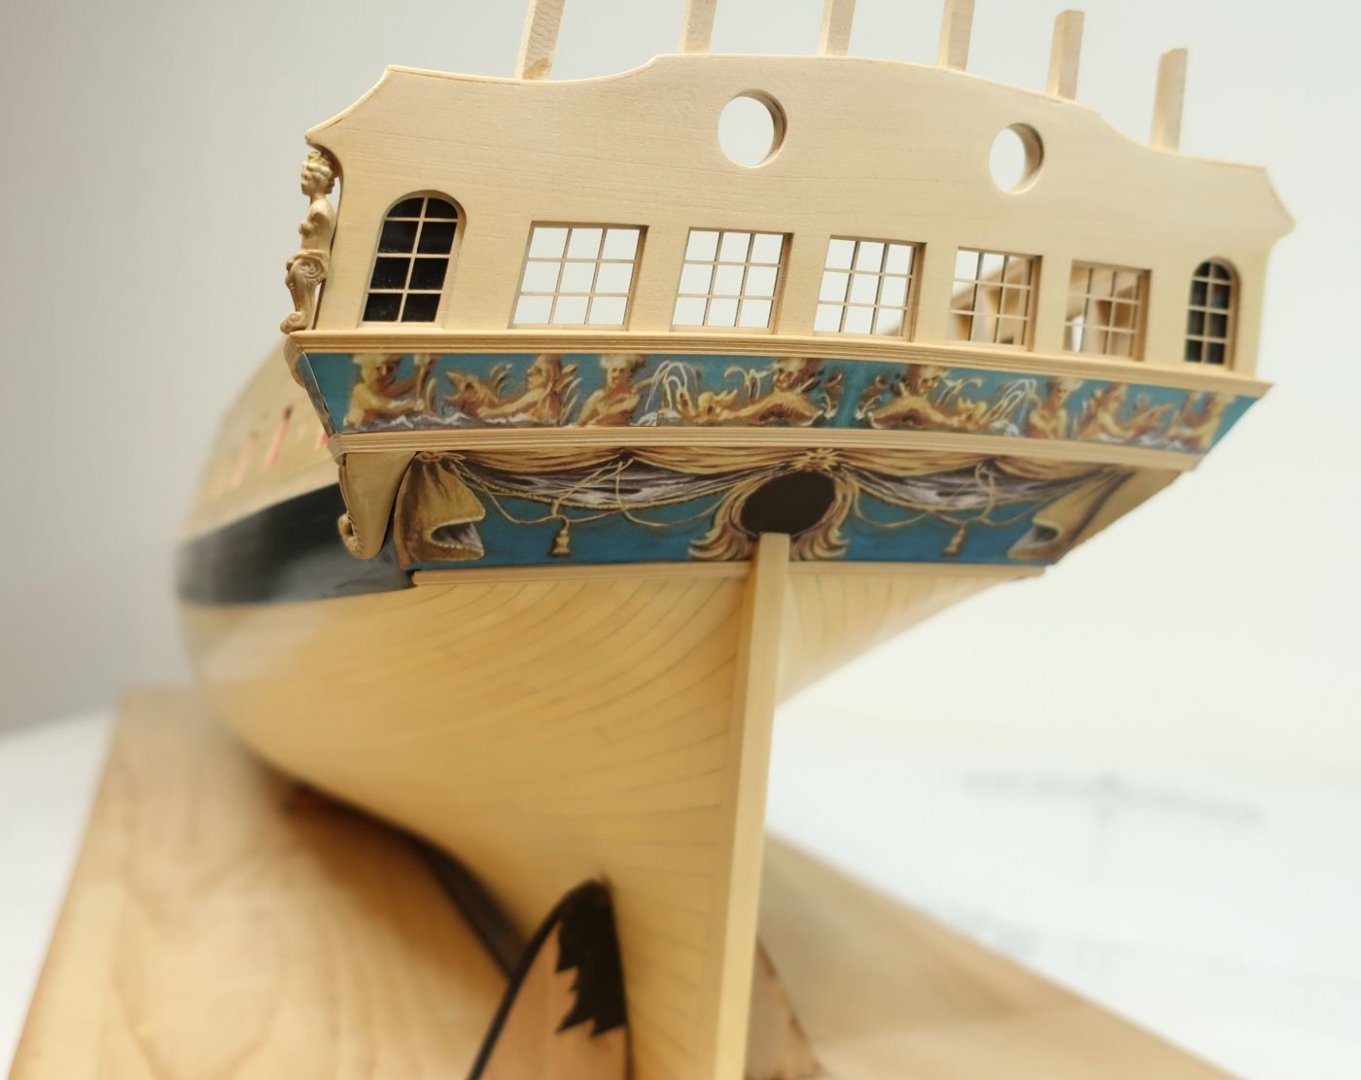
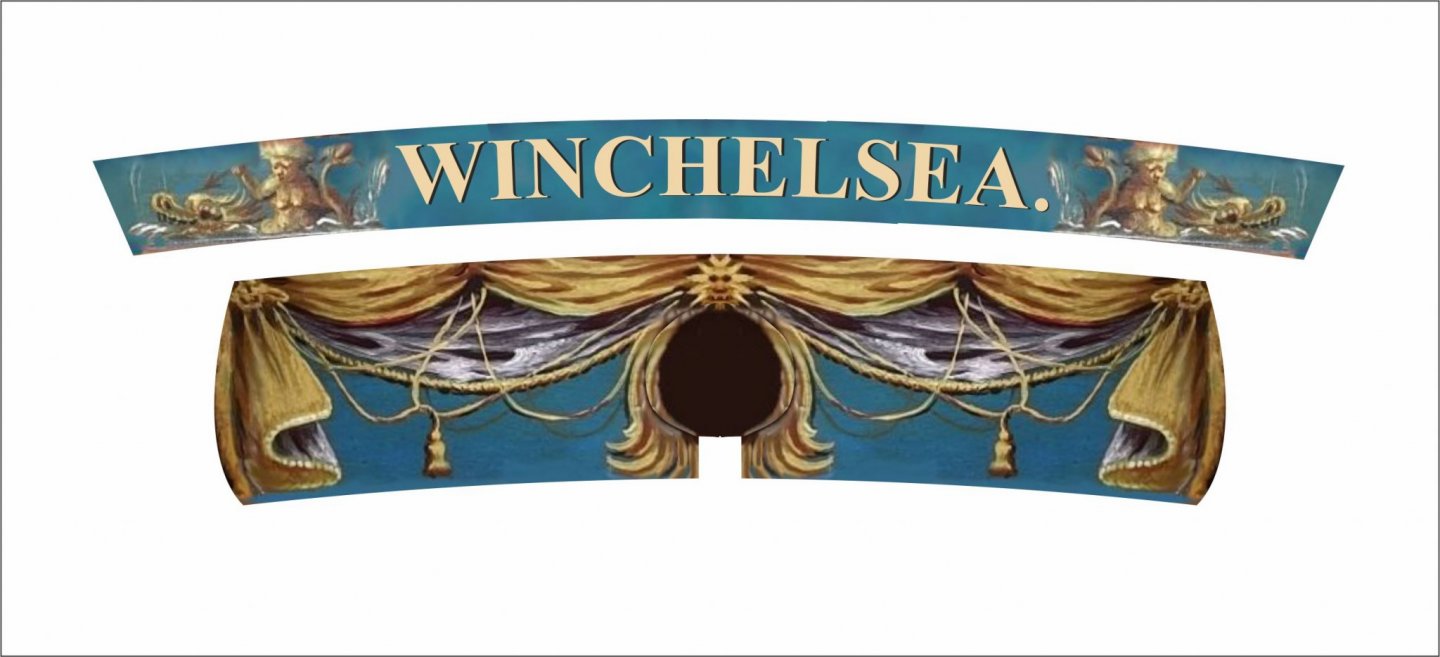
Here is what the frieze with the name looks like tested on the model. Its a little crooked but this is just a test...its not glued on yet. I think this one is the winner. Thank you David for helping me with the font. It looks very good and much better than my attempts.
- 1,784 replies
-
- 19
-
-
- winchelsea
- Syren Ship Model Company
- (and 1 more)
-
I actually just use a glue stick....the kind for paper. It has never failed me.
- 1,784 replies
-
- 6
-
-
- winchelsea
- Syren Ship Model Company
- (and 1 more)
-
I have used regular copy paper in the past. It works fine. But I am toying around with the idea of experimenting with acid free tissue paper. Its the same stuff that I use for flags. In theory it will be easier to hide the cut edges and fold it in place. Then trim off the excess. But that is just a theory. I will try it out tonight. This test was just done with plain old copy paper. You can see how the edge turns white after cutting. I usually use a soft pastel pencil to color this edge....but I am thinking this wont be needed with the tissue paper. Chuck
- 1,784 replies
-
- 16
-
-
- winchelsea
- Syren Ship Model Company
- (and 1 more)
-
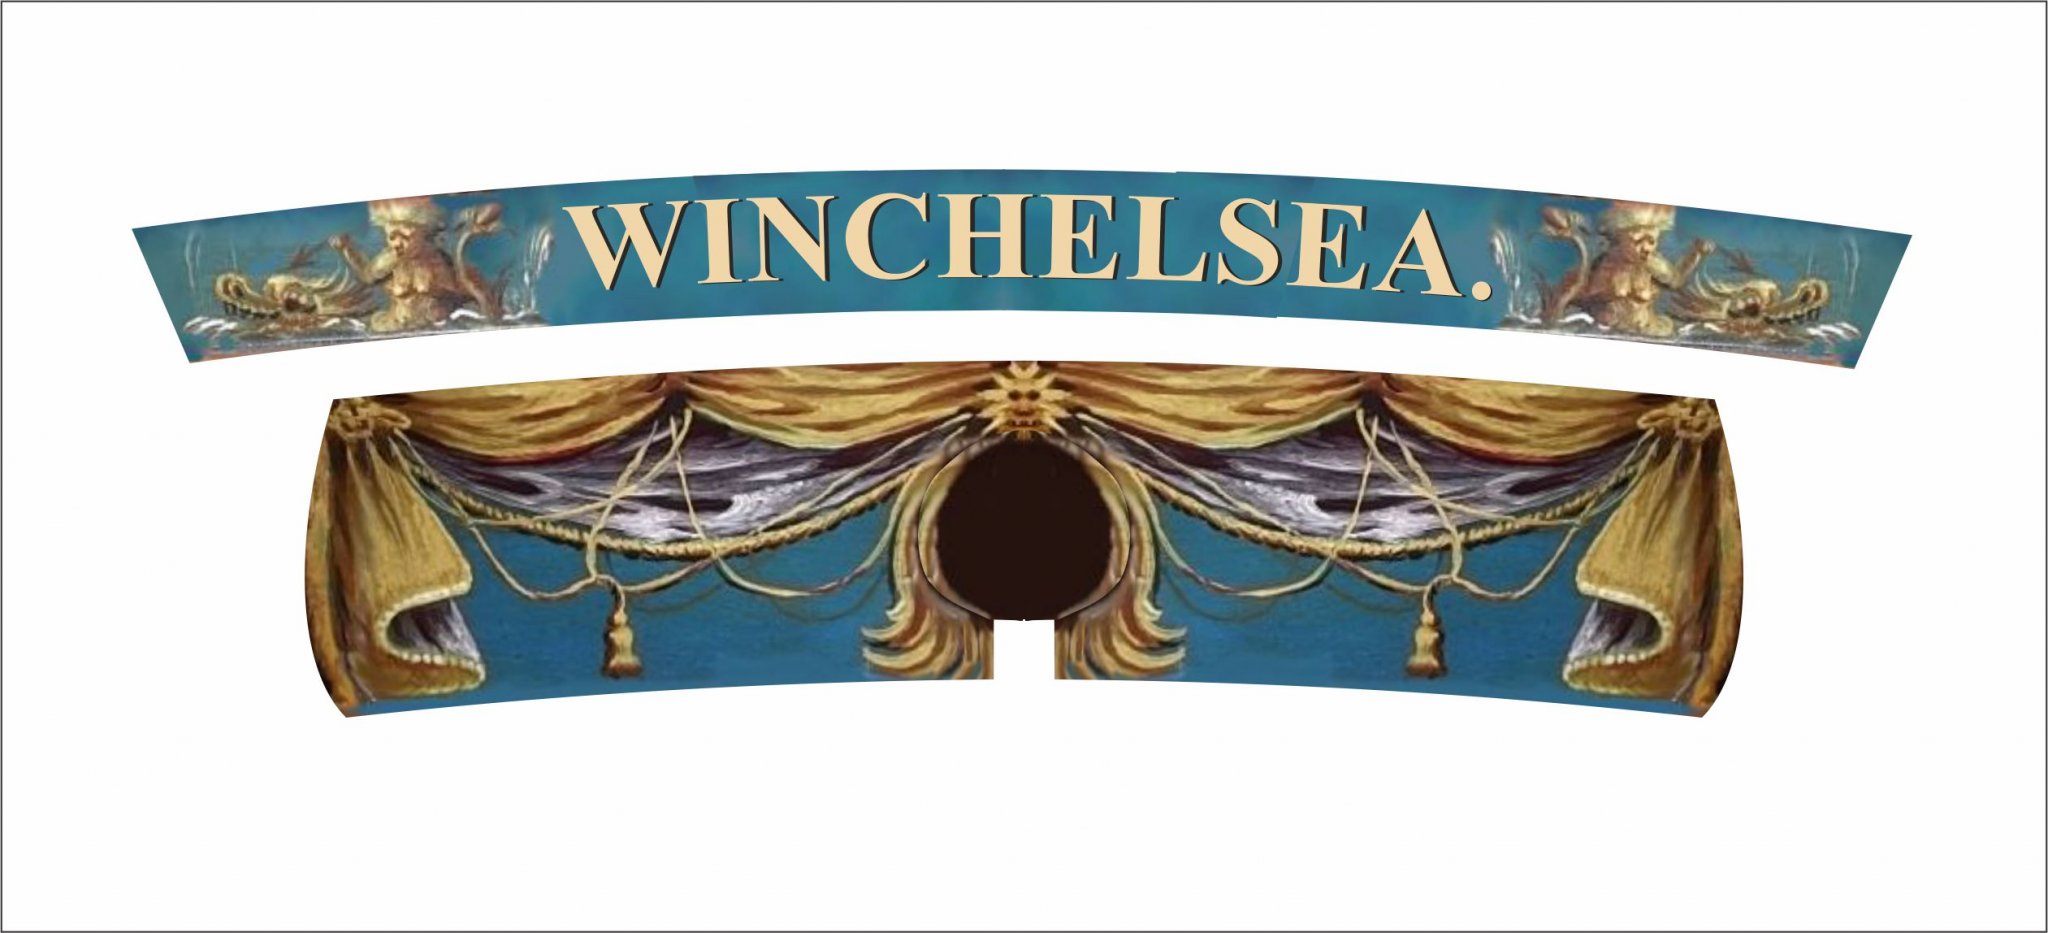
Here is a photo of the frieze with the name
- 1,784 replies
-
- 18
-
-
- winchelsea
- Syren Ship Model Company
- (and 1 more)
-
Yes its freaky although Im not that fat yet....but maybe after some turkey and stuffing and pumpkin pie. 😀
- 1,784 replies
-
- 8
-
-
- winchelsea
- Syren Ship Model Company
- (and 1 more)
-
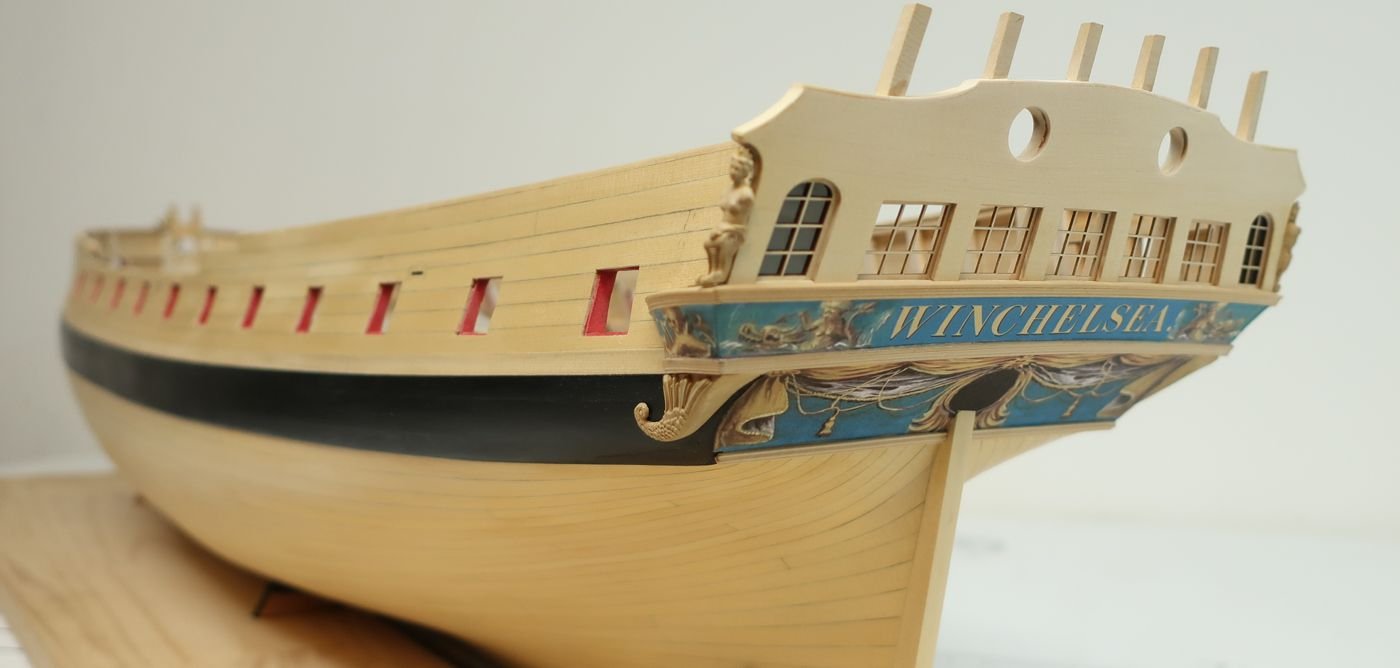
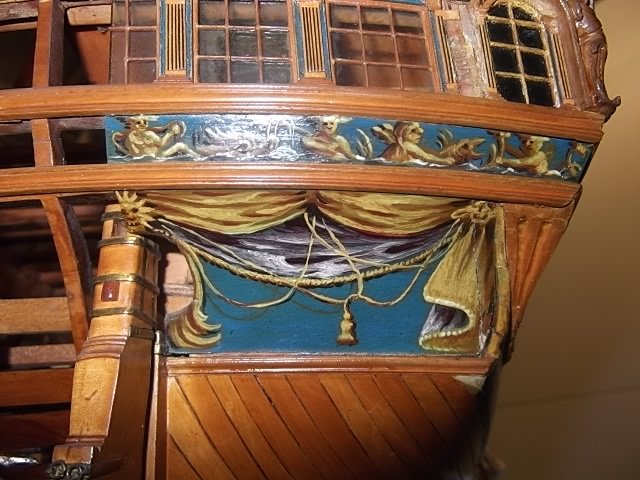
For a comparison....the contemporary model vs. my attempt to mimic the same with the friezes.
- 1,784 replies
-
- 19
-
-
- winchelsea
- Syren Ship Model Company
- (and 1 more)
-
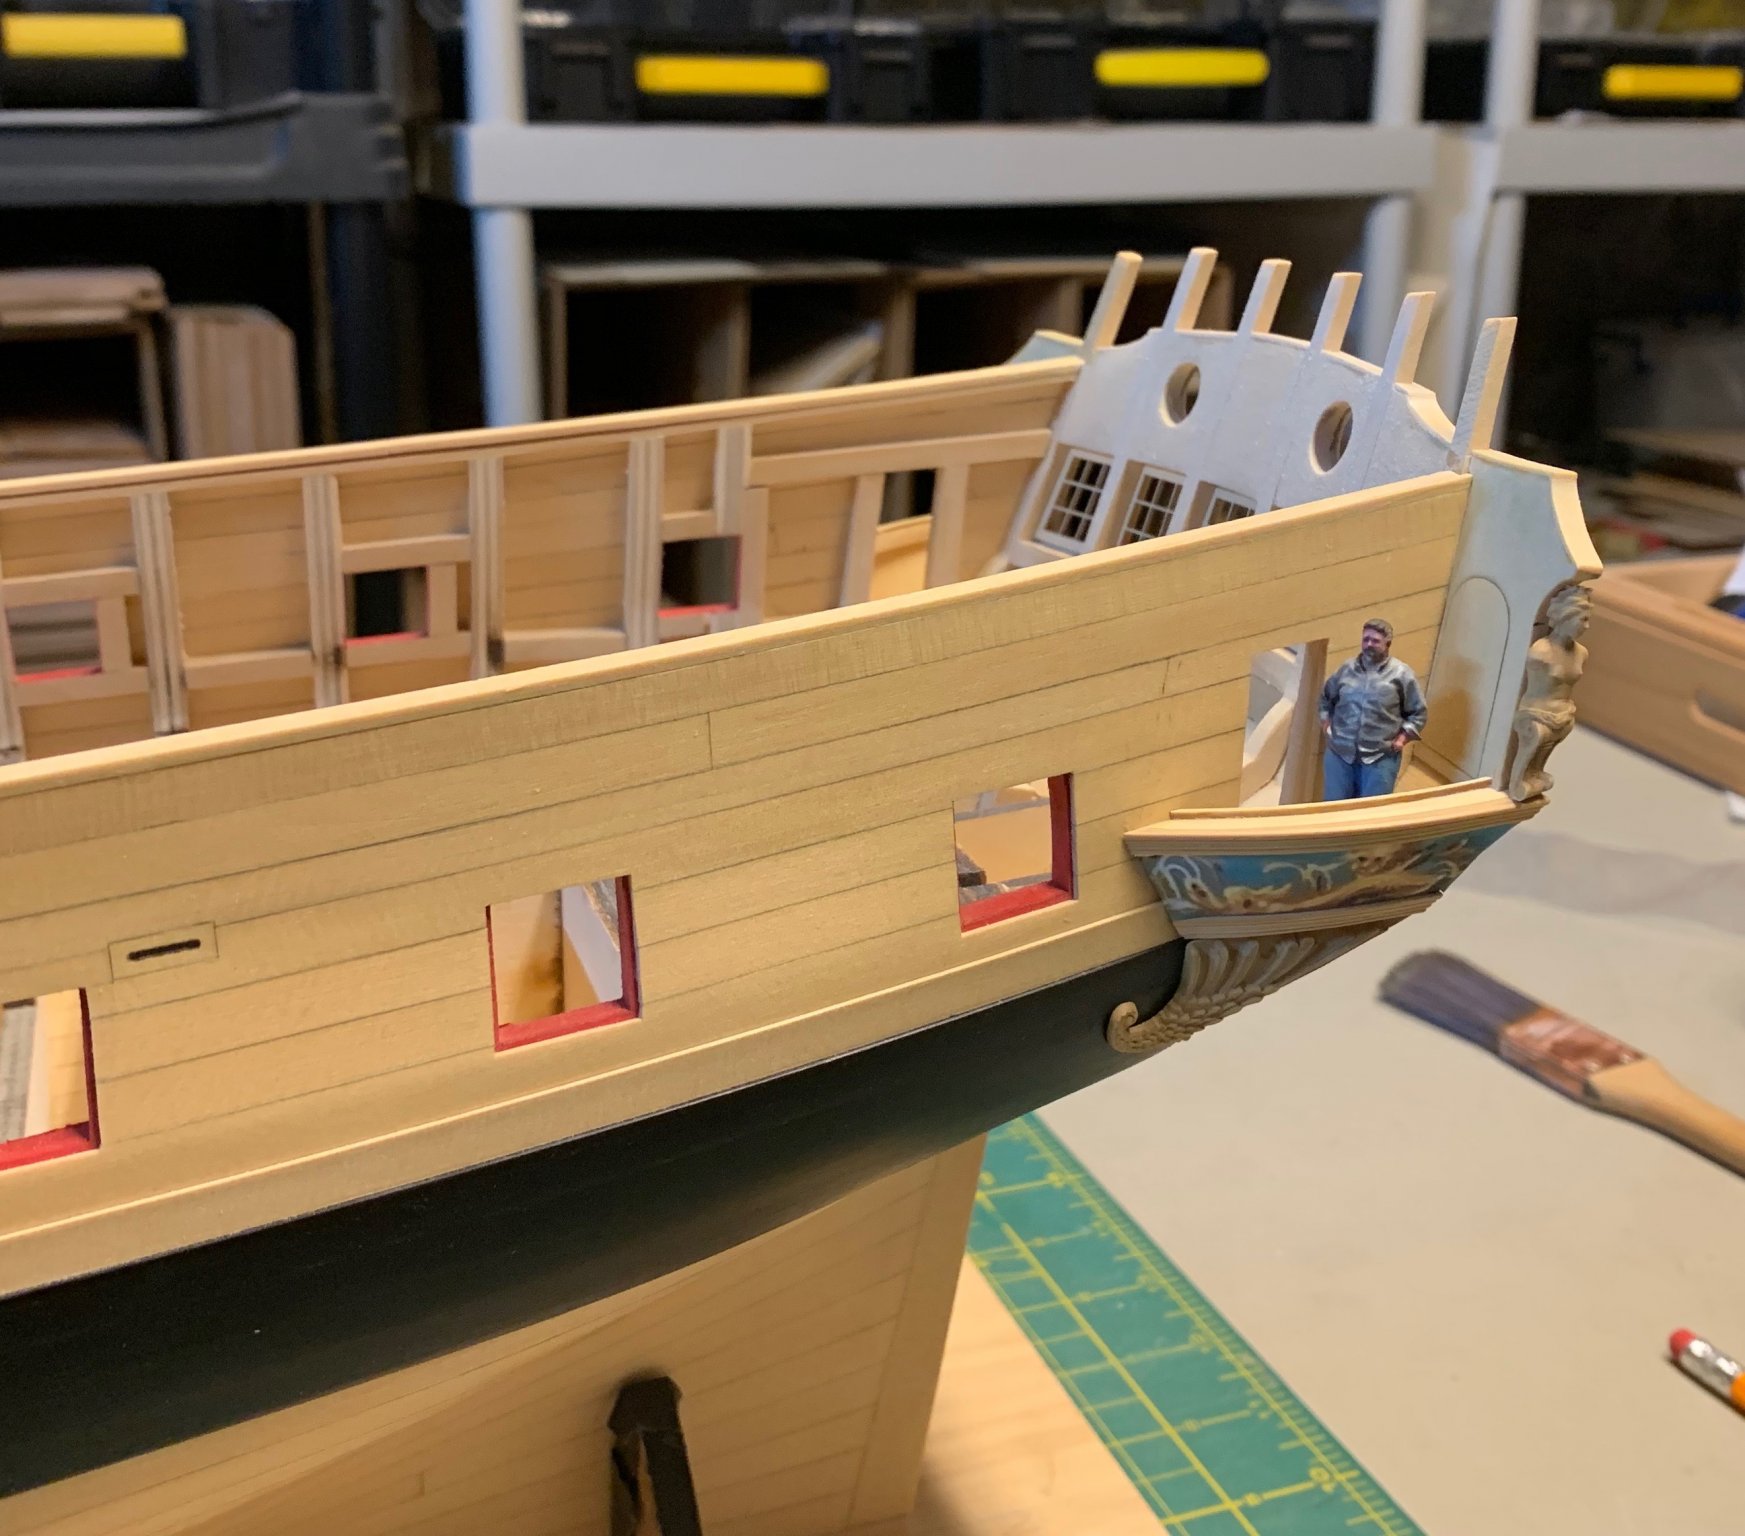
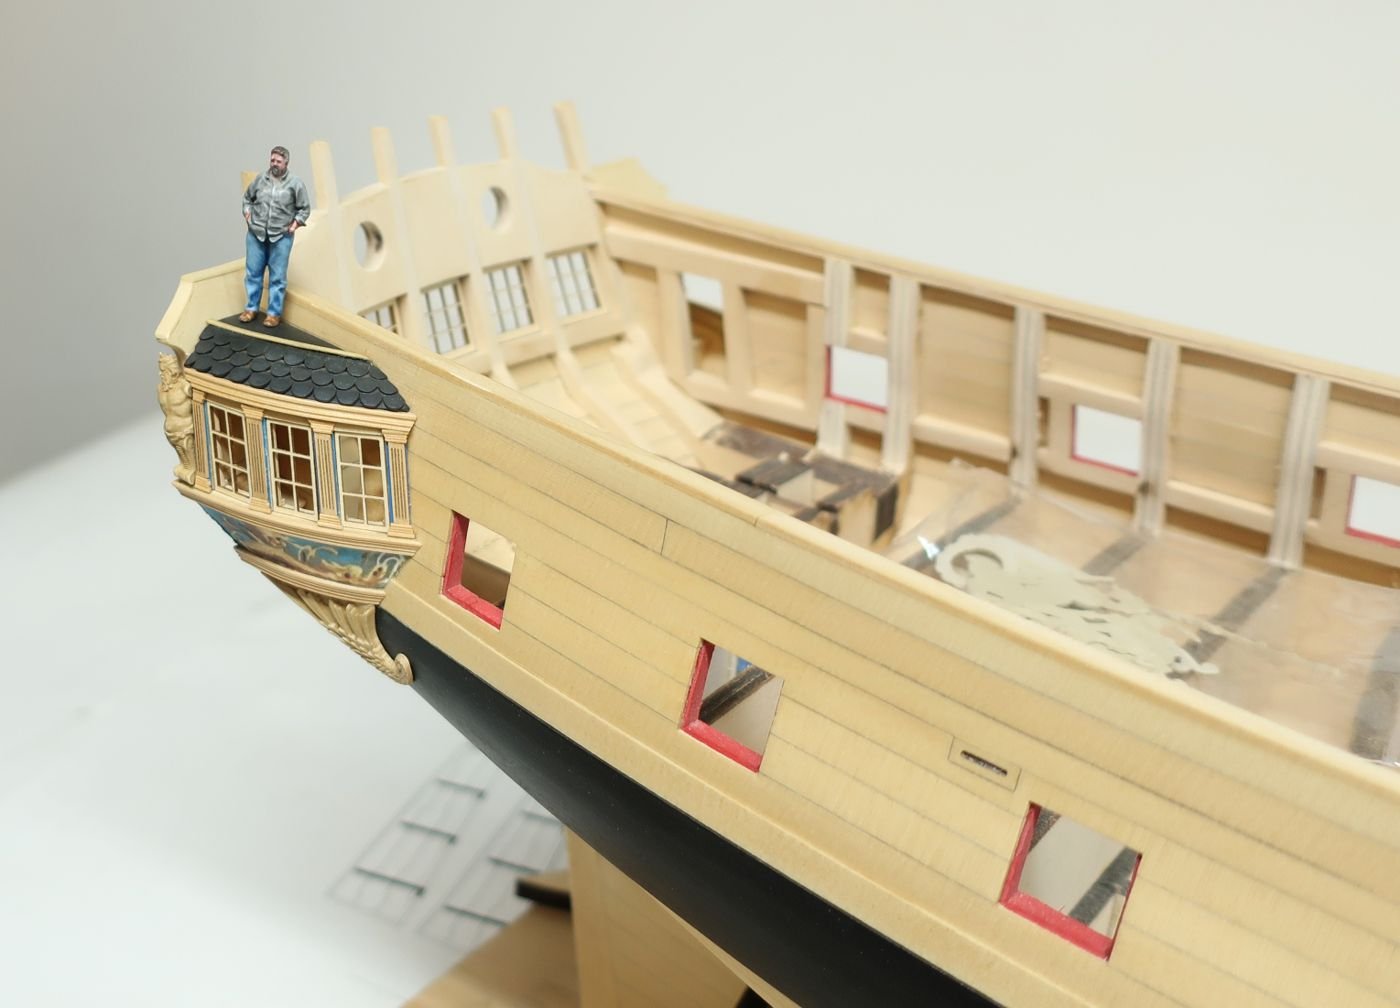
Happy thanksgiving guys!!!! I woke up this morning and hit the head. Took a selfie with my phone. Then I started working on the model, Here I am inspecting the quarter galleries. The 1/4" scale figure was painted by a friend of mine in my local club. He made it look like me.

- 1,784 replies
-
- 33
-
-
- winchelsea
- Syren Ship Model Company
- (and 1 more)
-
Indeed it is something to think about. But as I prefer not to offer “everything in the box kits”, its important to me to at least discuss the possibilities. Then each builder can decide fir themselves. Leaving some details to “bash” gives everyone the opportunity to make the model more unique. Hopefully with so many graphics software packages out there, folks will have some fun with the frieze. Import my file and play with it.
- 1,784 replies
-
- 2
-
-
- winchelsea
- Syren Ship Model Company
- (and 1 more)
-
That looks terrific. Nice fix. The bollard timbers look perfect. Have a great trip. And happy tgiving.
- 642 replies
-
- 3
-
-
- winchelsea
- Syren Ship Model Company
- (and 1 more)
-
I also forgot to mention. I am building the Winnie as she was during the American revolution. At this time, all ships would have had their names on the upper counter. I am also working on a version of the frieze with the name. But its not very easy to make it look good. Simply because the name “Winchelsea.” Is so long. It looks kind of funny. So i may use what i show in the photos myself even though it should have the name on it. Its a work in progress.
- 1,784 replies
-
- 1
-
-
- winchelsea
- Syren Ship Model Company
- (and 1 more)
-
Thanks, that is an easy one. It wont fit every model. Other than making things slightly oversize so folks can compensate, there isnt much one can do. At least not without making the outcome look extremely kit-like. If you are shooting for something better, then all that can be done .....is give folks the electronic file so they can stretch it and enlarge it until it fits their model.. Which is what i will do as well. About the false lights...I have no idea really. I just take it one model at a time
- 1,784 replies
-
- 2
-
-
- winchelsea
- Syren Ship Model Company
- (and 1 more)