DONATION DRIVE - SUPPORT MSW - DO YOUR PART TO KEEP THIS GREAT FORUM GOING!
×


Chuck
-
Posts
9,691 -
Joined
-
Last visited
Content Type
Profiles
Forums
Gallery
Events
Everything posted by Chuck
-
 Its not the design....its all you. The design only goes so far.
- 263 replies
-
- 2
-

-
- Medway Longboat
- Syren Ship Model Company
- (and 1 more)
-
Nicely done Ryland. That is not an easy part of the project. Those wide floorboards are tough and you executed them perfectly.
- 263 replies
-
- 1
-
-
- Medway Longboat
- Syren Ship Model Company
- (and 1 more)
-
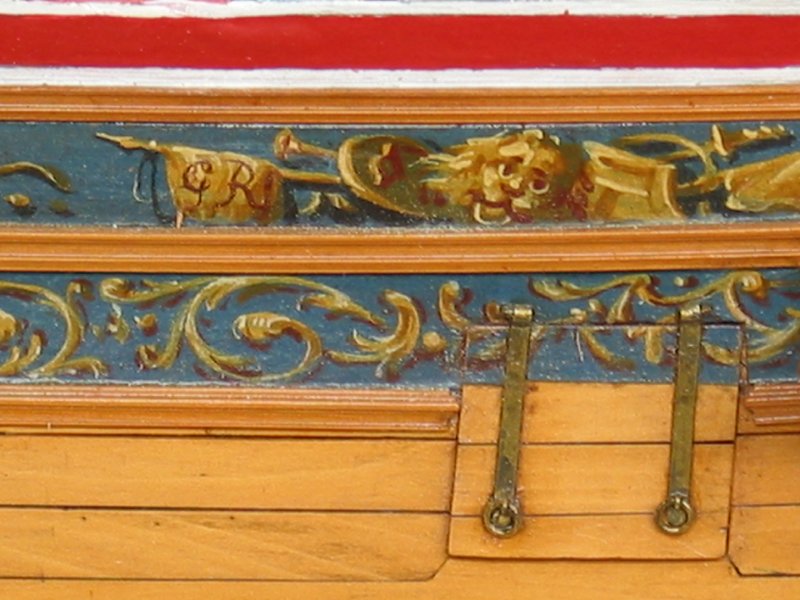
I also want to thank Simon Stephens at the National Maritime Museum for getting me these great photos of the contemporary model. He is the curator of ship models there. I wouldnt have been able to recreate the friezes like this without his help. Thanks Simon!!! 😊
- 1,784 replies
-
- 10
-
-
- winchelsea
- Syren Ship Model Company
- (and 1 more)
-
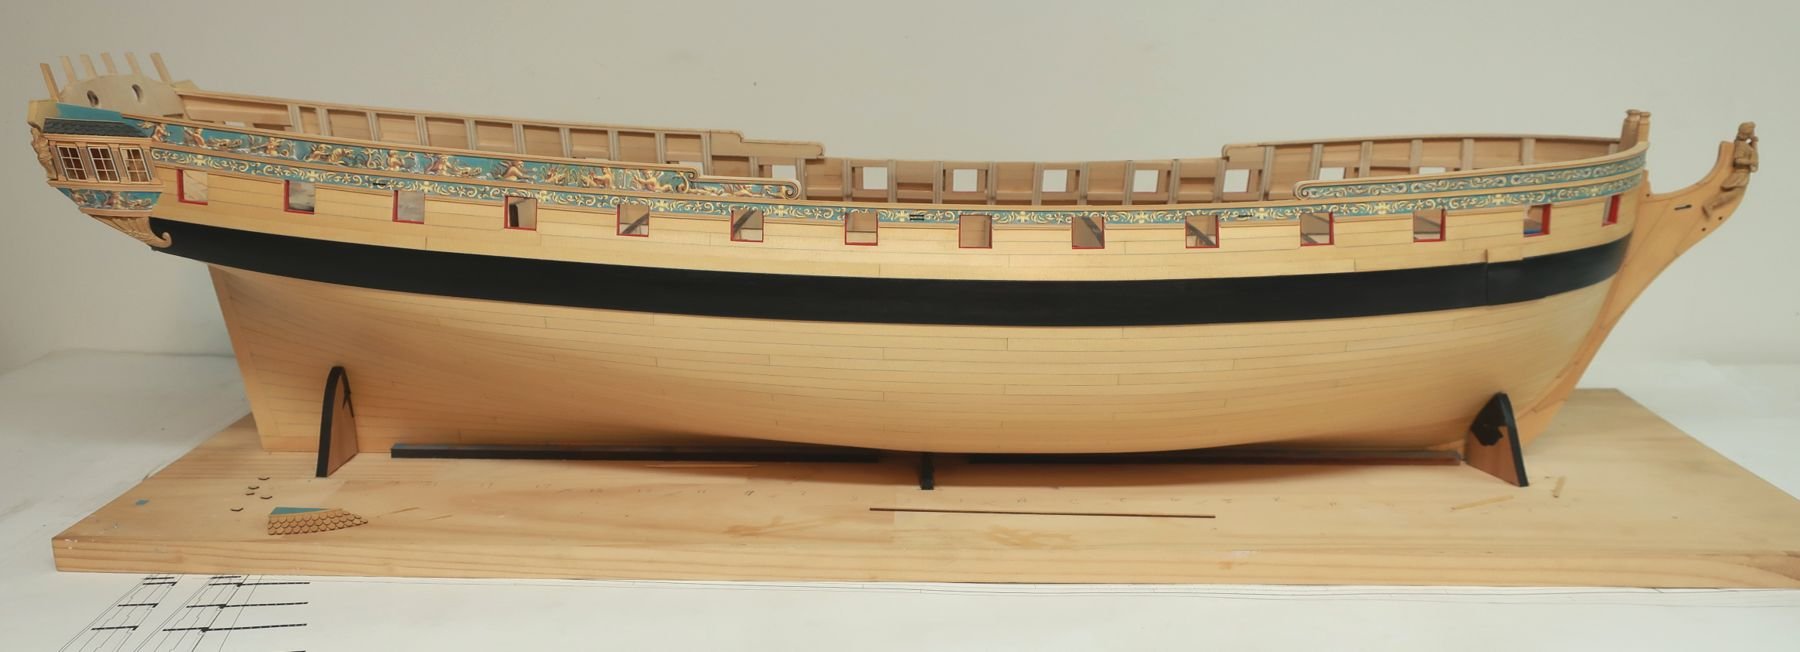
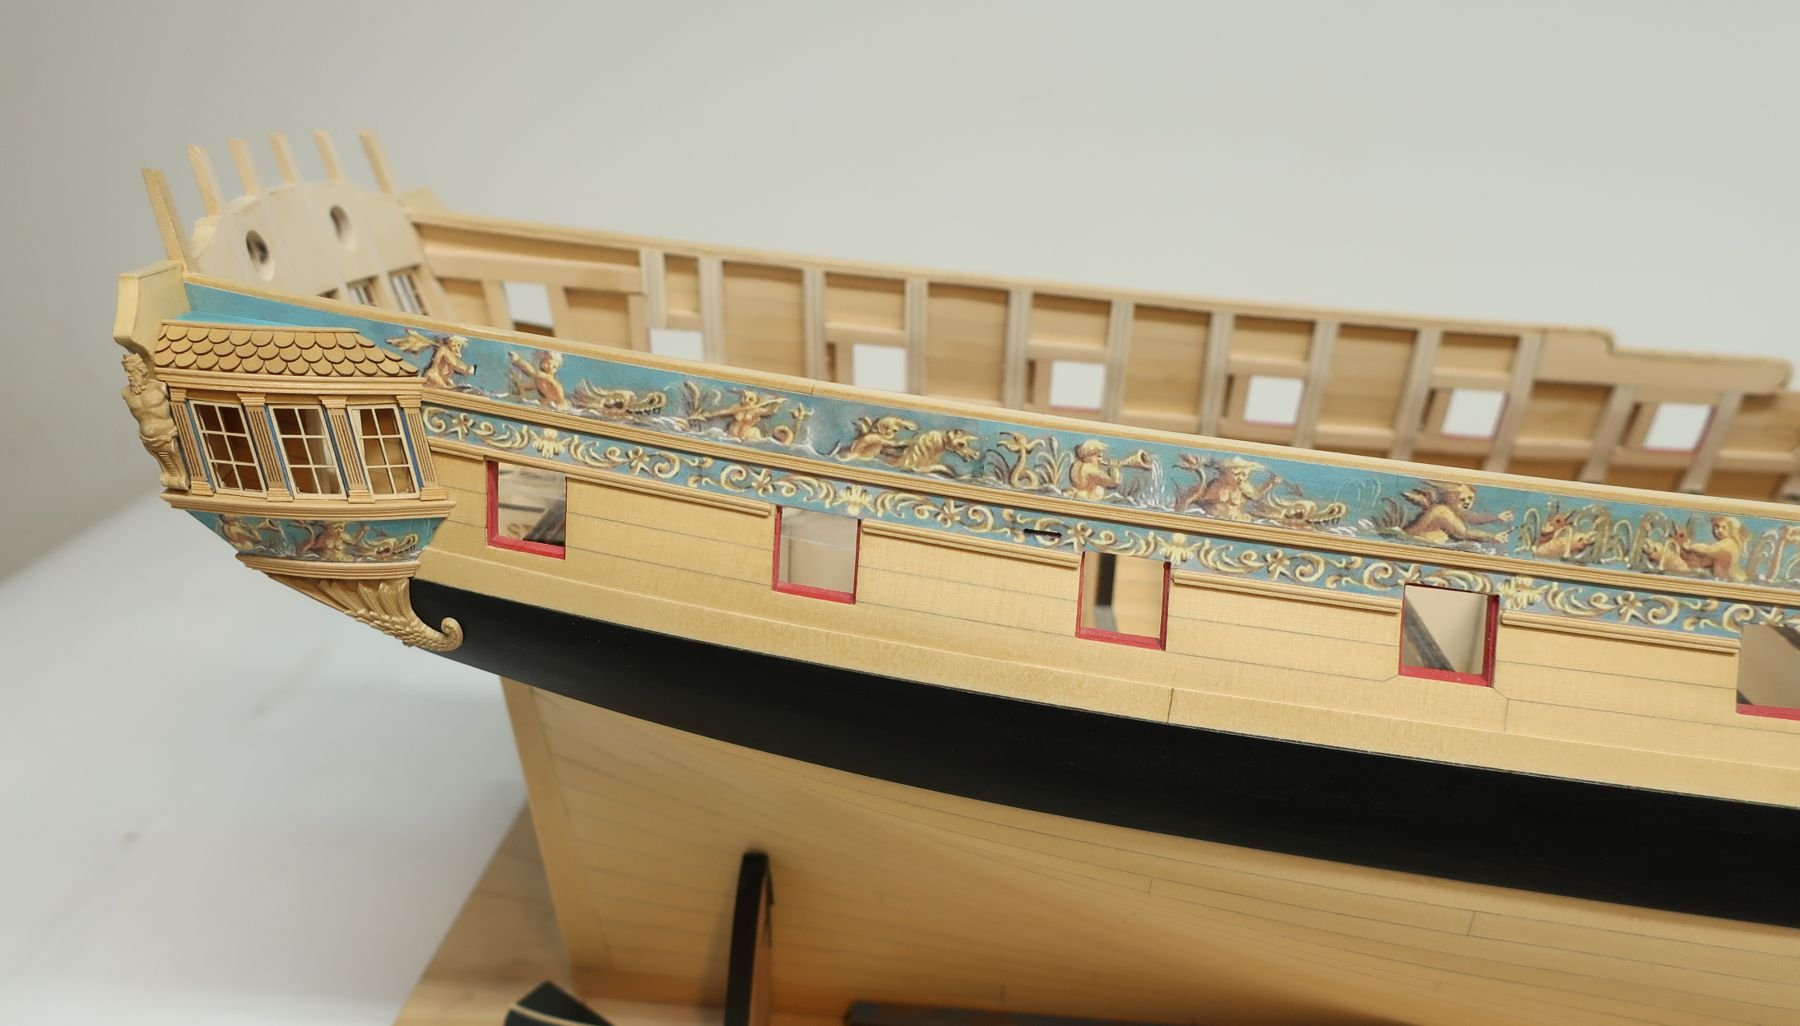
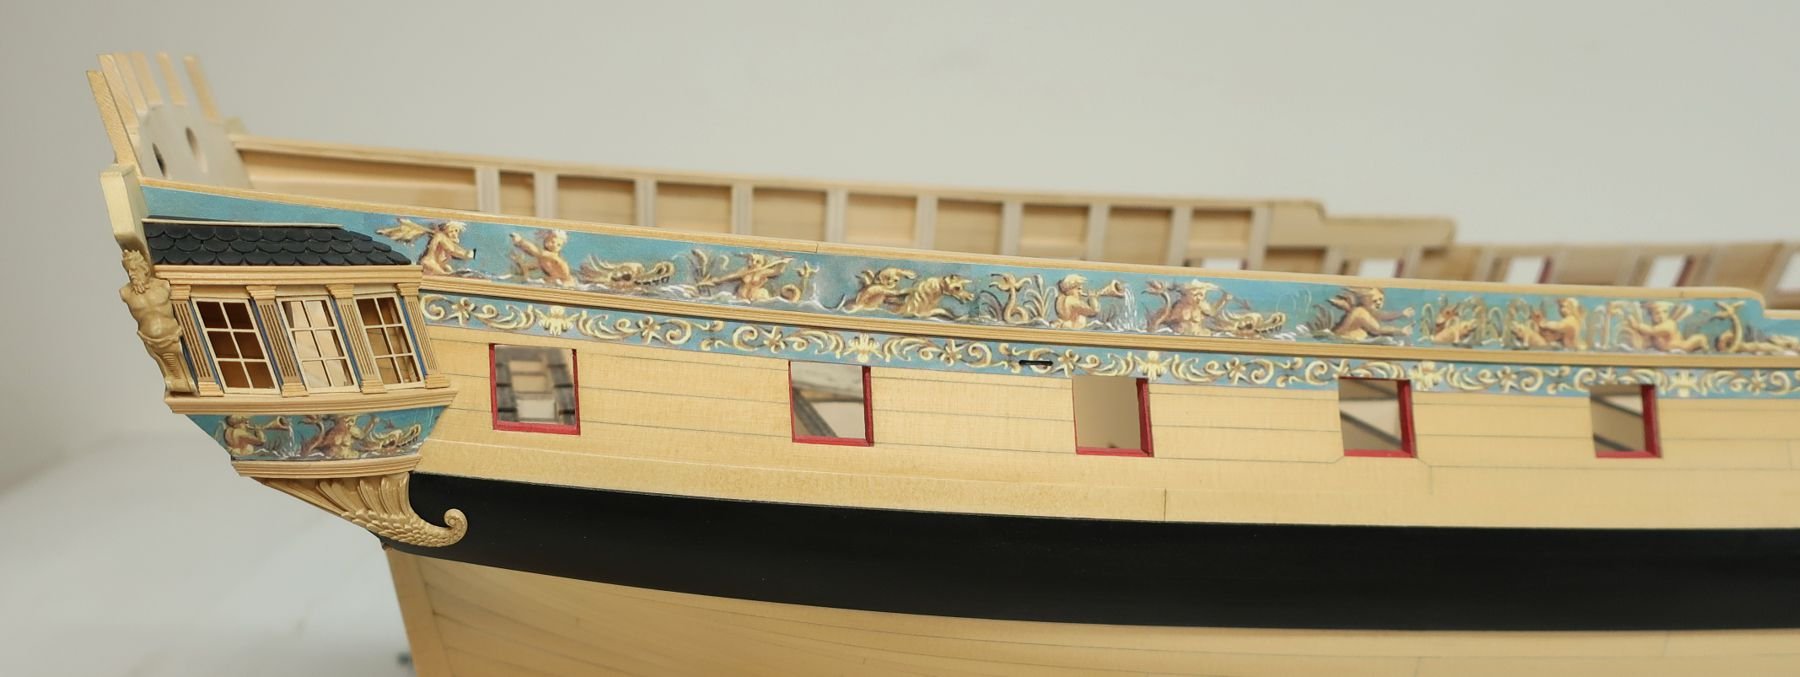
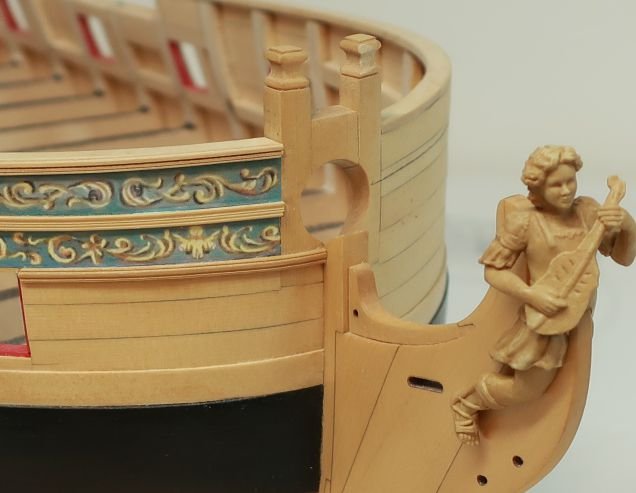
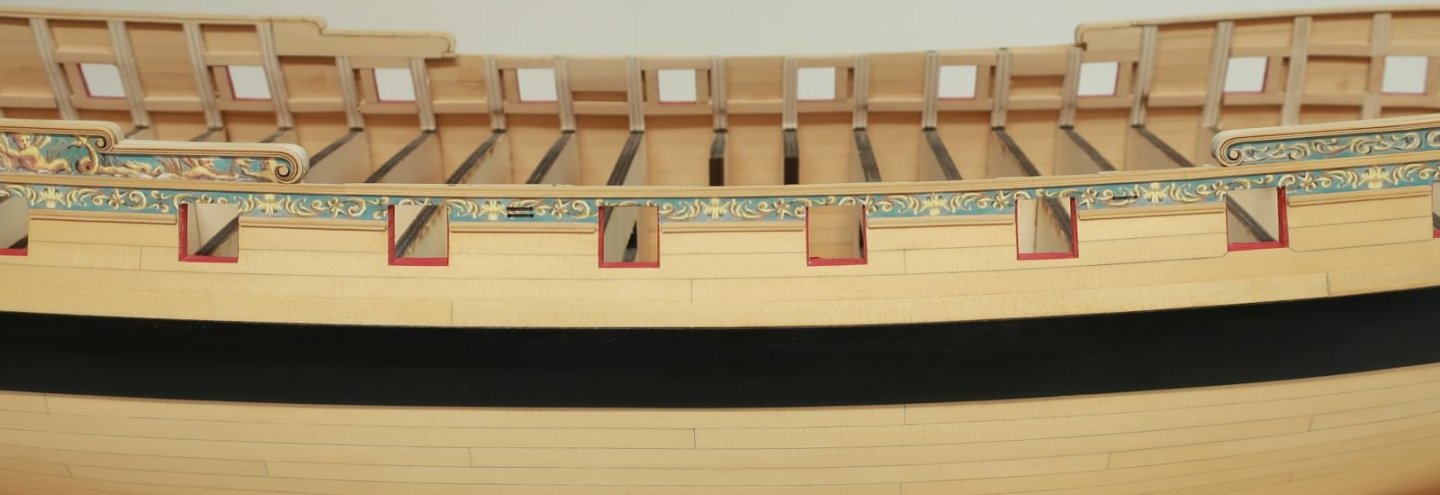
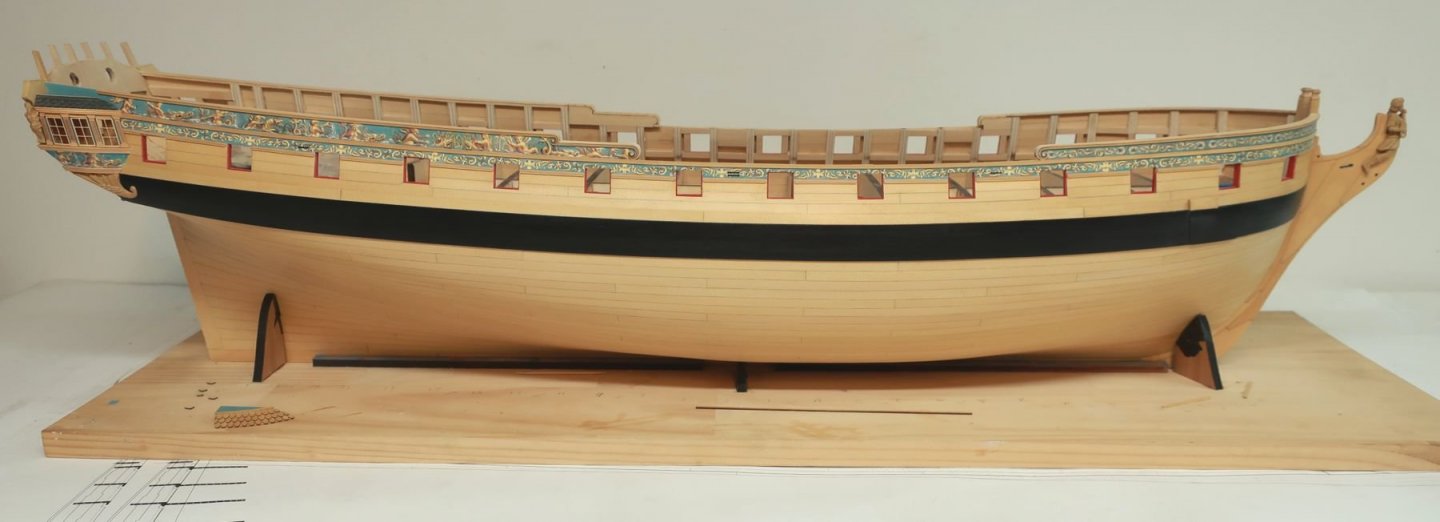
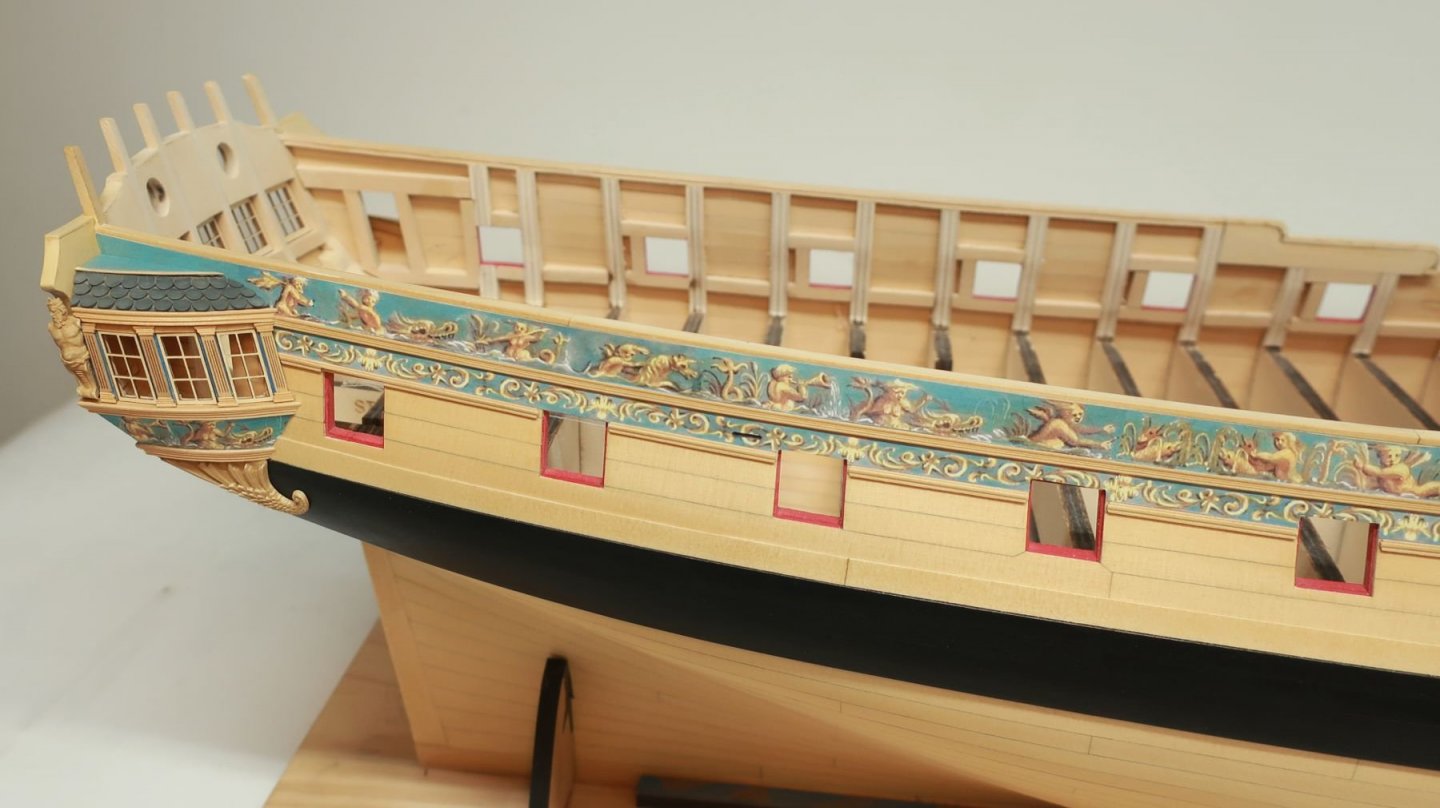
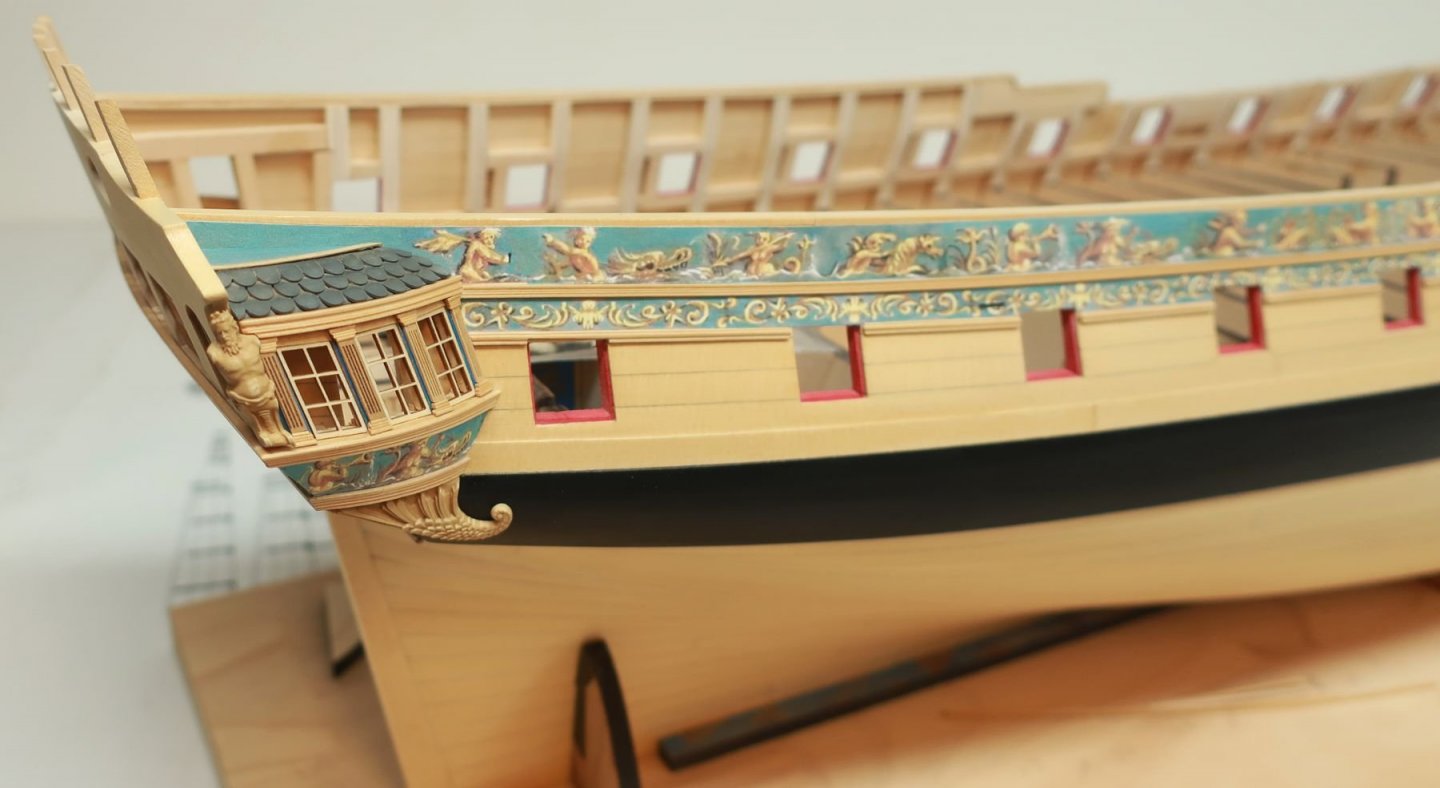
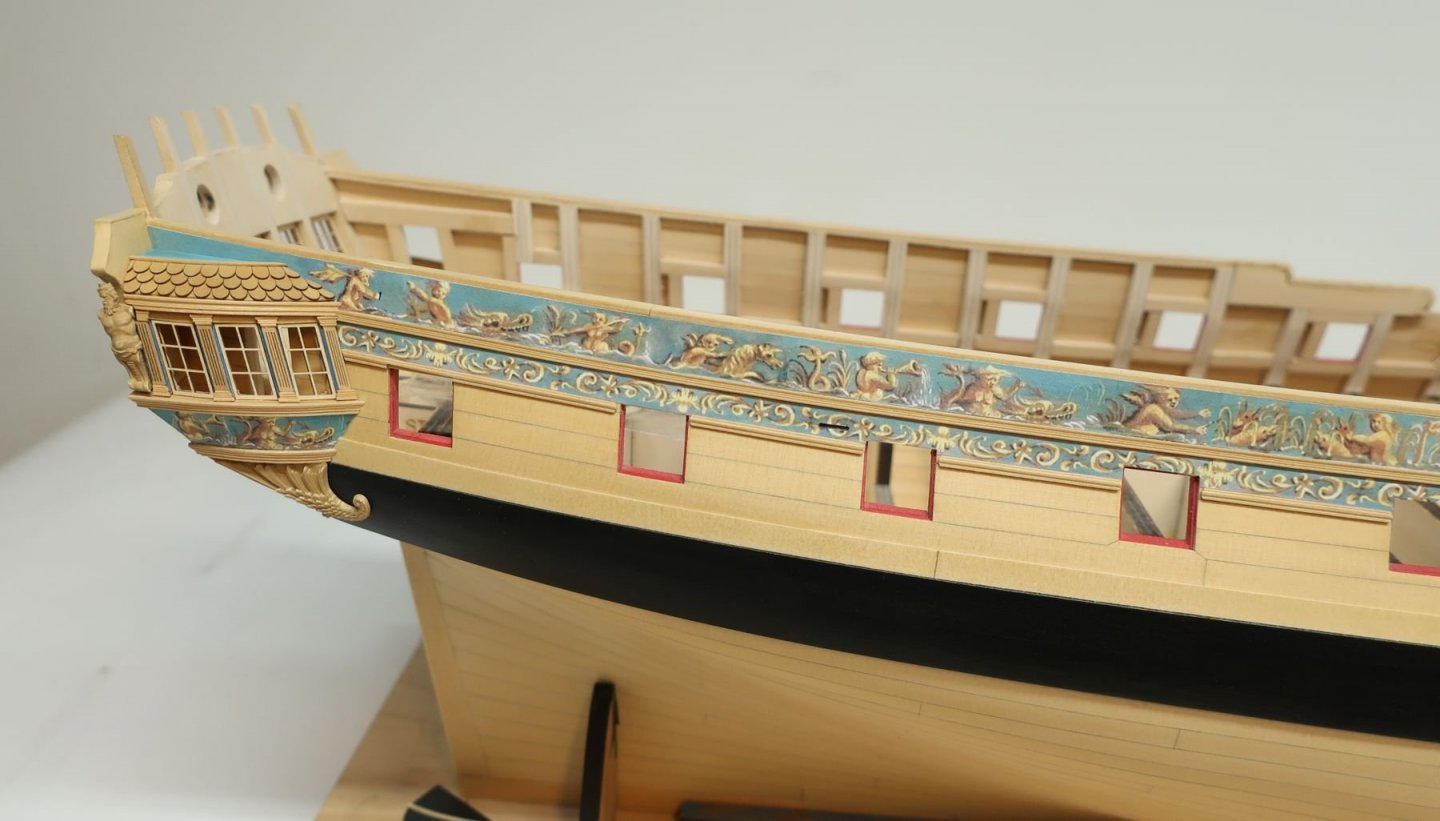
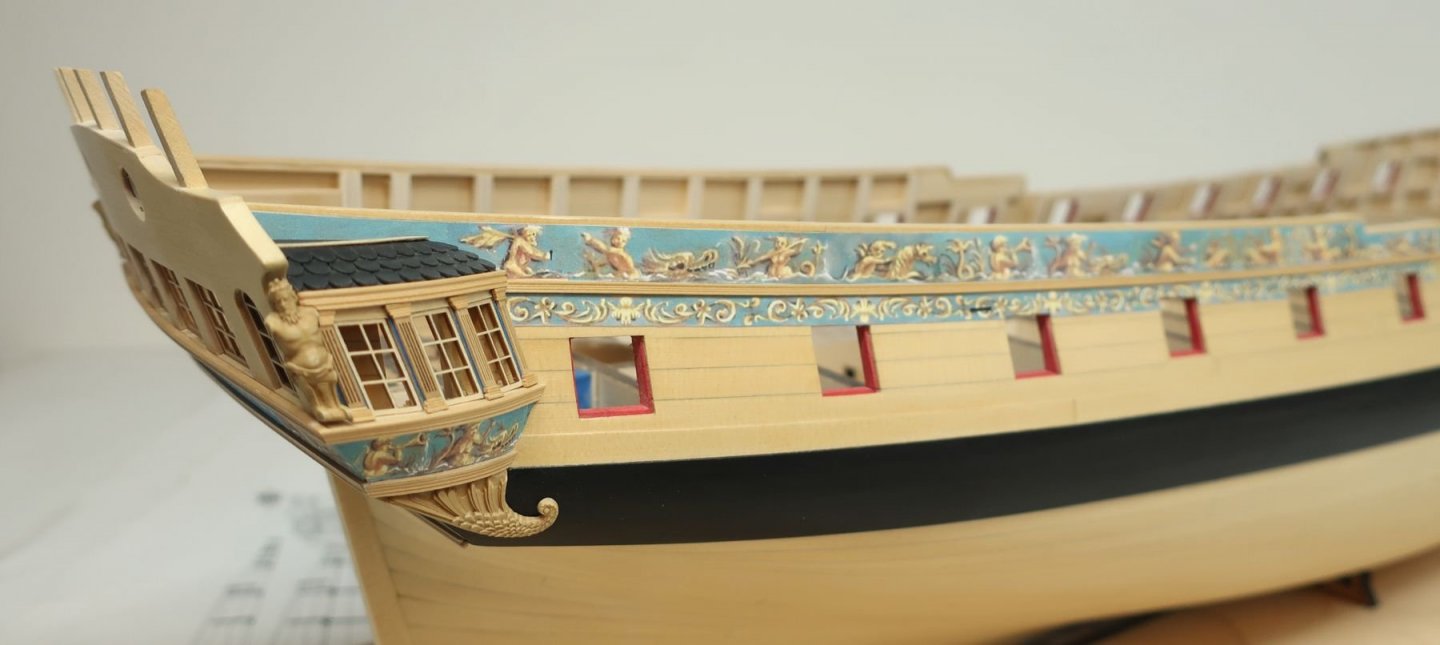
A small update.....the starboard side is almost complete (for chapter three anyway). I just want to add that fancy rail on the top of the qgallery. But today I finished the friezes and molding on this side. Remember, the middle molding goes on first. It is a scraped 3/32" wide molding. It establishes the proper sheer run. Then you can add the friezes above and below that molding strip. You should do this without the qgallery roof glued into position. It is done this way so the roof can cover the friezes (be glued on top of it) and you will get a nice clean edge. This way you want have to cut the frieze around the roof and shingles. The lower molding is also scraped in the traditional way. It is also 3/32" wide. It has a different profile than the middle molding. Check out the images of the contemporary model in the gallery before you make your scraper for the molding. You can cut the short lengths that need to be added between each port. In addition, you will need to cut the frieze around each port. I found this easier to do after the frieze was glued on. Use a very very sharp xacto blade. Go slow!!! Then finally, locate the fixed blocks which are now covered by your frieze. To do this, poke a drill bit through the sheave holes from the inboard side to puncture the frieze. Then carefully cut the frieze away to reveal the sheave slots. I ran a sharp pencil in the sheave slot to clean it up and make it neat. It also darkens the sheave. Then glue the top frieze into position. Try and locate the seams between each segment over a busy part of the design. This will help hide it. You would be very hard pressed to find it on my model. The frieze will not go all the way to the sheer. It will be about 1/16 - 3/64" below the shear. This is to accommodate the top run of fancy molding. This molding is not scraped. It is laser etched and cut for you from boxwood. I did this so I could also match it to the scrolls (volutes) along the waist. I think it looks pretty good and mixing traditional scraped molding with a laser cut one is a good approach. Much better than using a laser cut molding for every occurrence. Be very careful with the scrolls when you sand them....they are fragile at only 1/32" thick. The first thing you should do is lightly sand the top surface with some 320 grit sandpaper. Then remove them from the sheet. Use a light touch and then remove the laser char from the edges. As you do so, remember to support the scroll between two fingers so it doesnt break along the grain. Again use a light touch. Dont try and clean the char in the inner edges of the swirled scroll. It will break. To finish them up, round off the top and bottom edges. The same can be done with the lengths of laser cut molding so they match the scrolls and can be glued together so you cant see the seams between them. Dont try and scrape the char from the laser etched grooves. It just wont work and if you just leave it as is t will look great. This is what I did with mine. When its all done...this is how it should look at the bow. Take note of where the molding ends. Once I finish the other side, I will paint the bollard timbers black. You could do this ahead of time as well. Probably easier that way. Everything above the bottom molding will be painted black. You cant really tell the difference between the laser cut and etched molding and the scraped molding in that close up!! Its just a little darker where the char sits in the grooves. Lastly...at the stern, notice on the contemporary model that the top molding does not extend to the transom. The blue of the frieze extends right up to the shear. The black cap which we will add later will sit on top of the shear. The molding ends at the rail on the qgallery roof. Which I will add next. ANY questions or comments??? I dont think I forgot to mention anything.....remember....a light touch when sanding those scrolls....really. And I still havent decided on the roof color for the quarter galleries....but I have to decide so I can add that rail. By the way, I havent even started on the port side yet. So lots to do before I start working on the stern.

- 1,784 replies
-
- 34
-
-
- winchelsea
- Syren Ship Model Company
- (and 1 more)
-
Looks very good
-
That rigging is looking very good. That is a fine looking model.
- 231 replies
-
- 4
-
-
- model shipways
- armed virginia sloop
- (and 1 more)
-
Woodenkit is the worst. They have no original products at all. They even pirated from me. I have contacted them many times and received very nasty profane responses. They were horrible people and still copy stuff to this day. They even use my photos on their site to sell the designs they stole from me at syren.
- 216 replies
-
- 5
-
-
- masterkorabel
- ships
- (and 3 more)
-
That is looking ship-shape. You are well on your way.
- 137 replies
-
- 1
-
-
- winchelsea
- Syren Ship Model Company
- (and 1 more)
-
Then vote as you like based on your experience. That is what the poll is about. Based on your experiences select the MFG you are familiar with. Everyone who voted the way they did were not lying. This is what they believed and it was their opinion and just because it doesnt match yours you can not disregard them. Just vote for what you believe!!!! I just dont understand these people who dont believe the results........they are honest and true. You dont have to agree with it. To say it is untrue is just plain idiotic!!!! Model shipways uses both plywood and basswood for the bulkheads depending on the model....also they DO NOT use boxwood, They use basswood for planking which is the same as limewood. You are just wrong about that....sorry. Chuck
-
Really nice choice Toni. I actually considered this as a subject for a kit but saw too many differences between the model and the drafts I found. I even questioned whether the model is properly identified so i decided against it. But like you I fell in love with the model. You are off to a great start. Chuck
-
Well that is a great start. The stem assembly looks fantastic. Well done getting such tight joints.
-
Really looks nice. Great job on the bollard timbers. Everything is coming together.
- 99 replies
-
- 2
-
-
- winchelsea
- Syren Ship Model Company
- (and 1 more)
-
Looks really good Bob. You are moving along quickly. Chuck
-
Yes, I use an elmers glue stick. The same type of glue that children use. It has served me well without any issues at all. I believe I may have mentioned this in the instructions I wrote. Chuck
-
Spray your printed friezes with an artists spray fixative or even Dull coat. Chuck
-
That looks very good. You are well on your way.
-
Ughh!!!! Long night Bourbon Street at 5am. It aint pretty. But fun and now a bit fuzzy.

- 1,784 replies
-
- 12
-
-
- winchelsea
- Syren Ship Model Company
- (and 1 more)
-
Yummy!!! Cant wait. Have a 6am flight so i will probably be wiped when i arrive.
- 1,784 replies
-
- 1
-
-
- winchelsea
- Syren Ship Model Company
- (and 1 more)
-
Greg Thats probably the way i will go. But at least now everyone can see both variations and choose for themselves. looking forward to some GUMBO!!!!
- 1,784 replies
-
- 4
-
-
- winchelsea
- Syren Ship Model Company
- (and 1 more)
-
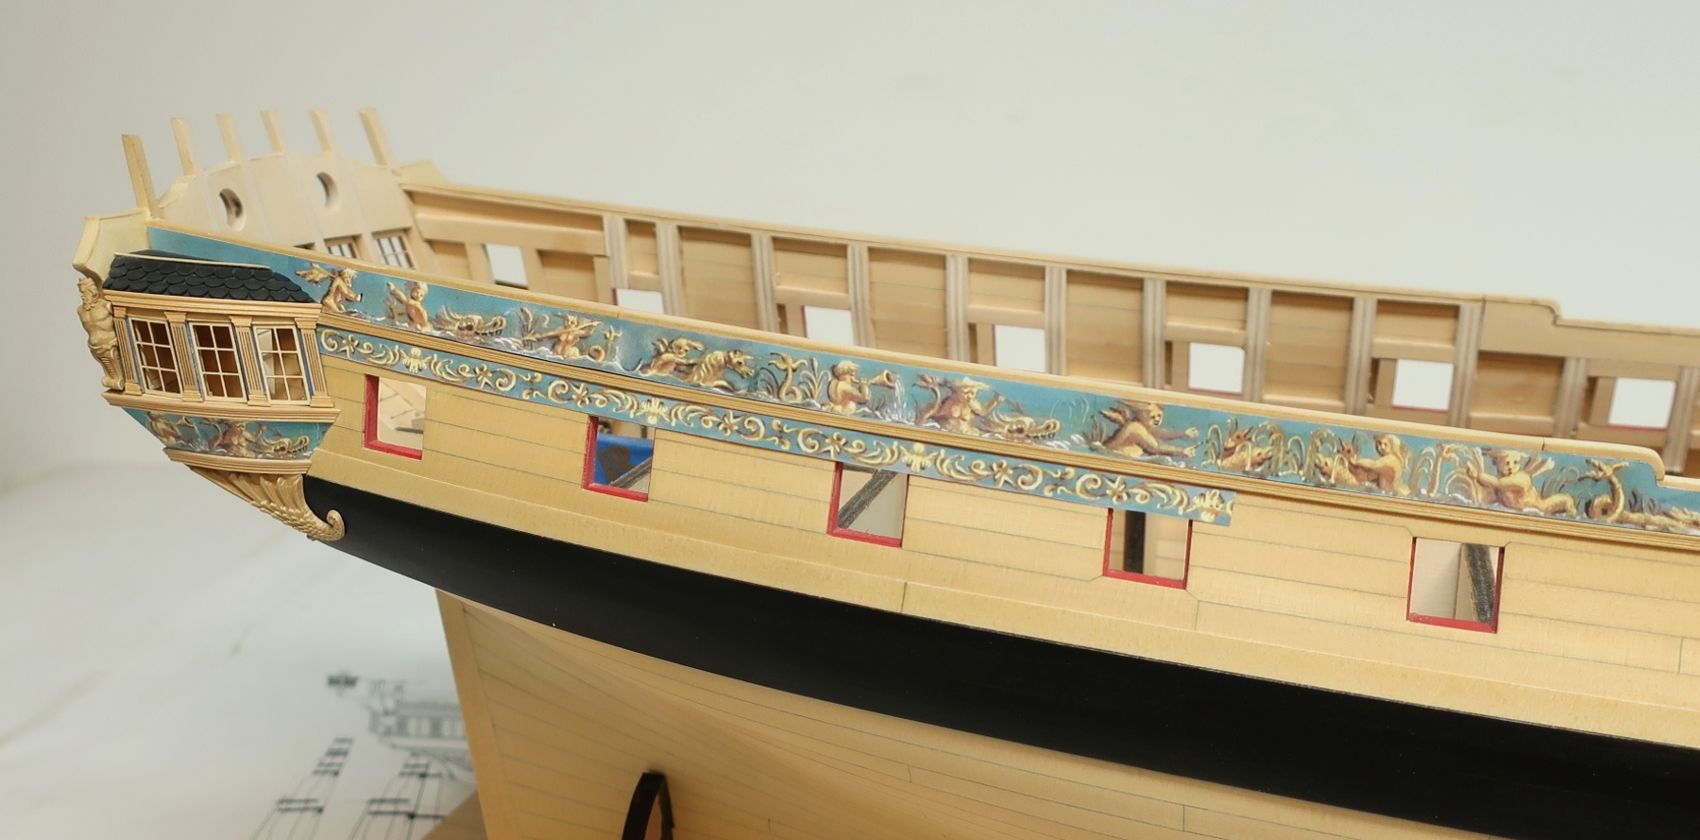
Hoping to try everything before deciding. Here is the dark roof again but I made it much lighter. I also painted the top blue to match the frieze which is like the minerva model. Now I cant make up my mind. I like them both. I will study these photos and make a decision with your help. Always a lot of fun right....I do appreciate the help and your thoughts on this.


- 1,784 replies
-
- 13
-
-
- winchelsea
- Syren Ship Model Company
- (and 1 more)
-
But then they would need to be painted. Most folks find that hard to do neatly and with a decent color. Everybody can sand!!!!! You cant beat the look of natural wood vs. painting whenever possible in my opinion. I would love to hear some more opinions on this... Chuck
- 1,784 replies
-
- 2
-
-
- winchelsea
- Syren Ship Model Company
- (and 1 more)
-
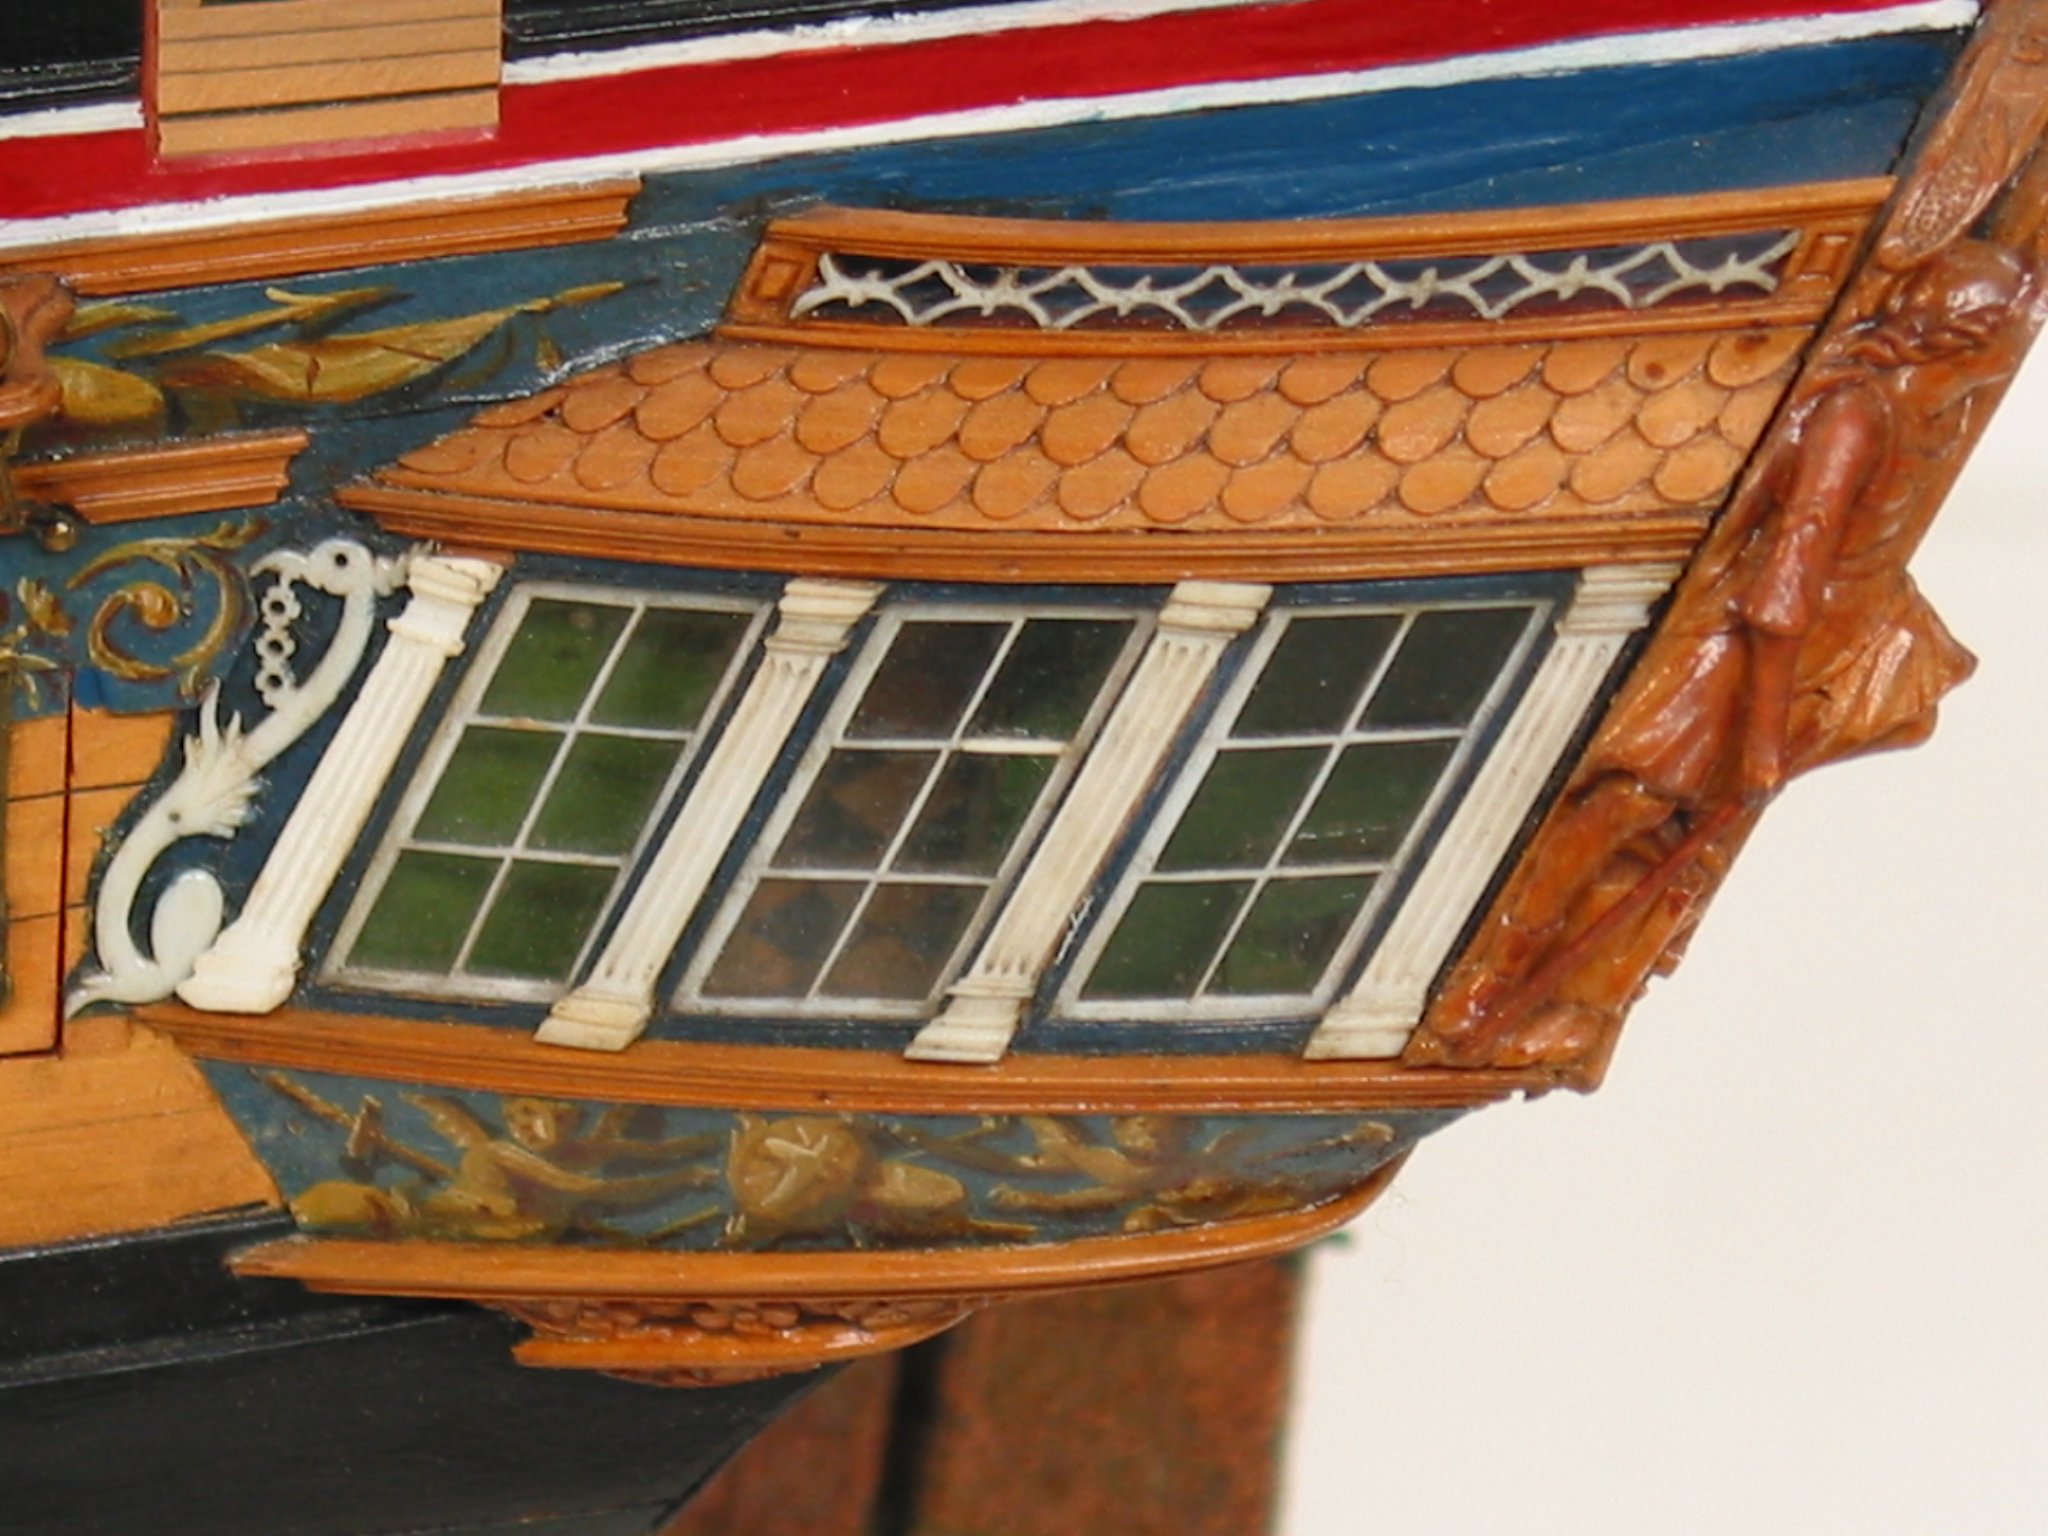
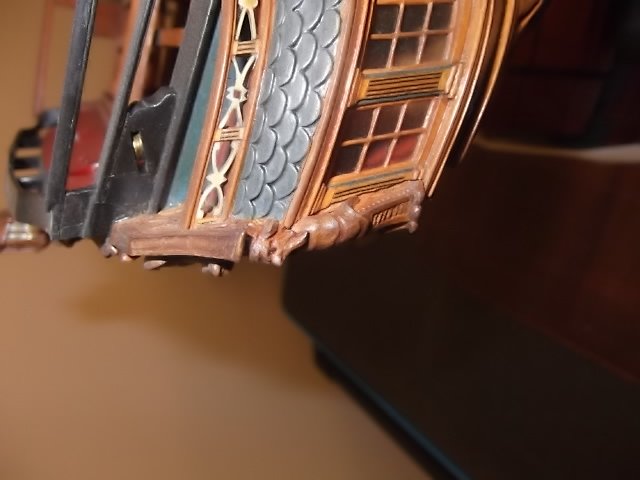
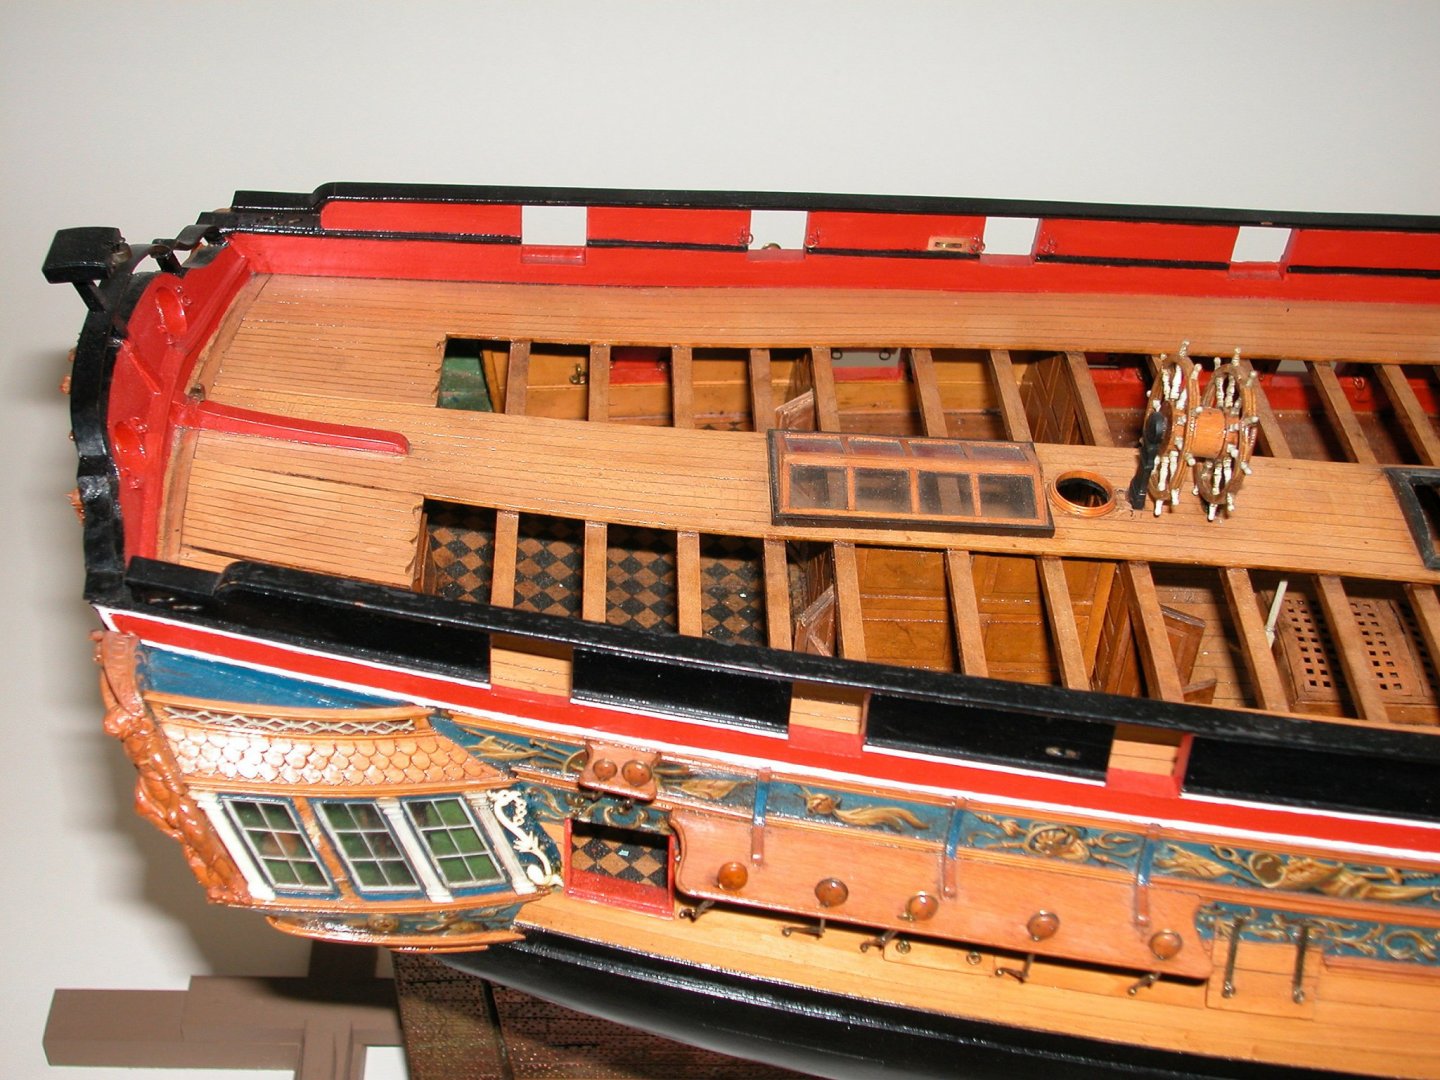
Minerva is one of my favorite models. It always serves to inspire me. Here is my version (a little hesitant to place my wok against such a masterful contemporary model) of the shingled roof left natural. I kind of prefer the natural look. But I will sleep on it a bit. What do you guys think. I think the dark roof is too "in your face". But I could be wrong. Note how thin the shingles are sanded after each row is completed. These are boxwood shingles.

- 1,784 replies
-
- 15
-
-
- winchelsea
- Syren Ship Model Company
- (and 1 more)
-
Just one note as while working on the friezes I have several photos of Minerva out for inspiration. Its one of the reason I have decided to go with a lighter toned frieze. The Cedar is light and anything darker would be too much. But I wanted to point out a few things. Note the unpainted roof shingles of the quarter galleries.... Note the painted interior of the qgalleries...I dont like that its a weird color. But I will be making a second roof as a test with the top painted the same blue as the frieze while leaving the shingles natural. There are plenty of choices out there and looking at the way contemporary builders did this is great for inspiration. The Minerva model in the Naval Academy is much more refined and built with more expertise than the Winnie contemporary model. The Winnie model is a bit crude in its details by comparison. So examining both makes for good study!! Also note how you can see that the contemporary builder painted his frieze on paper and glued it on the model. There is a bit of lifting in one of the images I posted.

- 1,784 replies
-
- 17
-
-
- winchelsea
- Syren Ship Model Company
- (and 1 more)
-
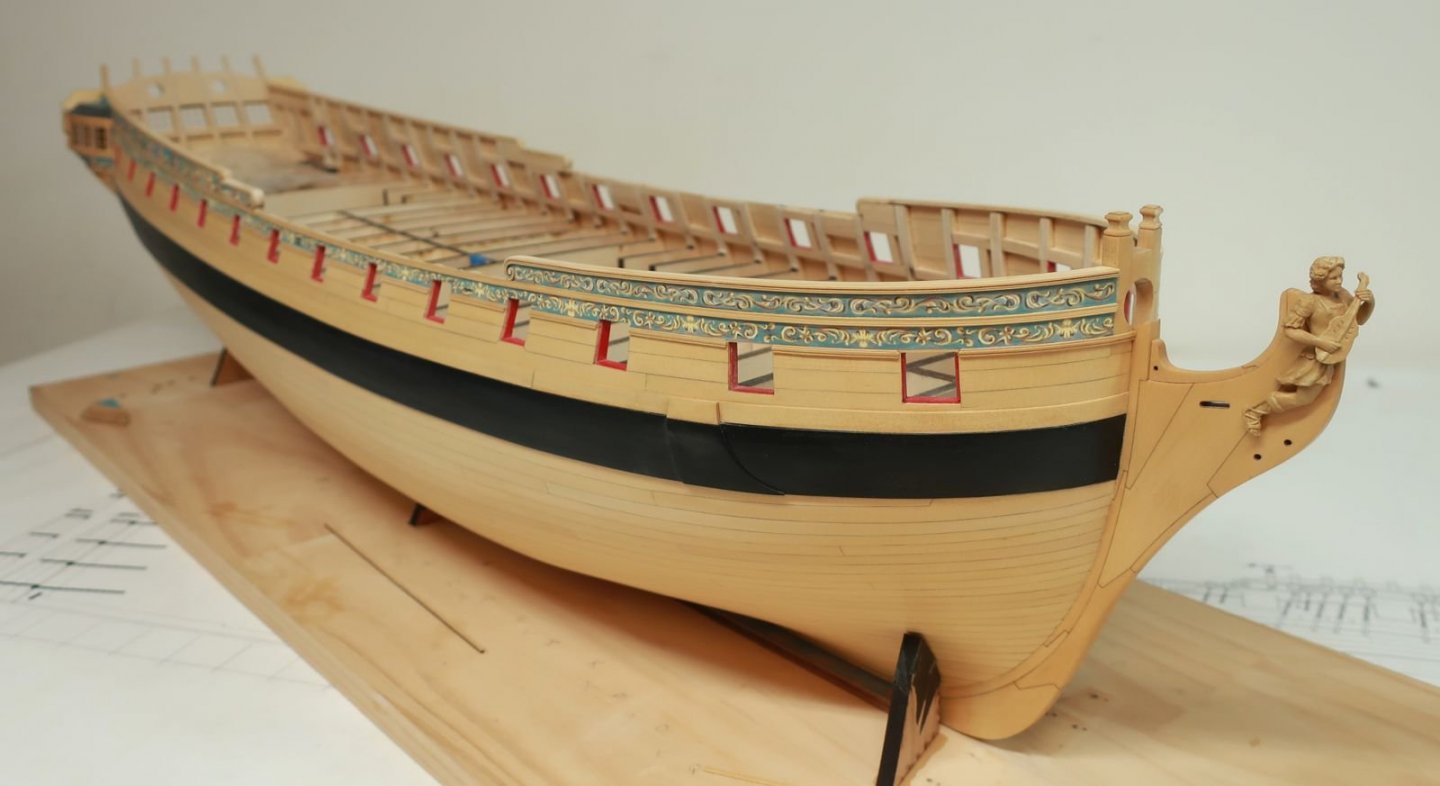
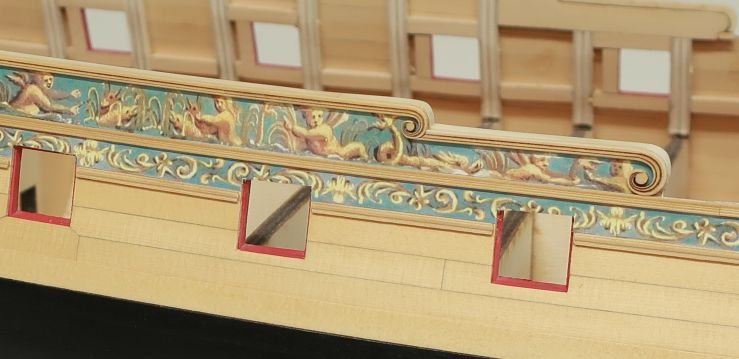
The reason why I havent just completed the quarter gallery is simple. I want to make a nice clean edge between the quarter gallery roof, rail and the painted frieze. This means the frieze along the hull needs to go on first. I am still testing and tweaking that. But first...the 3/32" wide fancy molding must be scraped and glued on the hull. This will be our guide for the friezes. I am just talking about the middle molding. Once glued in position, you will be able to sit the frieze on top of it as shown. The thinner frieze can be butt against it along the bottom as well. Then to finish it off the you will be able to use the friezes as a guide to place the remaining molding in position. This is the next step for me. Once this is completed I will then get back to finishing the fancy rail on the roof of the quarter gallery. Once this is done on both sides of the hull, I will then start finishing the stern transom with all of the carvings and columns. When that is all done it will complete chapter three. But there is a lot of work involved with all this stuff so it will take several weeks at least. I have stop work this weekend though because I am leaving for New Orleans yet again!!! Second attempt at some fun and relaxation. Here is a look at the testing so far!!! The friezes are not glued on yet as I am still tweaking them. They are just resting on the molding.


- 1,784 replies
-
- 35
-
-
- winchelsea
- Syren Ship Model Company
- (and 1 more)
-
You could paint the interior but i rather like just leaving it natural wood. The interior on the contemporary model is just left natural although the paneled walls that sep the cabins are painted off white. Yes i added facilities in both galleries.
- 1,784 replies
-
- 2
-
-
- winchelsea
- Syren Ship Model Company
- (and 1 more)