HOLIDAY DONATION DRIVE - SUPPORT MSW - DO YOUR PART TO KEEP THIS GREAT FORUM GOING! (Only 72 donations so far out of 49,000 members - Can we at least get 100? C'mon guys!)
×


Chuck
-
Posts
9,673 -
Joined
-
Last visited
Content Type
Profiles
Forums
Gallery
Events
Everything posted by Chuck
-
 Unfortunately that is typically the case....the cost would change that much for these folks and the kits would look so much better. I just dont understand it. Chuck
 -
Nice progress and thanks for the kudos on the rope.
-
Tanganyika looks very good. Walnut would be much too dark with a noticeable grain pattern. The planking came out wonderful. Nicely done.
-
uploading pictures
Chuck replied to David56's topic in Using the MSW forum - **NO MODELING CONTENT IN THIS SUB-FORUM**
You can adjust the setting in your phone to take smaller photos. Thats what i did because then they upload faster. You can also create your post on MSW right on your phone. Then upload the photo from your phone right to msw. That what I did below. My stash of yellow cedar. Just got delivery of more wood sheets from the Syren Sawmill. Uploaded from my Iphone.
-
uploading pictures
Chuck replied to David56's topic in Using the MSW forum - **NO MODELING CONTENT IN THIS SUB-FORUM**
If you dont want to screw around with wires and draggingging and dropping etc......I usually just click on the photo in my phone and email it to myself. Depending on your phone you will be able to either email it or send the image in a text. Select the email option and send it to yourself. Then I open the email on my computer and download it for use. I am computer challenged also so my son told me to do it this way.....LOL. That is the easy way if your phone is set up for it..... -
Jim, That looks good, I hope that method works out for you. It does take some time but the results are worth it. That should make a nice smooth surface after the second layer for painting. Even though it will be painted when it comes time to plank a model that isnt painted you will be so happy that you spent this time on an earlier project. It is a beauty of yacht. Before you know it you will have only a few planks left to go!!!
-
You are off to a great start!!! Welcome to the forum. One thing I would suggest with this kit is that you fill some of the space between those bulkheads. This is a well known kit for having the bulkheads spread too far apart which will make planking more difficult. At least maybe at teh bow and stern areas below the wales. I look forward to your updates. Chuck
-
I am following along with much interest....keep up the fine work. Have fun with the sticks and strings!!!!
-
Your doing a really fine job on the model. You will be masting and rigging in no time at all. If its your first time around with rigging a model like this you just might find you like rigging more than making the hull and deck fittings. I am sure you are going to have fun doing so. Chuck
-
It looks good so far!!! 😀 i hate when life gets in the way of some workshop time as well. Glad to see you are back at it.
- 109 replies
-
- 1
-

-
- medway longboat
- Syren Ship Model Company
- (and 1 more)
-
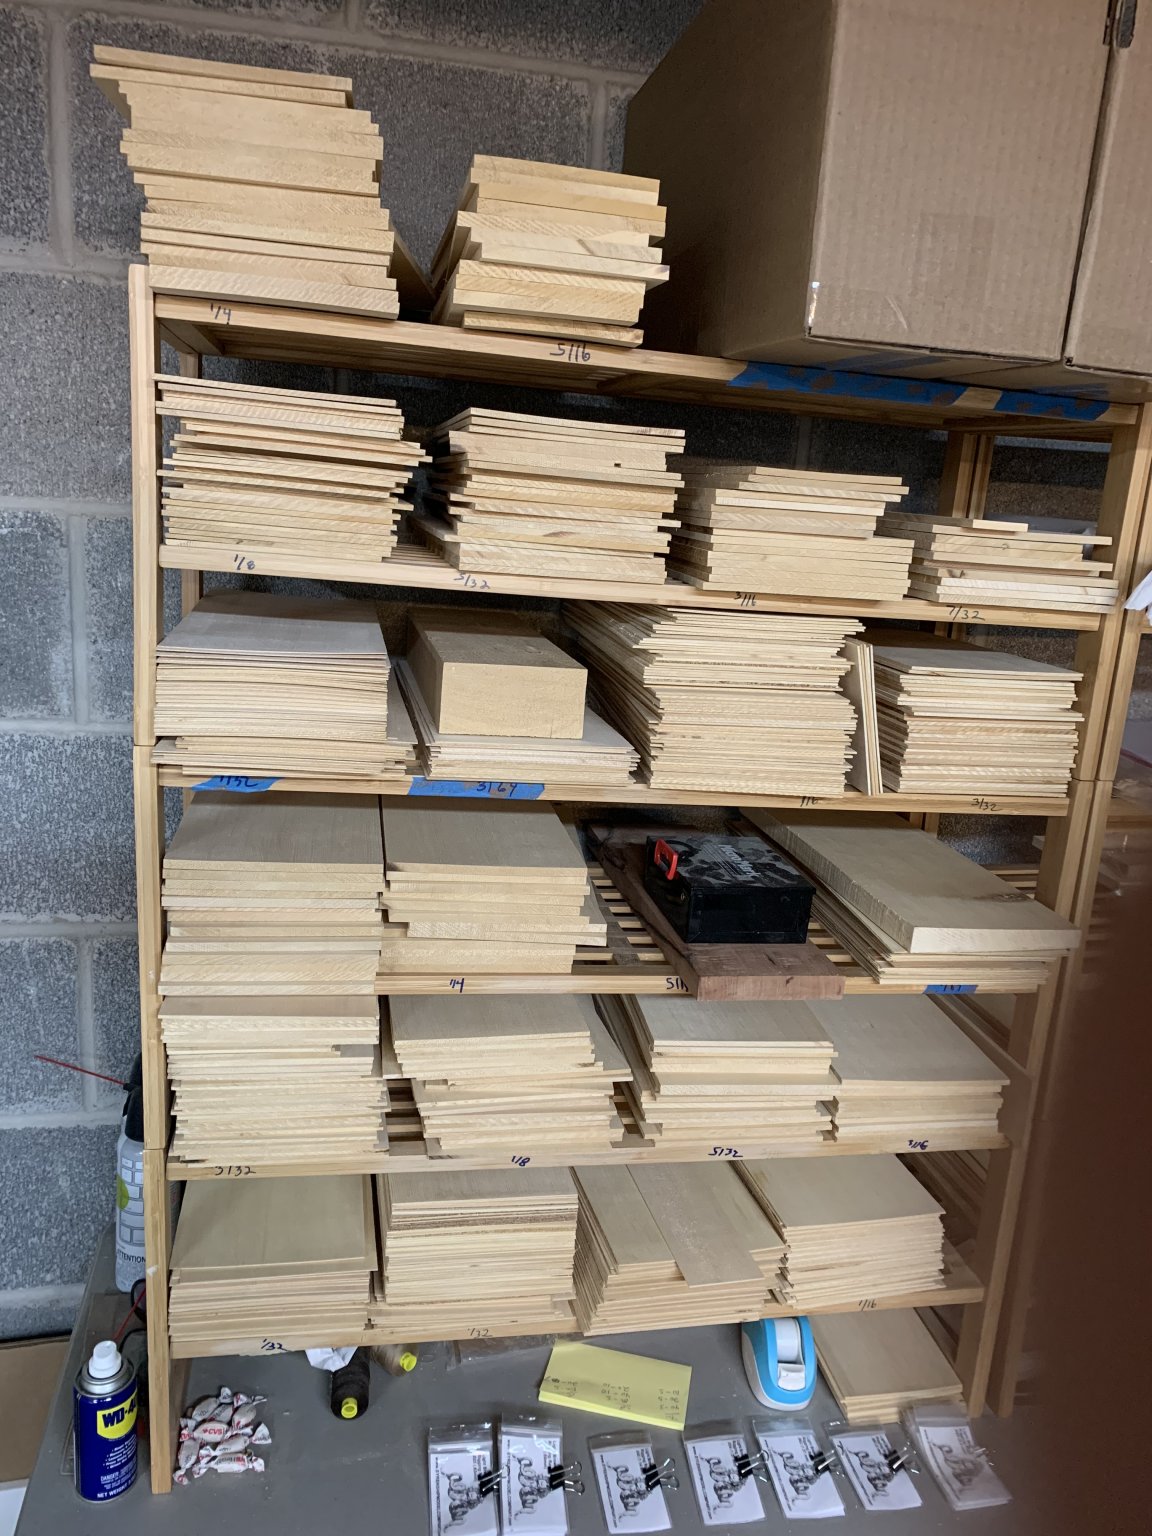
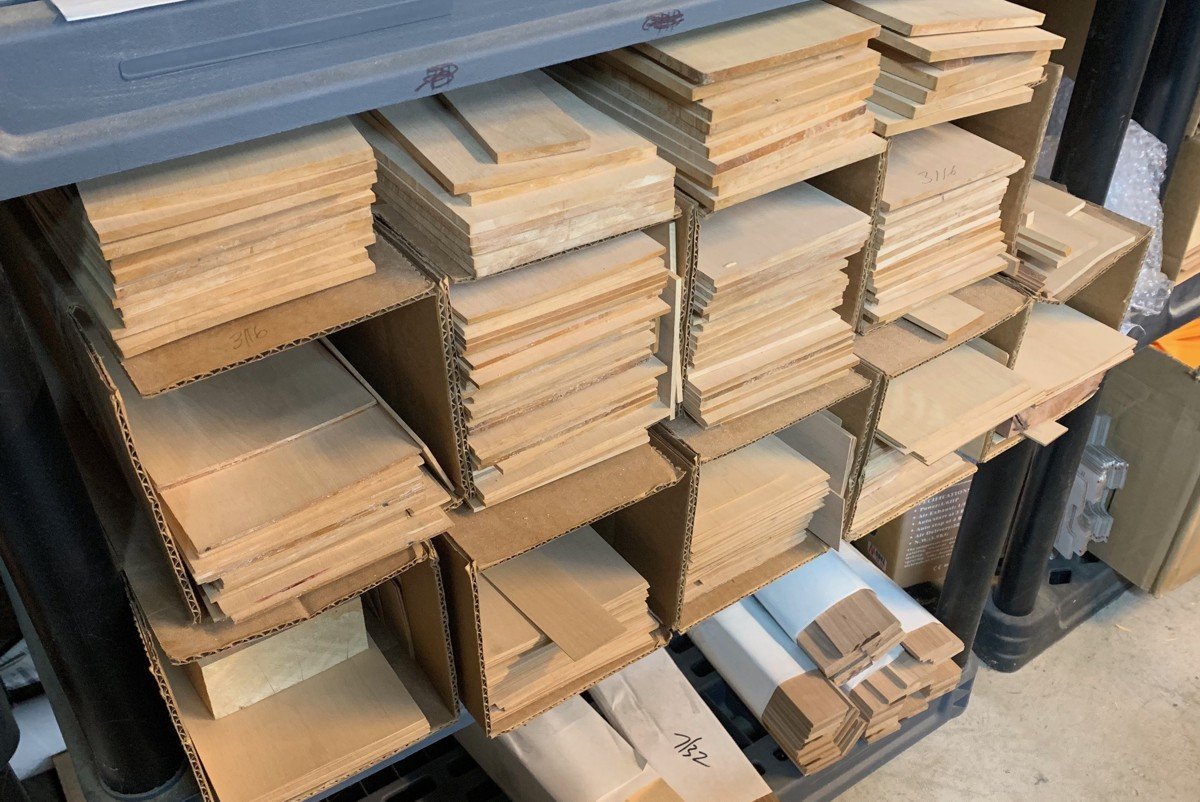
I use a wood slicer for the Cedar and its great. Super smooth cuts. But I use the Laguna Resaw King for the boxwood. The Wood Slicer just gets too dull very quickly. I am happy with the Resaw King blade and its fine if I am only cutting sheets for my products.....if I were selling sheets though I would go through too many blades. I have tried getting them resharpened but they just dont work the same. Scares the crap out me when they break though. That can get hairy if any of you have experienced that. I use a 3/4" blade. They are 115" long. I have thought about alternatives but I am so used to these blades I know how they handle and when they heat up too much etc. So I am sticking with what I know rather than trying something new at this point. I have a guy that does most of my milling now though, so I dont do too much myself any more. But that alone makes it more expensive. I have plenty of Boxwood sheets on hand right now already milled. I just ran out of the billets. Will order more on Monday. Here is my current stash...each pile is a different thickness. You can see my last remaining swiss pear stash on the floor that I keep just in case.....
-
I am not going to sell the 10/4 stock. The billets I get are 5" wide and 2 1/2" thick. You cant cut that with a Byrnes saw. You need a big bandsaw for that with a good quality resaw blade. I use a 2 horsepower laguna bandsaw. I am talking about just selling the milled sheets as listed above. There are lumber providers out there can sell you the billets should you need them like Gilmer and Rare Woods. I believe Gilmer current price is $40 per board foot. Chuck
-
I do the same thing Lou...it works for me. I just set the fence once and start ripping.
- 105 replies
-
- 4
-
-
- winchelsea
- Syren Ship Model Company
- (and 1 more)
-
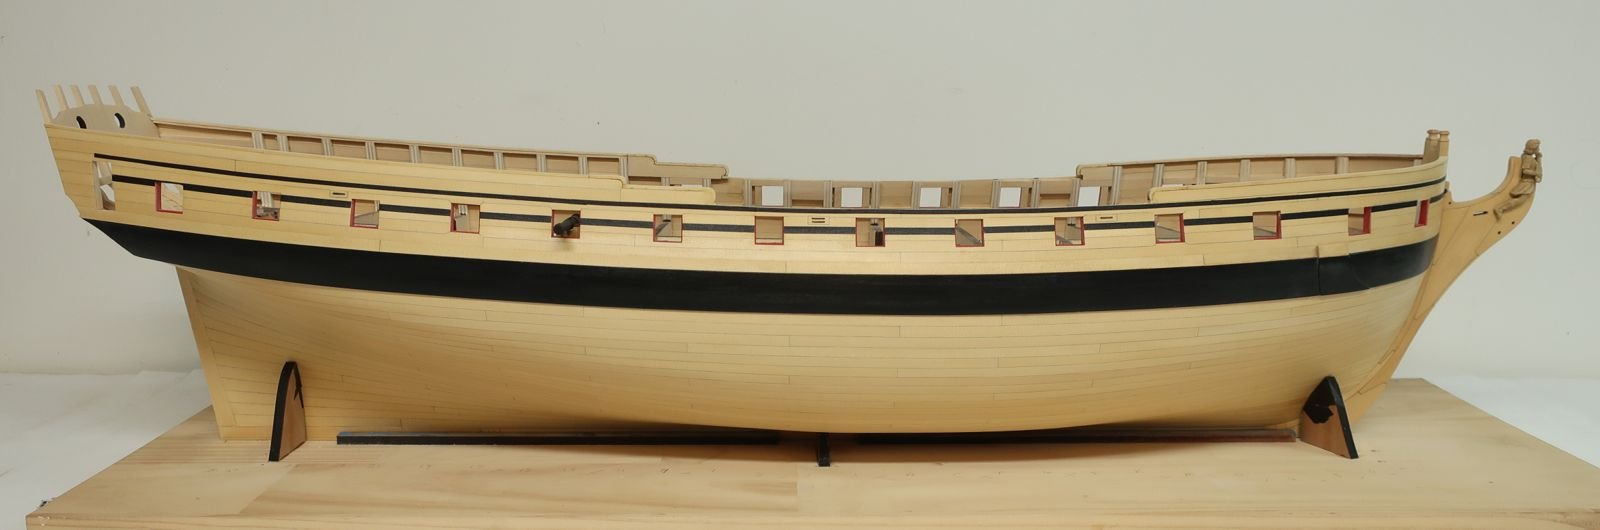
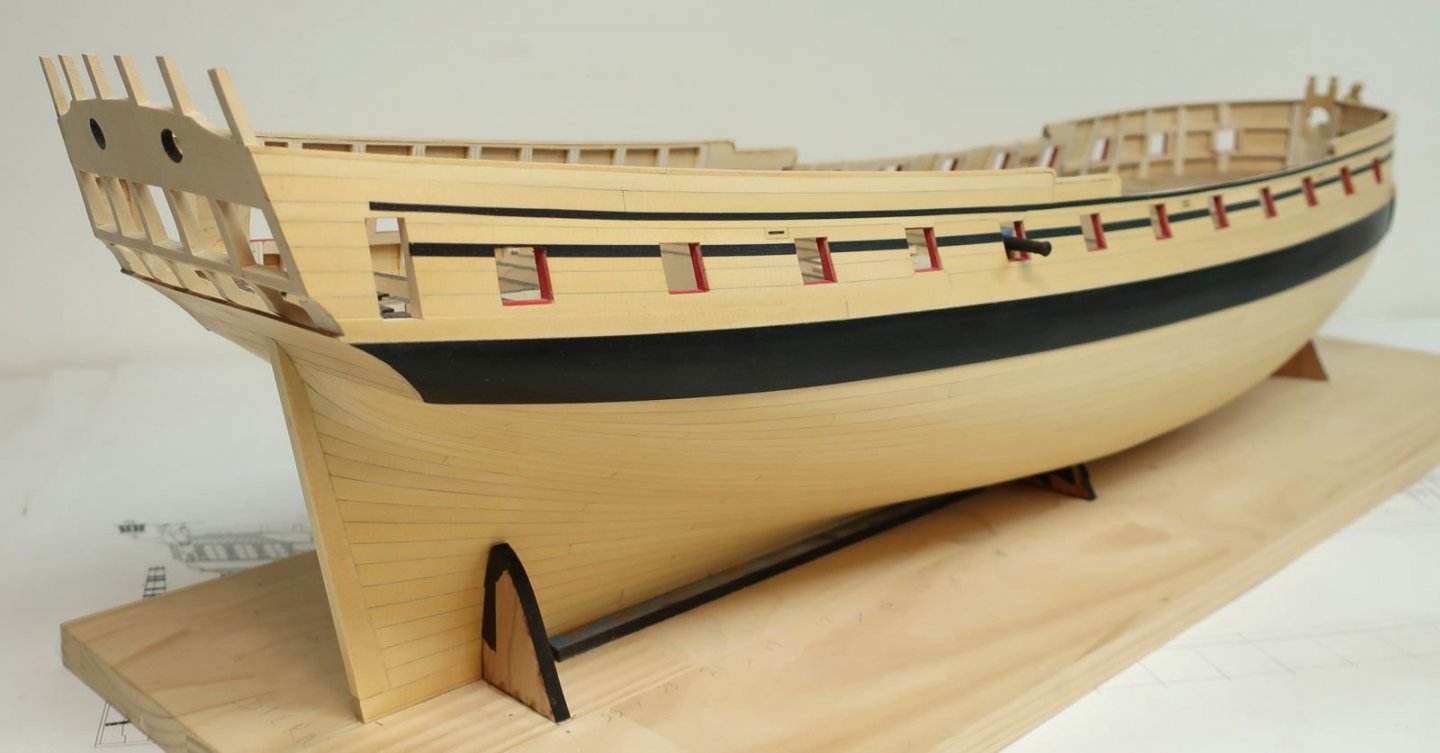
Probably ....but based on the response I doubt I will move forward....I was just trying to do a good thing and offer up the service if it was indeed such a huge issue based on what I am hearing. I am going to place my order on Monday for some billets and will only get enough for my needs through the winter by the looks of it. I am personally more fond of Yellow Cedar now than boxwood now, so for me it isnt a real big deal. I like the overall look and color of it better. It just takes some adjustments to get used to working with it....but once you do, its a beautiful wood. And at a third the price. My Winnie in Yellow cedar is below in case some of you havent seen it all planked up in the group build area.!!!!

- 30 replies
-
- 13
-
-
No I havent considered Cherry because you can buy it anywhere and everywhere. Even Midwest sells it. You can ask Ethan to mill any thicknesses you like if they are different than those shown on the Ocooch site. Bluejacket also sells Cherry. Thanks for answering as well. your response helps me out a great deal..... Chuck
-
That looks very good....the deck fittings are the most fun!!!! Fiddly yes indeed but the most fun. Chuck
-
I have been swamped with emails and requests to offer boxwood sheets again at Syren. I have to be honest...I really have reservations about this. But I will consider it. Keep in mind that this was never a profitable or "time-worthy" venture for me. If I do decide to start selling it again I will only offer milled sheets and I will warn everyone that the price per sheet will be extremely expensive. The good quality bandsaw blades I would need cost $150 each....and they dont last long on this hard wood. This is do to the cost of milling them and acquiring good quality stock while culling out the bad stuff I get which can not be sold. The cost for the culled pieces must be absorbed somehow....otherwise this venture will just be a complete drain on my resources....I will also have to limit the sale of boxwood sheets to the USA and Canada as shipping them to Europe and elsewhere is just too expensive. Usually double what anyone was willing to pay for it. But before I make the decision....I must hear from you guys if you would seriously consider buying it from me at the prices I would need to charge. If not....then I wont bother. I have crunched the numbers and the prices per sheet are listed below. If you seriously would not buy it then please let me know.....or if you would!!! Unless I have more than just a few folks that would use me as their supplier it just wont be worth the effort....Absolutely no strips though. I have received at least 3 dozen emails lately so if only two or three respond here then I know its just not worth it now based on the $$$ I would need to charge. This is a serious commitment for me and I need to know what the potential for sales is before I move any further. Your responses are crucial because I need to buy new 10/4 stock right now. If I am only buying it for myself it will cost me about $800 but if I need to buy enough to mill sheets for resale then I need to buy about $3800 worth of lumber. Its a big difference and a huge nut for a small business like mine. Thanks in advance...my proposed pricing is shown below. .025" Thick Milled Boxwood Sheets (4" - 4 1/2" wide x 14" long) $14.50 1/16" Thick Milled Boxwood Sheets (4" - 4 1/2" wide x 14" long) $15.25 1/32" Thick Milled Boxwood Sheets (4" - 4 1/2" wide x 14" long) $15.00 1/4" Thick Milled Boxwood Sheets (4" - 4 1/2" wide x 14" long) $20.00 1/8" Thick Milled Boxwood Sheets (4" - 4 1/2" wide x 14" long) $17.00 3/16" Thick Milled Boxwood Sheets (4" - 4 1/2" wide x 14" long) $18.50 3/32" Thick Milled Boxwood Sheets (4" - 4 1/2" wide x 14" long) $16.00 3/64" Thick Milled Boxwood Sheets (4" - 4 1/2" wide x 14" long) $15.00 5/16" Thick Milled Boxwood Sheets (4 1/4" - 4 1/2" wide x 14" long) $22.00 5/32" Thick Milled Boxwood Sheets (4" - 4 1/2" wide x 14" long) $17.75 7/32" Thick Milled Boxwood Sheets (4" - 4 1/2" wide x 14" long) $19.50
-
Its a favorite of mine and so far you are doing great. I love the pilot boat as a subject and i just wish it was a bigger scale. But it certainly finishes into a beautiful model.
-
That looks very good. Its really coming together....one thing that sticks out for me however are those gratings. Its not a criticism of your work because you did a masterful job putting them together and gluing them on deck. Its just that for whatever reason most kit supplied gratings are so oversized and out of scale. The holes are just too big.... Its something to keep in mind for your next model since you are a terrific model builder, just replacing the gratings with properly scaled versions can elevate your model without much hassle. But I am enjoying your progress and it is looking excellent. Chuck
-
That is a really good start and very neatly done. I look forward to your next update. I can see what you mean with those metal ports. They look weird. If not too late maybe try and frame the ports with wood instead. The metal was a poor kit design choice by the mfg. But Im sure it will look fine either way. So far so good.
-
That is a really nice start. I would like to follow along. I have always admired the Granado and often thought of building her myself. Maybe I still will some day. Chuck
-
That looks excellent!!! Well done You did a very nice job painting.
- 20 replies
-
- 1
-
-
- red baron
- lobster boat
- (and 2 more)