

Remcohe
-
Posts
607 -
Joined
-
Last visited
Content Type
Profiles
Forums
Gallery
Events
Posts posted by Remcohe
-
-
What about Minwax Wipe-on poly, it's water thin, it will penetrate the paper and any surplus can be wiped off keeping the crisp lines of the butt joints in tact.
Remco
-
Remco,
Put those pictures in here: http://modelshipworld.com/index.php?/topic/1940-other-hobbies-interests-or-pastimes-that-you-enjoy/ and then forget that I told you...
 :D
:D I added some pics from my sculpting adventure. Pics of the plastic kit will come in due time
Remco
-
-
Thank you Karl, you're very kind.
Jan, 2 modern desert vessels
 a buffalo mpcv and a m-atv mrap
 -
Gary, your guns and the frappings turned out really nice Sir.
Remco
-
Thanks Nils, Greg.
Oktay, I use Castello Boxwood, aka lemonwood for 95% of the build the rest is Swiss pear and Holy.
Sam, I take that as a big compliment. Jan is right, I'm a perfectionist looking for the limits of what can be done with the materials I use. This sometimes results in redoing parts most of us would find just perfect (and they are right).
For the moment no updates, life is getting in the way and the time I do get to spend in the workshop is devoted to a plastic kit I bought recently and some figure sculpting and painting.
Sorry guys, Kingfisher will have to wait
Remco
-
That is some fine joinery you are showing us here Sir, remarkable how perfect those parts fit.
Remco
-
Congrats Ed, she turned out perfect!
-
Thanks guys. Urb, I've send you a pm.
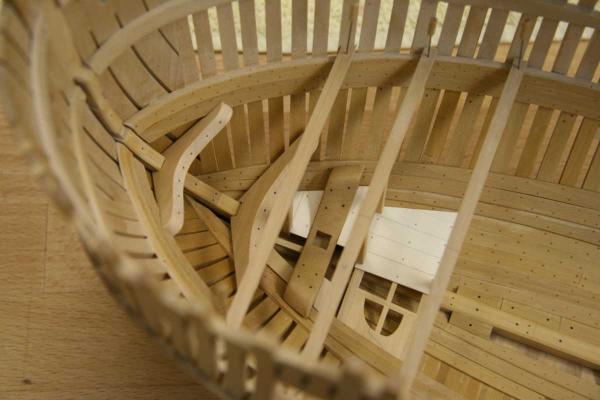
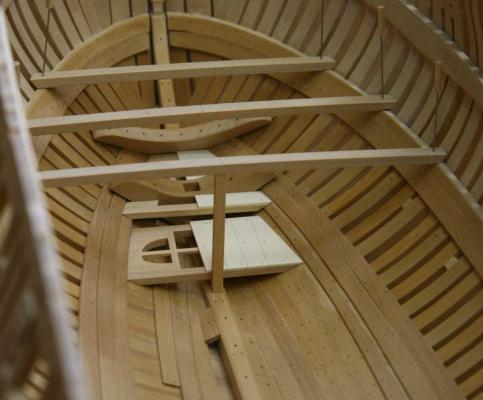
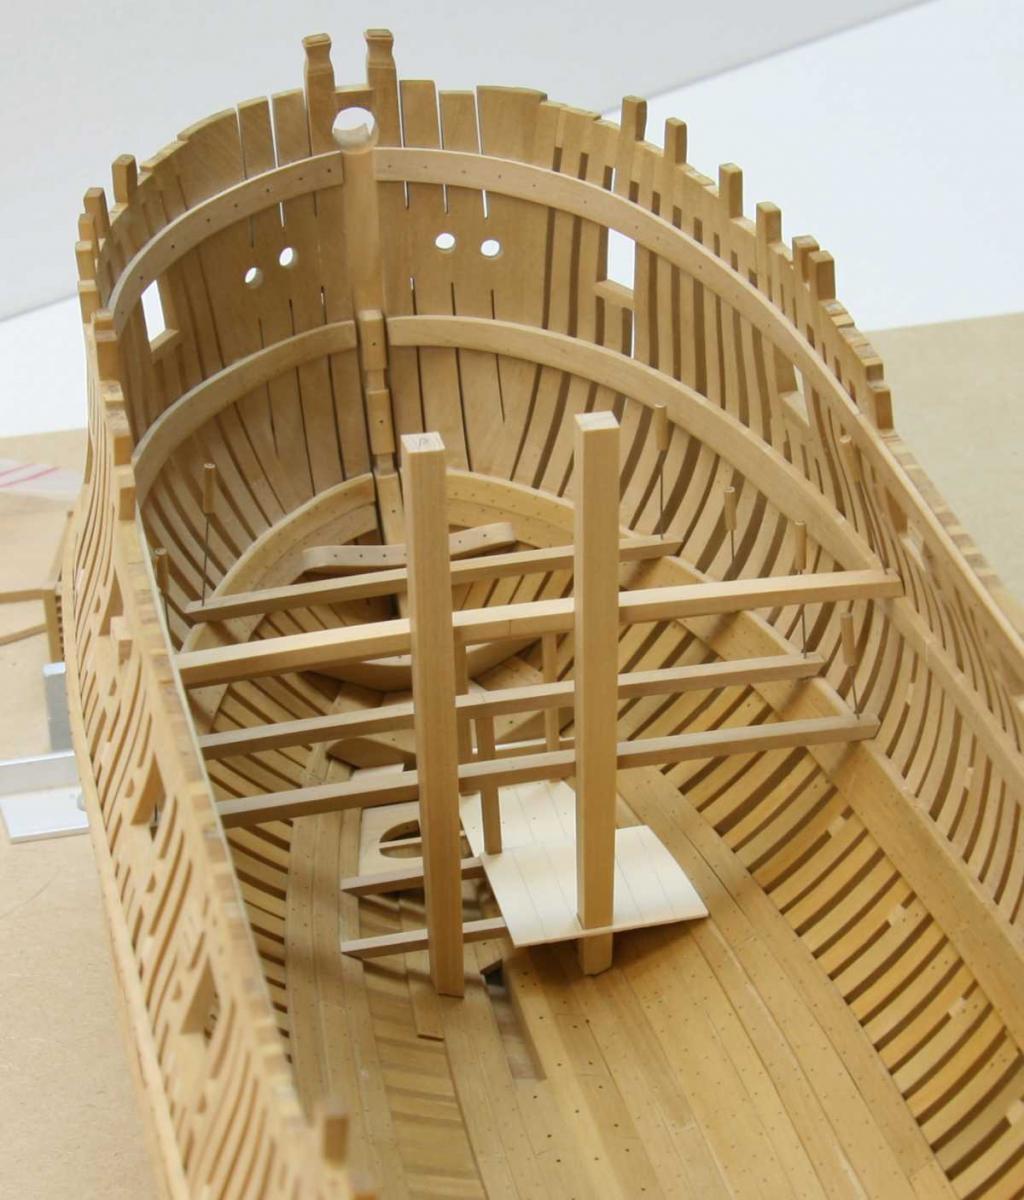
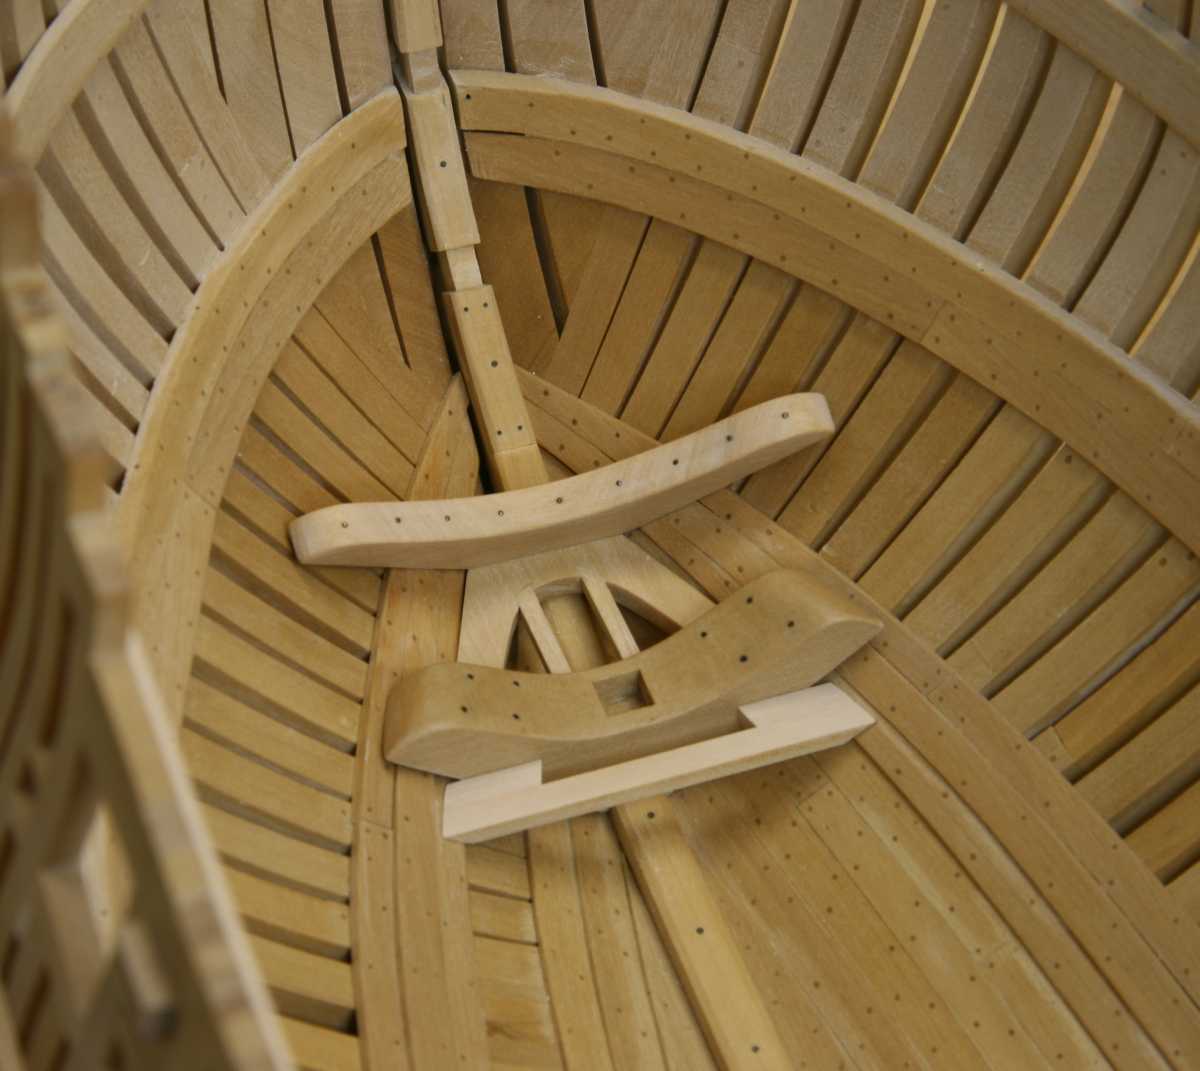
Here's the whole assembly with the crosspiece and I decided to make the short version of the cleat (this is the piece that supports the upped deck beam)
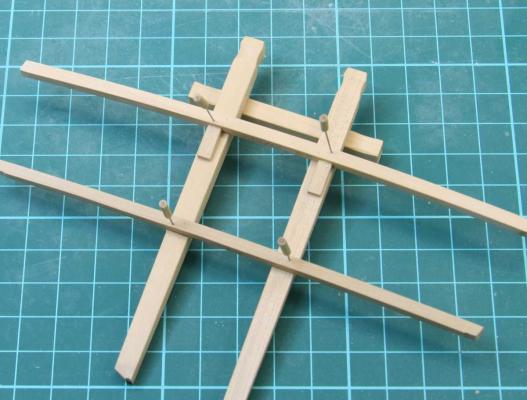
Still need to add some ironwork, not sure if I'll add the hook on the inside or the outside. TFFM shows two options (V1 p 276
and p80 V2)
Remco
-
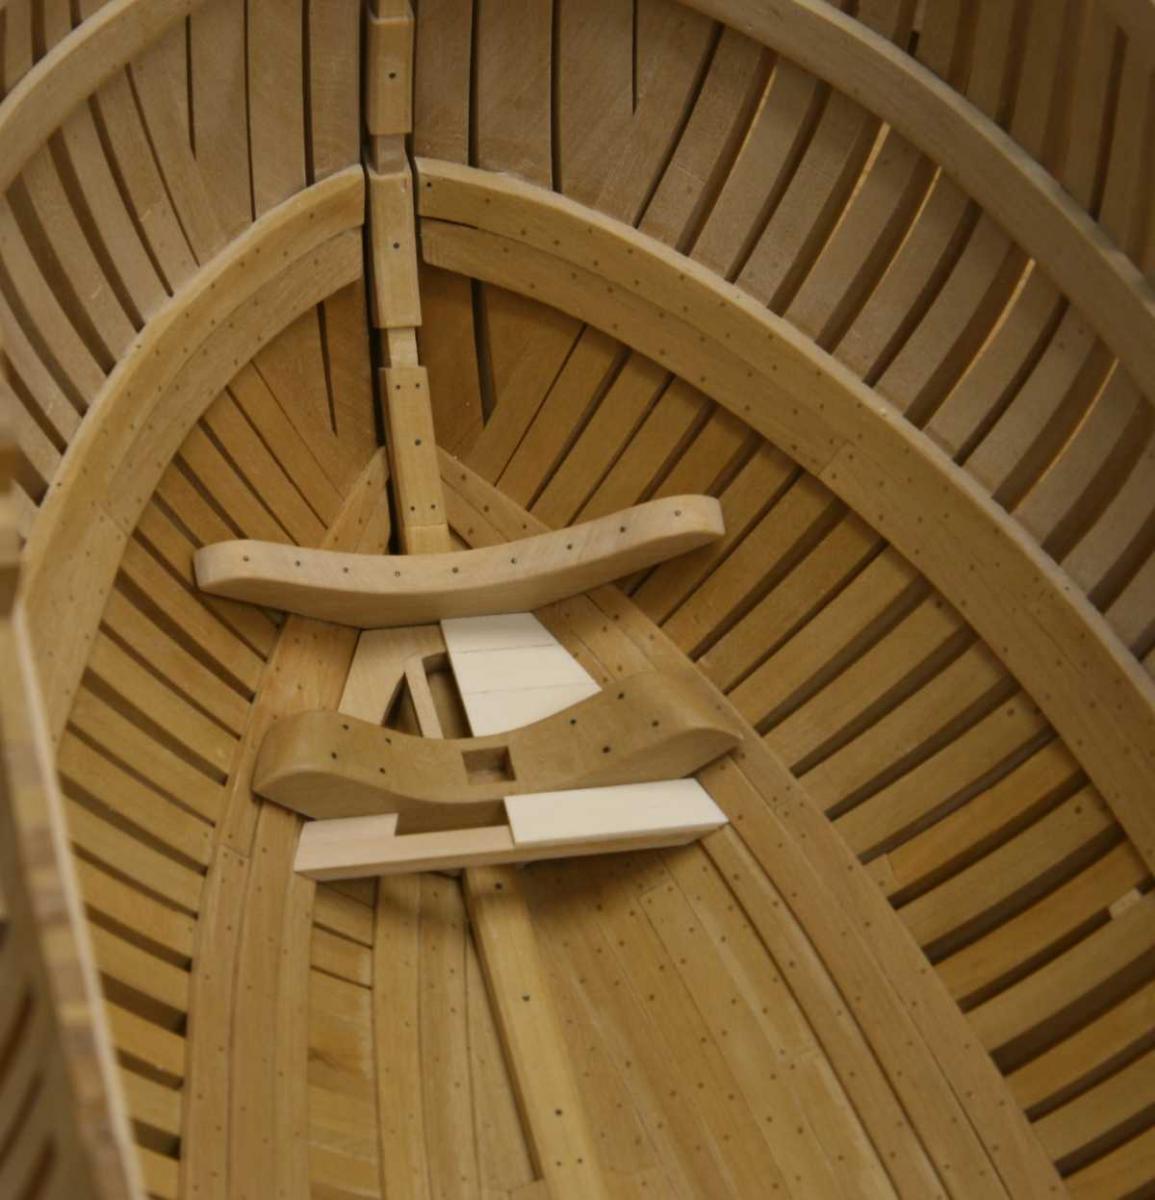
Thank you for the compliments and the importand tip. I'm going to plank the lowerdeck but just a few bands, I'll make sure the bitt pin stays clear. Allthough I build the complete assembly now, getting it installed at a much later point will keep it from harms way while doing the rest of the decks.
I'll post some pictures of the complete riding bitt this weekend.
Remco
-
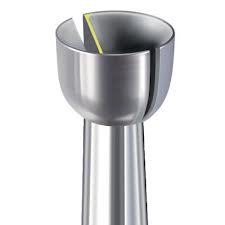
Ed, I had the same issue until now, you'll definitely like it. I use this one: http://www.gesswein.com/p-10767-busch-burs-twin-cut-cup-fig-411t.aspx
Remco
-
-
It's tricky, trying to keep in mind everything above the deck you are working on aligning properly later. I'm glad that you caught that earlier rather than too late!
Trying is the right word, and then comes hoping you've got it all in the right spot. Glad this was an easy fix, further down it would have been impossible...
Ed I now use a cup burr that works even better
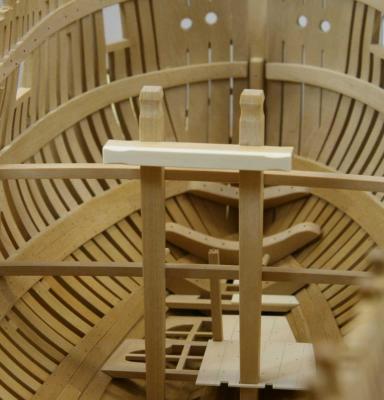
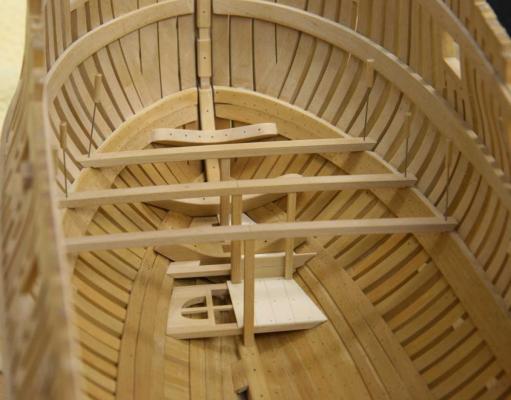
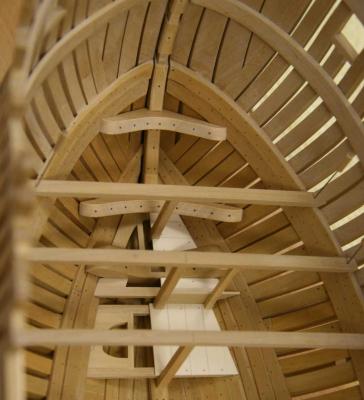
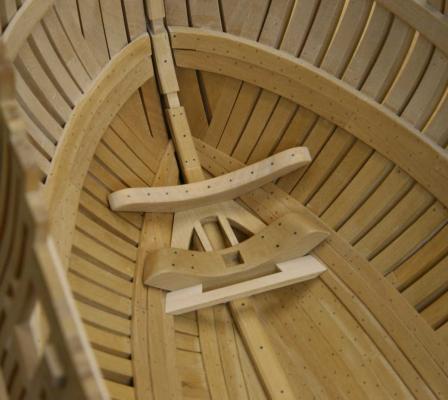
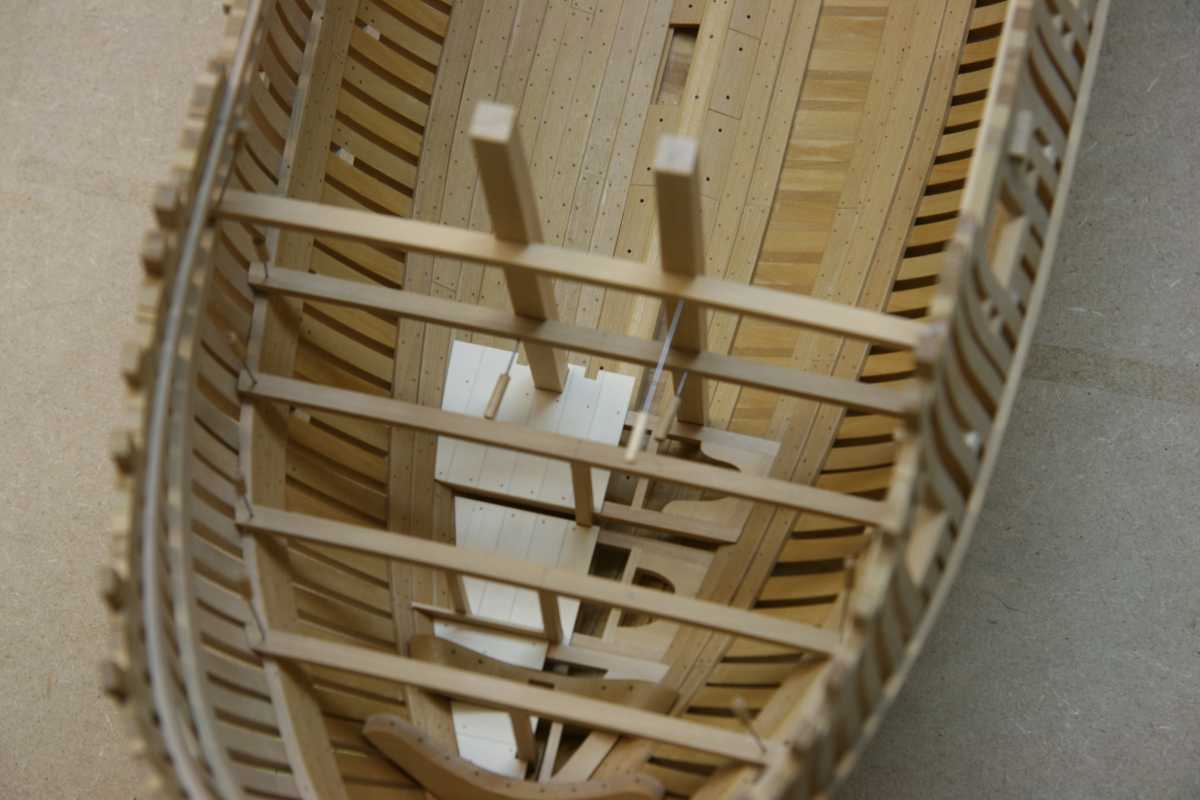
Here the third platform is partially complete and the riding bitt's are test fitted, hard to see but they taper quite dramatically towards the bottom of the hull.
This is one of those jobs where I would like to have 6 extra hands ;-)

Remco
- Mcdood, Wishmaster, paulsutcliffe and 4 others
-
 7
7
-
Thanks Scott, John.
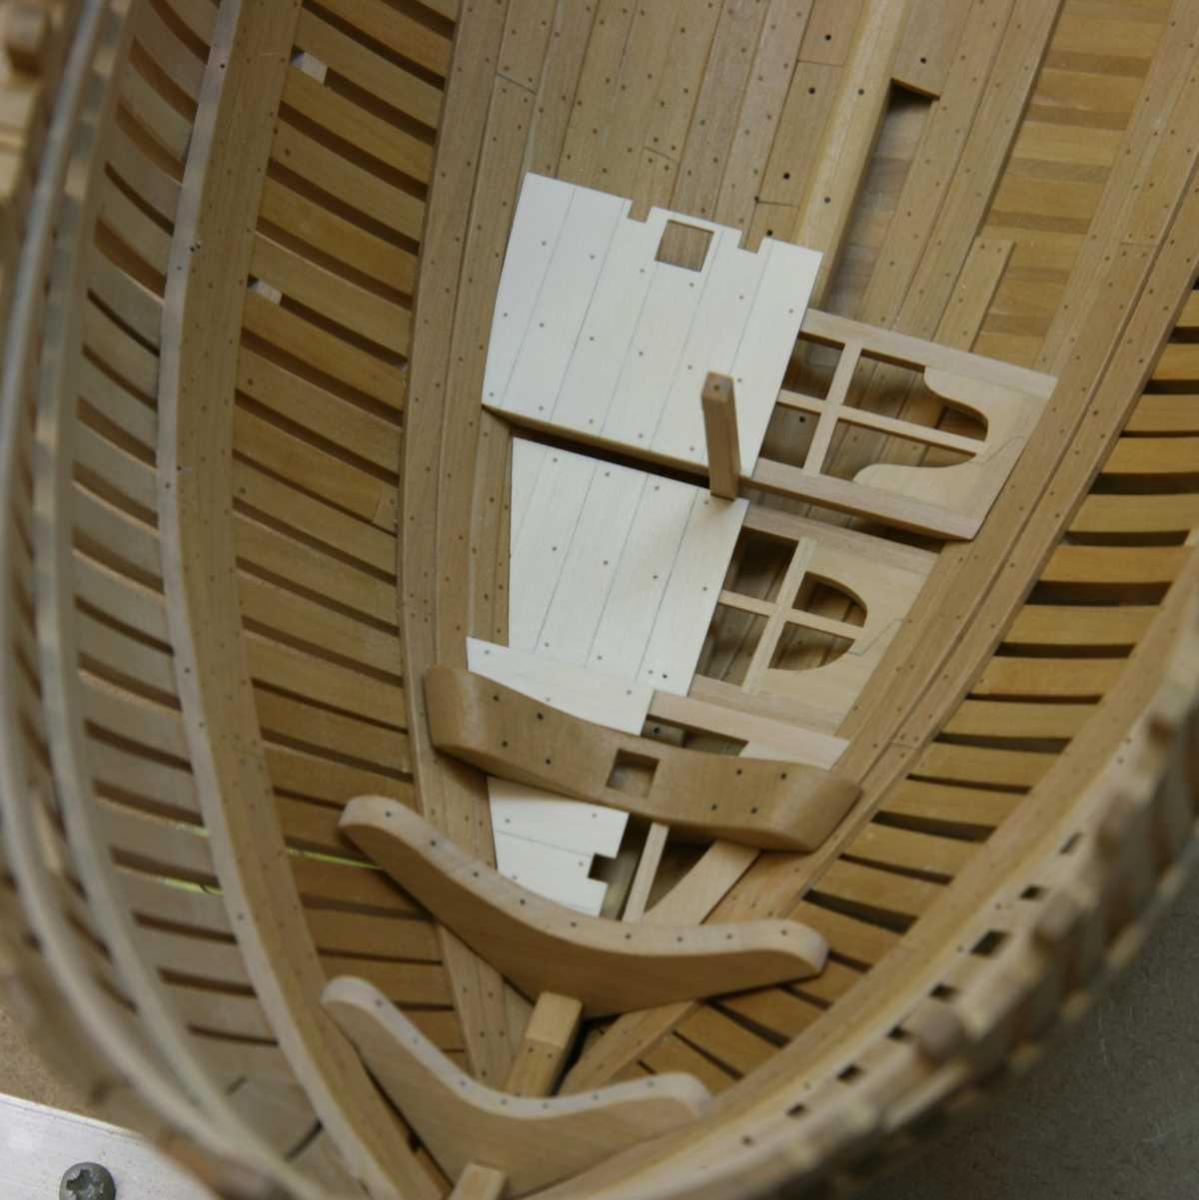
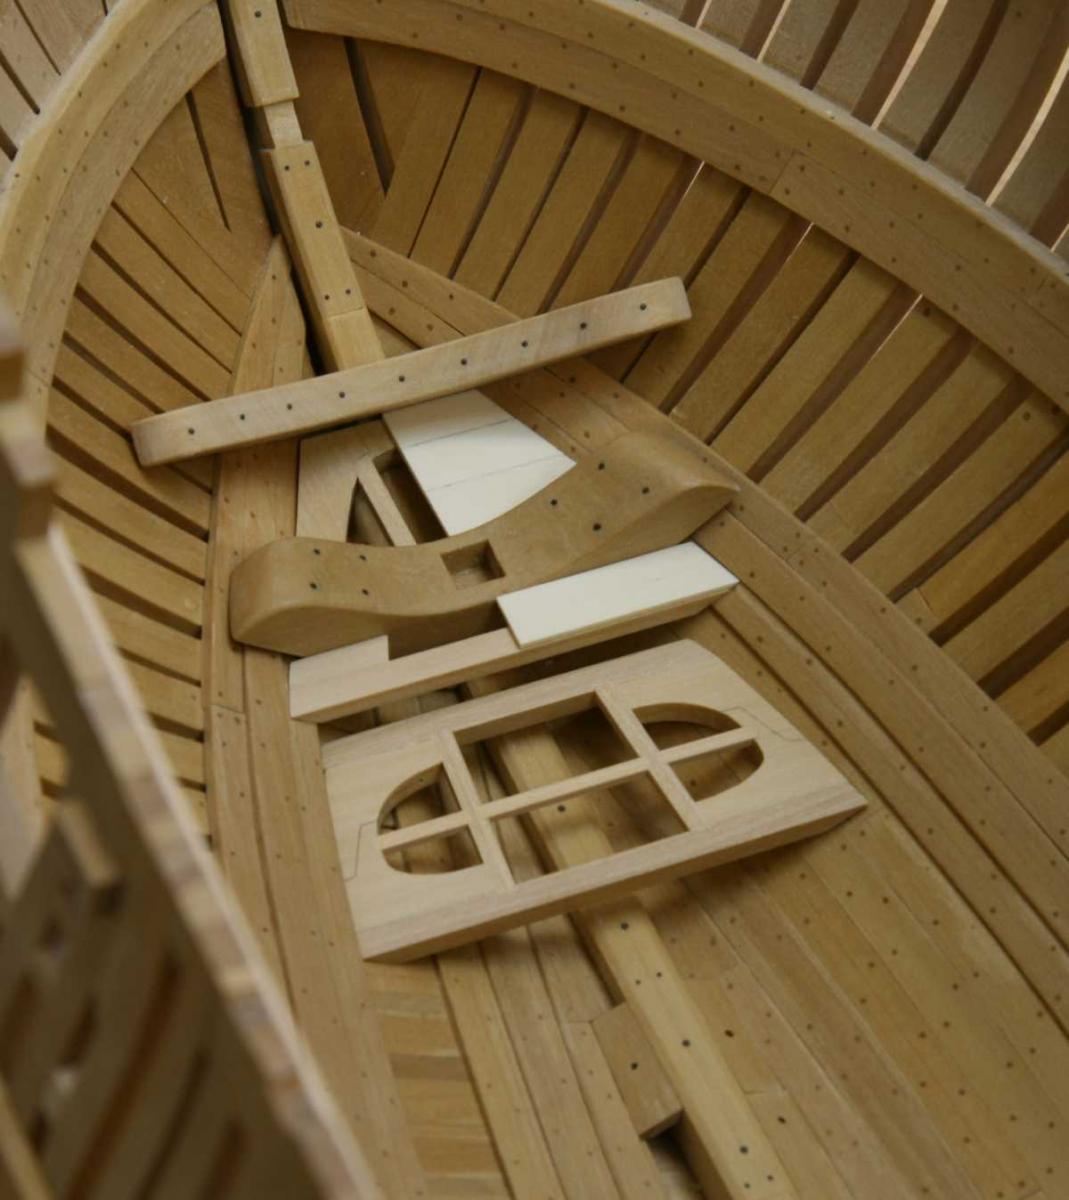
I had to rebuild the forward small platform as the deck pillar didn't line up with the deckbeam above.
More deck pillars and stancions added, a small portion of the bulkhead is made too. The upper breast hook was made using card templates and trimmed further until a snug fit was obtained.
Remco
- mtaylor, Dan Vadas, harvey1847 and 7 others
-
10
-
Looks great, you certainly know what you are doing!
Remco
-
Thanks so much guys.
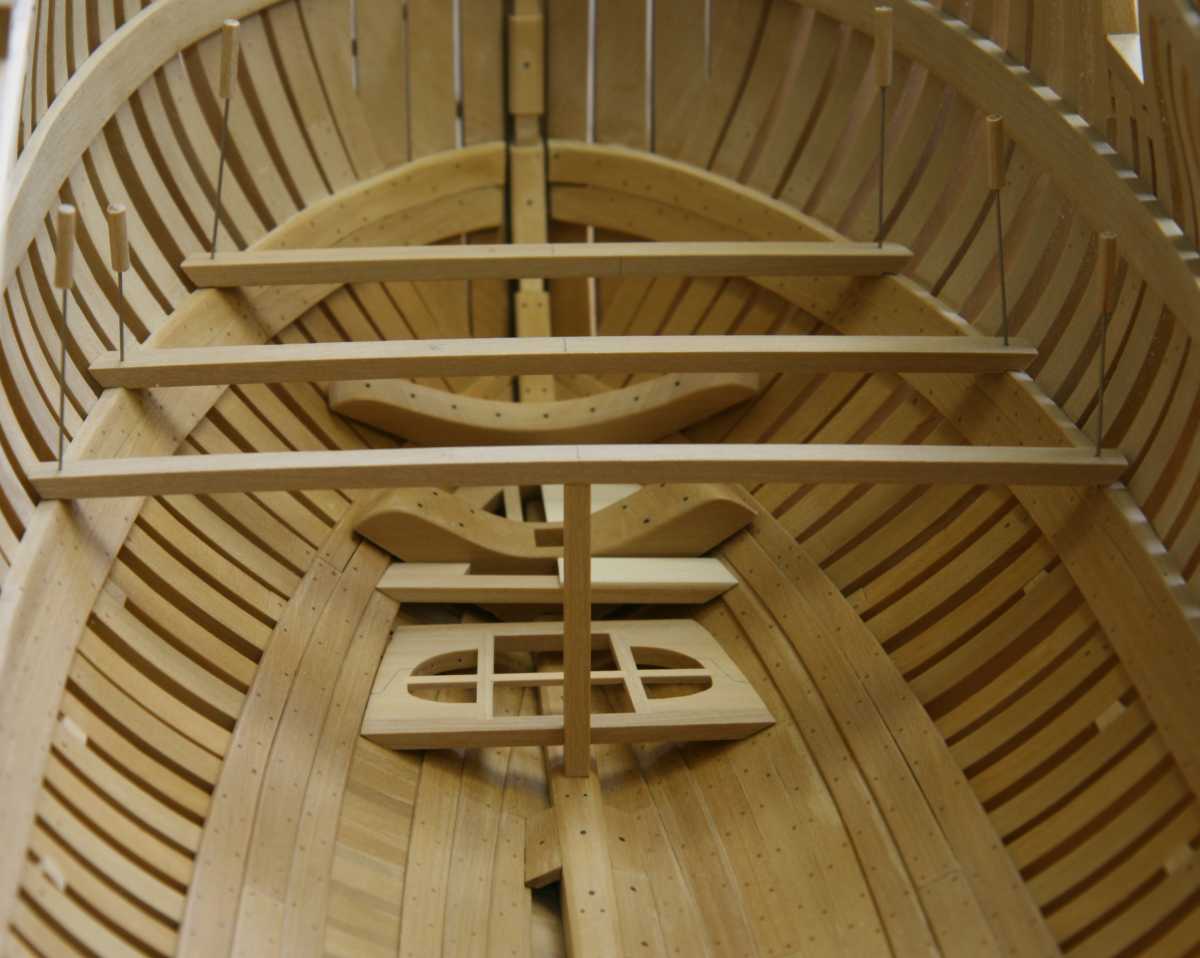
The second part of the fore platform is taking shape. The planking is treenailed, the scarph joint is simulated


Remco
ps Piet it's not on the drawing table yet....
- mtaylor, Elmer Cornish, dvm27 and 13 others
-
16
-
I finally found my way back to my workshop. Real life, other projects and a bit of modelers block got in the way. I finished beam 11 with the hanging knees and now I moved to the bow section to built the fore platform.
The footwalling already has it's final finish so the bare wood looks light in contrast.

Two more platforms coming up...
Remco
ps Ben, nope I'm not a brain surgeon, nor something alike ;-)
- Mcdood, Jeronimo, avsjerome2003 and 8 others
-
11
-
-
Oh my, you really have been a busy beaver. It's great to see the hull taking her shape. At first I didn't understand why the bow is so much higher, but when I checked the drawings I understood, the deck structure needs to be build up on top of the hull. Are you going to show some details below the deck too?
Remco
-
Congratulations Matt, your model turned out really well!
Remco
-
Very nice Danny!
I guess Remco will now have to "catch up" to you? I think you rose to the "Druxey Challenge" and exceeded it .
 alarenverse.gif
We'll see when I get there, my capstans 1.0 definitely don't have retaining pins. I think Danny is pushing me now to make 2.0

Remco
-
Not easy, those pieces are really tiny. Nice pillars too!
Remco
-
Thanks guys, I really appreciate the comments
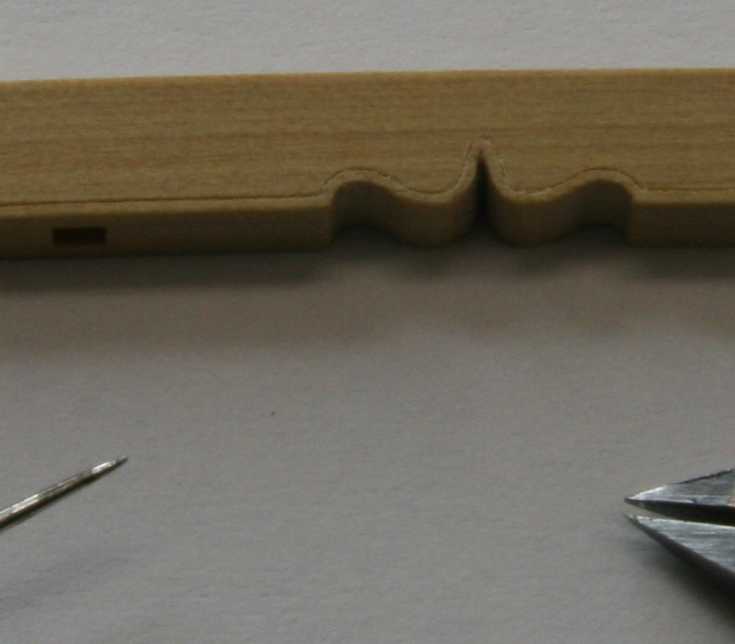
So how did I do it, the how-to was indeed like Jan noticed in the first picture. The divider was used to scrape a thin line evenly spaced from the bottom of the gallow. Multiple passes with very light pressure were needed to cut through the grain. In the middle the cut was done free hand.
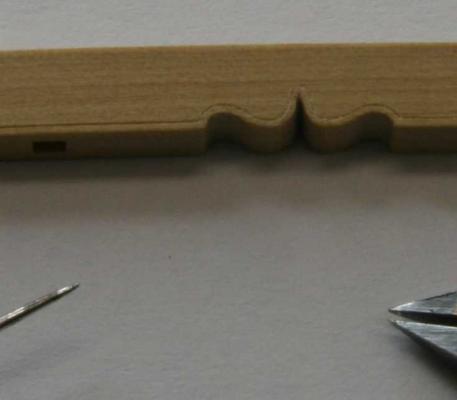
Then I used a slightly blunted threading needle to make the molding, again multiple passes and the wood shaped nicely.
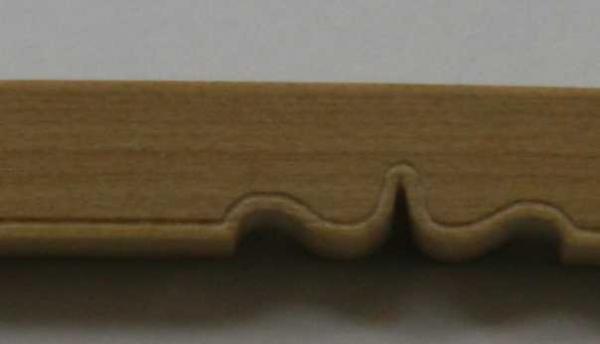
And yes Piet I do have some miniature 0.4 mm chisels made from hypodermic needles and thin steel but I use them elsewhere

Remco
-
Looks really great Piet, it's nice to see the contours emerge.
Remco


La Créole 1827 by archjofo - Scale 1/48 - French corvette
in - Build logs for subjects built 1801 - 1850
Posted
Very impressive work Johann!
Remco