

Remcohe
-
Posts
607 -
Joined
-
Last visited
Content Type
Profiles
Forums
Gallery
Events
Posts posted by Remcohe
-
-
Congrats on finishing the deck. It looks great and a very wise advise too, don't make the joint stronger than necessary you never know when it is time to redo something. This the reason why I stay away from using CA to glue wood, I know many do because it's fast and easy, but when the time comes to take the plank out, you are in trouble...
Also a very neat way to make the rodings, that sensitive drilling attachment is on my wish list....
Remco
-
Looking really good Piet, I'm amazed how good the ply is holding it's shape.
Remco
-
Thanks Martin, Druxey, John, Matt and everybody who 'liked'
Matt I use Holly for the deck planking, I ordered it from Hobbymill Jeff there makes wonderful sheets and strips for modeling.
For now no pictures, but:
Merry Christmas and a wonderful 2014 to all of you here @MSW
Remco
-
She's looking really sweet Piet. You'll manage the hinge's I'm confident you will :-)
Remco
-
-
Thanks, funny how problems create new idea's.
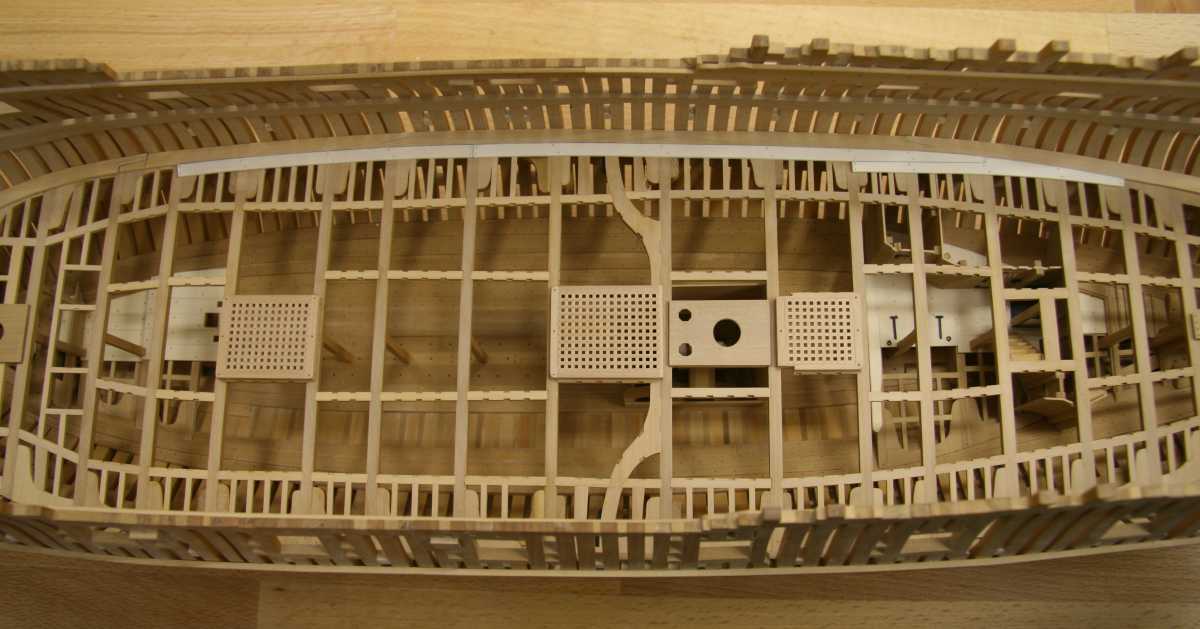
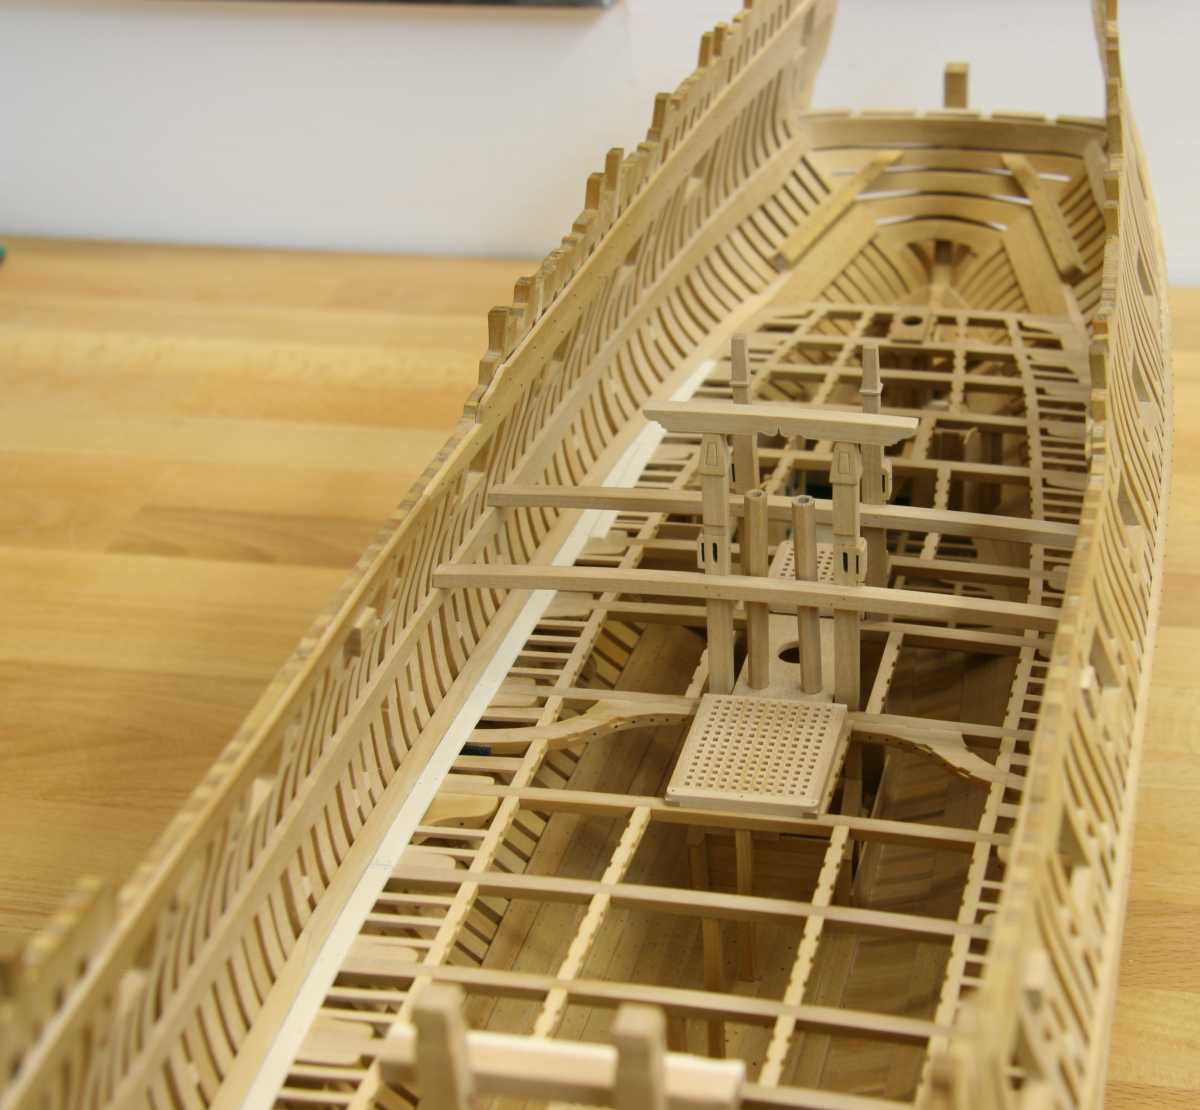
I laid just one strake of the deck planking and wil only add partials to support the bulkheads for the cabins. I'll try to keep as much view to the hold as possible.
The caulking is very thin paper blackened with a sharpy.
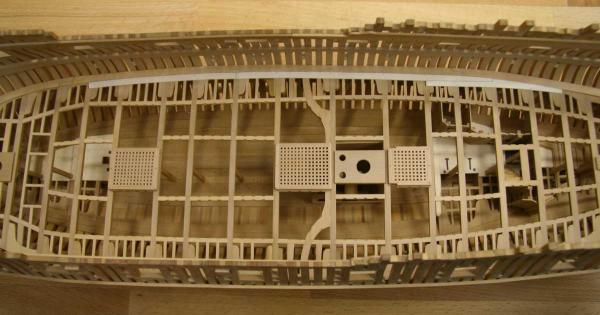
Added some of the furniture just for fun and to see how things start to look 'dressed up' it will be pretty crowded once the bulkheads are in

Remco
-
Thanks, Daniel, Martin, Albert & Tim
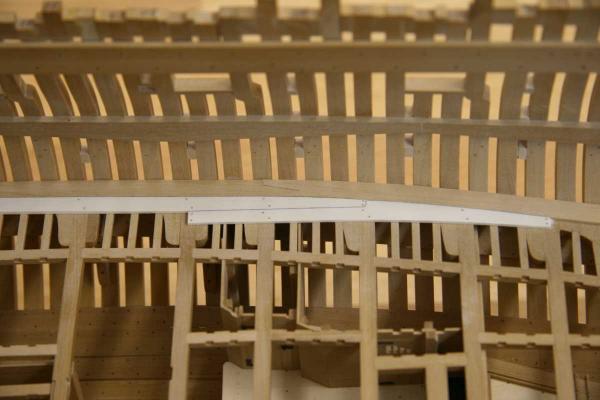
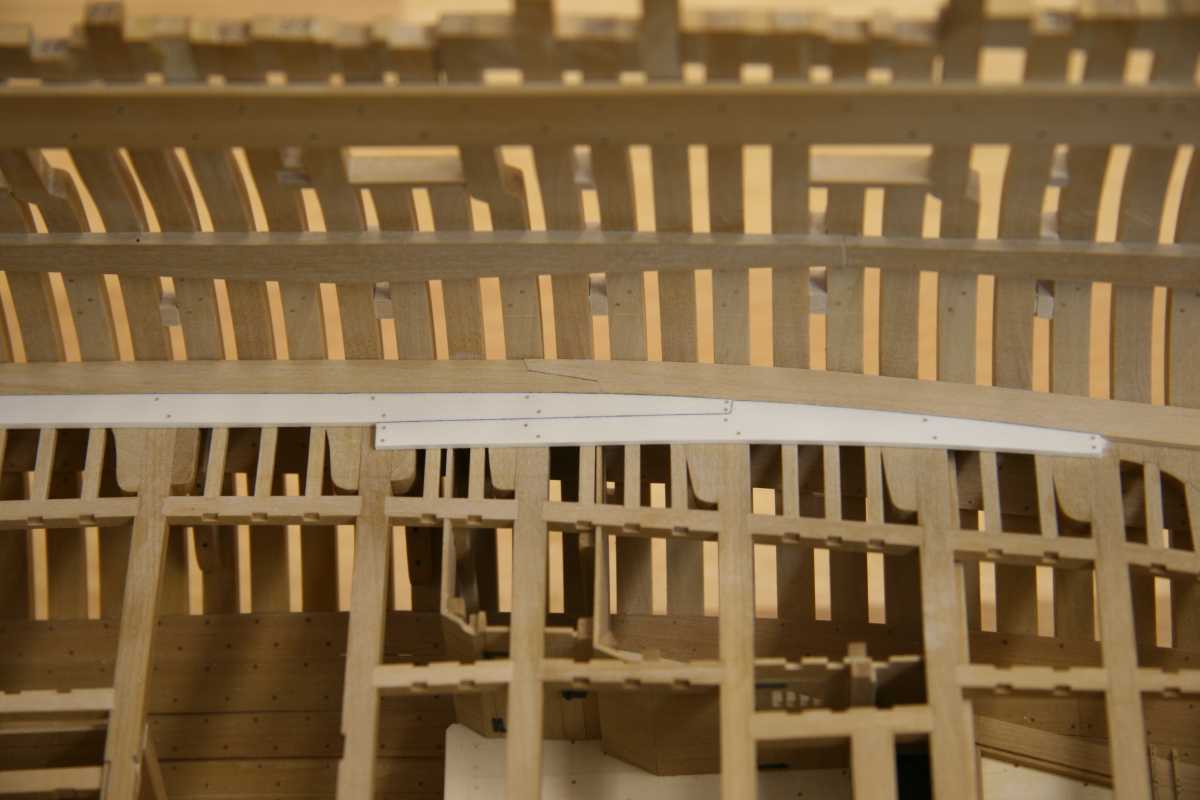
Onwards to the waterway, it's typical shape is hard to see in the pictures.
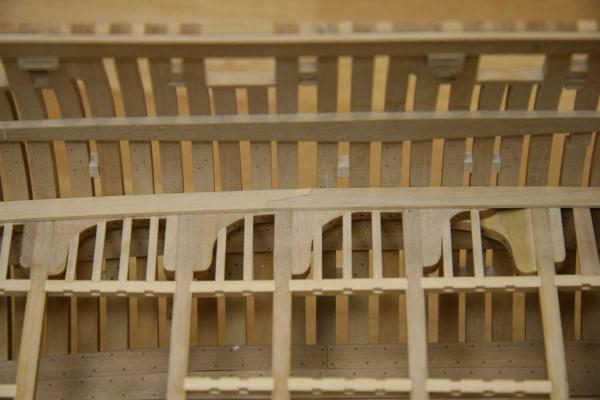
In hindsight it was better to work front to back, now I had a hard time to fit the forward portion of the waterway between the closing part at the stem. btw this part looks a lot like a B-2 stealth bomber, would Northrop have peeked at the 18th century ship design before they drafted this 20th century machine


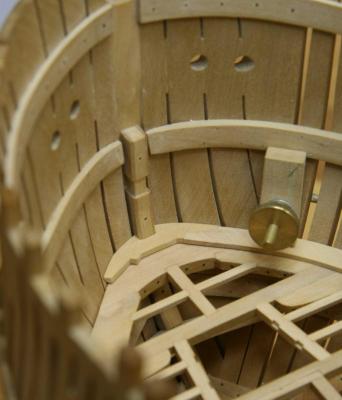
Using a compass to copy the shape of the waterway to the first plank wasn't possible. The compass was to big, so a simple washer did the trick

Remco
-
Hi Bob,
I completely missed that you started your Essex. It looks great and it has your style signature all over it (that's a compliment
 )
)Remco
-
-
I do plan on planking over the plug first, without frames. Then taking the shell off, and inserting the frames afterwards. The purpose of notching the plug for the frames would be so that I can use the plug for bending and "setting" the frames, before transferring them to the planked shell.
That will work just fine is my experience. There is also a risk involved if you install the frames on the plug, Davids tutorial also showed this. You're in for a fun side project!
Remco
-
I've worked a lot with styreen and I wouldn't dare taking thick stock heating it to form a tube. the stuff also takes its previous form when heated and it will become thicker. Try this, take thin stock +/- 0.3 mm it is soft enough to form around a dowel glue a second sheet to the joint and take it all the way round and glue this two effectively making two tubes glued together with the joins opposing.
Remco
- avsjerome2003, Piet, WackoWolf and 2 others
-
 5
5
-
-
Thanks all for your kind compliments. Much appreciated!
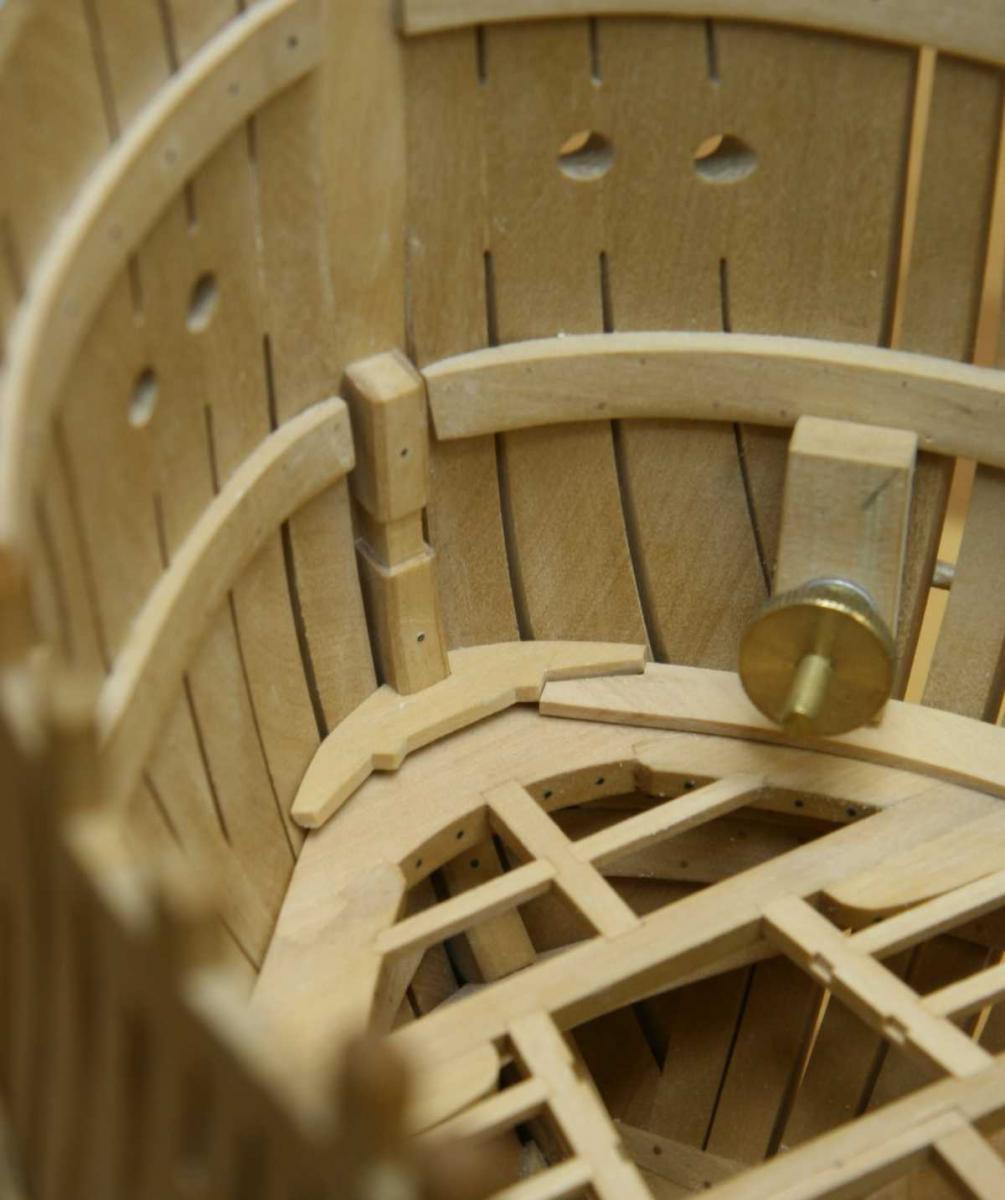
I have a question for you shipwrights. I'm wondering how the waterway is tree nailed, would it follow the same principle for tree nailing patterns as regular deck planks or is it different?
Remco
ps I got the new fiebing's dye, this is certainly different stuff ;-)
-
-
Spectacular line up. I like the touch of aging.
Remco
-
Thanks Grant, about 3 on the main deck and a few small ones I think. No nightmares here

Danny, thanks for the compliment and pointing out my error, I made the battle station 3 years ago meanwhile I also learned I shouldn't portray them run out
Meanwhile knight to C4, bishop to C4, bishop takes knight........ I like Greg's metaphor that scratch building is like playing chess. And I was caught by my opponent. I forgot to cut the mortises in the curved beam and had to do them in situ, little nerve wrecking.....
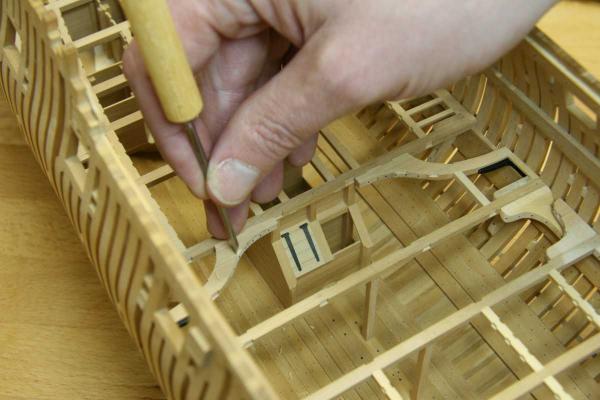
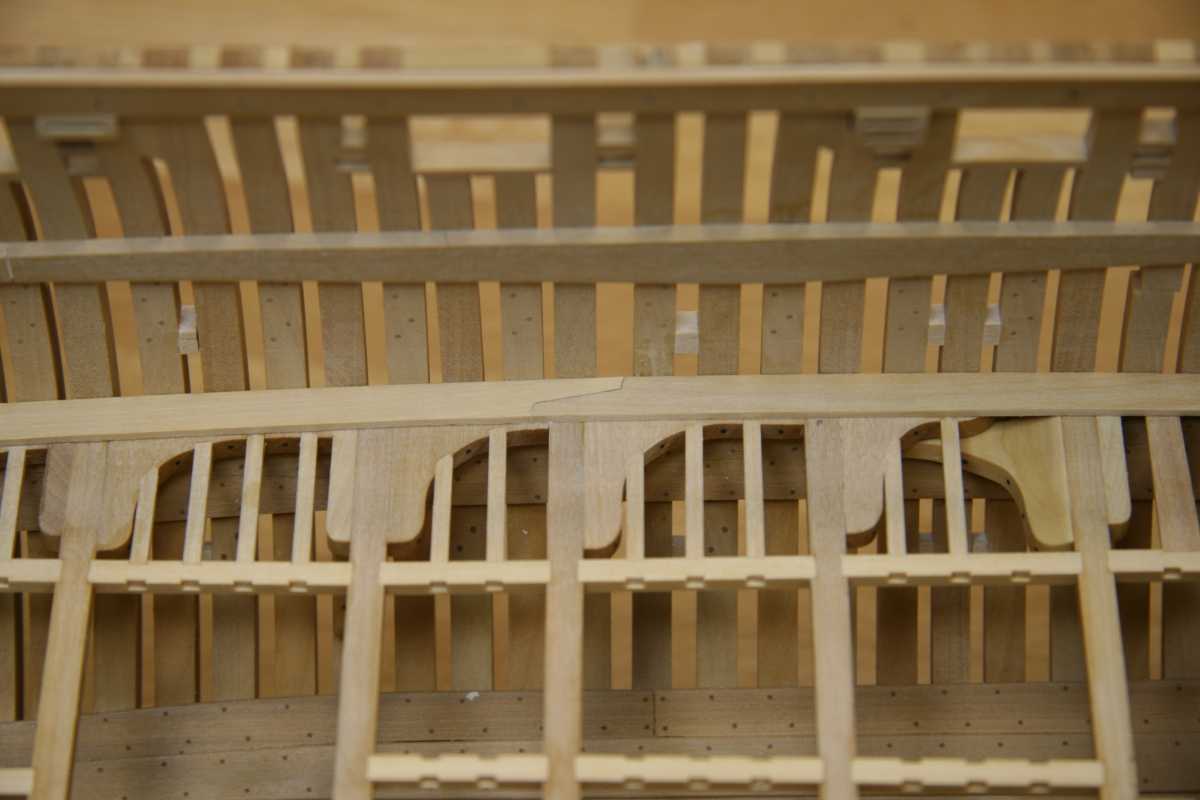
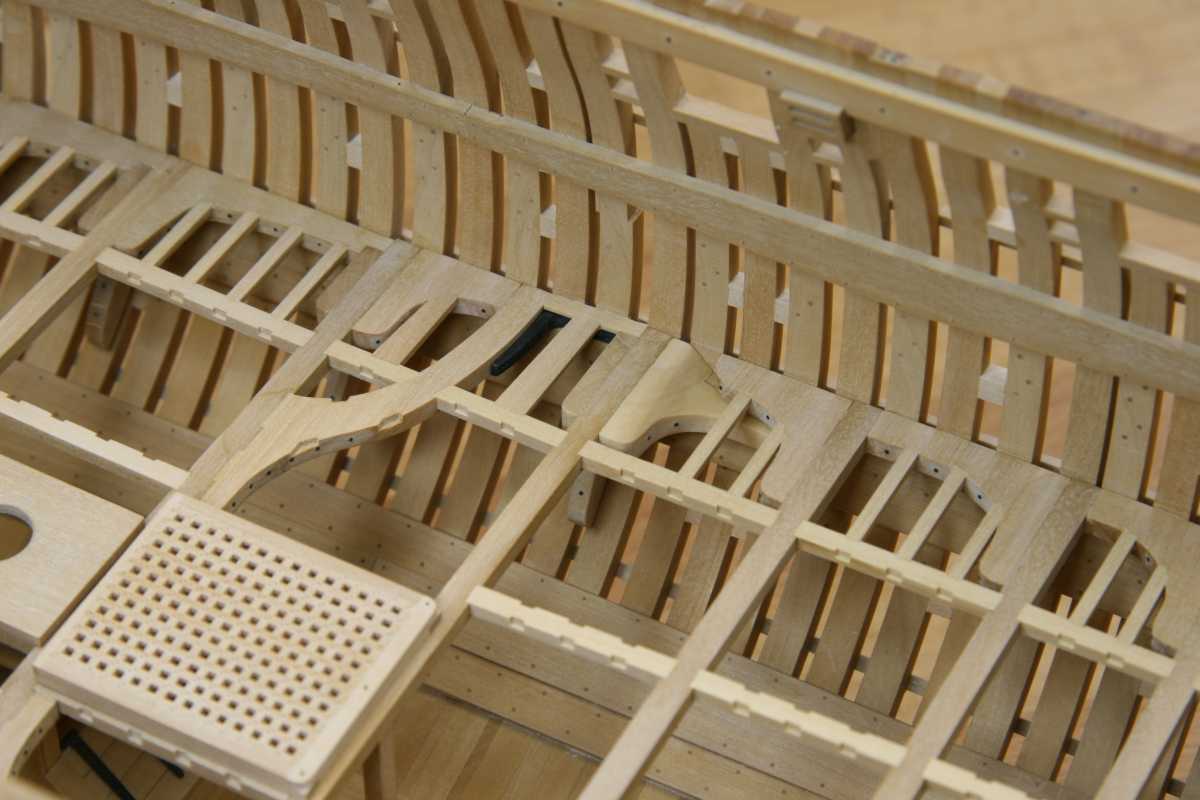
So a little mile stone today, I finished all the beams, knees, carlings, ledges, opposing knees ands so on for the lower deck that I want to portray. After sanding the deck it came out really nice. On to the planking of the deck, I'll keep that to a minimum though to show as much of the details as possible. A waterway on both sides and just enough planks to support the bulkheads.

Remco
- SailorGreg, mtaylor, rafine and 24 others
-
27
-
-
Thanks guys for all the likes and complements!
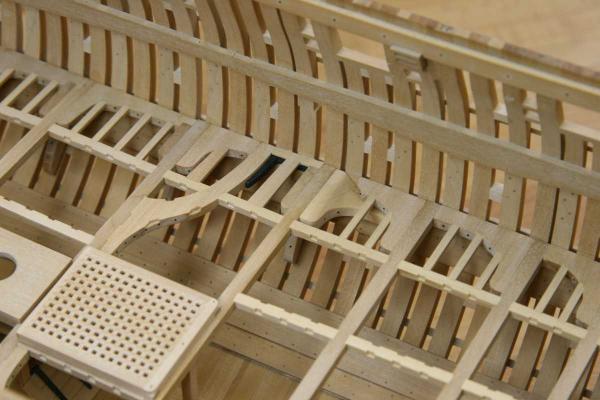
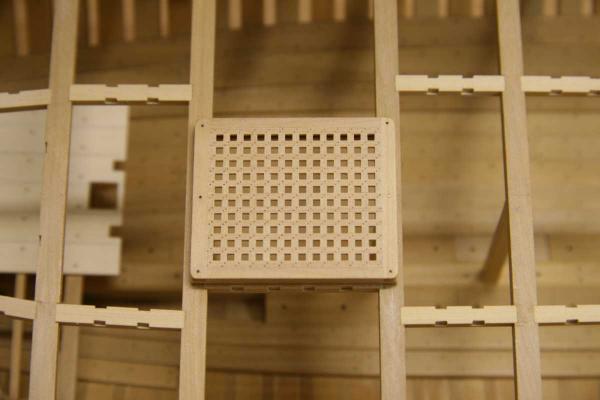
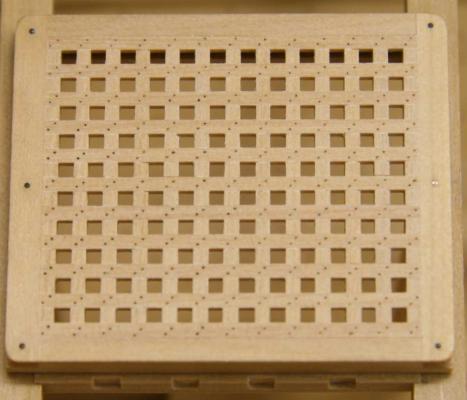
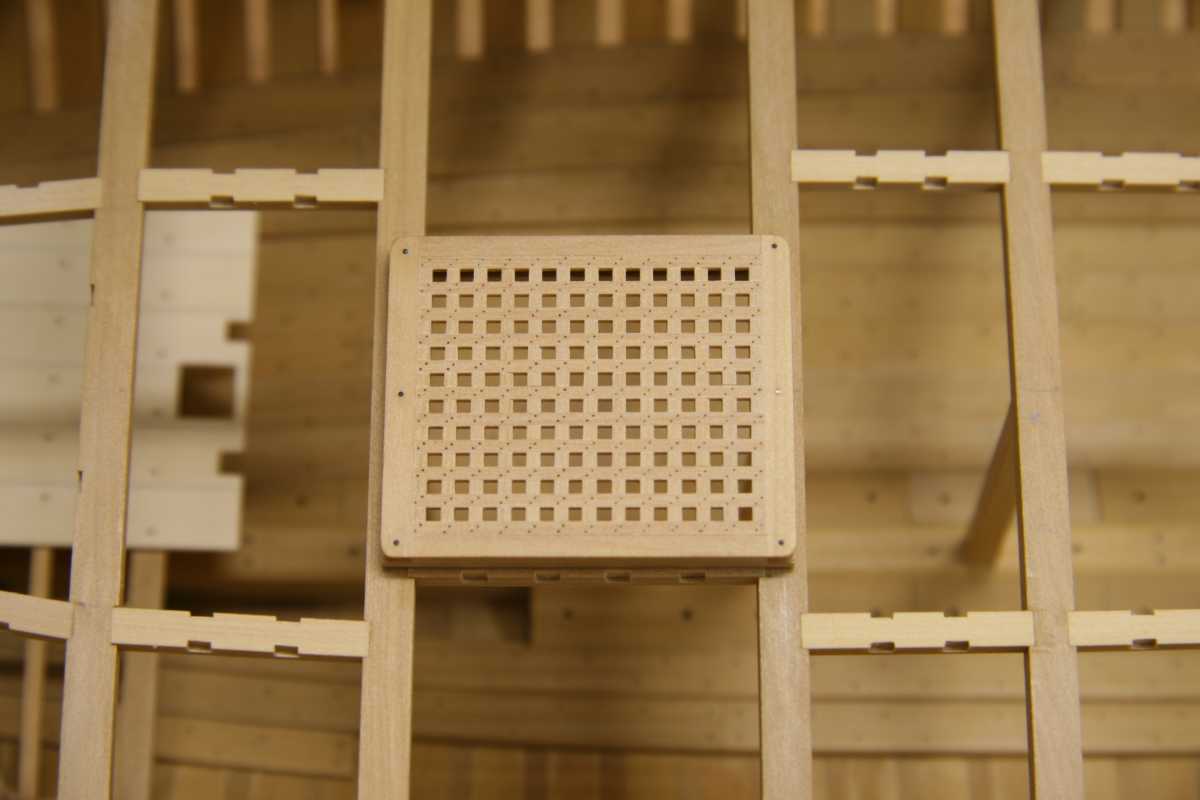
Greg, it's no coincidence, coamings and ledges were fit to the finished grating. I rather see a not so perfectly sized coaming than a mutilated grating to get it fit in a perfect coaming.
Joe, I think 45 minutes.
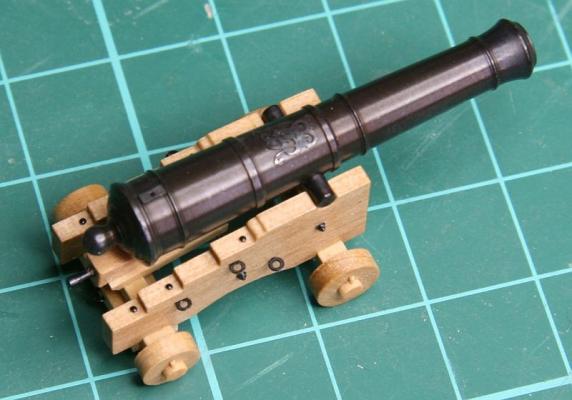
Mark, I'll pass the compliments to Greg, the barrels are from admiraltymodels.com the engravings, or Royal Cyphers were a 'wedding gift' from Greg. EU etching produced these but I'm not sure if they are still available. The 'only' thing I added was the vent.

Daniel, thanks for taking the time to count them, and this is just one of many gratings
Remco
- Rustyj, Wishmaster, Elmer Cornish and 12 others
-
15
-
Hmm thanks Greg, I checked the container I'm using, its Fiebings edge enamel
 I think I should have paid better attention when I picked that up from the equestrian shop. This stuff does a poor job penetrating the wood and after it dries its still soluble in water. I'm not sure what part of the horse ('s equipement) this is any good for... Or it's over bbe date... Anyway I'll look for the leather dye version next time.
Remco
-
Absolutely wonderful to watch Johann
Remco
-
-
Absolutely marvelous Greg!
What did you use to 'fixate' the Fiebings dye, I noticed mine is water soluble even to the touch of a damp finger.
Remco
-
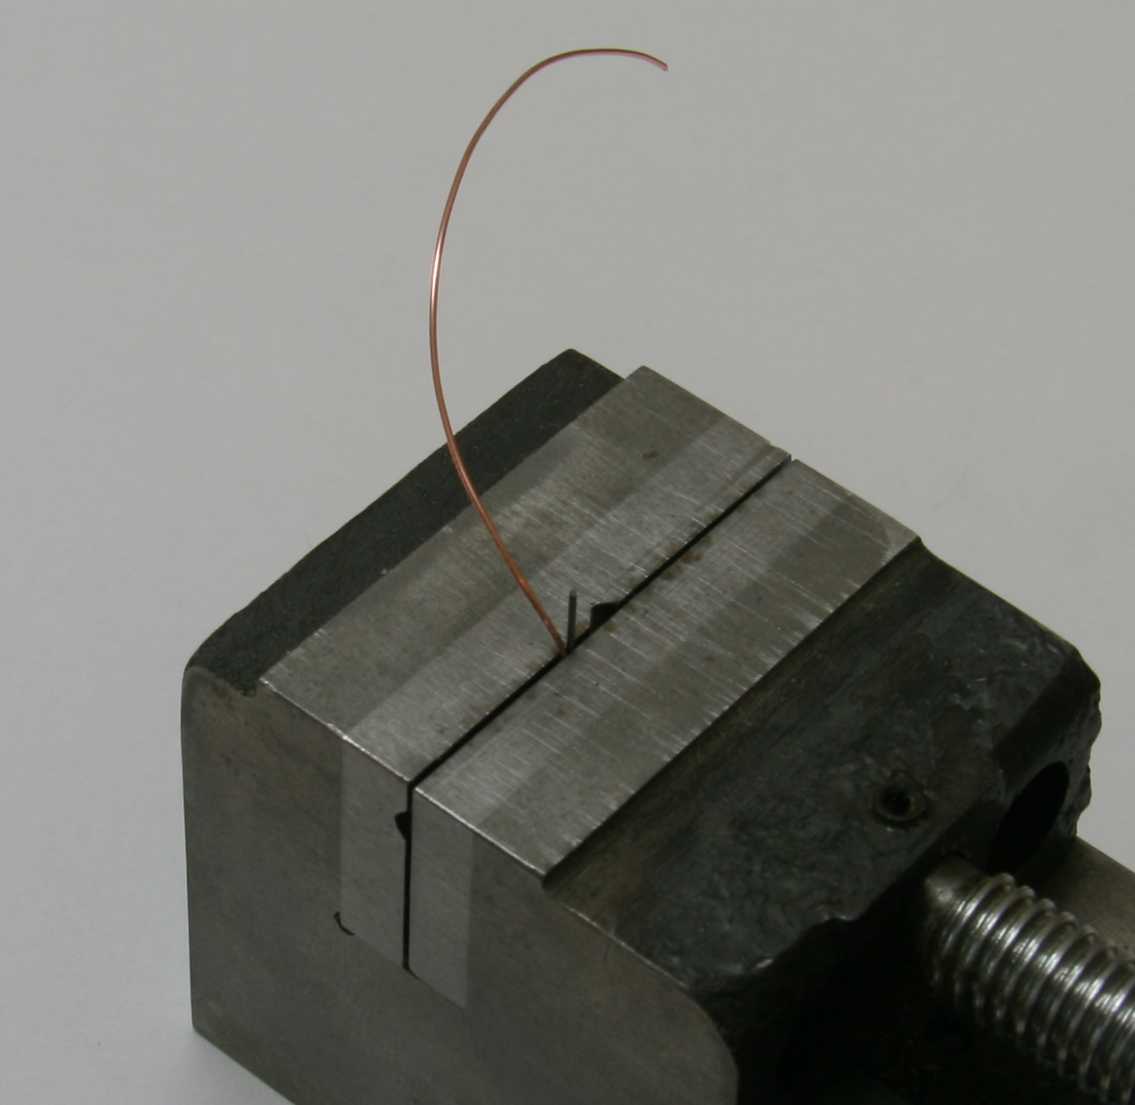
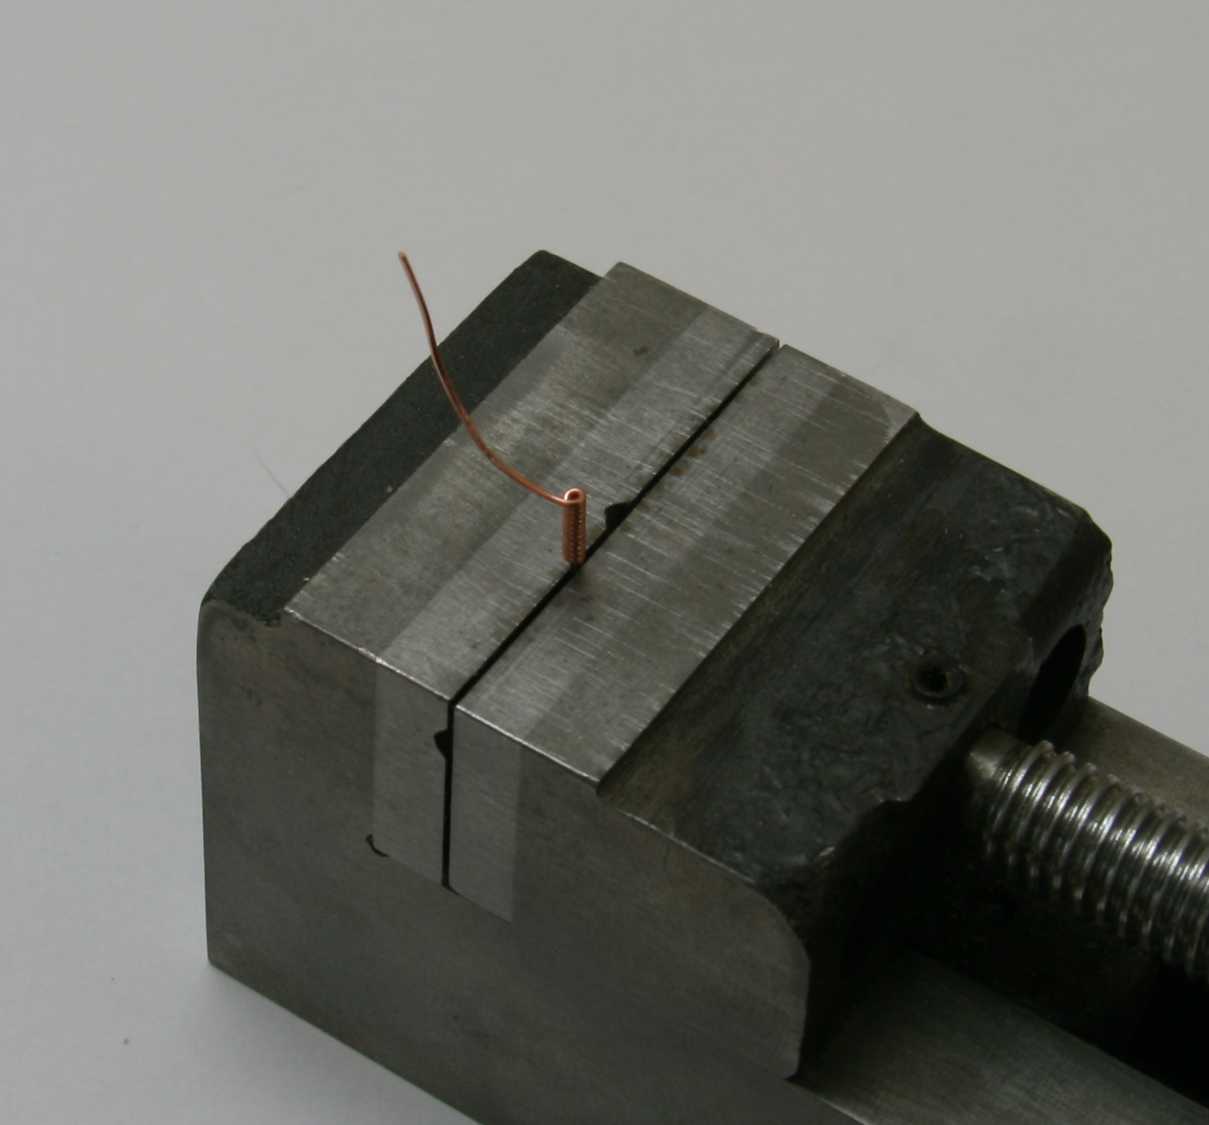
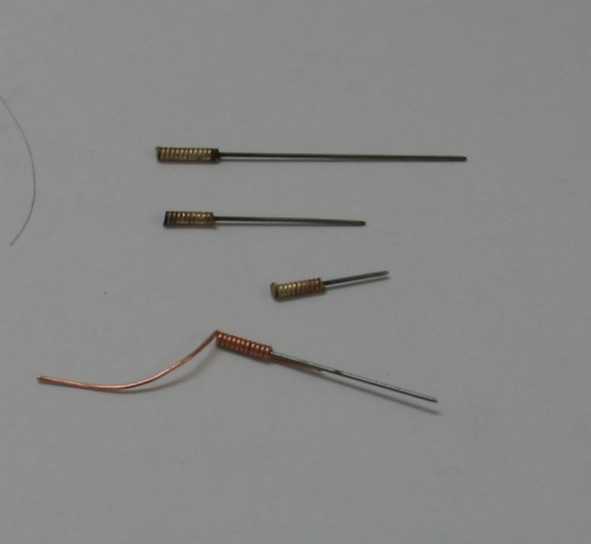
Go for it guy's make lots and lots of pins
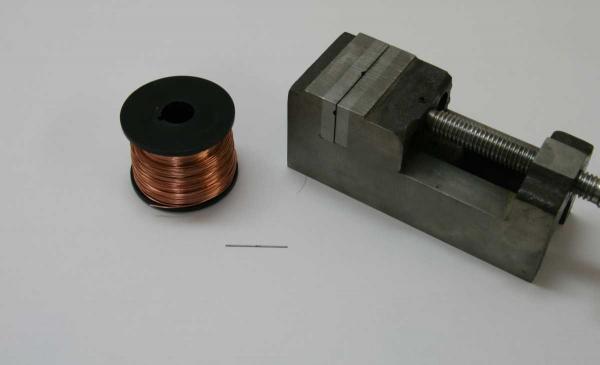
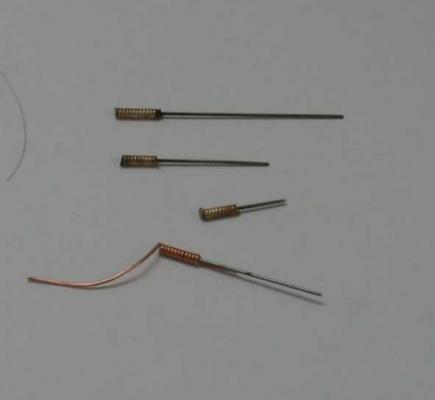
They are key to position parts temporarily, I don't exaggerate but I think any particular beam in this build is taken in and out at least 100 times to position parts, mark mortices etc etc. So today I did a little detailing of the gratings. I simulated the pins that were used by making small holes with a needle and then taking the same needle tip loaded with graphite to enhance the holes. This really takes your mind off-line after a busy day

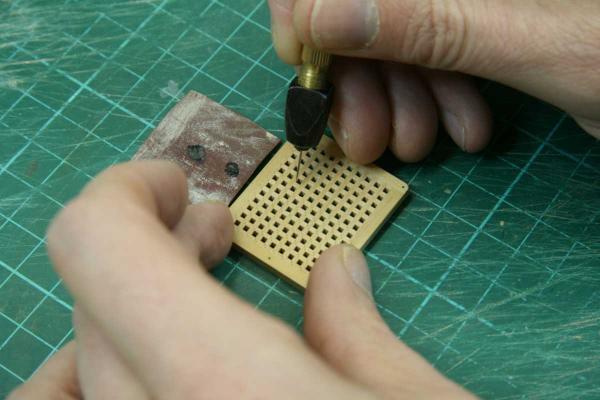
For comparison, the 'big' bolts on the corners are 0,4 mm
Remco
- gjdale, Mirabell61, Trussben and 24 others
-
27
-
Thanks guys for your very kind compliments.
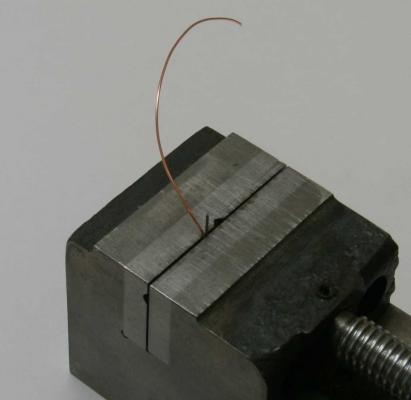
Sure Maury, the pictures speak for them selfs. I use spring steel wire 0,5 mm cut to different lengths and the tip slightly grinded in to a point like a needle. After the copper wire is coiled it's silver soldered to the pin. I use a potato to act as a heat sink, you definitely don't want to anneal the steel, this happened to my first batch of pins and the steel becomes soft.

Remco


US Brig Oneida 1809 by rlb - The Lumberyard - 1:48 scale - POF - Lake Ontario Warship
in - Kit build logs for subjects built from 1801 - 1850
Posted
Looks great Ron, the hardest part is behind you now :-)
Remco