CDW
-
Posts
7,760 -
Joined
-
Last visited
Content Type
Profiles
Forums
Gallery
Events
Everything posted by CDW
-

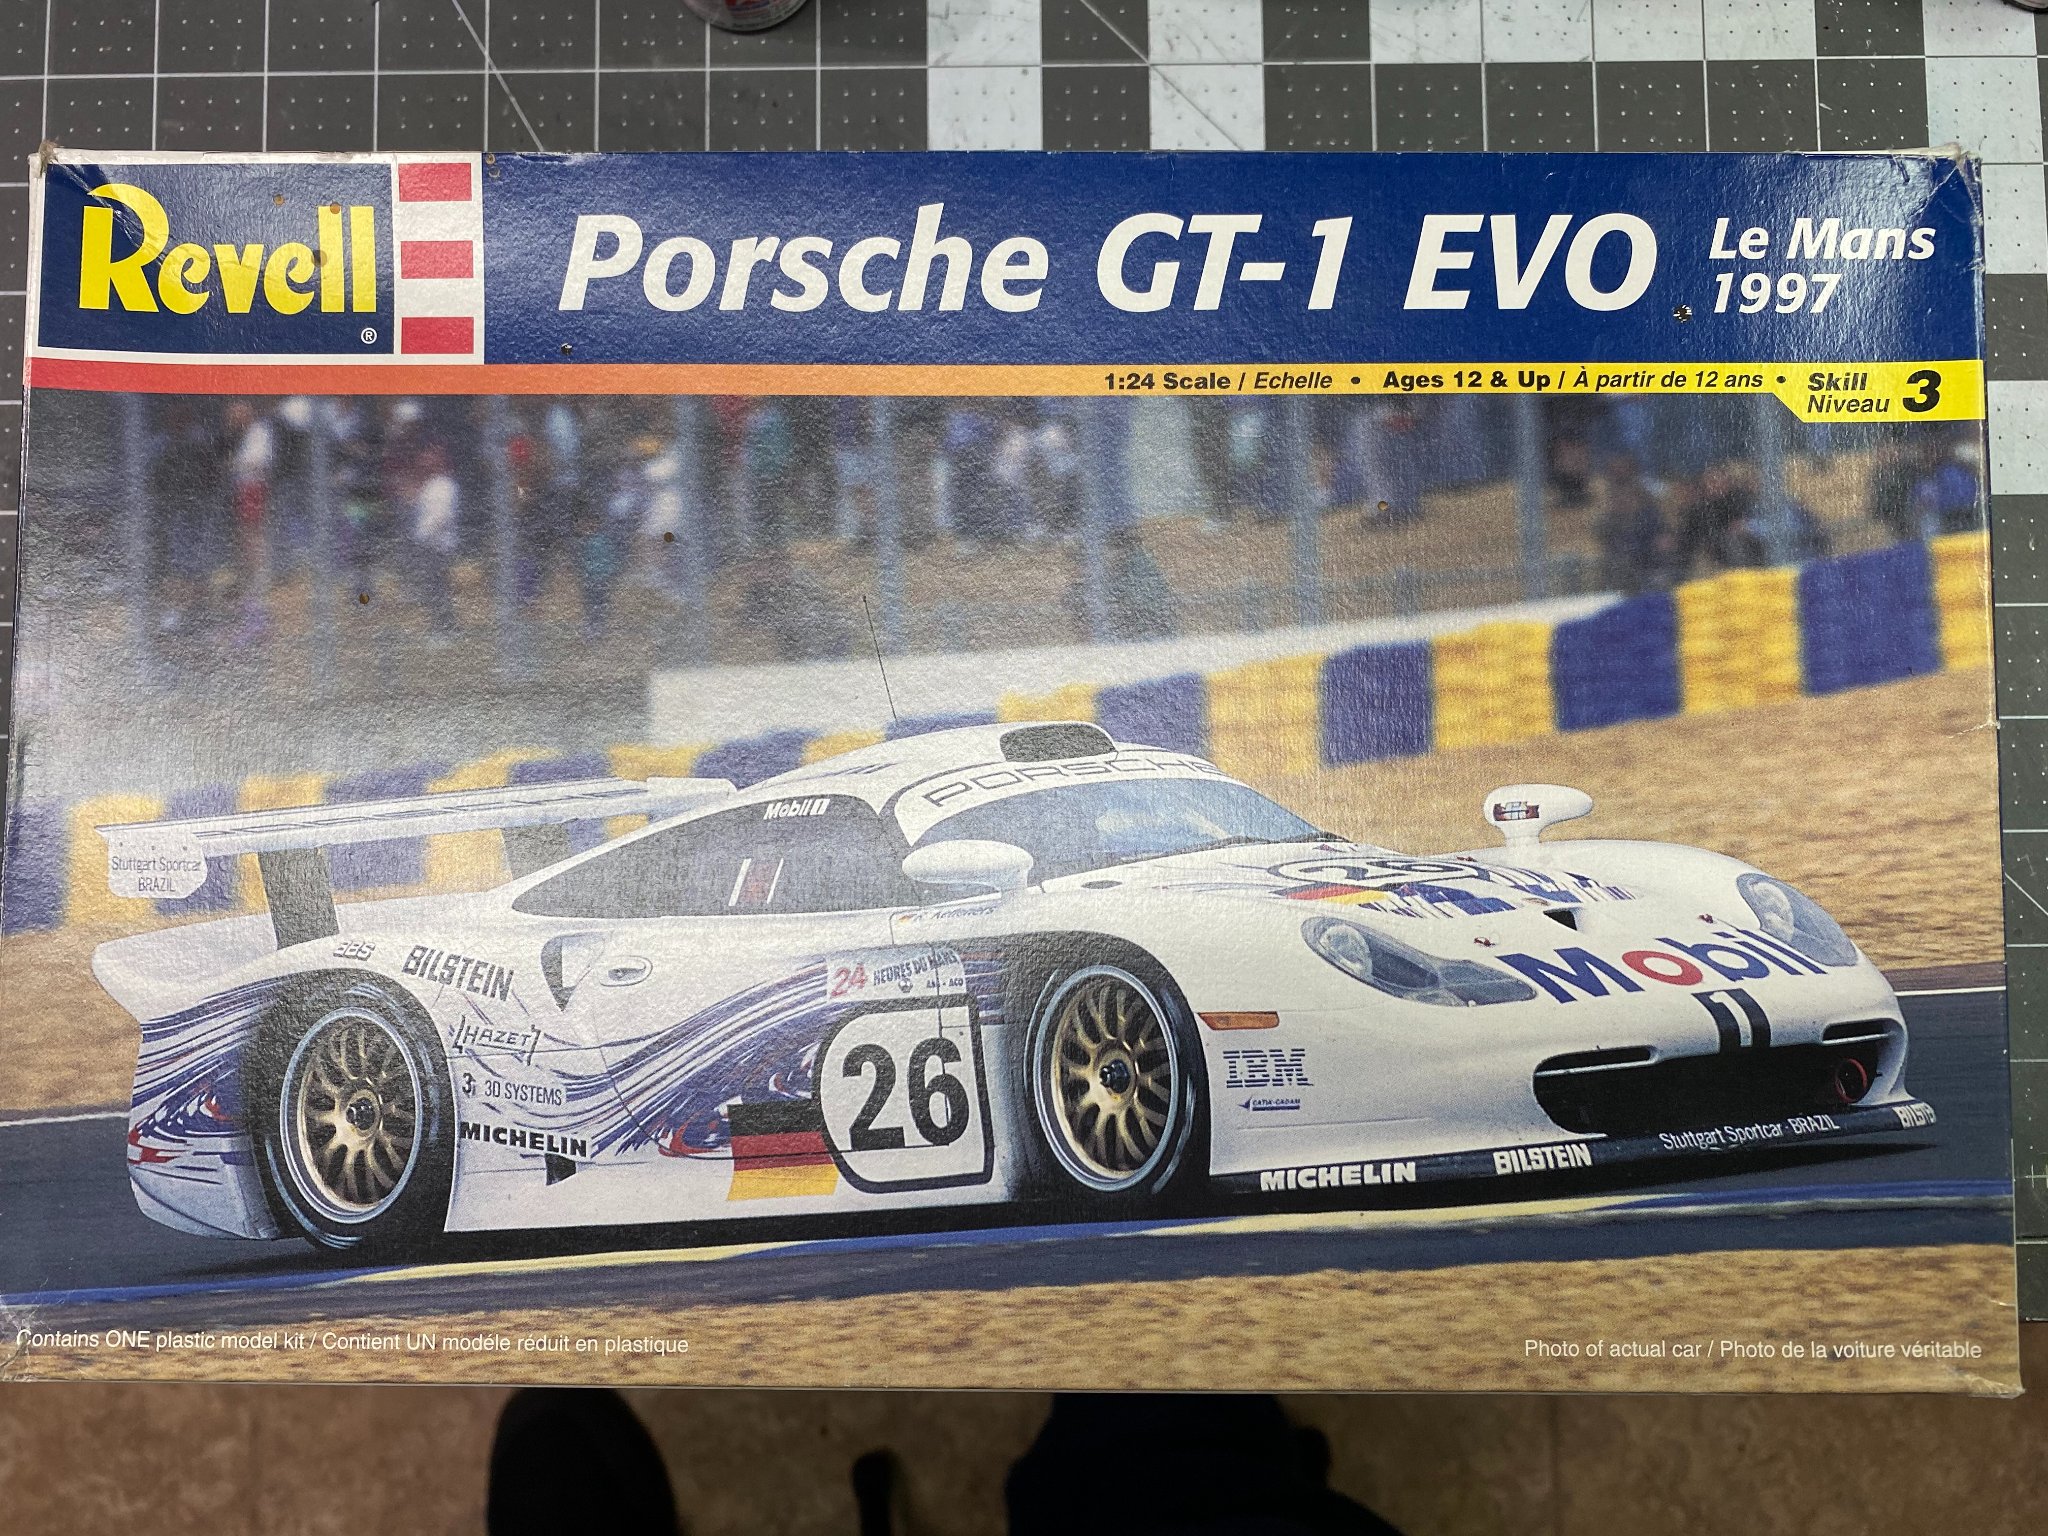
Porsche GT-1 Evo by CDW - FINISHED - Revell - 1:24 Scale - PLASTIC
CDW replied to CDW's topic in Non-ship/categorised builds
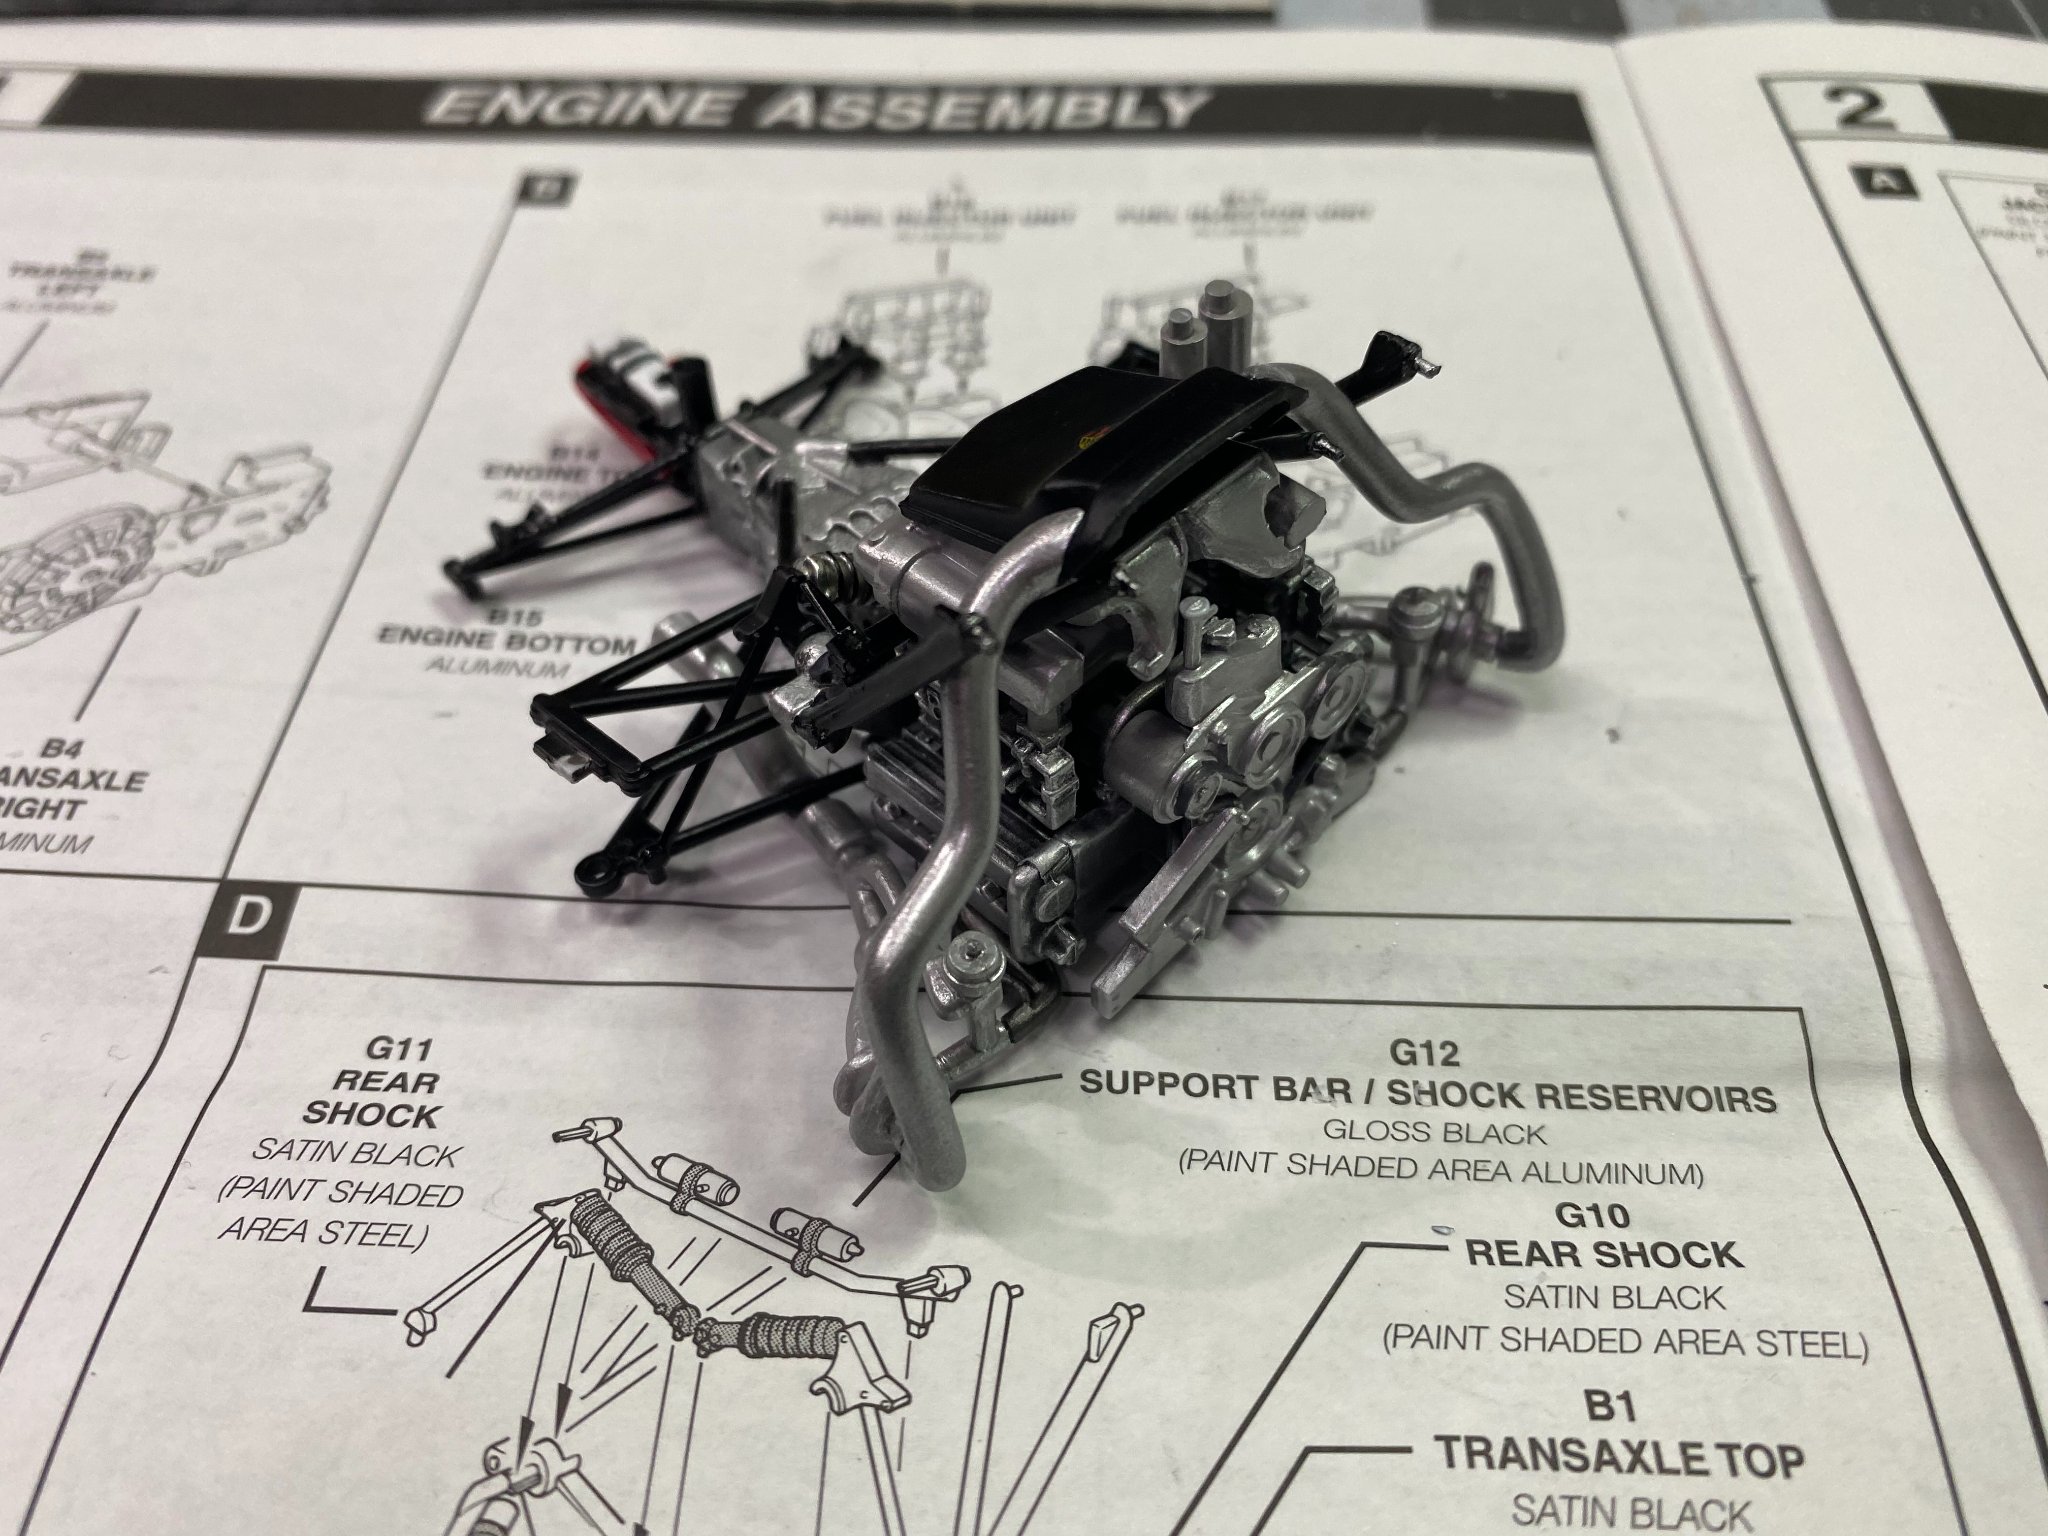
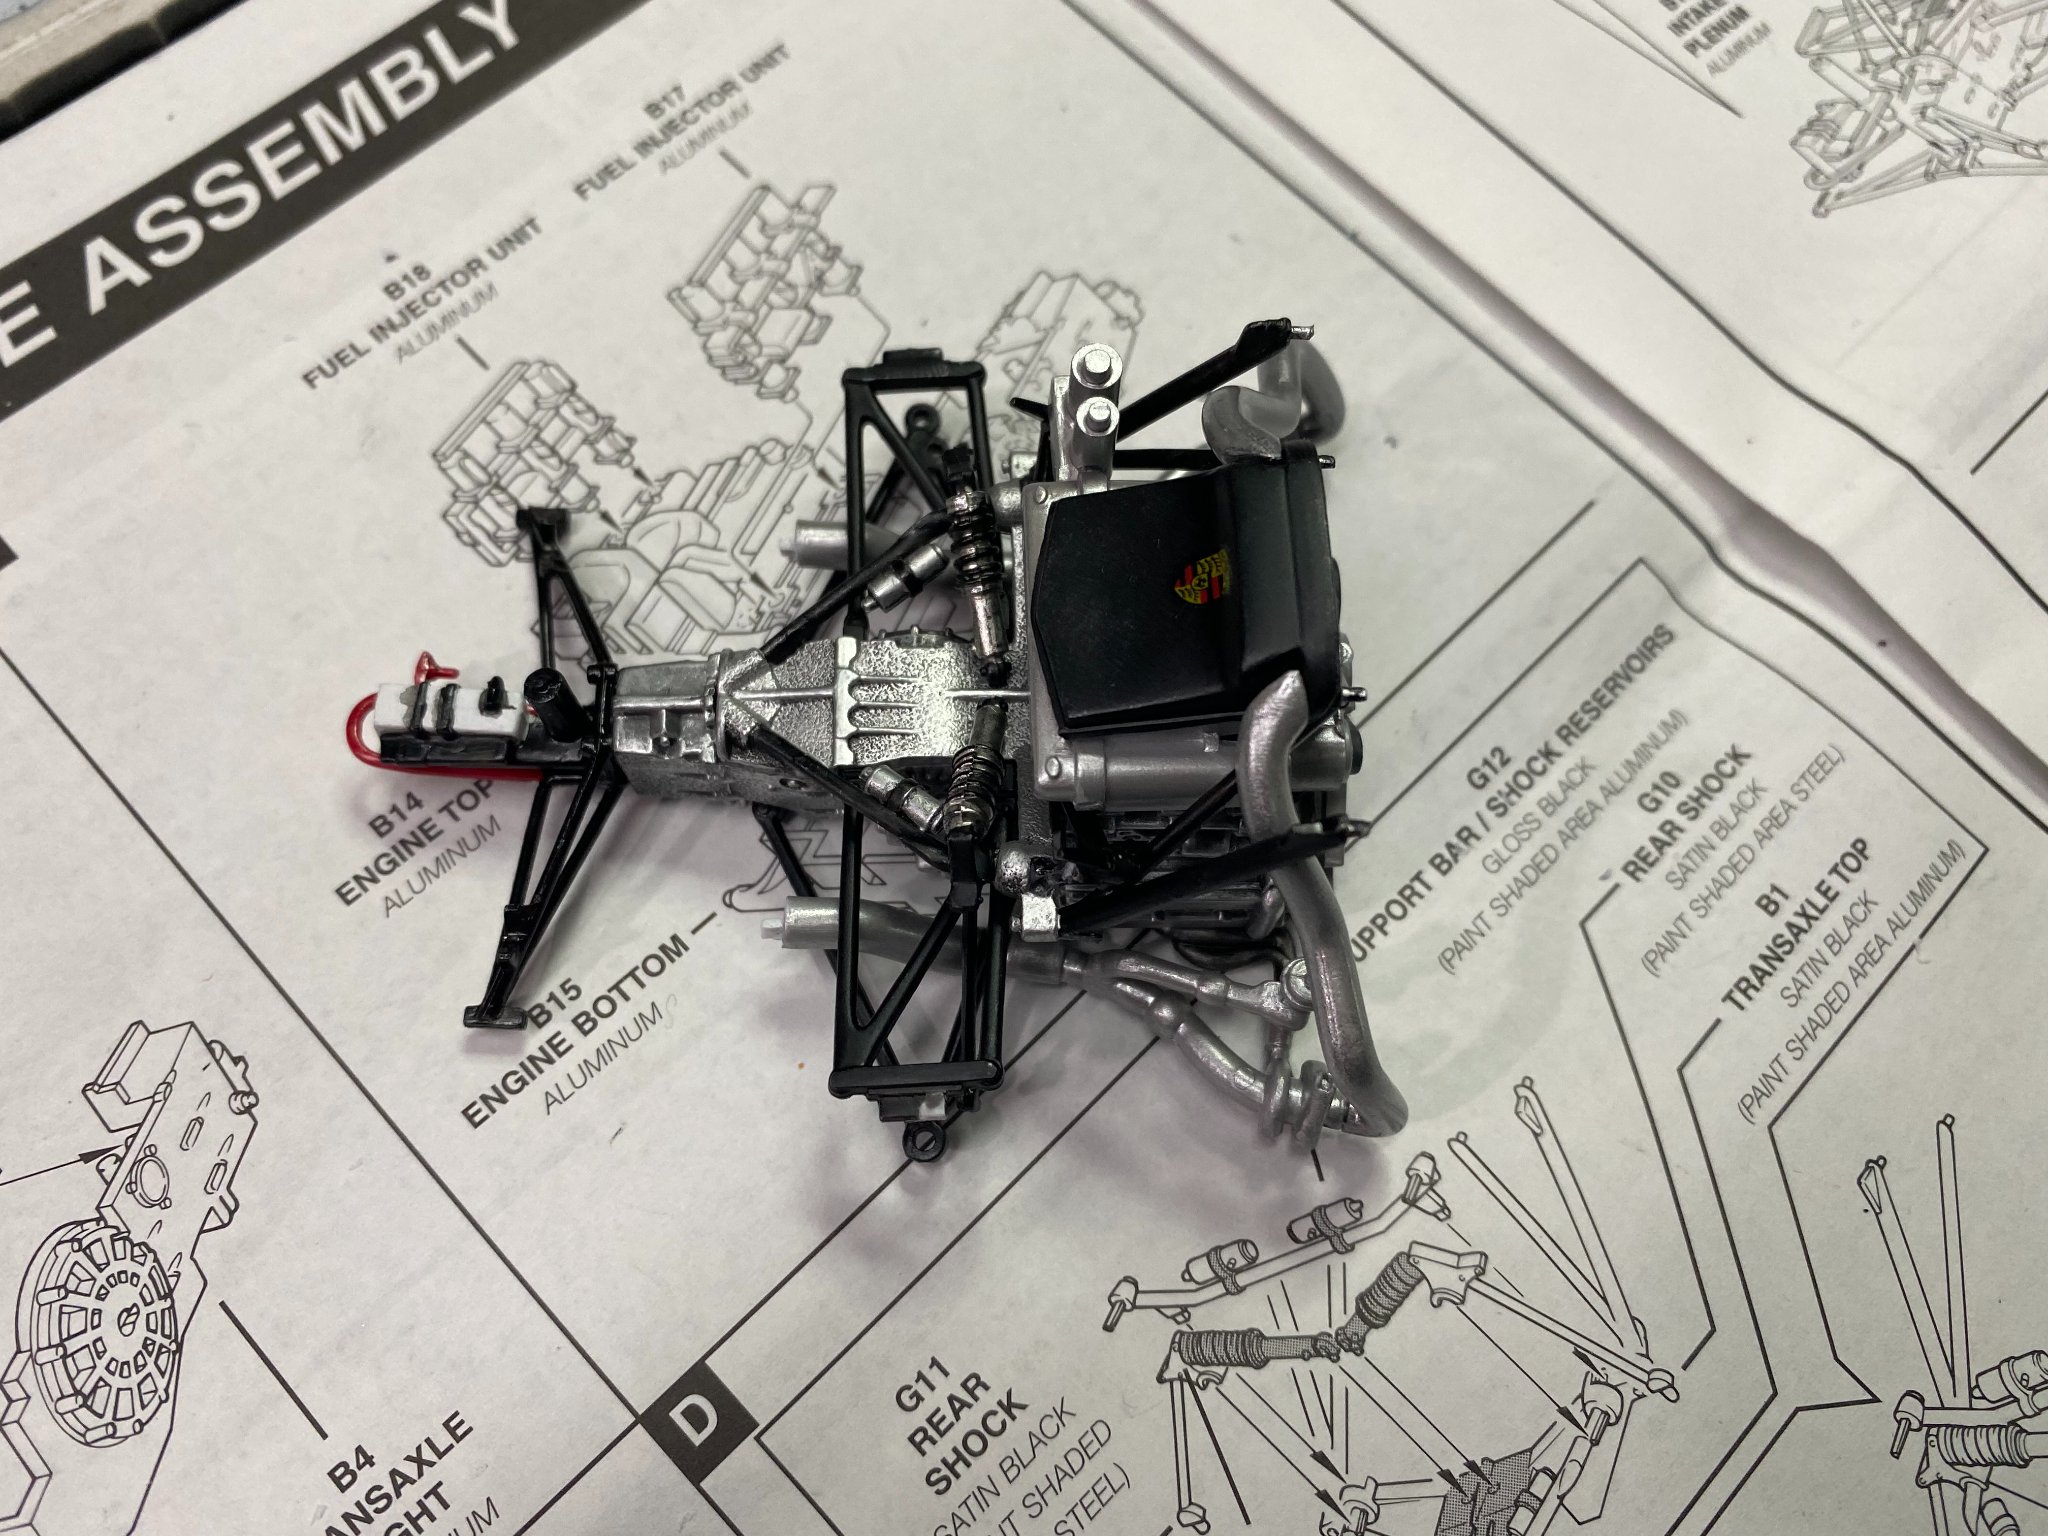
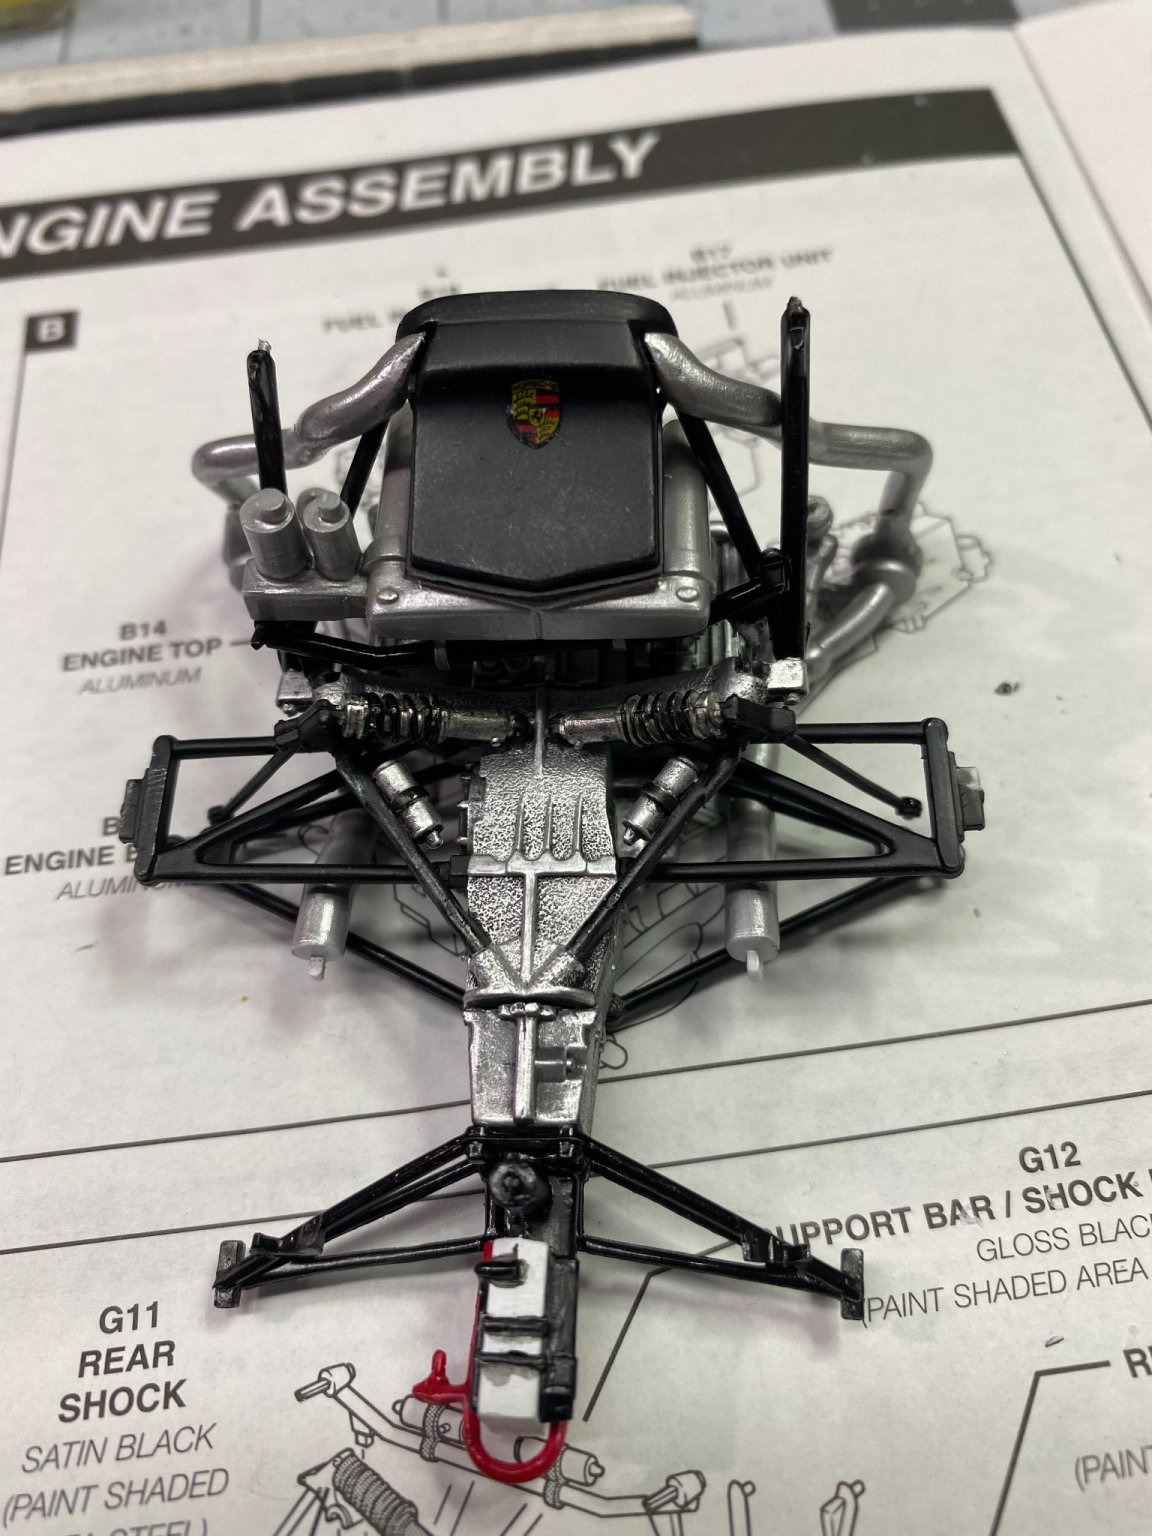
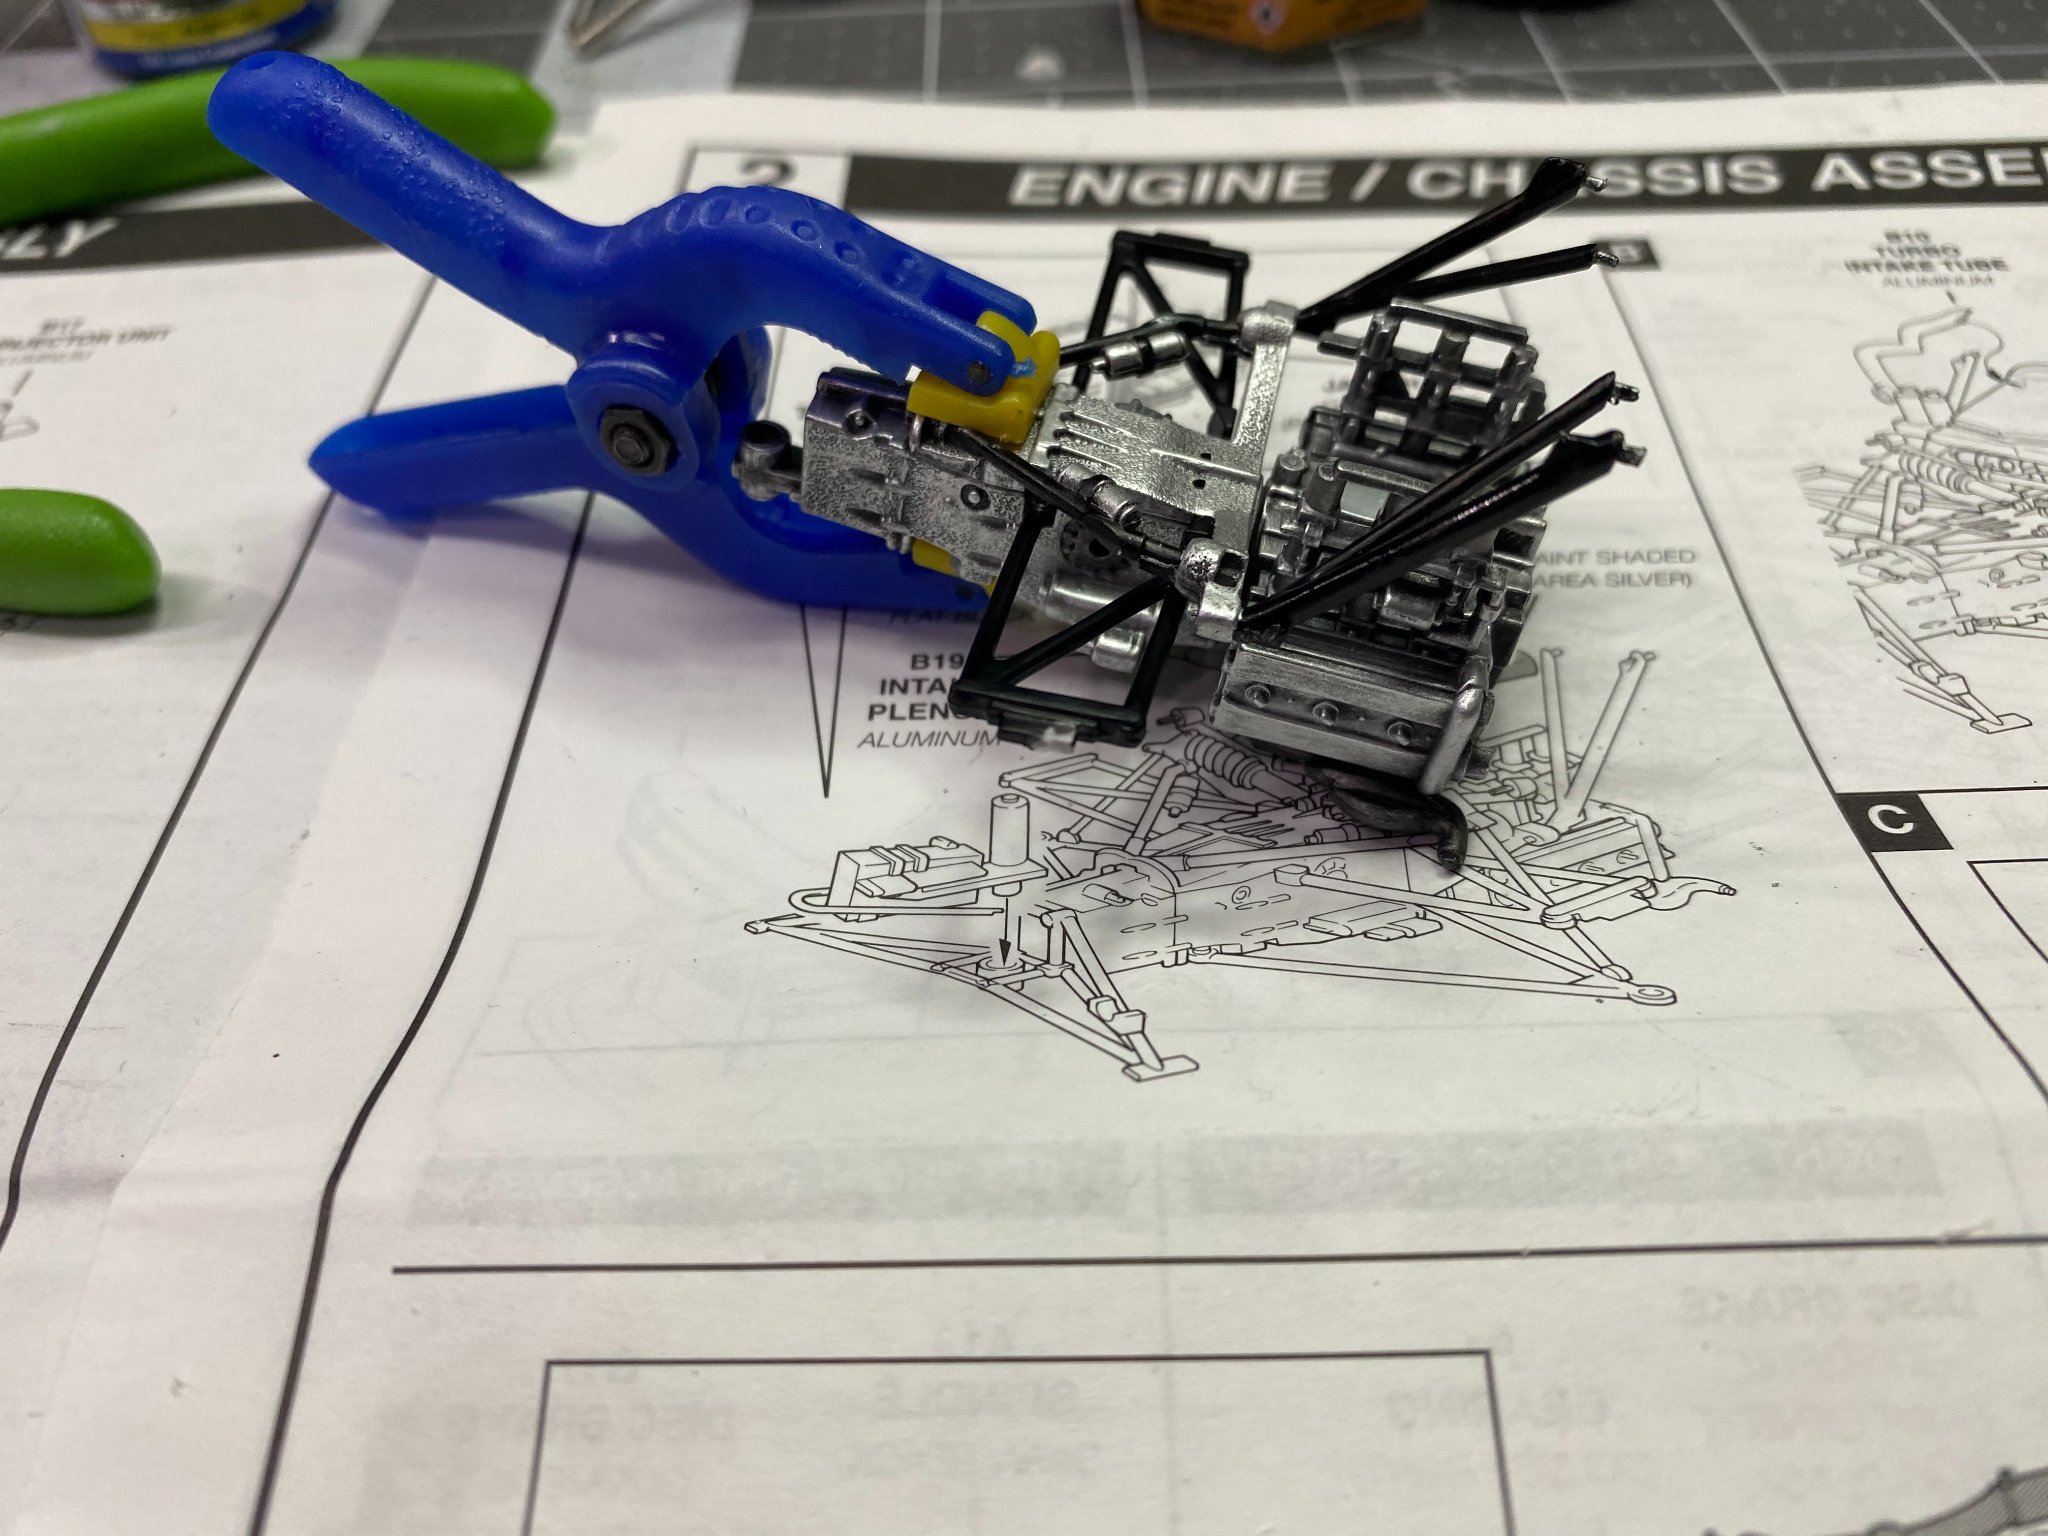
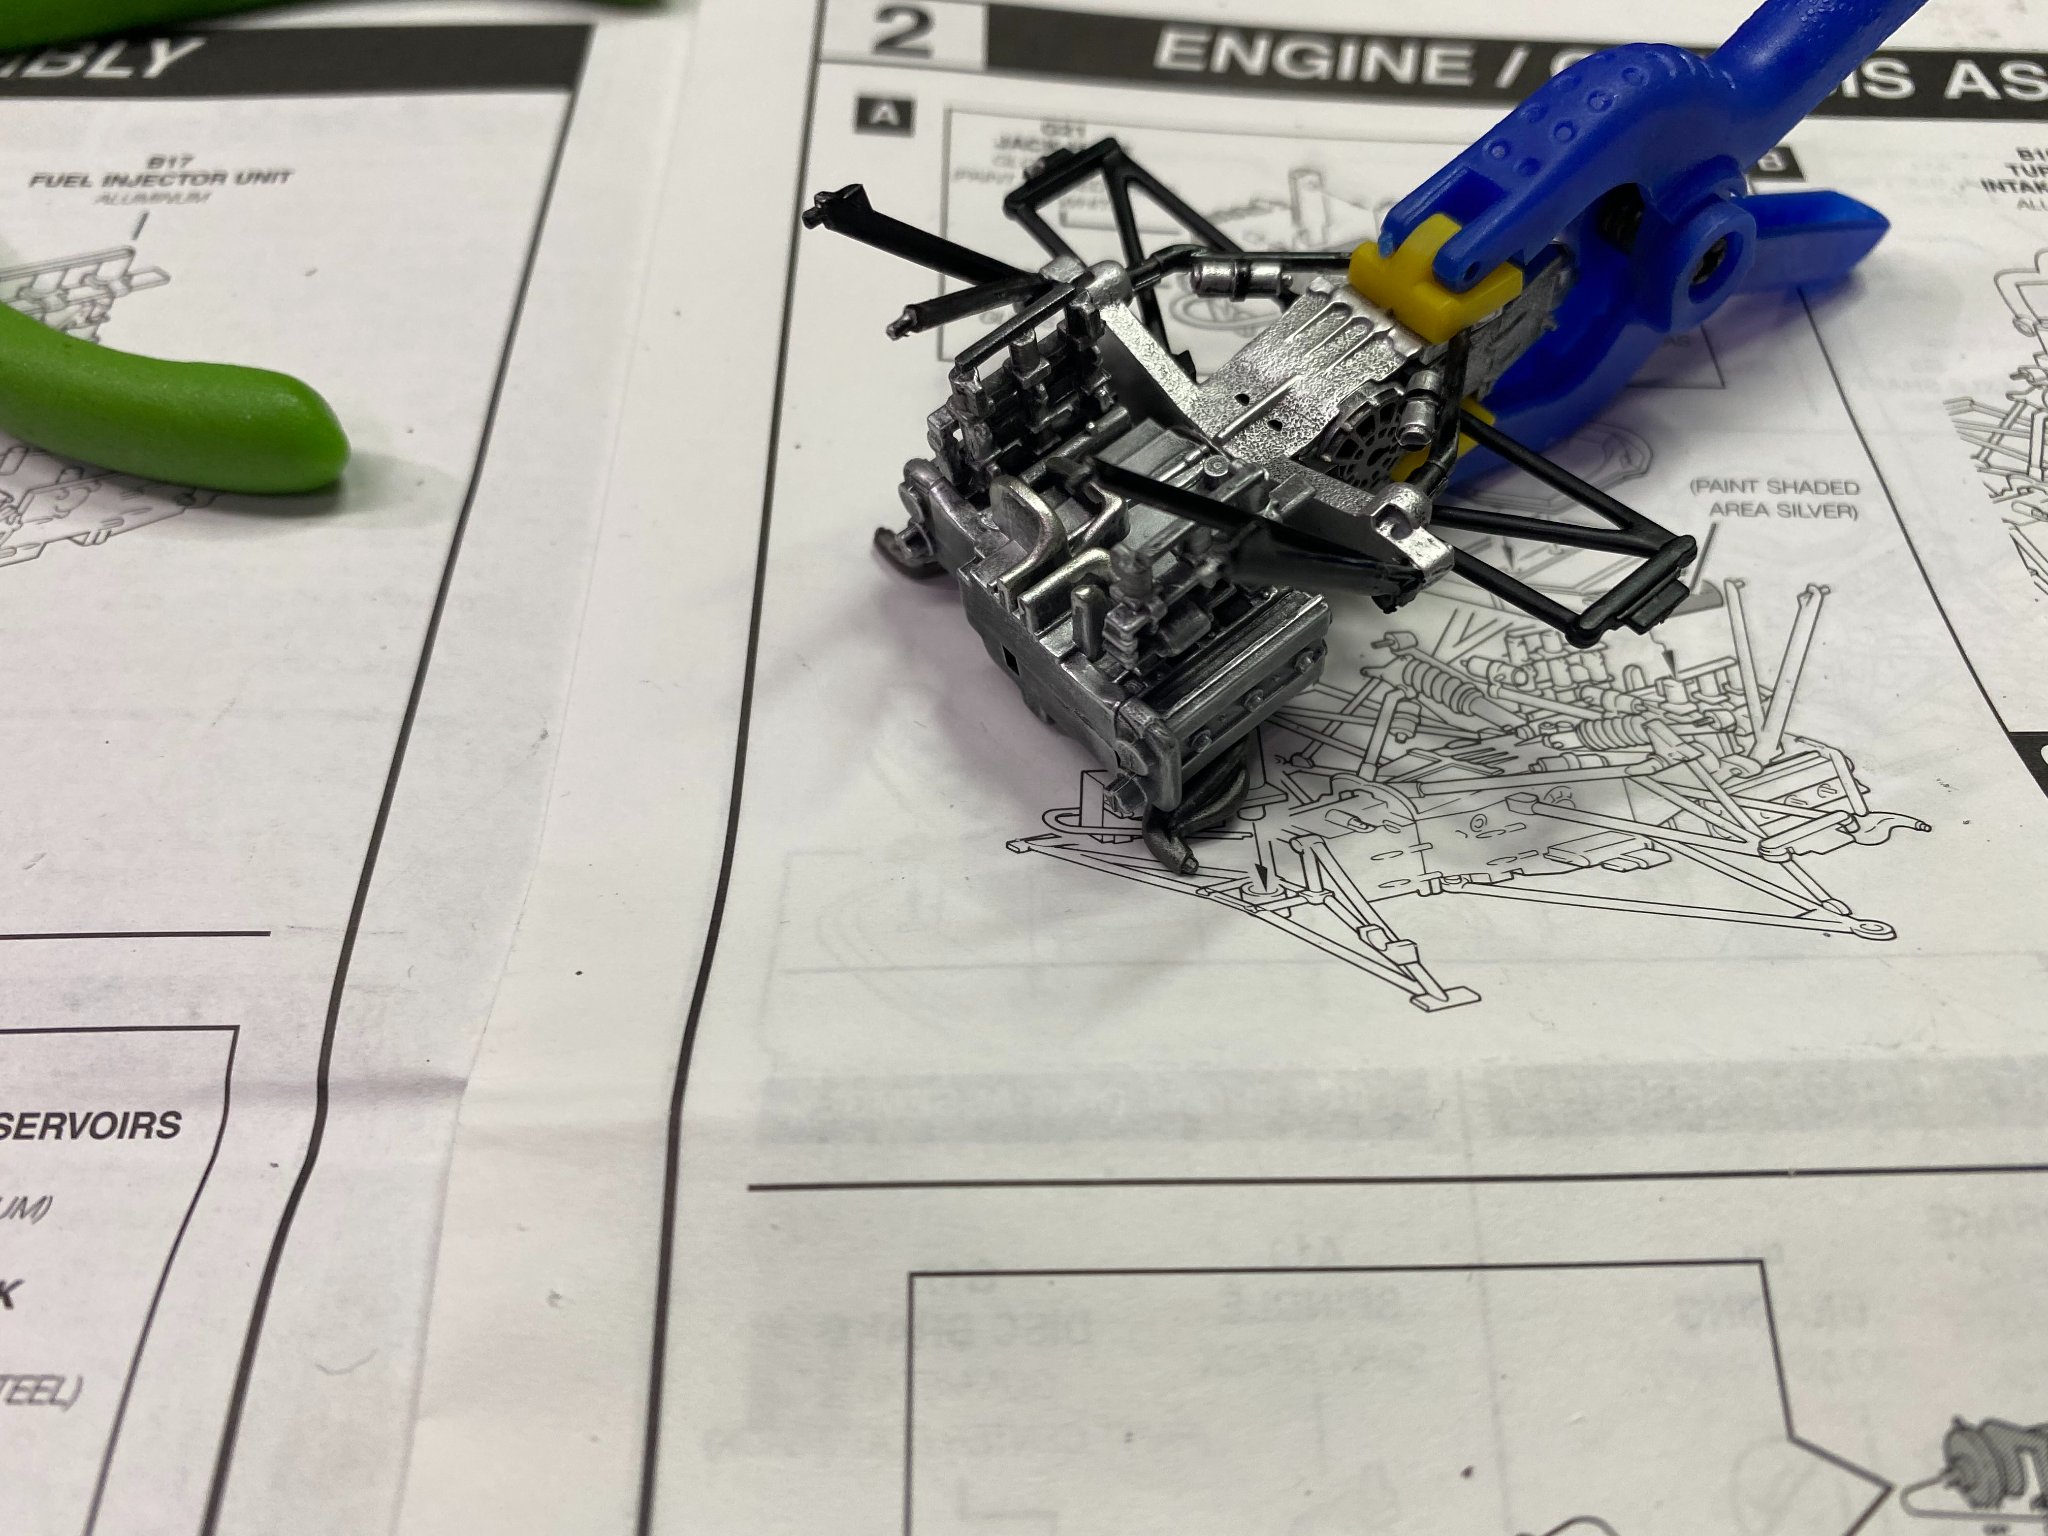
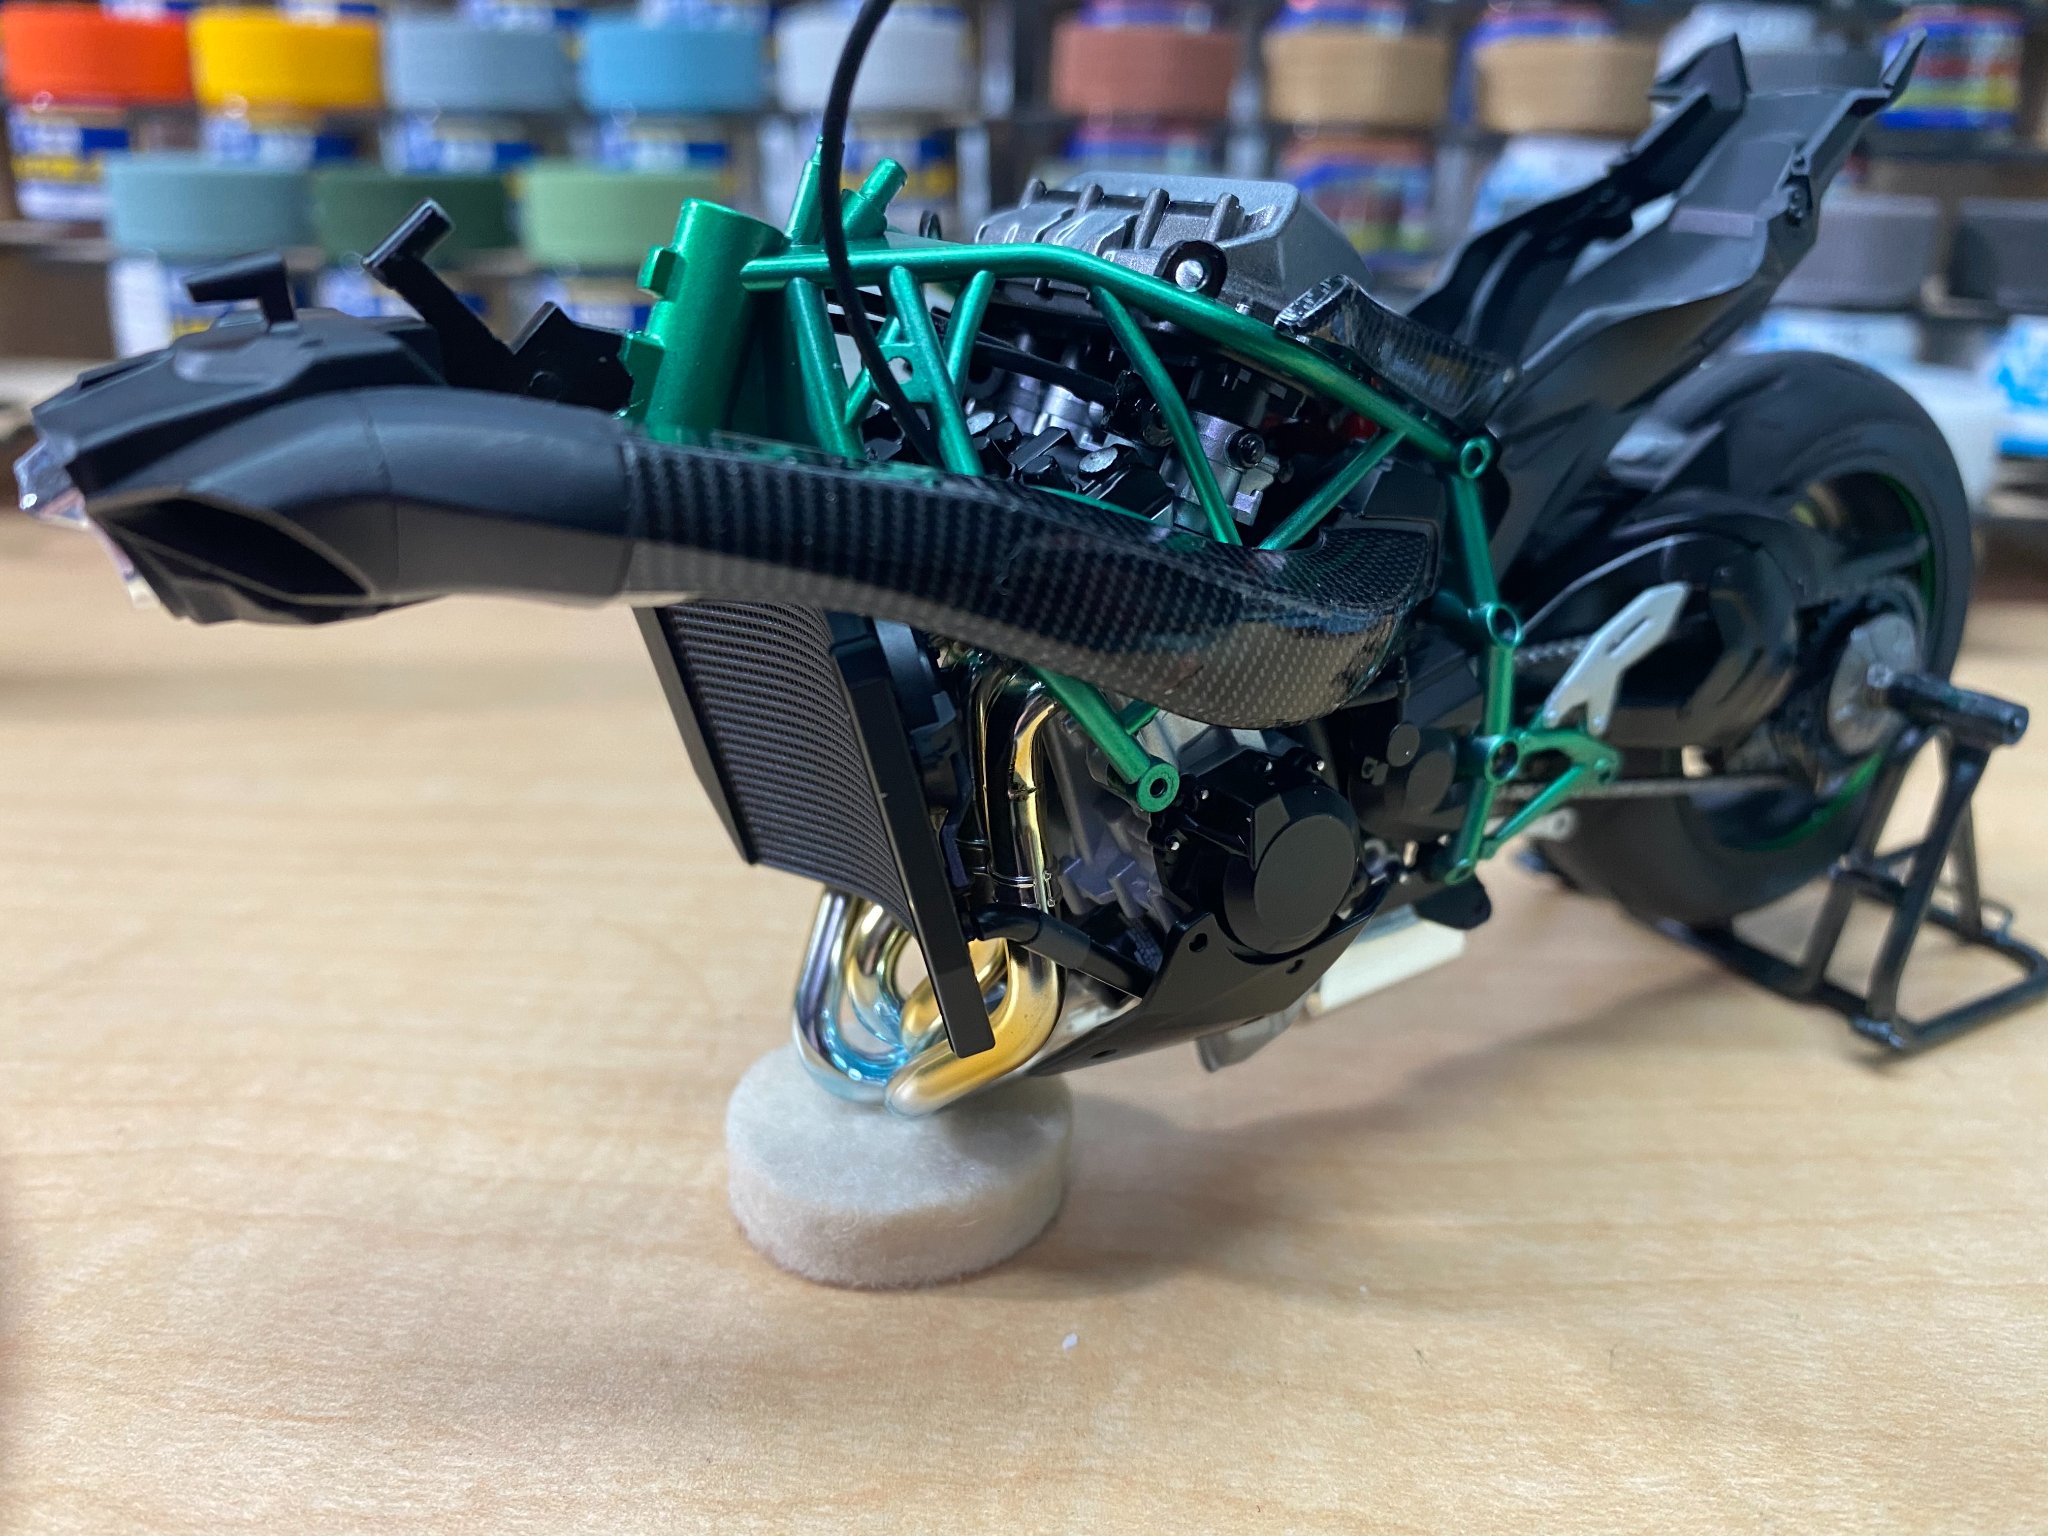
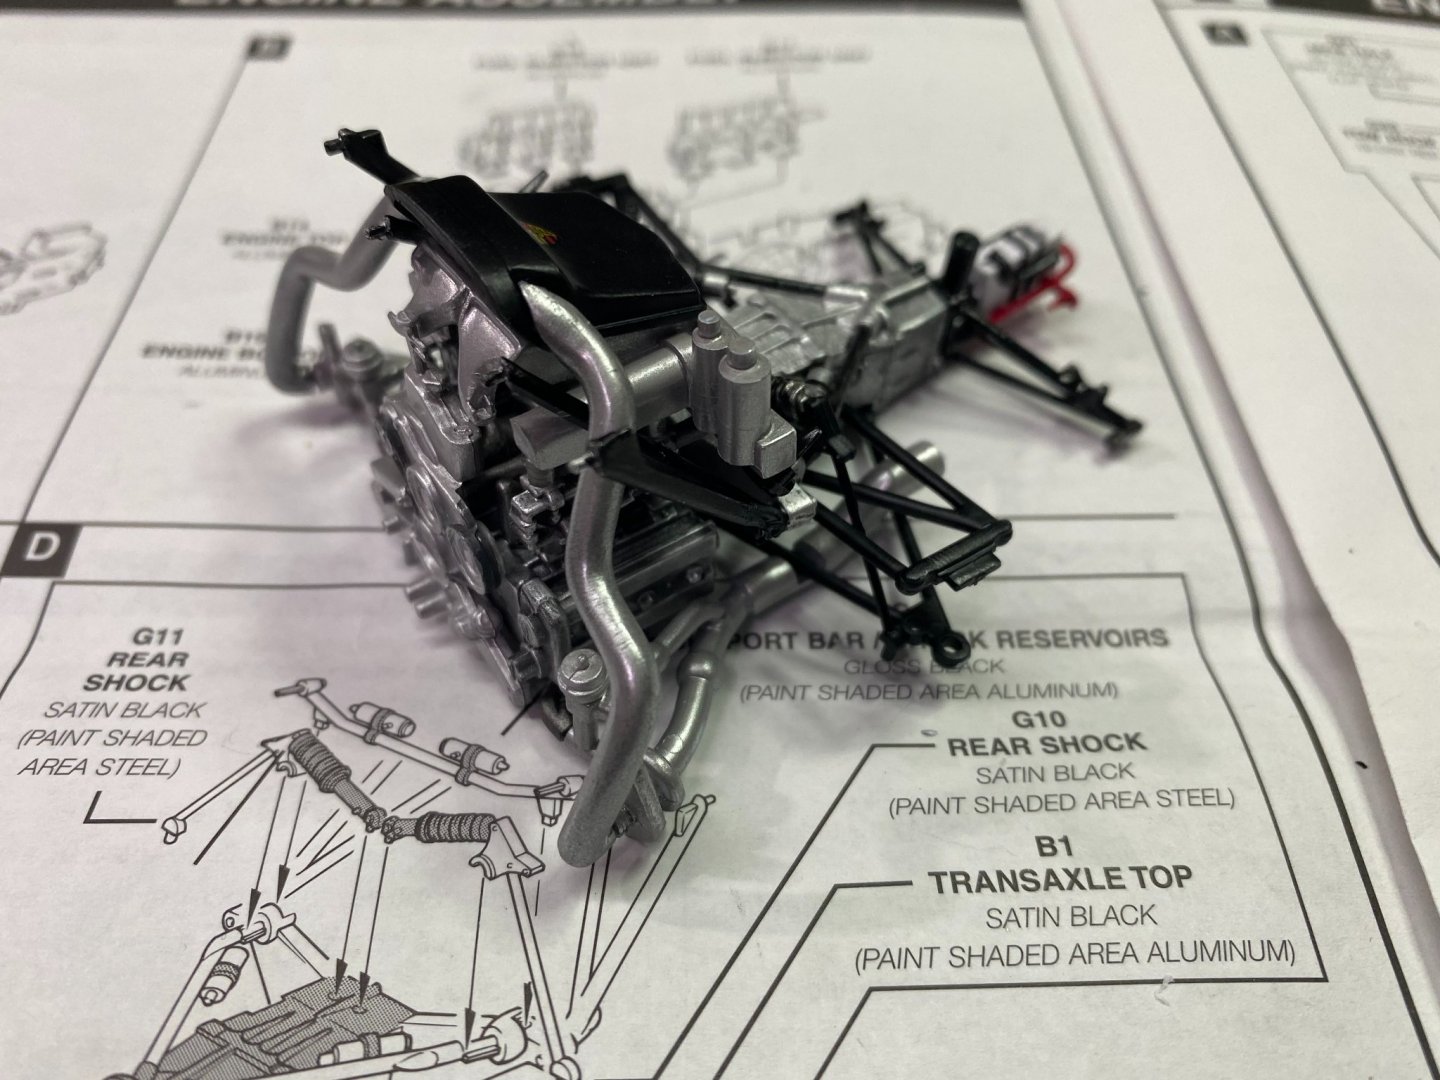
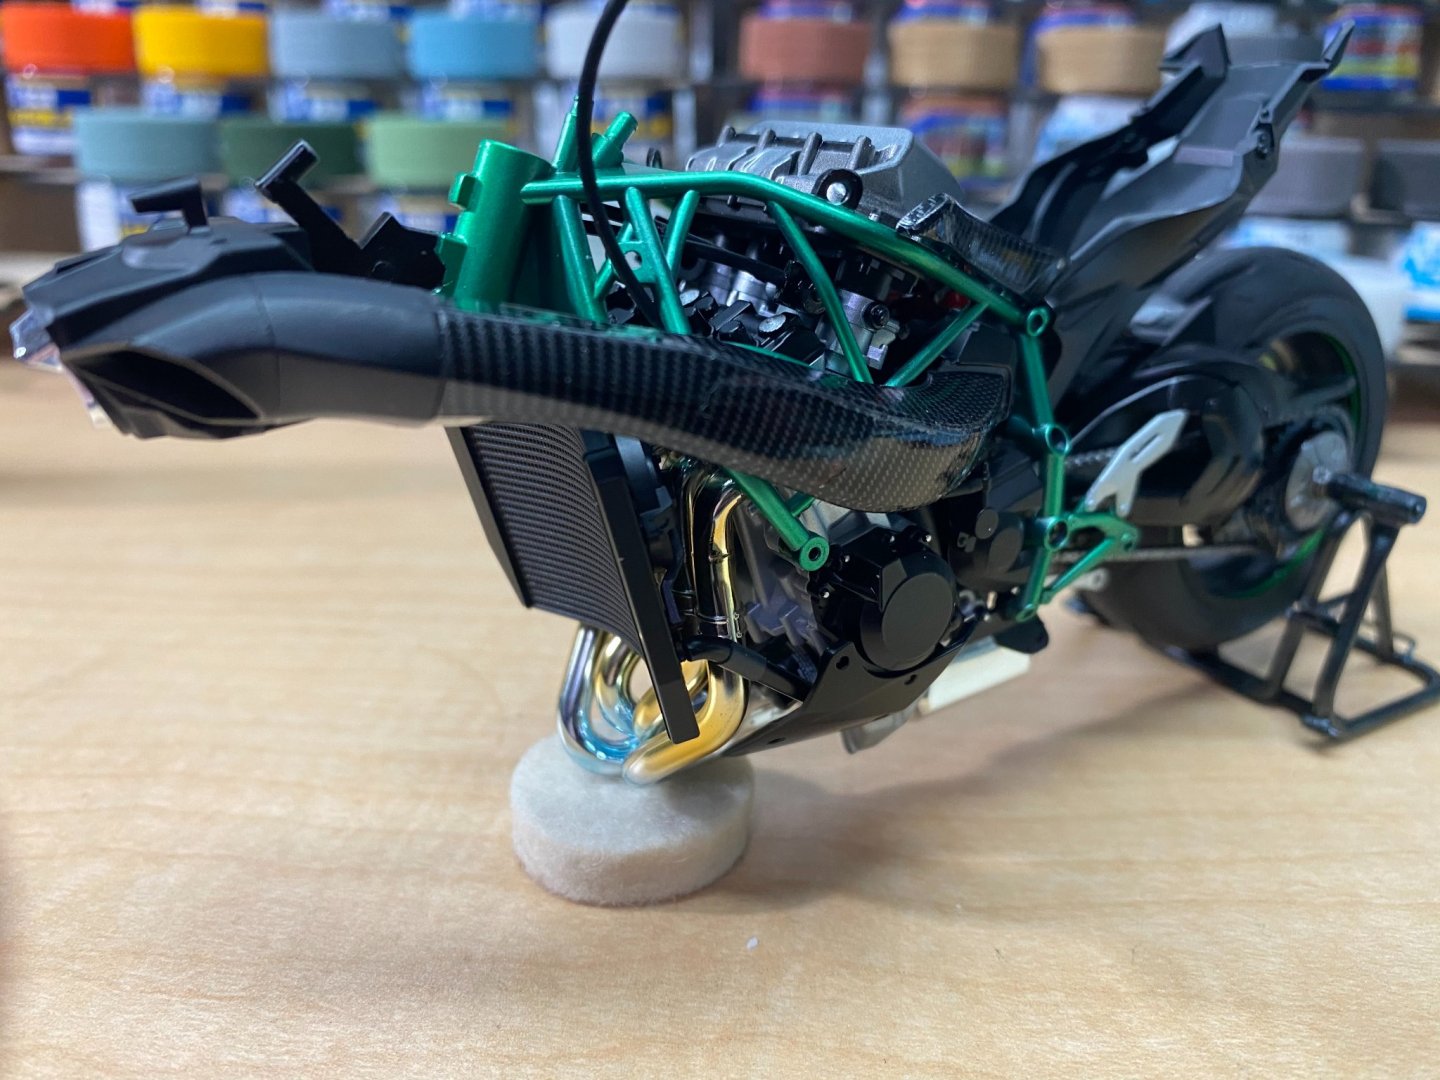
Continuing with the engine assembly


- 44 replies
-
- 11
-

-
Porsche GT-1 Evo by CDW - FINISHED - Revell - 1:24 Scale - PLASTIC
CDW replied to CDW's topic in Non-ship/categorised builds
Construction begins with the engine/transmission/rear suspension. Flat black base coat (Tamiya), then dry brushing of various metallic colors from Mr Color.

- 44 replies
-
- 12
-
-
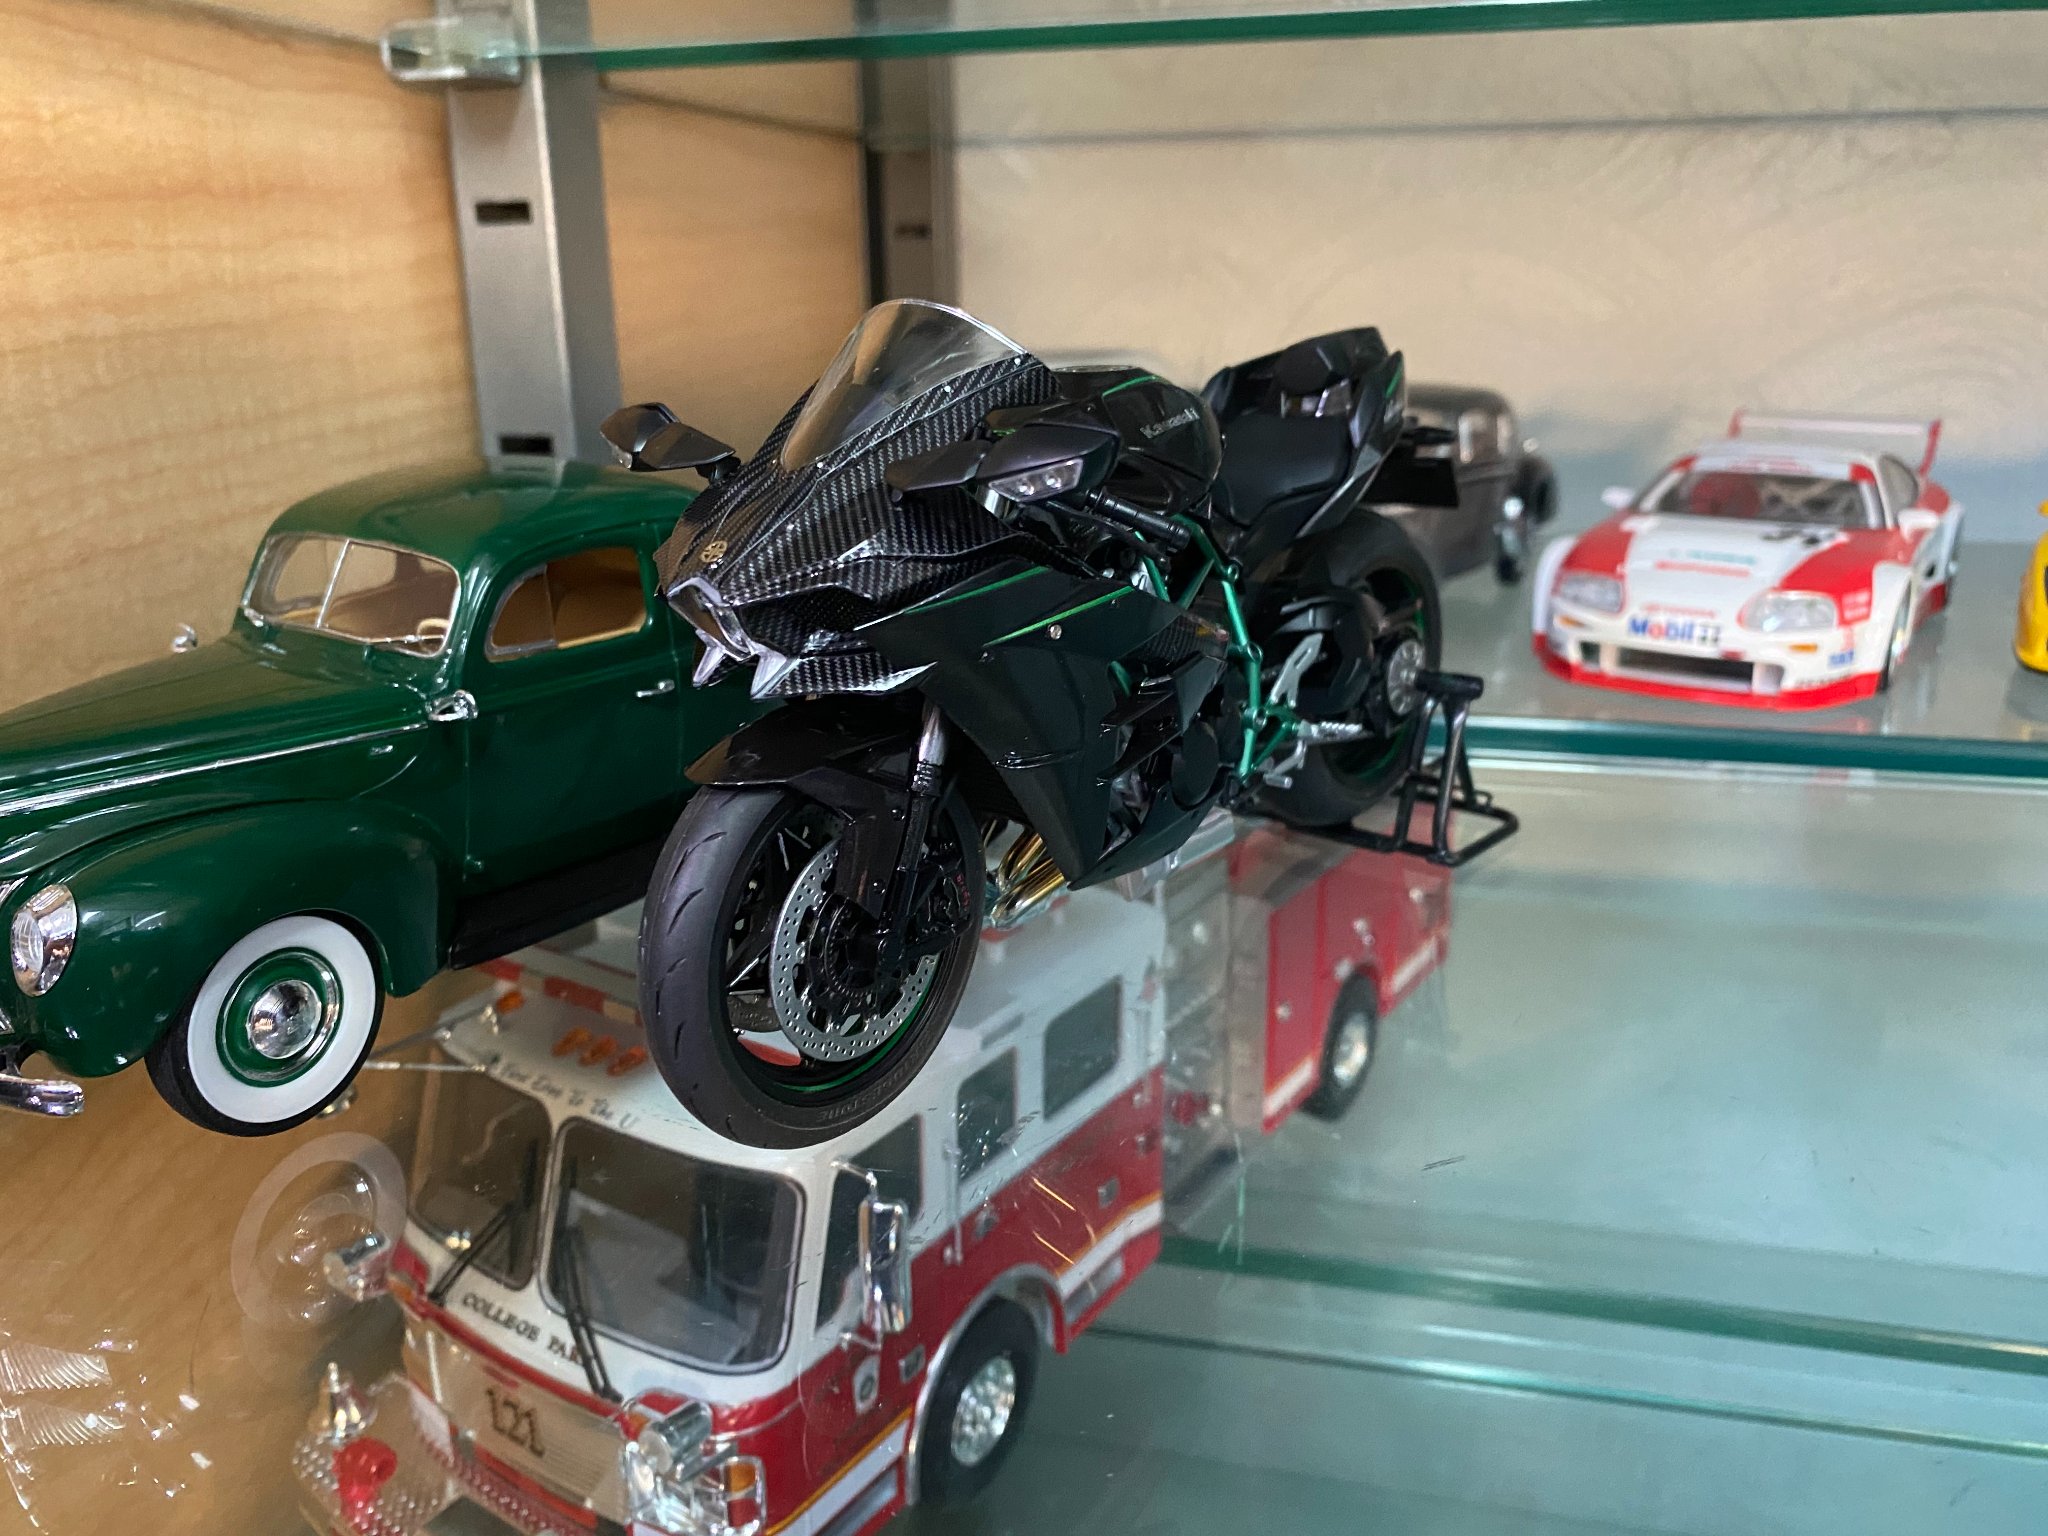
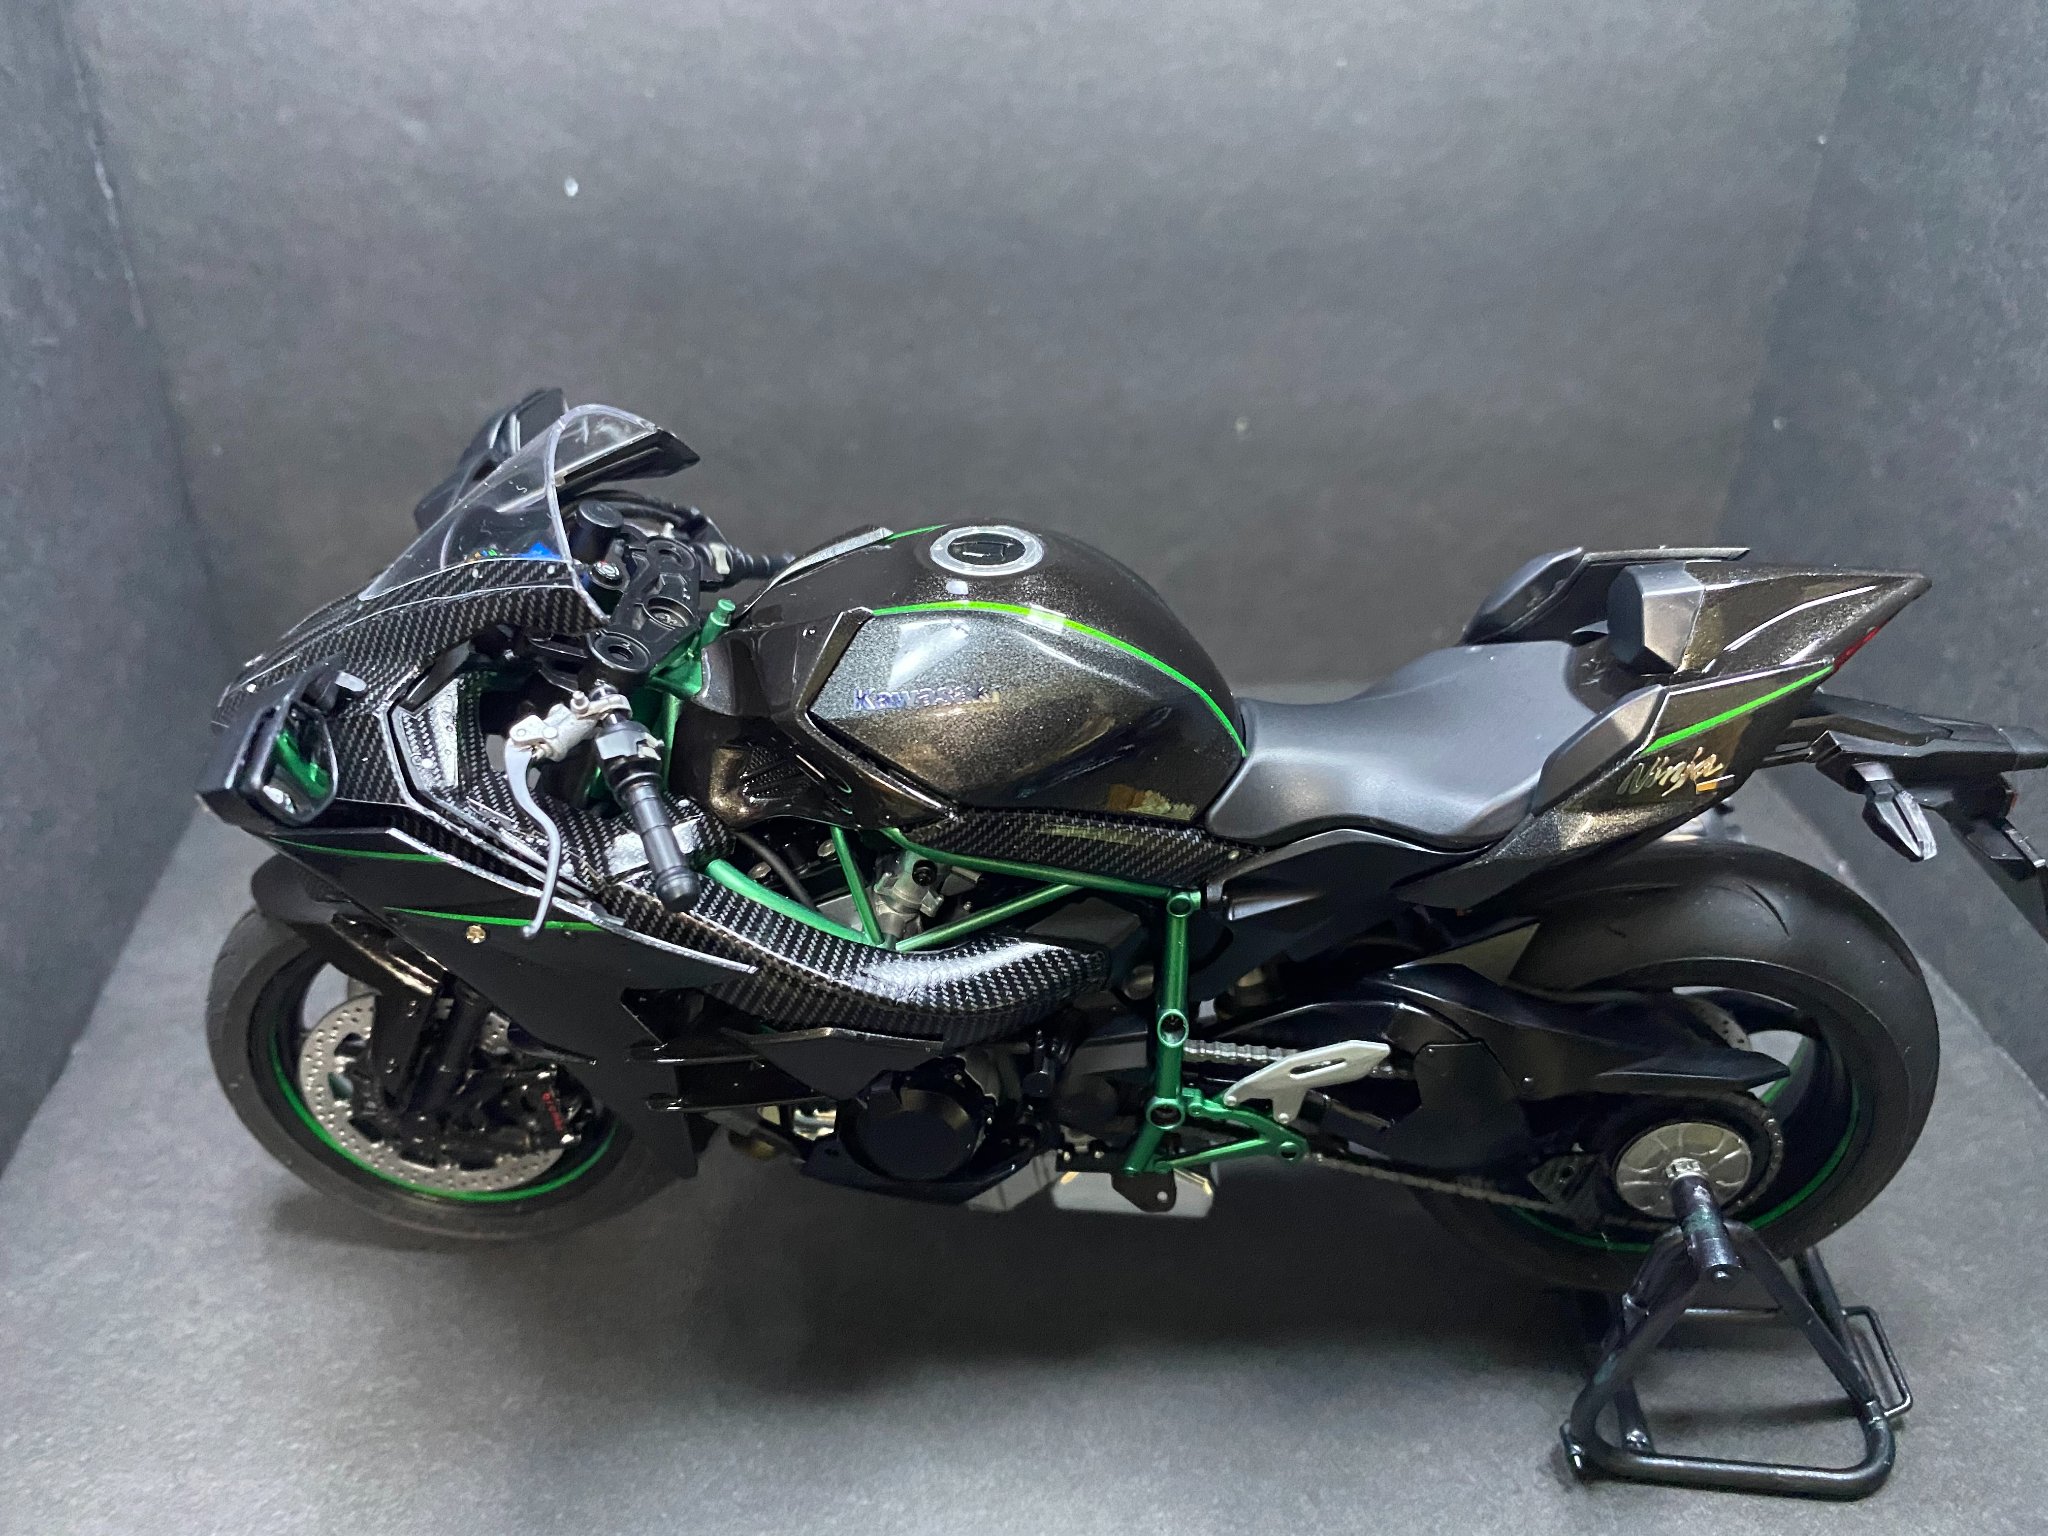
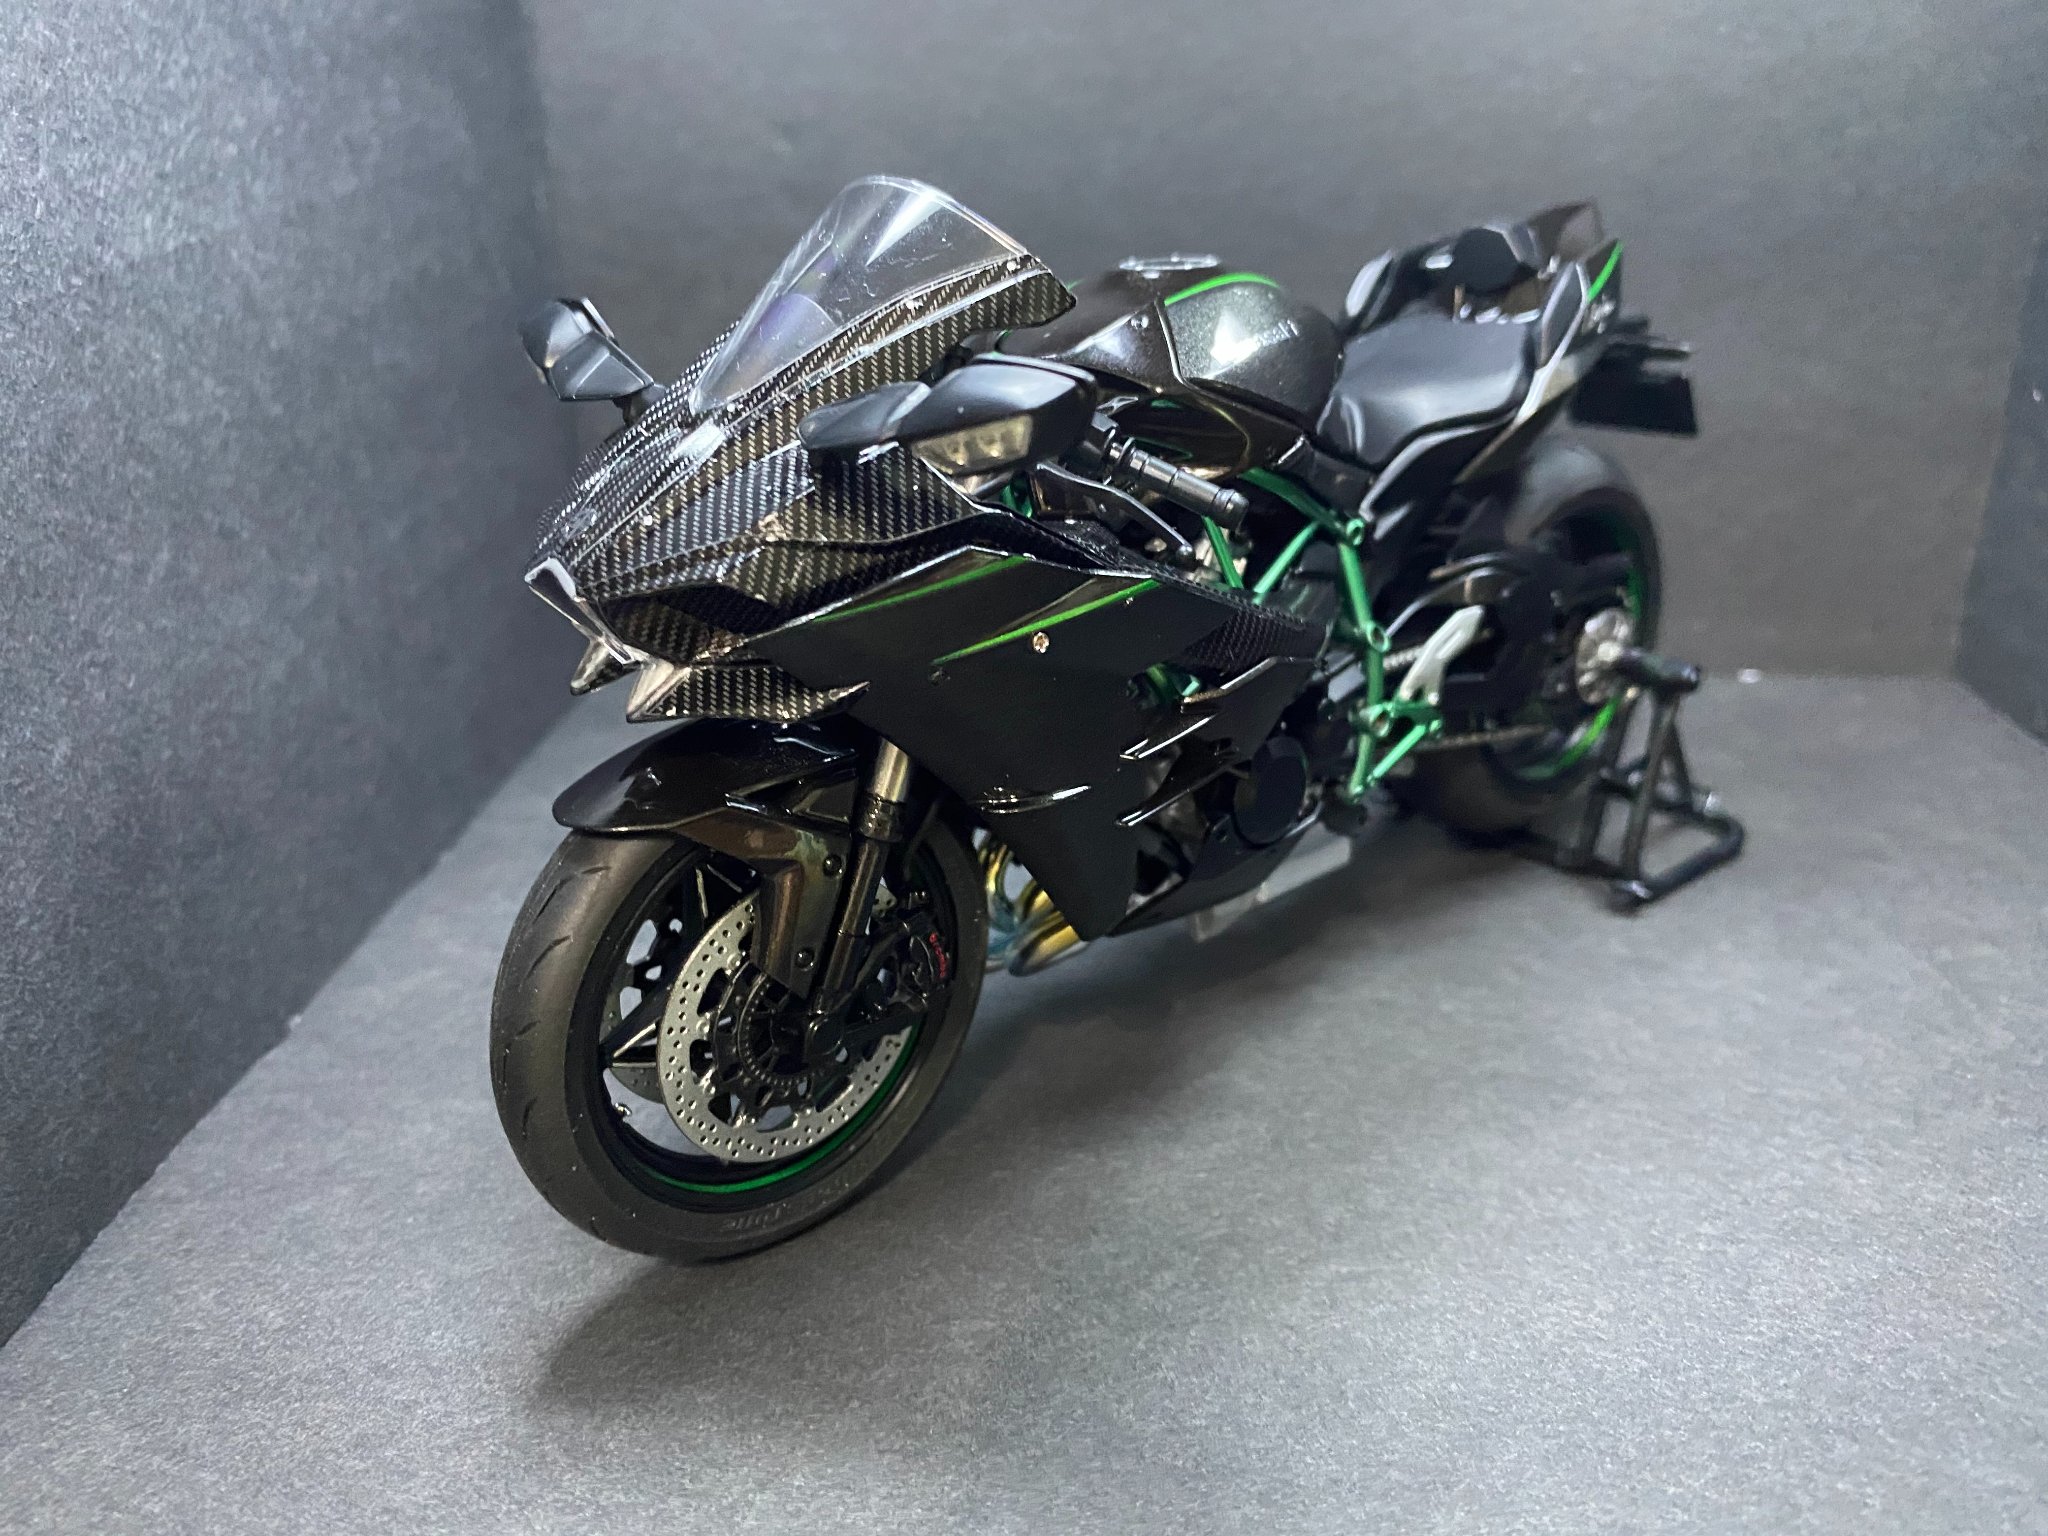
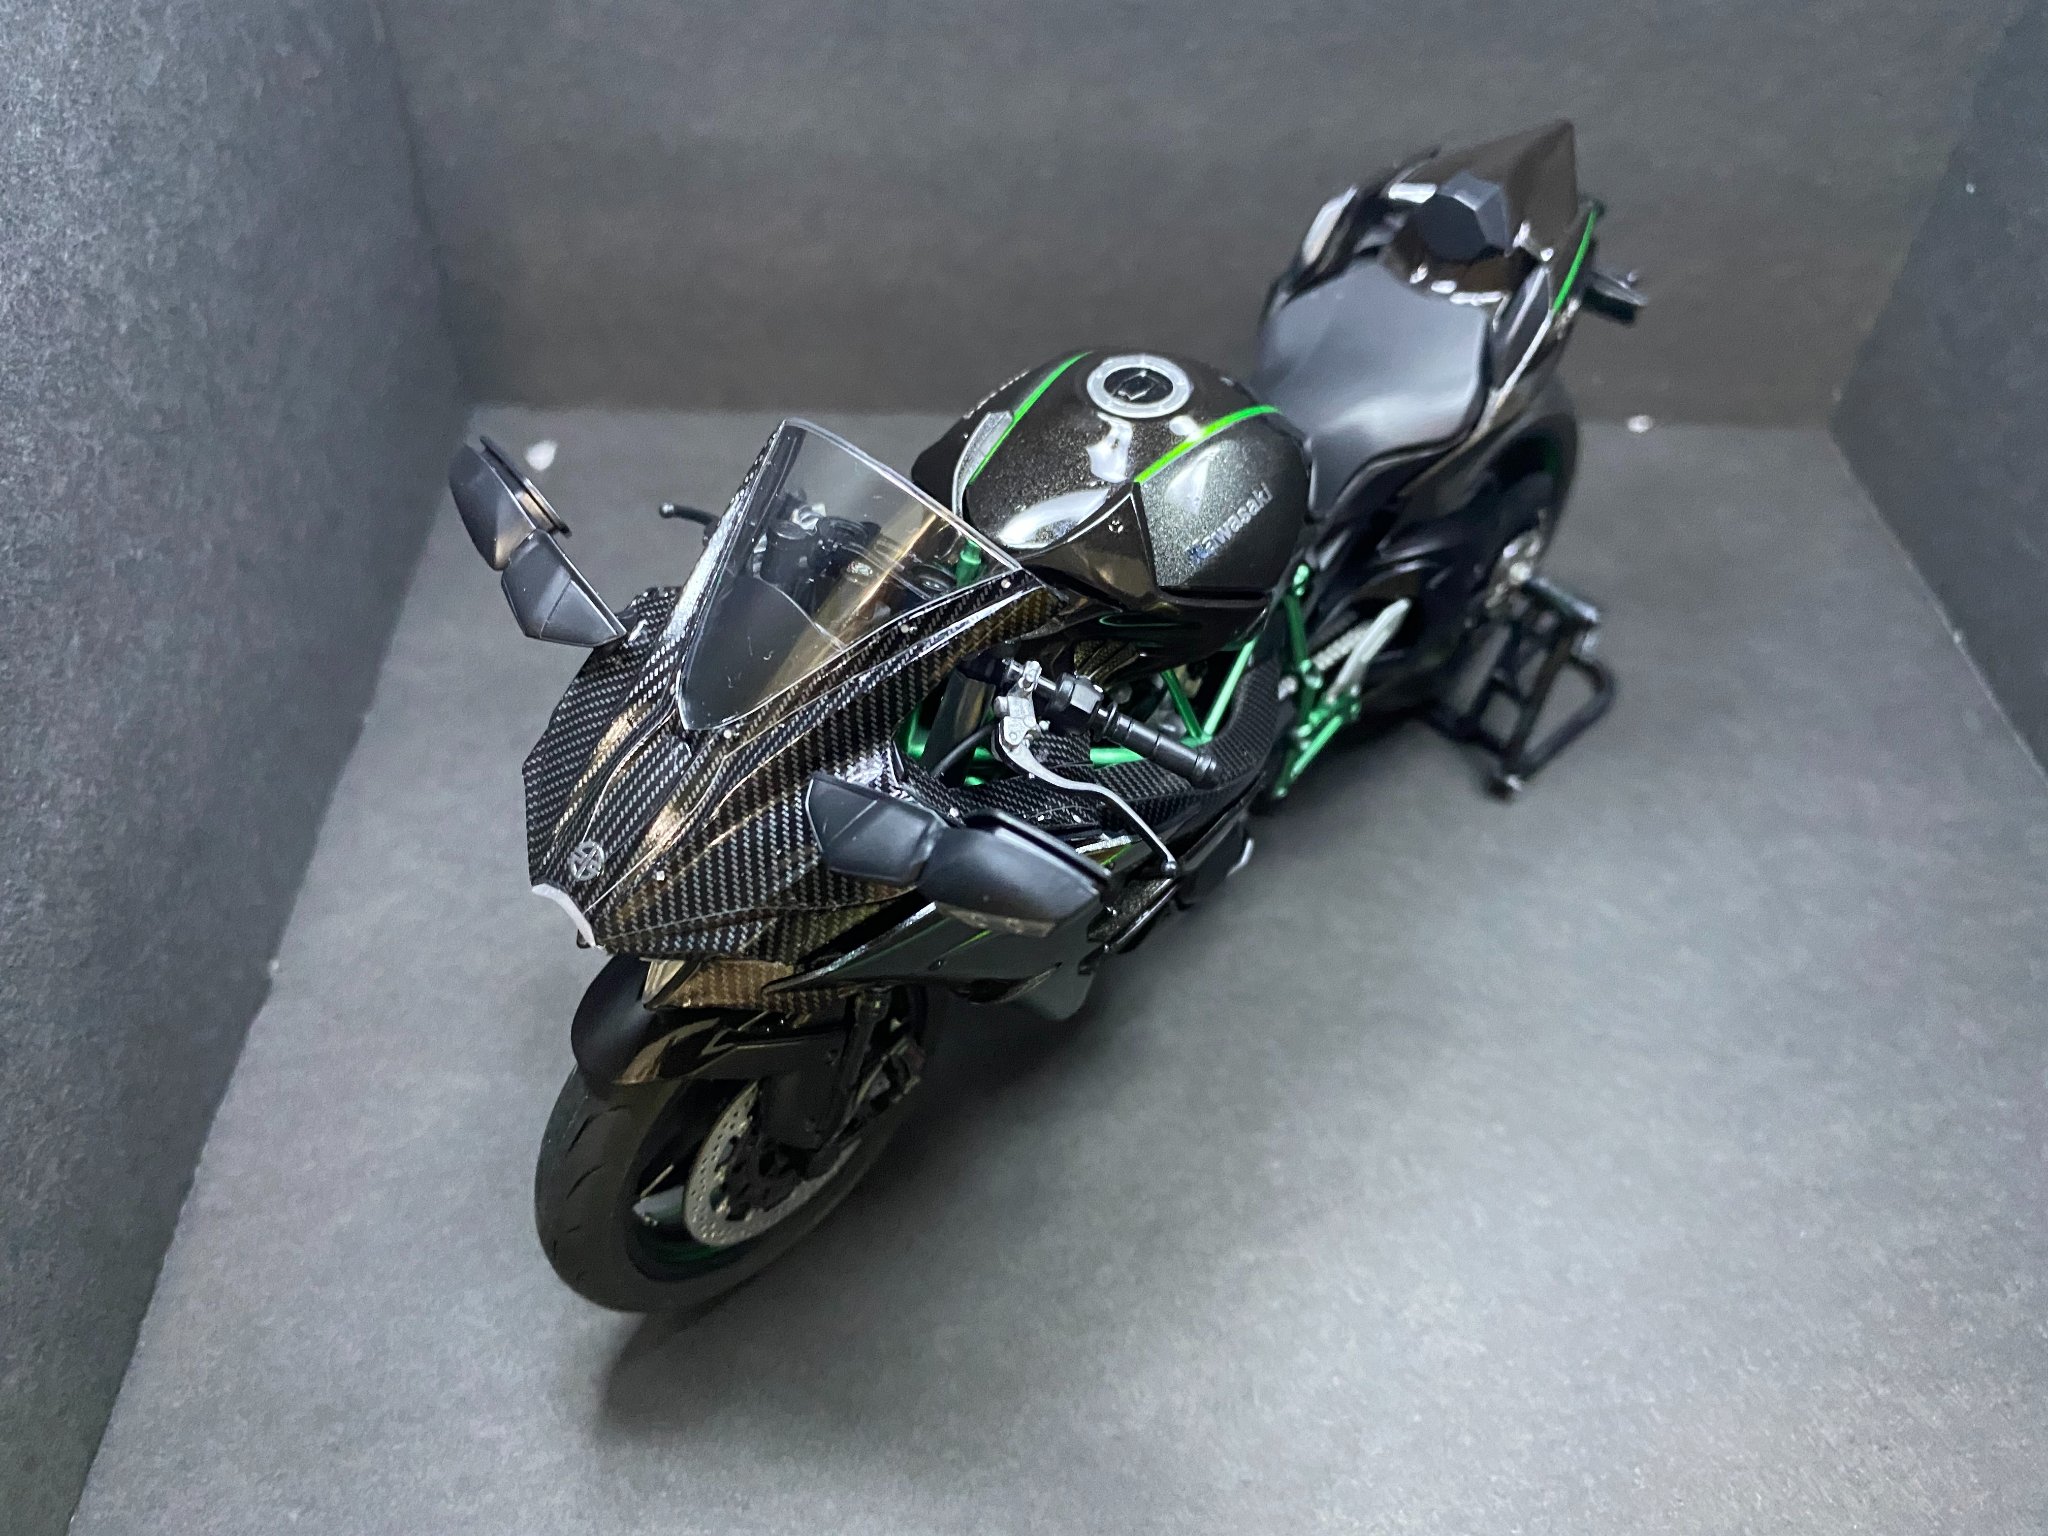
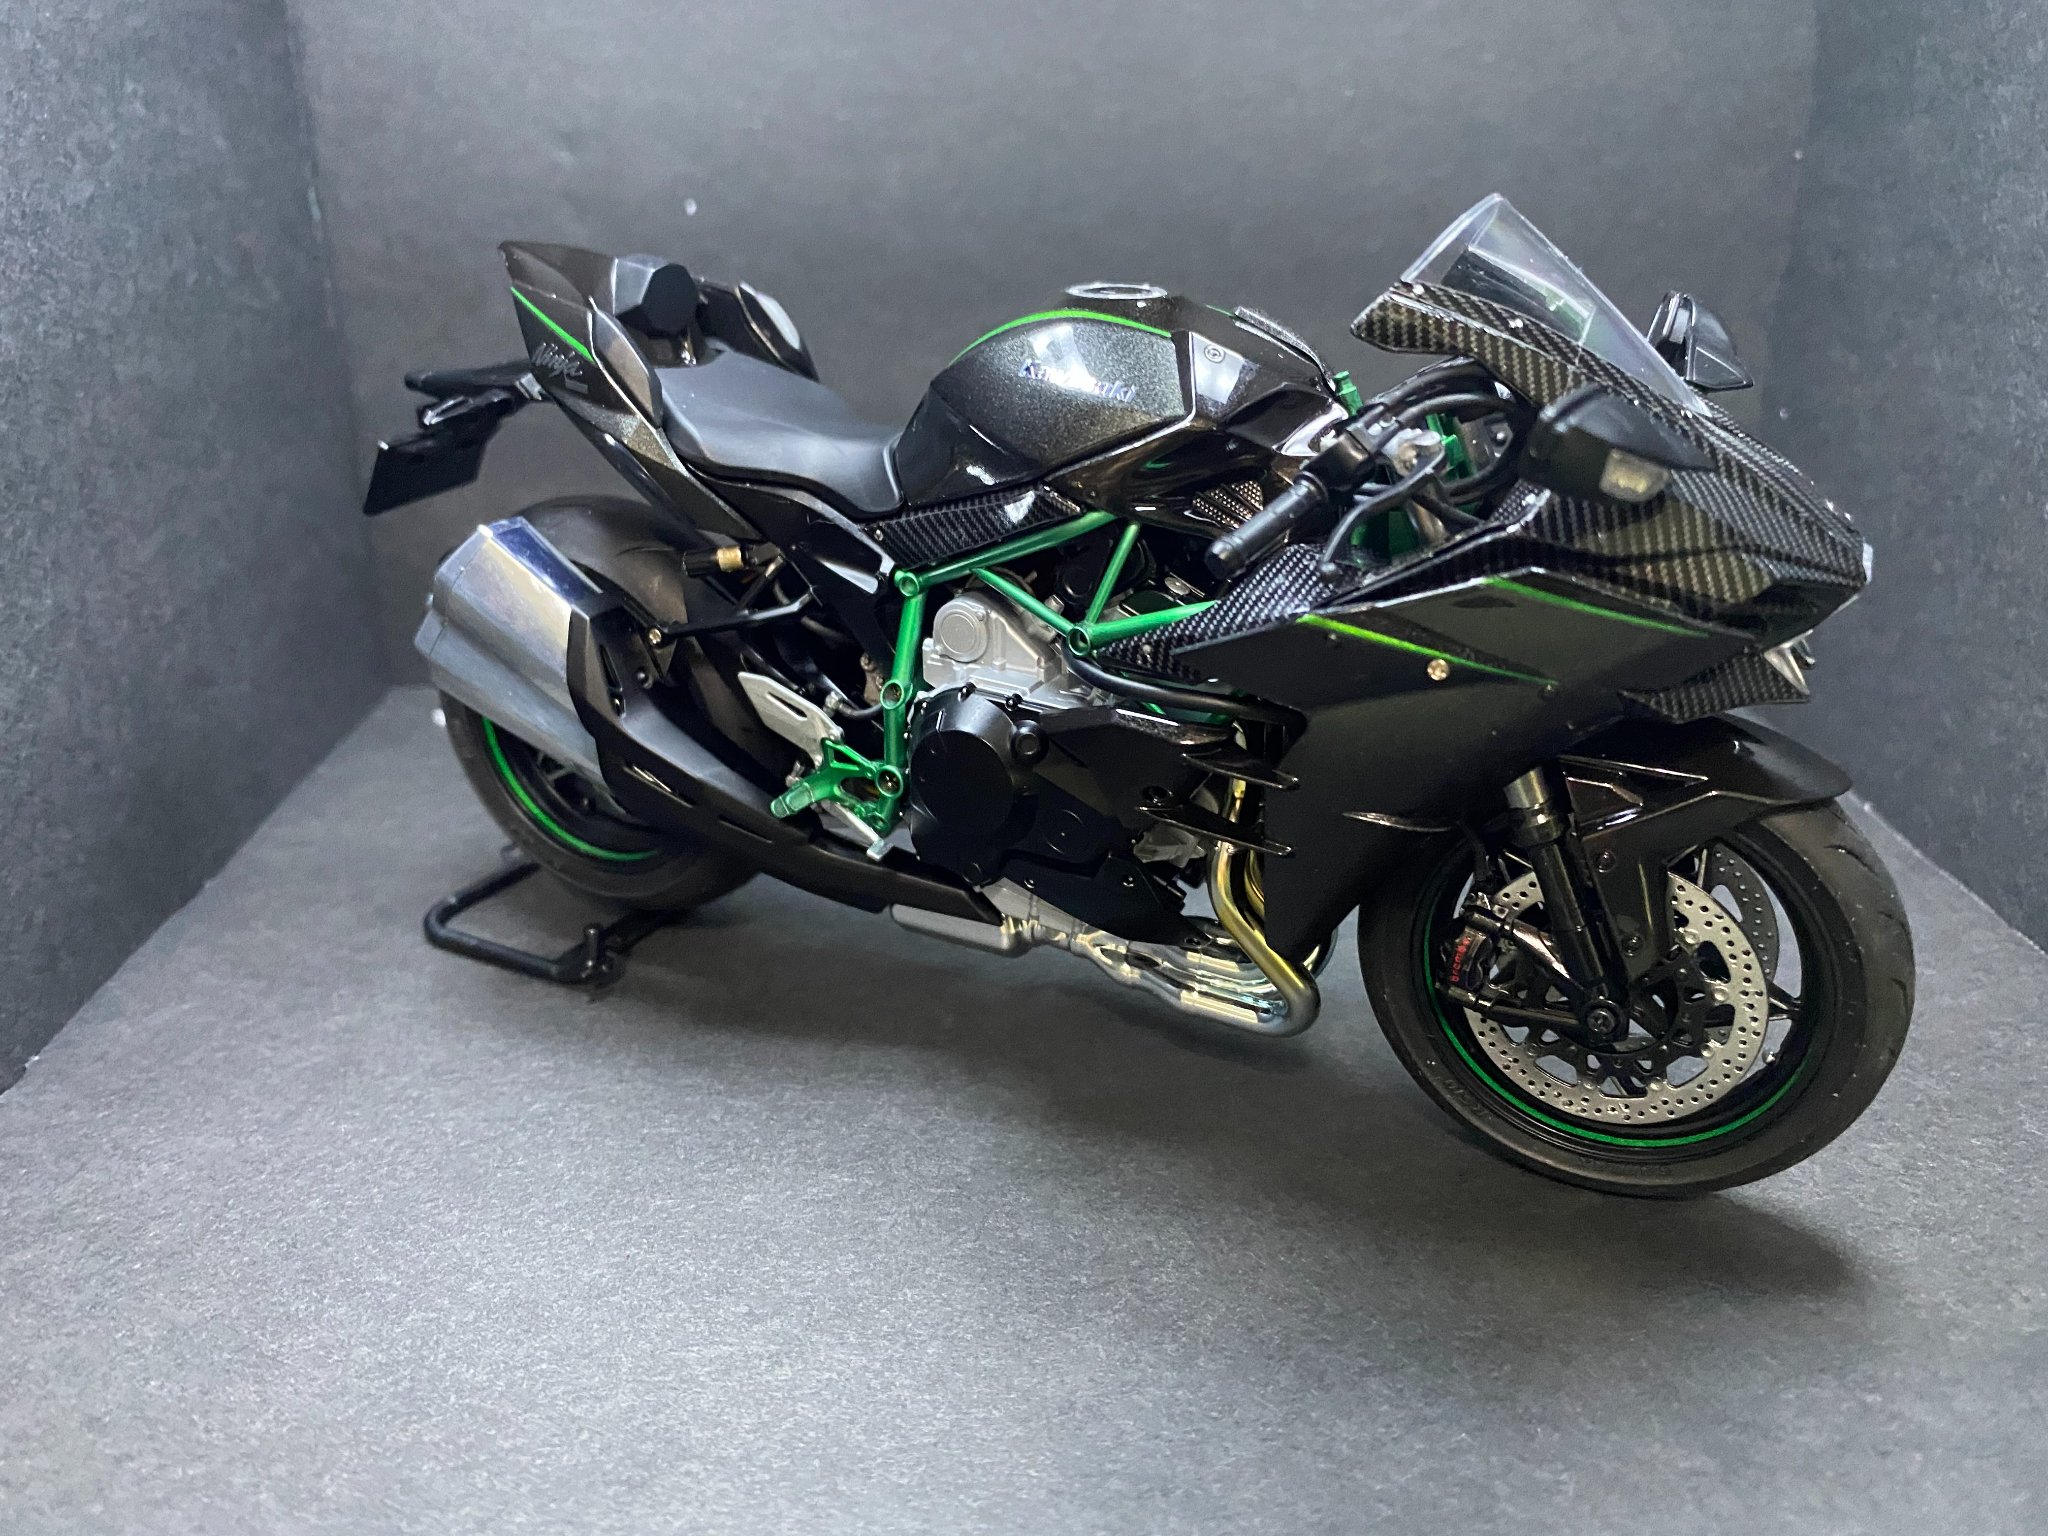
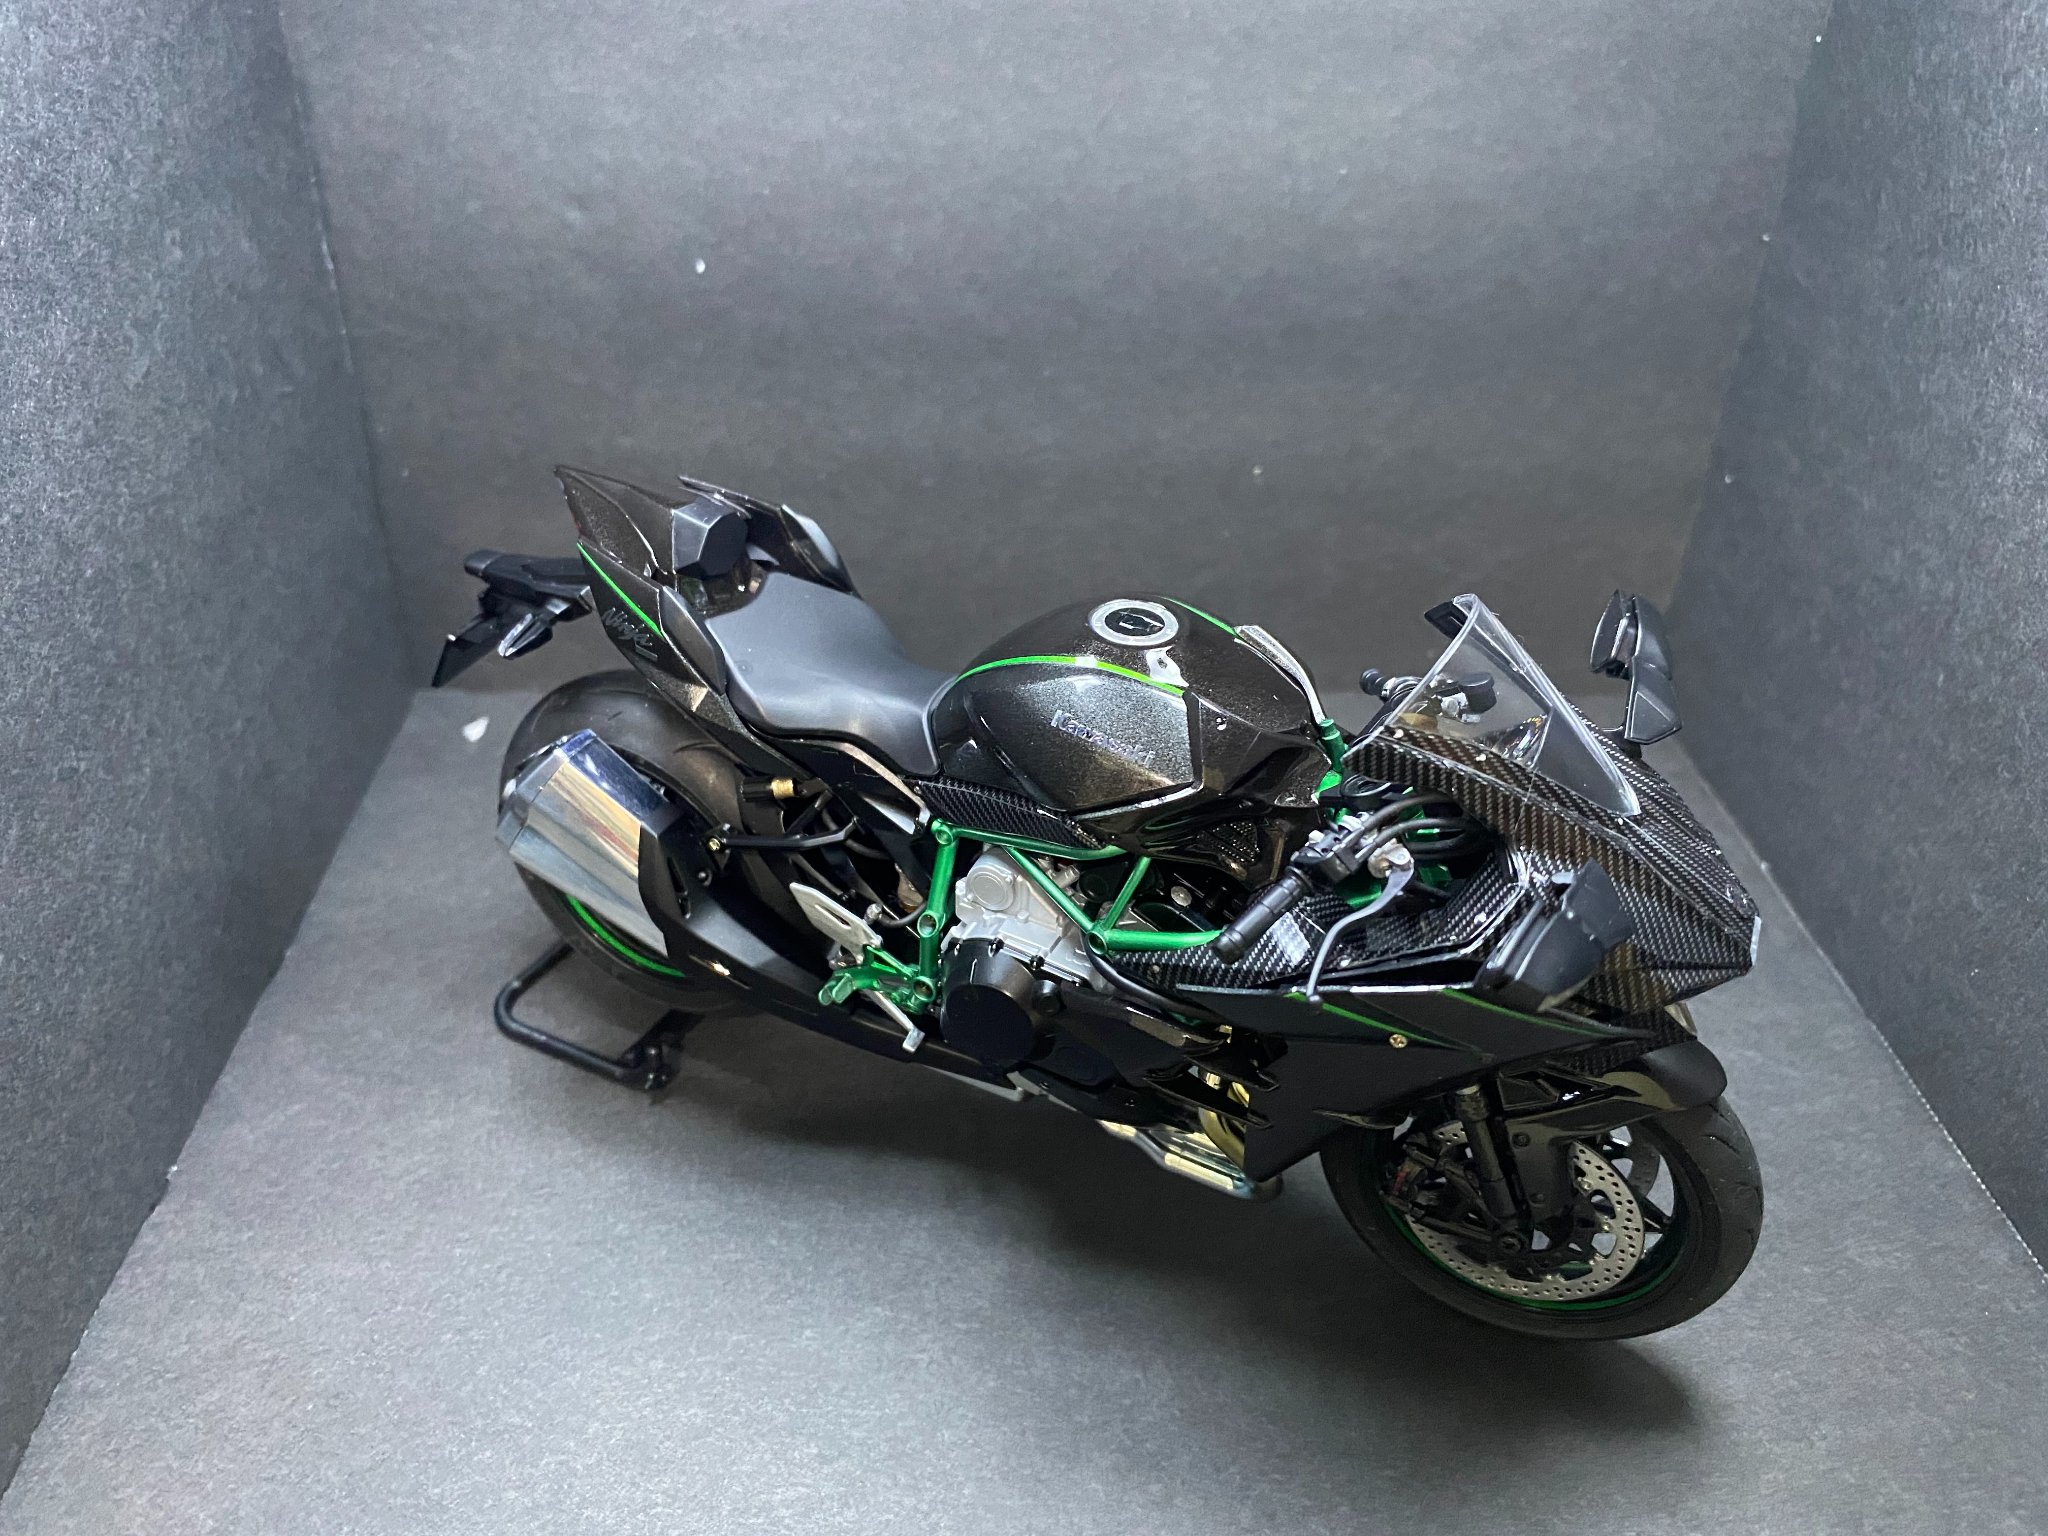
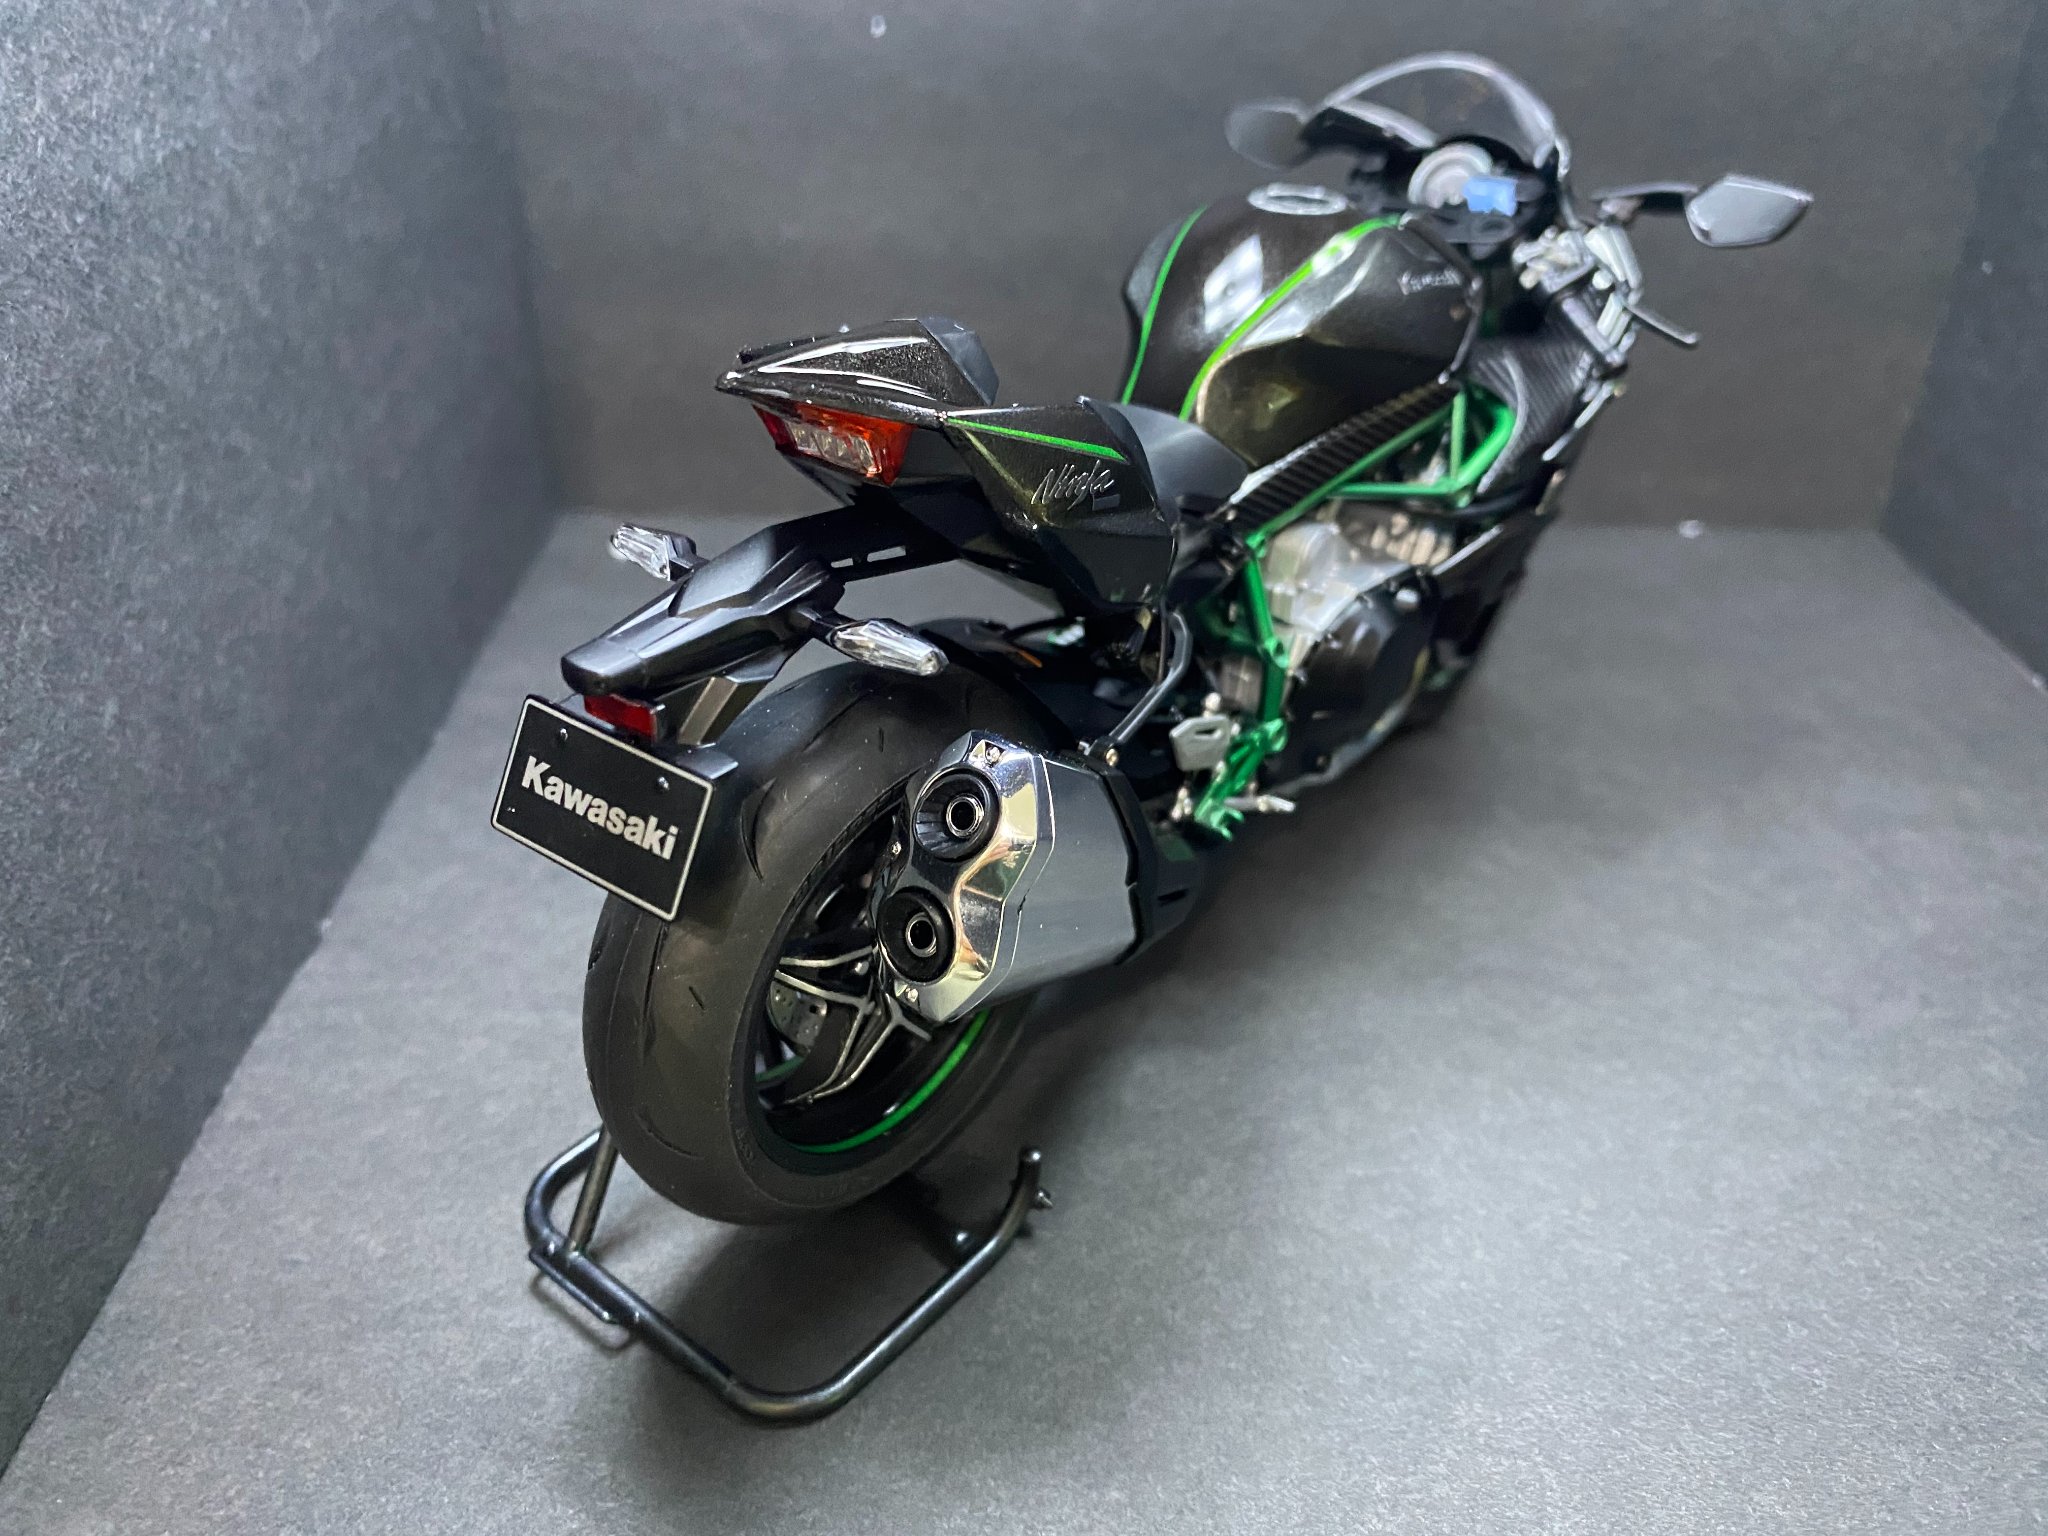
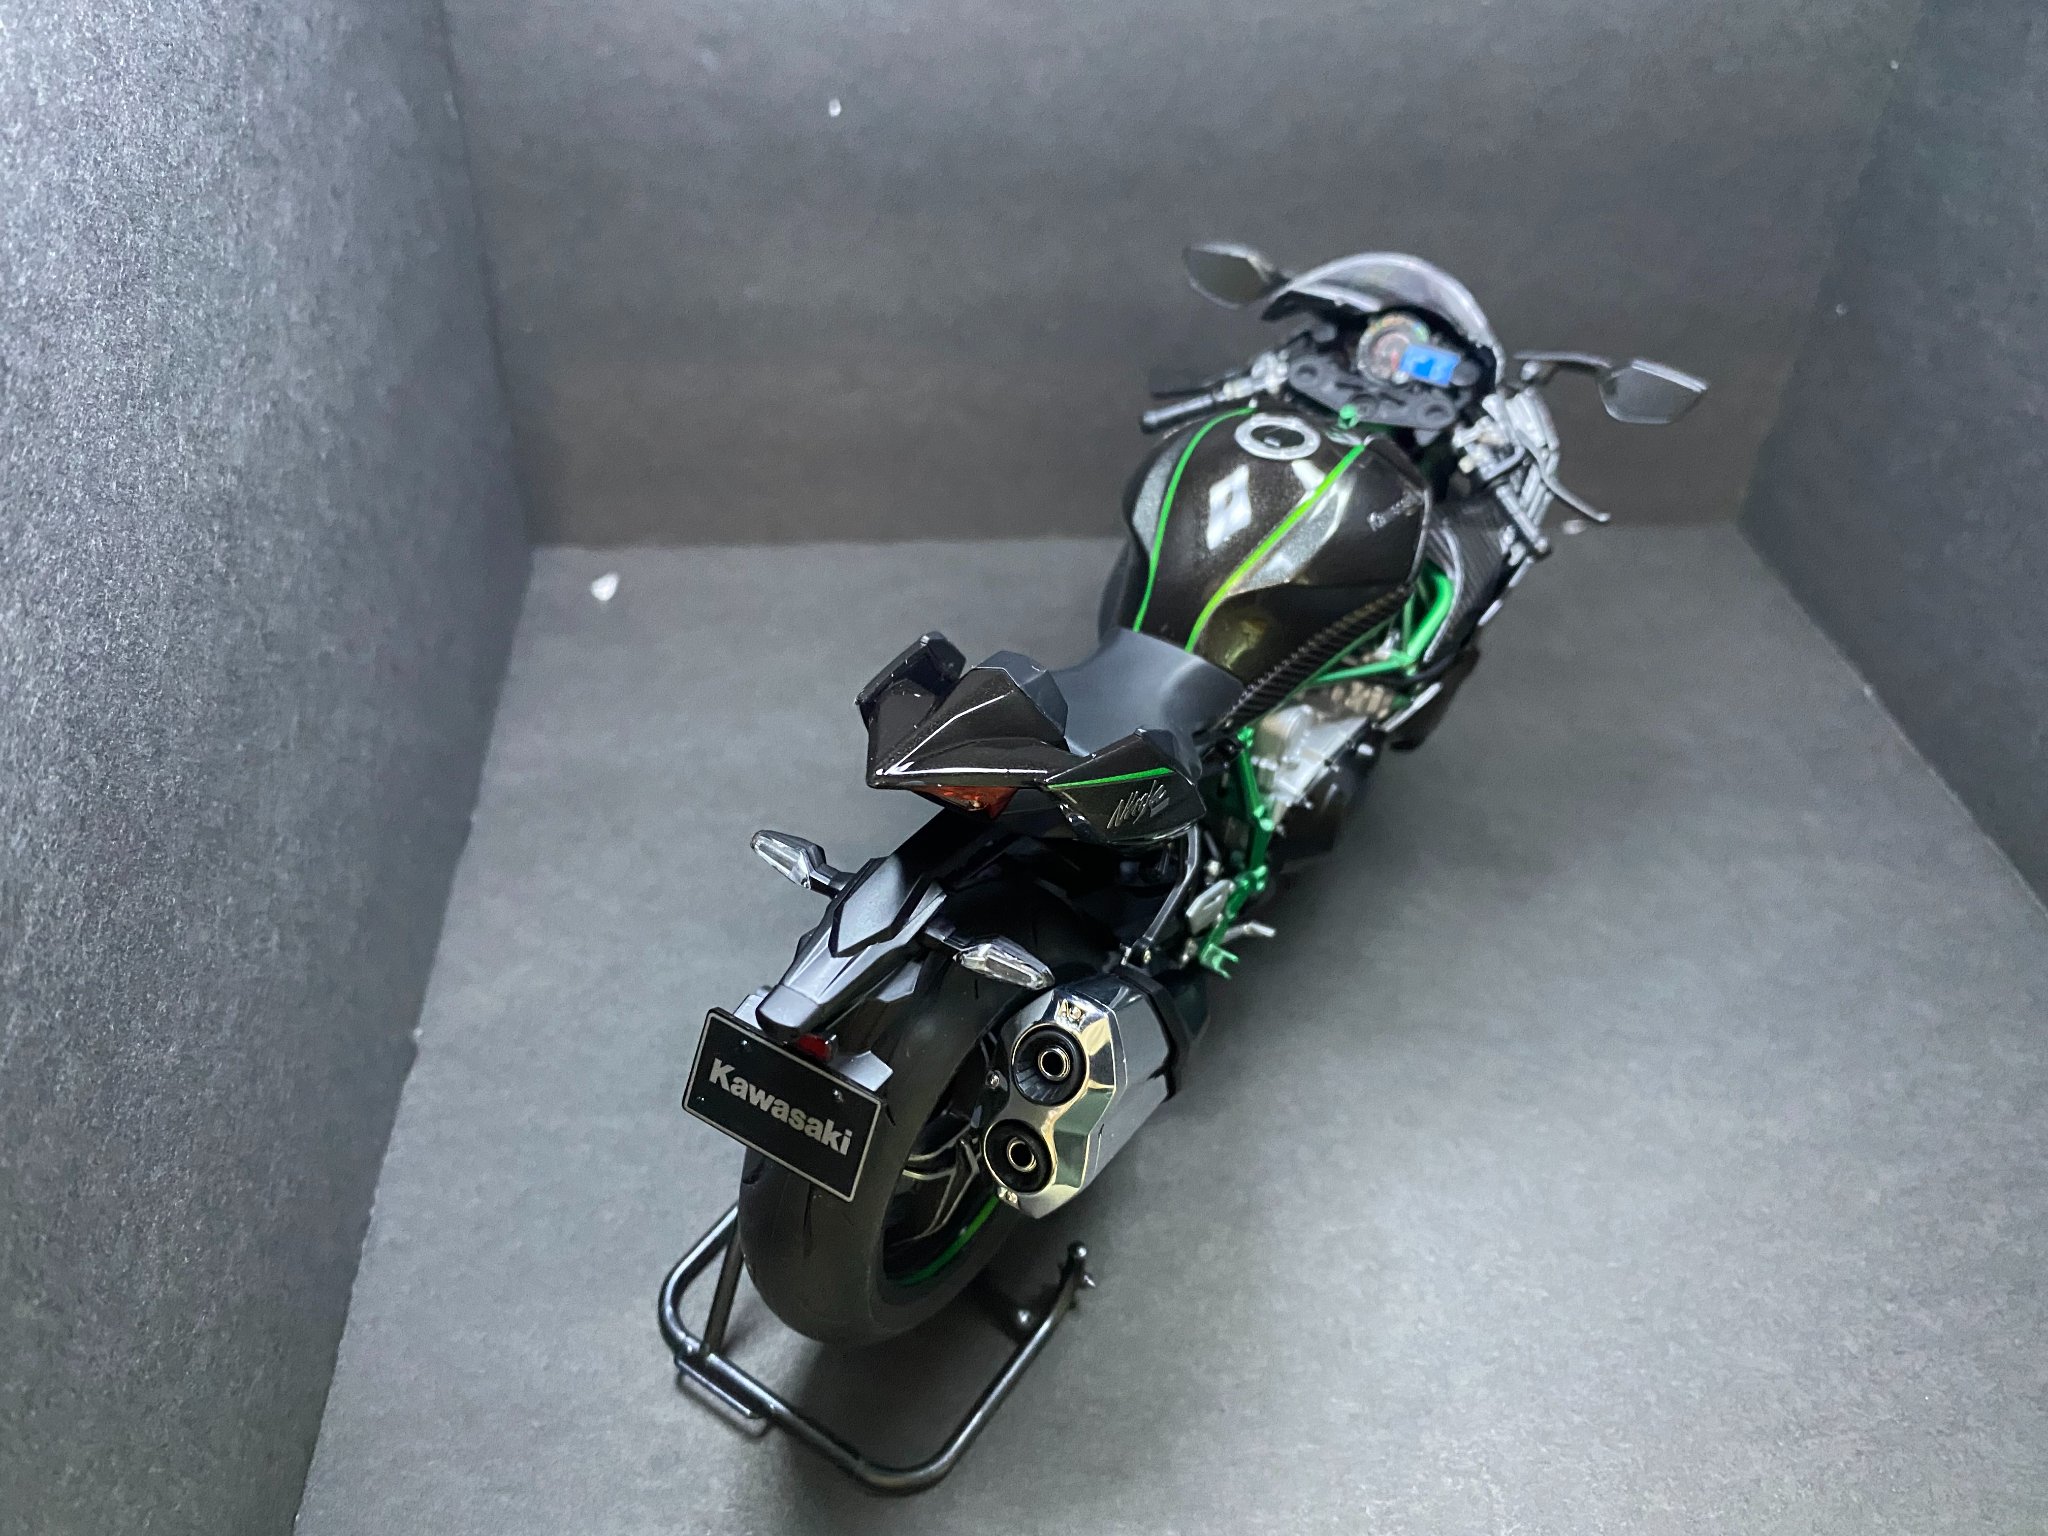
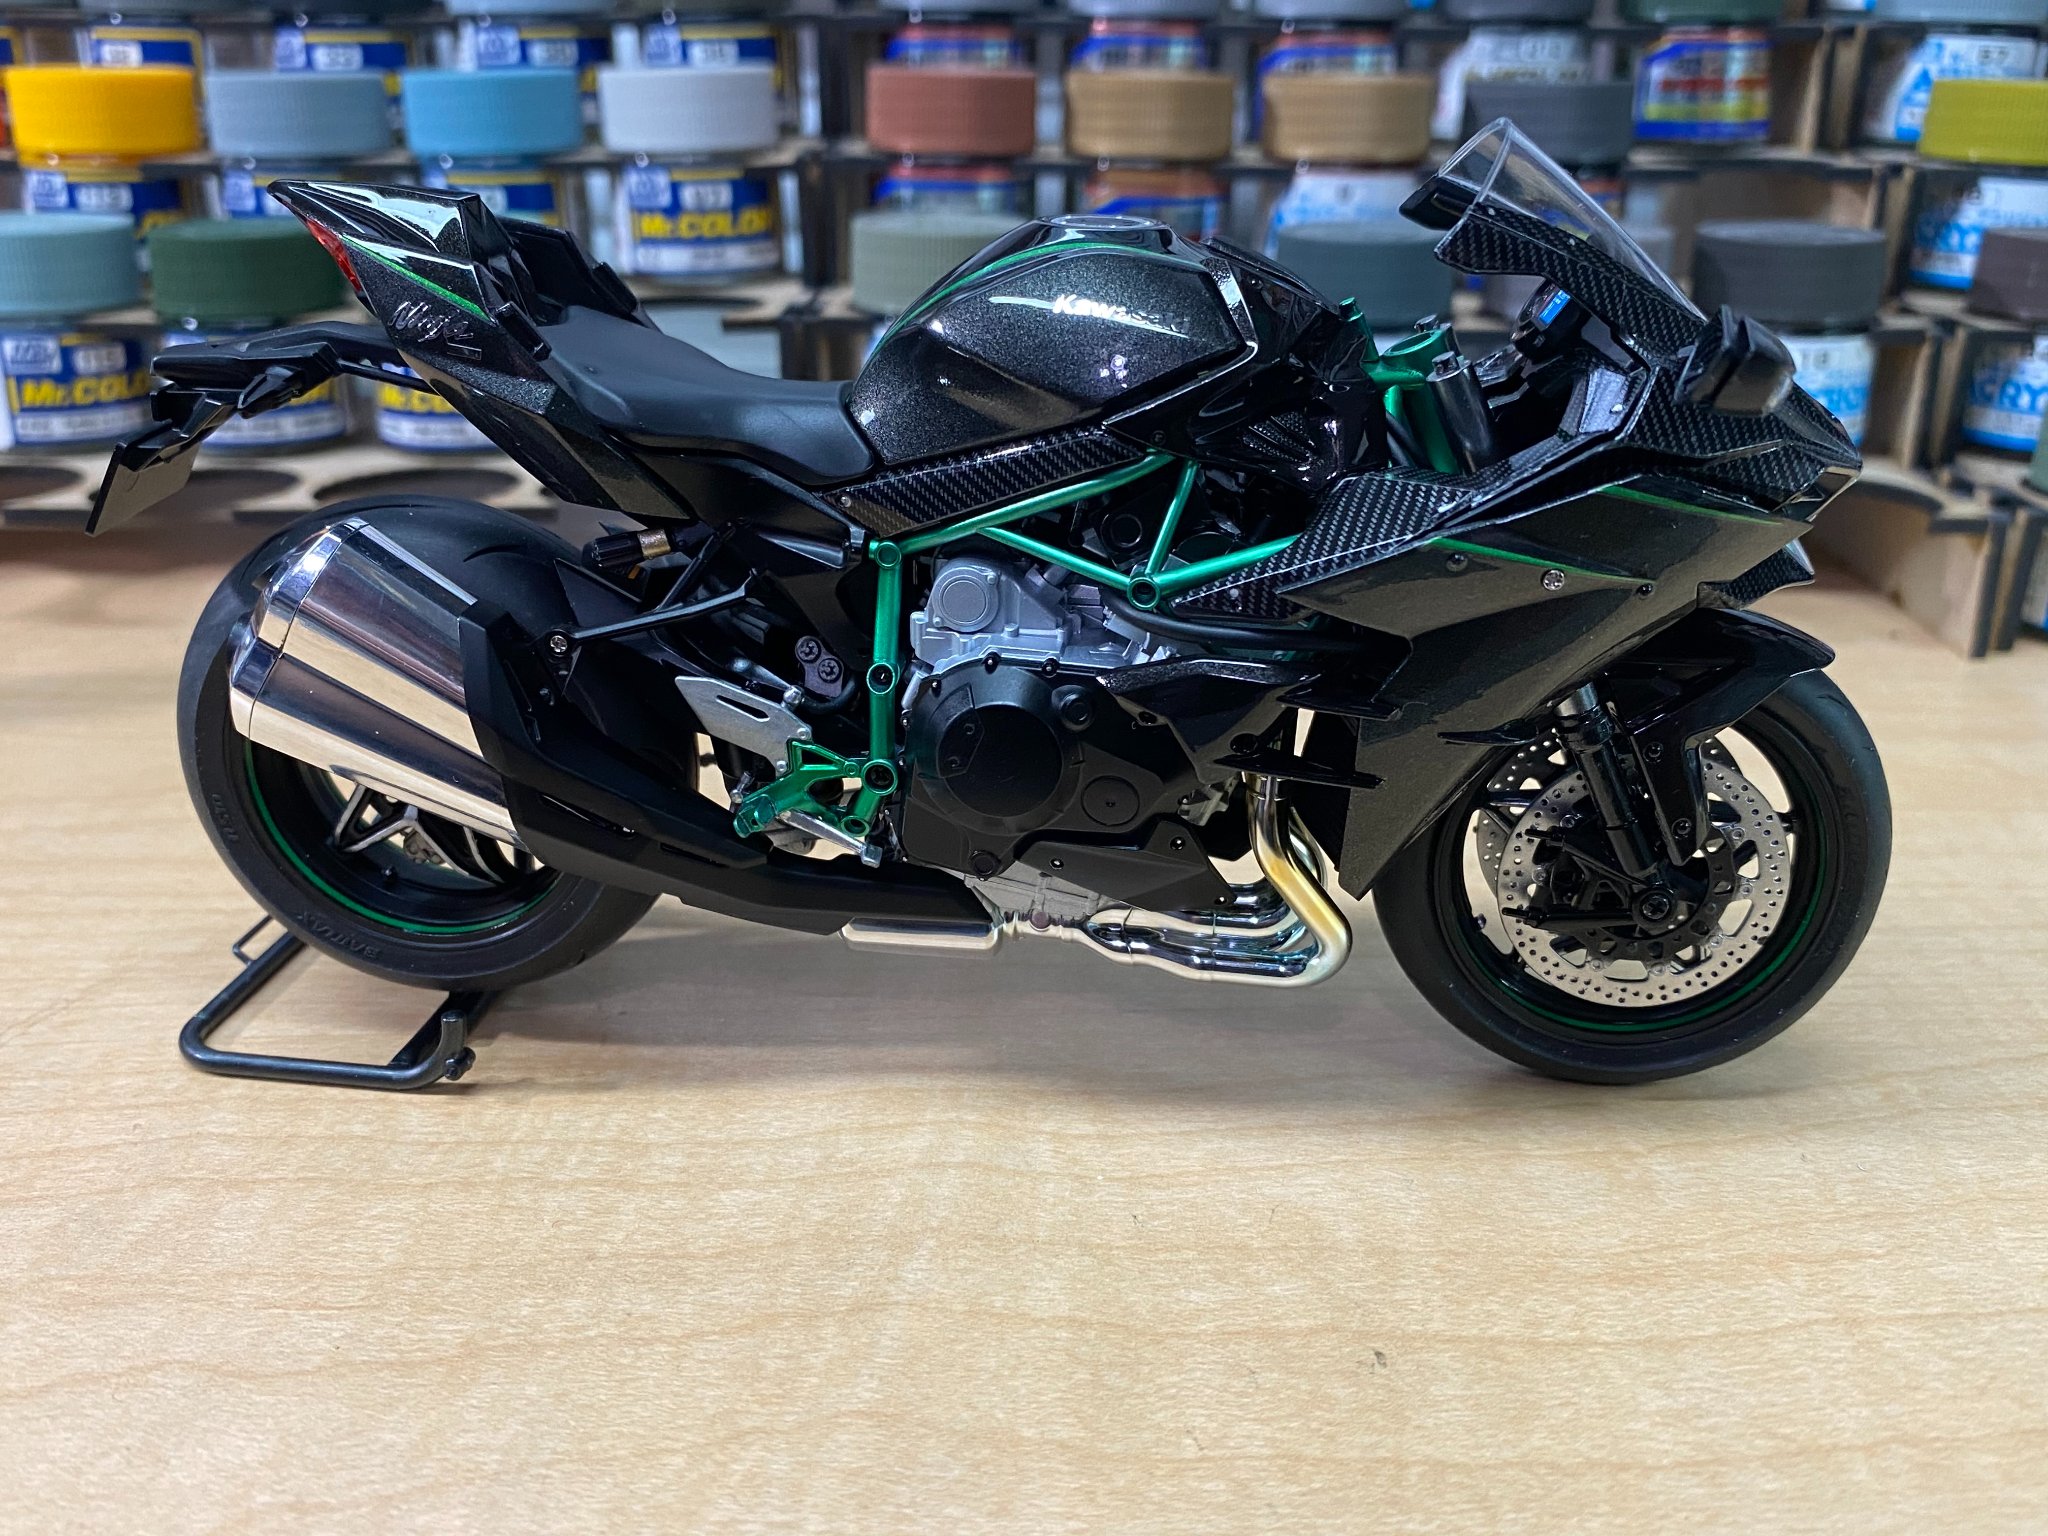
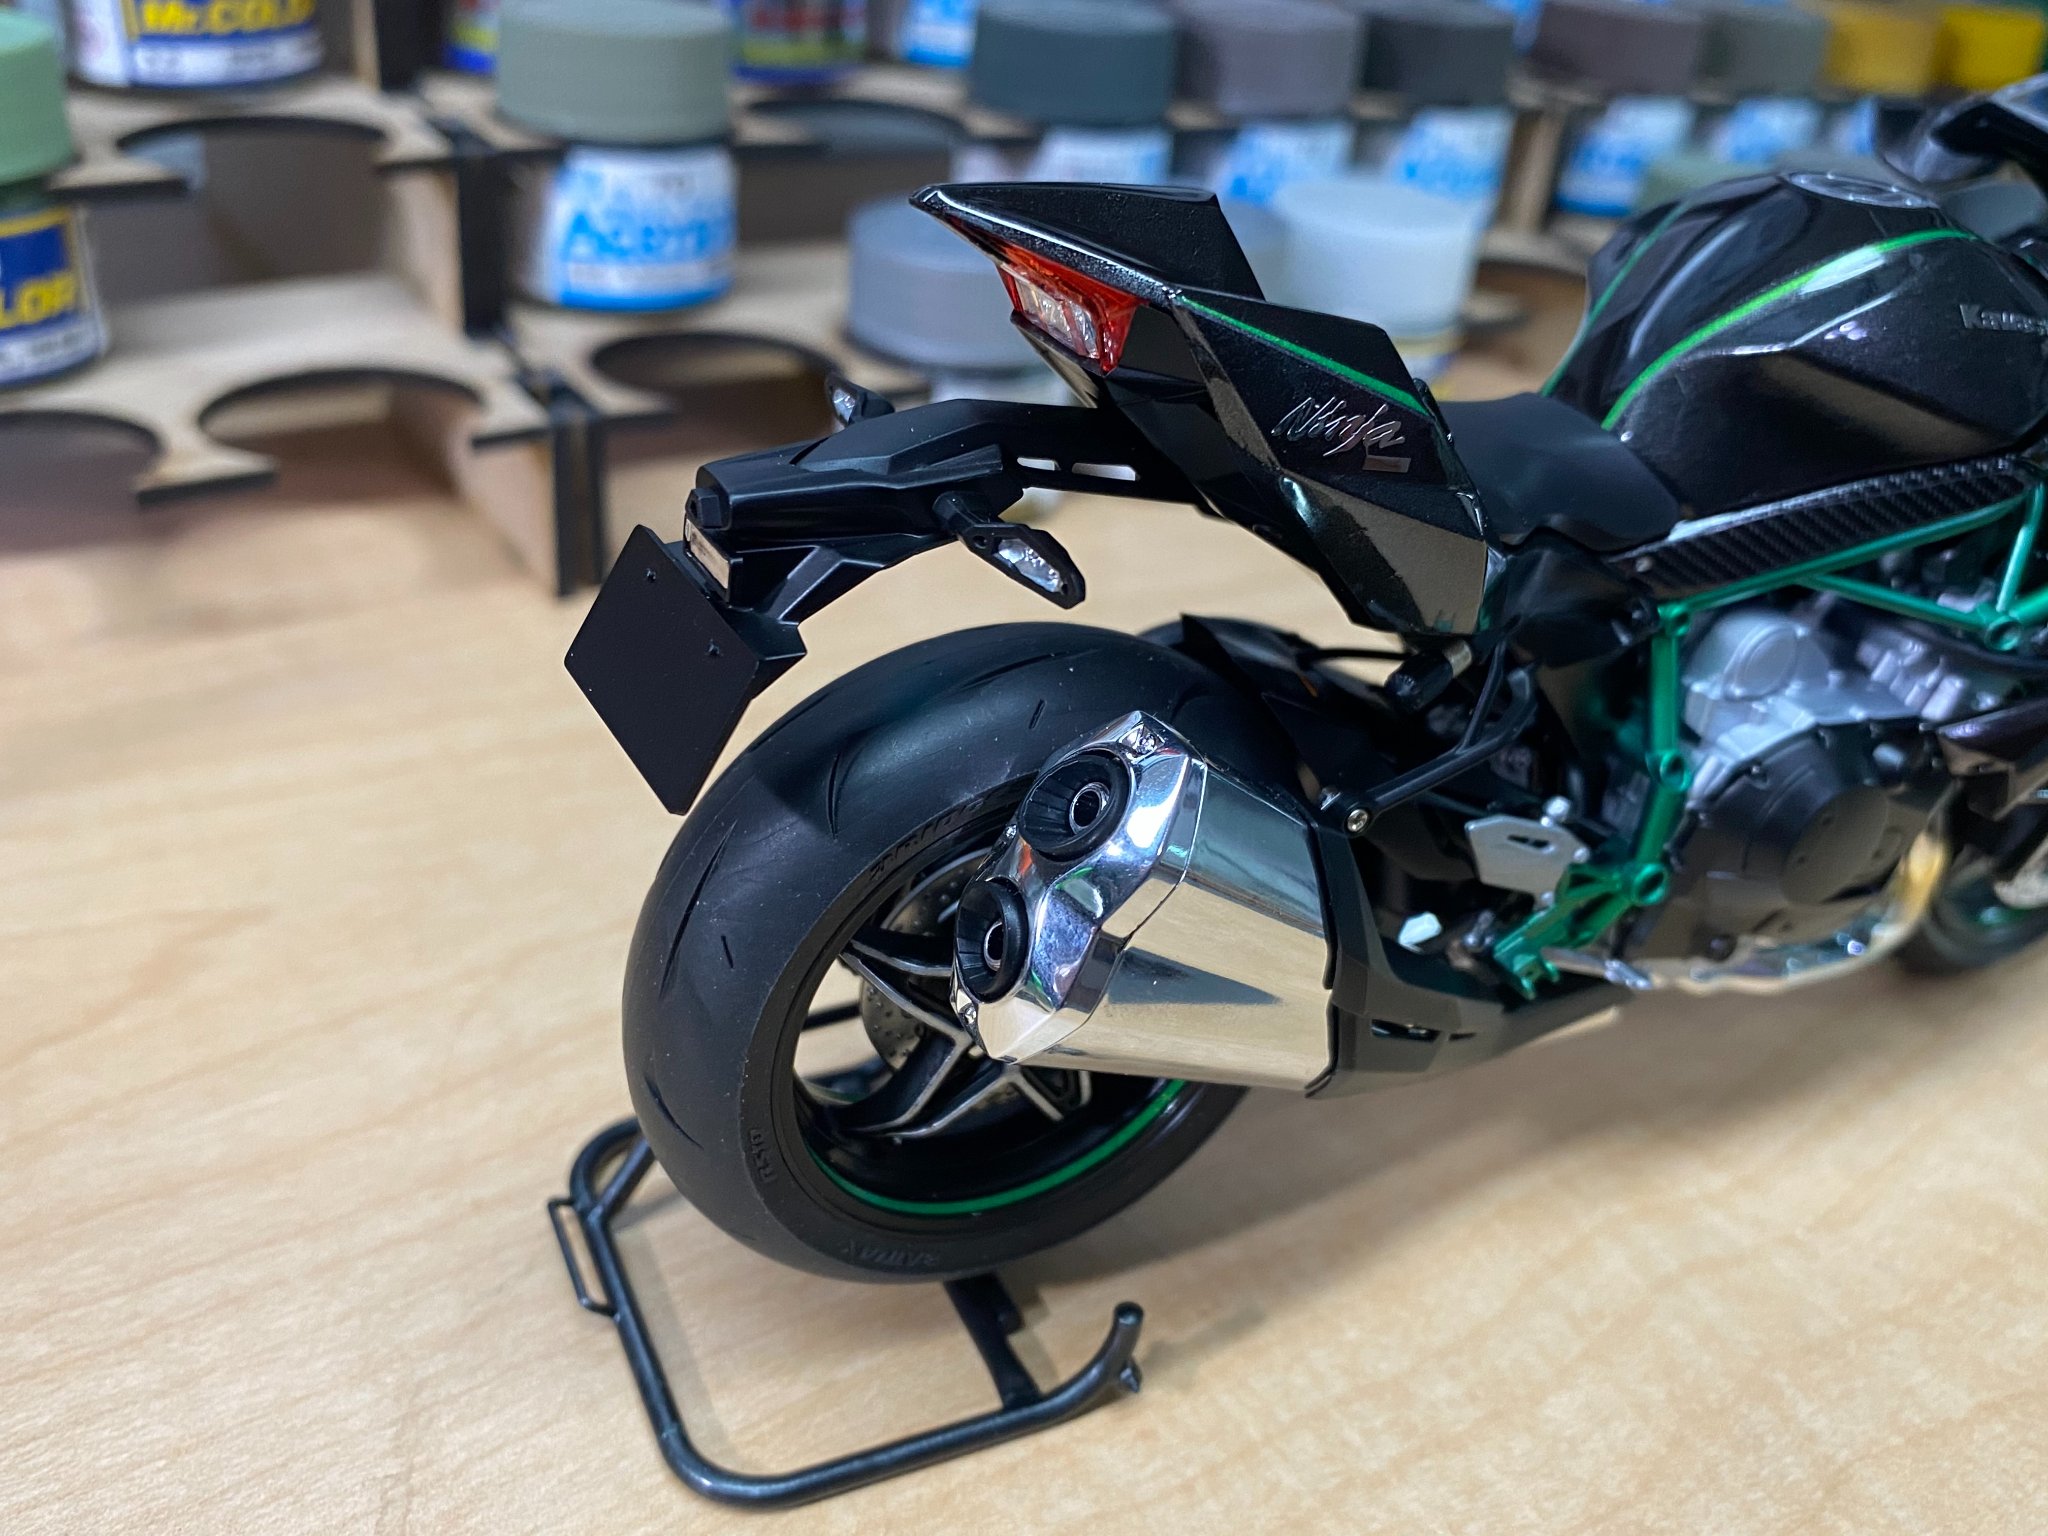
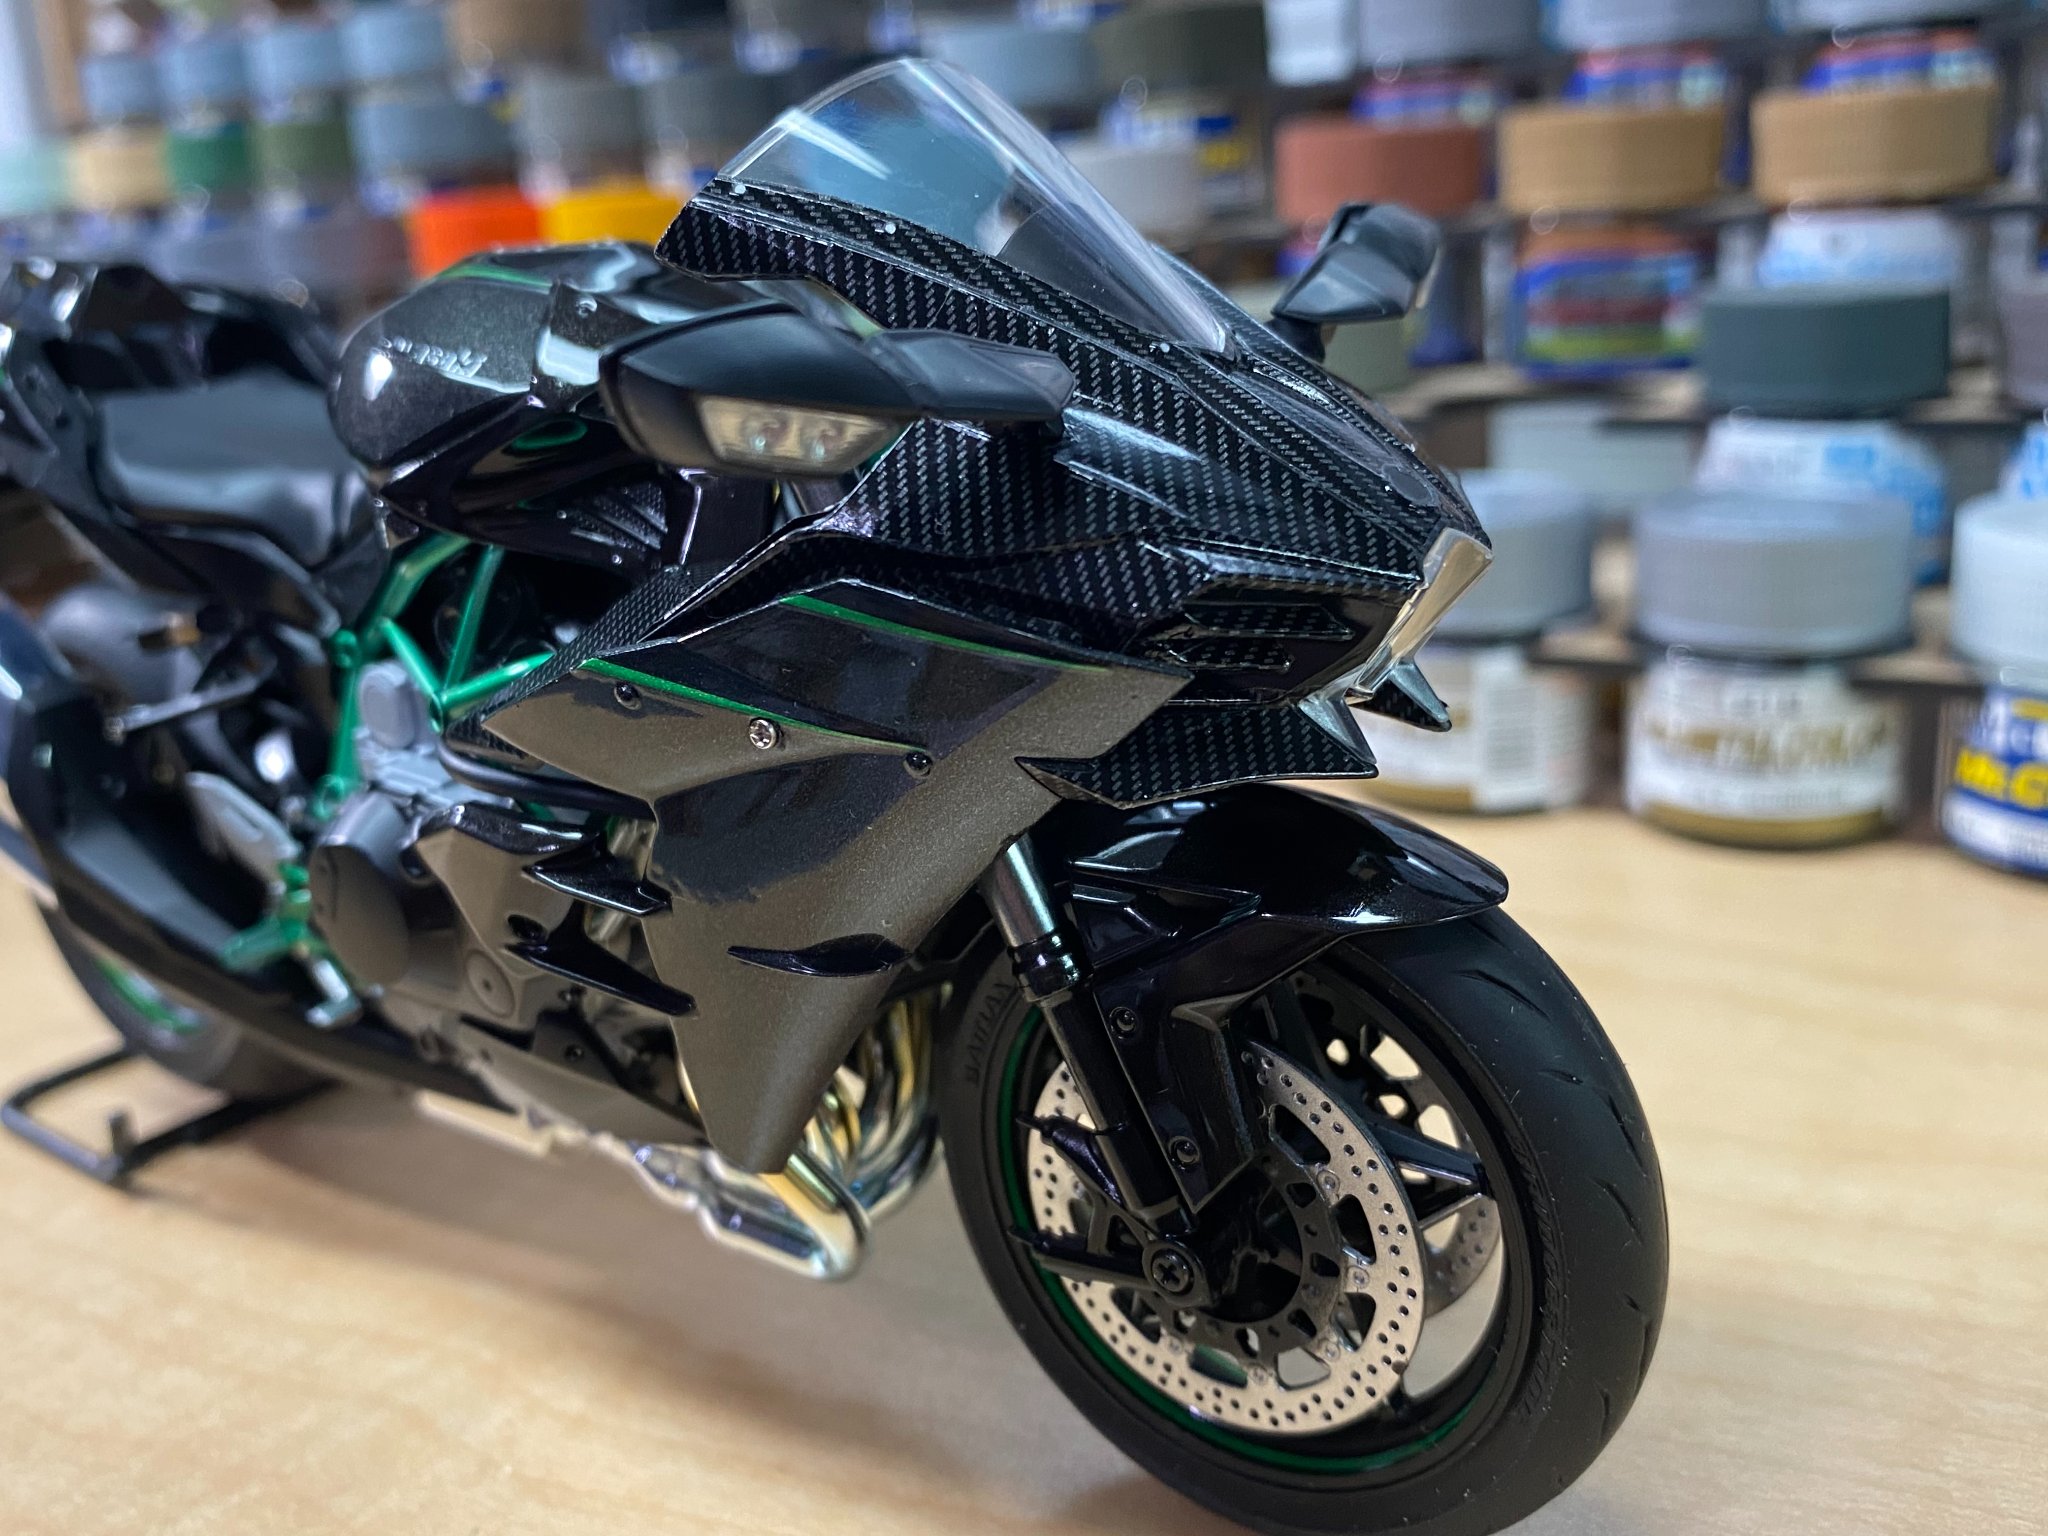
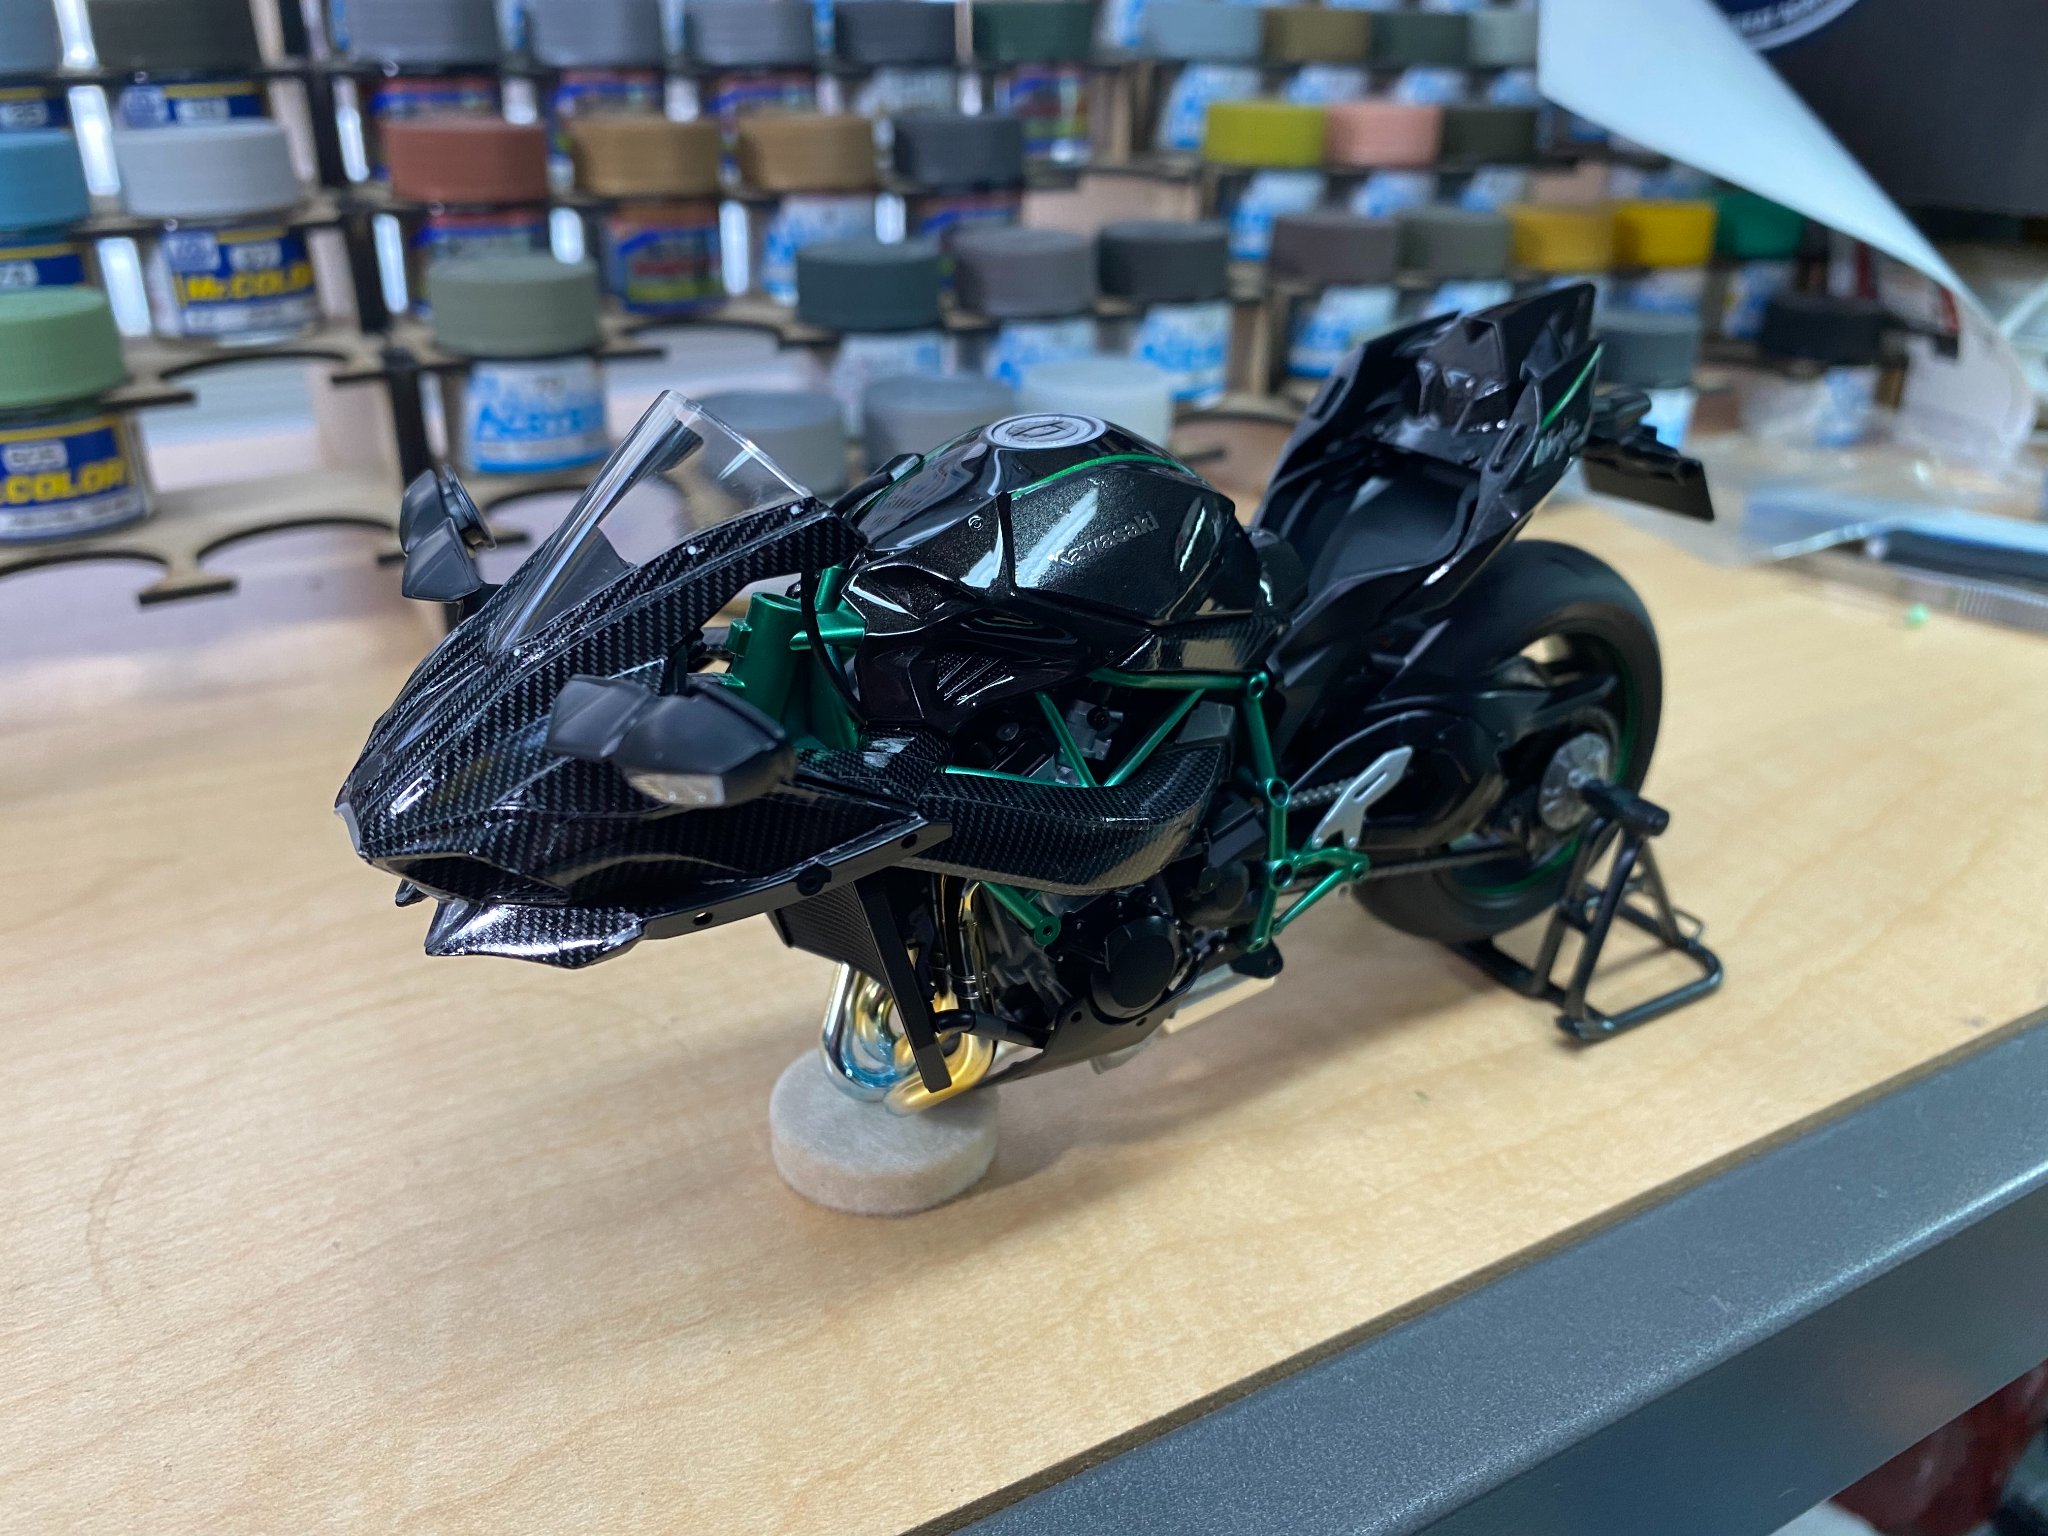
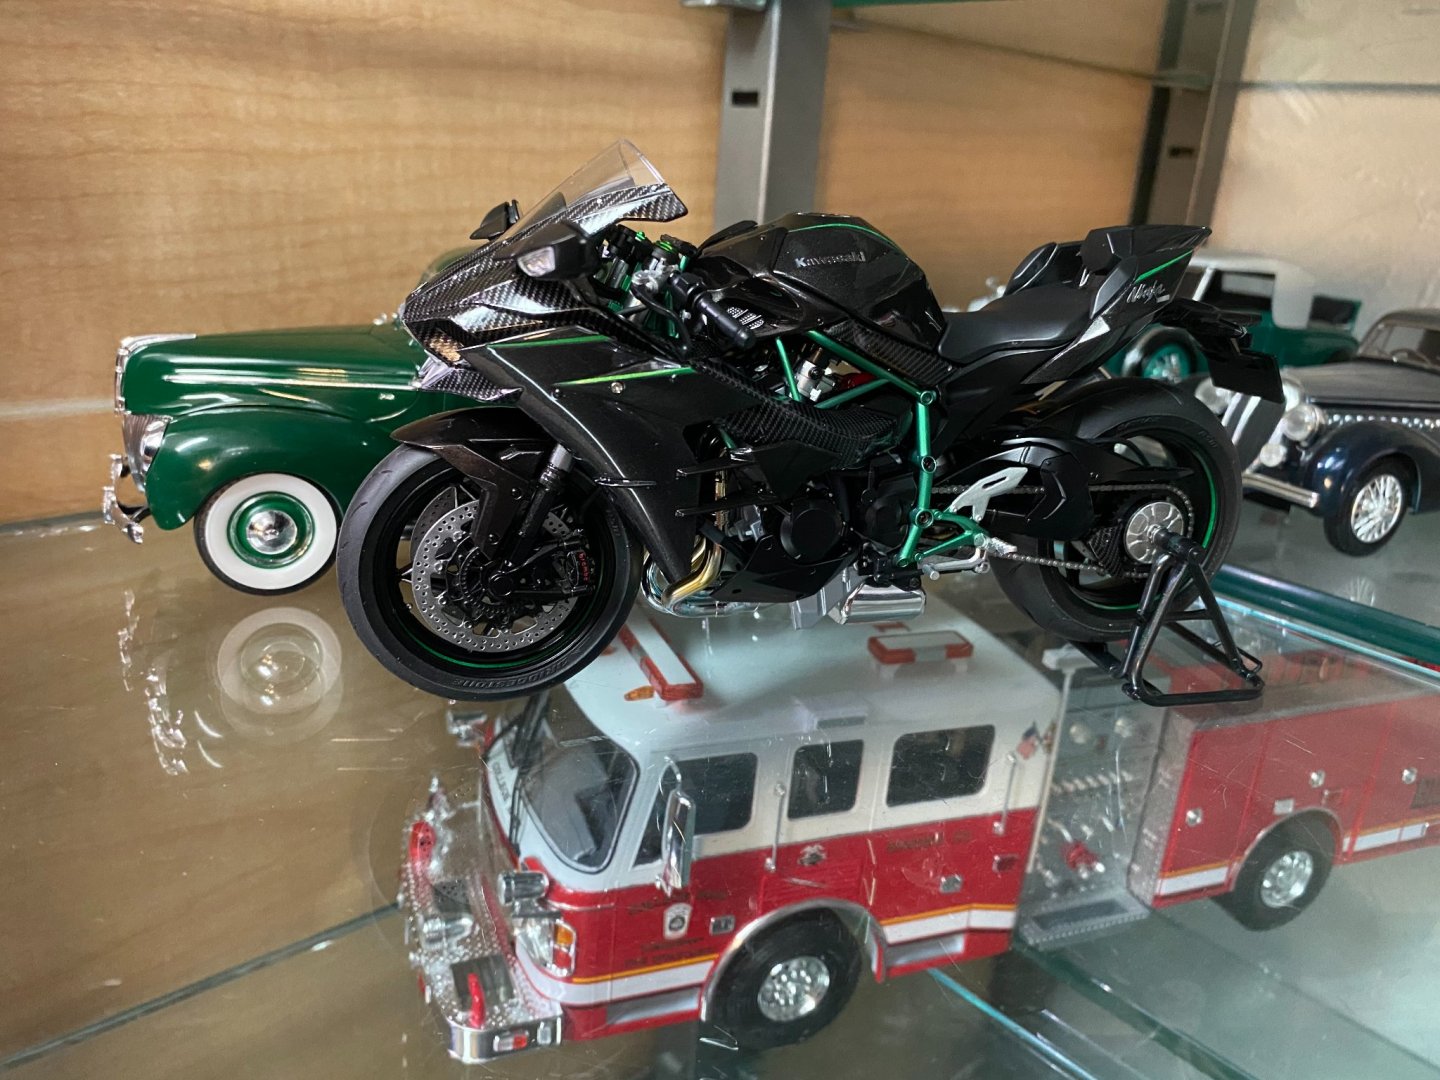
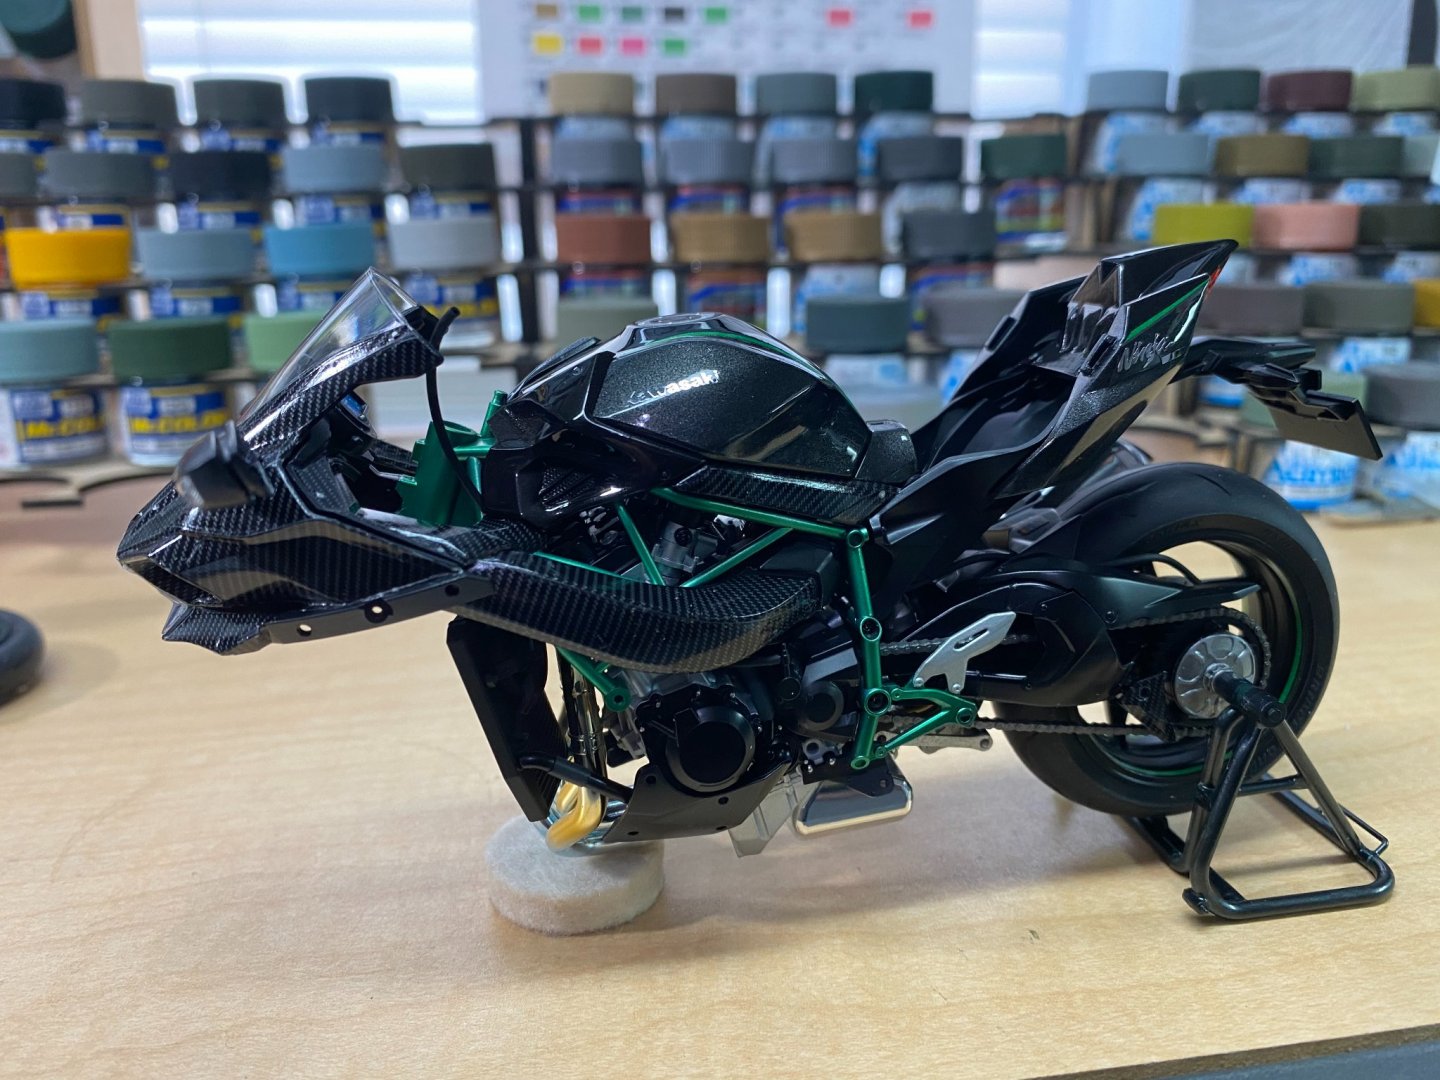
And another build comes to an end. Tamiya did a great job on this kit, it was a pleasure to build. She now finds herself in her resting place along side the '40 Ford Coupe in the display case. At some time in the future, will need to devote one entire shelf to motorcycles only. Others are waiting in line to be built. Thanks for following along and for all the encouragement along the way!

- 85 replies
-
- 13
-
-
Way too fast. One street legal version of it tops out at over 200 mph. Where could you ride that thing at 200 mph besides a modern motor speedway like Daytona?
-
This came from Jazz Hobby out of Hong Kong. Fast and reliable. Always low prices. Main land China is a totally different animal. Good luck with that. Big difference with Taiwan, Hong Kong, or Japan as opposed to mainland China.
-
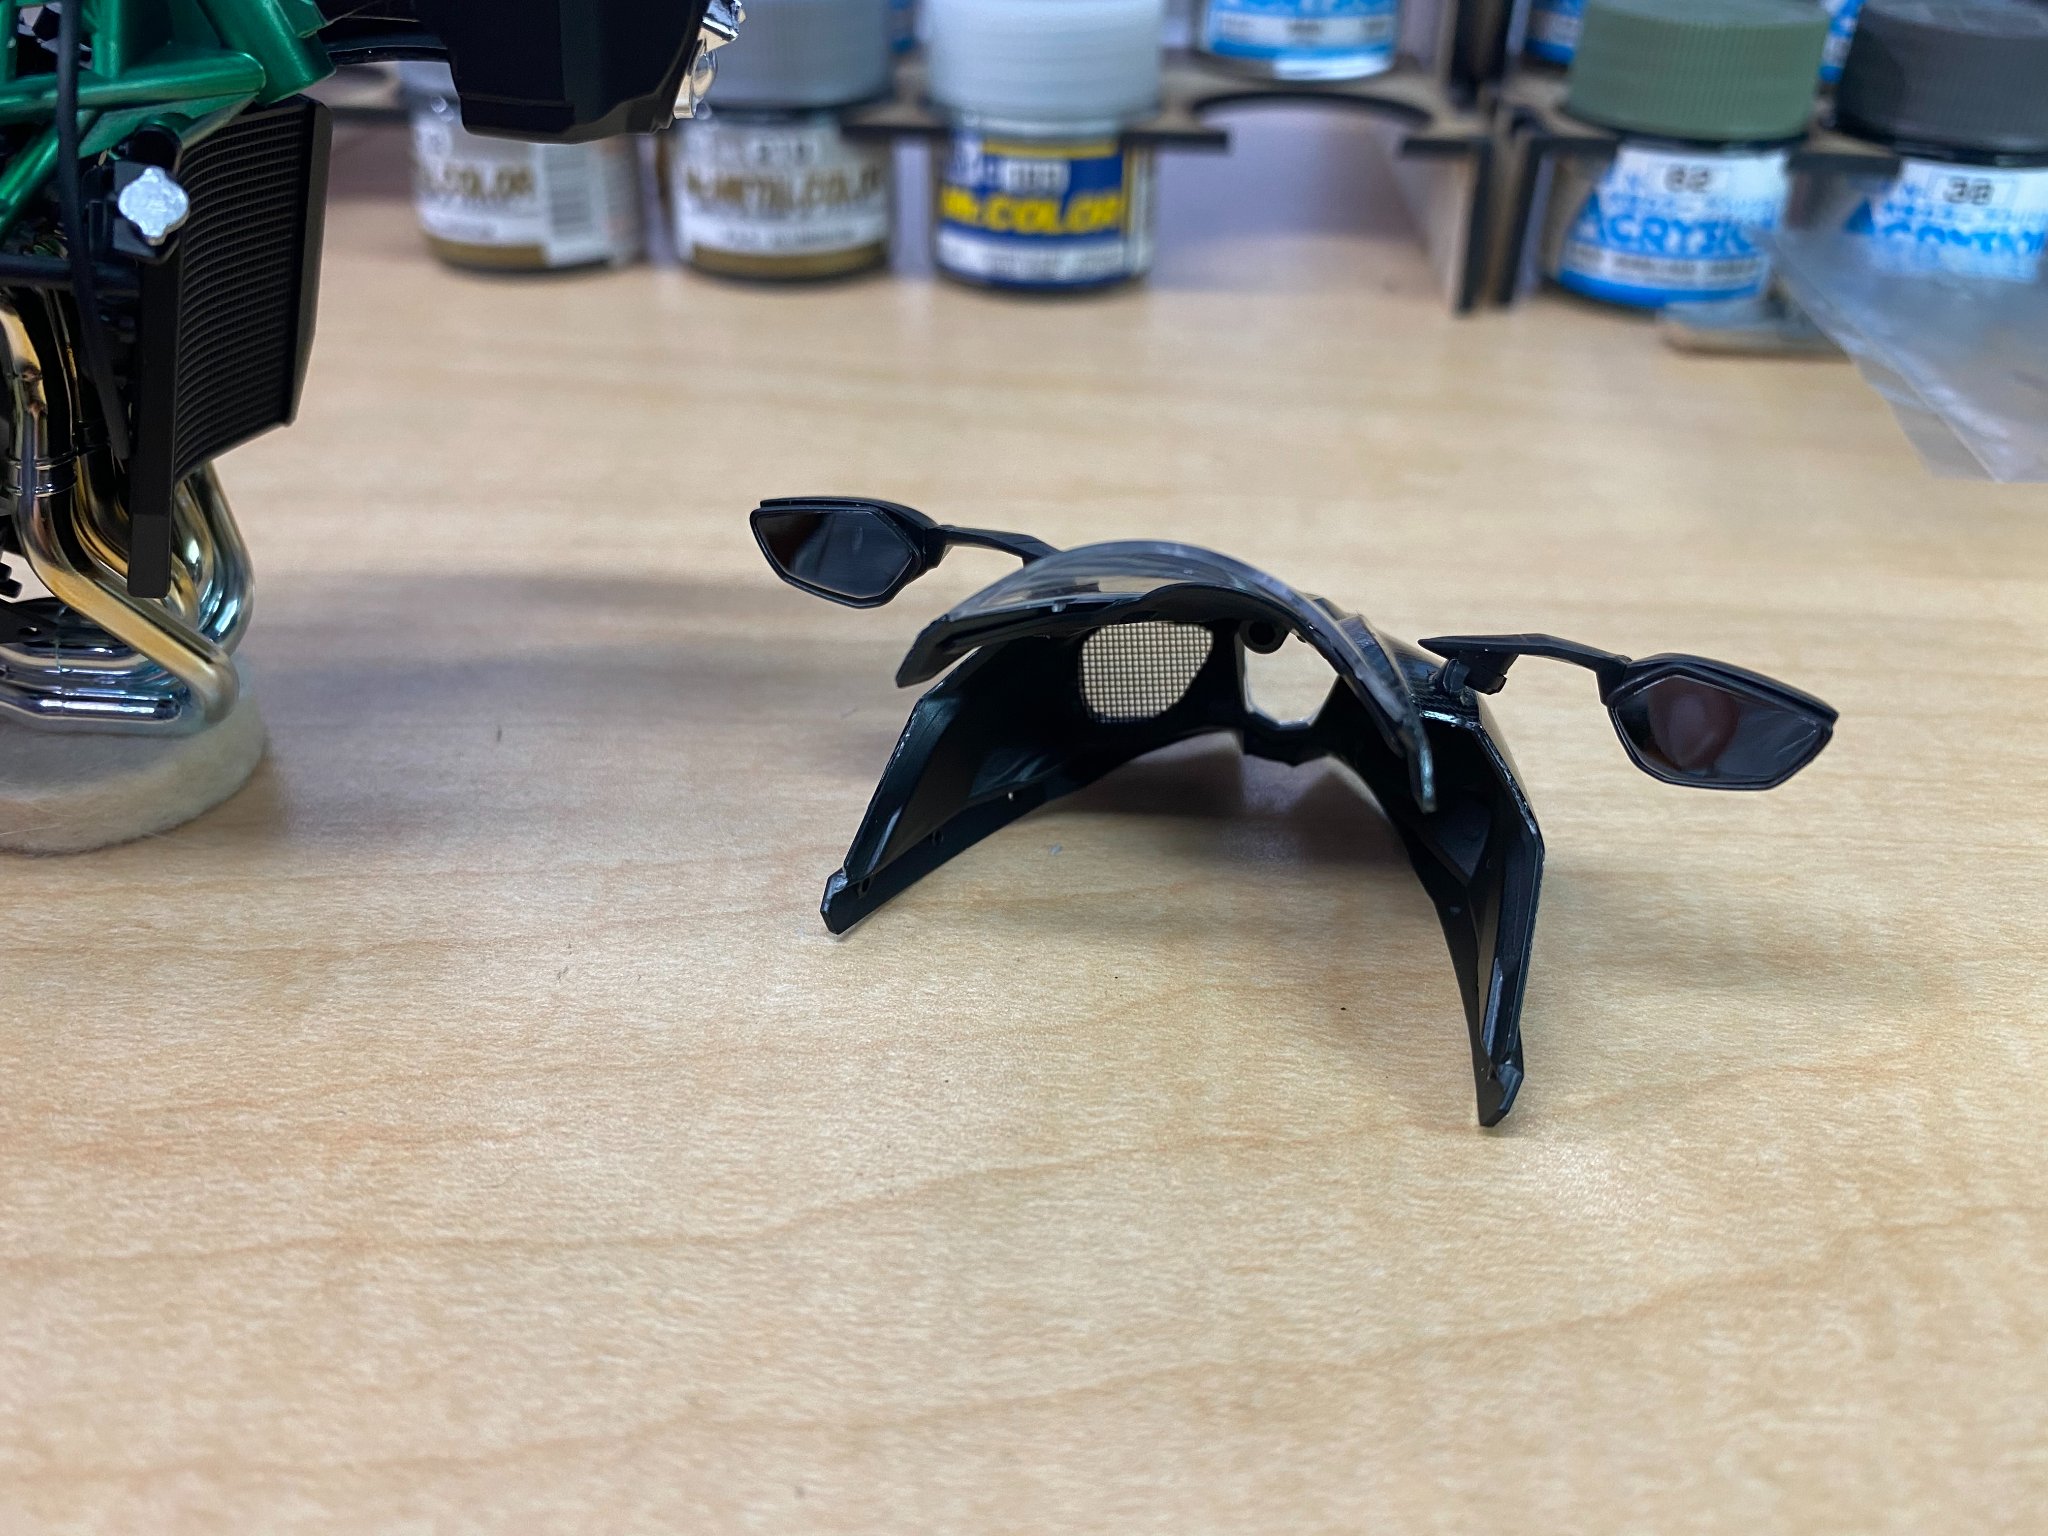
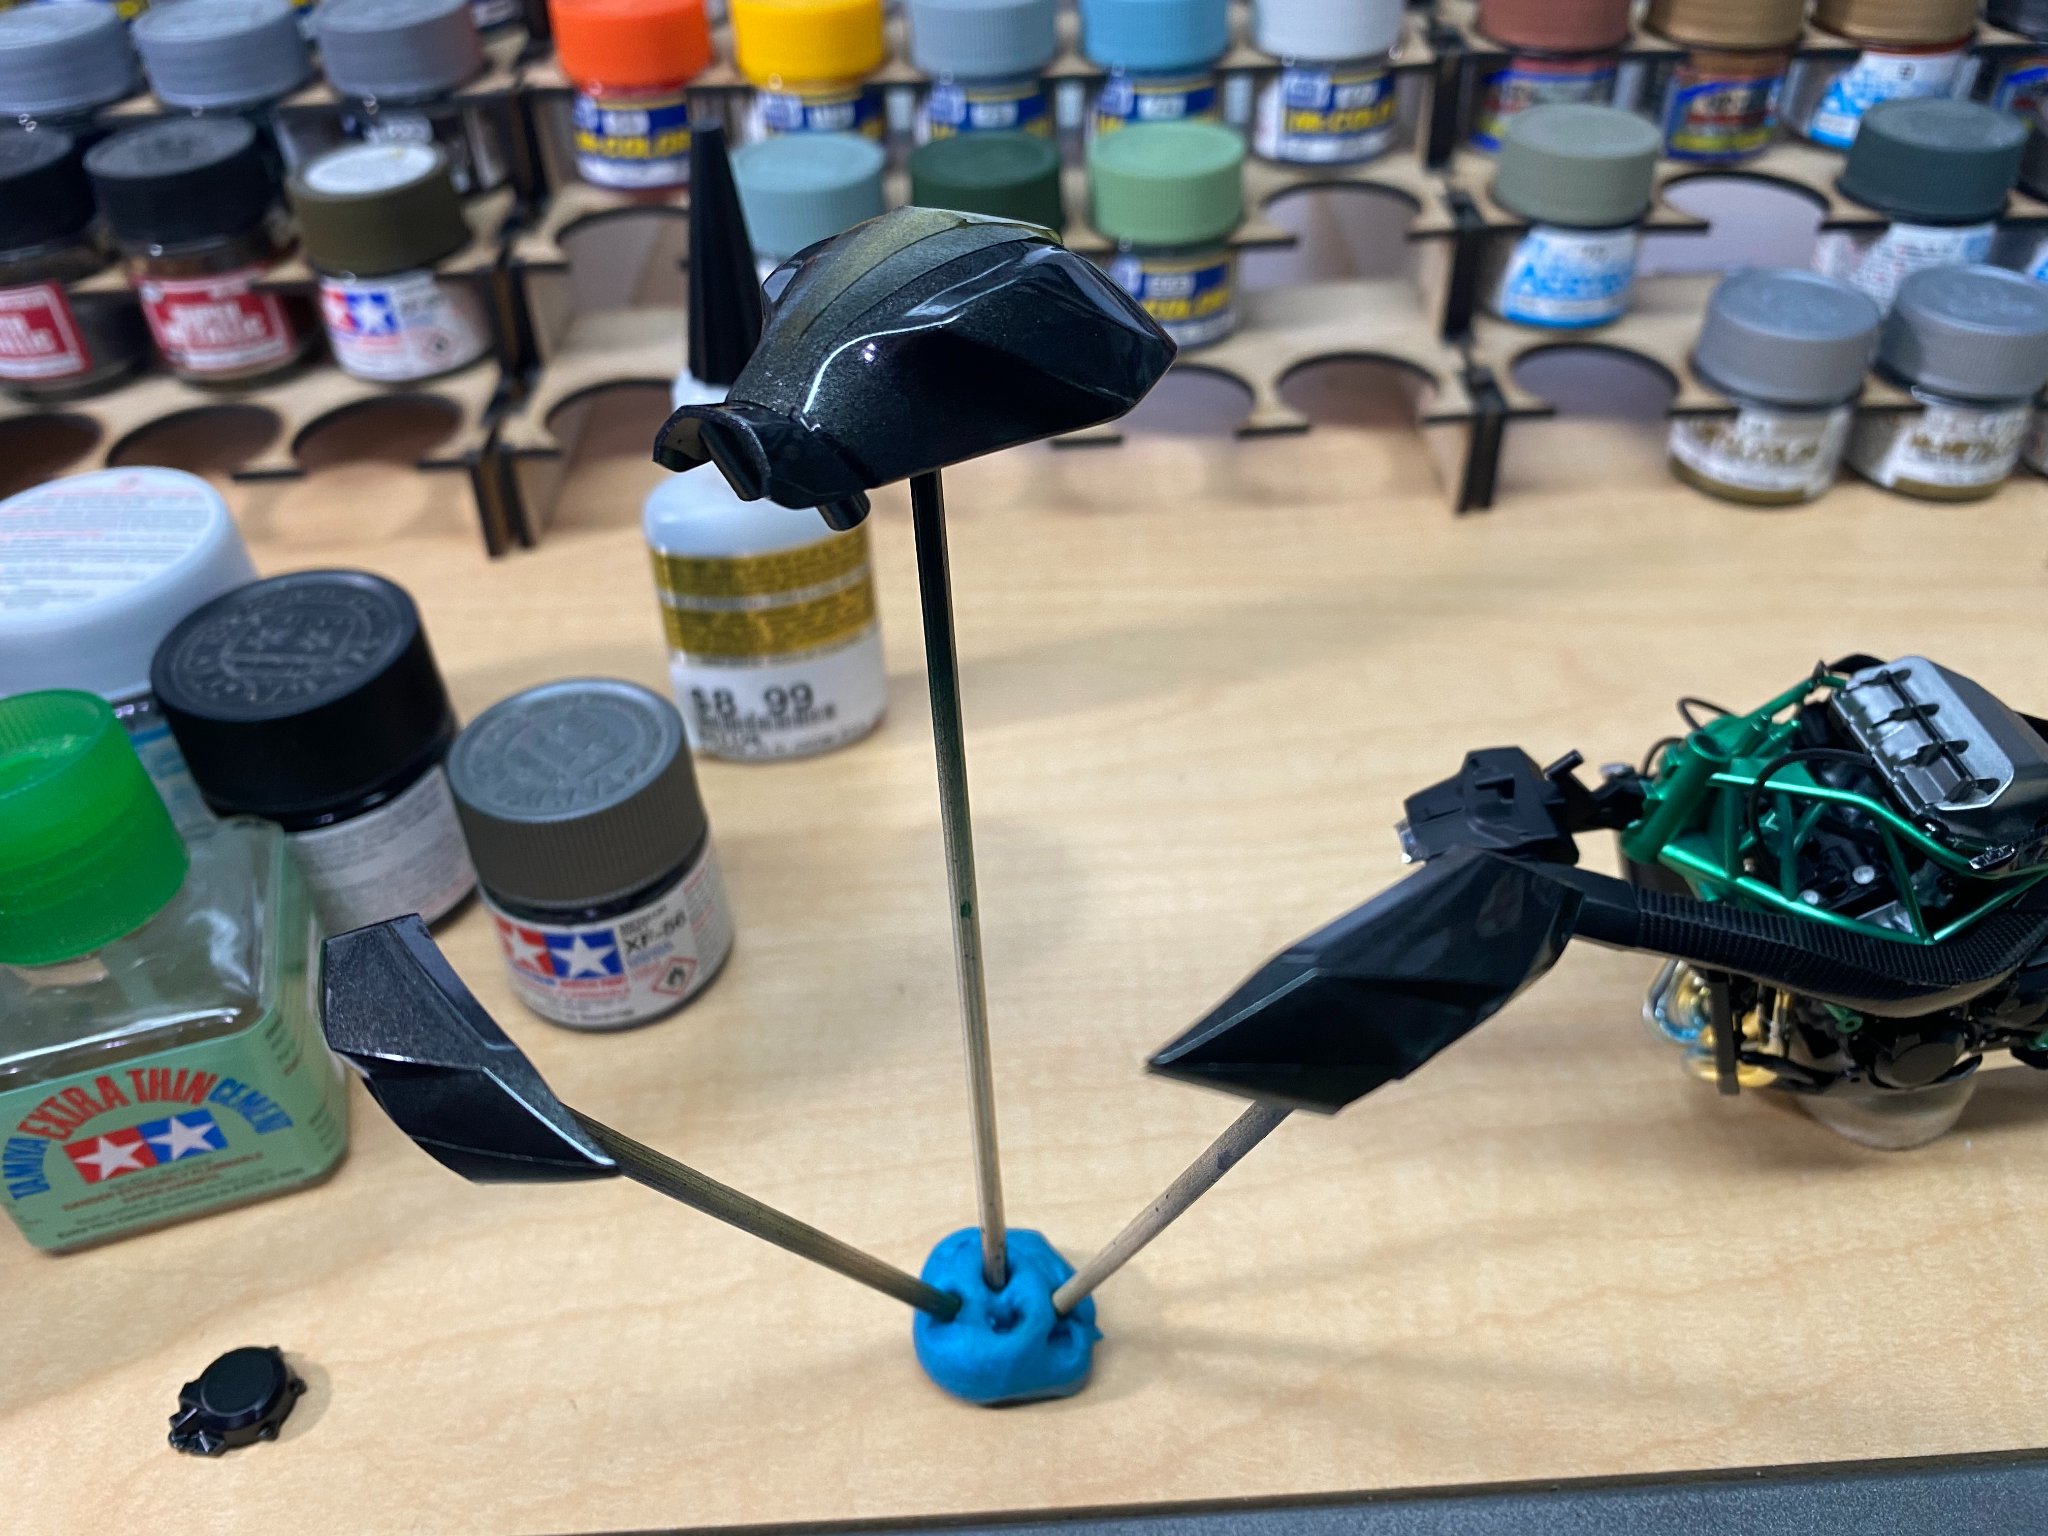
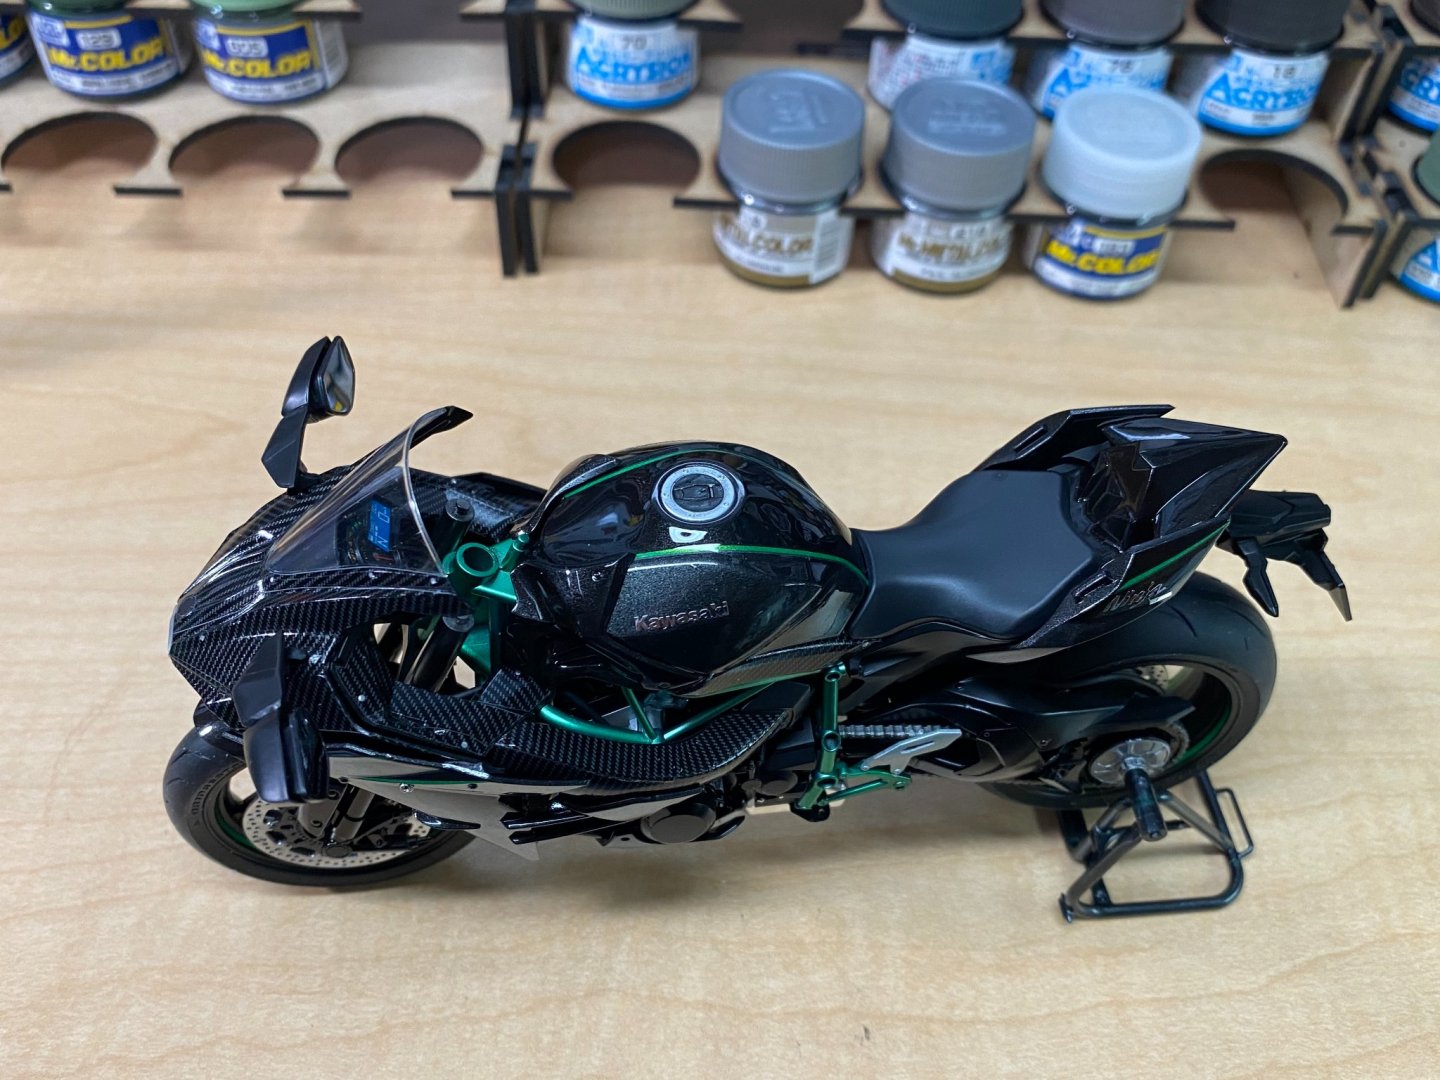
Need to install top of triple tree, handlebars, connect front brake lines and calipers, a couple of rider comfort pads, foot pegs, then a few last placard decals before this is done.


- 85 replies
-
- 14
-
-
This particular model hasn't come out in the USA yet. Had to order it from Asia. There's a hobby shop I use in Hong Kong who is very fast, low prices, and reliable. From time of order, takes less than 2 weeks to get a parcel from him.
- 85 replies
-
- 10
-
-
Thanks OC Just need to finish the front forks and wheel/brake assemblies, then all the part sub assemblies can be brought together and close this one out. Dry fit check...


- 85 replies
-
- 12
-
-
Thanks Denis
-
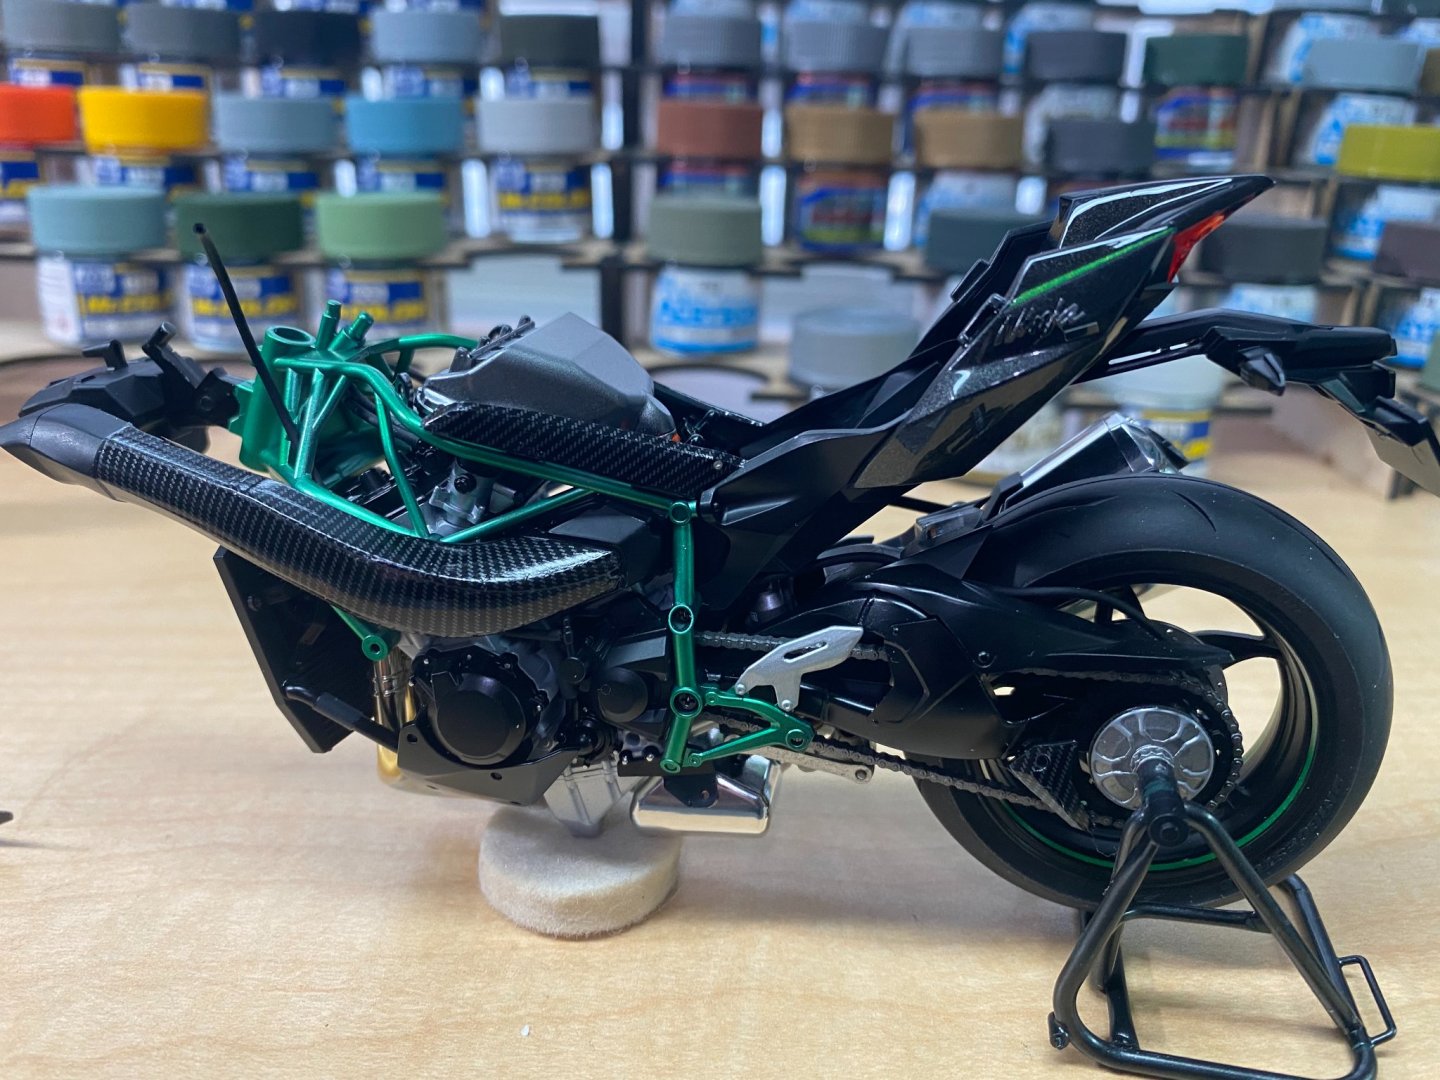
Strength to weight ratio is the major advantage of carbon fiber. Status/prestige is no small factor as it is very pricey, so yes to prestige. When I was building and flying RC models, nothing gave more strength for less weight than carbon fiber. I used small diameter carbon fiber rods as wing spars in lightweight model aircraft where a light wing loading was essential for the power system.
-
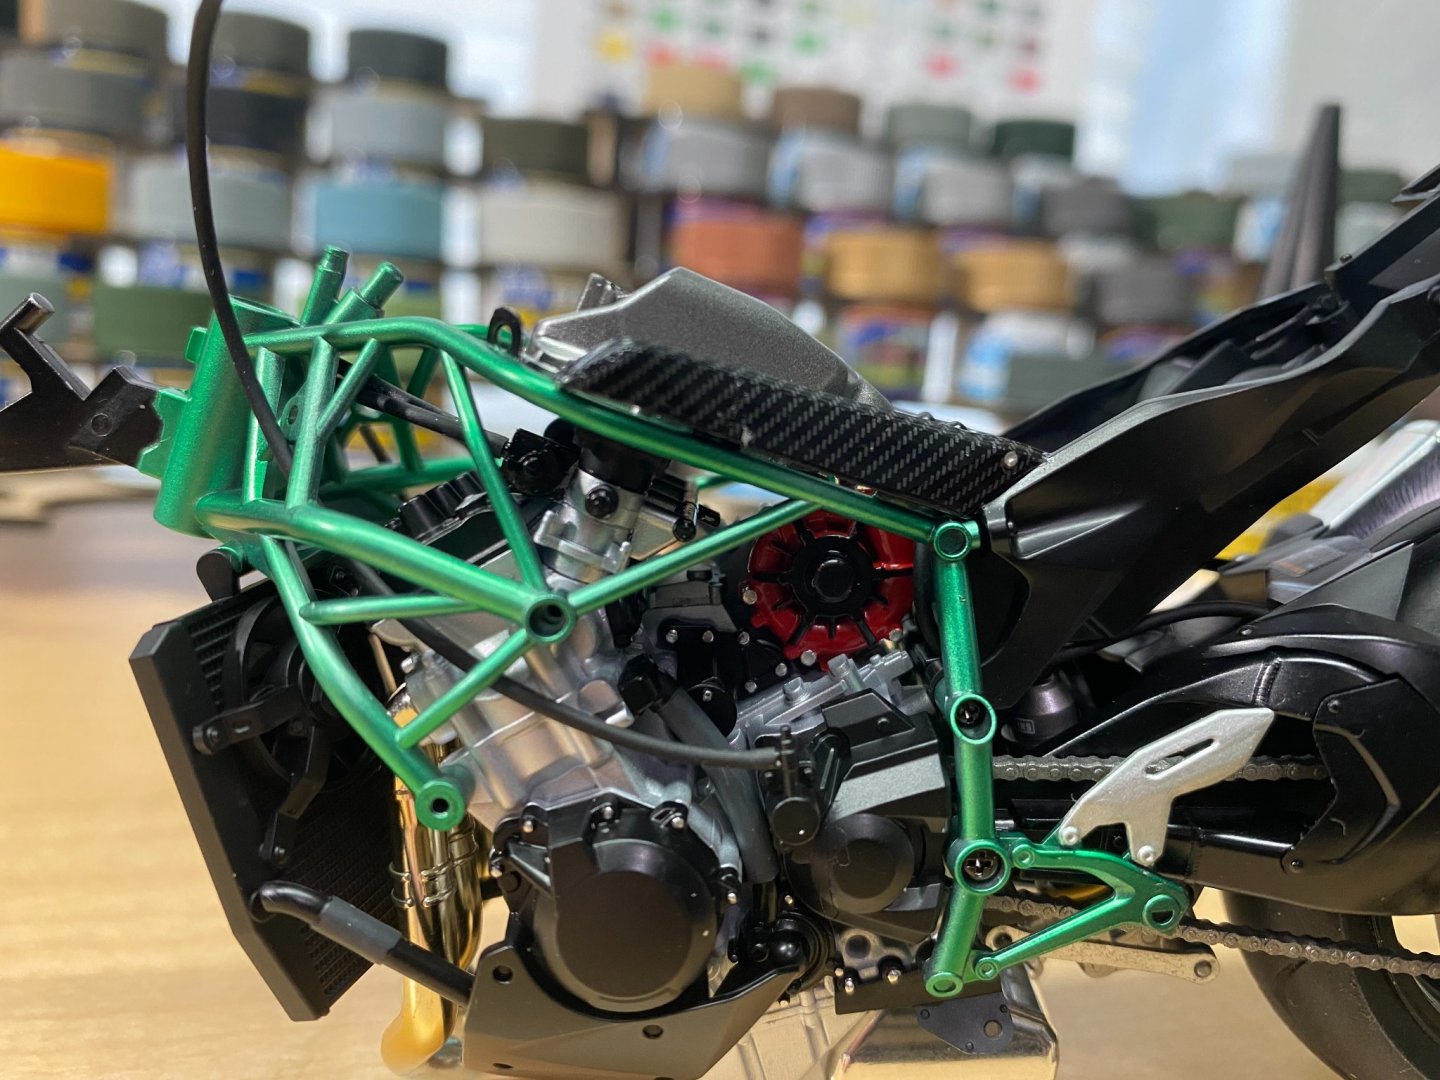
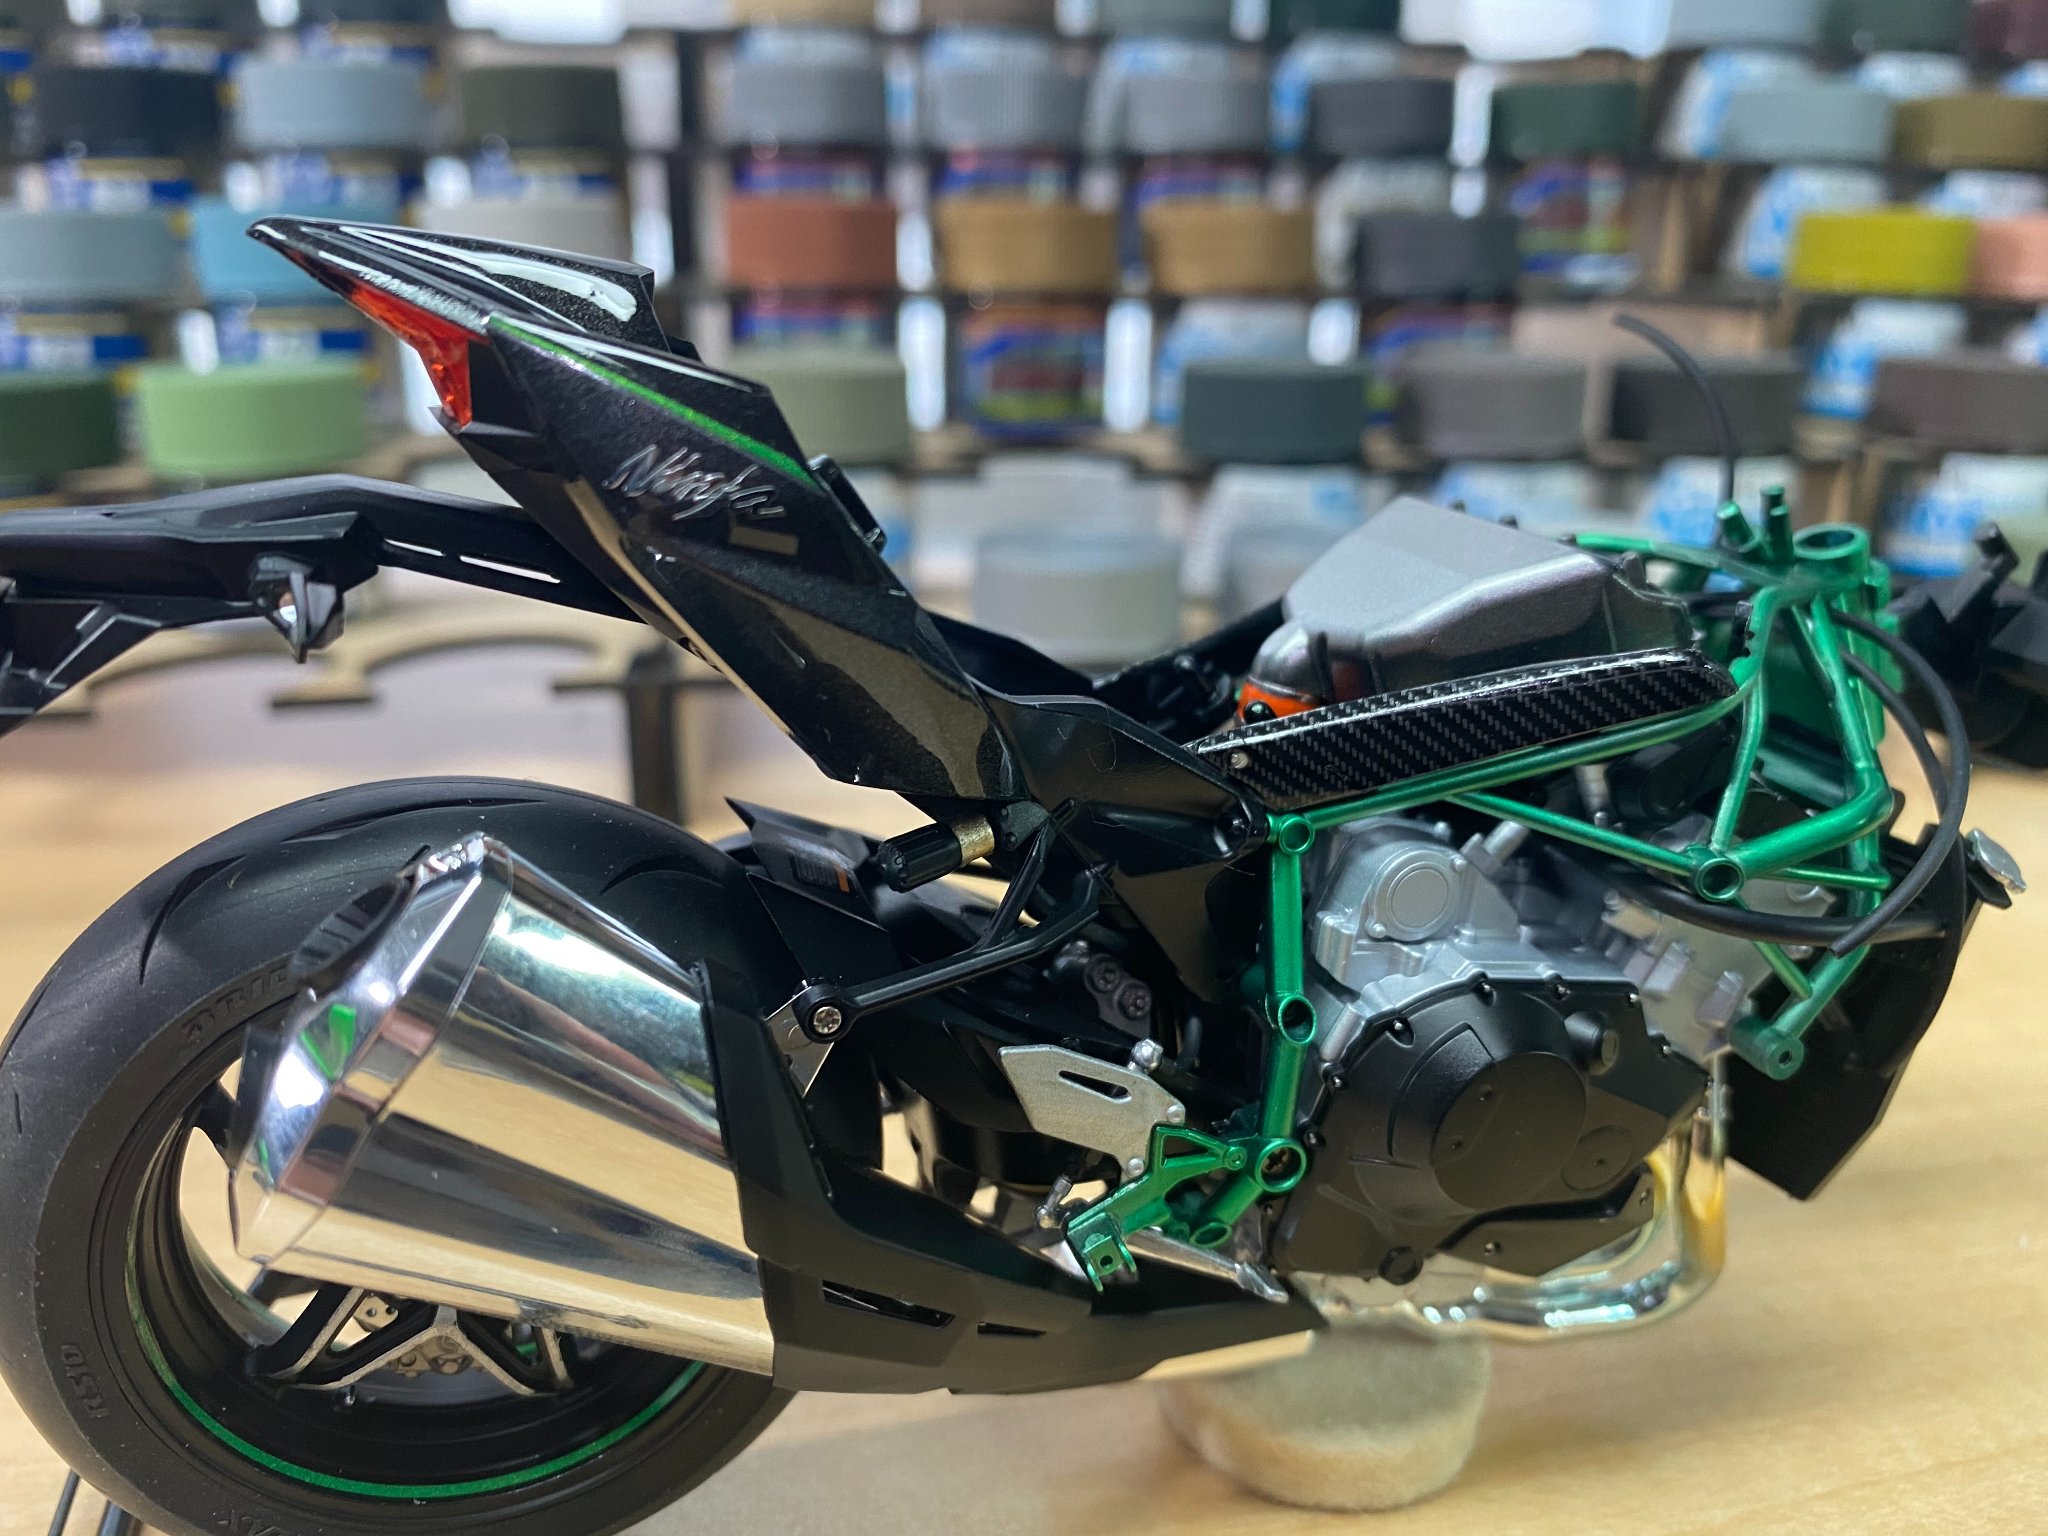
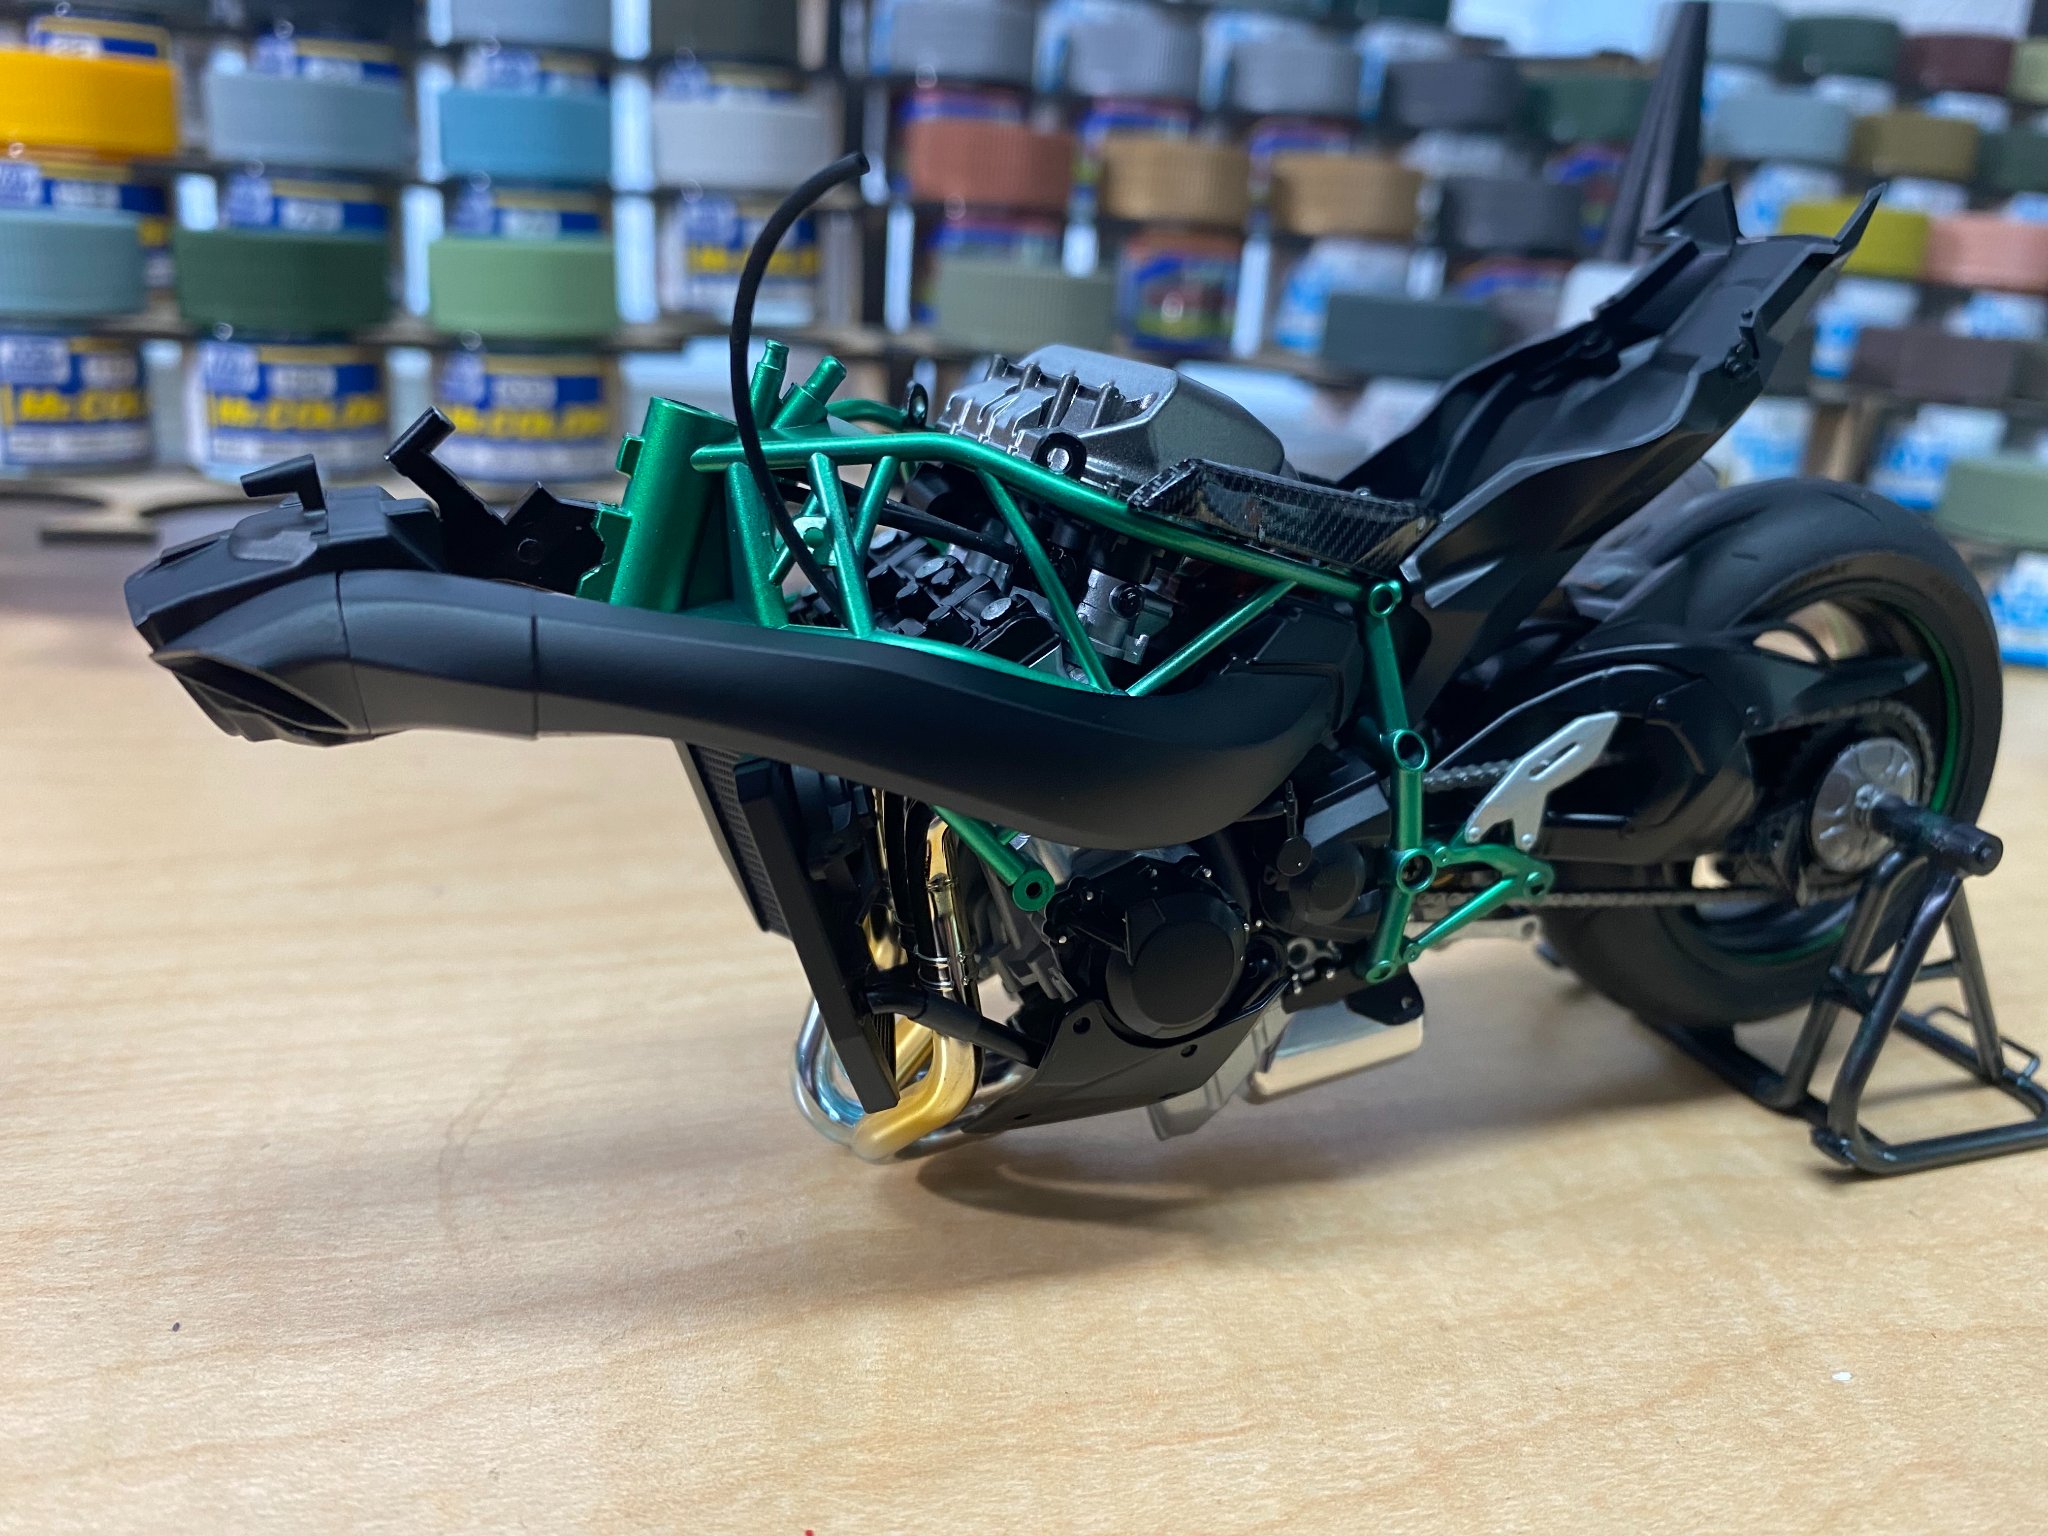
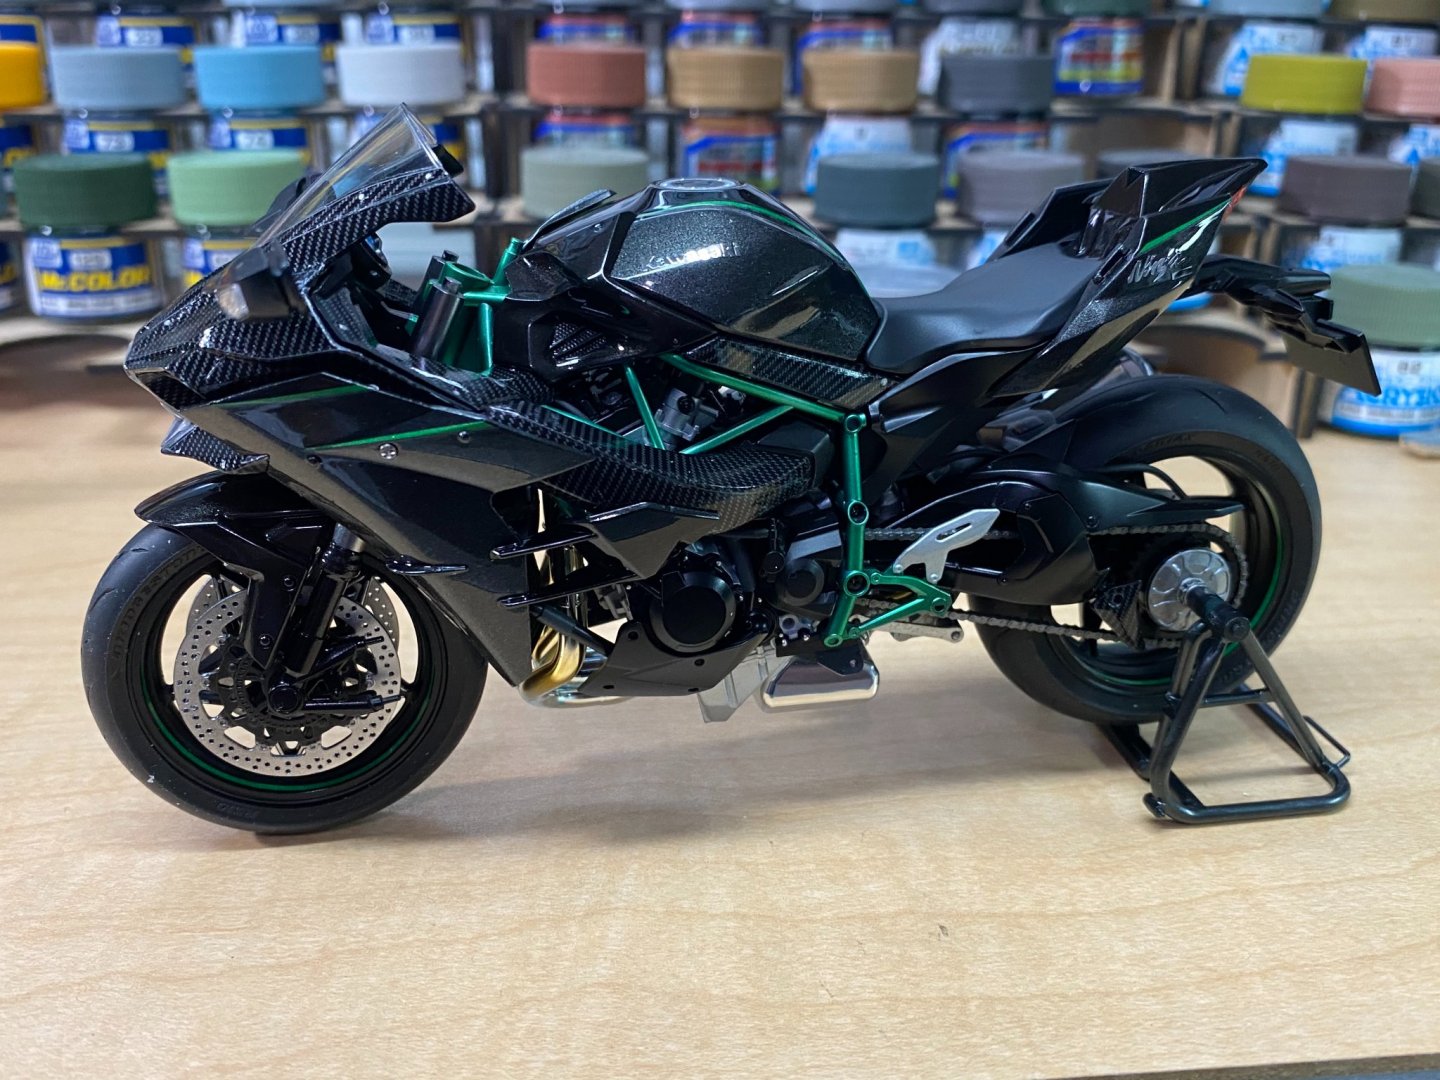
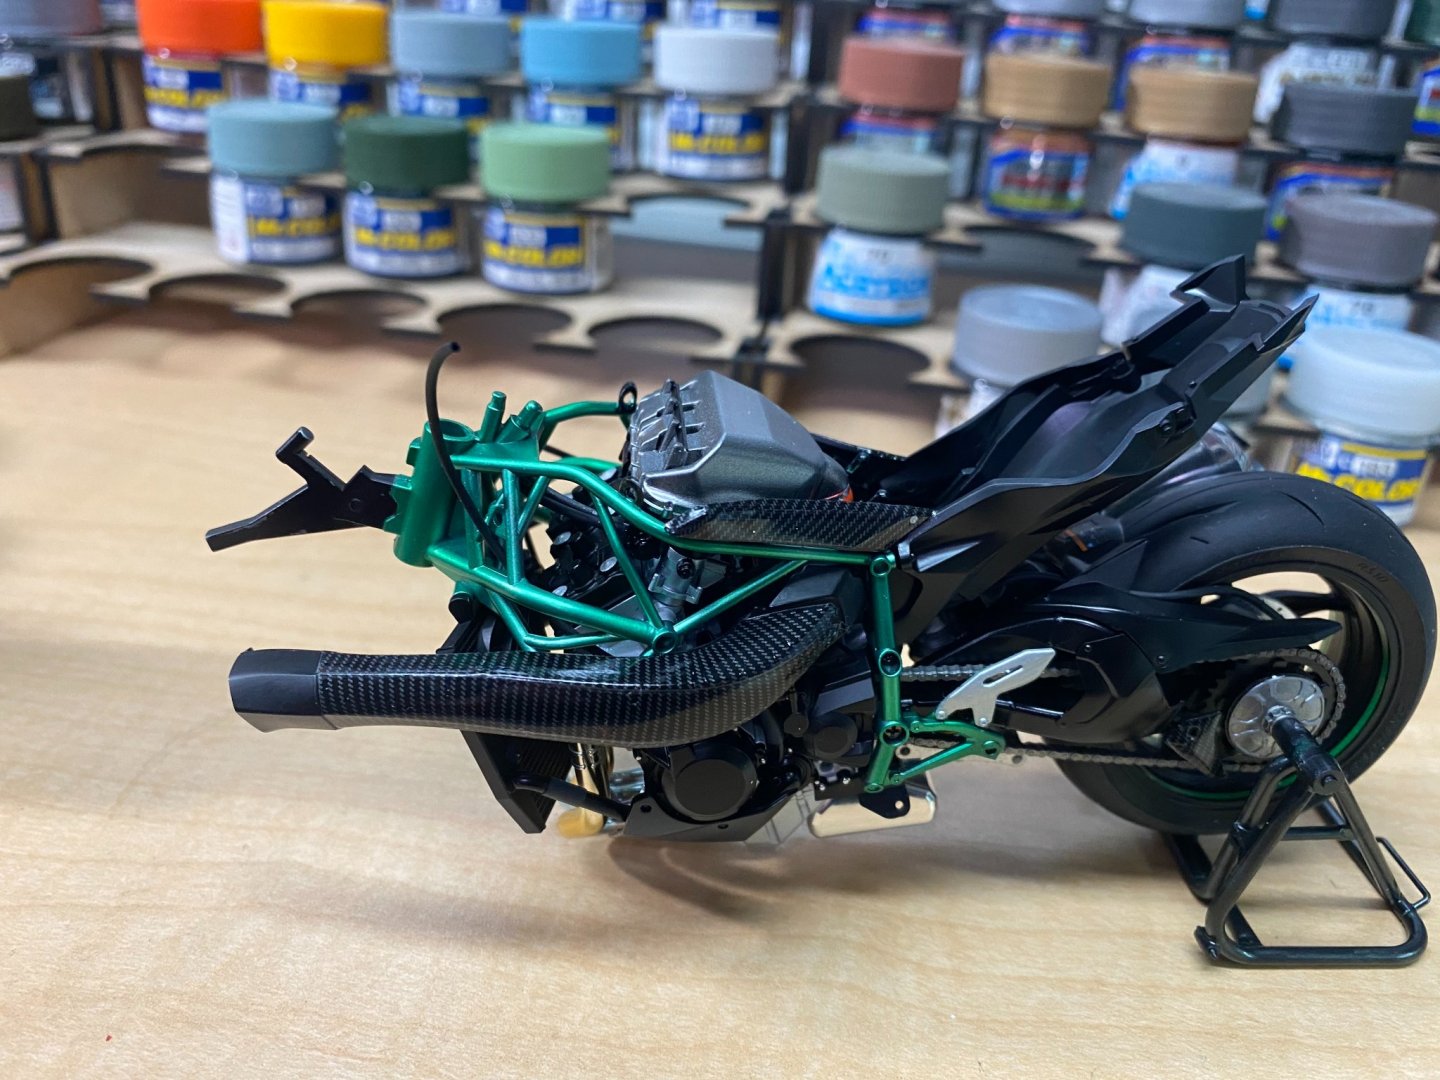
Thanks Edward. Yes, I think the small touch of green break things up nicely.
-
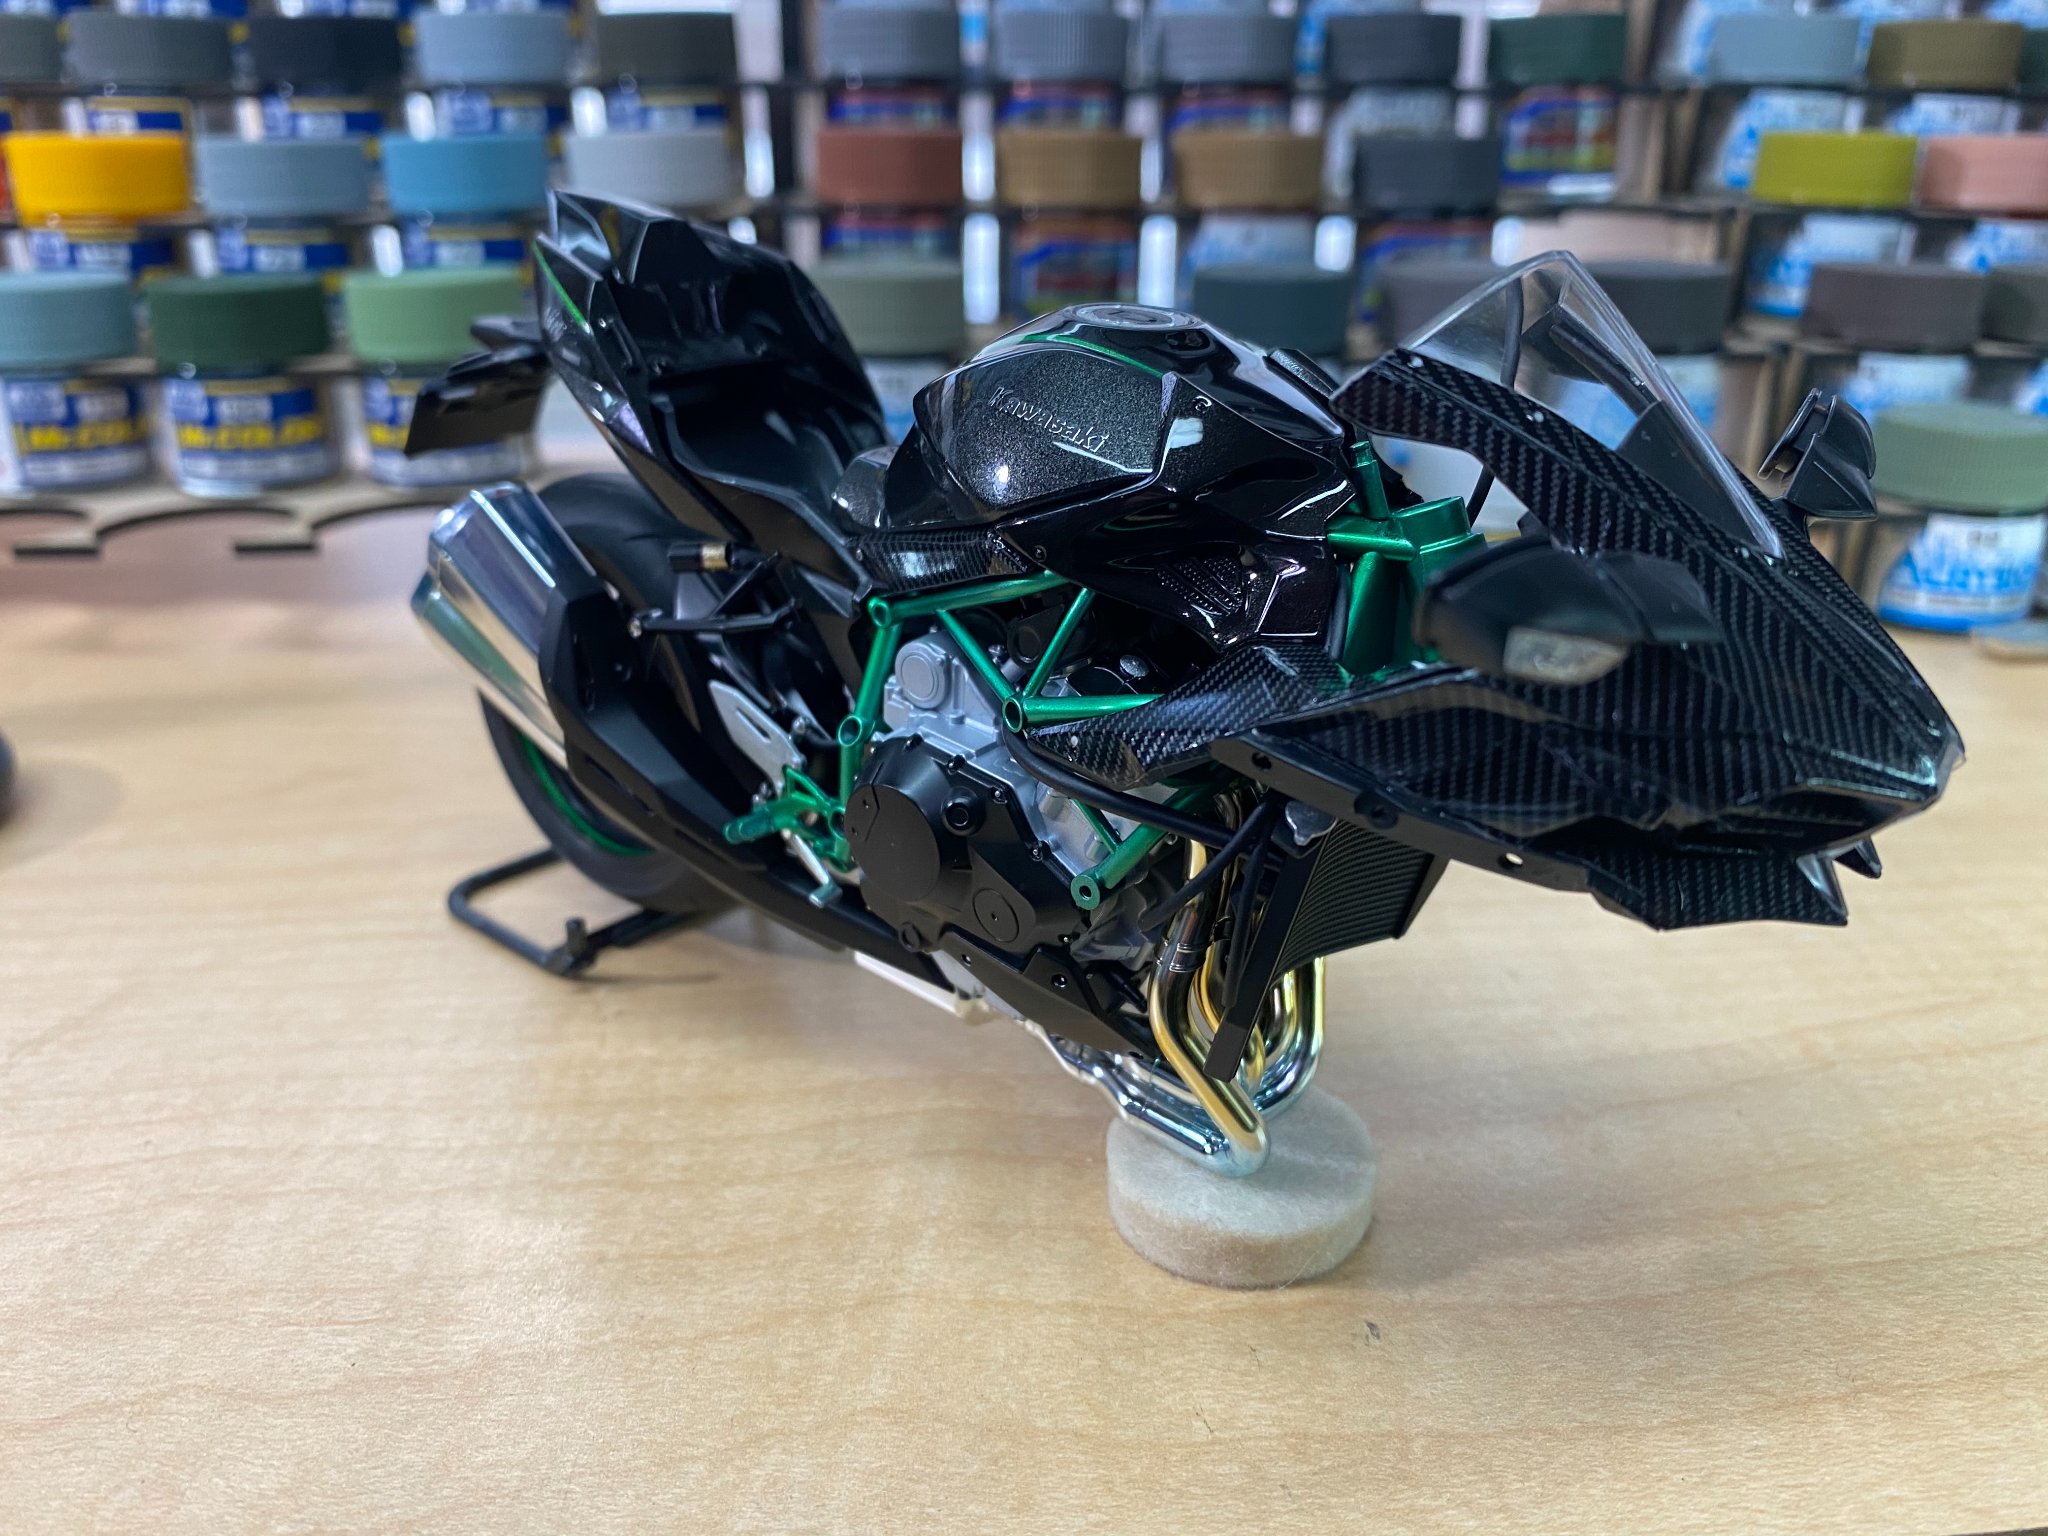
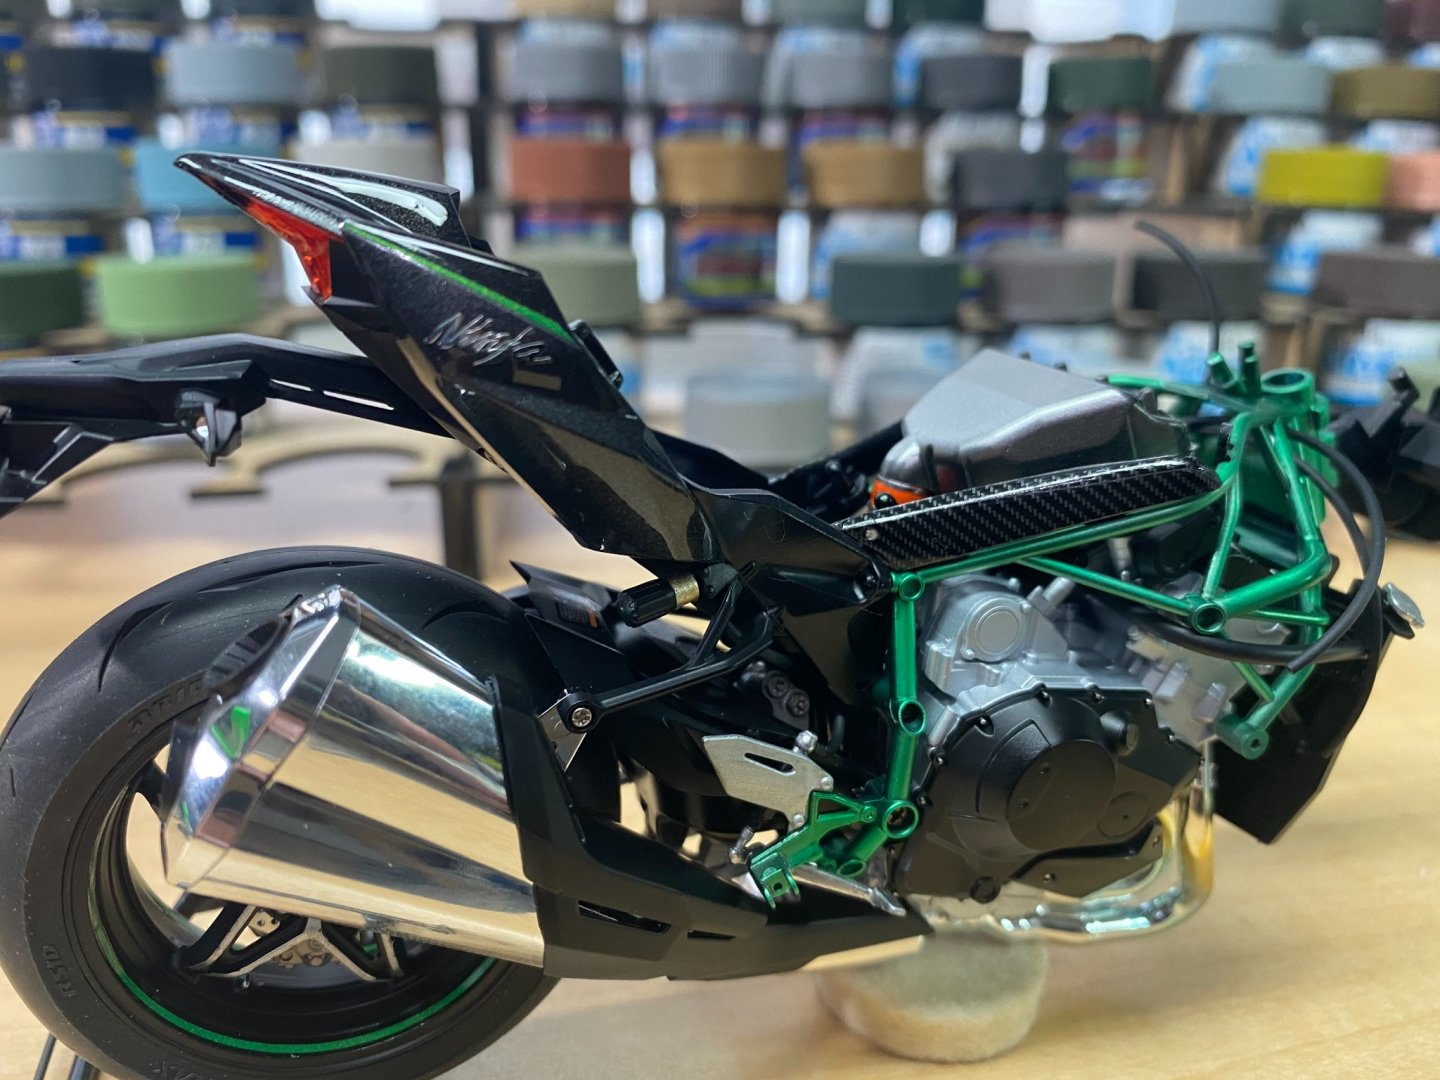
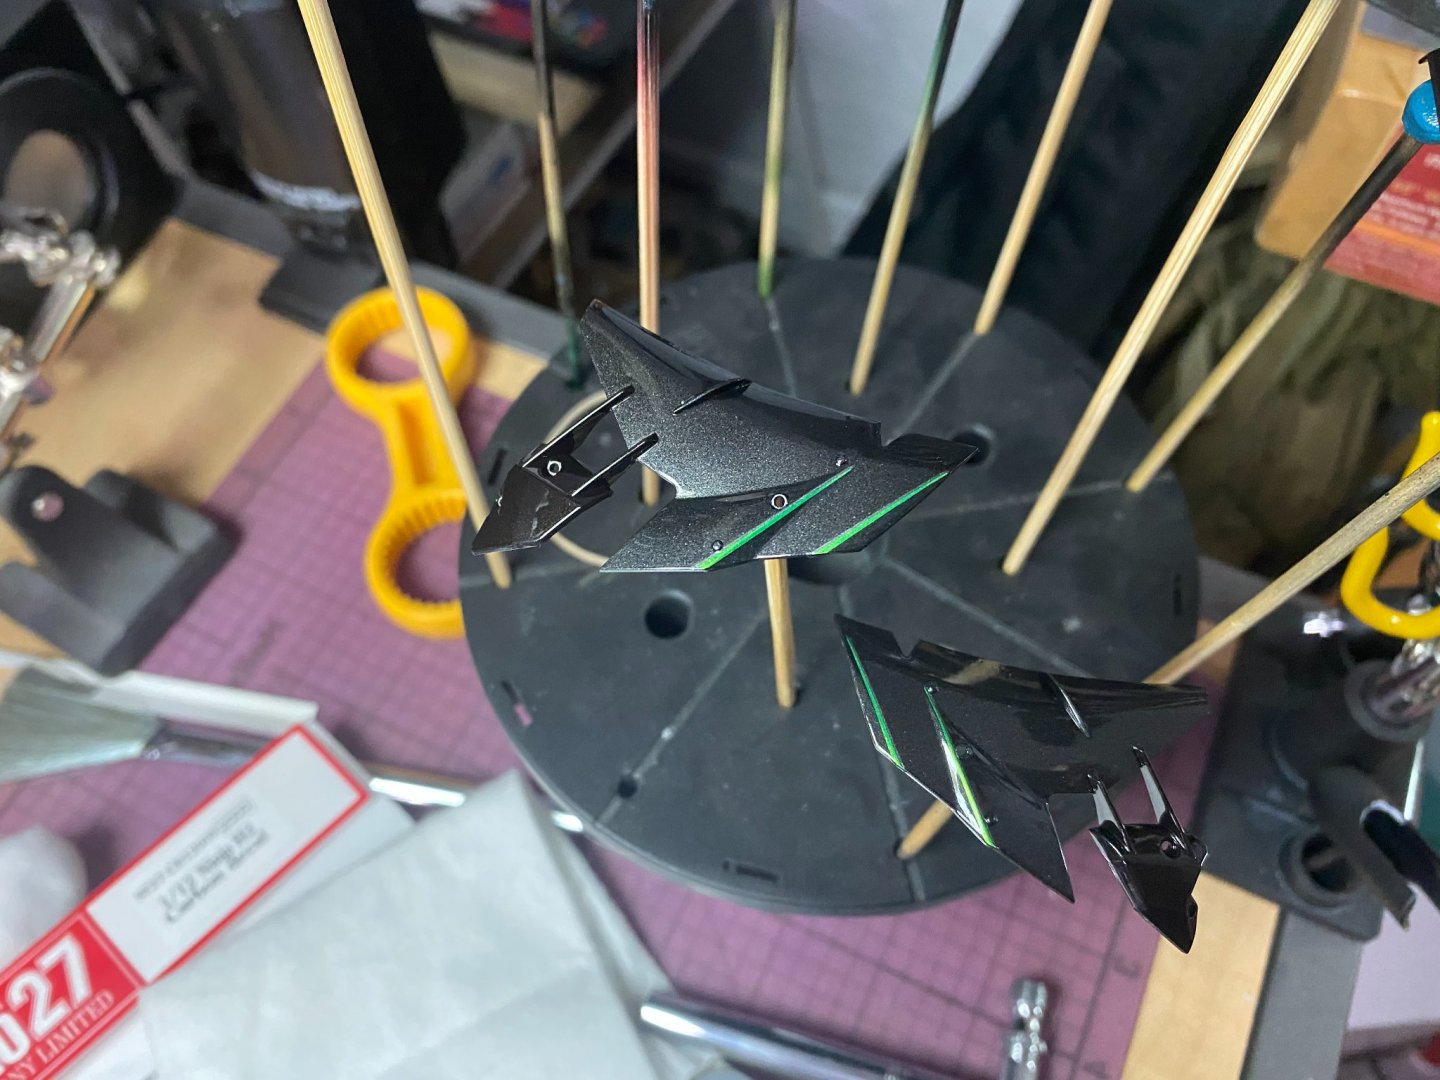
The paint work finished, decals were placed on the various body parts. After the decals dried over night, a clear coat of 2K urethane was given to all painted body parts. Getting closer to the finish line with this model. 🙂

-
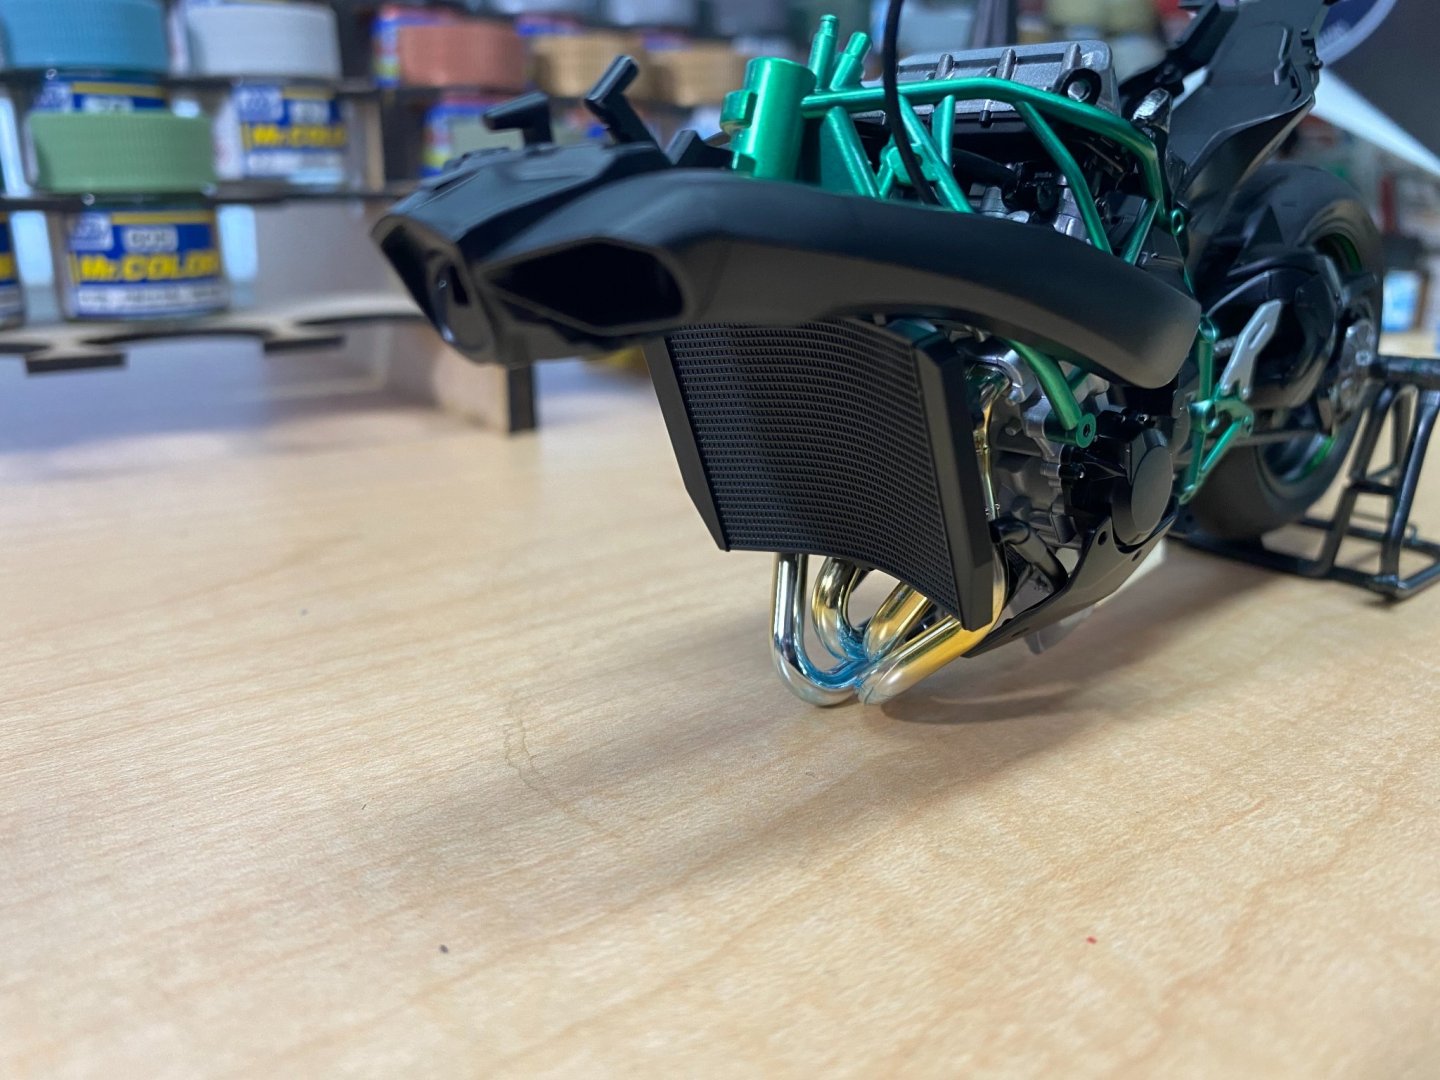
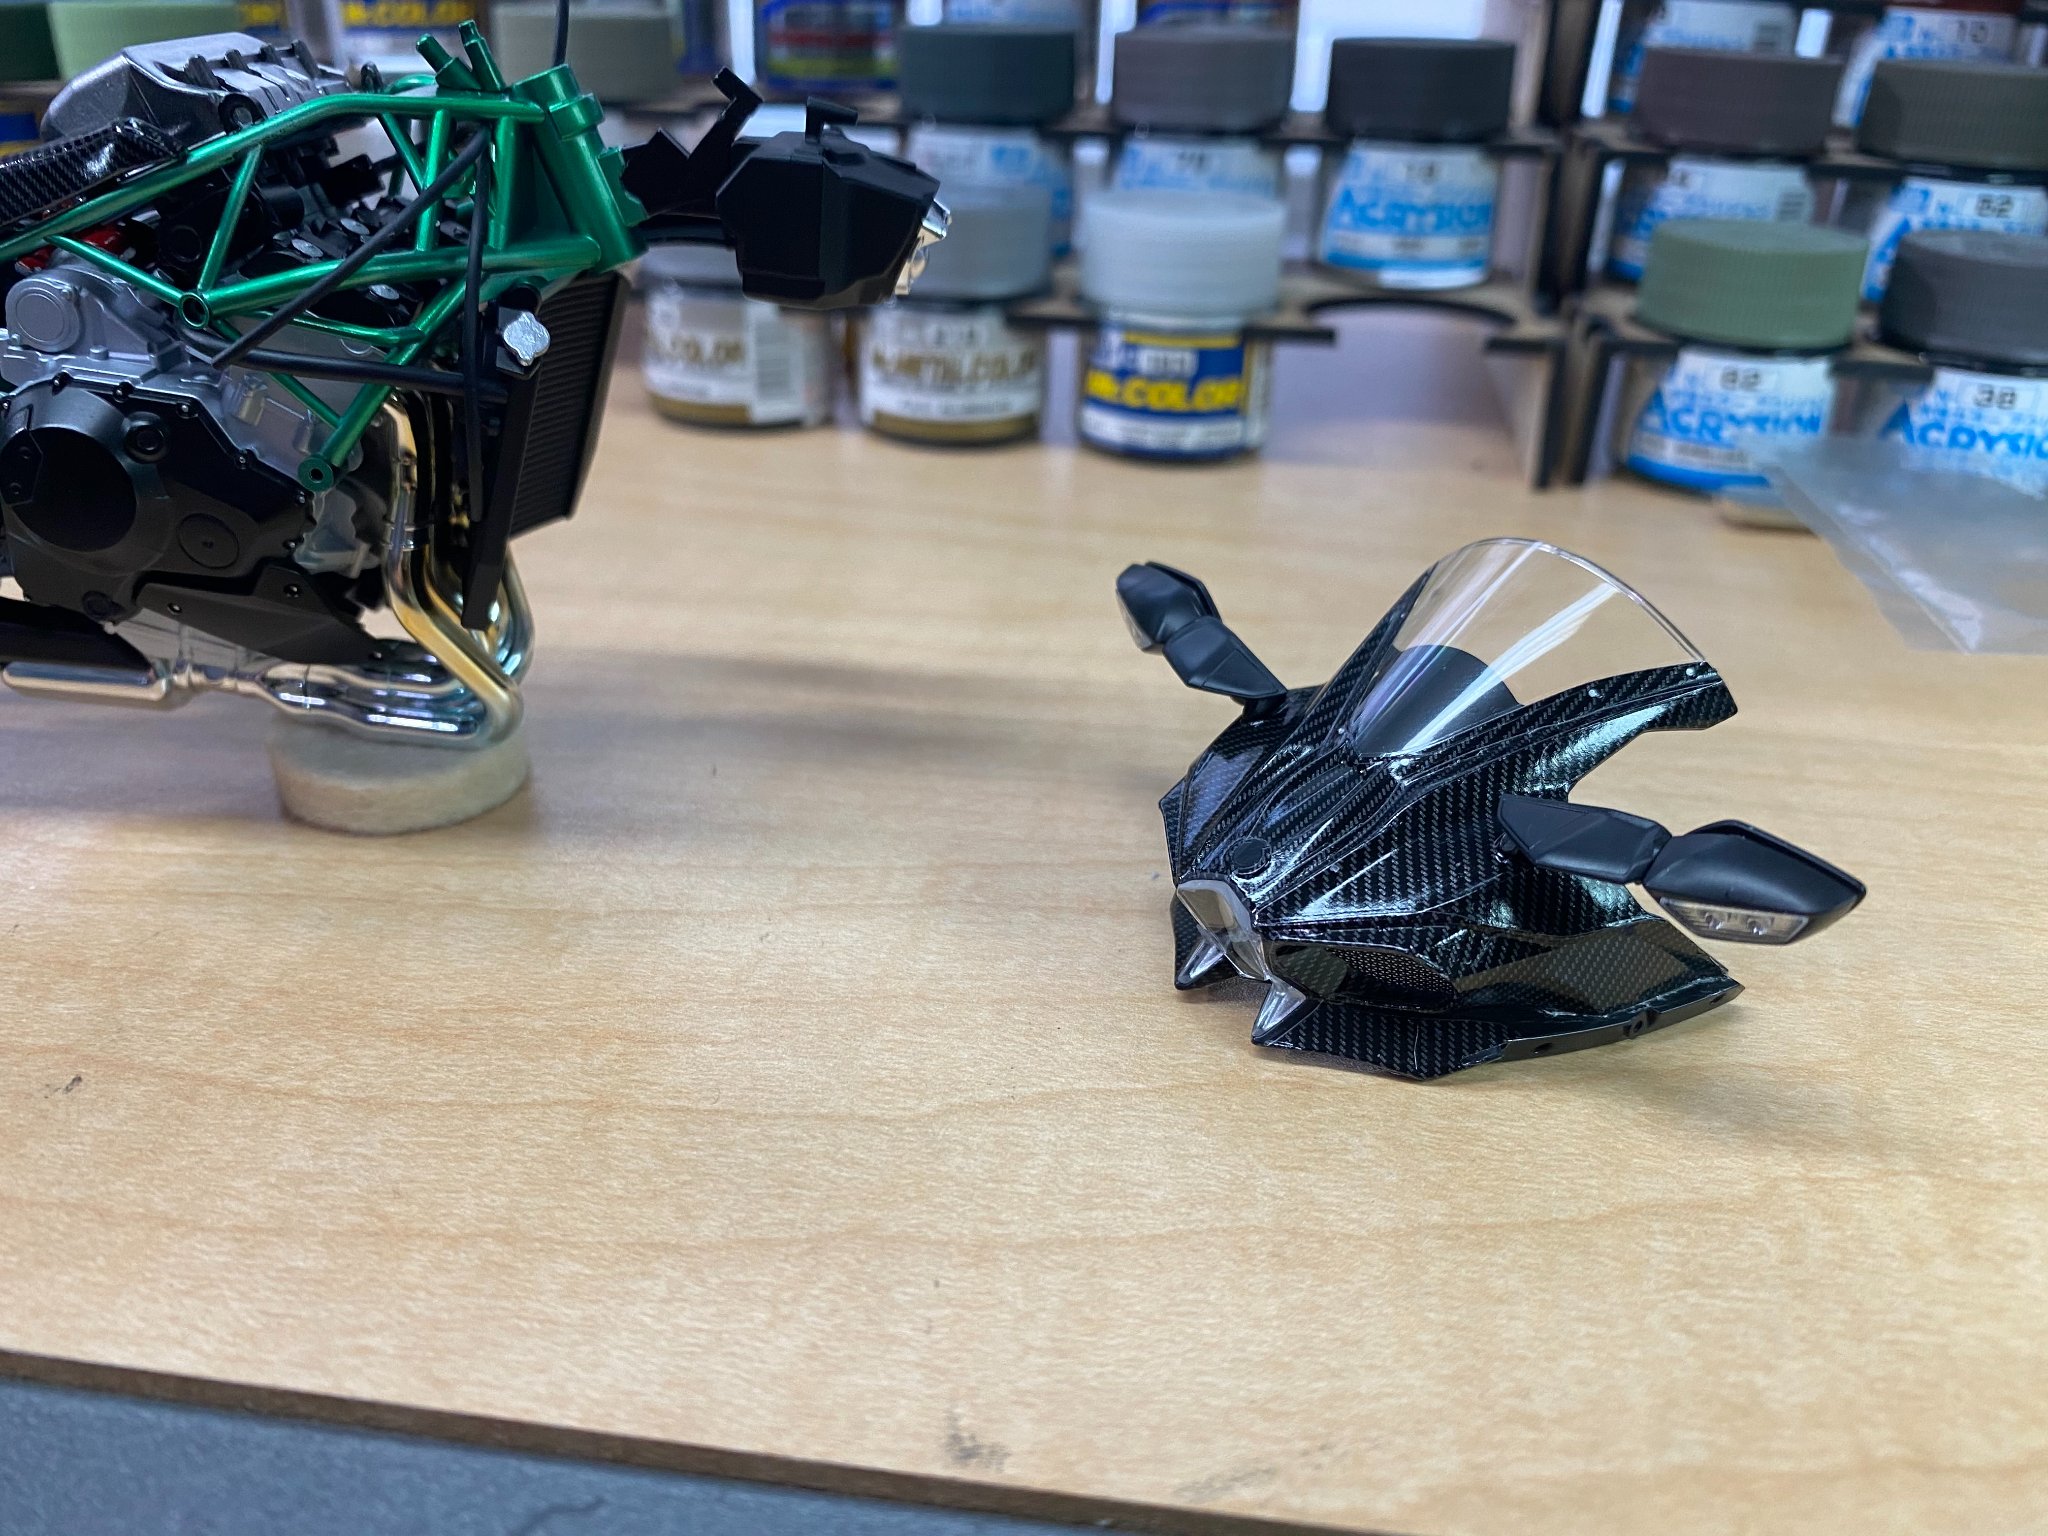
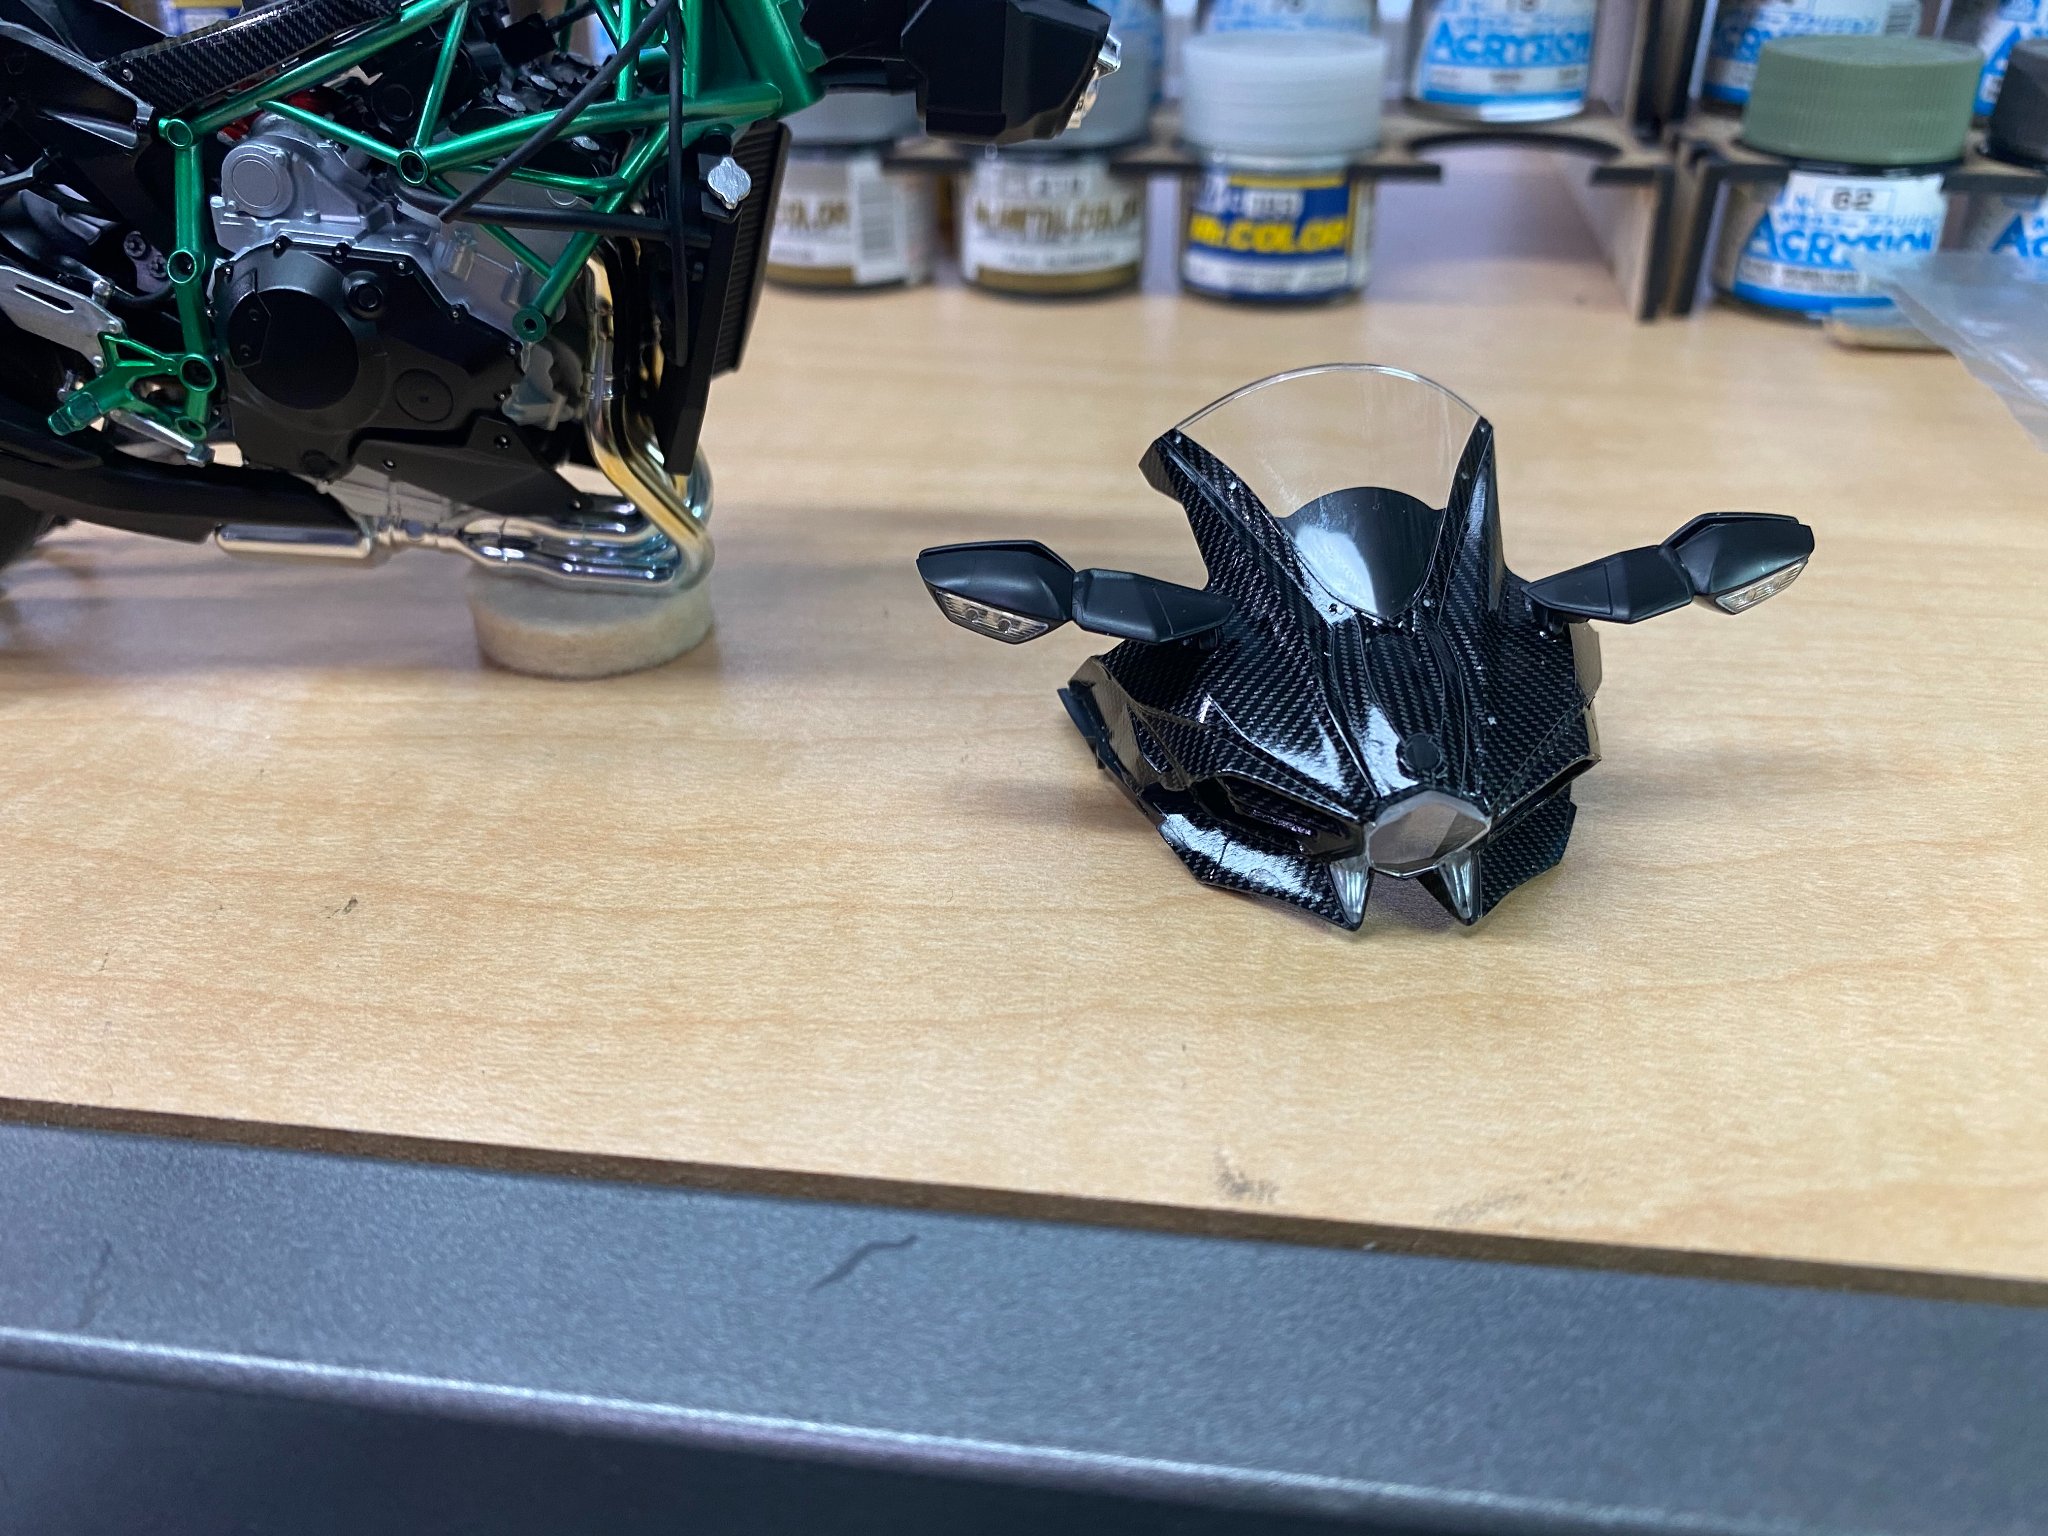
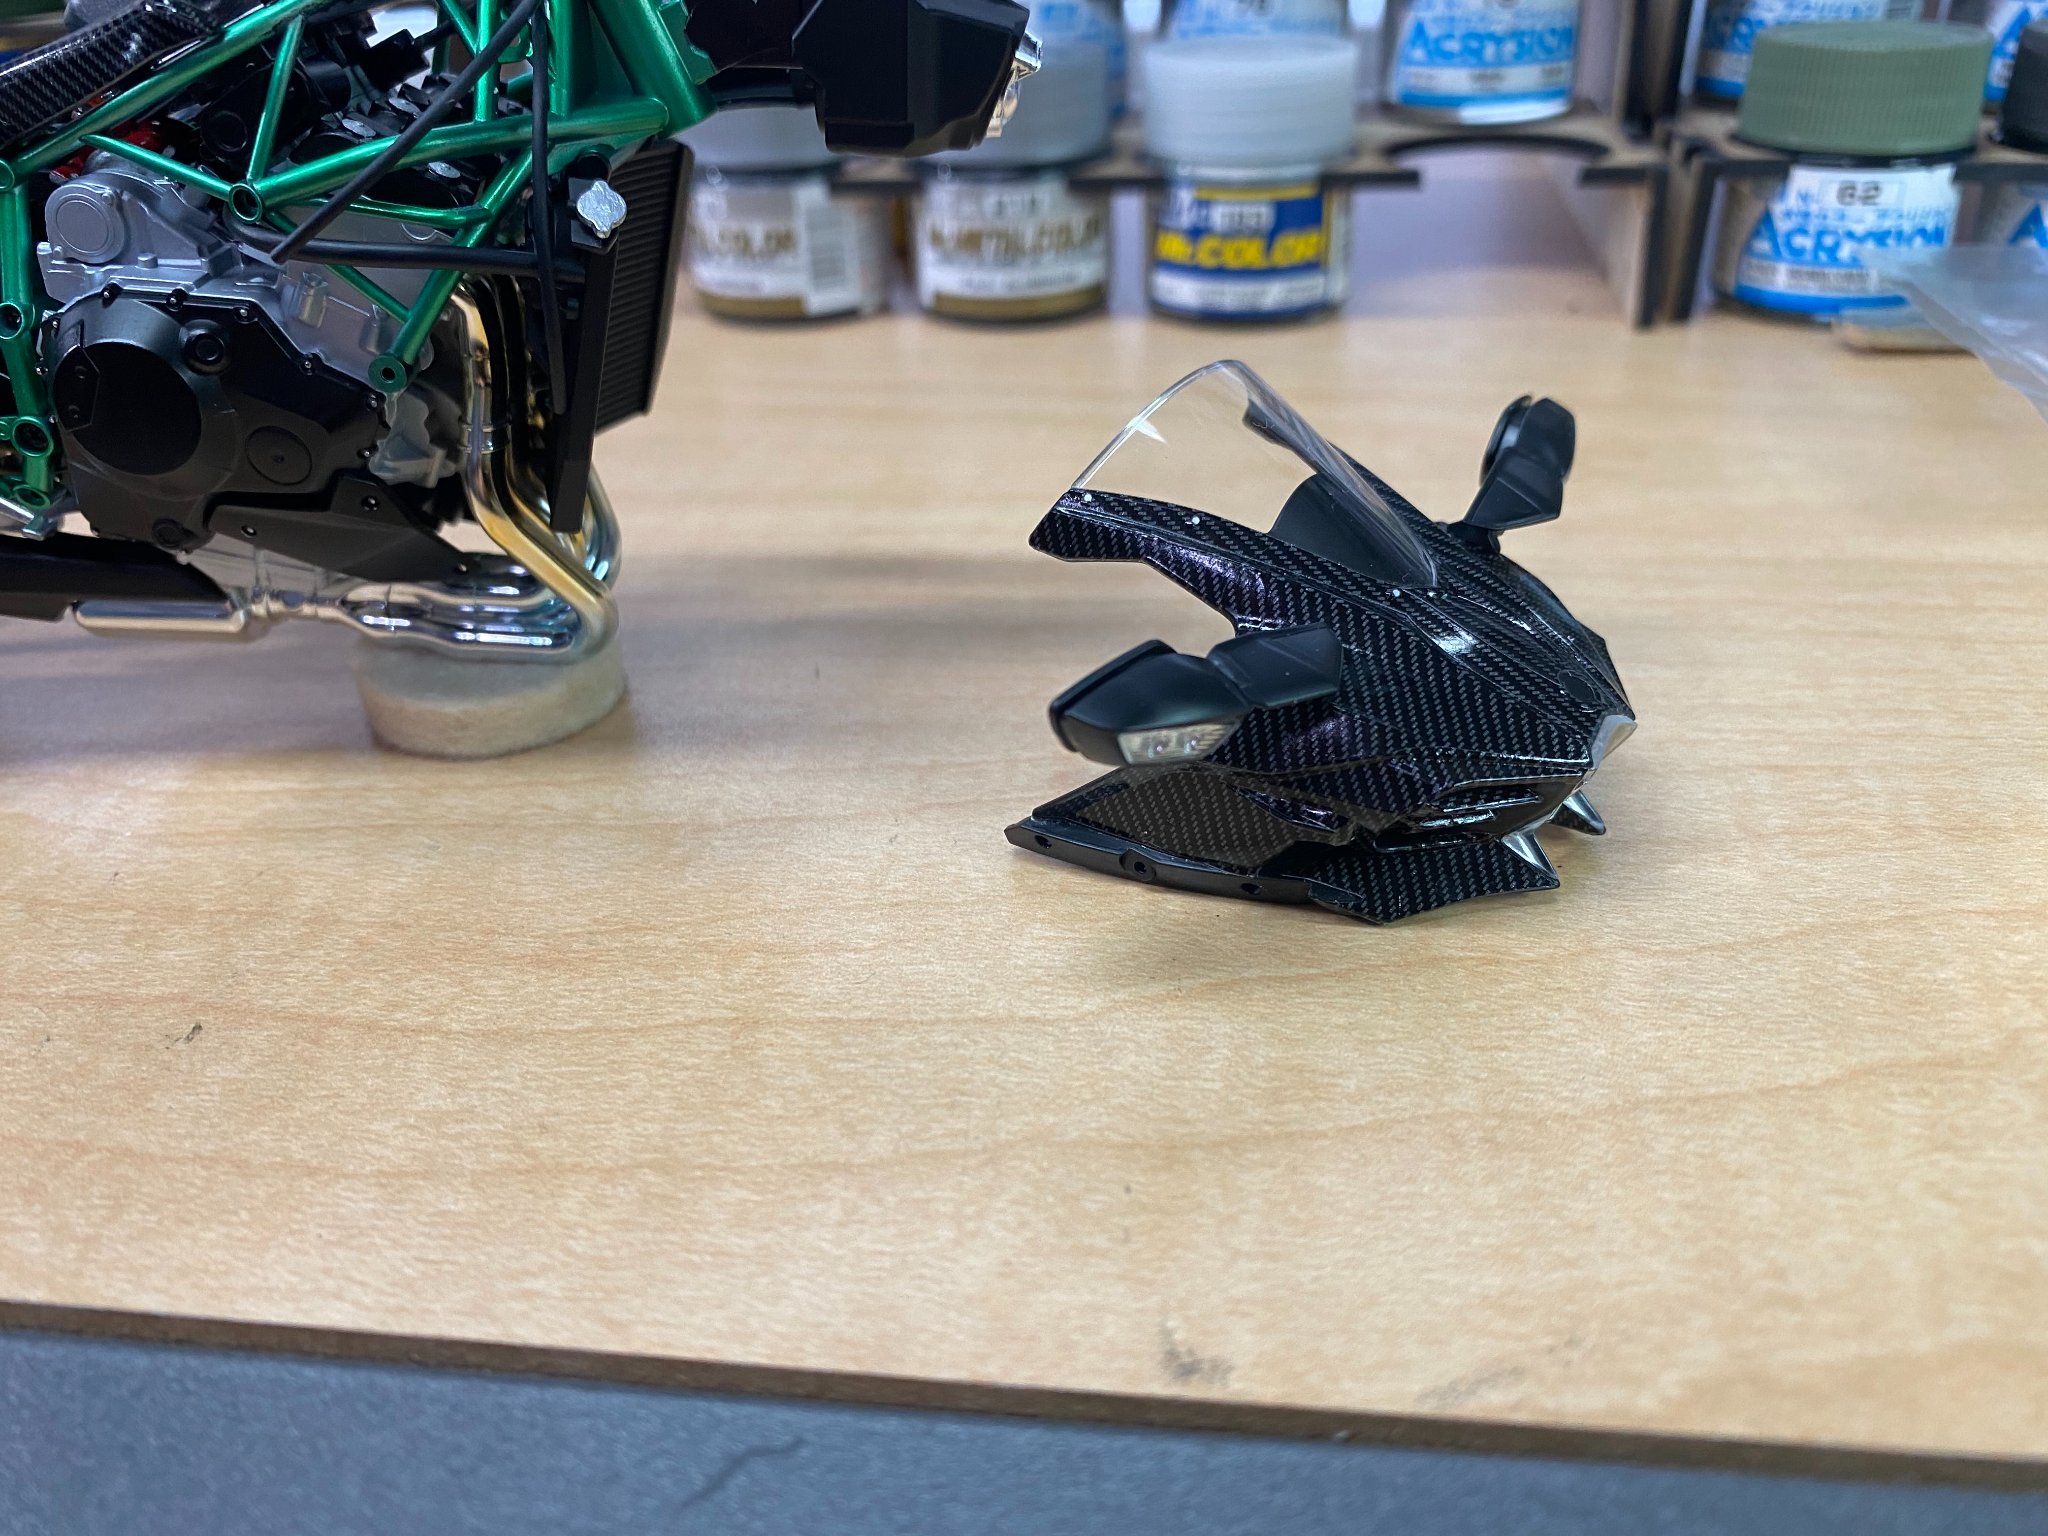
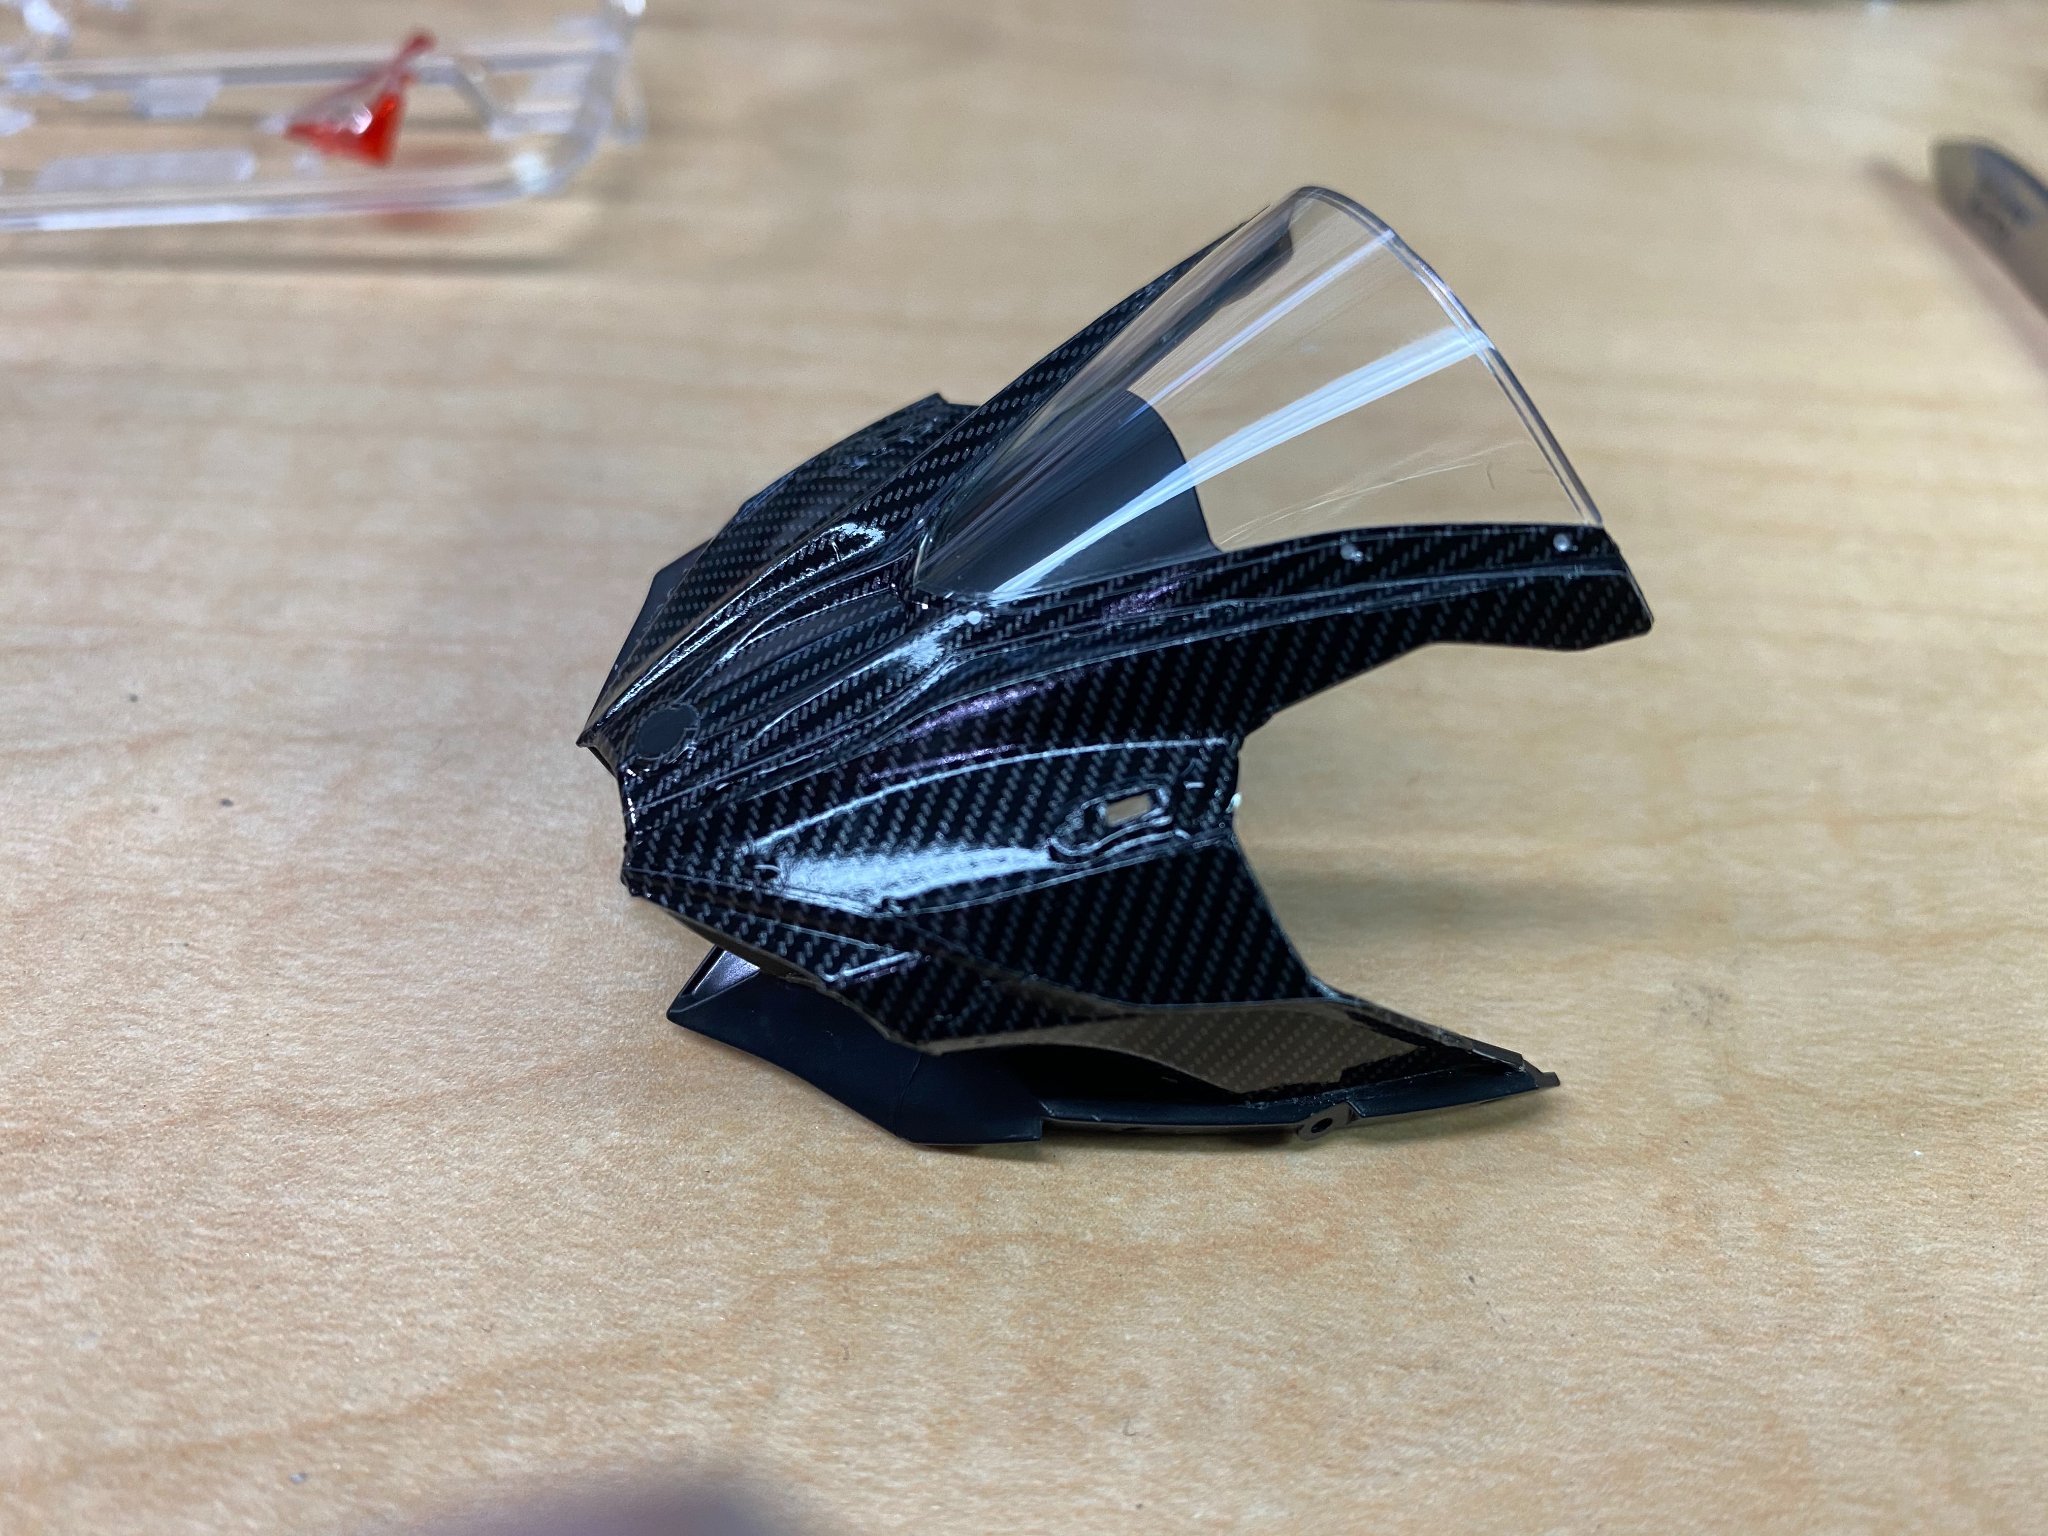
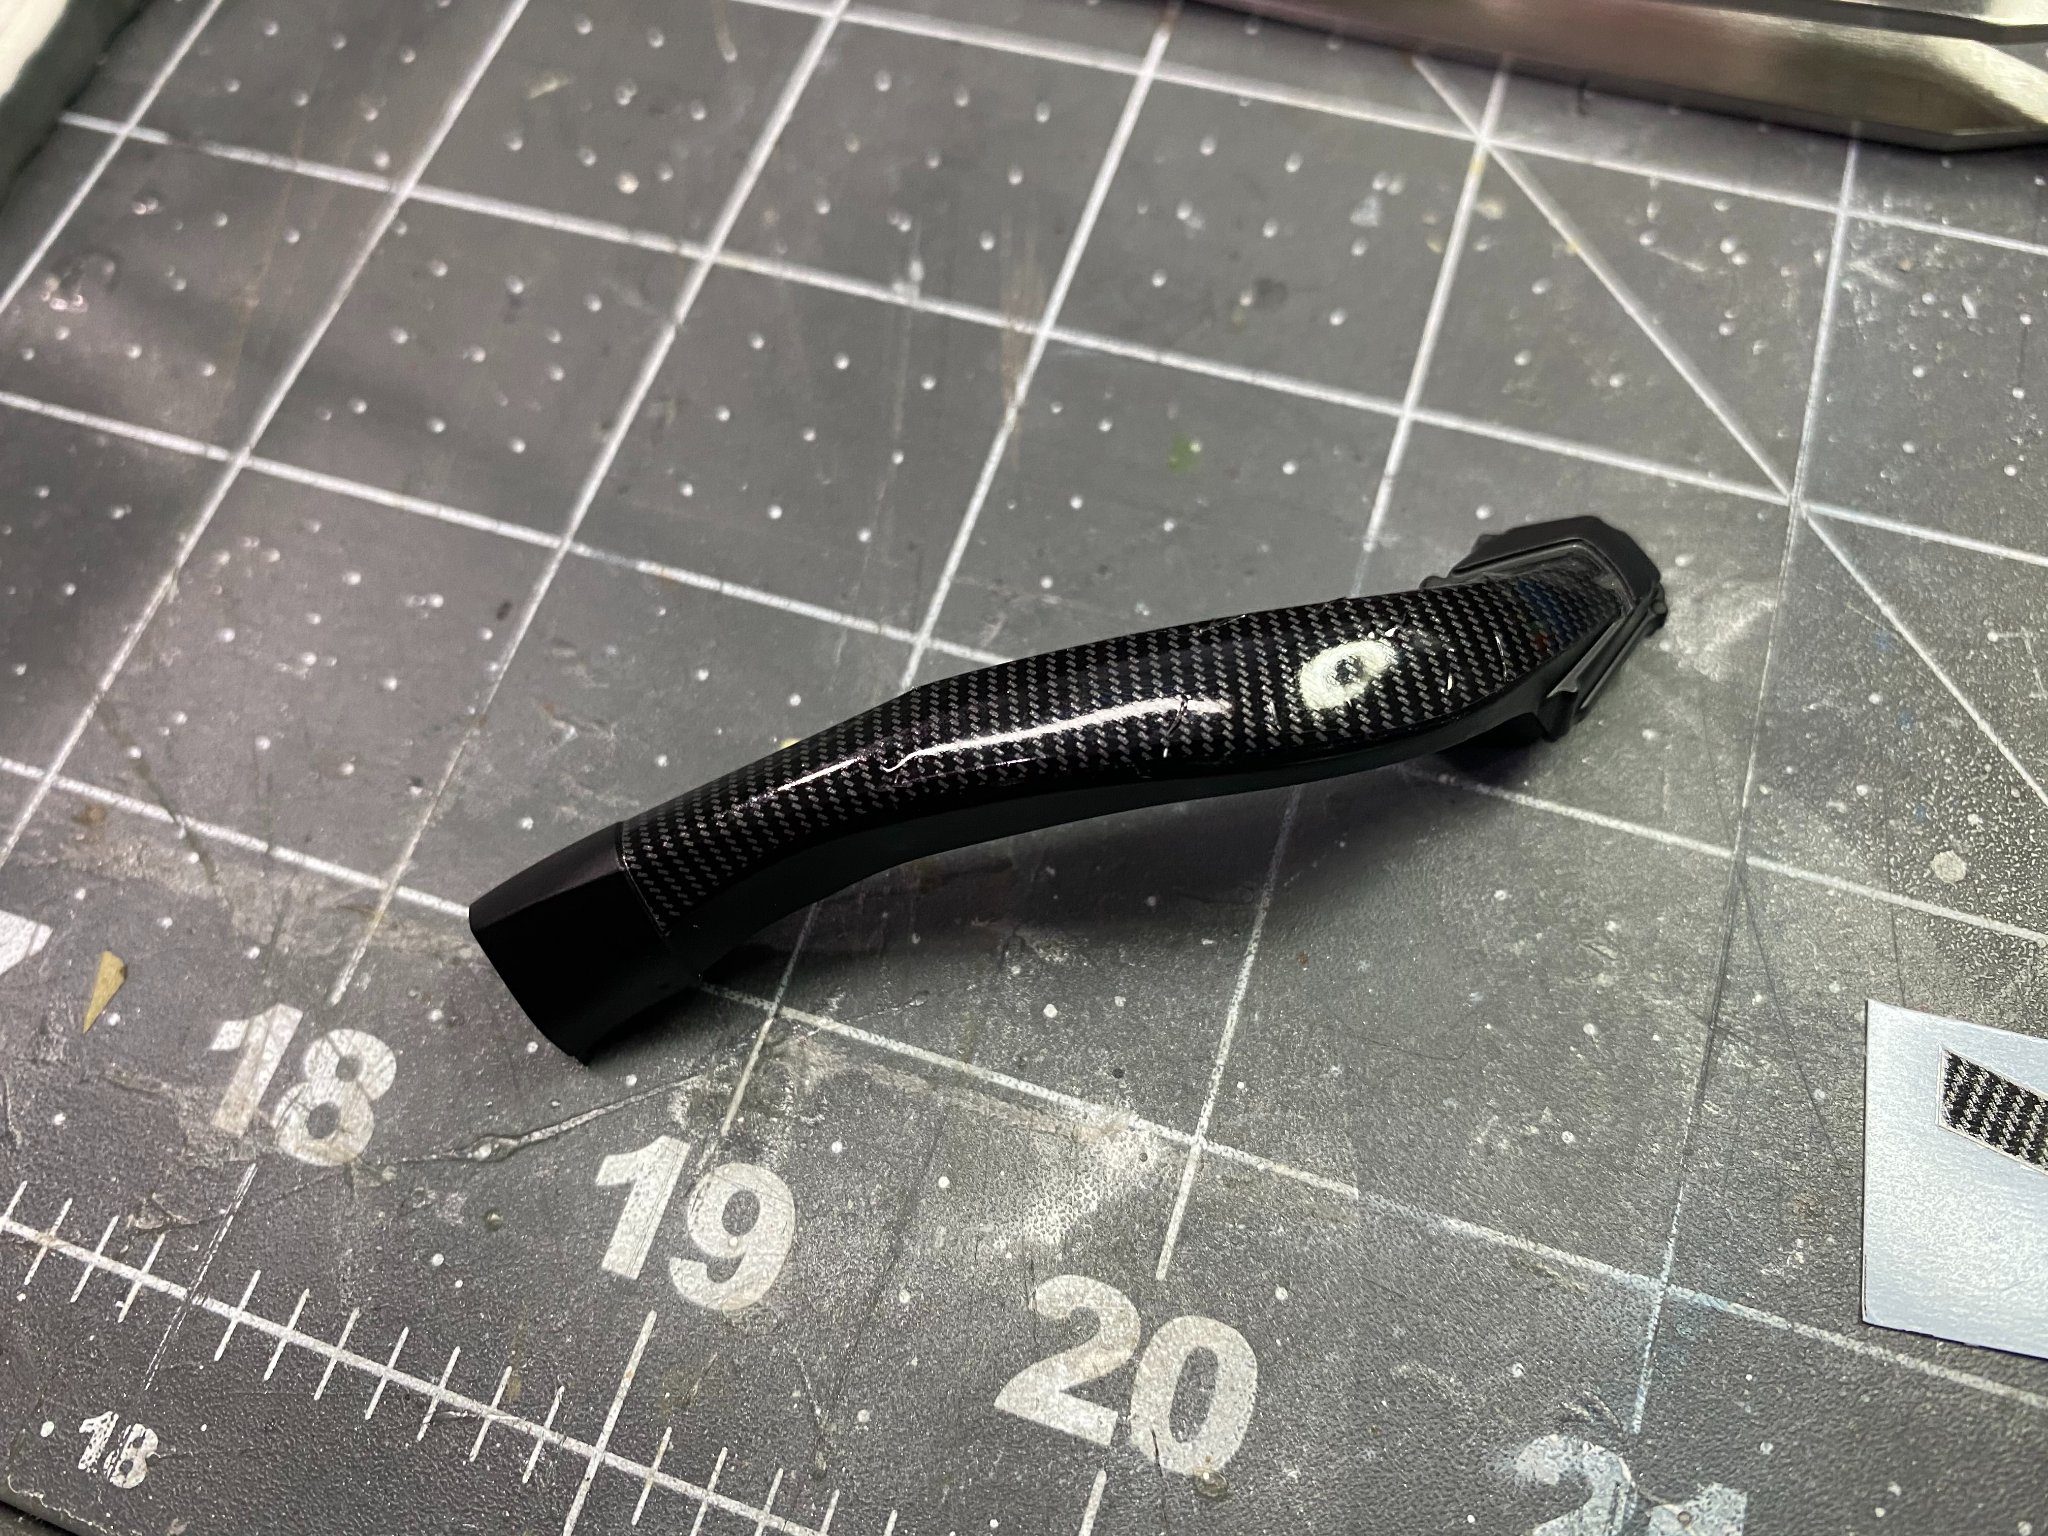
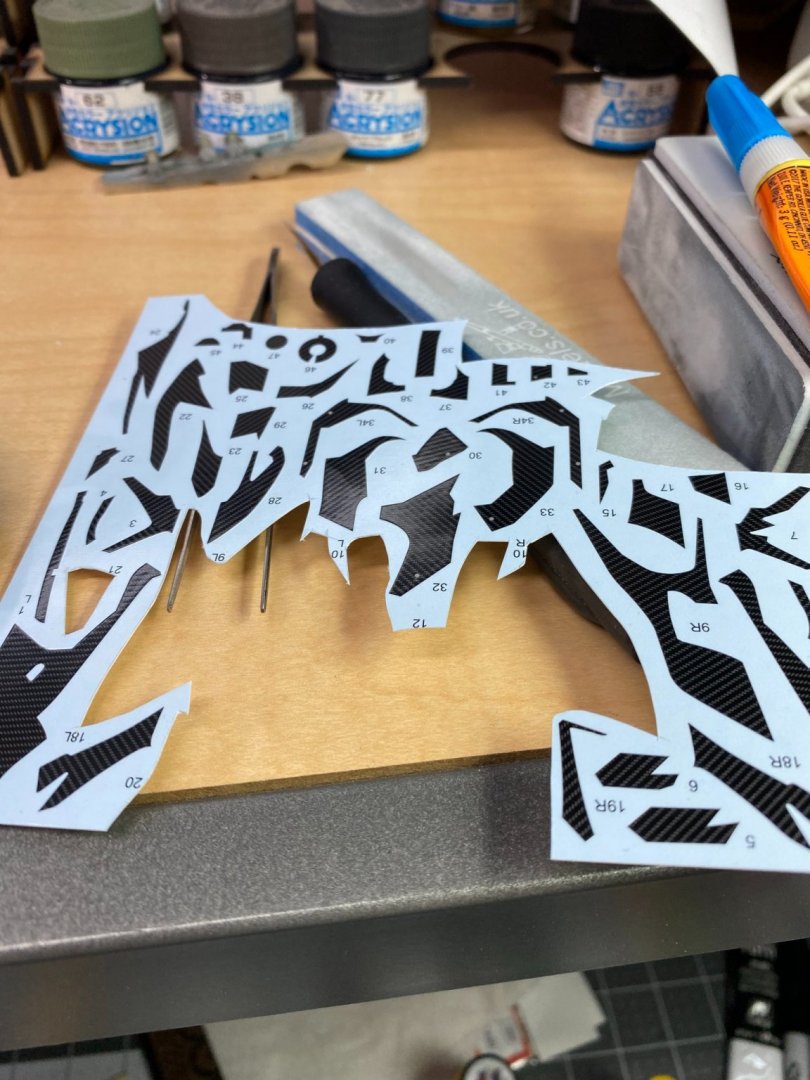
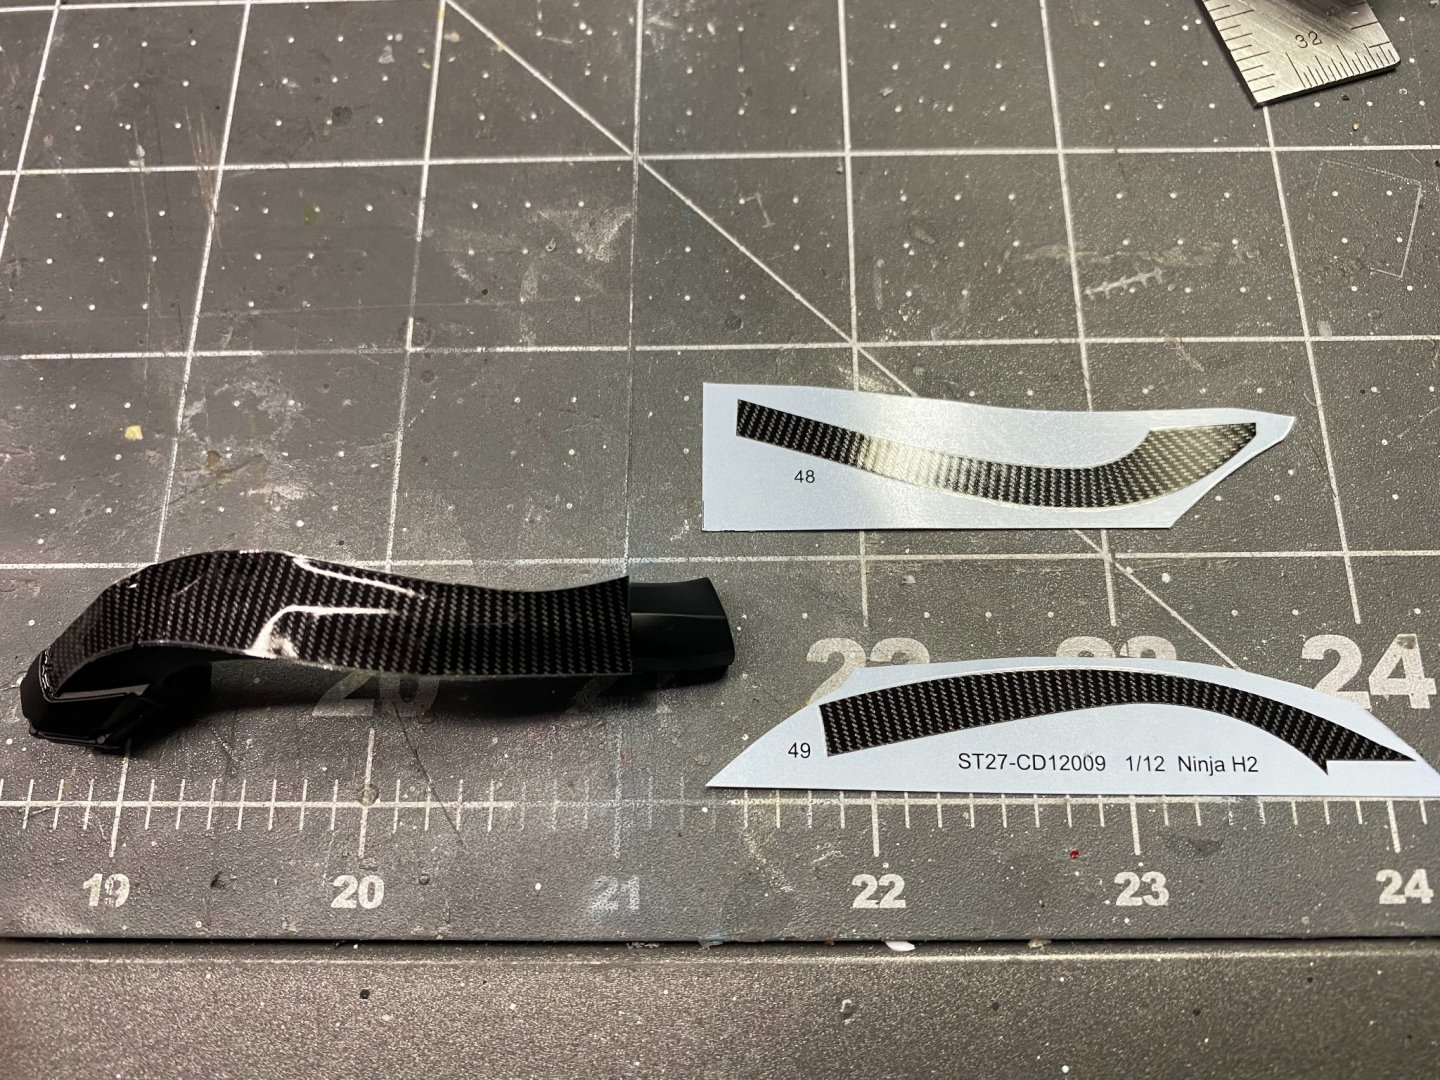
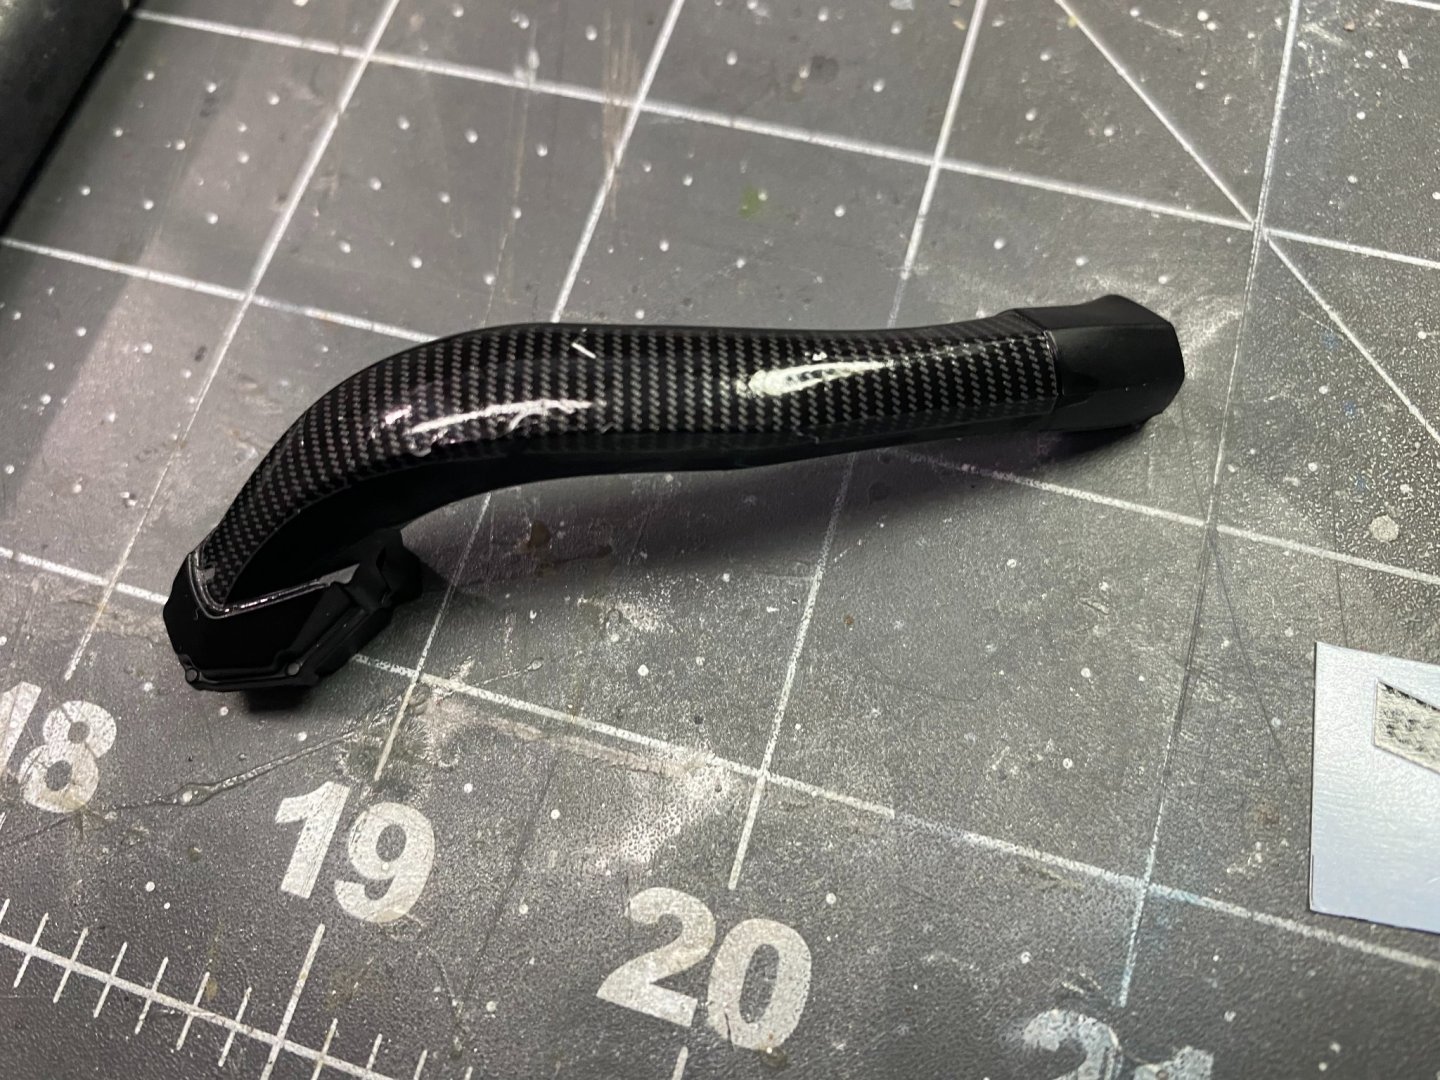
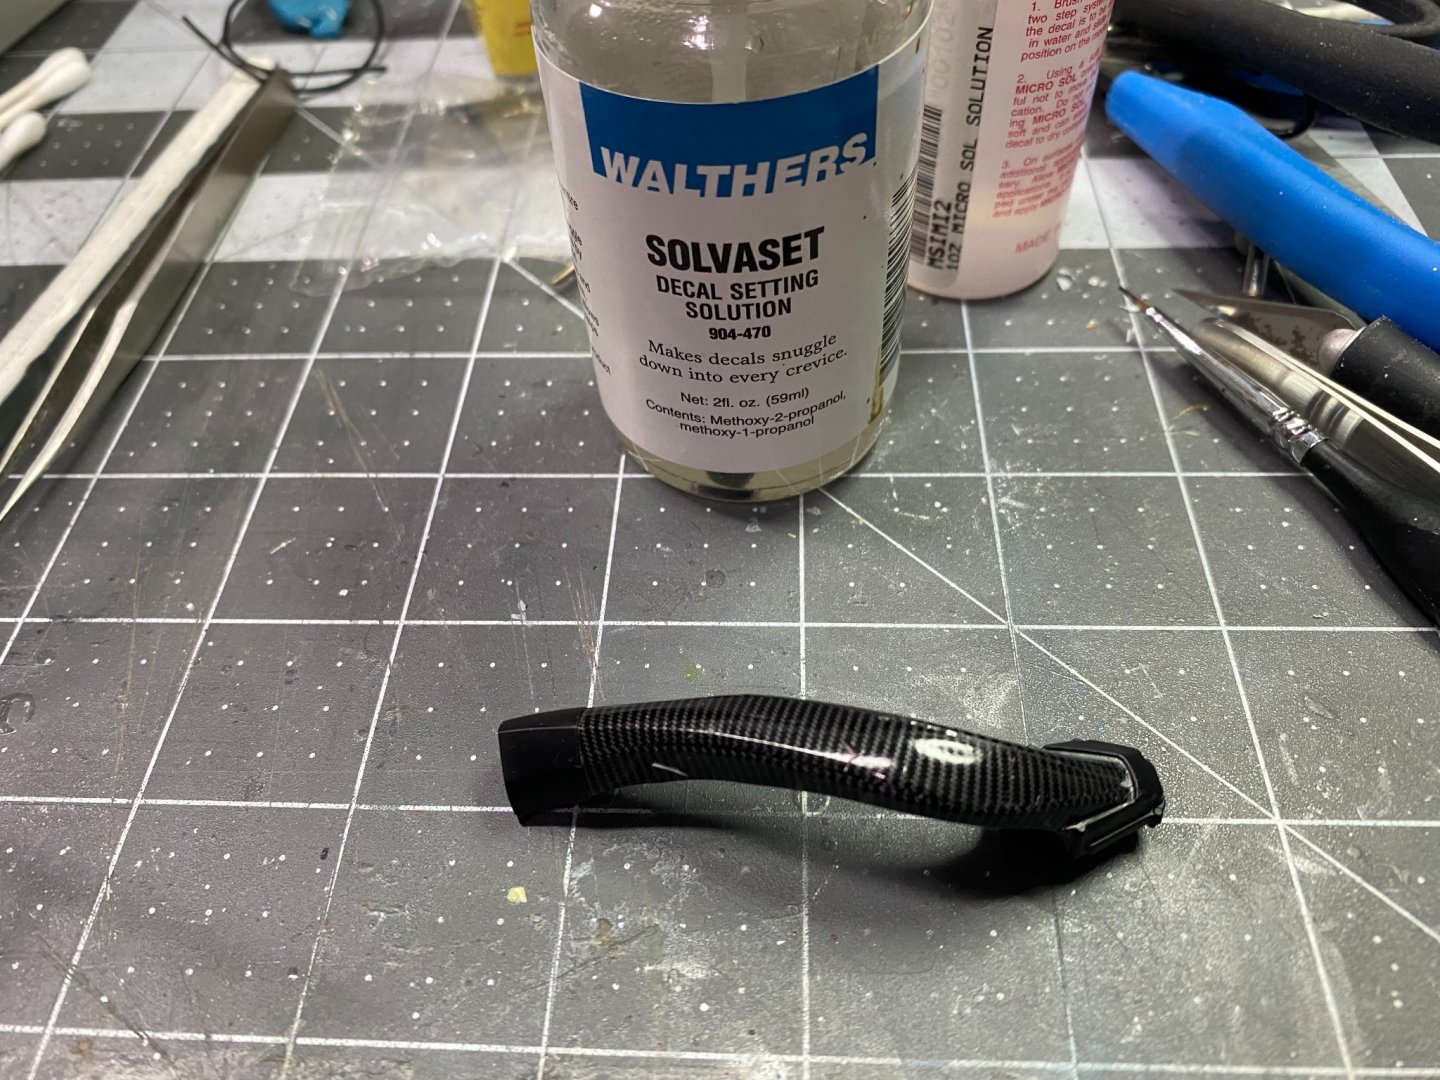
The fairing receives the lion's share of the carbon fiber decals. There are many individual pieces of decal required for the fairing. As a result, it's painfully slow getting the job done. However, the results are satisfying as the decals are of a high quality. Without a strong decal solvent like Solvaset, this task would be next to impossible.

-
I believe the simple answer is, the Asian market for models dwarfs the Western market. Many many more modelers in Asia than the West. The answer is an economic one. They produce models for sales. Not enough sales in the Western market. The Japanese ships are big sellers in Asia.
- 179 replies
-
- 8
-
-
- hatsuzakura
- pit road
- (and 2 more)
-
Looks fabulous Mike. Takes someone with the skills of a watchmaker to work in that scale. Your work almost persuaded me to buy a 1:700 scale Tirpitz this weekend, but I resisted the temptation. I do have an aircraft carrier in that scale. Will do that one before I buy anything else, just to make sure I'll follow through.
- 179 replies
-
- 8
-
-
- hatsuzakura
- pit road
- (and 2 more)
-
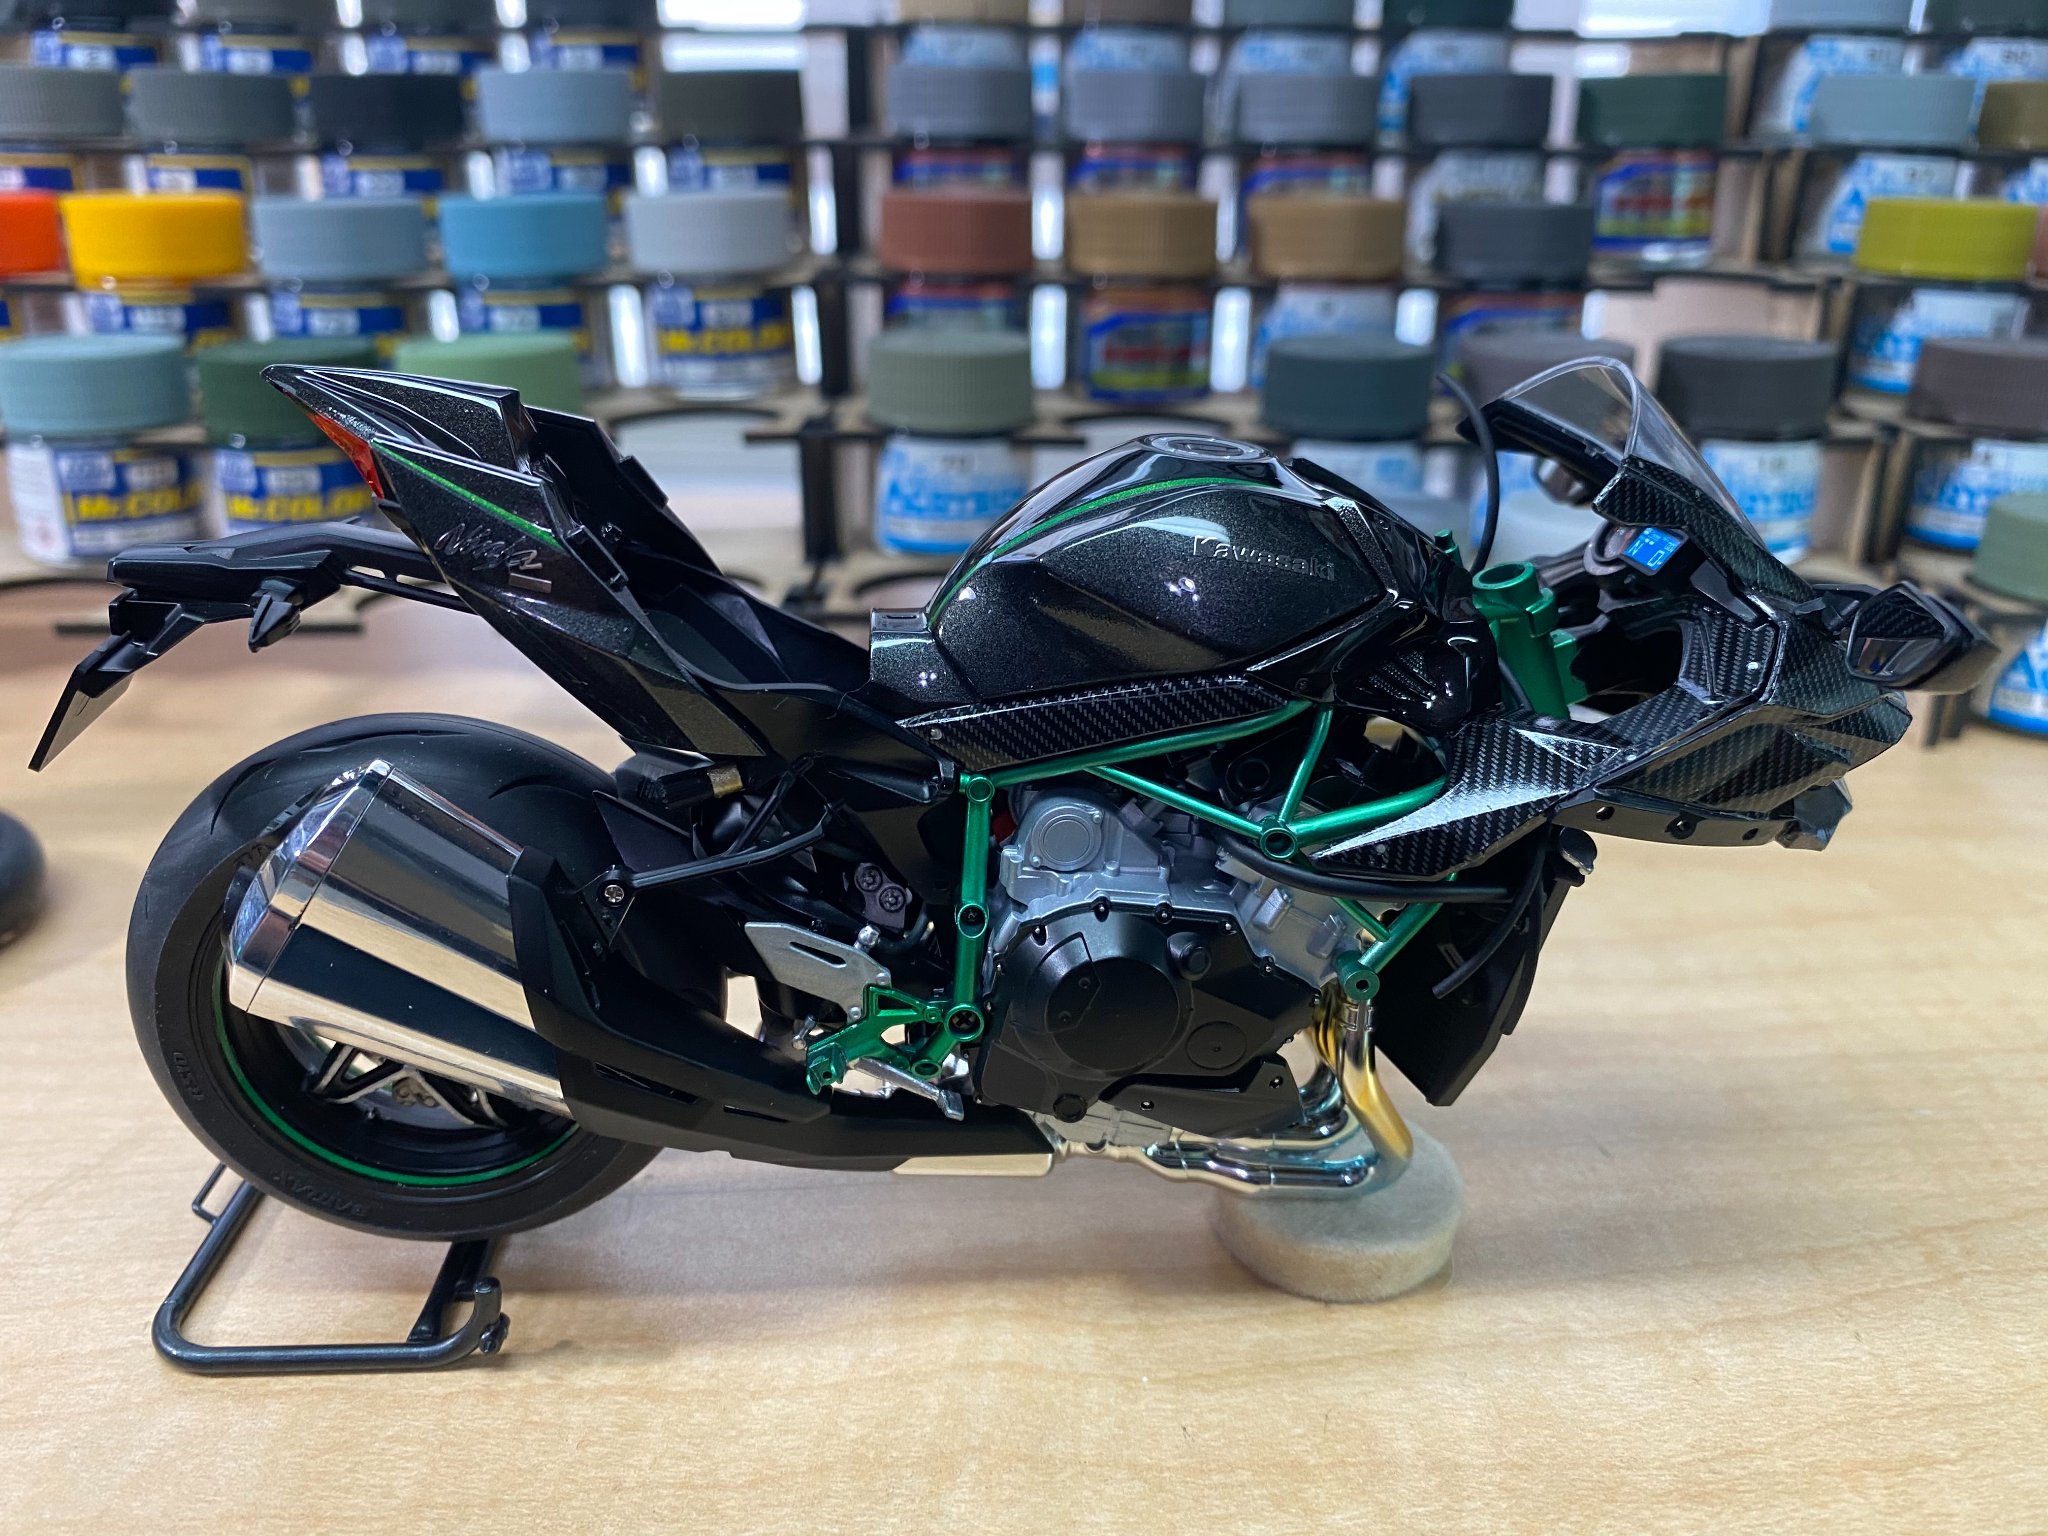
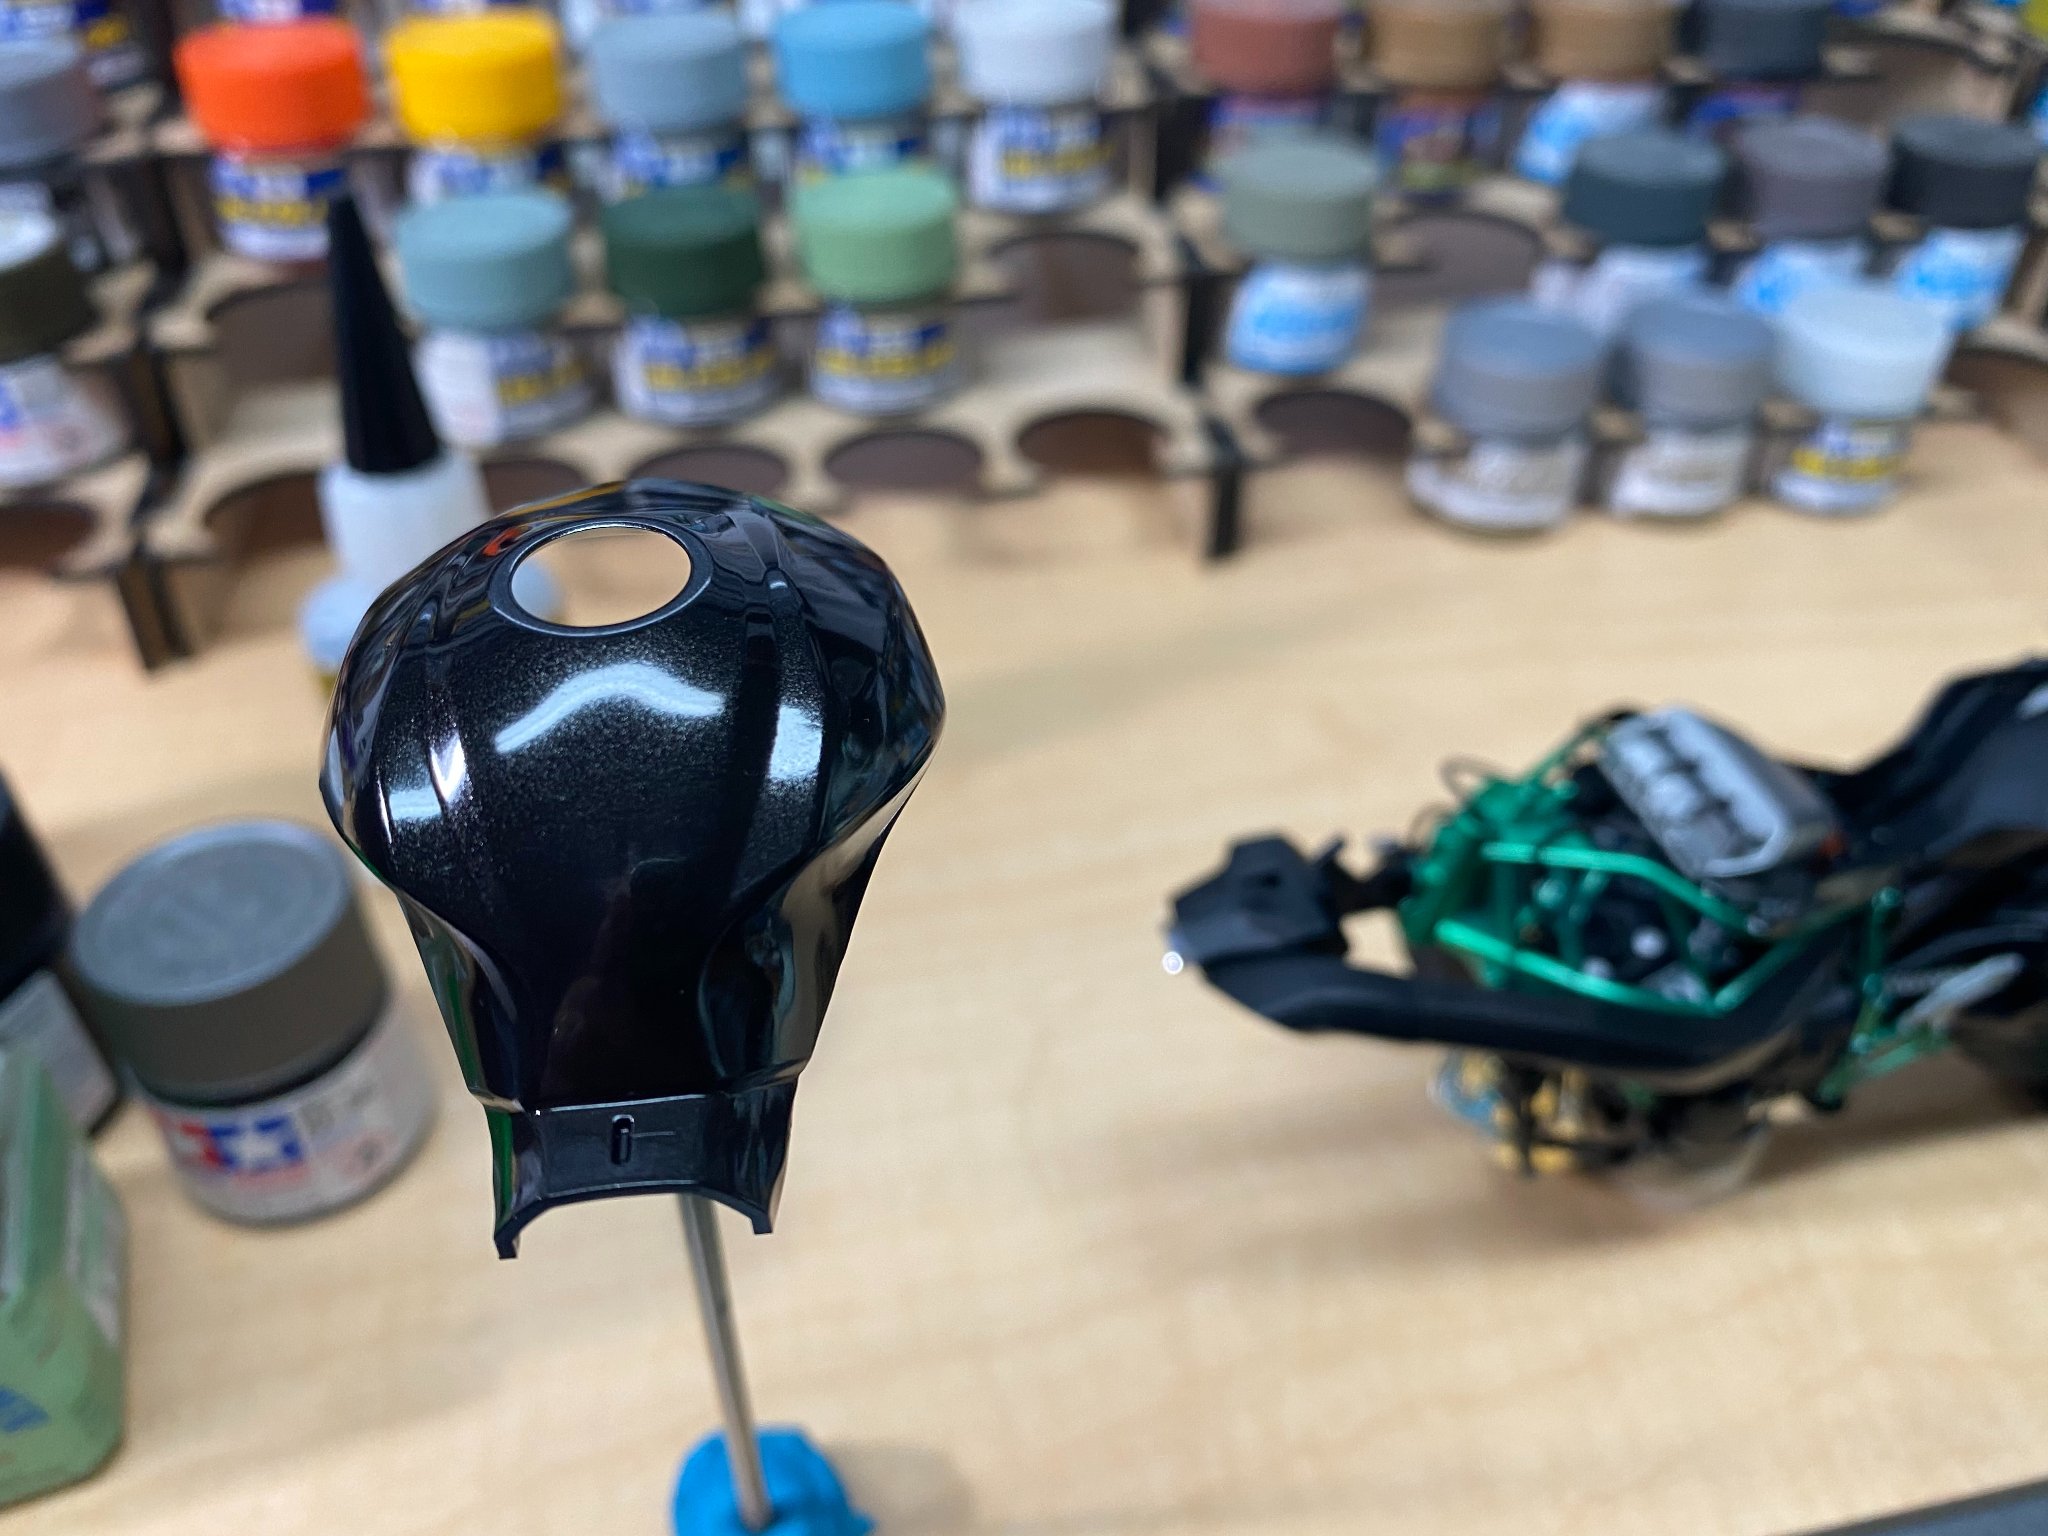
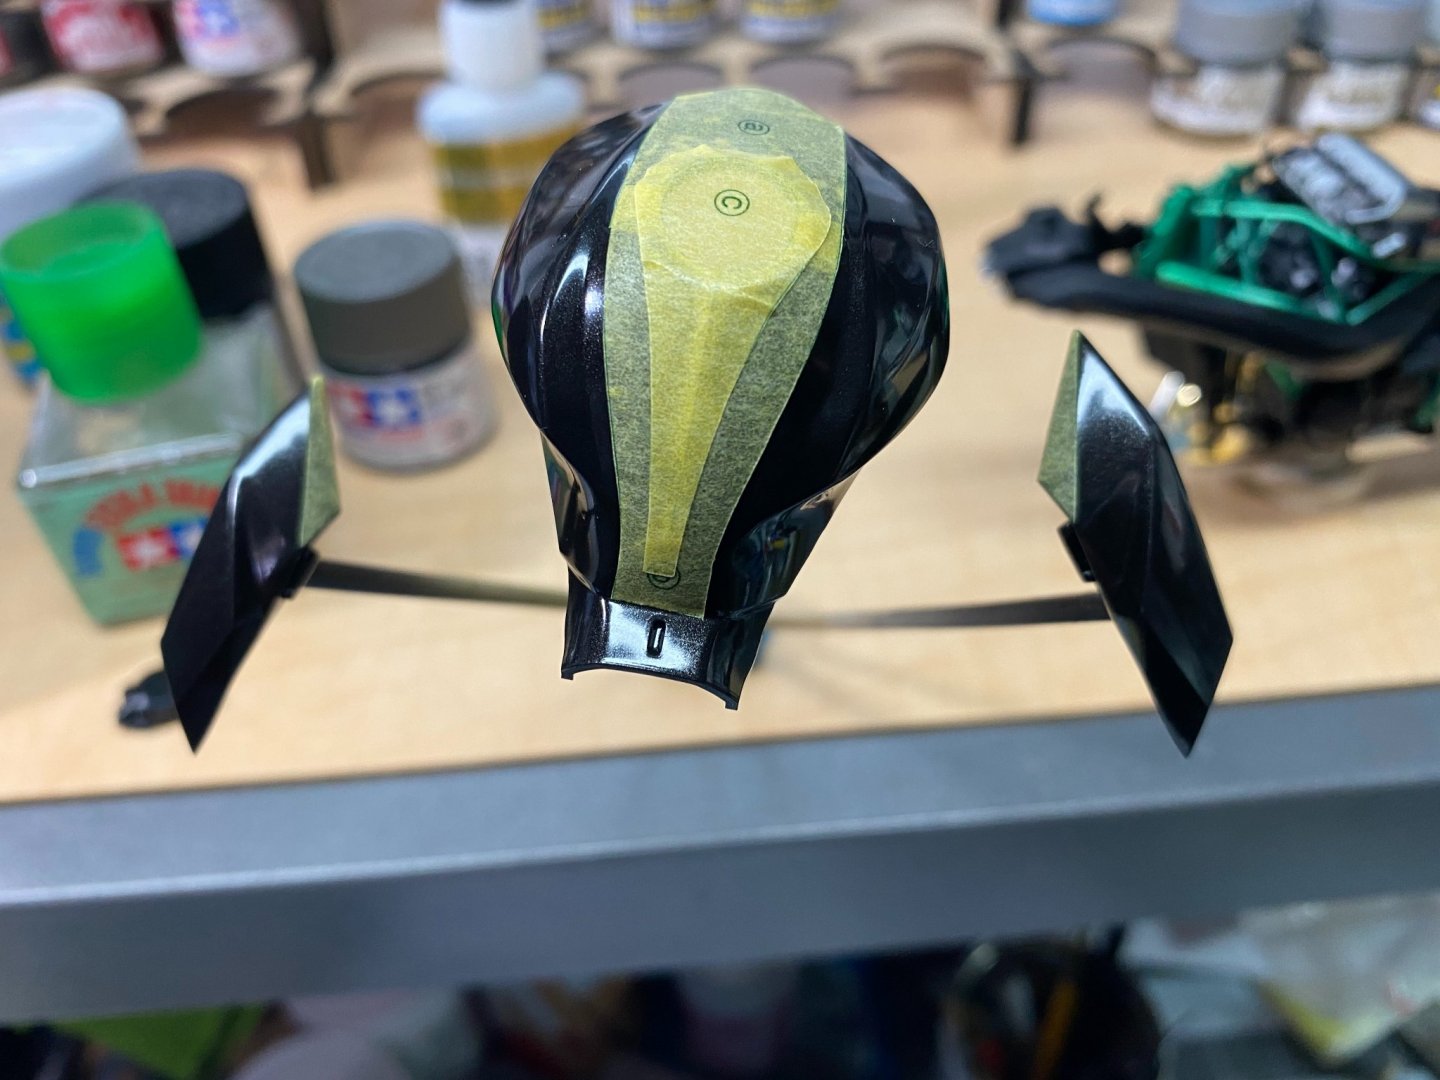
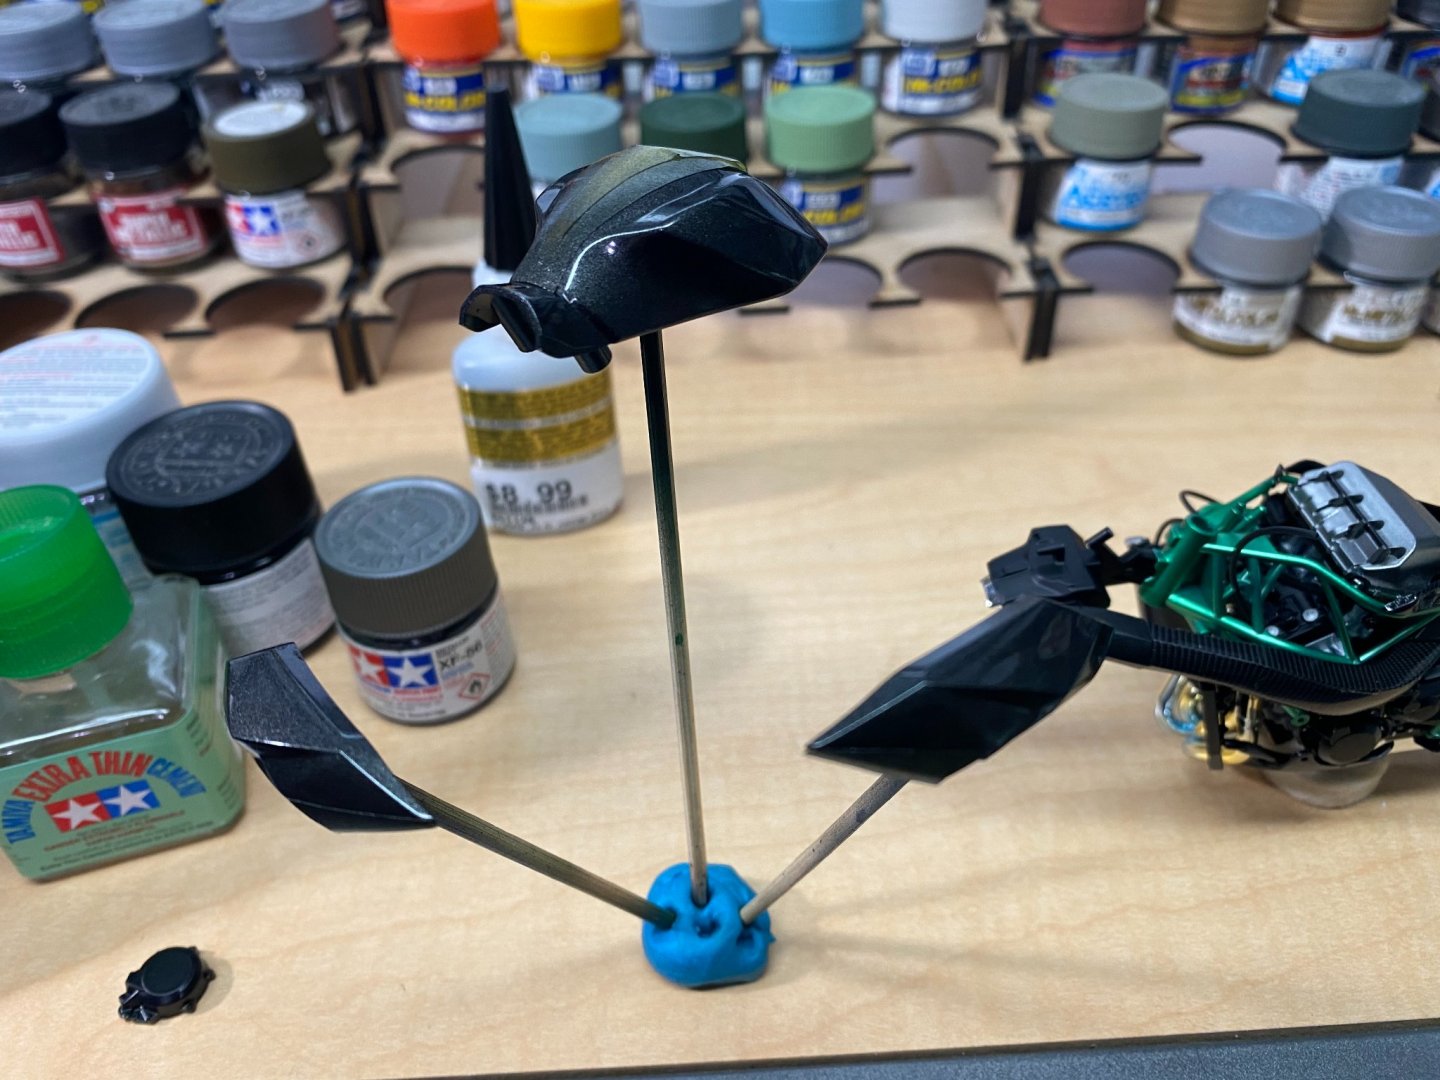
With masks removed, I think this two tone color gives a good representation of the bike in the reference photos.
- 85 replies
-
- 11
-
-
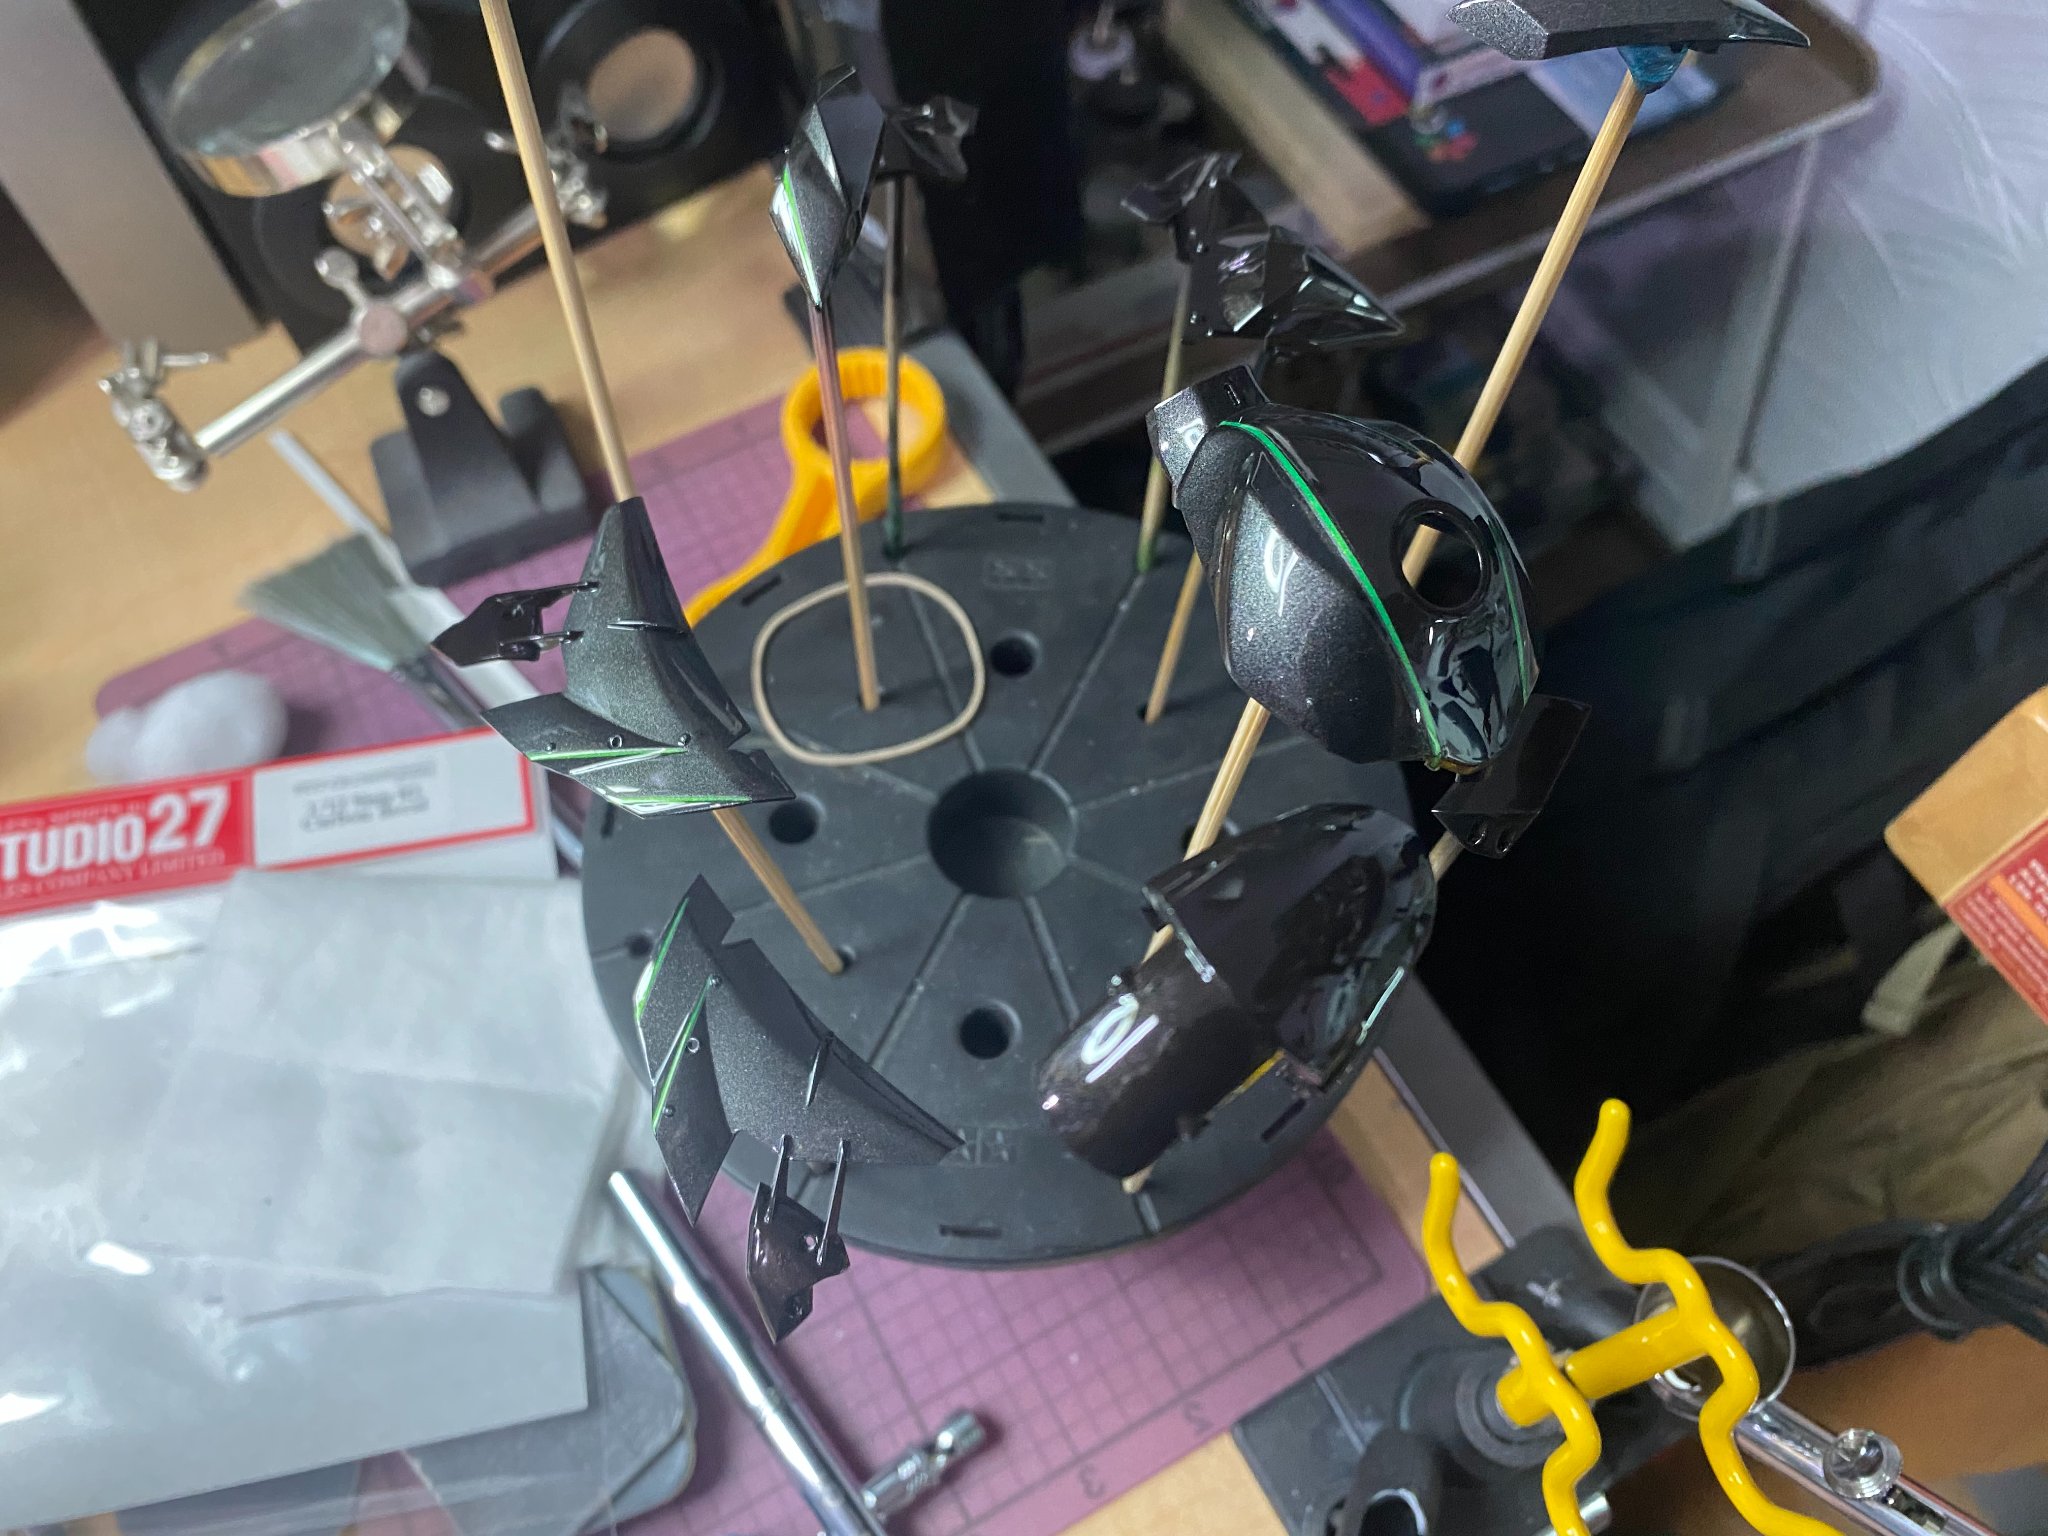
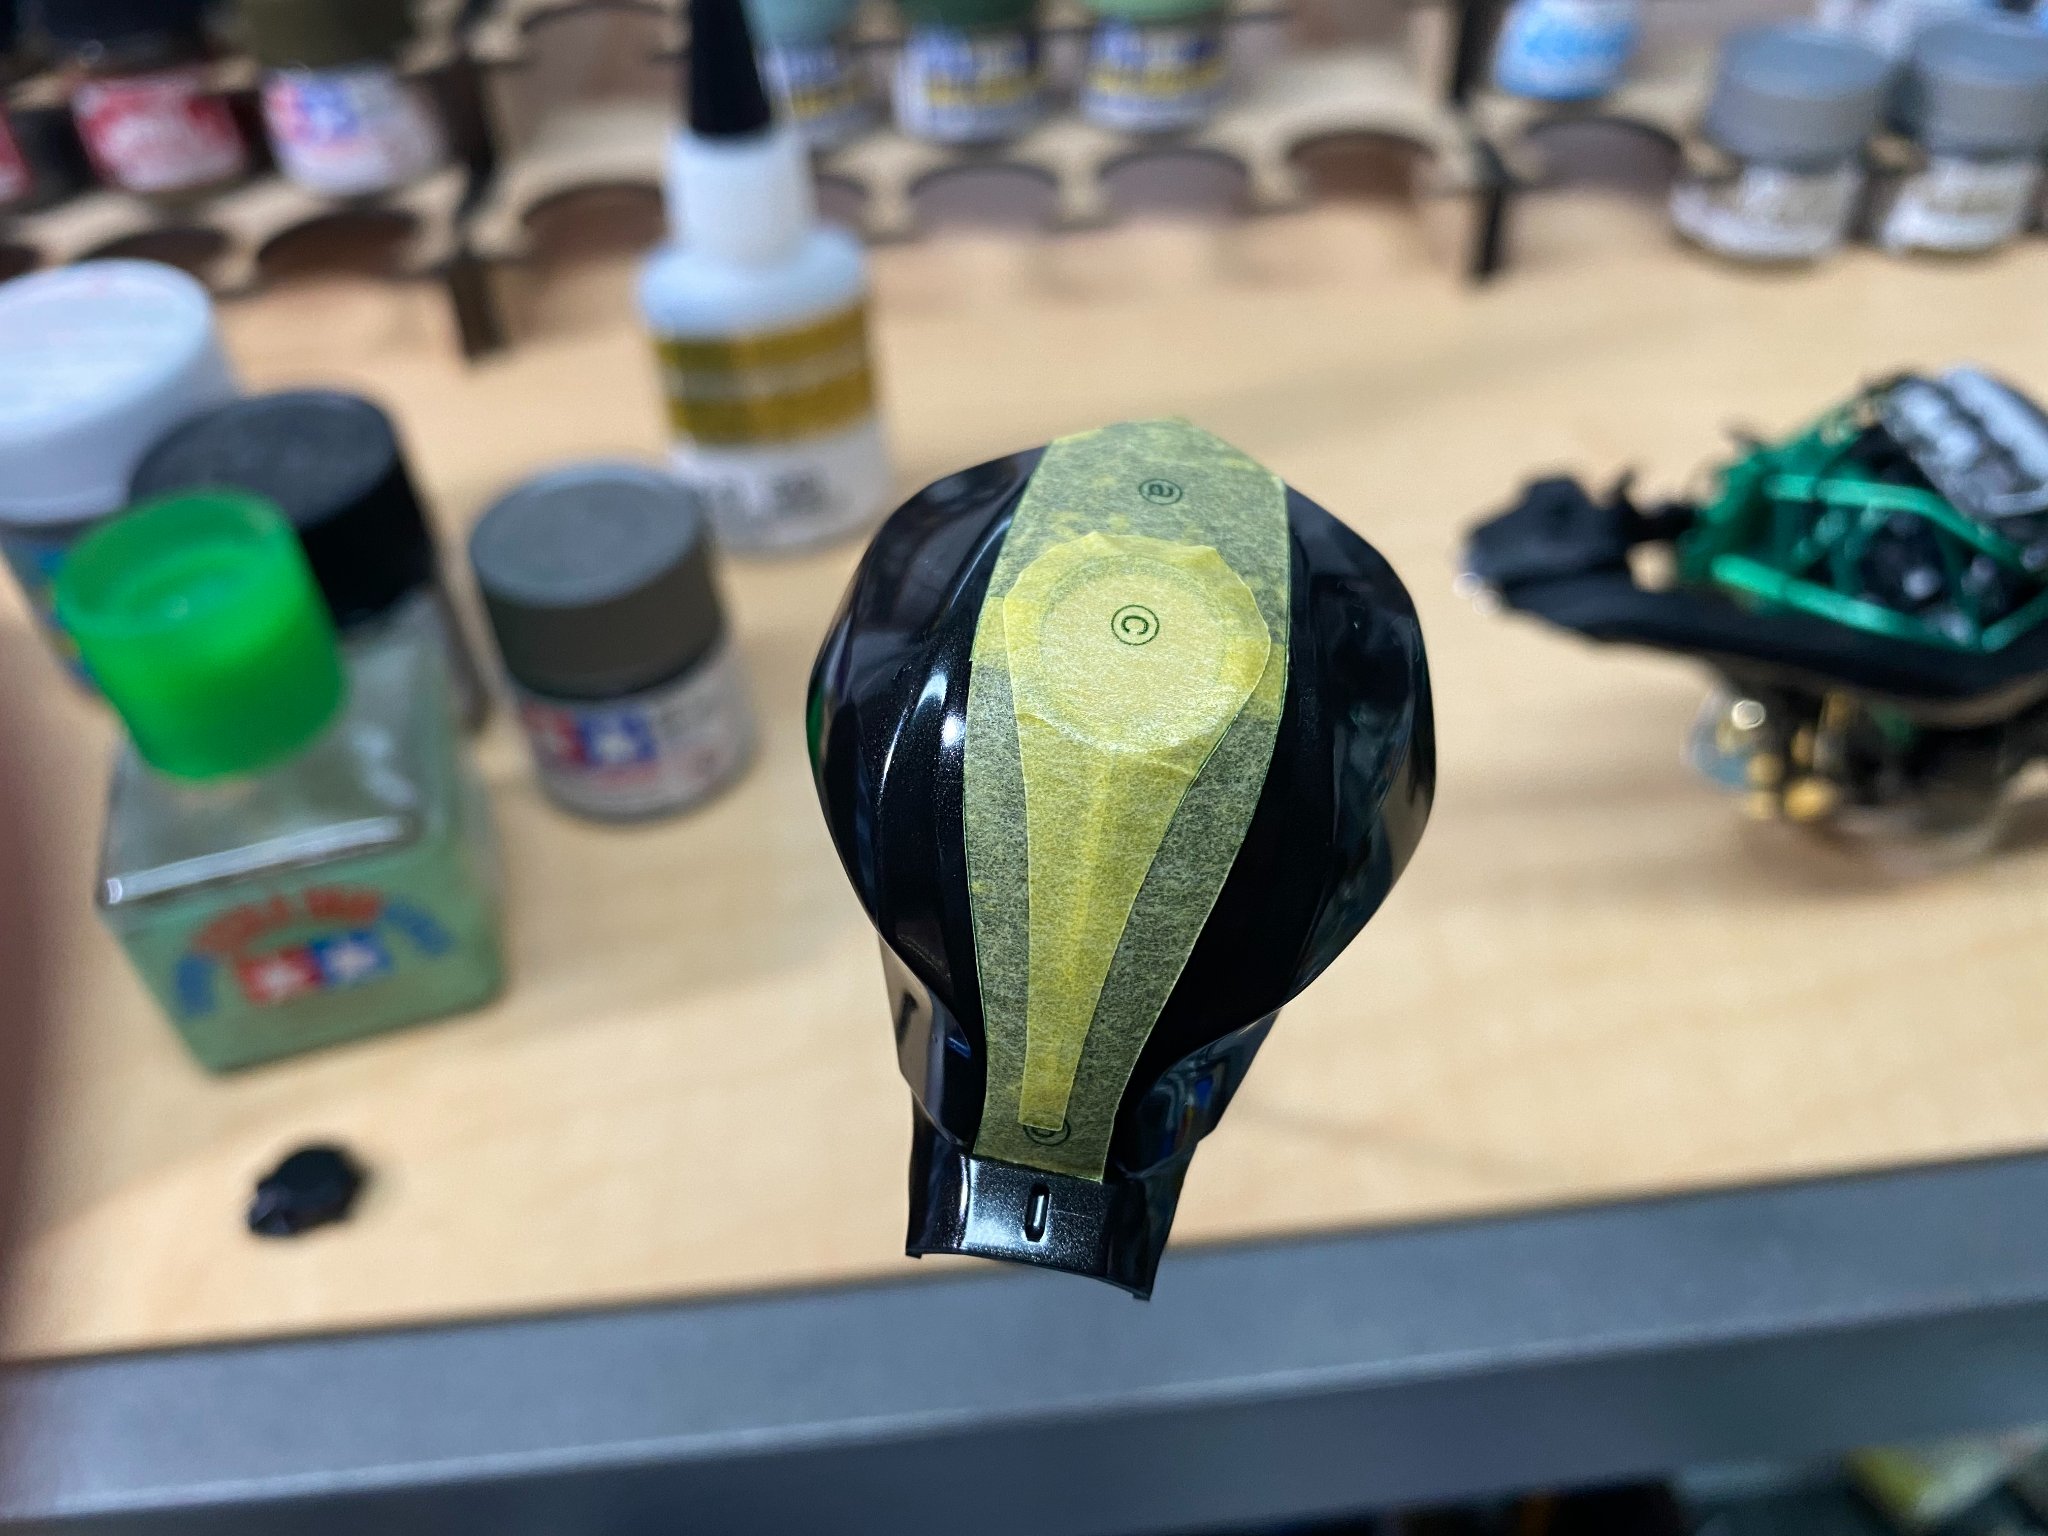
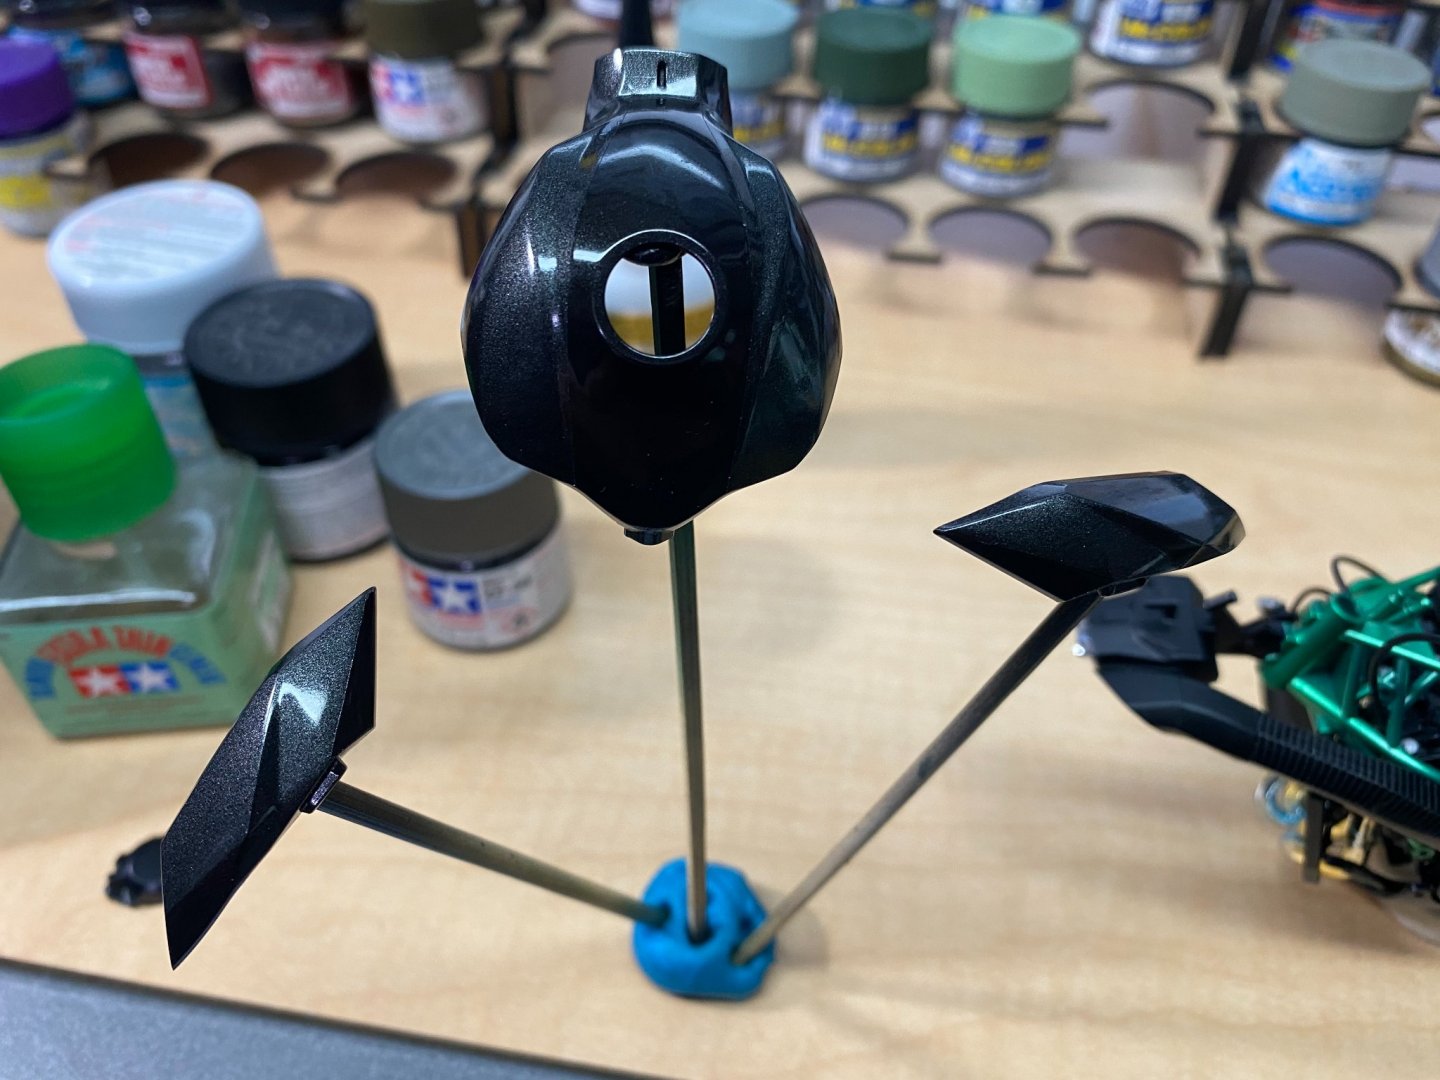
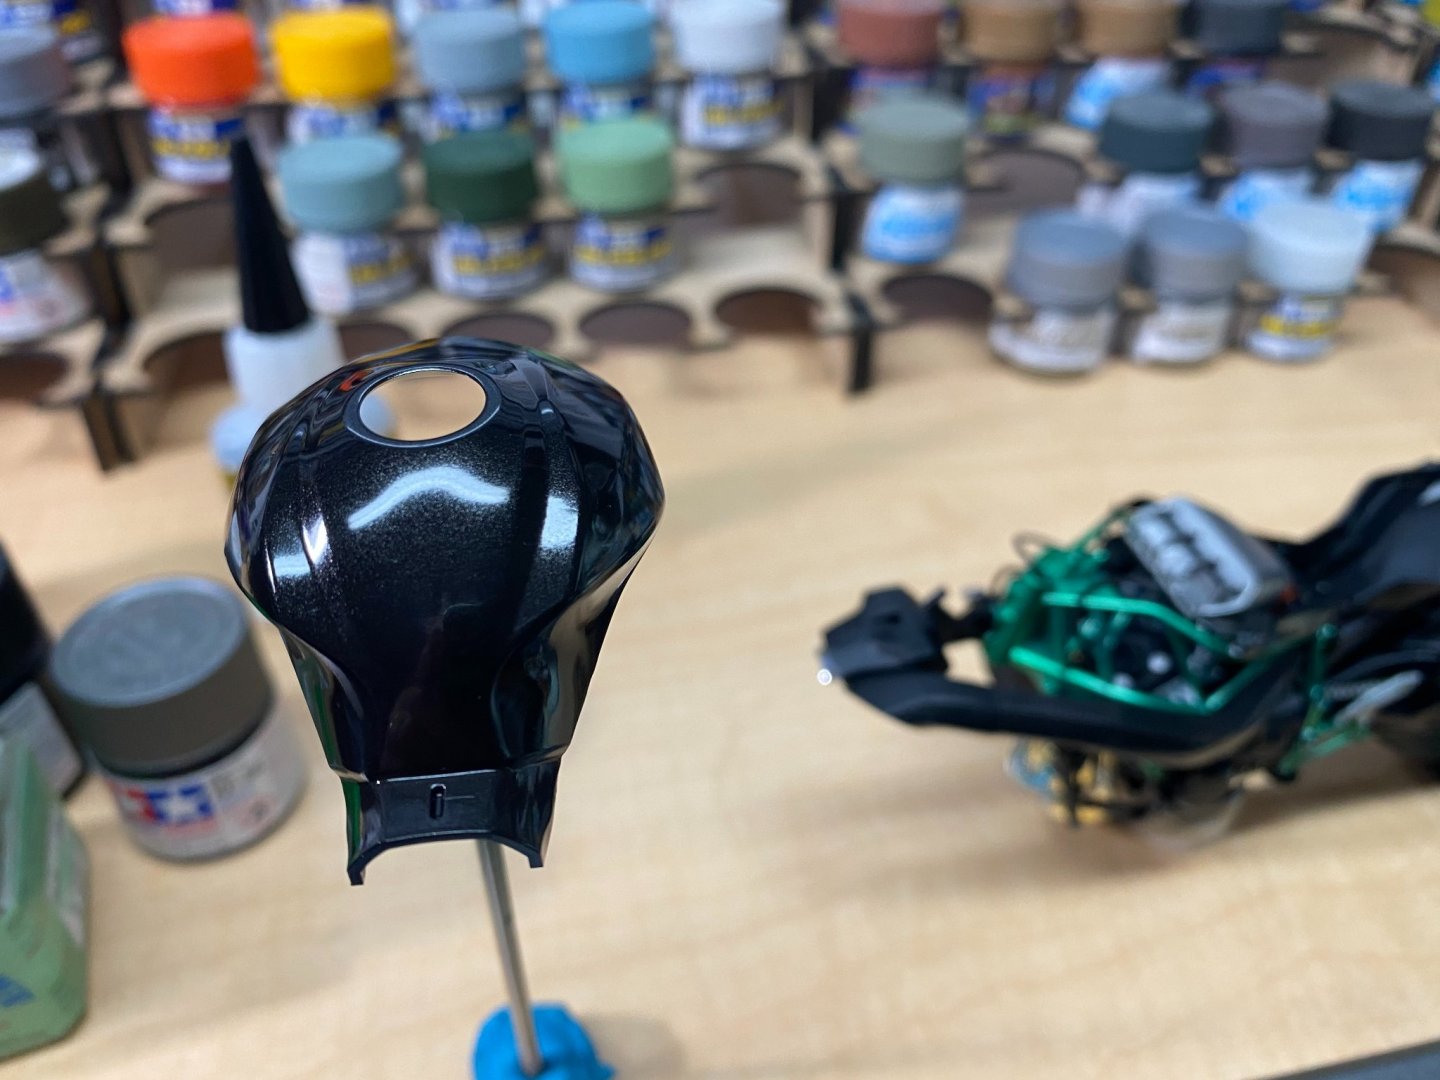
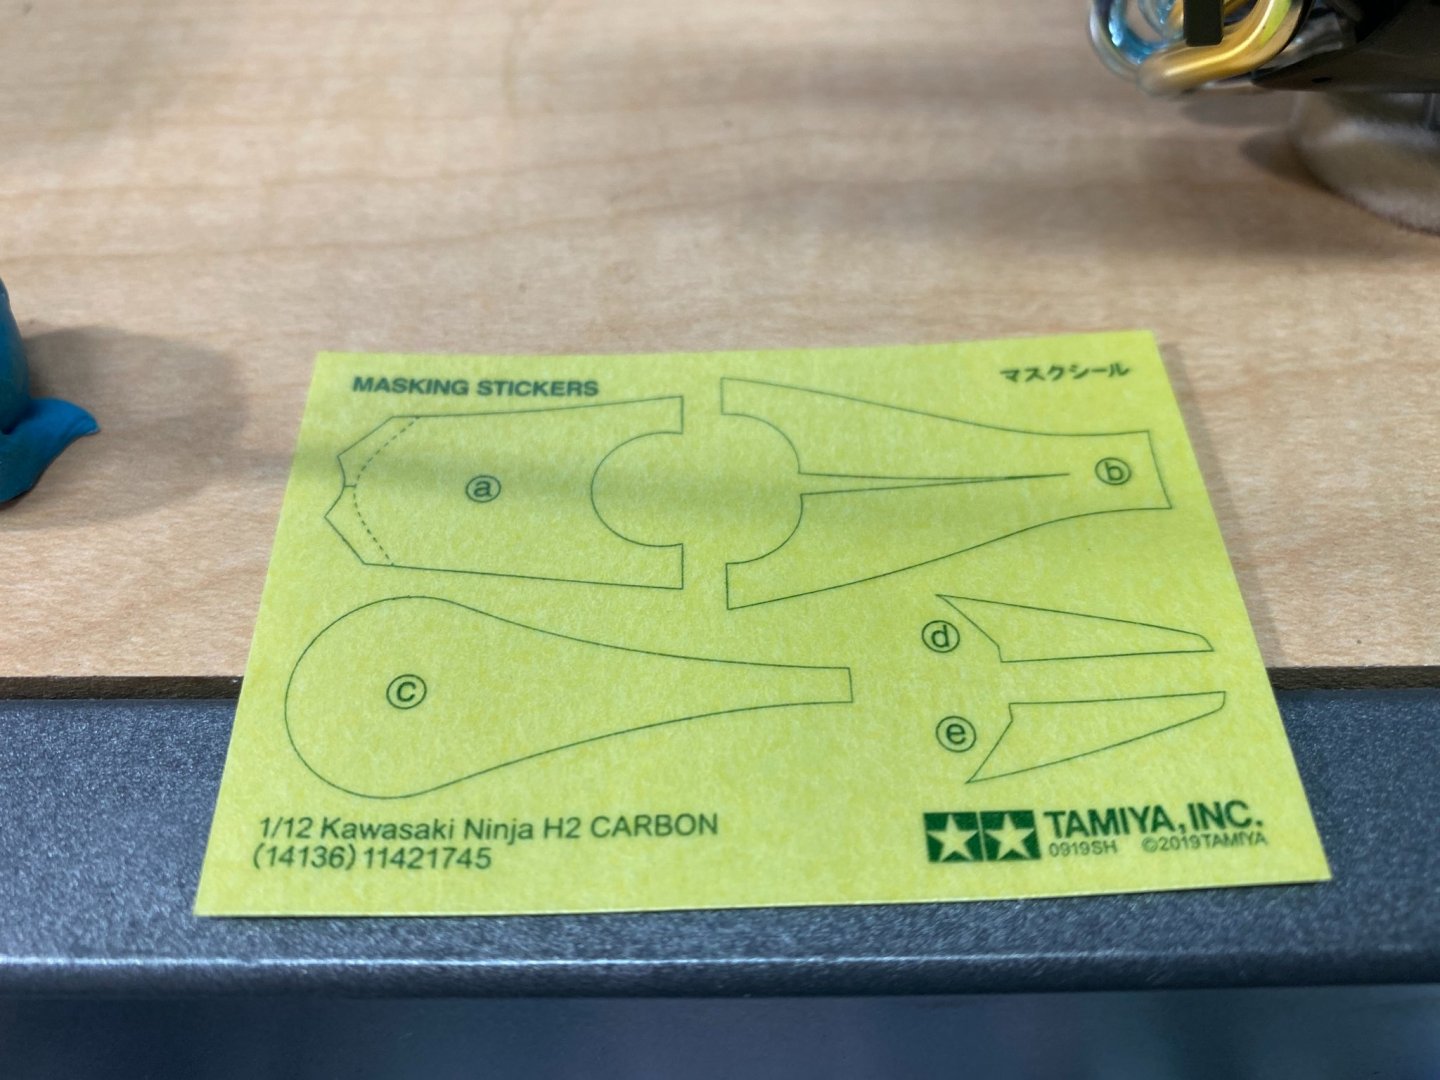
The main paint call outs for this model are metallic black and gun metal. Those parts get a clear coat. Here, I have painted the parts that are metallic black. The kit provides paint masks. The paint masks are applied to the parts that were painted metallic black After the masks have been applied, gun metal color is sprayed on.


- 85 replies
-
- 10
-
-
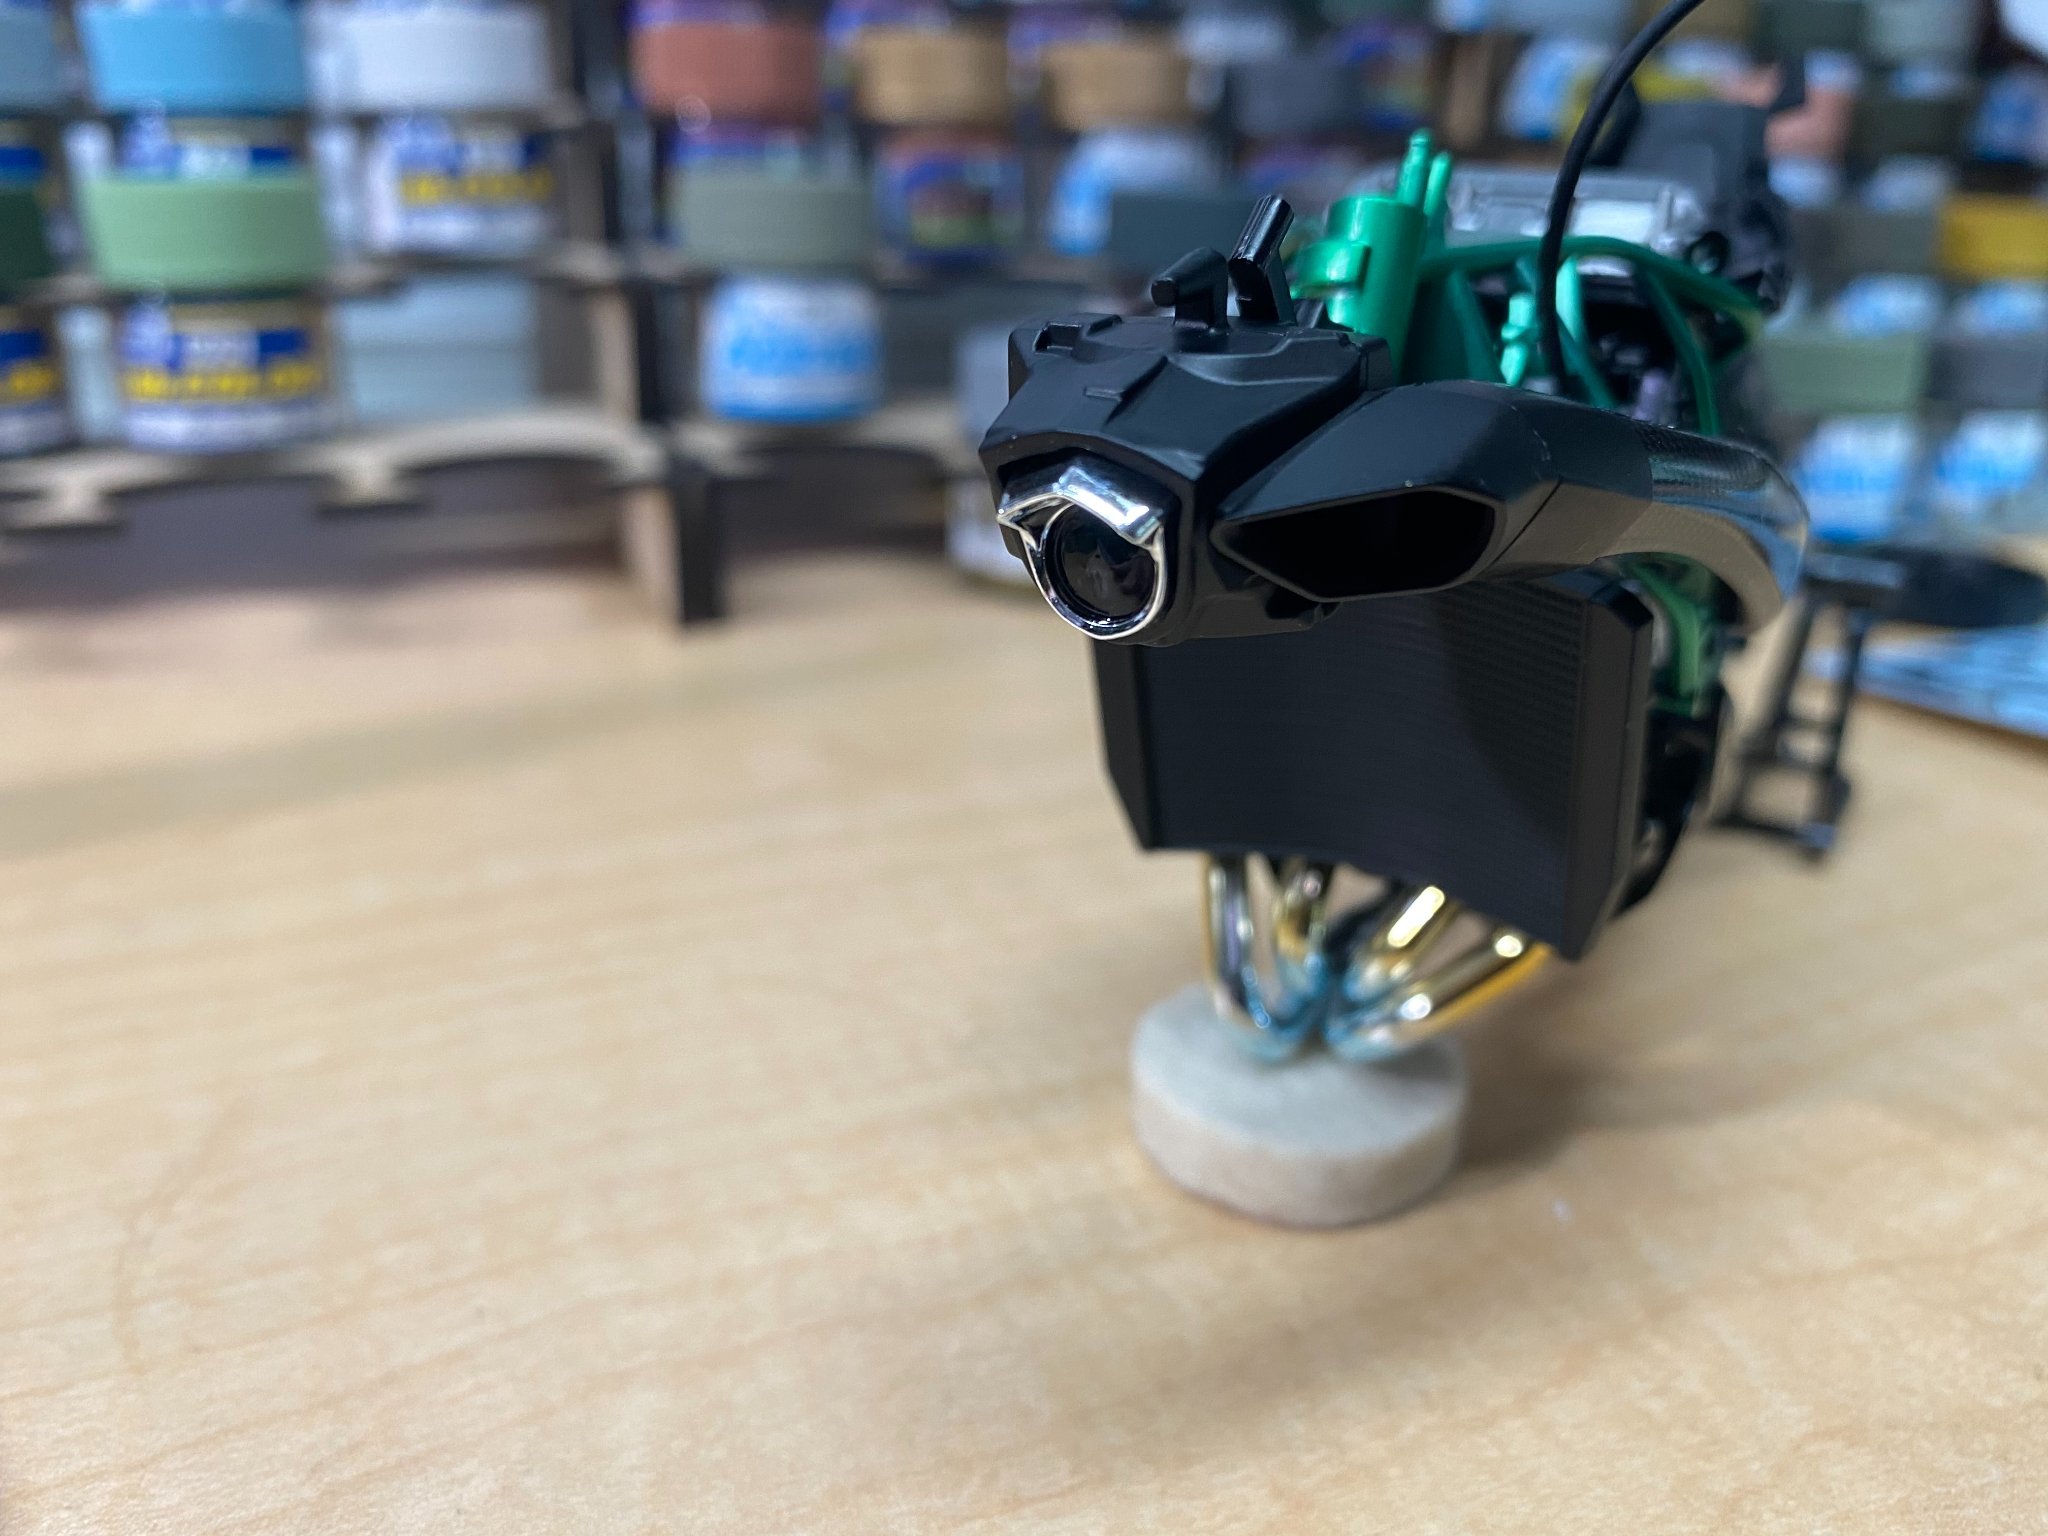
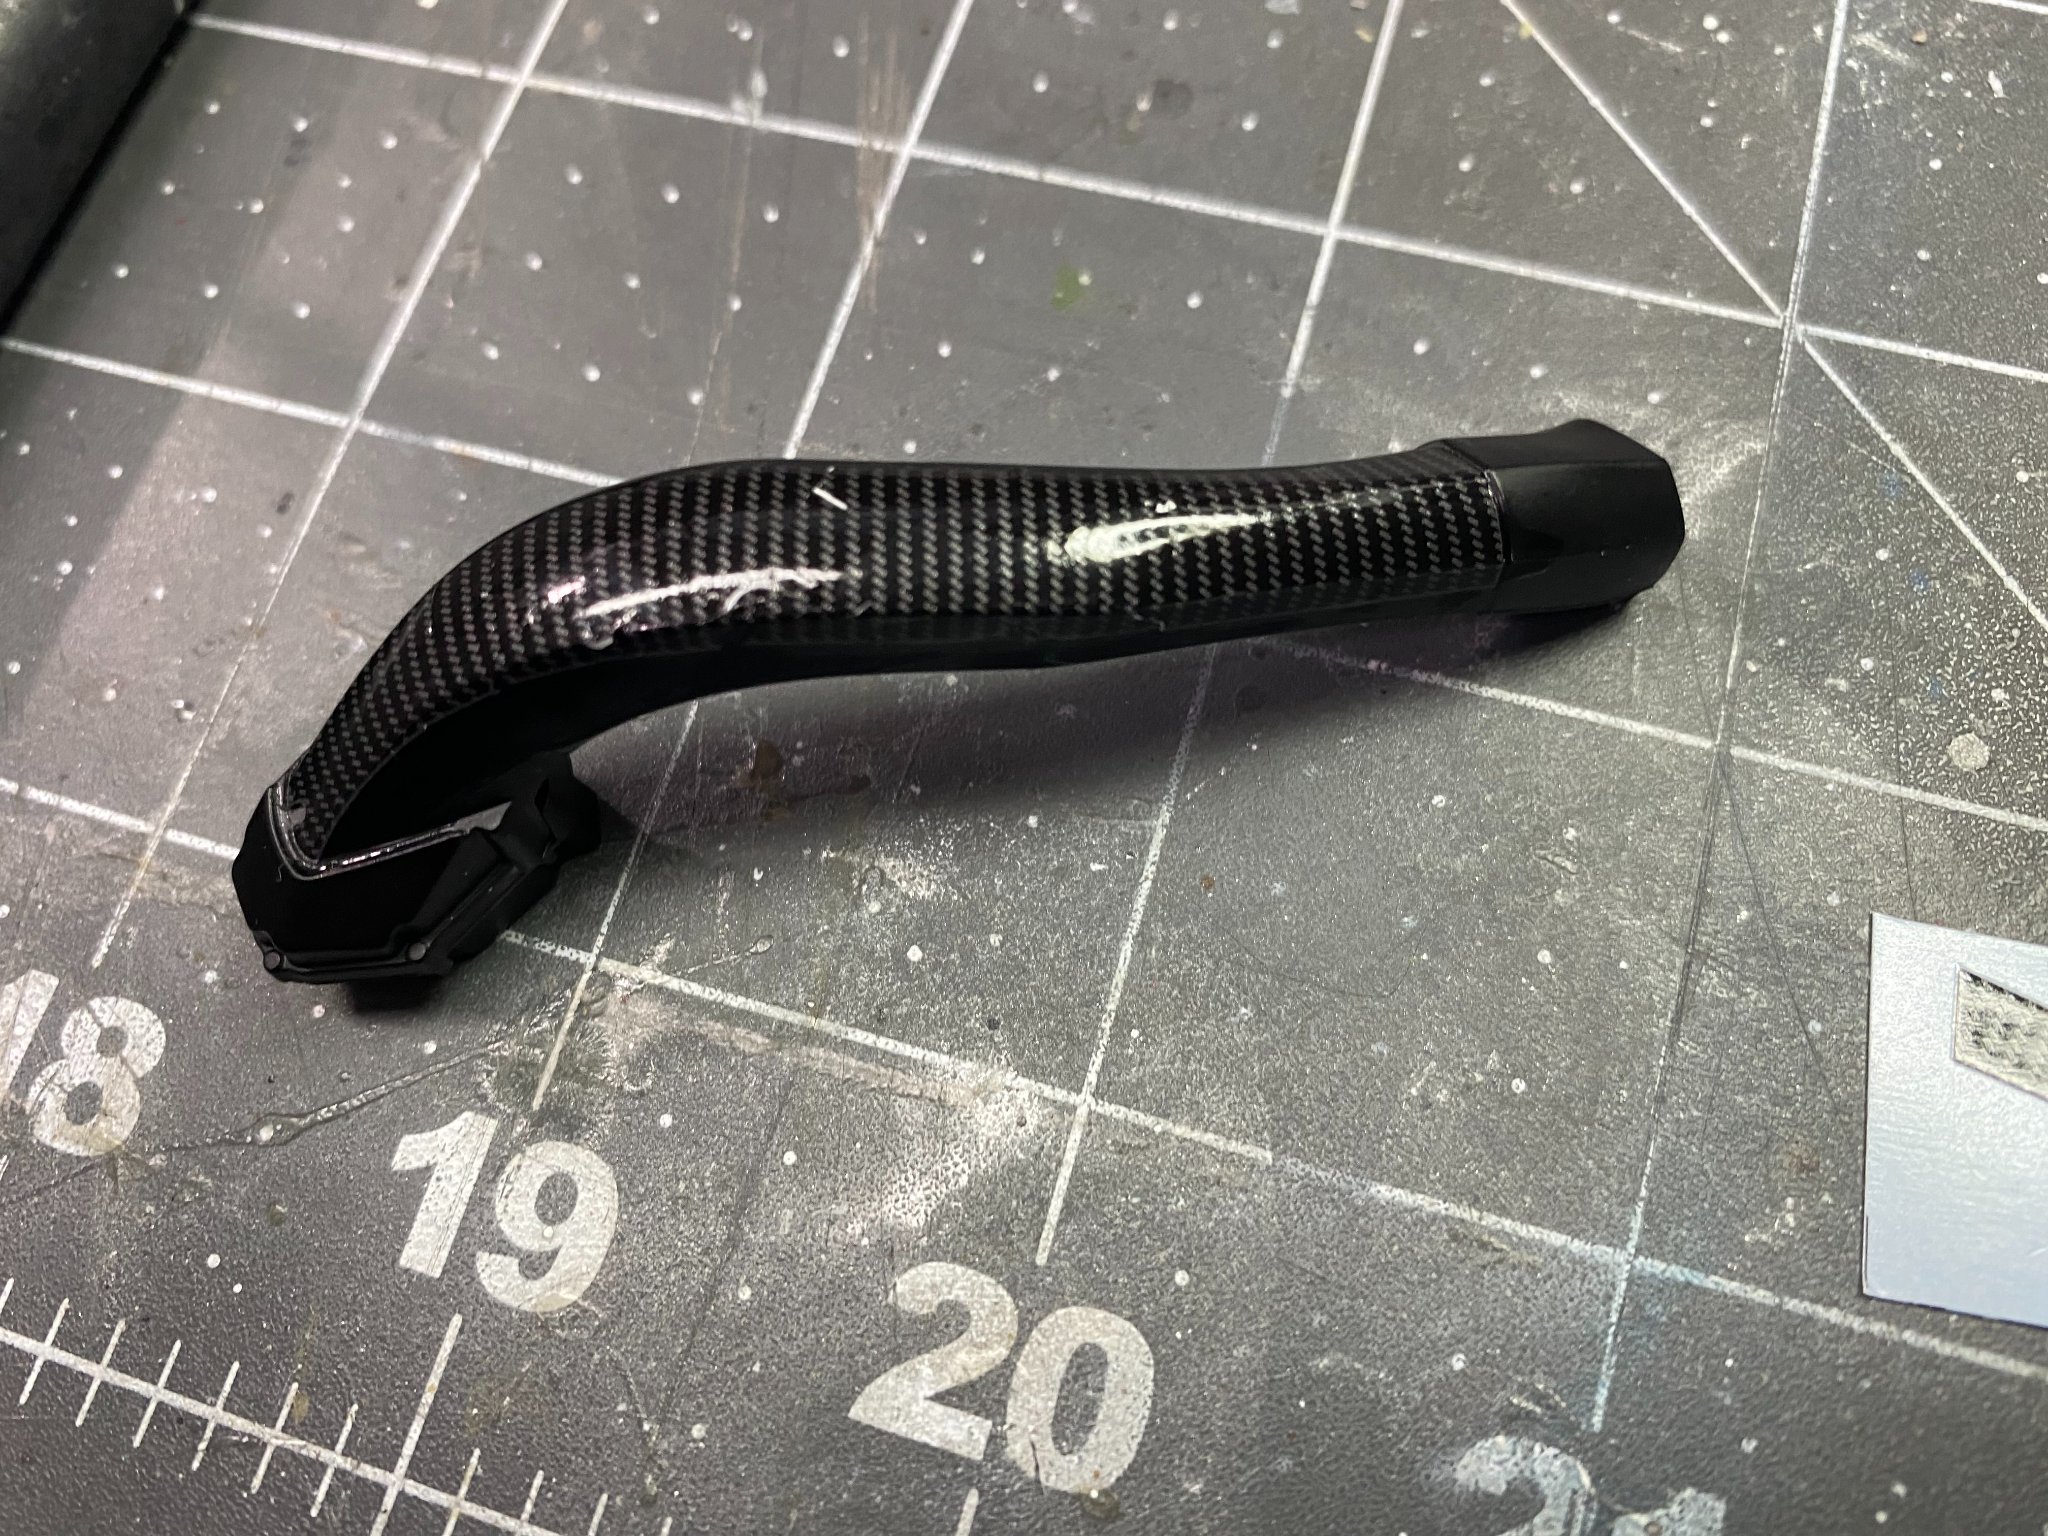
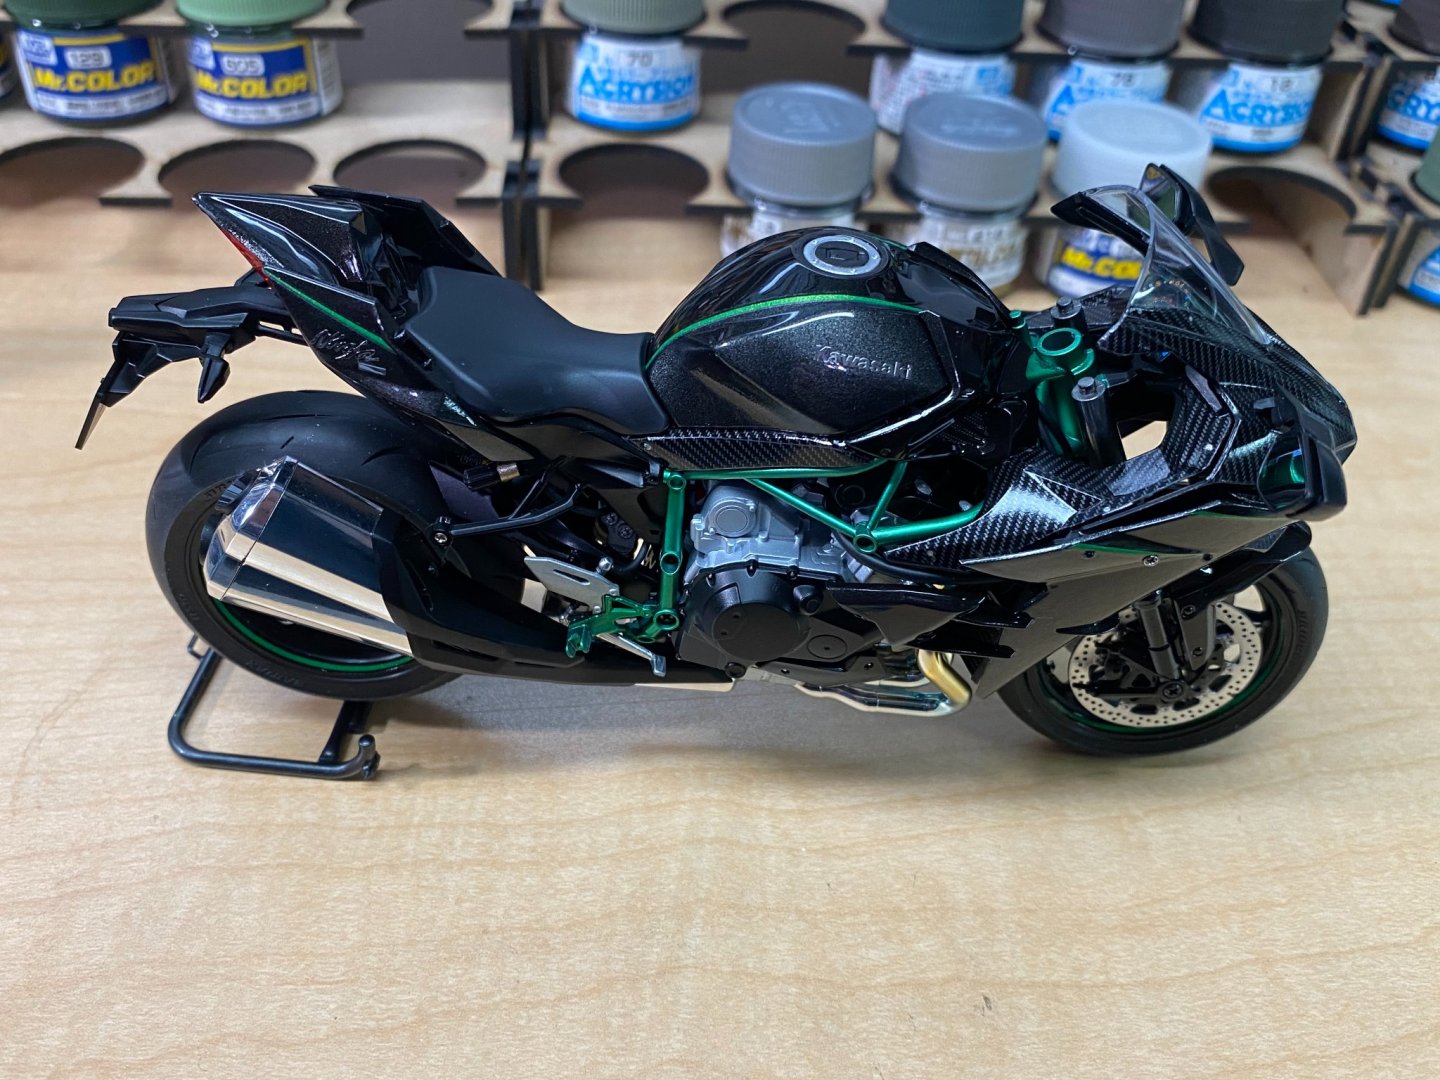
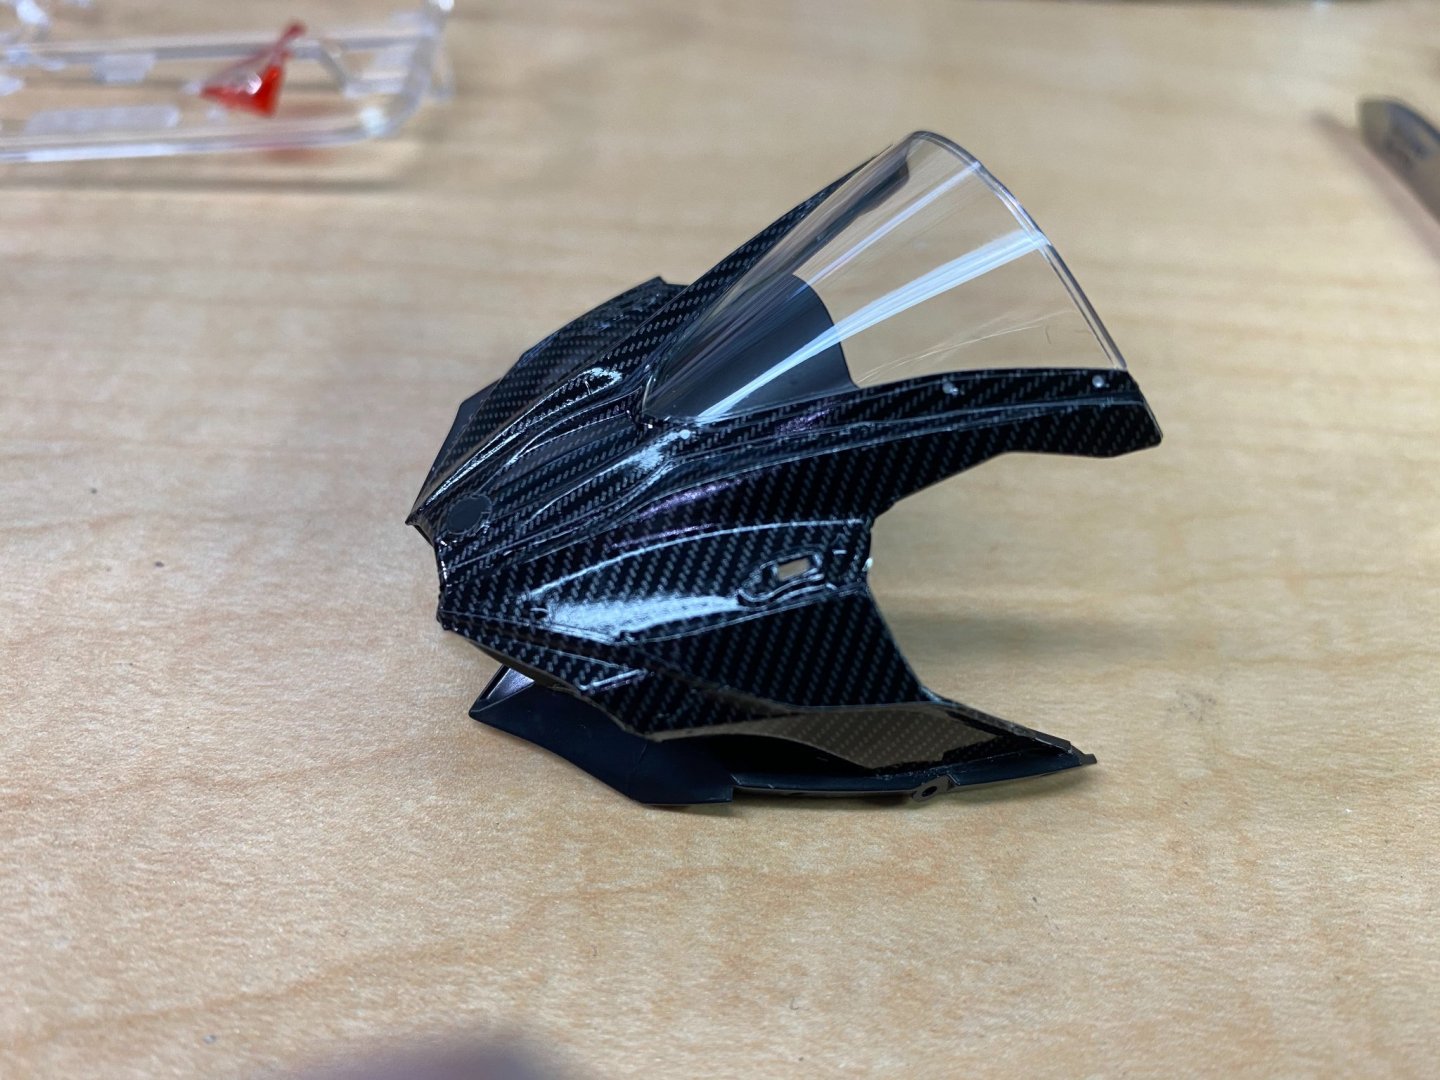
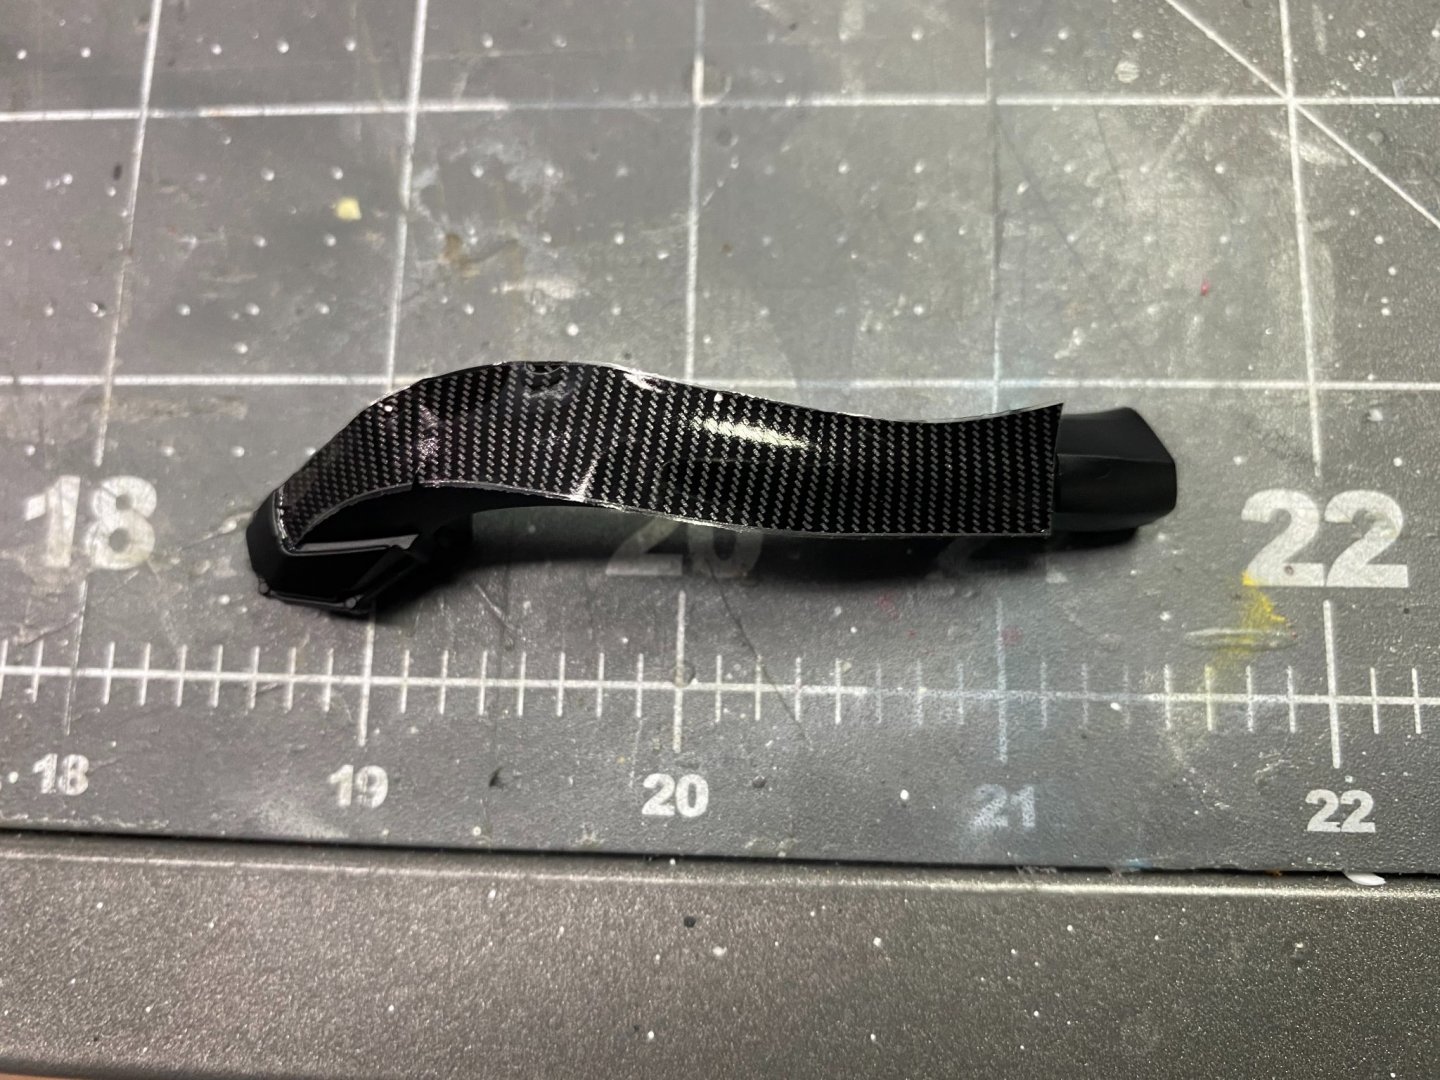
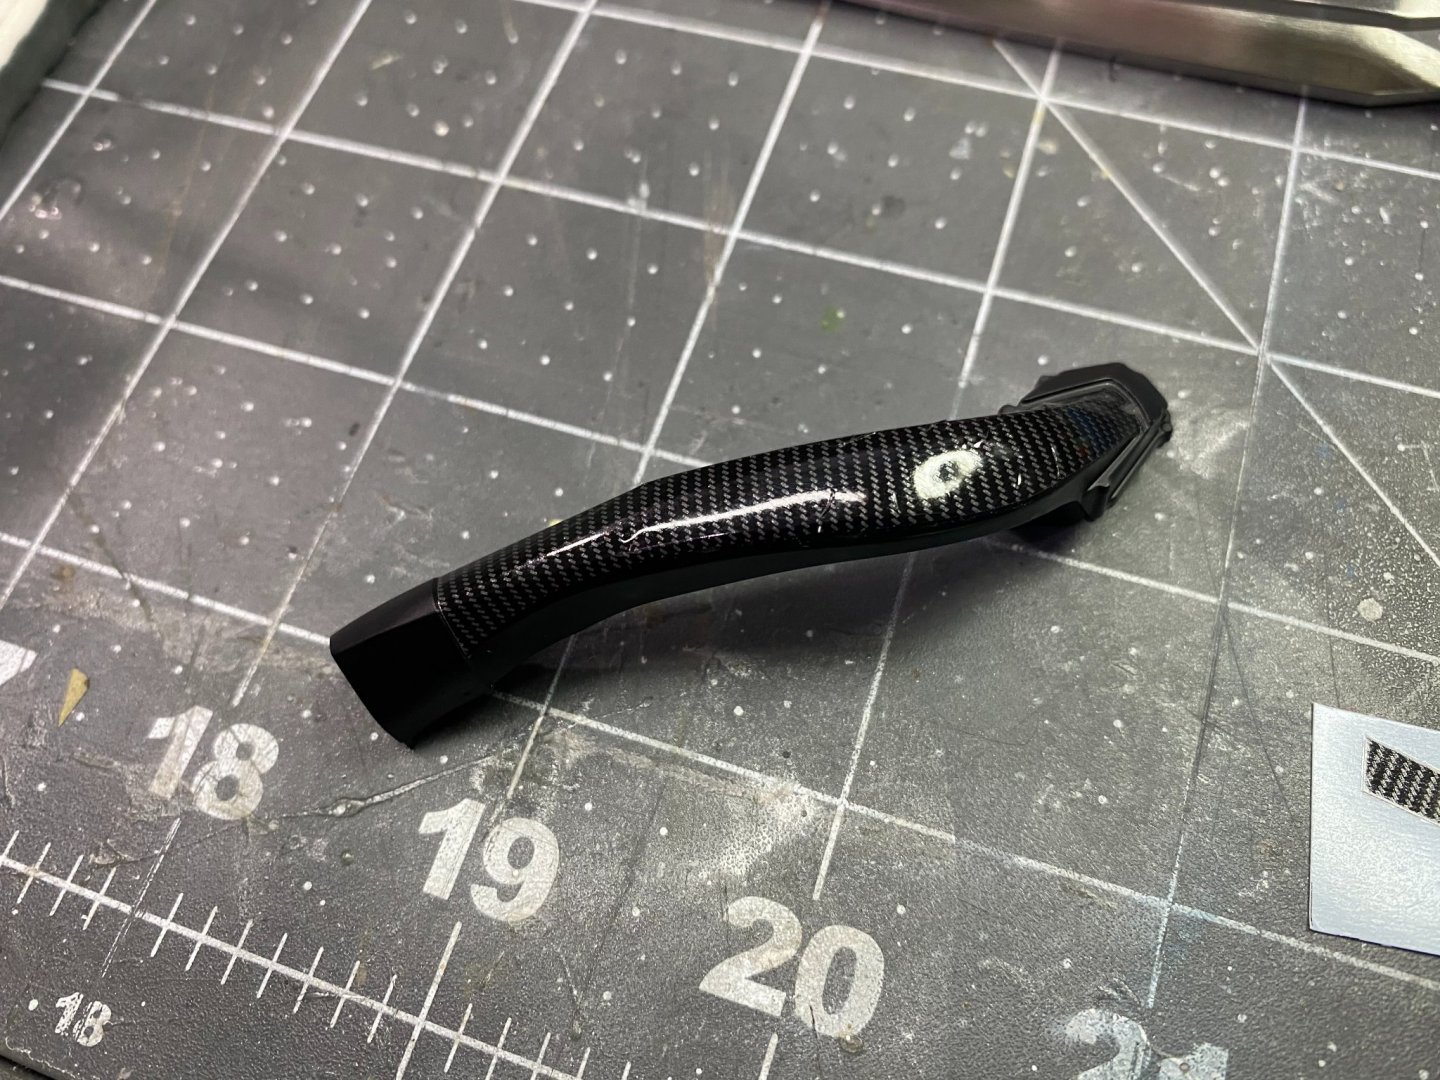
Here is the air intake trunk after application of the carbon fiber decals. After trial and error, I switched from Microsol decal solvent solution to the stronger Solvaset decal solvent solution. The Microsol required too many applications and consequently, time. Even with Solvaset, several applications are needed for the Studio 27 carbon fiber decals to settle down and conform to shape. I think the end results are worth the effort.

- 85 replies
-
- 12
-
-
Thanks Ken. The trick is to reduce the paint to about a 1:8 ratio of paint to thinner, and then airbrush very lightly to build the color. Less is better.
-
Buried within the frame, you can see the red supercharger. The intake trunking to the supercharger is dry fitted in place prior to applying the carbon fiber decals to the trunk. "Fit check".