CDW
-
Posts
7,760 -
Joined
-
Last visited
Content Type
Profiles
Forums
Gallery
Events
Everything posted by CDW
-
 My color scheme for the tug will be a black hull and bulwarks, red upper deck and lower main deck, white main superstructure, red bottom and white top upper superstructure, red railings, yellow and black funnel. Everything will be weathered and detailed to look like a well worn tug. Will probably use a fictitious name of my own choosing for the boat with waterslide decals of my own making.
- 63 replies
-
- 6
-

-
- revell
- harbor tug
- (and 2 more)
-
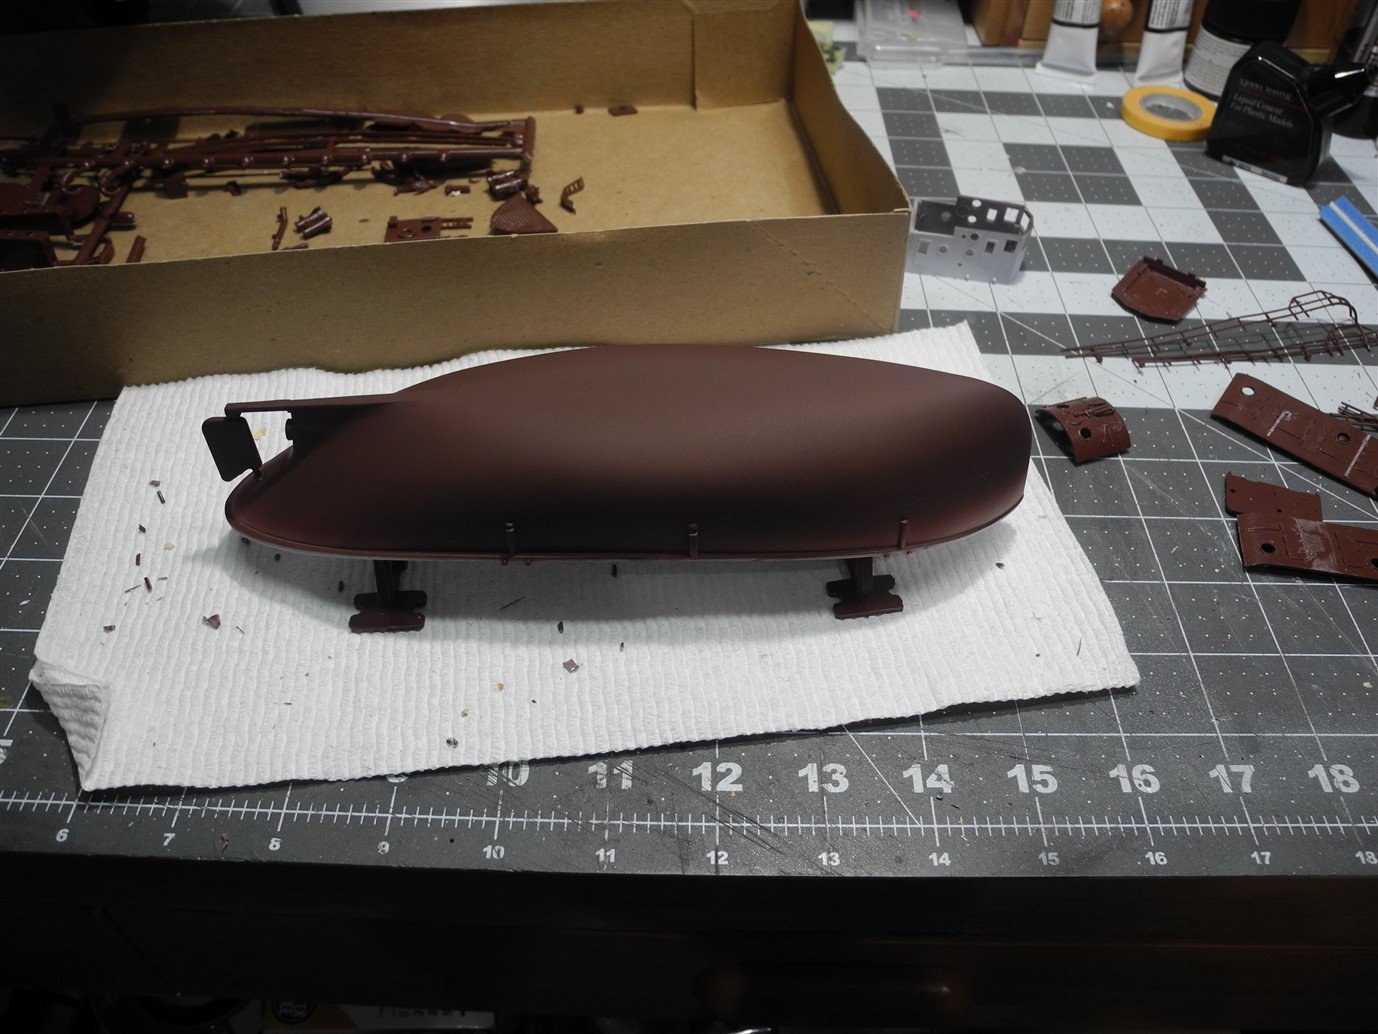
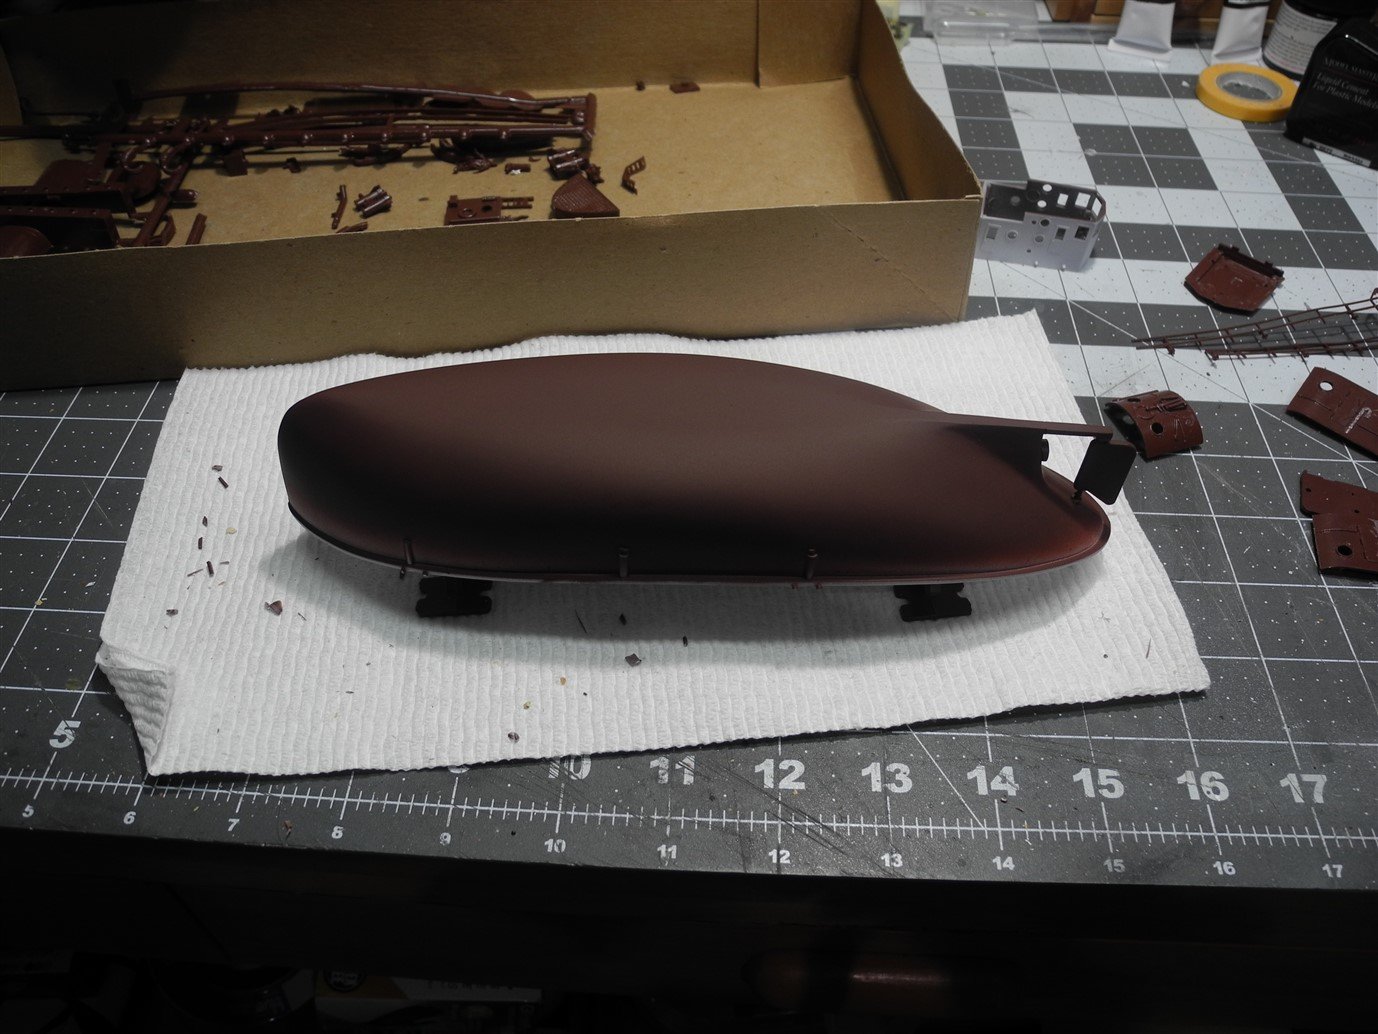
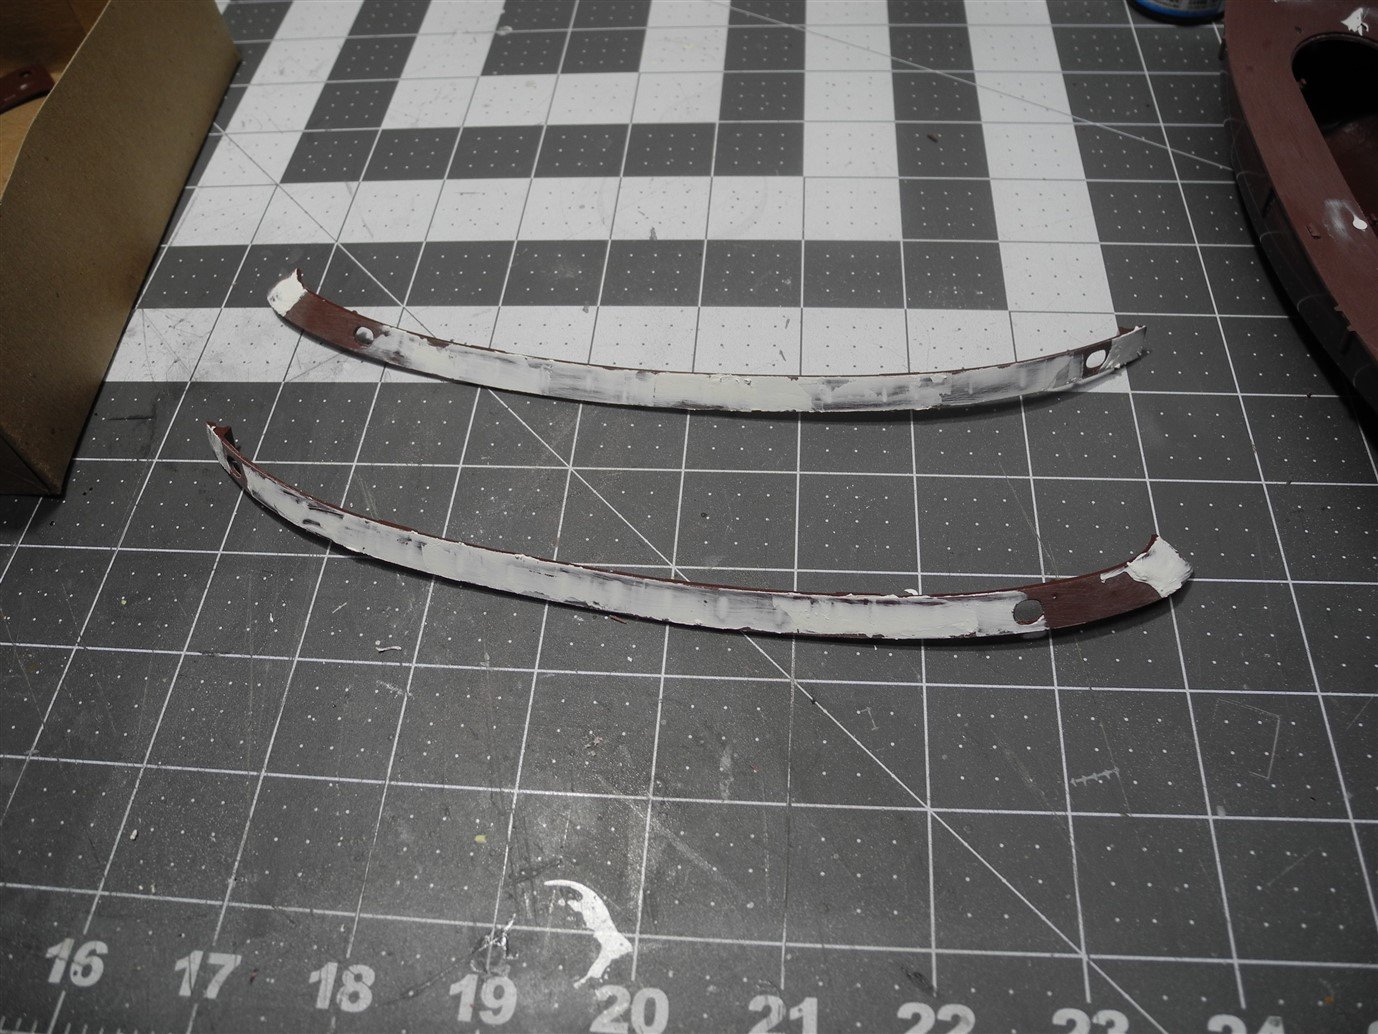
After the Tamiya White primer, the hull bottom got 2 coats of Tamiya Hull Red reduced with Mr. Color Leveling Thinner. Above the water line will be black. Prior, the rudder support was glued to the hull before adding the rudder and prop shaft bearing. Some Tamiya fill and sanding was needed on the hull-rudder support join. To be expected on an old kit like this. Fit is often sloppy. I will look through my spares box to try and find a replacement prop. The prop supplied with the kit looks horrible.


- 63 replies
-
- 8
-
-
- revell
- harbor tug
- (and 2 more)
-
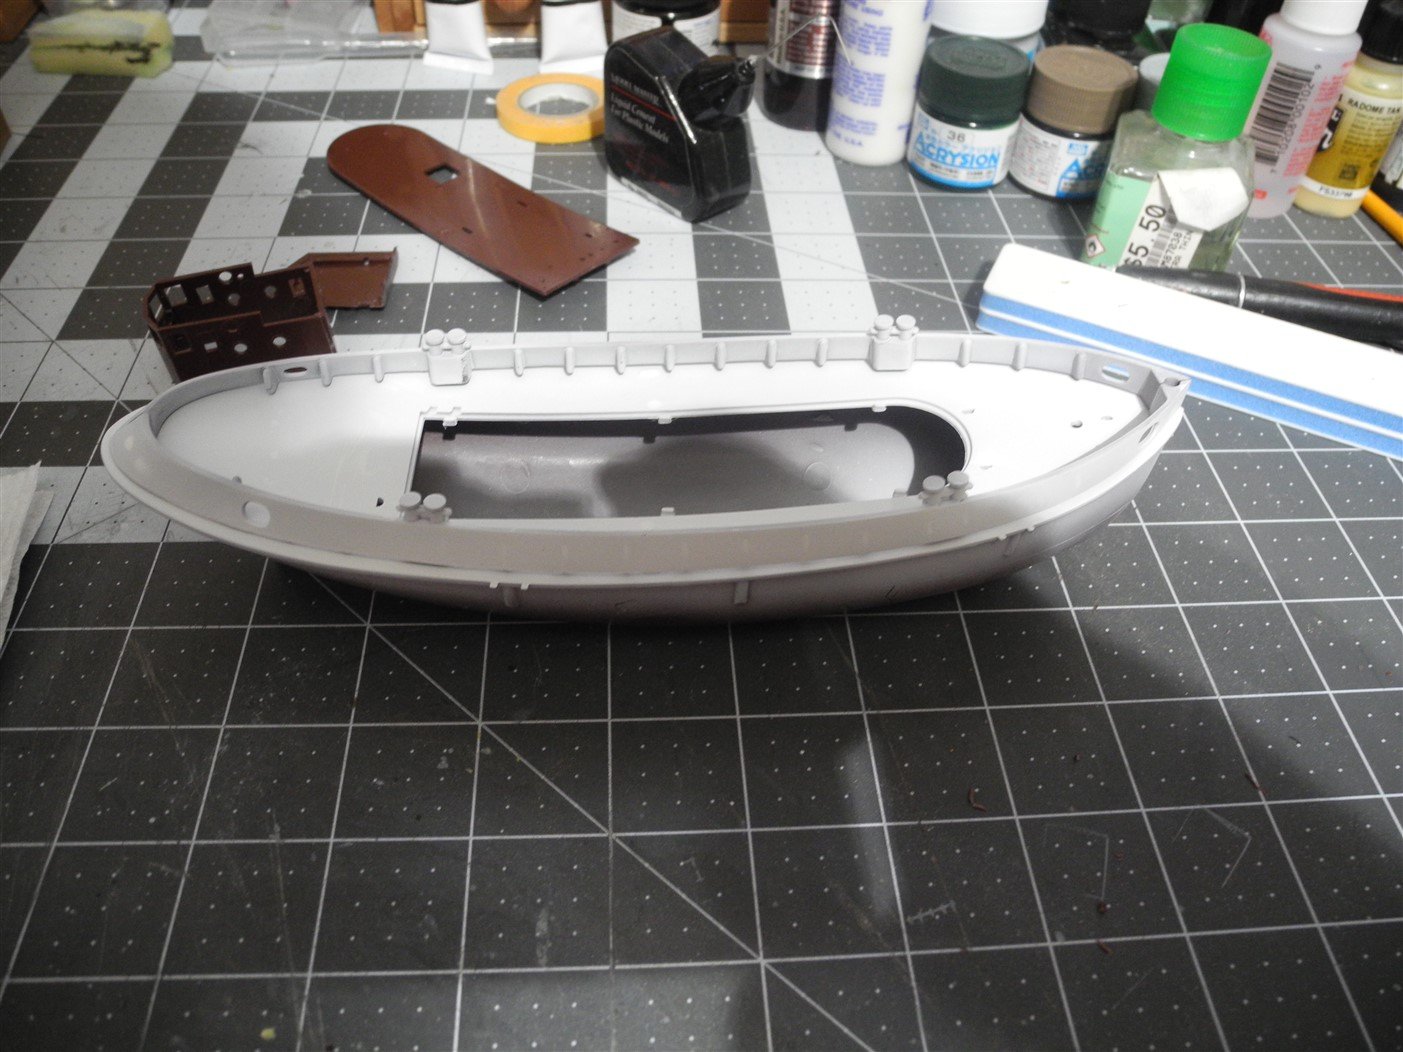
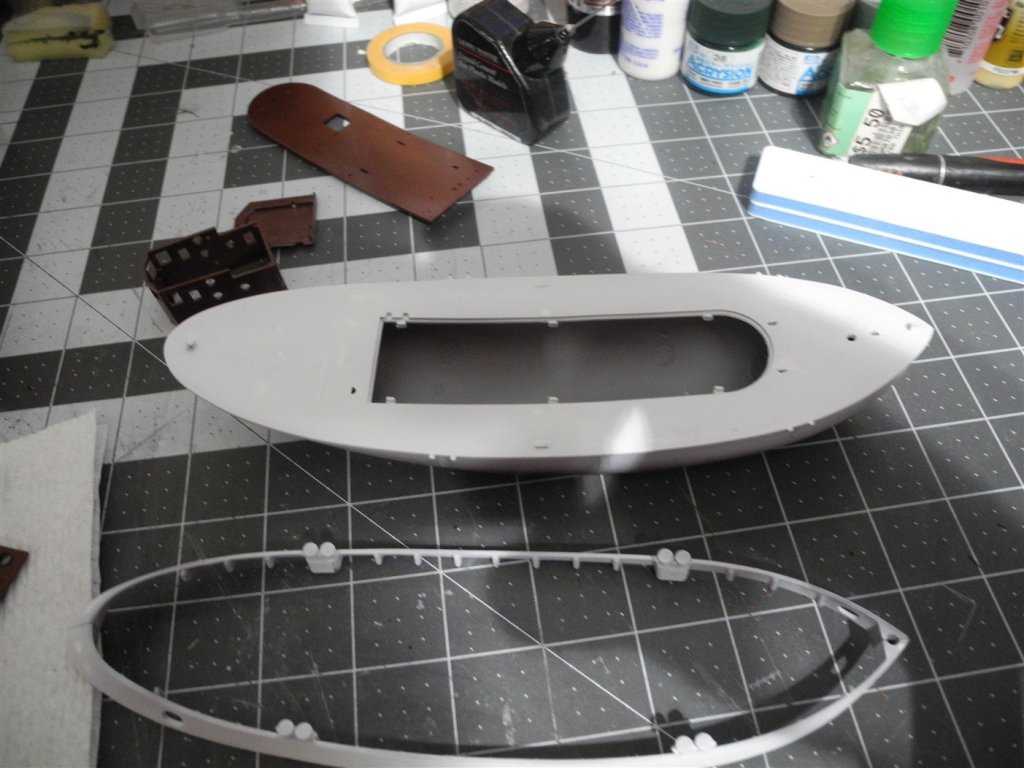
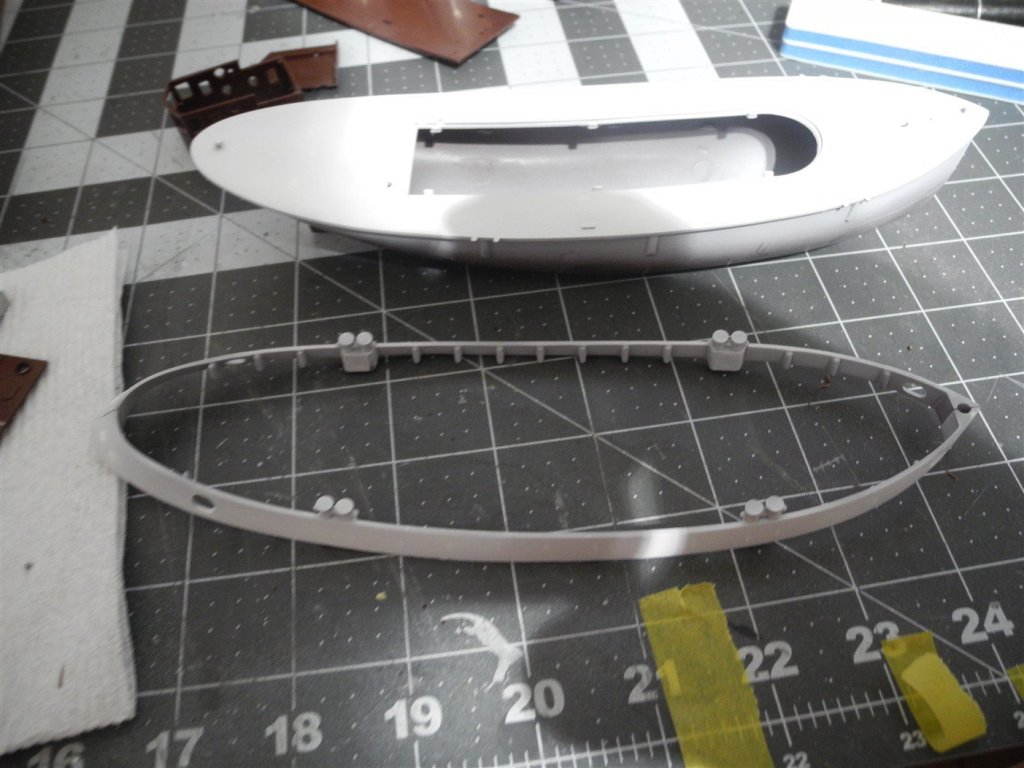
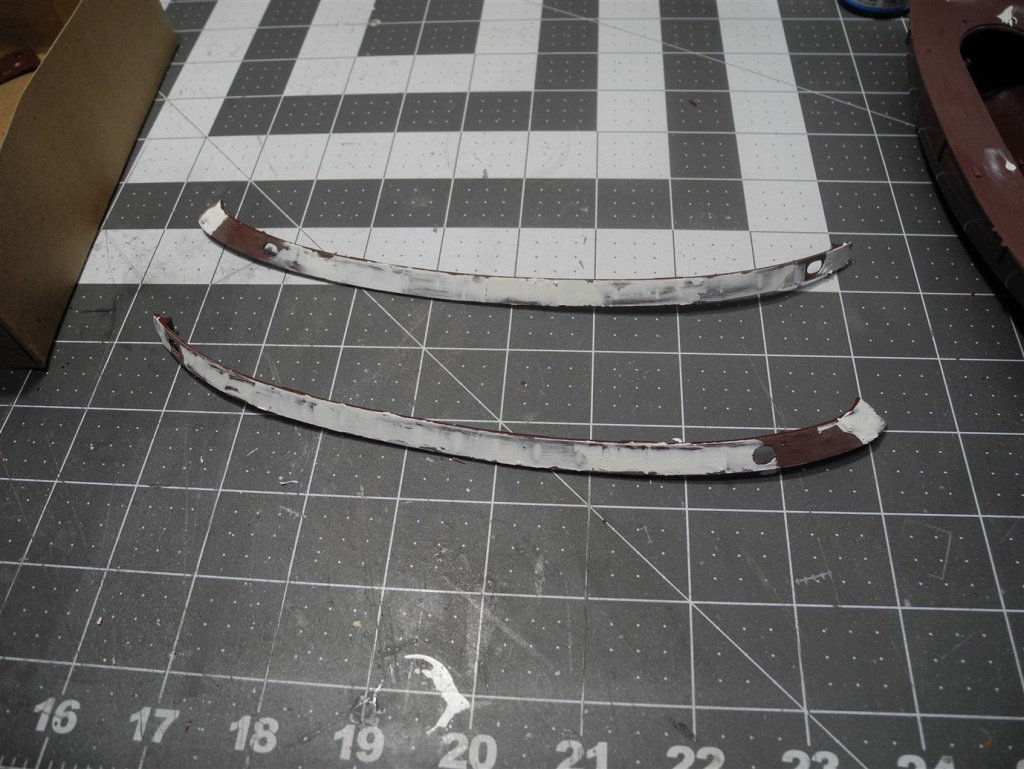
I shot some flat white Tamiya paint reduced with alcohol as a primer on the hull and deck, and on the bulwarks. The halves on the bulwarks were glued together before they were primed and will be installed after the main deck has been painted red. The bulwarks will be black. This will help avoid a tricky masking job on the bulwarks.

- 63 replies
-
- 11
-
-
- revell
- harbor tug
- (and 2 more)
-
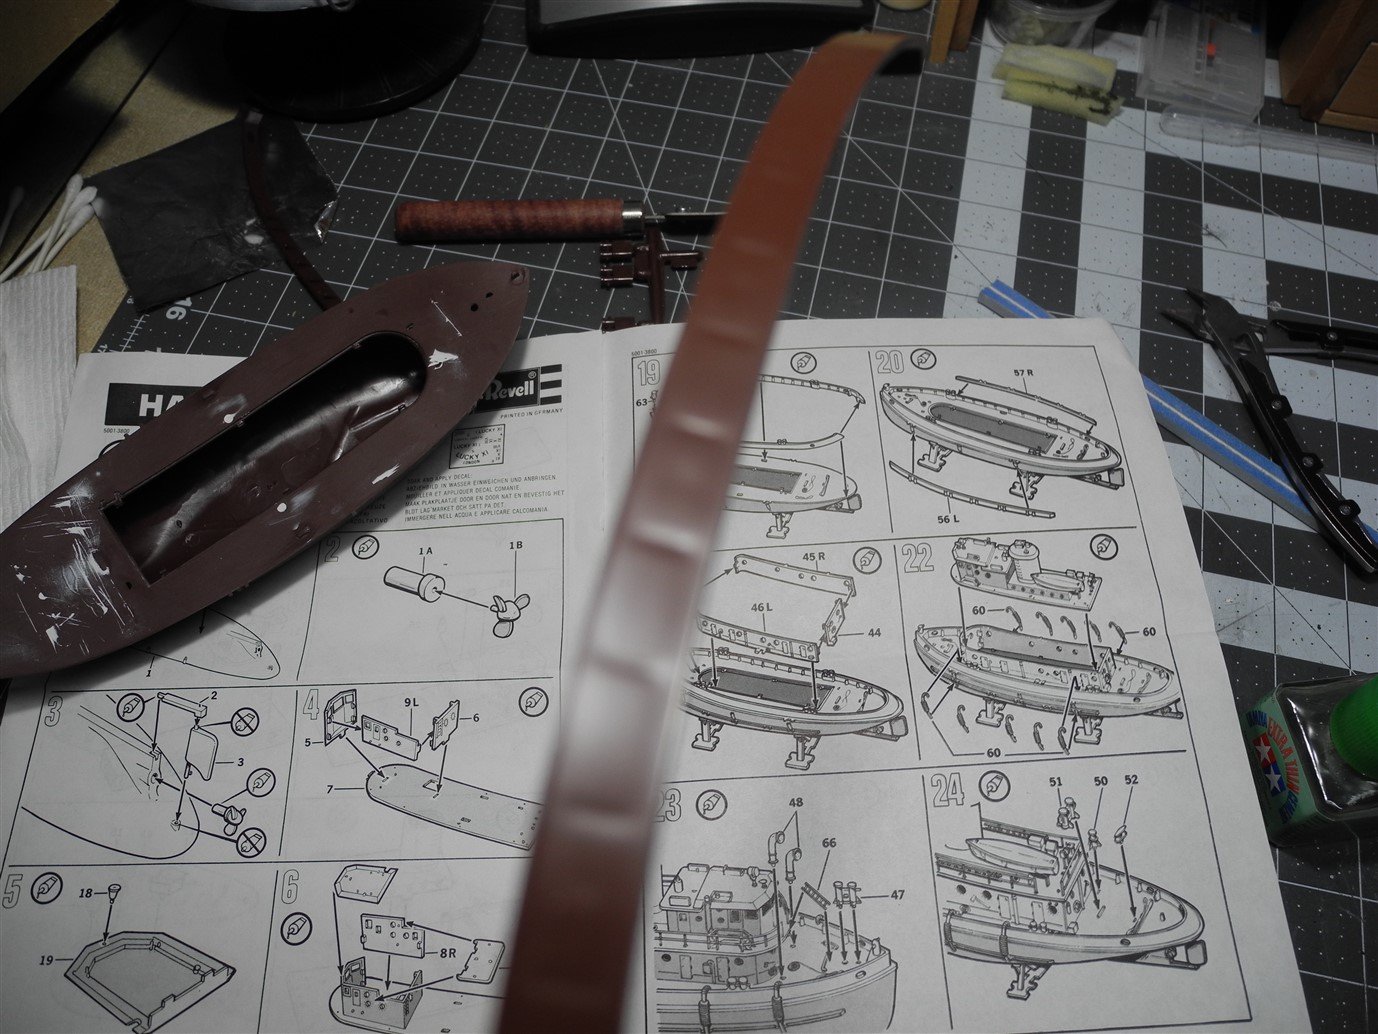
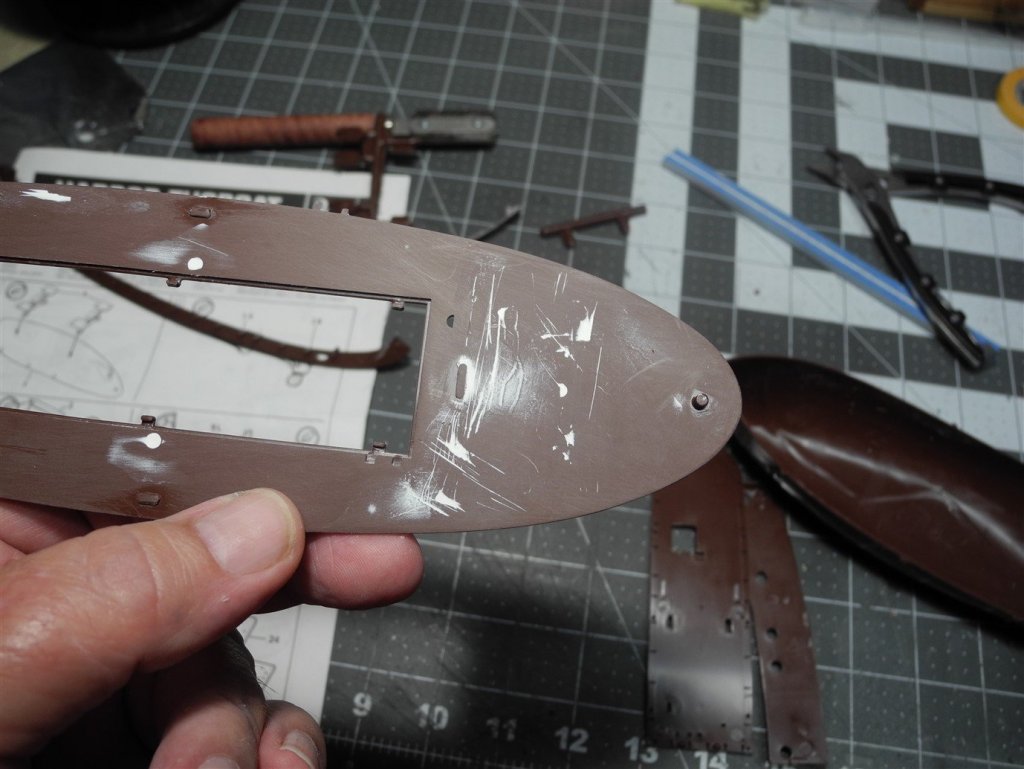
If you take on an old kit like this, you will spend time sanding and filling to get a presentable finish.
- 63 replies
-
- 8
-
-
- revell
- harbor tug
- (and 2 more)
-
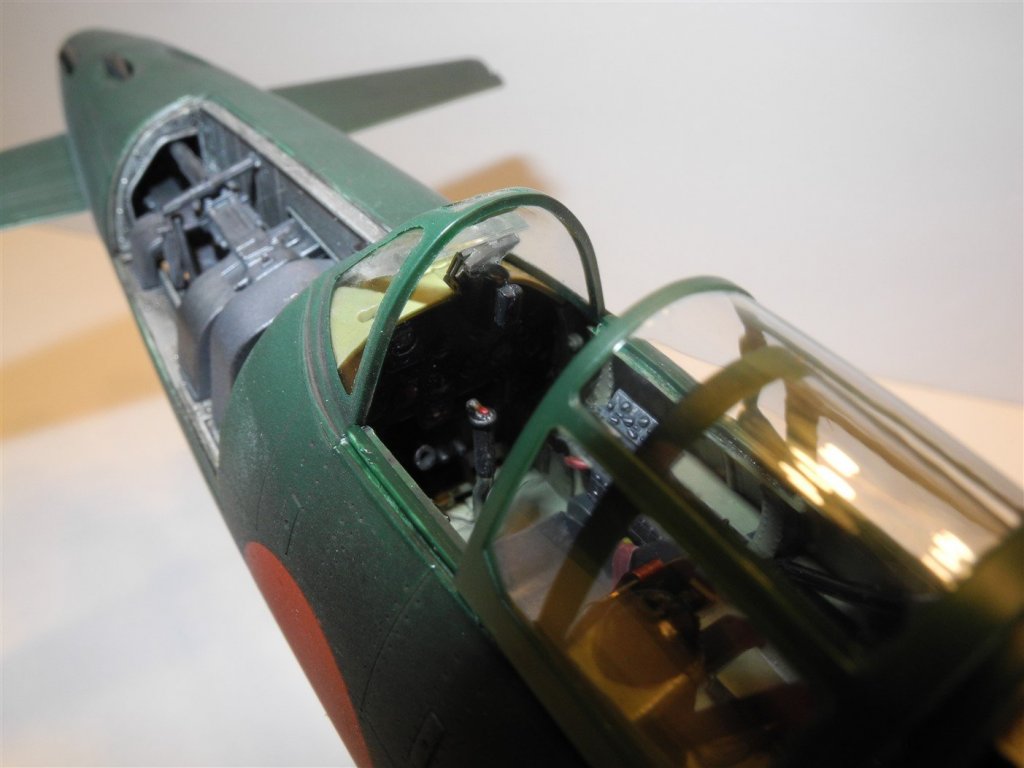
Ki-45 Nick by CDW - Zoukei-Mura - 1:32 scale - PLASTIC
CDW replied to CDW's topic in Non-ship/categorised builds
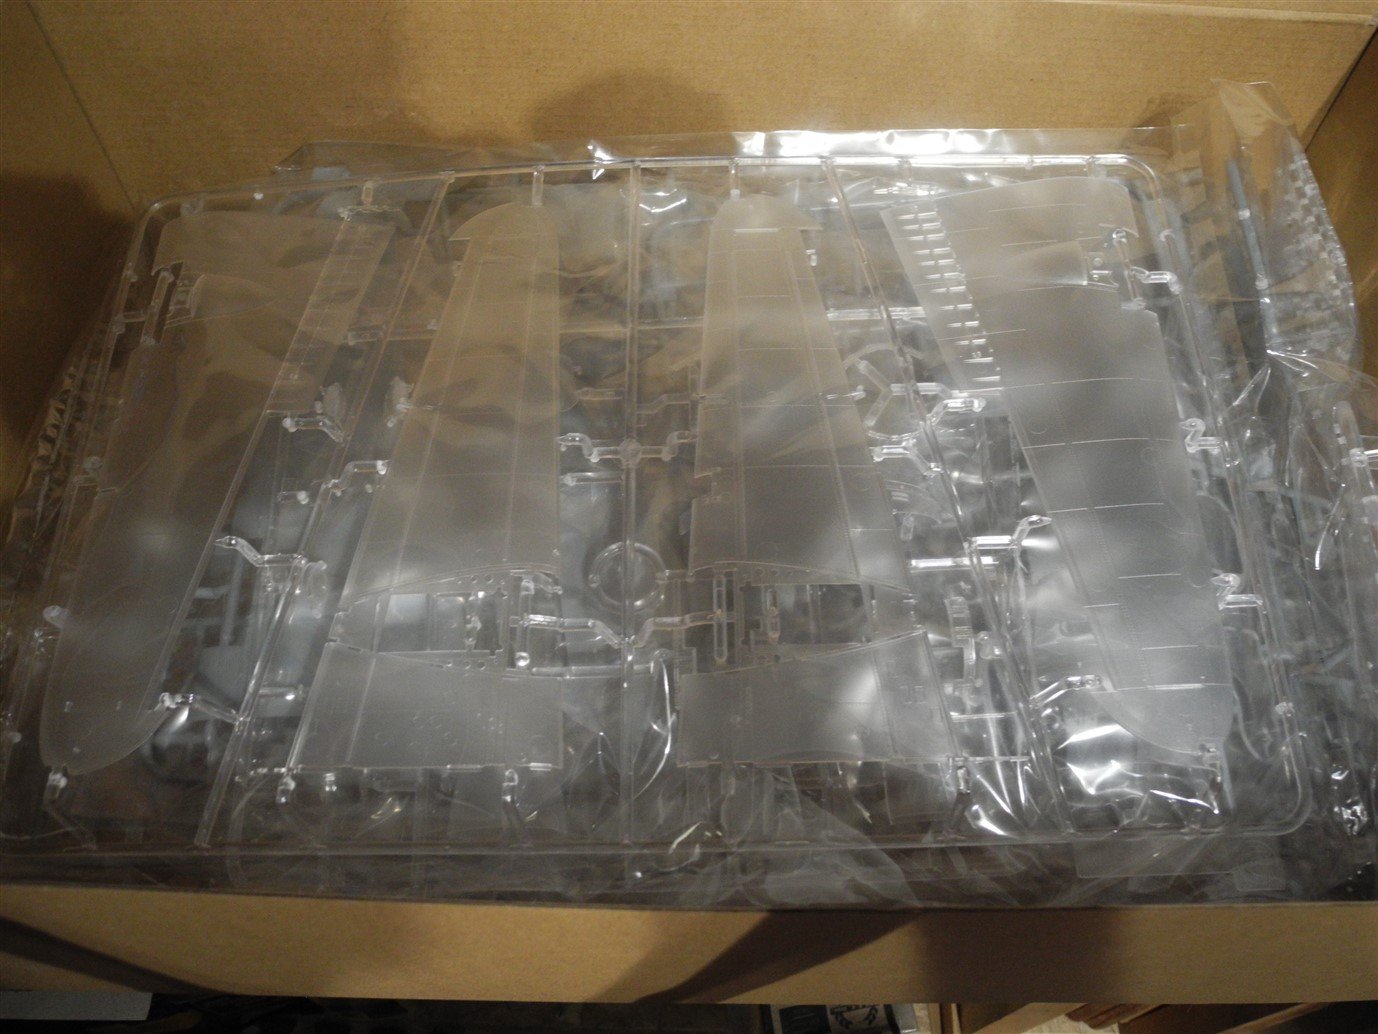
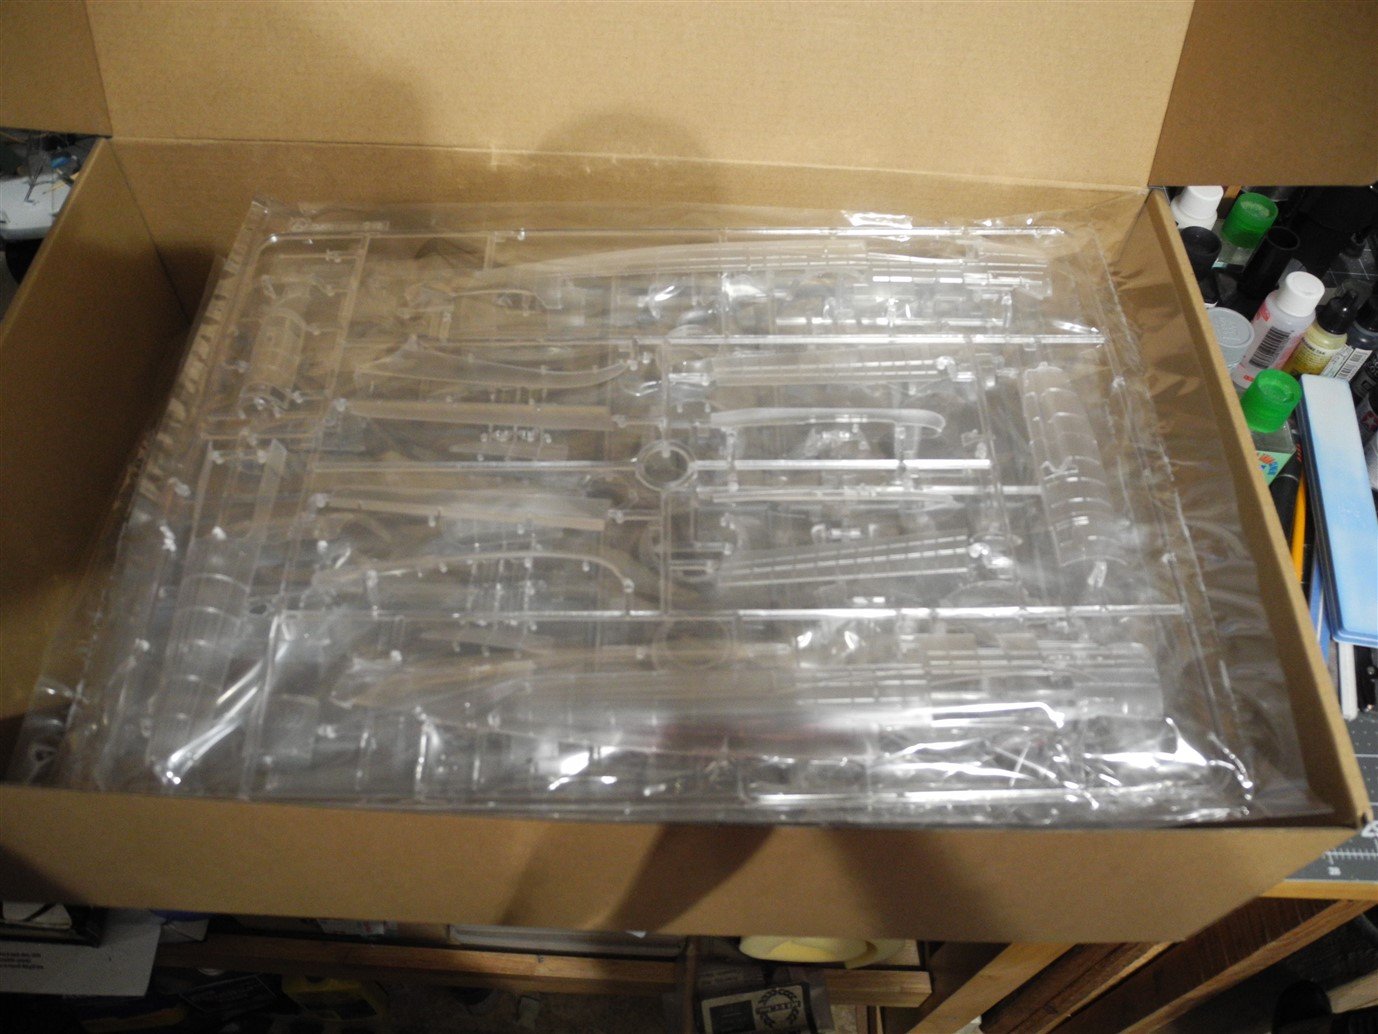
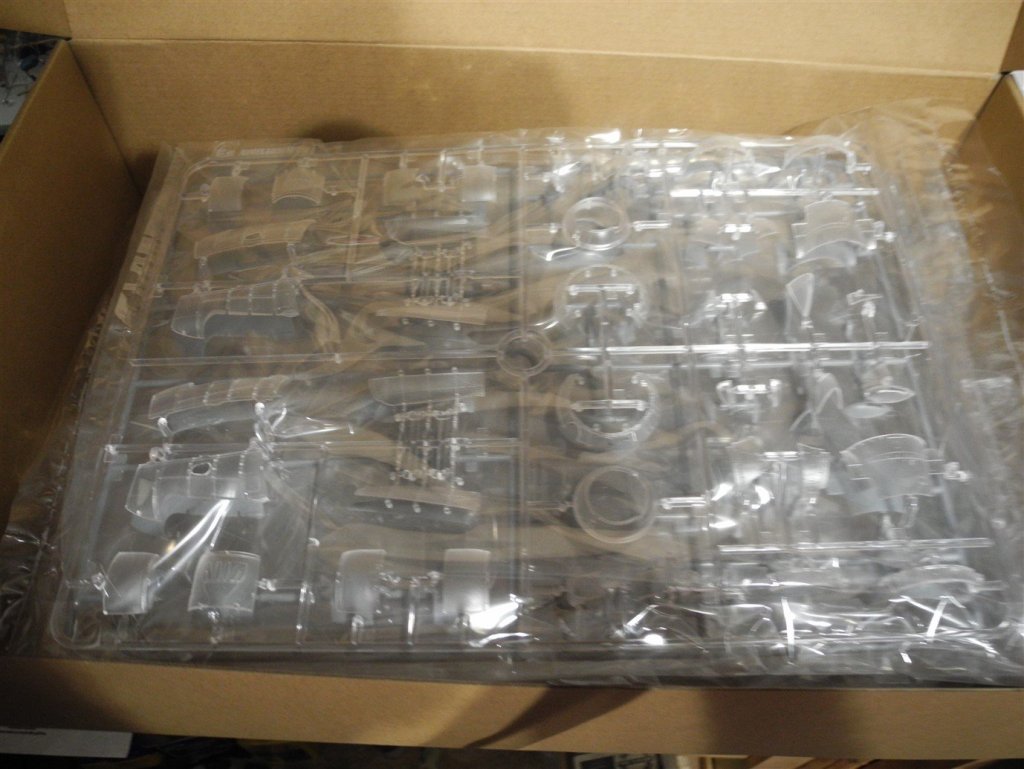
I am not a fan of clear. -
Ki-45 Nick by CDW - Zoukei-Mura - 1:32 scale - PLASTIC
CDW replied to CDW's topic in Non-ship/categorised builds
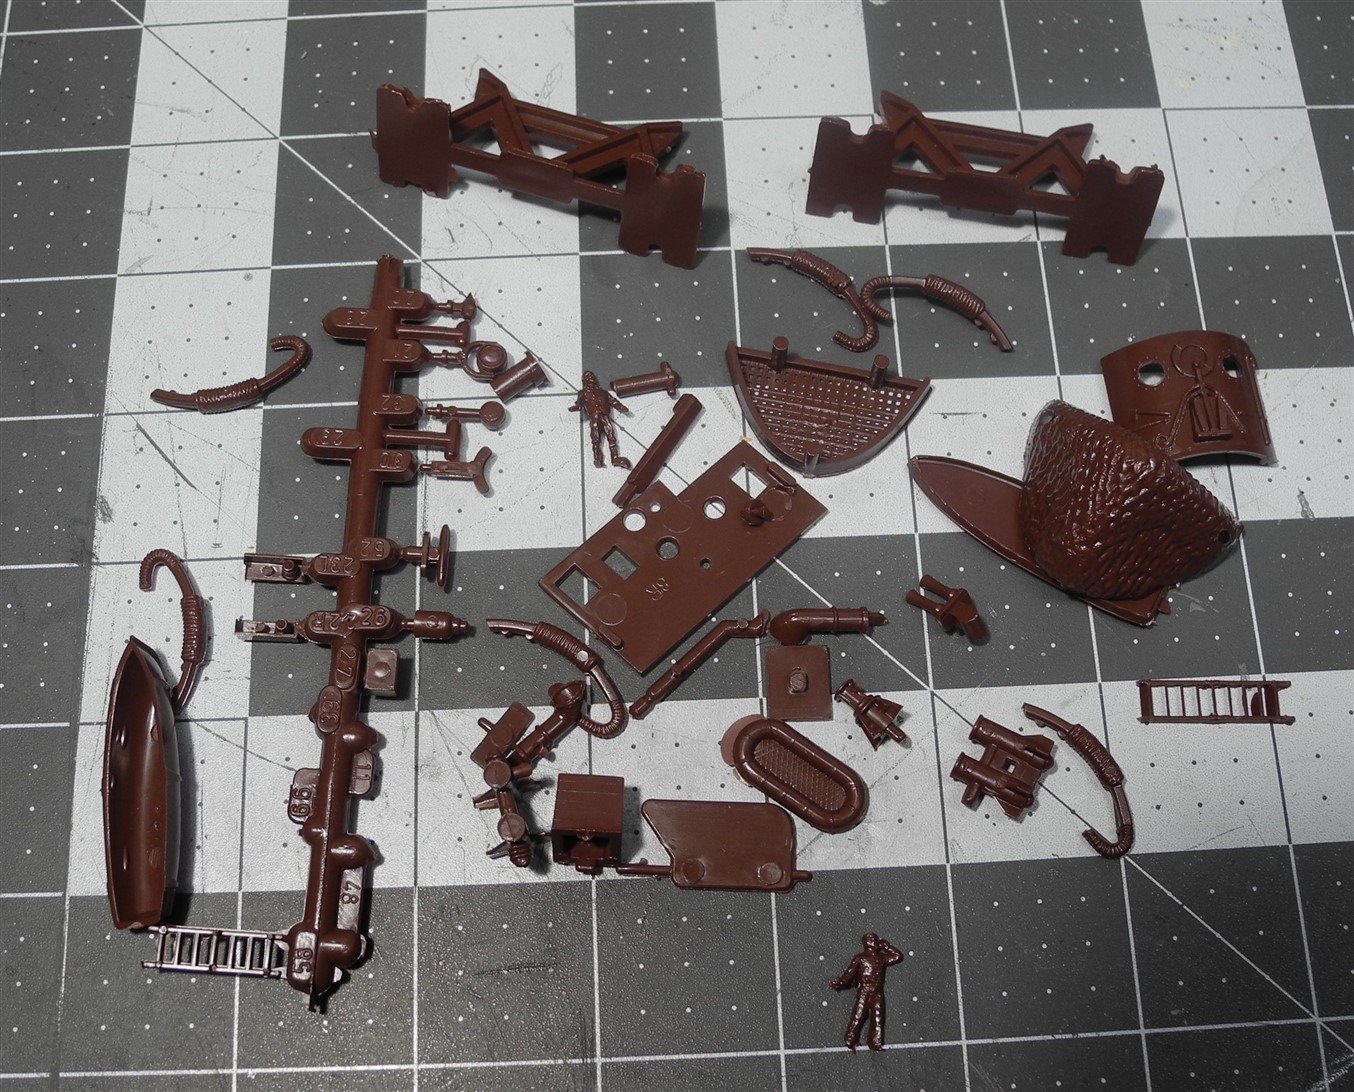
more parts...


-
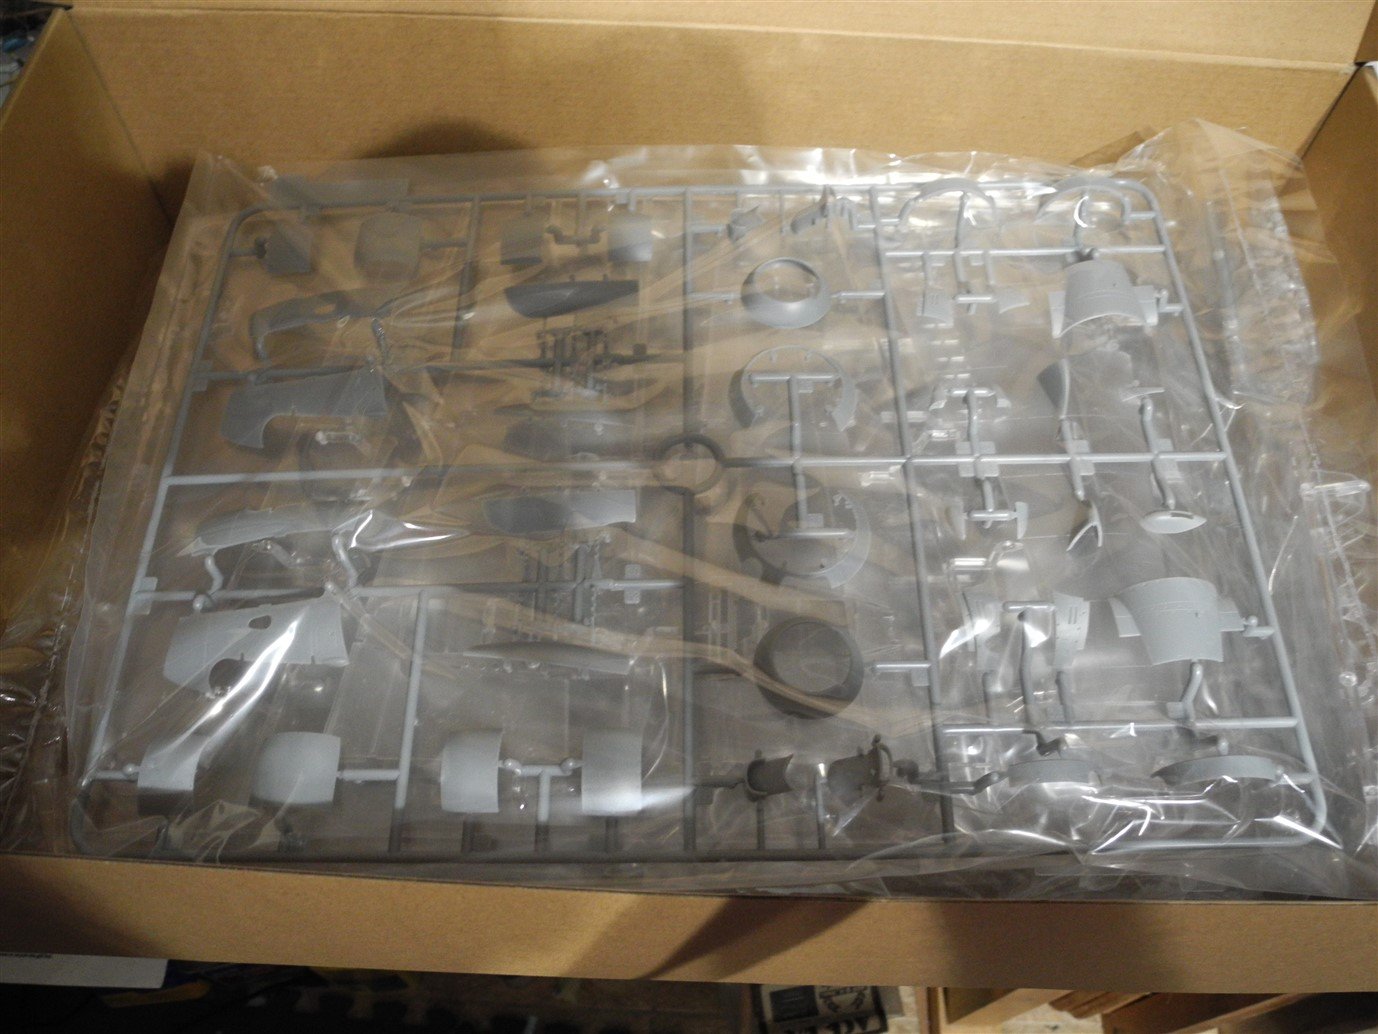
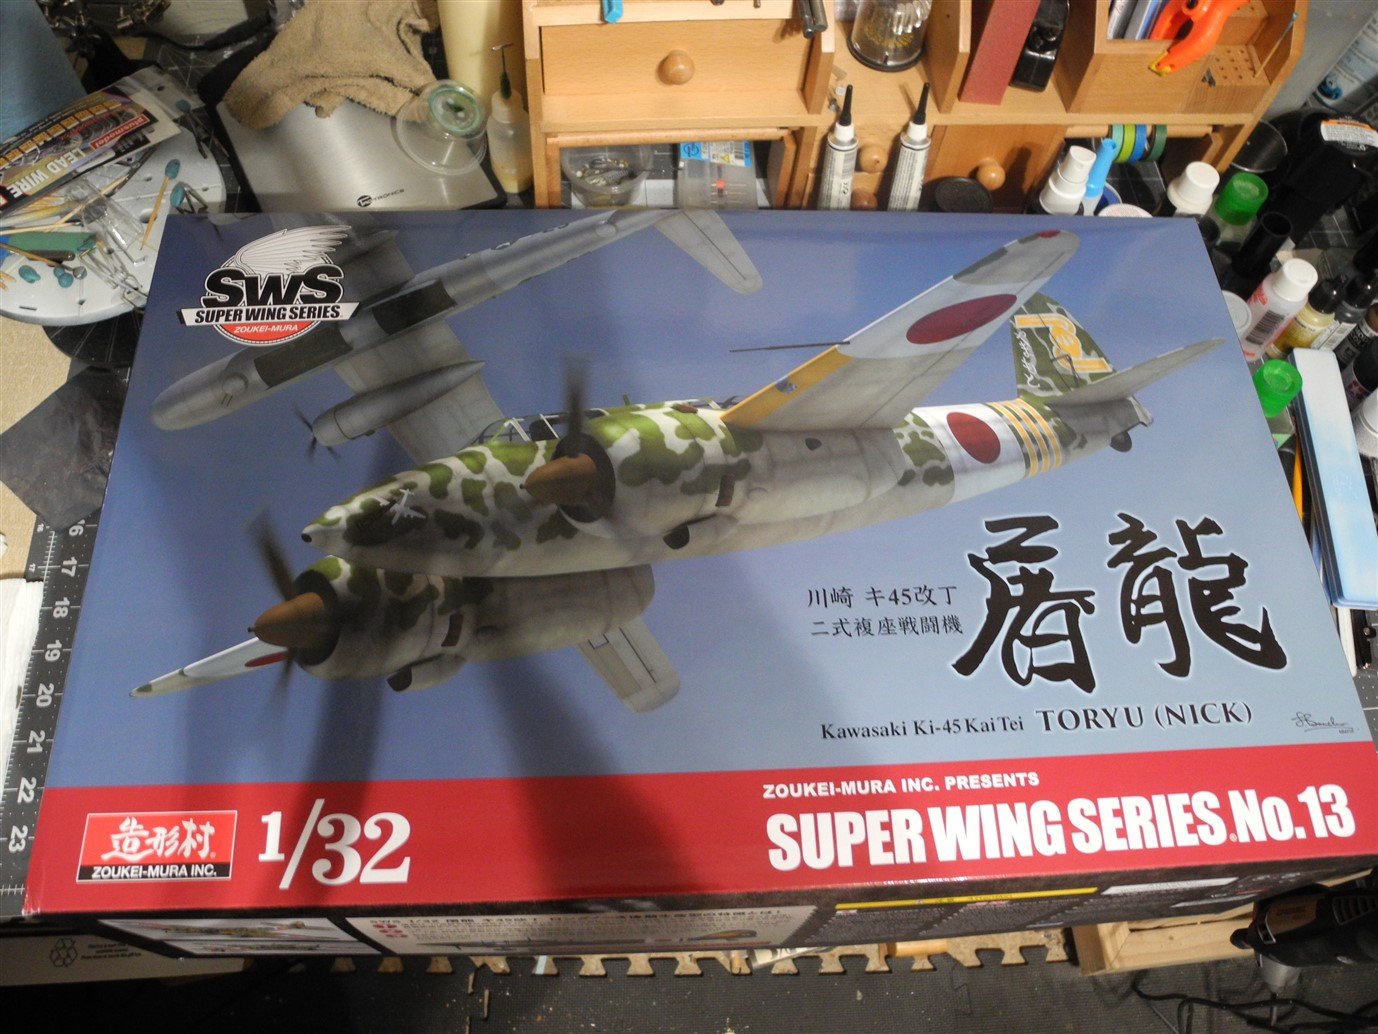
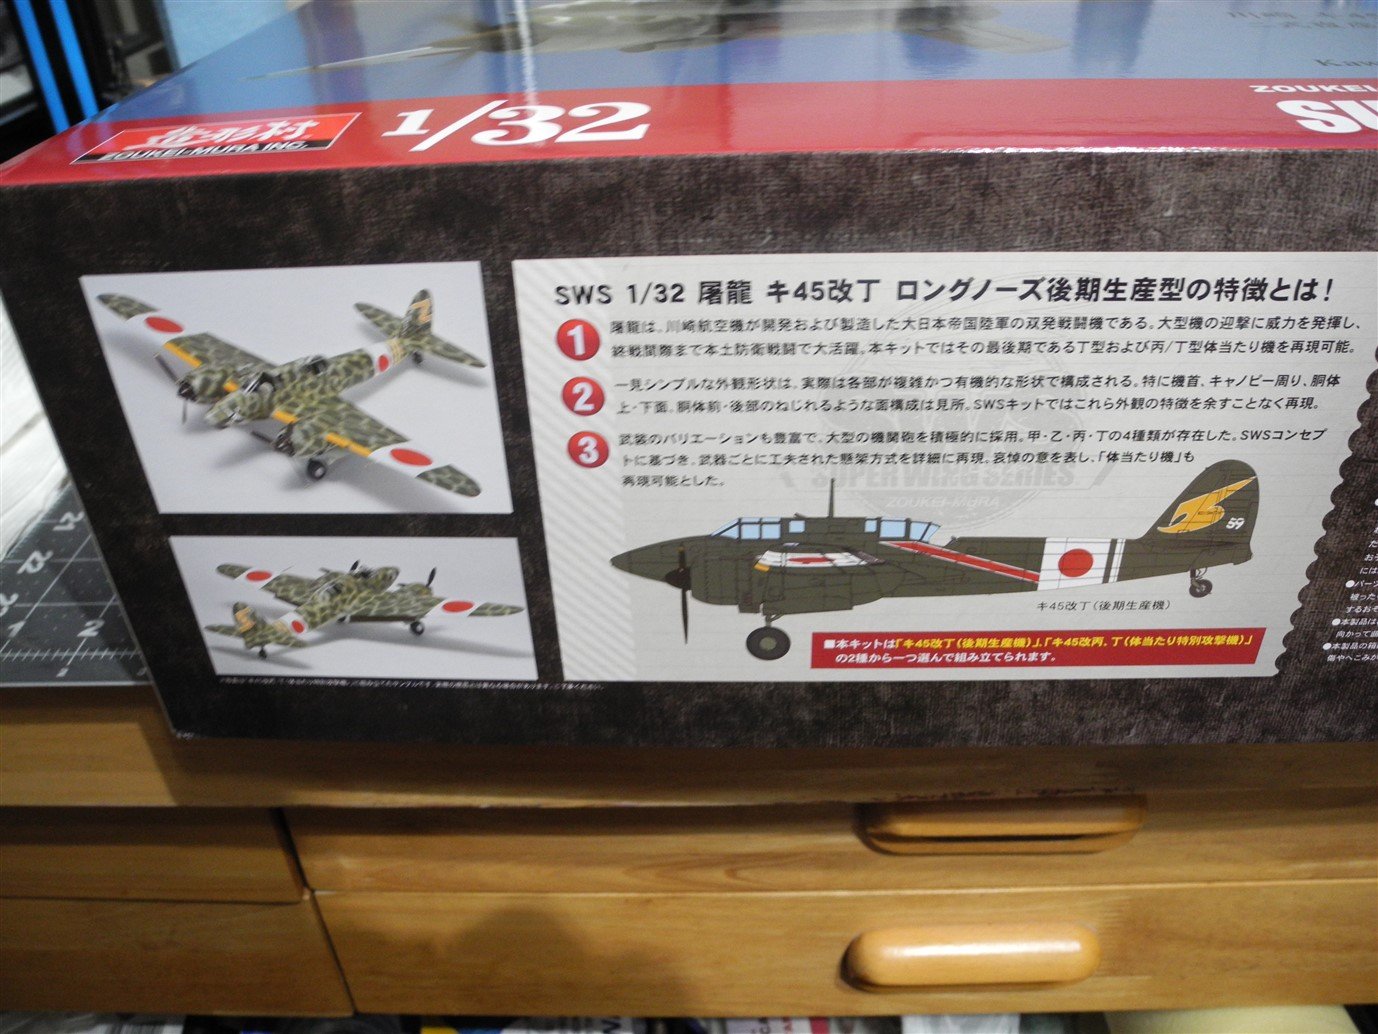
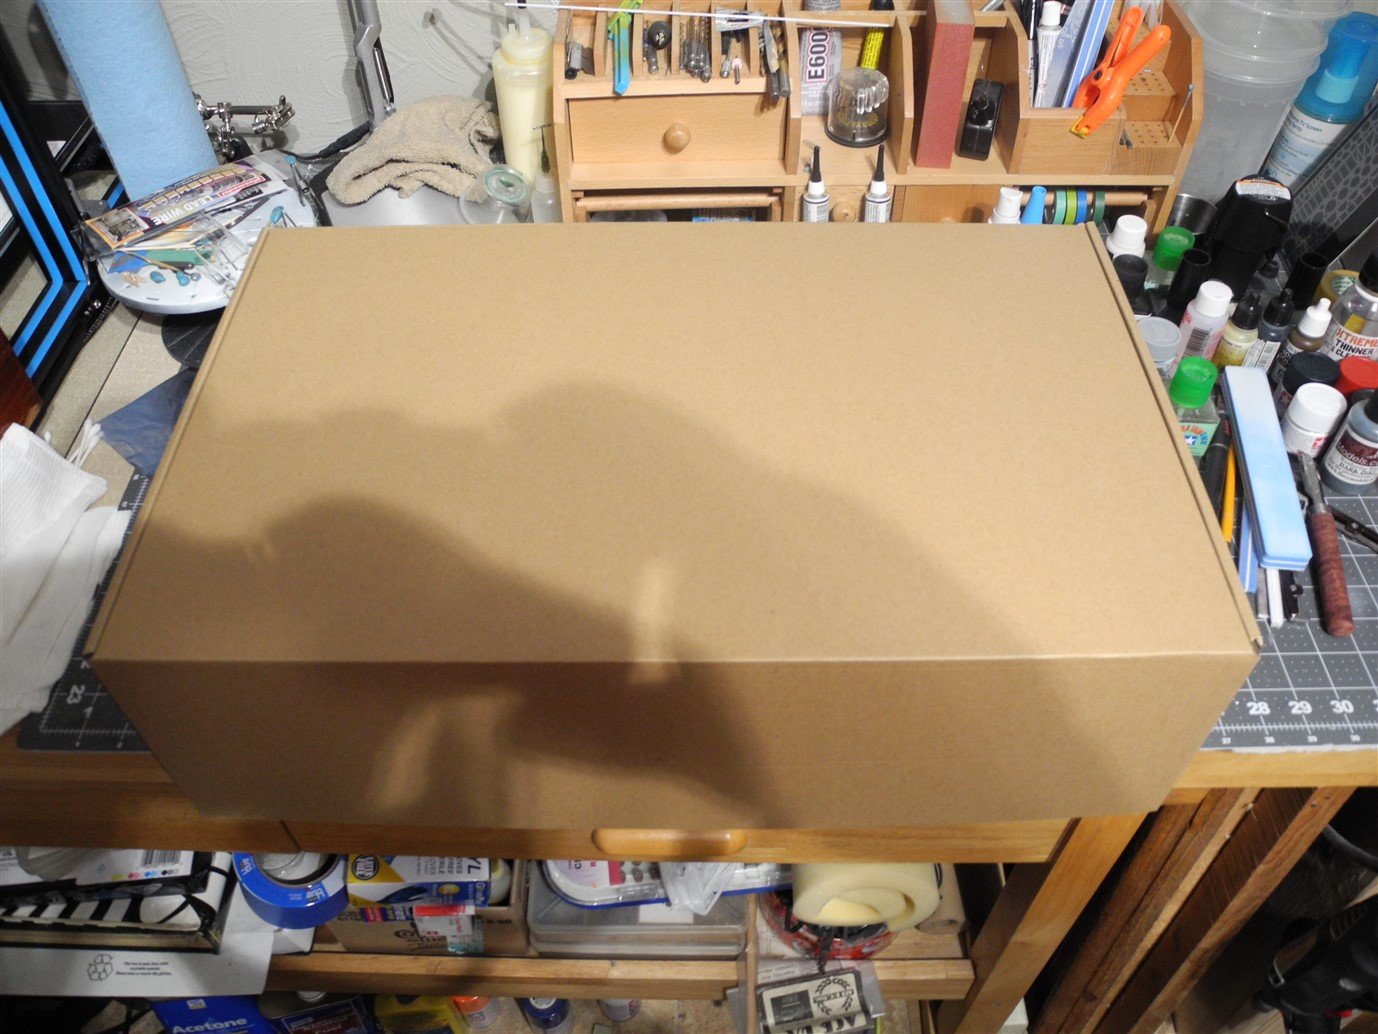
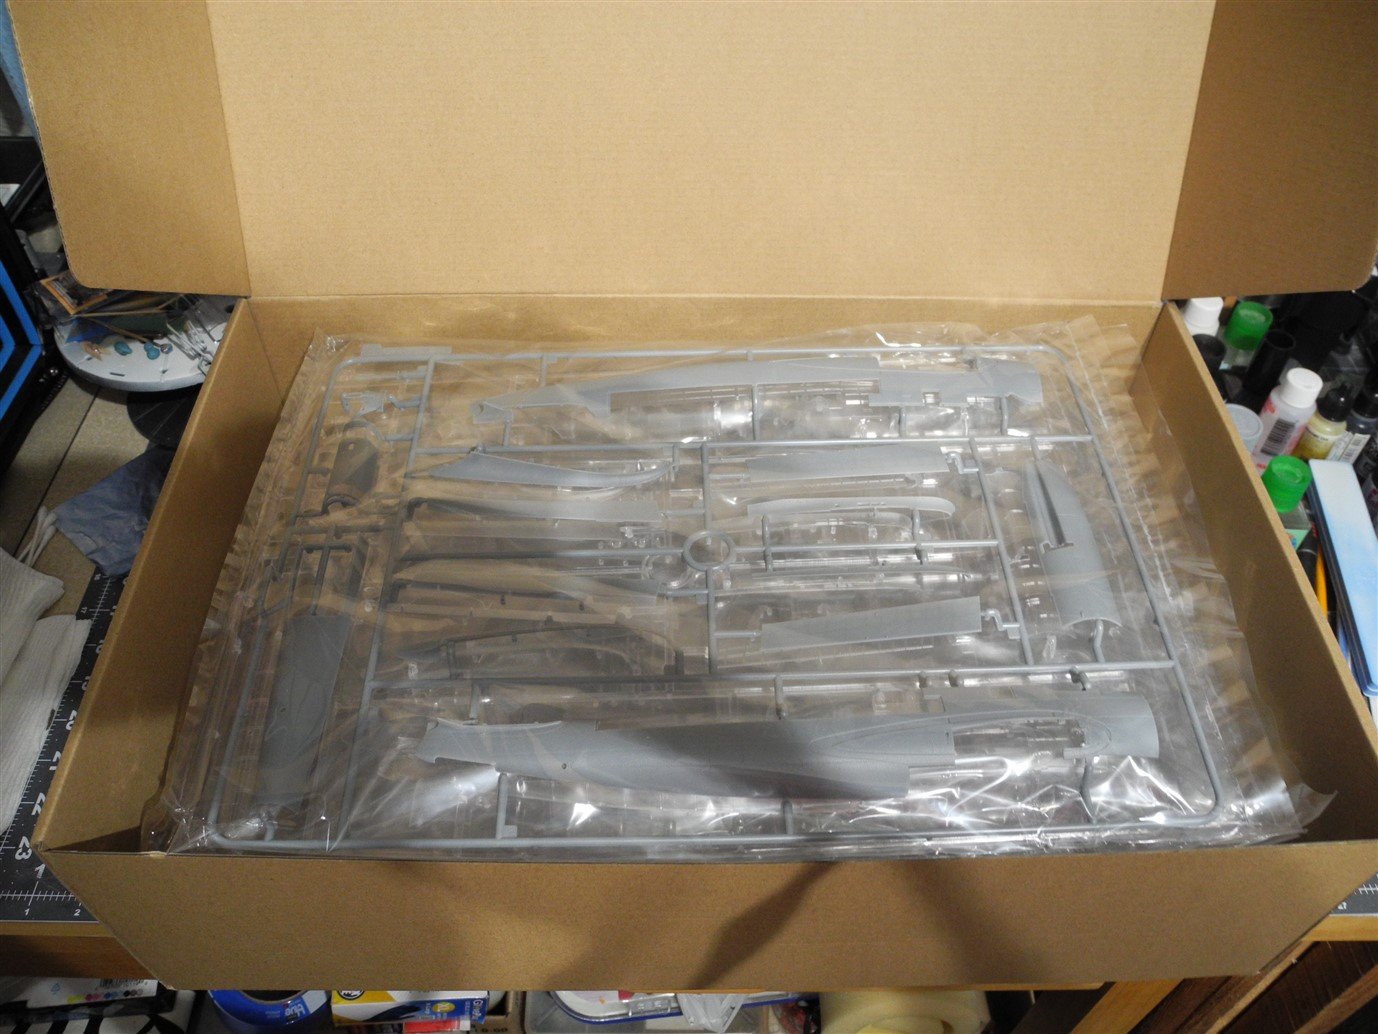
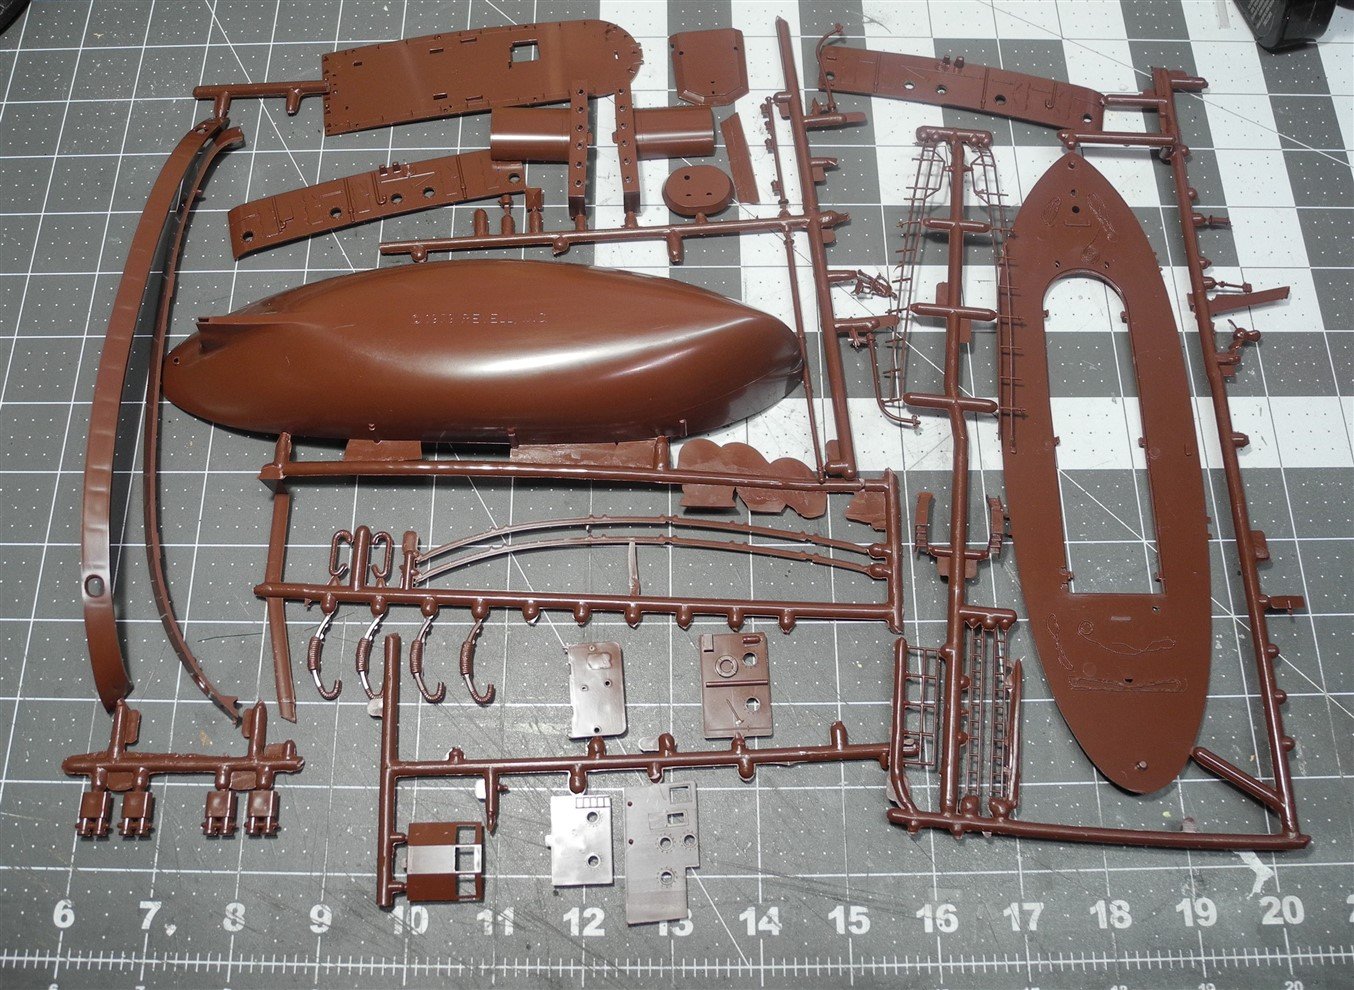
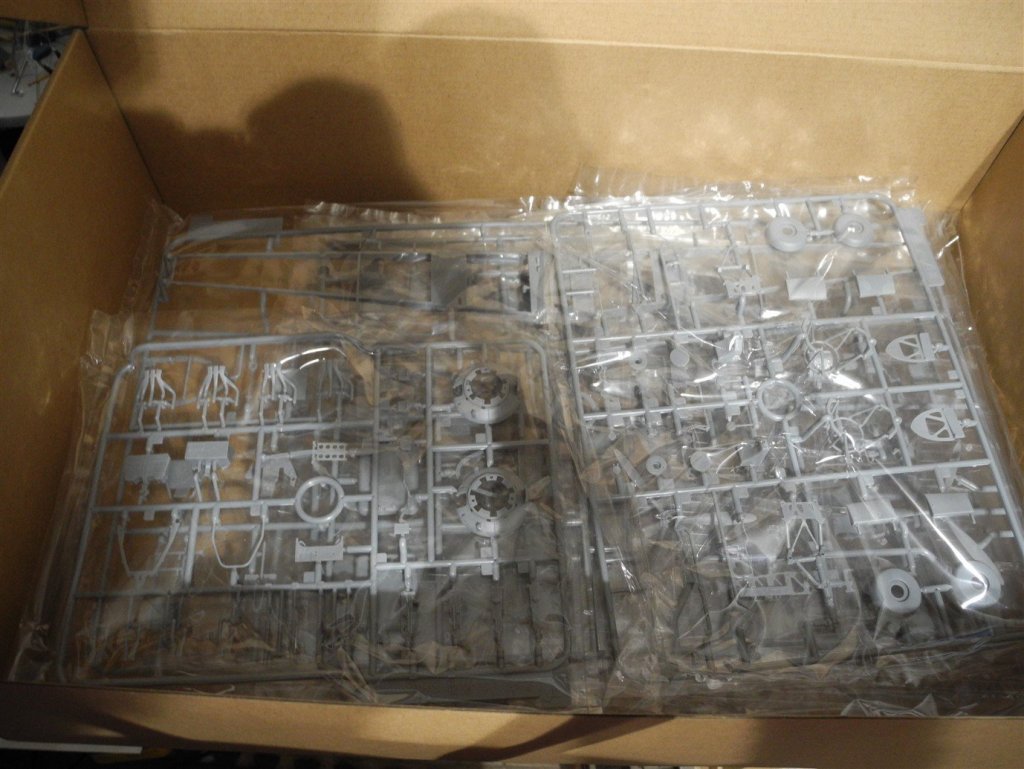
I pre ordered the 1:32 Zoukei-Mura Ki-45 Nick. Today it arrived on my doorstep via FedEx. The shipping box was very large and at first I thought they used an oversized box to help protect the model kit inside, but once I picked it up, immediately knew from the weight of it there was a whole lot of plastic inside this box. Taking it inside and opening the shipping box, it dawned on me what a huge kit this is. Opening the kit box, you find another box inside that one - for extra rigidity. When you get inside that box, you find tree after tree of model airplane parts...almost 600 of them. One of the reasons for the high parts count is that Zoukei-Mura decided to mold the outer skins in both clear plastic as well as opaque, giving the modeling the option to decide whether he wants a clear outer skin to show off all that amazing inner detail or use the opaque skin and just concentrate on getting a beautiful painted finish. Either way, this model is just loaded with detail and looks to be nothing short of amazing in the details it offers. I am going to start this build thread by showing about half the parts trees inside the box. In a later installment, I'll show the other parts, the instruction booklet, and the decals. I will slowly start this thread, then gradually build up momentum once I finish a couple of other small projects. Maybe it's pie in the sky, but I hope to have this model finished by mid April 2019. We'll see.


-
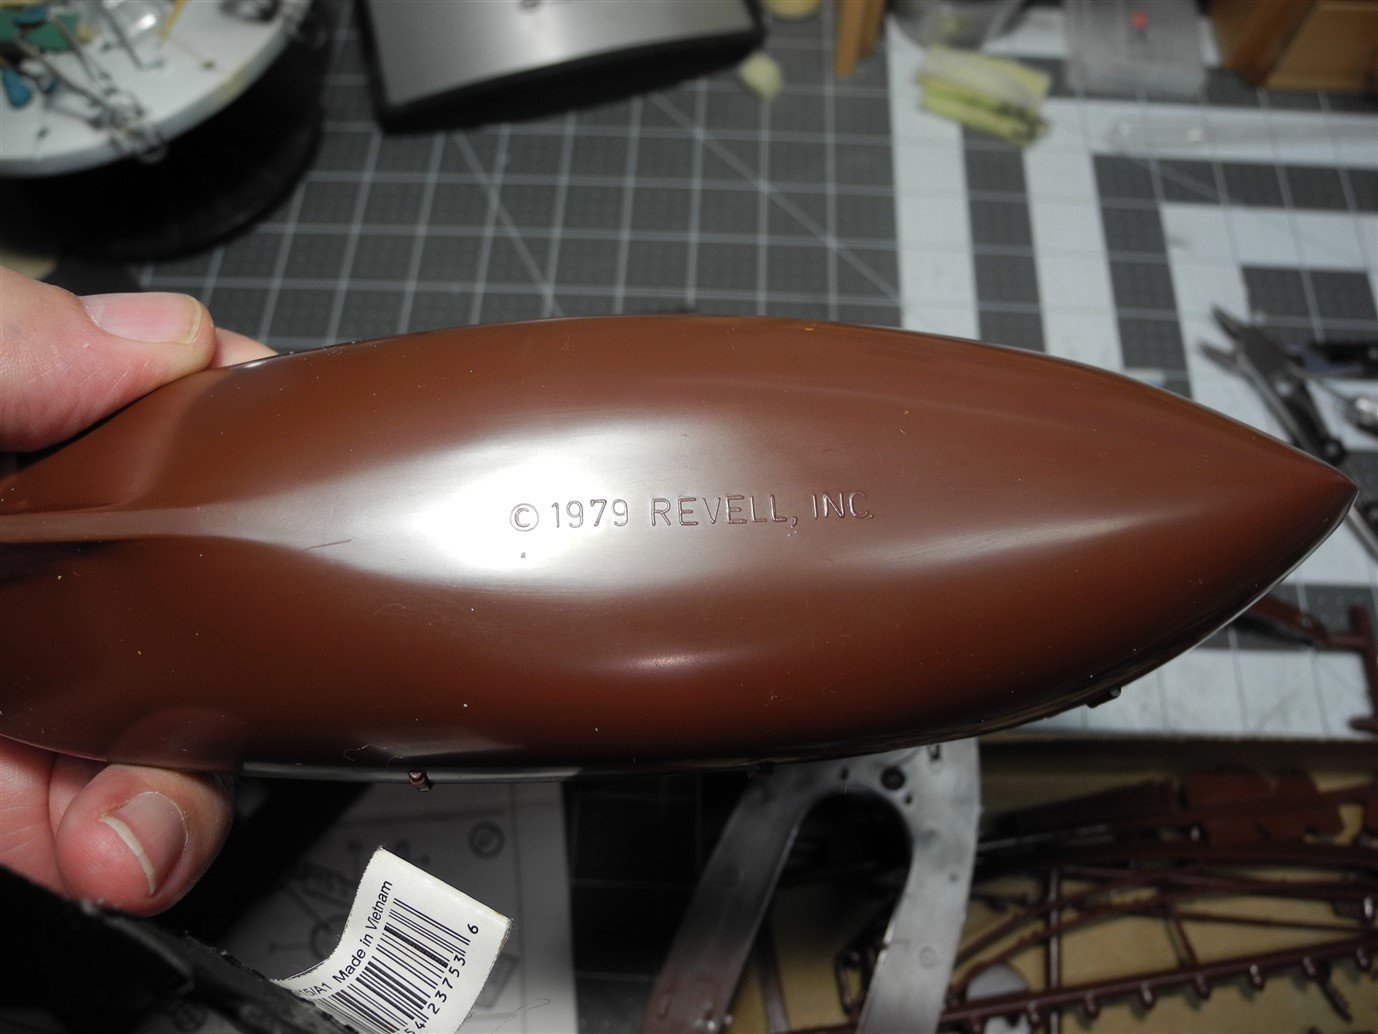
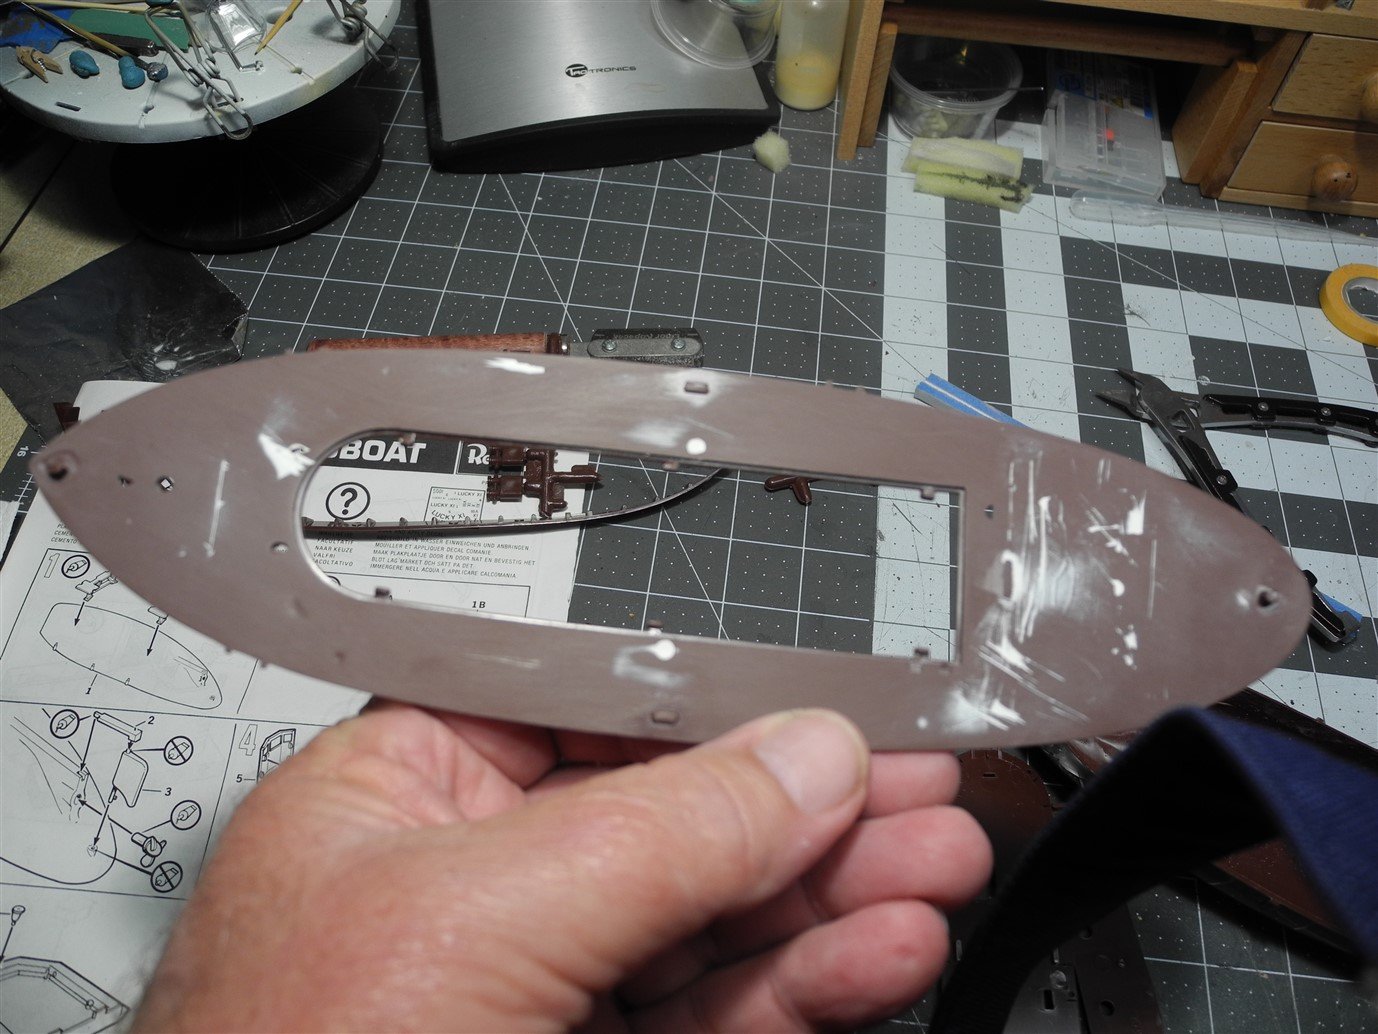
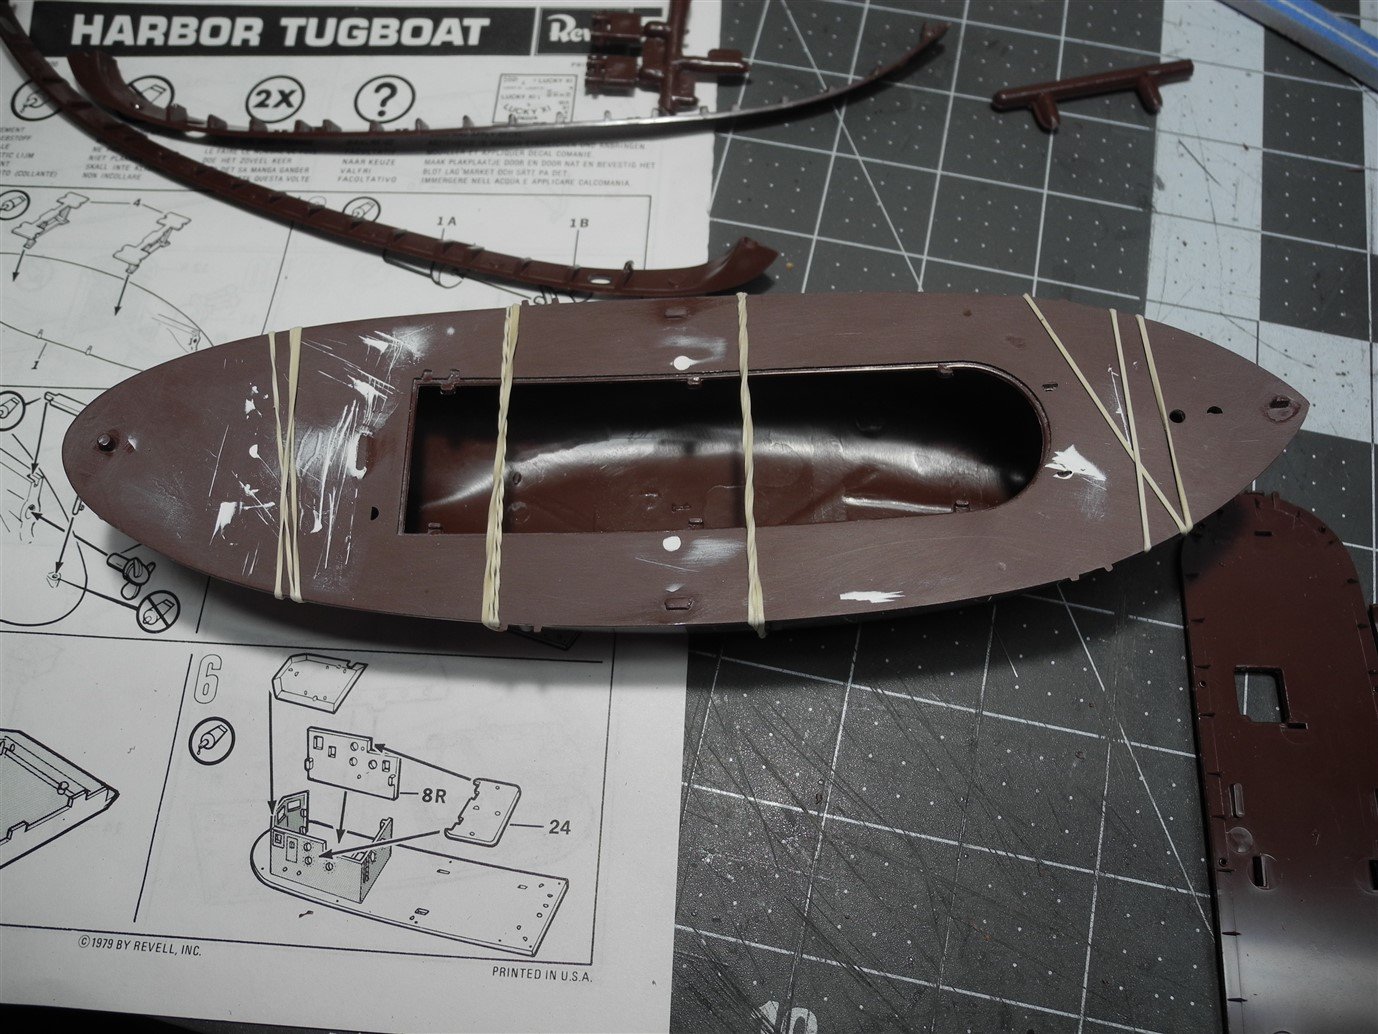
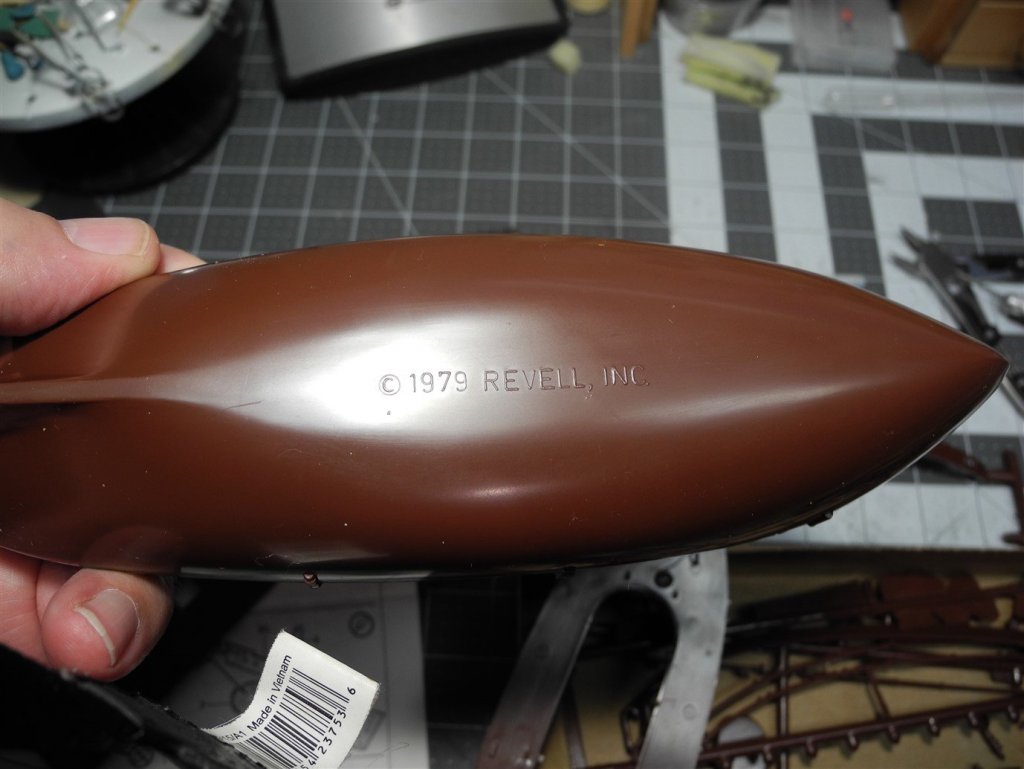
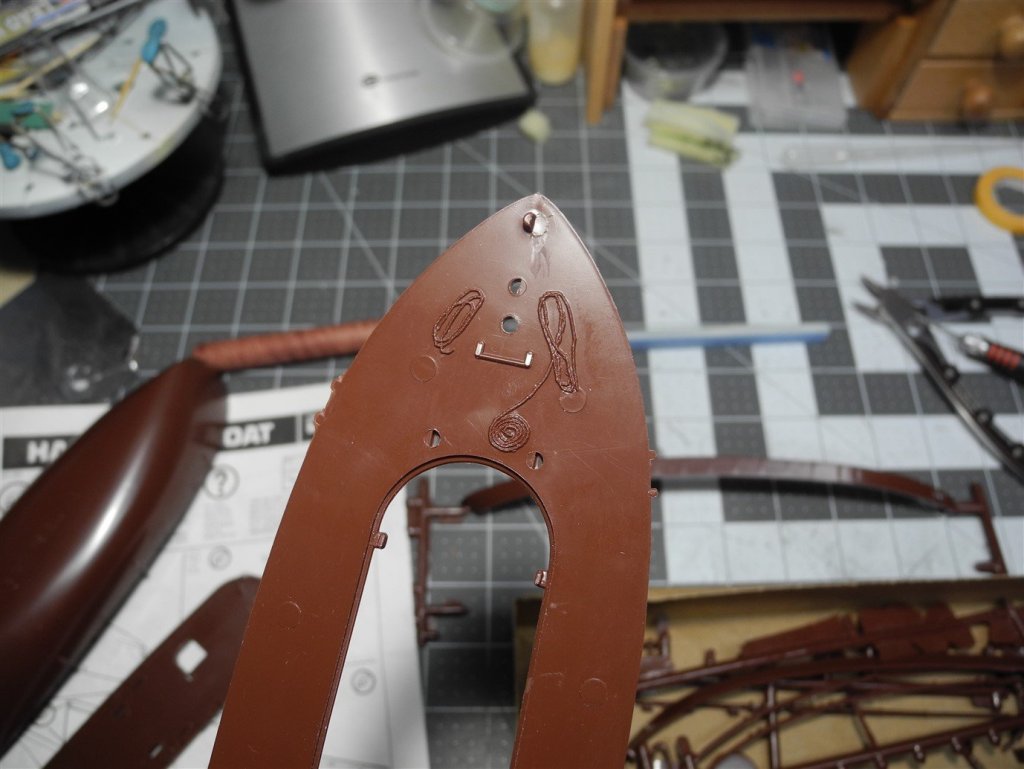
The hull had the typical raised letters used by Revell and others in that era to indicate their copyright date. The main deck had raised details that needed to be removed along with some other extraneous and unsightly irregularities. After cutting those away, I had some gouge marks that needed a quick swipe of Tamiya White Putty then a sanding after the putty dried. The deck was then attached to the hull with Tamiya thin liquid cement and held in place to dry with rubber bands. I believe those removed raised details (mostly coils of rope) will be easy to recreate with appropriate sized thread and will look much better at the end of the build.


- 63 replies
-
- 8
-
-
- revell
- harbor tug
- (and 2 more)
-
Oh yeah, a vent makes sense. The model has several of these molded onto the superstructure. I will sand away the molded ones and scratch build those. Some of the molded on details look pretty crappy on this kit to be honest about it. It's gotta go.
- 63 replies
-
- 5
-
-
- revell
- harbor tug
- (and 2 more)
-
Pack a small lunch or snack, OC. I plan to make this one as short and sweet as possible. Don't want to get OCD'd or otherwise carried away with it. Will try to make it look presentable, but not go overboard.
- 63 replies
-
- 7
-
-
- revell
- harbor tug
- (and 2 more)
-
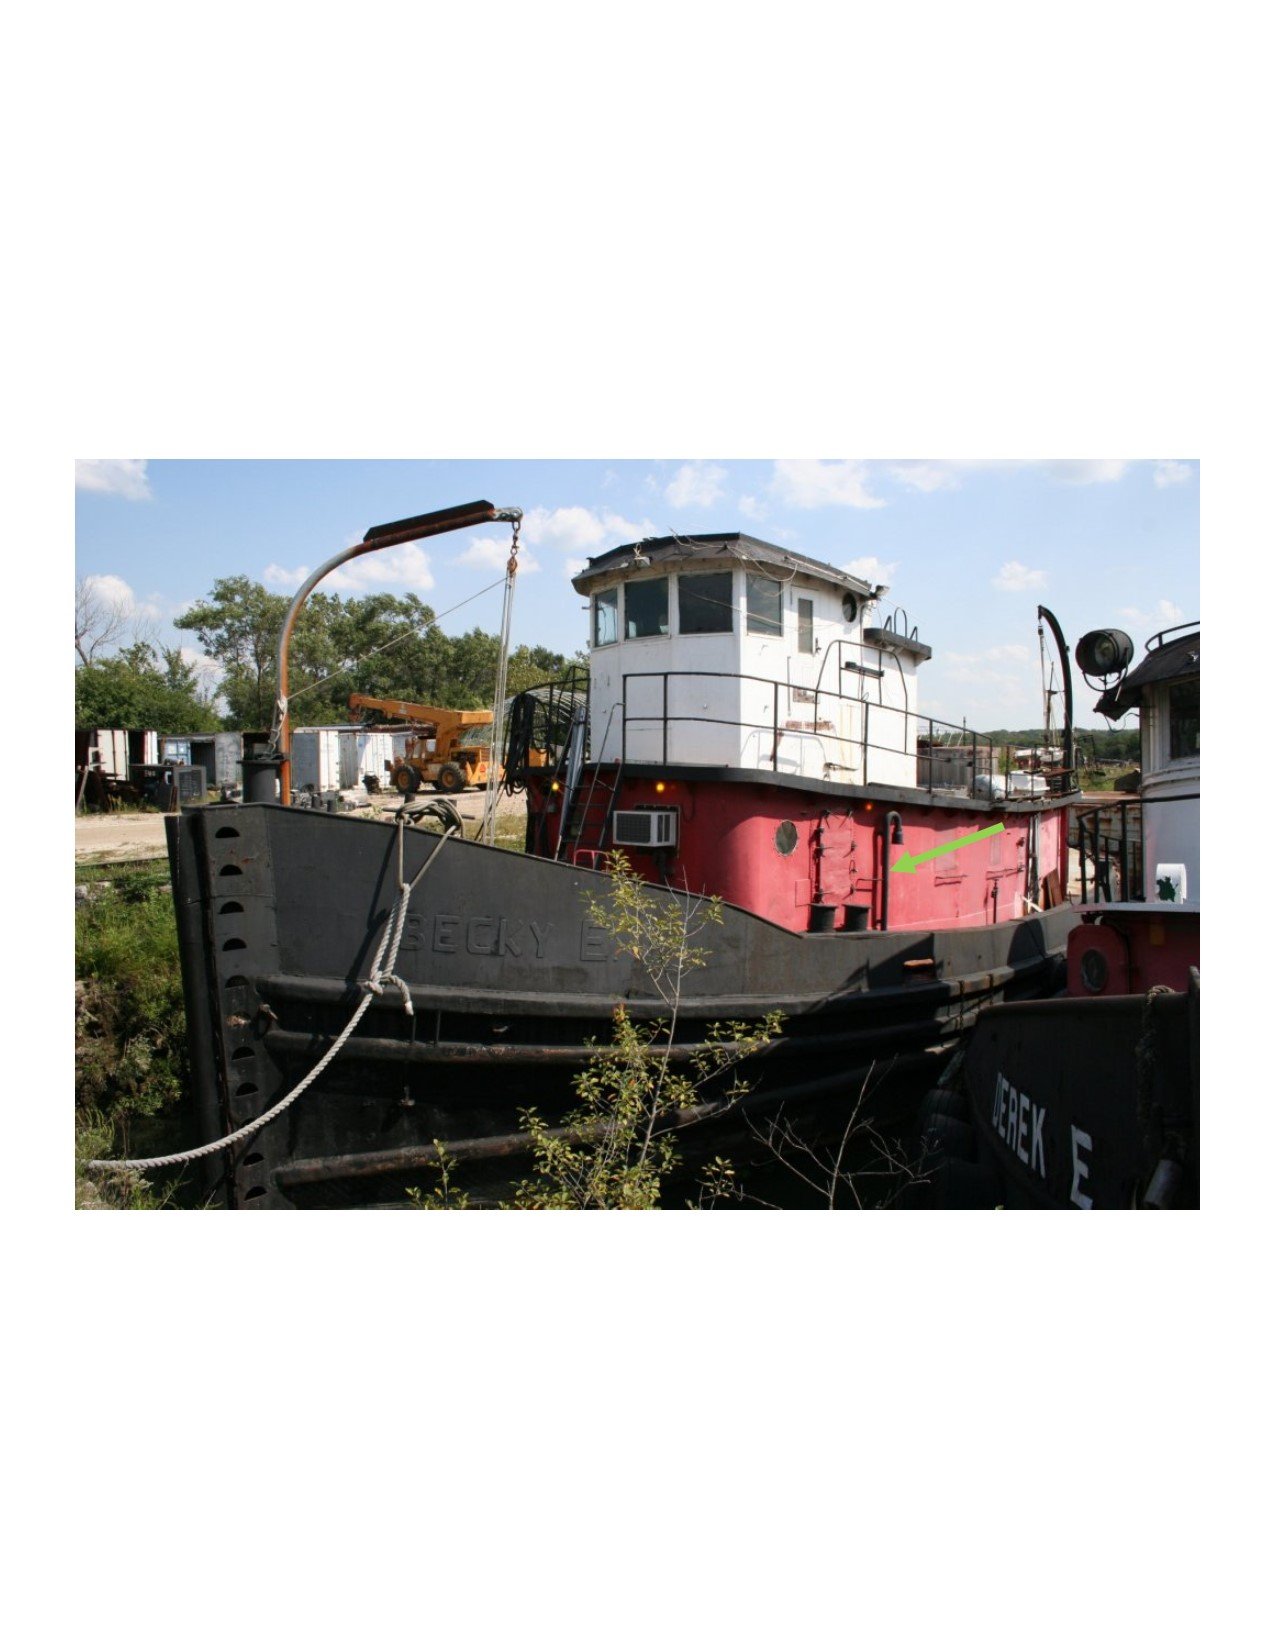
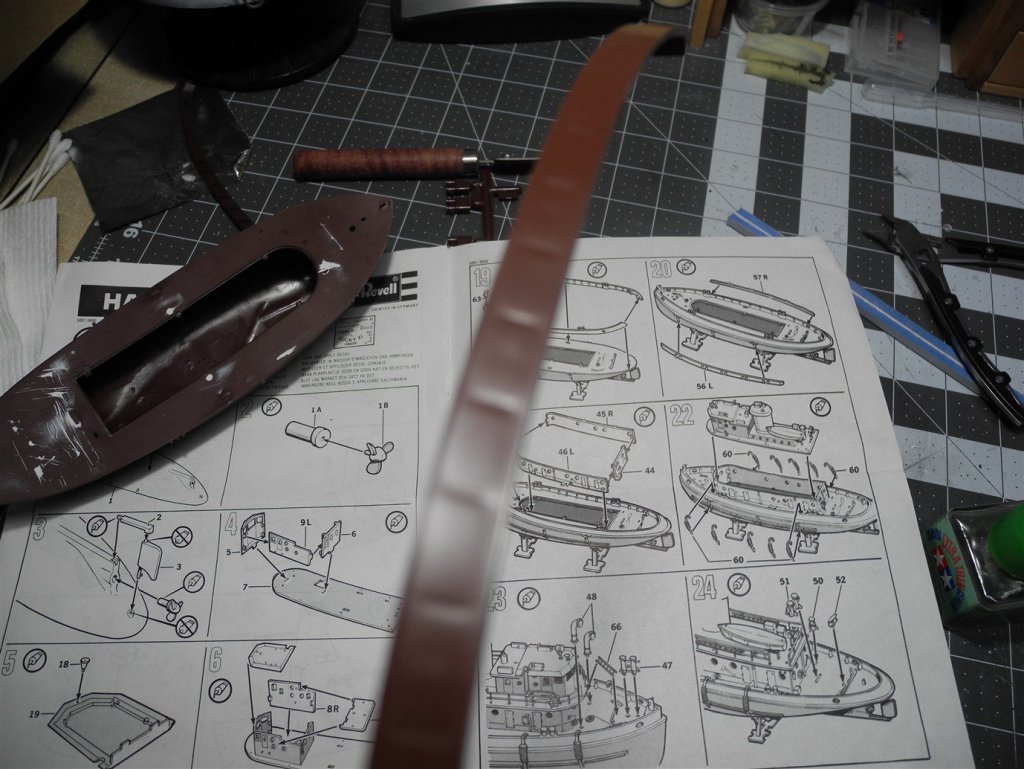
Thank you Kurt. The history and particularly the photos help me a lot! Seems I remember reading a little about this long ago but had forgotten. Being nautically challenged, please tell me what these are called (see highlighted items in the photo)?

- 63 replies
-
- 5
-
-
- revell
- harbor tug
- (and 2 more)
-
With the micro servos and RC equipment available today, making this a working model like that would be cheap to do. A very small lipo battery and brushless motor could power it. Way back when you and I first built this model, it looked like this:

- 63 replies
-
- 6
-
-
- revell
- harbor tug
- (and 2 more)
-
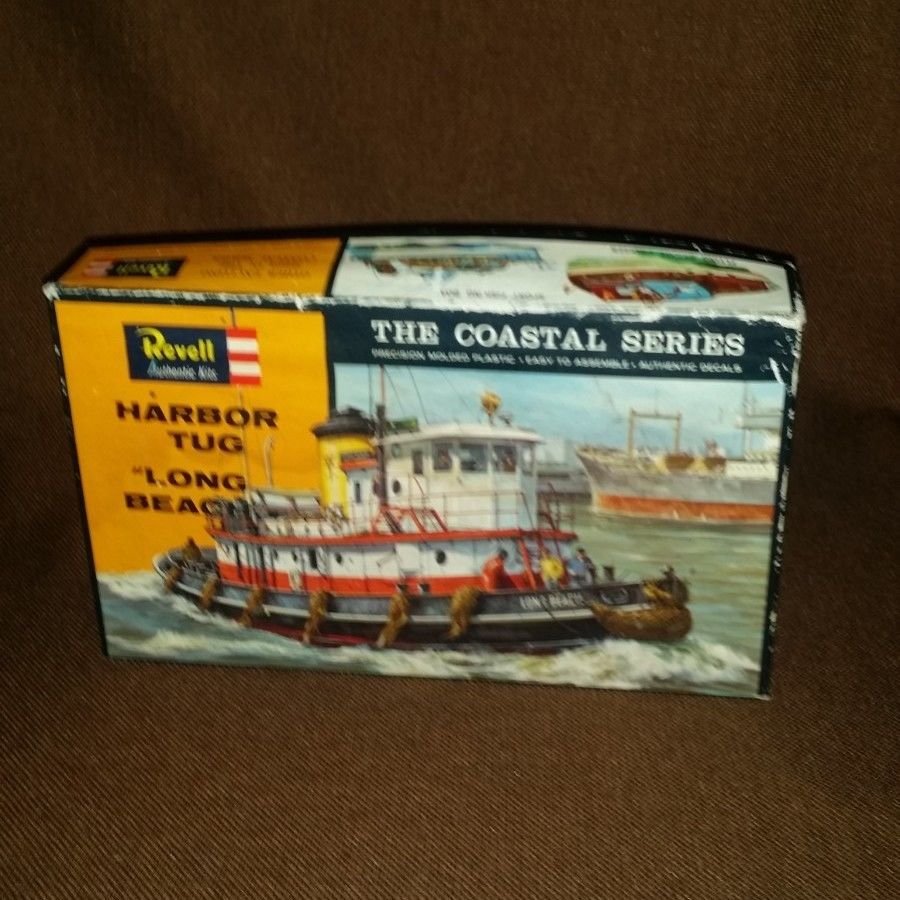
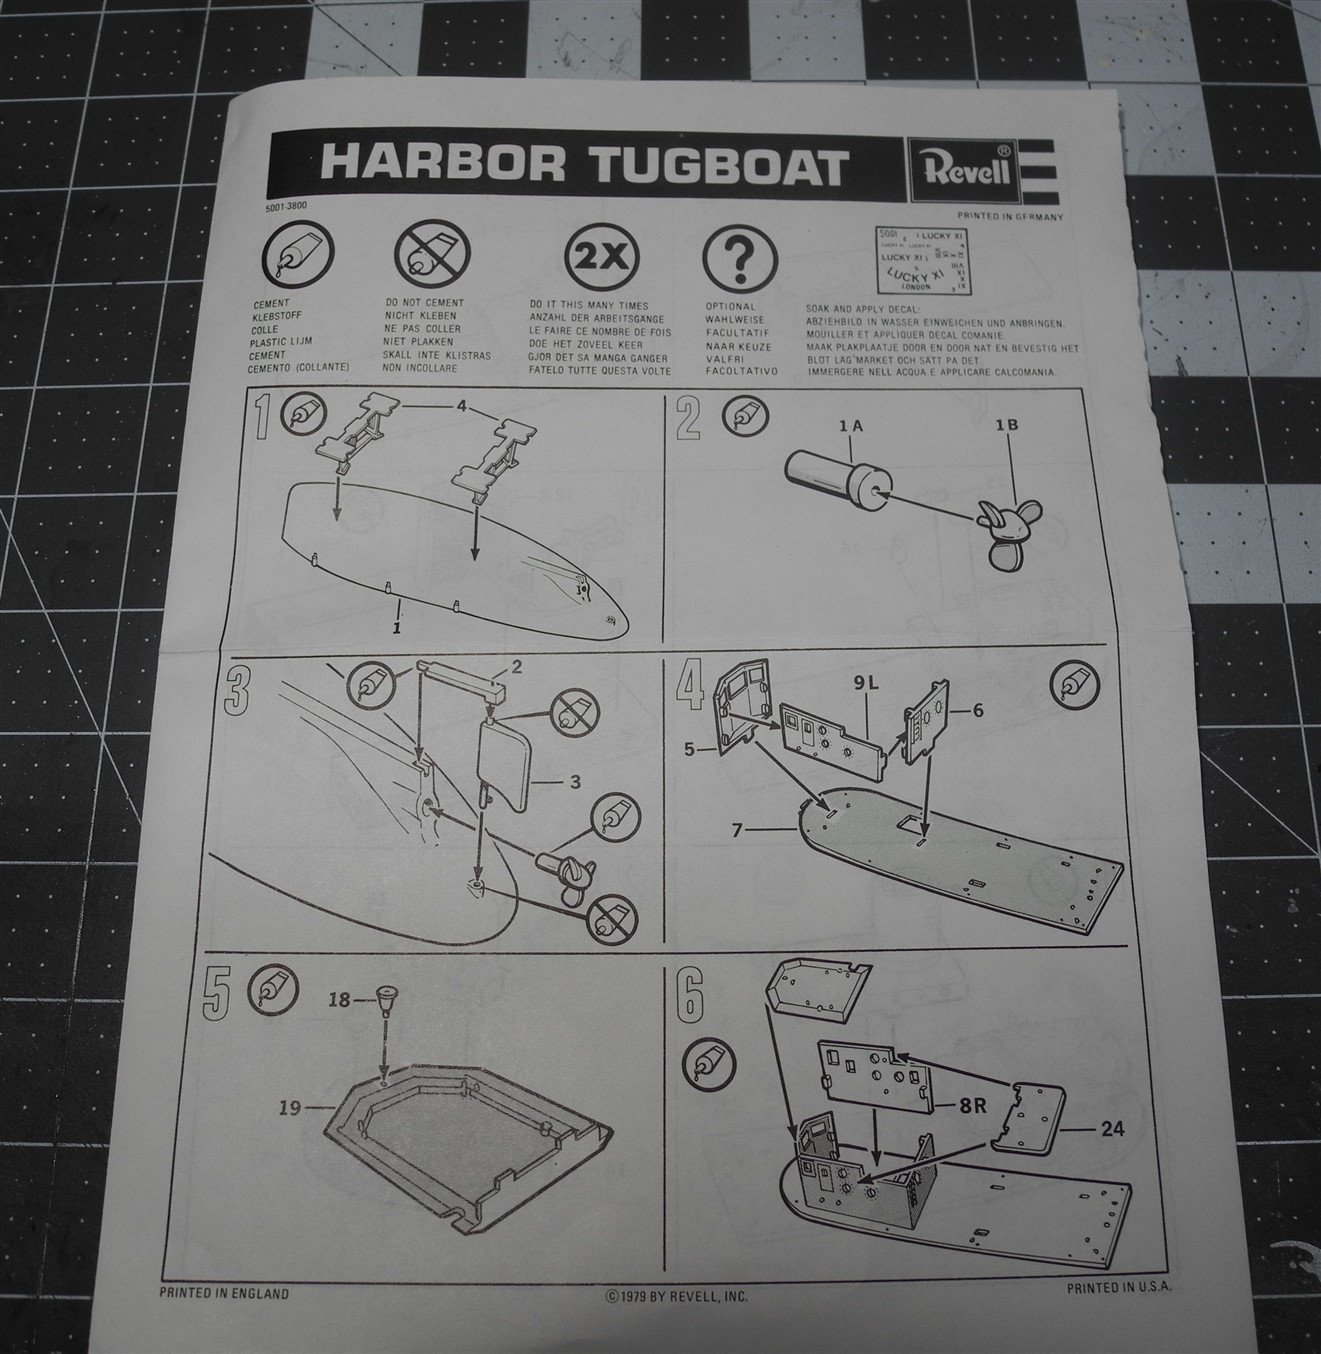
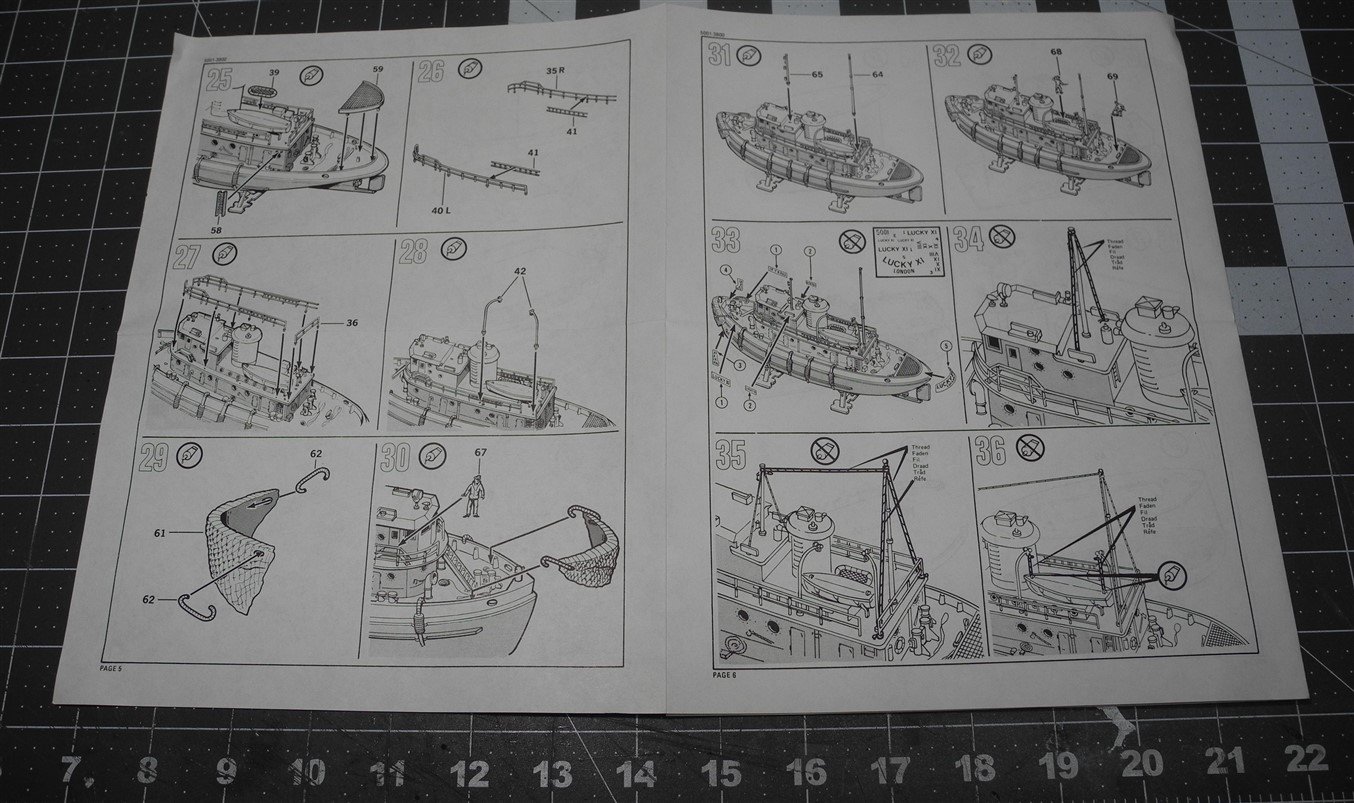
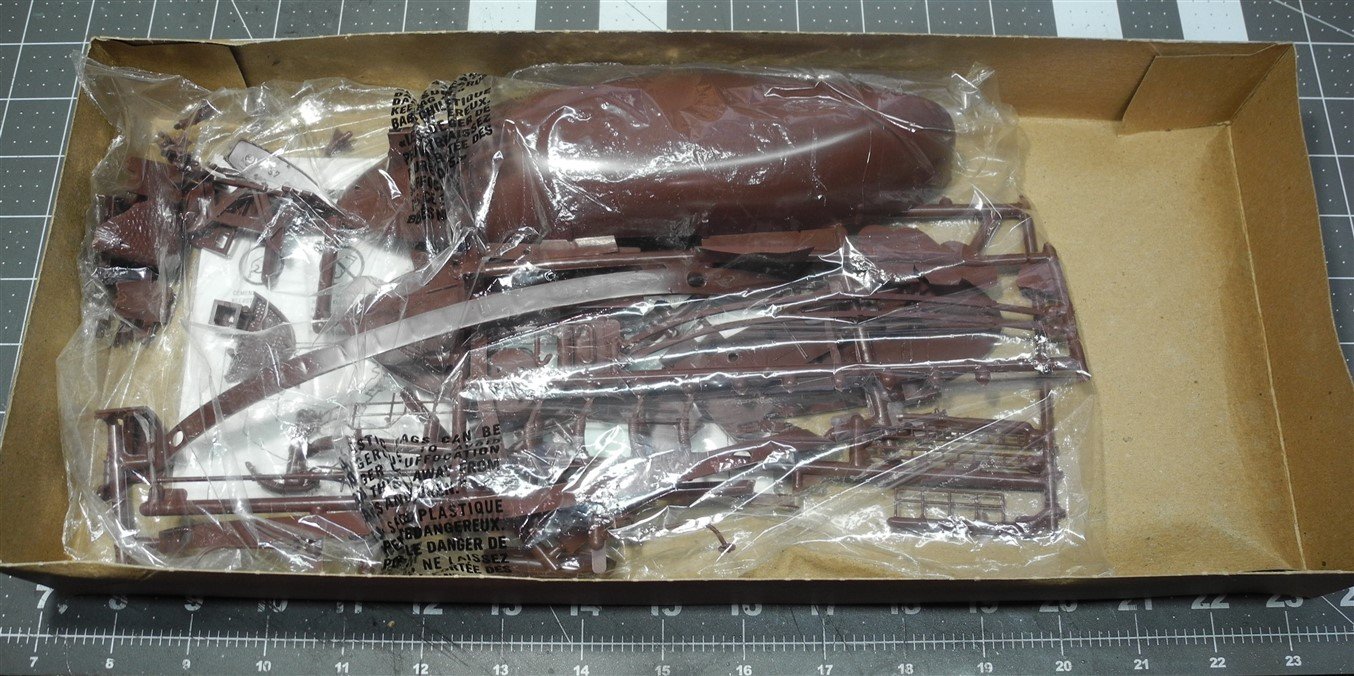
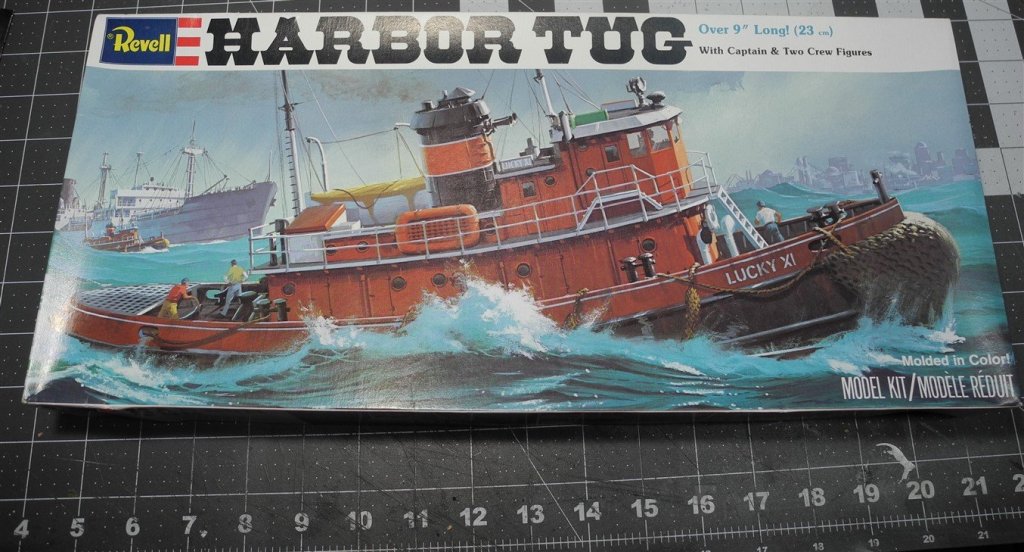
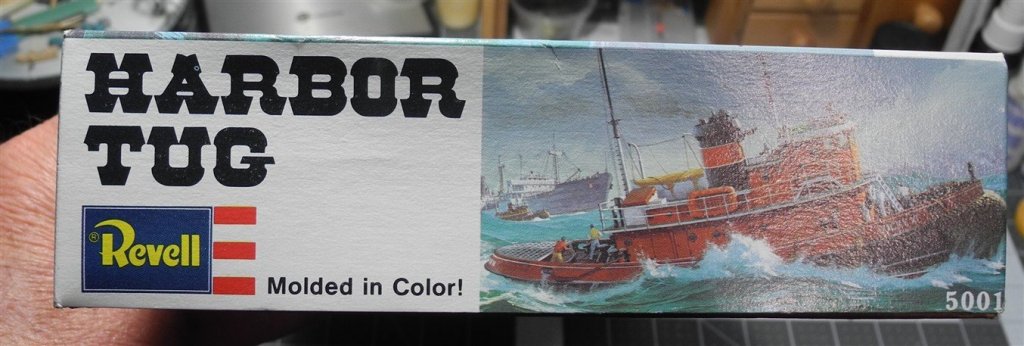
This will be a build thread for the venerable old Revell Harbor Tug injection molded plastic kit. My copy of the kit is from 1979. I am uncertain when was the last time Revell released this kit. Mine was found on Ebay a couple of months ago for a very small cost, around/about $10 plus shipping, so less than $20 total. The model has all the shortcomings of vintage plastic kits...a lack of good detail, lots of flash, ejector pin marks, and other minor deficiencies. Having said that, the kit was/is a fun build and I can recall building the model long before 1979 so it is definitely long in the tooth. As I go along in this build, I may decide to scratch build or otherwise improve on glaring deficiencies, but as much as possible I plan to build it box stock and not make a long drawn out project of it, keeping it fun and not like work. Way back in the day, plastic model kits were often "box scale", not designed to any particular popular scale but more pragmatic, just to fit inside a specific size box. I am pretty sure that is the case with this model. When you look at the parts laying on my build mat, you can see the crew figures are about 1/2" tall and that the grid on my build mat is 1" square, so I guess the model is approximately HO scale. Lets get on with looking at the kit box, the parts inside the box, the instructions, and the little decal sheet. First the box:

- 63 replies
-
- 4
-
-
- revell
- harbor tug
- (and 2 more)
-
Just found this thread and the link to the photos. The link does not work for me. Are others having a problem connecting to the link?
-
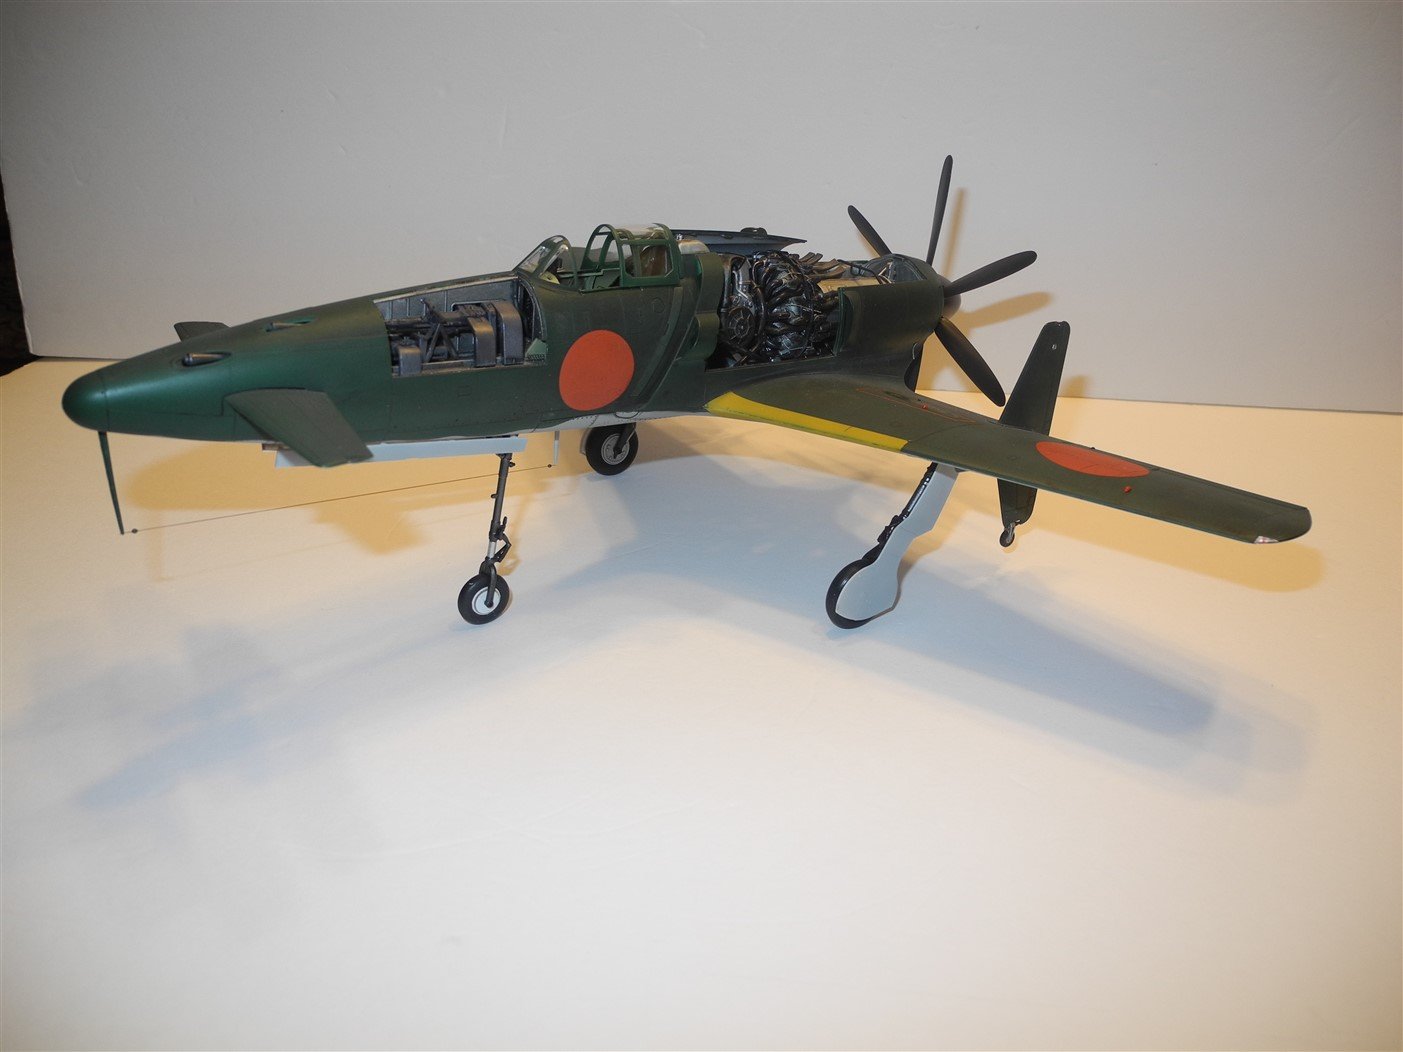
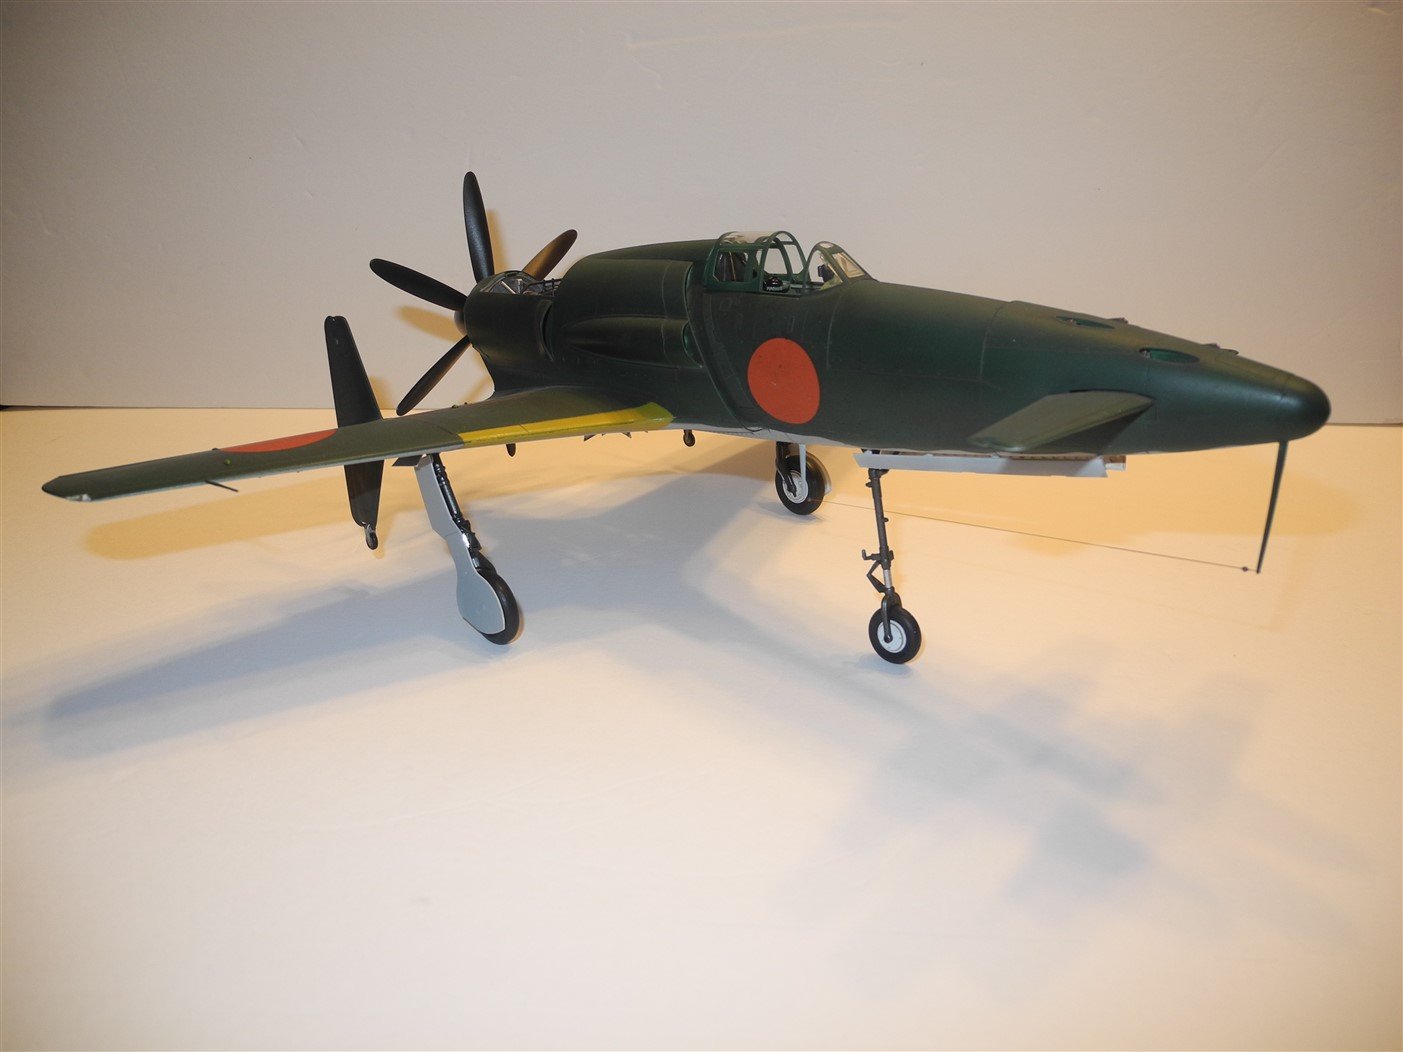
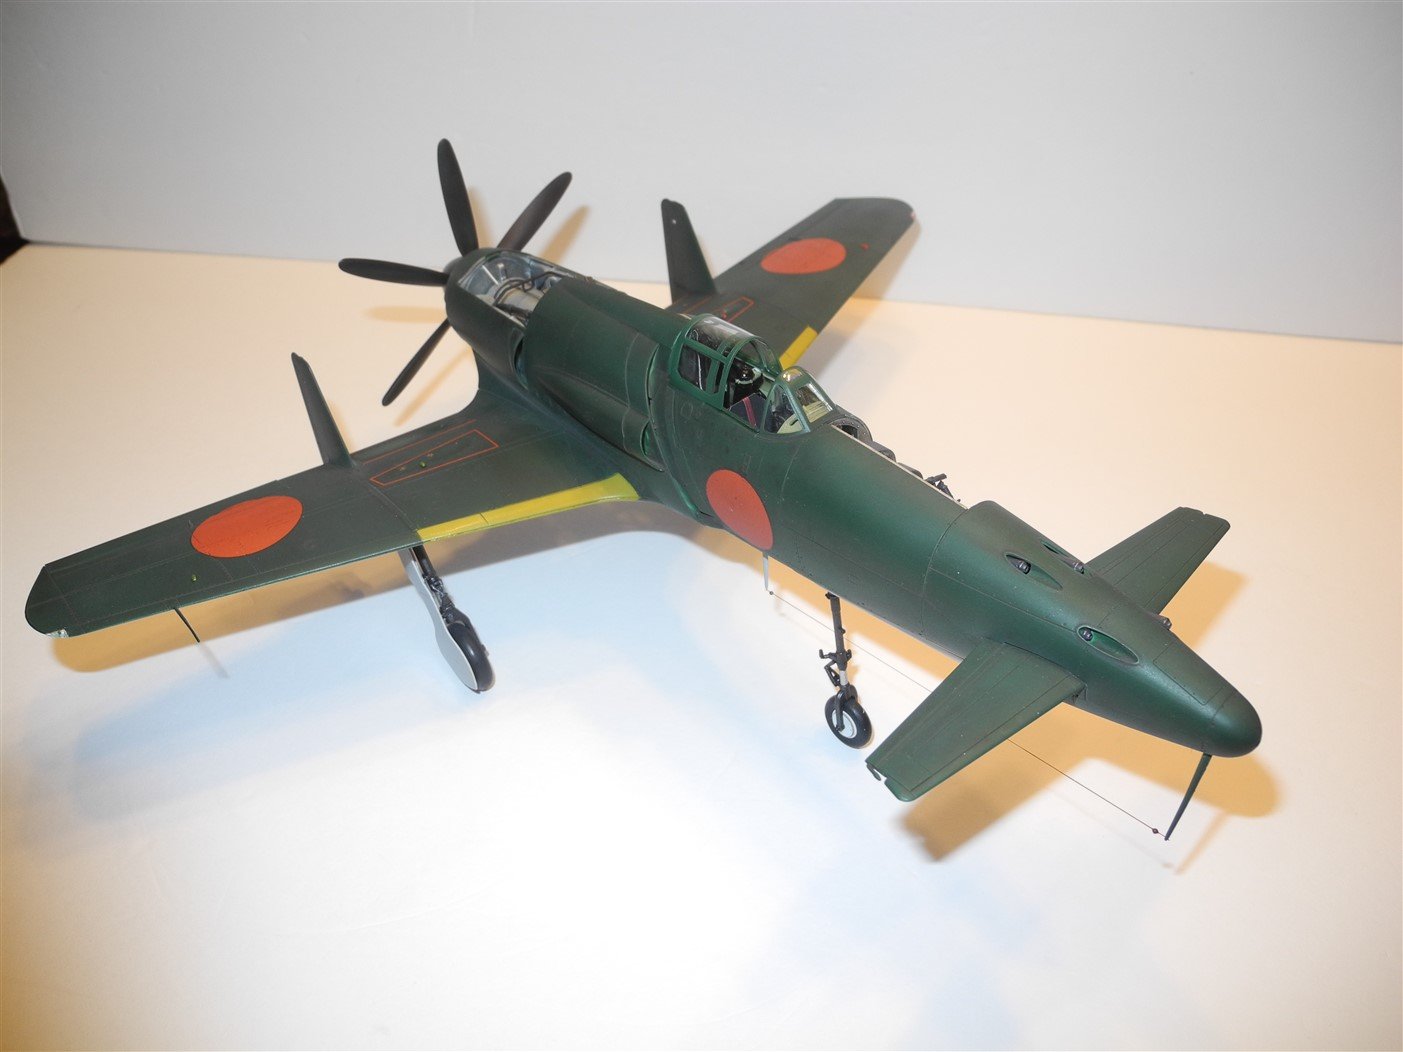
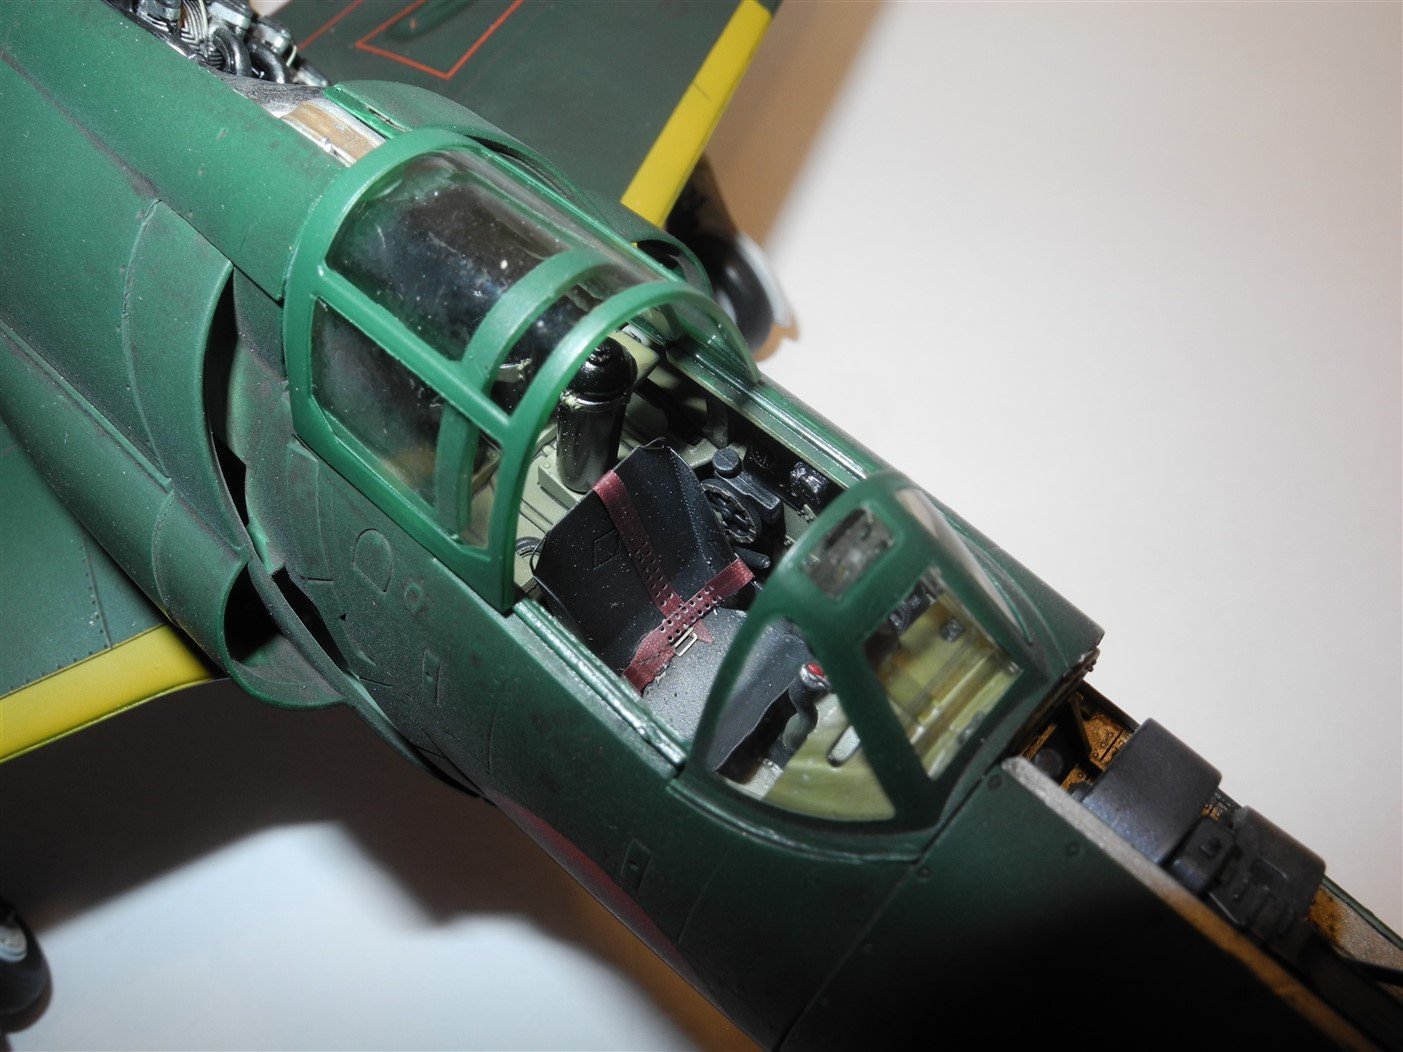
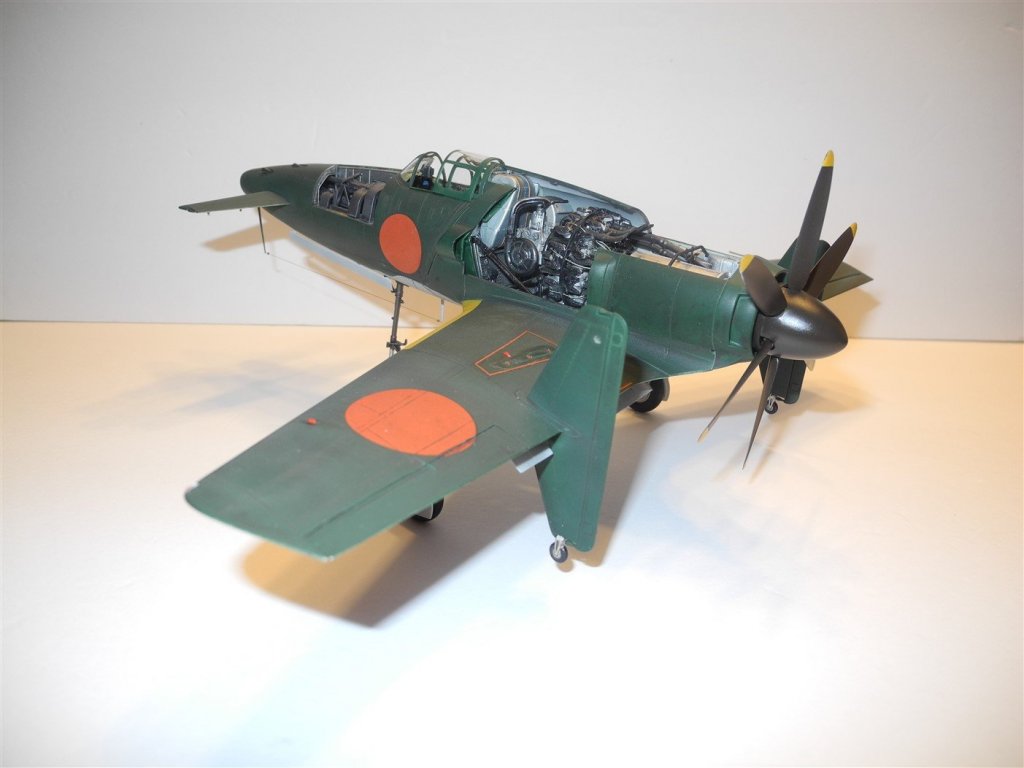
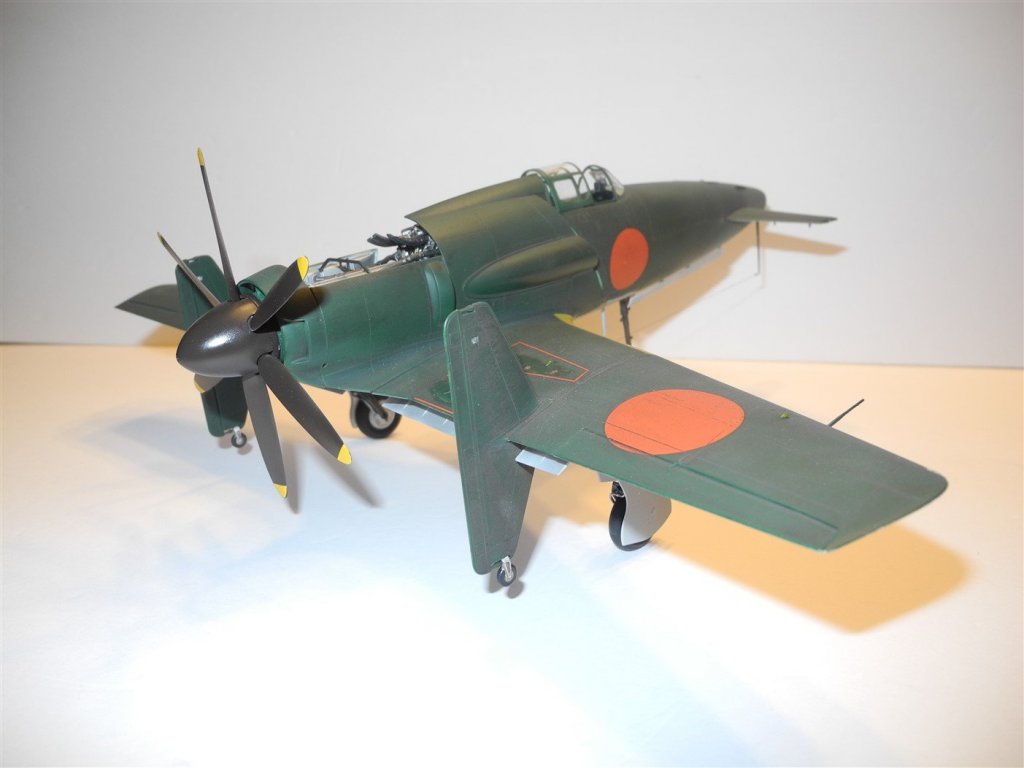
These will likely be the final photographs I will post of the J7W1 Shinden build. There may be a few minor touch ups I will do here and there, but nothing significant enough to post new photos. The finished model will be displayed on a wooden plaque that depicts a grass runway at the April IPMS regional show coming up soon. Next, I want to finish one more complete model as well as finish the 1:200 IJN Mikasa started a year ago. These will also go to the regional IPMS show in April. Tentatively, plan to build the red 1:32 Albatros D.V of Manfred Von Richthofen from Wingnut Wings next. Mark Taylor: If you read this...is it appropriate to post photos of non-ships model in the gallery?


- 112 replies
-
- 10
-
-
Thanks for the link. Looks like the consensus of opinion with other modelers is all the formation lights hold to the standard navigation routine of red on the left and green on the right.
-
Very nice!
-
Green Elephant funny car by jct - FINISHED - 1/24 - PLASTIC
CDW replied to jct's topic in Non-ship/categorised builds
I have never seen decals behave that way, JCT. It must have been a bad batch of decal paper they printed those decals on. I don't know any other explanation for it. I recently learned the company I used to buy my blank decal paper from went out of business. I have a good size quantity on hand, but after this will have to look for another vendor. The company I used (now out of business) was known as Bel Decal, in Florida. If you ever by chance look for blank decal paper to print your own decals, be advised there is specific paper for ink jet, laser, and various other uses including ceramics. It's not "one size fits all". -
You did a marvelous job on the funny car Denis. I hope there are more to come from you later on down the road. Very neat and clean. The Mooneyes Dragster I told you about is now part of the Don Garlit's racing museum here in Florida. Don Garlits was a local boy and as you can imagine, he was a driver I admired and followed closely as I grew up. Not many remember today, but Art Malone was a pioneer drag race/master engine builder. He and Garlits teamed up to build some very famous and record breaking dragsters. Here is a link to a great photo of the Mooneyes Dragster:
-
That engine was used in the Revell kits of the Orange Crate and the Moon Eyes Dragster way back when. And yes, the supercharger is crankshaft driven through the timing cover. I have both those ancient kits in my stash by the way.
-
Oh, one more thing...anyone have an idea of what color formation lights on the tops of the wings and rudders might have been. I'm guessing clear but I'm not sure and the references I have don't show that detail.
-
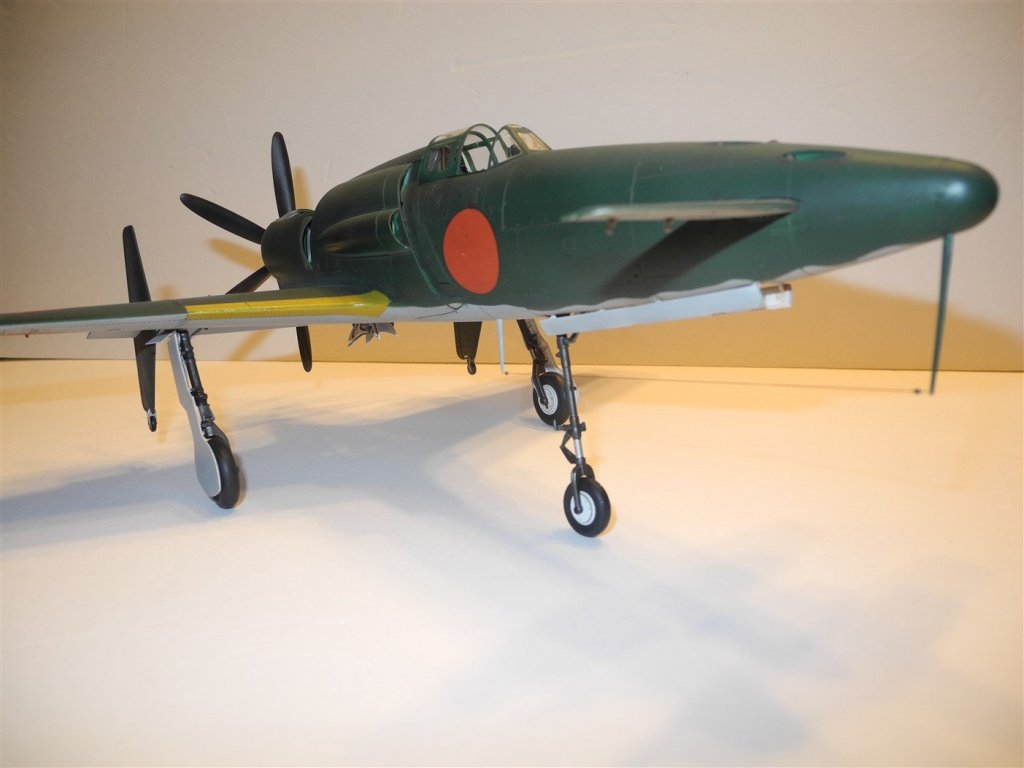
Thanks for the comments and likes. To finish this model, I will add final details, final decals, and a dull clear coat. Will do a simple base for it to sit upon, maybe something like a grass runway and maybe a table or two to set the maintenance panels on. RE: the landing gear...they are an enigma to me. So long and spindly looking. Makes one wonder if they could have held up over time, particularly as a carrier based plane where aircraft are known for abusive conditions for landing gear. One plane that comes to mind is the F7F Tigercat. It had some very spindly legs as well but they seemed to hold up during the Korean War, so go figure.