CDW
-
Posts
7,756 -
Joined
-
Last visited
Content Type
Profiles
Forums
Gallery
Events
Everything posted by CDW
-

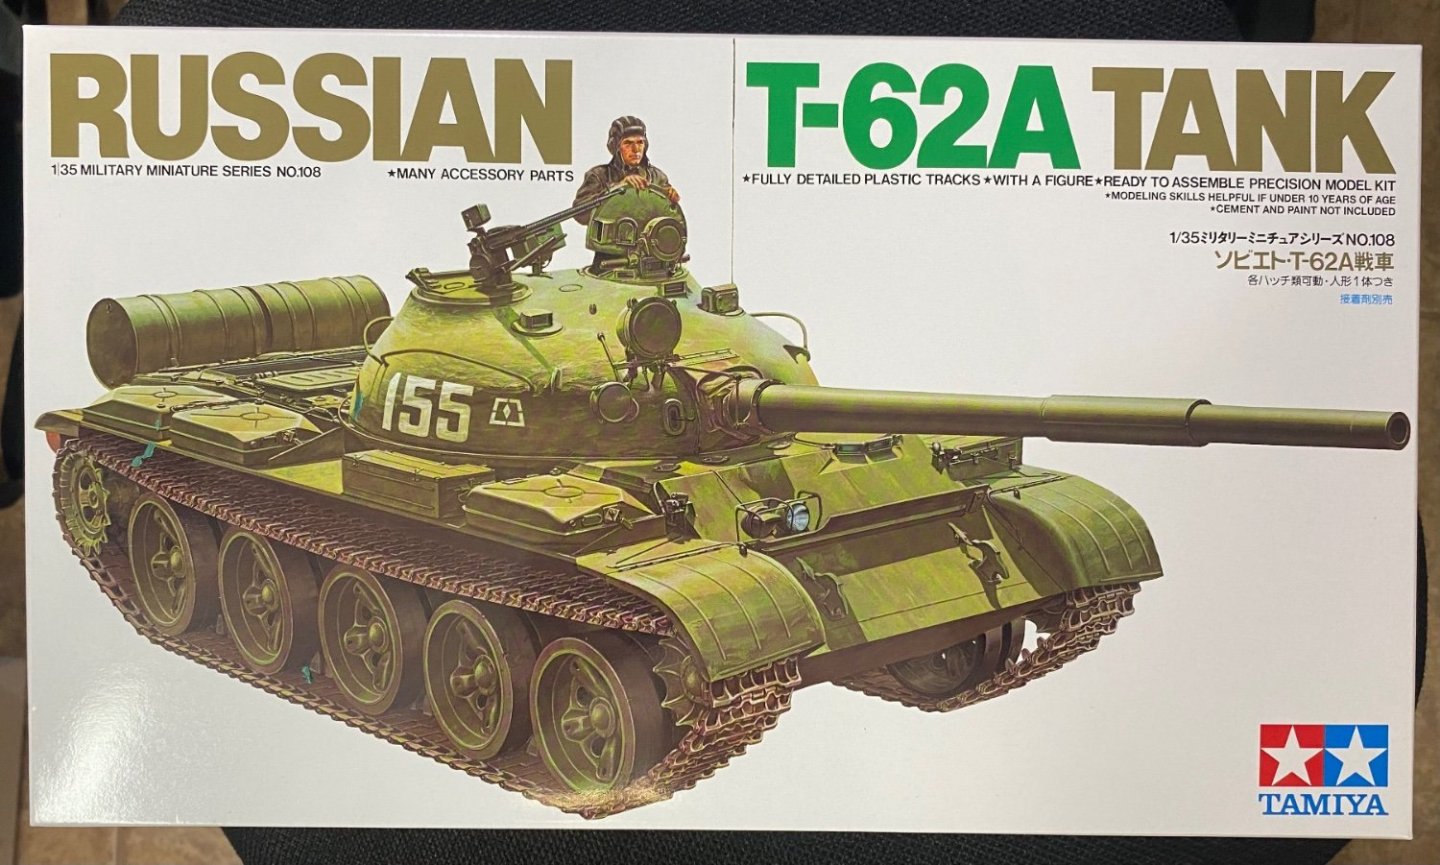
Russian T-62A Tank by CDW - Tamiya - 1/35 Scale FINISHED
CDW replied to CDW's topic in Non-ship/categorised builds
Thanks Denis. The new releases of these old kit molds no longer have any of the running gear hardware included, but the cost is just a shade more than $20 retail. A very decent model for low cost. -
Russian T-62A Tank by CDW - Tamiya - 1/35 Scale FINISHED
CDW replied to CDW's topic in Non-ship/categorised builds
The Russians manufacture these tanks at just a small fraction of the cost of a Western-made tank. No wonder they fill the arsenals of so many armies throughout the world. Think "AK-47", cheap, loose fitting, but they darn sure get the job done in even the worst conditions. -
Russian T-62A Tank by CDW - Tamiya - 1/35 Scale FINISHED
CDW replied to CDW's topic in Non-ship/categorised builds
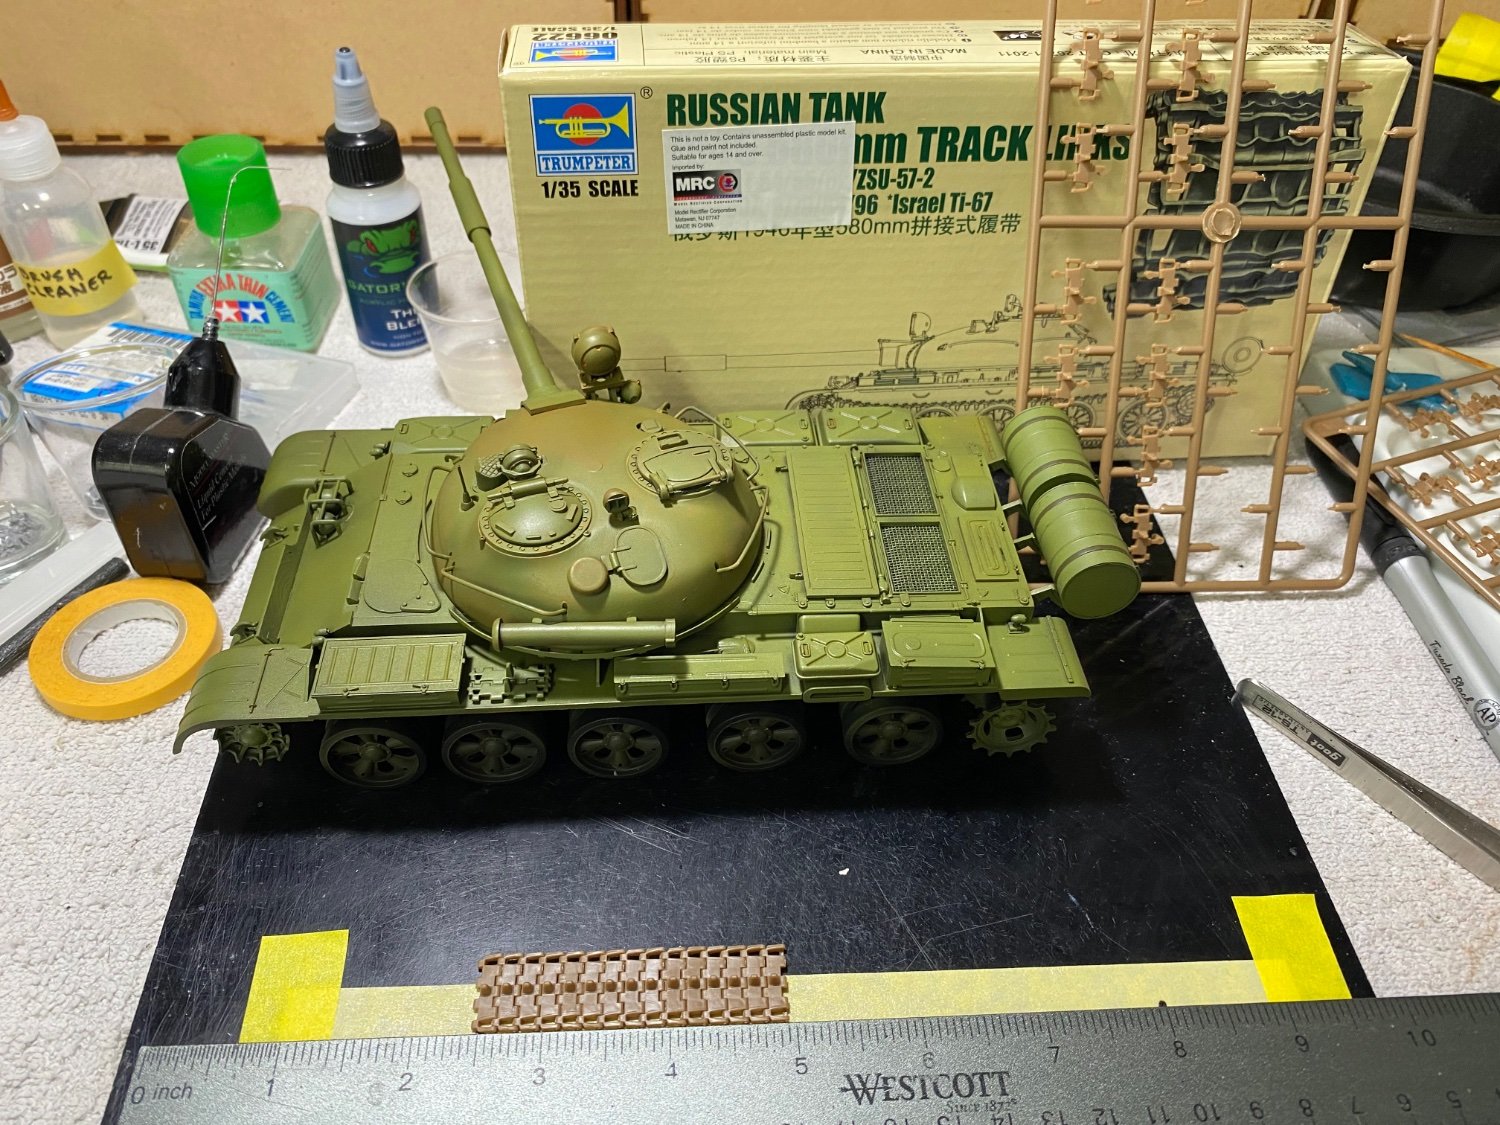
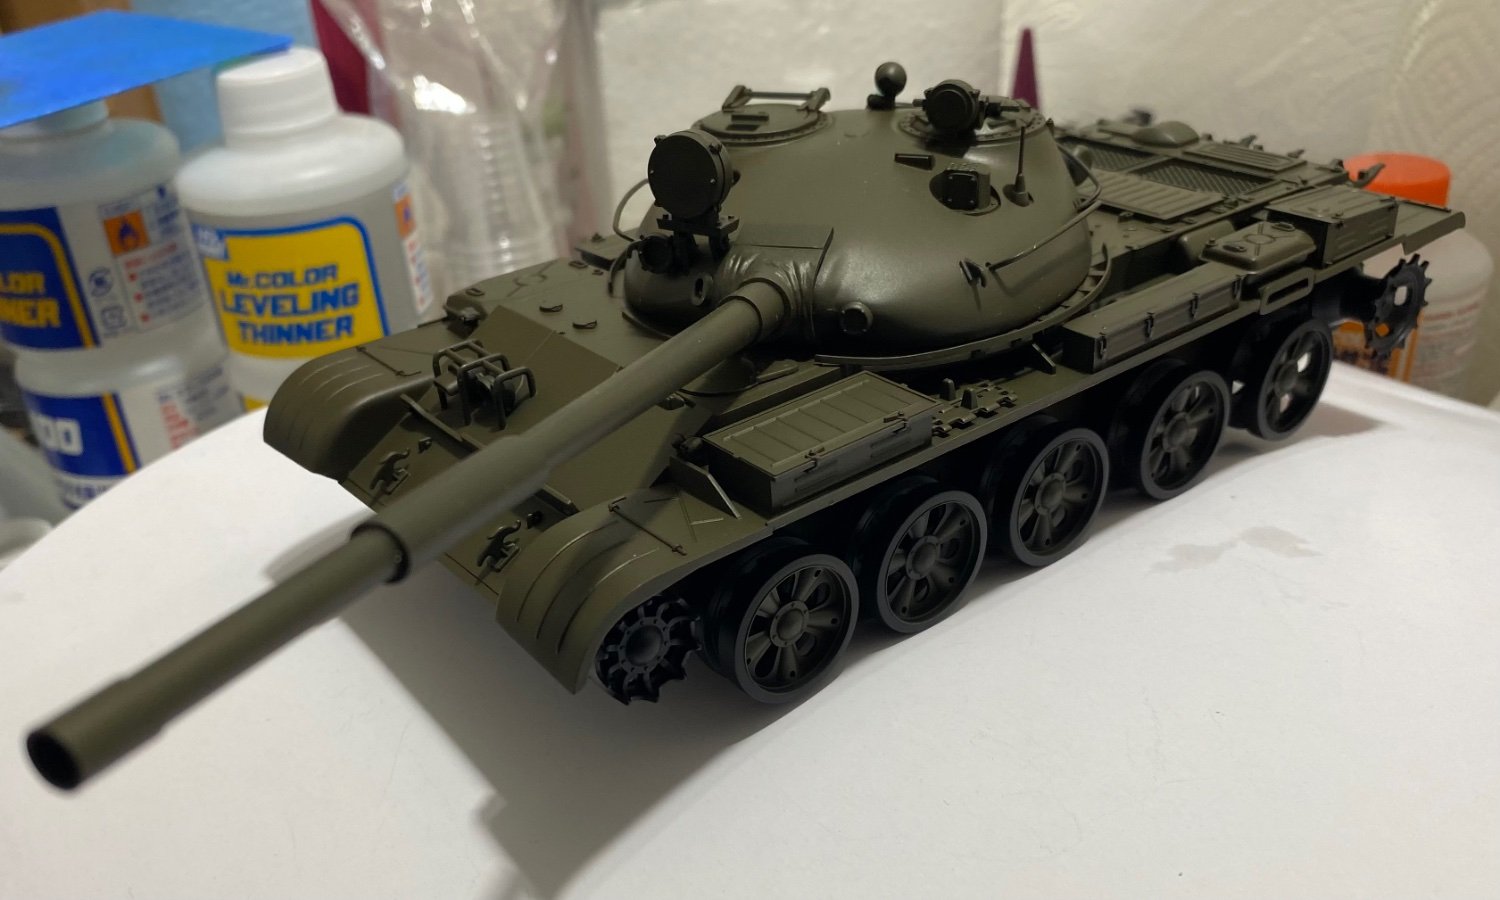
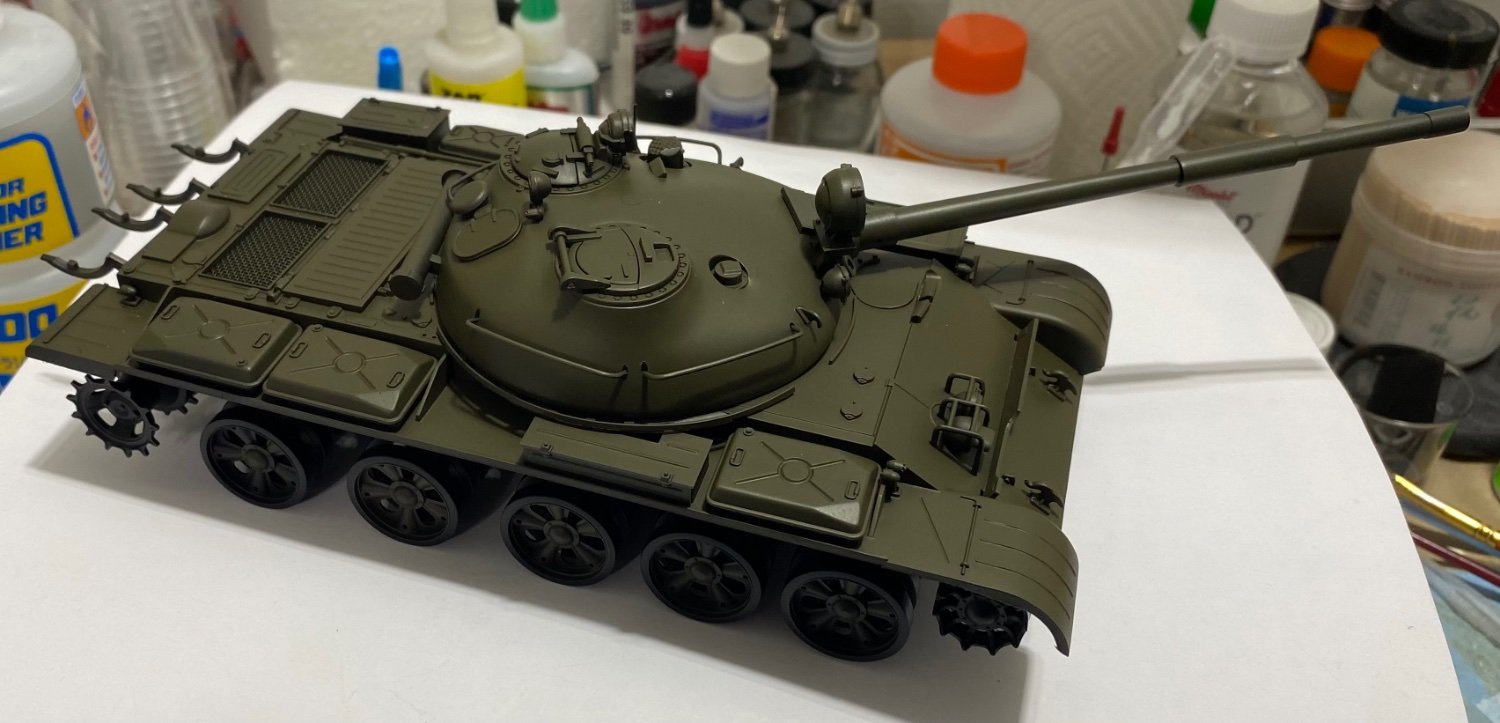
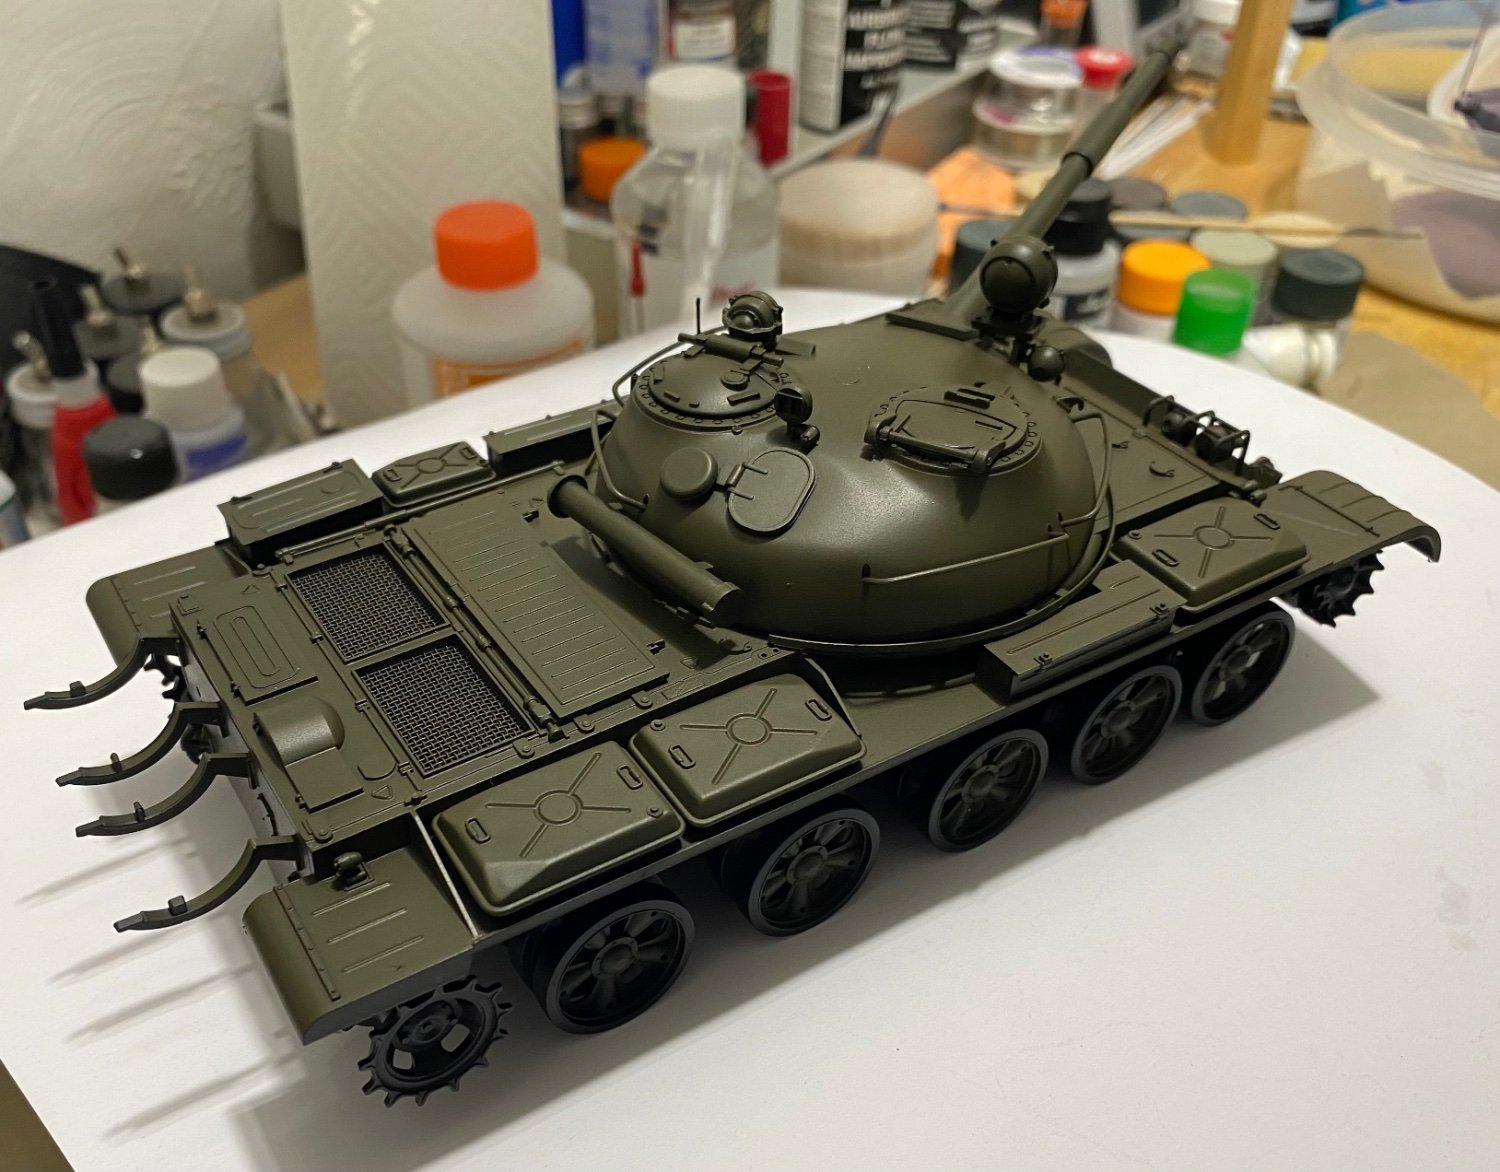
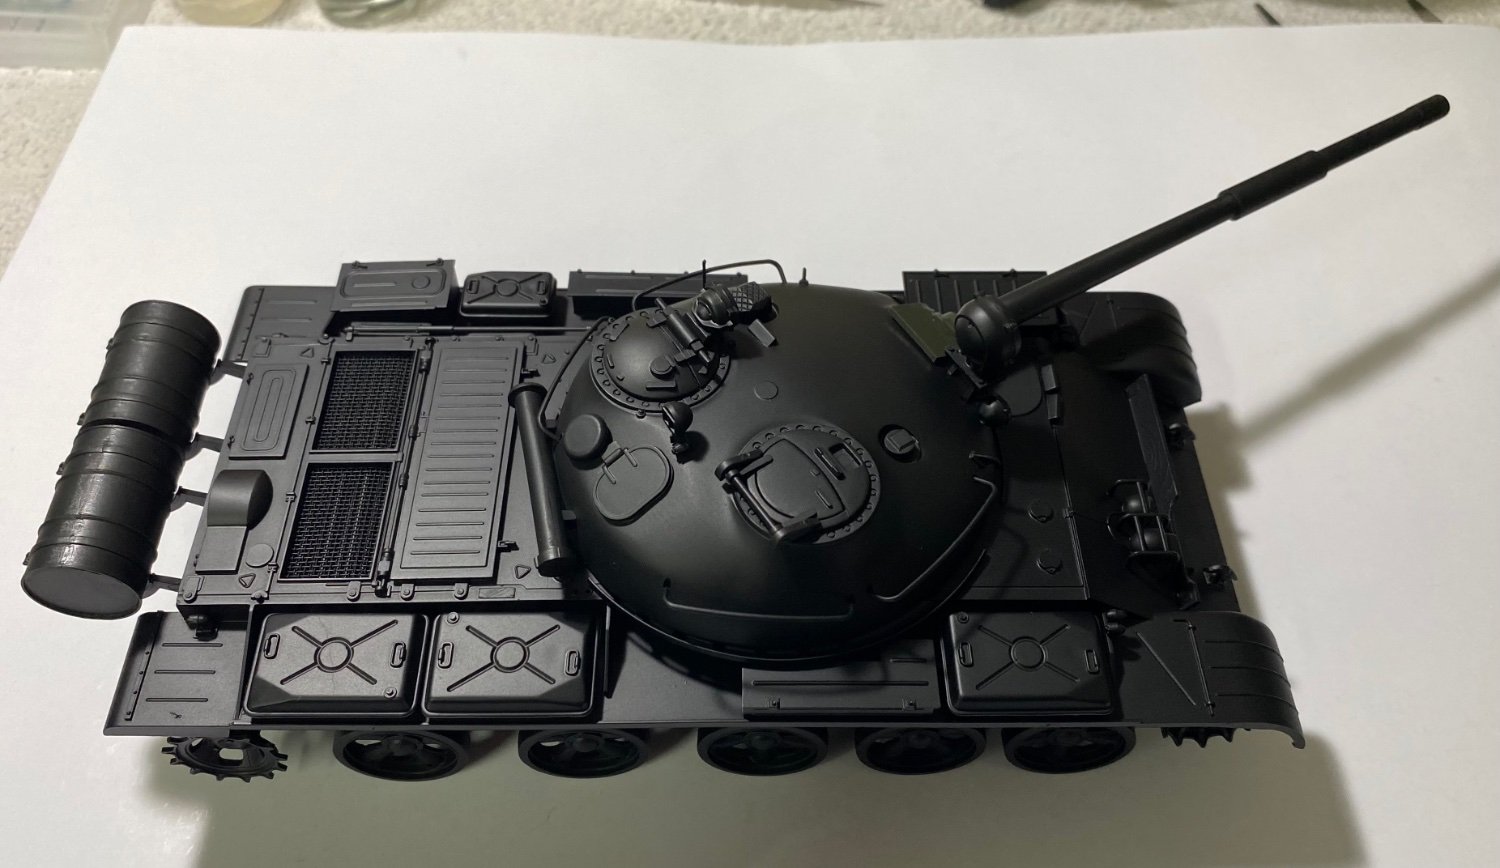
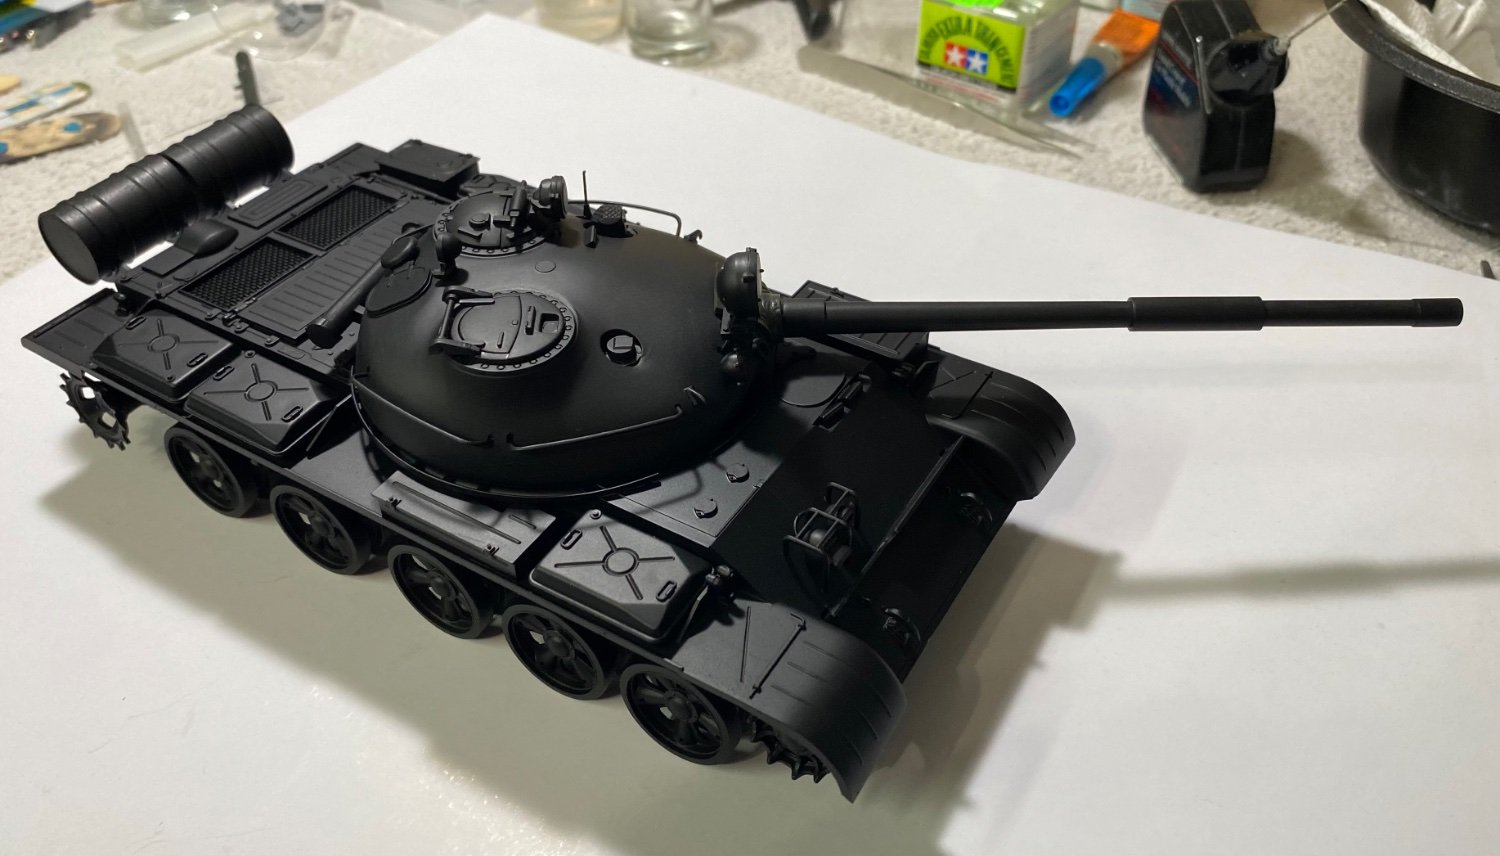
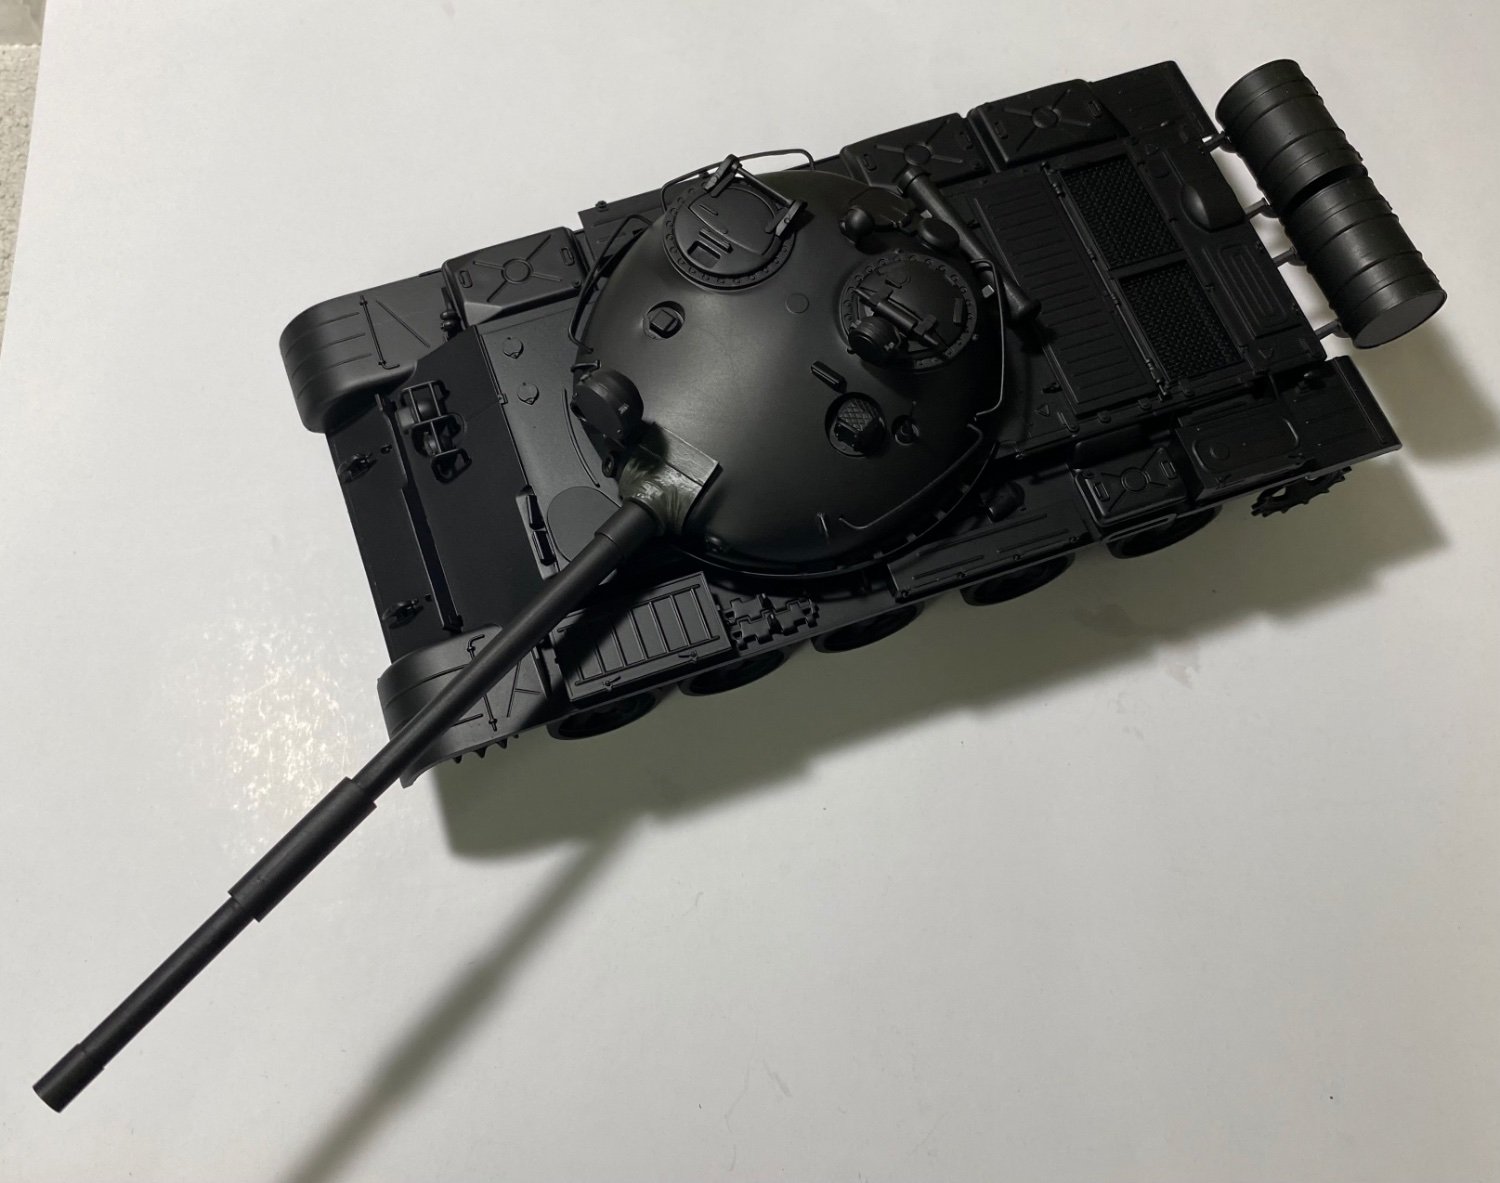
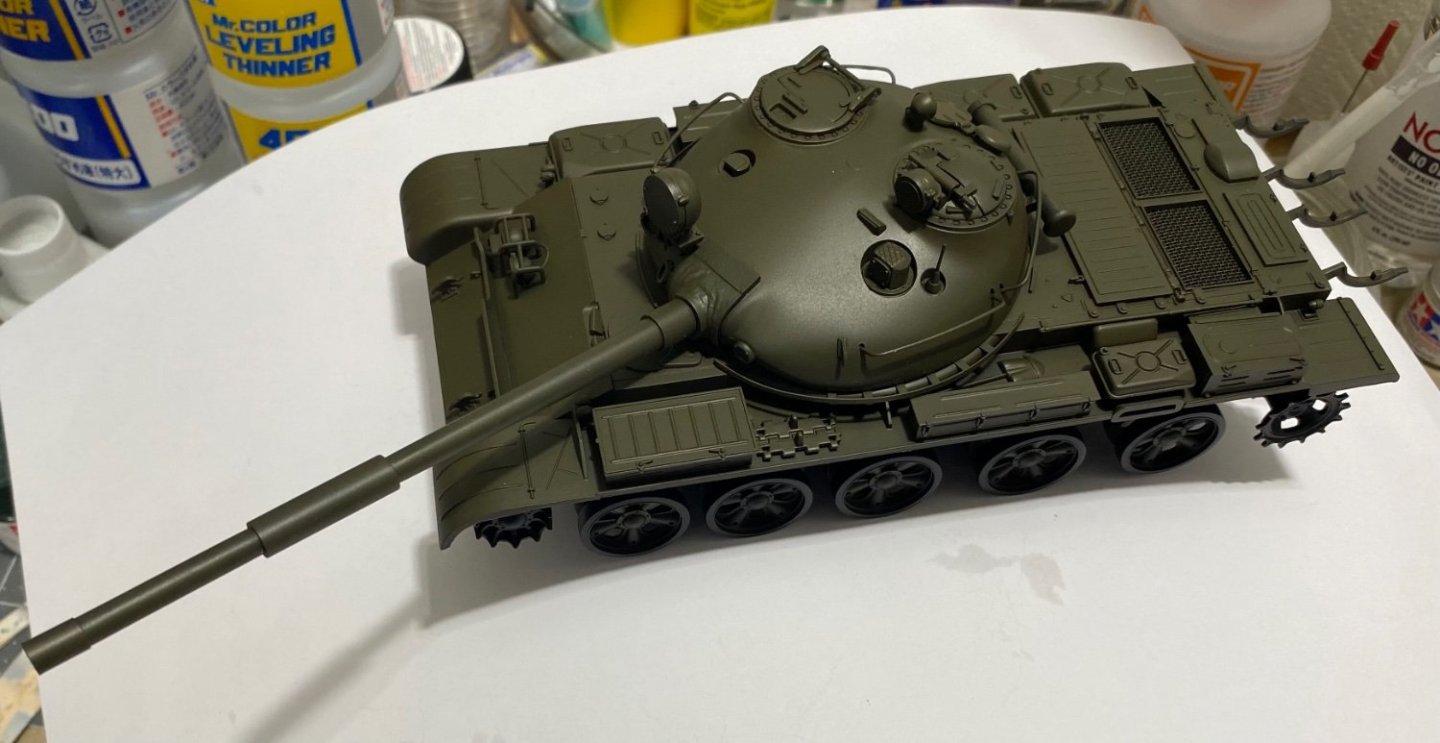
Auxiliary fuel tanks added. I have opted for an aftermarket set of individual track links to replace the “rubber band” tracks included with the Tamiya kit. A cheap but effective upgrade I think.
- 67 replies
-
- 10
-

-
Russian T-62A Tank by CDW - Tamiya - 1/35 Scale FINISHED
CDW replied to CDW's topic in Non-ship/categorised builds
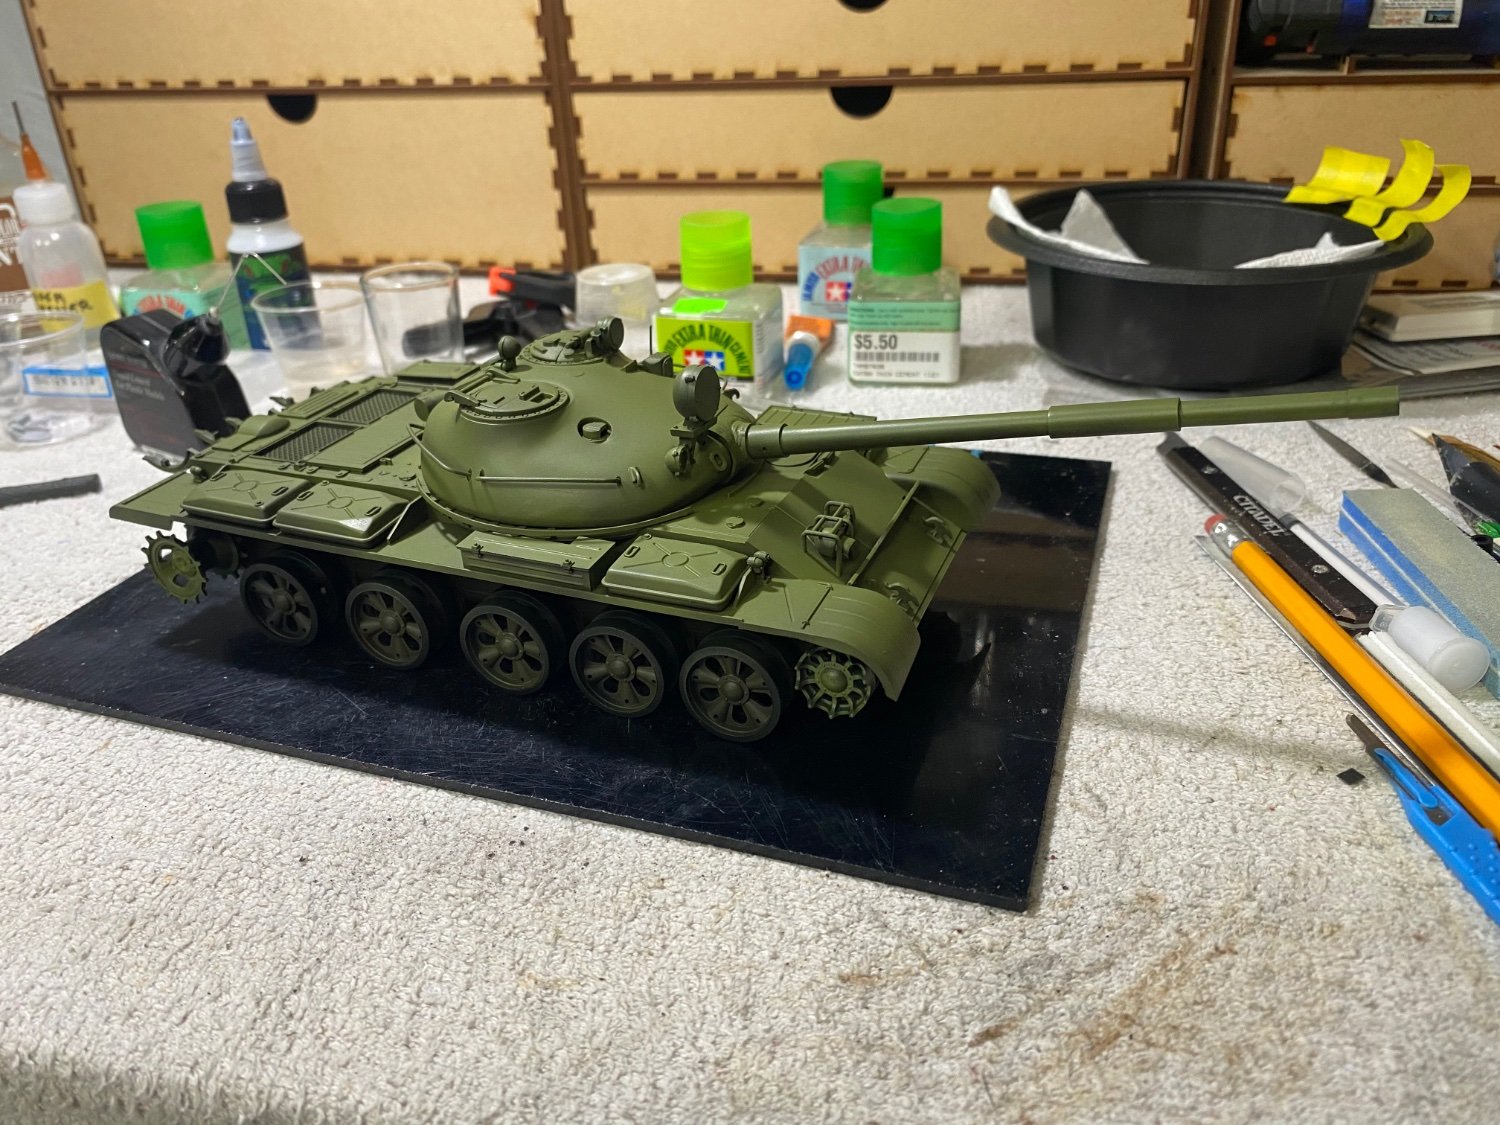
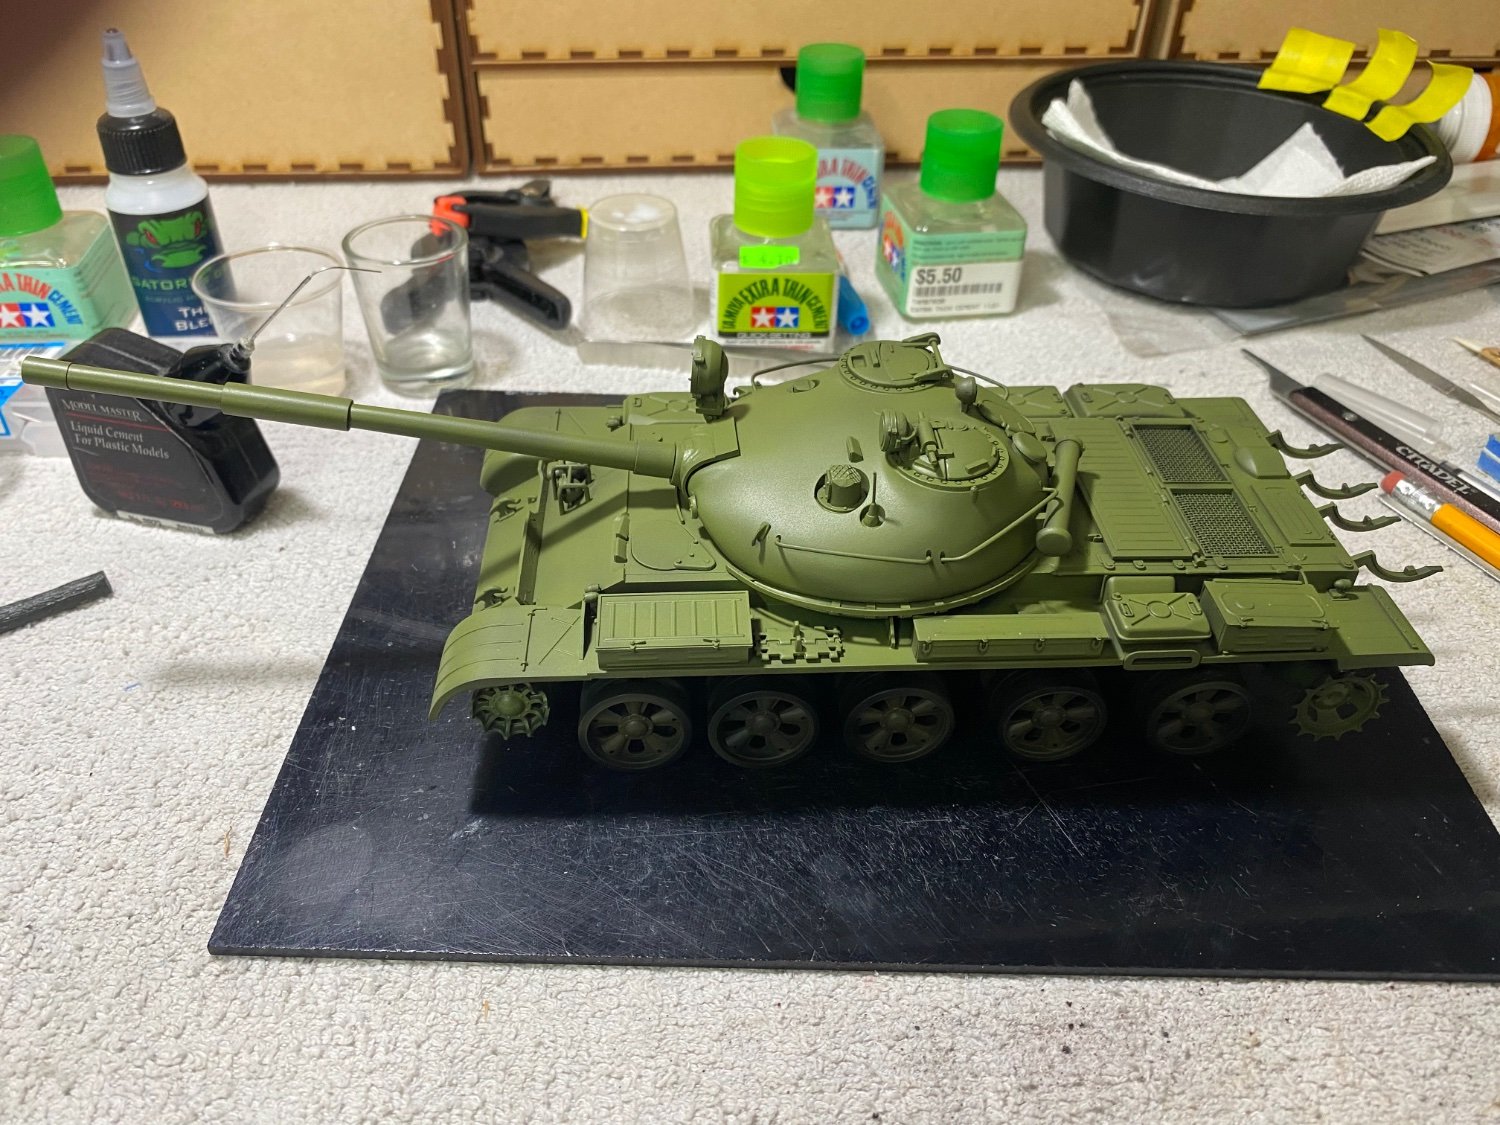
Next, the entire model is given a light wash/filter of light rust.
- 67 replies
-
- 13
-
-
Russian T-62A Tank by CDW - Tamiya - 1/35 Scale FINISHED
CDW replied to CDW's topic in Non-ship/categorised builds
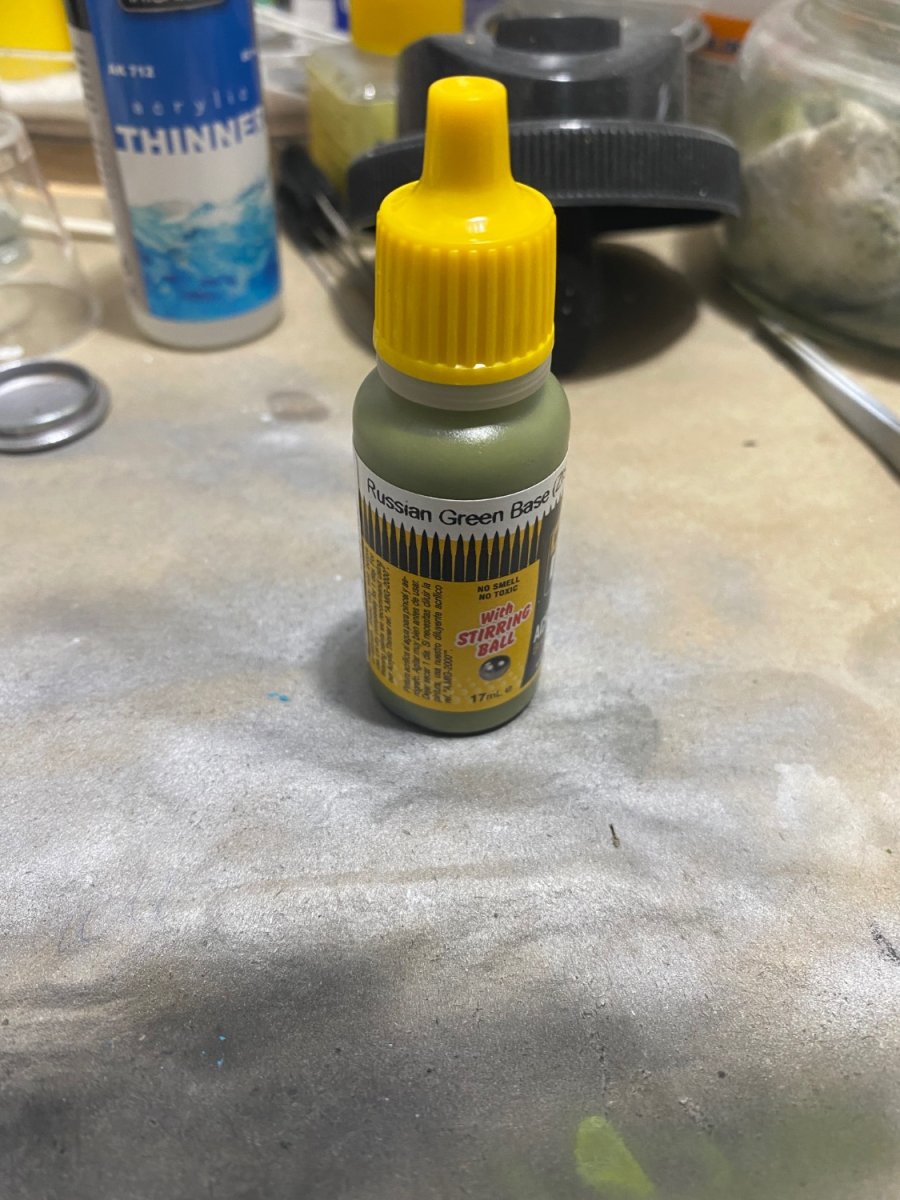
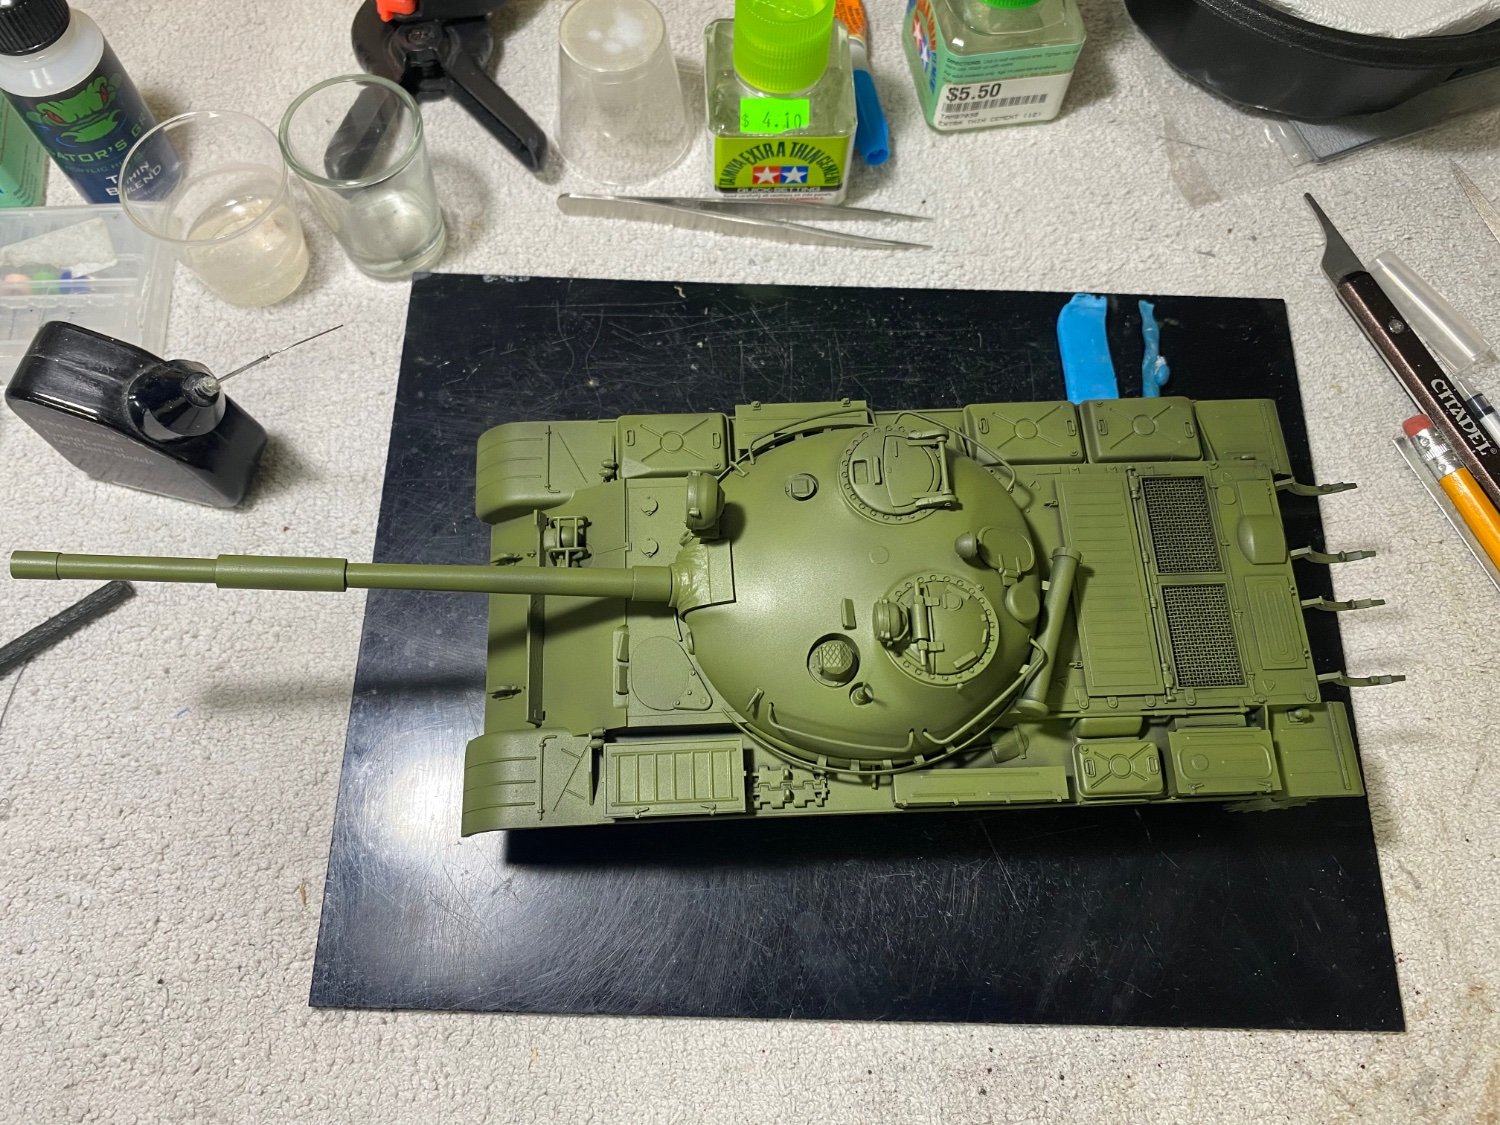
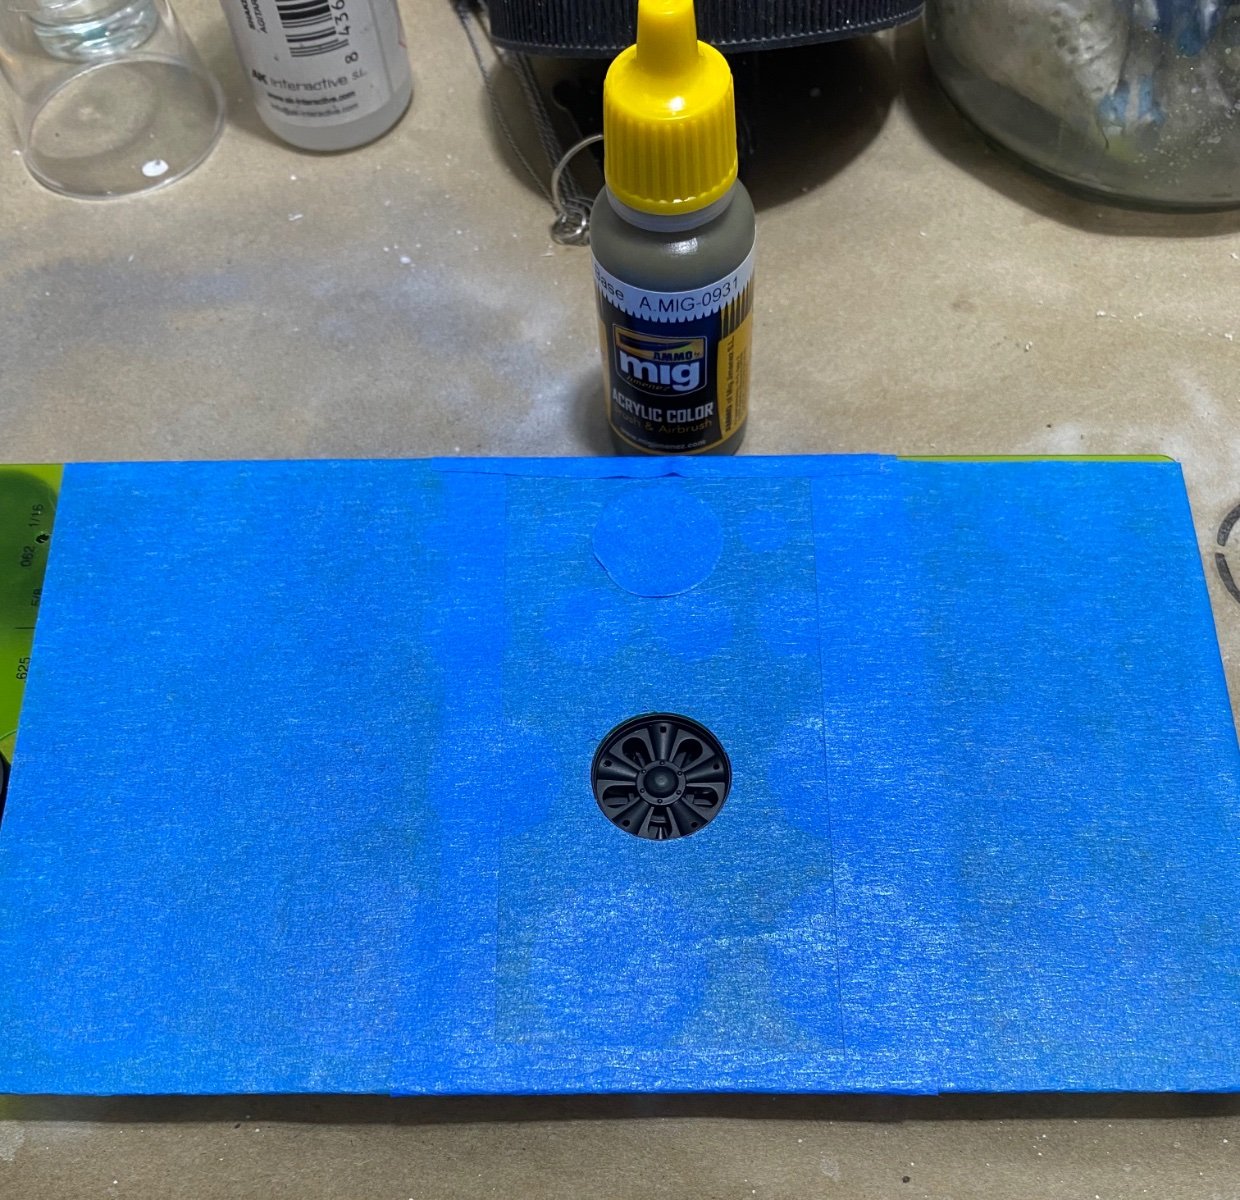
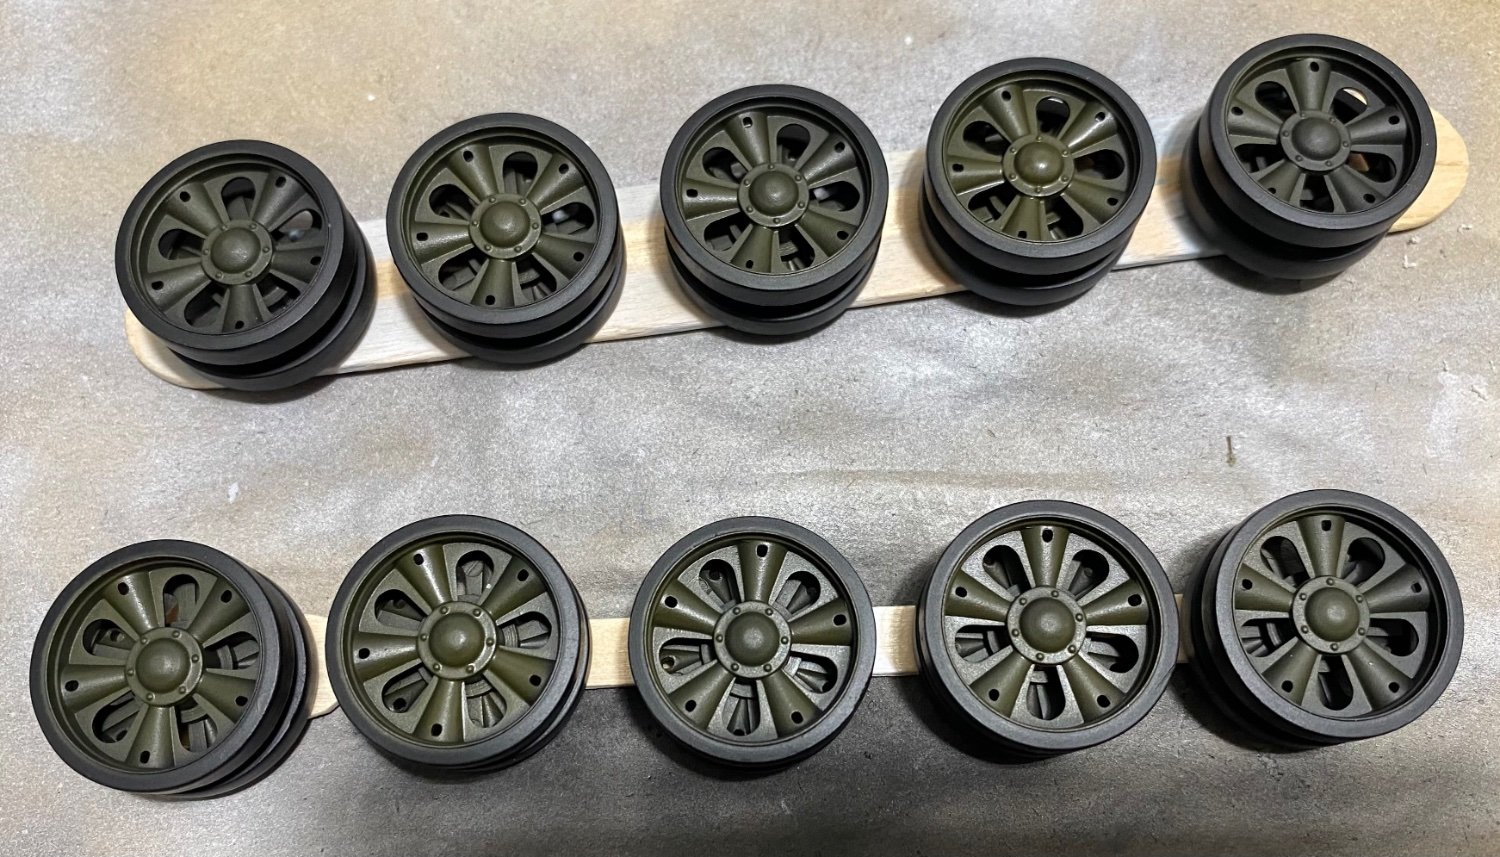
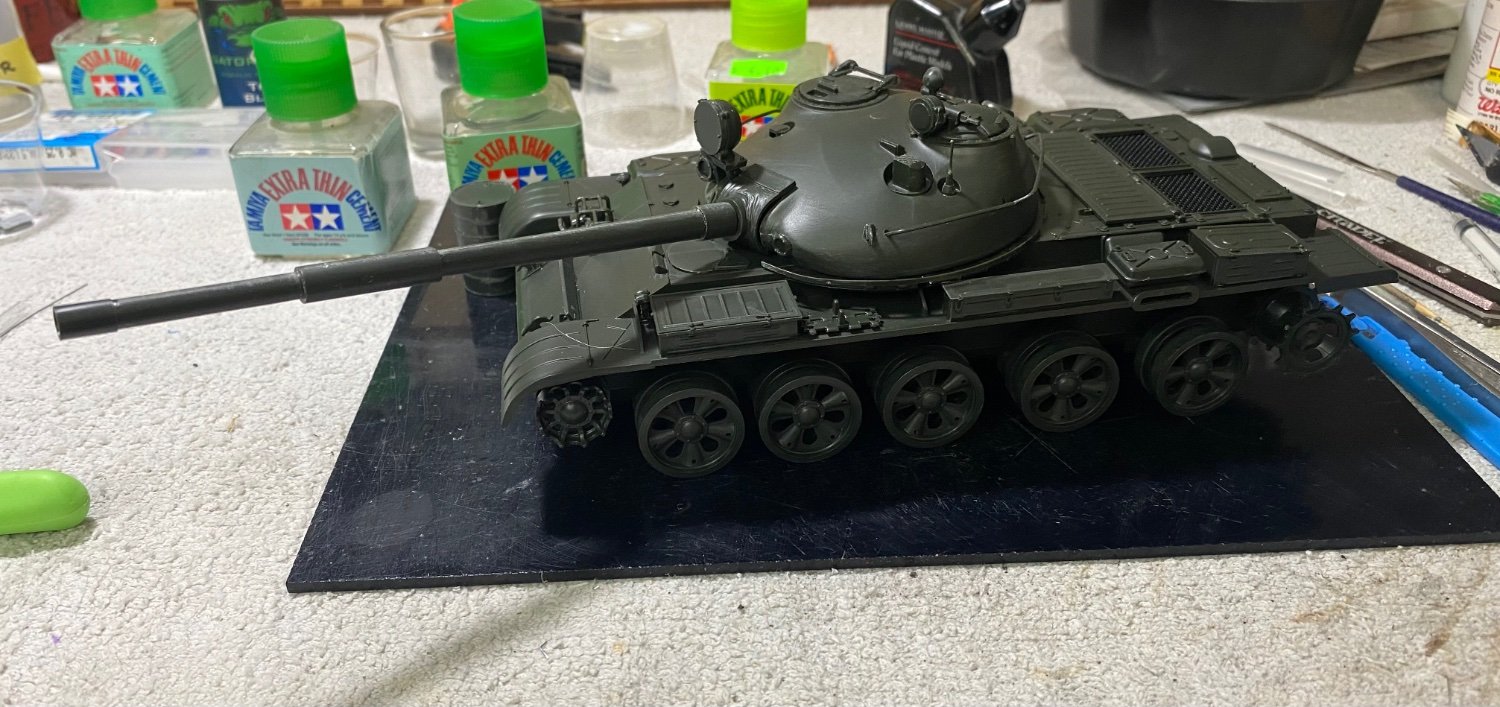
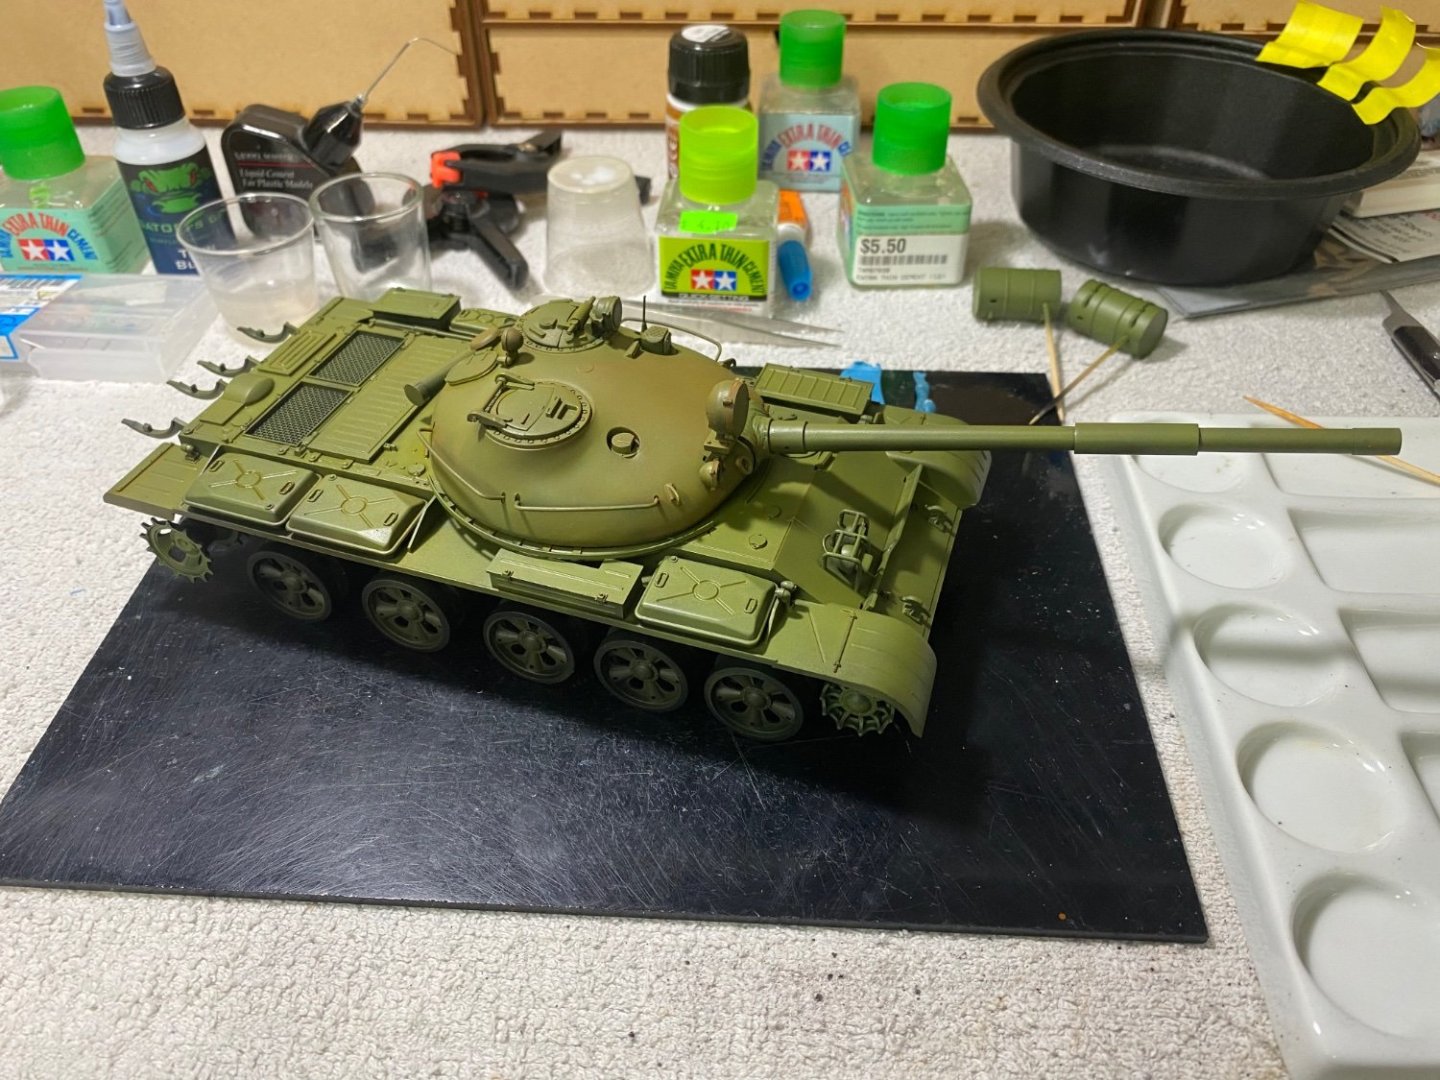
Next is a light coat of a lighter shade of Russian Base Green. All my finishing paints will be ZMig Ammo acrylics. My local dealer has been running a sale price. Nice discount and great supply-selection.


- 67 replies
-
- 14
-
-
Russian T-62A Tank by CDW - Tamiya - 1/35 Scale FINISHED
CDW replied to CDW's topic in Non-ship/categorised builds
Will do that if I cross over! -
Russian T-62A Tank by CDW - Tamiya - 1/35 Scale FINISHED
CDW replied to CDW's topic in Non-ship/categorised builds
Do both. Watch reference videos of the model subject you are building. It’s a lot less expensive than buying reference books. Reference books are a rabbit hole all their own. -
Russian T-62A Tank by CDW - Tamiya - 1/35 Scale FINISHED
CDW replied to CDW's topic in Non-ship/categorised builds
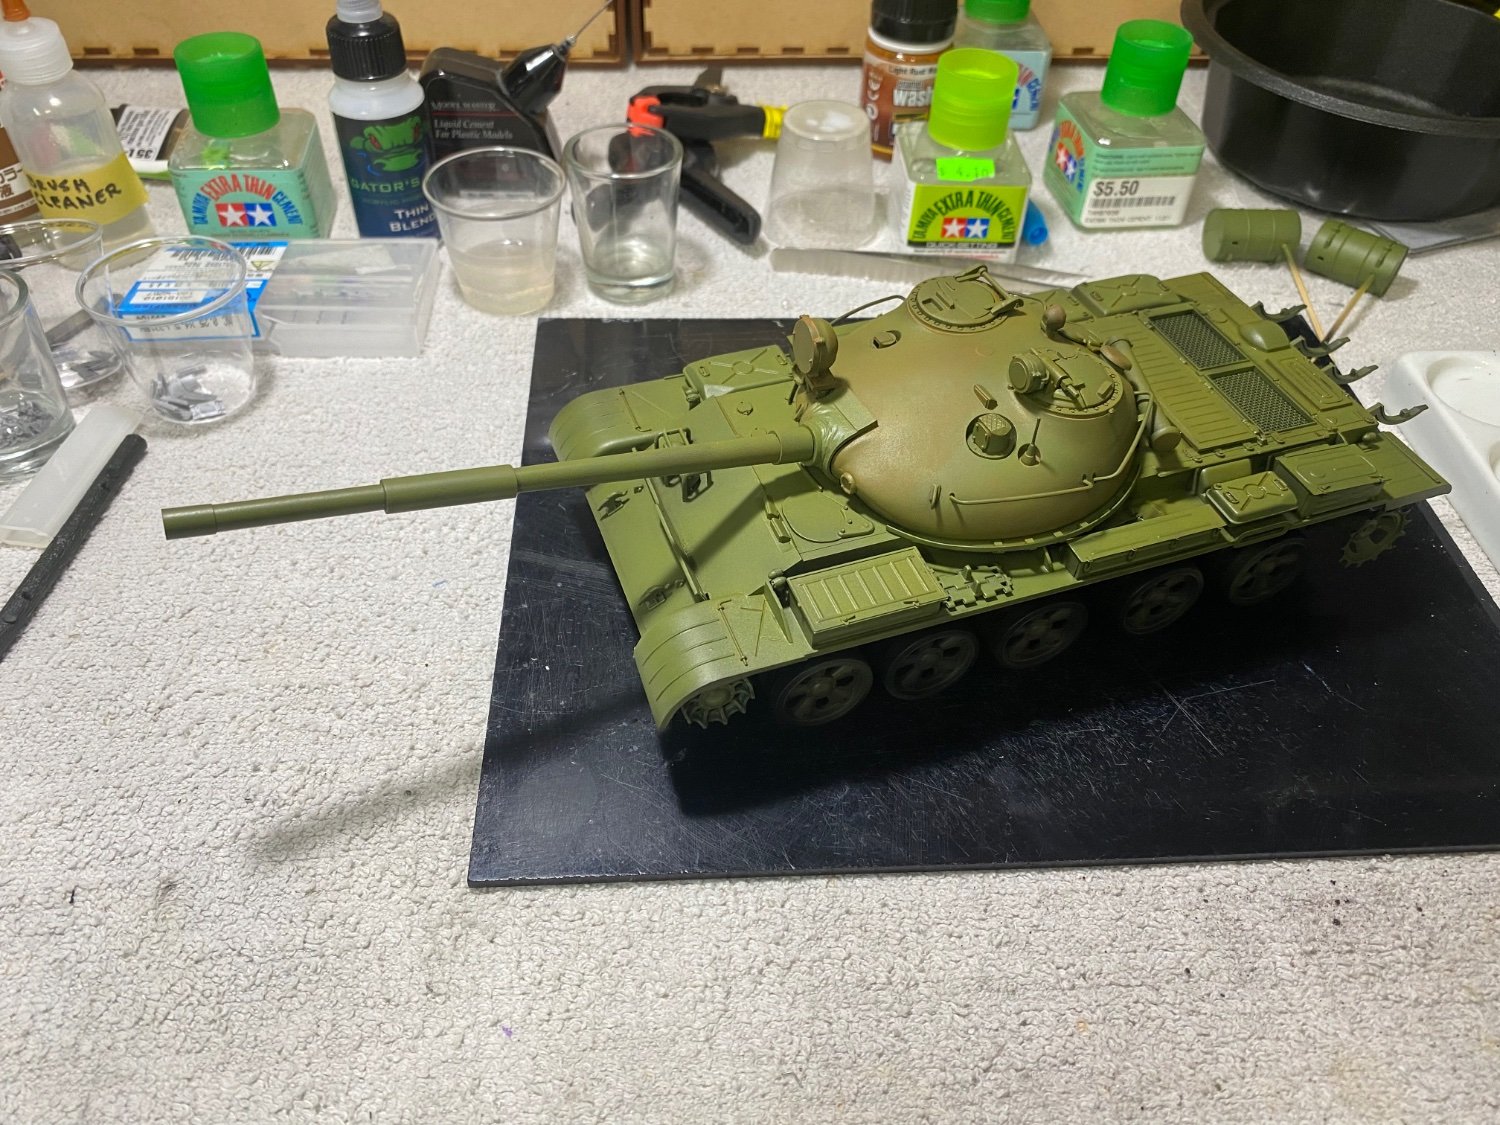
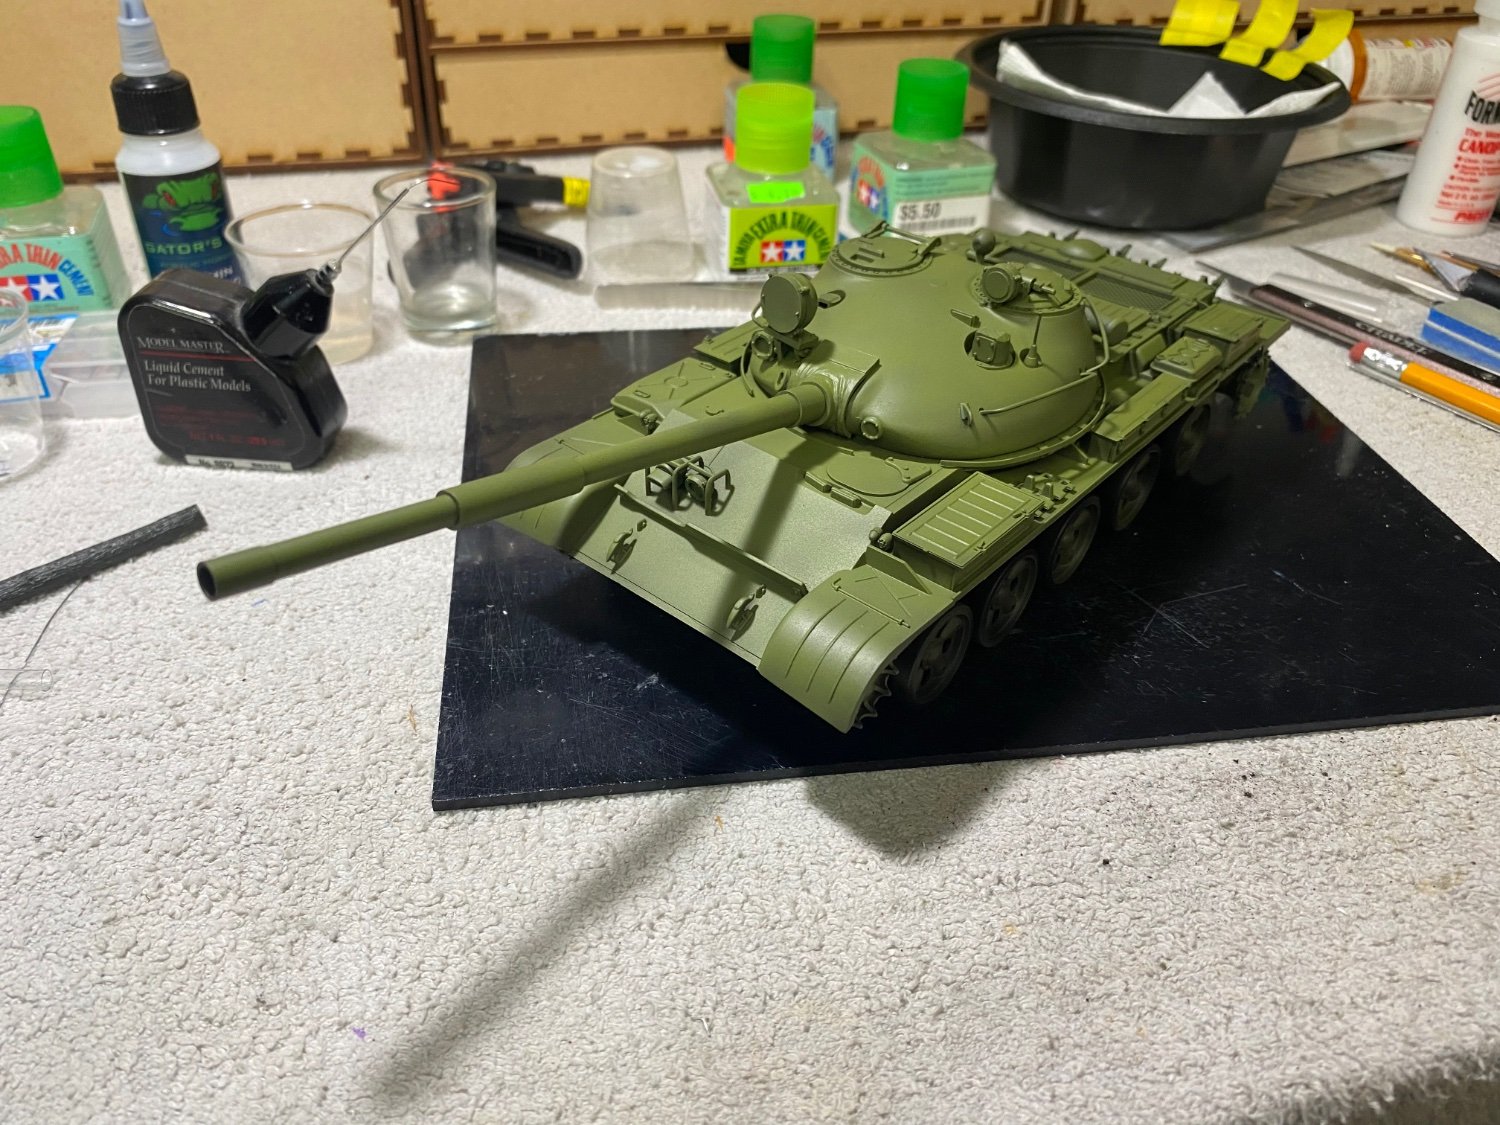
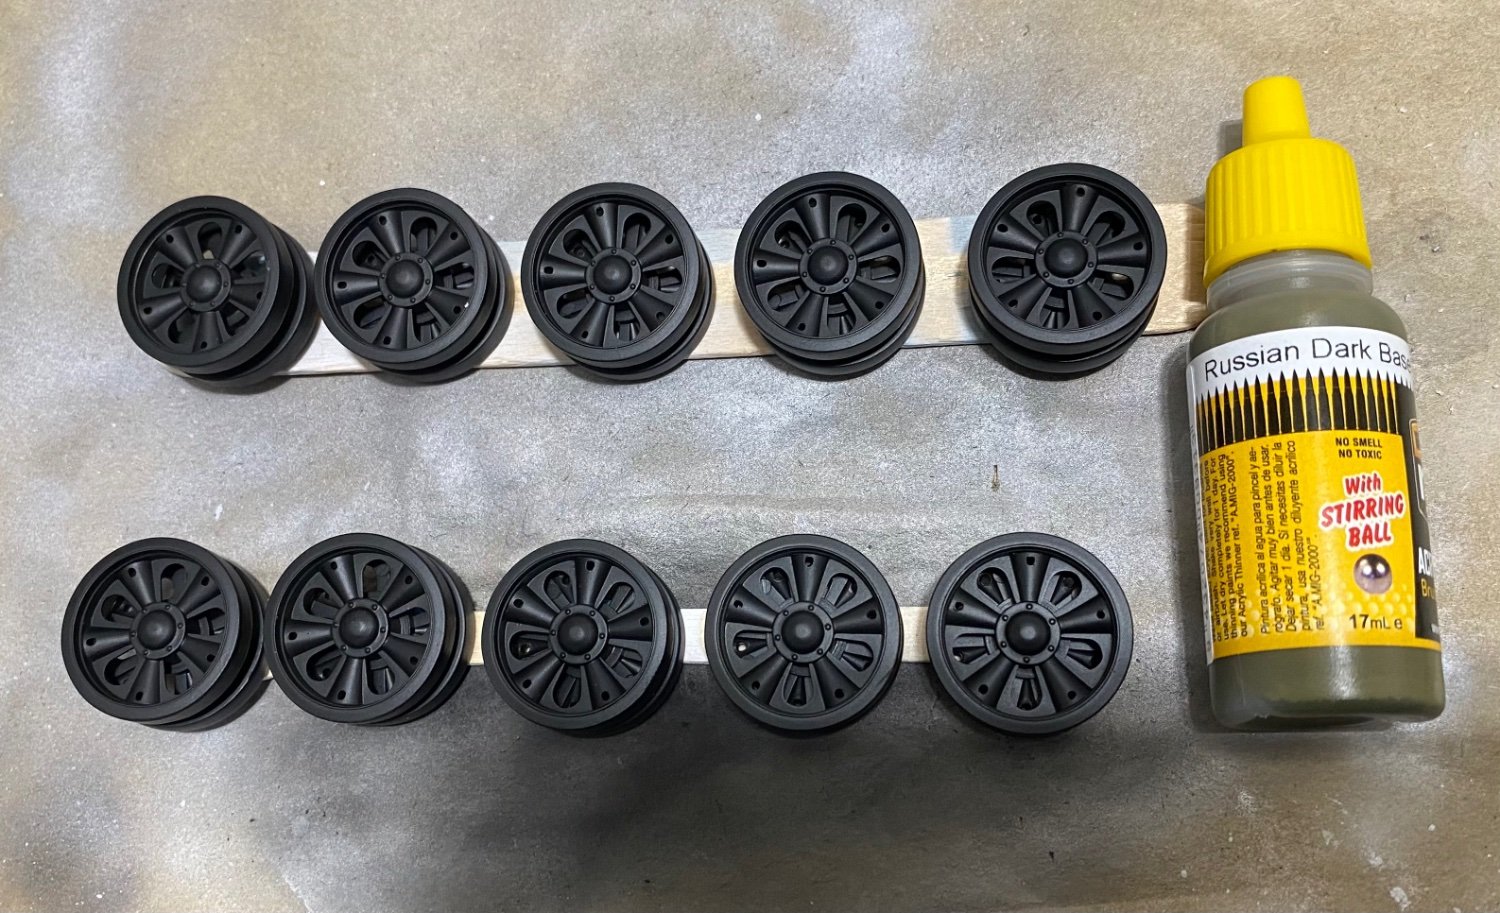
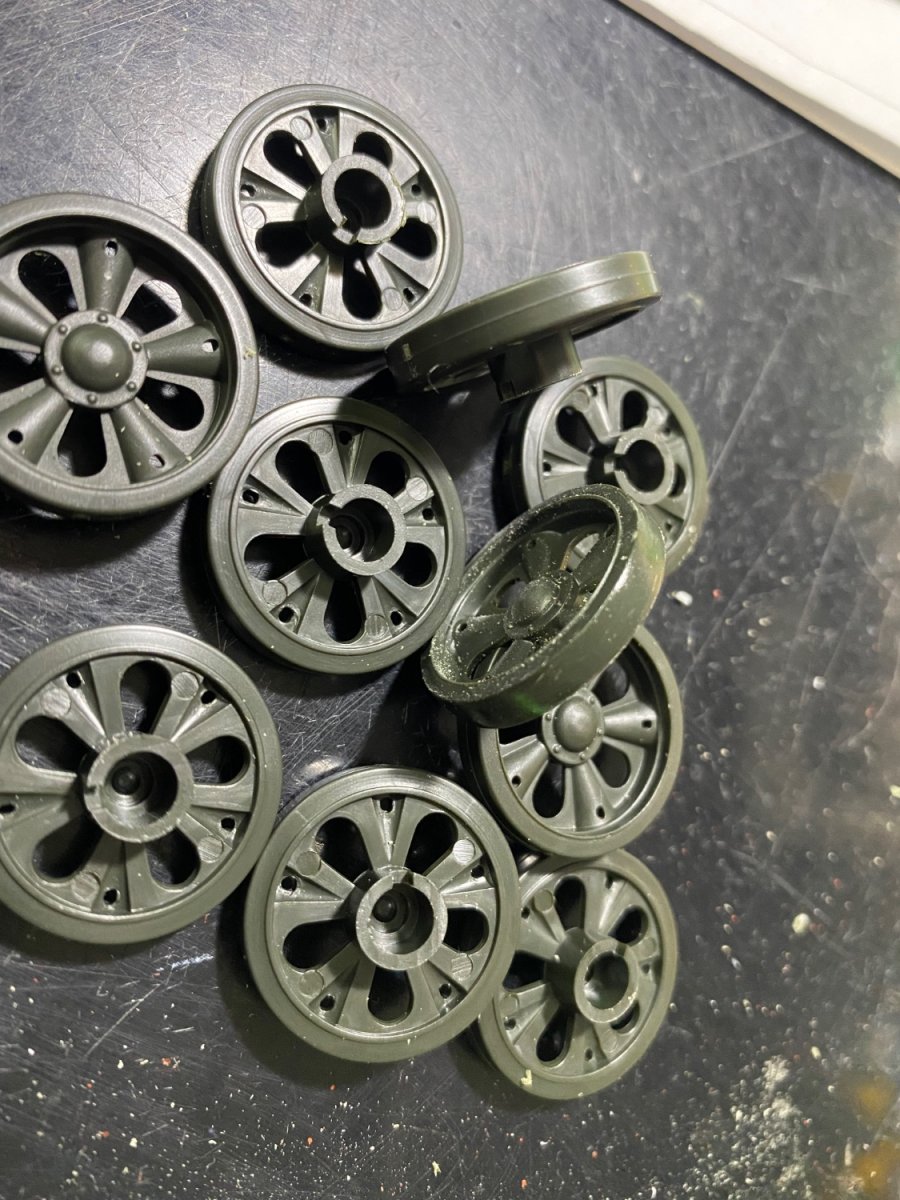
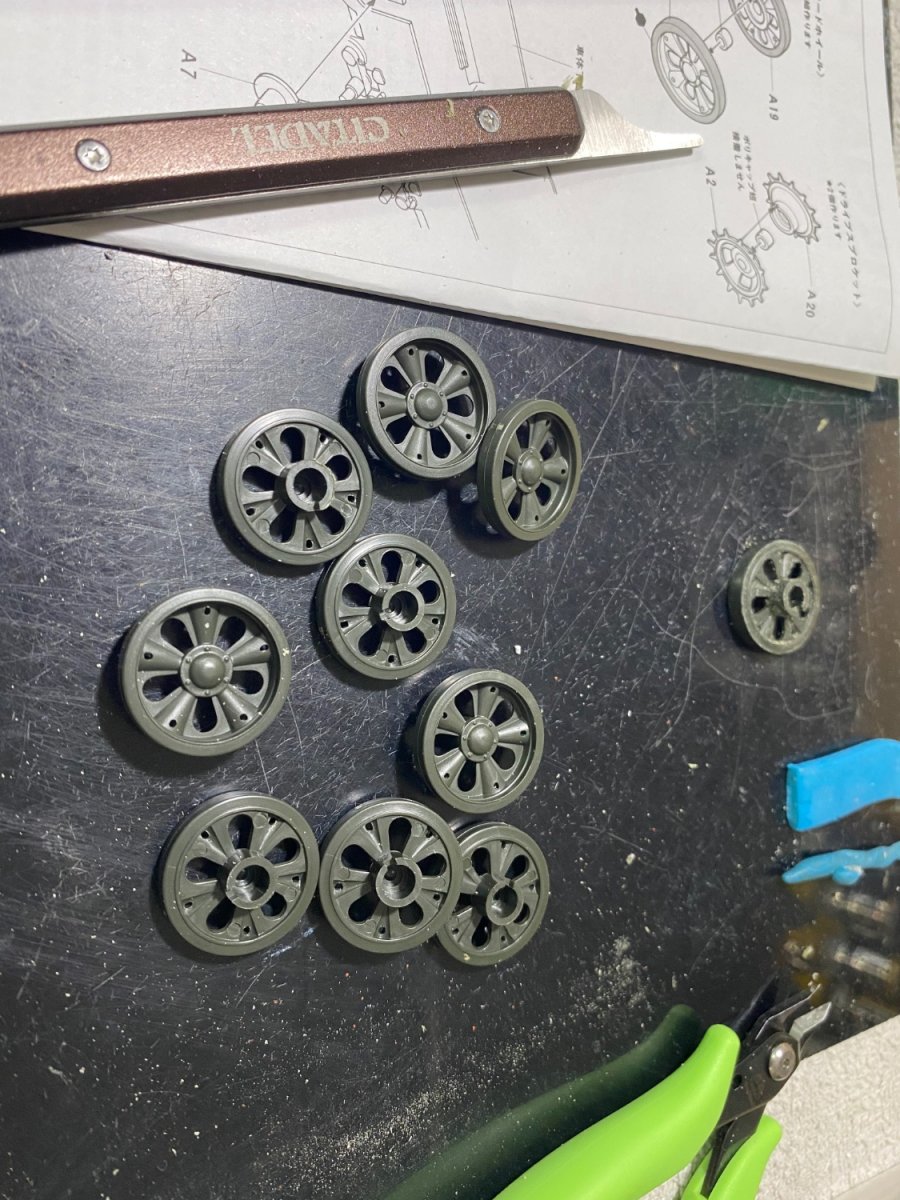
First color coat will be Russian Dark Base by Mig Ammo. A circle template is a must when painting armored vehicle road wheels. Makes short work of what can be a tedious chore with a brush or masking tape.


- 67 replies
-
- 11
-
-
Russian T-62A Tank by CDW - Tamiya - 1/35 Scale FINISHED
CDW replied to CDW's topic in Non-ship/categorised builds
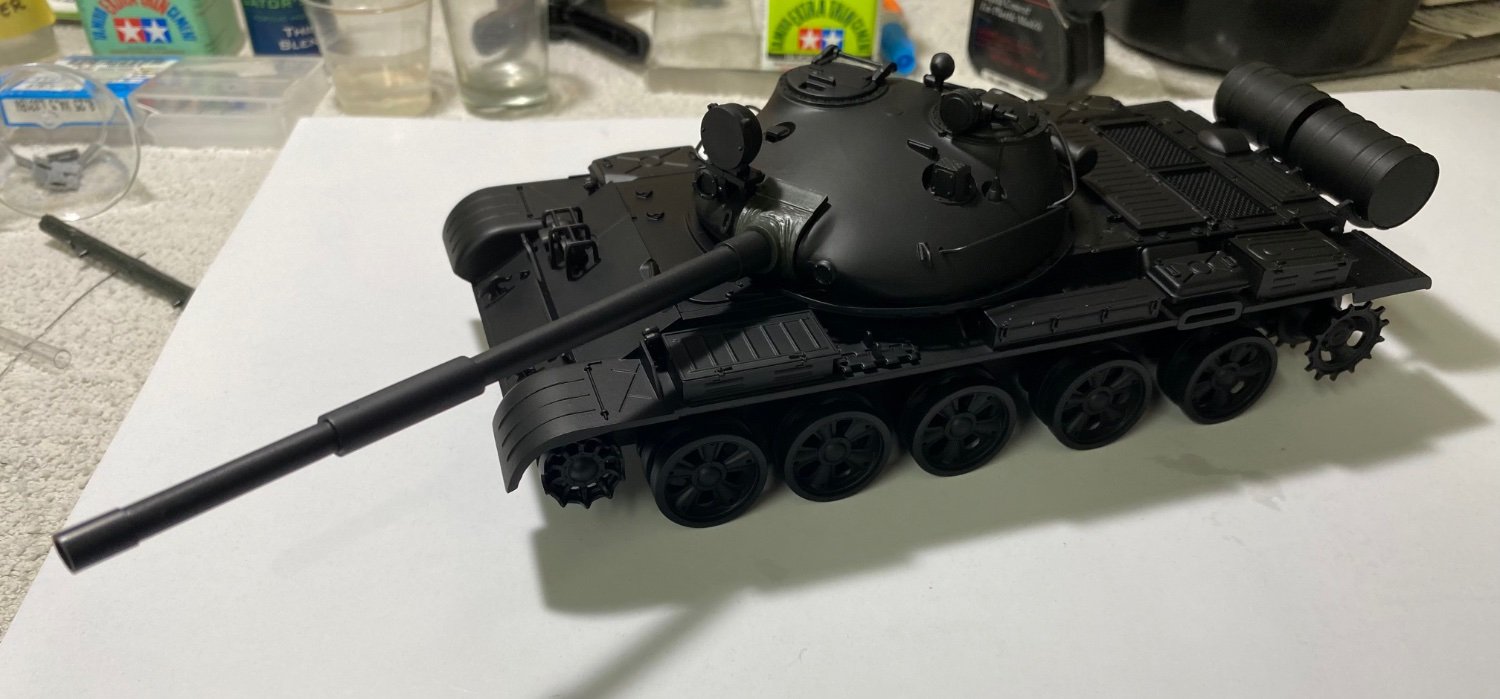
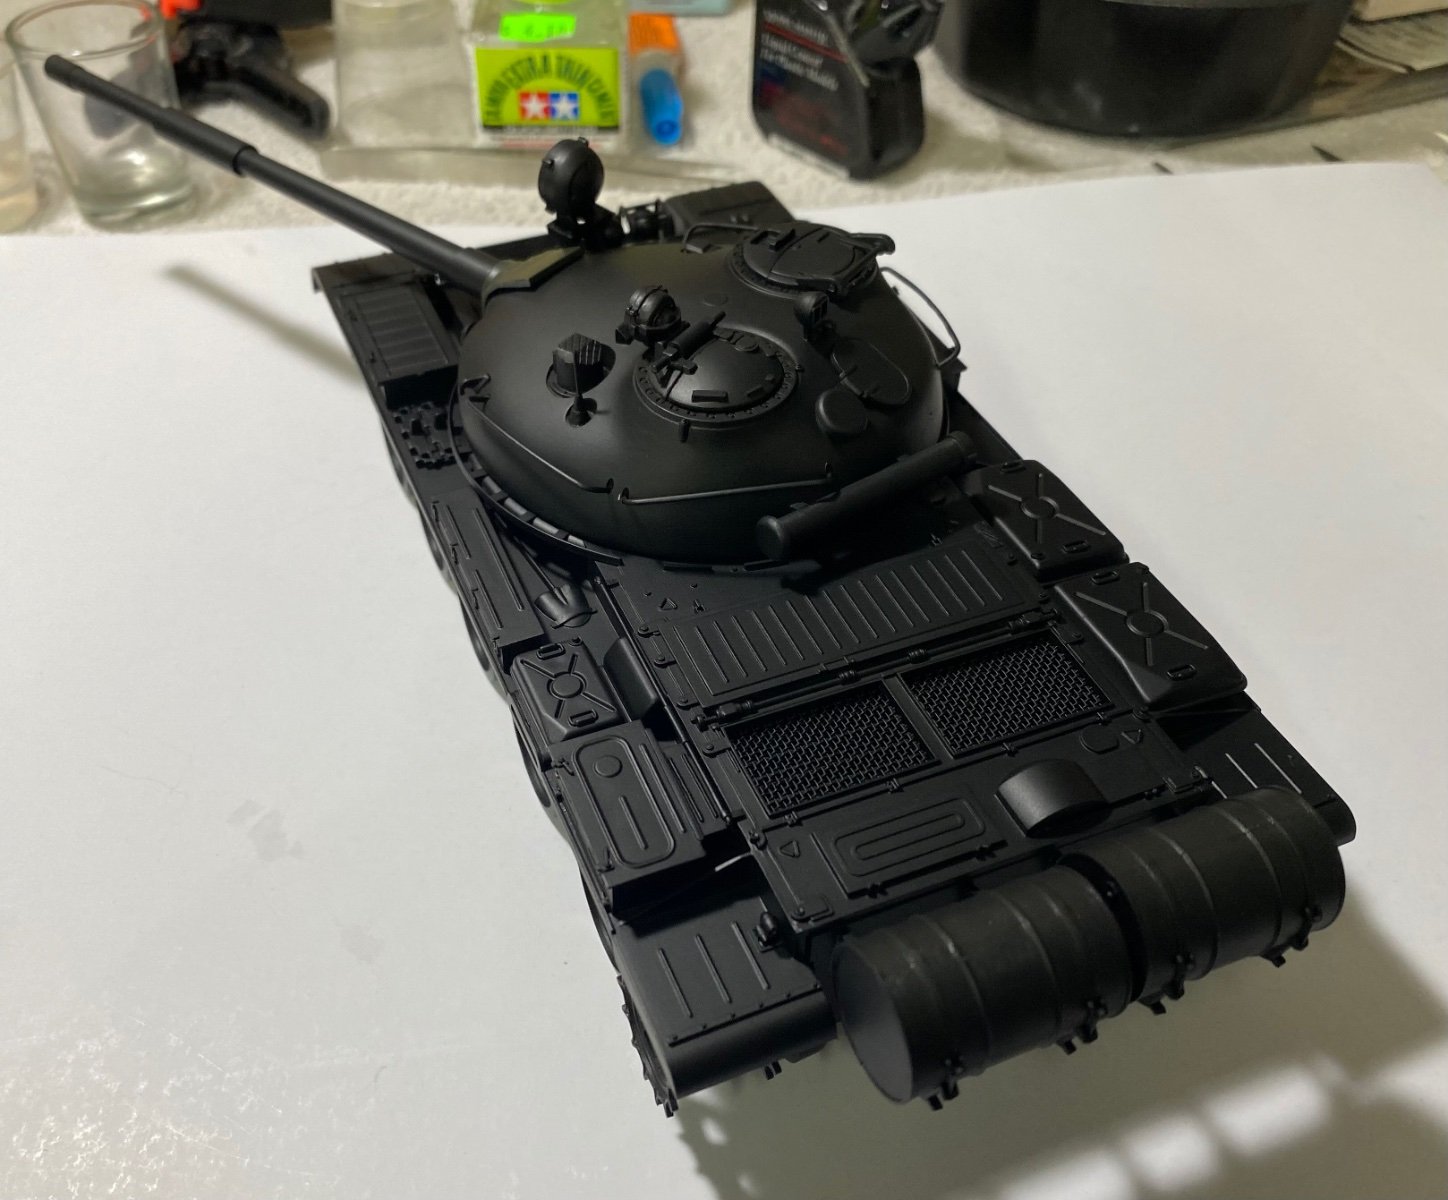
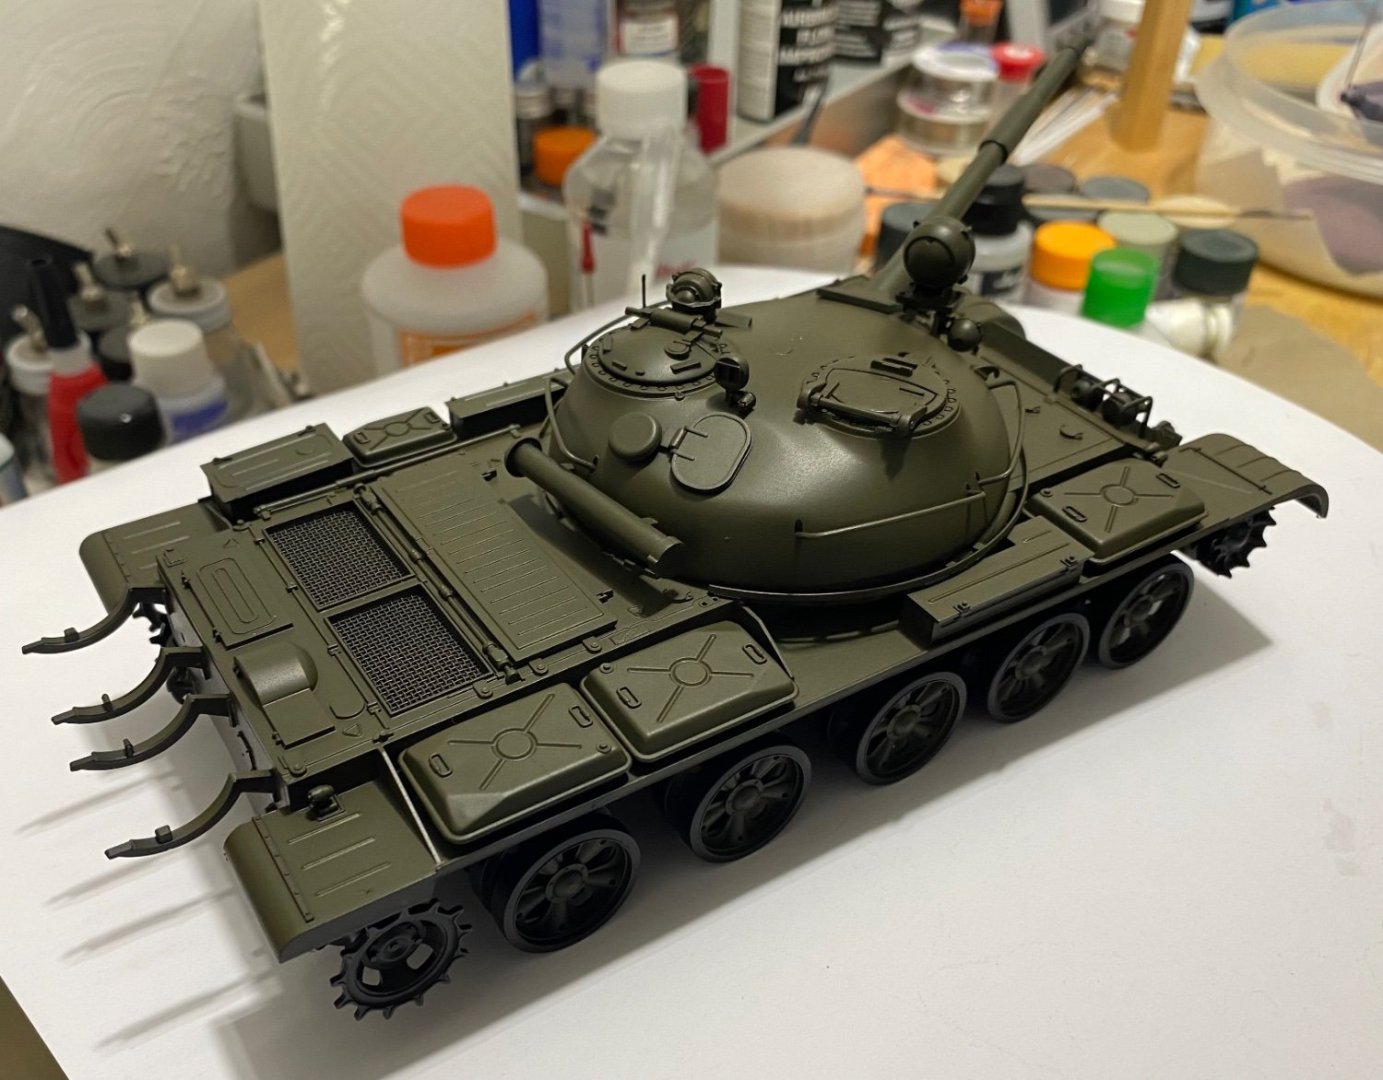
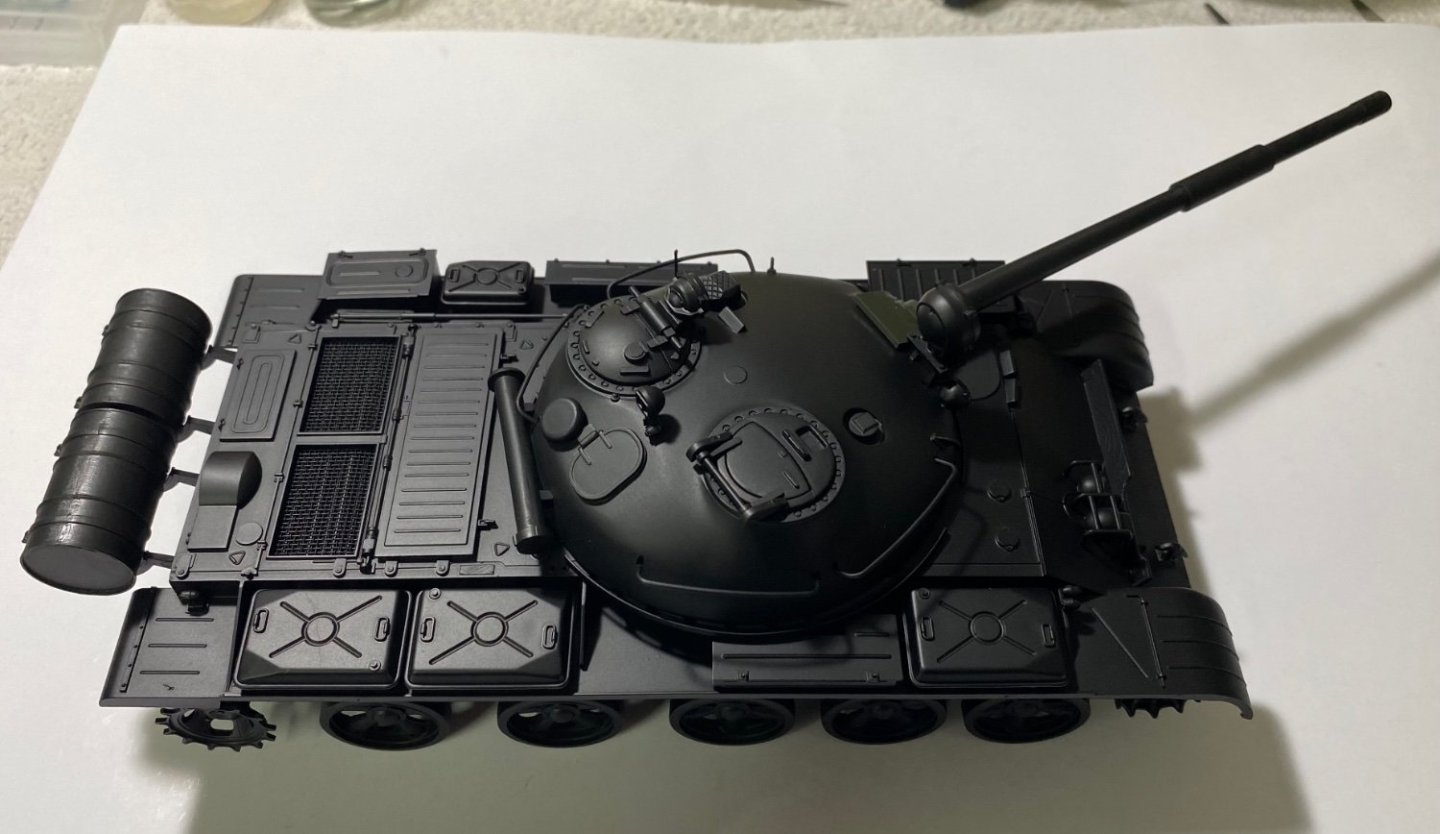
With primer in place, will start color coats next. I’ve used Mr Surfacer 1500 black for the primer, reduced to six parts reducer : four parts paint. It delivers a smooth surface for the color coats.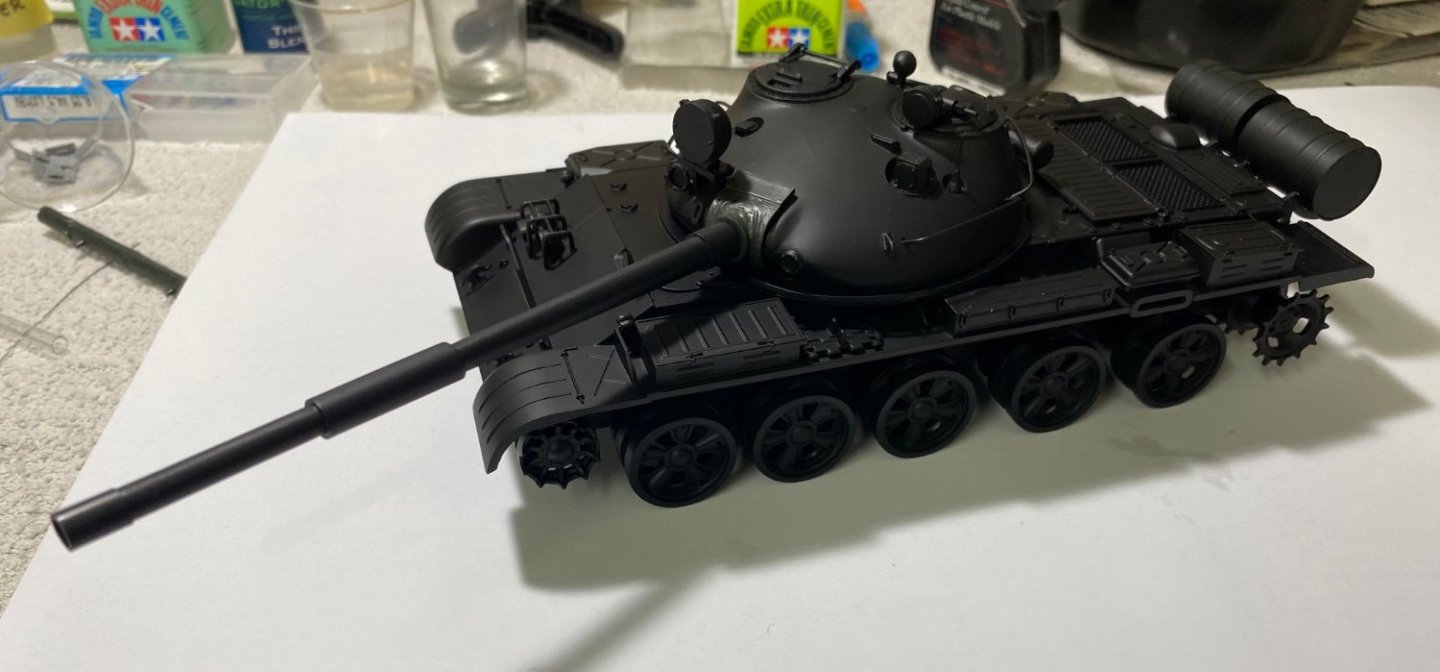
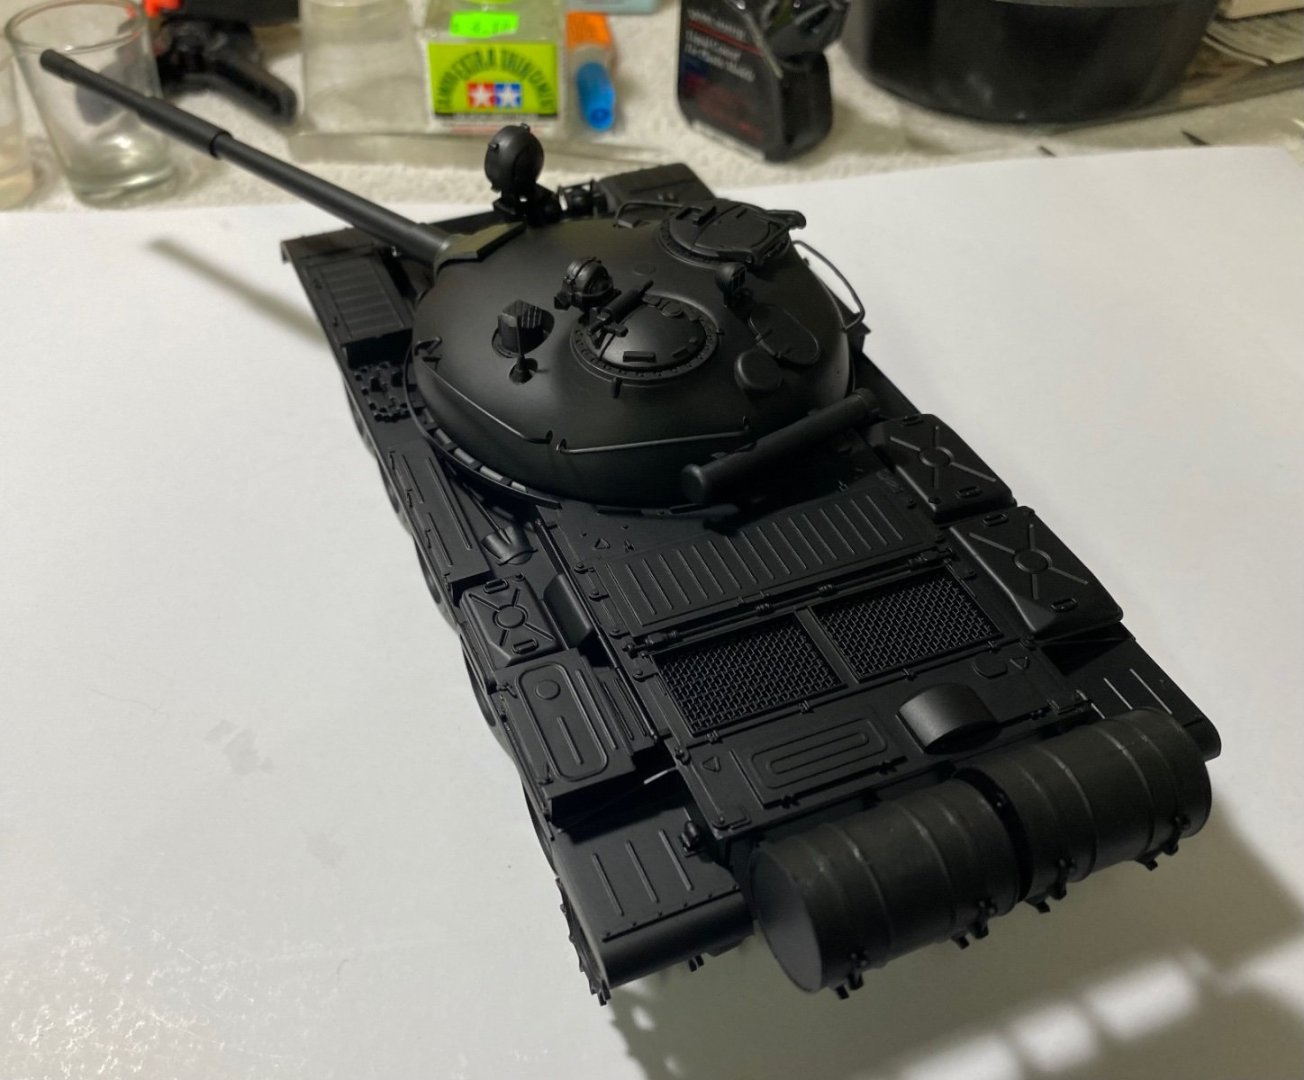


- 67 replies
-
- 10
-
-
Russian T-62A Tank by CDW - Tamiya - 1/35 Scale FINISHED
CDW replied to CDW's topic in Non-ship/categorised builds
It can readily be dropped and is optional to begin with for extended range, however I don’t think it’s a push-button arraignment from inside while the tank is moving along. 🤒 -
Russian T-62A Tank by CDW - Tamiya - 1/35 Scale FINISHED
CDW replied to CDW's topic in Non-ship/categorised builds
This I believe is a very good piece on the development and production of the T-62. It also introduces the listener to Soviet tank doctrine post WW2/lessons learned. Well worth the time to hear it out IMHO. -
Russian T-62A Tank by CDW - Tamiya - 1/35 Scale FINISHED
CDW replied to CDW's topic in Non-ship/categorised builds
All are external fuel tanks. As Lou said, the two drums in the rear are jettison-able to provide two hundred extra km range, with a total range of six hundred km with the added rear drums. -
Russian T-62A Tank by CDW - Tamiya - 1/35 Scale FINISHED
CDW replied to CDW's topic in Non-ship/categorised builds
Will be ready for some paint tomorrow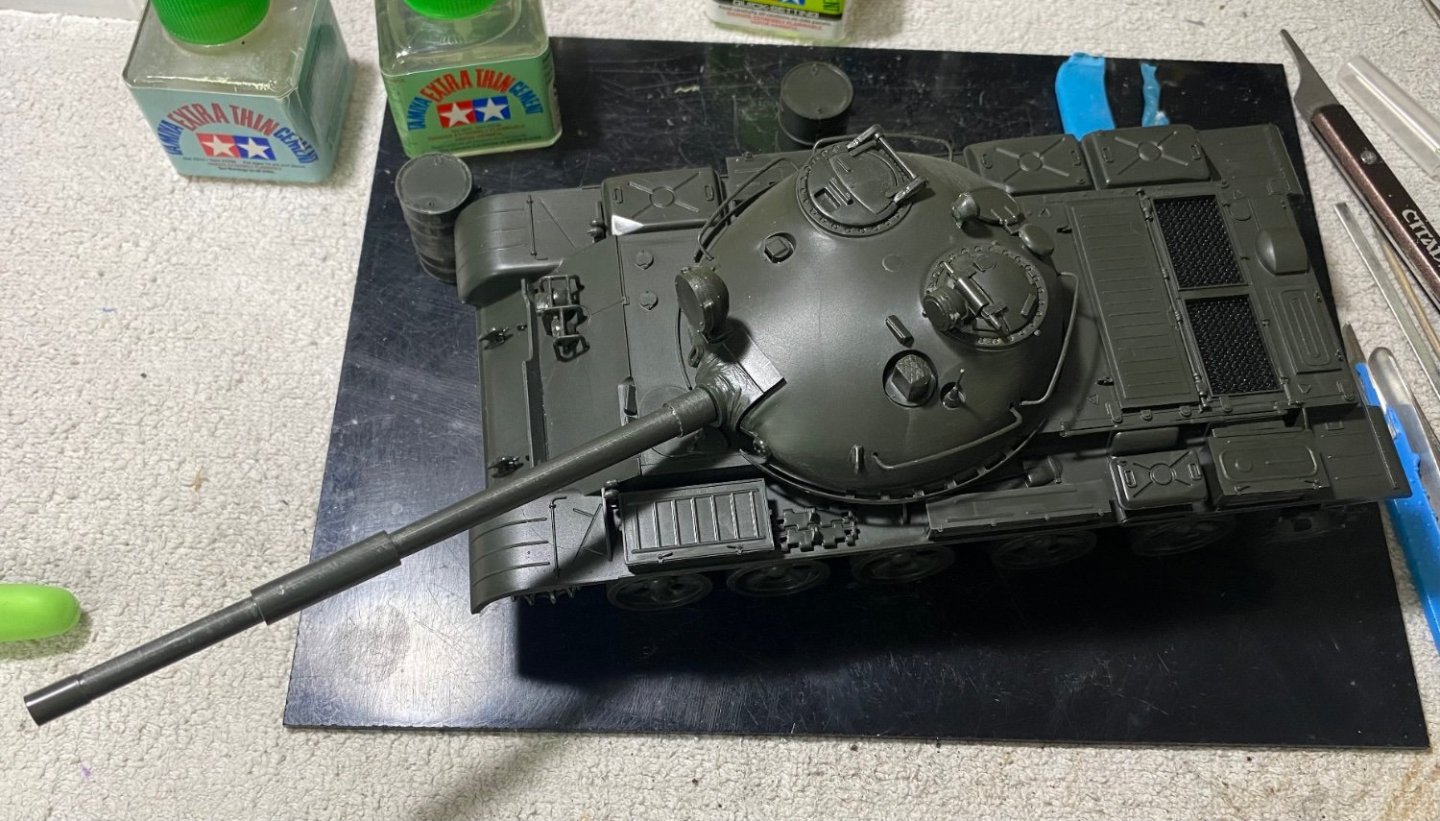

- 67 replies
-
- 14
-
-
Russian T-62A Tank by CDW - Tamiya - 1/35 Scale FINISHED
CDW replied to CDW's topic in Non-ship/categorised builds
I believe that particular flaw was shared by the T-54's, 55's, as well as the 62's. Nevertheless, well over 20,000 were produced and many remain in service still today. -
Russian T-62A Tank by CDW - Tamiya - 1/35 Scale FINISHED
CDW replied to CDW's topic in Non-ship/categorised builds
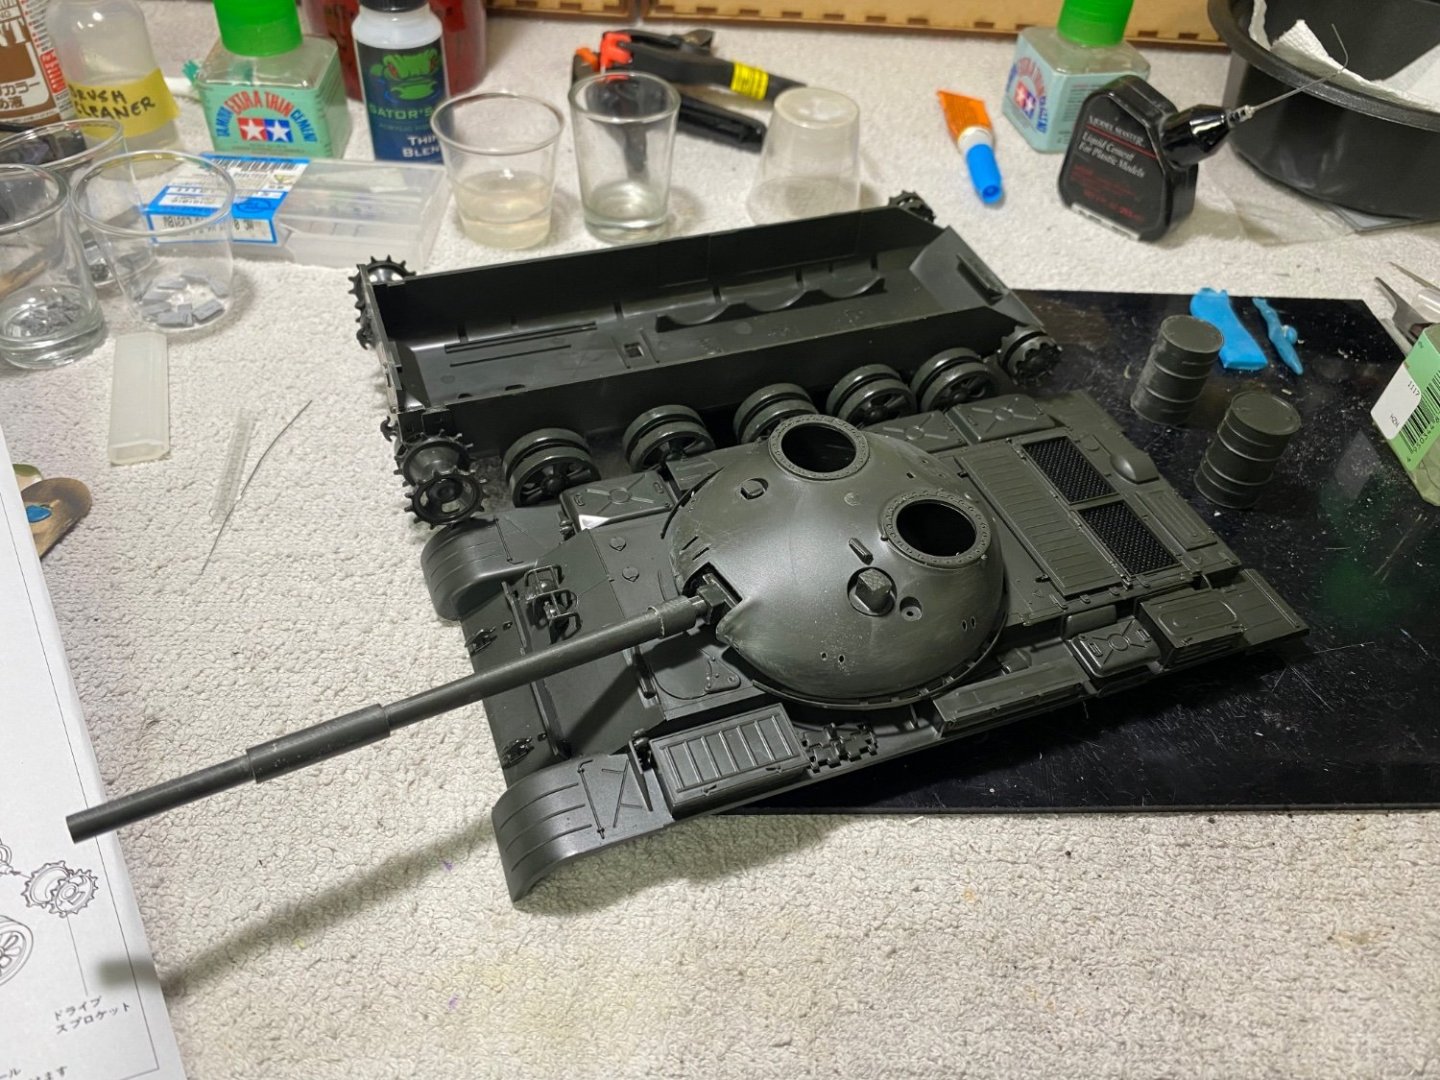
Construction of the T-62A is very simple and basic. As such, I will not be taking and posting copious photographs of the construction phase. Basic cleanup of seam lines and spruce attachment points are about all that’s required to construct a nice model. I will focus most of the future posts on this build on the finishing and painting phase. I may create some custom made stowage pieces and if I do, will provide some photos and words about that. In all, future posts will be much fewer than with the previous project. This one should be finished in rather short order due to the simple construction.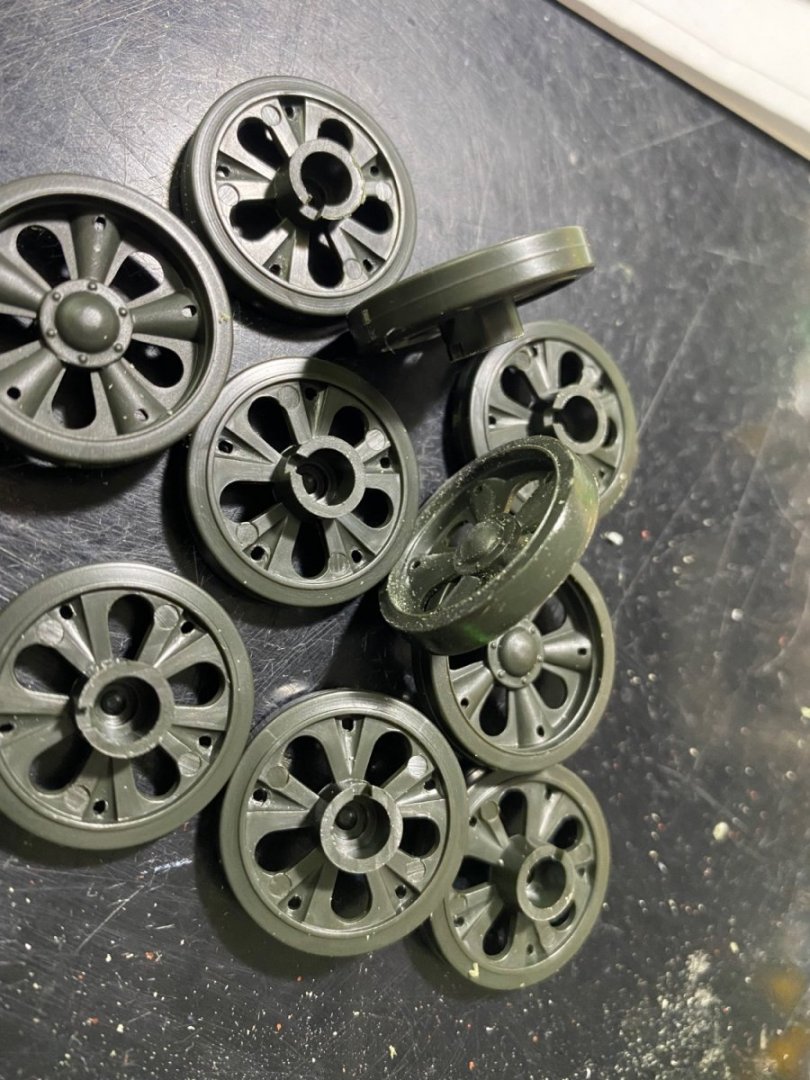

-
Russian T-62A Tank by CDW - Tamiya - 1/35 Scale FINISHED
CDW replied to CDW's topic in Non-ship/categorised builds
I am still contemplating -
The Hussar looks amazing. Great job on that OC.
-
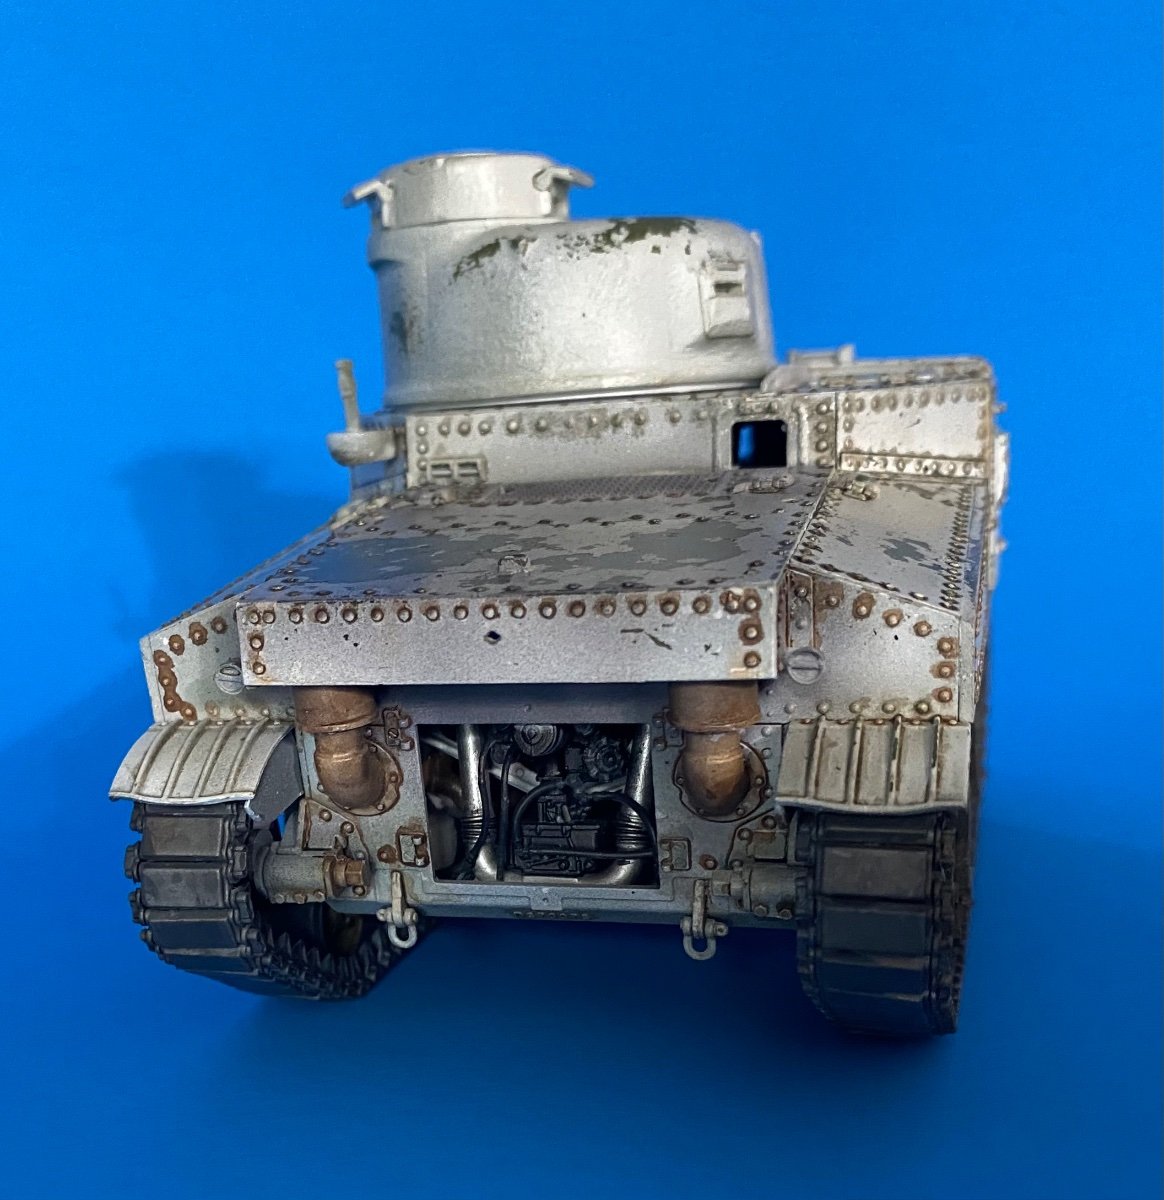
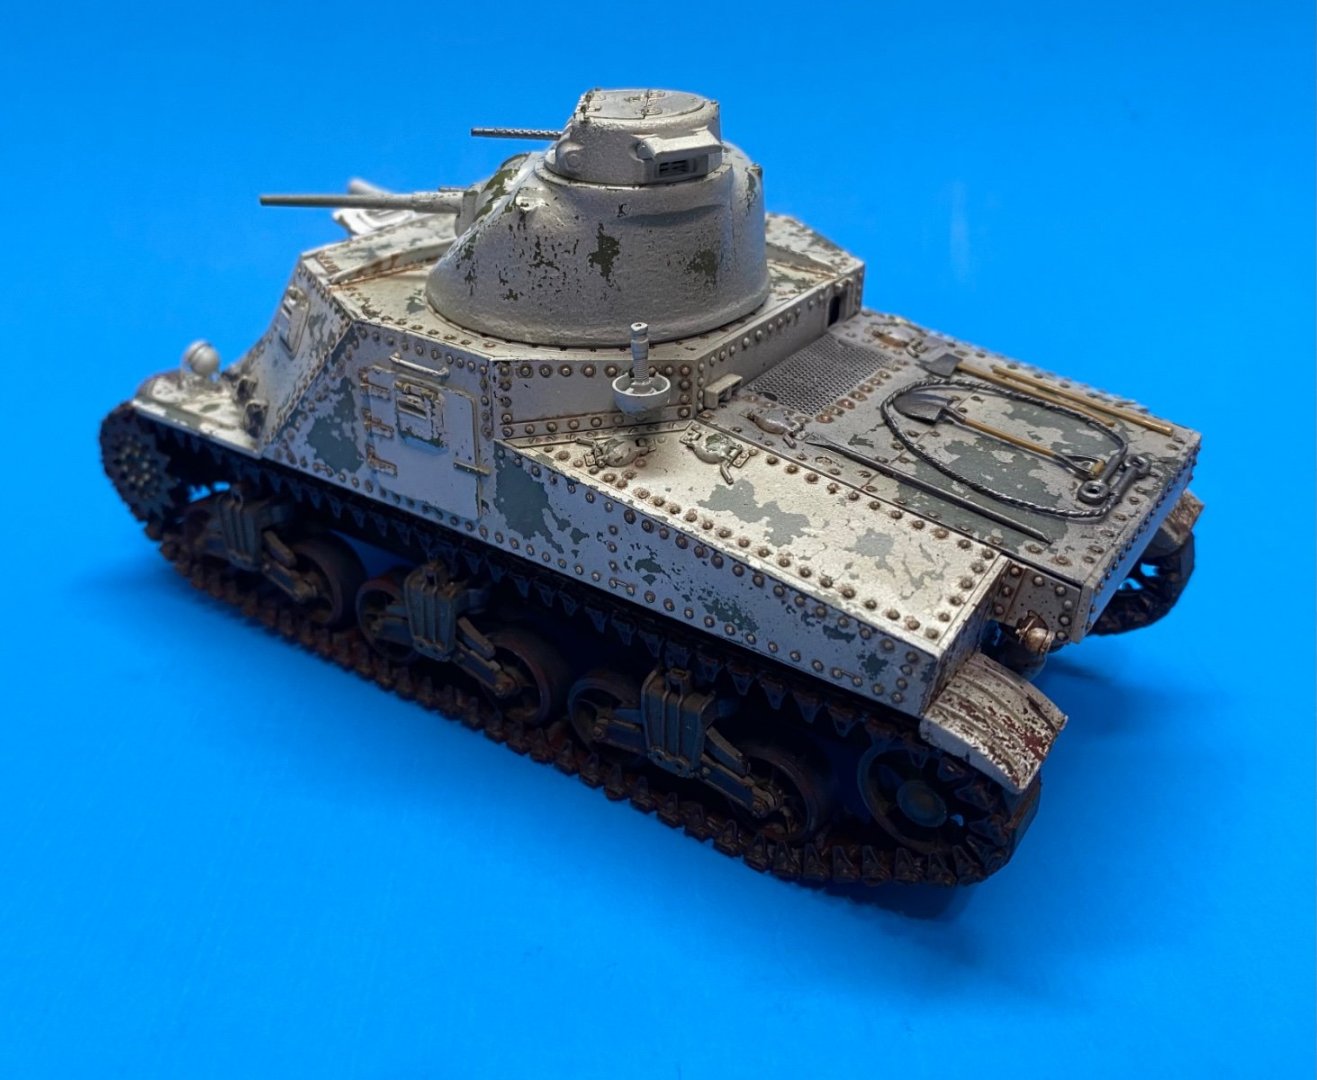
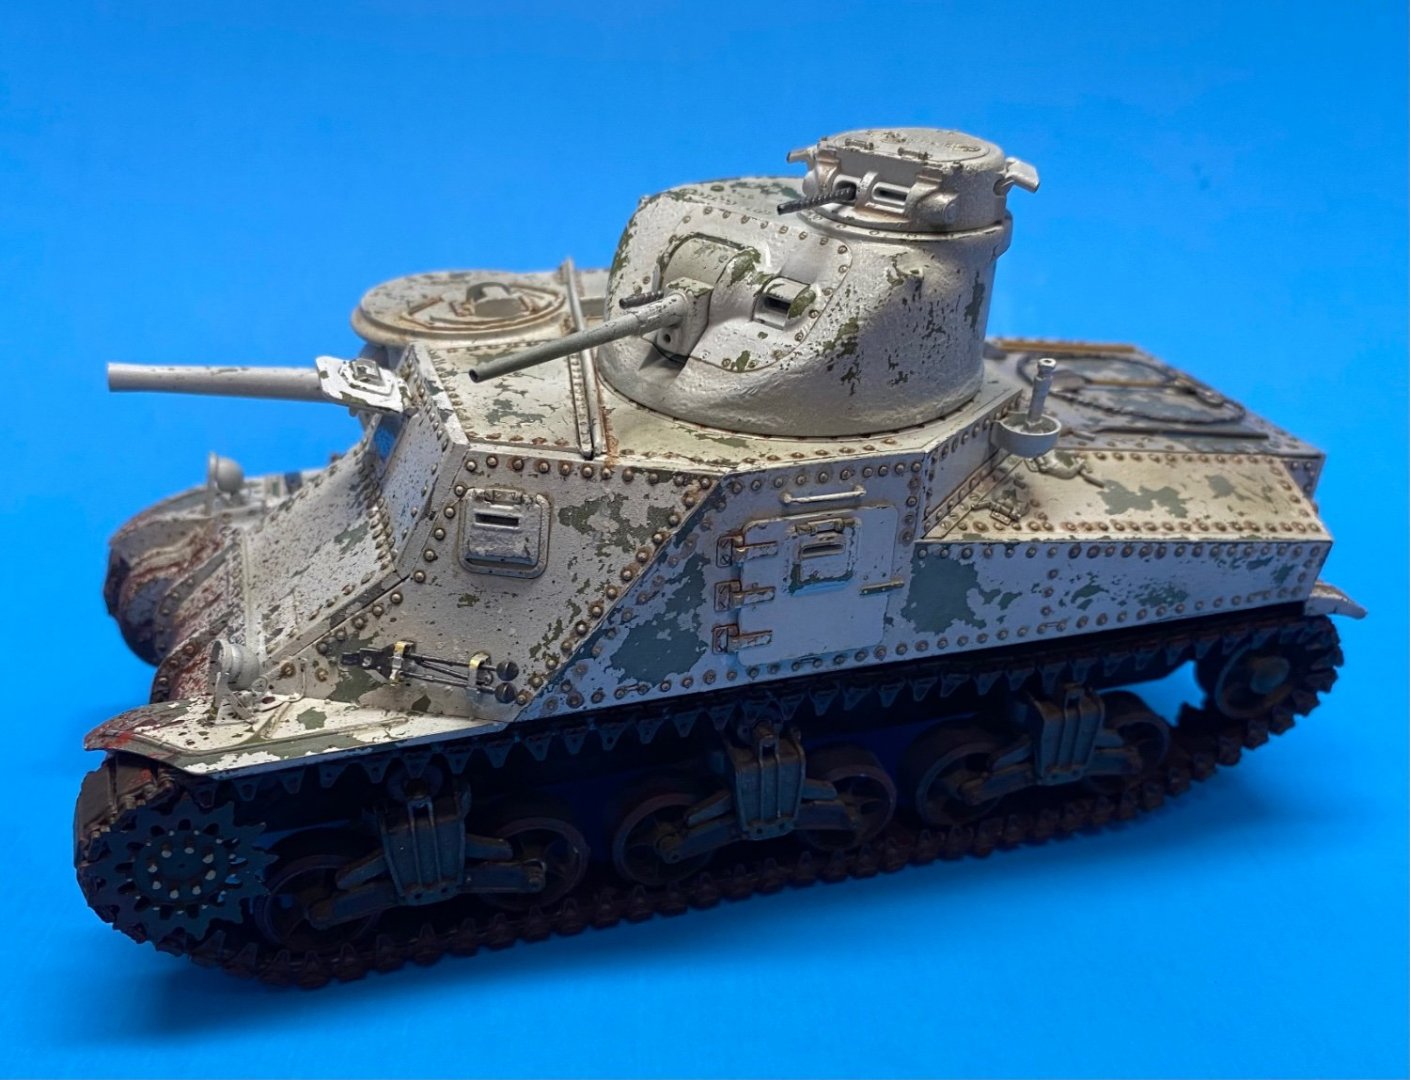
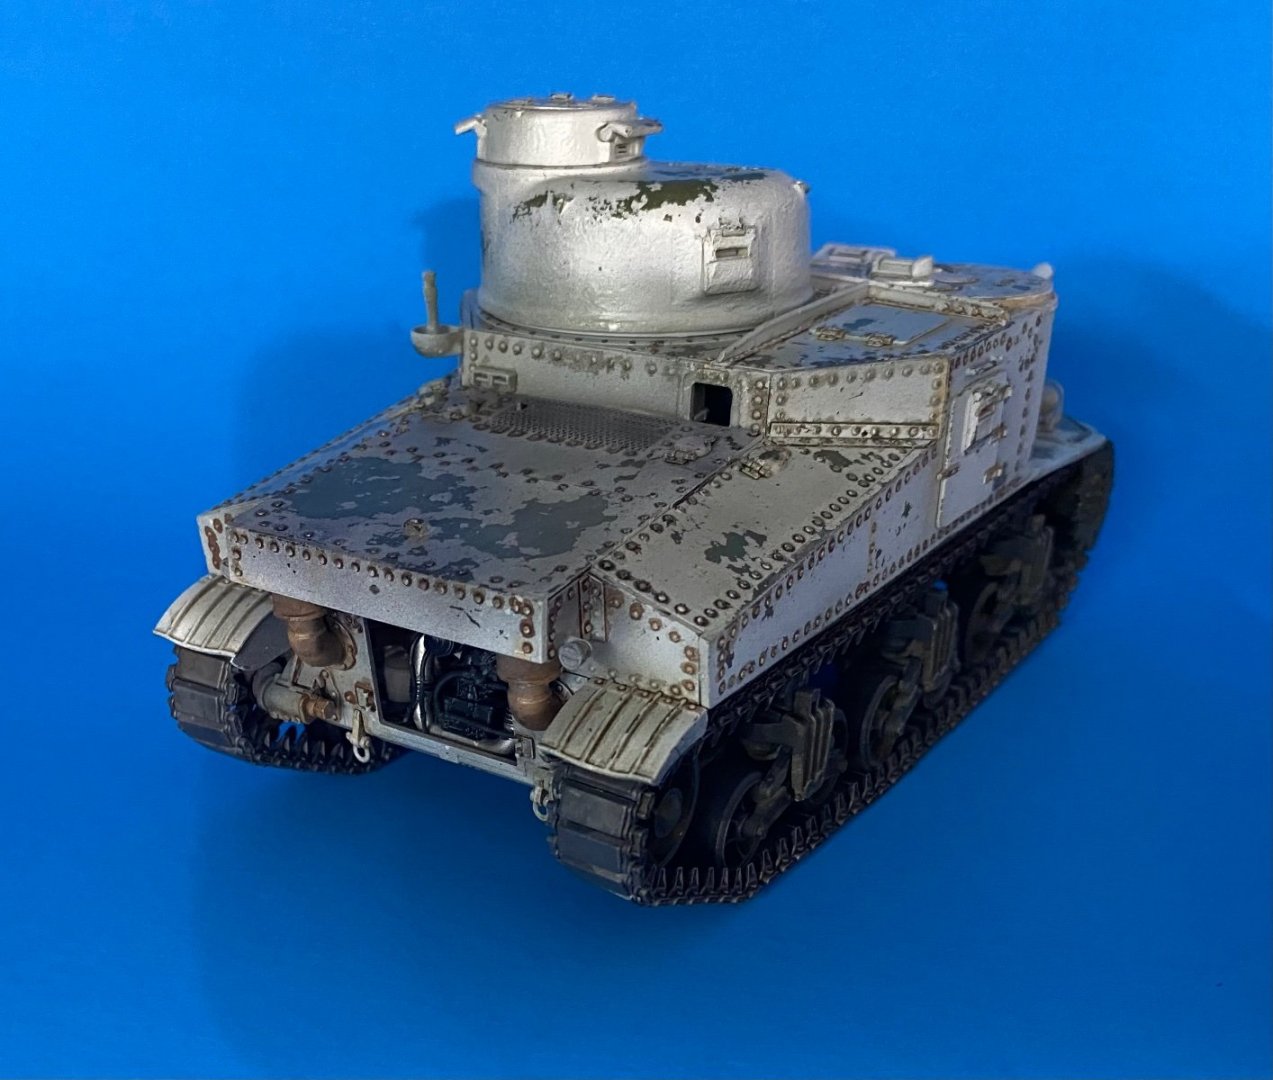
M3 Lee Tank by CDW - Miniart - 1:35 Scale - FINISHED
CDW replied to CDW's topic in Non-ship/categorised builds
The inspiration for it was a Russian unit captured by the Germans at Mzensk in February '43. I neglected to put the German iron crosses on the sides of it, but it eventually had them. -
Russian T-62A Tank by CDW - Tamiya - 1/35 Scale FINISHED
CDW replied to CDW's topic in Non-ship/categorised builds
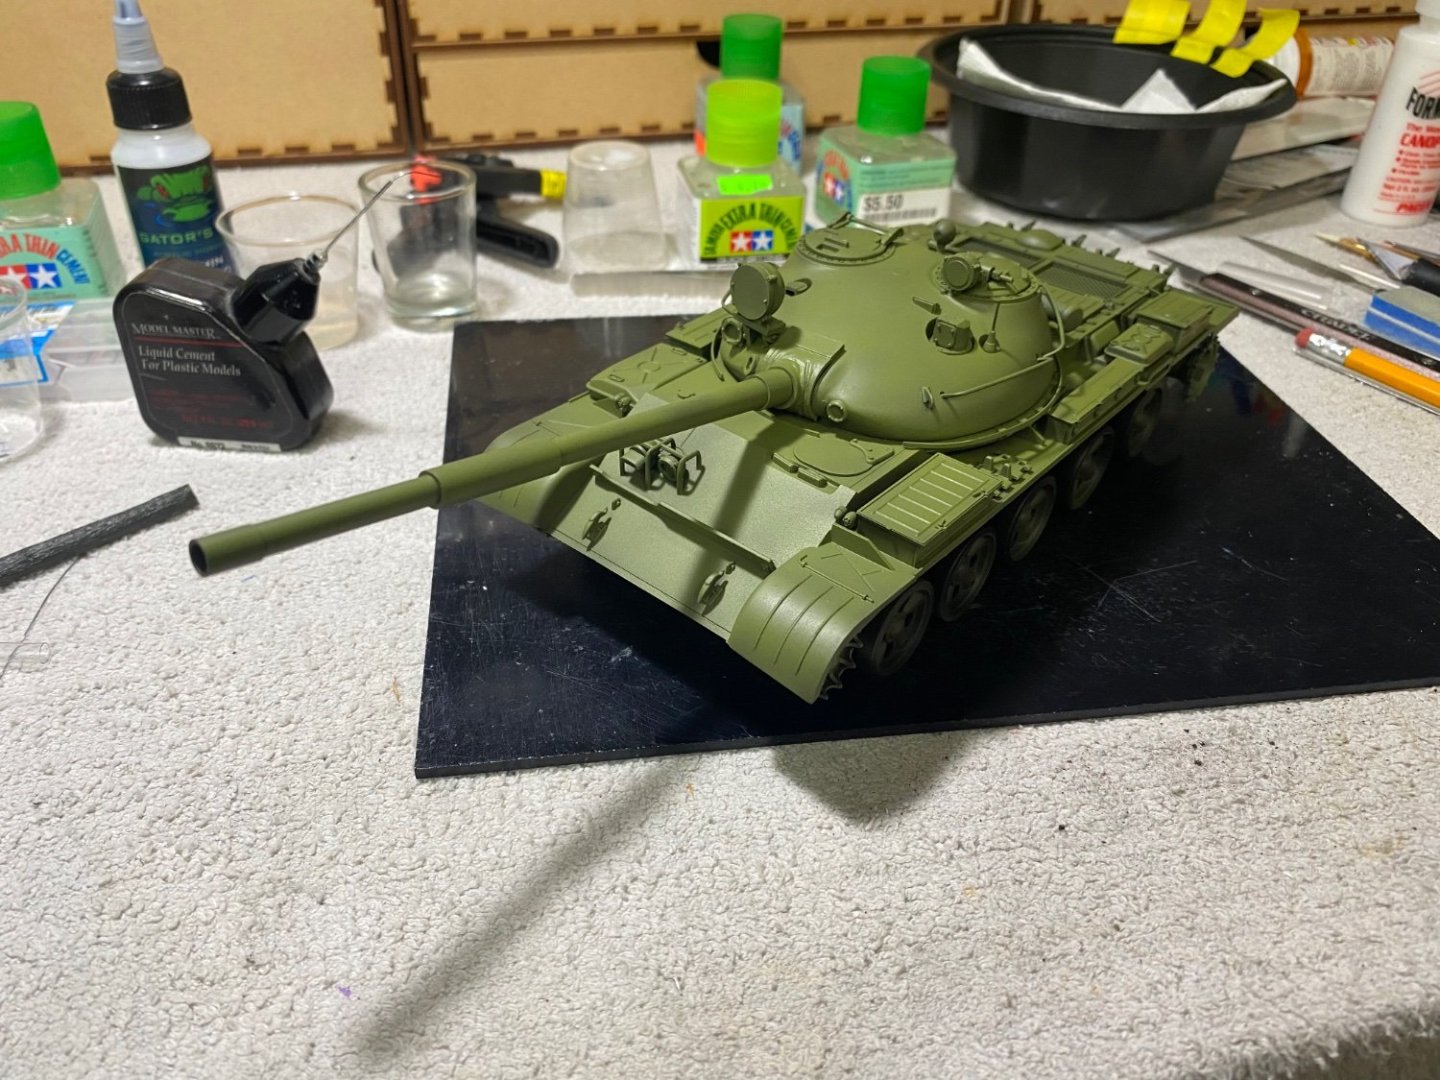
Negative. This is an OLD Tamiya mold, very basic. It was once built to be battery powered. Still has the battery tabs and cutouts for a motor switch in the hull. Needs some TLC.- 67 replies
-
- 10
-
-
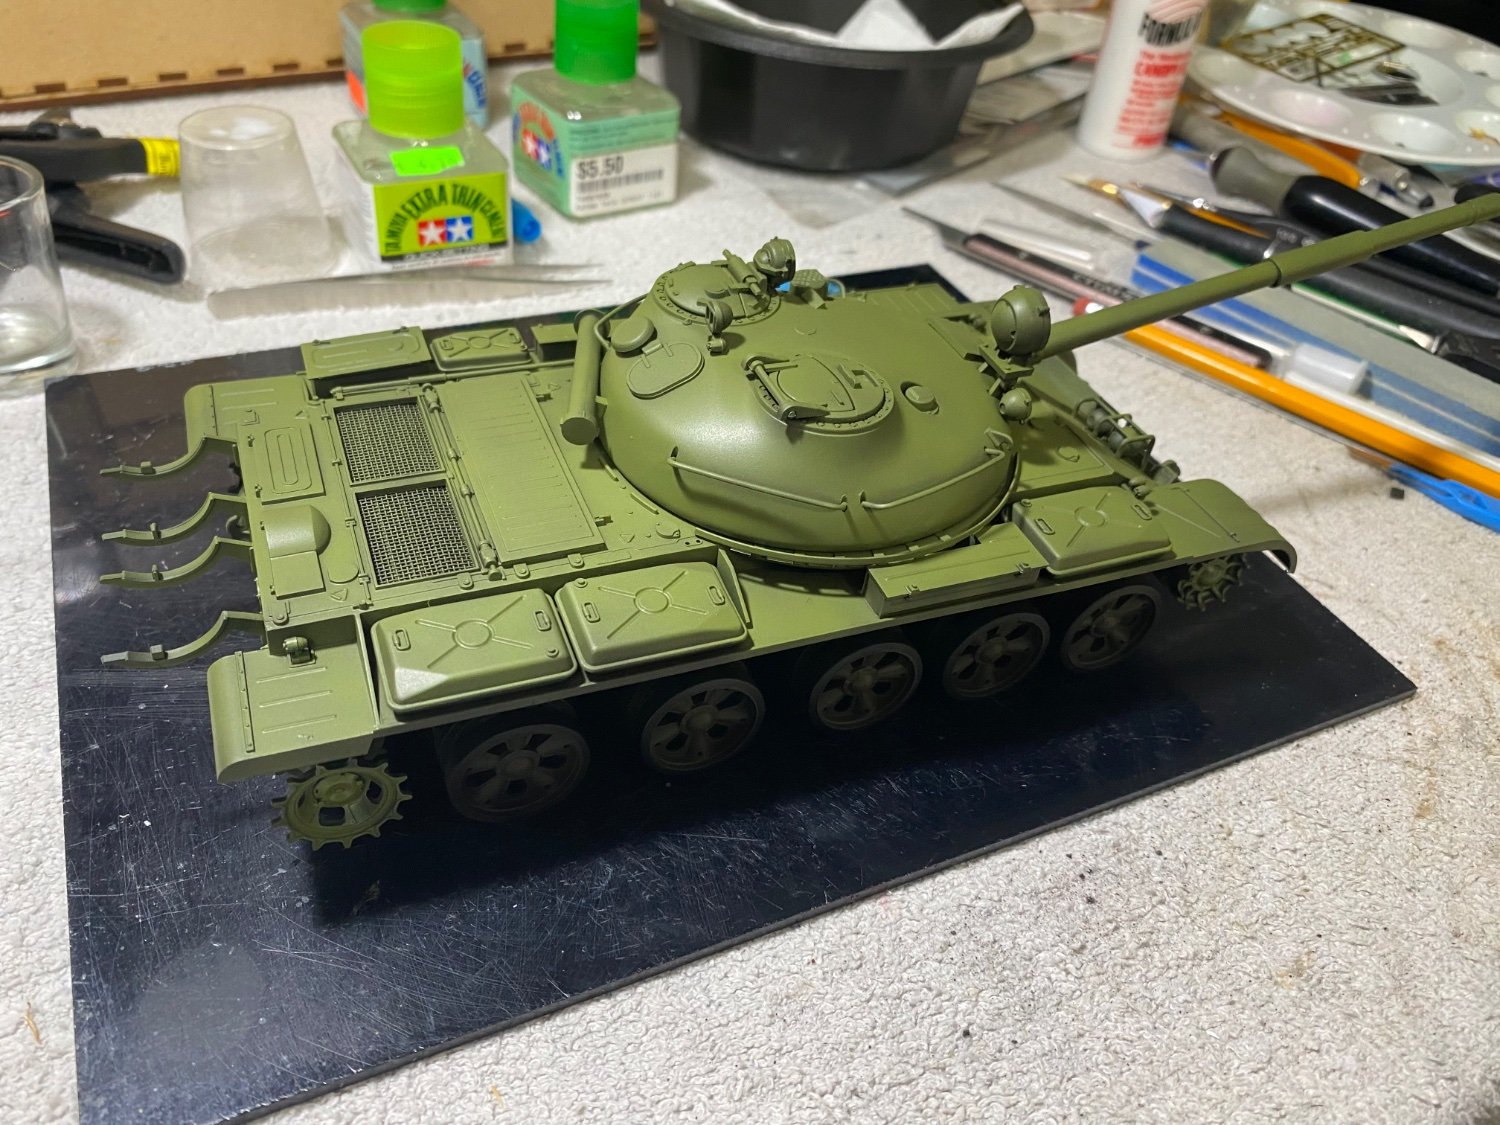
The T-62A was an evolution of the Russian T-55 main battle tank first seen in 1961. Remarkably, this 60+ year-old tank can be seen in combat today serving the Russians in Donbas, Ukraine. The Russians still have reserves of this venerable old design in great numbers. I’ll be building this model using some upgraded parts as the old Tamiya kit is rather dated.
- 67 replies
-
- 13
-
-
M3 Lee Tank by CDW - Miniart - 1:35 Scale - FINISHED
CDW replied to CDW's topic in Non-ship/categorised builds
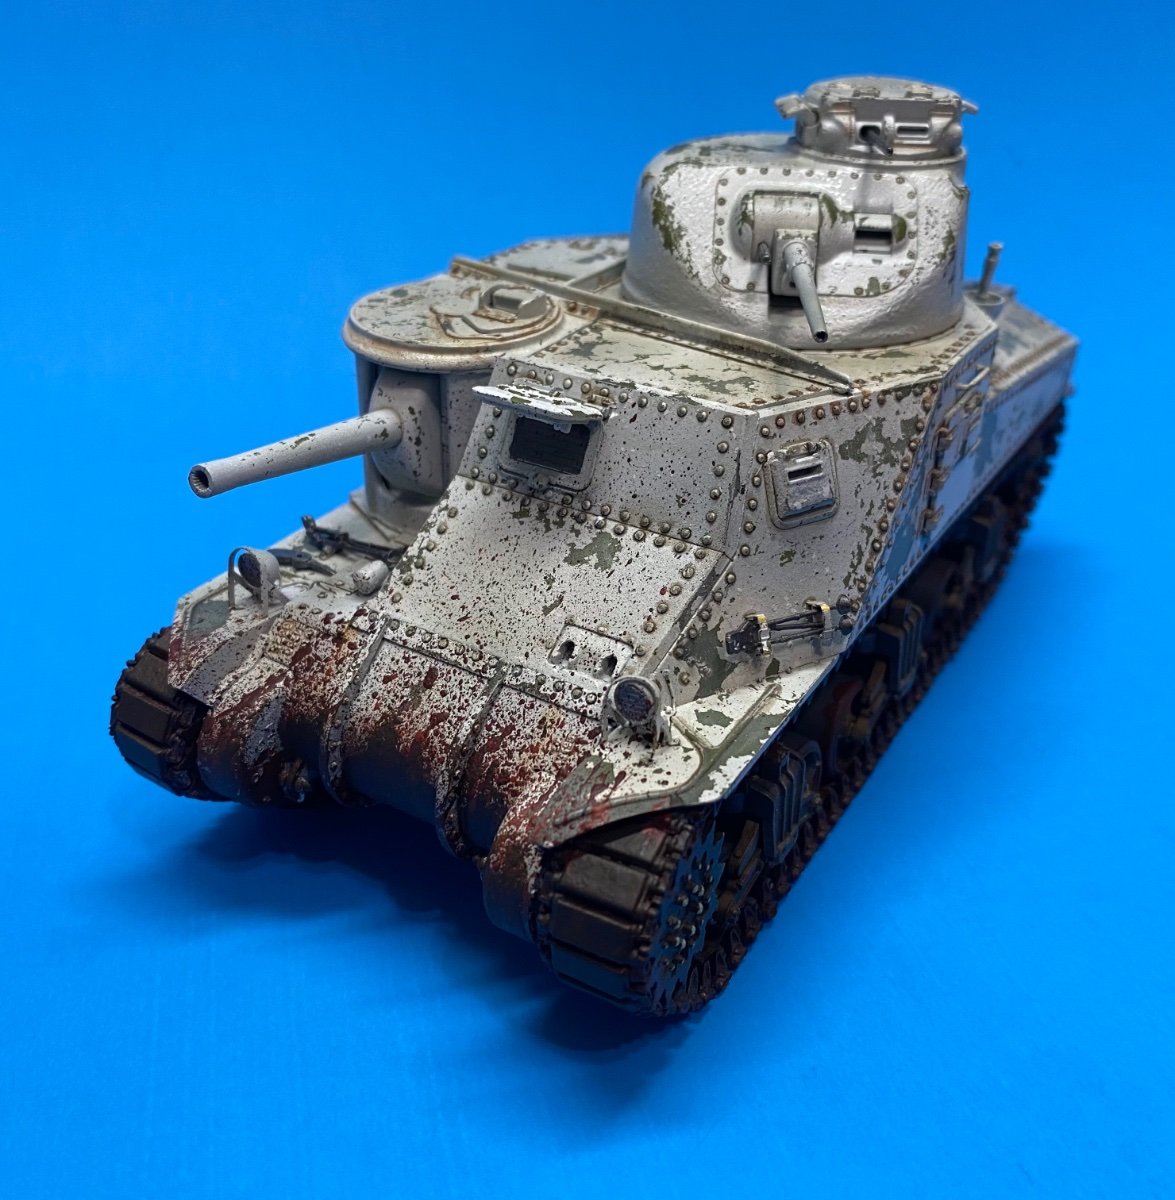
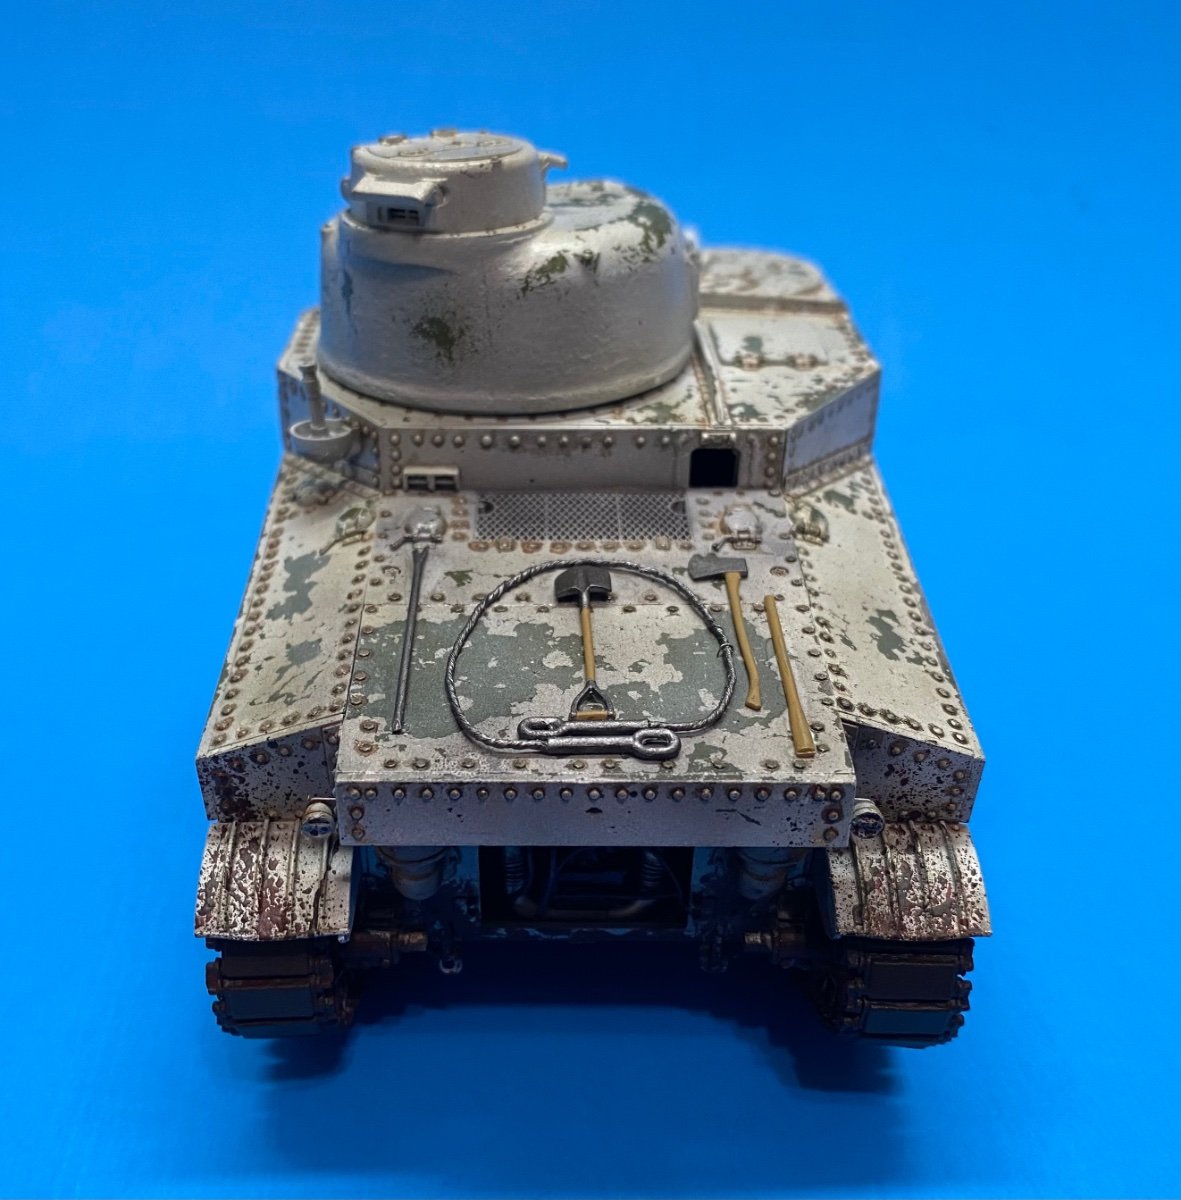
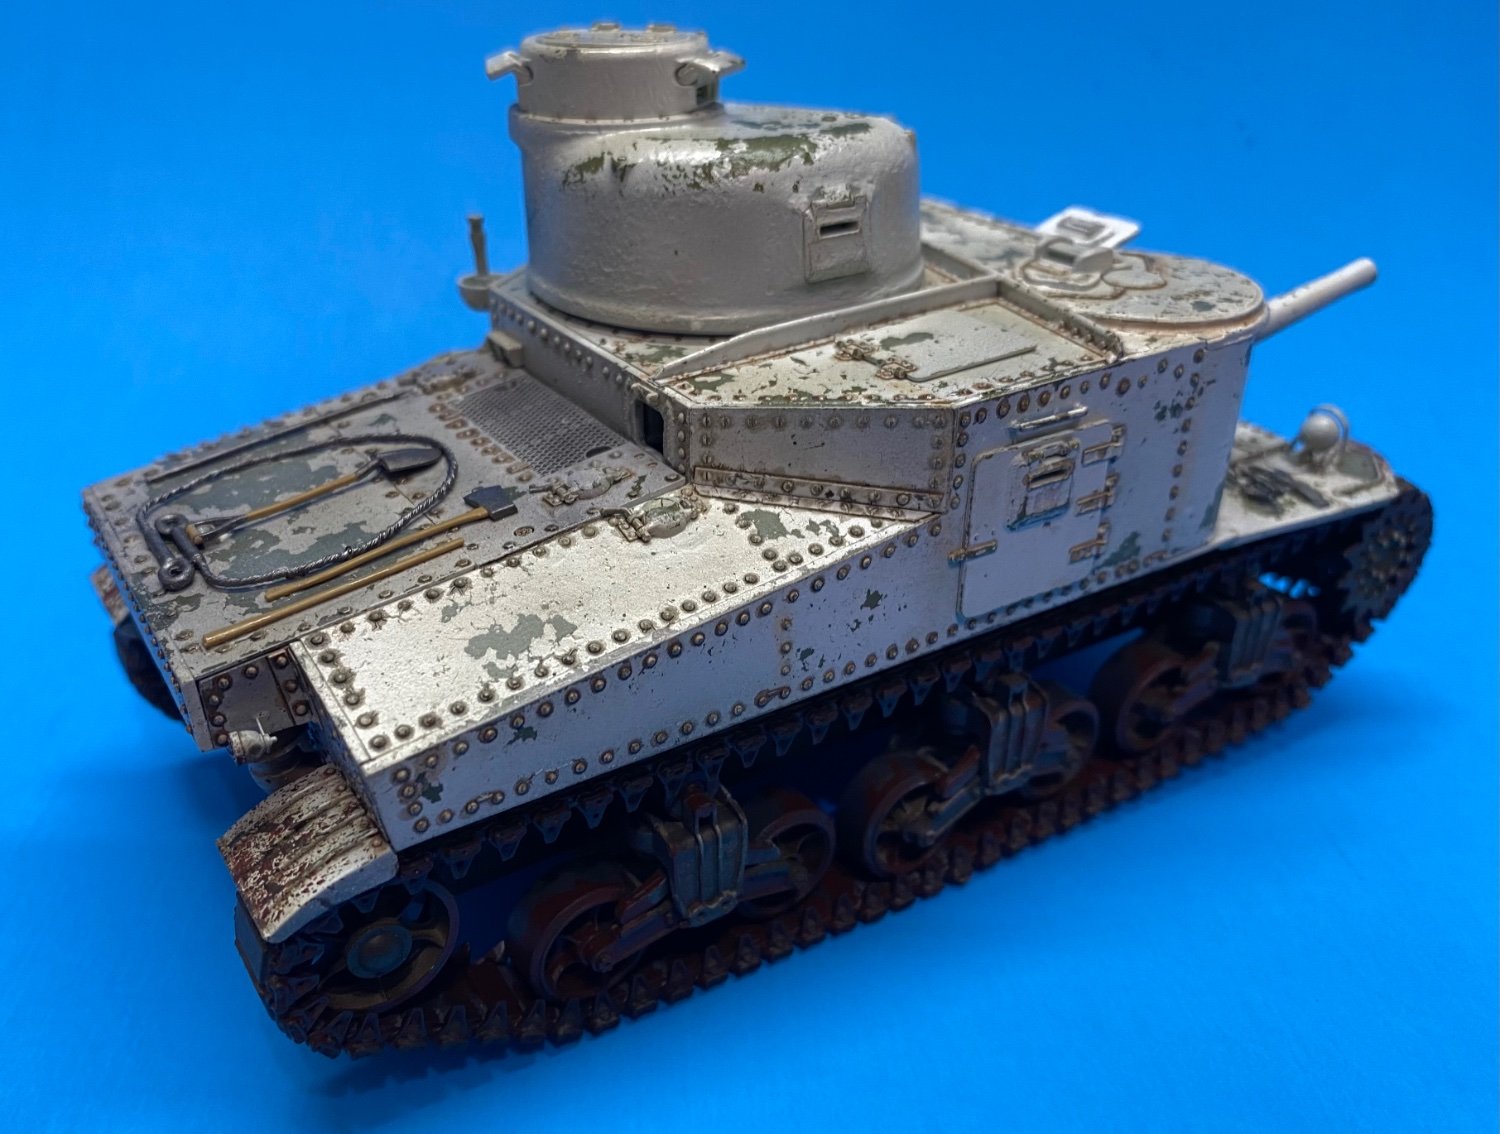
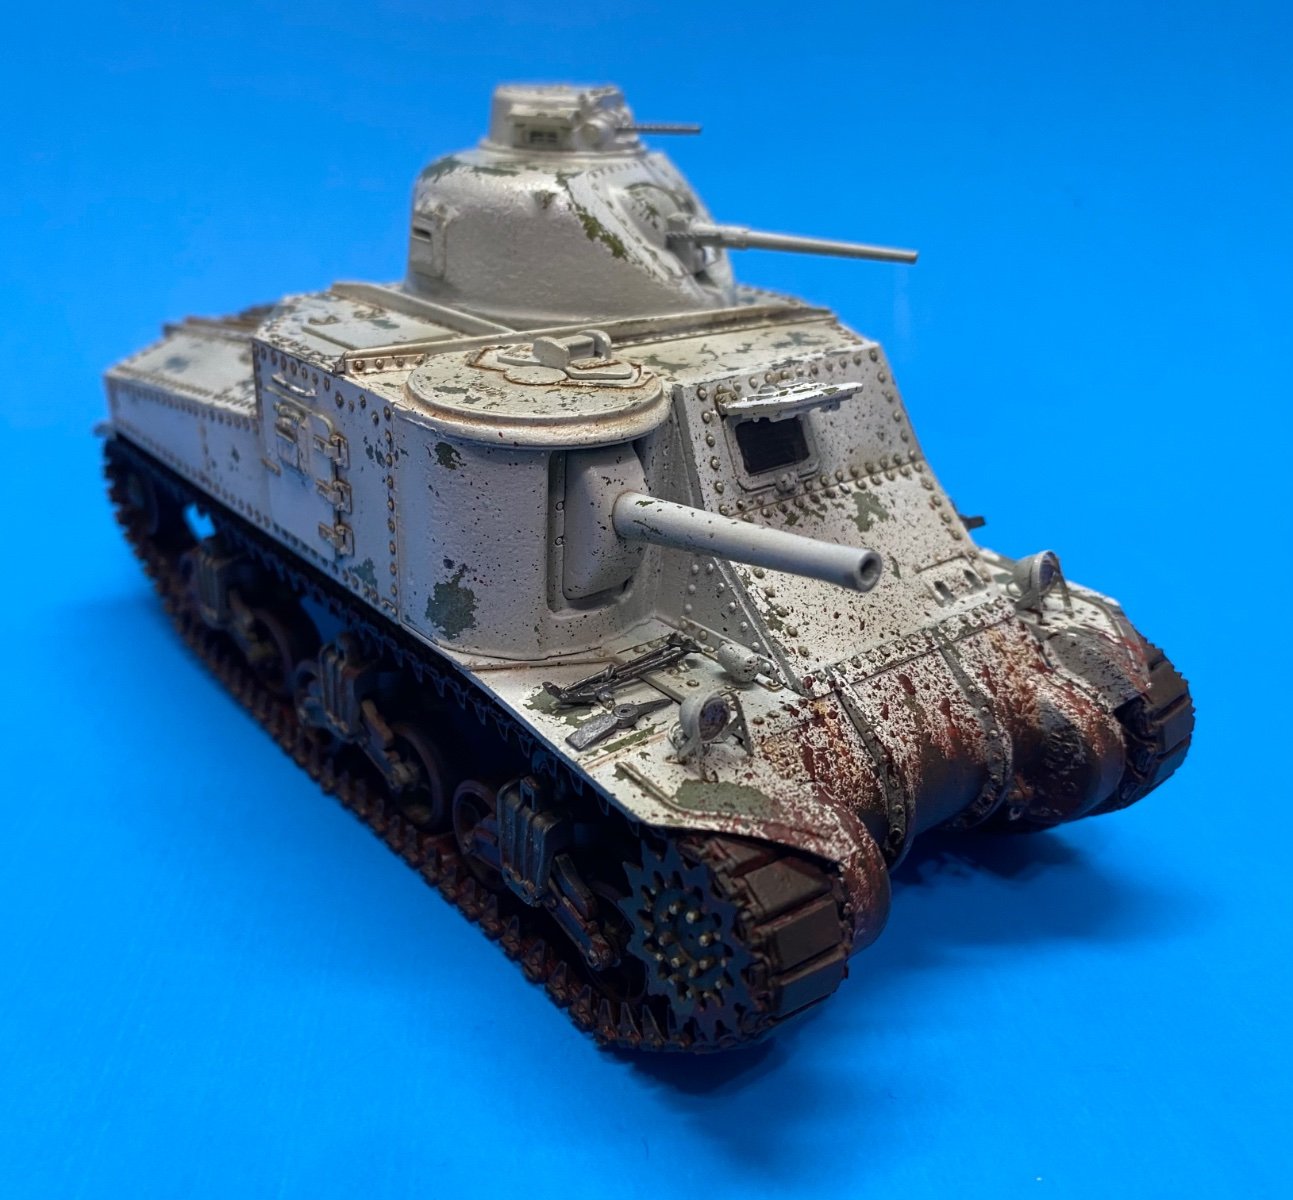
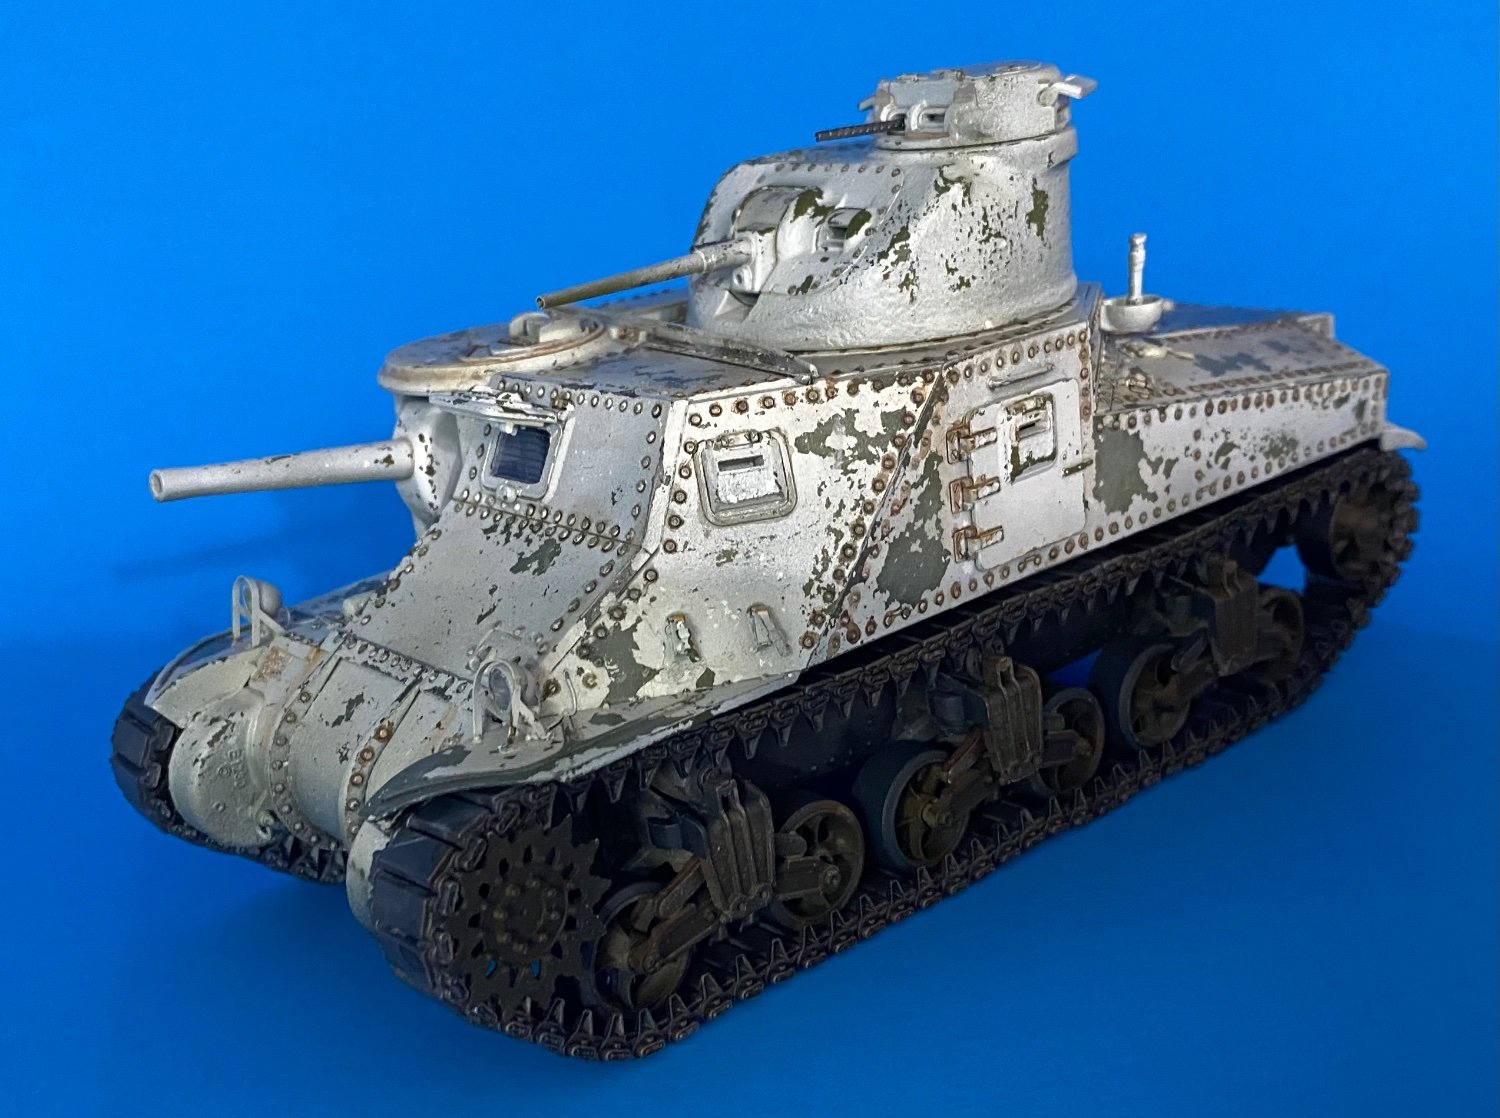
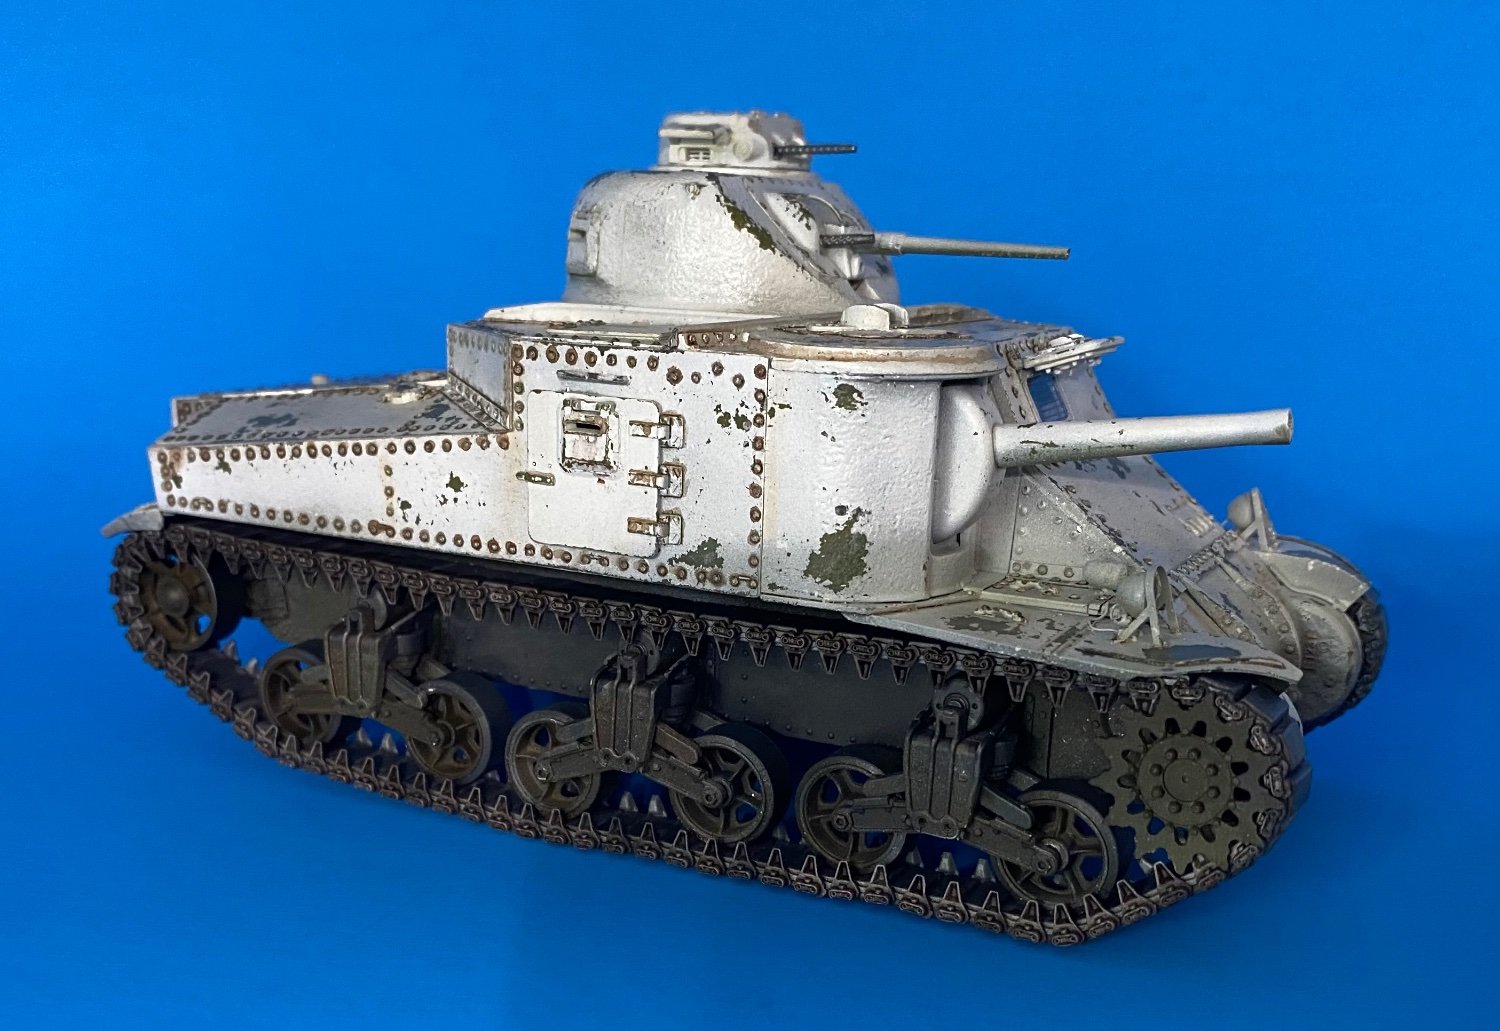
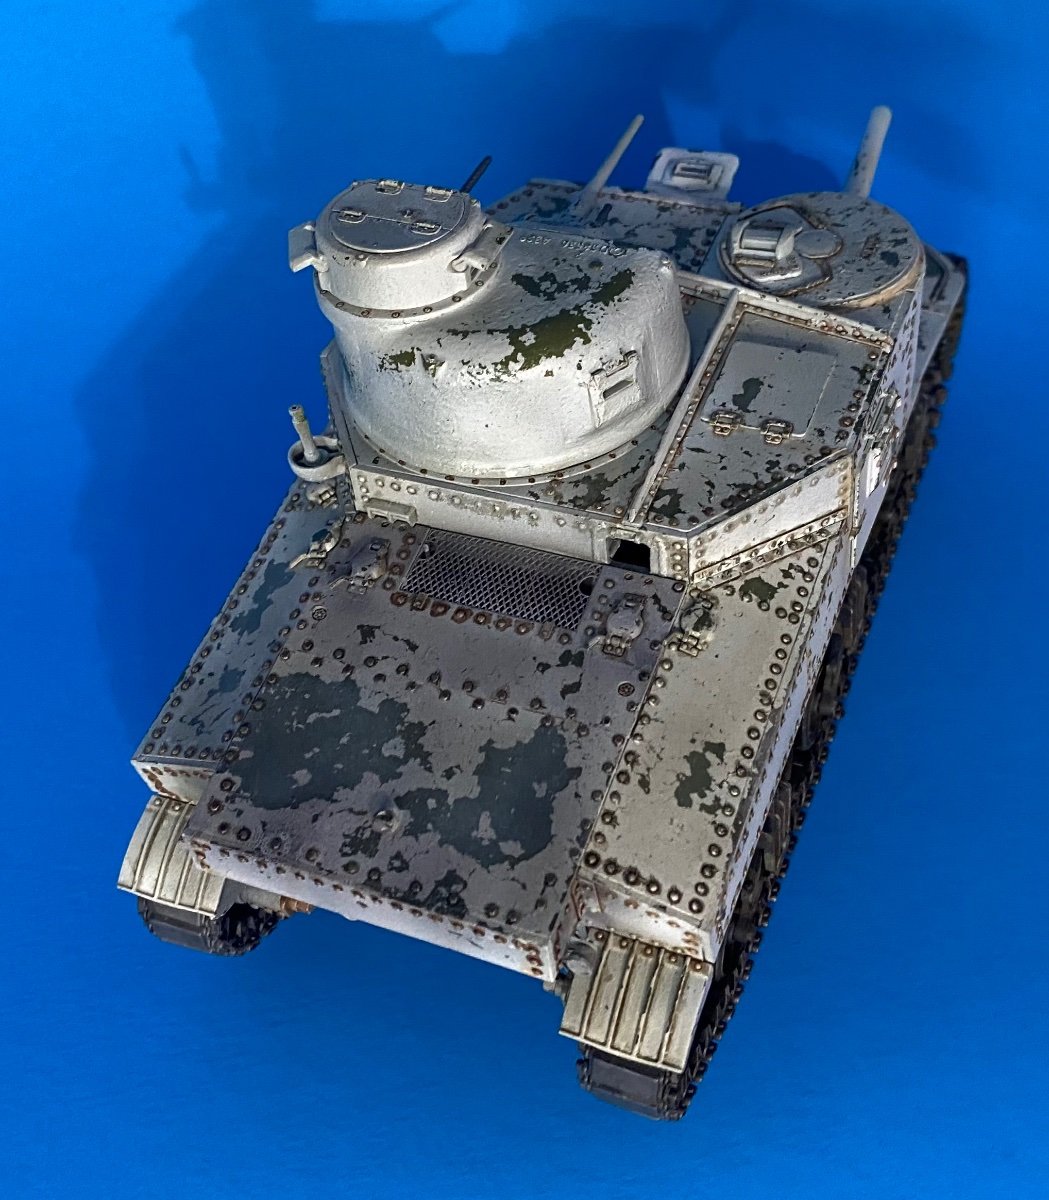
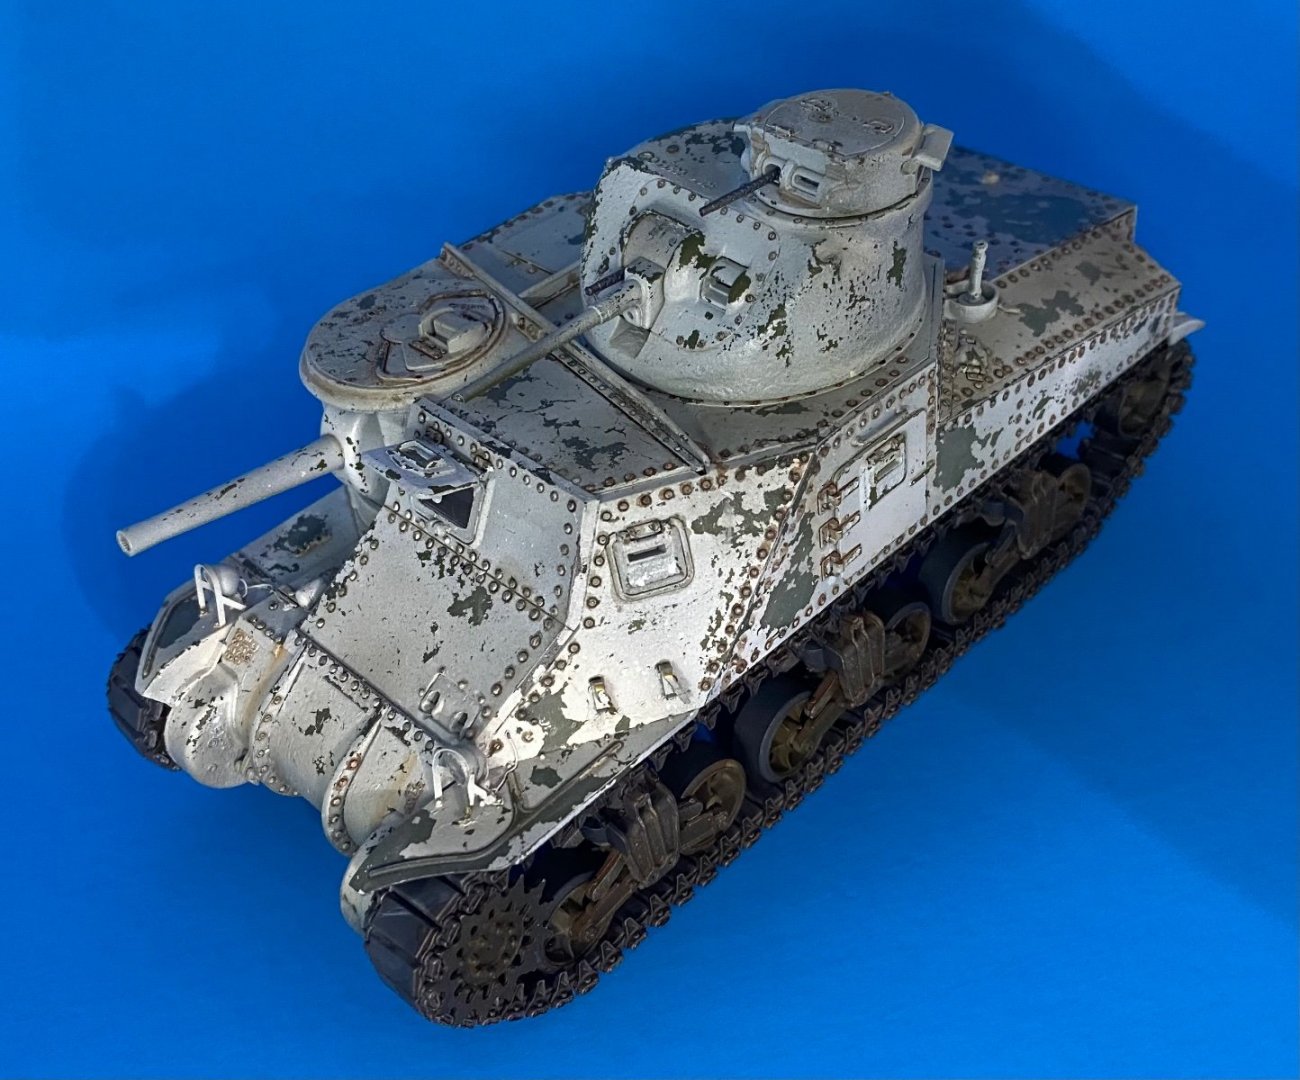
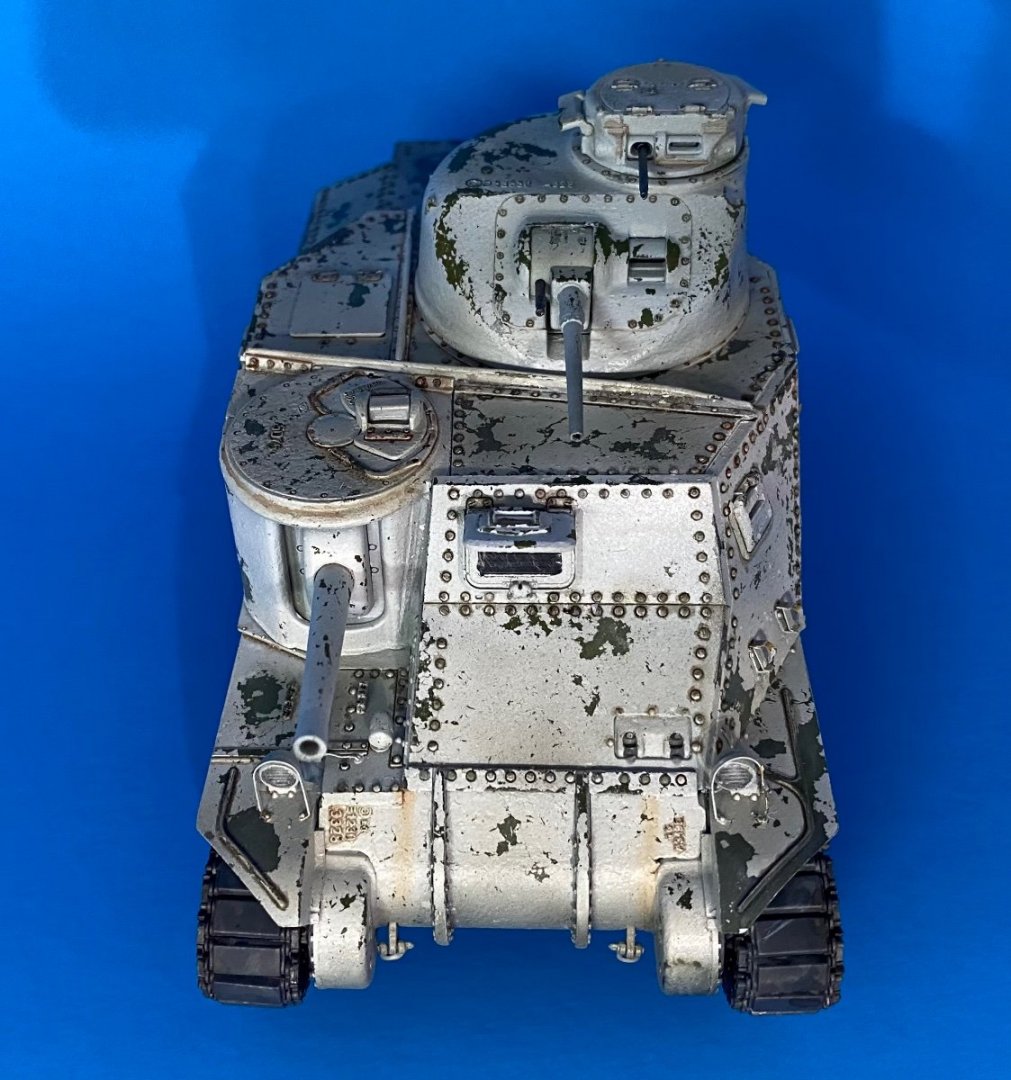
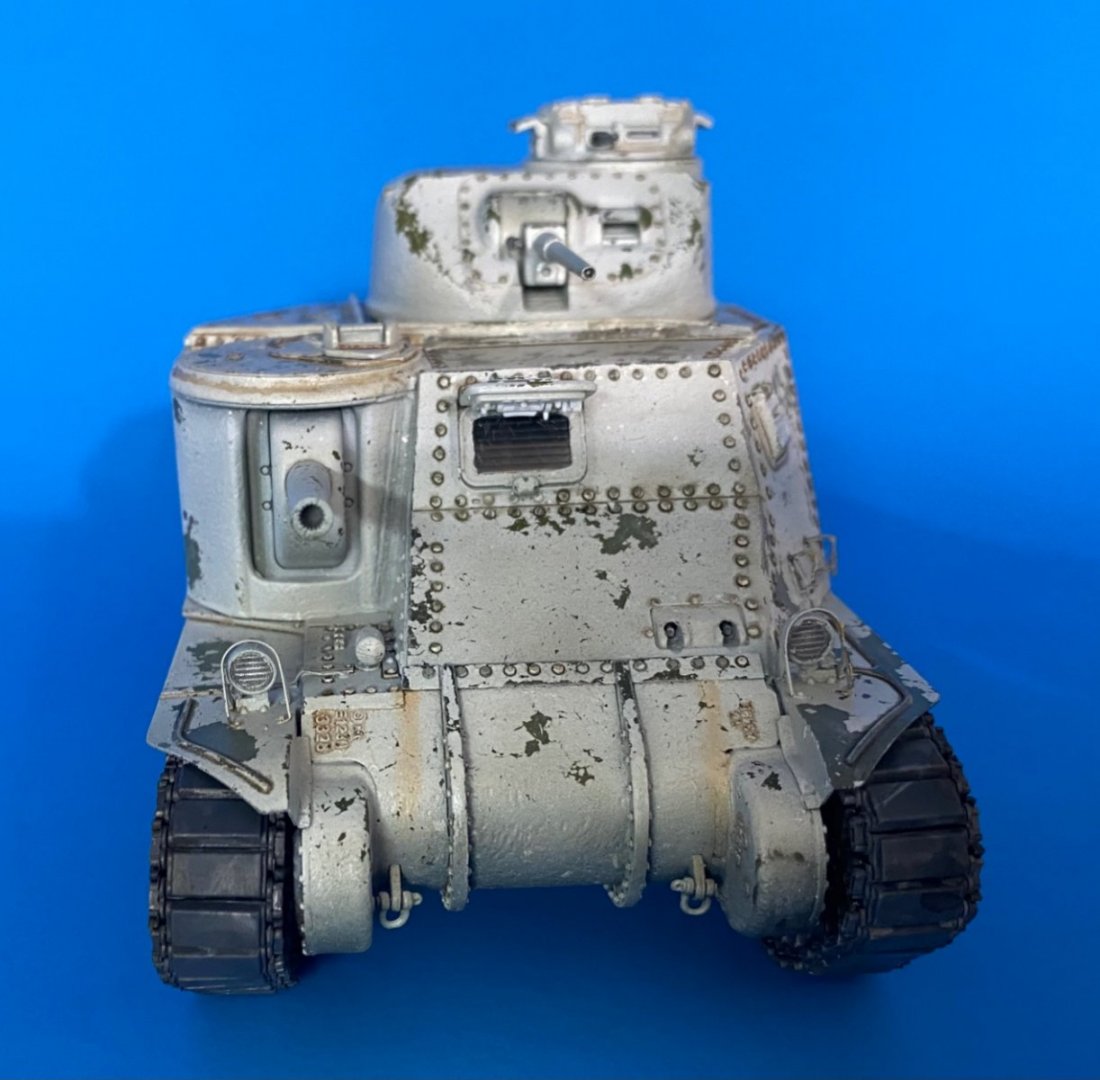
Final photos


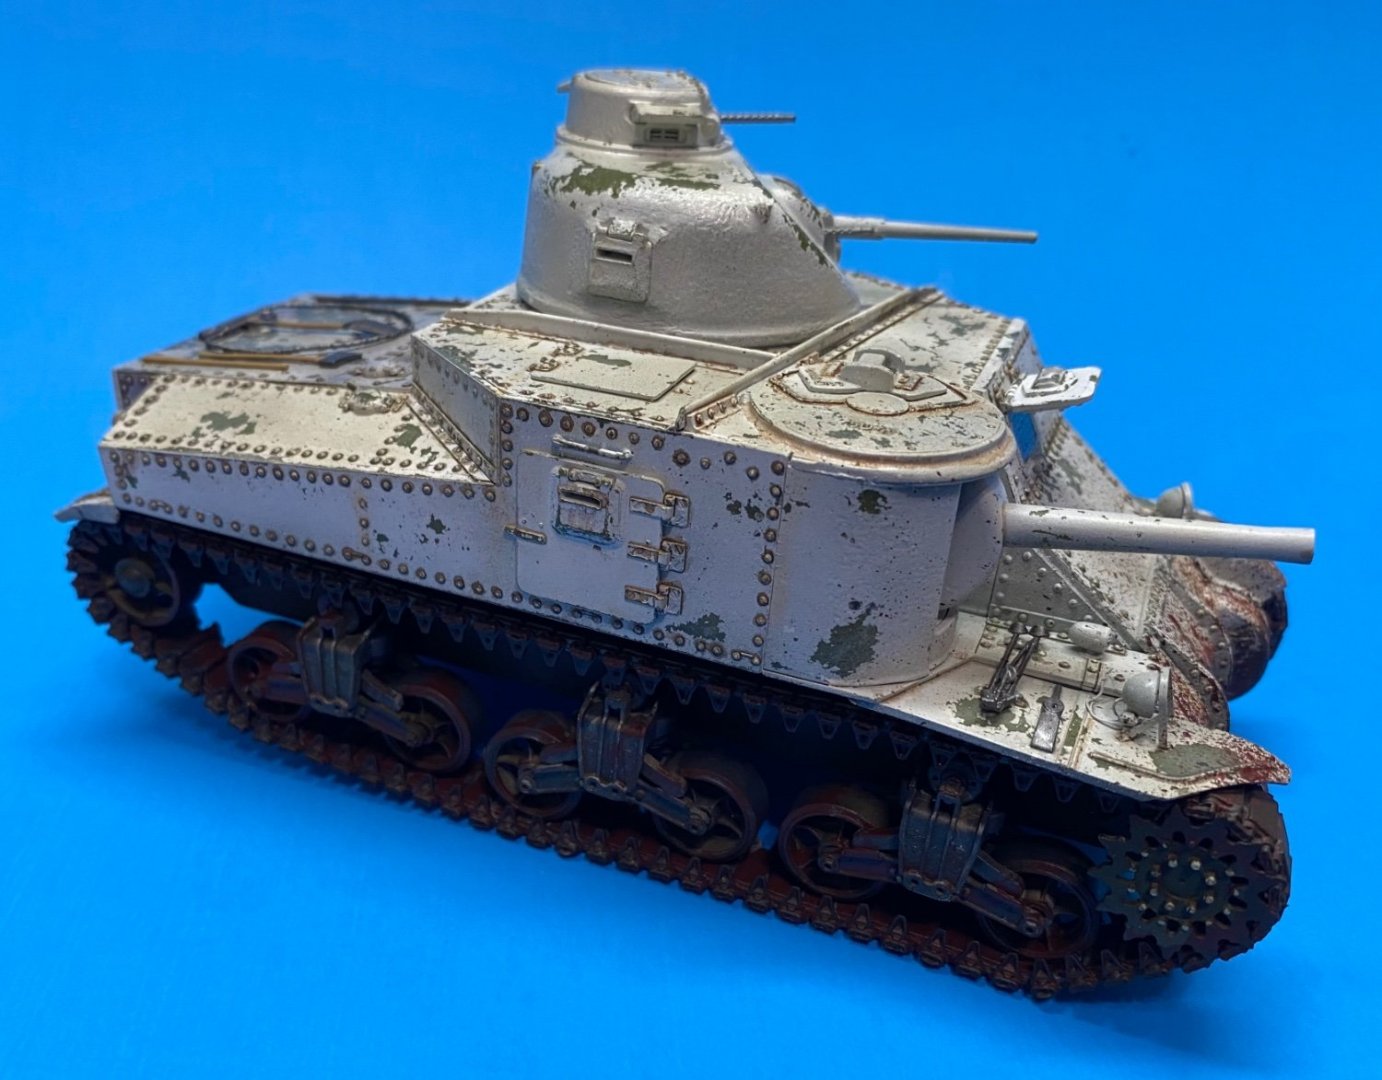
- 99 replies
-
- 14
-

-
-
M3 Lee Tank by CDW - Miniart - 1:35 Scale - FINISHED
CDW replied to CDW's topic in Non-ship/categorised builds
Thanks for the kind comments/compliments gentlemen. Frankly, I am ready for this one to be done so I can start something new. Decisions, decisions... Aircraft, sports/super cars, battle tanks, support vehicles, ships??? Hmmm...... -
M3 Lee Tank by CDW - Miniart - 1:35 Scale - FINISHED
CDW replied to CDW's topic in Non-ship/categorised builds
Will add the stowage then some mud and call this one done.


- 99 replies
-
- 13
-
-
M3 Lee Tank by CDW - Miniart - 1:35 Scale - FINISHED
CDW replied to CDW's topic in Non-ship/categorised builds
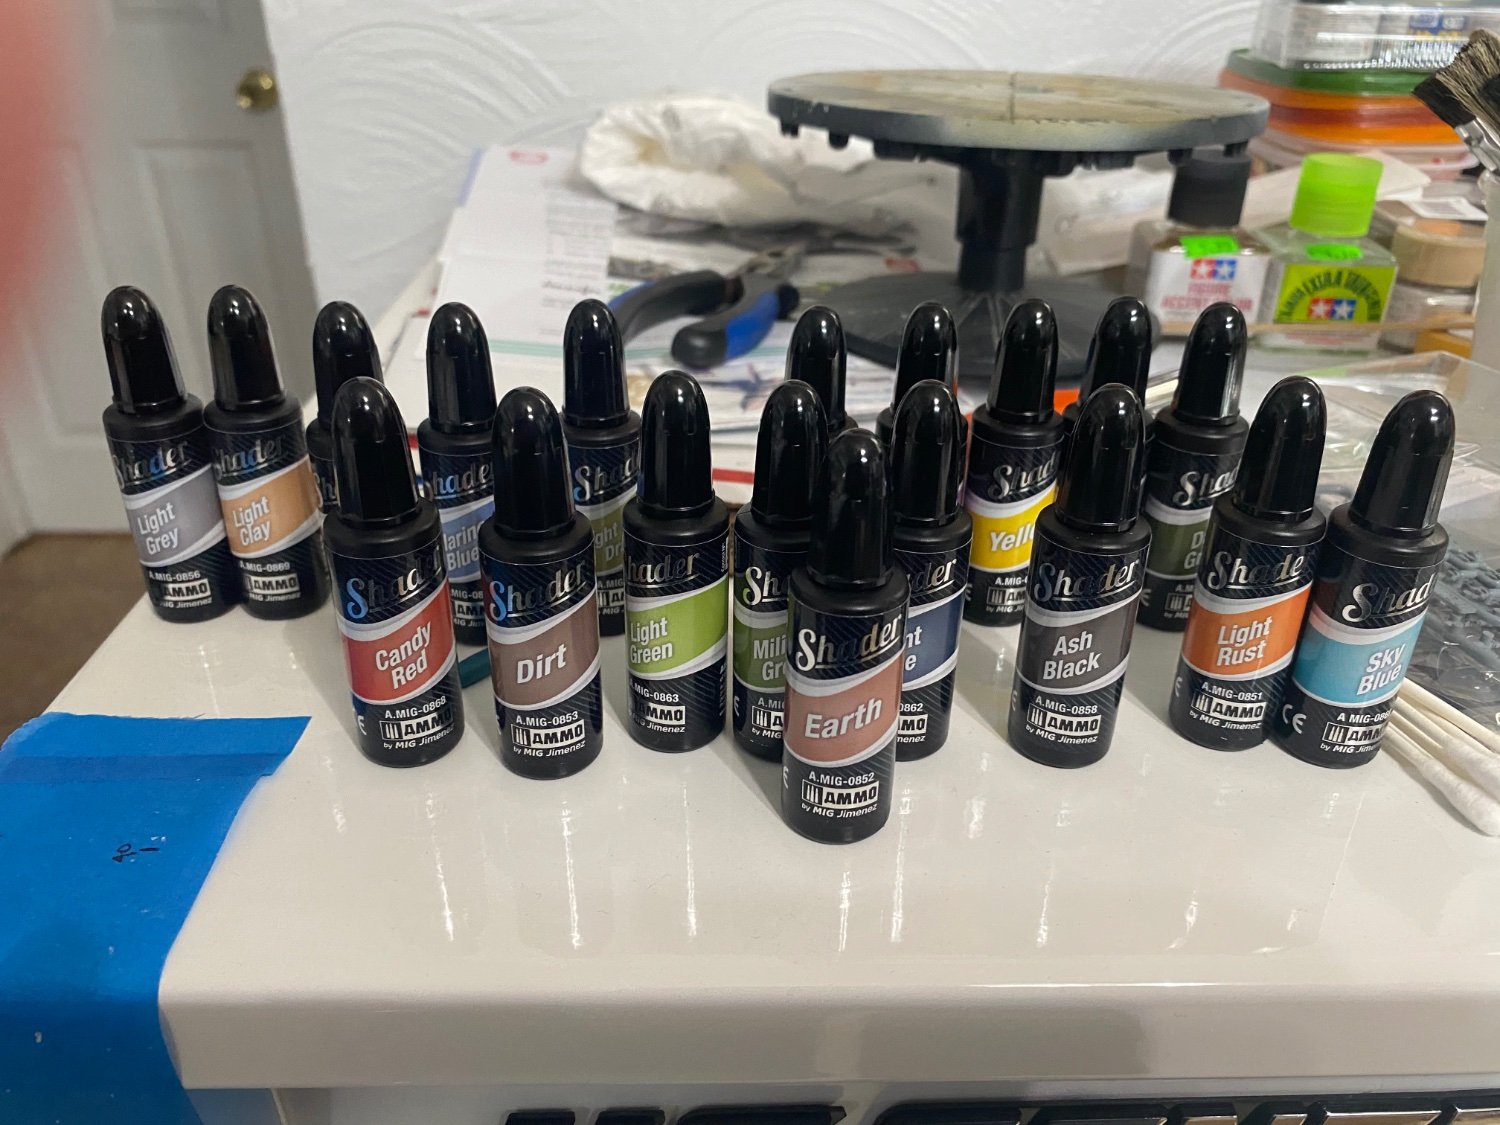
Shaders
- 99 replies
-
- 10
-
-
-