CDW
-
Posts
7,756 -
Joined
-
Last visited
Content Type
Profiles
Forums
Gallery
Events
Everything posted by CDW
-

M3 Lee Tank by CDW - Miniart - 1:35 Scale - FINISHED
CDW replied to CDW's topic in Non-ship/categorised builds
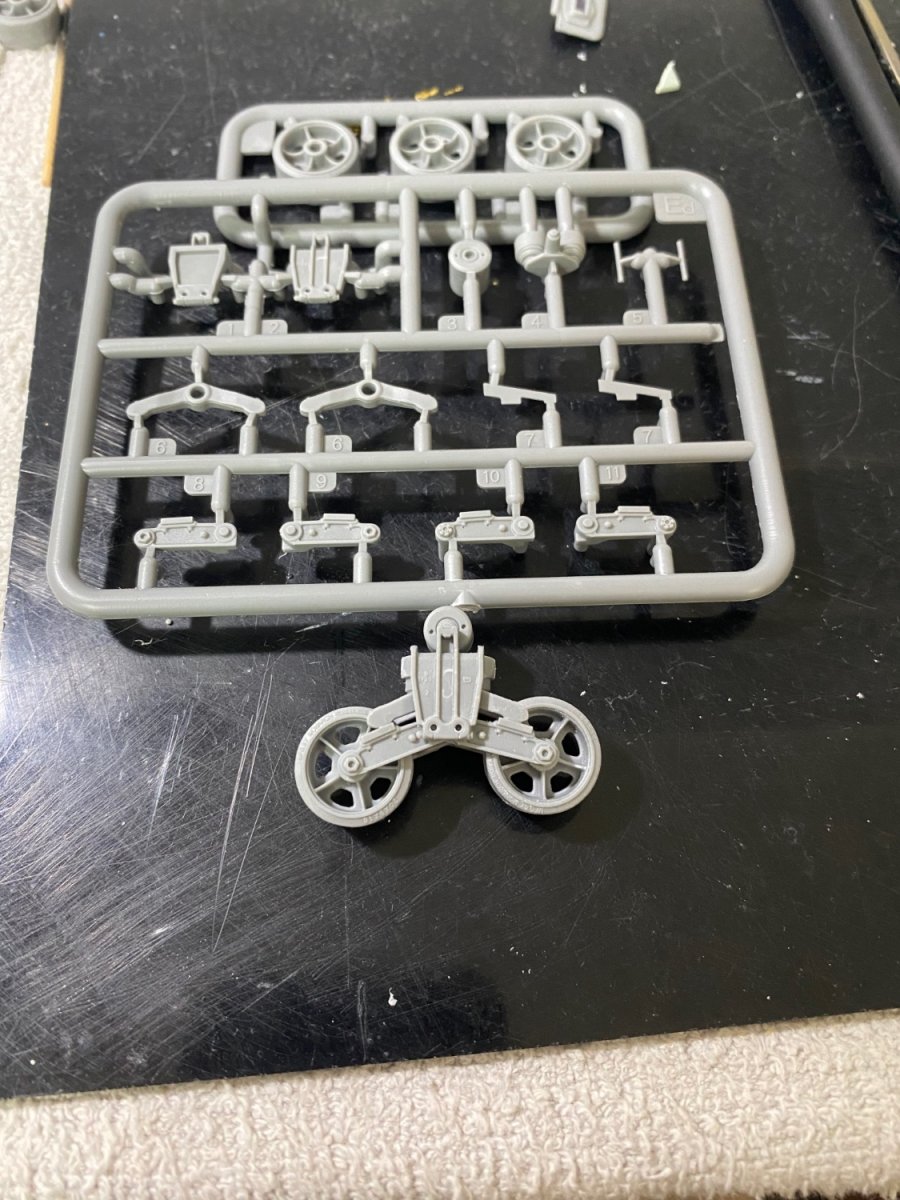
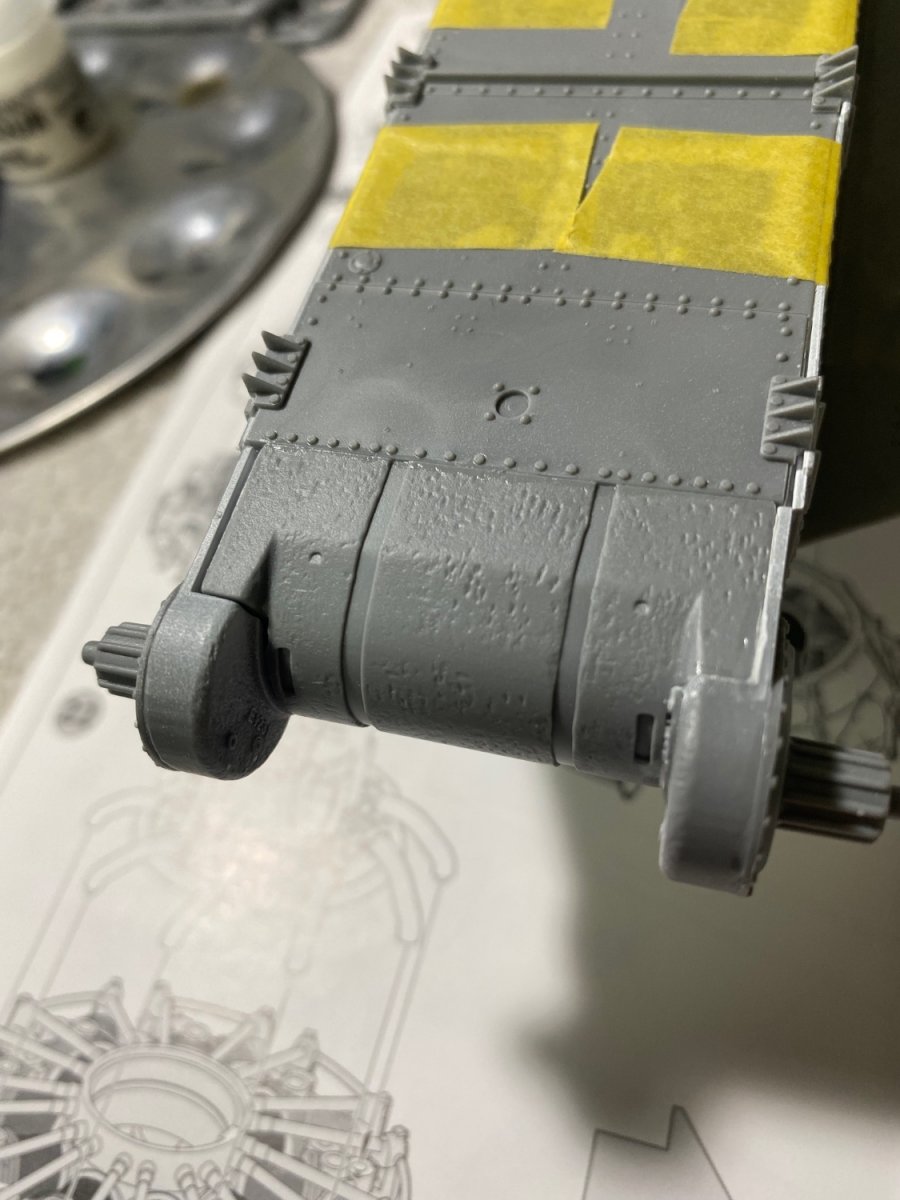
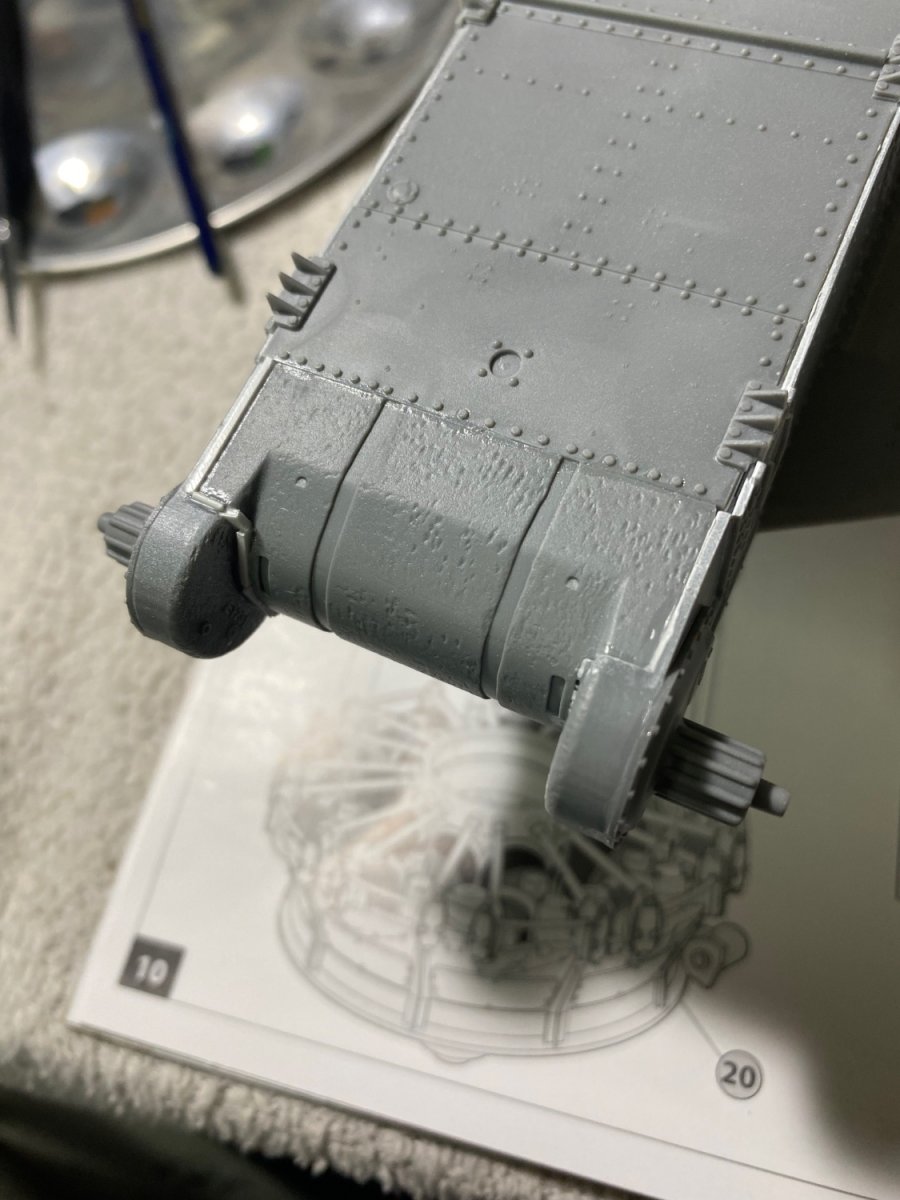
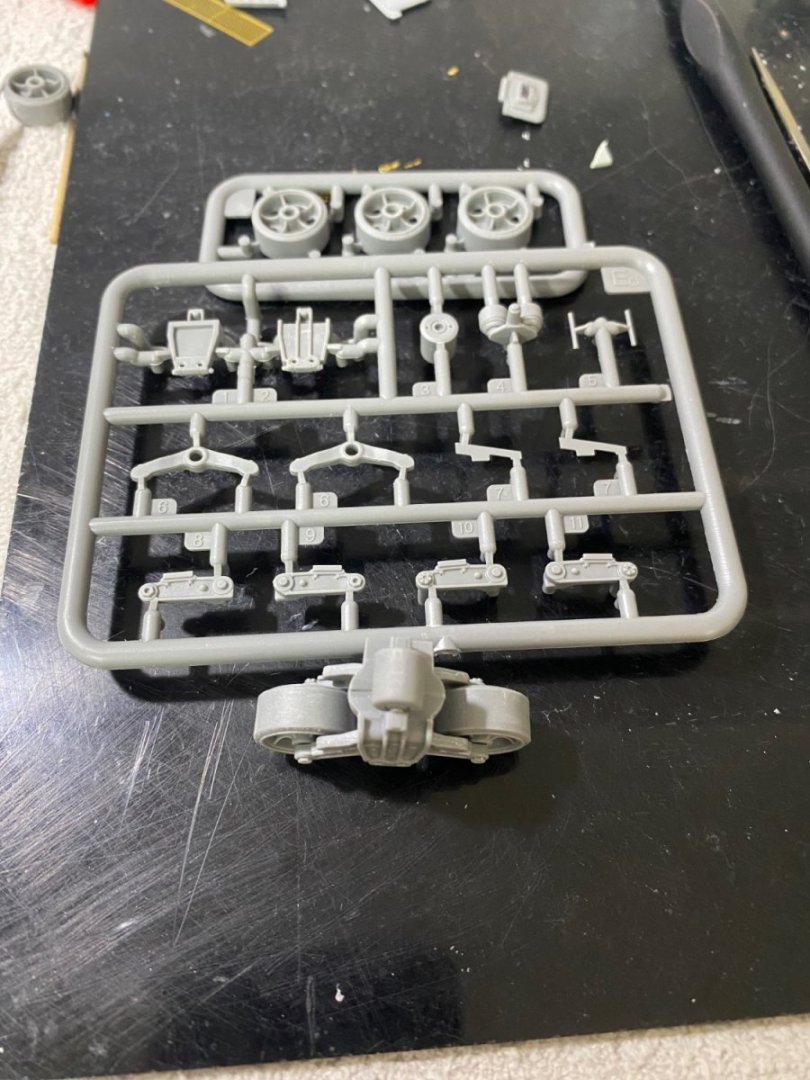
Each of the six trucks consist of sixteen parts and are a bit fiddly to assemble but look good when finished I think. The part fit is not entirely ‘Tamiya-like’ but not too shabby. Probably just a wee bit over engineered. It is what it is but don’t consider this a put down of the kit. Just have a feeling some modelers won’t like it due to all the parts/pieces.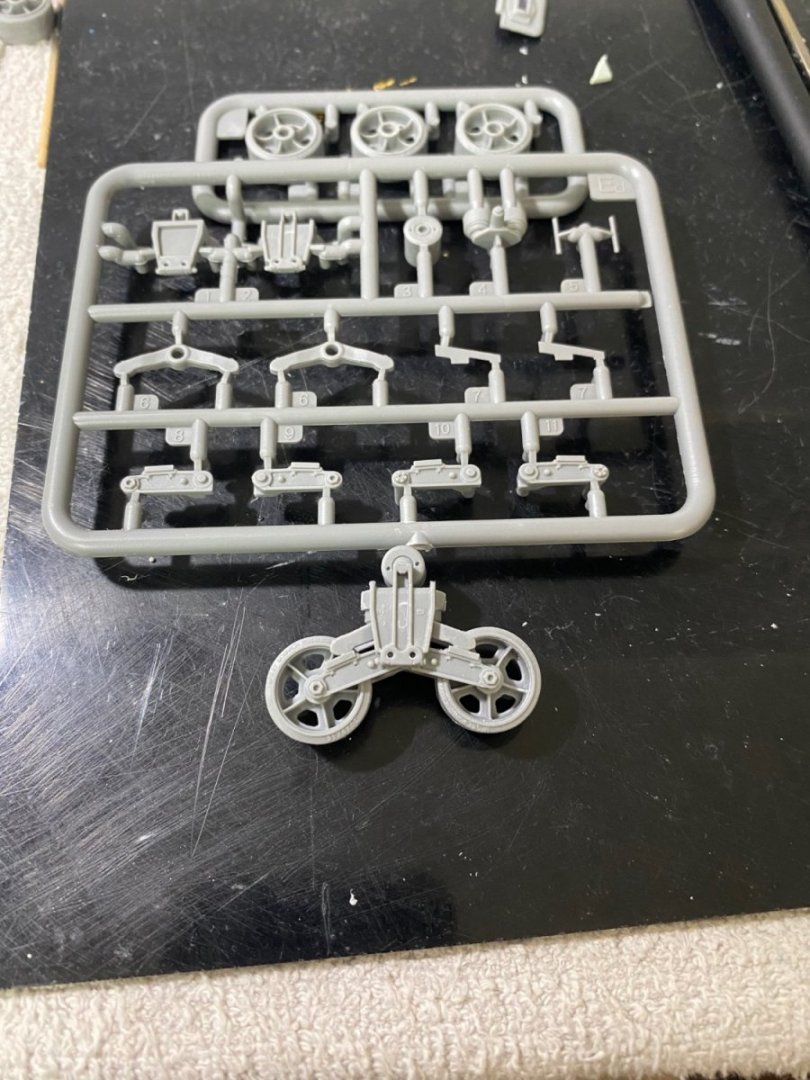

- 99 replies
-
- 13
-

-
M3 Lee Tank by CDW - Miniart - 1:35 Scale - FINISHED
CDW replied to CDW's topic in Non-ship/categorised builds
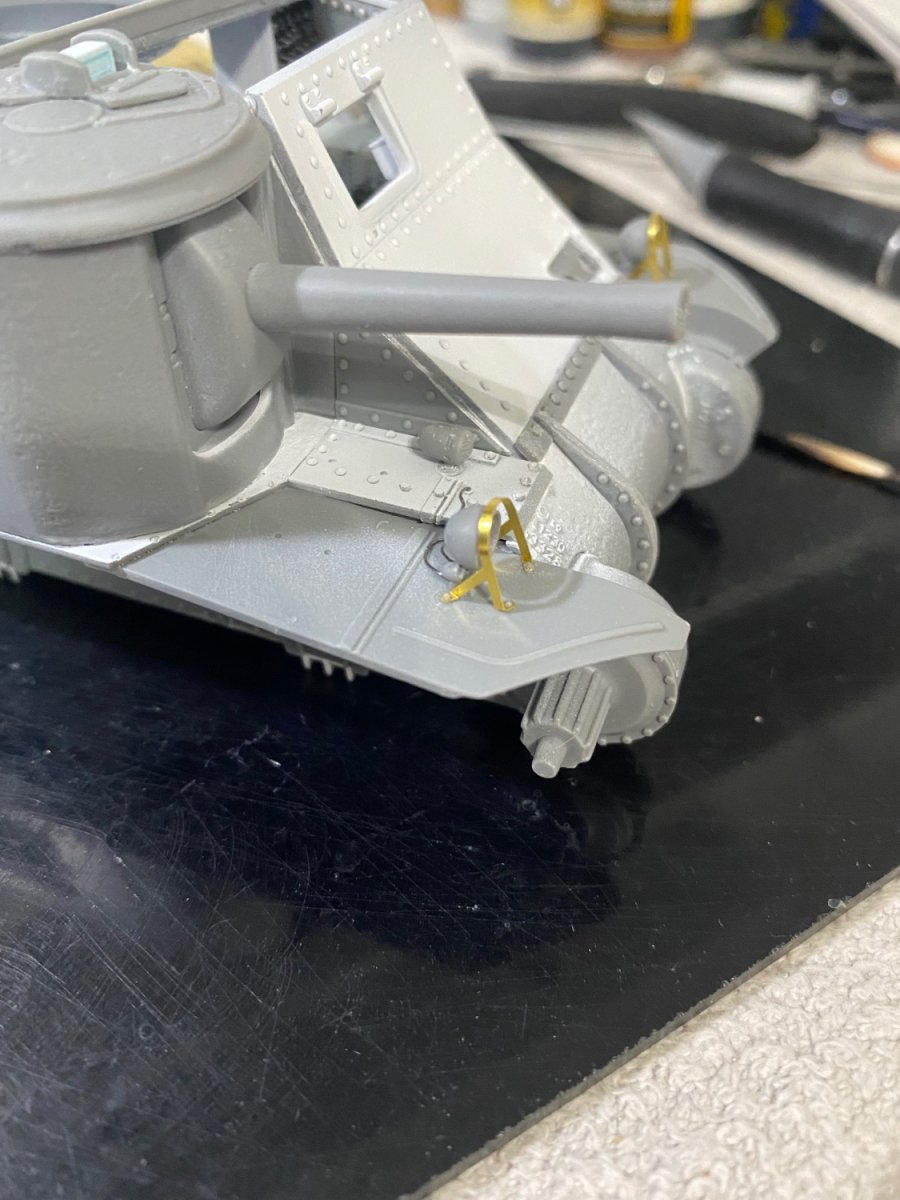
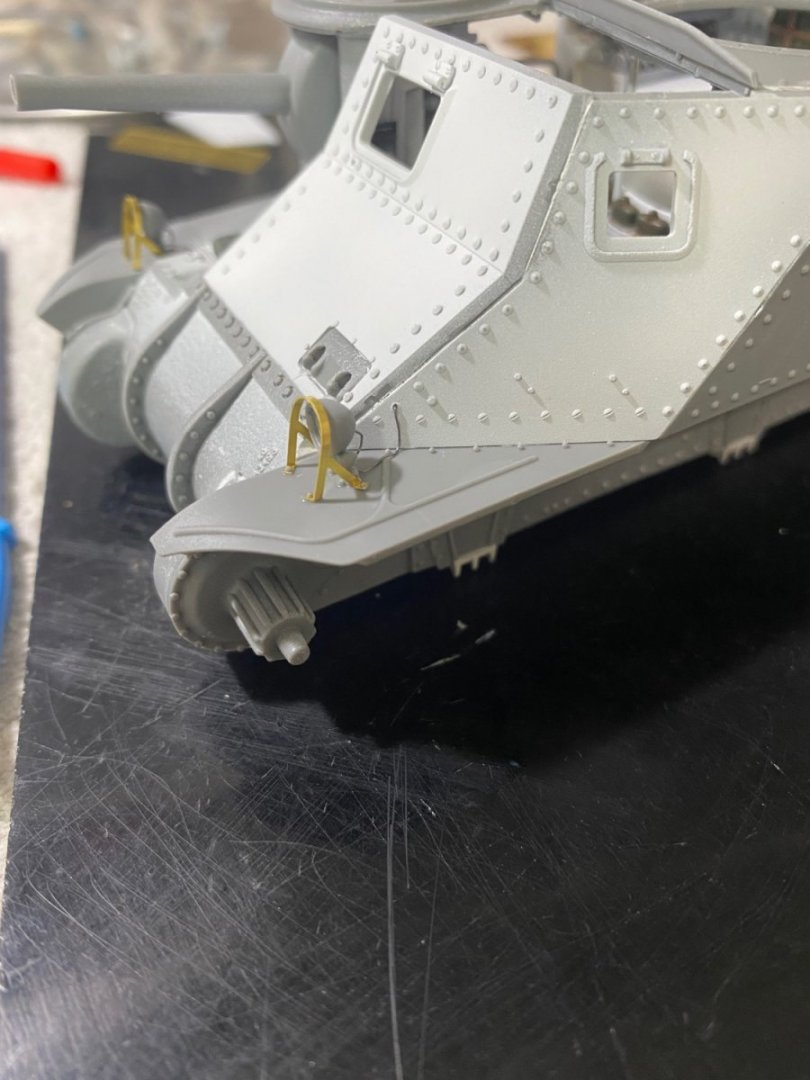
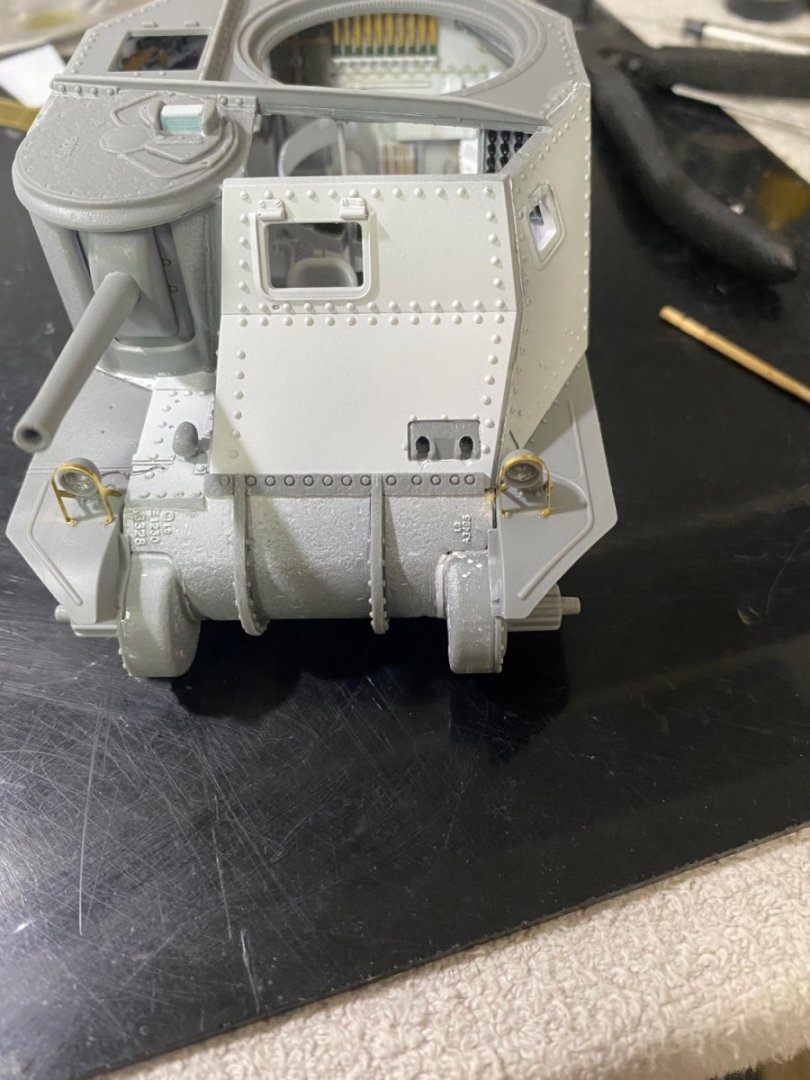
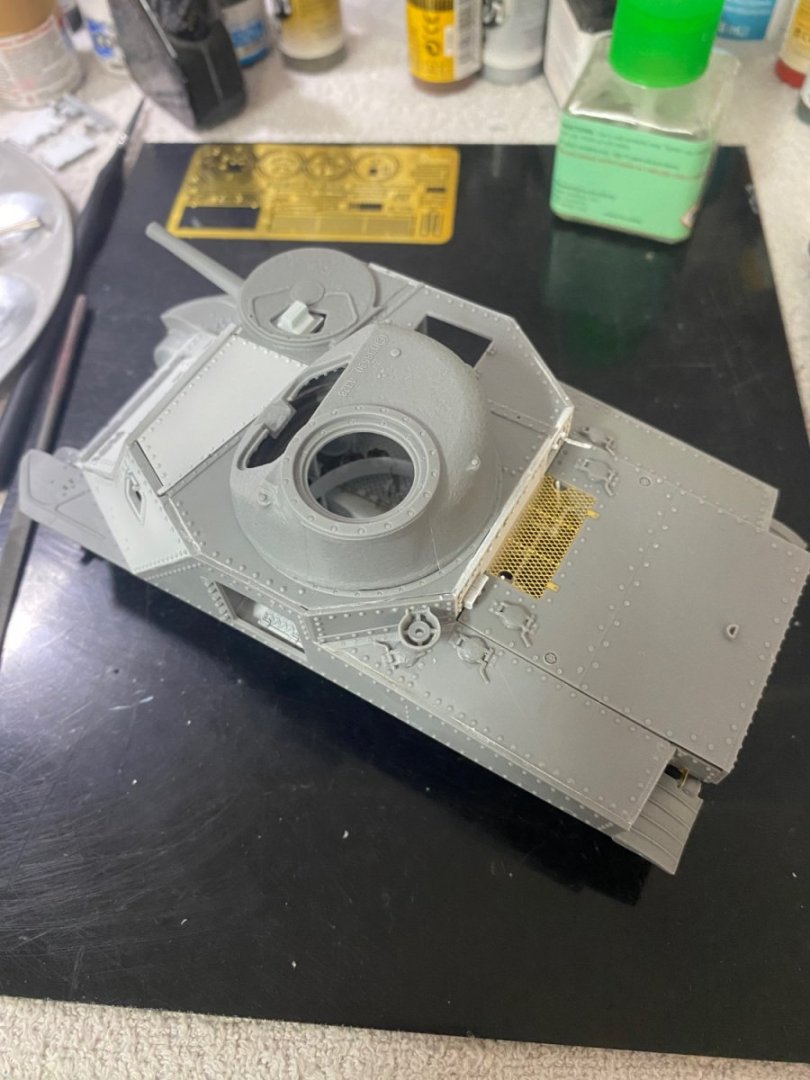
The kit includes a basic photo etch sheet for various detail pieces including these headlamp guards. The wiring shown here is not included, instead I used .1 mm lead wire for this.
- 99 replies
-
- 11
-
-
M3 Lee Tank by CDW - Miniart - 1:35 Scale - FINISHED
CDW replied to CDW's topic in Non-ship/categorised builds
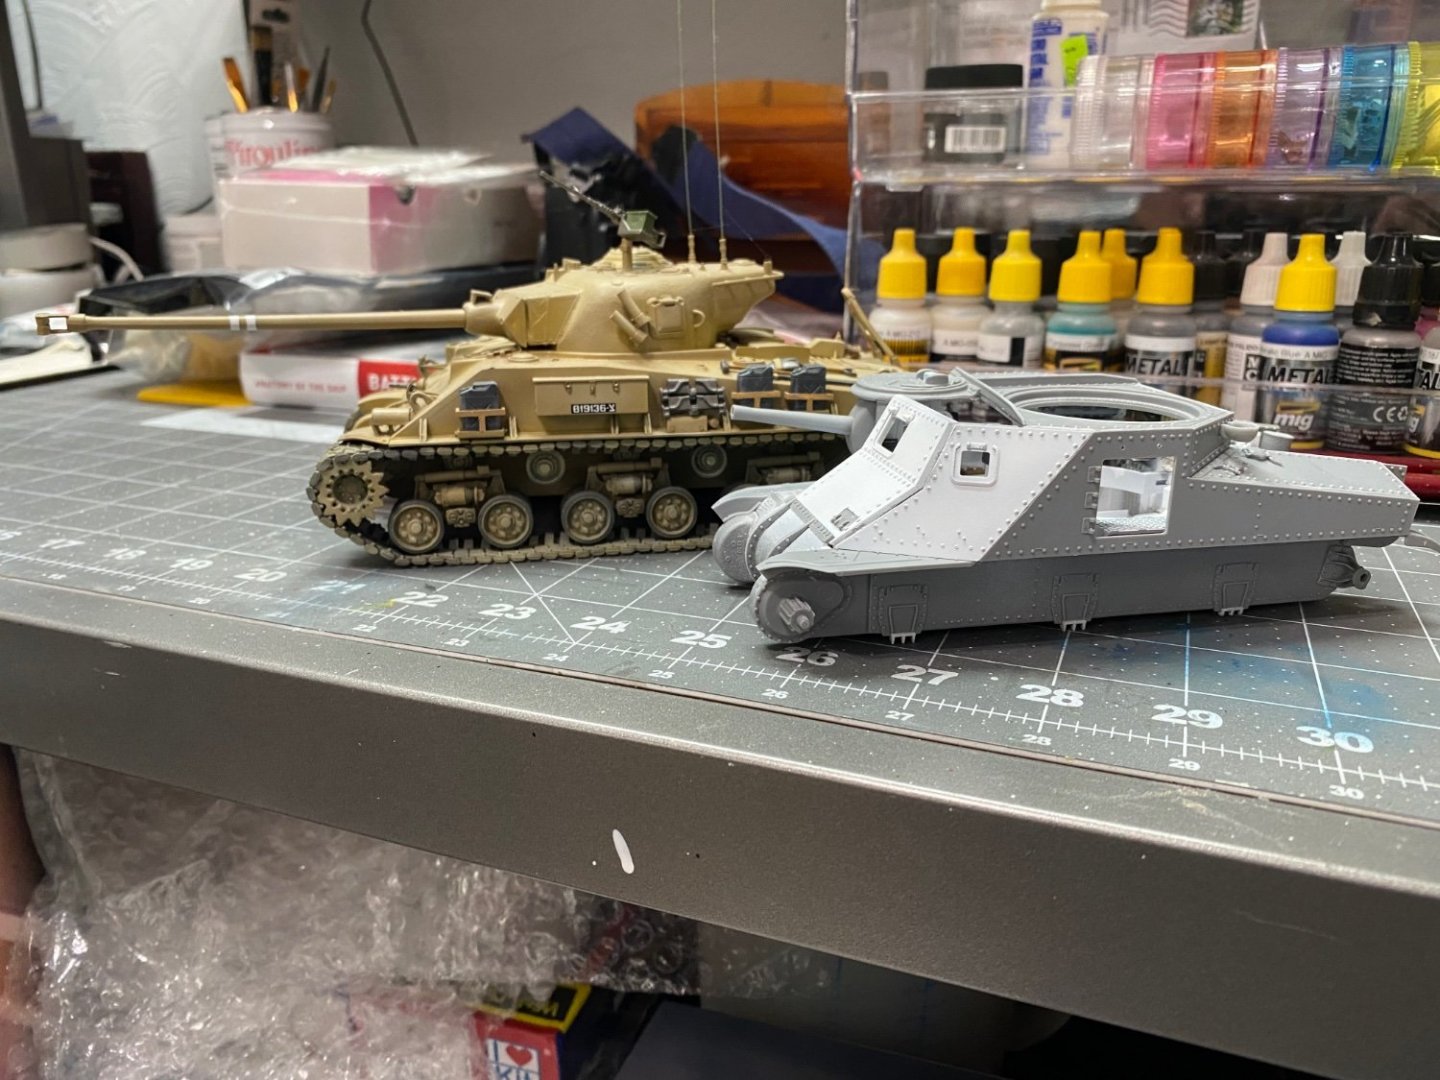
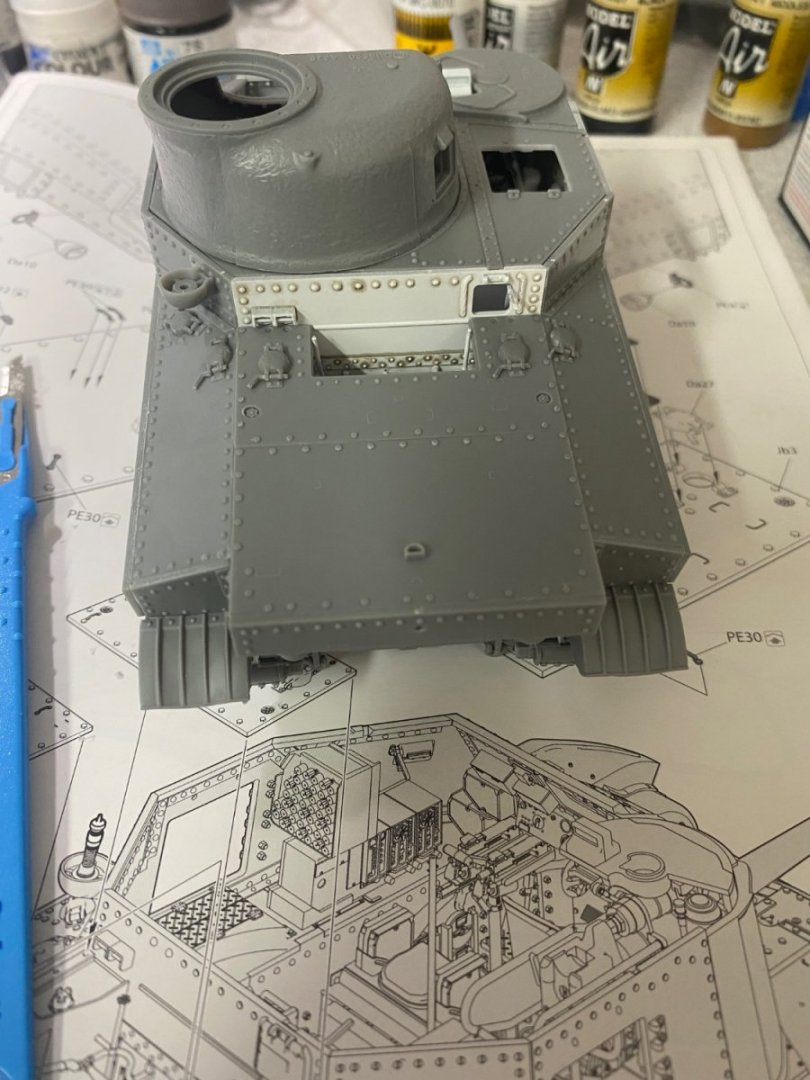
Once the suspension and road wheels are added to the Lee, the similarity and evolution of design between the Lee and the Sherman will be easy to see.
- 99 replies
-
- 12
-
-
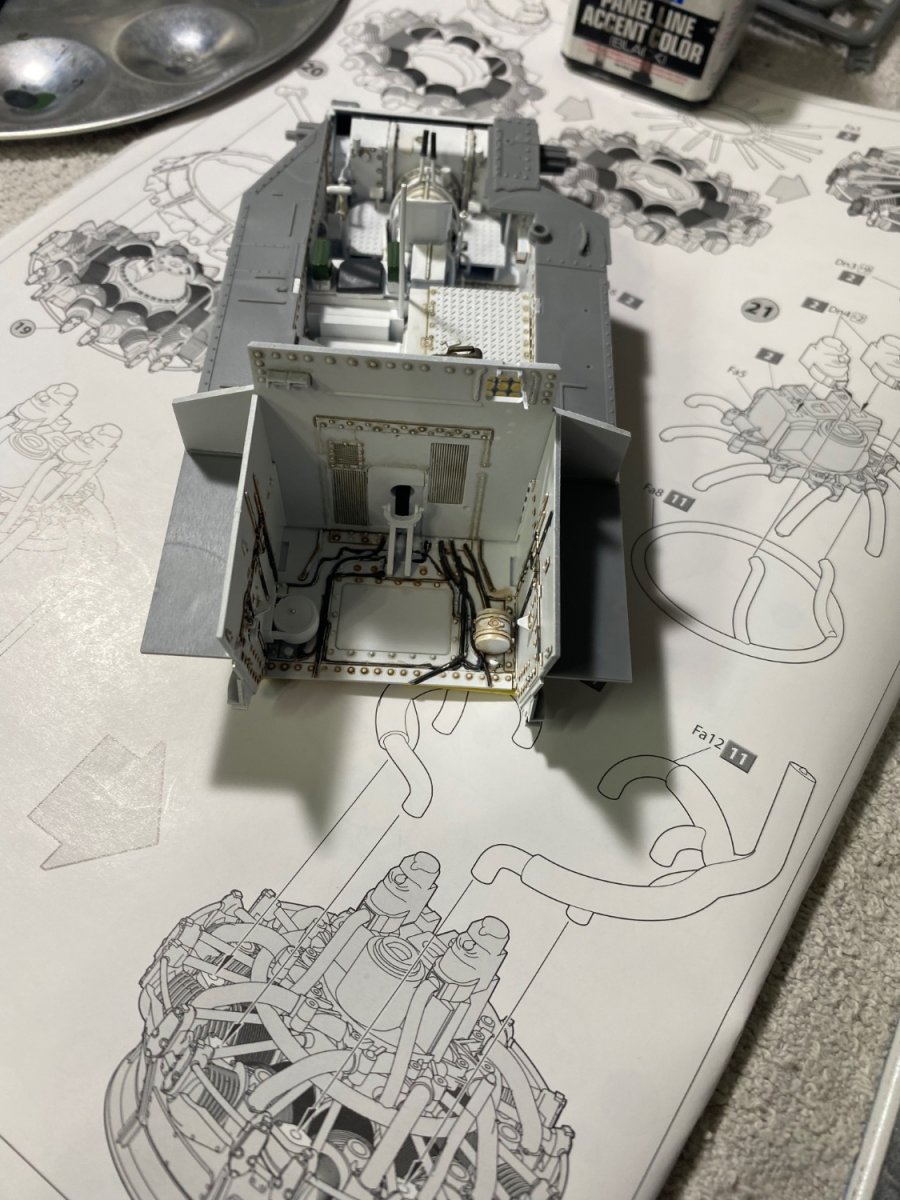
M3 Lee Tank by CDW - Miniart - 1:35 Scale - FINISHED
CDW replied to CDW's topic in Non-ship/categorised builds
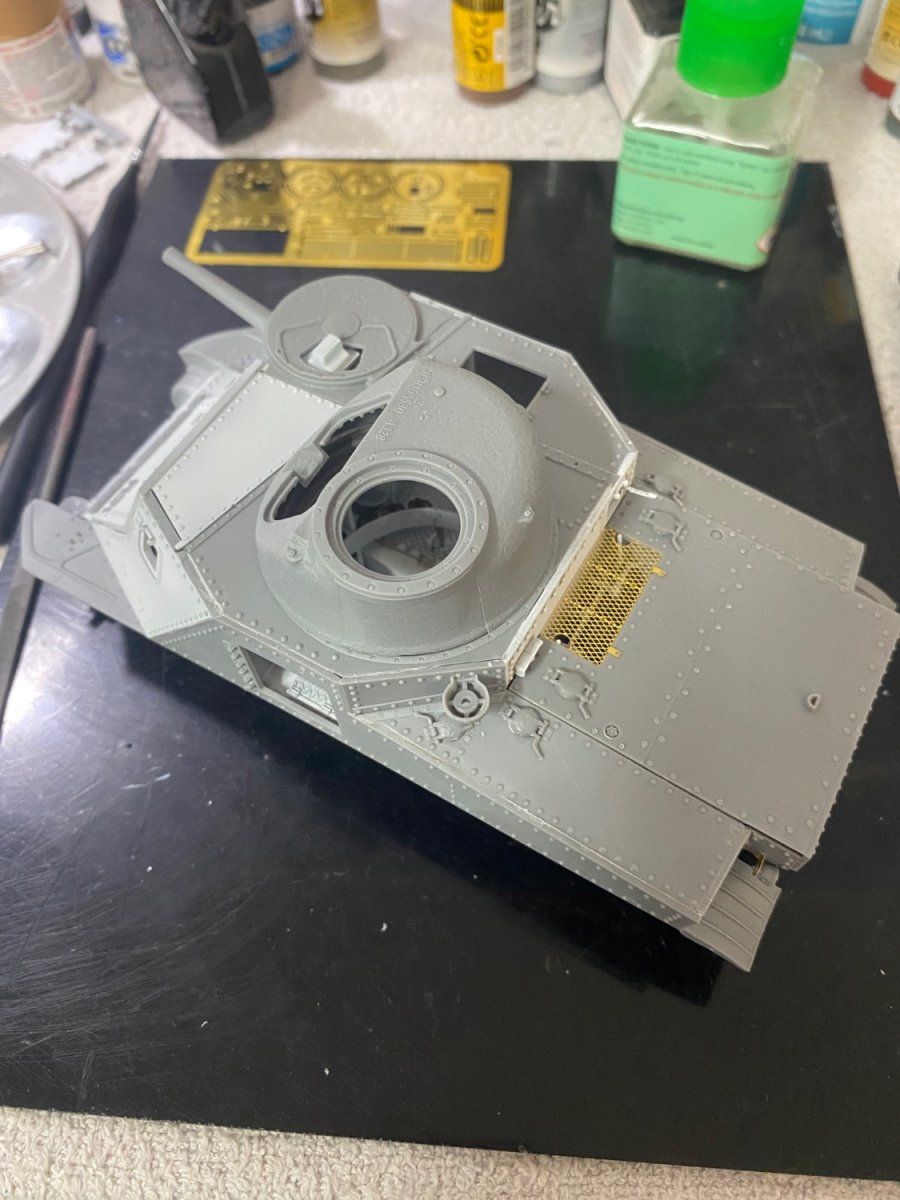
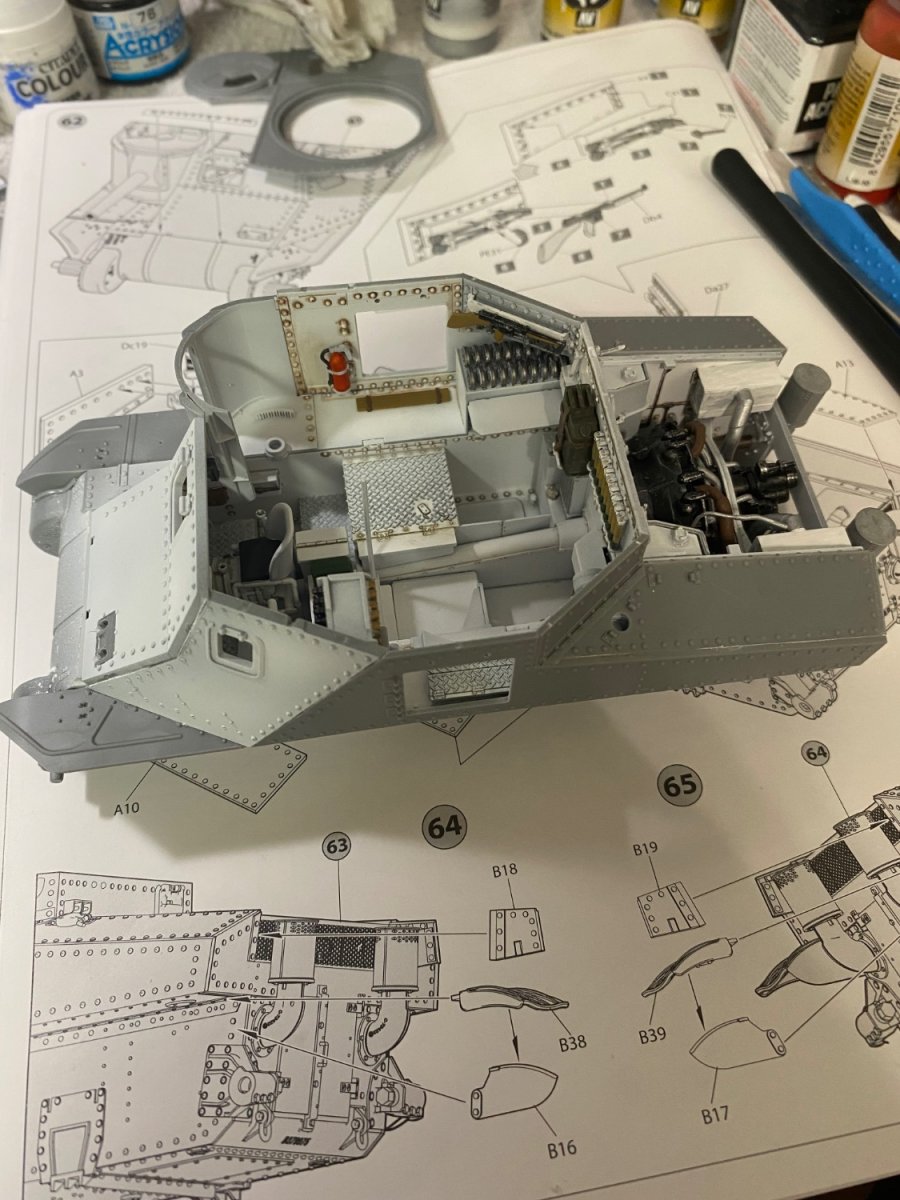
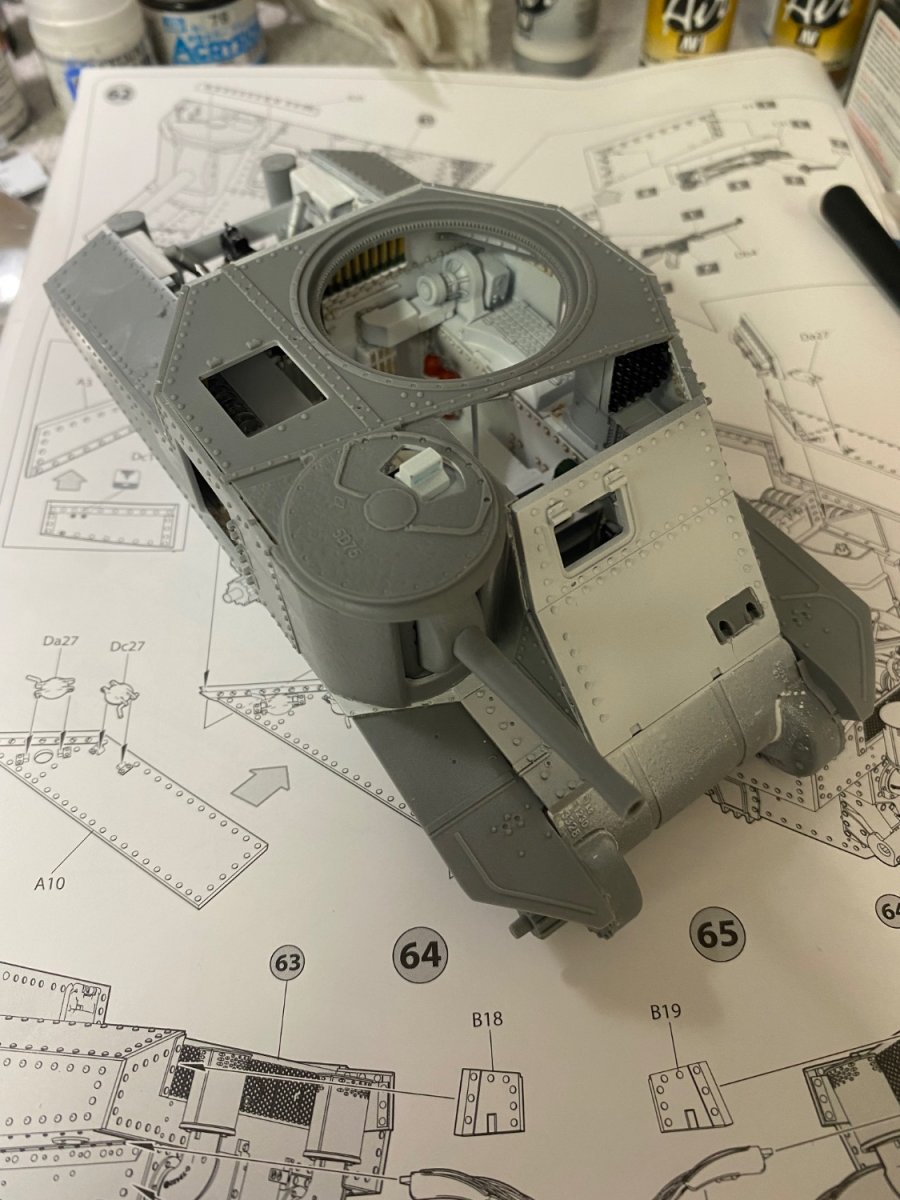
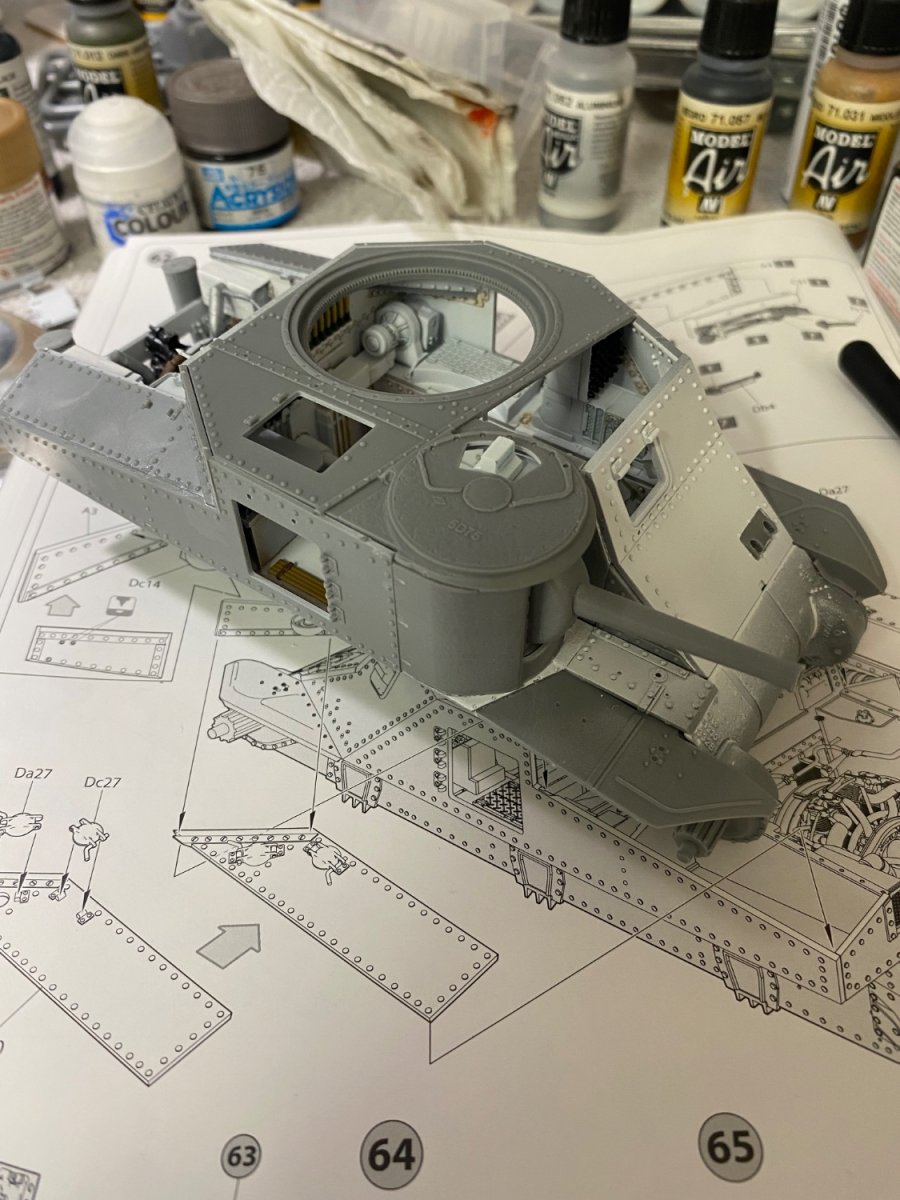
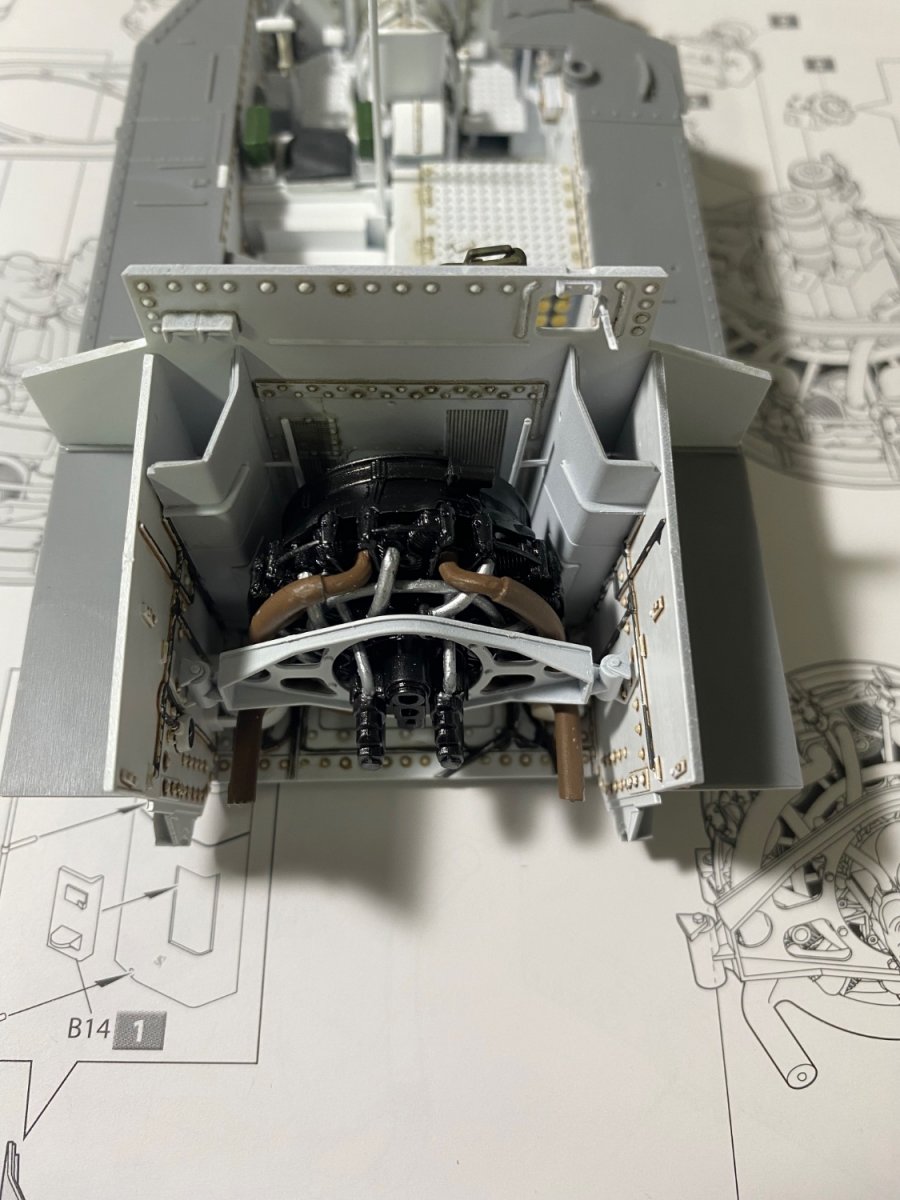
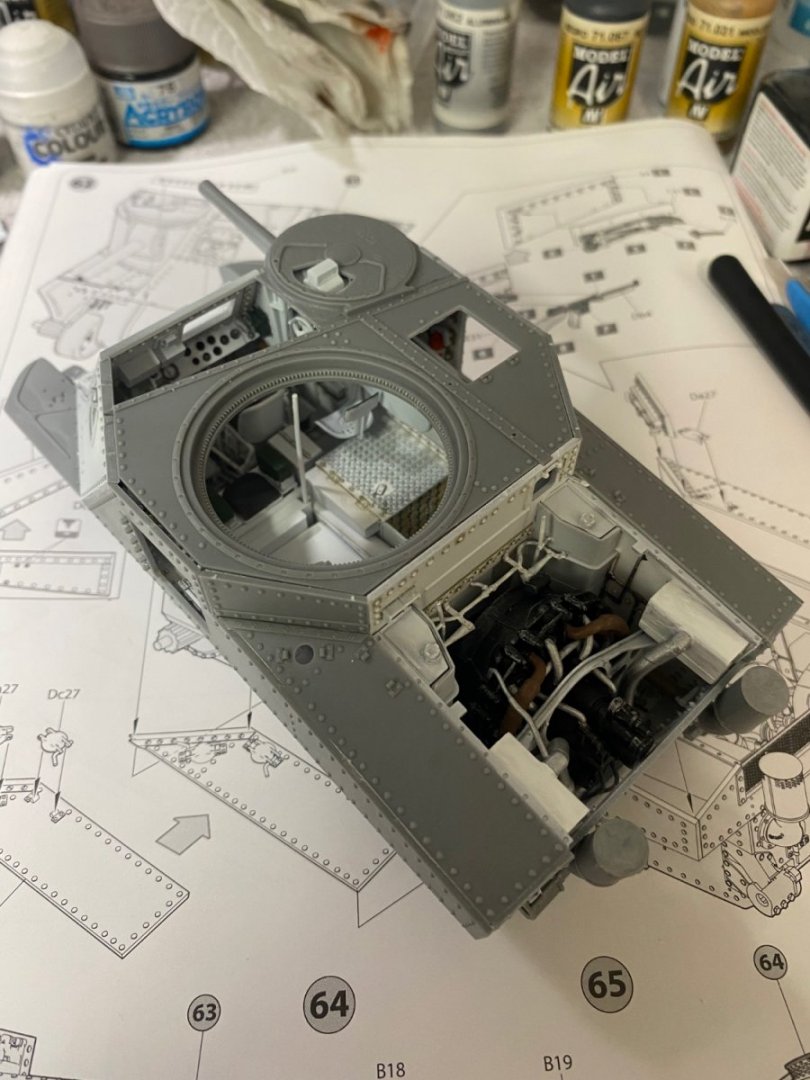
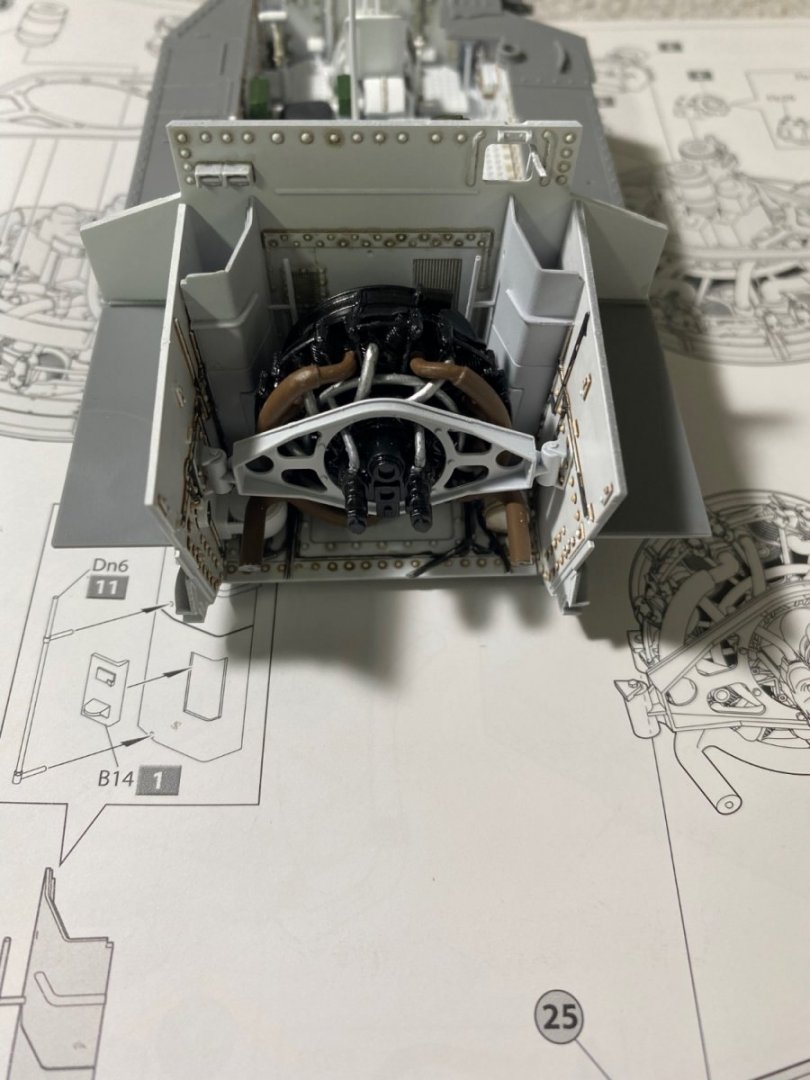
Once it’s all done it will look like this closed up and liked this opened up The panel fit is tight enough that magnets will not be needed.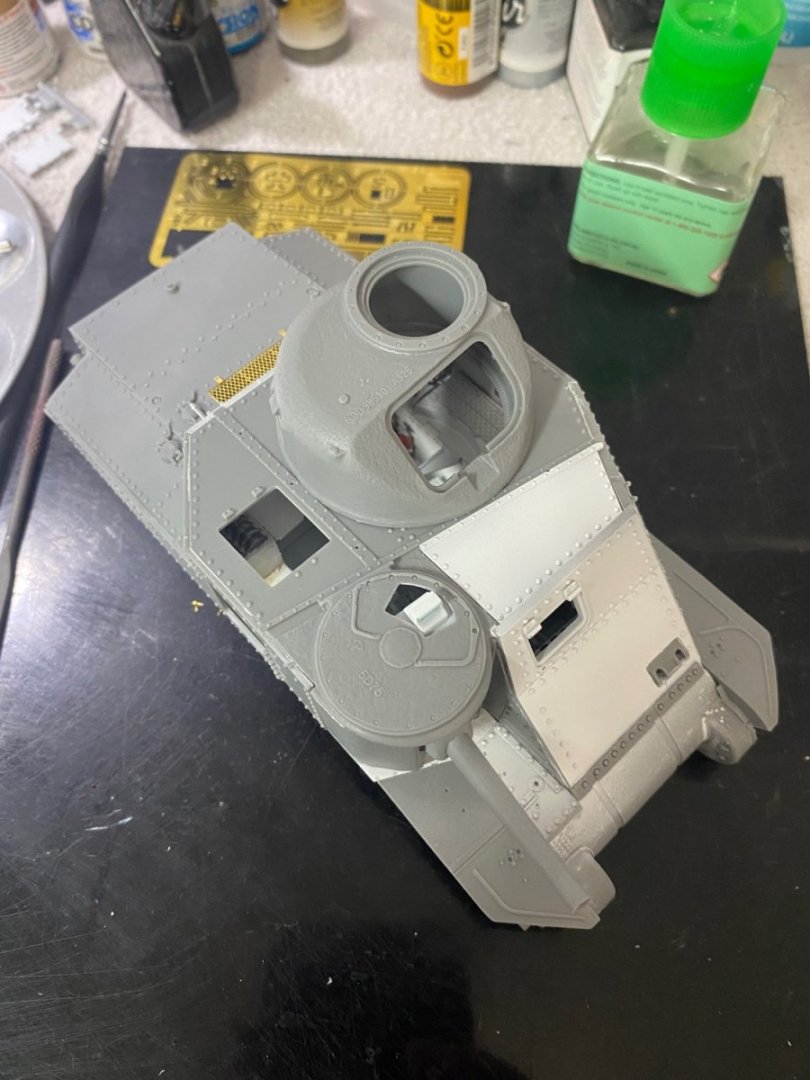


- 99 replies
-
- 14
-
-

-
M3 Lee Tank by CDW - Miniart - 1:35 Scale - FINISHED
CDW replied to CDW's topic in Non-ship/categorised builds
Yes, the M3 was the precursor of the M4 Sherman, USA's primary tank for WW2. It was a stop-gap measure until the Sherman was fully developed and put into production. If you compare the two vehicles, you will notice a similarity in the chassis and power train of both tanks. Indeed it resembled those early WW1 tanks in many ways. -
M3 Lee Tank by CDW - Miniart - 1:35 Scale - FINISHED
CDW replied to CDW's topic in Non-ship/categorised builds
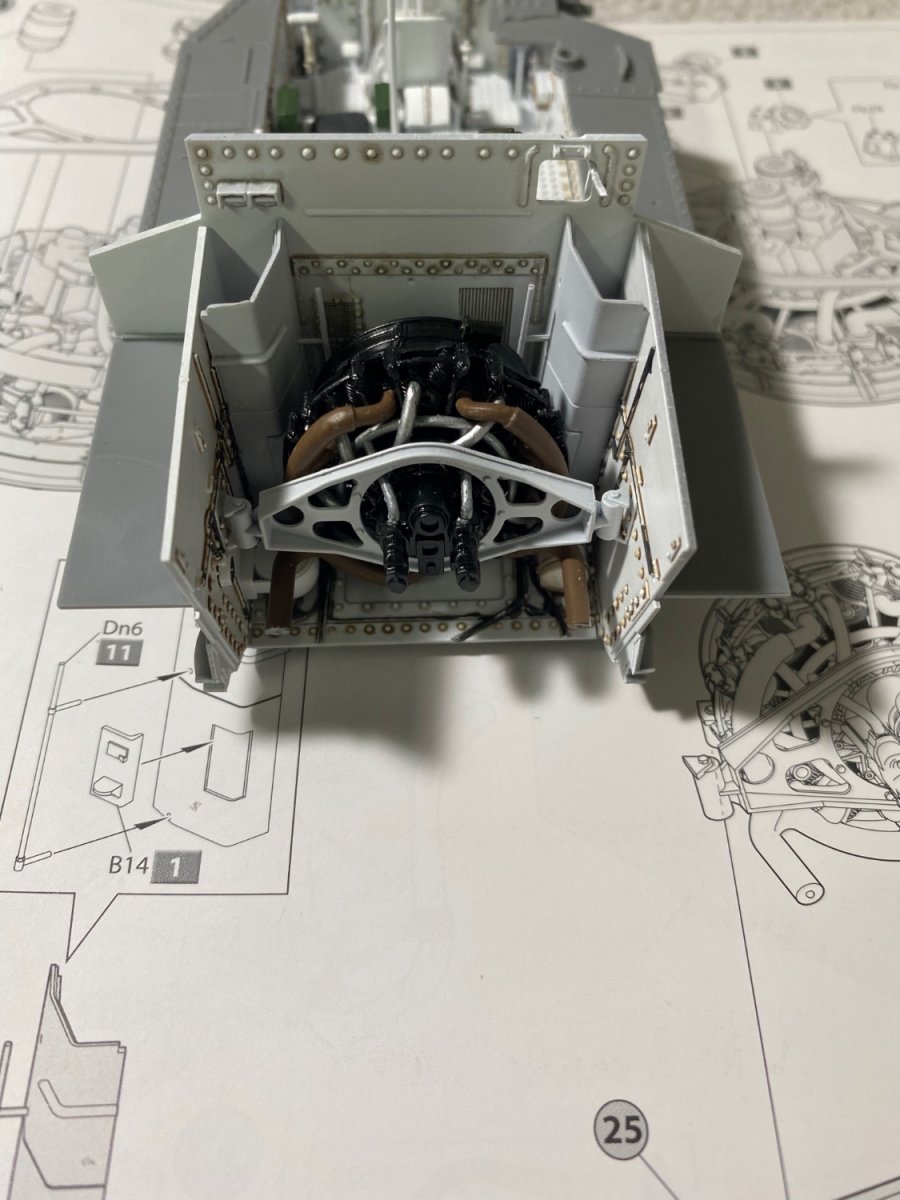
Have not decided yet, but I may build magnetic fasteners to allow removal of panels to allow major parts of the interior to be viewed. The engine bay cover is an example.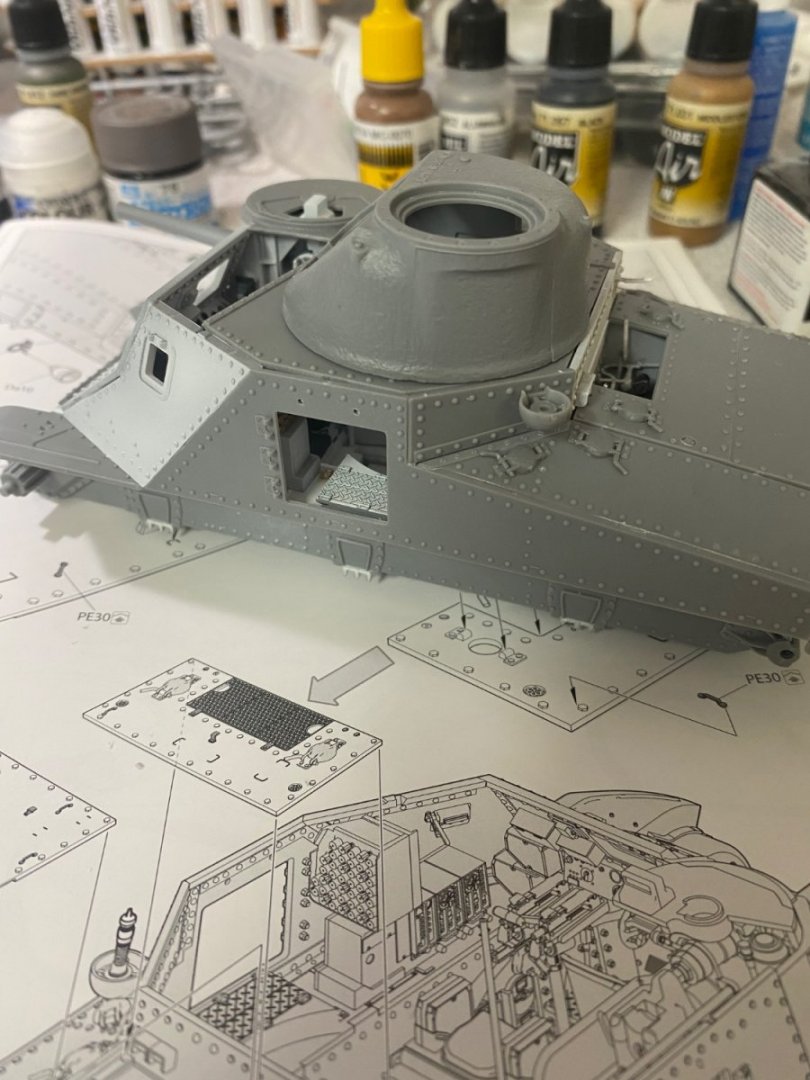

- 99 replies
-
- 14
-
-
M3 Lee Tank by CDW - Miniart - 1:35 Scale - FINISHED
CDW replied to CDW's topic in Non-ship/categorised builds
When I look at these vehicles, it reminds me of extremes in every category: cramped, heat, cold, fire trap, etc. I was never interested in being a “tanker” though I do admire and respect those who served in that capacity.- 99 replies
-
- 10
-
-
M3 Lee Tank by CDW - Miniart - 1:35 Scale - FINISHED
CDW replied to CDW's topic in Non-ship/categorised builds
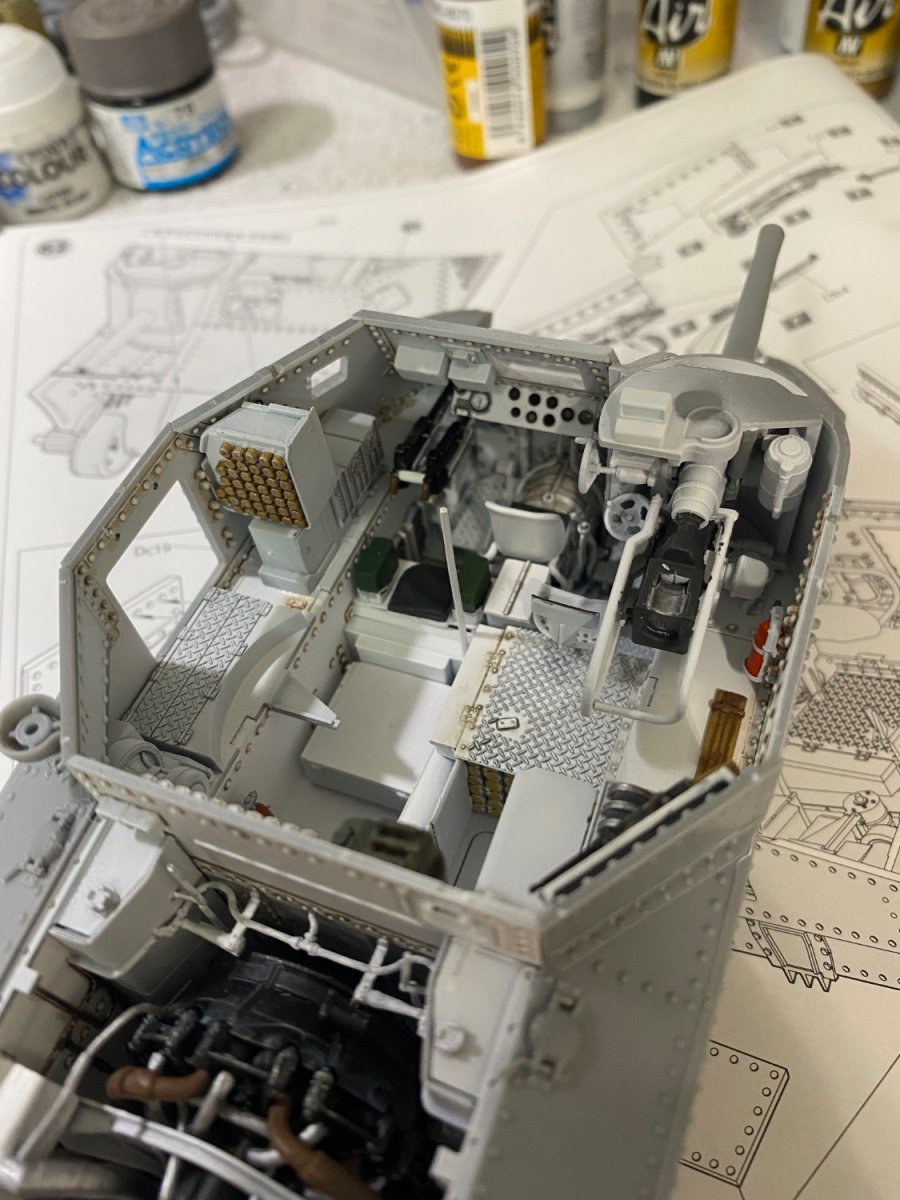
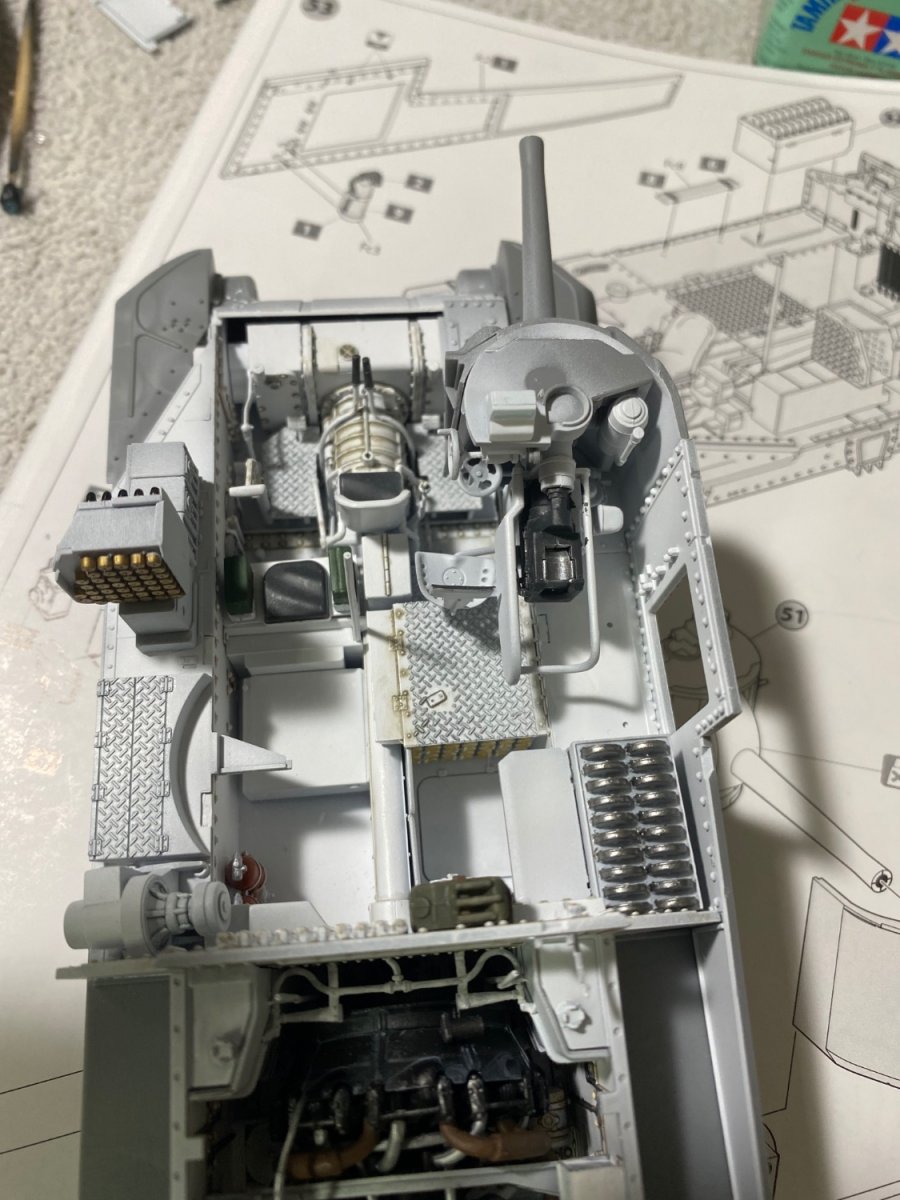
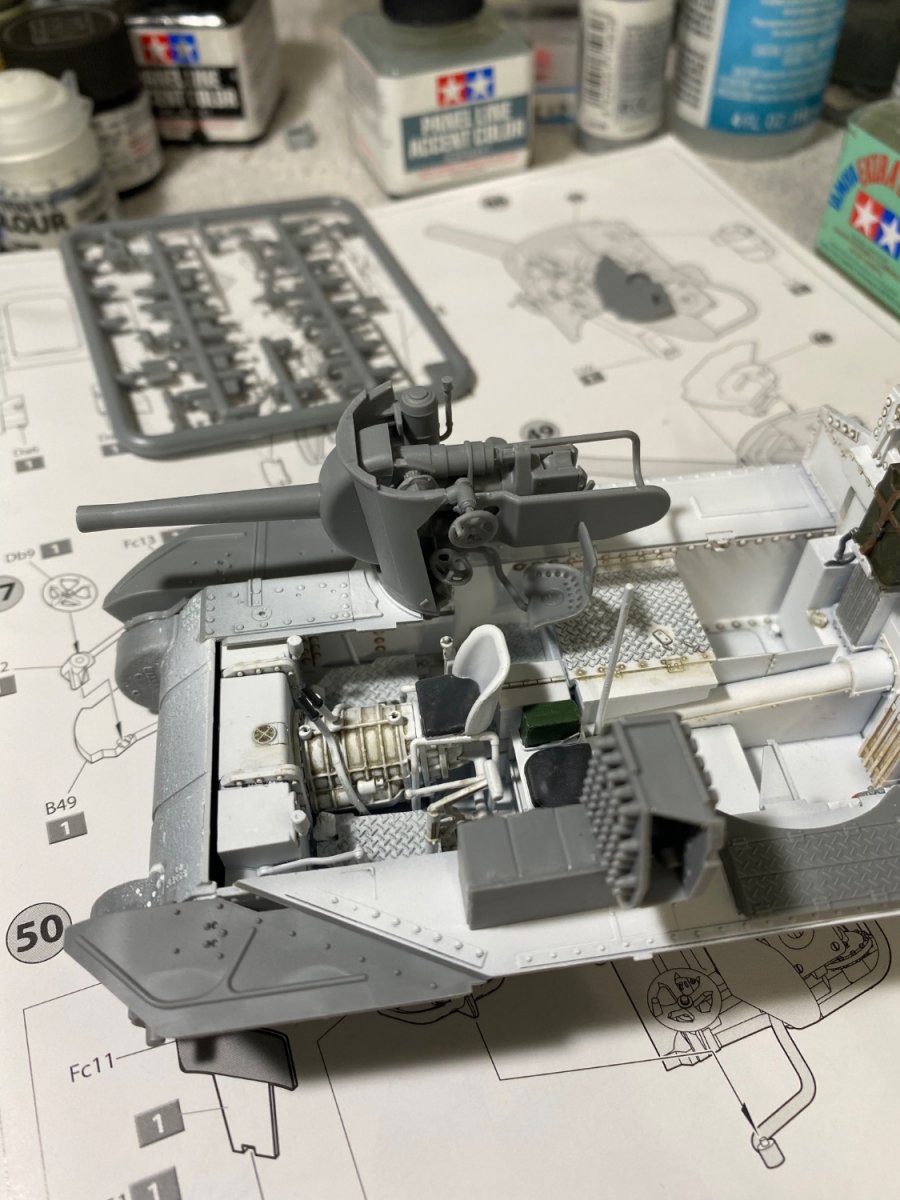
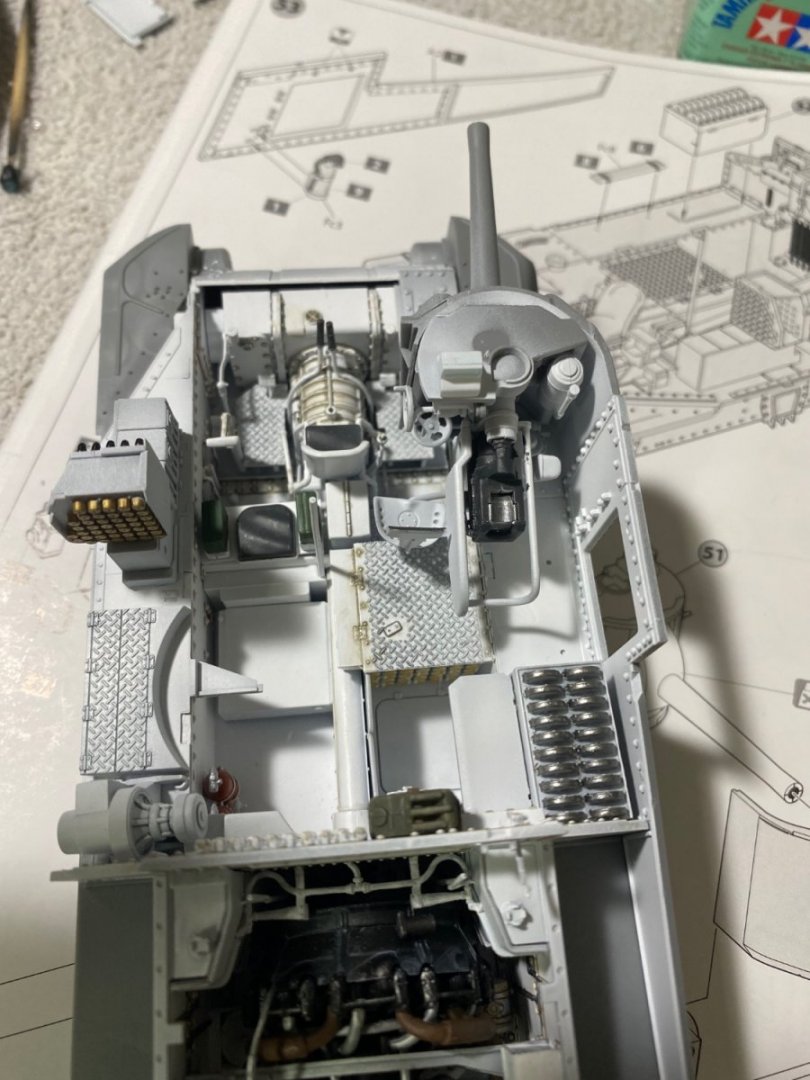
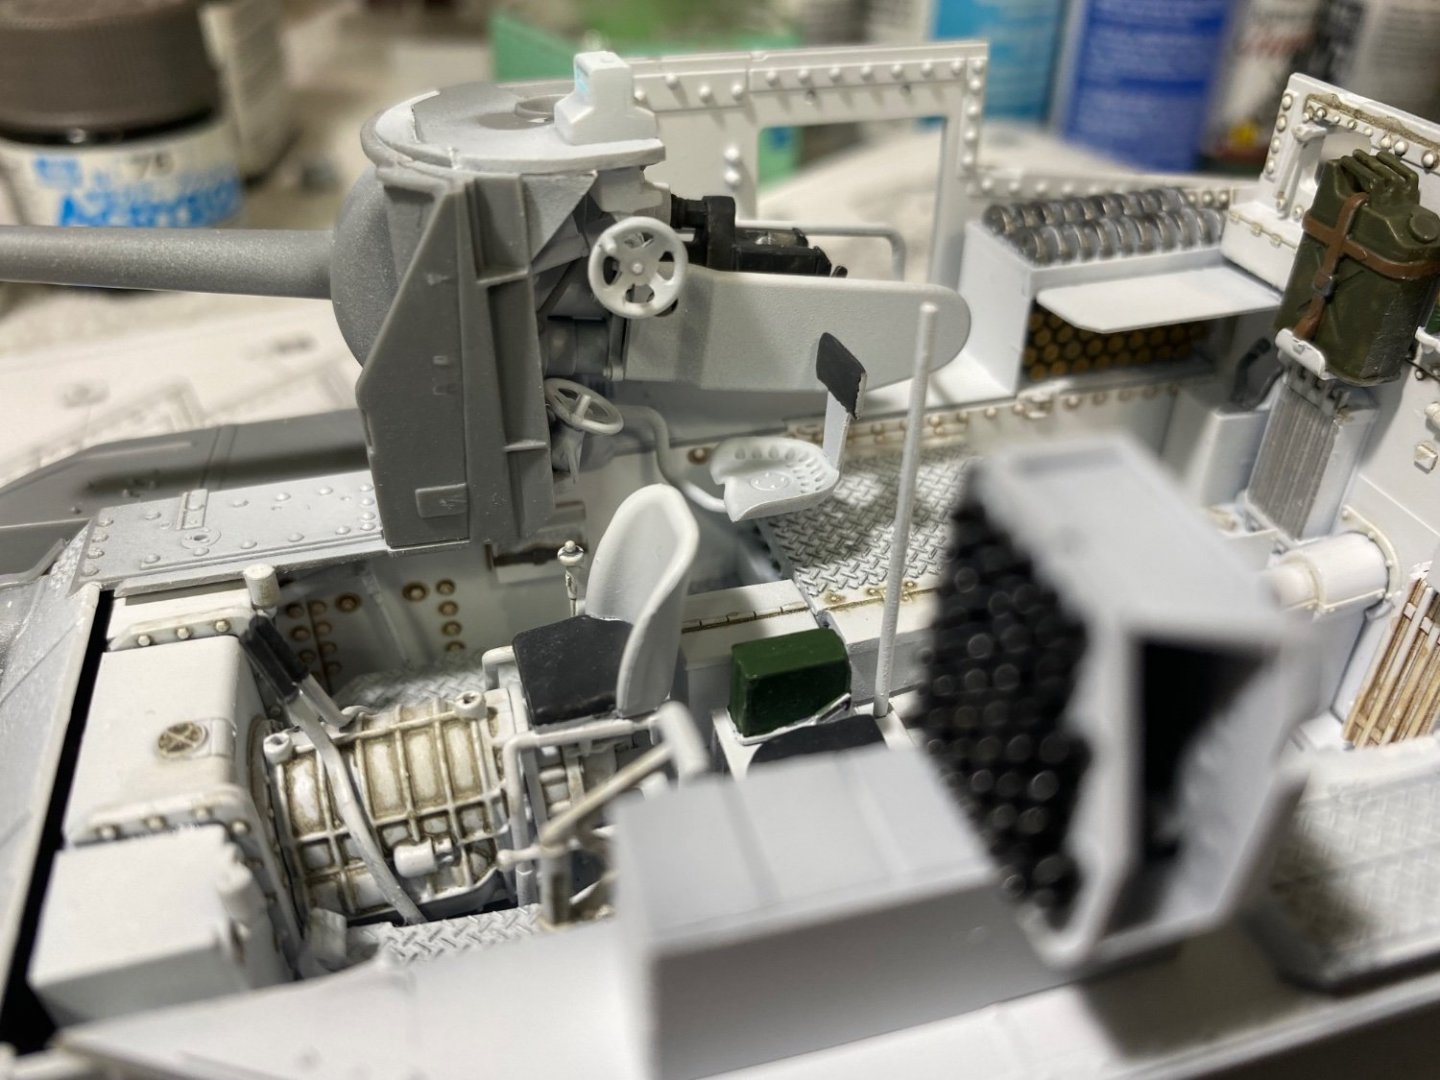
While there was a pair of 30 cal guns mounted here, there was little to no way to swing the aim left or right, nor to elevate. Even the main gun had very small lateral movement or elevation. Maybe 15 to 20 degrees total I’m guessing. The main turret mounts a 37 mm gun that fully rotated.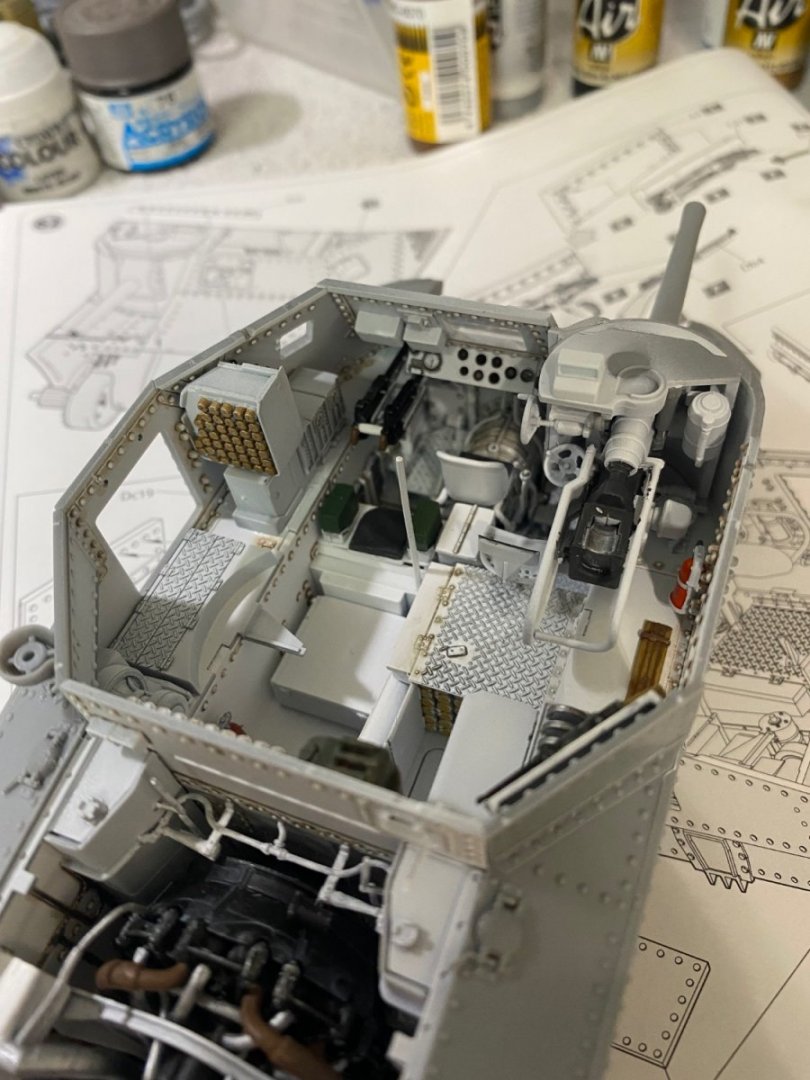
- 99 replies
-
- 15
-
-
What a ship. I bet there were no others even close to this in terms of "luxury" battleships. Must have been a source of national pride when they were built or at least the pride of their dictator. 🤔
- 203 replies
-
- 6
-

-
-
- Roma
- Micromaster
- (and 4 more)
-
M3 Lee Tank by CDW - Miniart - 1:35 Scale - FINISHED
CDW replied to CDW's topic in Non-ship/categorised builds


- 99 replies
-
- 11
-
-
Your glass work looks remarkable in these photos.
-
What good reference sources did you find for Roma. Any books?
- 203 replies
-
- 5
-
-
- Roma
- Micromaster
- (and 4 more)
-
M3 Lee Tank by CDW - Miniart - 1:35 Scale - FINISHED
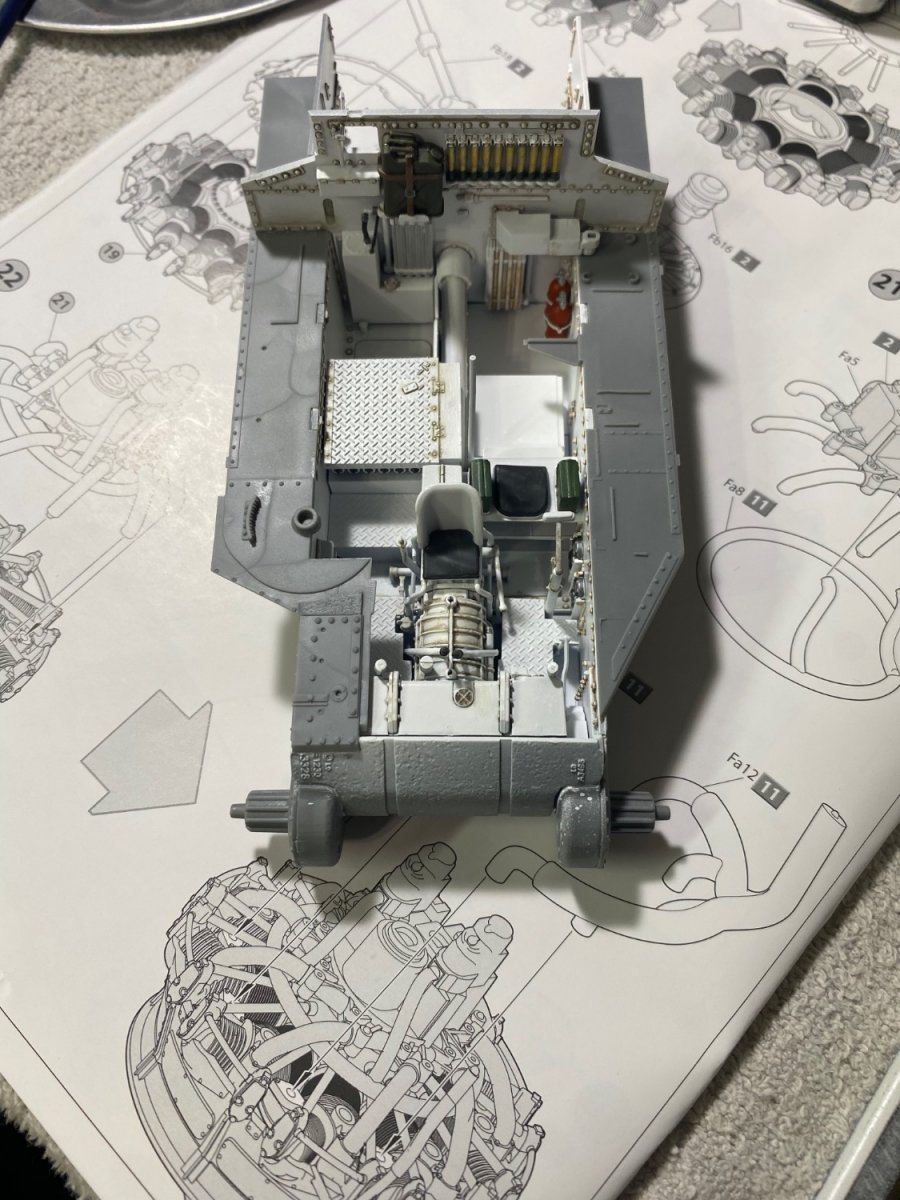
CDW replied to CDW's topic in Non-ship/categorised builds
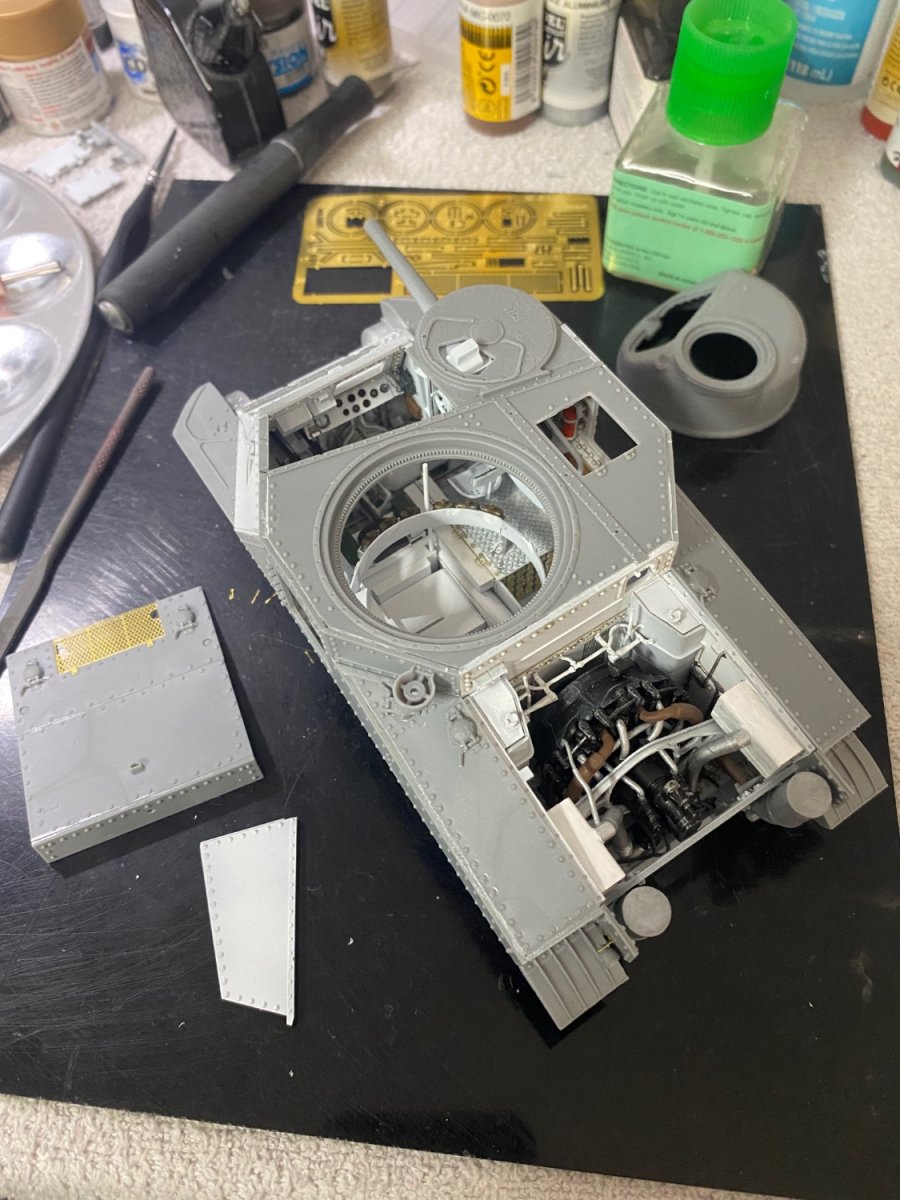
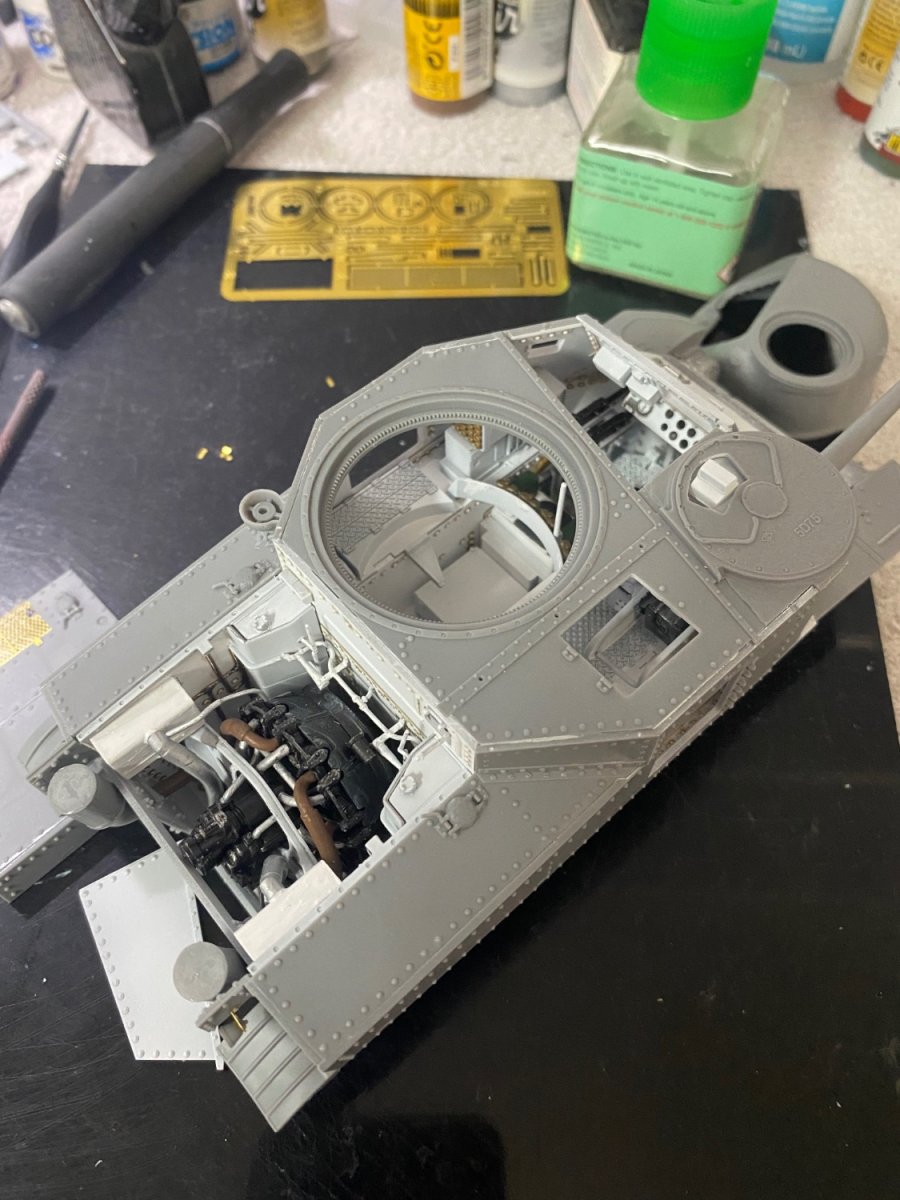
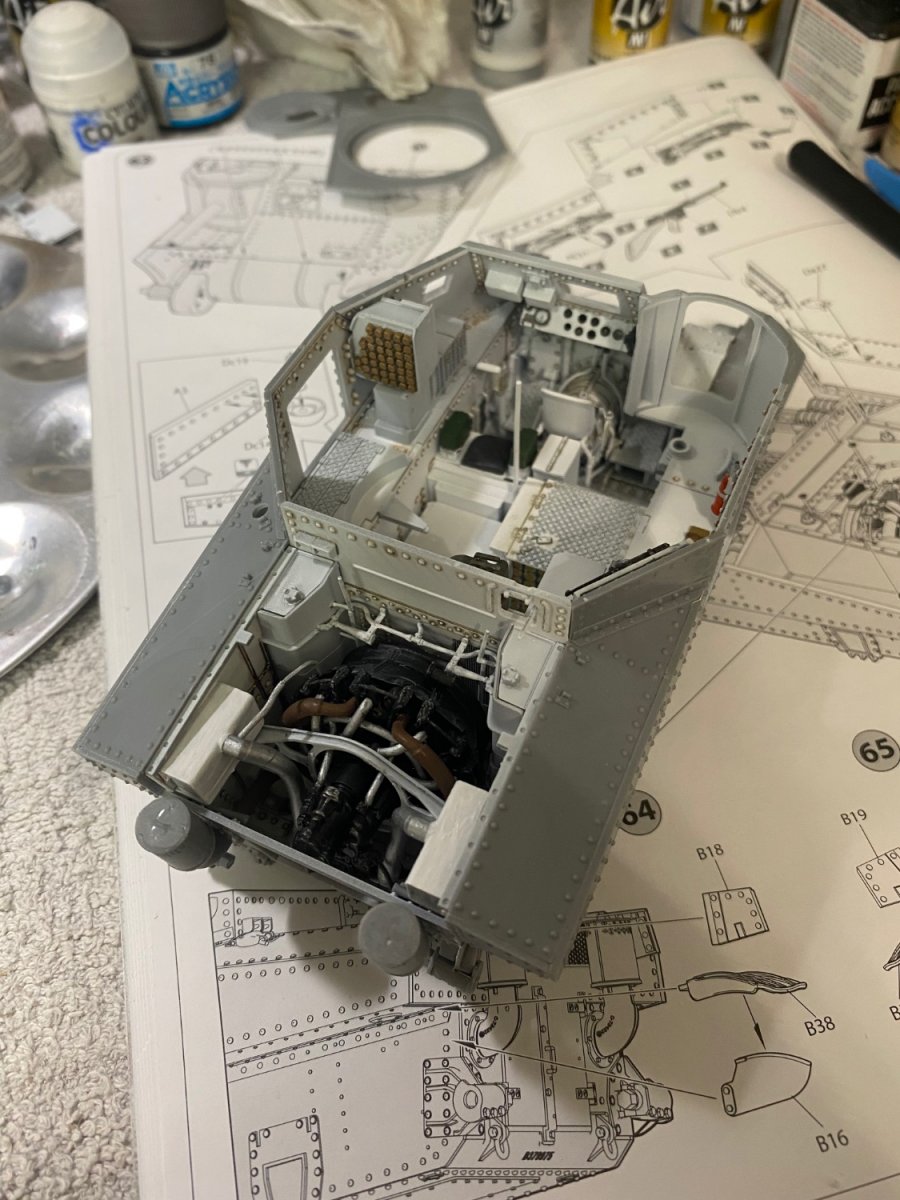
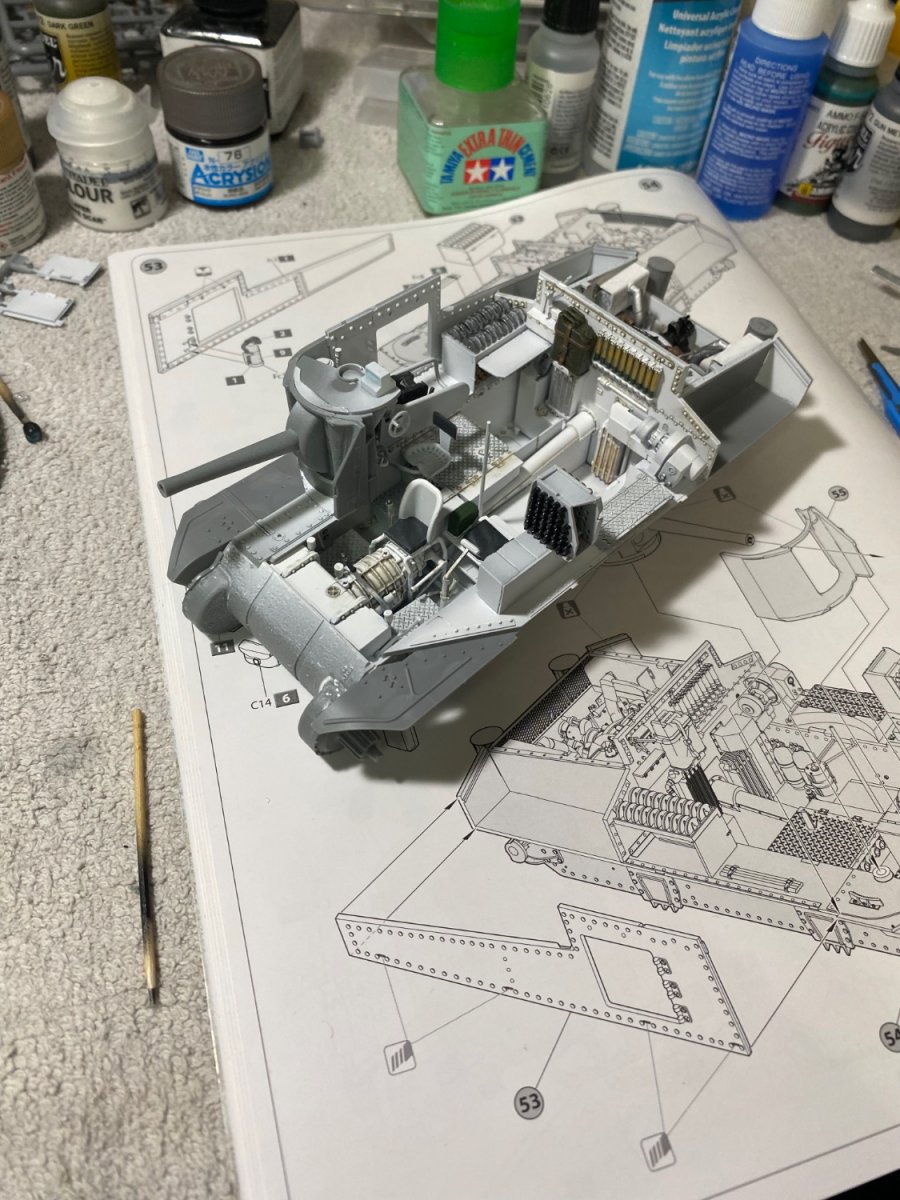
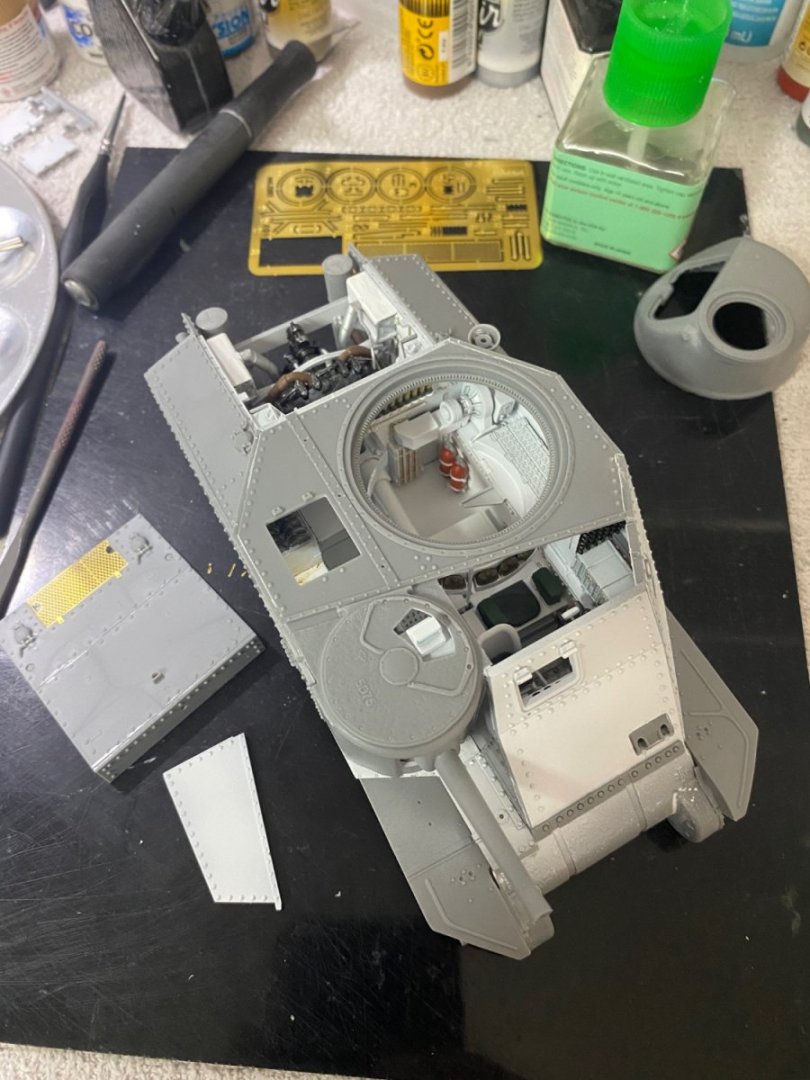
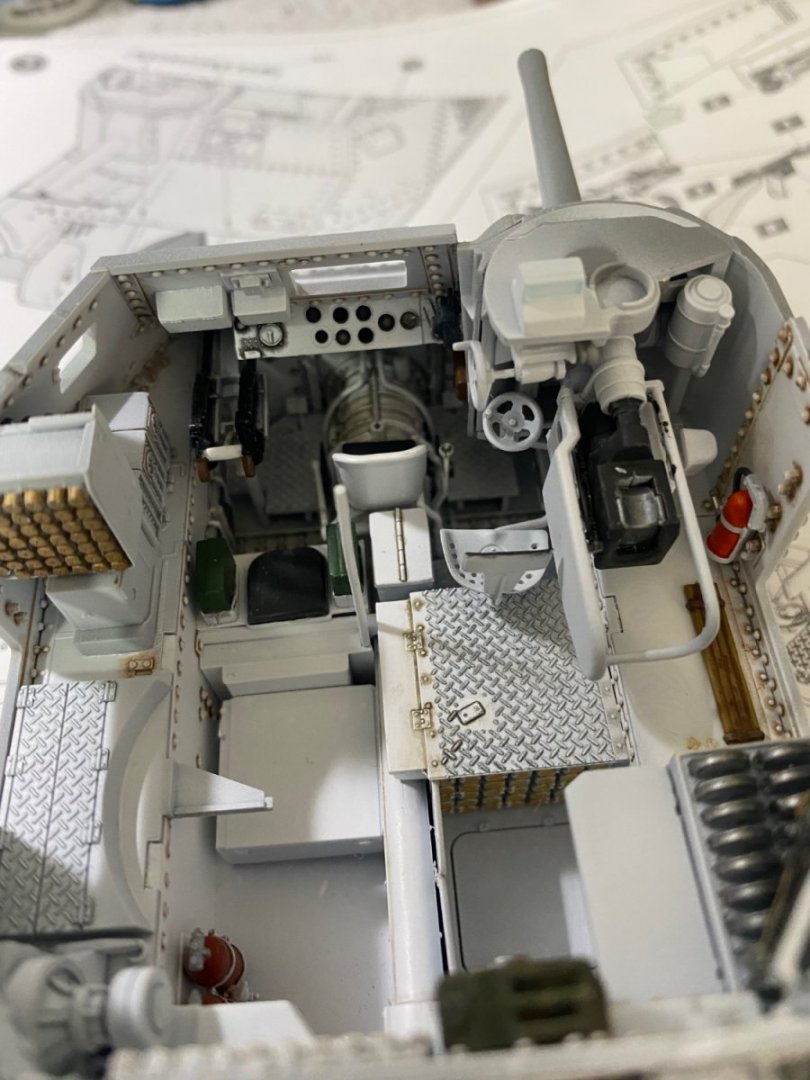
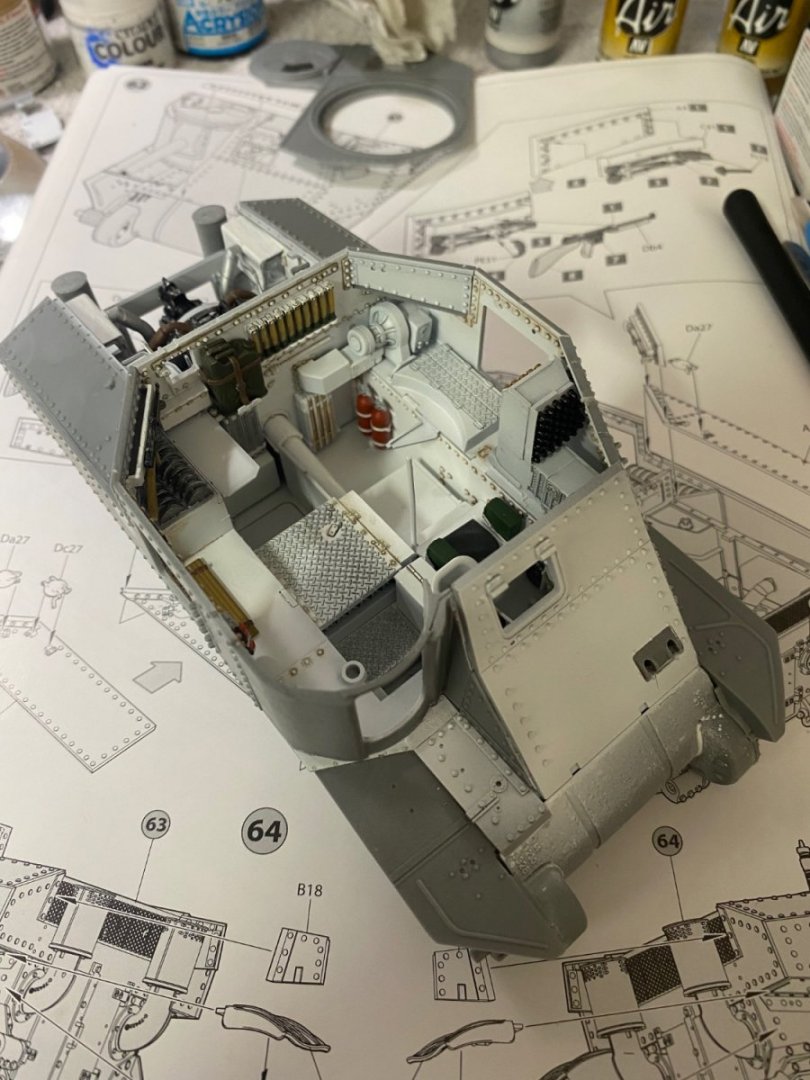
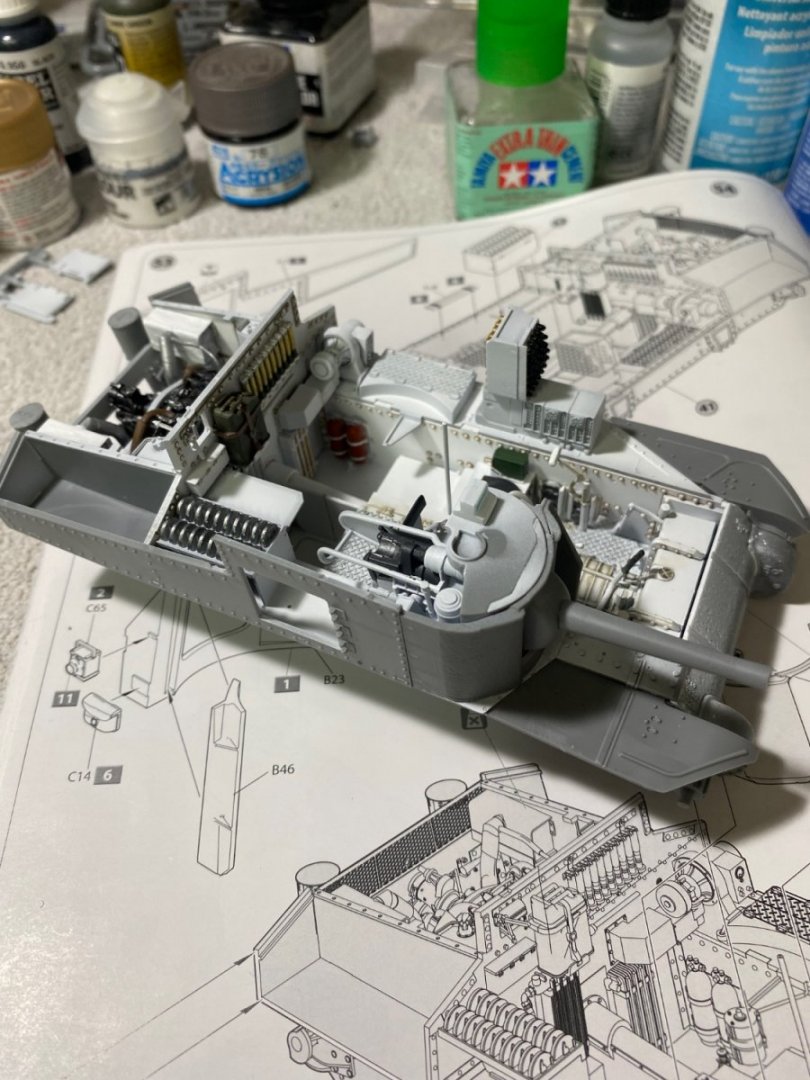
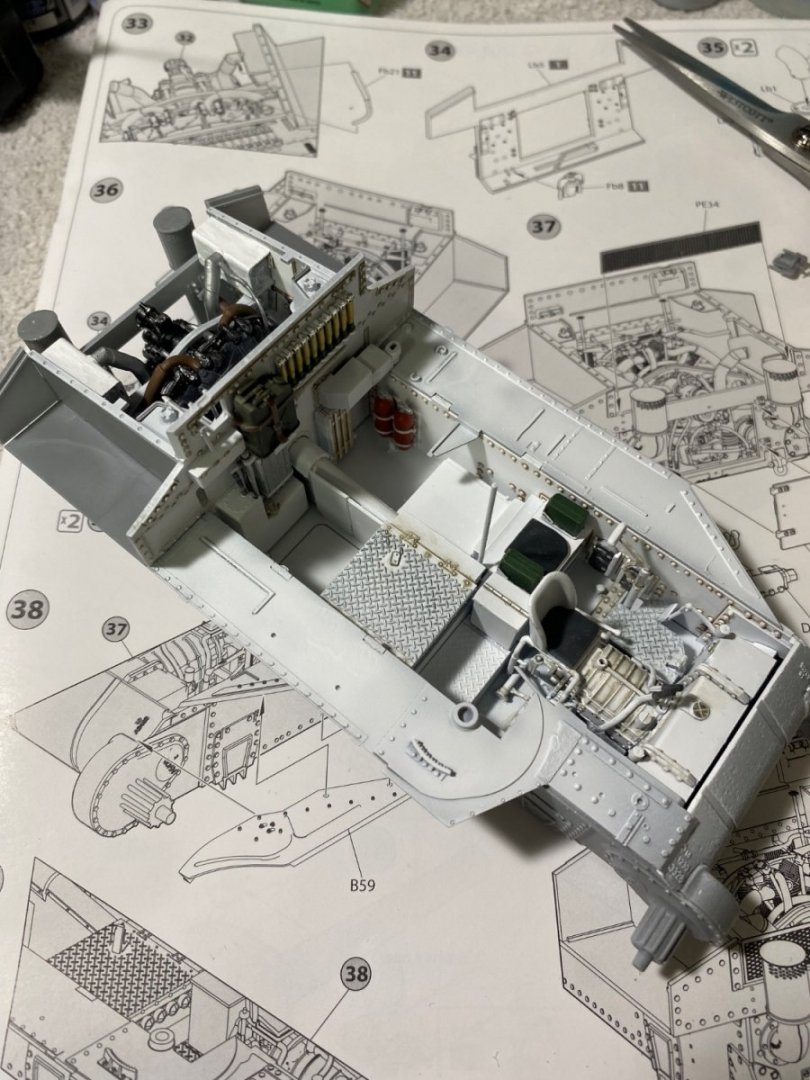
There’s a lot packed in here, but still quite a bit more to go for the interior. Gotta drop back to do some detail painting.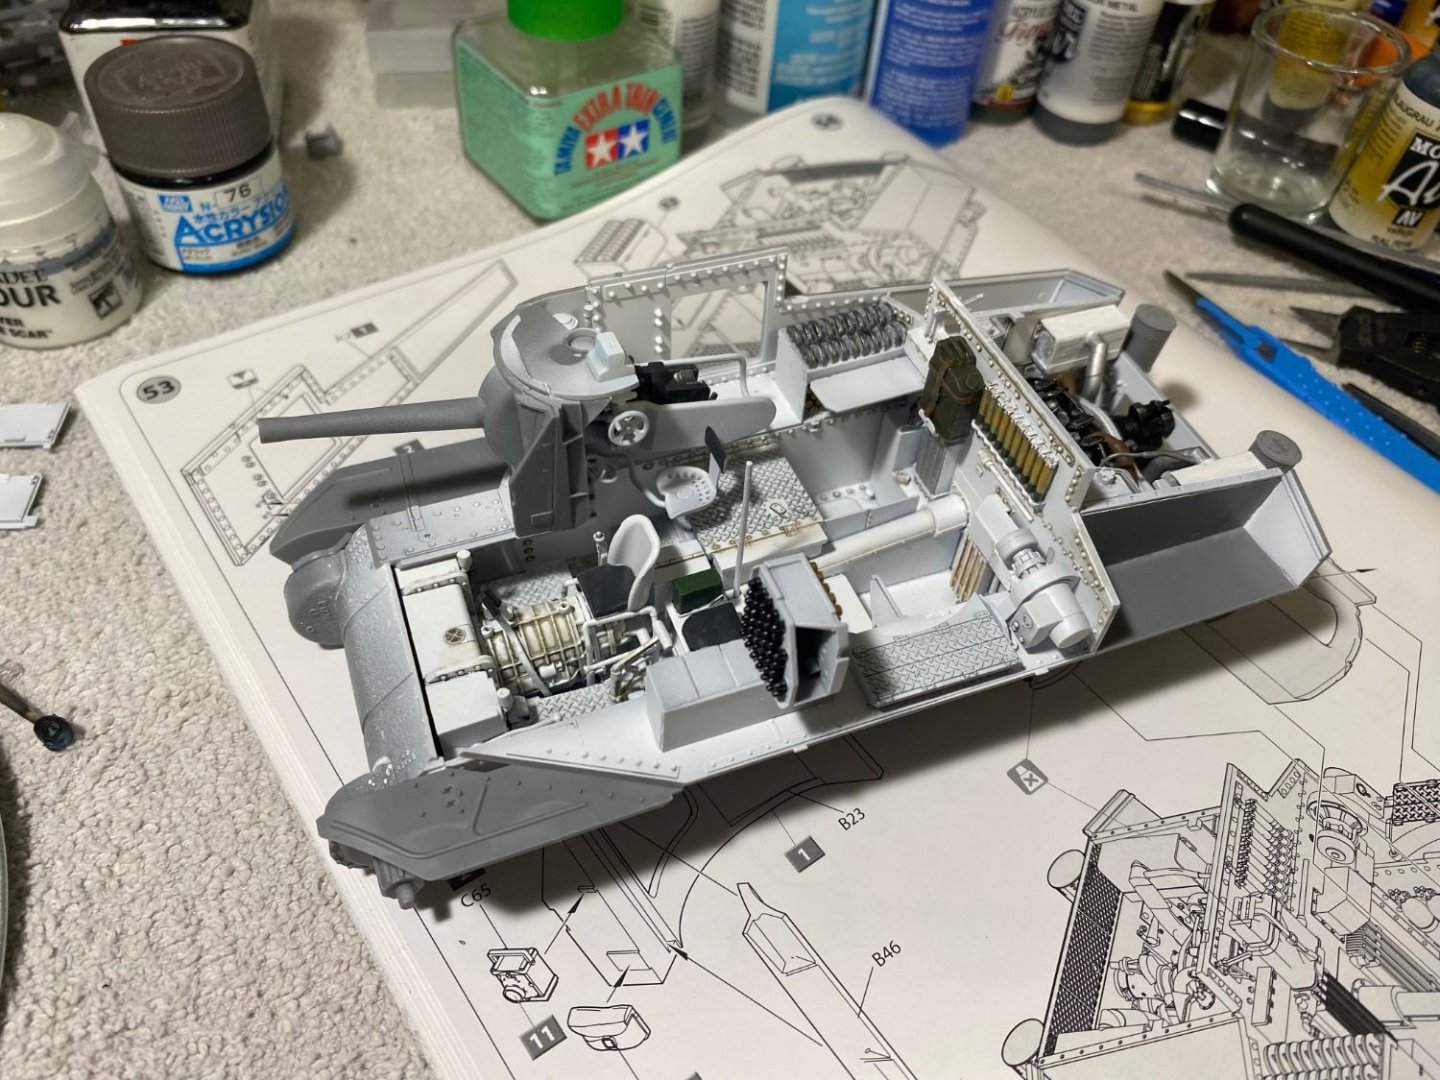

- 99 replies
-
- 10
-
-
M3 Lee Tank by CDW - Miniart - 1:35 Scale - FINISHED
CDW replied to CDW's topic in Non-ship/categorised builds
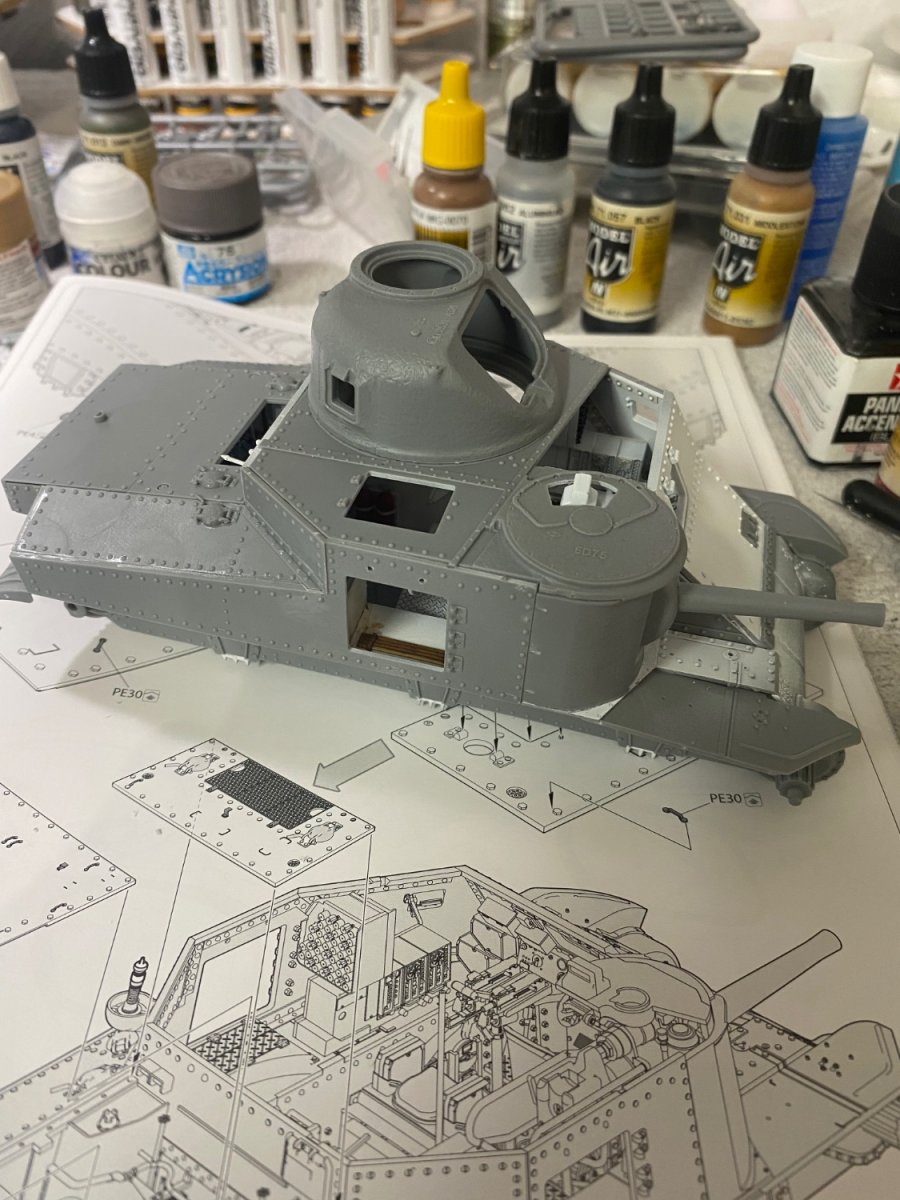
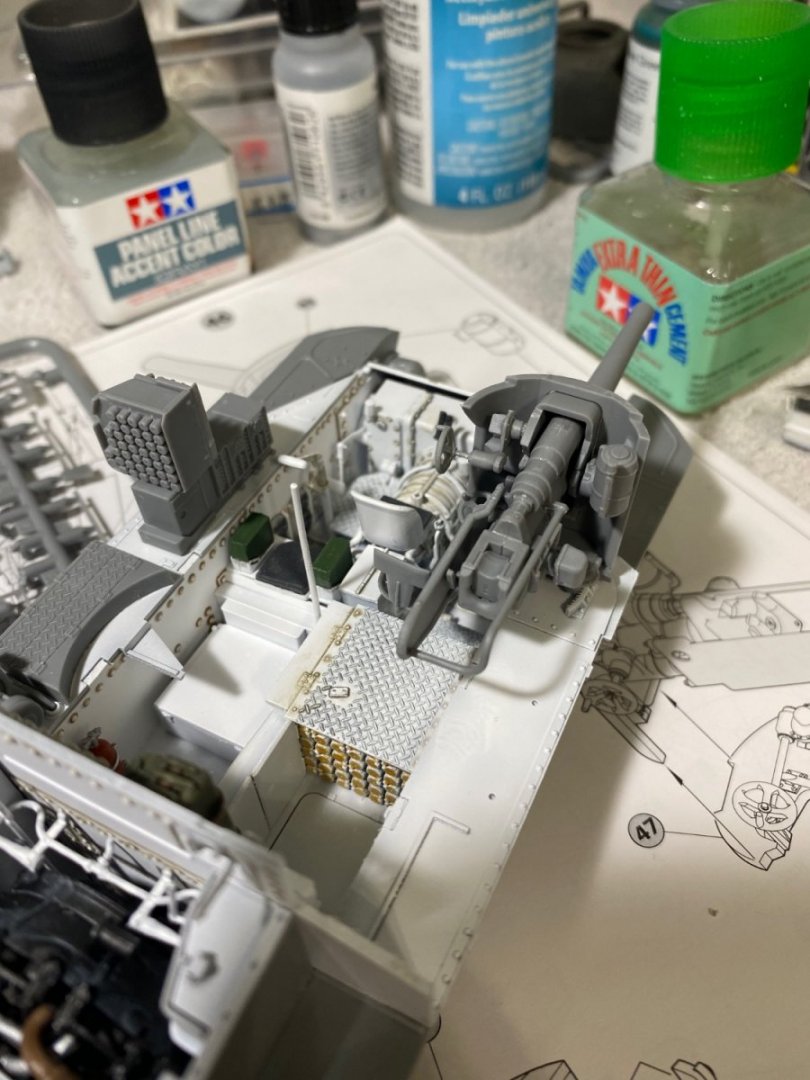
Main gun and ammunition cabinets added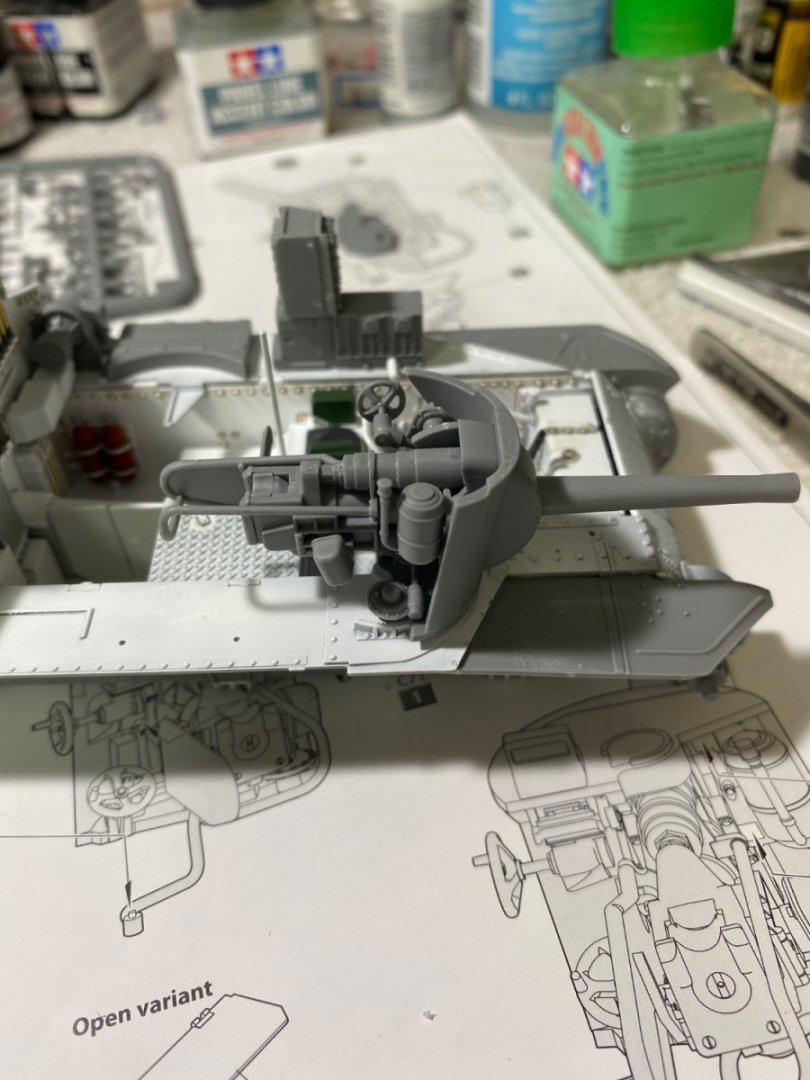

- 99 replies
-
- 12
-
-
-
The subtle effect of the pastels looks very very nice.
-
M3 Lee Tank by CDW - Miniart - 1:35 Scale - FINISHED
CDW replied to CDW's topic in Non-ship/categorised builds
Look what's coming soon (pre-order only right now from Sprue Brothers) to your hobby shop. The massive 1:200 Gallery Models IJN Yamato. Antiquated, overpriced, Nichimo Yamato's will be relegated to door stops after this one comes out. Boy oh boy, the bottom will drop out on the value of those old kits. I just had to tempt you with this: Scalehobbyist.com: IJN Battleship Yamato by Gallery Models- 99 replies
-
- 10
-
-
-
Bad to the bone! Very nice model Denis.
-
M3 Lee Tank by CDW - Miniart - 1:35 Scale - FINISHED
CDW replied to CDW's topic in Non-ship/categorised builds
Steady as she goes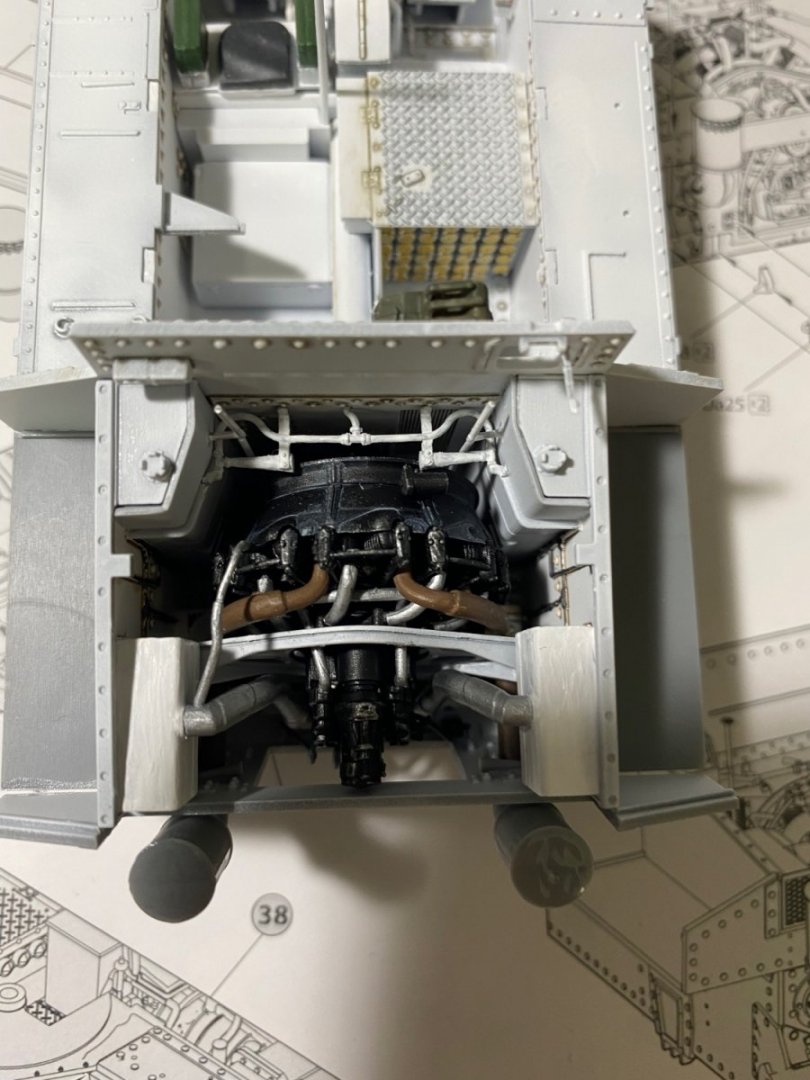

- 99 replies
-
- 13
-
-
-
M3 Lee Tank by CDW - Miniart - 1:35 Scale - FINISHED
CDW replied to CDW's topic in Non-ship/categorised builds

- 99 replies
-
- 12
-
-
F-86F-30 Sabre by Egilman - Kinetic - 1/32nd scale
CDW replied to Egilman's topic in Non-ship/categorised builds
Wow, EG, that looks awesome! Congratulations, you have worked long and hard to arrive at this level of perfection. Encouraging to see you do it. -
M3 Lee Tank by CDW - Miniart - 1:35 Scale - FINISHED
CDW replied to CDW's topic in Non-ship/categorised builds
Yes, the M4A1's used radial engines, but these proved underpowered and required complete overhaul after just 200 hours of service. The M4A2's introduced the General Motors diesel engine which was much more favorable for power and serviceability. -
M3 Lee Tank by CDW - Miniart - 1:35 Scale - FINISHED
CDW replied to CDW's topic in Non-ship/categorised builds
By all accounts I have read, the M3's were built as a stop-gap measure until the M4 Shermans reached full production status. I suspect the radial engines were in production for aircraft use and as they were available in quantity, used as the tank powerplant. Could be wrong about that as it's just a guess on my part. I read that the M3's provided to the Russians were rather despised, but they nevertheless stood their ground and sometimes performed well against Panzer III's and early Panzer IV's at Kursk and at Stalingrad. I recall reading one time the rivets that were used extensively on the tank hull became shrapnel for the M3 tank crews when the vehicles were hit by enemy fire.- 99 replies
-
- 10
-
-
An ocean going Ferrari...another great project. Looking forward to following your progress.
- 203 replies
-
- 7
-
-
-
- Roma
- Micromaster
- (and 4 more)
-
M3 Lee Tank by CDW - Miniart - 1:35 Scale - FINISHED
CDW replied to CDW's topic in Non-ship/categorised builds
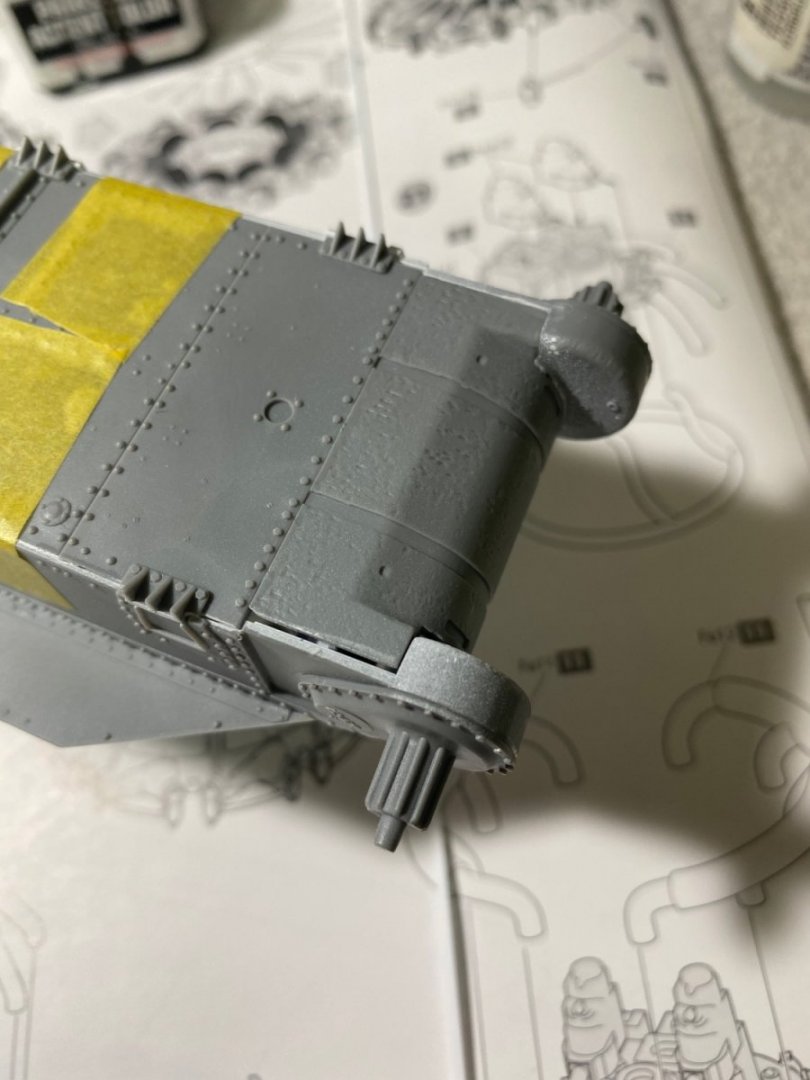
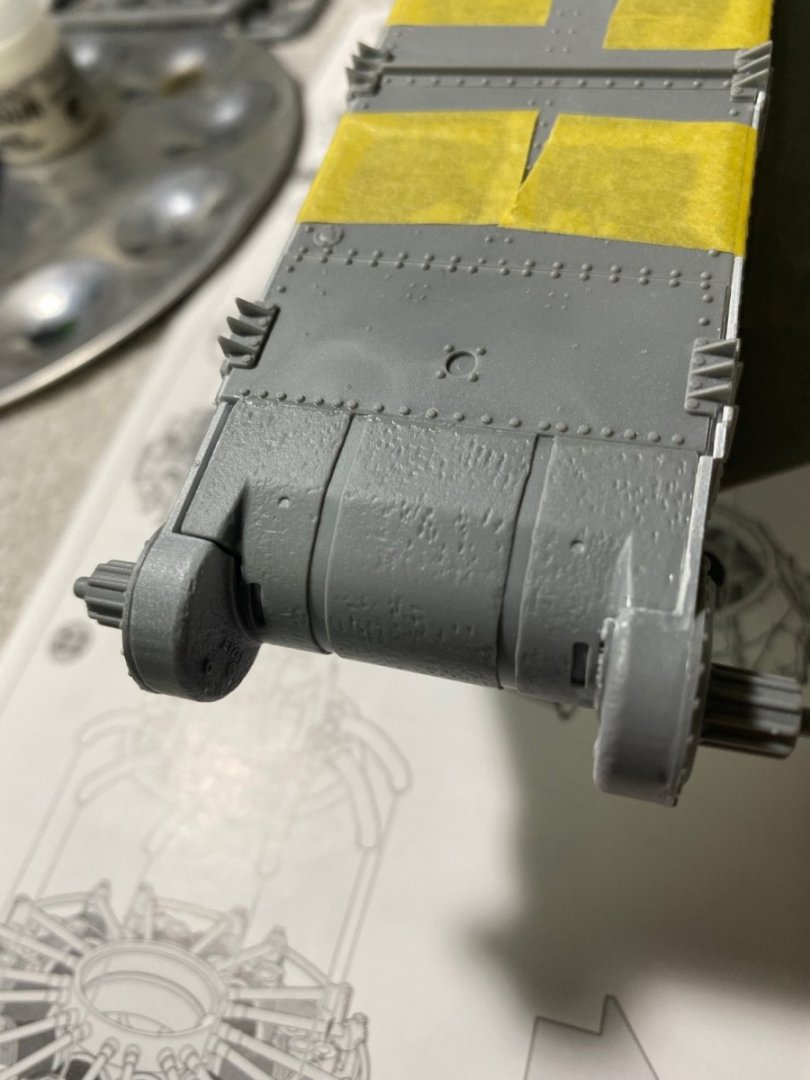
I was not as careful as needed to align the front armor plate on the hull, so an ensuing gap was filled with strip styrene.


- 99 replies
-
- 12
-