HOLIDAY DONATION DRIVE - SUPPORT MSW - DO YOUR PART TO KEEP THIS GREAT FORUM GOING!
×


mikiek
-
Posts
2,276 -
Joined
-
Last visited
Content Type
Profiles
Forums
Gallery
Events
Everything posted by mikiek
-
 I really like the multi colored areas of wood. I don't remember if you told us your plans for coloring the hull. Paint? Stain? All the above?
- 120 replies
-
- 2
-

-
- mercury
- victory models
- (and 1 more)
-
Stylus, or would it be stylii in your photo? Good idea.
-
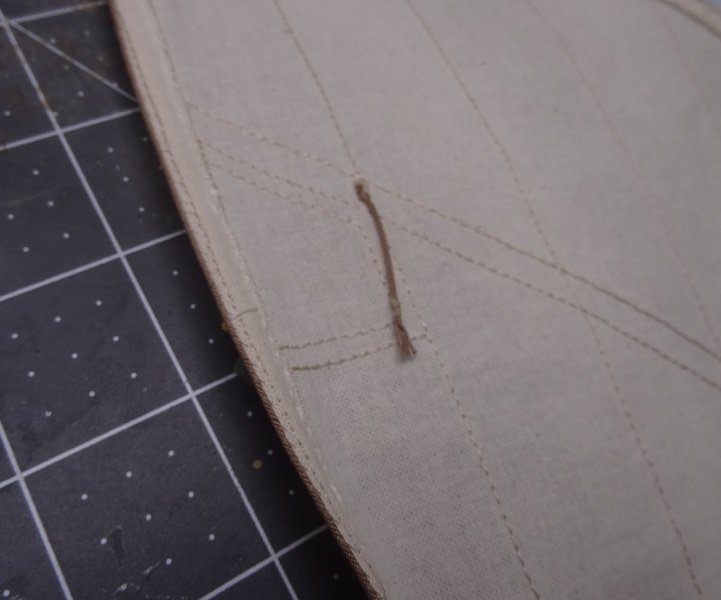
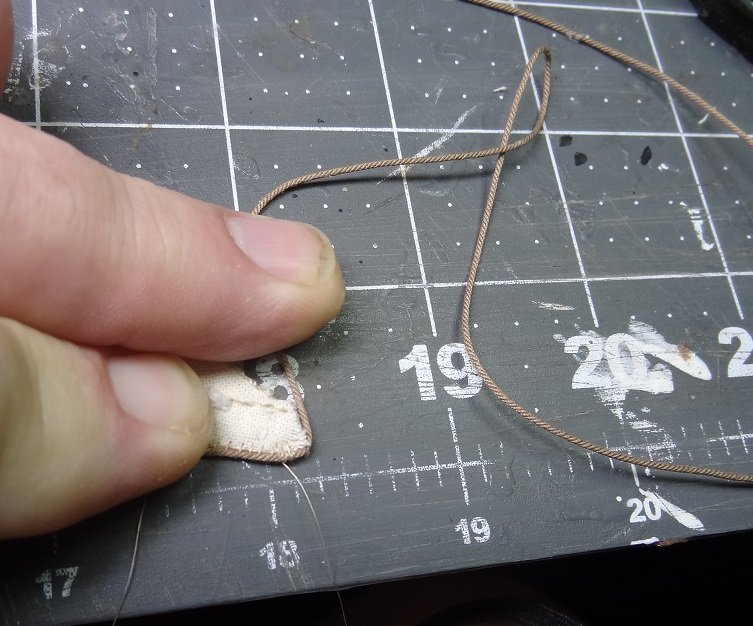
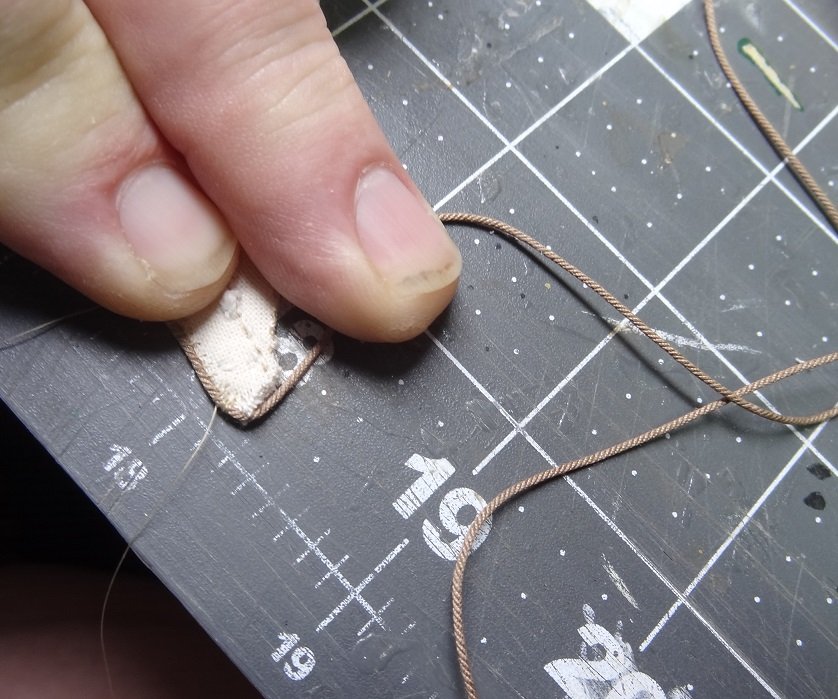
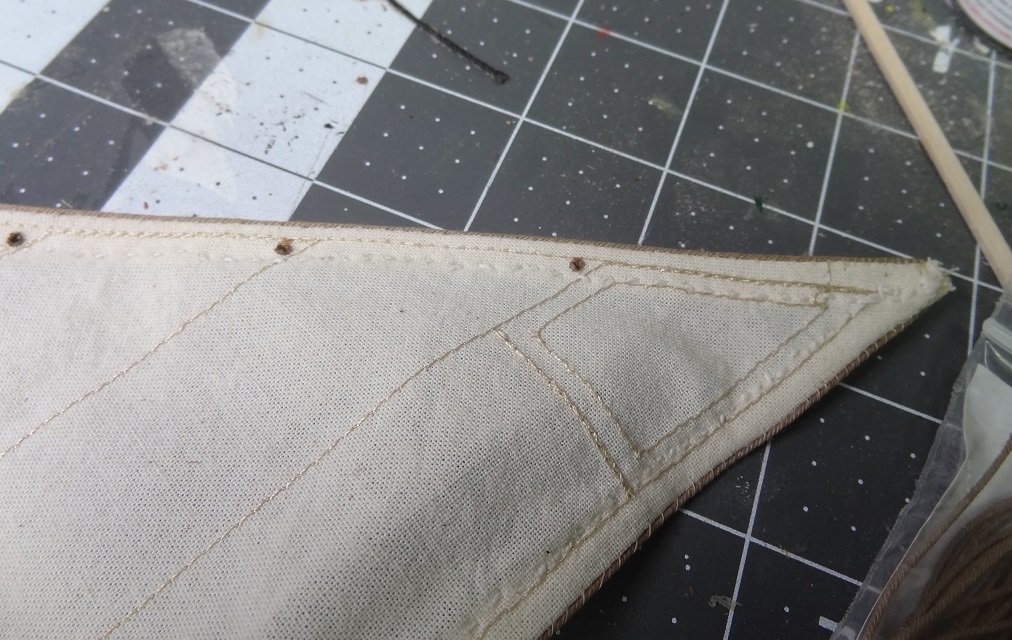
Awh man! The prototype nettle is about 1/4" shorter than the one in the plans. Tempting to leave as is. However looking at a few more pics, there is a reinforcing patch that would have been sewn to the sail. A hole is punched thru the patch and the rope is fed thru. I guess if I'm going to do this right I need to look into making some sort of patch. So I need to remove the prototype after all.
-
A good start Ron. I like the yellow. Don't get too wrapped up with the perfect paint job right now. I promise you, you will most likely have to go thru the whole exercise again later - at least once more. Your hull will get scratched and dinged during the rest of your build. Be careful on your "touchups". It's easy to get into a vicious cycle. Touch up the yellow to cover the black. Dang, got some yellow on the black. Touch up the black to cover the yellow. Dang, got some black on the yellow................. I had 3 thoughts on the bleeding. When you apply the clear, slather over the wood and the tape. Brush strokes work up to and over the tape. Literally try to force it up under the tape. Better the clear than your color. Then when you paint the brush strokes should start at the tape edge and flow away from the tape. Secondly, you might try a roll of Tamiya tape. A lot of modelers (including me) use it. It comes in several widths, if you're getting a trial roll go for the narrowest. I think it's about 1/8". Lastly, when you brush the clear up under the tape it will take a LOT longer for it to dry so have patience and give it the time it needs. When you burnished, what did you use? Nice to see some color on her, isn't it?
-
Good point Zoran - and that also tells me that nettles serve a completely different purpose than the tell-tales I keep referring to. It sounds like the nettles are used to trim the sail. Tell-tales are used to tell when the sail is trimmed properly and the wind is flowing over the sail surface correctly. Thanks for the heads up. I will re-size the nettles per the plans. I will also search for some photos of the sail being trimmed with the nettles. That might be a cool way to display Trajta. That does make me wonder about the ropes that tie the sail to the yard. The plans show some extra rope that hangs down. Is this used to furl the sail?
-
Finished out a quick prototype of a nettle in the sail. I managed to get all the features in Zoran's illustrations even the frayed ends below the seizing. One question, I'll throw to @MarisStella.hr If the boat was out on the water and the sail about half full, how would those nettles be laying? On boats I've sailed with tell-tales on the sail, if the sail is trimmed properly the tell-tales would be almost horizontal and flat against the sail. So what about Trajta? Wow, that's a really bad picture. Sorry!
- 204 replies
-
- 1
-
-
- trajta
- marisstella
- (and 1 more)
-
Niagara was built in Erie PA - on the shores. If I recall the closest town by land was over 100 miles with nothing but woods & swamp in between. Did they have oak? With that said, they were in such a hurry to build Niagara & Lawrence they did not let the wood cure/dry. So what does green oak look like? A lot of folks like Minwax Golden Oak. It looks nice on basswood. You reminded me of something when you mentioned "lots of cut planks". I believe I was working on the deck but the same holds true for the hull. I thought I would save some time one day by cutting a big pile of sticks. Then I could grab from the pile as I was laying the planks. So I took an hour and probably cut 30 sticks into planks. NOT A GOOD IDEA. Although your eye may not see it, those sticks are not a consistent width. They can be and are 4-5 hairs width different. It doesn't sound like much until you butt the end of a skinnier one up to the end of a wider one. You can probably imagine where I am going with this. The moral, cut up one stick and use it all in the same strake. Your plan for the bands can work, just be aware the bands can help you when you are about to sink yourself. Using the bands, if you get to the last strake in the band you can judge how well you are doing by where the stick lays in relation to the band border. If you need to go wide or skinny with that stick the adjustment won't be too bad and you'll be right back on track for the start of the next band. If you turn your remaining bands into 1 it's harder to tell when you are getting off track. <stand on soap box> Unless of course you are using dividers <step off soapbox> Stay warm....
-
I did but that can be problematic. Just a brush on led to spotting. I ended up more like soaking them with mostly water and white glue, about 75%/25% . The most important thing was getting a slight bend in the coil. If you think about it, the coil at the pin is not hanging vertically. The pin rail pushes it a little towards horizontal then the coil falls vertical. So it's a little bit out and then down.My jig was a board with some nails in it, wrapped the rope a few loops then glued it. What you end up with is a coil that sticks straight out at the pin. Solution - lay your board down, nail one nail vertical on top, the other nail horizontally in the side edge of the board. You'll have to adjust the distances to your taste. But the idea is the rope goes over the edge of the board and down to the other nail. The rope will bend some as it goes over the corner. Put your glue on that and when it dries you'll have a coil with a slight bend at one end and it should hang nicely on a pin. I was also lazy and instead of some fancy hitch at the pin to hold the rope on, I just put the entire coil over the pin and buried both ends inside the coil. It looks OK to me but it could have been dressed up more if I wanted to take the time. Have fun!
- 648 replies
-
- 2
-
-
- niagara
- model shipways
- (and 1 more)
-
I hear ya - things are getting tight. One thing you might consider when you go to add the separate coils on the pins. First off I think you rigged more than I did, even though we both left off the sails. I had quite a few empty pins which looked kind of strange. I also realized that to be accurate some of the coils would be huge. I ended up doing coils no bigger than 5-6 loops and then started hang those off the pins whether or not there was a rope coming down to the pin. The clutter looked pretty good and the small coils are easier to manage. FWIW
- 648 replies
-
- 2
-
-
- niagara
- model shipways
- (and 1 more)
-
Oh yes - a front came thru last nite. It was a bone chilling 48 this morning I wouldn't mind some of your stuff for a change.
-
Very good details on the rail units Darrell. I'm wondering, you said they cover some of the pin rails. Are the units wider than the hand rail? Are you getting some overhang? If yes, could the overhang be pushed over the outside of the rail so the inside of the unit is flush with the rails inner edge? Just a thought. Sounds like you have it under control. And you didn't have to tie 150 itty bitty hammocks
- 648 replies
-
- 2
-
-
- niagara
- model shipways
- (and 1 more)
-
I understand completely on the reuse. I was asking because the style of the drawings is very similar to the drawings in Darcy Lever's book Young Sea Officers Sheet Anchor. I tend to hoard books and I was not familiar with the illustrations so I wondered if there was a "new" book out there I needed to buy. No matter. The drawings were excellent and a big help. I'll be working on the nettles tonite.
- 204 replies
-
- 1
-
-
- trajta
- marisstella
- (and 1 more)
-
Thank you Zoran - I appreciate you watching over me on this project. BTW - I was wondering about the nettle illustrations you posted. Where did those come from? Nettles are next and I believe I can duplicate what those illustrations show - whipped at the ends, sewn at the sail. The yard is ready so I can give this bird some wings.
- 204 replies
-
- 1
-
-
- trajta
- marisstella
- (and 1 more)
-
Master Sanborn told me another trick and I think you are almost at that point. It's a little hard to describe. Where the stern post runs up and "meets" the transom forms kind of a joint. From the keel up to this joint is a lot of deadwood. Then you reach that last bulkhead piece (the transom) which sort of flares out if you are looking at things from the rear. Your strake widths should be sized so that the edge of the last strake on that deadwood fits right up against that joint. Similarly, the planking over that bulkhead should be sized so that the edge of that last strake also fits right down to that joint. If that joint was 90 degrees it would be easier to picture, one leg being the deadwood the other being the bulkhead. You want the strakes from both sized so they fit into the corner. What you want to avoid is having a strake laying diagonally across the corner. I'd post you a picture but my hull is all black and the camera doesn't see that joint very well. Let me know if that doesn't make sense.
-
Hey Tom - No stealers is your goal. Don't do one just because the plans say. Do one when you need one. You may need more, you may need less. Where that ends up being depends on how you finish planking. If you do B,C,D you probably won't know that you need one until you get to D. The garboard would best be done with one stick - wider than the rest of your strakes. Some people, including me, used the same width for the strake right above it. Of course that will wreak havoc with your bands as you have monkeyed with the size. Not to worry. Plank B completely. Do the first few strakes of C. Then turn the remainder into 1 band. You may want to recalculate strake widths at that point. Just what the dividers were made for.
-
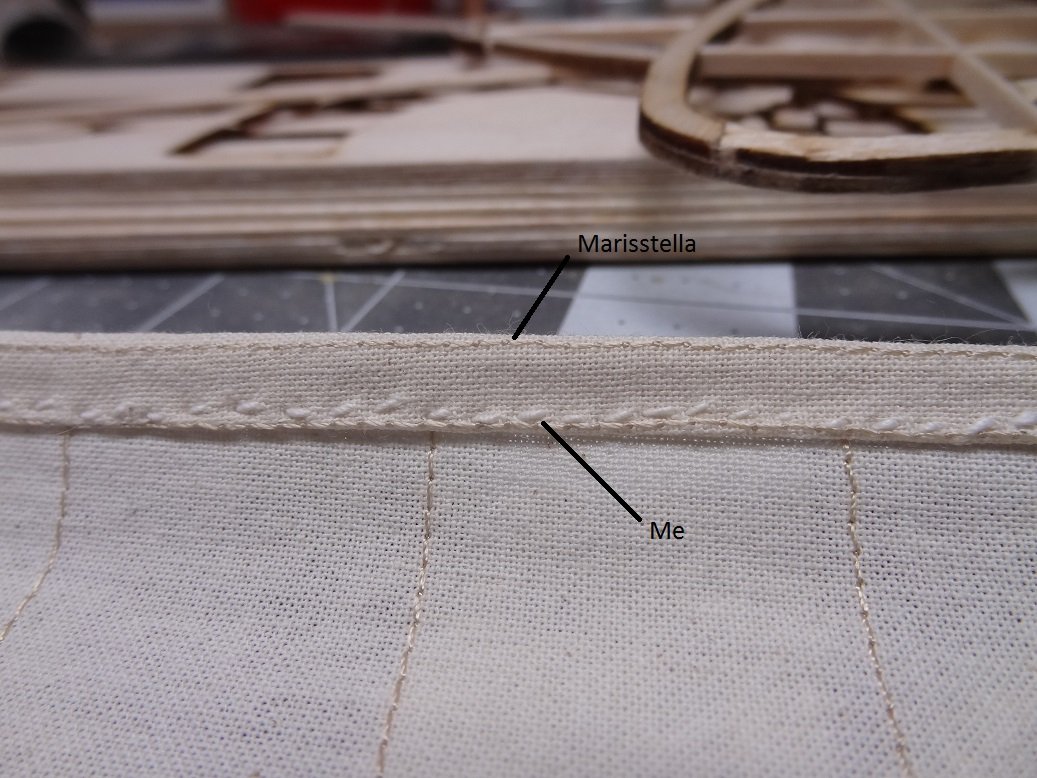
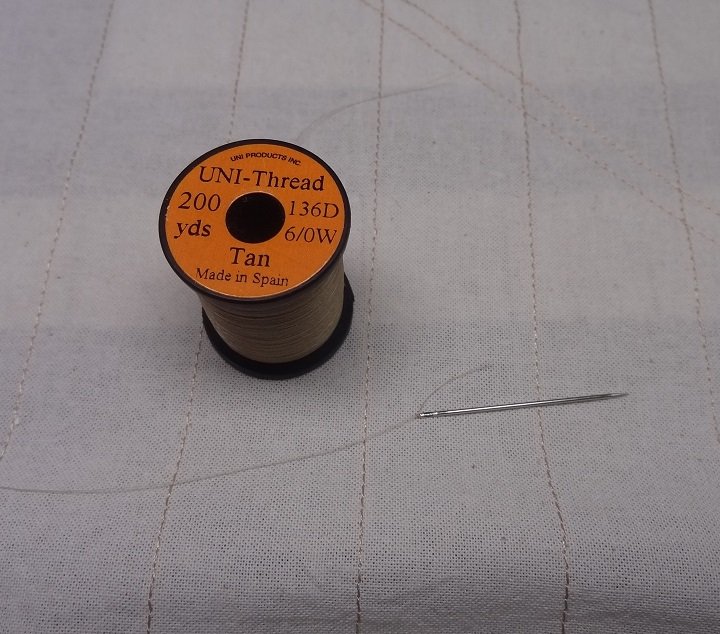
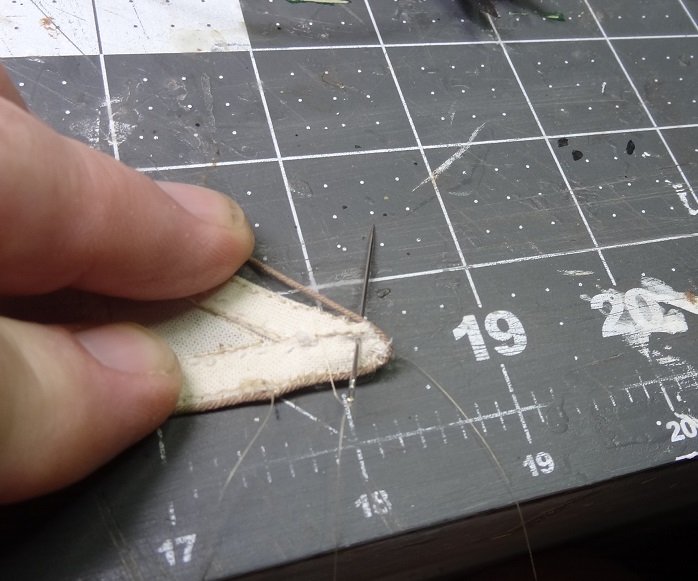
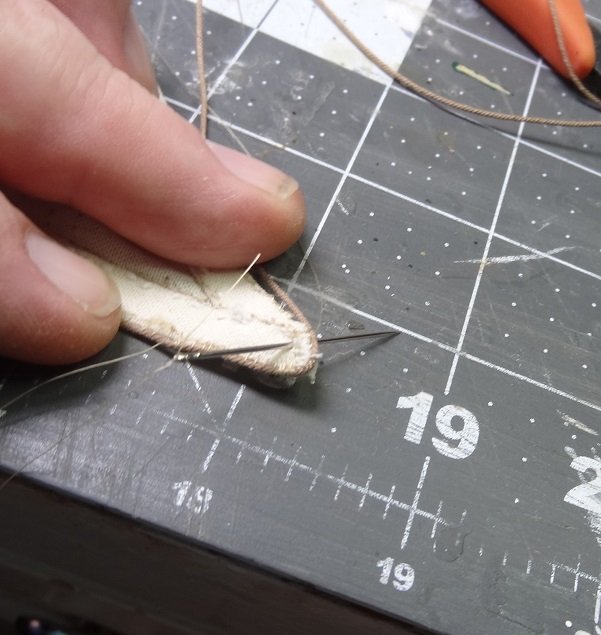
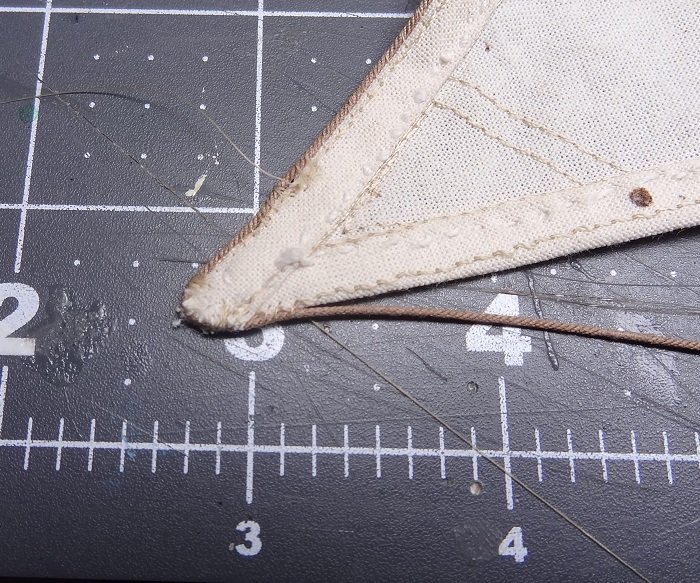
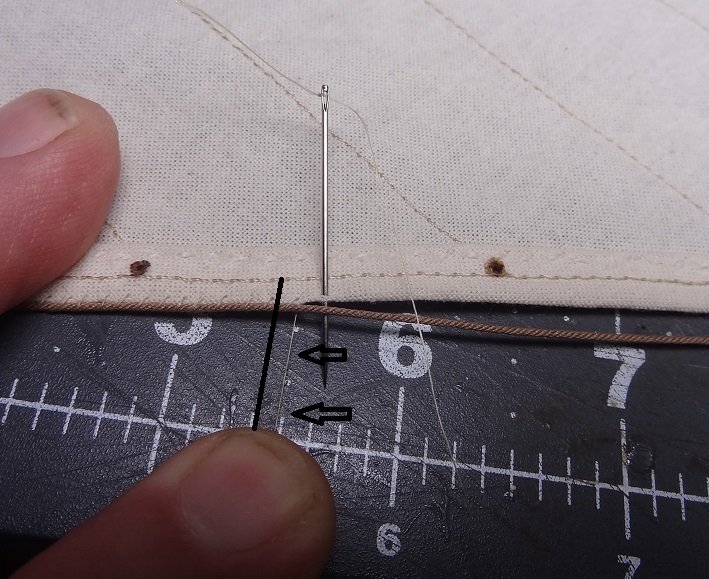
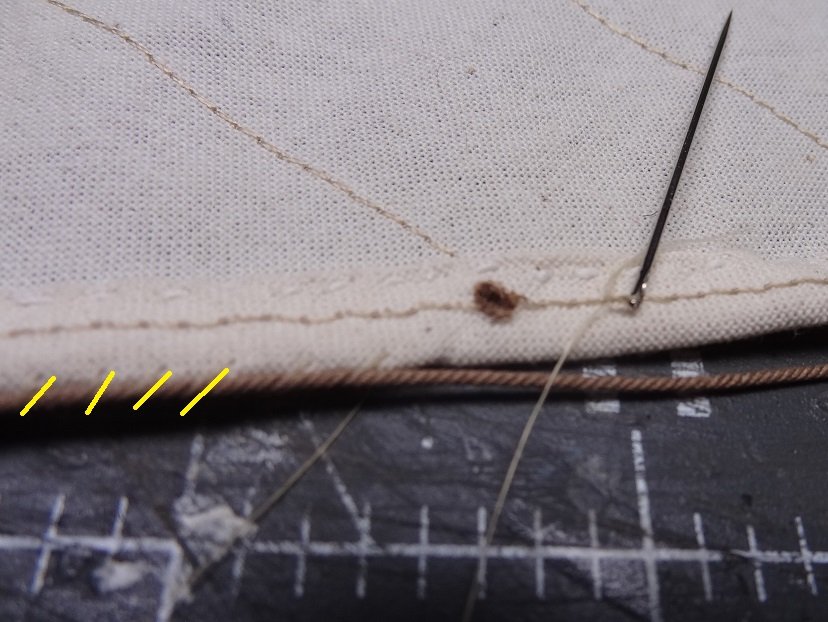
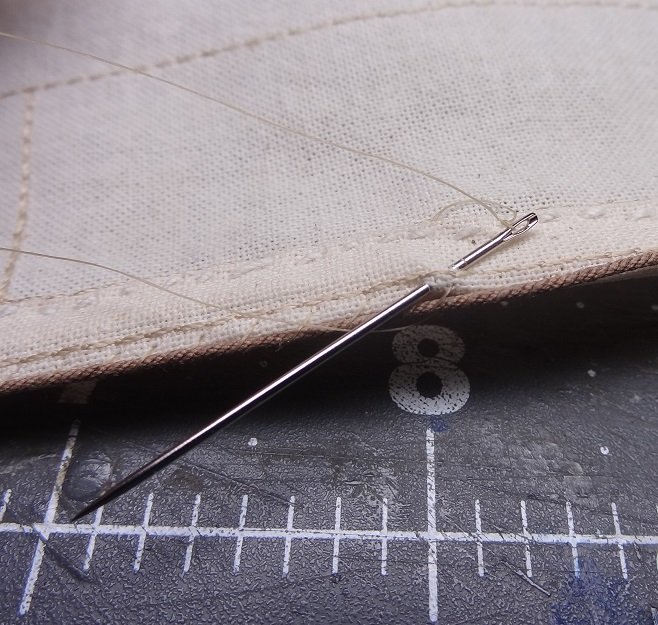
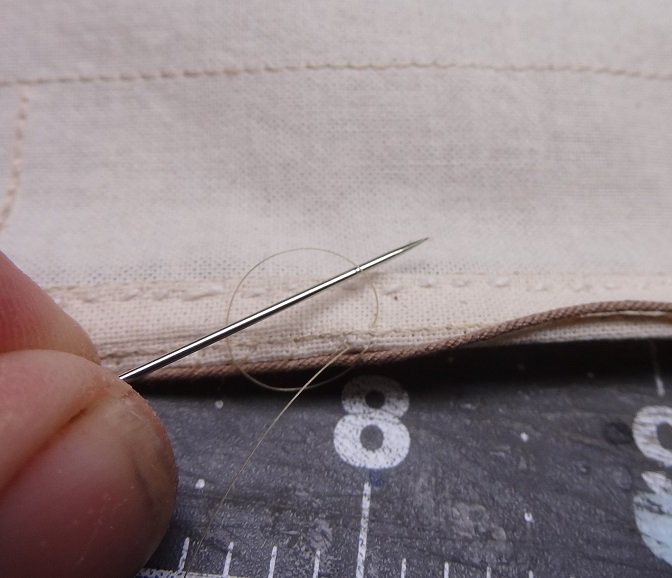
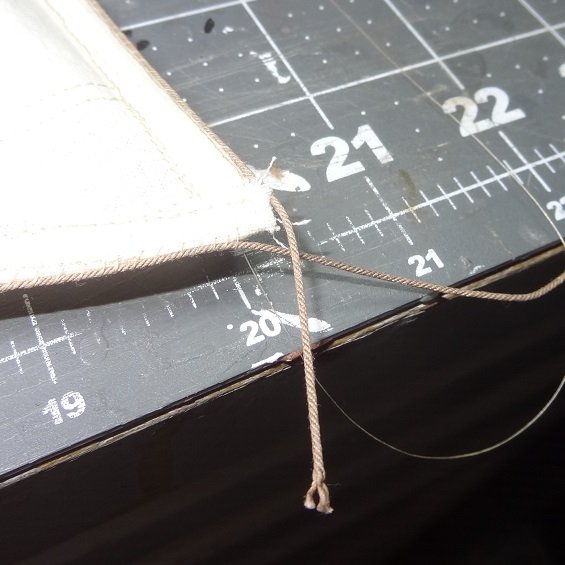
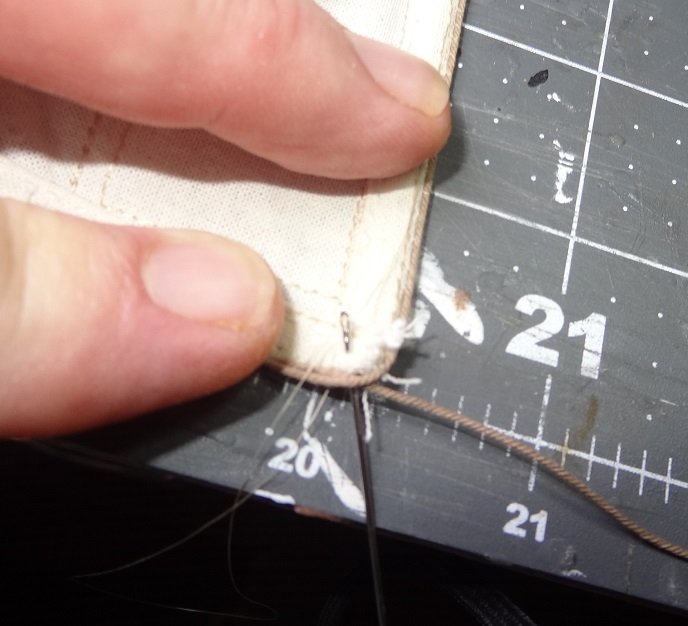
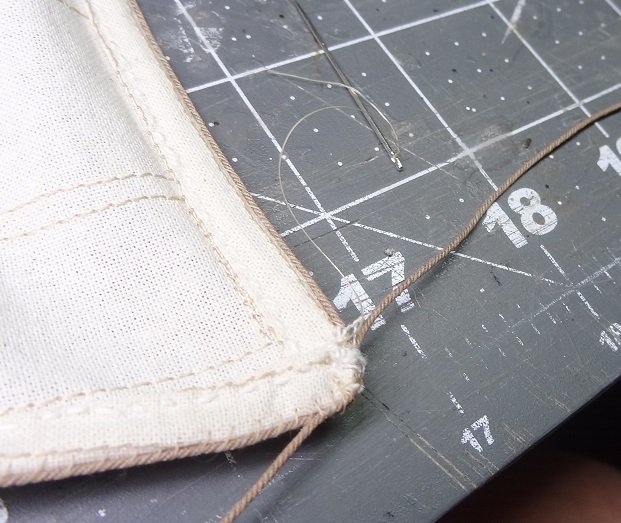
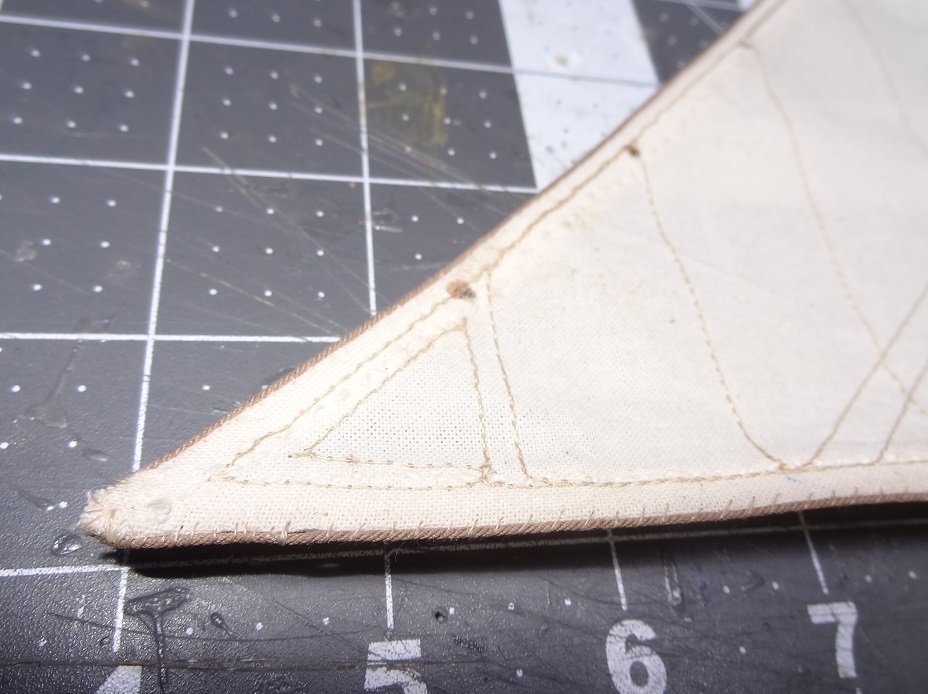
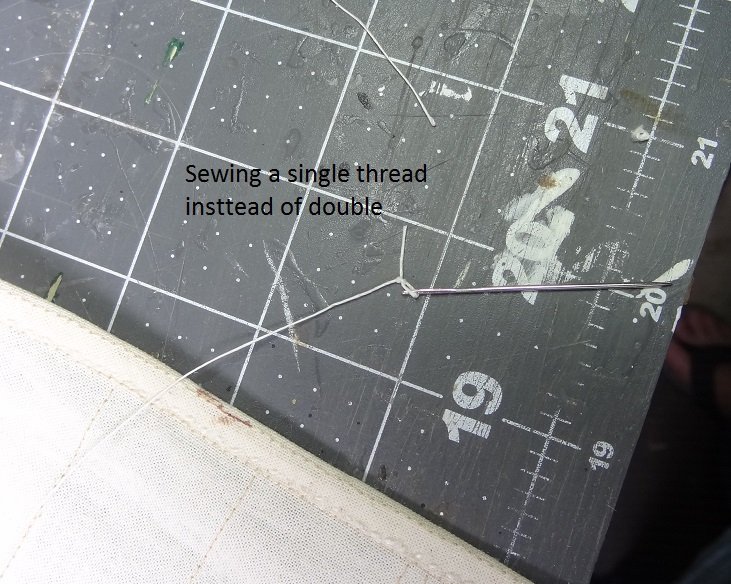
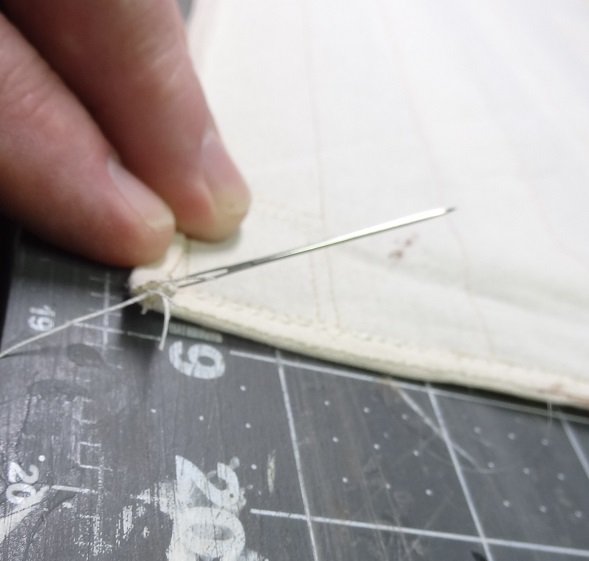
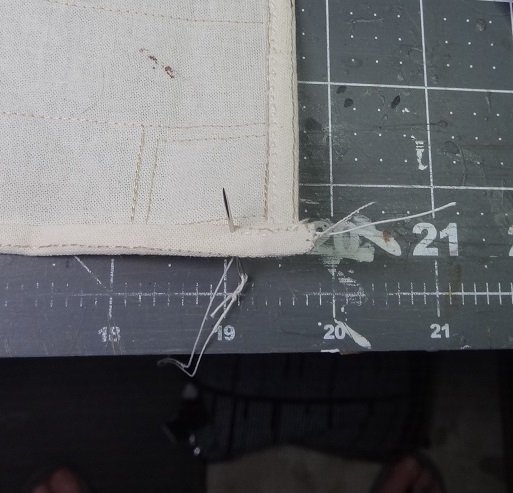
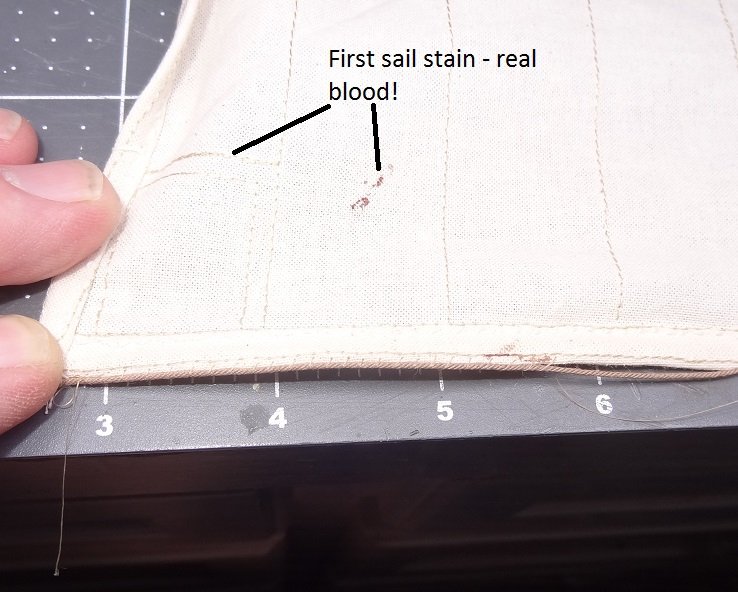
Some hard core sewing today and I've finished the bolt rope. While it could always be better, honestly I'm real happy with it considering it's my first try at this. There are a lot of How-To posts here regarding bolt ropes. They seem to boil down to just a few methods. On the restore I recently finished I actually just glued one on. It was OK but that was a very small boat. Another method has you sew the rope on by repeatedly running the thread thru the rope then the edge of the sail. I believe this is how it is done in real life, however the rope did not hold up well after sticking a needle thru it so I abandoned this. A similar method - and the one I used - is running the thread over the rope and into the sail edge. This worked a lot better. Sewing was very tedious but not overly difficult. Trajta has a big sail making this task seem more intimidating. This is also a "by hand" task. Even if I knew how to use a machine it would not help here. The goal is easy enough - attach a rope around the edge of the sail. Here's some photos. I did my best to keep these in sequential order but the first few were taken while I was still hemming so don't get confused. I used a regular needle and fly tying line. The 6/0 line gave a combination of strength and near invisibility. Similar to hemming I did not thread thru the eye and run the end back out to the other end. I just threaded and tied it off at the eye. Then a big granny knot at the other end. So pick a corner to start with. Lay the rope up against it and put in several anchoring stitches. Be sure to leave about 1" hanging out as extra. You will need this when you have stitched all the way back to this corner. I started out using the kit rope for the bolt rope. As mentioned above it did not hold up very well for me when I was trying to run a needle thru it. I tore that out and tried some Syren 0.35 rope. This did somewhat better but I quickly decided that sewing thru the bolt rope was not necessary. I could have gone back to the kit rope but I already had the Syren out. Getting away from the corner and moving across the edge. I tried to catch just the very edge of the sail with the needle. Sometimes only 4-5 threads. A lot of repitition working to the next corner. The first corner. Things get a little dicey now. I pretty much held the rope in place and stitched around the corner. Then stitched backwards a bit and forward one more time to reinforce the corner. Corners are where the material wants to fray. They are also the "junction" of the hems being folded over so you are sewing thru as many as 6 layers of material. Finished up and ready to work down the edge to the next corner. Back to the grind. A few notes. I kept the stitches about 2mm apart. Less would have been better but also more time consuming. More and the stitch starts to show more. Right before starting the next stitch hold the thread down with a finger so you can see where the last stitch came out and figure where the next one should go. I don't remember my rope terms but you can see how it is laying here. By working my stitches from left to right the thread lays in the same direction as the strands in the rope. When you pull the thread tight it wants to worm itself into the rope making it almost invisible. Had I stitched right to left the thread would lay across the grain of the rope and would have been a lot more obvious. It would be darned near impossible to start with a piece of the fly line long enough to get all the way around the sail so plan on using 3-4 pieces. Of course that means stopping one and starting another. At the determined stopping point run the needle under a few top threads and begin to pull thru. Run the needle back thru the loop and pull tight. Repeat this a couple of times. Then cut. The second corner is just like the first. Stitch that similarly and continue down to the last corner. Now it gets interesting. The idea here is the same as the other corners except that you have 2 ropes to stitch. Wrap both ropes around the corner and just stitch like crazy. Around the corner, out about 1/2", back the opposite way about 1" and then back one last time. Terminate the thread as shown earlier and trim the rope ends. And there you have it! If I drank I would be after that. A few close up shots. As usual the camera shows all. Those stitches are not nearly as visible with naked eye. Hope this helps someone down the road.

- 204 replies
-
- 3
-
-
- trajta
- marisstella
- (and 1 more)
-
Hey Tom - One trick I read somewhere regarding garboard placement - it has worked well for me. A common question is where does the garboard stop at the bow? Actually in a lot of cases it stops before the bow. The one thing you are trying to do with the GB is provide a perfectly flat edge for the next strake to lay on. It is easy to place the GB too far forward and get it into the bow stem where it will want to curve upwards. Avoid that like the plague. If your GB has an upward bend to it, all subsequent strakes laid on it will too. In fact that bend seems to increase exponentially on each additional strake. All you can do to fix is to whittle down the front ends of the rest of the strakes. The trick - and this will also show how well you did your rabbet - is to insert the GB into the rabbet with the front end about 1/3 back from the bow. Lay as much of the GB edge into the rabbet as you can. Then slowly start sliding the GB forward keeping it in the rabbet. Watch the front end closely, eventually you will see it begin to lift up as it tries to follow the rabbet into the stem. STOP! Back up and do it again. Find out exactly where the lifting begins. Your GB should be installed a hairs width before that. You'll probably have to put a rounded curve at the front bottom edge of the GB to get it to fit into the rabbet. The late Mr. Sanborn taught me something about the ships rabbet that I never knew. Lay a plank along the keel about with the bottom edge about 3/16" up. Now try to press the plank up against the side of the hull from one end to the other. You'll see that the plank lays at several different angles. At the stern it's almost vertical pressed up against the deadwood of the stern. Amidship it may be contacting a frame and is bowed out somewhat. Your rabbet should be cut to receive the edge of that plank. This means the angle of that rabbet notch is going to change from bow to stern just as the angle of the plank does. It isn't easy to do but the closer you get to that the better your GB will fit. More than you ever needed to know.
-
Ha - had to run the AC unit in my shop this weekend. Band A looks good Tom. A suggestion for continuing. Do your garboard as planned and the next strake above it. Don't do anymore than that for D. Then start your B and work down. Like most of us you will likely have some adjustments to make when you are finishing up. If you do those in D they will be somewhat out of sight. If you have to make them in B or C they will be more obvious. Regarding the tops, check my log, I put a brass strip around the edge along with some faux bolt heads. I liked it. Warning - it did get knocked off quite a few times while working with the top. Suggestion - get one ready to go but don't put it on until later. If you think working with that top piece is bad, I am also building a balsa airplane right now. 1/16" square strips for the framing of the fuselage, wings, etc. Gives me a new appreciation for basswood.
-
Elijah - it has been killing me since you started this build and even before when I see pix of this kit. I feel stupid asking this - either there is a real obvious answer or I am really missing something. Either way it has nothing to do with the quality of your efforts. What is the story with the hull on this kit? Is it just a representation from the waterline up? The way it is always shown in pix it couldn't possibly stay upright for long. And out of curiousity, could you show a photo of the underside of your build?
- 228 replies
-
- 3
-
-
- gunboat
- model shipways
- (and 1 more)
-
Is the area under the foredeck left open and accessible? Or is the fordeck that I see an additional deck on top of the main deck?
-
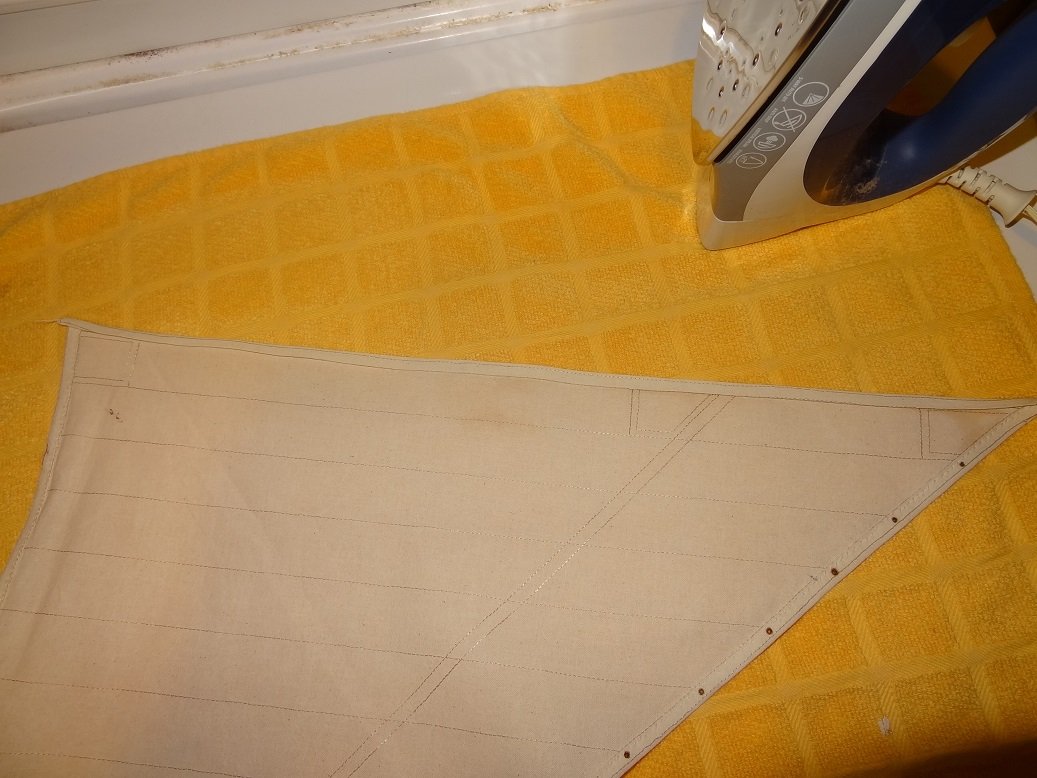
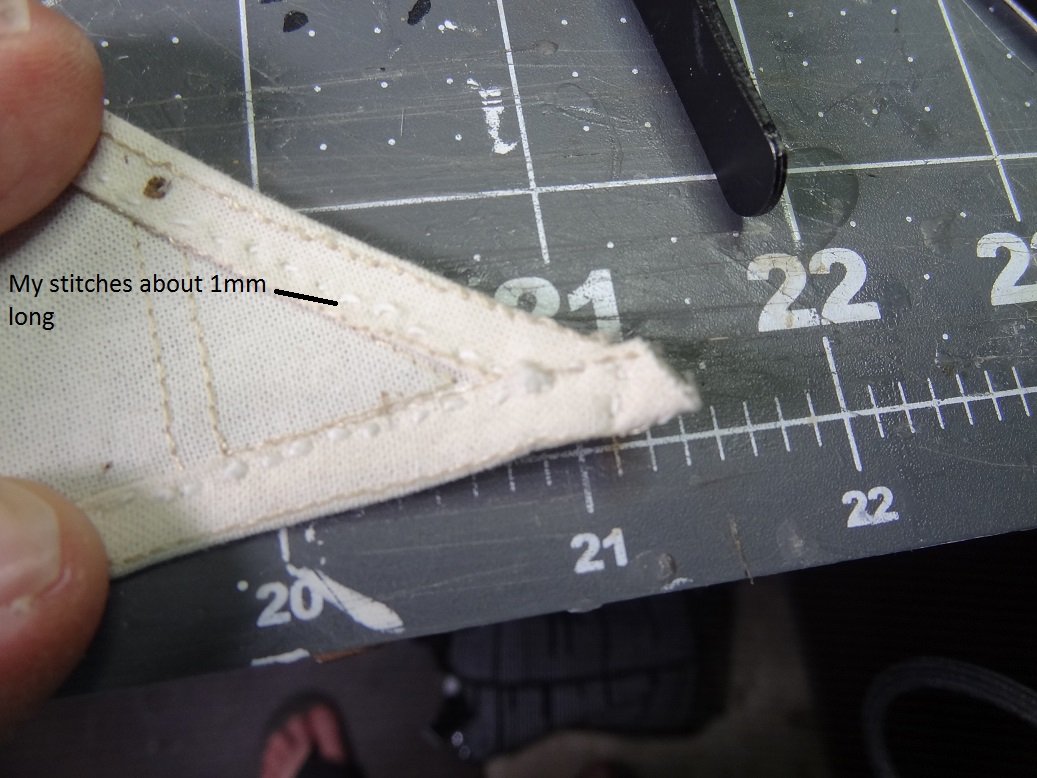
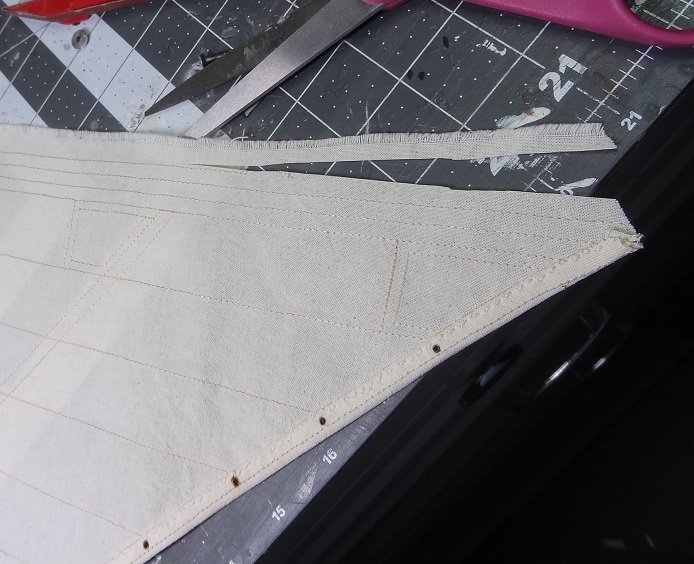
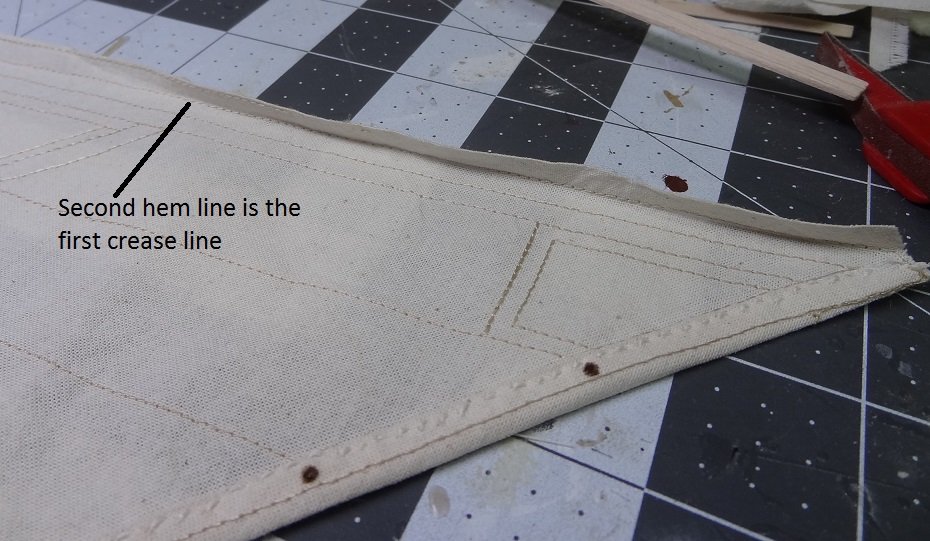
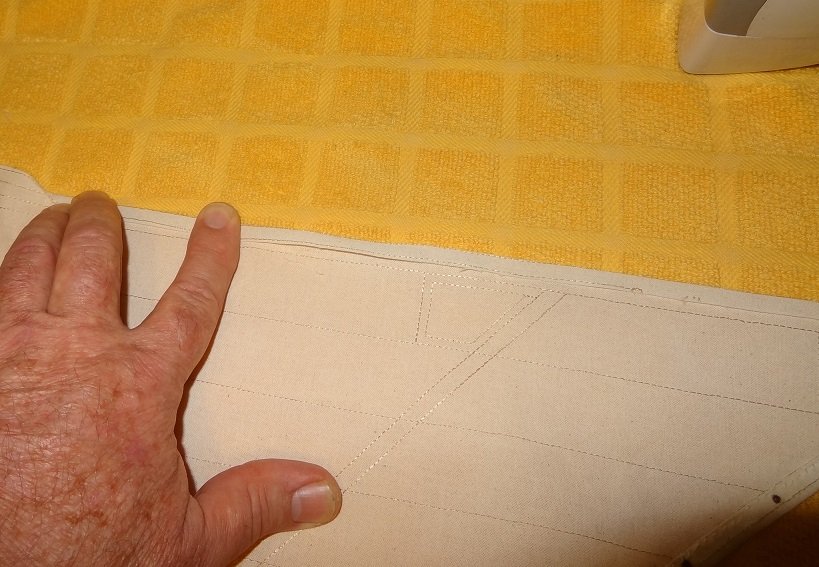
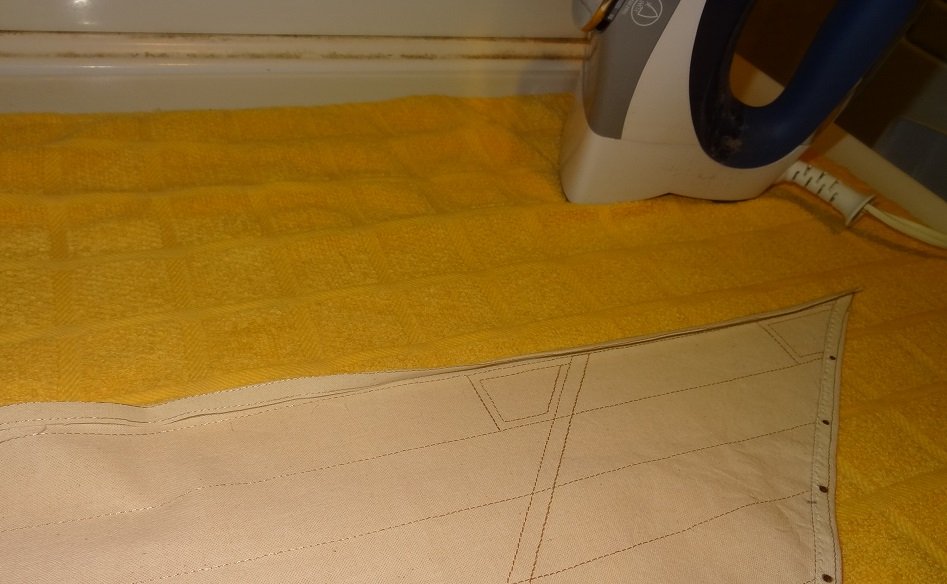
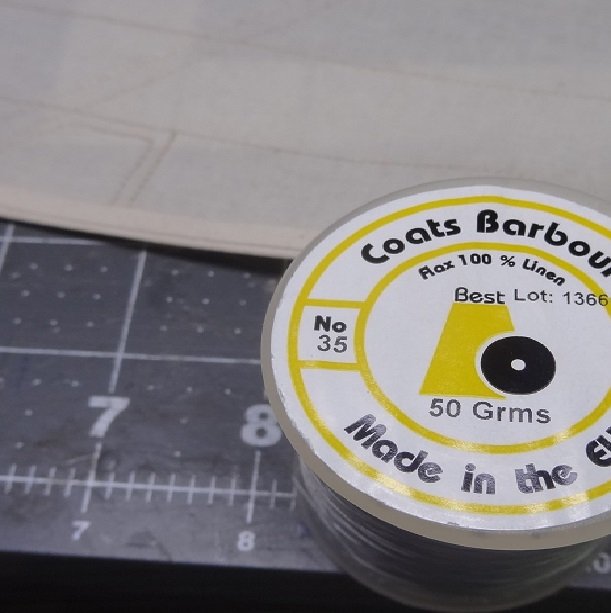
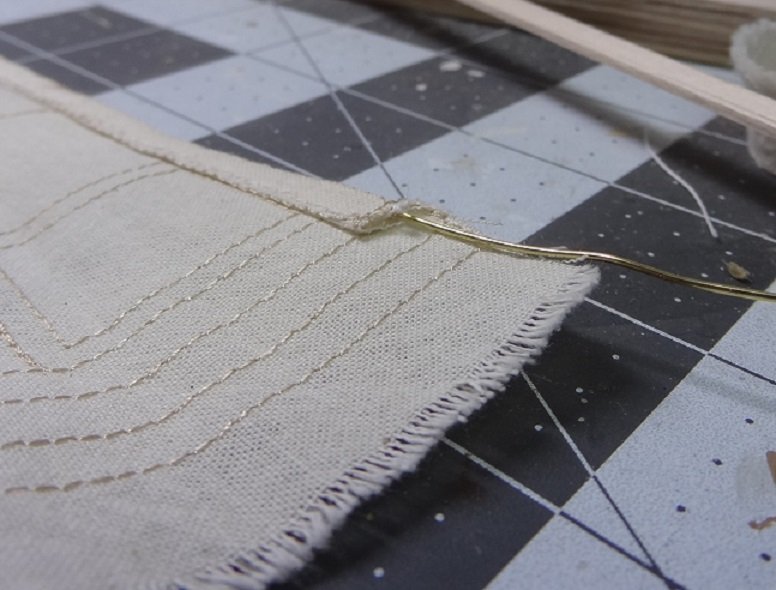
I finished the 3rd edge of the sail last night. Was admiring my work and looking at what was next, then I saw it. The bolt rope. Last time I did one of those I glued it to the sail edge. I could quickly see that wasn't going to work this time. More on that in a while, but first a few notes on stitching a sail edge. None of it is complicated and I doubt if what I show here is anything revolutionary. But it might have helped me, so maybe it can help someone else. As I've said before, Marisstella did a nice job for a out of the box sail. The interior and edge stitching is there, the builder has only to hem the edge. So first the edge is trimmed with sewing shears down to the outer most stitch. One note - the pix below are not all from the same hem edge. They are a compilation of shots as I was sewing all the edges so don't let that confuse you. Then you begin to fold and form the hem. Keep in mind we will be sliding a piece of 0,75mm wire inside the hem after the stitching is done. The wire will allow you to easily add a lot of shape to your sail. I have not seen another sail technique that makes shaping as easy and realistic as the wire does. Get an iron nice & hot. It will also REALLY help if you use some spray sizing or starch. On an ironing board or a towel on a hard surface, make the first fold again and begin to iron it. I found the easiest way is to let my left hand working on folding and holding it down while the right hand is ironing a few inches behind. PAY CLOSE ATTENTION the hem has a tendancy to want to widen. I was shooting for a hem width of 3/16". Continue from one corner to the other. When complete spray some sizing along the folded edge and iron again NOTE: While sizing is a big help be careful with it. If you spray too much (as in saturate the material) and then iron it, it can burn. Leaving an indelible brown spot on your sail. So do 2 passes with a light spray each time. When finished with the first fold, begin the second fold and repeat the process. Time to start sewing. I used an oversized needle on the first edge - it was too big. Hard to push thru the folded material. The second edge I used a slightly oversized needle. Much better. I used the same size linen thread for all. For a lot of sewing you run the thread thru the needle eye, then back down to the other end and tie off both ends. So as you stitch you are running 2 threads thru the material. I felt this was not necessary for my purposes, so I threaded the needle then tied off the end at the needle. So I'm only passing 1 thread thru the material. Tie a granny knot in the bitter end of the thread. Starting at one end of the edge (the right hand edge is better for righties) run the needle starting inside the hem to the outside and pull the thread all the way to the granny knot. There's your anchor. From there, begin your stitching towards the other end - only a few hundred more to go Work on keeping each stitch in line with the previous. Leave enough free space in the hem to slide your wire in. Keep the size of your stitch to about 1mm. The smaller the better. The bigger the more visible the stitch is. Your thread should start out at least twice as long as the hem you are sewing. Keep stitching all the way to the edge at the other side. Occasionally, stop and try to slide your wire into the hem to make sure you have left clearance. Better to find out early on if there is a problem. When you get to the end put in a few extra stitches for reinforcement. Terminate the sewing by barely running the needle thru a few threads on the top layer of material. Before you pull it tight run the needle thru the loop. Repeat that at least one more time. Slide your wire into the hem and all the way across. There are several ways to terminate the wire. You can pull it back out about 1", cut it and slide it back in. It will not be visible this way. Others cut the wire long enough to extend out of the hem and become the tie down at the sail corner and let it extend to a belay pin. You can add amazing action to a sail using option 2 as the wire can hold a sail out and extended where a rope will not. You must paint the wire rope colored. Above shows the corner and also the start of my bolt rope which I think I will show in another post.


- 204 replies
-
- 1
-
-
- trajta
- marisstella
- (and 1 more)
-
I'll disagree with a few and say it may well be a kit. I just finished a 70 year old restore and had many of your questions when I started. Interestingly, your boat while completely different than mine has the same style and feel to it. Even the name plate is similar in design. As mentioned - pictures, pictures, more pictures. Every piece of wood. Every sail. Every rope. From both sides and front and back. You will thank yourself one day. Don't take things apart piece by piece if you can help it. For instance I cut the rat lines (the triangle climbing ropes-catwalk) right at the hull and was able to take out the entire mast with everything still intact. The mast then becomes just one project in many for the restore. Working on items off the boat is a lot easier than on the boat. I was also able to keep much of the original material in place. You will find that modelling ropes made today don't look much like those made years ago so the more original you can reuse the better. The same goes for other materials. Have a look at the structures on deck. Even under the structures. Take them off. I took off a skylight and there was the manufacturers name stamped on the deck. A company out of business for almost 60 years now. But if you find a piece of info like that, Google is your friend. You might even find the same model today on Ebay and now you have spare parts. Save every scrap you remove, cut, sand, etc. It may be just the thing to make a repair somewhere else on the ship. For some reason, many kits back then were of fictitious and fictional boats. Mine came from Treasure Island. Since there was no real model to go by, a lot of artist discretion was used. Does it look like any real boat? Not really. Does it matter? Not really. In my signature there is a link to the restoration build log I kept. It shows a lot of what I am describing here. If you are going to follow thru with a restore I strongly suggest you consider a log. Good luck and enjoy. There will be frustrations, just persist.
-
New member with a question about shipping models
mikiek replied to CJ2S's topic in New member Introductions
Welcome to MSW CJ2S. Something else you will want to be asking is, is there anybody in (nameyourtown) that works on models that might be willing to fix what will hopefully be just a few small breaks? Unless you drive the models home yourself - and maybe not even then - it is inevitable that things will break off, fall off, come untied, scratched, etc. during transport. I have things break off mine just driving 15 minutes to some show. Of course that could also be your opportunity to jump into the hobby and learn what we do here. You won't find a better group than those here to help you out. Make sure you get the display case as well. Depending on your home situation - cats, kids, dust, dirt - the cover will keep the build looking pristine for years to come. You can get them made locally but they range in price from maybe $150 - $500 for one that size. Always keep them covered. BTW I agree with Chris, your dad did a wonderful job with that build. Let us know what you decide..... -
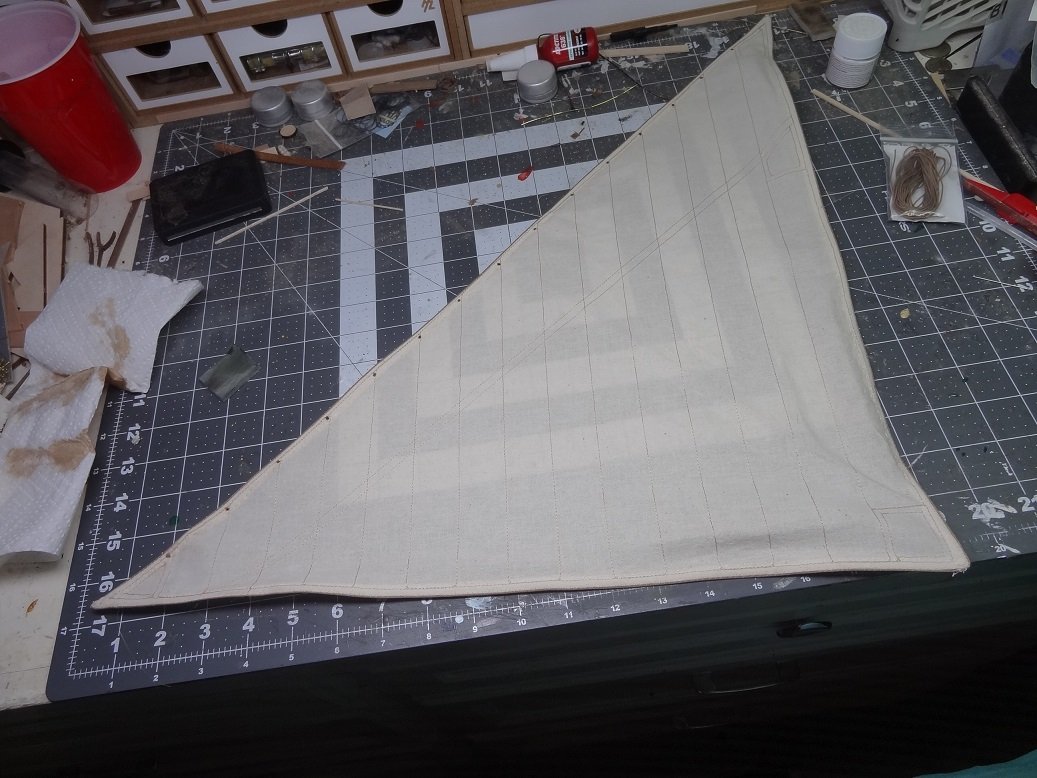
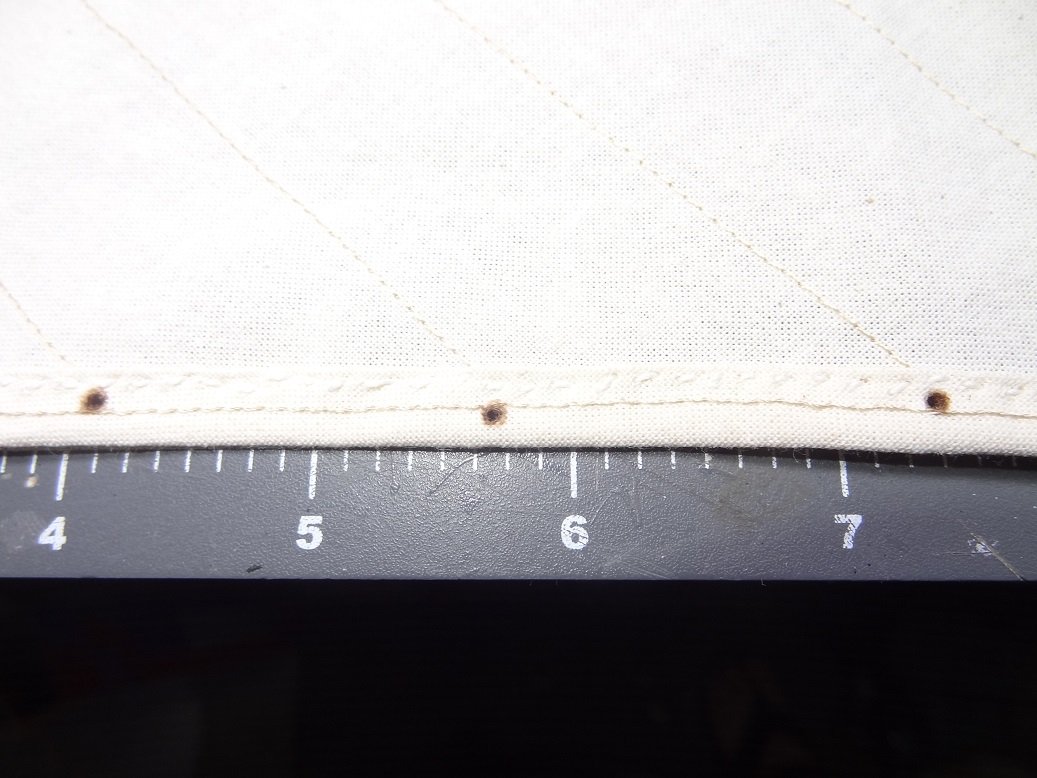
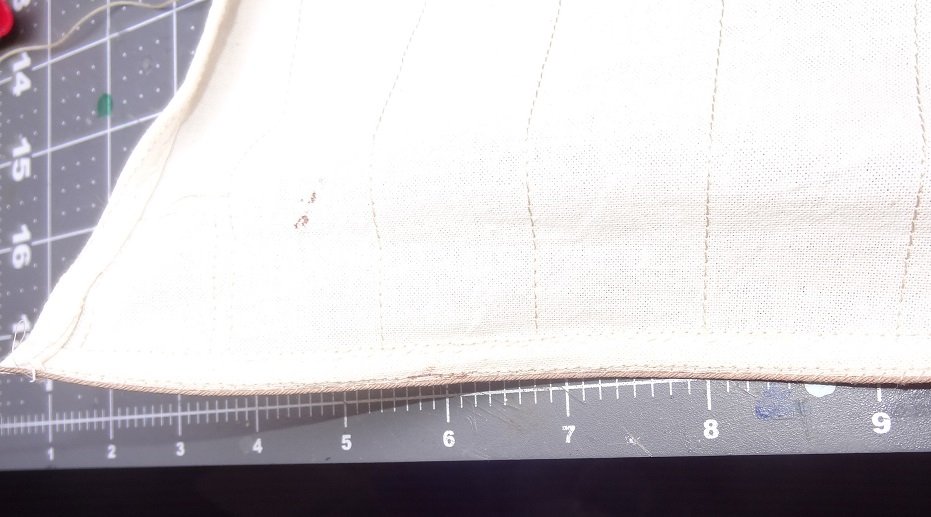
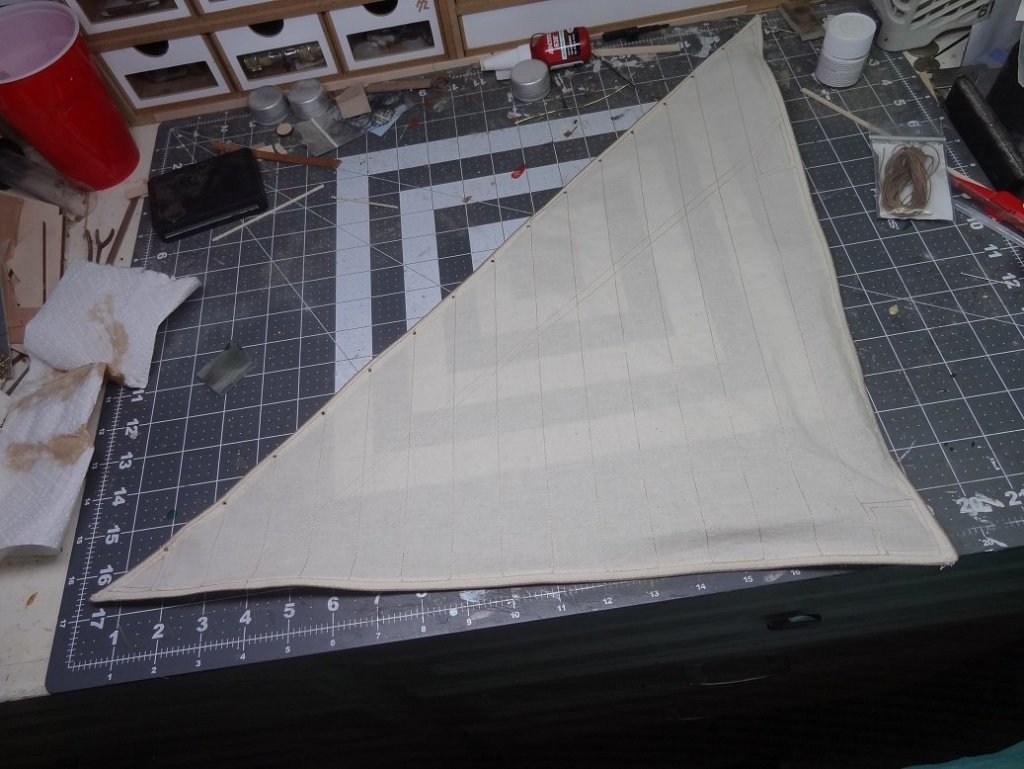
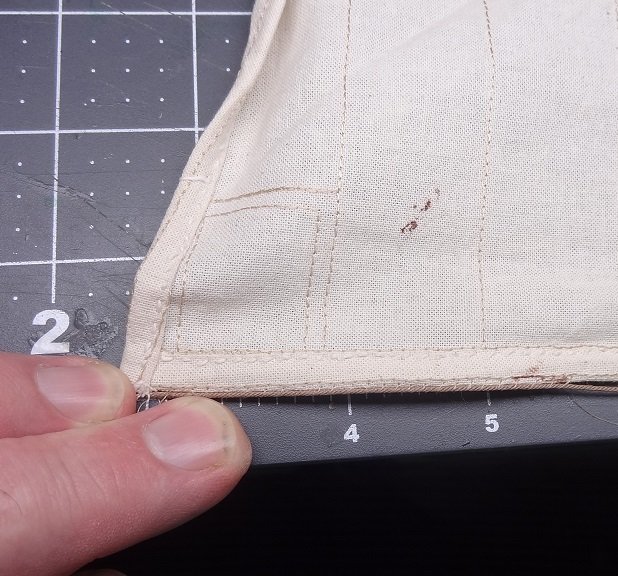
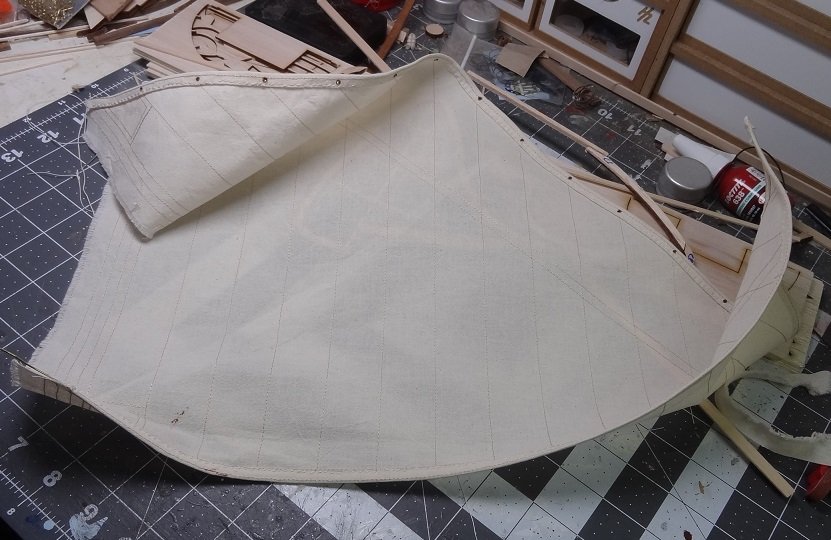
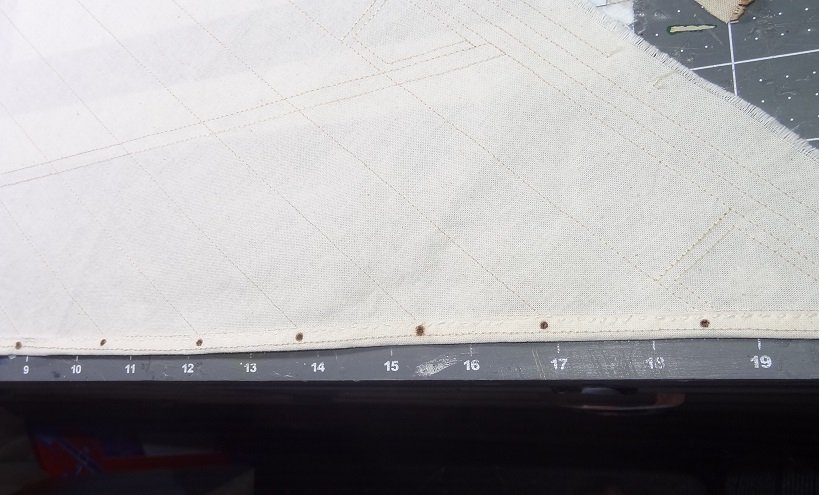
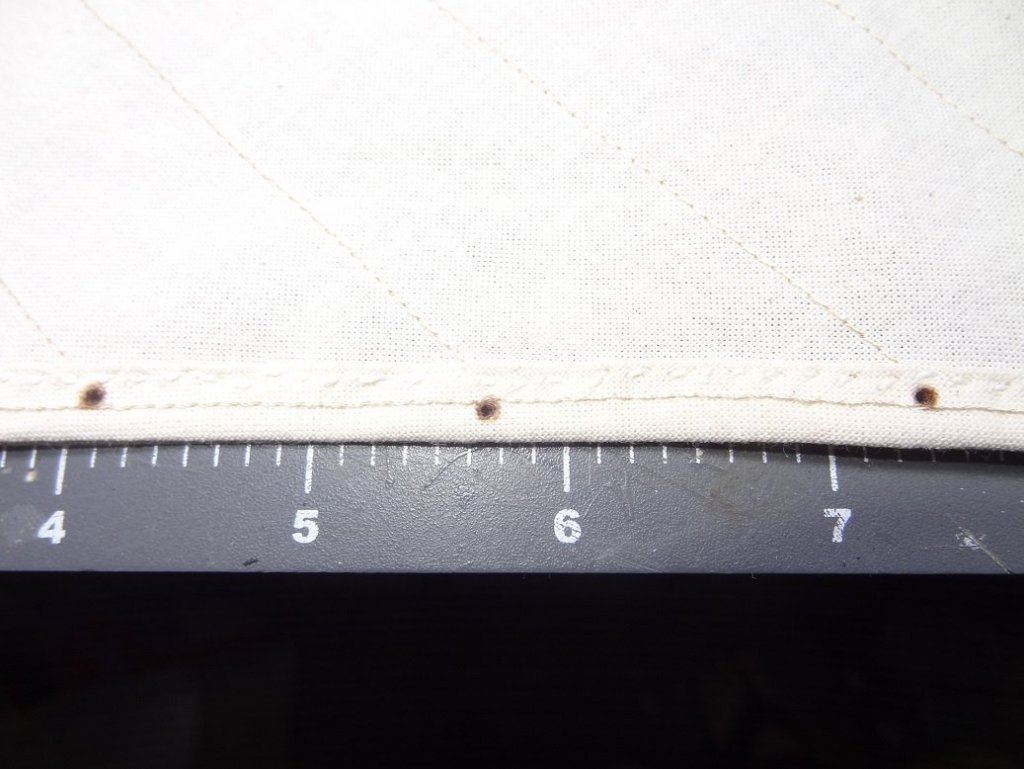
I'm quickly gaining respect for the seamstress/tailor occupation. No patience for the repetition involved with hand sewing. But, still I persevere. I was able to finish hemming the second edge tonite. One more to go. This one came out better than the first so I must be learning. This is the first hem to have a wire in it. As mentioned previously, rather than trying to stitch the hem with the wire in it, I just did the sewing and slid the wire in when I was done. Much simpler! After close inspection of the hem, I won't quit the day job but it could have been a lot worse. I also added some grommet looking holes to the first edge - the edge that fastens to the yard. I picked up this idea from the restore I did, someone passed it on to me. As you will see it doesn't look great from 6" away but from distance it's not bad. This was done by drilling holes (yup drilling) at the appropriate places. Then a mixture of dye (season to taste) water/white glue at 25%/75% is applied by dipping the tip of a toothpick in the mixture, then sticking the tip into one of the holes. Not too much on the toothpick as the liquid will soak in and spread. The result is a nice brown spot that looks sort of like a grommet or just reinforcement stitching at the hole. The glue dries and keeps the hole spread open. One pic shows what you can do with the wire in a sail. No plans on leaving it like that but I think you can see the possibilities. Now that I have the routine down I'll take a few pix as I'm doing the last edge. Maybe it will help someone. Lastly, I've mentioned dying the sail - a little darker. I want the sail to look a little dirtier and hoped my white stitching would pick up the color and blend in better. No such luck. I put a few stitches in some scrap and dyed that. If anything the stitching sticks out more now. The dye didn't take very evenly in the sail either. Different materials taking up different amounts of dye. I'll have to think on that a little more. Here's what I have:


- 204 replies
-
- 2
-
-
- trajta
- marisstella
- (and 1 more)