HOLIDAY DONATION DRIVE - SUPPORT MSW - DO YOUR PART TO KEEP THIS GREAT FORUM GOING! (Only 13 donations so far - C'mon guys!)
×


mikiek
-
Posts
2,276 -
Joined
-
Last visited
Content Type
Profiles
Forums
Gallery
Events
Everything posted by mikiek
-
 Your secret is safe. Styrene - sheets, tubes and bars - have saved me on more than one occasion. I wish my wood working skills were better. Sad but true, I have a good lathe and mill. But I learn best by watching someone and there ain't no one in the neighborhood. I do get tickled with your WD40 idea - sounds like me. Any odd piece of anything I find, i usually toss it in a bin. You just never know.
- 843 replies
-
- 4
-

-
- niagara
- model shipways
- (and 2 more)
-
Joel - I was asking because there is a really good UTube (one of many) on seizing. The result looks solid but the whole process seems too much. Instead, I take the seizing rope around the rope to be seized then put a half hitch and a dot of CA. Then i wind for as much as I need, add another half hitch and a dot of CA. Of course the long term viability of CA is debatable, but that is the route I am taking. In many cases it allows me to seize in place if the need arises. So I was curious to know how Darrell was doing his seizing.
- 648 replies
-
- 1
-
-
- niagara
- model shipways
- (and 1 more)
-
Tool for Shaping Brass Strip
mikiek replied to mikiek's topic in Metal Work, Soldering and Metal Fittings
I'd have to agree with you Mike. Nice for the coffee table but that's about it. I needed (and still do) more basics. Sadly, I still haven't found it. -
Good steady progress Darrell. It's coming together nicely. On your seizing, are you doing the thing where you make a loop with the seizing rope, wrap that, then stick the other end thru the loop and pull the loop tight? (Excuse the poor description). I've found that this is too much for my taste. I'm just half hitching one end, wrapping for as far as I need then CAing the end.
- 648 replies
-
- 3
-
-
- niagara
- model shipways
- (and 1 more)
-
FYI - the plans call them "sea steps". Google searching for any of the names mentioned here did not turn up much. Not sure, but the tape sounds like a reasonable idea. Should help with them all being parallel and evenly spaced. I've already done the starboard by eye. It came out pretty good. Will try tape on the port. Speaking of tape. After gluing a few to the hull, I realized that these things will be begging to get knocked off. Particularly in the stage of the build I am in. I'm hoping if I put some tape over them they will survive.
-
I forgot to mention, on the channels in addition to the deadeyes there is a small bullseye. I believe it gets one of the backstays. Much as I wanted to machine some wood like Darrell did, I do realize my limitations. So I used styrene tubing instead. Just inside the tube edge I was able to cut/file a groove and then just slice it off. Paint it like the deadeyes and who would know?
- 843 replies
-
- 2
-
-
- niagara
- model shipways
- (and 2 more)
-
Great idea! I'll give it a shot. I've been using styrene tubing for the bullseyes, but it would be nice to have ones of wood.
- 653 replies
-
- 5
-
-
- trabakul
- marisstella
- (and 1 more)
-
Mike - one thing I have found. We bend planks long ways and edgewise. For Niagara's stern, I twisted planks. Soak them as usual, put one end in a vise. Twist the other end and stick that in another vise. Let it dry. If you play around with that you can get some bizarre shaped planks that fit perfectly on a frame with curves.
- 129 replies
-
- 3
-
-
- finished
- model shipways
- (and 1 more)
-
I know what you mean about no time to build. The last 5 months have really put a cramp in my free time. It could be a good thing though. We are both moving into spars and rigging. Probably best to not do too much at one time.
- 701 replies
-
- 6
-
-
- phantom
- model shipways
- (and 1 more)
-
That helps Don. Per Darrell's Niagara effort, I was going to try to make some bullseyes but couldn't figure out the parting. Do you think it could be done with a softer wood like the beech dowels in a kit?
- 653 replies
-
- 6
-
-
- trabakul
- marisstella
- (and 1 more)
-
Thank you Don. She's needing a good cleanup. Or in our case maybe a blowdown with a compressor.
- 843 replies
-
- 3
-
-
- niagara
- model shipways
- (and 2 more)
-
Mike - a cool tip I picked up regarding garboard placement. 1. Shape the front end of the garboard - usually rounded on the bottom and somewhat pointed on top. 2. Pin the plank in it's approximate location. 3. Lay another plank on the garboard edge above the garboard with the leading end behind the garboard leading edge. 4. Slowly slide the upper plank forward to where it would normally lay. 5. If the plank stays horizontal you are good. 6. If the plank end wants to go up at all slide the garboard backwards just a bit and repeat. The idea is you don't want the garboard to force the next plank upwards in the bow area because that upwards turn will get worse with each successive plank.
- 129 replies
-
- 7
-
-
- finished
- model shipways
- (and 1 more)
-
Anything I find the slightest bit useful I add to a Favorites folder in IE. That's why I'm surprised I can't find it. I even have a vague recollection of the pix. I was thinking maybe I need to review my books. All the time I've spent looking I probably could have made and installed them by now. However those pieces are one of those where if one or two are crooked it really looks bad. The technique that was described was foolproof.
-
OK - you may not have seen the page but maybe you can help with the terminology. I don't know what the real name of those steps are.
-
Hey Mike - thanks for checking in. You are right about perseverance. This exercise has been a real test of character. I see you are building a galley. How cool! And from scratch! I have a galley kit on the shelf that I have been tempted to open. That's when my perseverance goes out the window. Kits are fun to start, but it is harder to finish them.
- 843 replies
-
- 4
-
-
- niagara
- model shipways
- (and 2 more)
-
I'm referring to the handrails on the outer hull that continue the normal interior boarding ladders. At one time I had a link to a page that showed a very neat way to space and mount them. Can't find it now.
-
Interesting! Thanks for that Joel. I will change course and make the rails. I do wonder about the best time to install them - before or after the shrouds.
- 843 replies
-
- 3
-
-
- niagara
- model shipways
- (and 2 more)
-
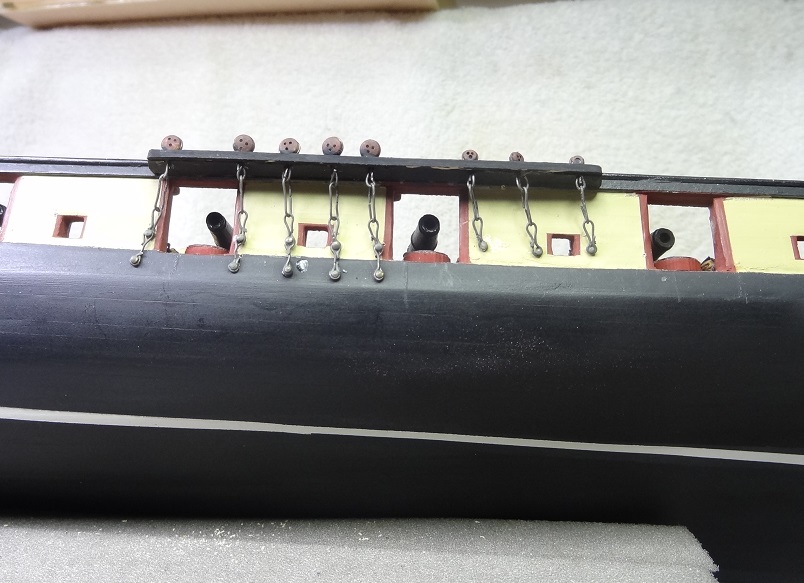
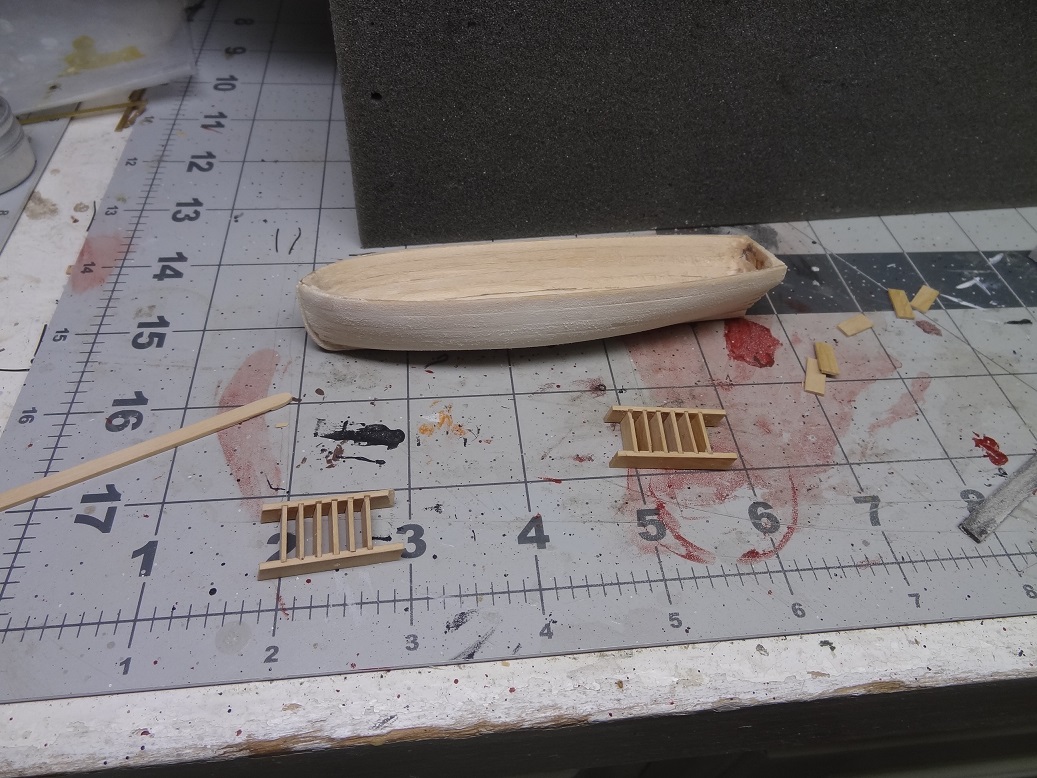
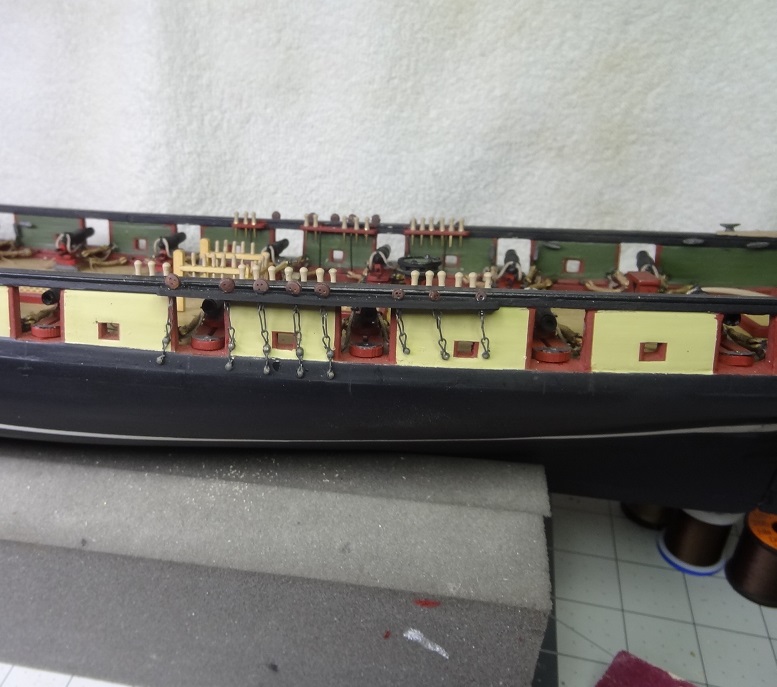
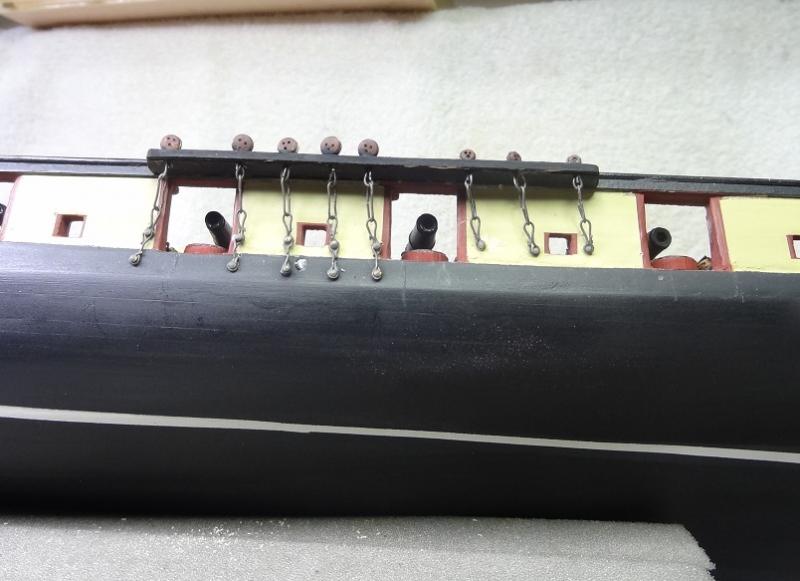
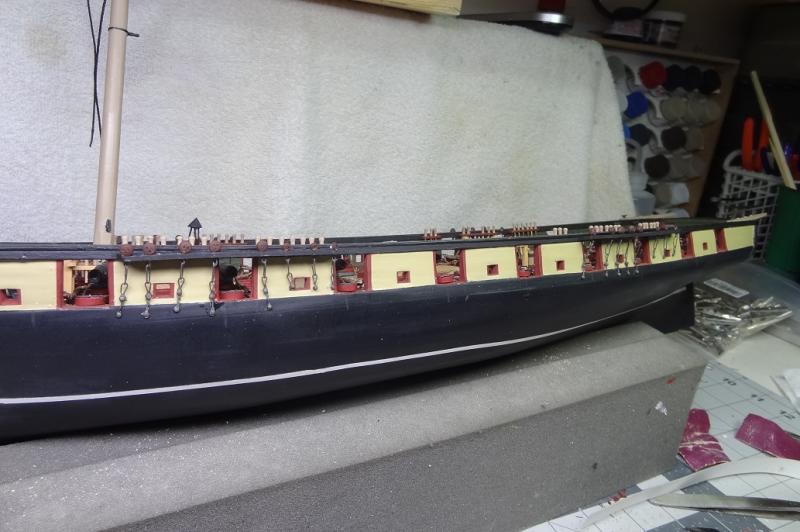
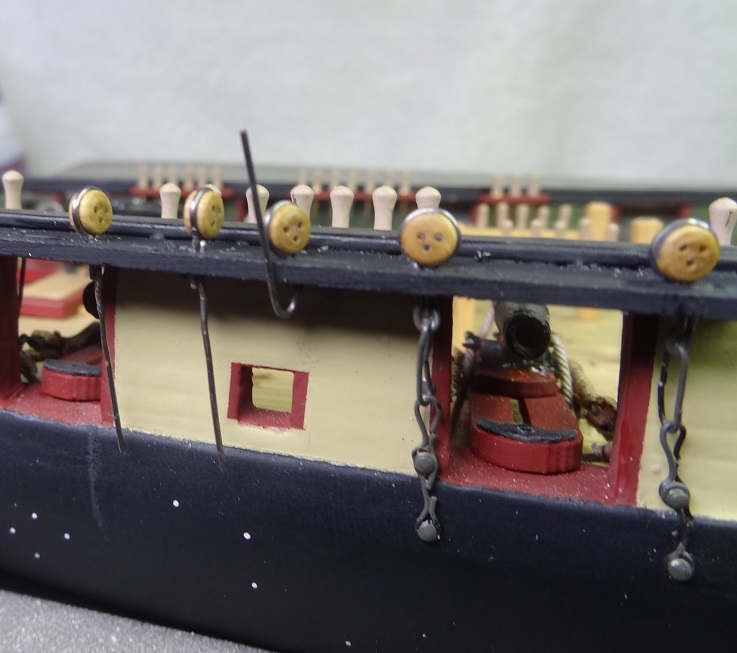
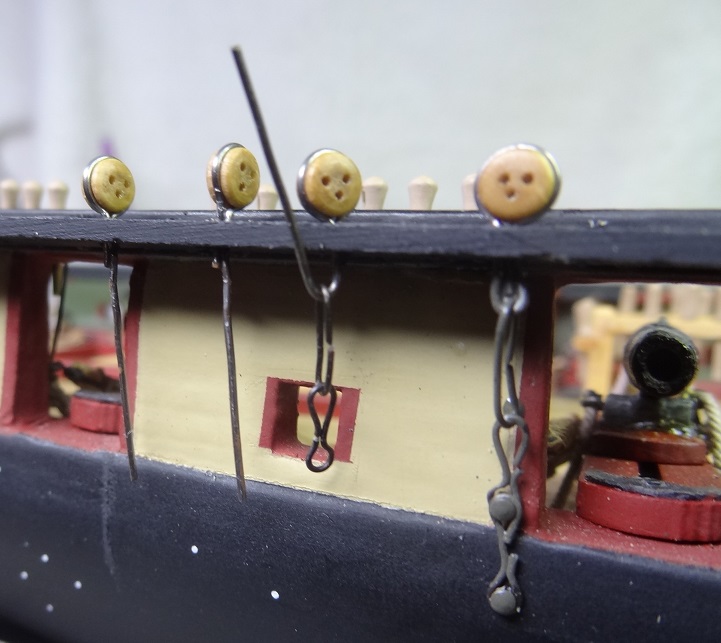
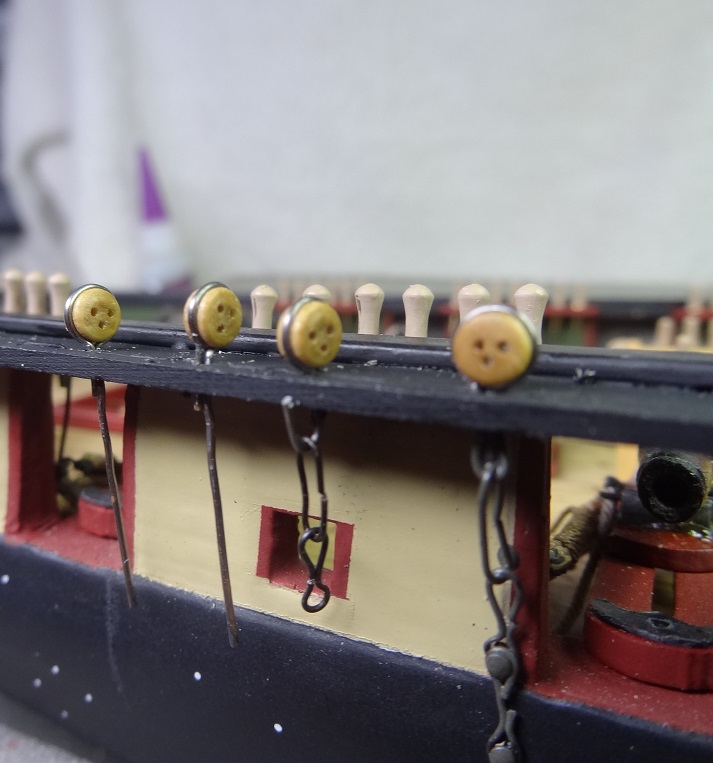
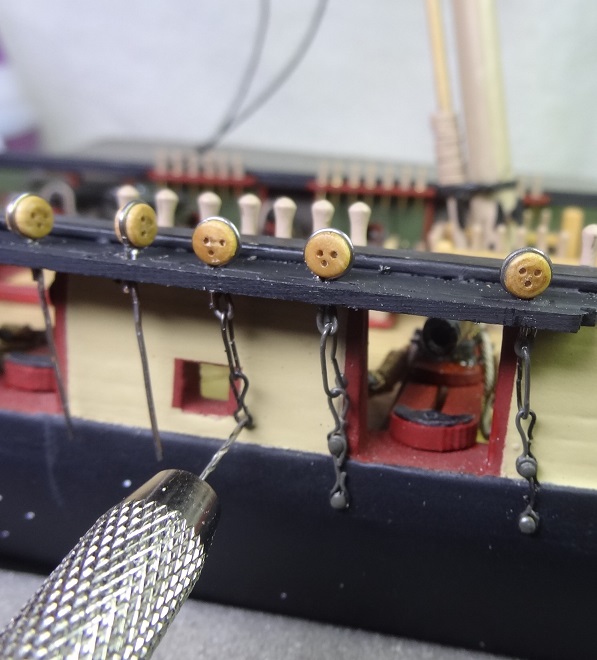
Channels and chain plates have been done for a few days, but I finally took the camera out this evening. So here's a few pix. I'm pleased with how they came out - good scale and very sturdy. Again the process I used is a combination of Hubert Picard's and Model Shipways Syrene practicum. Bad part is I found more deck items that I overlooked. Fore pin rail, boarding ladders, belfry, ships boats, rudder chain. I think I am going to go with 2 of the 3 ships boats. I built the yawl months ago. The cutter was started a while back, but I just finished planking it and hollowing it out. Now I need to dress up the inside. One will be hung from the rear davits (I will not be making the side davits) and the other will sit over the grate of the main hatch. I am also still debating whether to add the hammock rails. Not sure whether they would have been used on the original. Seems like a dumb place to put them when you know they are going to get all shot up.

- 843 replies
-
- 4
-
-
- niagara
- model shipways
- (and 2 more)
-
On that same topic. As a complete newbie to lathe work, what do you use to part something that small (and I suppose fragile)? Thanks
- 653 replies
-
- 5
-
-
- trabakul
- marisstella
- (and 1 more)
-
Don - just catching up with your log. Beautifully executed deck pieces! I am curious - the dowel you used for the porthole covers, what was the diameter of that compared to the bit you used to drill them out? Any problems doing that?
- 653 replies
-
- 5
-
-
- trabakul
- marisstella
- (and 1 more)
-
Looks great Darrell. Those yards raised or lowered is a tough call, but I think I will be doing like you. To some, it might look odd but I believe that's how they would be with a sail-less boat.
- 648 replies
-
- 1
-
-
- niagara
- model shipways
- (and 1 more)
-
Mike - won't the blocks come out when you knock out the inner part of the frame?
- 129 replies
-
- 1
-
-
- finished
- model shipways
- (and 1 more)
-
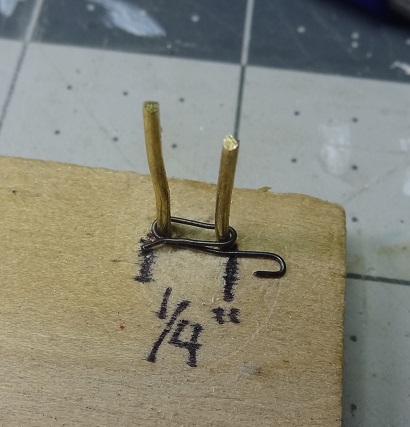
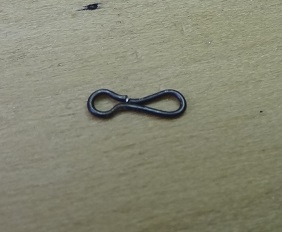
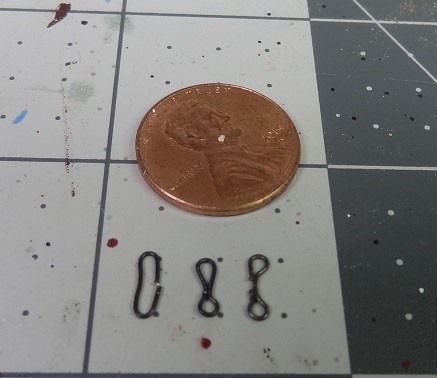
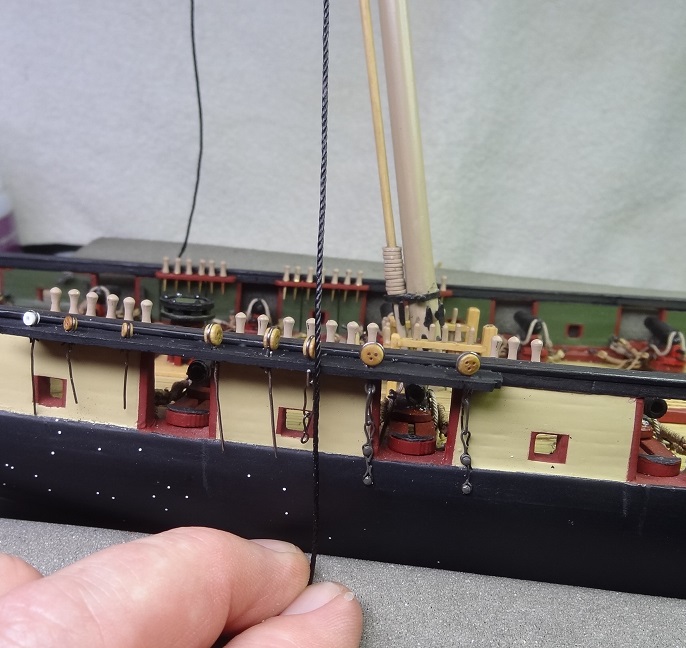
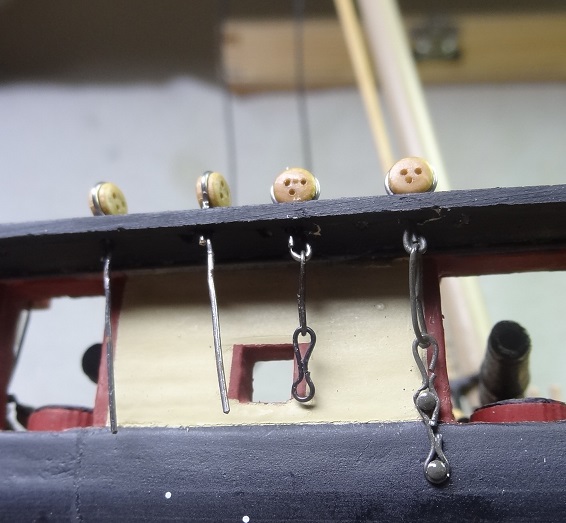
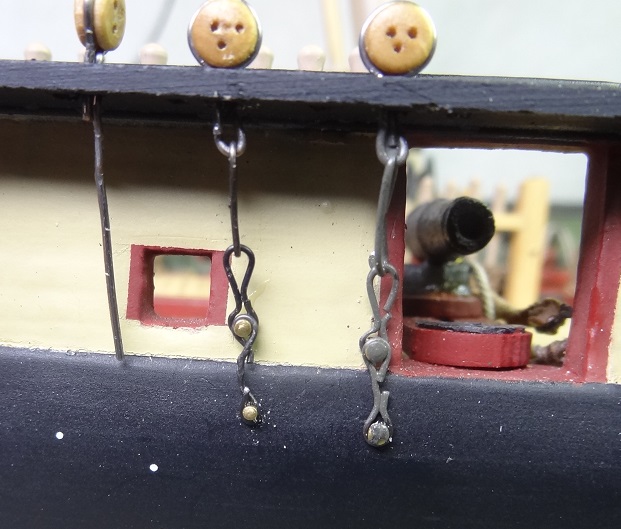
Maybe the third time will do it. While the 2nd try at chain plates was better than the first, I finally decided it was too bulky for 1:64. So I've decided to run with the rest of the flock and make all the parts from wire. For the most part I have followed the practicum for Syren - Chapter 18 which can be downloaded from Model Expo. Two similar jigs, just a couple of nails in a board. One with outer nail edges spaced 1/4", the other spaced 7/32". All the parts follow the same basic routine but each has it's own twist as well. For the larger chain plate assembly there are 4 pieces - wire stropped dead eye, a middle, toe and preventer link. Each starts as a wire looped tightly around the jig nails. The middle and preventer link use the 1/4 spacing, the toe link is from the 7/32. For the middle link, remove it from the nails, snip the wire on the side where the wire overlaps and you"re done. For the toe link, using round tipped long nose pliers squeeze the wire together just inside on of the nails. You should end up with a small loop and a slightly larger loop. Remove from nails and snip the wire ends. BE CAREFULL to snip the right wires, it's a little tangled It should end up like this For the preventer, wrap a loop around the nails, remove and snip. Then put the loop back on the nails and squeeze both ends, just inside the nail. Here's a set A tip here - when a link is finished, give it a squeeze with some parallel jaw pliers. This will flatten the piece out and give it a nice finished look. I posted about the dead eyes previously. At this point bend the wire on the underside of the channel The middle and toe link are easily joined - no soldering, remember? Then drop one of those over the bent up wire Snip the wire end right at the underside of the channel Get an idea of the angle the chainplates will lay by extending a line from the mast top downwards. Twist the deadeye so it faces outward and squeeze the wire under the channel Drill a hole (first of two) I used some nails from the kit to pin the chainplates to the hull. Insert a nail thru the upper loop in the preventer and lower loop of the toe. Drill another hole below that and put a nail thru the lower preventer loop. You may have some concerns regarding the unsoldered pieces - no solder anywhere. It turns out that the deadeye is taking all the upward stress and it's wire on the underside of the channel holds it in place nicely. The chainplates will not be stressed at all. So I was going along with this and then it hit me.You may have seen some white spots on the hull in a few of the pix. This was some splatter - from where I'll never know. But, I always knew I was going to have to repaint the hull. Besides I never cleaned it up after the rudder install. Well the more hardware I mount on the side the tougher it will be to apply masking tape. So attempting to paint the hull was never going to get any easier. I ended up taking a break and painting tonite. It came out pretty good. Back to the chainplates again........

- 843 replies
-
- 4
-
-
- niagara
- model shipways
- (and 2 more)