HOLIDAY DONATION DRIVE - SUPPORT MSW - DO YOUR PART TO KEEP THIS GREAT FORUM GOING! (Only 13 donations so far - C'mon guys!)
×


mikiek
-
Posts
2,276 -
Joined
-
Last visited
Content Type
Profiles
Forums
Gallery
Events
Everything posted by mikiek
-
 The matte varnish has virtually no shine.
 -
I'm using acrylic paints so I'm also using an acrylic polyurethane lacquer. How much shine you want is up to you but I personally don't care for glossy. Valejo makes a good matte and satin lacquer. It's more for protecting the wood over the long term than anything else.
-
Don't know about you but I am having a hard time even locating some of those blocks on the plans. Some that I do see, it's difficult to tell if it is centered or a P/S thing.
- 648 replies
-
- 3
-

-
- niagara
- model shipways
- (and 1 more)
-
Well done Scott. I will say the structures are somewhat noticeable, however when all the other stuff is in place they won't be as 'in your face' as they are now. Don't forget to put on some finish on the deck now. After the guns are in place it's a lot harder to do. Bring on the carronades....
-
Darrell - is that mast in the boat or laying on your bench?
- 648 replies
-
- 3
-
-
- niagara
- model shipways
- (and 1 more)
-
Sound advice!
-
Moving along nicely Darrell. I am amazed ANYTHING threads thru the holes on those small deadeyes. I was reading where some will do temporary fastenings to get opposing tensions correct (shrouds for instance) and then go back and do the real seizing, knots, etc. Are you doing this?
- 648 replies
-
- 3
-
-
- niagara
- model shipways
- (and 1 more)
-
I'll check both. And I suppose there may be a difference between how things were really done and what looks better for display. I imagine a big gap where the top and top gallant royal would be might look odd when the build is displayed. Most would expect evenly spaced yards.
- 648 replies
-
- 3
-
-
- niagara
- model shipways
- (and 1 more)
-
I agree Mike. The bending is doable particularly if you stay with the basswood. You just end up having to do both bending types on the same planks. That's what I started to do. The first one is the worst. After that you have something to glue the next plank to.
- 129 replies
-
- 3
-
-
- finished
- model shipways
- (and 1 more)
-
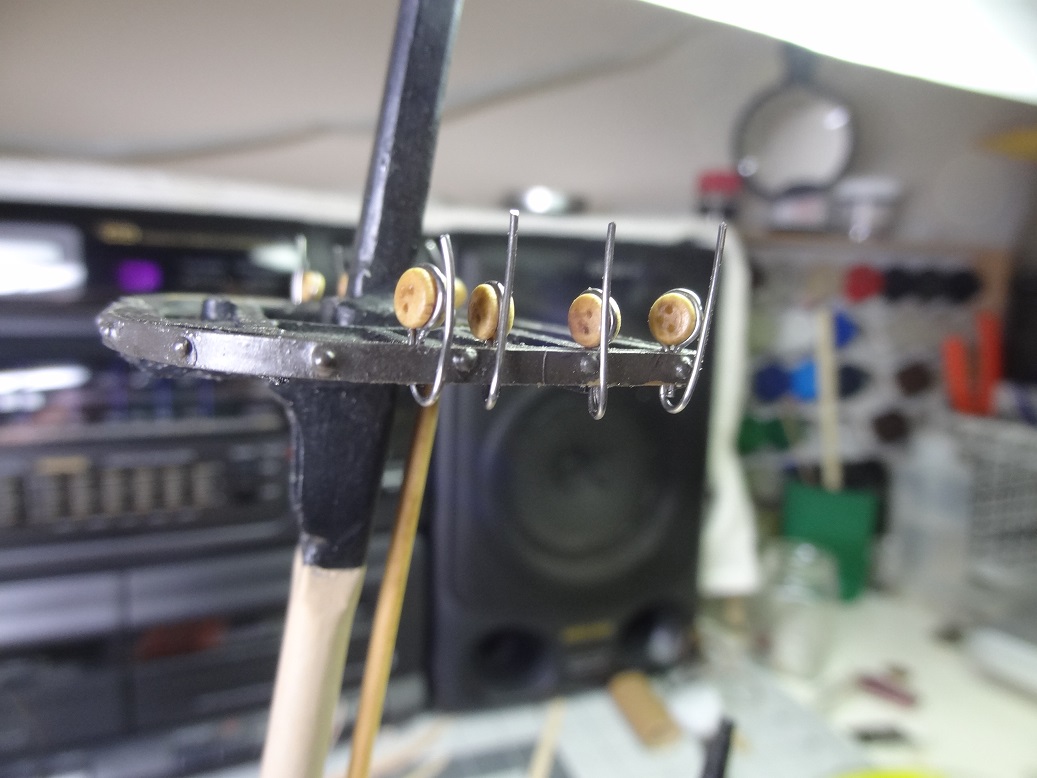
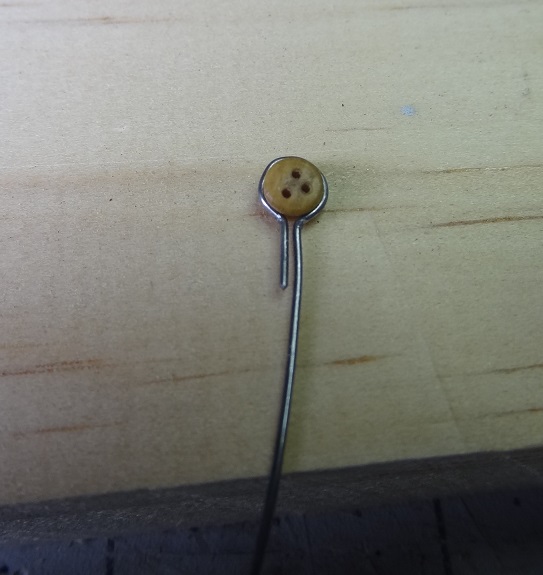
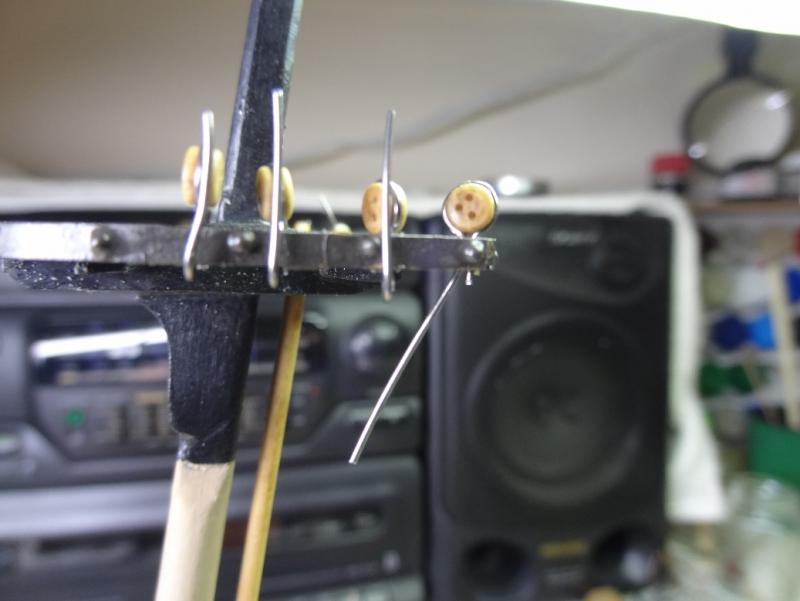
Hey Don - you are right about the deadeyes. I just left them mounted,that's it. It was almost 1:30AM about then. They do need to be rotated in the wire strop to get the holes in the proper position. They are also not yet facing out from the tops and channels. With this technique (modified from Sicard's site), you leave them as shown until you hook whatever needs to go into them. Then you twist the deadeye so that it is facing outwards and the wire ends up under (and stuck into) the top. That description was probably clear as mud. I'll post some pix when I get down to actually doing it. The thing I liked about this technique is you can strop and mount a deadeye in under a minute. No soldering involved and they seem very sturdy.
- 843 replies
-
- 3
-
-
- niagara
- model shipways
- (and 2 more)
-
Don't know if this is the same period but I thought the course and top gallant yards were "fixed" - they were not raised. The top and topgallant royal were raised. So the TGR might be lashed to the TG when no sails are present. Same for the top to the course.
- 648 replies
-
- 3
-
-
- niagara
- model shipways
- (and 1 more)
-
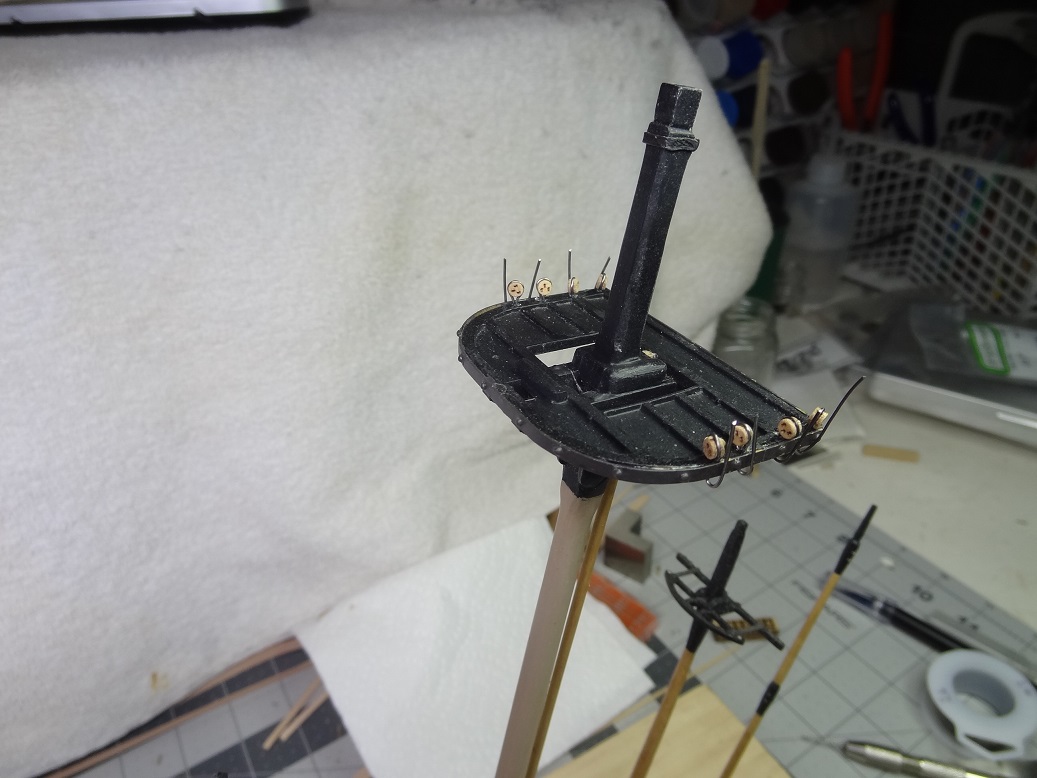
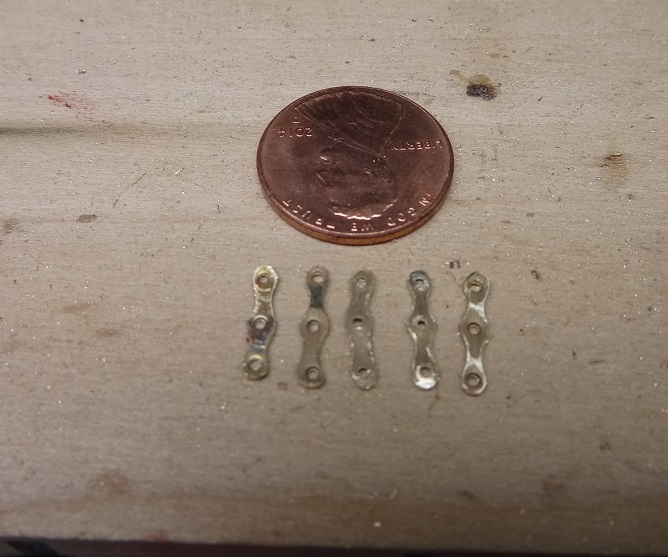
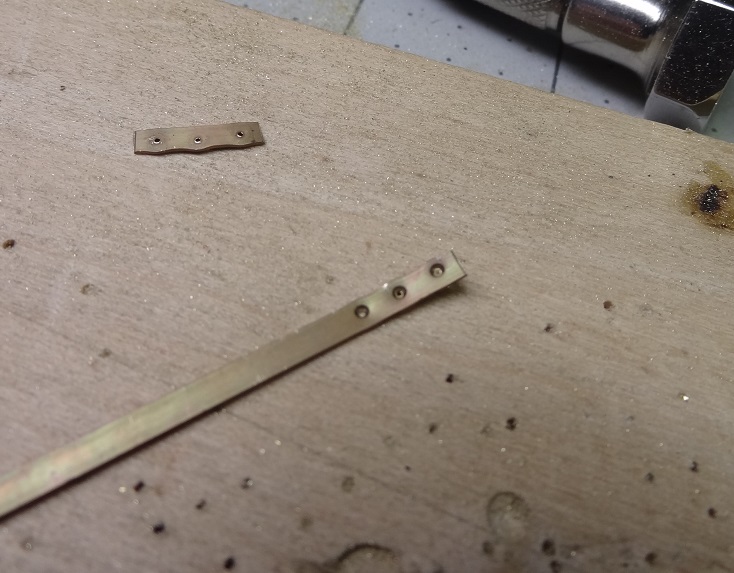
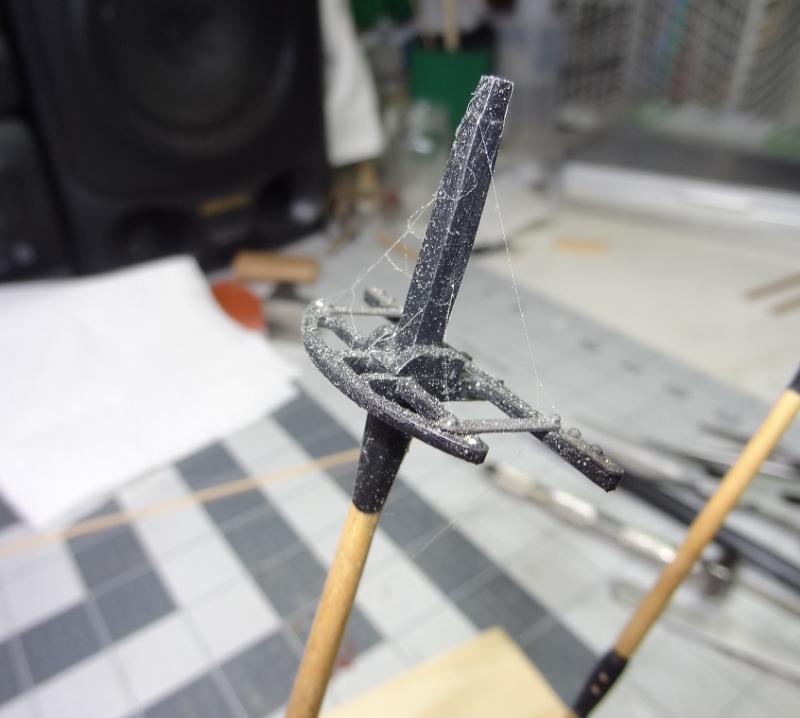
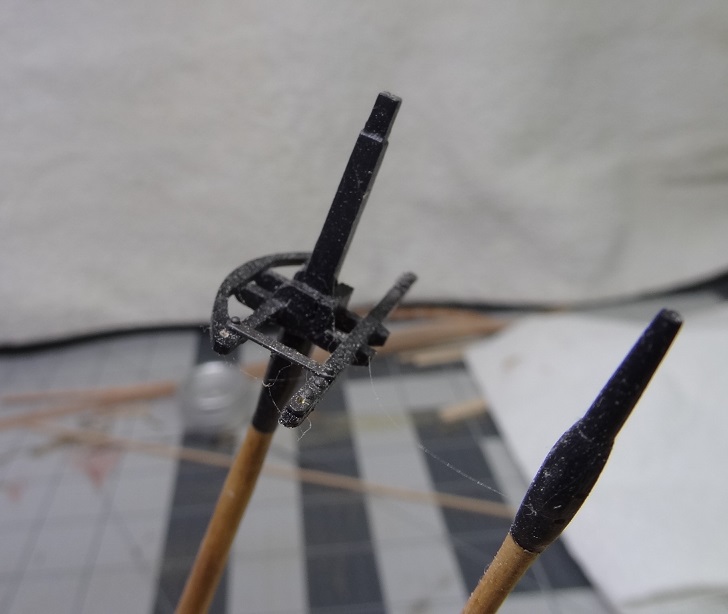
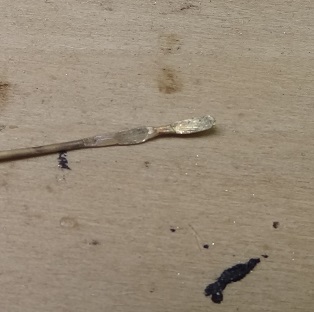
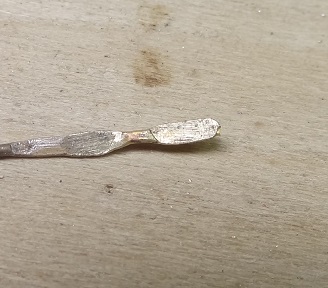
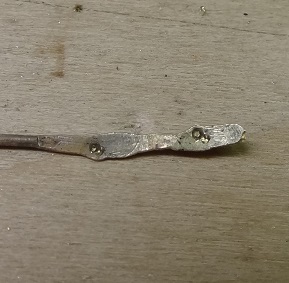
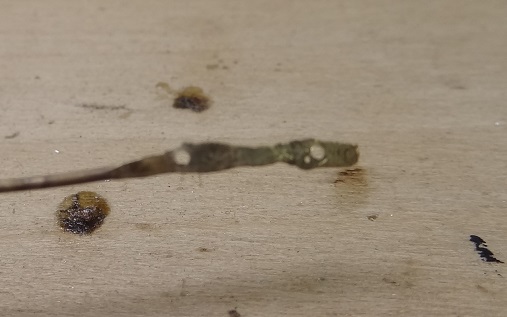
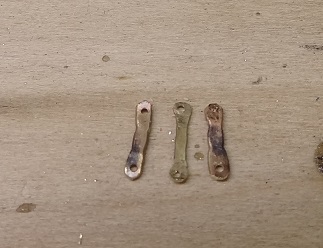
Sometimes I amaze myself with my own stupidity! One track, no options. The chain plates were a perfect example. I had originally made the preventer plates by trying to hammer (flatten) a piece of wire. Perhaps in real life that's how a smith would have done it. But there is quite a difference between beating on a 1' piece of metal and beating on a 3/16" piece. Looking back at my earlier post, those things were UGLY. Lightening did strike. How about taking an already flattened piece of metal and just shape it as you need it? Duh! Break out the Dremel. Break out the Foredom. Turn on the brain. So we start with a brass strip and punch some guide holes. Next, drill out the holes and grind to shape. Took a third of the time as the previous attempt. Next, getting deadeyes mounted on channels and mast tops. Due to shortages I used a combination of kit supplied and ones from Syren. Not overly thrilled with either. Wire is wrapped around and squeezed tight. The both ends are inserted into a hole in the channel or mast top. Trim the short end, bend the other end. This end will also be shortened to where it ends level with the top. The deadeye is turned into position. A piece of rope or chainplate can be inserted and then the end is pushed up into the underside of the top or chainplate. NO SOLDERING! I'll show you that when I get there. I really need to do something with these masts.


- 843 replies
-
- 4
-
-
- niagara
- model shipways
- (and 2 more)
-
Mike - something else to consider. After installing the frame pieces, fairing is a real bear. The frames are so thin they flap around as you run a file over them. I was really afraid of breaking them. And there is some serious fairing that needs to happen, particularly at the bow. I ended up dribbling thin CA all over the knock out part of the frames. It did help to stiffen them up a bit. Have you decided if you are going to try bending the planks or spiling them?
- 129 replies
-
- 3
-
-
- finished
- model shipways
- (and 1 more)
-
Darrell - nice work. A few questions/observations. A lot of real world descriptions of mast stepping mention doing all the lowers first, then the tops, etc. So I think you are right on there. That's my plan as well. Of course it could be different in modelling. Are you planning to glue the mast or just let the rigging keep it in place? I know it's early, but have you noticed any stretching in the standing rigging? Are there enough of the kit supplied large deadeyes? Seems like I may be short a few. And thanks for giving me a little juice for rigging. You know how I feel about that.
- 648 replies
-
- 3
-
-
- niagara
- model shipways
- (and 1 more)
-
Sweet Just curious Mike - do all your frame pieces have an identifier burned in? I had one whole sheet of frames that did not.
- 129 replies
-
- 1
-
-
- finished
- model shipways
- (and 1 more)
-
That will be interesting Darrell. I'm gonna start at the tail and work forward. Also hoping to do Main & Fore lower, then tops, then top gallants. We'll see if the plan holds up. I'd be curious to hear your take on how much stress the standing rigging actually puts on tie-downs like deadeyes. I know ropes like shrouds should not be limp but I imagine they are not cranked down either. I'm still coming across deck pieces I overlooked, like the bell and forward pin rail.
- 843 replies
-
- 3
-
-
- niagara
- model shipways
- (and 2 more)
-
Good point Scott. We are really counting on the woodcutter to get things right for us.
-
Came across this site today as I was researching the rigging process. It's probably of no use to the experienced folks but for the novice (and I include myself) it is a quick, concise explanation of a lot of rigging lingo.
- 843 replies
-
- 3
-
-
- niagara
- model shipways
- (and 2 more)
-
Thanks Don - I appreciate the feedback. I guess I will continue to rule out those kits without the interior.
- 653 replies
-
- 5
-
-
- trabakul
- marisstella
- (and 1 more)
-
Don, question for you as you are progressing on this build. I have been considering a Maristella kit. Several have caught my eye. It appears that some have a complete interior like your Trabakul and some do not. It would sound like doing an interior is a cool thing, but I have to wonder, after hull and deck is planked how much of the interior is visible? Just asking because I had ruled out a few kits that do not appear to have the interior.
- 653 replies
-
- 6
-
-
- trabakul
- marisstella
- (and 1 more)
-
Joel - the Niagara plans say channels are just under the rail. The Eagle practicum, which is based on Chrisman's Eagle excavation/plans, call for them on the gunwale. Wasn't sure if the under rails idea was a modern day thing or maybe there were some significant differences between Eagle and Niagara. I've been thinking they were close to the same design.
- 843 replies
-
- 3
-
-
- niagara
- model shipways
- (and 2 more)
-
But someone had to compute the taper before the plank was laid
-
Wow, 2 weeks gone by. They have been very busy with little time to build. This weekend was literally the first in 4 months that I have had to do what I please. I split that between Niagara and an RC sailboat I am building. Weather was gorgeous, had both ends of the garage open - no A/C needed. What? Yes that's right, another build A 1 meter racing yacht. Compared to what we do, this build is a piece of cake. The difference? This boat can get wet Beginning the prep for rigging, I needed to get the channels and chain plates in order. Channels were easy enough. Chain plates? The plans are not clear. I started with the preventer plates. A lot of builds make a loop of wire and pound them flat leaving holes at each end. I'm not a fan of that look. Instead I stole a technique from the Eagle practicum. I started with a piece of annealed 0.03 wire. Then using a metal punch, I hammer out 2 spots which will wind up being the ends. Then the spot in between gets a couple of whacks. Using a center punch, start a hole for each end. Then drill out the holes. Cut and shape each end. A few of the early attempts. They are getting more consistent and it is taking about 2 minutes per piece. Kind of expensive but I prefer this look. The toe links were just the basic piece of wire, looped and ends soldered. I am holding off on the upper links for now, I suspect they are not all going to be exactly the same size. Deadeyes will be next. I found a technique that I will be trying from a pay-for site. No soldering involved. I want to throw one question out there - Niagara plans show the channels mounted just under the hand rail. The Eagle practicum (which I have referenced a lot) shows them on the gunwale. At the moment I am opting for under the rail. Any thoughts??? From what I am seeing, the angle of the mounted chain plates should follow the angle of it's shroud, so to get much further I will have to step a mast. I believe I will follow Lever and work from the stern forward. Still debating that. Nice to get back to things again....
- 843 replies
-
- 3
-
-
- niagara
- model shipways
- (and 2 more)
-
Interesting design. Will you be planking the 2nd layer at the stern?