mikiek
-
Posts
2,276 -
Joined
-
Last visited
Content Type
Profiles
Forums
Gallery
Events
Everything posted by mikiek
-
 Well he's done it now. Pulled out the Constructo Enterprise kit and glued the bulkheads to frame. I'm not sure how far I will take this. Much more and I suppose a build log is in order. So while the paint was drying on Niagara, I pushed her to the back of the workbench and put Enterprise in front to do the bulkheads. Not sure, but I thought I might have heard some hissing and spitting Kind of nice working on some different wood. I'm not sure if it's one of the wood types or just the laser burn on plywood but when you open the kit top it smells like a cigar box. Nice!
- 843 replies
-
- 3
-

-
- niagara
- model shipways
- (and 2 more)
-
Thanks Bill - that helps a lot. That will be the first thing I try come time to apply finish. My apologies to the OP. I did not mean to hijack. But I did learn something here so thanks for the thread.
-
The Chili Red is 20%-25% thinner - Tamiya acrylic and thinner. I applied a 3rd coat last nite and the waterway looks better but still looks brushed. The killer is all that very thin trim around the bulwark ports. I bought a 0/3 detail brush to use for this but even with that the edges do not look sharp. I have come up with every excuse in the book NOT to mask. My results so far are the reason for doing so. I think it is my only option if I want to get the paint job back where it was.
- 843 replies
-
- 3
-
-
- niagara
- model shipways
- (and 2 more)
-
Bill - that's why my ears perked up when I saw you mentioned Tamiya clear coat. I've tried to stay exclusively with all their products and so far have had good results. Other than spray can, I wasn't aware they had any finishing products like a lacquer or clear coat. I've used their clear paint for sealing up masking tape, but that's it.
-
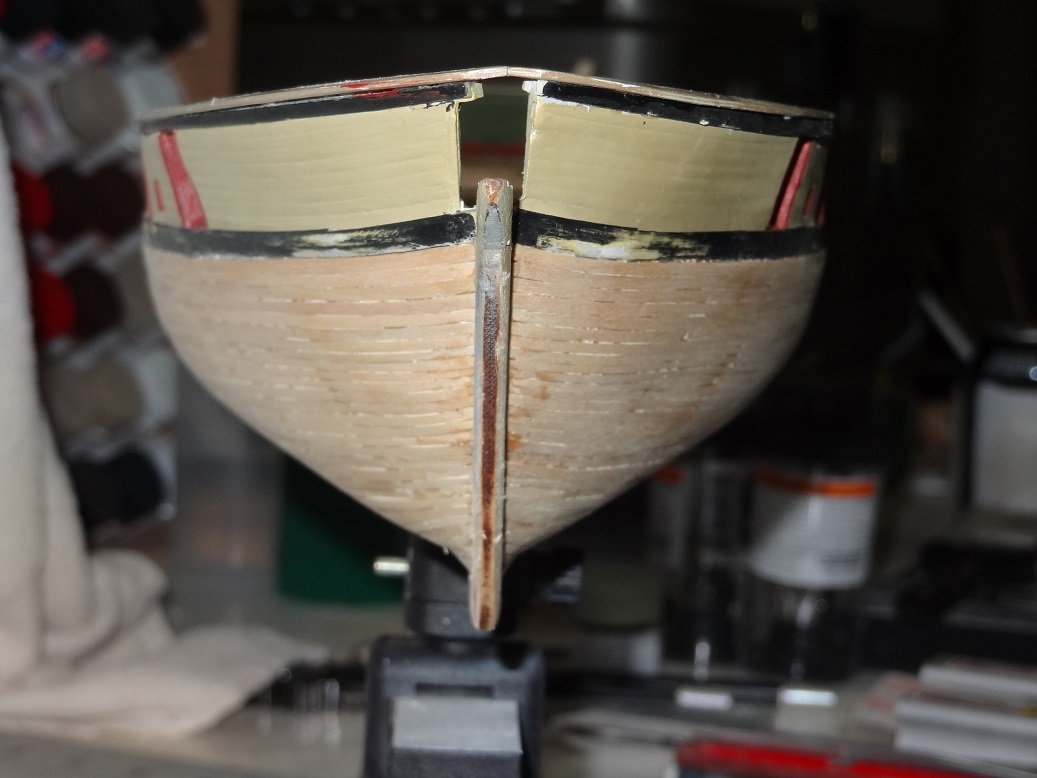
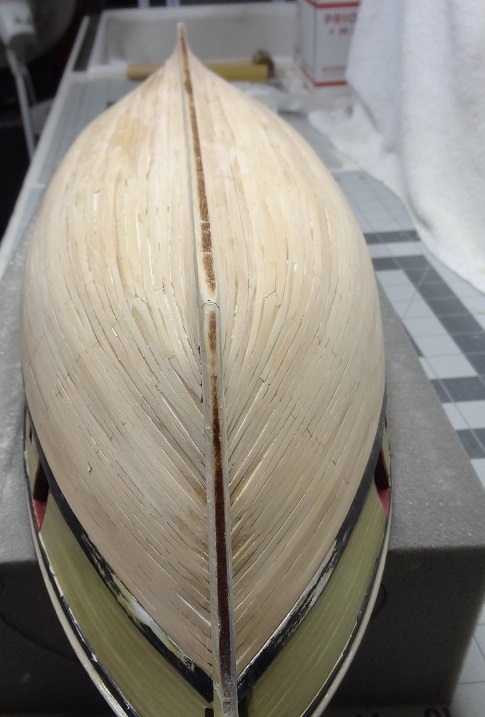
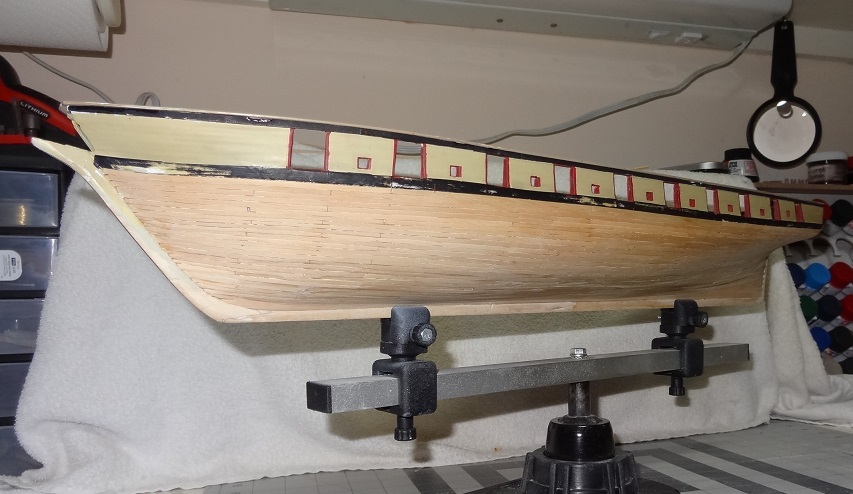
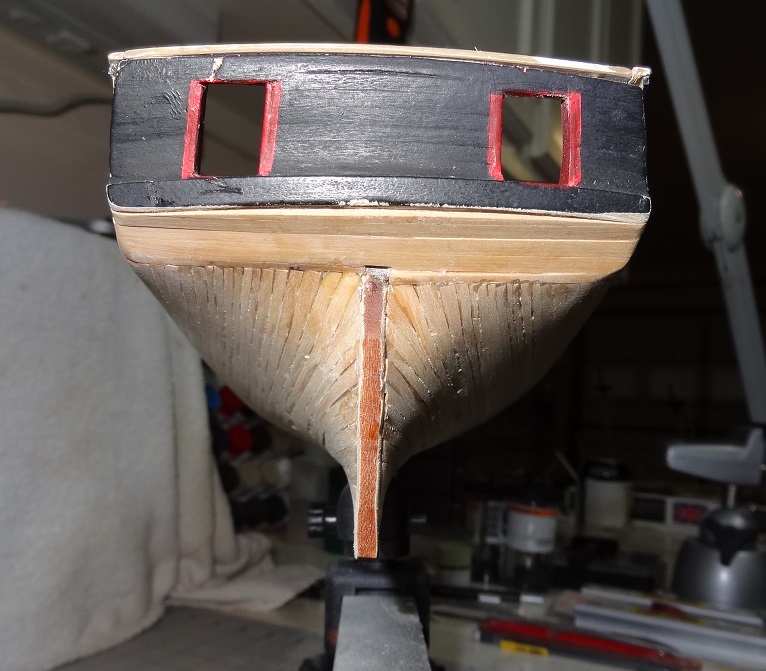
From the air conditioned studio in steamy S.E. Texas I bear good news. Hull planking is done! Sorry I haven't checked in for some time, but a log entry like "did 3 more strakes tonite - 10 more to go" just isn't very news worthy. That is ALL I have been working on for the last 2 weeks. Not sure where to begin. First off, a big thank you to all that have chipped in with advice and support! It would have been very difficult without you guys. Holy smoke, checking back I see I started this process exactly 1 month ago. I'm pretty happy with the job over all, although (as usual) the pix bring out the worst of everything. Plans called for 29 strakes per side, I ended up doing 28. Plans called for 4 stealers per side, I did 3. Plans DID NOT call for any drop planks, I had to do 1 at the bow and 1 at the stern on each side. The last strake. I got off on the butt pattern a couple of times. Maybe a senior moment? Hull painting will cover a lot of evils. Per the plans - 4 bands per side. Started at the wale and worked down for the first band. Did about 2/3 of the next band then decided I wanted to get the garboard in. Did that plus the adjacent 4 strakes. Then took the remaining unplanked area and considered that as the final band. This band I worked from both directions alternating top and bottom. It worked out pretty well as the last few strakes ended up in a relatively flat area so I didn't have to do a lot of bending and twisting. I already had enough stress worrying about whether the last 2 strakes will fit together. Now I suppose I will be sanding for the next week Niagara seems SO much bigger now. She is heavier too. Wow, we must be on a good relationship - try telling that to the Admiral. I know not many use them, but for me the proportional dividers were indispensable. Right down to the final strake. Come to find out I am kind of using them bass ackwards. Apparently, artists typically use them to make things bigger. You measure with the small end and the big end will give you a proportionally larger measurement. I was measuring with the big end and using the small end to tell me plank width. Whatever works. Also helpful was the technique I used to put a twist in some of the stern planks. Soaked them like I was going to bend them but instead put one end in a vise, twisted the strip twice and put the other end in a vise and let it dry. Naturally curly planks! Very helpful for the transition from a vertical lay to a horizontal lay. Here's a peek: A few days ago. So close I could taste it. You can see I mangled up the existing paint job pretty good. Speaking of that you may notice the 'new red' I'm using. Once I finish painting over the fire engine red I will finally be ready to glue down the deck. However I am debating with myself whether I need to apply with the airbrush. So far I have hand painted and that is exactly what it looks like. I've lost the nice airbrush finish. Given that I am moving towards more accurate colors for the period I am also going to paint the rail black like it should have been. I really need to move on. All the spars have been sitting in the rack for too long.


- 843 replies
-
- 4
-
-
- niagara
- model shipways
- (and 2 more)
-
Thanks Brian. If you do notch, you should decide what you will use to close it up once the deadeyes are in place.
- 287 replies
-
- 3
-
-
- niagara
- Model Shipways
- (and 1 more)
-
Great point Mark. Did not think about relieving stress. I imagine in most cases it would also make sense to have thicker material above the waterline to slow down enemy shot.
-
I'm just wrapping up hull planking on Model Shipways Niagara 1:64. The plans had bulkheads divided into 4 bands which I totally get. The width of the bands are dictated by the number and width of wood strips used. Band A is the topmost, Band D ends at the keel. The plans call for 3/32", 1/8", 5/32", 5/32" wide strips for A, B, C, D respectively. Just wondering why the varied widths and would something similar (to scale of course) have been done on a real ship? All I can figure is getting around curved bulkheads or frames would be easier accomplished with narrower planks.
-
Bill - is that Tamiya clear paint or do they have a finish product? If not the paint, how do you dilute it for an airbrush?
-
I've seen what they call ships curves on Amazon for about $10
- 701 replies
-
- 2
-
-
- phantom
- model shipways
- (and 1 more)
-
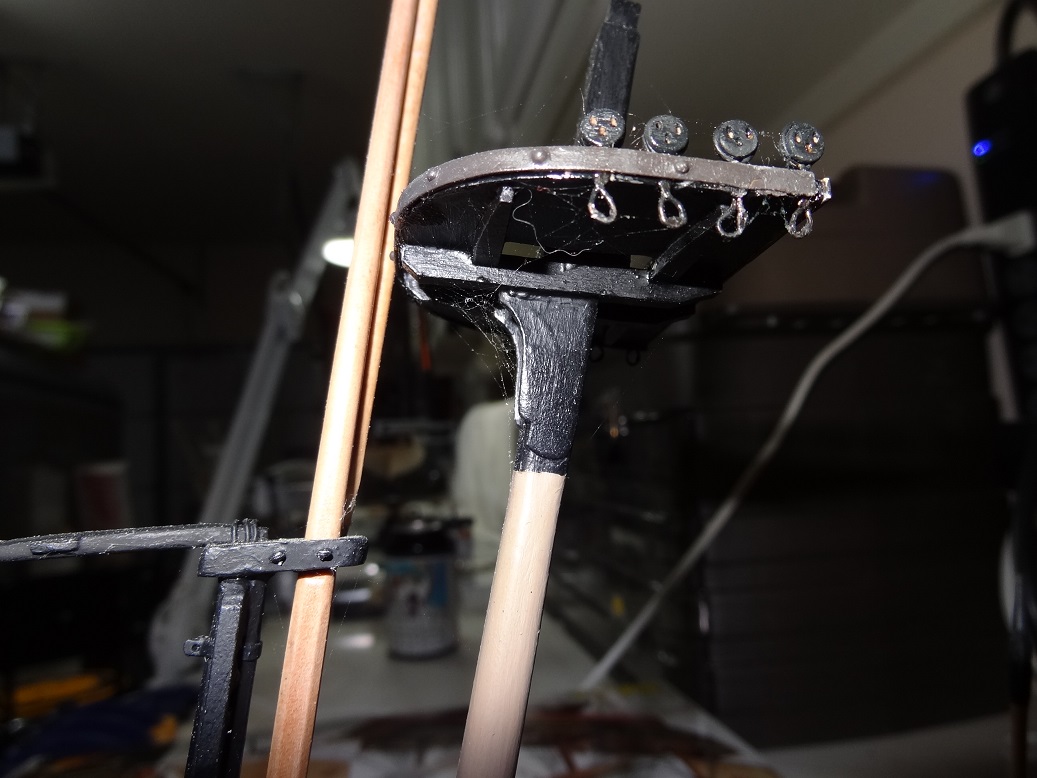
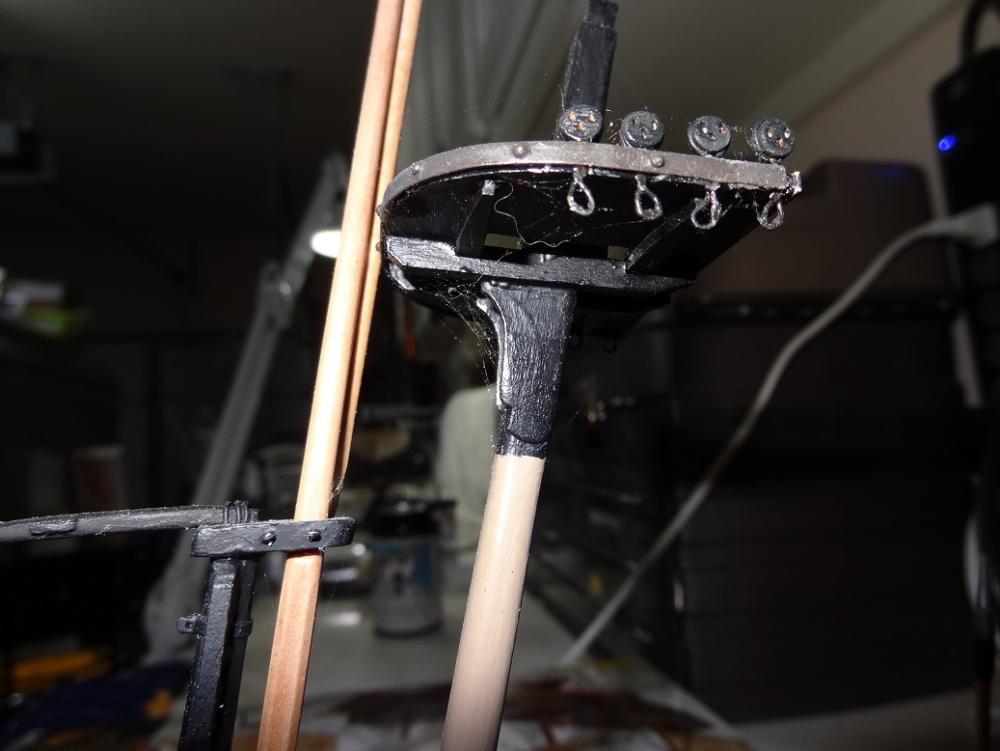
I drilled 2 holes close to each other and then carved out what was in between them. Another option (and I did this as well) notch the edge of the top where a deadeye should go. After you get them in place glue a blackened brass strip around the top to close the notch. This is similar to how some folks do channels and chainstays. Page 7 of my log has a few pix.
- 287 replies
-
- 3
-
-
- niagara
- Model Shipways
- (and 1 more)
-
Elijah - some will argue with this but here is what I found while planking my hull. The instructions say to mark 4 bands on the bulkheads. They varied in width due to the width of the plank strips call for. The instructions even go as far to say pin a strip (batten) on the marks so you can see how the bands line up. I didn't do this for 2 reasons. 1. Way too much trouble 2. By the time I have planked to the 2nd or 3rd band, it is VERY LIKELY that my planks are off somewhat and they don't end up on the marks. So then you have to recompute everything based on where you are at now (reality) vs. where the plans say you should be. So all that work to mark bands 4, 3, and maybe 2 were a waste of time. I did 1 band at a time and did not worry about the others - until I got there. I'm saying all this because you might consider doing something similar. Whether you are going to start at the keel and work up or at the wale and work down, just focus on getting 1 band right. If you do that, the next band will fall where it needs to. To preach about the proportional dividers some more - if you have these, all you have to do is mark the beginning and end of a band. You don't need marks for each strake in the band - the dividers will tell you how wide each plank needs to be at each bulkhead. They will even self-correct the remaining strakes if you happen to make a strake too wide or too narrow. Not trying to take away what anyone has said here. This is just another option. It worked very well for me. BTW - I just finished my hull this morning.
- 701 replies
-
- 5
-
-
- phantom
- model shipways
- (and 1 more)
-
I recently "cleaned out" my workbench. Used the leaf blower. It looked good for about 5 minutes.
- 701 replies
-
- 4
-
-
- phantom
- model shipways
- (and 1 more)
-
I'm trying to catch up with you and we can fight the rigging together.
- 843 replies
-
- 2
-
-
- niagara
- model shipways
- (and 2 more)
-
John - if you have the nerve to leave it parked somewhere - at least during the day - put it in front of the Bentwater entrance. There's a place behind the E.M.S. office (a little strip shopping center) where lot's of folks sell vehicles. Could give some exposure to folks with $$$.
- 843 replies
-
- 3
-
-
- niagara
- model shipways
- (and 2 more)
-
John - the photos on your site have been a tremendous help to me. Never been on any tall ship.
- 843 replies
-
- 3
-
-
- niagara
- model shipways
- (and 2 more)
-
Ahh, forgot about the copper! And I hear ya on trying to match the plans to the letter. I'm using boxwood from Crown and the widths are probably more consistent than the MS basswood. It also sands a lot better - no fuzzies and it keeps an edge. But I'm probably still being too anal about it.
- 843 replies
-
- 3
-
-
- niagara
- model shipways
- (and 2 more)
-
Thanks John - I have one. Used it a lot at first. Now during planking - with all the turning one end or the other, right side up, upside down - I am finding the foam holder to be more practical, and a soft surface. I imagine I will switch back once the hull will be right side up most of the time. Hey, since your last build was a Model Shipways kit, did the plank count listed in the plans in the last band (closest to the keel) include the garboard?
- 843 replies
-
- 3
-
-
- niagara
- model shipways
- (and 2 more)
-
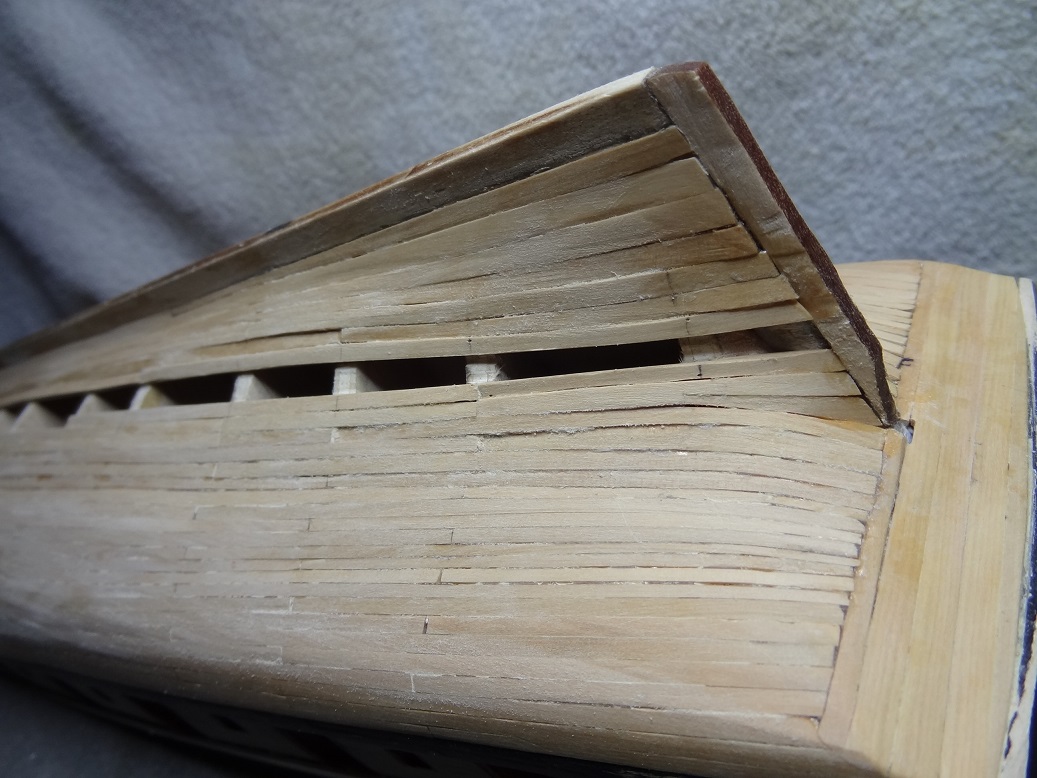
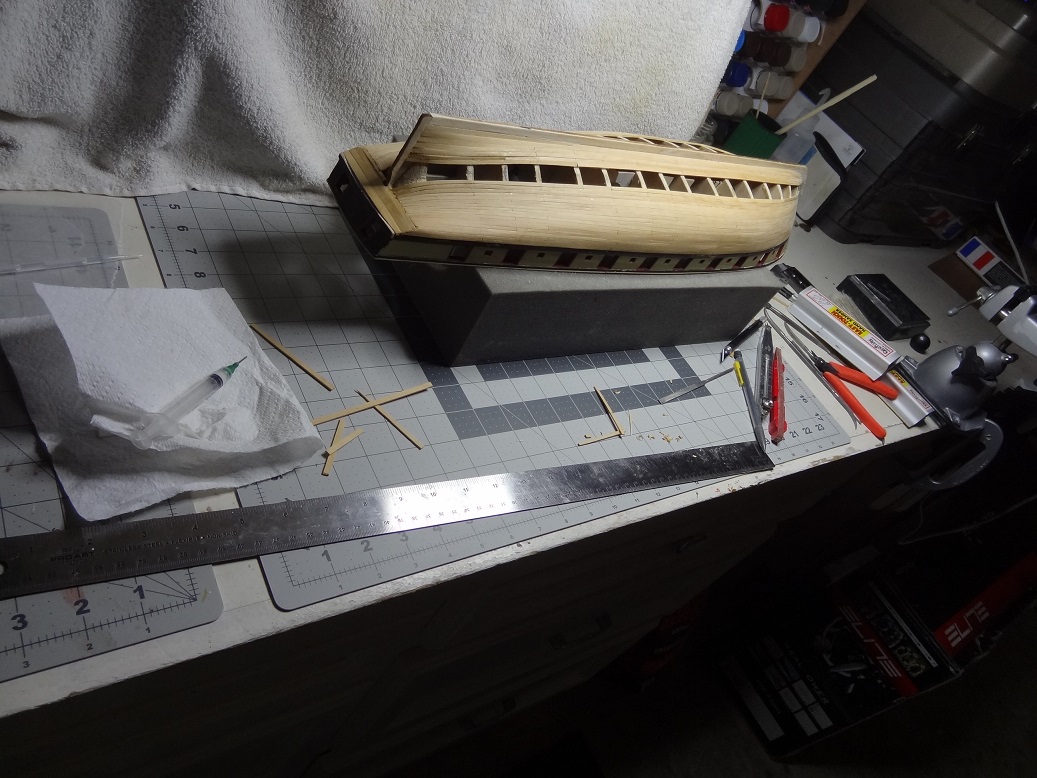
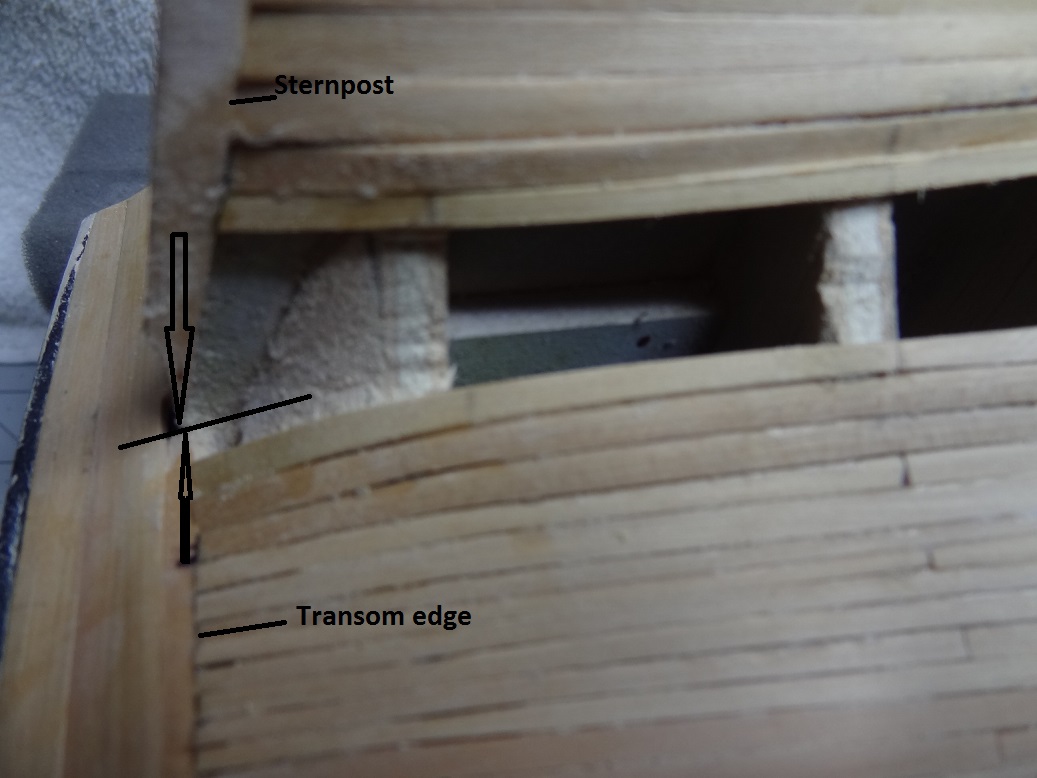
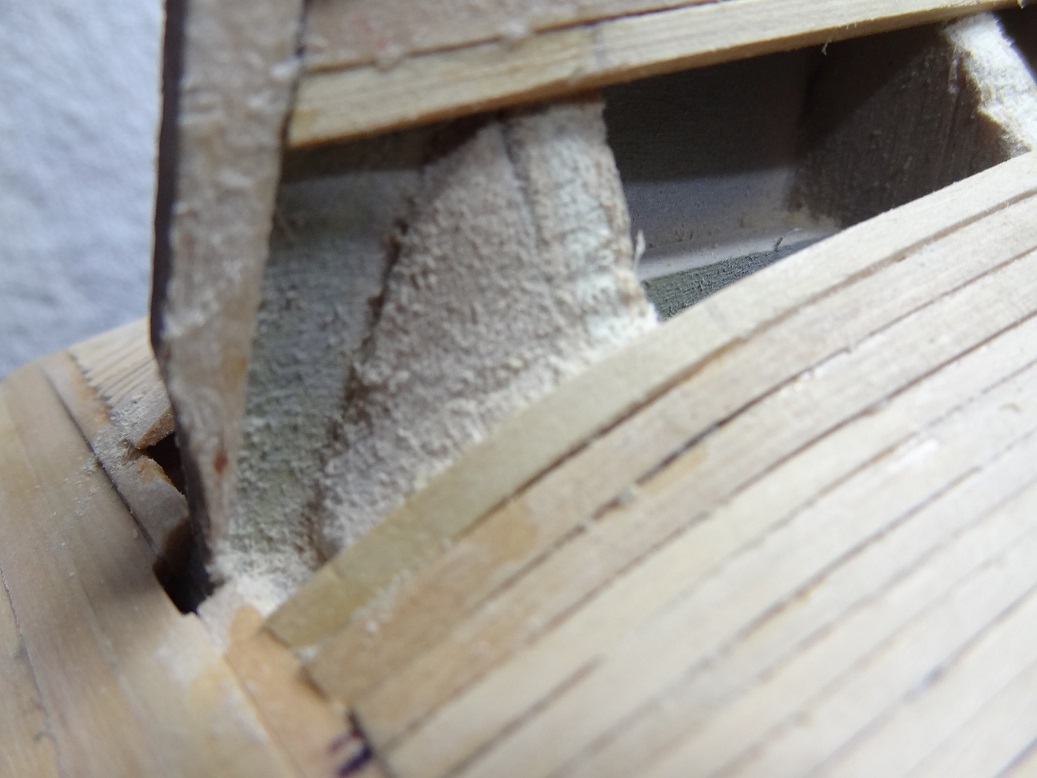
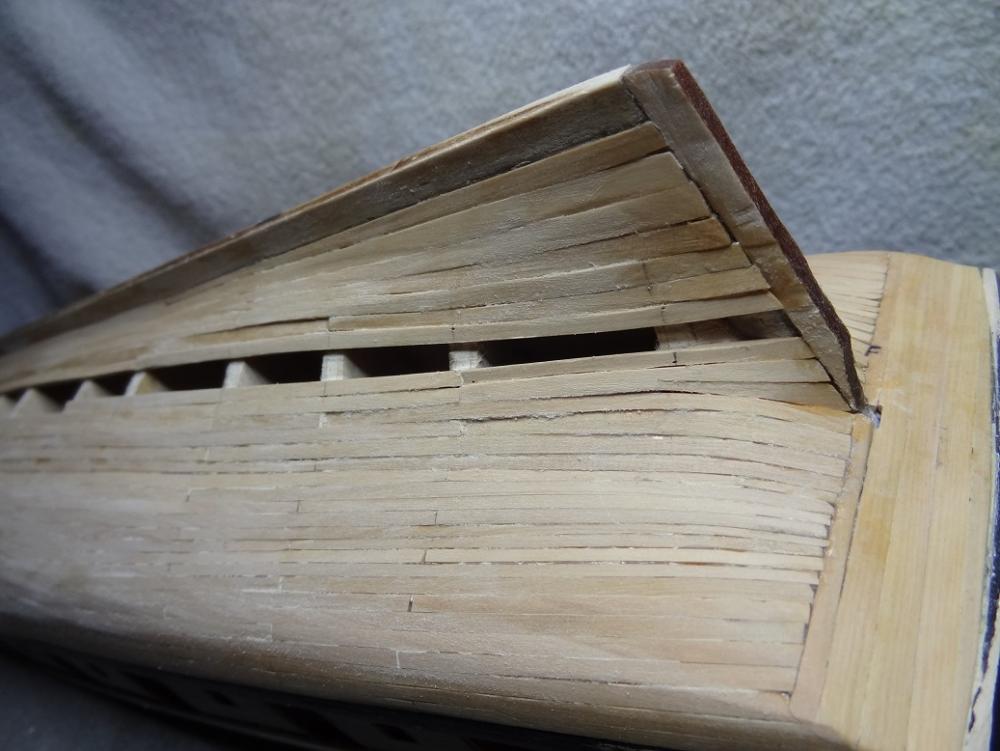
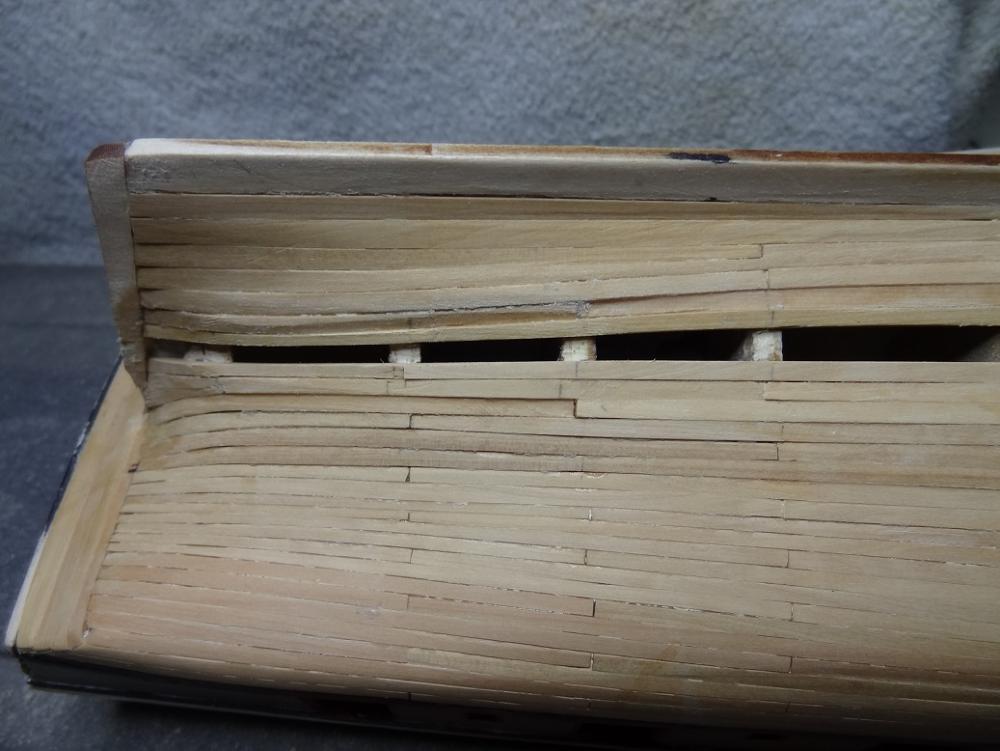
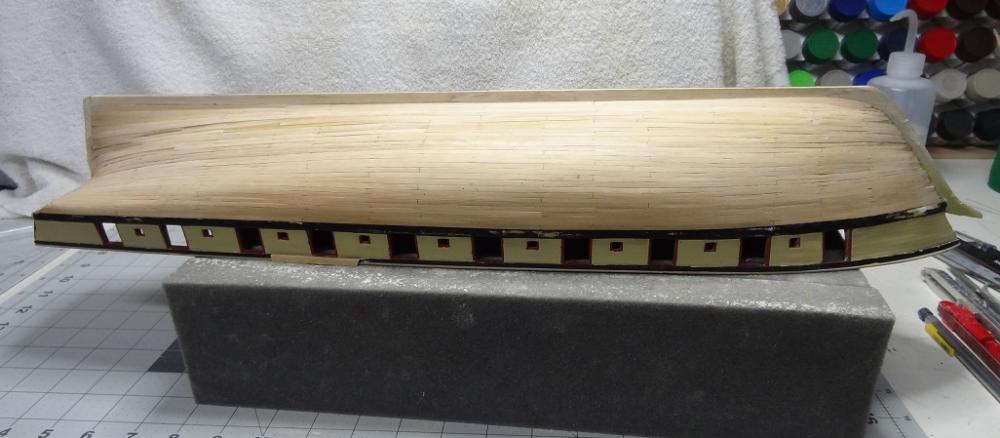
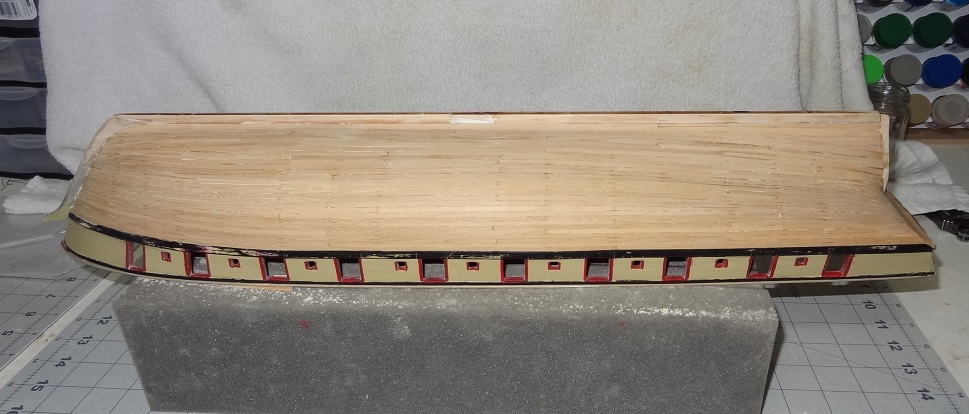
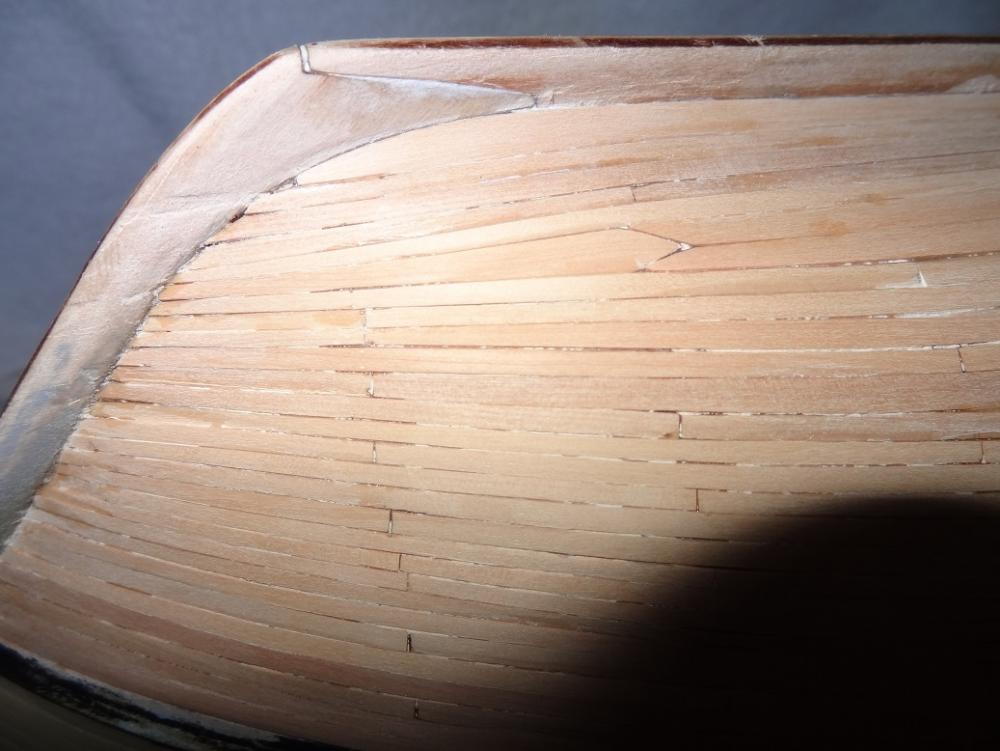
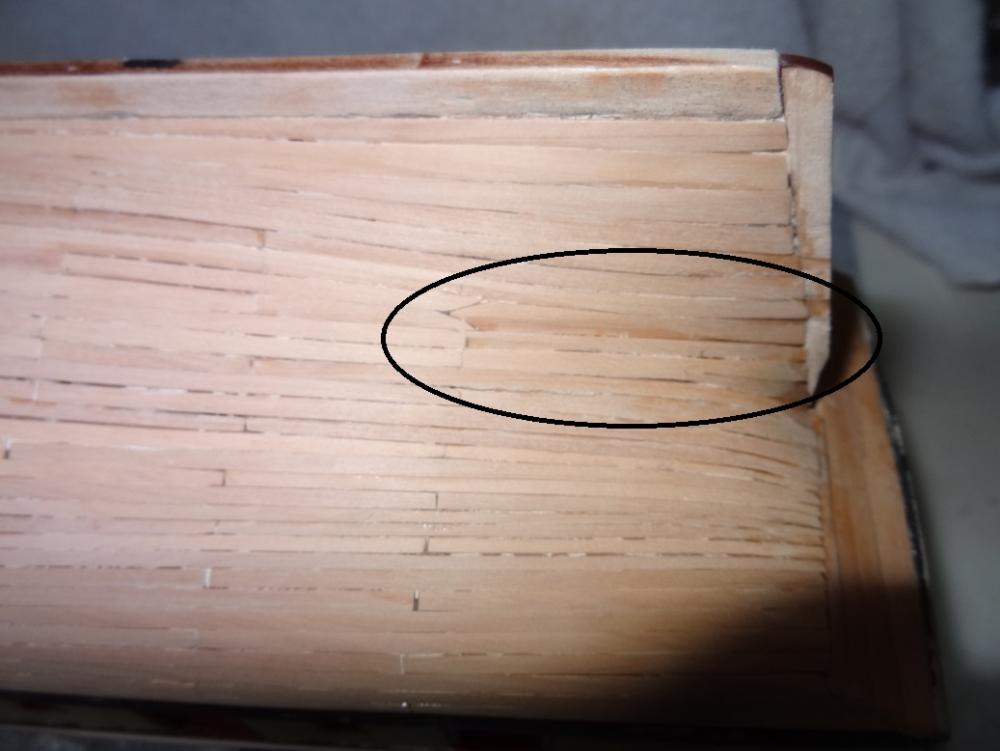
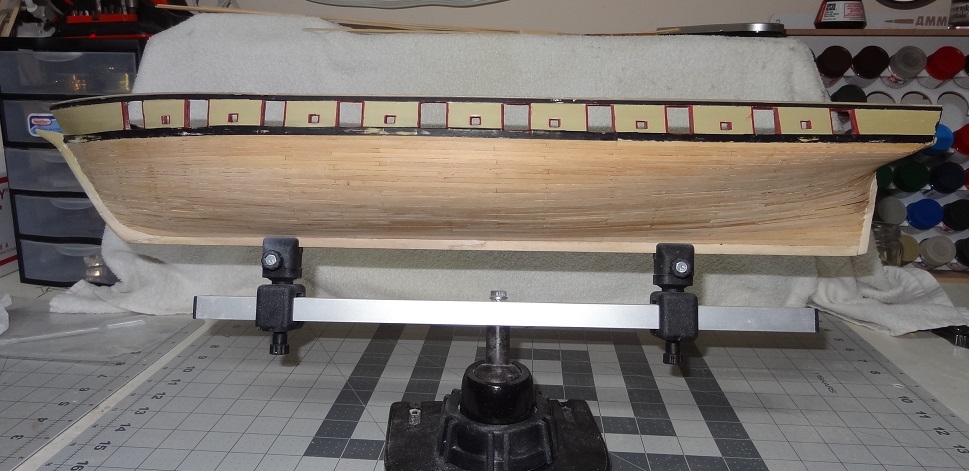
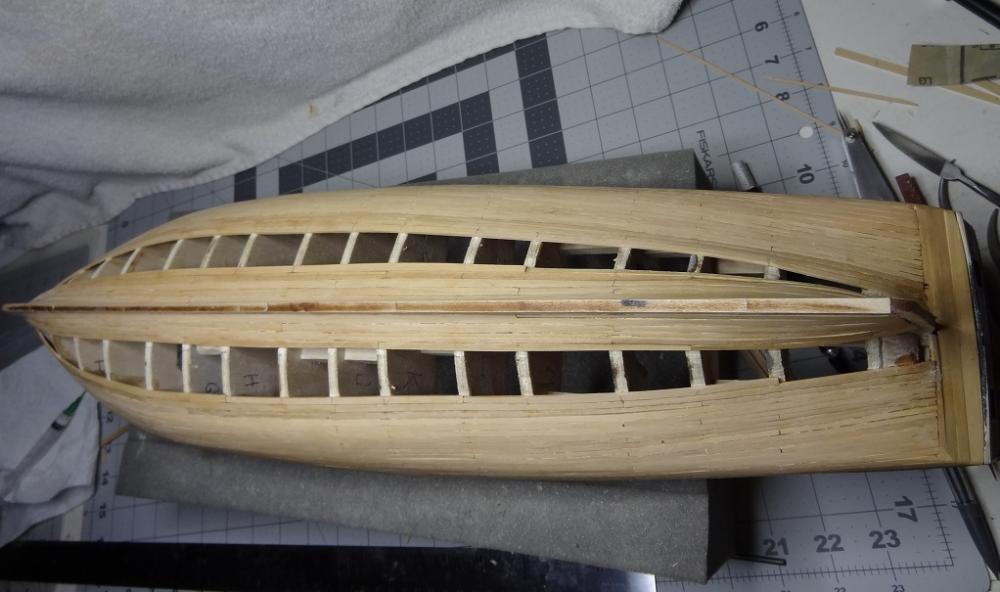
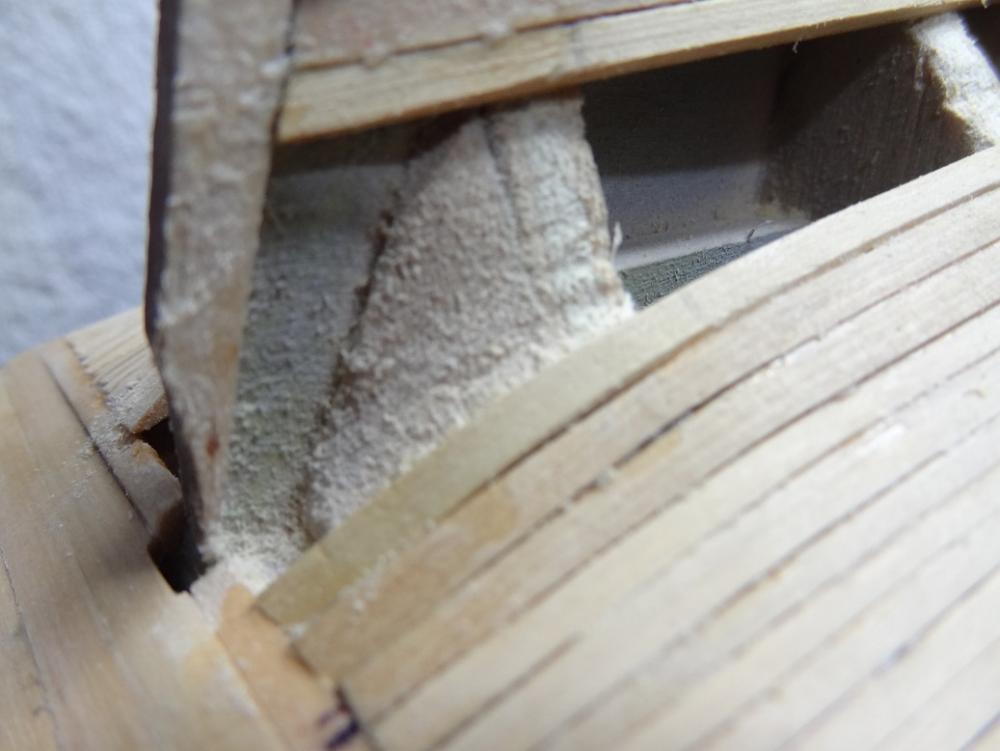
Most of the activity of late on this thread has been me yapping about this or that, so I thought I would get back on track. Still planking, but nearing completion. So far everything has followed the plans. While there has been some serious edge bending happening, the only adjustments were the 2 stealers called for in Band D. There are also 2 called for in Band C. I started Band C (top down) then decided I wanted to see how Band D would shake out. For all the times I measured D it just didn't look right marked on the bulkheads. So I've laid 4 strakes there + 2 stealers. This has raised a question that is not apparent from the plans or instructions. The plans call for 8, 8, 8, 5 strakes for Band A - D respectively. Does the 5 for D include the Garboard? With 1 strake left for D and 6 left for C I decided to consider the remaining area the last band. I knew the start and end points. All the remained was to decide the width of the planks. Both C & D use 5/32"x1/16" in the plans and it looks like the combined width of 7 strakes of that width still fit into the widest space on the bulkeads. Oddly, bulkhead H started out as the widest bulkhead (the longest outer edge) but now that honor has shifted the bulkhead G. Strange, but I'm not going to lose any sleep over it. So with 1 band remaining, using 7 5/32" strips, my dividers can still tell me how wide the strips should be at each bulkhead. Well, almost. There is still a critical milestone coming up, that being laying of planks at the stern so that the planks terminating at the sternpost (running vertically) meet perfectly with the planks that terminate on the transom edge (running horizontally) It's almost a perfect corner at the junction so planks will have to lay in there precisely. It appears that I have 2 more strakes to lay that will terminate on the transom. How these end up can be controlled by the final width of the plank. They both will need a little bit of tapering so I should be able to get a good fit in the corner. There are 5 more to lay that will terminate on the sternpost. The problem here is the total width of the 5 is less than the amount of space left to cover. Bring on the stealers. The plans call for 2 within the area I have left. I'm assuming it to be more of a 'play it by ear' thing. The sole purpose of those stealers is for width adjustment so that the 5 strakes (plus stealer(s)) will terminate in the corner as well? It all gets a little crazier because the shape of the band is narrow at the bow, widest amid ship, narrow right before the stern and then wider at the termination. A few shots of my overall progress: All the sanding from tapering has left a pretty big mess in my work area. Yesterday morning, I took EVERYTHING off the workbench, got out the leaf blower and hosed it all down. Then the rest of the garage. Then put everything back. Nice & clean?


- 843 replies
-
- 4
-
-
- niagara
- model shipways
- (and 2 more)
-
Beautiful! Thought for a moment I was looking at the real thing.
- 287 replies
-
- 3
-
-
- niagara
- Model Shipways
- (and 1 more)
-
Oh man - Am I going to have to go thru this too? Your work looks good Brian.
- 287 replies
-
- 2
-
-
- niagara
- Model Shipways
- (and 1 more)
-
Nice idea. I like the paper cutter idea as well. I've tried to do something similar on a smaller scale but I was cutting the strips with scissors. No matter how well I followed my lines, I never get 100% straight edges. The paper cutter will do the work in half the time with twice the accuracy. Thanks!
-
If you haven't bought already here's something I just learned. And it came straight from Jason at Crown - who by the way has an outstanding product. I keep a lot of different sized strips on hand - all Costello Boxwood from Jason. The other day I needed 10 5/32"x1/16" strips for planking, but I did not have that size strip. However I did have both 1/16"x2" sheet and a 5/32"x3" sheet. I elected to use the 5/32" sheet and rip some 1/16" strips. Sizewise the strips came out just fine but as I began to use them I noticed they were not flexing very well. It was tough getting them to lay on curves in the hull. I felt kind of dumb asking this of Jason but I put the question to him - given the size that I need is it better to use the 1/16" sheet and rip 5/32" strips or use the 5/32" sheet and rip 1/16" strips. Suprisingly, there is a correct answer for this with a caveat. When Jason cuts strips he uses sheets of the desired thickness and rips strips to the desired width. BUT in addition he also recommends (and uses) 2" sheets rather than the 3" sheets. It has to do with where the cut is made in the bulk stock. You are more likely to get straighter more even grain with the 2" sheets. Don't know if you have worked with boxwood before, but my feeling is I will never go back to basswood again. In fact I have a kit on the shelf that has basswood as the main material - I sent Jason a copy of the parts list and had him do a complete replacement. My current build started with basswood but as soon as I tried some boxwood I got replacements for what I have left to do. Hope that can help.....